Clark
-
Posts
310 -
Joined
-
Last visited
Content Type
Profiles
Forums
Gallery
Events
Everything posted by Clark
-
Even if you apply the PVA to the false deck, be careful with thinning. Let it dry slightly first. I made the same mistake. Clark
-
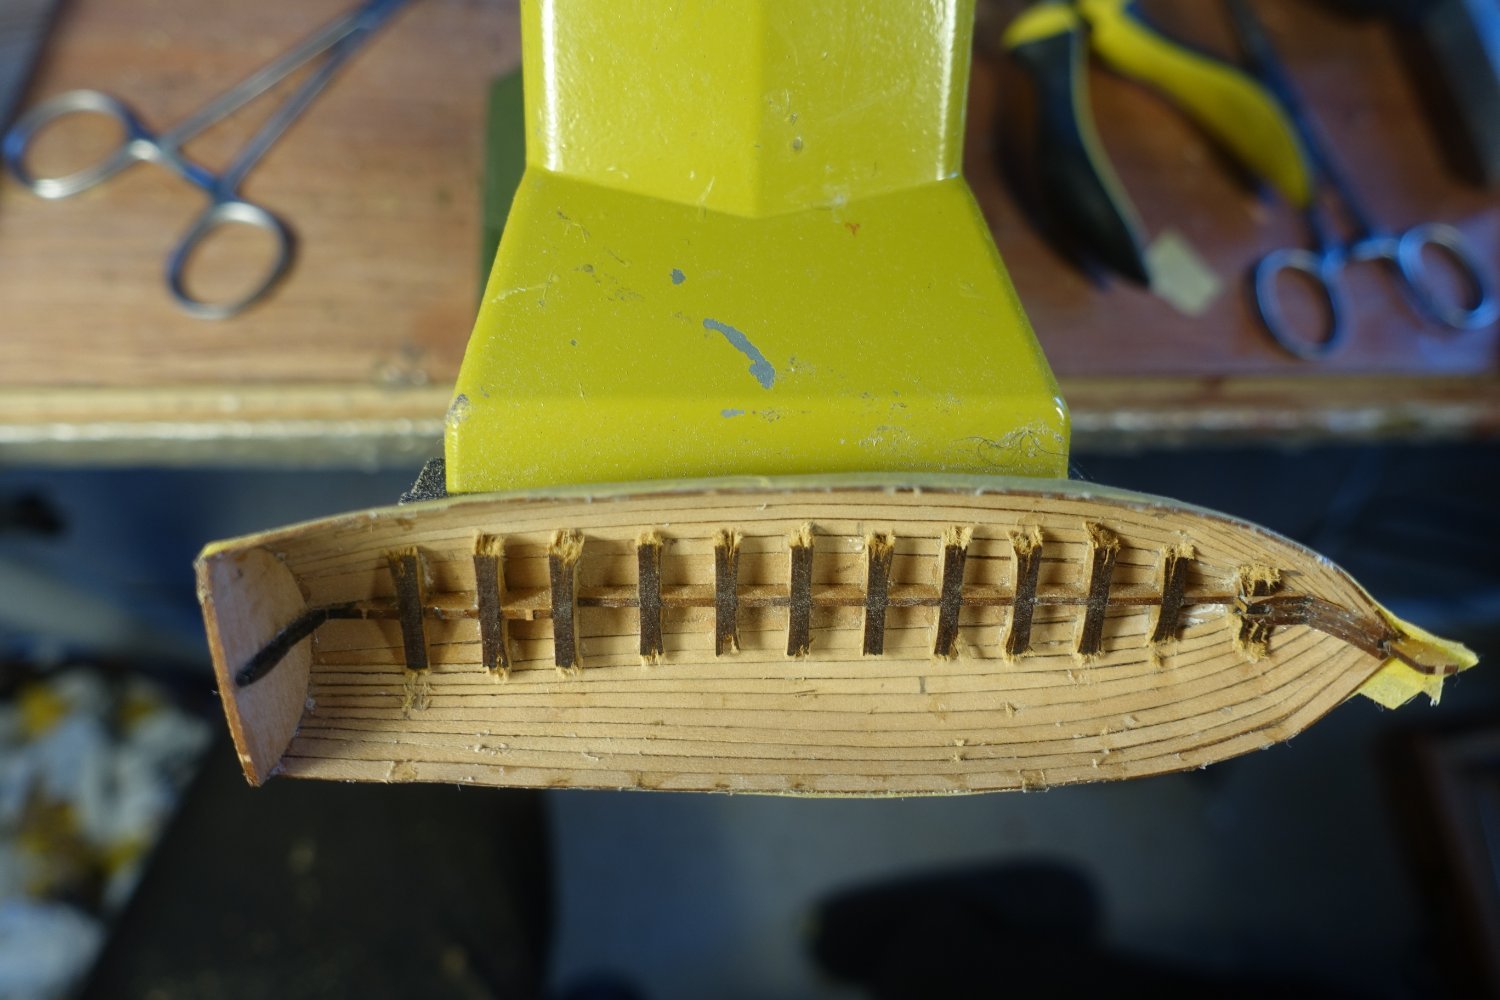
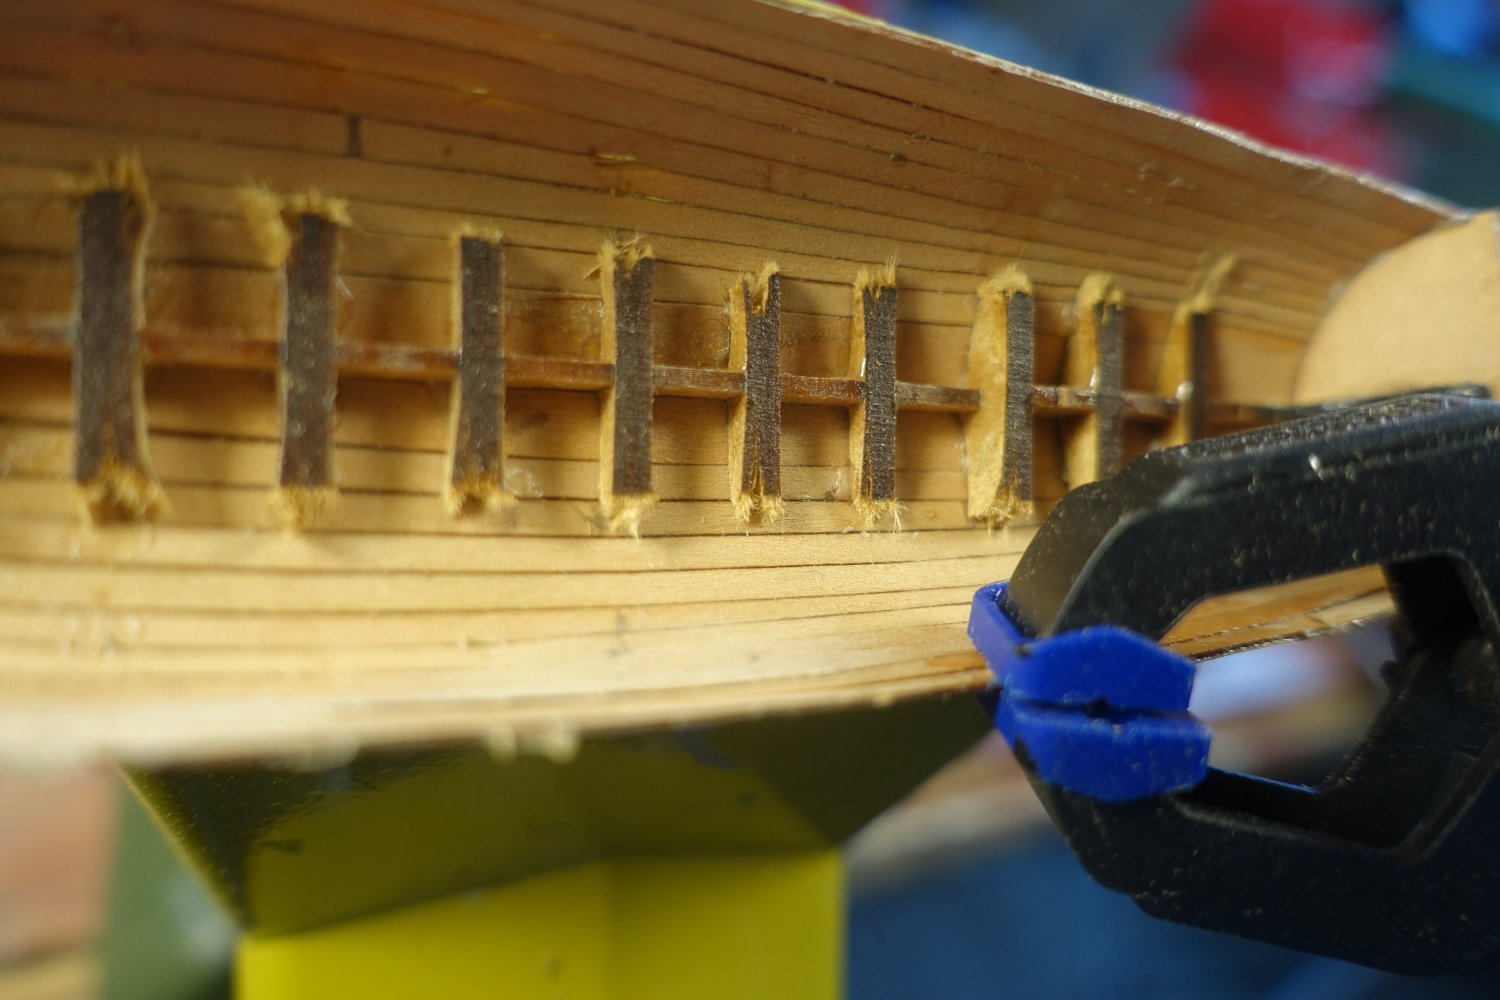
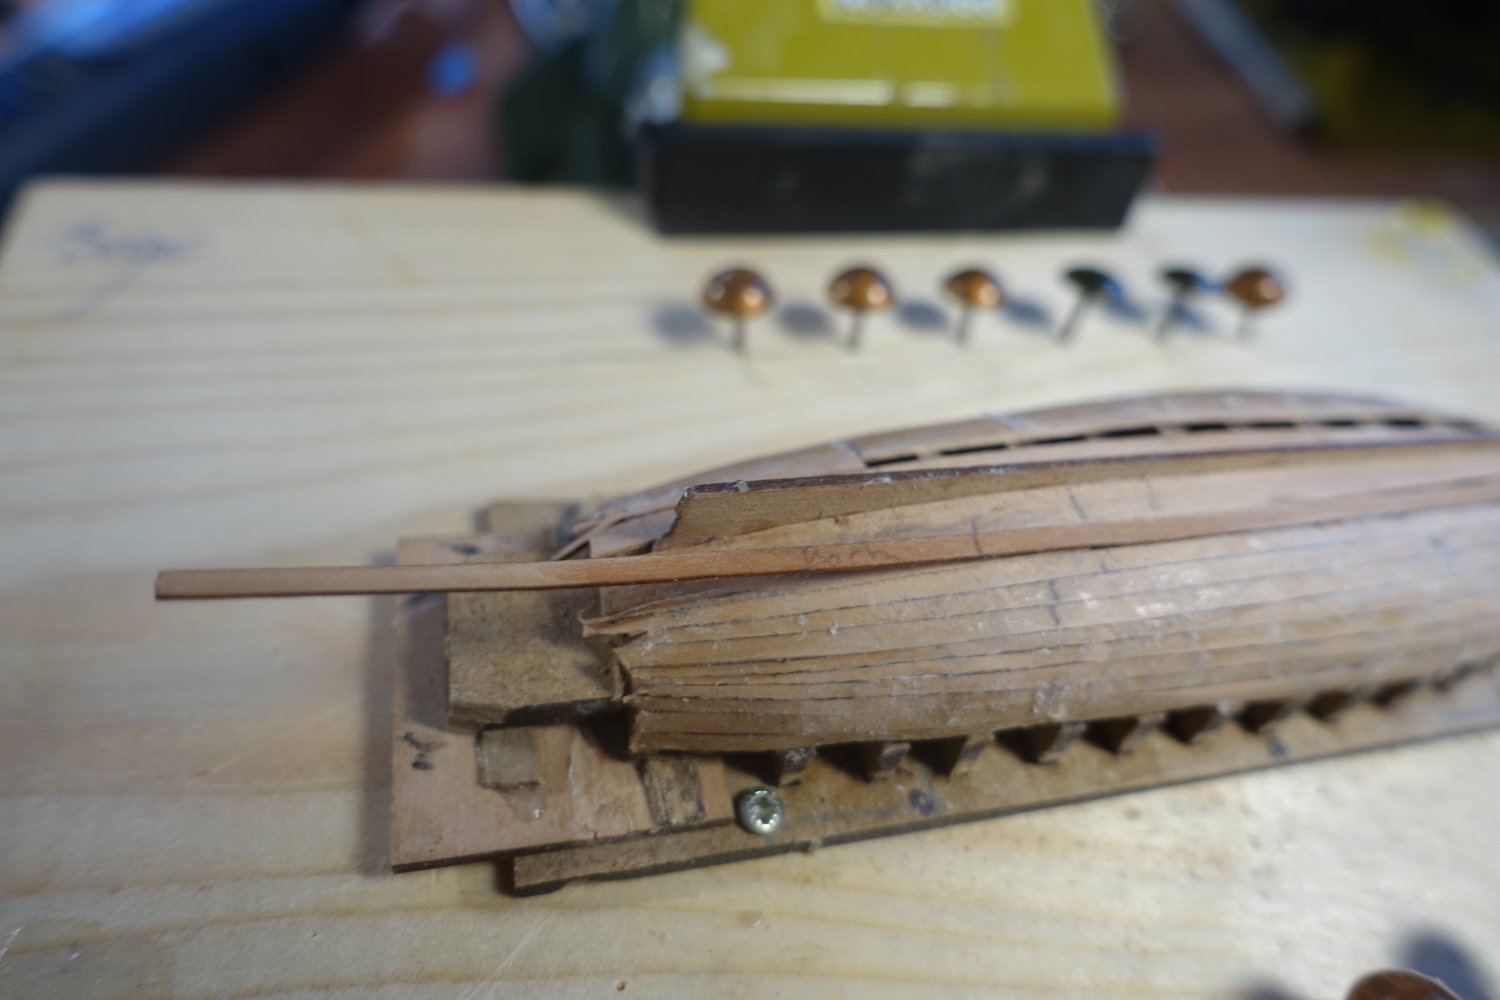
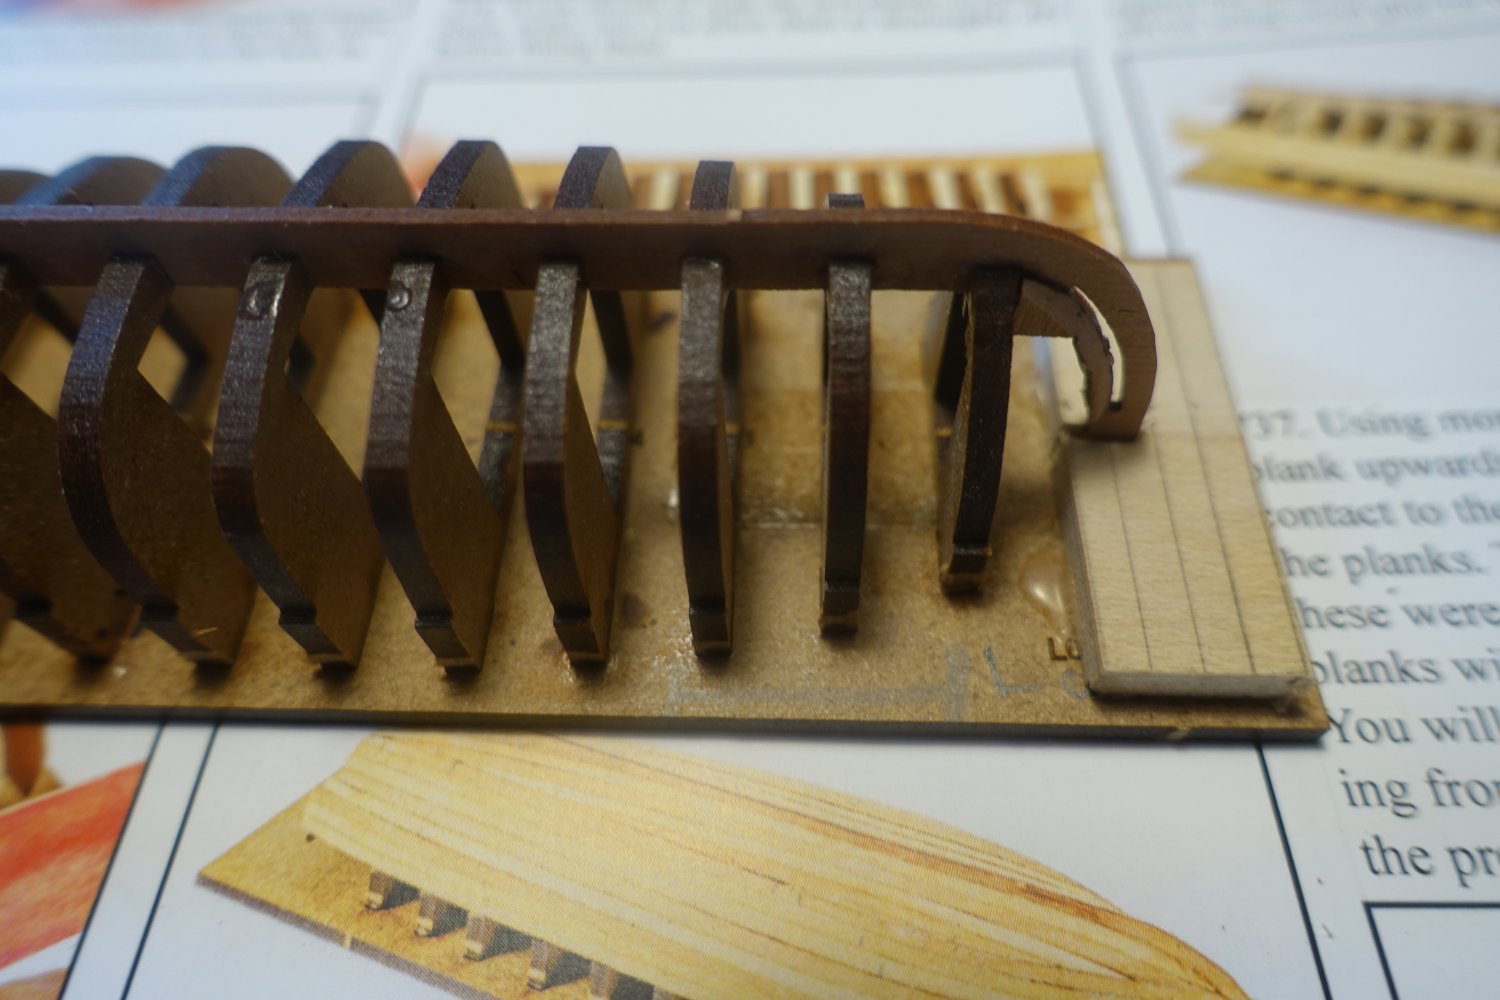
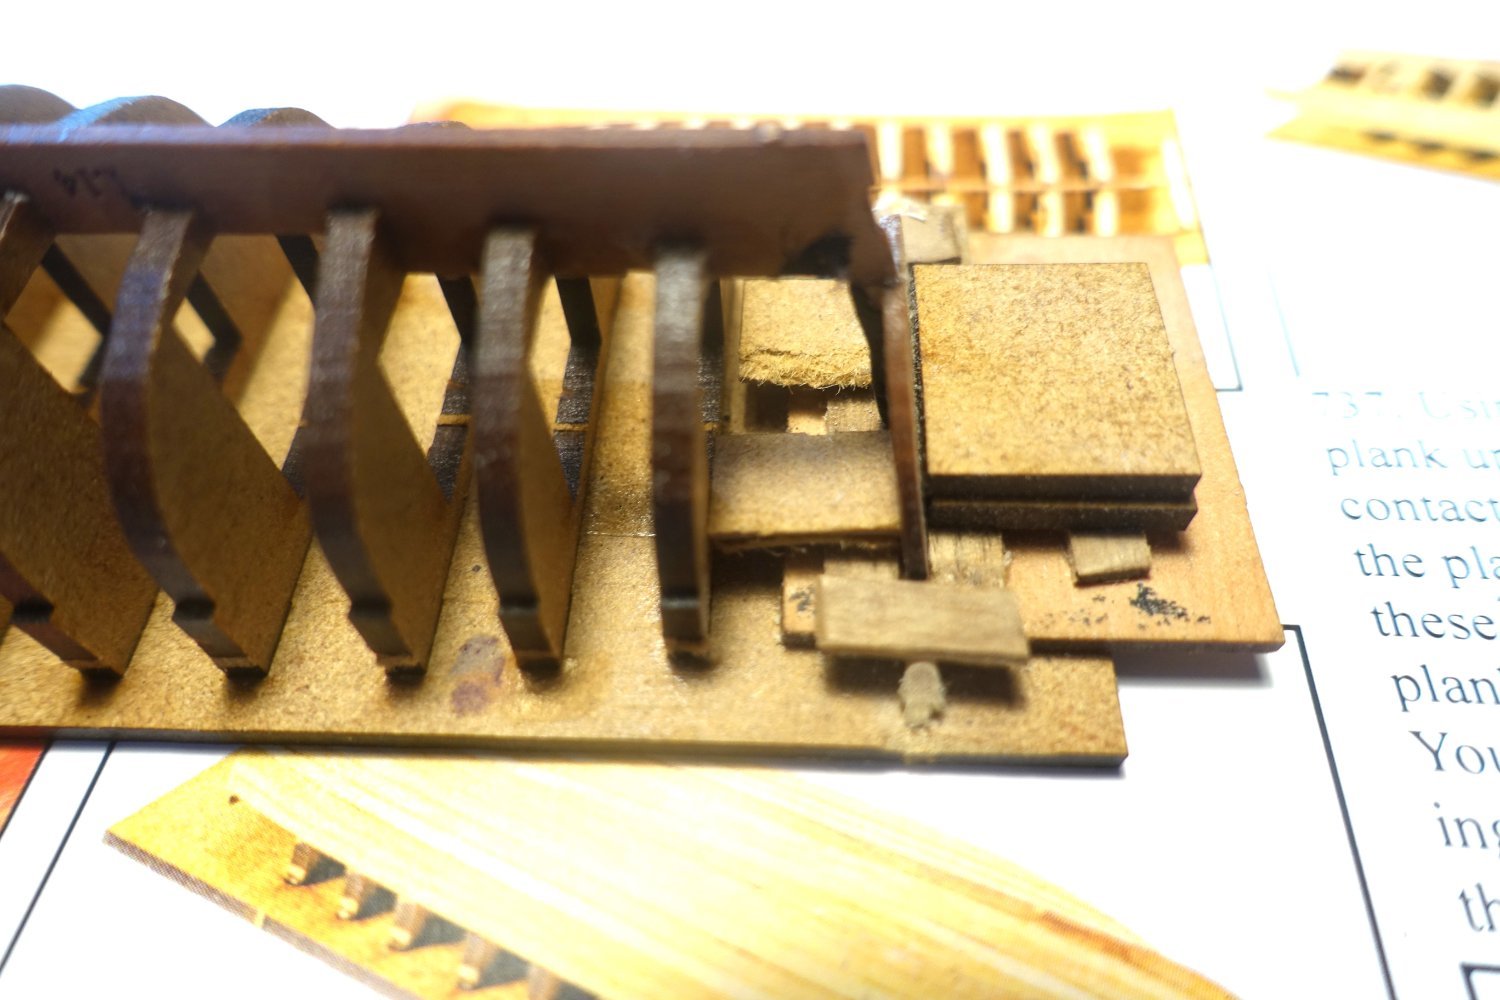
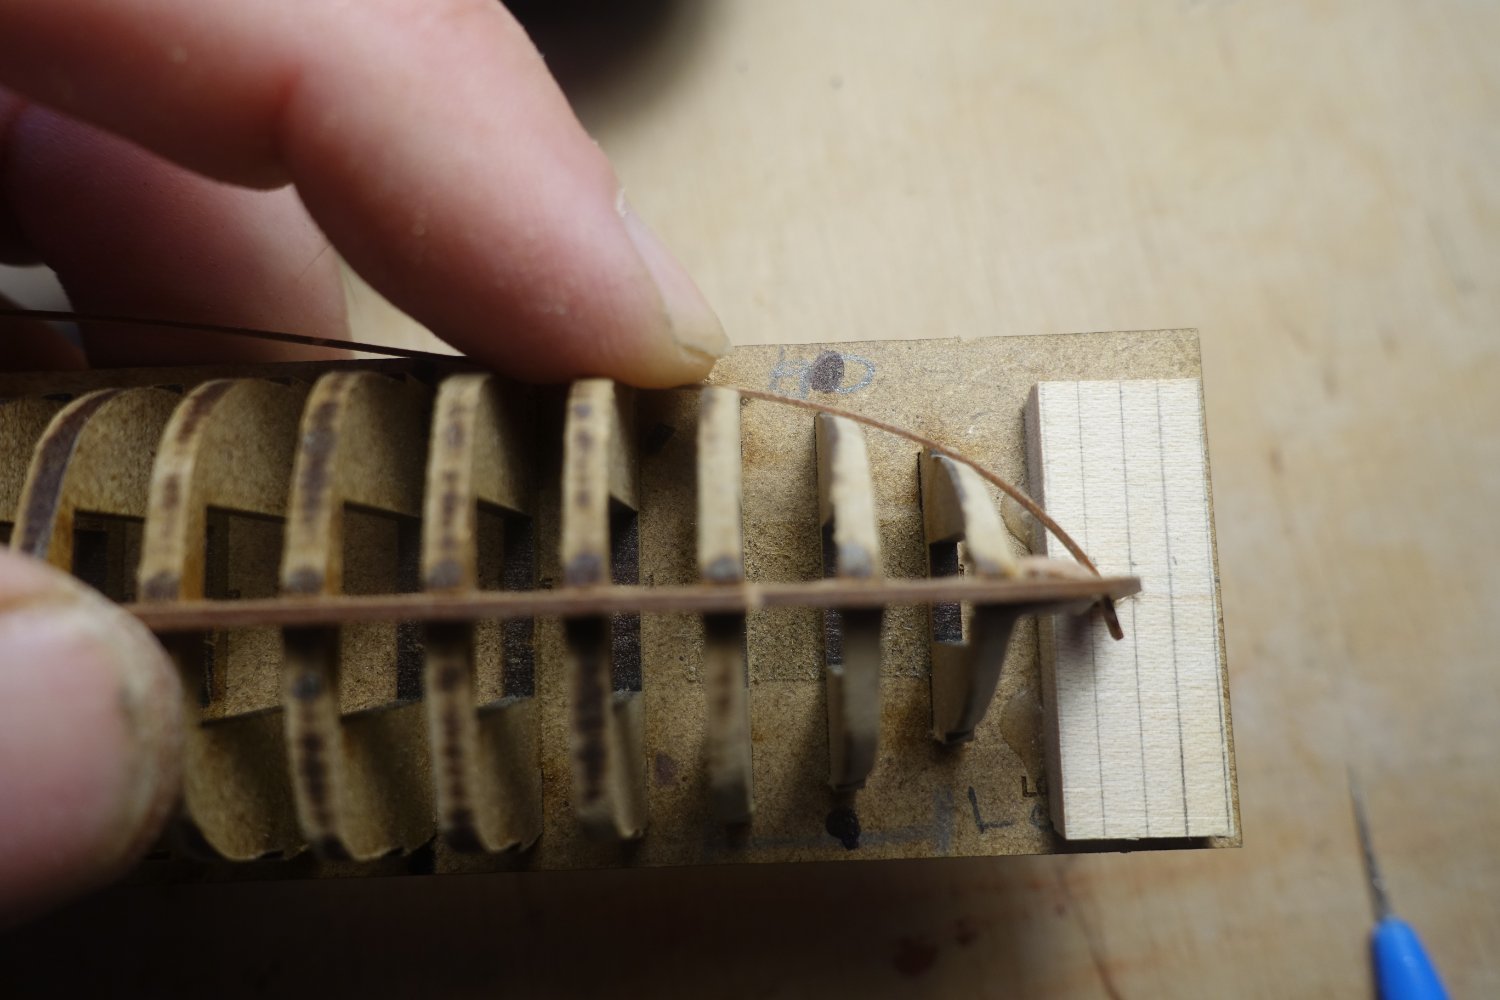
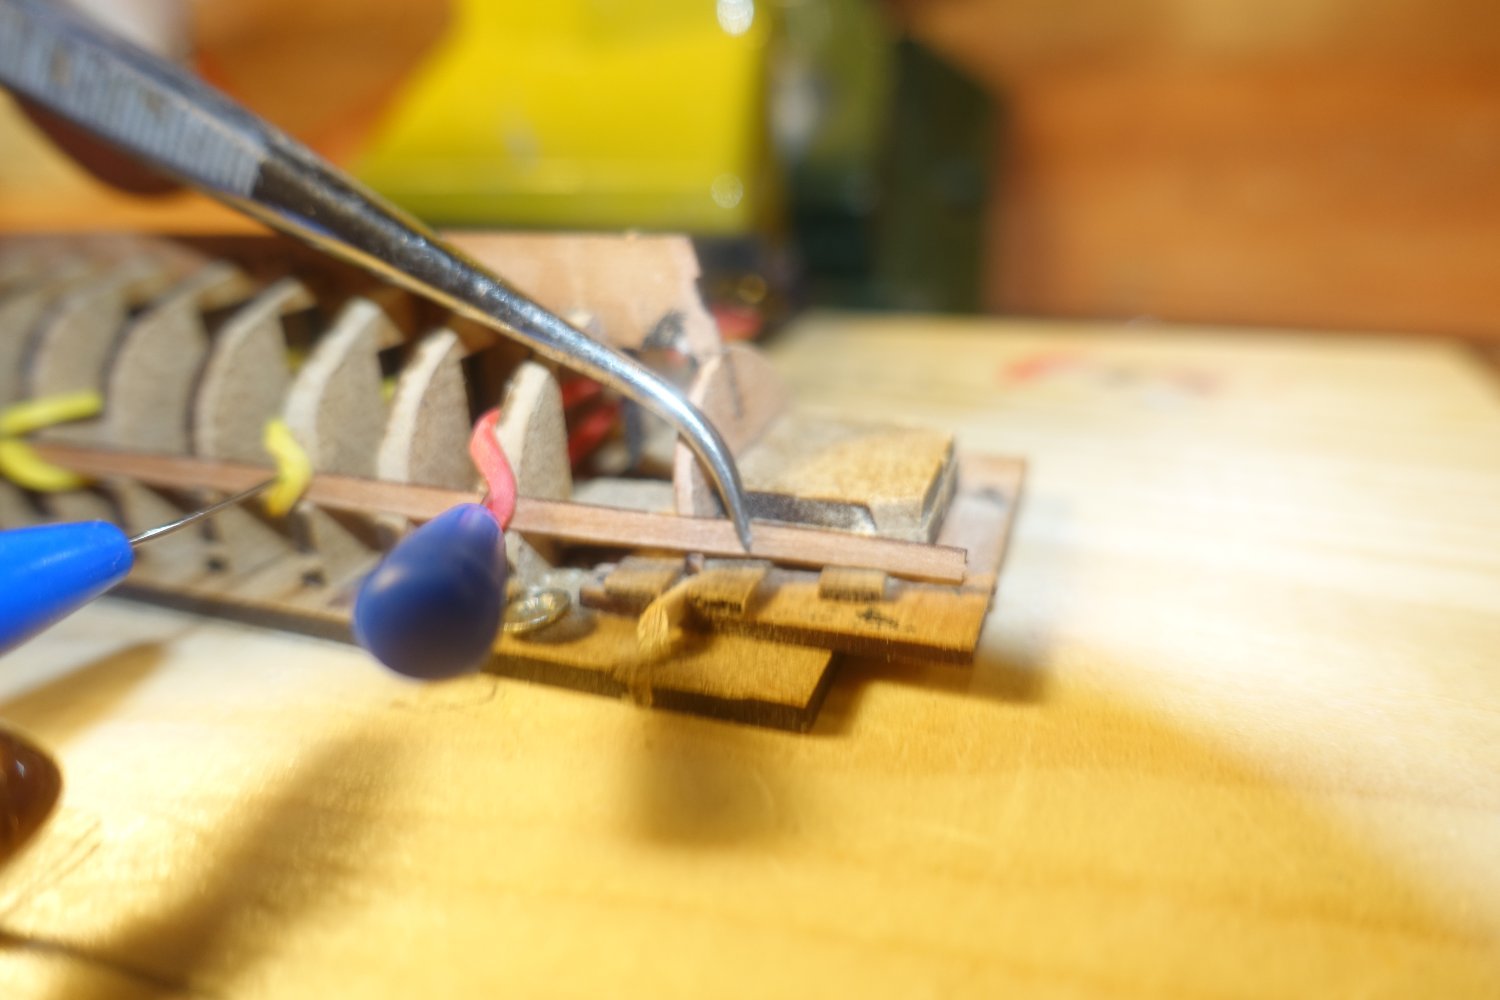
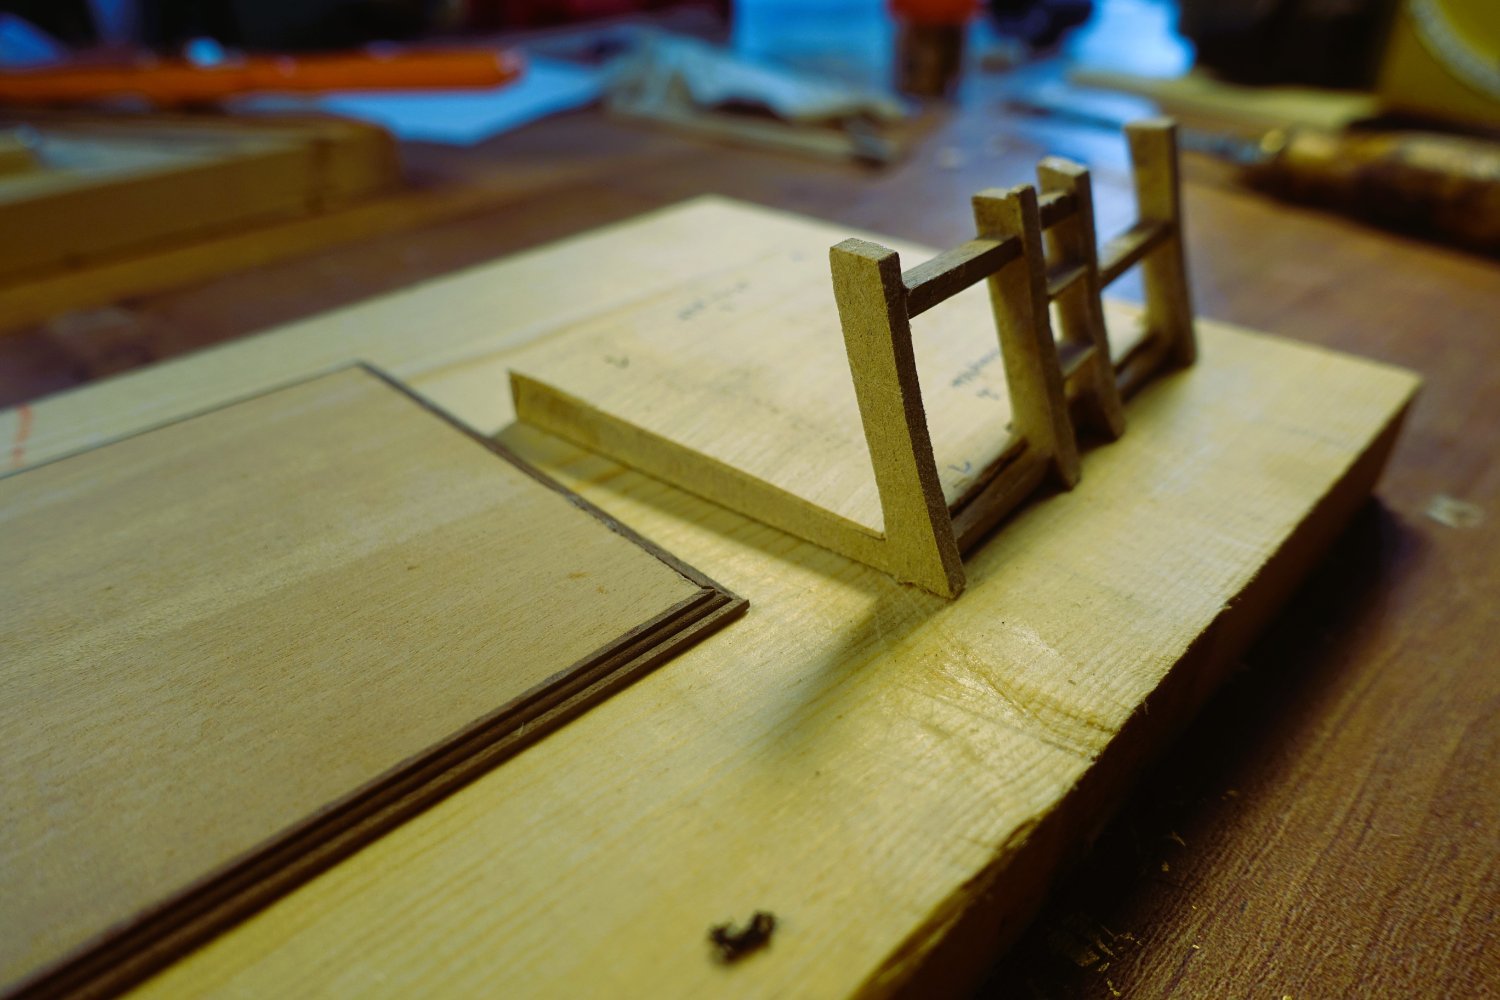
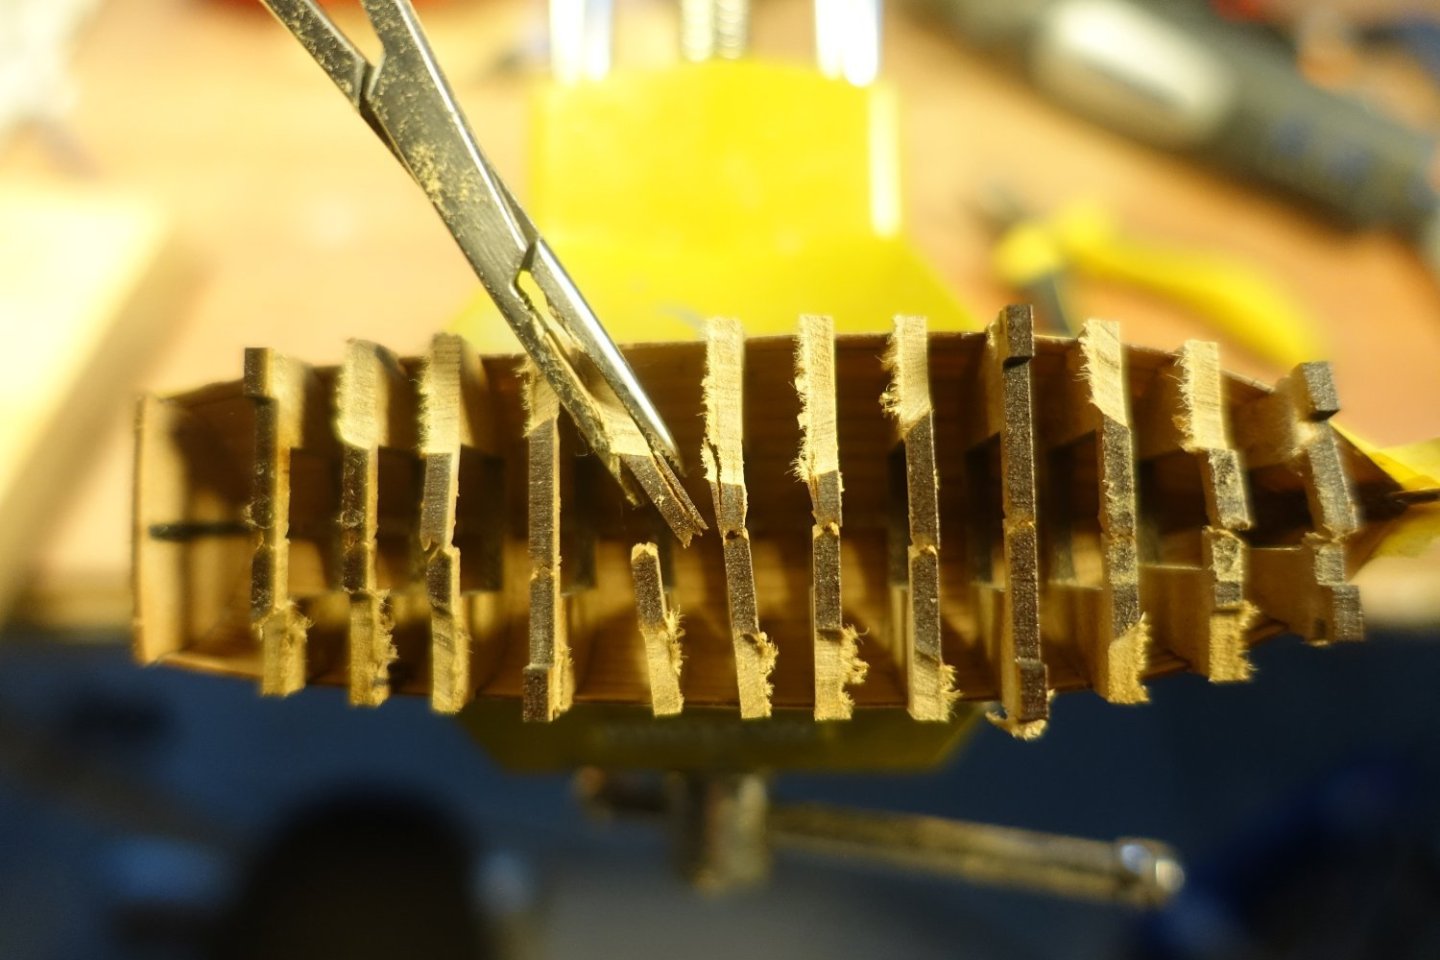
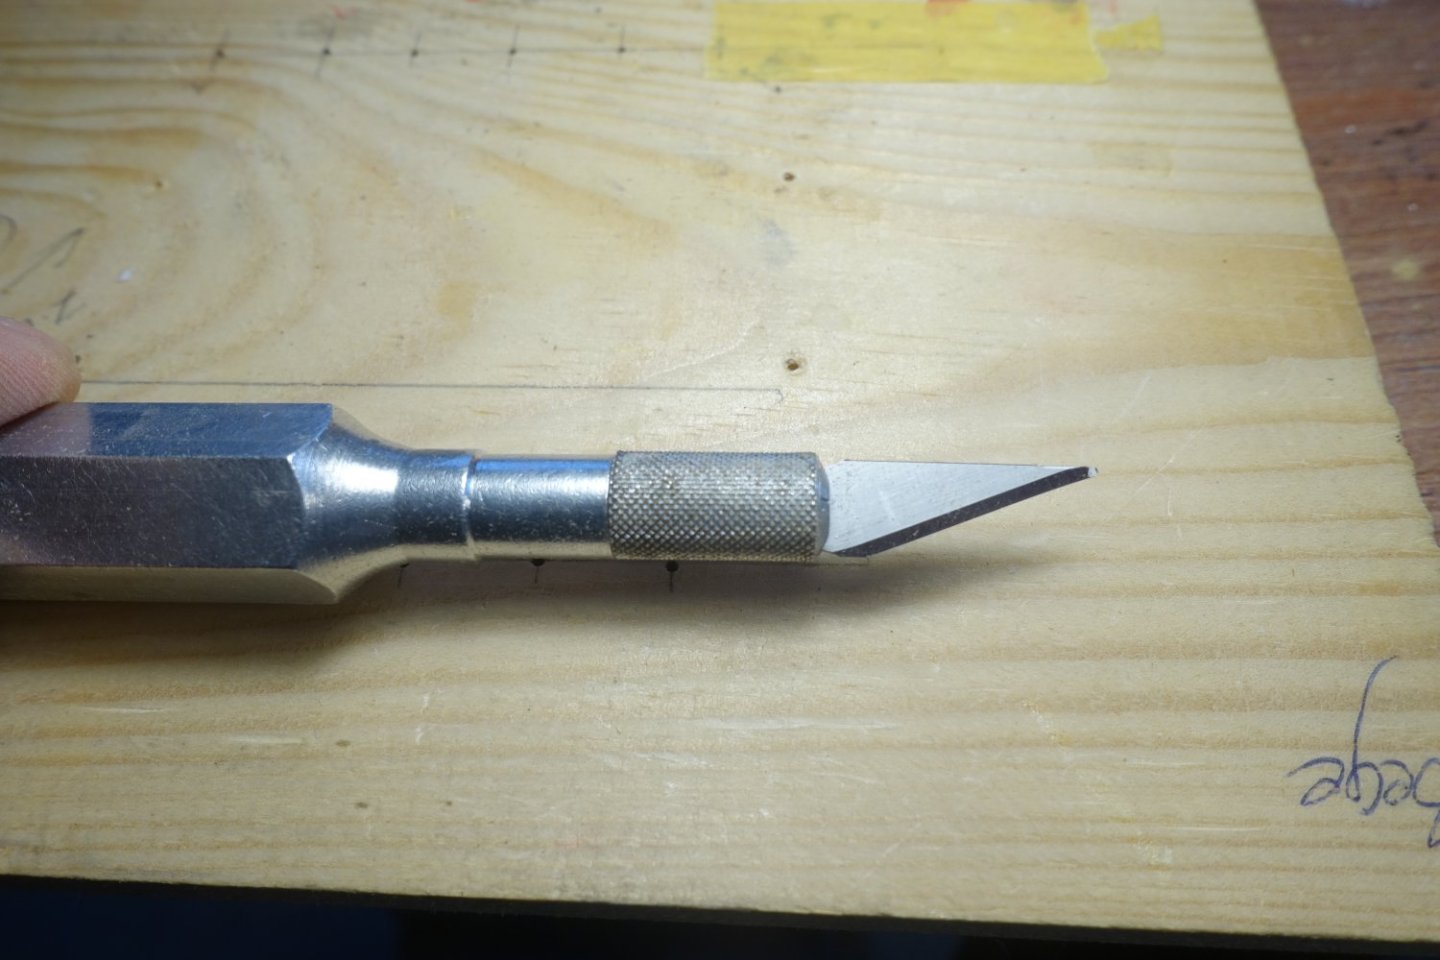
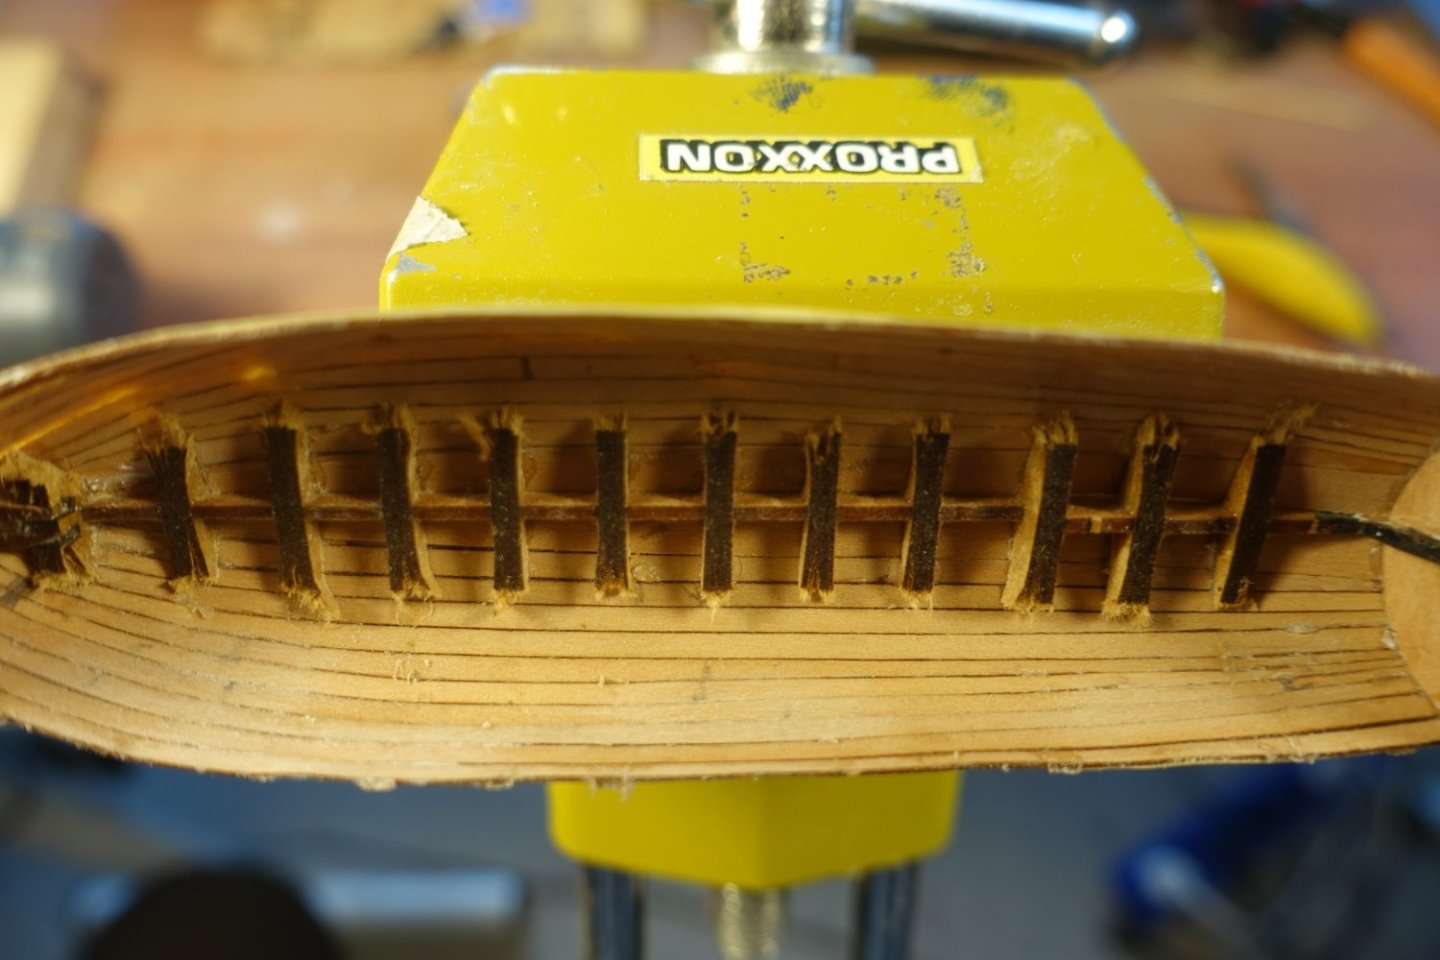
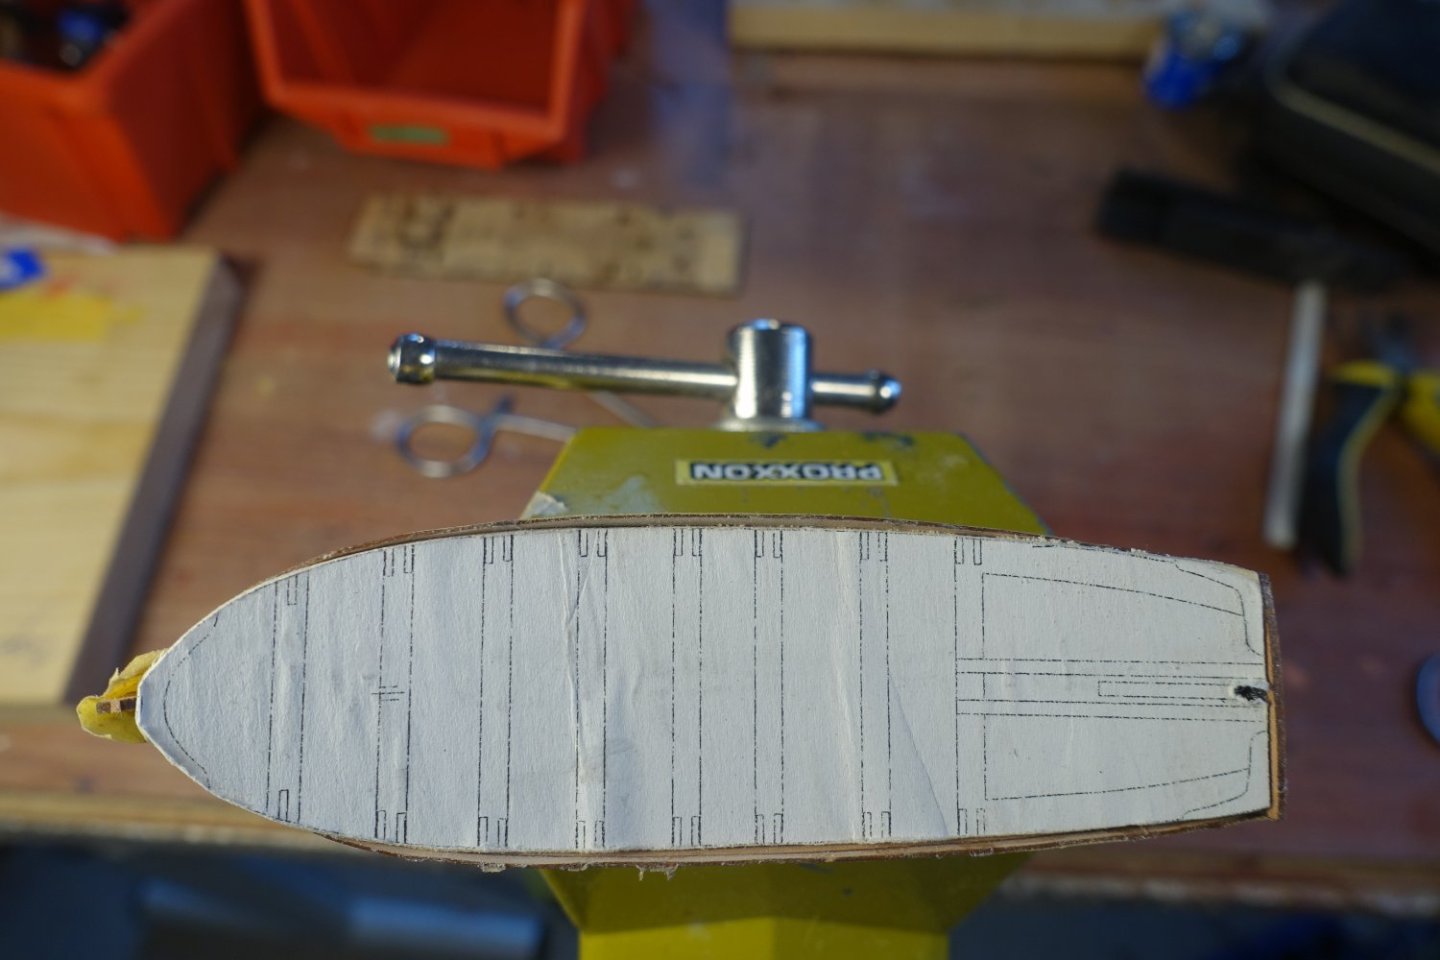
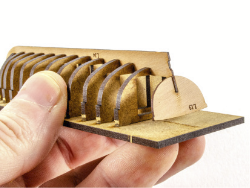
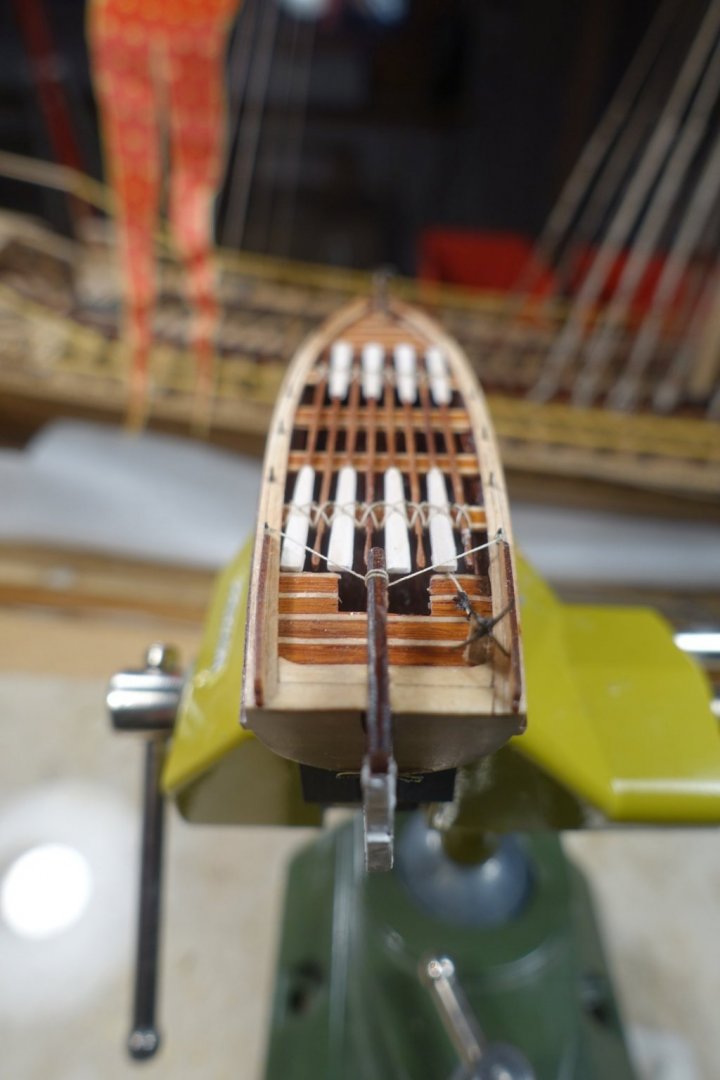
To remove the boat from its base, I first had to saw the frames that I had previously glued into the frame base. After removing the frame base, the upper bars were cut through and then the frames were removed by turning them. As these were not glued to the planks, this was relatively easy. There are very few traces of glueing visible inboard, only my pencil marks, which I forgot to remove before gluing the planks. . To remove the few traces of glue, I ground a mini chisel from a cutting blade (tip flattened and sharpened). When looking at the edge of the hull, a slight indentation is noticeable on the port side at the height of the 4th frame from the rear. The area was slightly moistened and straightened with the help of a clamp. I cut a template (glued on a wood base) from the plan for further processing. This will later be used to place the ribs and the thwarts exactly.


- 22 replies
-
- 8
-

-
- 24 ft Launch
- Vanguard Models
- (and 1 more)
-
Thank you for stopping by. The Portland is certainly an extremely ambitious project that will take the model builders further, also with the markings for the plank width. However, I'm not sure whether this makes sense and works with the small MDF frames of Chris' boats. Clark
- 22 replies
-
- 1
-
-
- 24 ft Launch
- Vanguard Models
- (and 1 more)
-
You've described the construction very well. I think you experience all the ups and downs with the small boats as you do with the larger ships.
-
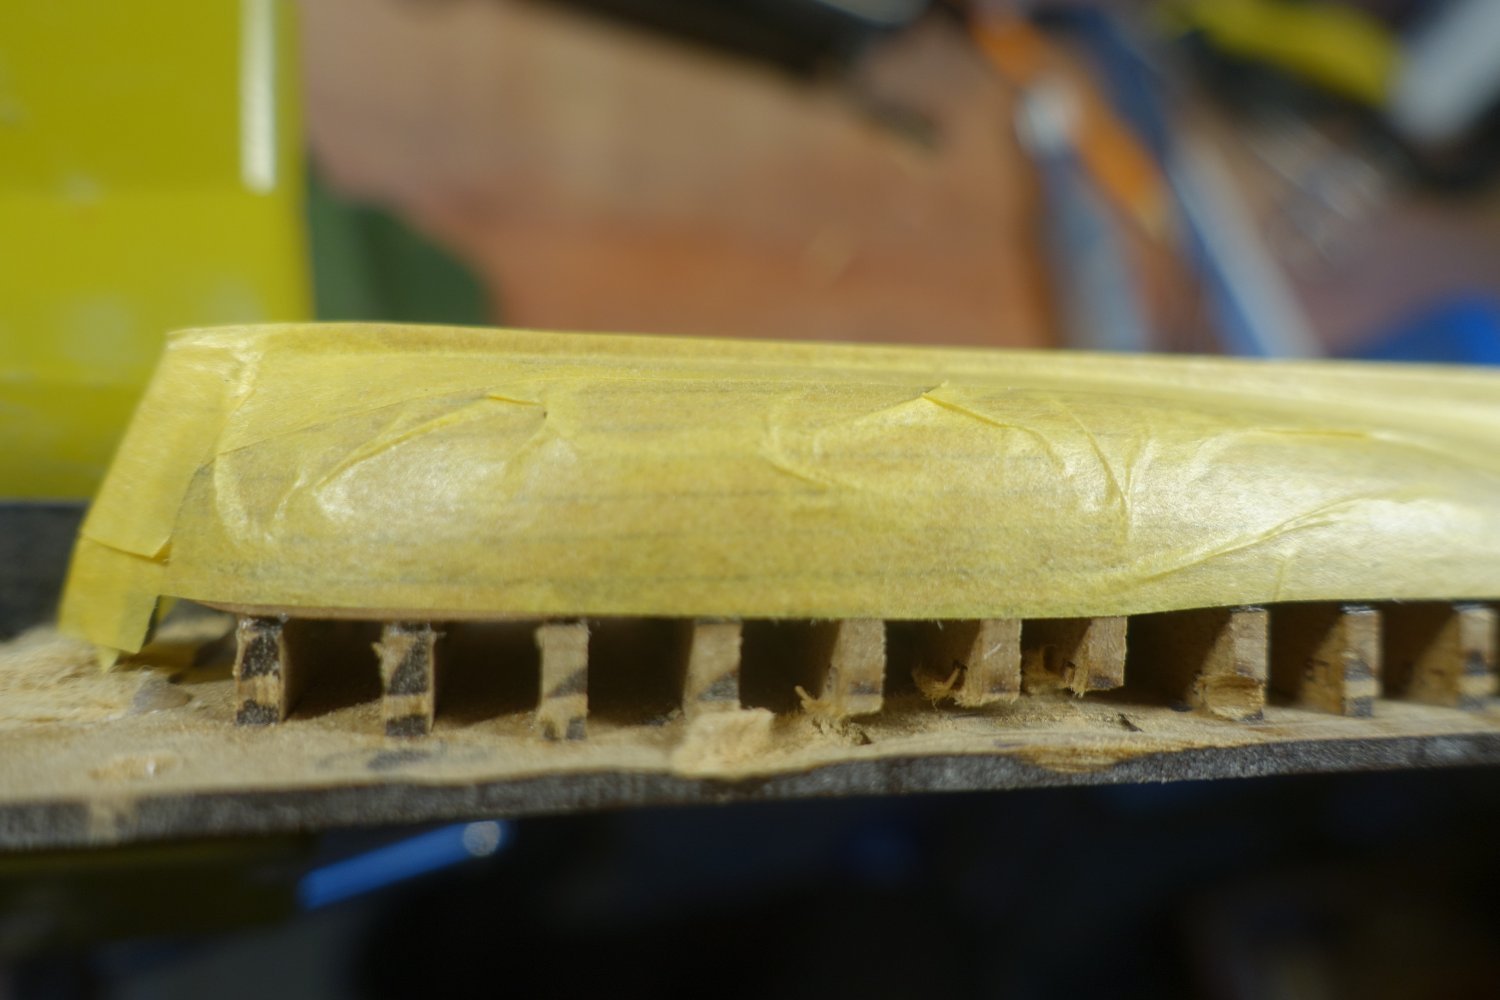
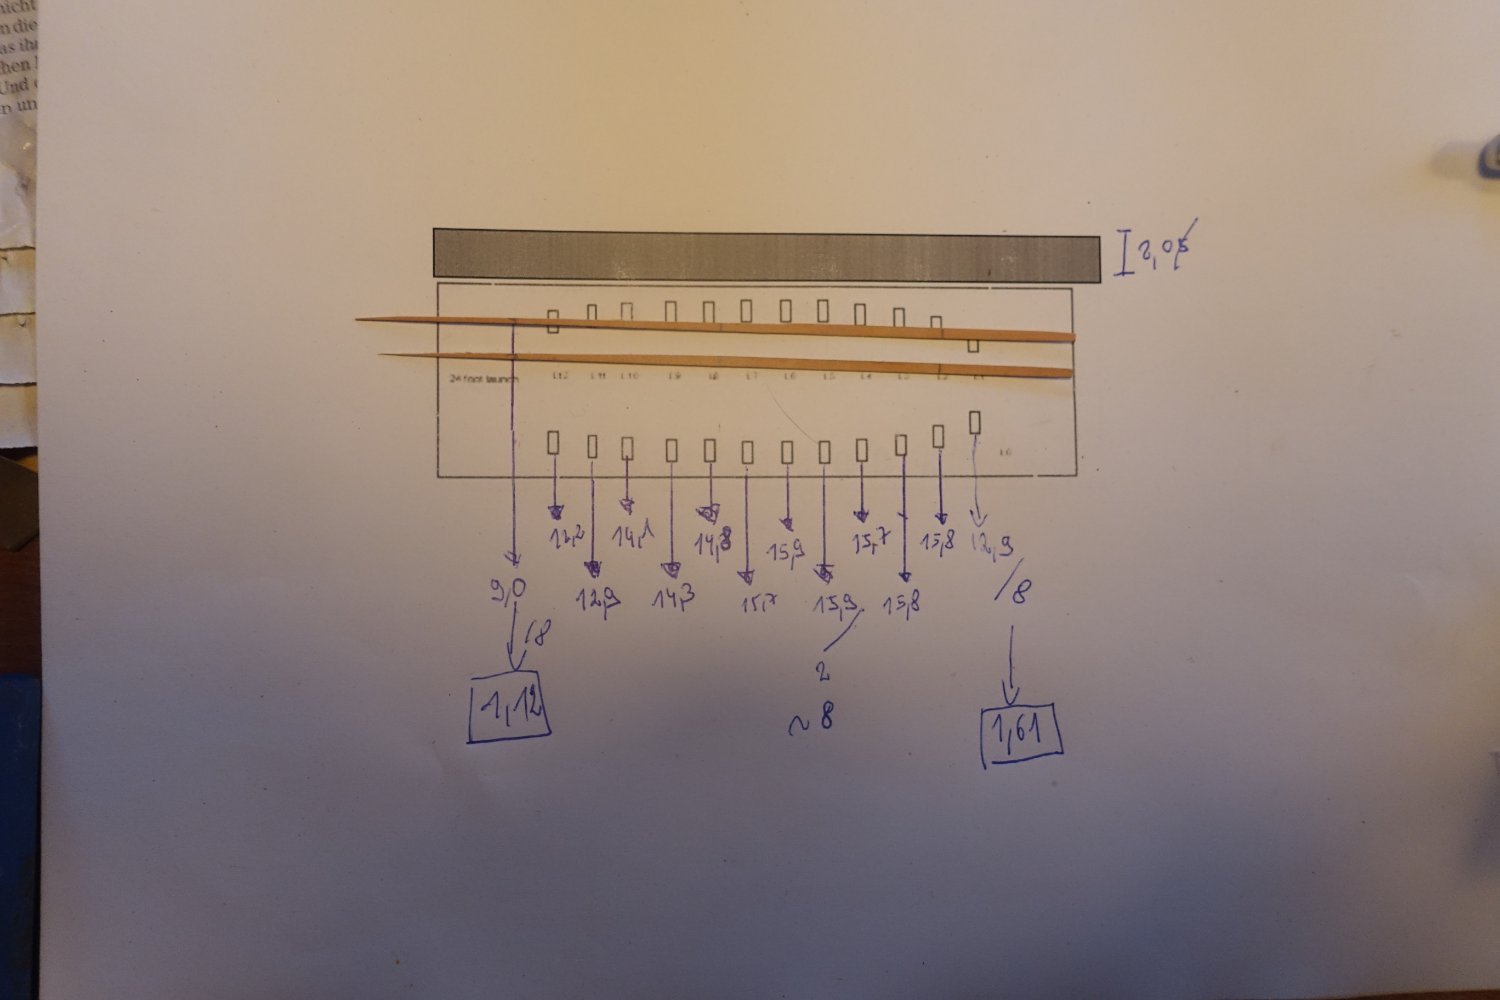
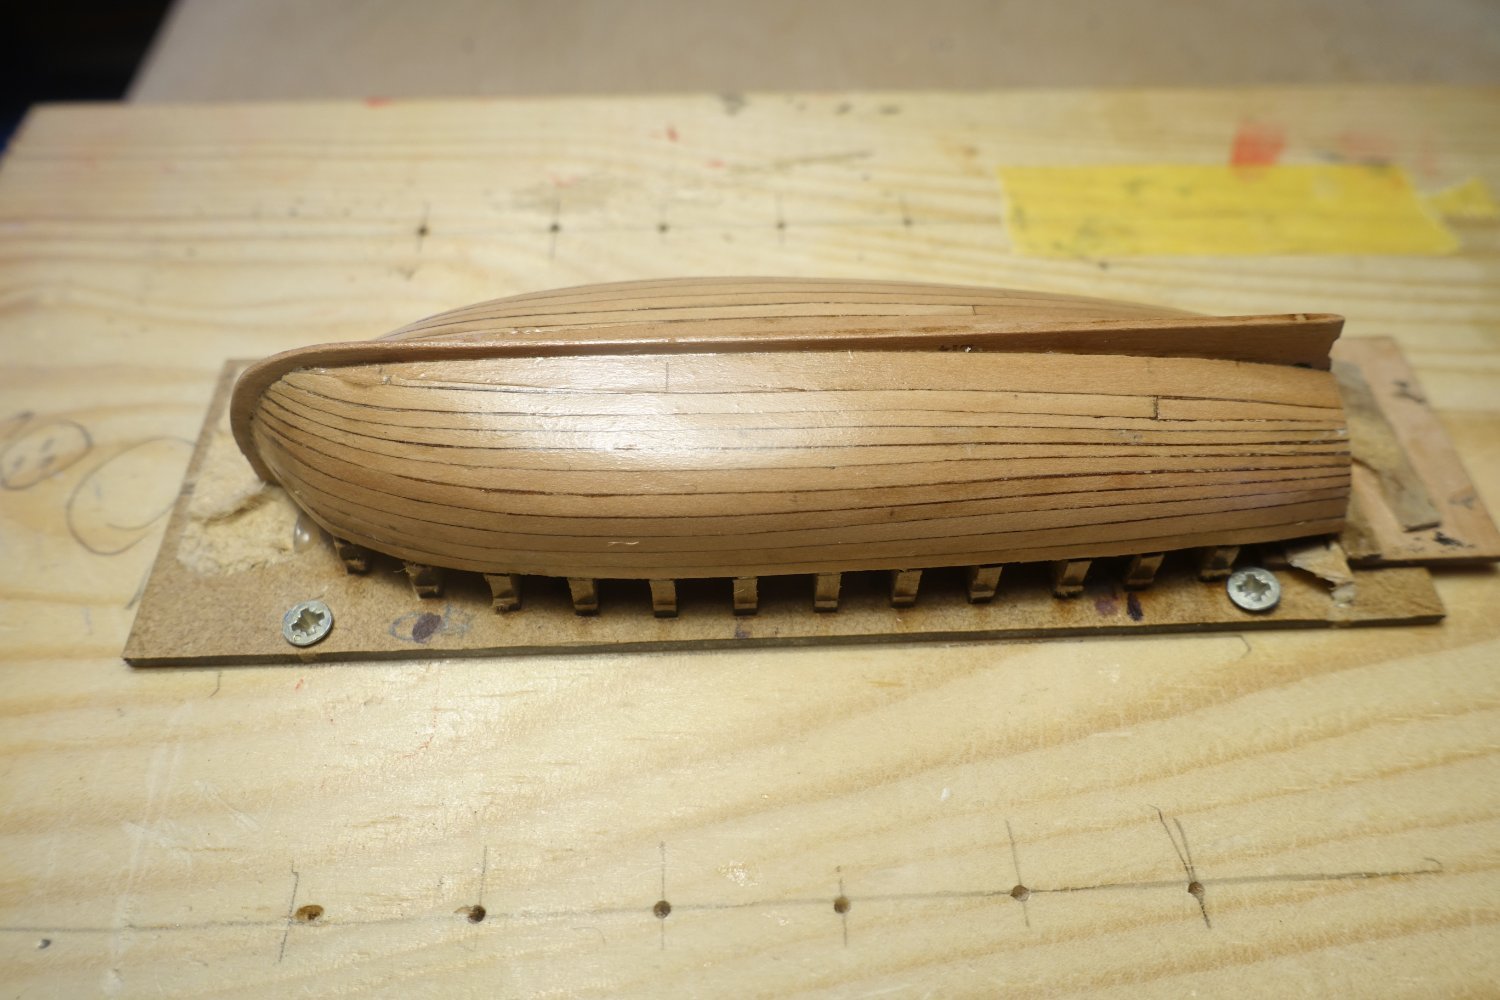
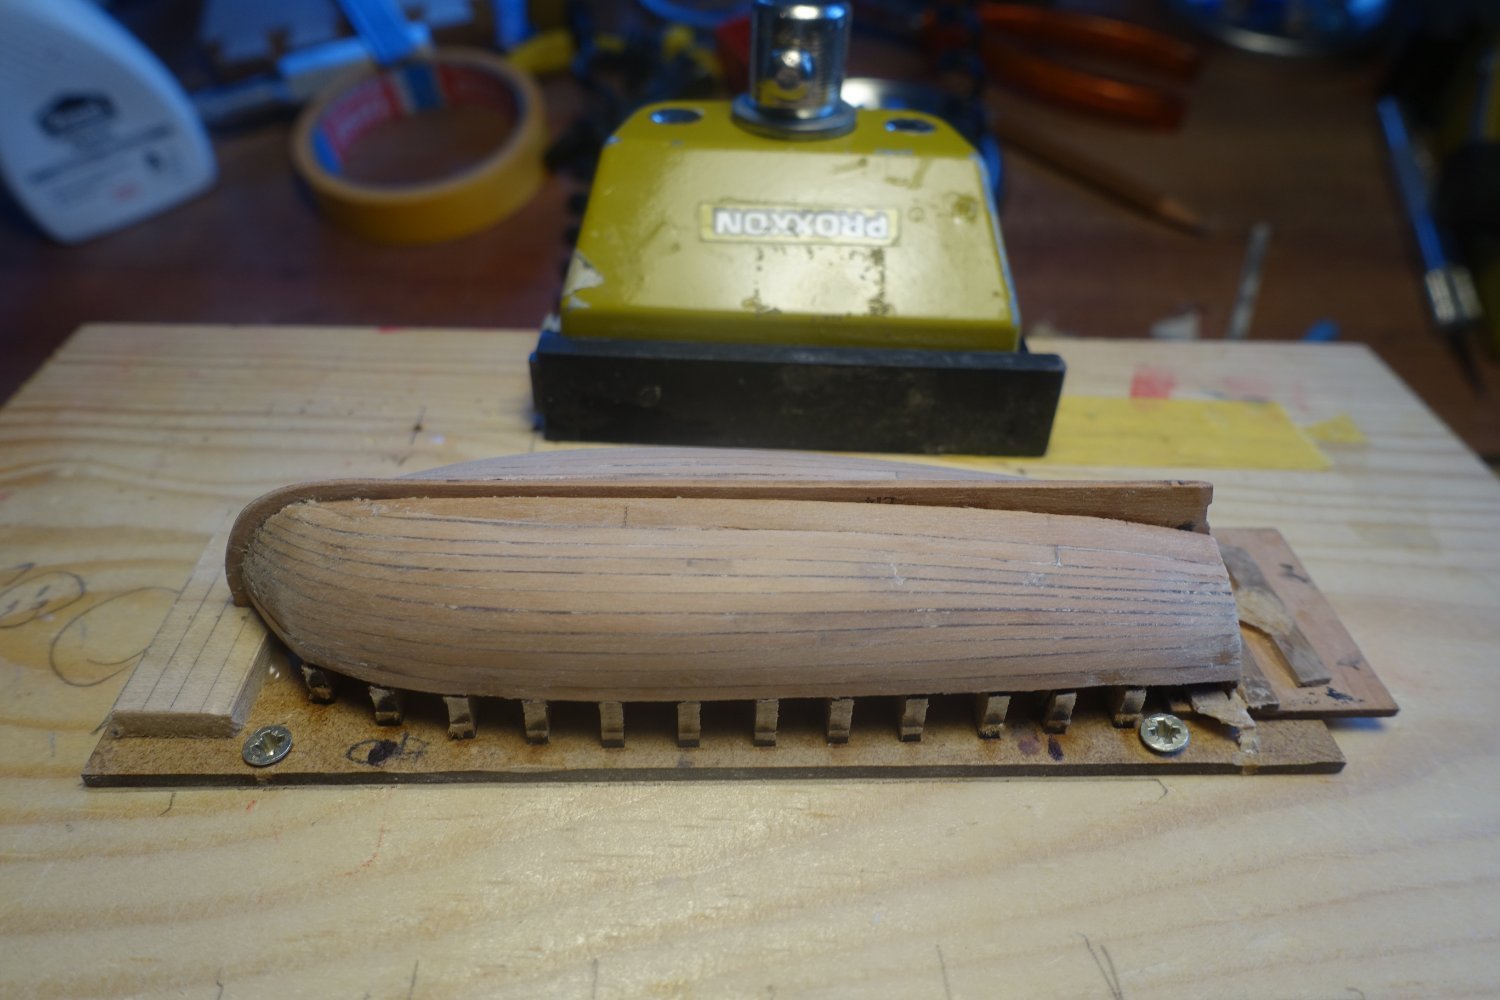
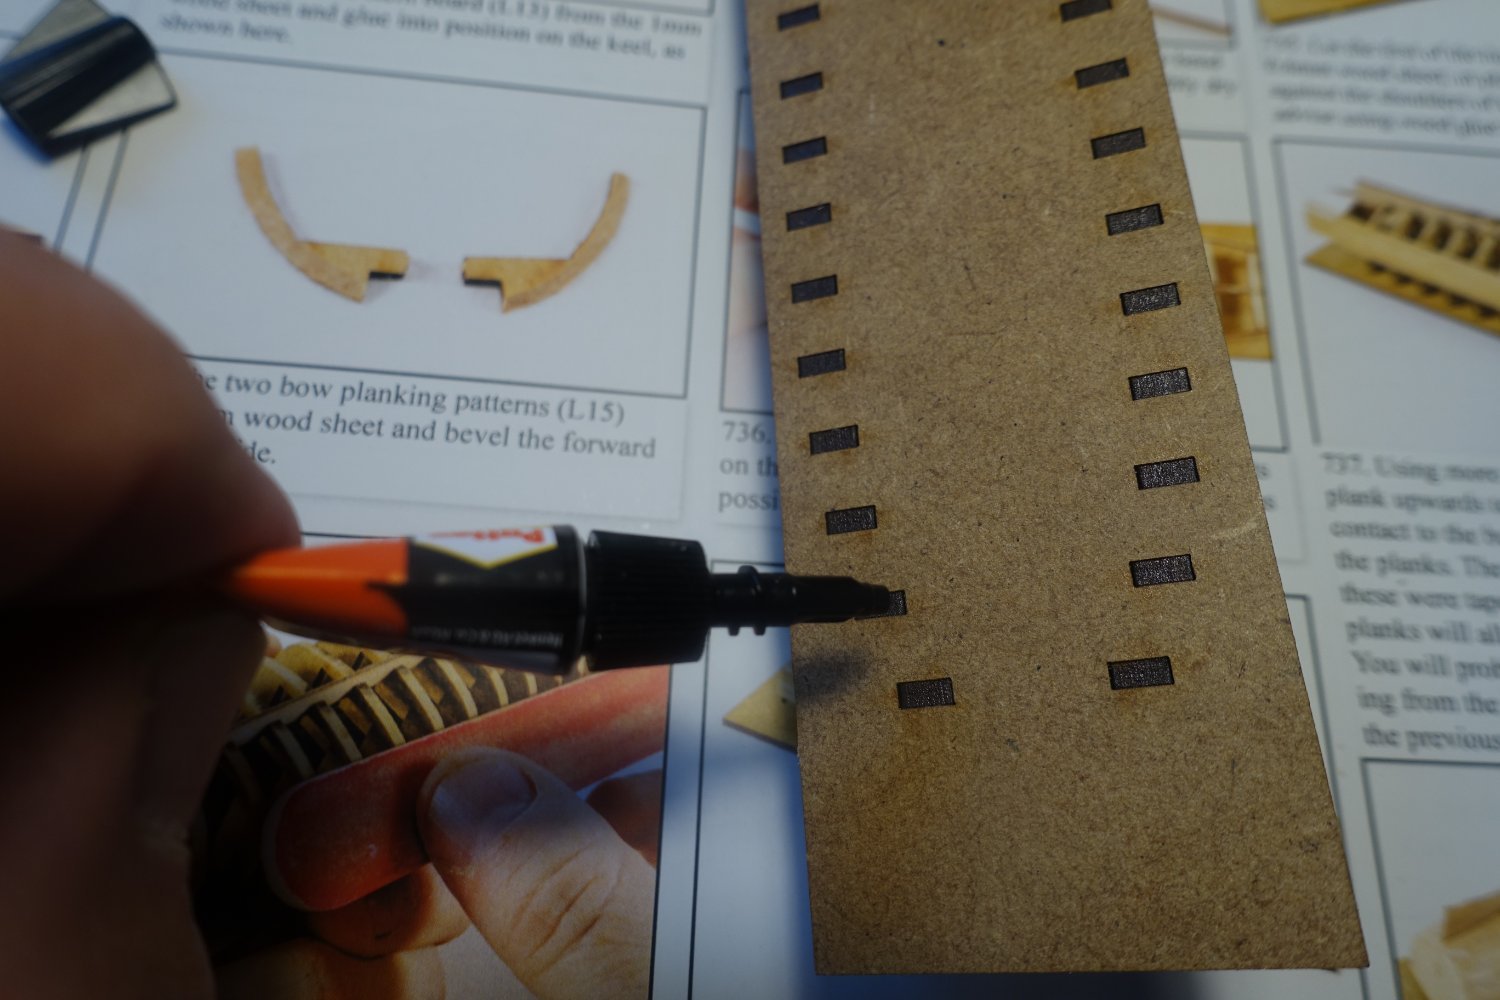
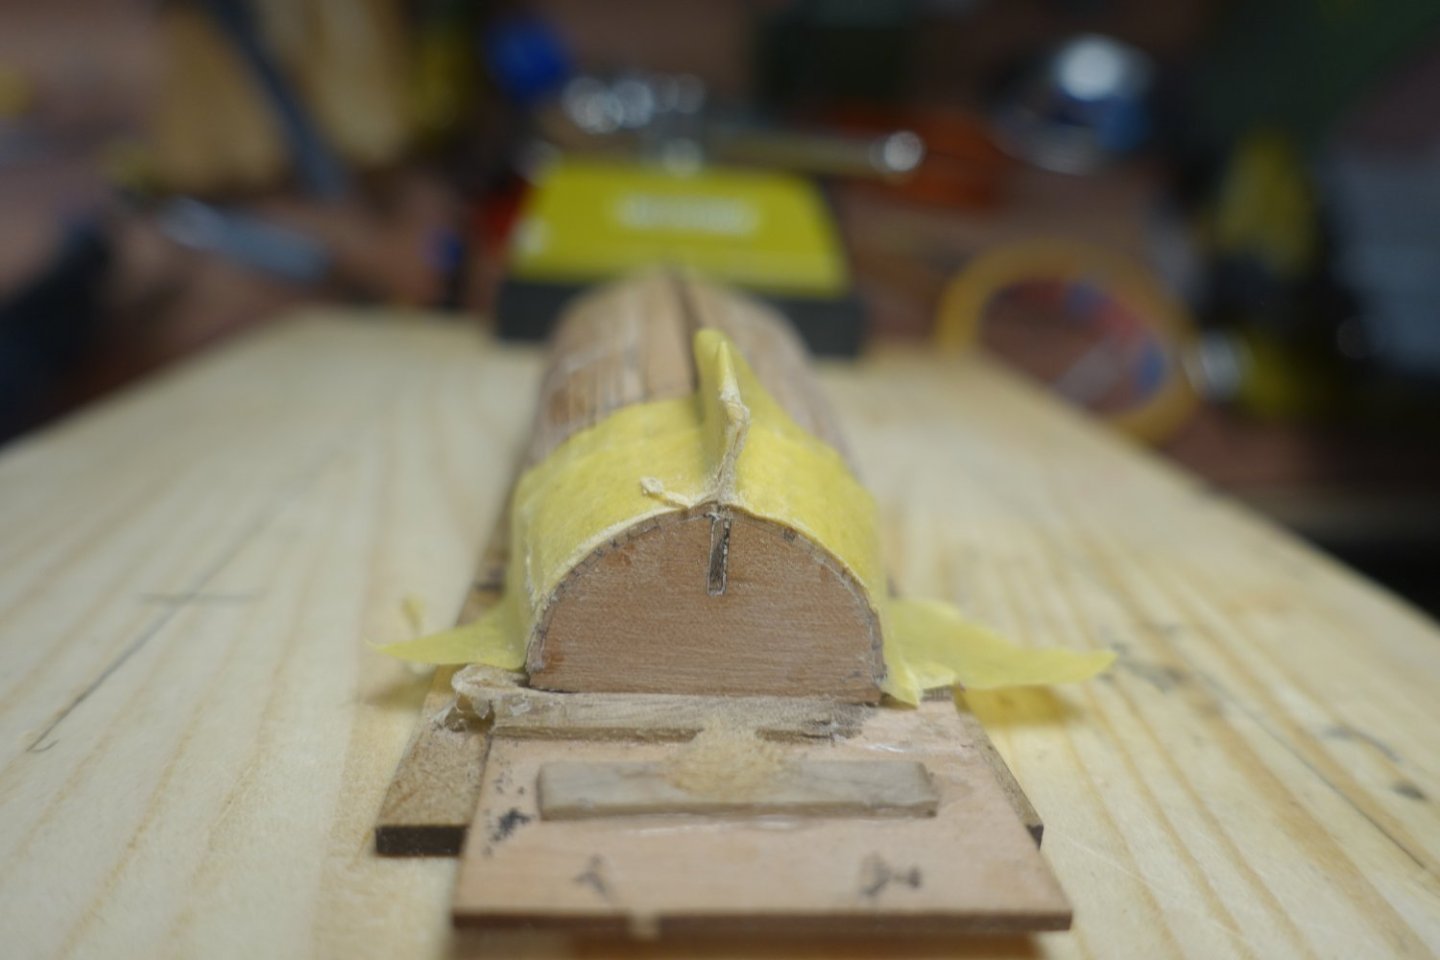
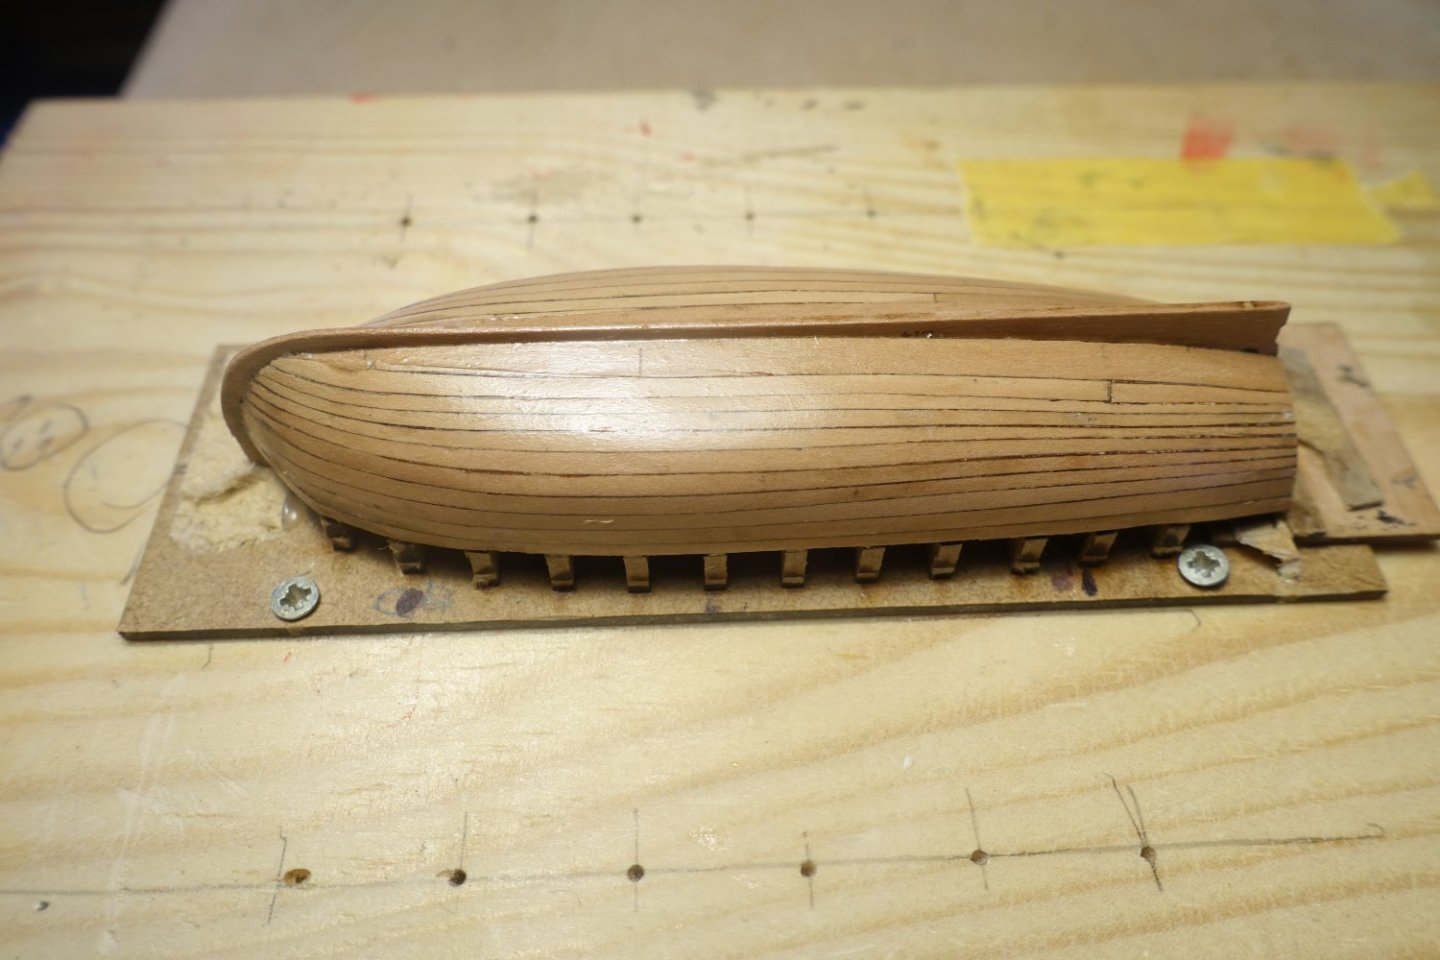
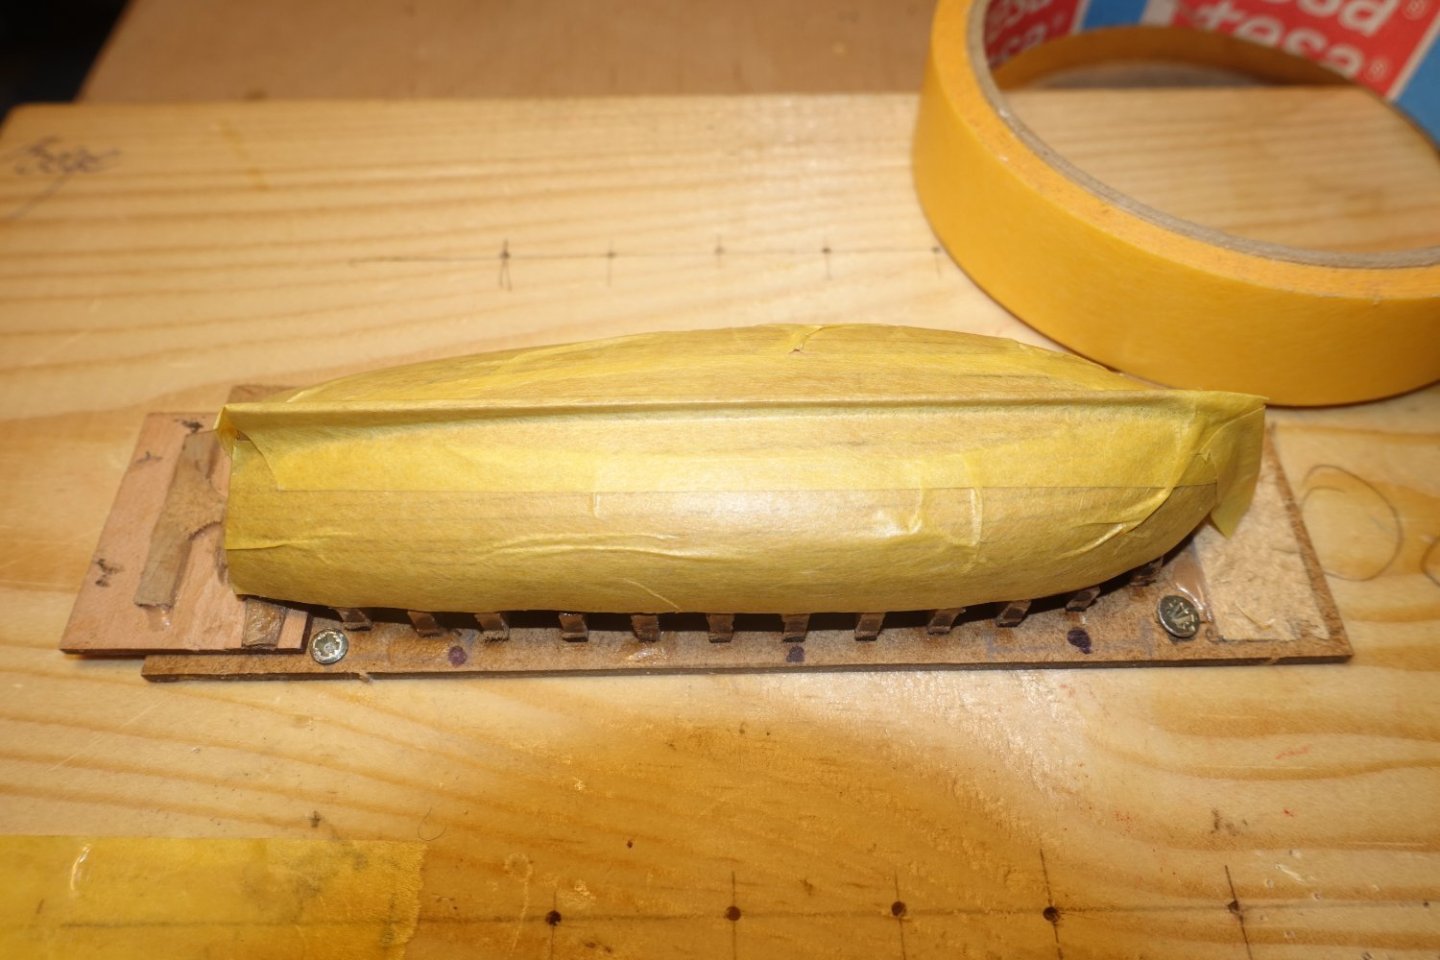
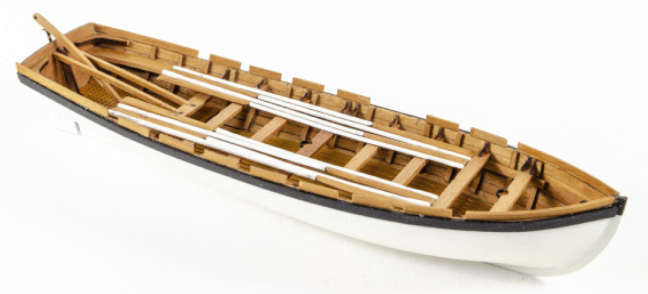
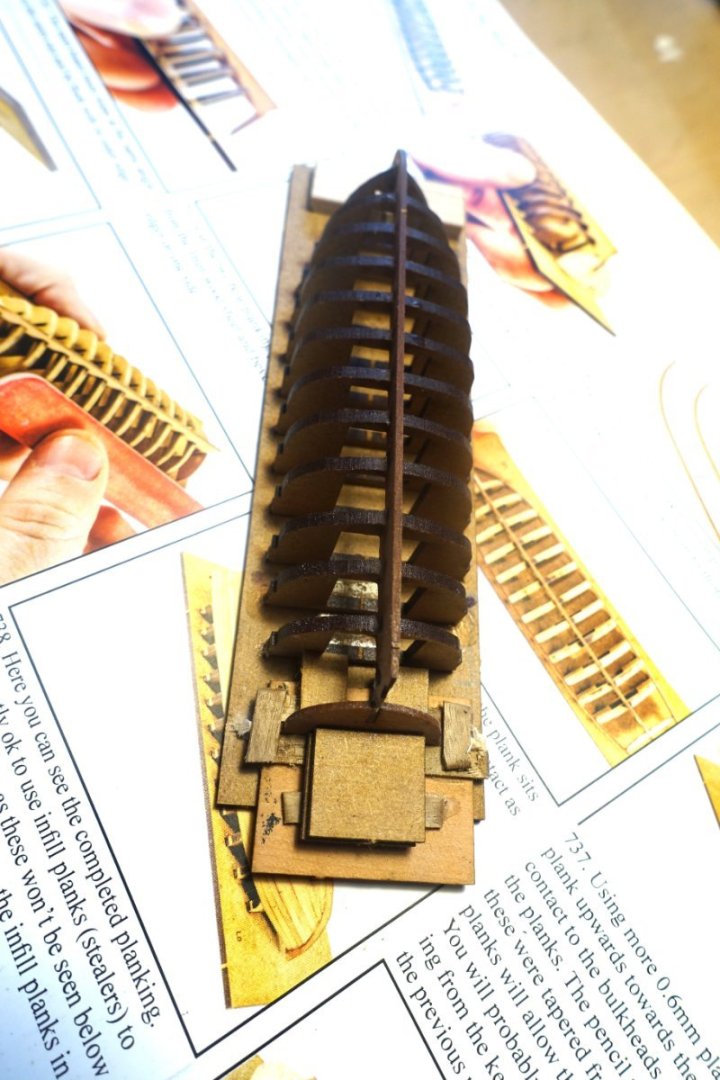
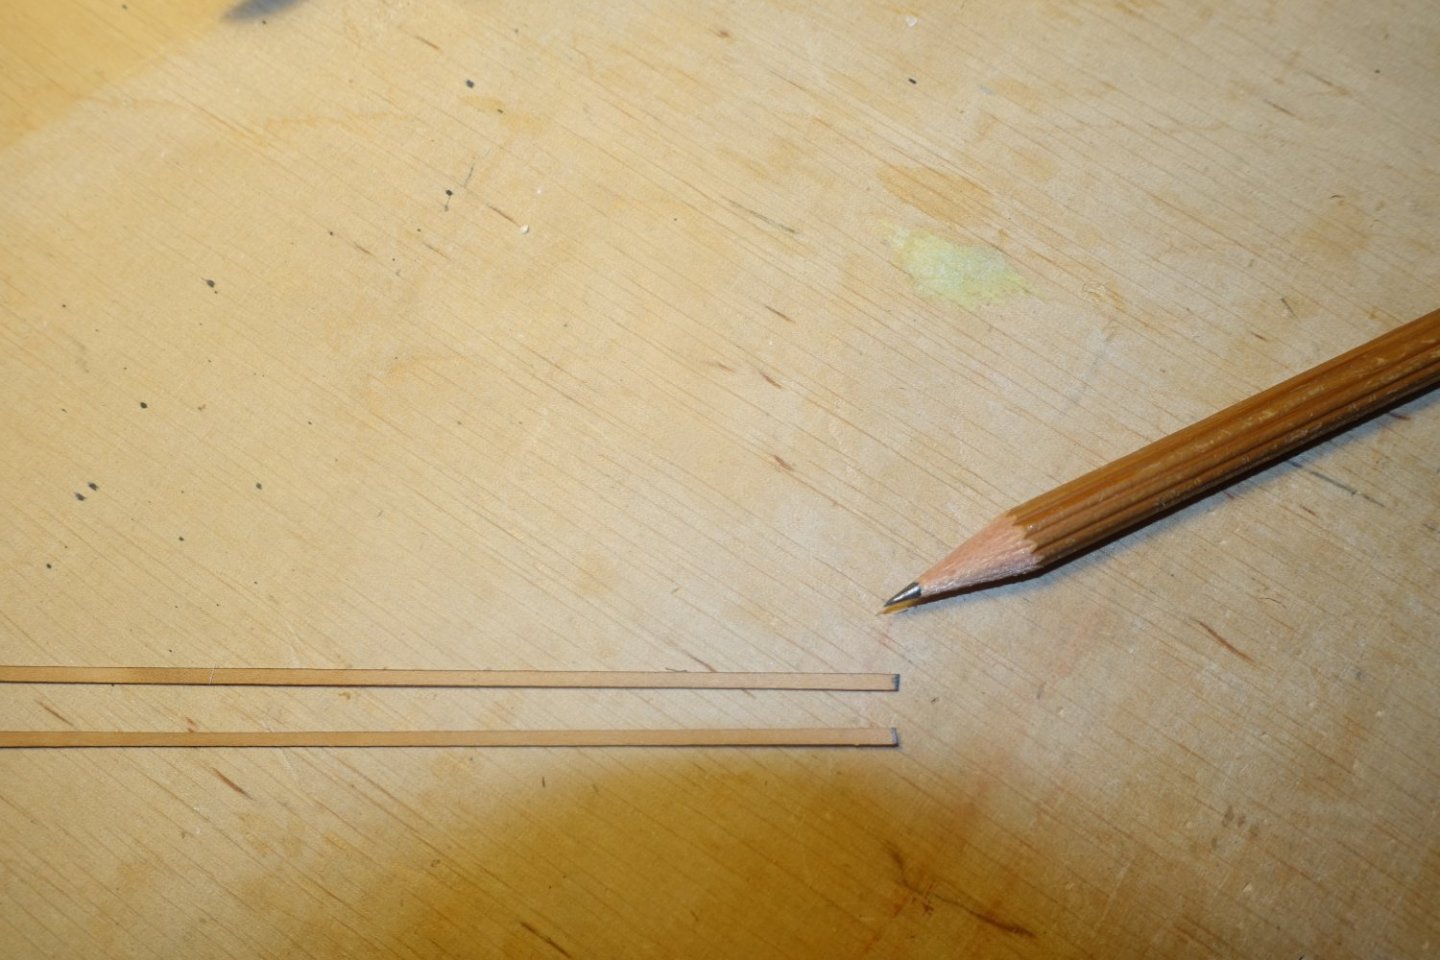
To get a rough idea of the taper still required for the planks, I measured the distance between the garboard strake and the upper planks and transferred it to the plan of the frame board. I then proceeded in the same way as for a larger ship. The largest width in the middle of the hull is 15.9 mm, i.e. with a plank width of 2 mm, 8 planks are required here. Accordingly, a plank width in the area of the first bulkhead of 12.8/8=1.61 mm and a plank width in the area of the transom of 9.0/8=1.12(5) mm. Even if the figures seem accurate, they will certainly have to be adjusted later. In any case, I cut the next two pairs of planks according to these figures. Only the last plank up to the garboard strake is now missing. You could try to take exact measurements of the gap. However, I have found that it is best to adjust by eye. I then adjusted this plank position in two sections (stern and bow). The hull is still littered with white crumbs. These are the remains of the dried PVA glue. It looks bad, but will disappear completely when sanded. Next, I cut off or sanded the protrusions at the stern. To prevent the fine planks from splintering during sanding, I covered them with masking tape. The hull was sanded. I started with 180 grit and finished with 320 grit. I want to present the boat later without paint and also without a waterline, as I always find it nicer when the wood presents itself. I therefore applied three coats of thinned clear varnish. Unfortunately, I missed a pencil mark on the garboard. But I won't sand it all down again, as the line will come to the bottom later and therefore won't be visible. I covered the boat (including stem) with masking tape to prevent bending after removing the frames and to protect the wood. This is the current status of the launch. Furhter posts will follow as soon as a corresponding construction phase is completed.


- 22 replies
-
- 13
-
-

-
- 24 ft Launch
- Vanguard Models
- (and 1 more)
-
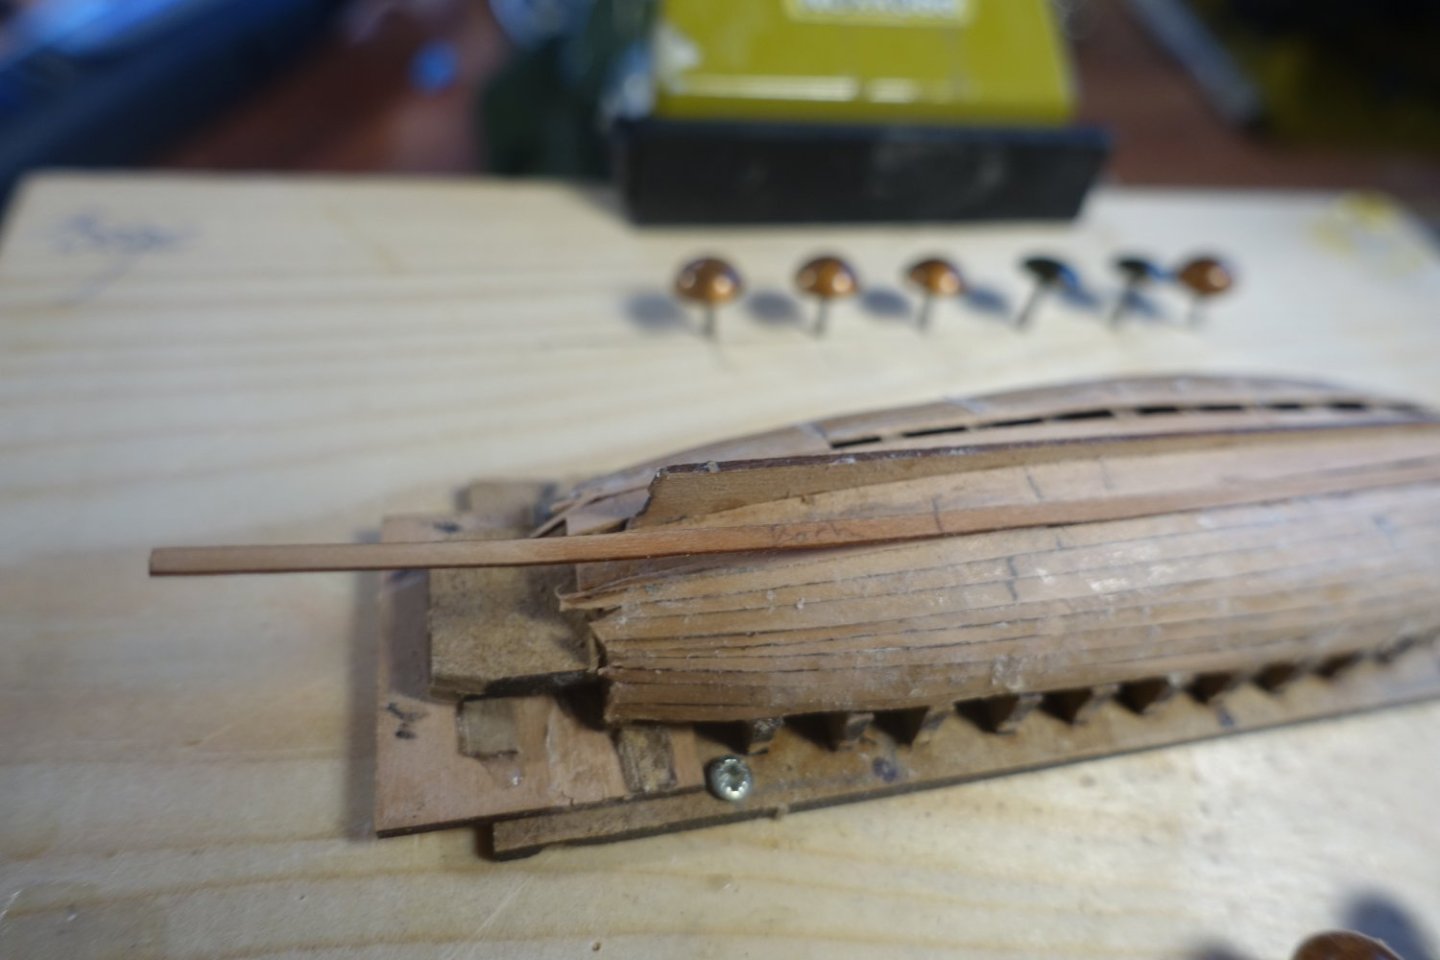
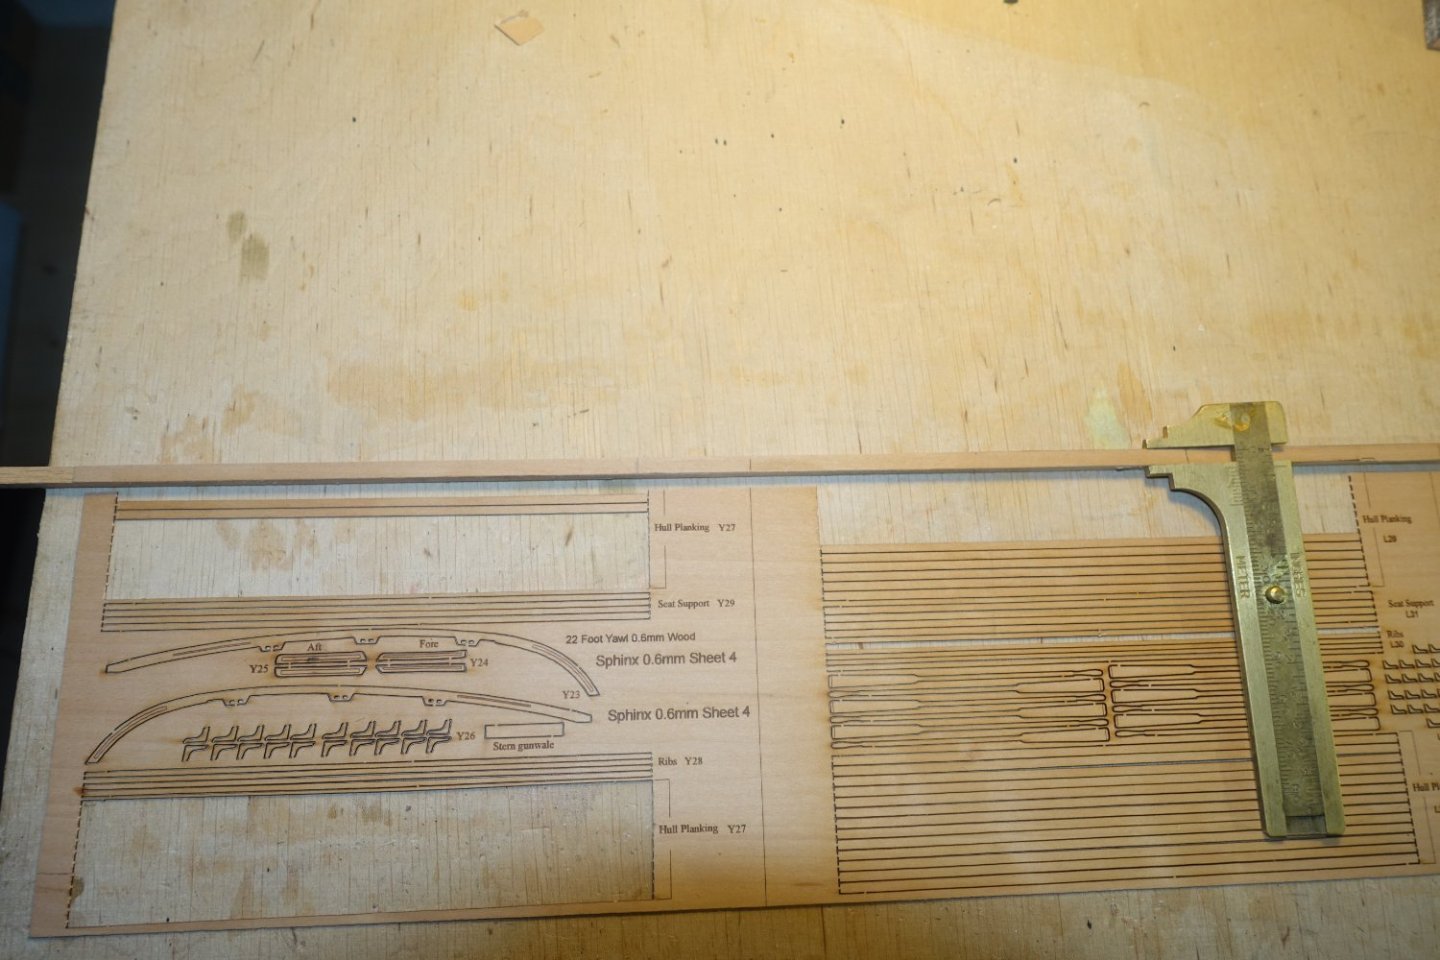
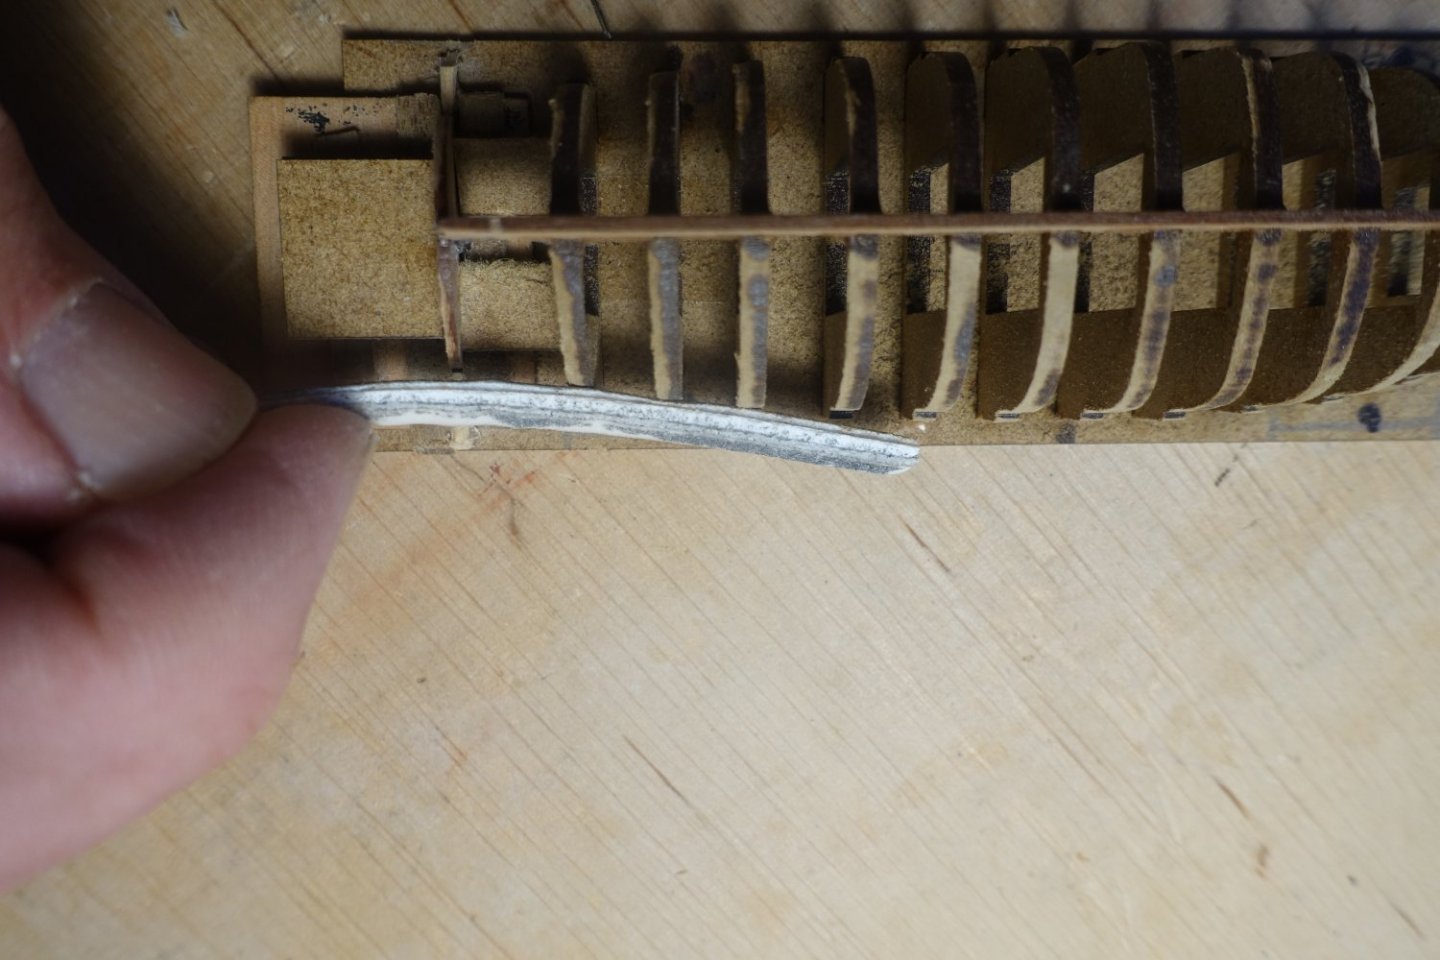
Garboard strake. As in a ship, the strake should also have about twice the thickness of the regular planks. To make this I used the edge of the 0.6mm thick wooden sheet from the Sphinx kit and cut it off. the I then attached the cut-off area to a 4x4 mm beech strip with double-sided adhesive tape and sanded down the overhang of the 0.6 mm thick wooden strip to the 4 mm using the beech strip as a guide. There are certainly other ways to make the garboard strake. The garboard strake was first cut and sanded by feel in the bow area. Both garboard strakes were then fitted with CA. The frames are in the keel area and will later be covered by the floor so that the glue is no longer visible.
- 22 replies
-
- 6
-
-
- 24 ft Launch
- Vanguard Models
- (and 1 more)
-
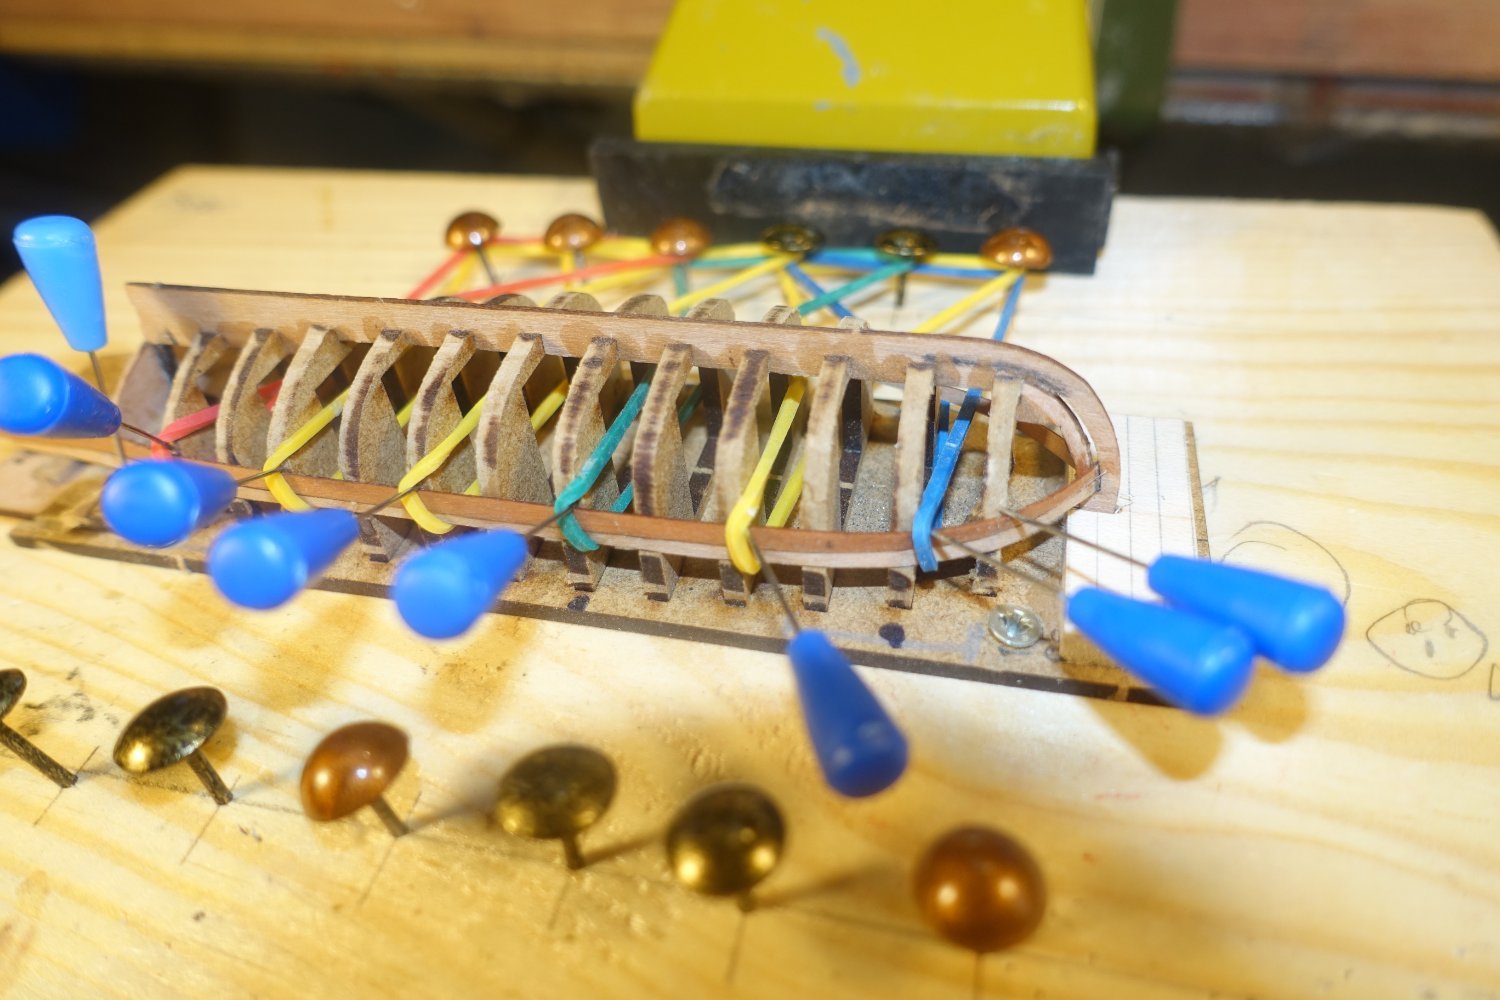
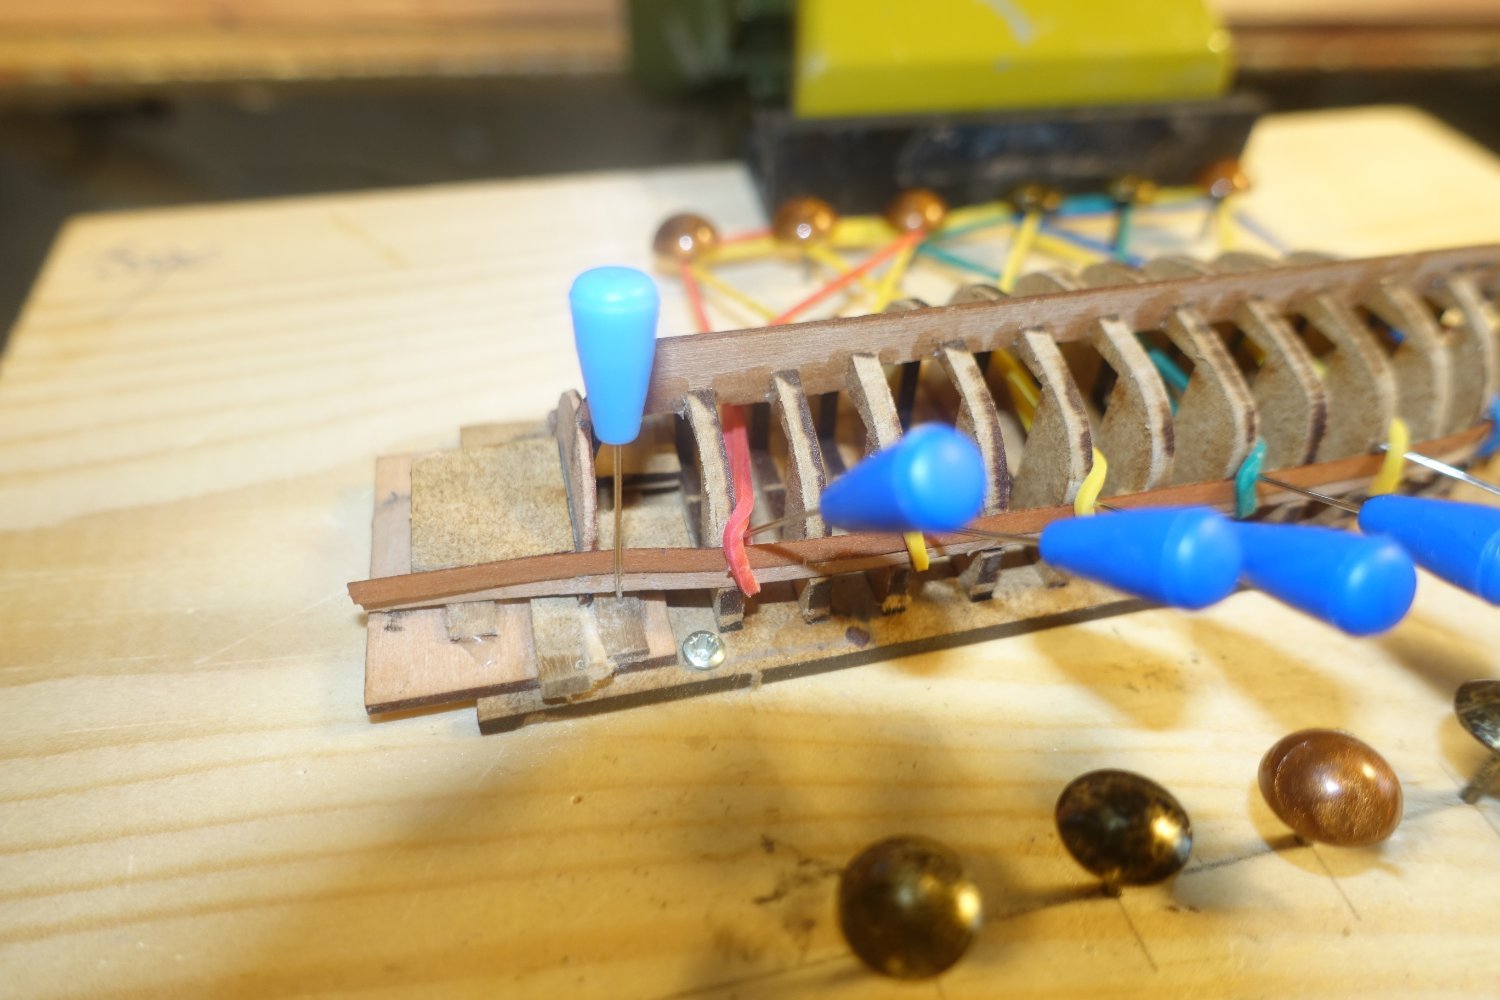
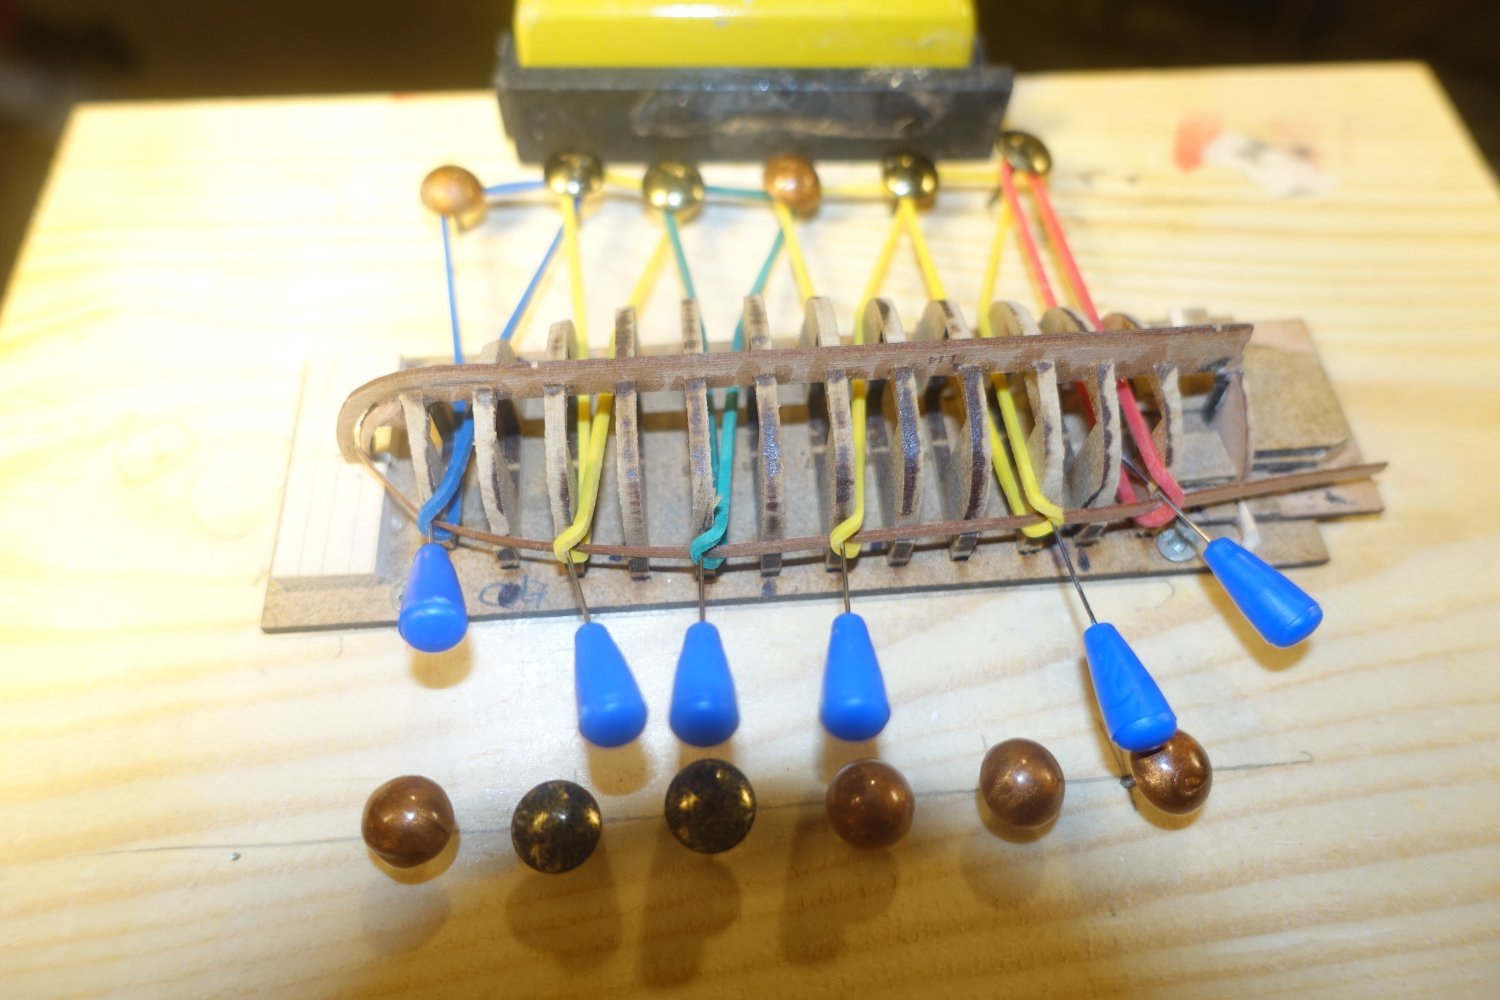
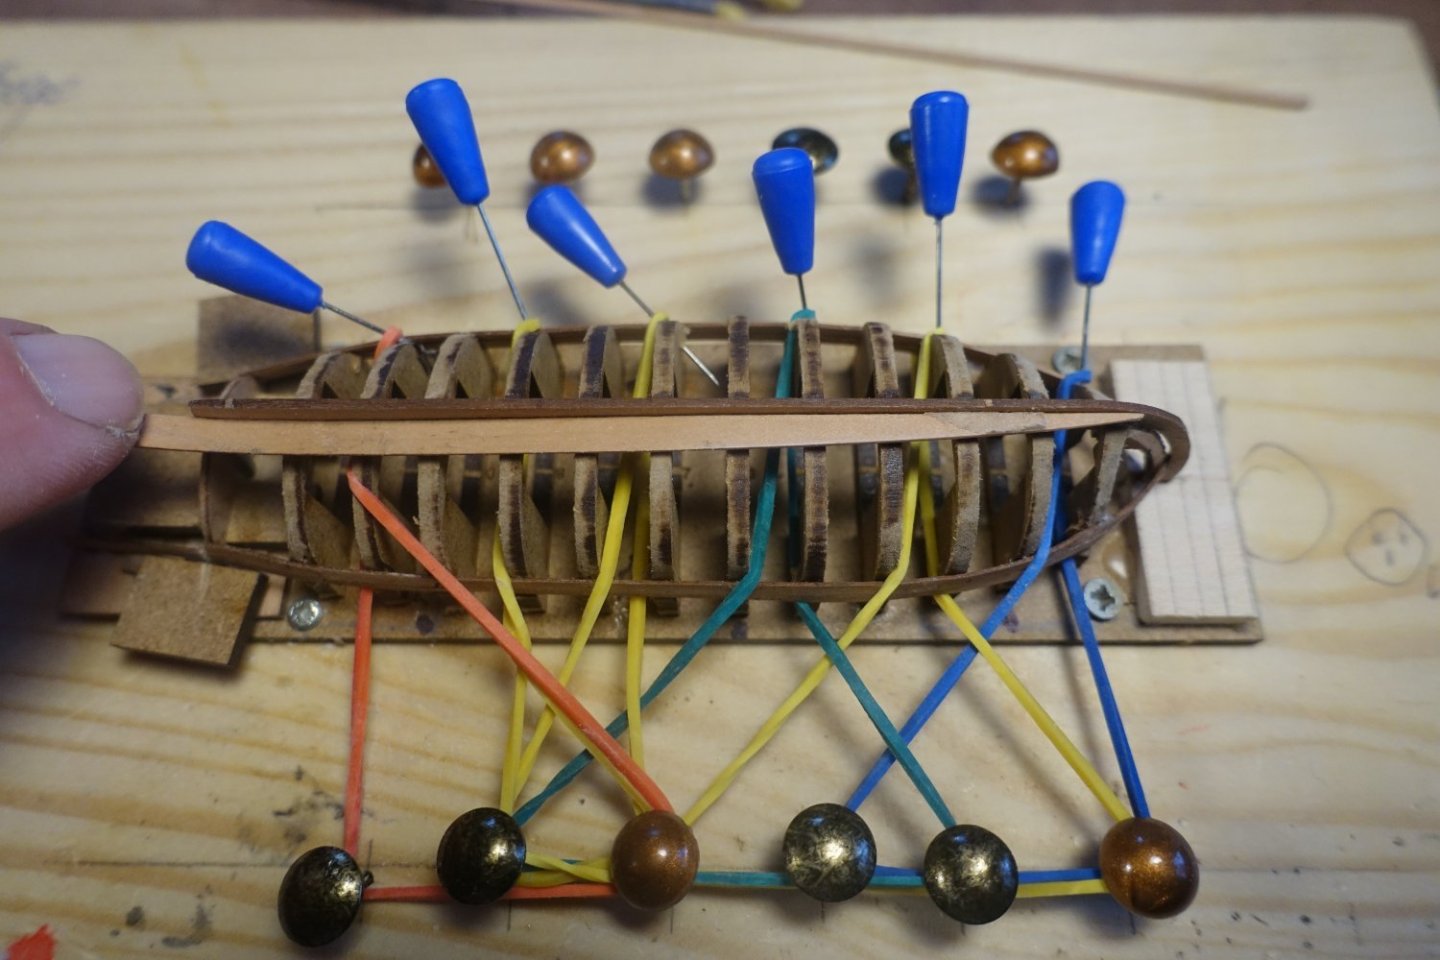
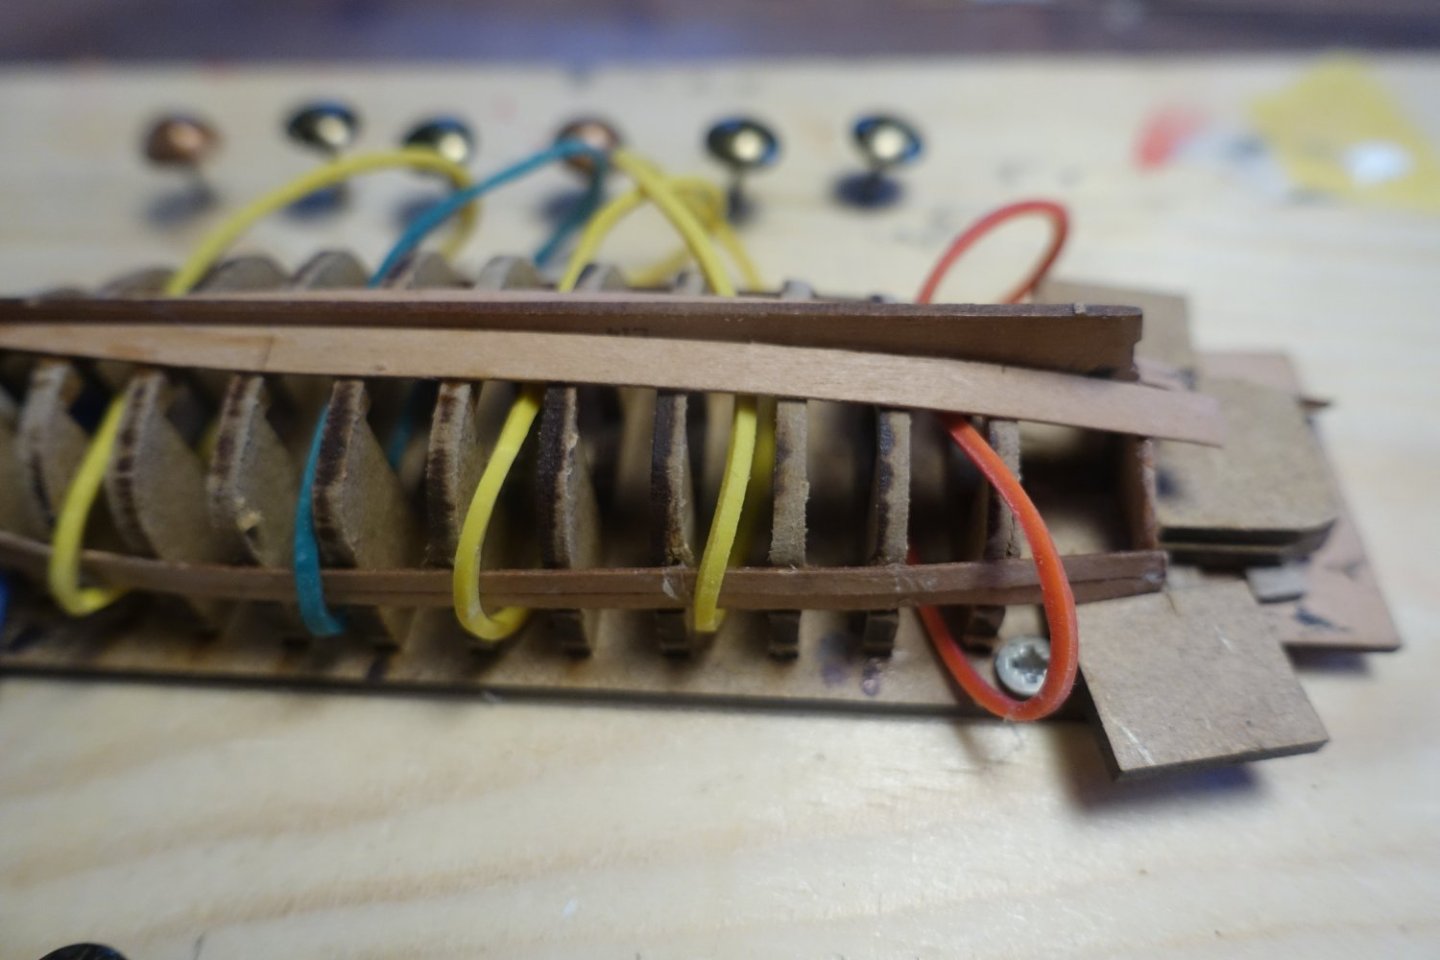
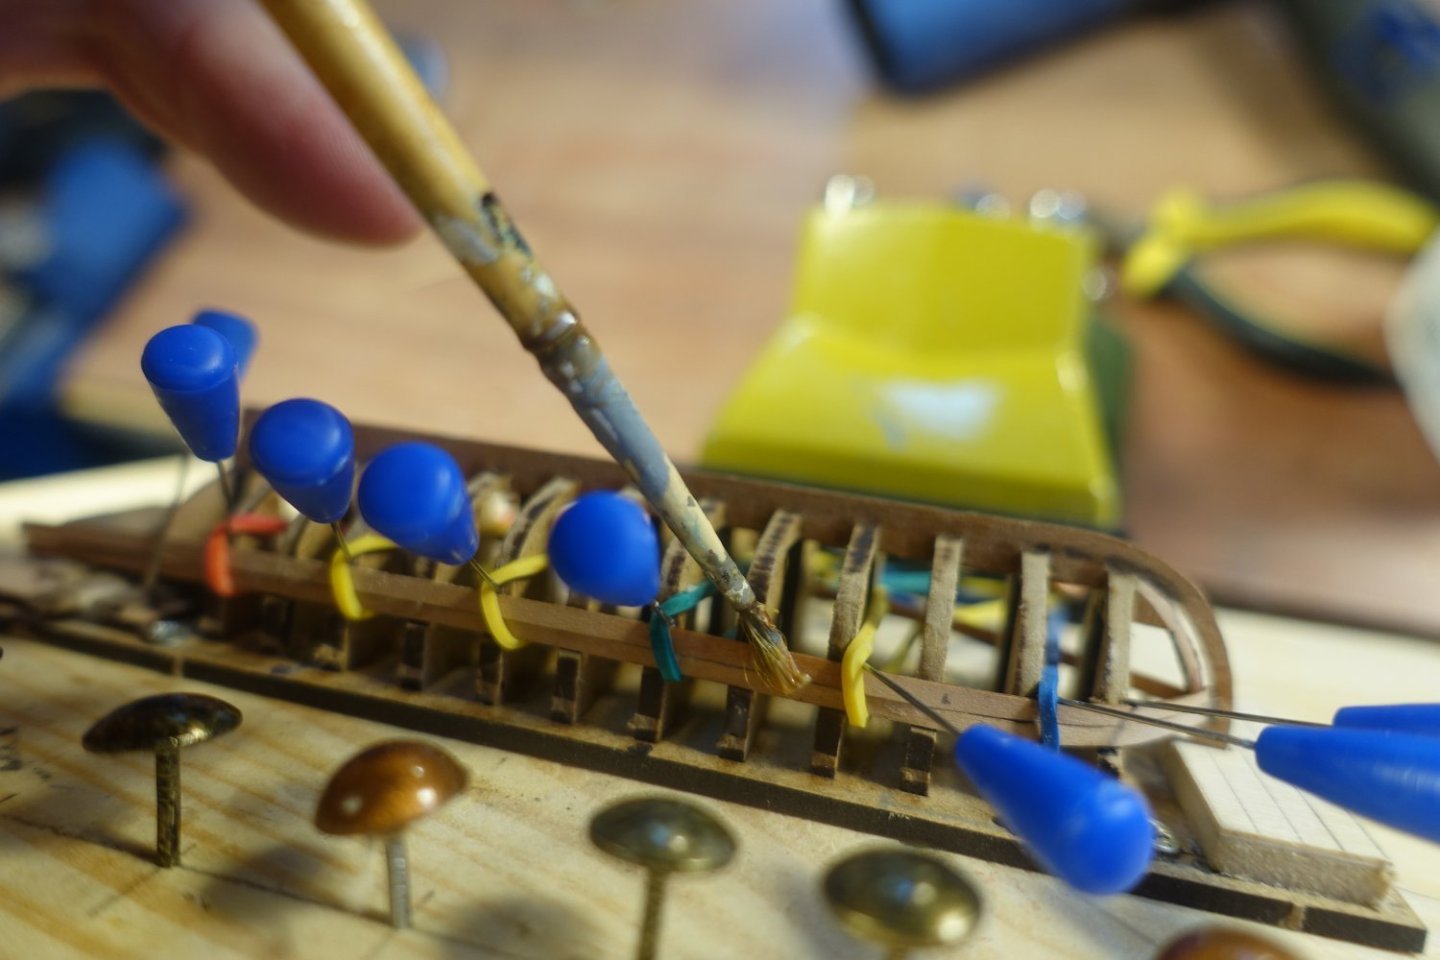
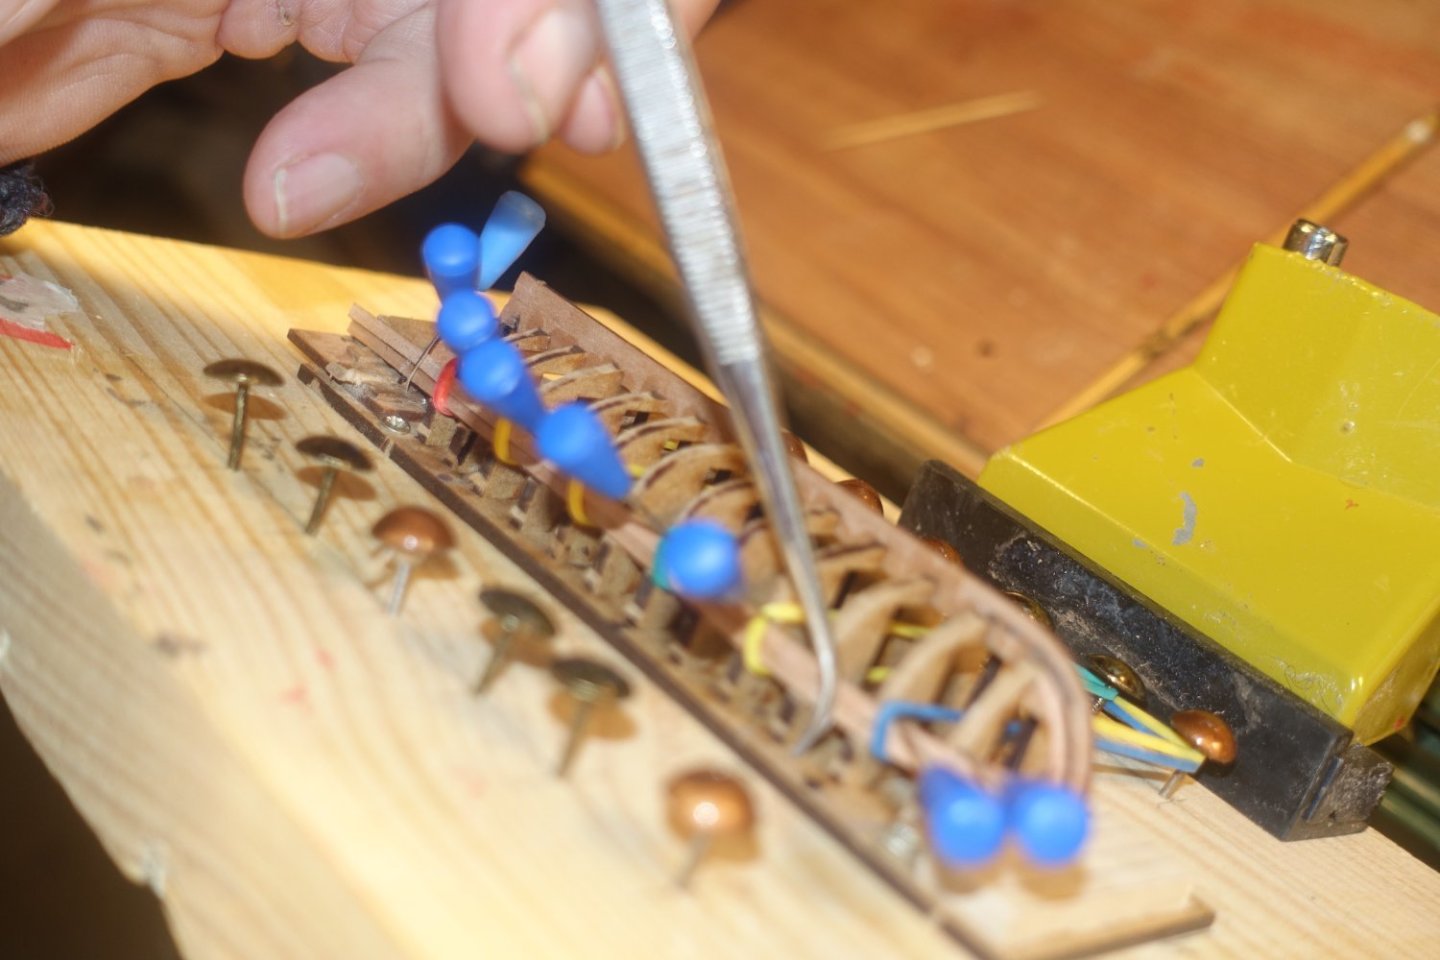
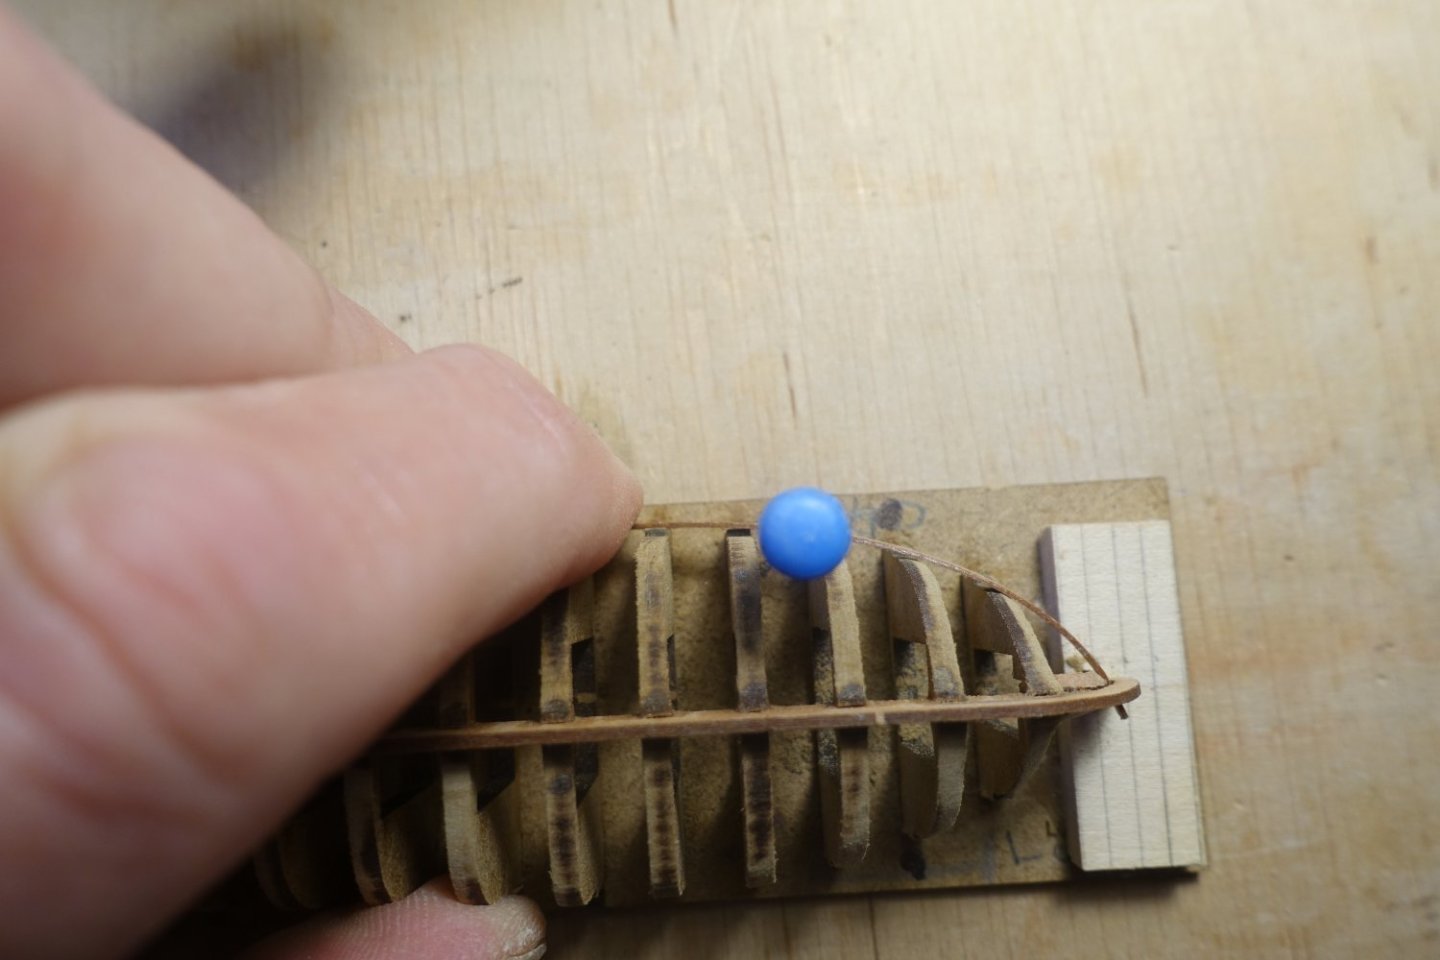
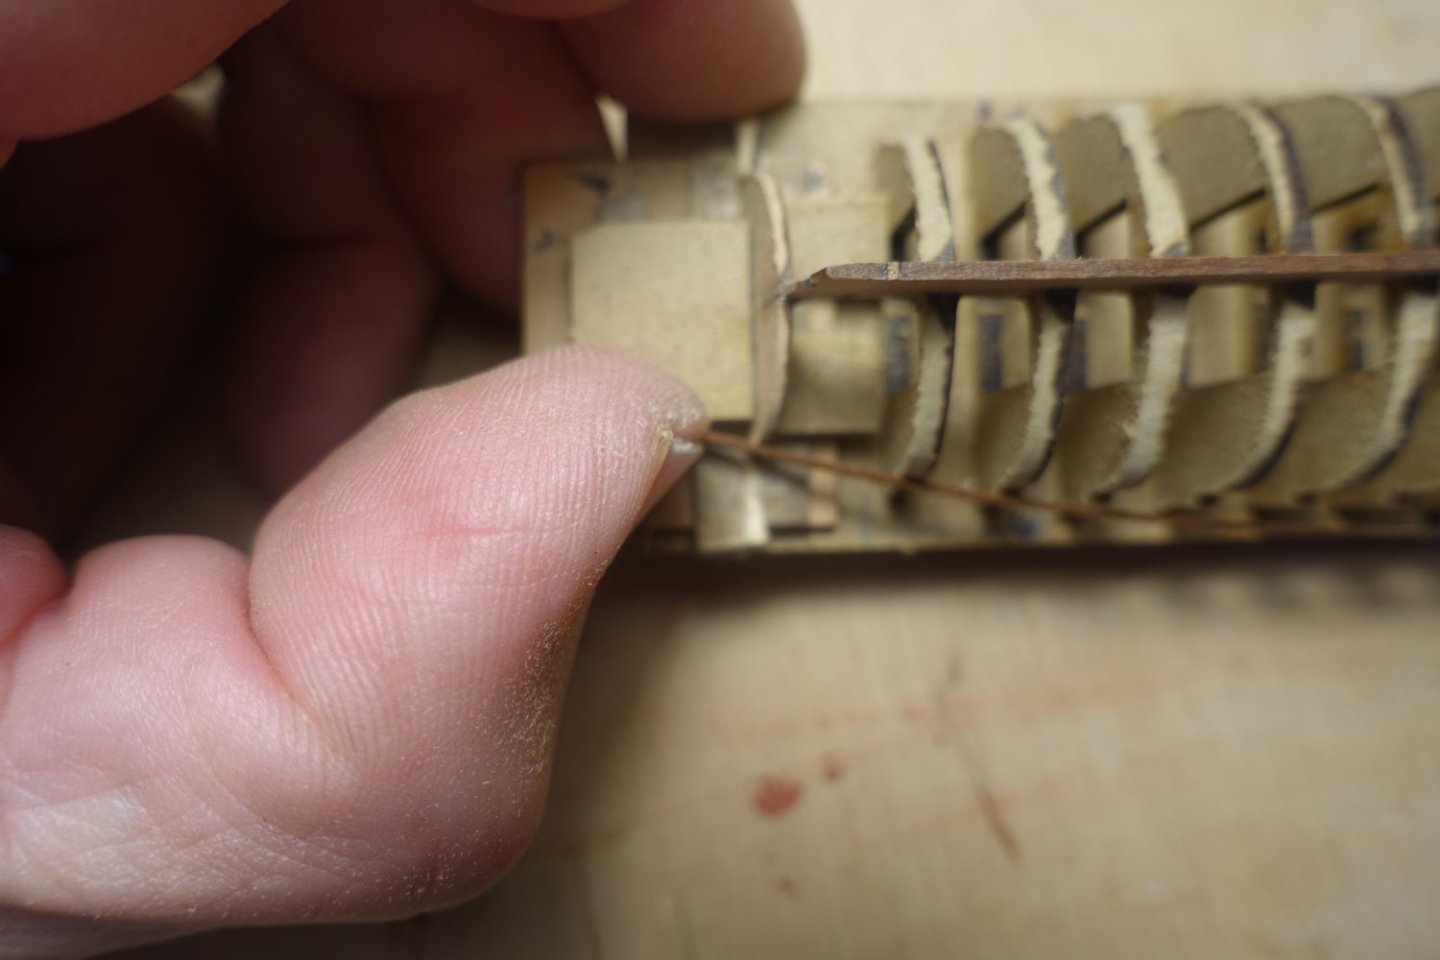
I tapered the bow area from the second strip onwards, trying to make the taper on the port side the same as on the starboard side. The frames are cut so precisely that the distances from the first strip to the keel are the same on both sides The planks were watered, laid out wet and pressed onto the frames and first strip with the help of the pins and rubber bands. . The planks were watered, laid out wet and pressed onto the frames and first strip with the help of the pins and rubber bands. The planks were then dried again using a hair dryer (approx. 5 min). Without removing the strip, PVA glue was applied to the area between the strips. Where the strip protruded, it was pressed against the first strip. A small amount of PVA-glue between the planks also holds the strips together (photo out of focus, sorry). The protrusions are usually very small. However, the planks are also extremely thin, which leaves little room for sanding later.


- 22 replies
-
- 3
-
-
- 24 ft Launch
- Vanguard Models
- (and 1 more)
-
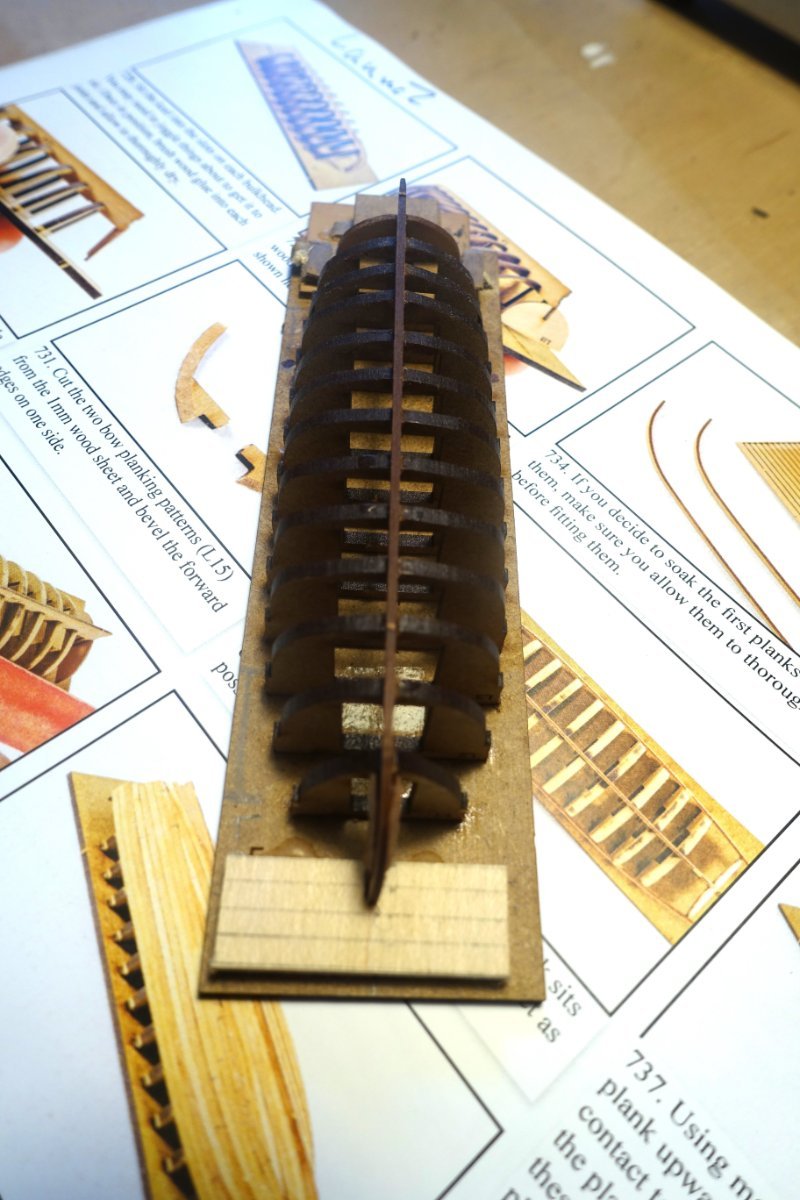
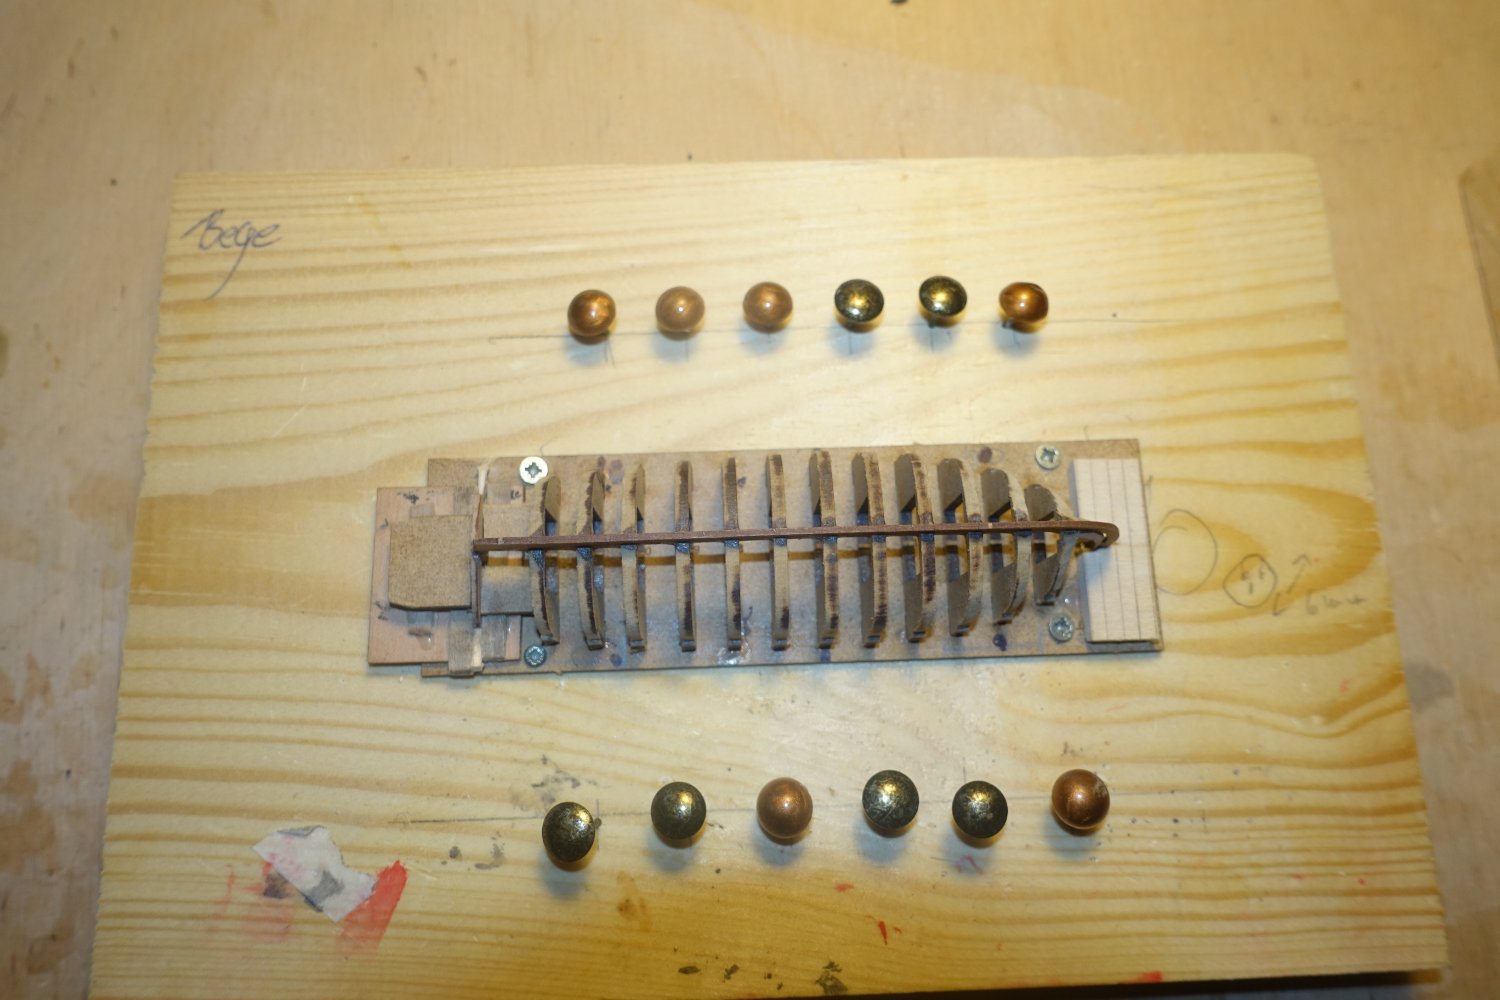
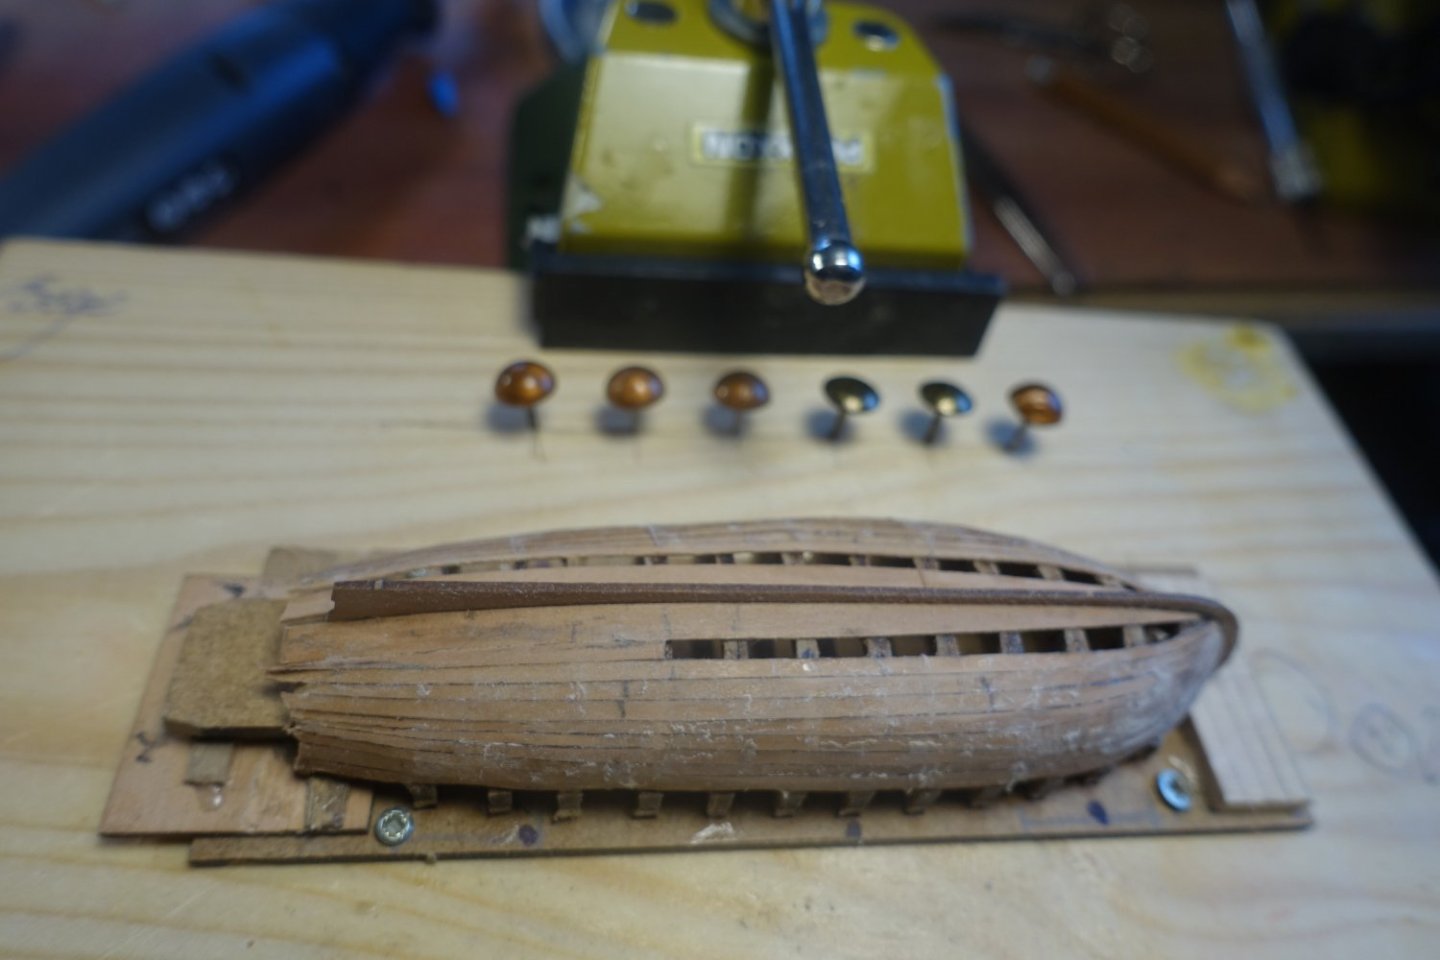
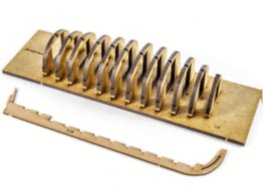
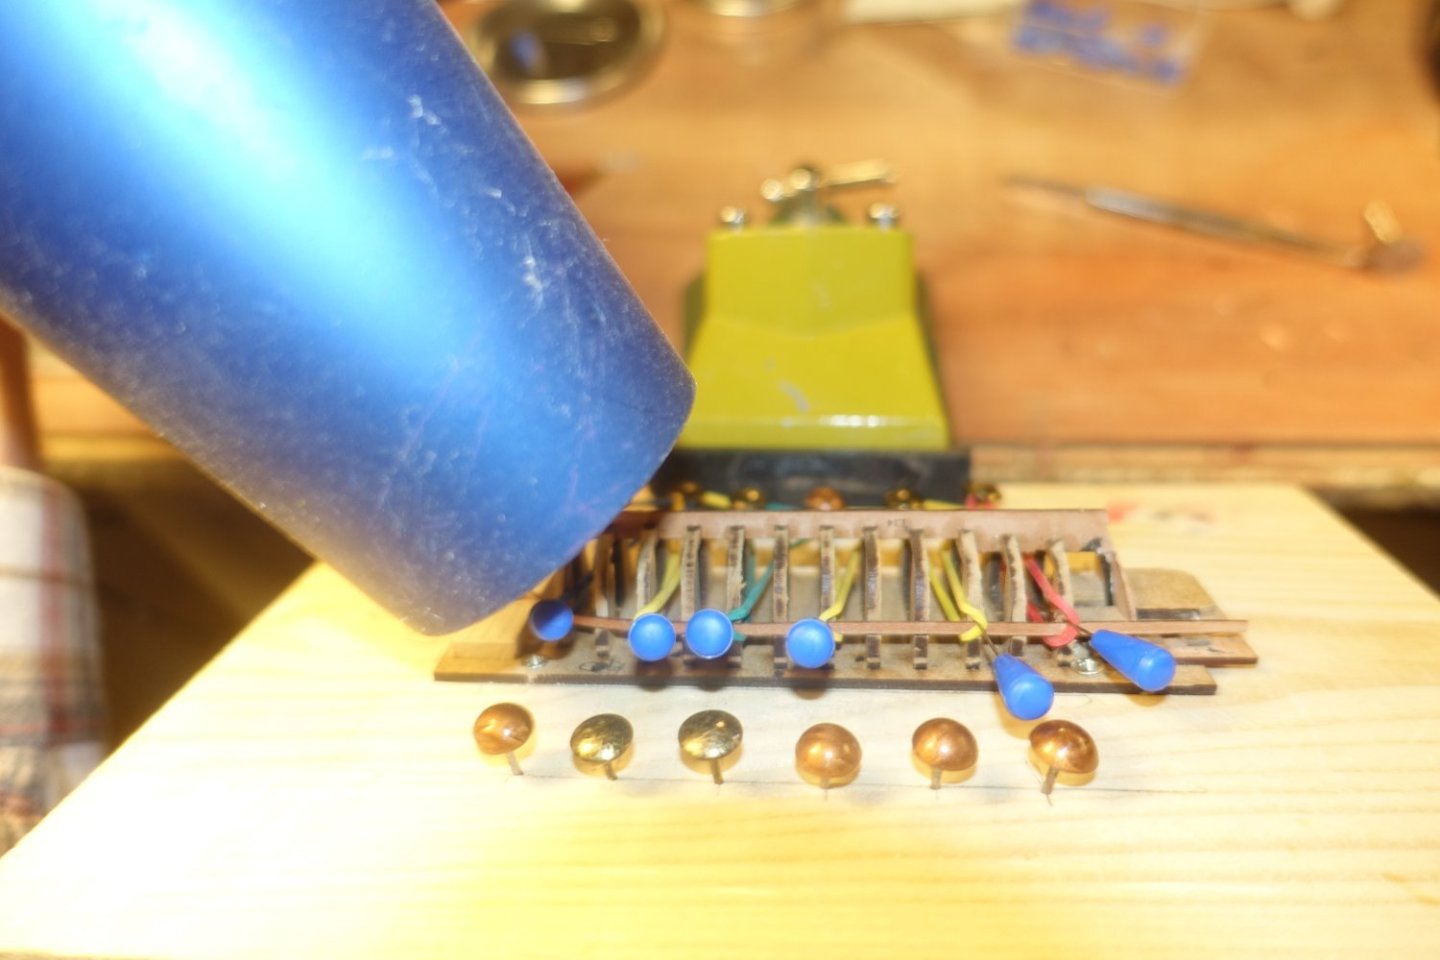
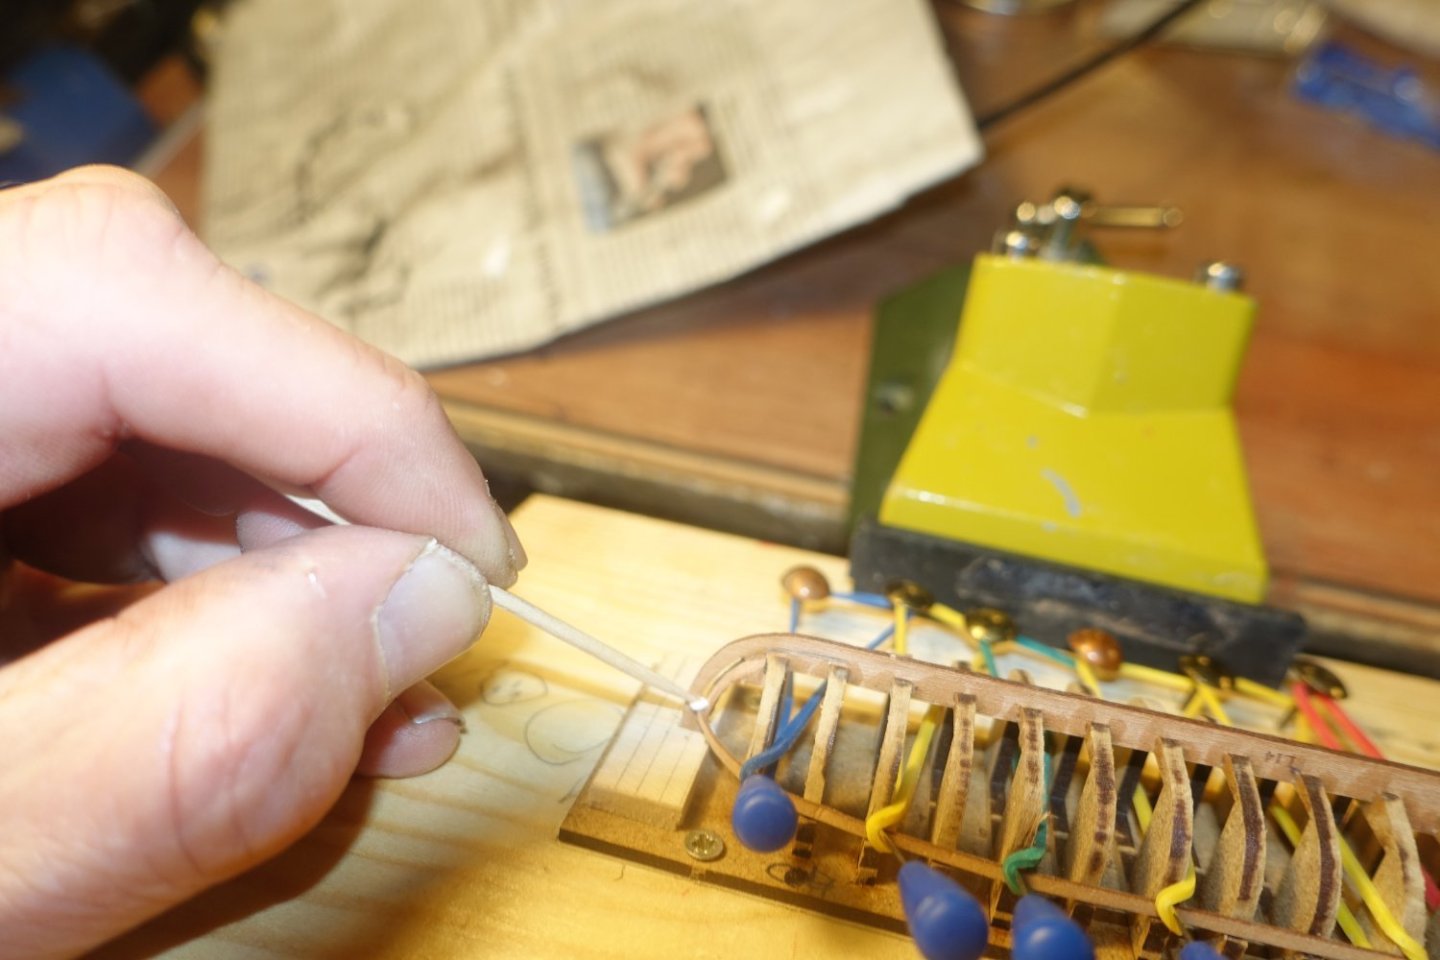
Photo taken from the building instructions of Chris/James Chris Watton (Vanguard) has some smaller boats in his range which he offers separately and which are also part of some larger kits (Indefatigable, Sphinx). I am currently in the process of building the Sphinx and have noticed that opinions about the boats are divided here in the forum ("torture" versus "fantastic"). I would therefore like to describe the construction of the Launch in more detail. You can also find a clear description in the reports from Blue Ensign. I have of course based my description on these reports. However, I have come up with a few more tricks that - at least from my point of view - make it easier to build these small boats. Perhaps Blue Ensign's and the other reports and/or mine will encourage a few more people to build these beautiful boats. I don't want to discuss whether the model is historically accurate or not. I just want to encourage some to take a look at these boats and share my experience on how to handle these delicate little boats. I don't have any photos of the very beginning, but this can easily be seen from Chris'/James instructions. Photos taken from the building instruction of Chris/James It seems important to me that both the bow and stern transom are well fixed. These are the most sensitive areas. I secured the transom both inboard and outboard. I glued the frames to some points in the base plate with CA glue and marked the points so that I could cut the frames out of the base plate later if necessary. There is enough space on the top of the bulkheads to be able to use a knife or a small saw. I used CA instead of PVA to fix the frames because I want to bend the planks later with a hairdryer and the heat would soften PVA glue. For further sanding, I used sanding sticks (100 grit) and tried to sand three frames at a time (similar to a large ship). The charring from the laser cut is a good guide. As long as there is still a lot of it visible, sanding is usually not enough A first test with a plank shows that the first two frames have not yet been sanded sufficiently (also visible in the remaining charring). After re-sanding, the plank fits better, but the frame still needs to be sanded a little. When adjusting, I also beveled the transom so that the planks fit well here too (photo unfortunately a little out of focus). The assembly was then screwed onto a wooden board and 6 nails were driven into the starboard side and 6 nails into the port side at a distance of approx. 4 cm from the hull. The first plank is not tapered. However, the bow end has been slightly chamfered so that it is flush with the guide slot in the stem. The planks have also been marked to show how far they can be inserted into the slot without obstructing the other side. The planks were soaked in water for about 15 minutes and then fixed to the frames. The pins were guided against the keel side of the plank with very light pressure. Rubber bands were passed around the pins and tension was applied via the nails on the opposite side. The guiding around the pins ensures that the planks are pressed against the frames but do not bend. The fixed planks were heated with a hair dryer for approx. 5 minutes. This time is usually sufficient for the planks to retain their shape and size. In the stern area, the plank is pressed against the transom with tweezers during heating. I did not remove the plank again, but applied PVA directly to the frames or the stem and finished with a slightly damp brush. PVA is only applied to the frames for the first plank, then later between the planks. I only used CA on the transom to fix the planks in place.


- 22 replies
-
- 5
-
-
- 24 ft Launch
- Vanguard Models
- (and 1 more)
-
I'm also busy with the Sphinx at the moment, or rather it's keeping me busy. The cannons are of excellent quality and can be perfectly restored to their 18th century condition with enamel paints and a little powder.
-
Thanks, it was something for in between
-
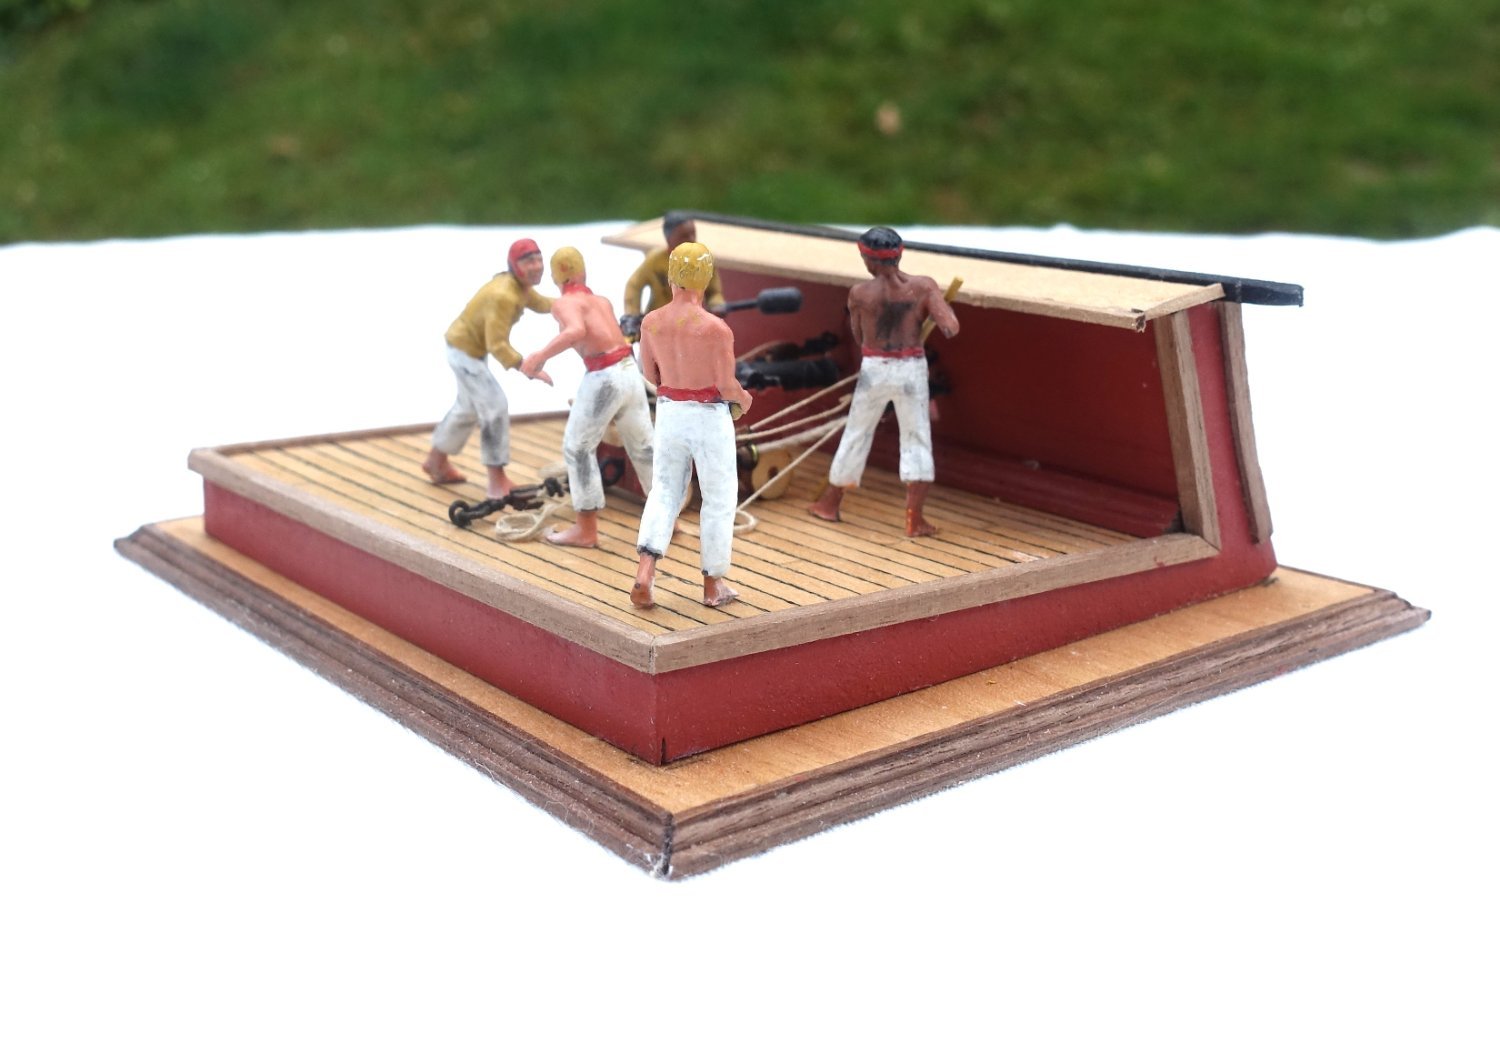
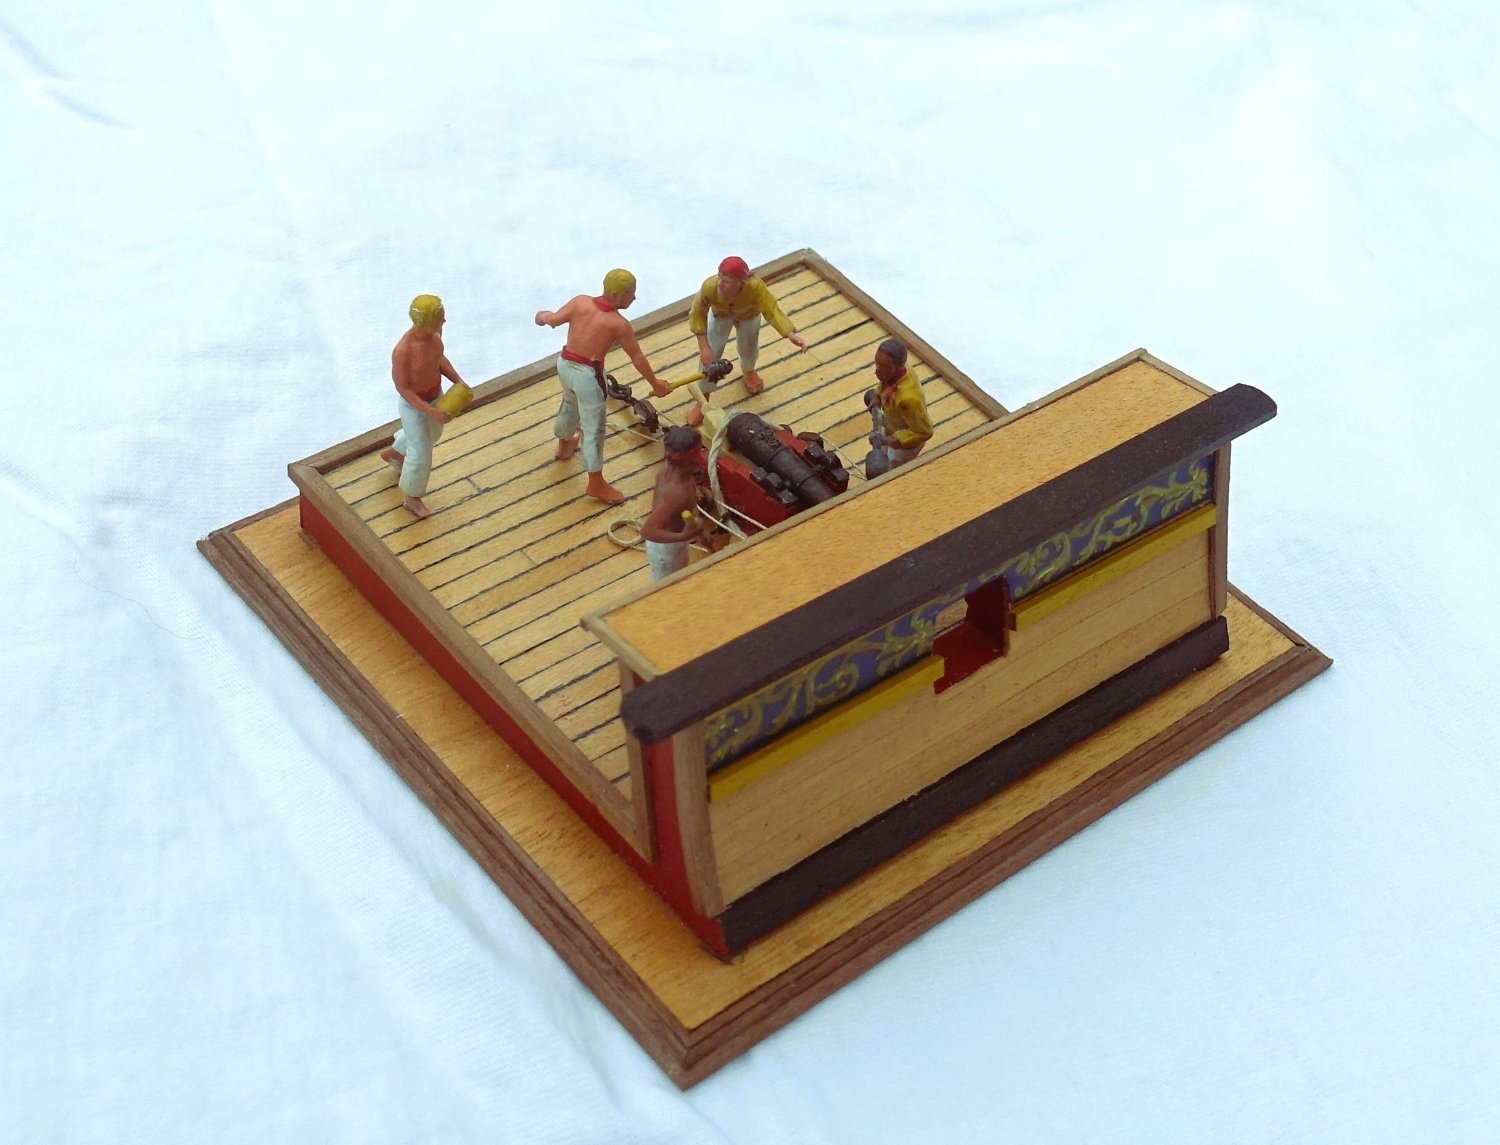
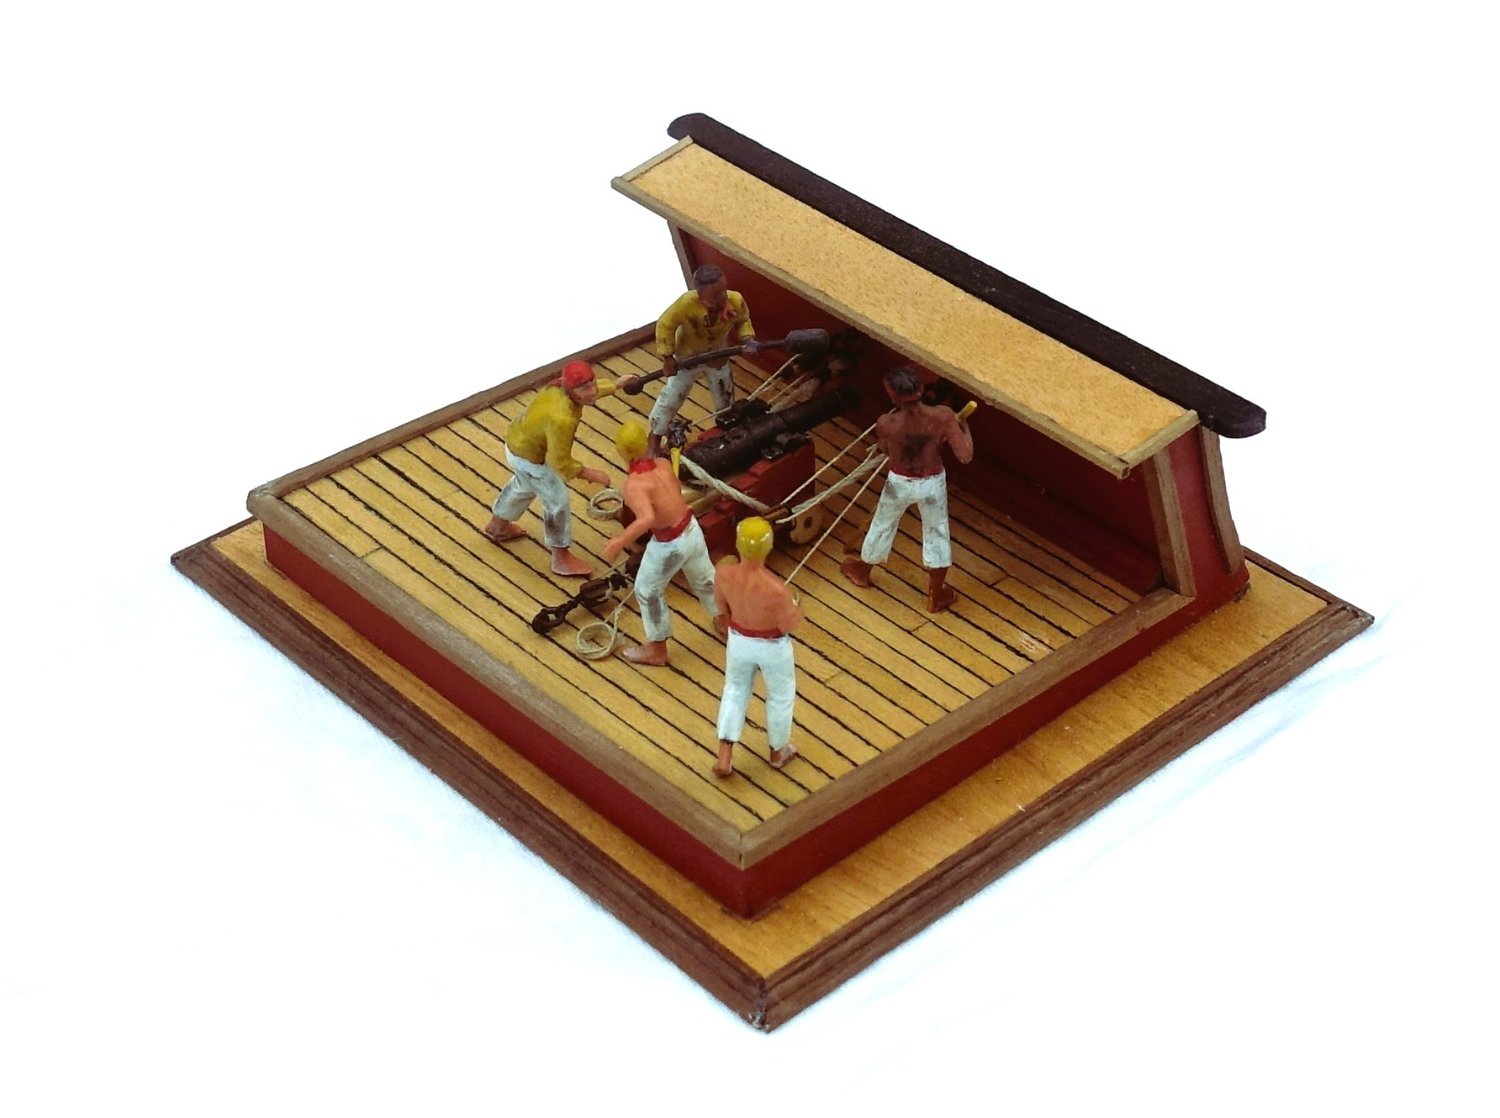
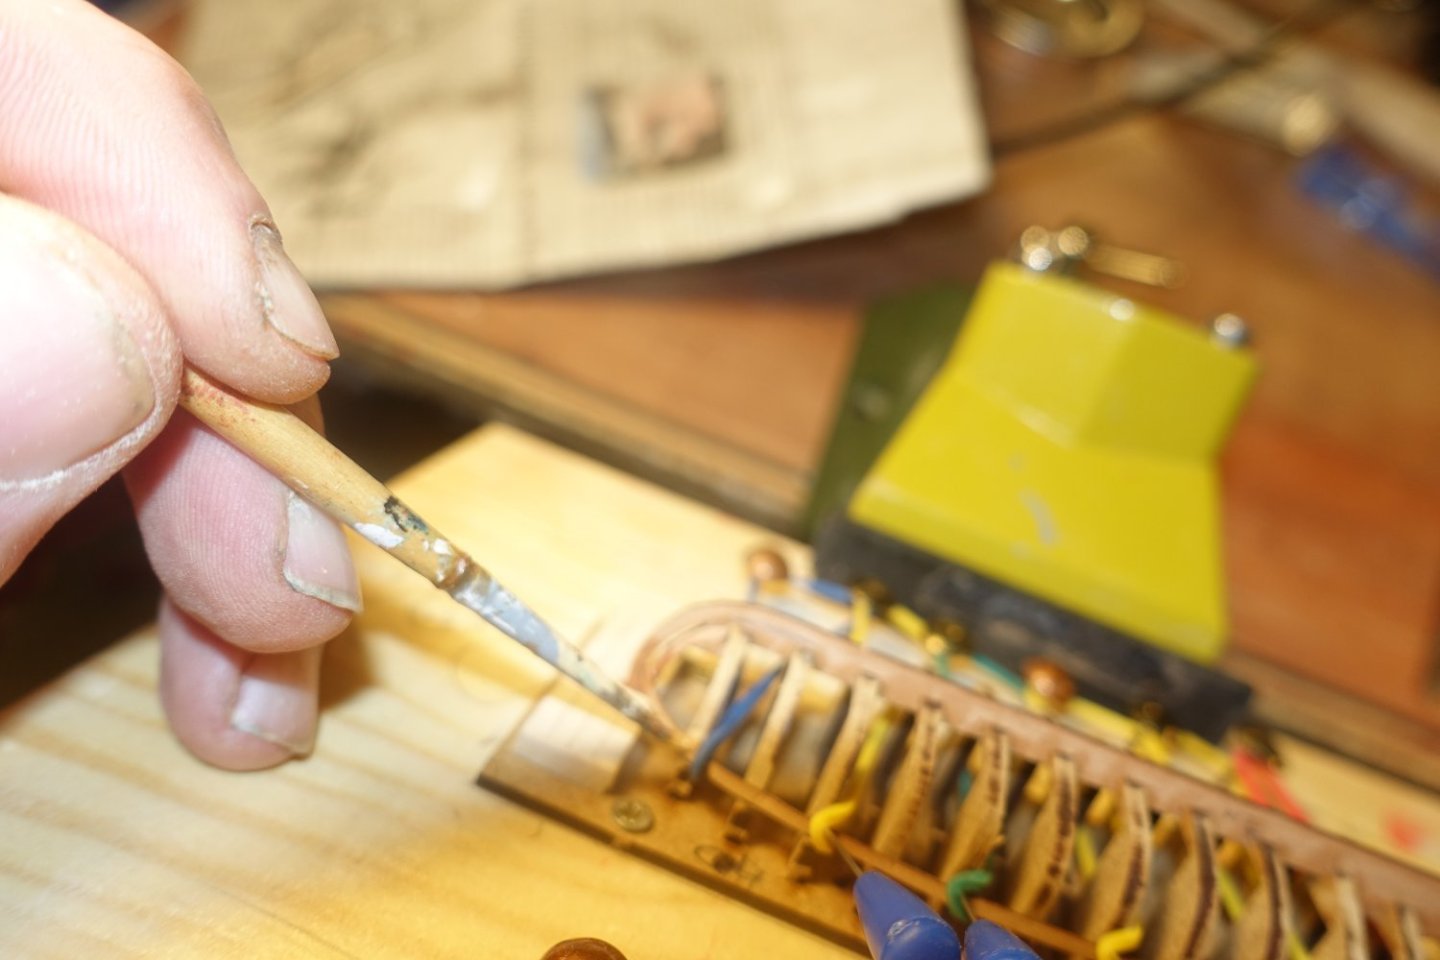
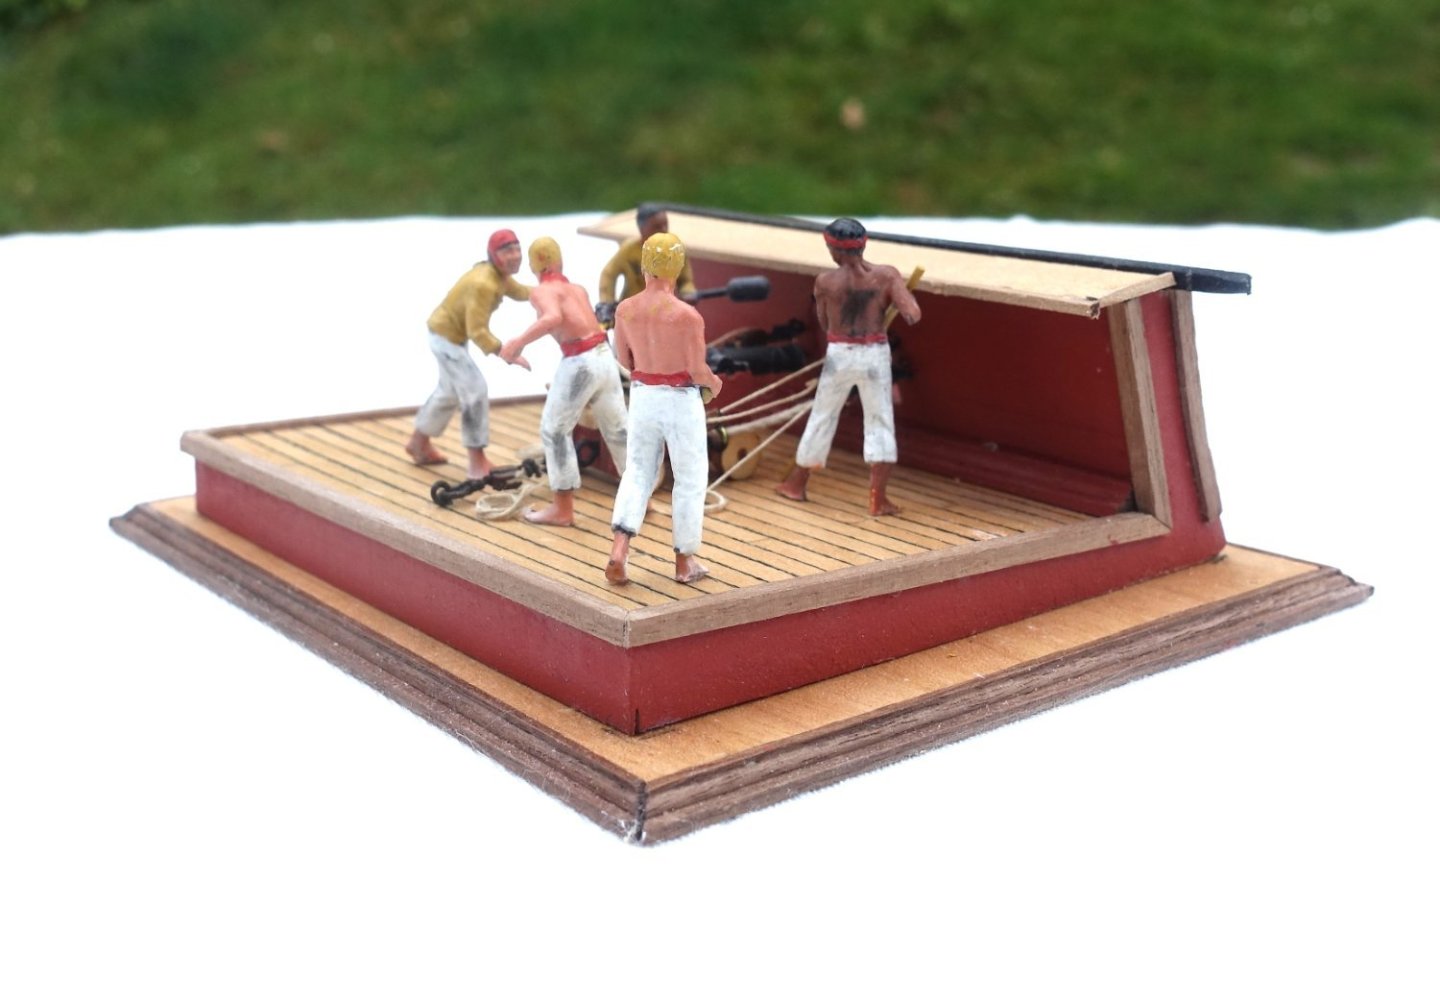
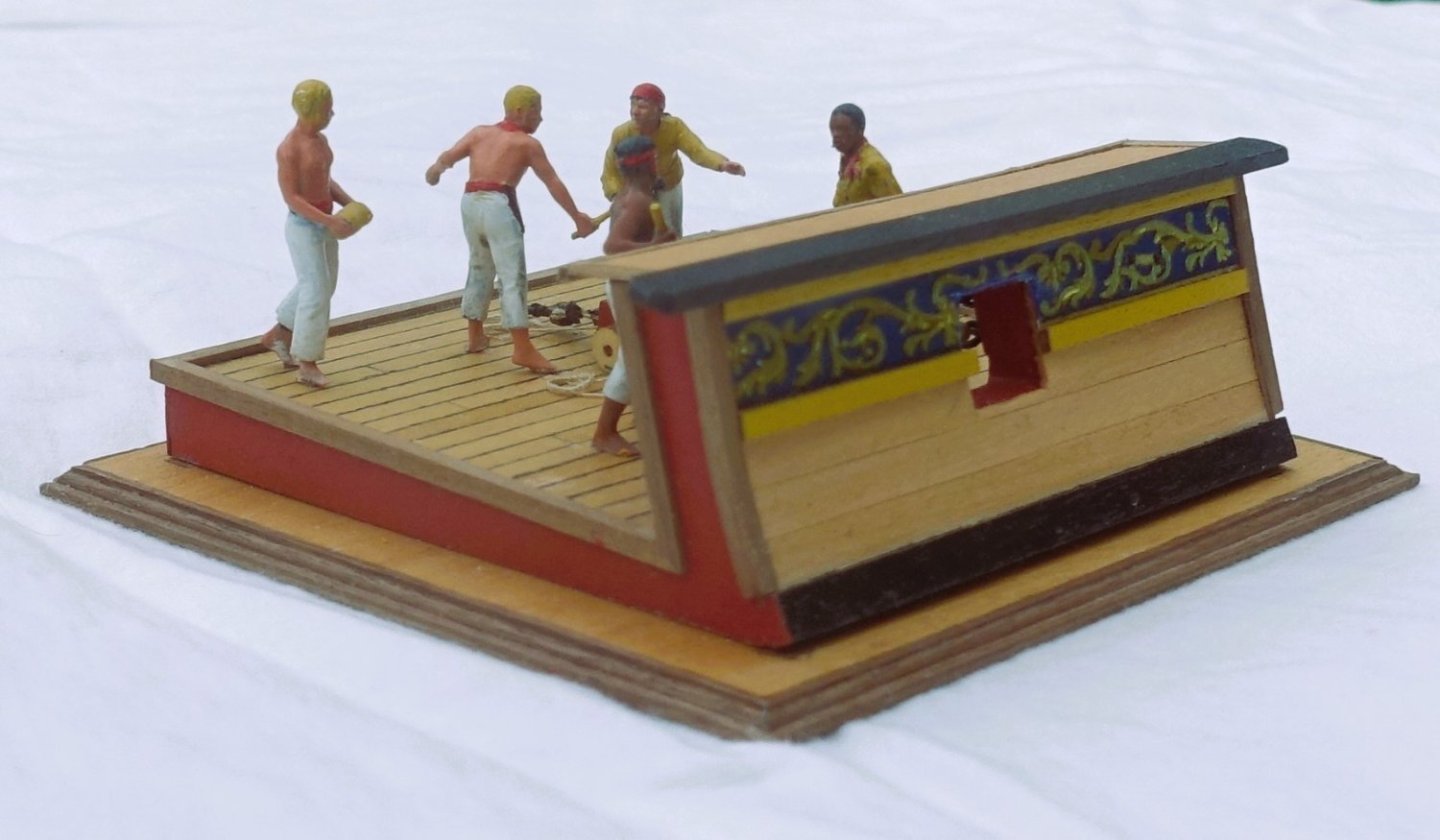
Actually I wanted to decorate the Sphinx with the wonderful figures of Chris (Vanguard models). However, I found it a pity that the crew is covered by the dinghies. So I made a cut of the ship's side with gun during the loading process. For the colouring of the crew I followed Ron's example: https://modelshipworld.com/topic/30217-hms-sphinx-1775-by-hollowneck-finished-vanguard-models-164/page/15/


-
Great to have you back in the yard. I hope you didn't get the virus too bad. It was certainly an excellent idea to order the blocks from Chuck. As far as I remember, Chuck has a description somewhere of how the blocks can be rounded in a special device. As far as coiling the ropes is concerned, I had first tried to make an eight loop like Delacroix, but there was not enough room. Have fun, Clark
- 510 replies
-
- 2
-
-
- reale de france
- corel
- (and 1 more)
-
The masts look really good, especially the zig zag garland. I'm looking forward to seeing your sails. Clark
- 510 replies
-
- 1
-
-
- reale de france
- corel
- (and 1 more)
-
Thanks!
-
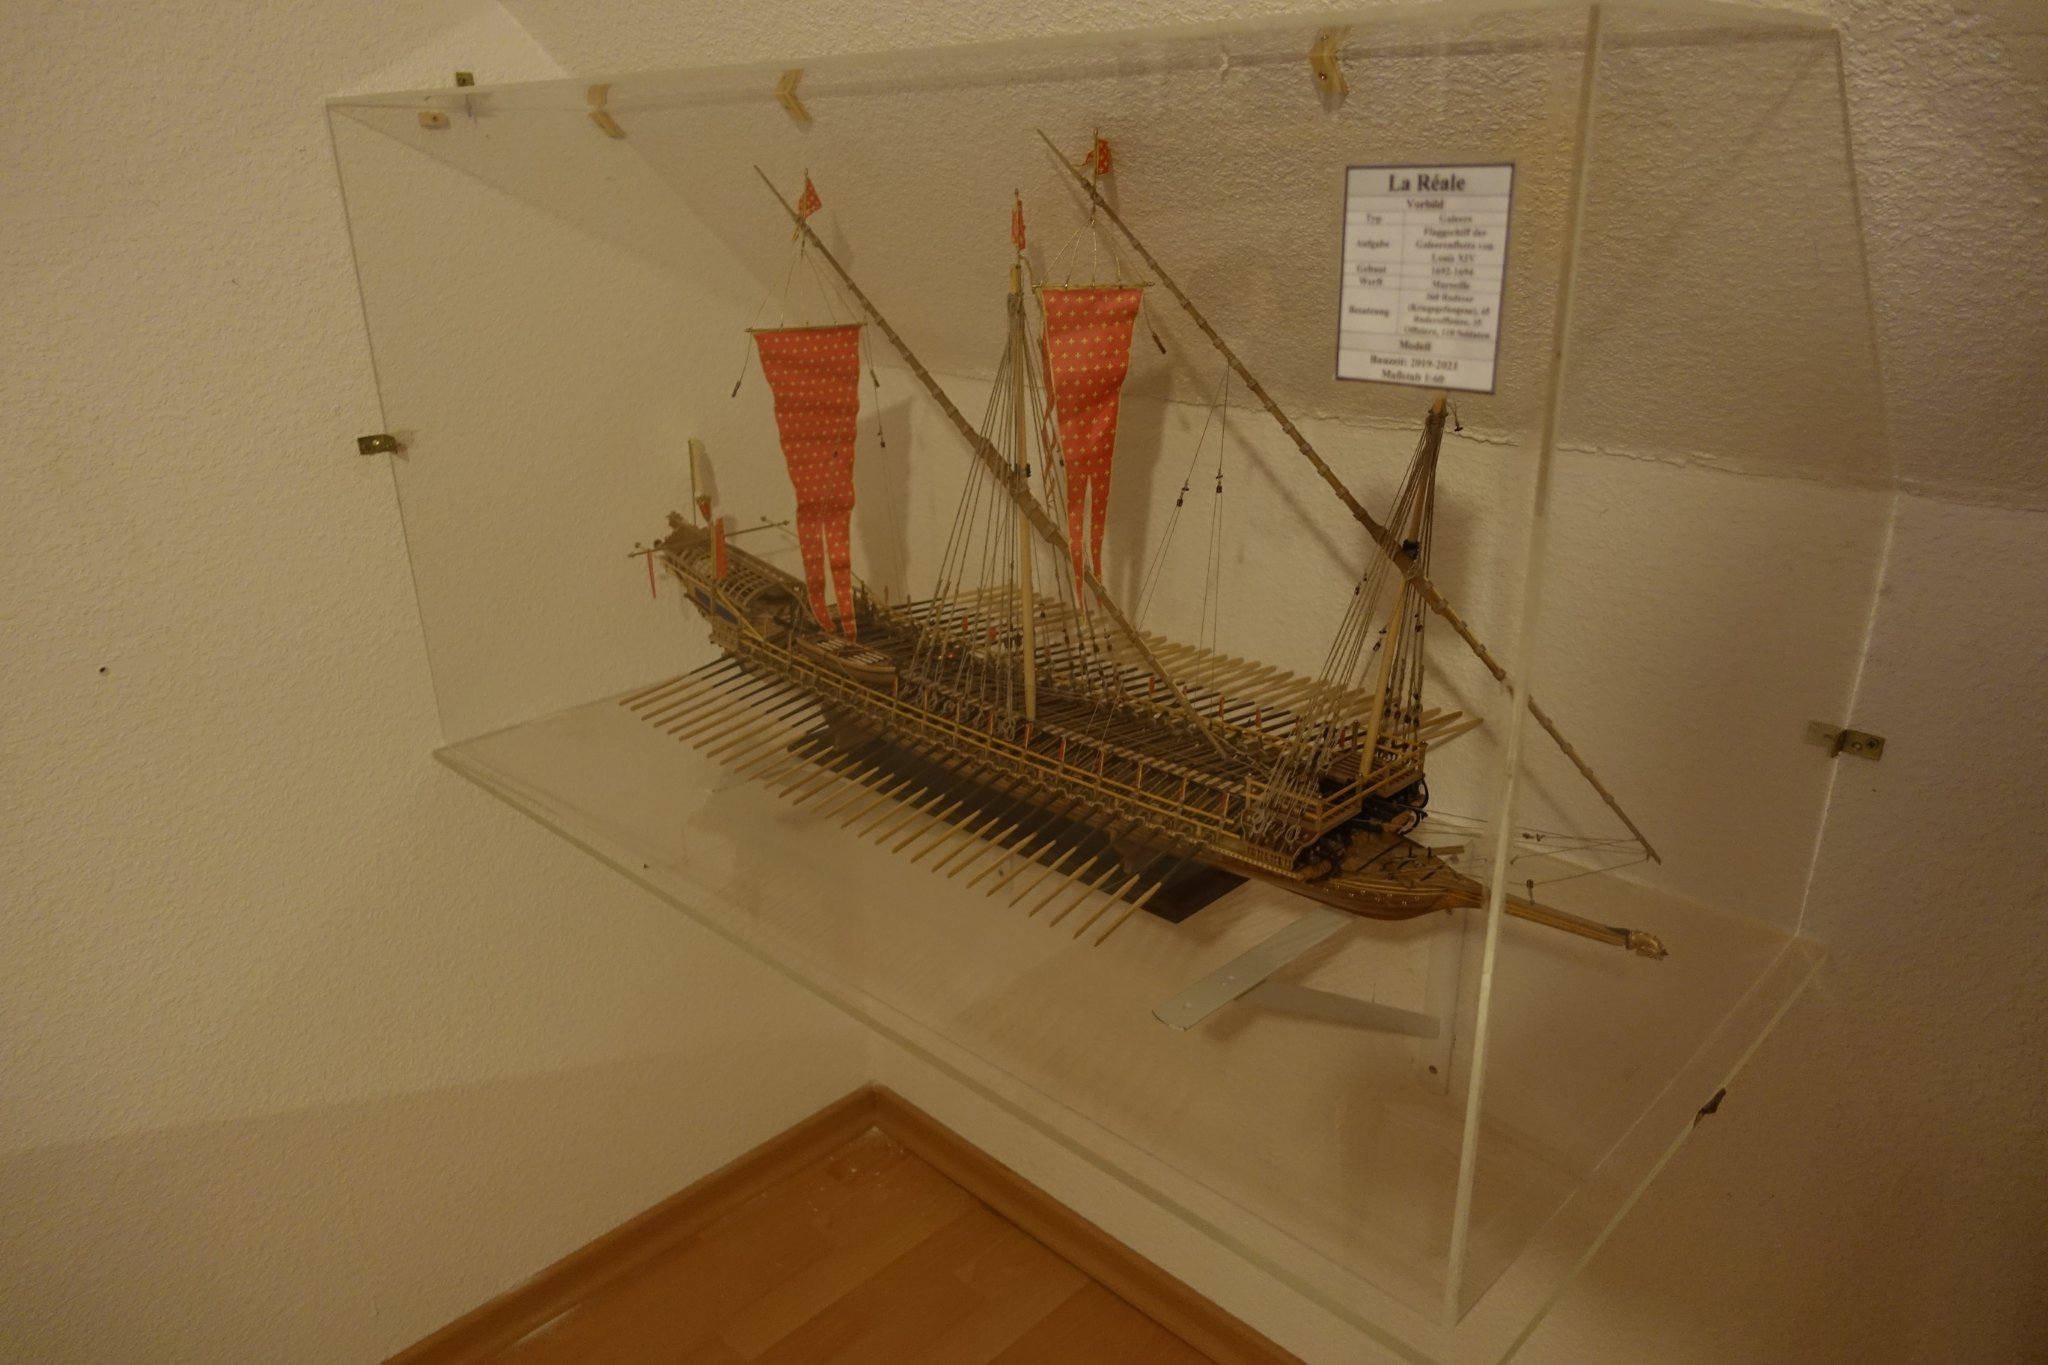
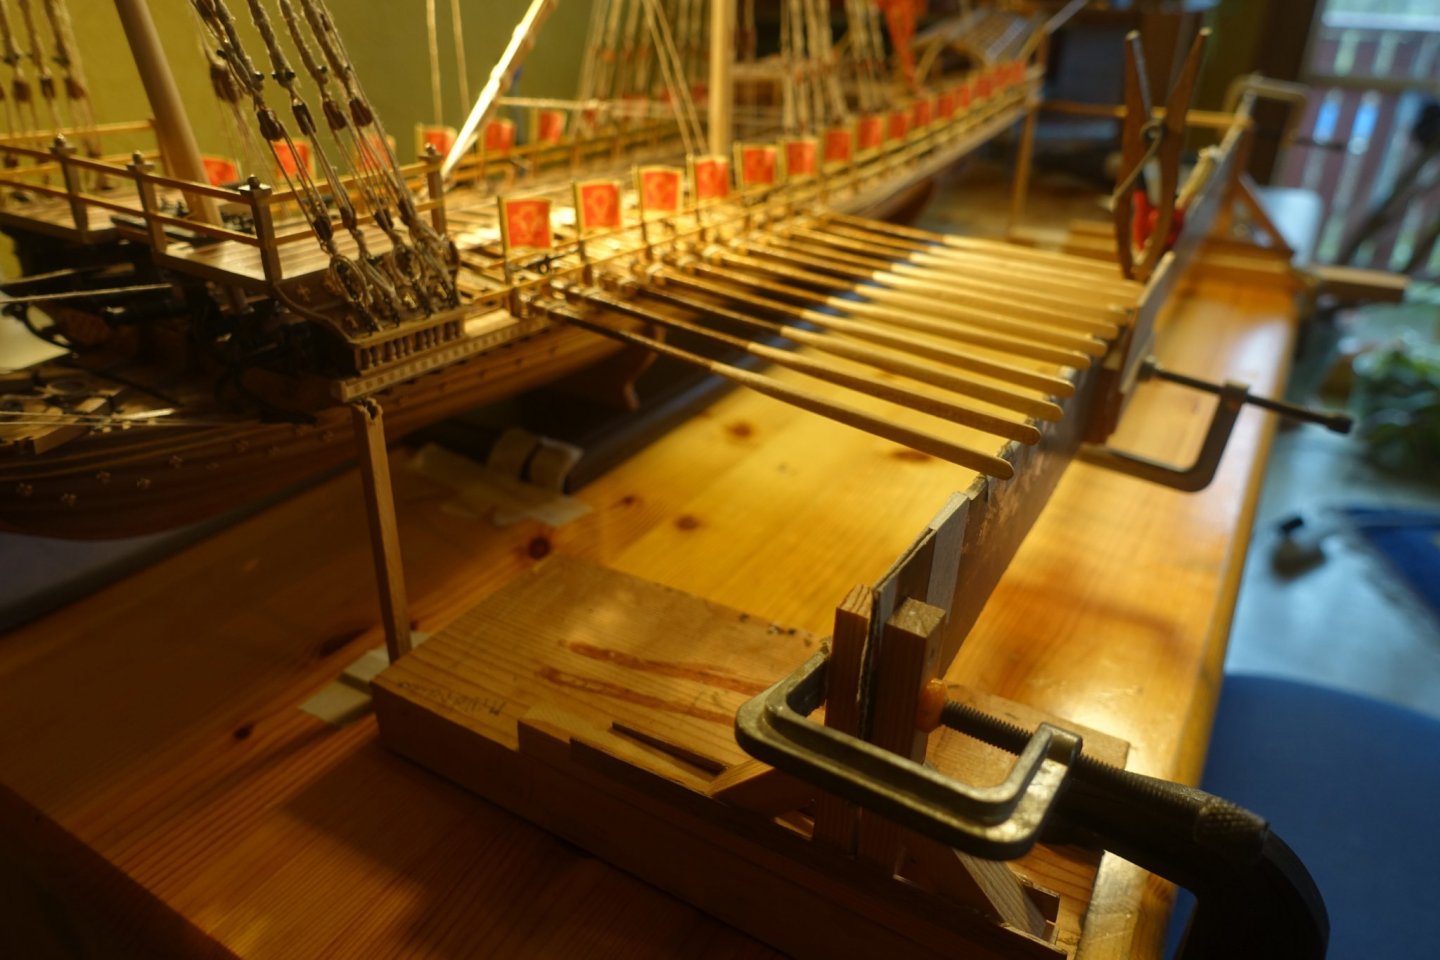
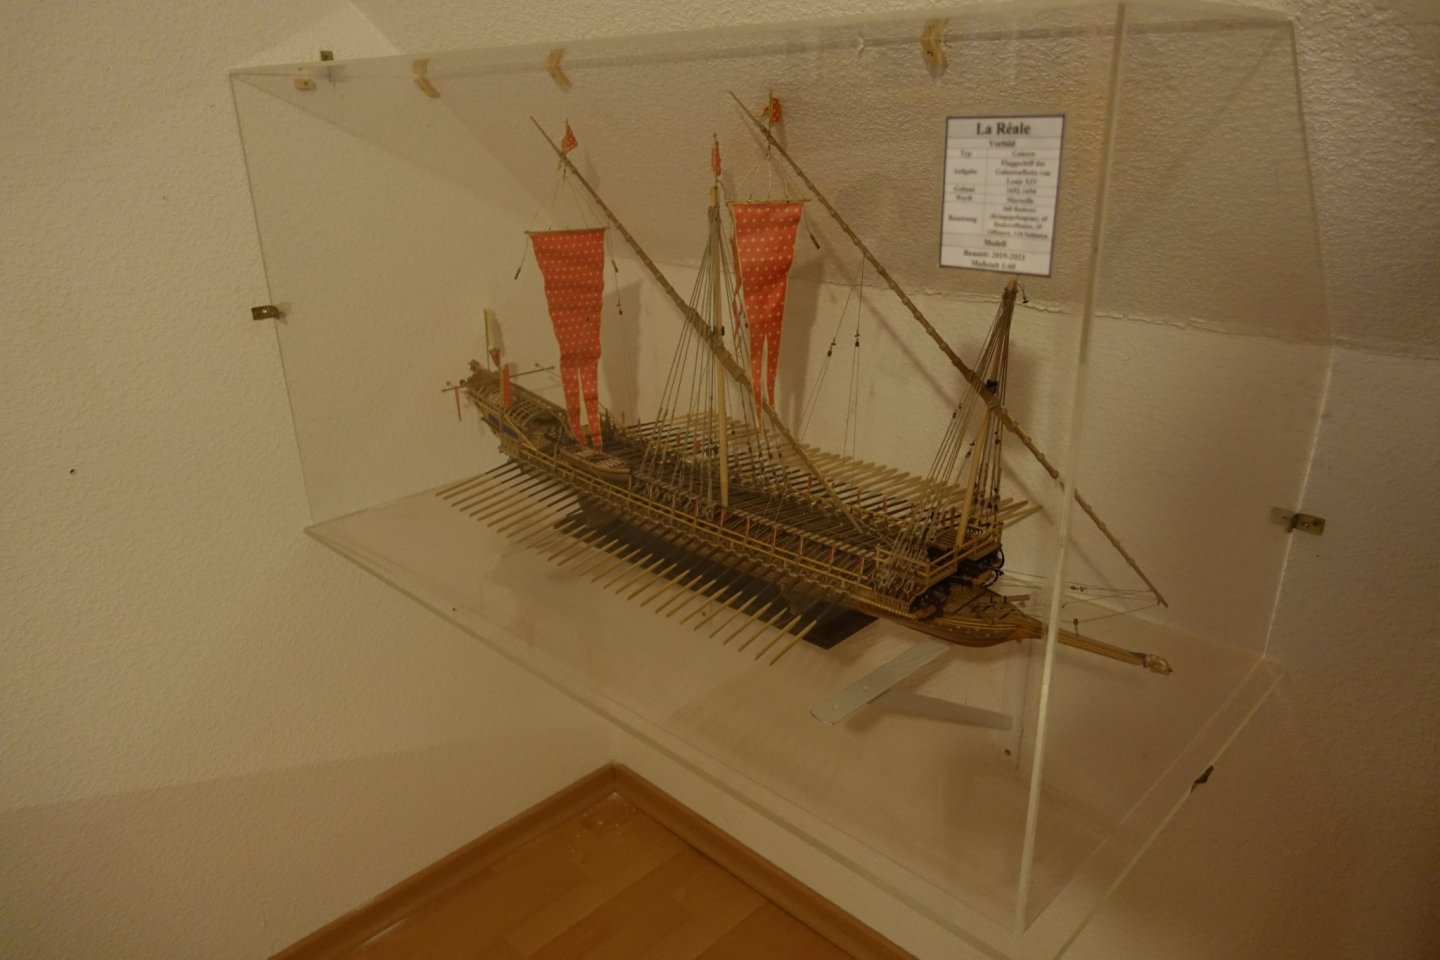
Thank you very much. The width of the model including oars is 49 cm, I designed the display case for an internal width of 50.5 cm, I did not want to "consume" too much space, because I also discussed with the admiral longer where to put the display case. As for the placement of the oars, I interpreted the descriptions and the pictures that they were not hidden even with the ship under sail. Thanks for stopping by. Clark
-
Thanks for stopping by.
-
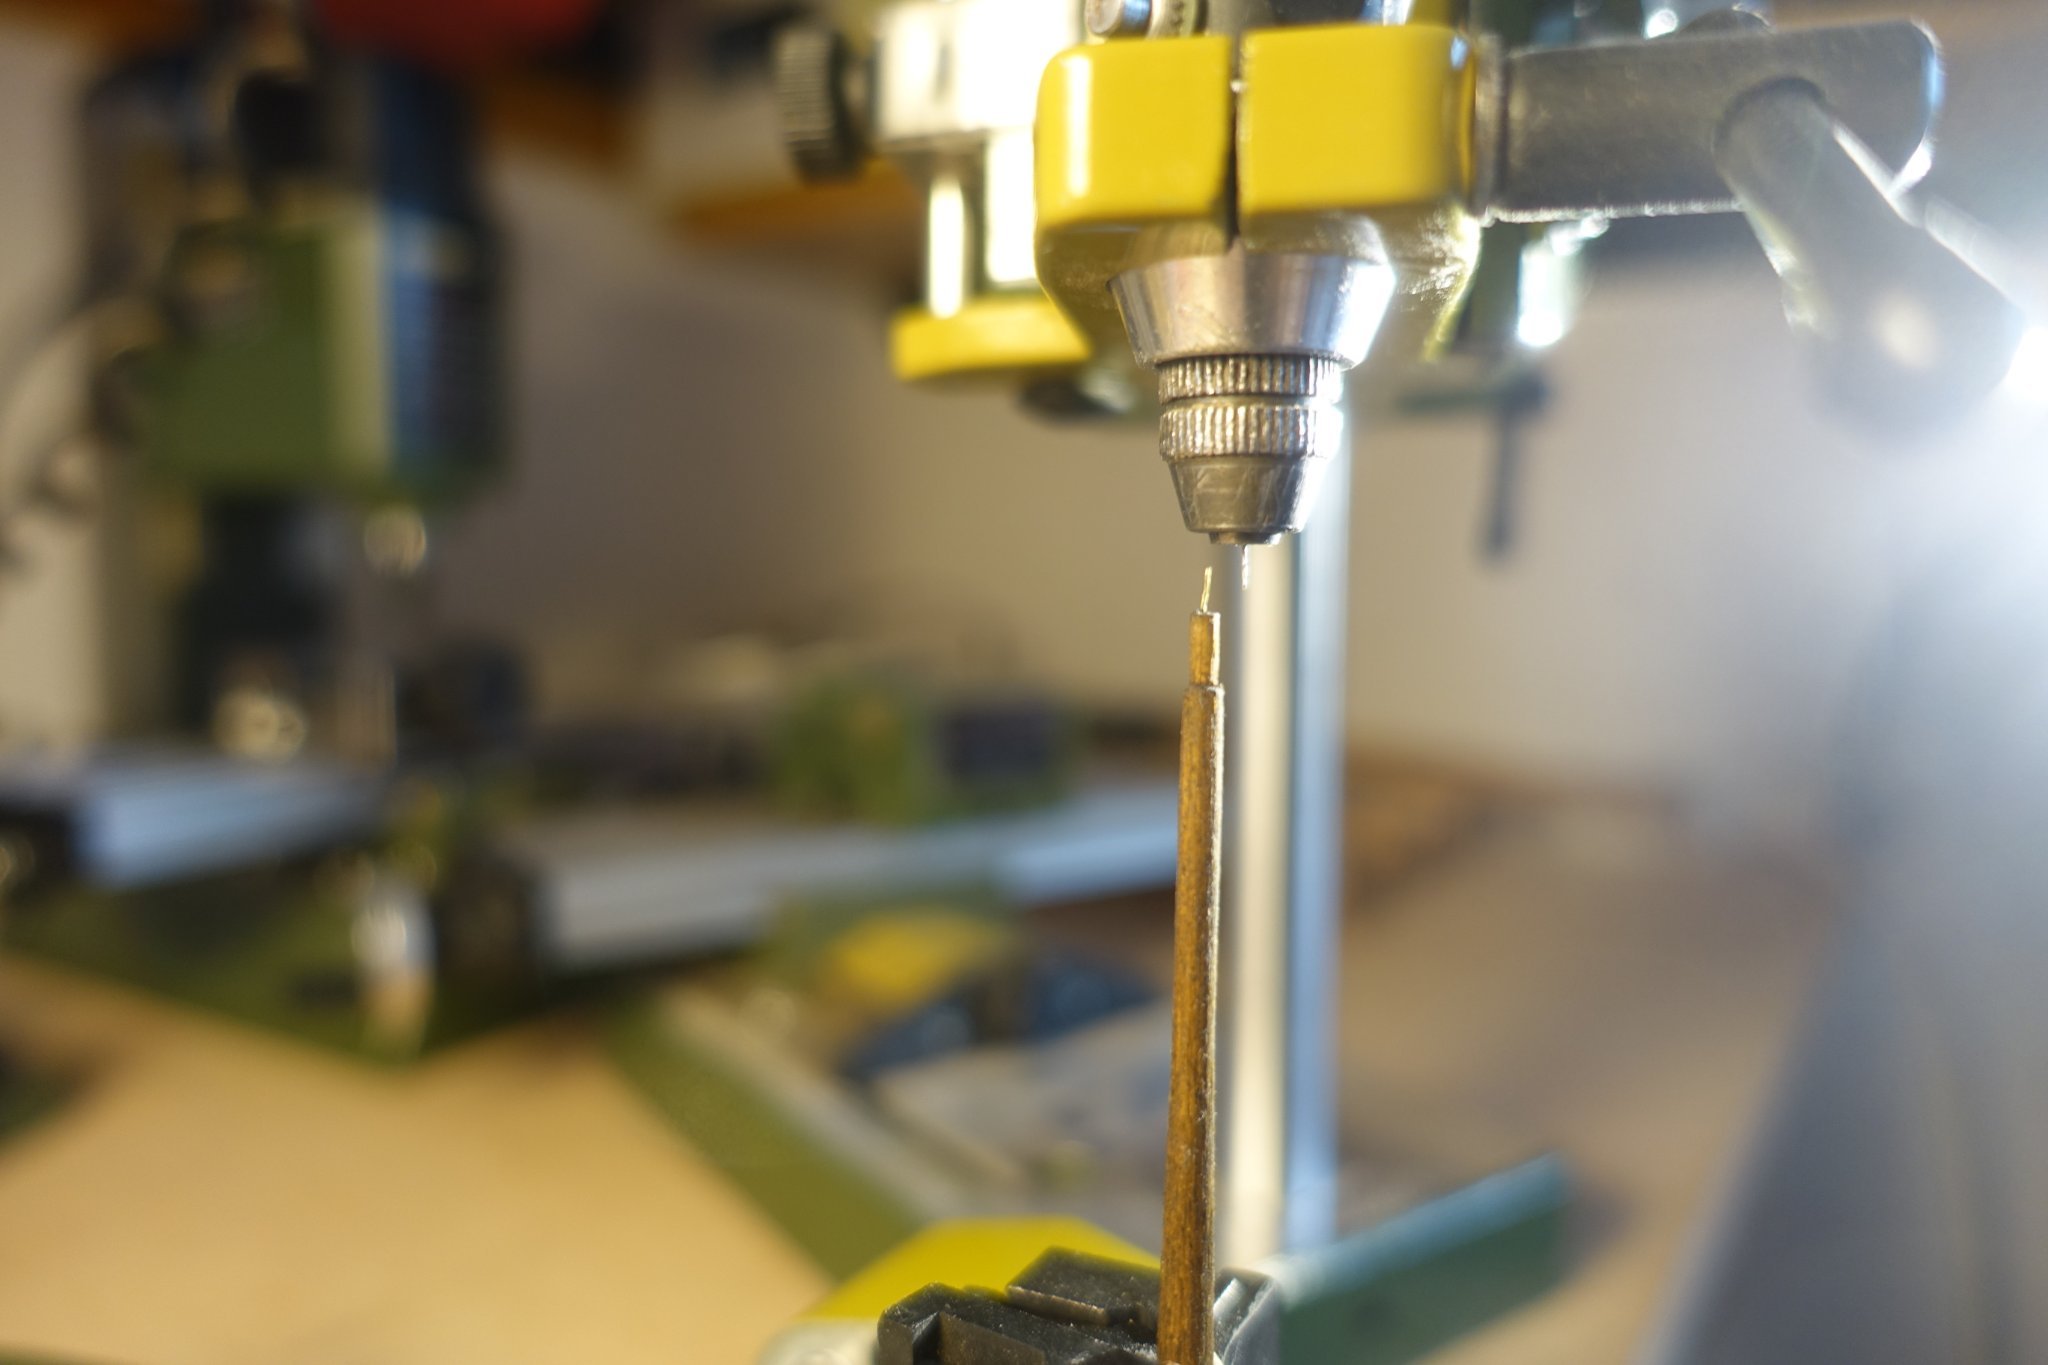
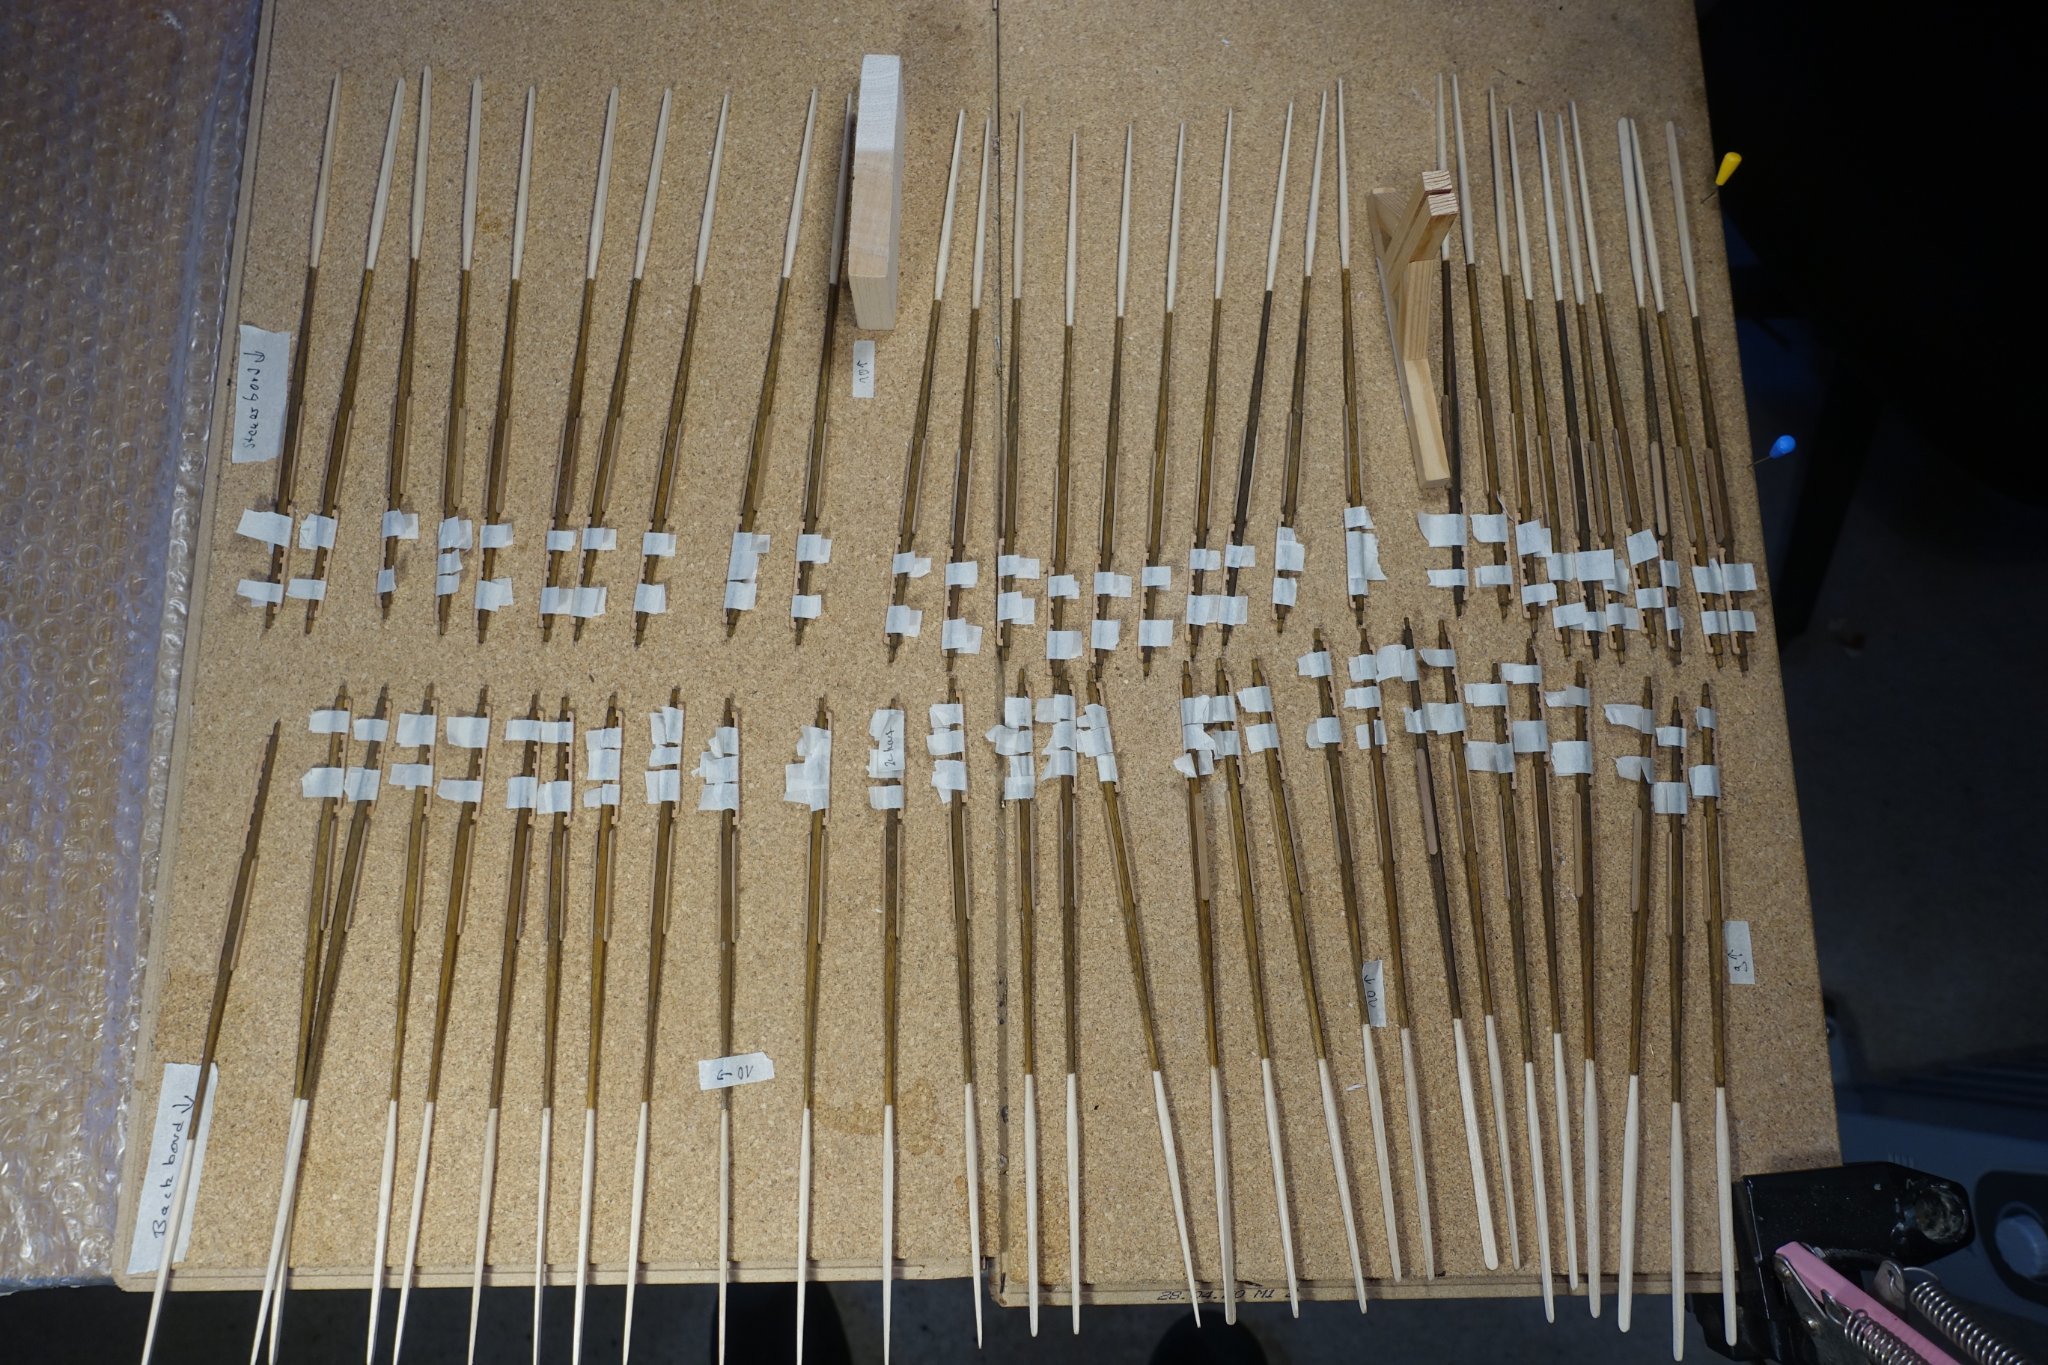
Thanks! Diameter of the thicker part of the oar blade (dont know if this is the correct name) varied between 4 and 2.4 mm. Sanded them the best I could.
-
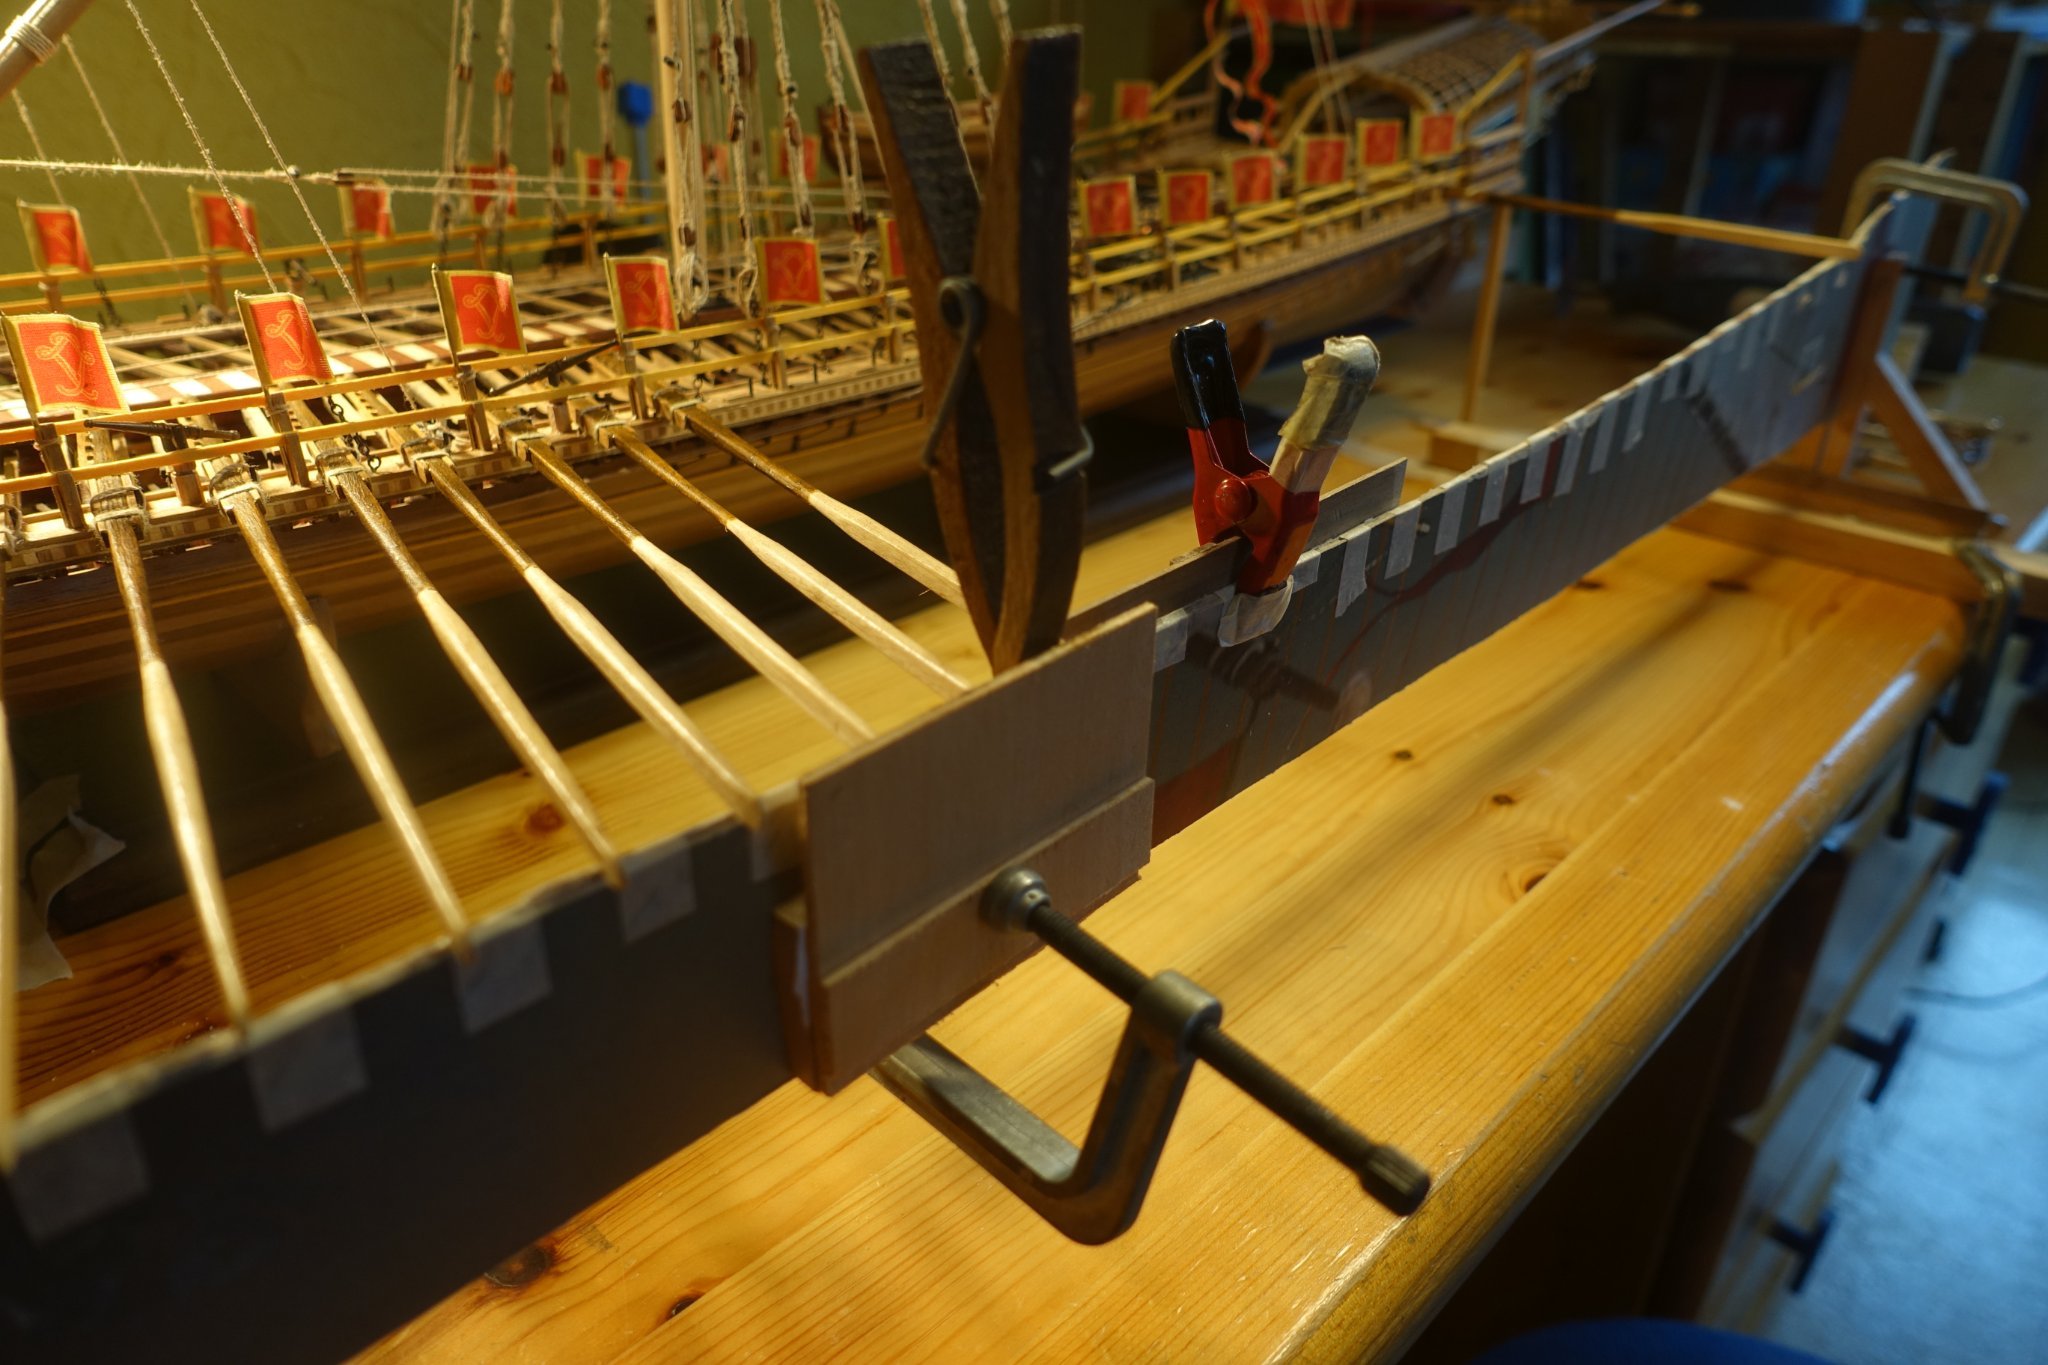
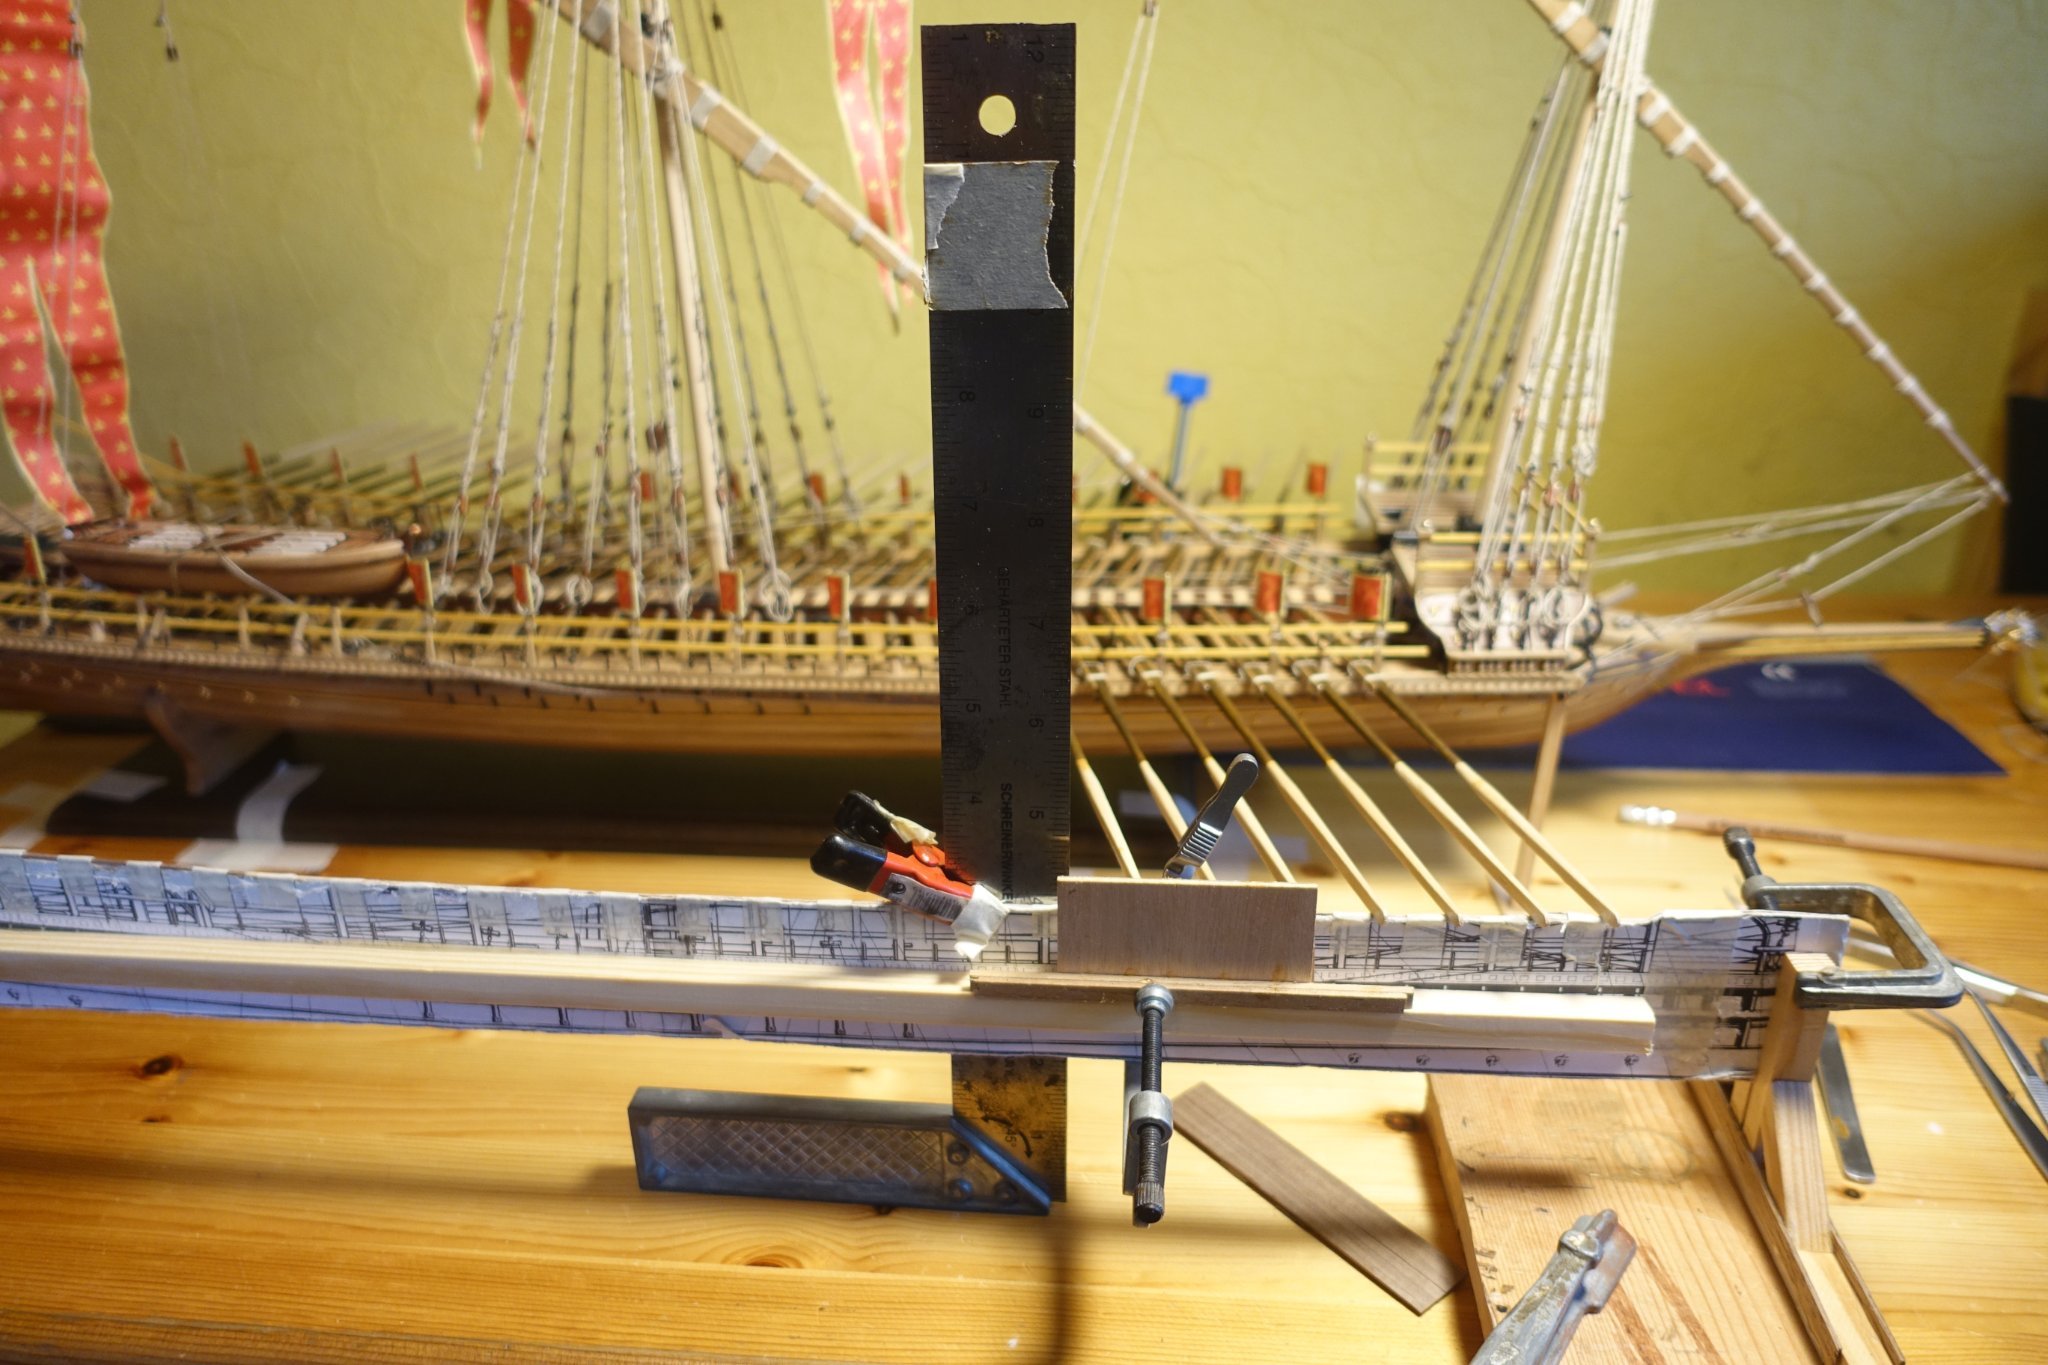
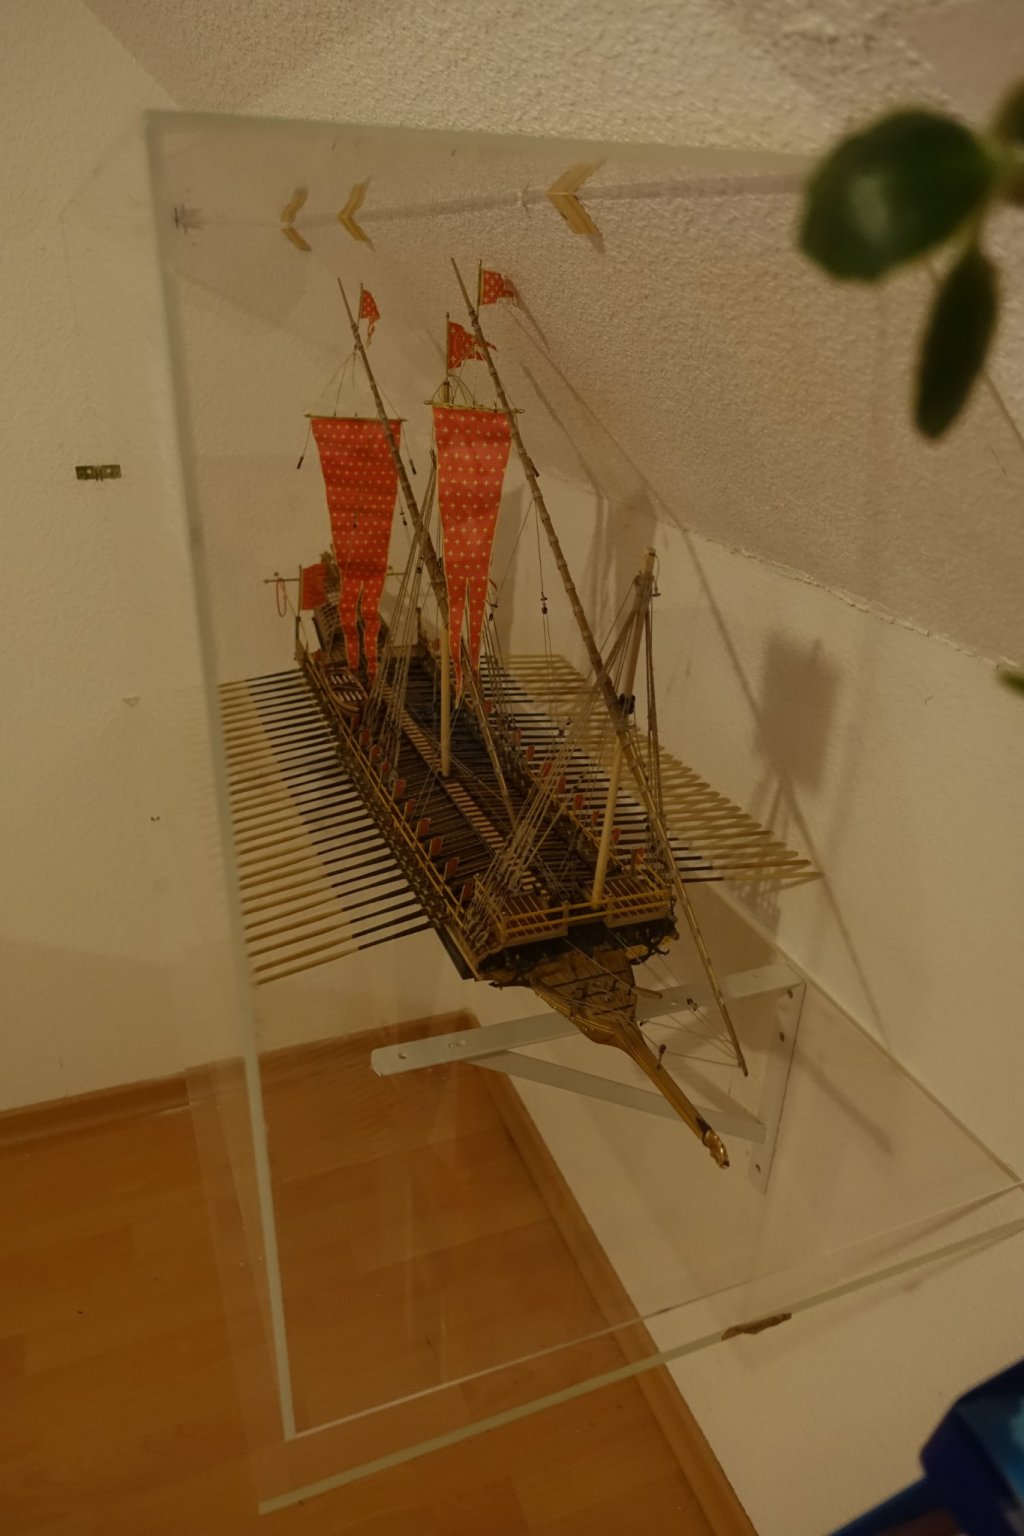
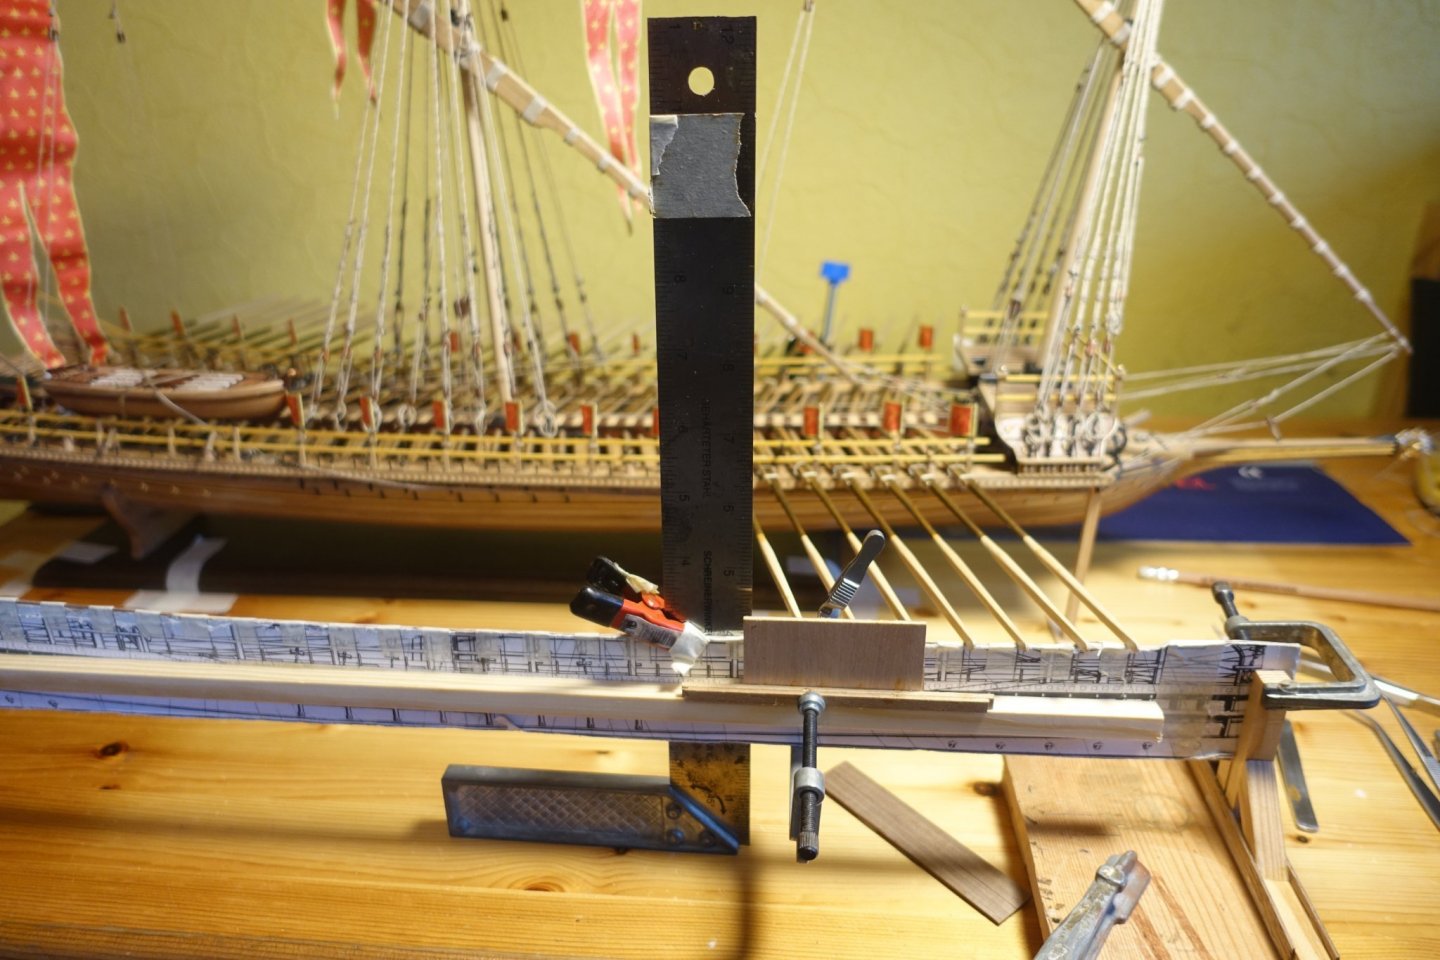
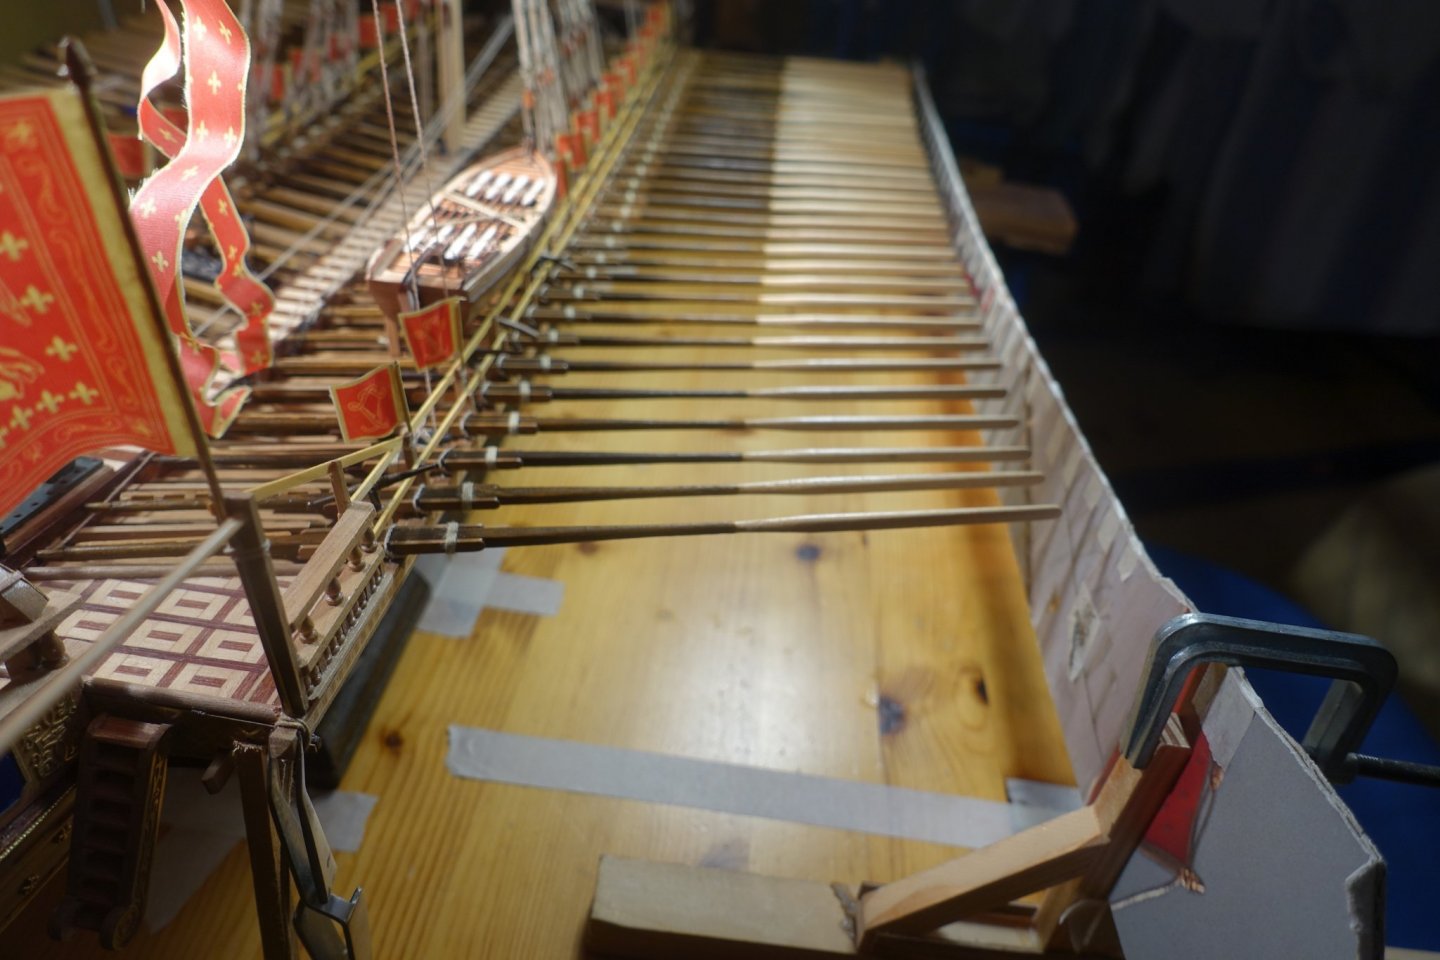
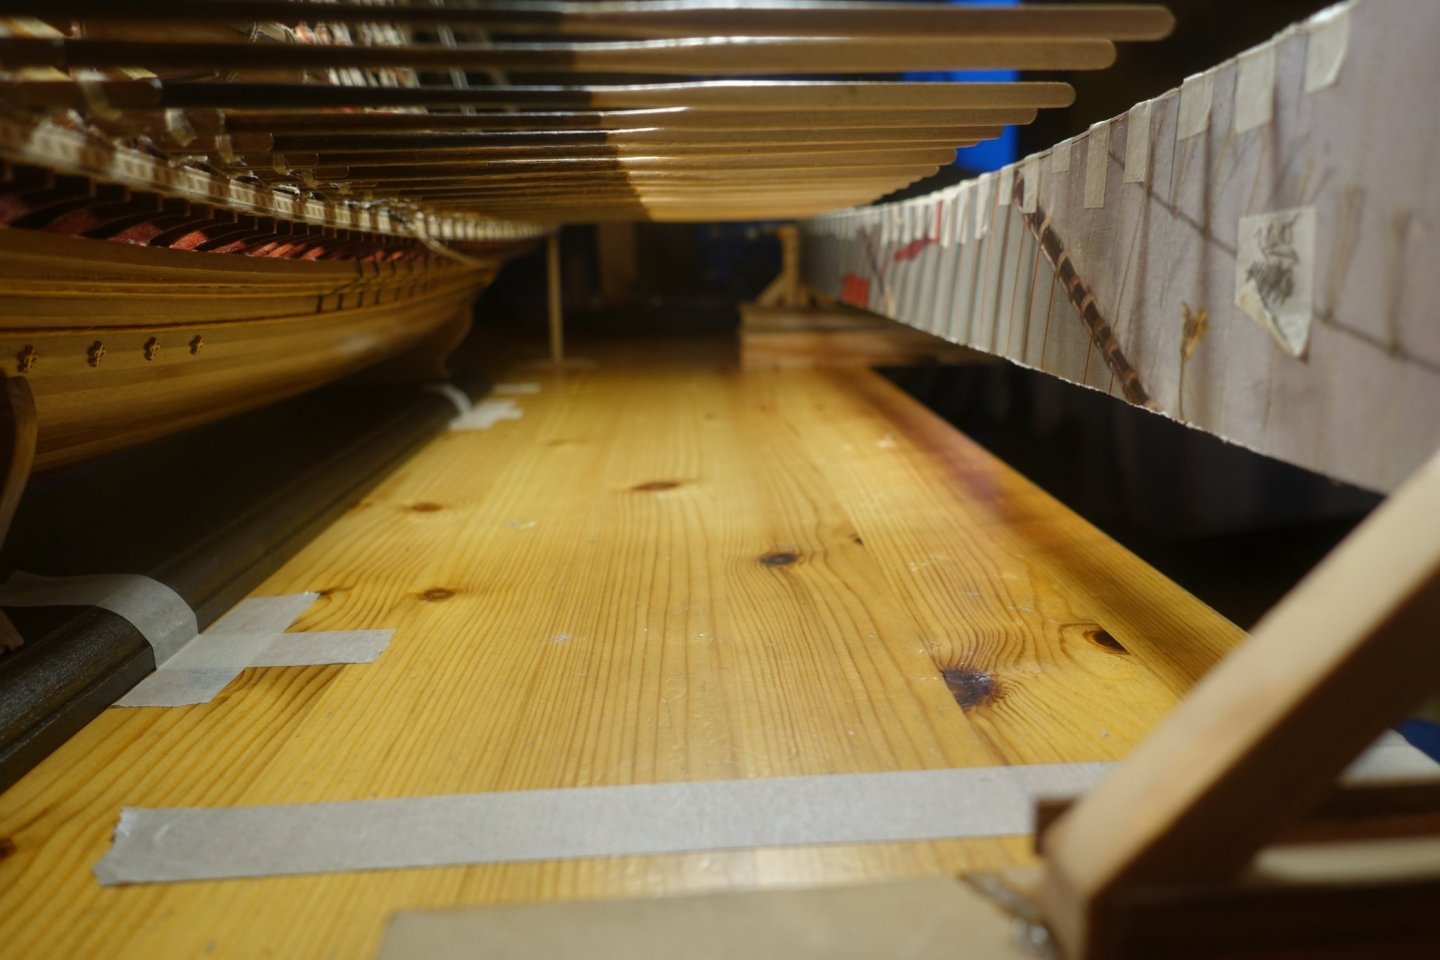
Next, the oars were prepared. The blanks from Corel had to be sanded and adjusted quite intensively. It might have been easier to make the oars from a strip with a square cross-section. Since later the ship will be visible mainly from the starboard side, I assigned the slightly worse oars to the port side. Also between port and starboard was later differentiated in the simulated attachment of the protective boards (knots/gluing on the keel side of the oars). To fix the rudders better, small pieces of wire (diameter 0.2 mm) were first sunk into the shaft. However, it turned out that these wire pins made adjusting the oars rather difficult. They were therefore subsequently ground off. To adjust the oars on the ship, I made a template that imitated the bend of the ship's side. The distance between the oars was marked. On the outside, the oars were brought to the same distance by a spacer bar. For the showcase I used acrylic glass. The showcase was mounted under a sloping roof. The easier sawing of acrylic glass proved to be advantageous here. Now in the showcase it becomes especially clear what dimensions the ship has. In retrospect, building the ship was a lot of fun even if the material from Corel sometimes left something to be desired.


- 112 replies
-
- 6
-

-
-
- corel
- reale de france
- (and 1 more)
-
Hello Gerard, thank you very much for the detailed answer, which really helped me and removed many uncertainties. I had so far relied on von Mondfeld with his special editions on the galleys and the ships of the Mediterranean. However, he is less informative here than with his other books. Also congratulations on the galleys video (La Fleur de Lis) which helps explain a lot. Clark
-
I just saw that an old discussion is being reignited. In this context, I have a question for the experts.In the case of ships from the Mediterranean region (xebecs, galleys), the standing rigging is also modeled light. Is this correct? Clark
-
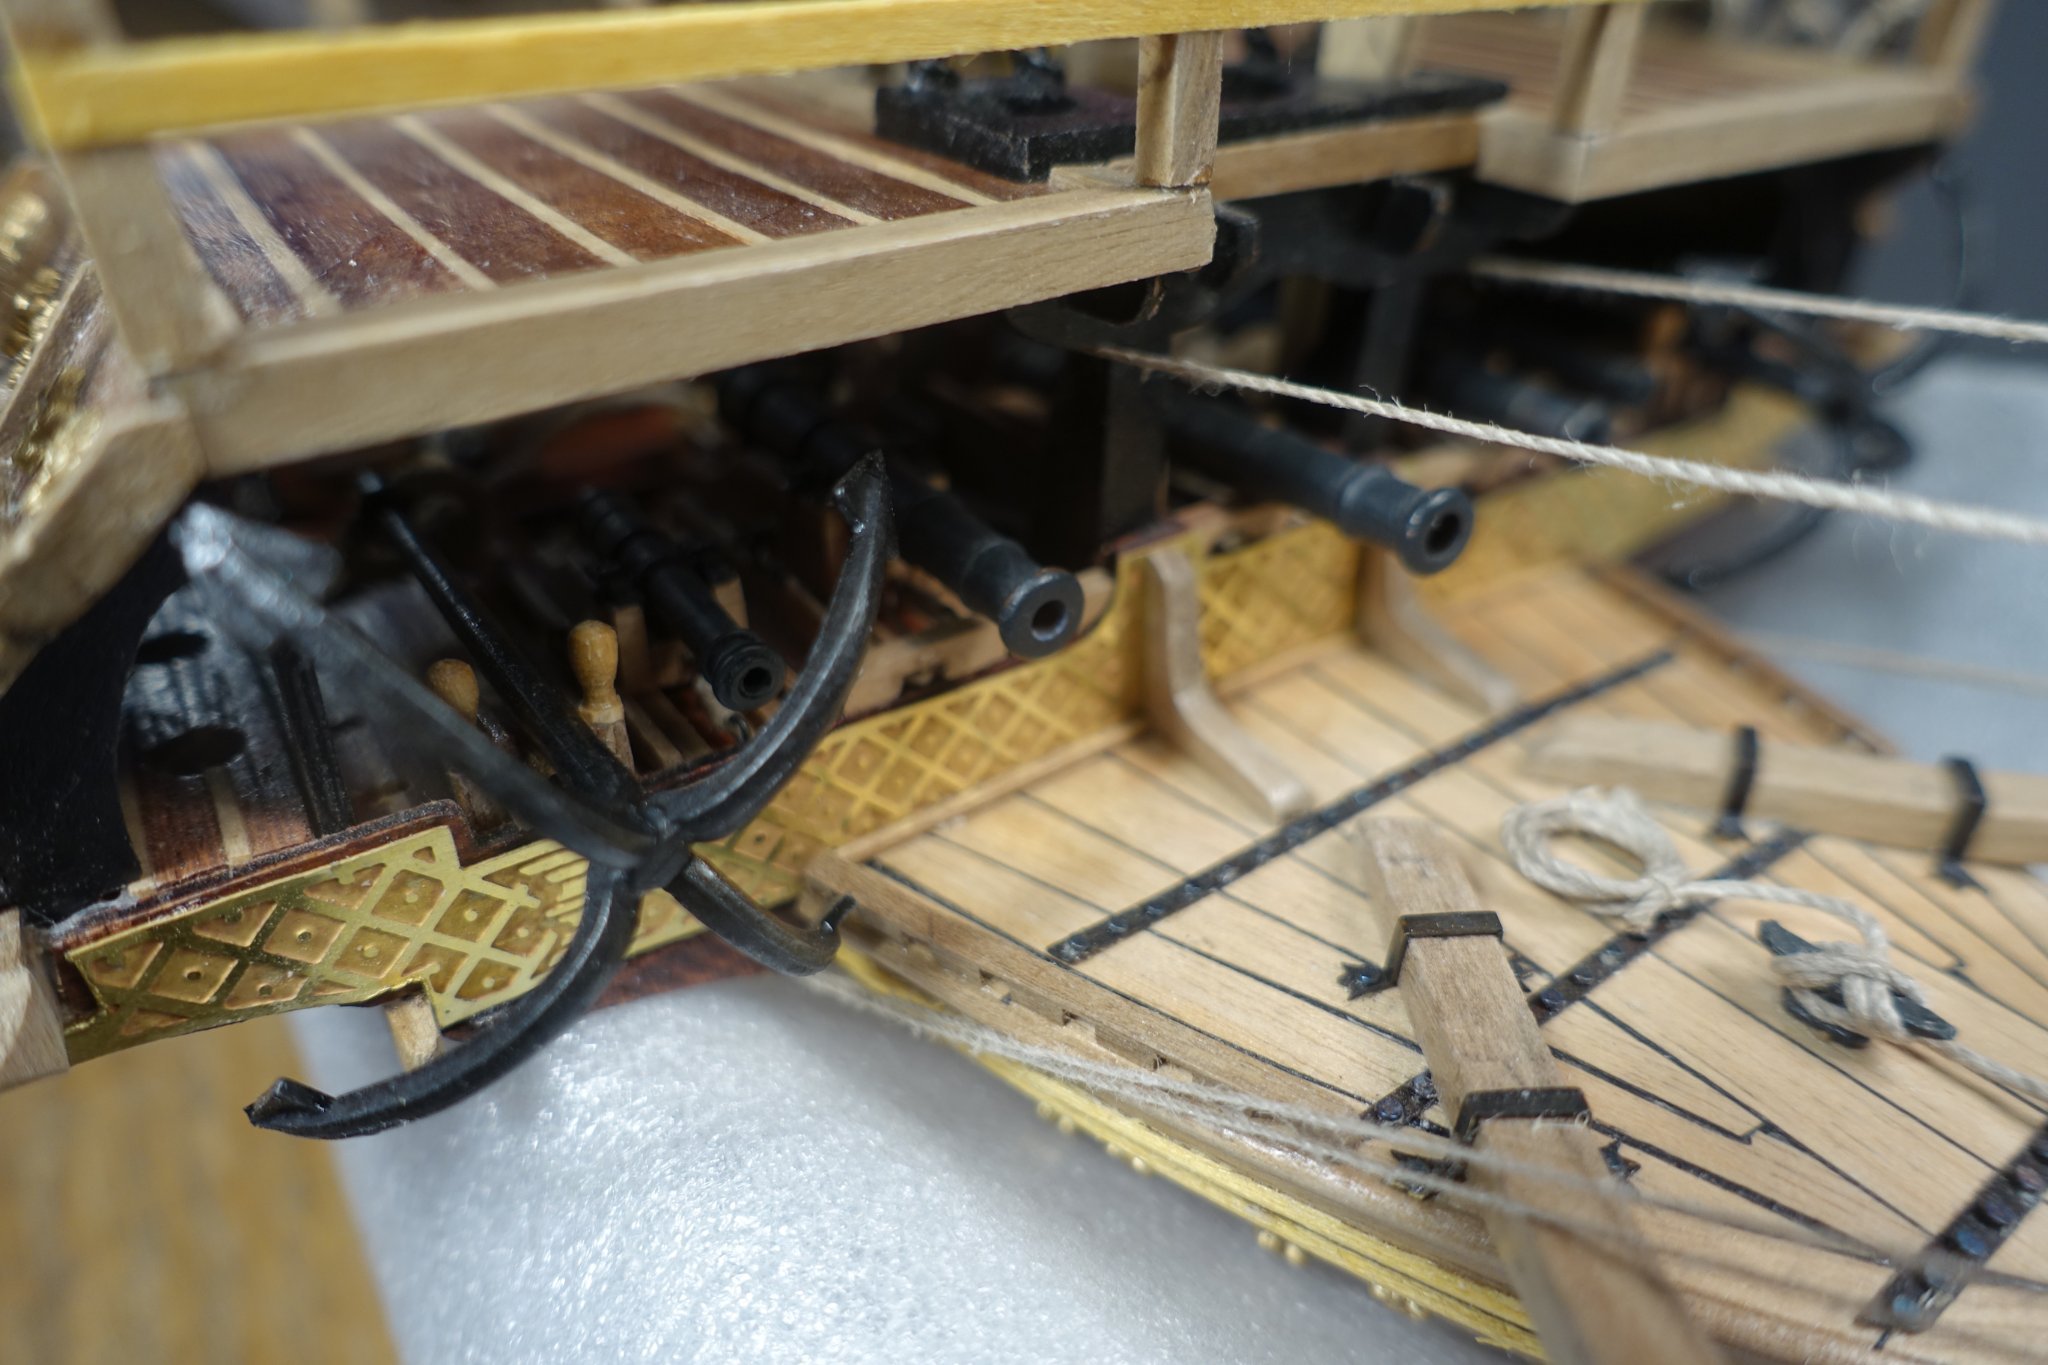
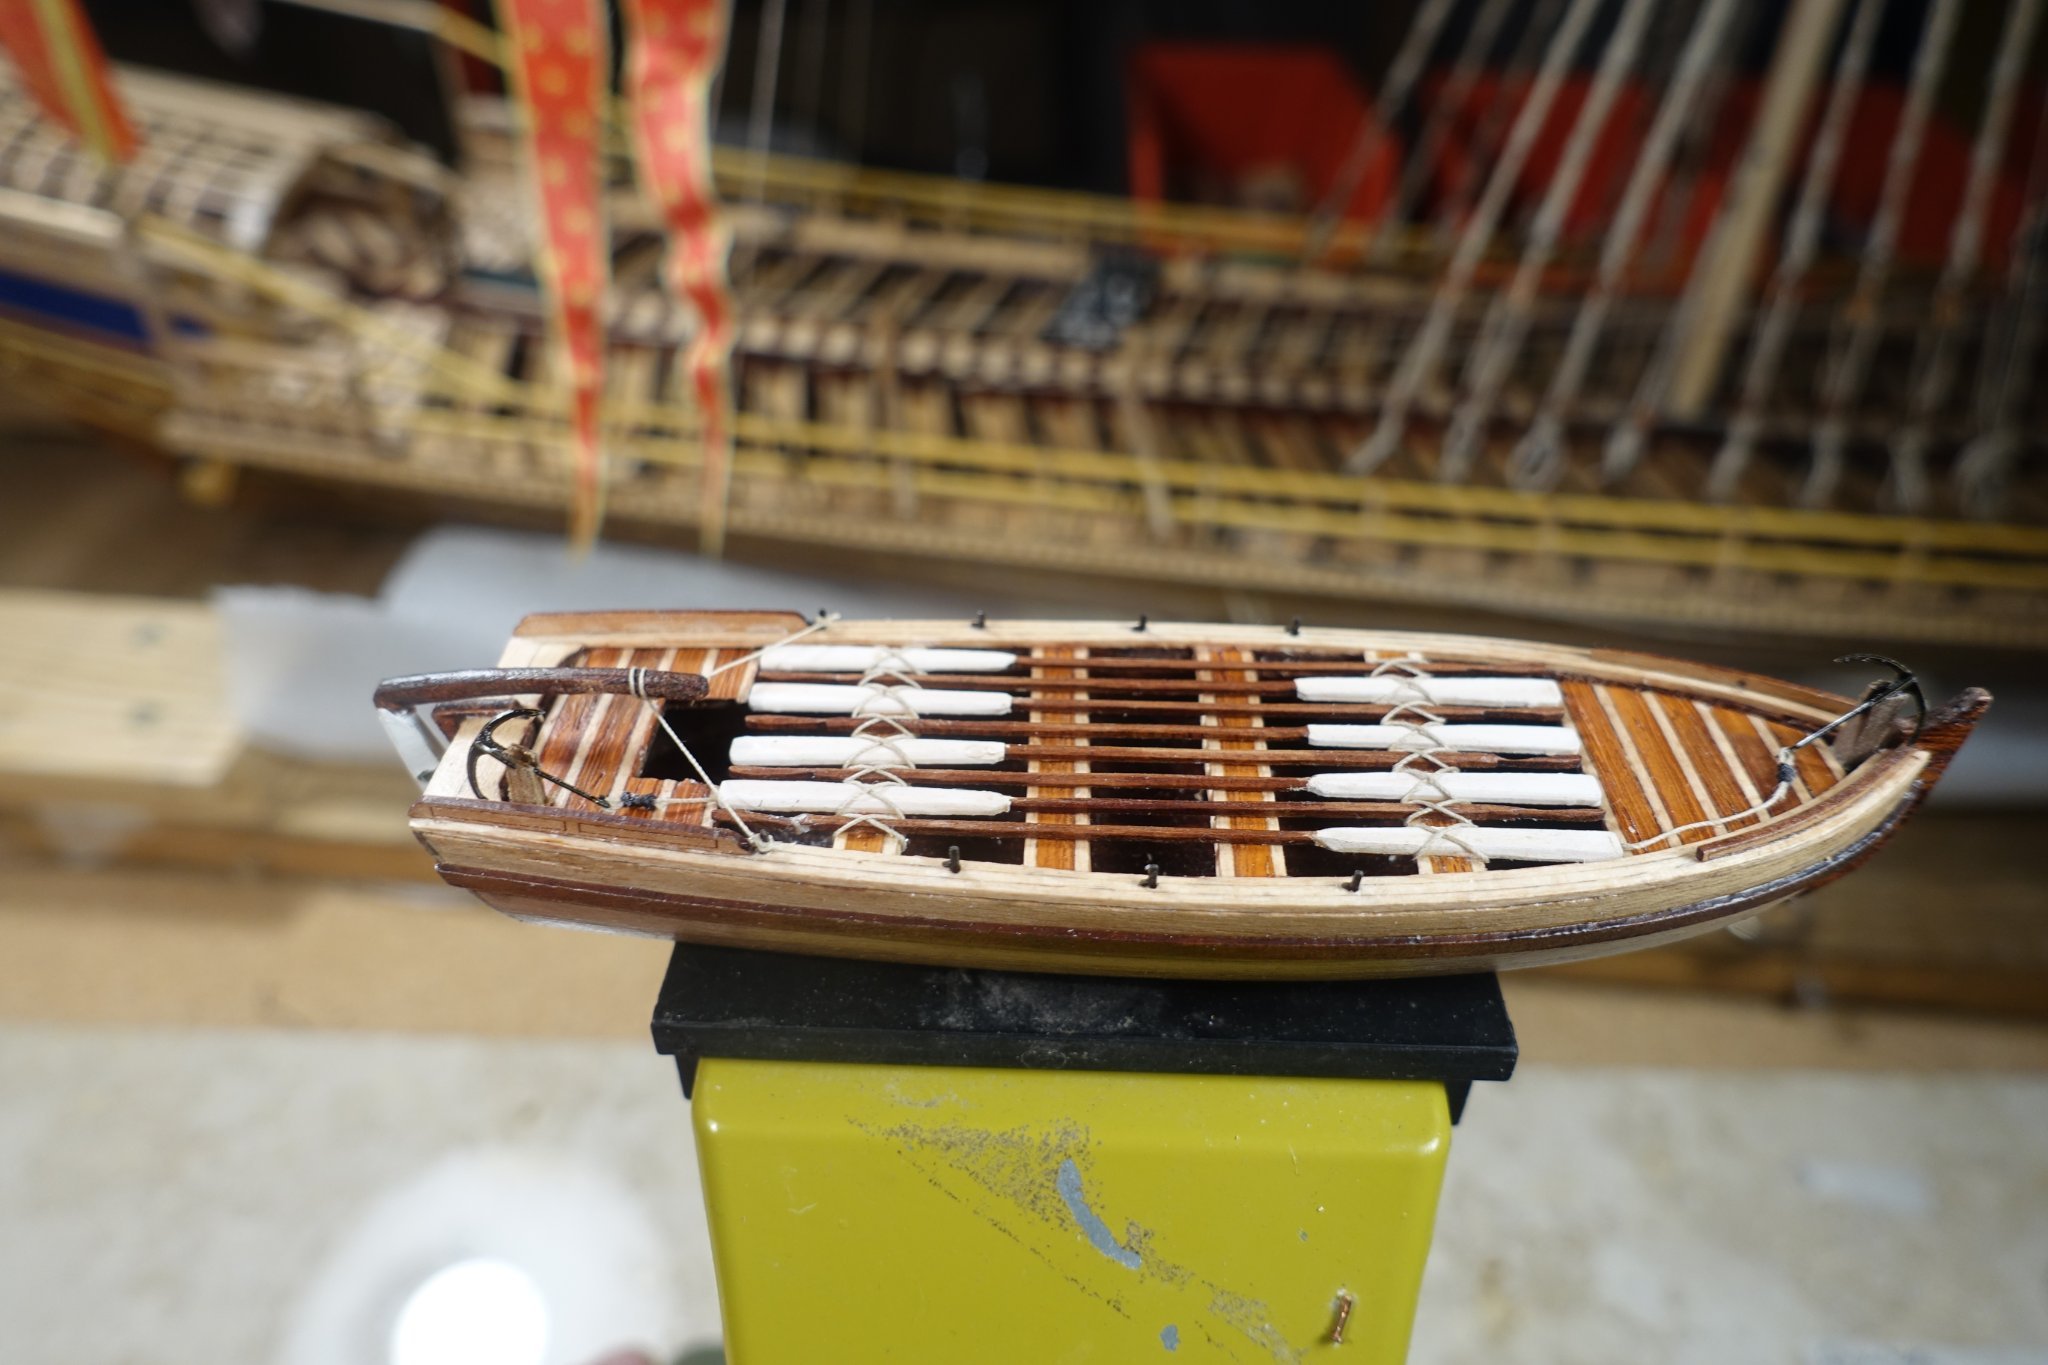
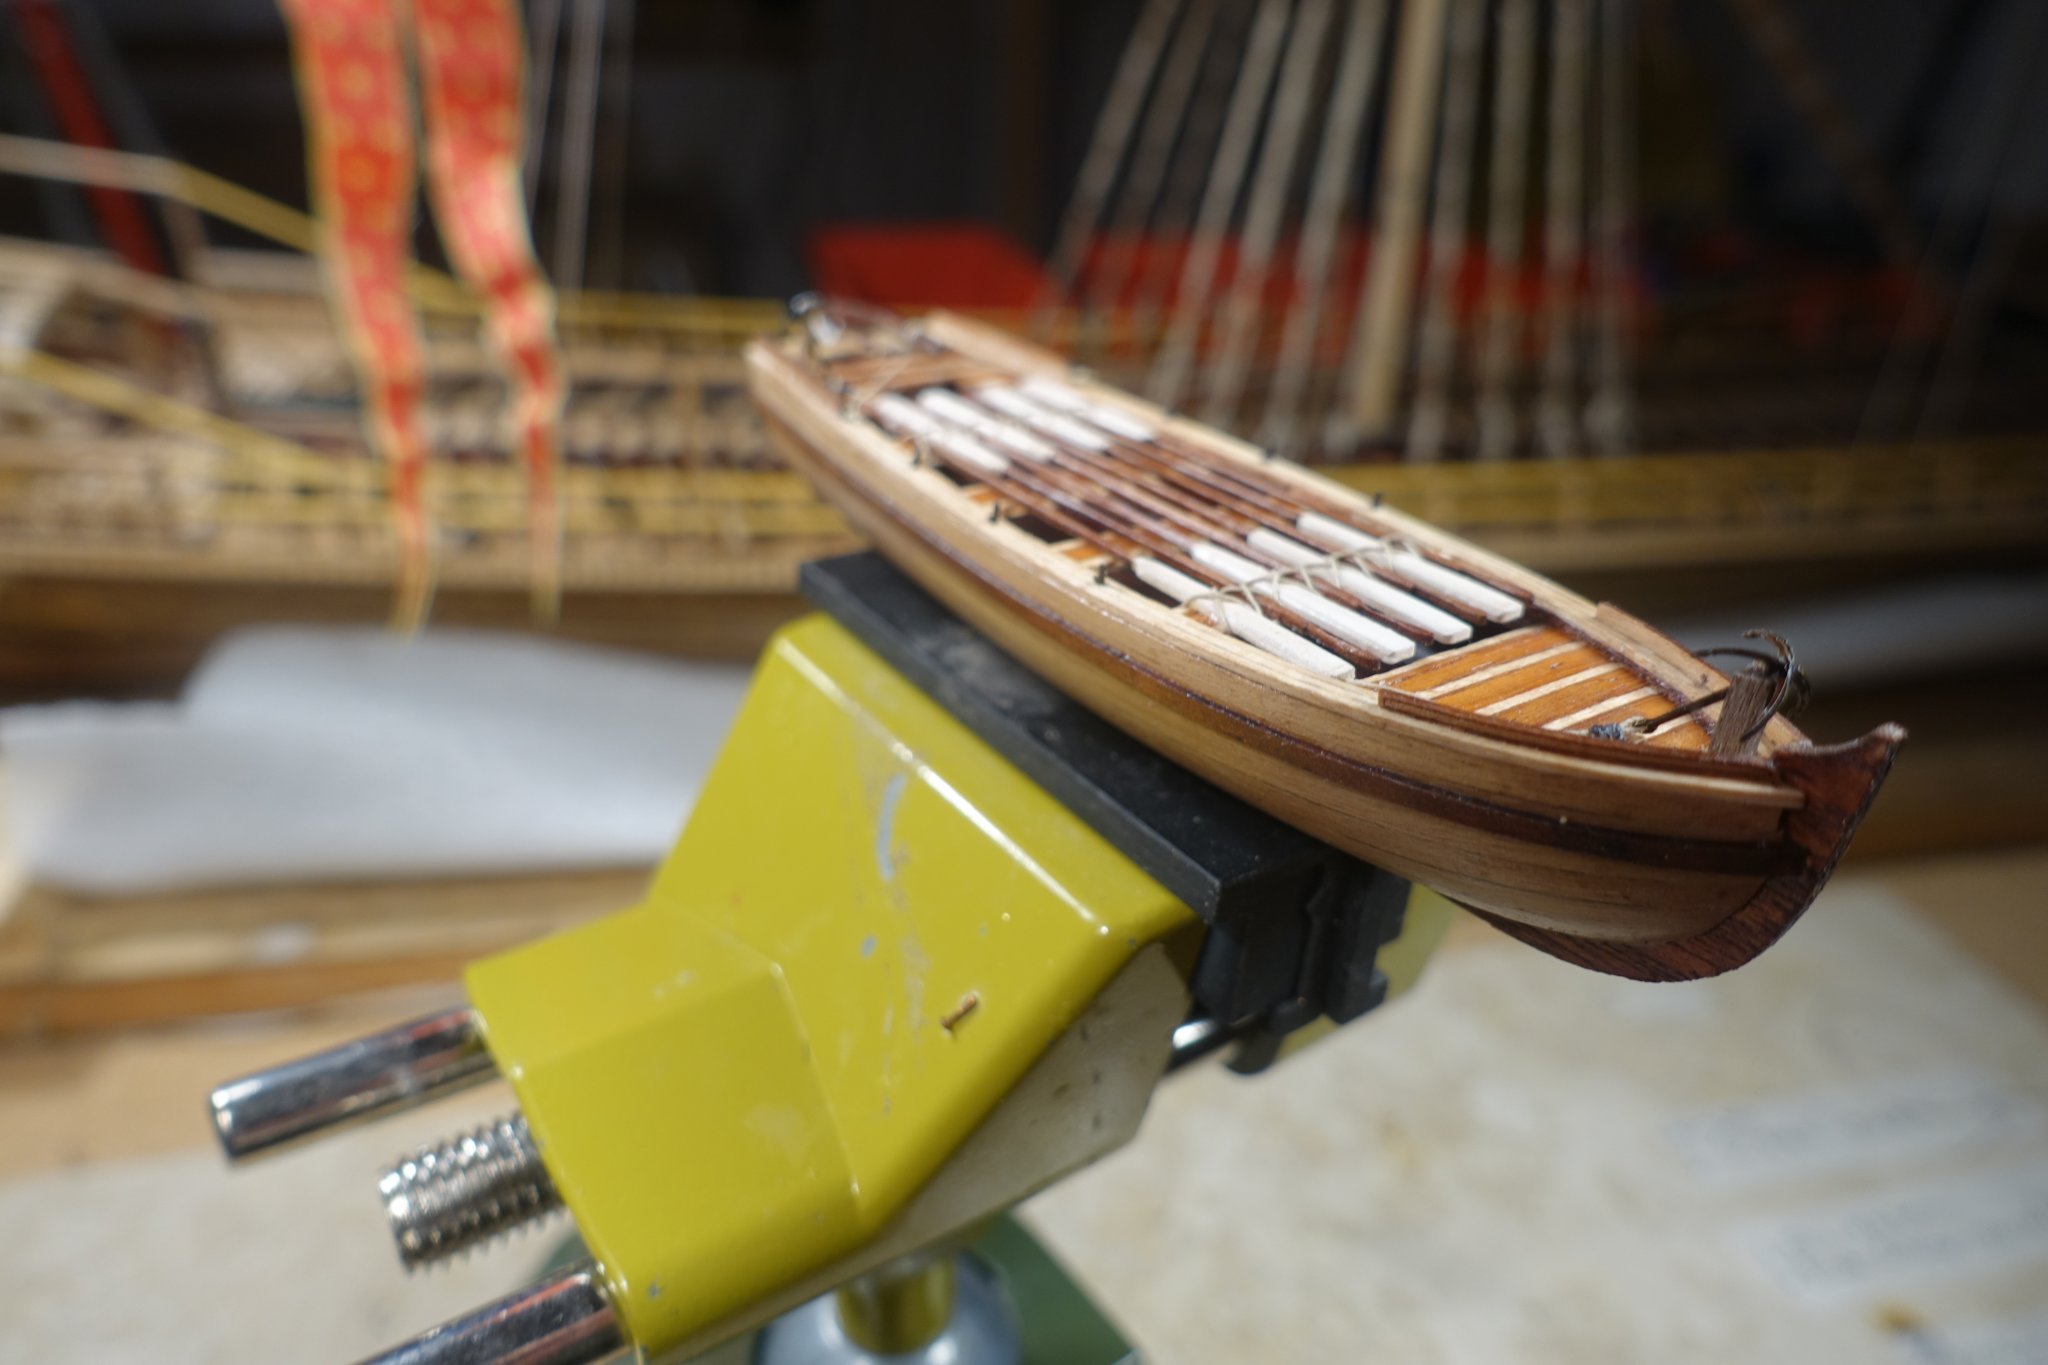
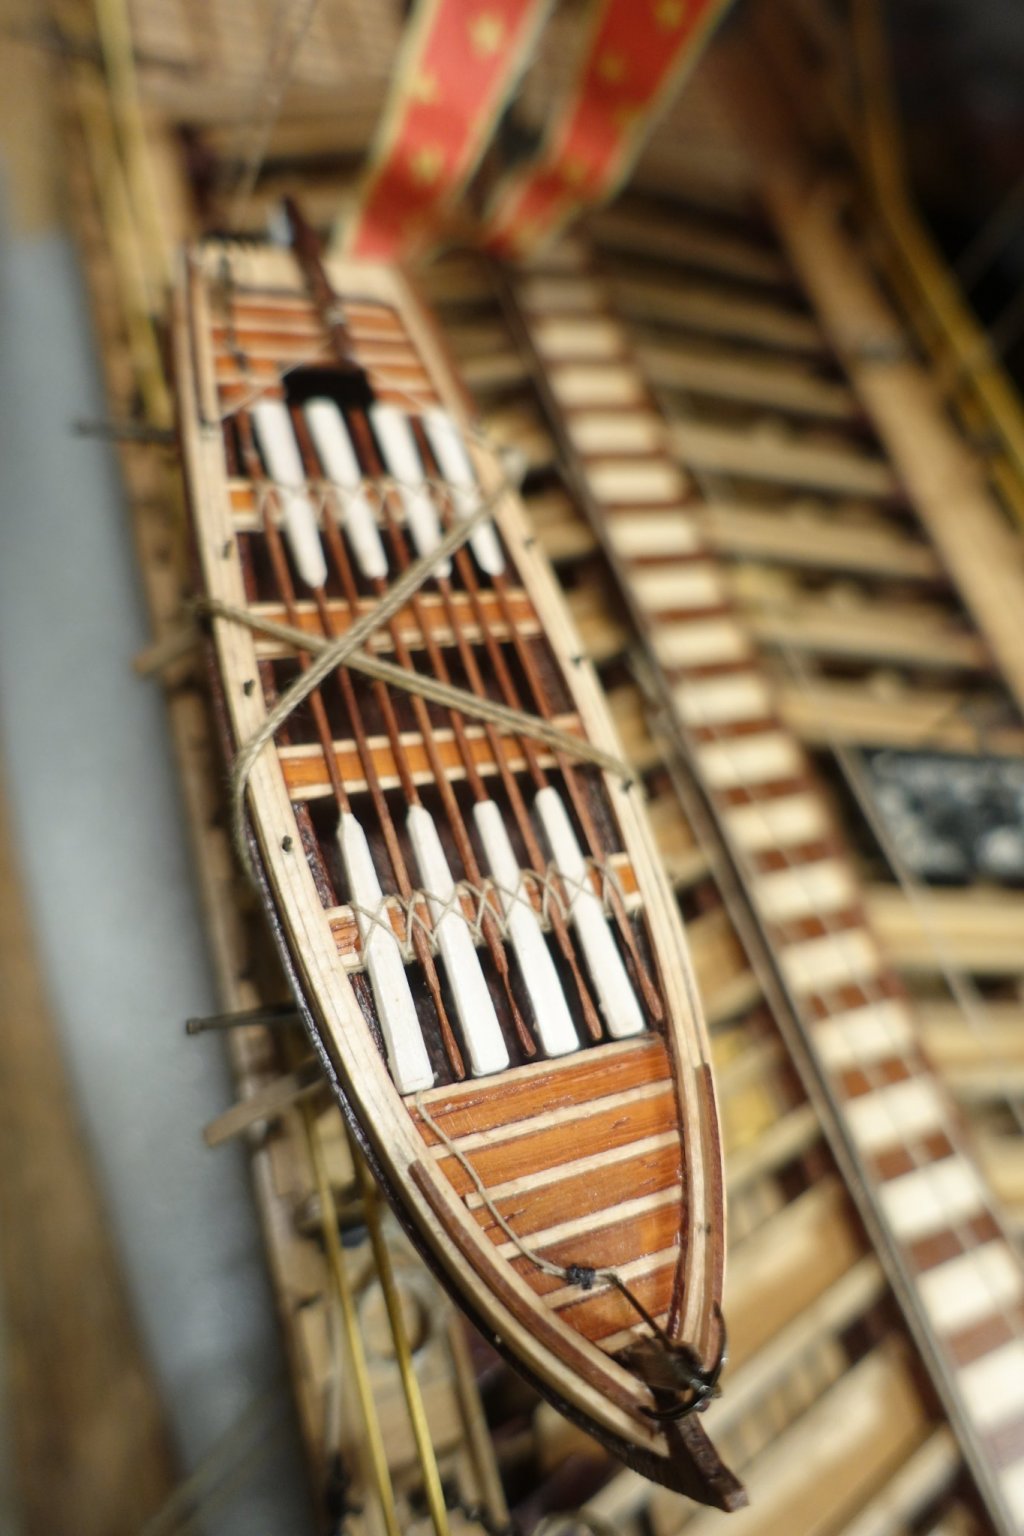
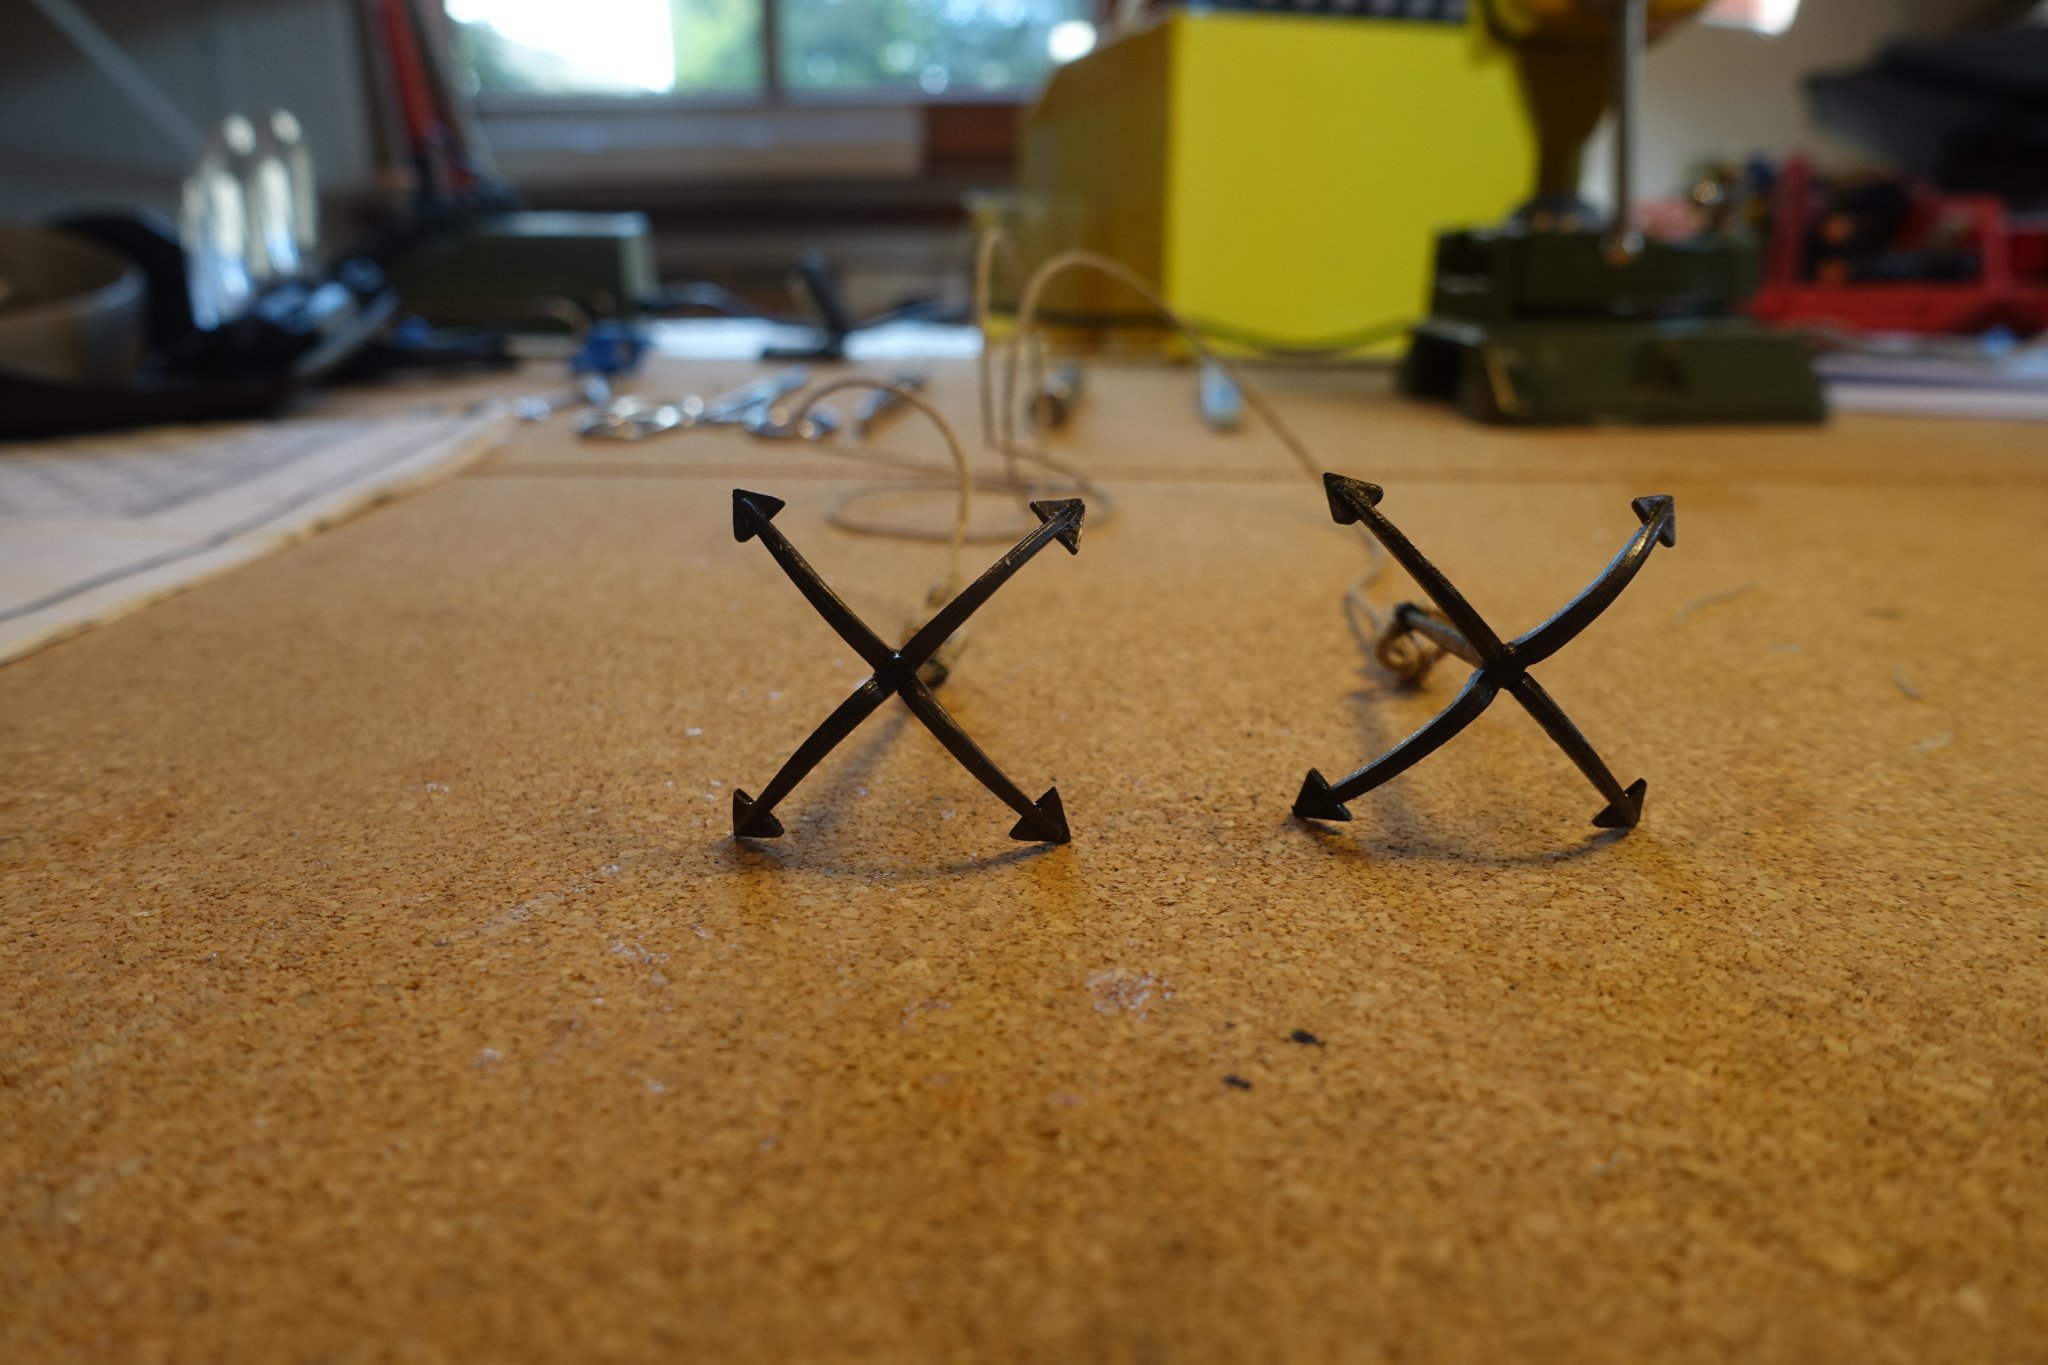
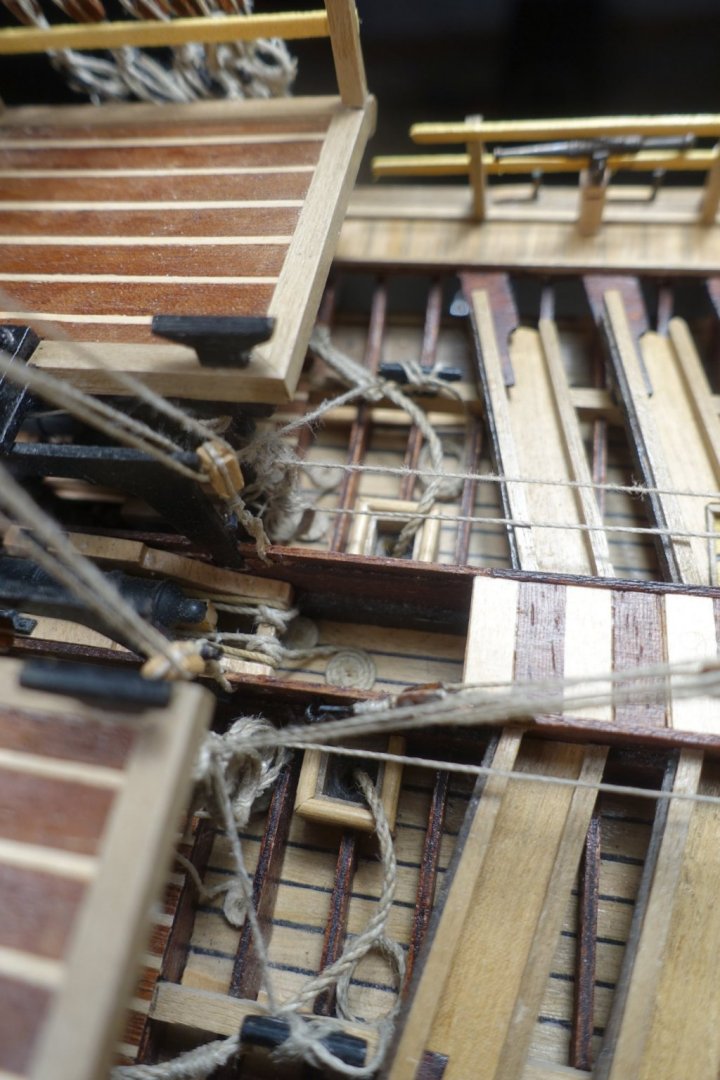
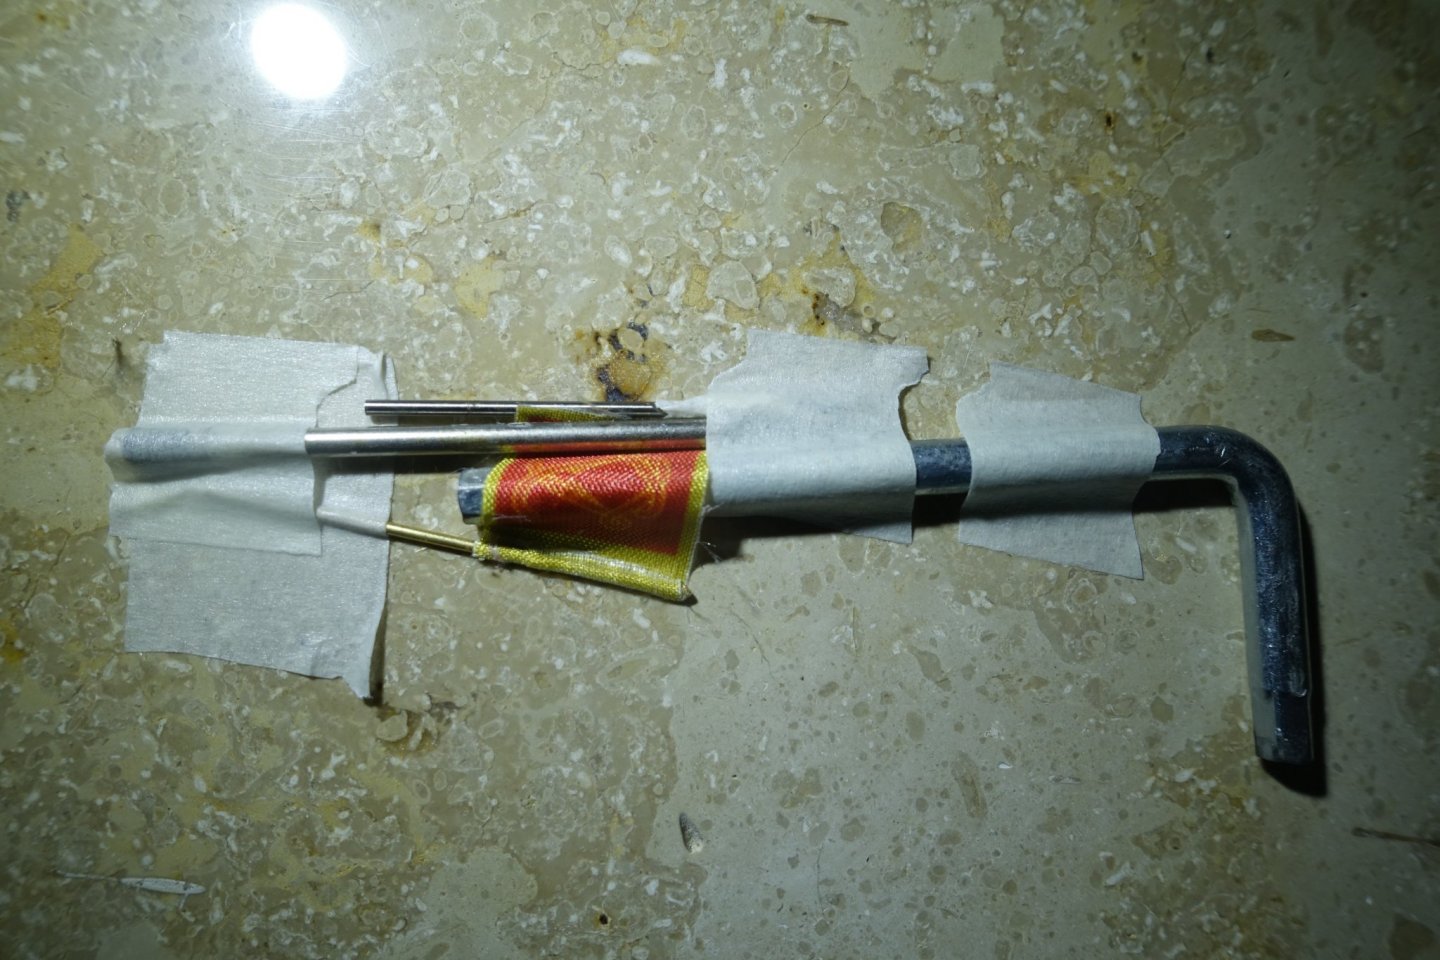
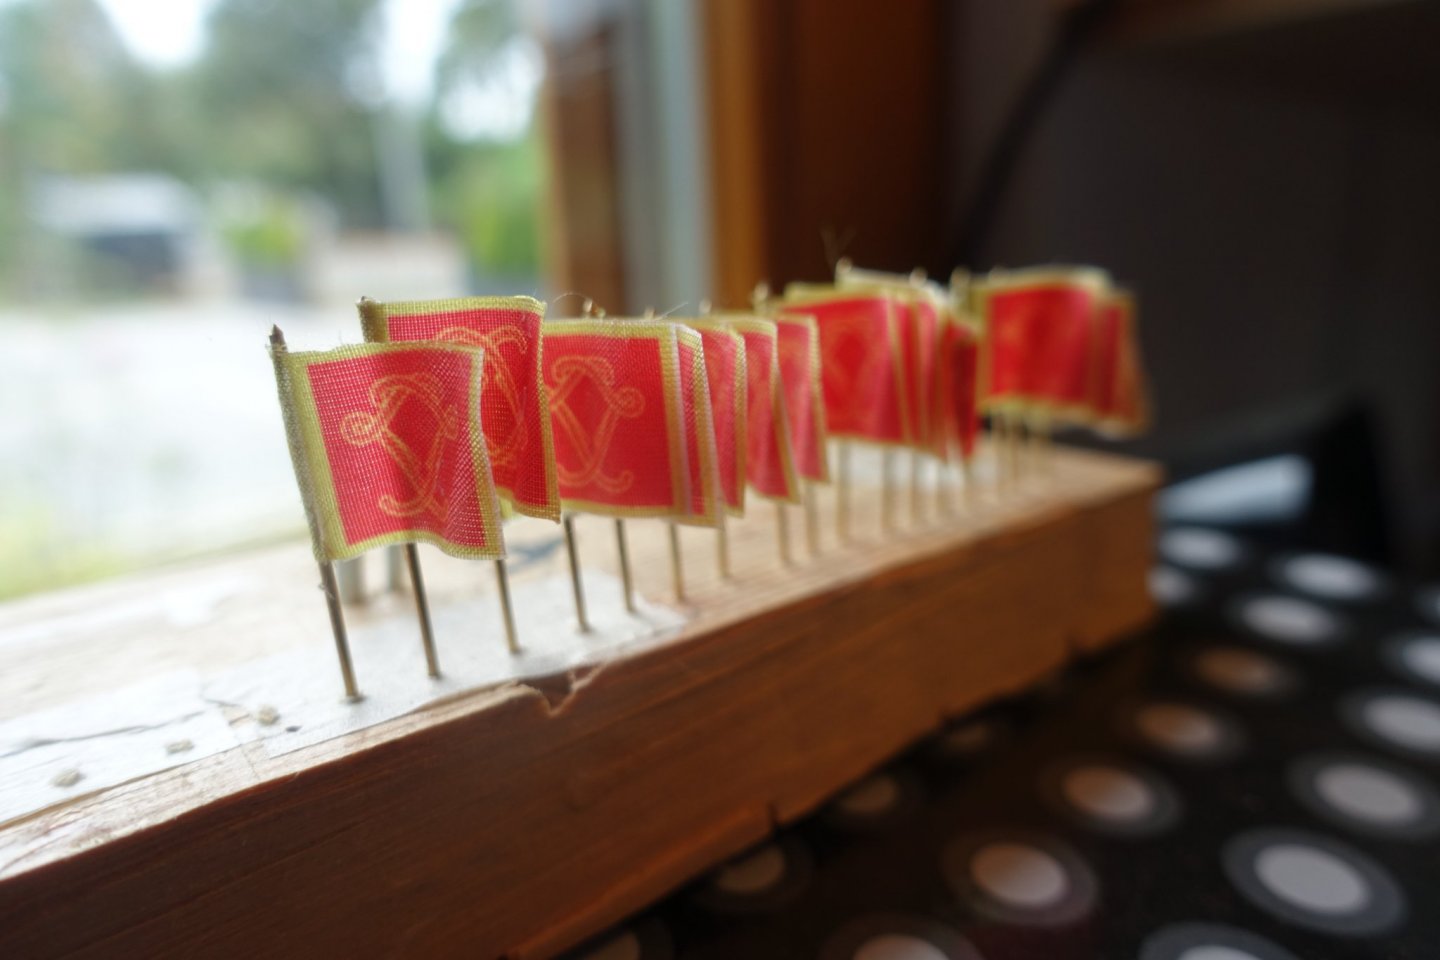
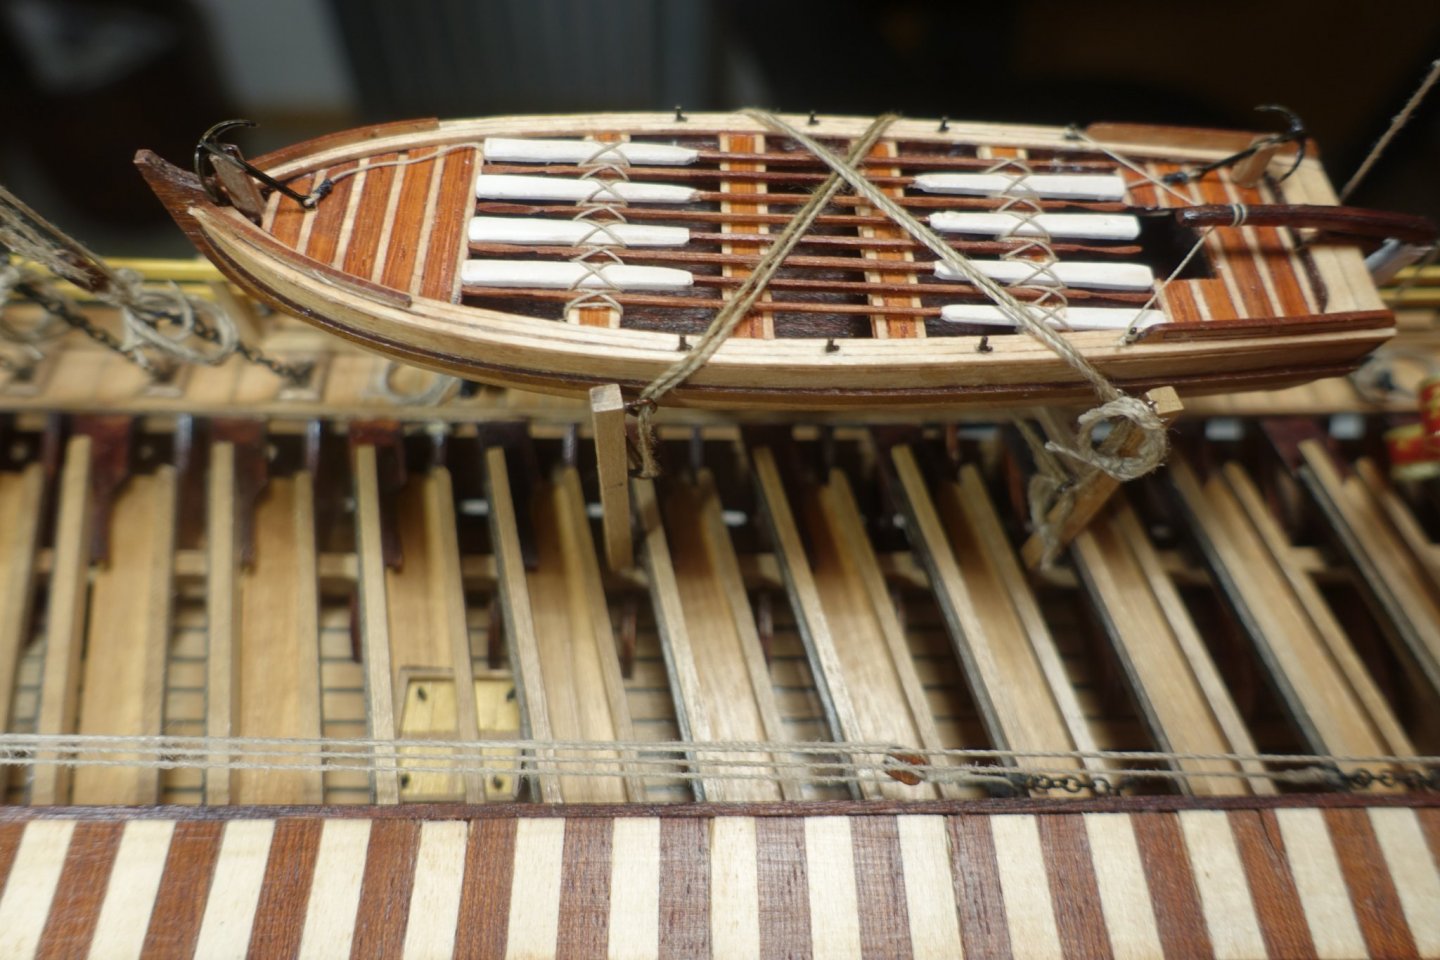
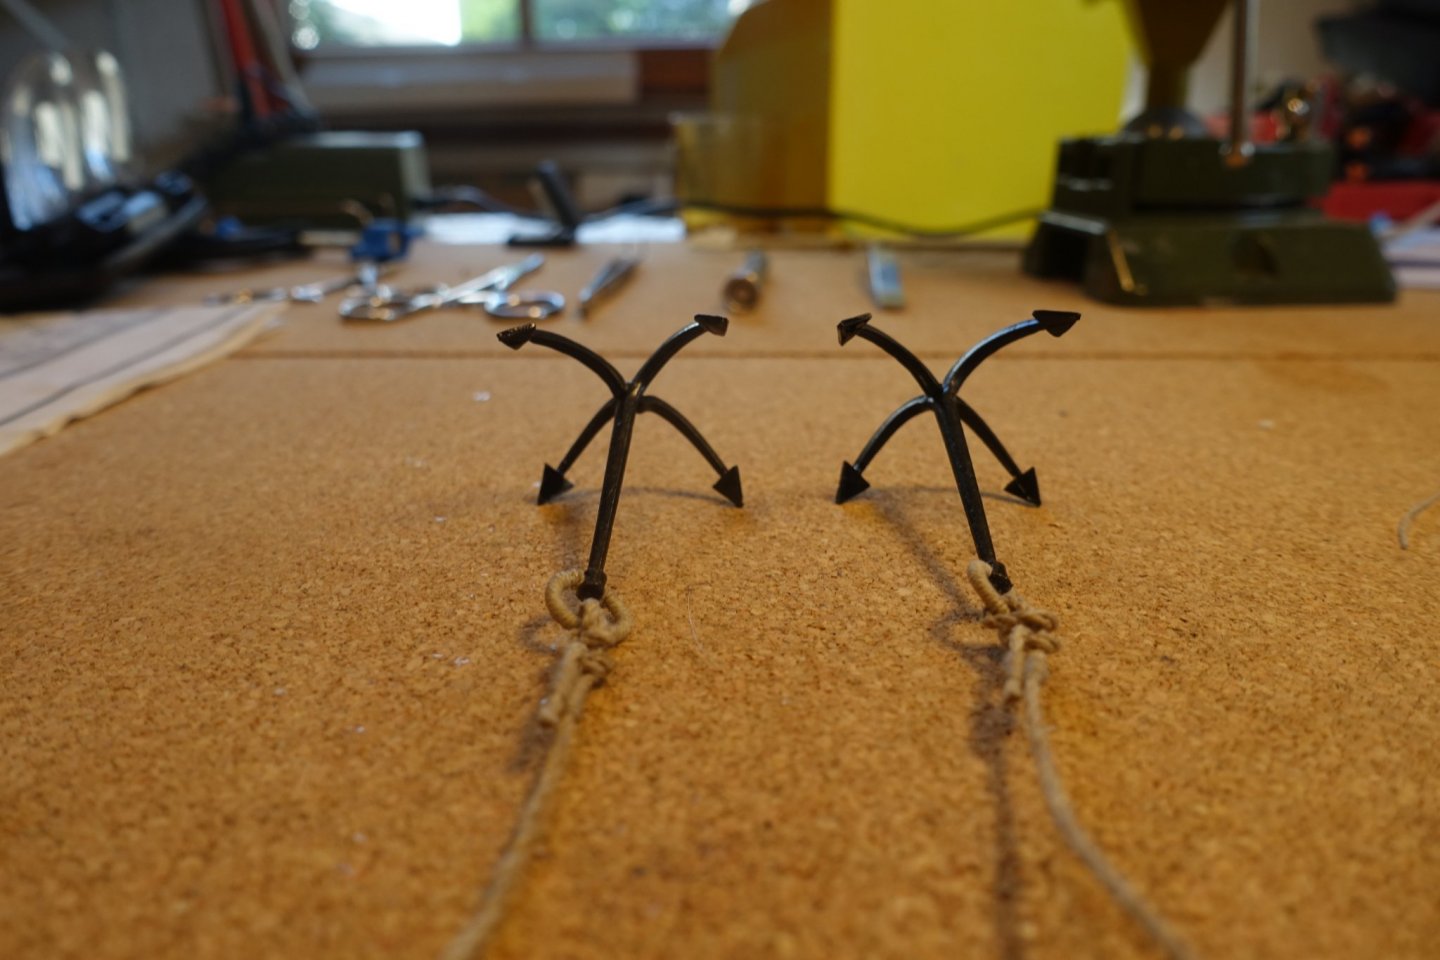
In the last few weeks I have finished the anchors, the flags and the dinghy and attached them to the ship. The problem with the Corel anchors is shown in the previous post. Regarding the exact bearing of the anchors, there was a discussion on safemaster's blog: https://modelshipworld.com/topic/20561-reale-de-france-by-safemaster-heller/page/7/ In the end, Gérard Delacroix convinced me, his video is quite compelling and contradicts Corel's presentation: https://www.youtube.com/watch?v=YYxrbtuyNG0. In my opinion the anchor ropes have to be guided tightly. Therefore, they are guided directly into the box. For the flags, movement due to the wind was simulated with highly diluted PVA. For the dinghy, material was also used that came from Chris https://vanguardmodels.co.uk/product/ships-boats-various-types/. It's not quite contemporary this way, but I liked it better this way. Next I will work on the oars and think about the construction of the display case.


- 112 replies
-
- 3
-
-
- corel
- reale de france
- (and 1 more)
-
Rotary tool recommendations, preferences
Clark replied to Steve116's topic in Modeling tools and Workshop Equipment
IIf you have enough money, you might want to buy a second device that runs on a rechargeable battery. The Dremel inserts can also be used with Proxxon. Conversely, only those with a thick shaft. Have fun Clark -
The "Krick" dregg anchors only had to be slightly deburred. Following von Mondfeld's description, galley anchors were fastened with a special stay. I put the ship aside for the time being, so the anchors are also in stock and will only be attached later. The next thing I want to do is the dinghy.

- 112 replies
-
- 3
-
-
- corel
- reale de france
- (and 1 more)
-
Hi Frank, Not only are the anchors bent, but the right one has a depression on the lower blade arm. I ordered new ones from "Krick" (German specialist dealer), they arrived yesterday and look excellent. I had tried to make anchors myself on a previous ship, but it was not successful. How are you doing with the move? Ships secured? All the best Clark
- 112 replies
-
- 1
-
-
- corel
- reale de france
- (and 1 more)