HOLIDAY DONATION DRIVE - SUPPORT MSW - DO YOUR PART TO KEEP THIS GREAT FORUM GOING! (Only 51 donations so far out of 49,000 members - C'mon guys!)
×


mtdoramike
-
Posts
2,094 -
Joined
-
Last visited
Content Type
Profiles
Forums
Gallery
Events
Everything posted by mtdoramike
-
Need tips on deadeyes rigging
mtdoramike replied to Tallsails2's topic in Masting, rigging and sails
I use a piece of wire shaped like an elongated "U" which I would use to keep the proper spacing between the lower and upper deadeyes. It's a pain for sure, but you have to like a challenge to get through it and on to the next task. PS: I might also add here that most people try and make the shrouds too tight. They don't need to be as tight as a banjo string, just taught. I know this because I have done it myself and if you hate doing it once, try having to do it twice because you put too much pressure on one side or the other and caused the misalignment of the main mast compared to the others. mike -
Advice for planking
mtdoramike replied to Slowhand's topic in Building, Framing, Planking and plating a ships hull and deck
Now this I might try if a decide to ever build another model just to see the difference. mike -
Advice for planking
mtdoramike replied to Slowhand's topic in Building, Framing, Planking and plating a ships hull and deck
Yep, you are taking the fun out of it. -
Advice for planking
mtdoramike replied to Slowhand's topic in Building, Framing, Planking and plating a ships hull and deck
Thanks for the example Pete and also the suggestion on the book. But I've built too many ship models to change my practice. My way of ship modeling is "the ends justify the means". I'm not a purist when it comes to ship modeling like yourself. I do what I need to do to get the job done the easiest, quickest and best way that I can. This is why I make sure and tell folks that I "do not build museum quality models, only display pieces for decor purposes" and I try and also let folks know when viewing any build logs that I do, if you are looking for the purist way or the right way, don't follow my examples. But if you want to get a nice display model built without going nuts and in a relatively quick time frame then my builds are for you. For instance, if I know ahead of time that I'm going to either paint the hull or copper plate it, I use shssssssss don't tell anyone (putty), because the only two who knows would be me and the big man up stairs. Beautiful planking job by the way. I guess I'm just to caught up in the kit type of build, which about every kit that I have ever built suggested starting at the shear strake and plank towards the keel. mike -
Advice for planking
mtdoramike replied to Slowhand's topic in Building, Framing, Planking and plating a ships hull and deck
Now you see, this is what I mean. I start from the Sheer and work downward toward the keel so that way if there is any piecing to be done, it will be at the keel area and not really visible. This way, there is always a solid plank at the sheer without any issues or needing to be trimmed because I don't care how much you mark and how careful you are with laying out the planking patterns first, it seems never to come out exactly as planned. This could be because of poor layout, poor planking job with too much gap in between the planks or more than likely poorly cut planks which are not all the same width, which can be an issue with kit furnished planking. mike -
Advice for planking
mtdoramike replied to Slowhand's topic in Building, Framing, Planking and plating a ships hull and deck
I agree with Don. That is what I usually do, but then again, I usually don't do things the "Right" way, I do them my way or the easiest way I can do them to get the hull planked and looking as good as I can get it without pulling my hair out (whats left of it) or taking the model outside and stomping on it. mike -
Thanks Paul, but like I told the City Council, no noble gesture on my part. I have always wanted to build this magnificent ship model, but with limited space to display her, so next best thing is turn her over to the Public Library where I can go any time I want and visit the Vic. I have been to the Library several times since donating the Vic and there is always people standing around looking at her and sometimes I offer educational tidbits about the ship and the model and not revealing that I was the builder of it. Really cool too. mike
- 230 replies
-
- 1
-

-
- victory
- artesania latina
- (and 1 more)
-
No way, this Dremel tool has no place in ship modeling, it's a piece of crap and completely worthless. So I'll take it off your hands, send it to me and I'll do my best to test it thoroughly for the next year or three to make sure it's worthy, before I send it back to you. Oh yeah, better send a bunch of those no good worthless attachments and bits with it just in case I can get it to half way perform like a decent rotary tool. mike
-
This kit is an oldie, you find Dikar kits popping up on Ebay every now and then. They look like good kits and I would equate them to the old Aeropicola kits. I believe they went out of business years ago. They were based in Spain I believe. Now if you are asking of how great a kit they produce. I will say this: I have built better than thirty ship model kits from various makers some known others not so much and I have never found a bad kit. But I also learned a long time ago, that a kit is a kit is a kit and it's up to the builder to make a decint model out of the contents and a kit is only the starting point. Research, detail make a good product from a kit good bad or indifferent. You may be able to produce this from the contents of the box or you may have to add to it and use aftermarket parts in order to achieve this. mike
- 1 reply
-
- 3
-
-
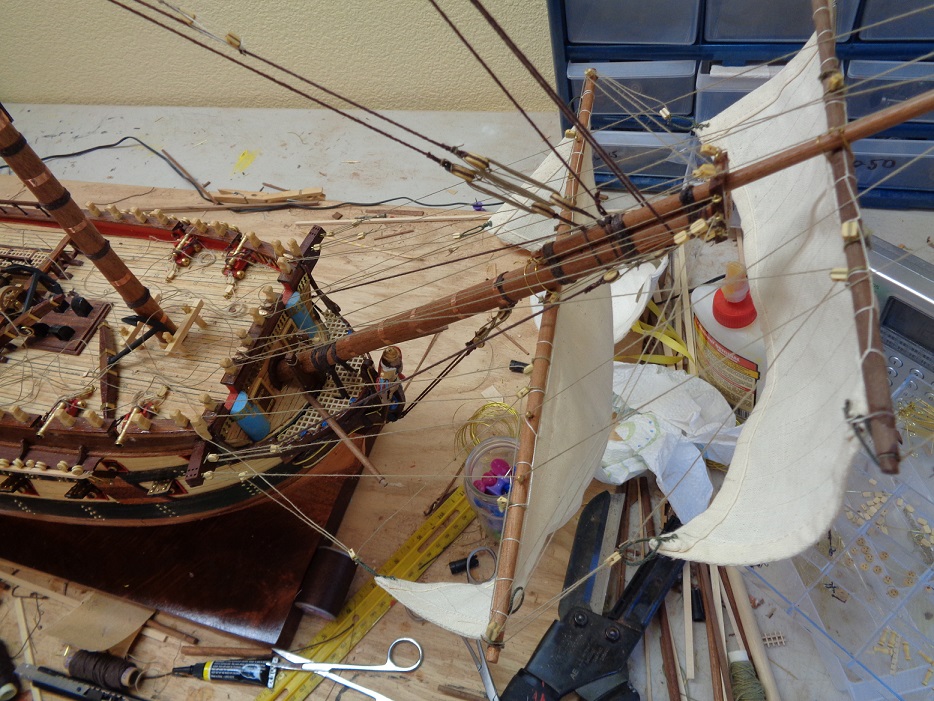
Got some more rigging done on the bowsprit yesterday. I know, my work table looks a mess, but it's an organized mess believe it or not. I try and clean it up after I finish each step before moving on to a new step in the build. mike

-
Hey JMS, you might also try a little bees wax on the line, which will take a lot of that loose hair look out of the line and give the line a little more smooth look. I have also used aquanet hairspray on my rigging line, which stiffens it up a little and also helps with fraying. I used to use stuff called liquid tar that was sold by Model Shipsway's if I remember correctly and would coat the ratlines with it, which is what they did on real ships to help preserve the lines to keep it from rotting. But alas, they don't make the stuff anymore. mike
-
I have tied hundreds ratlines over a 20 year period and the first thing I realized after my first attempt at it is that ratlines do not have to be overly tight and the cross pieces should have a slight stirrup effect to it if you are looking for realism. Your rig looks promising and I will give it a go on the Monte that I'm getting close to the ratlines process now. Anything to make that process easier is a win win. mike
-
You said it Wacko, This is one of my all time favorite ships. I'm thrilled to see it being done such beautiful justice by such a fantastic artist. This is one of three ships that I have always wanted to build, but not meant to be. But what a thrill this is to see such beautiful work. mike
-
It is huge at 49 inches long. Ship models like this are built to sell or donate due to their size unless you have a huge room to display it and there wouldn't be room for anymore.
-
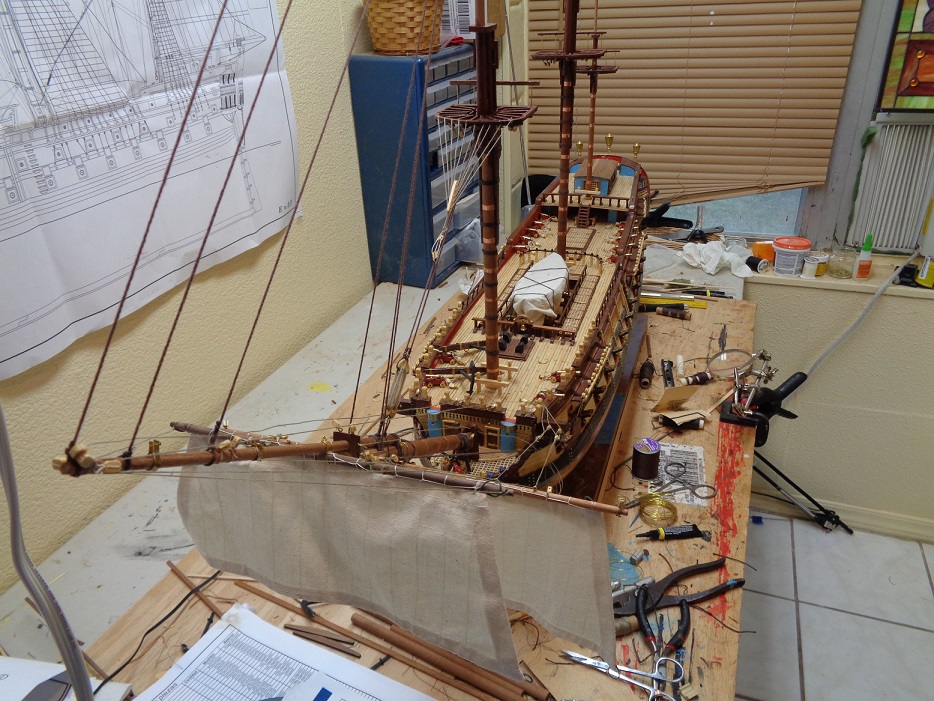
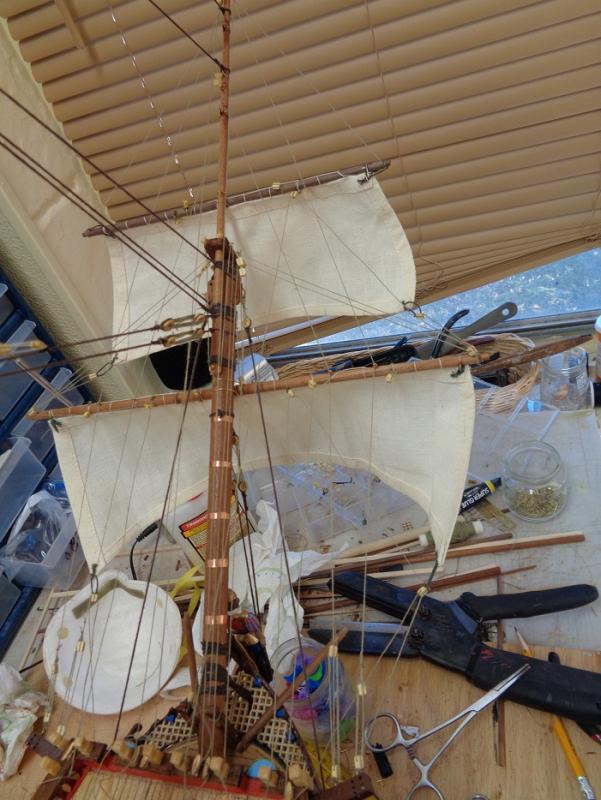
I'm back baby. I'm not quite up to a rutting buck standard, but I'm doing much better. At least I don't feel like my chest is going to explode each time I coughed. Here are a couple of pics of the little work I have been able to do on the Monte. I was torn between sails or no sails, but it was really a no brainer because I love to see ships with sails and since I don't have to make my own because OcCre included a fully sewn set of sails in the kit. mike

-
What a beautiful piece of work she is WOW! mike
-
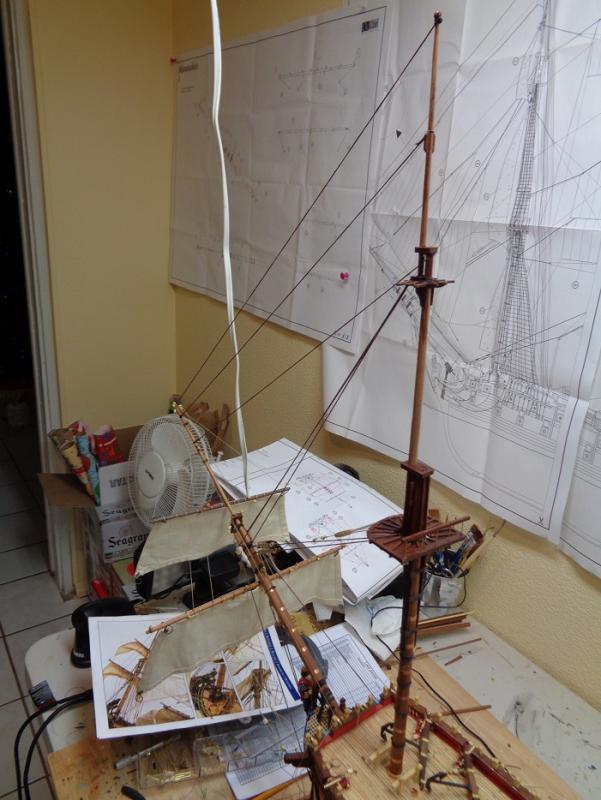
I have started then standing rigging from the bowsprit back, but haven't been able to do a lot since I have been battling a bout of Pmonia for the past couple of weeks, which has left me a might weak. The last two days have been the best I have felt in a couple of weeks for sure. mike
-
Hey Paul, I'm currently working on the Montanes, which will be my last ship model. I'm at the rigging stages on her at this time. I will also be starting the Dumas Chris Craft 1954 Commander Express 36" radio control boat in March once I finish the Montanes. I wanted a change of pace from ship models, which Is why I chose to do the Commander R/C boat. mike
-
beautiful work, makes you think you are on a real ship. mike
- 708 replies
-
- 1
-
-
- victory
- constructo
- (and 1 more)
-
This will be the name of the Chris Craft Commander when finished unless someone wants to put a deposit down on her, then they would have the honors of naming her. mike

- 146 replies
-
- 4
-
-
- dumas
- Chris-Craft Commander Express
- (and 2 more)
-
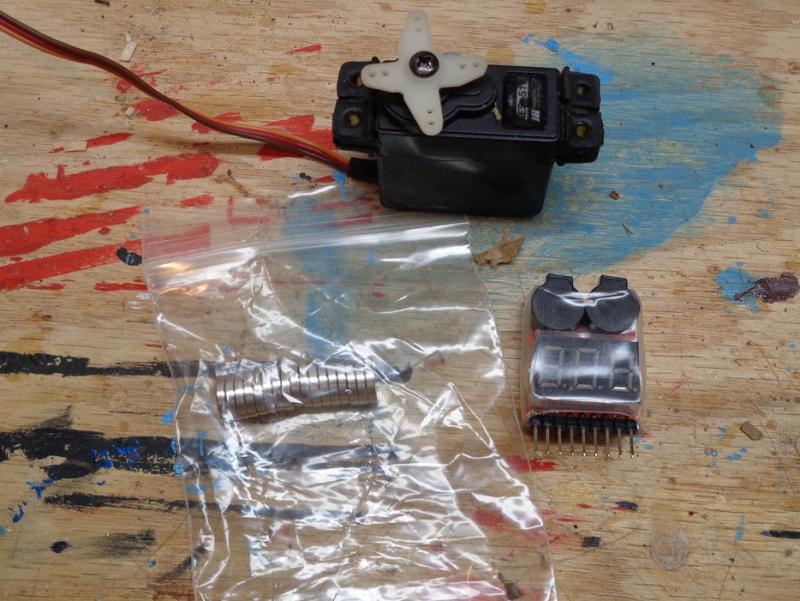
I received a standard size servo, the rare earth magnets ( I will use these to attach the cabin or hatchway to the hull, to give access to the electronics), I also received the Low Volt buzzer. These will go into my collection of stuff readying for the build. mike
- 146 replies
-
- 4
-
-
- dumas
- Chris-Craft Commander Express
- (and 2 more)
-
When I saw the name, it instantly made me thing of that commercial with a big burly biker guy getting a tattoo from a girl, who was eating a Snickers bar. When she finished the tattoo and the guy looked at it, it said "No Regerts". Her excuse for the foul up was that she was eating a Snickers bar. hahahaha. I'm glad to see that the spelling was intentional though on your model. The naming should score you some huge brownie points with the lady of the house. I have no Regerts! mike
- 339 replies
-
- 3
-
-
- dumas
- Chris-Craft
- (and 3 more)
-
It was just pointed out to me that unless the buyer wants to go swimming to retrieve his boat that shut down in the middle of a lake or pond due to low battery voltage, I best get a Low Voltage Meter buzzer that will buzz when power starts to wain a little. So I was able to snag one of these off of ebay: Lipos unlike Nihms or Nicds, which gradually run down, Lipos run like a cat with it's tail on fire and then just quit when voltage gets too low. mike

- 146 replies
-
- 4
-
-
- dumas
- Chris-Craft Commander Express
- (and 2 more)