Jack12477
-
Posts
5,677 -
Joined
-
Last visited
Content Type
Profiles
Forums
Gallery
Events
Everything posted by Jack12477
-

Rigging tools how are they used
Jack12477 replied to Telp's topic in Modeling tools and Workshop Equipment
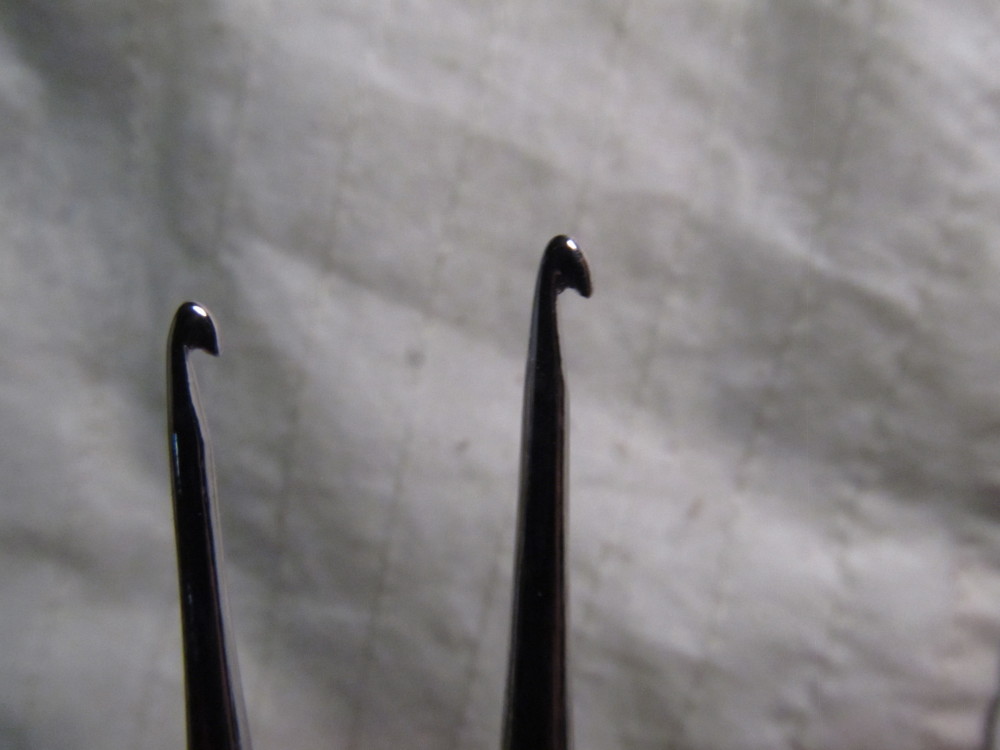
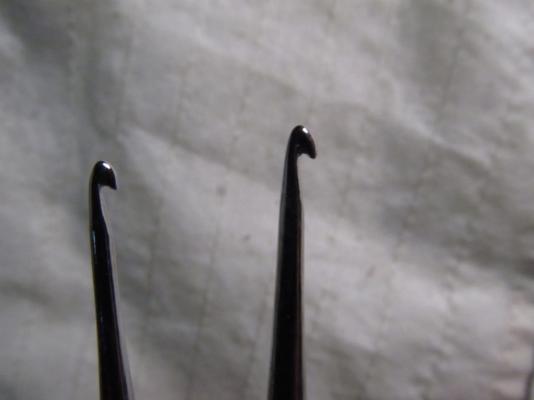
I have that exact set - the hook and angled/bent point are useful for getting line under and around a belaying pin. I also find the bent point useful for holding a line down while I wrapped it around something and also till the glue sets up a bit. They are long enough to reach into the deck area thru the rigging and getting into tight spots. You can also use ordinary crochet hooks for a lot of rigging - get the smaller size ones, example US #5 or #7. I use the ones show above a lot as well as the crochet hooks. Or as others say - make your own. -
Looking very nice - also great tutorial - thanks for sharing it - Hull plates look really great.
-
Thanks Popeye - I did hand sew a bunch of sails for the Bluenose II I did for a friend so yes I have gotten over the learning curve. I am looking for already dyed cloth thin enough for sails, this is my preferred choice - dyeing is my back-up plan - I also want to leave the kit supplied sails untouched in case I need them as replacements later - I may try my hand at machine sewing. Haven't got a Hobby Lobby close by - have to see where the nearest one is and maybe do a road trip. Thanks for looking in.
- 203 replies
-
- 5
-

-
- artesania latina
- marie jeanne
- (and 1 more)
-
Nothing to update: I'm just posting a link to a question I asked in Masting and Rigging forum so that I don't lose the link and the information. Question was "How are the bolt rope loops attached to the spar"
- 203 replies
-
- 3
-
-
- artesania latina
- marie jeanne
- (and 1 more)
-
Nah ! I envision a large BBQ in one corner, nice circular fire pit (properly lined of course), nice circular seating around the pit........... Big cooler of adult beverages :D :D
-
David, yes, RIT dye is my next experiment. Planned on doing some shopping later today to see if I can find RIT dye in the colors I'm thinking of.
- 203 replies
-
- 3
-
-
- artesania latina
- marie jeanne
- (and 1 more)
-
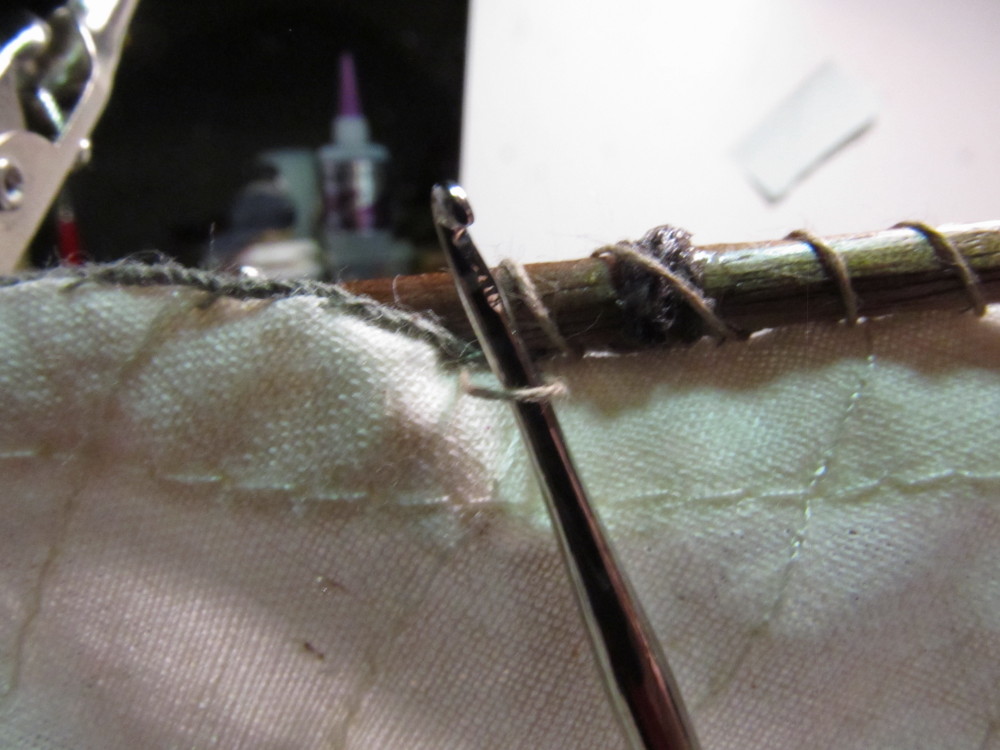
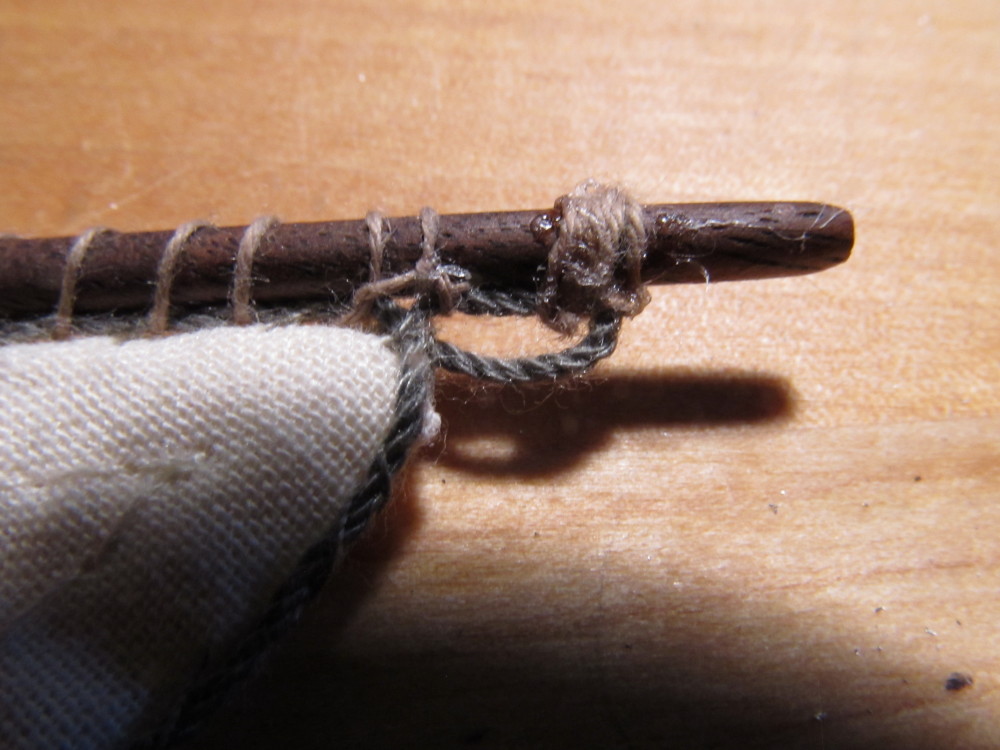
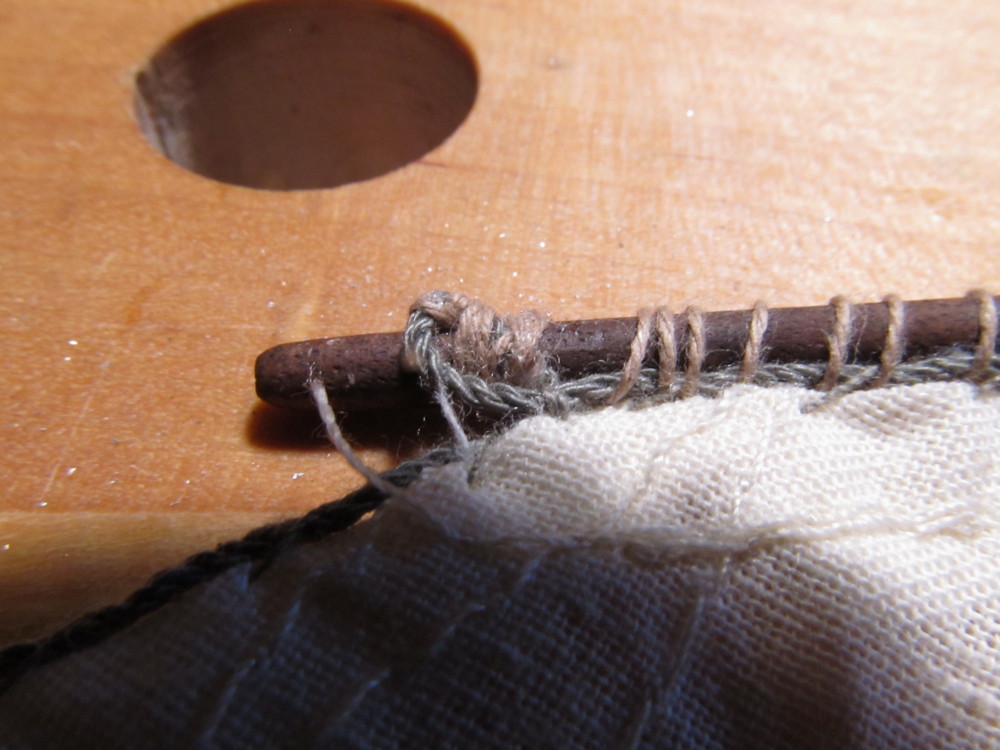
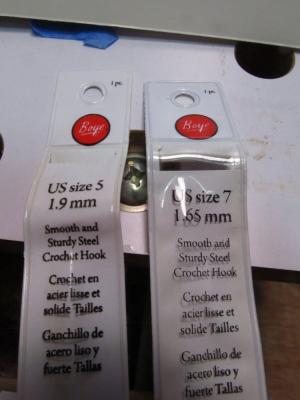
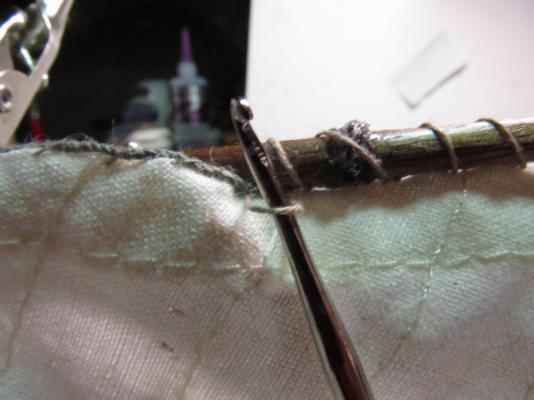
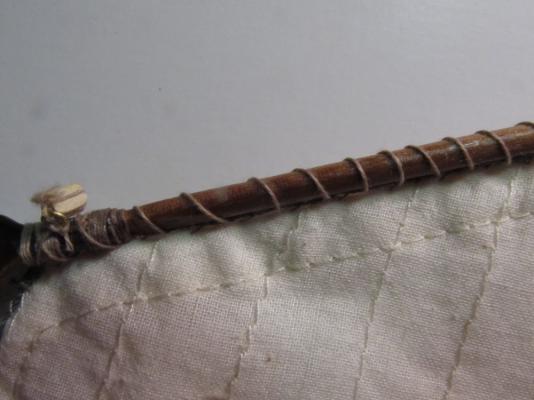
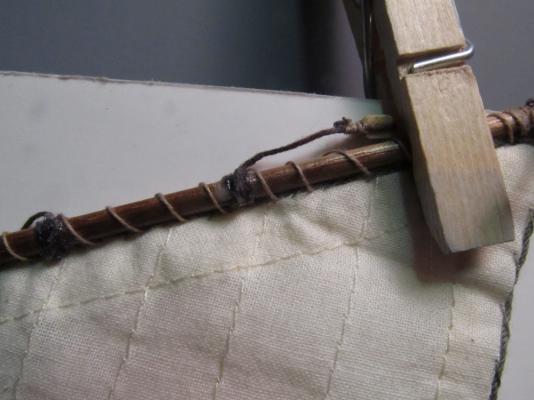
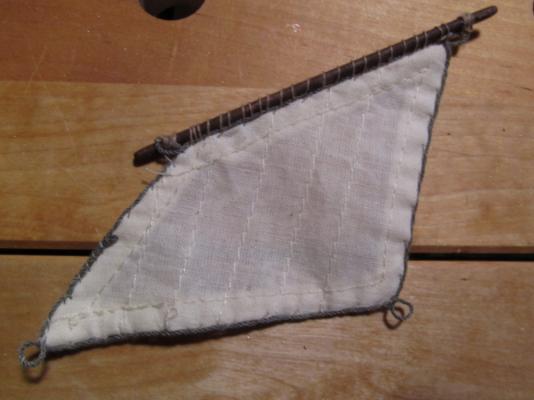
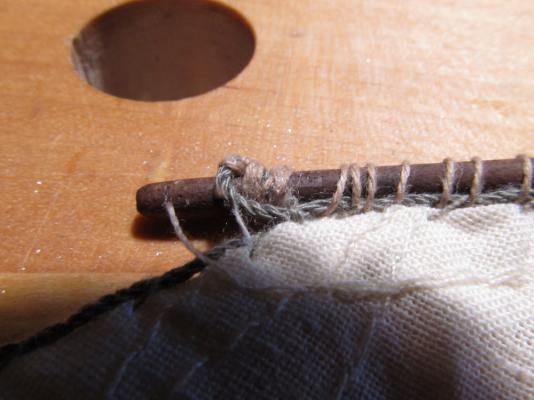
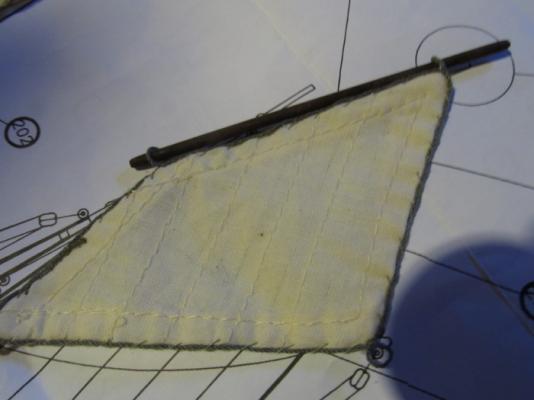
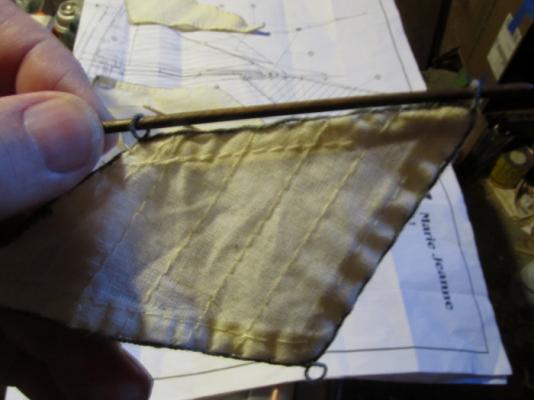
Another small update: Main mast sail bend to the main mast gaff. I'm using crochet hooks to pull the thread thru the bolt ropes. I slip the hook between the sewn on bolt rope and the sail cloth, catch the thread on the back side of the gaff and pull it thru. I've tried other methods, example, curved sewing needle, fine pointed tweezers, but the crochet hook works best. [And no, these are not the Admiral's. They are mine. She does a lot of crocheting herself and helped me navigate the sizing charts to pick the right sizes] I'm using a US # 5 (1.9 mm) and US #7 (1.65 mm) hook. I also have some larger size hooks. See photos below:

- 203 replies
-
- 11
-
-
- artesania latina
- marie jeanne
- (and 1 more)
-
Thanks, Mobbsie, always welcome suggestions. I have not tried the fabric dyes yet. That's the next experiment Thanks for the compliments on the sail bending all and the LIKEs
- 203 replies
-
- 3
-
-
- artesania latina
- marie jeanne
- (and 1 more)
-
Nice ! I like the figurehead. Great job, Ken
-
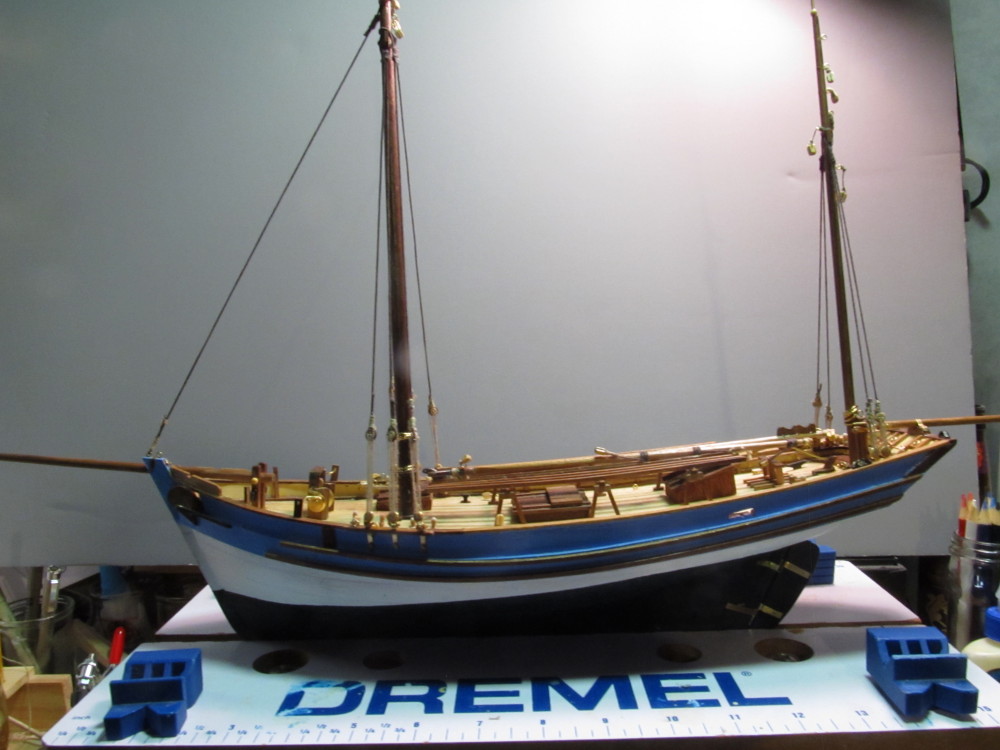
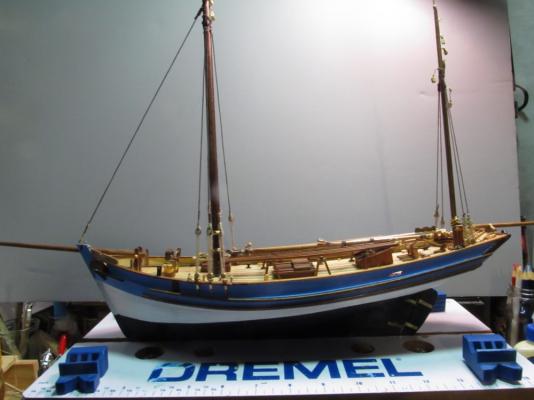
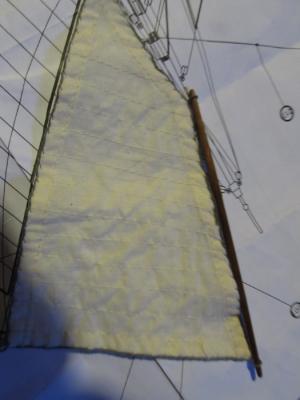
Small progress update: Installed main and mizzen mast. rigged the deadeyes and main mast forestay. Installed the boat rack amidships. Started bending the sails to the upper spars. Still experimenting with the color dye technique - not getting consistent results - some hues cause a build-up of pigment on the surface of the cloth while others actually dye the cloth. Have to consult with my paint expert (son) when he comes over. Still researching how I want to color the sails. Progress photos: Mizzen Gaff topsail Main Mast Gaff topsail Overall Model


- 203 replies
-
- 14
-
-
- artesania latina
- marie jeanne
- (and 1 more)
-
How are the bolt rope loops attached to a spar
Jack12477 replied to Jack12477's topic in Masting, rigging and sails
Henry, thanks - that makes it a lot clearer. -
How are the bolt rope loops attached to a spar
Jack12477 replied to Jack12477's topic in Masting, rigging and sails
Thanks, Dave, that does help. -
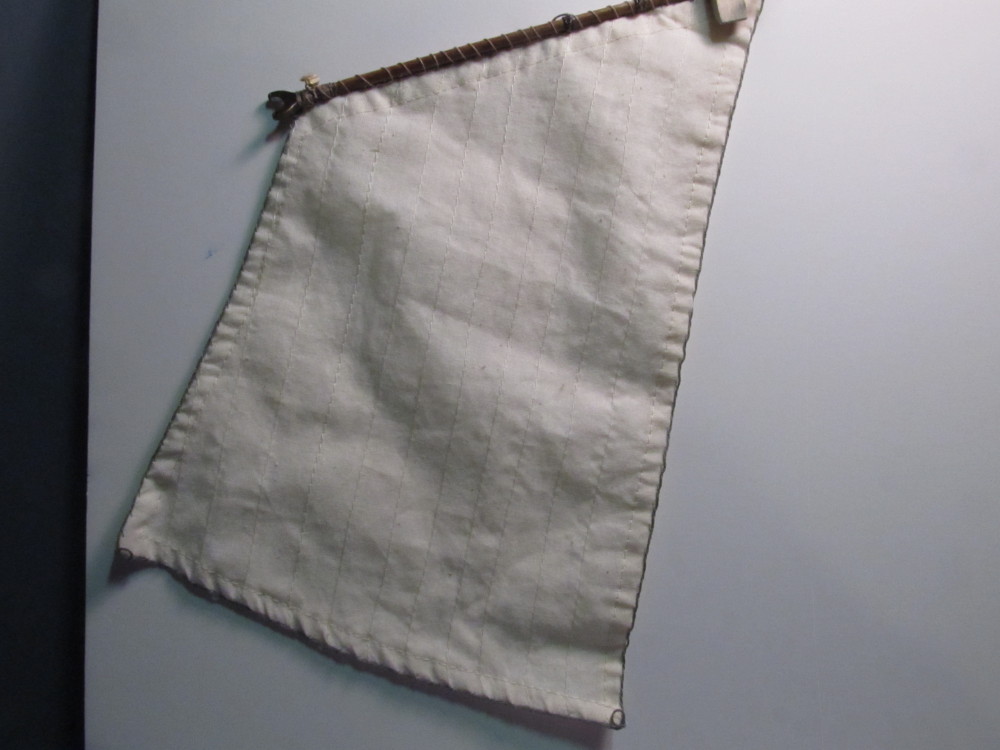
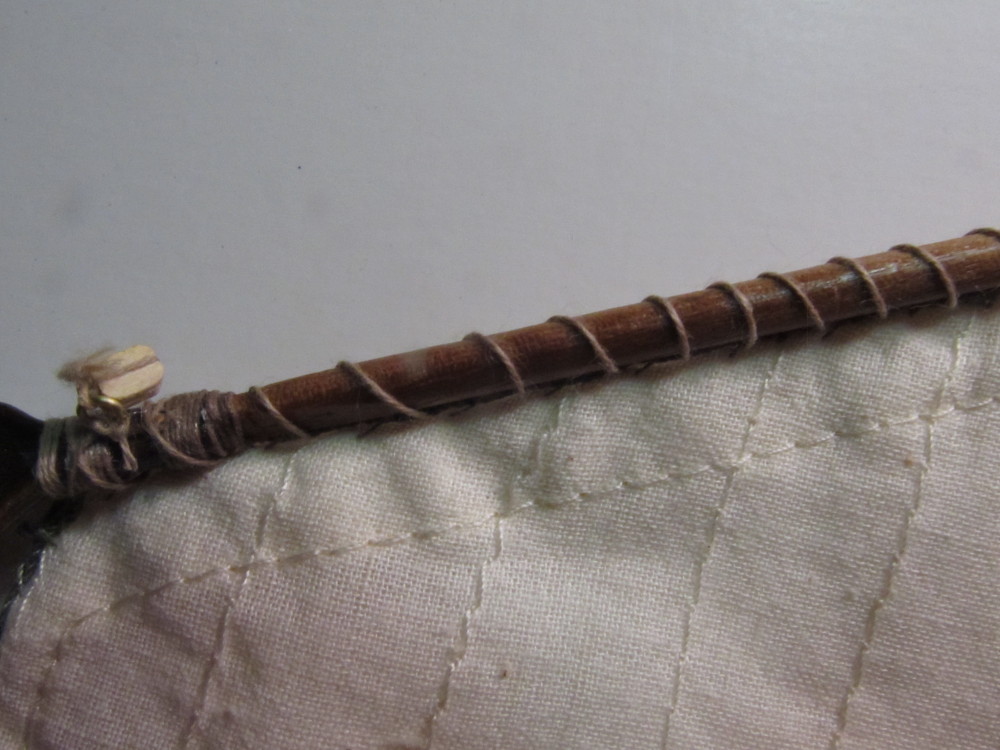
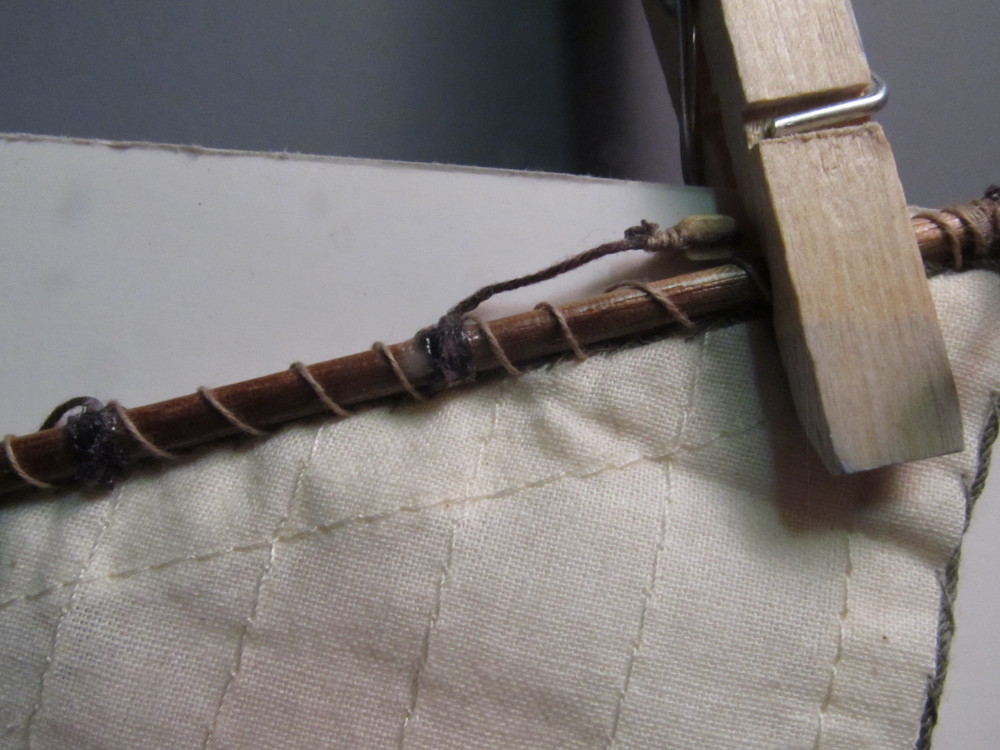
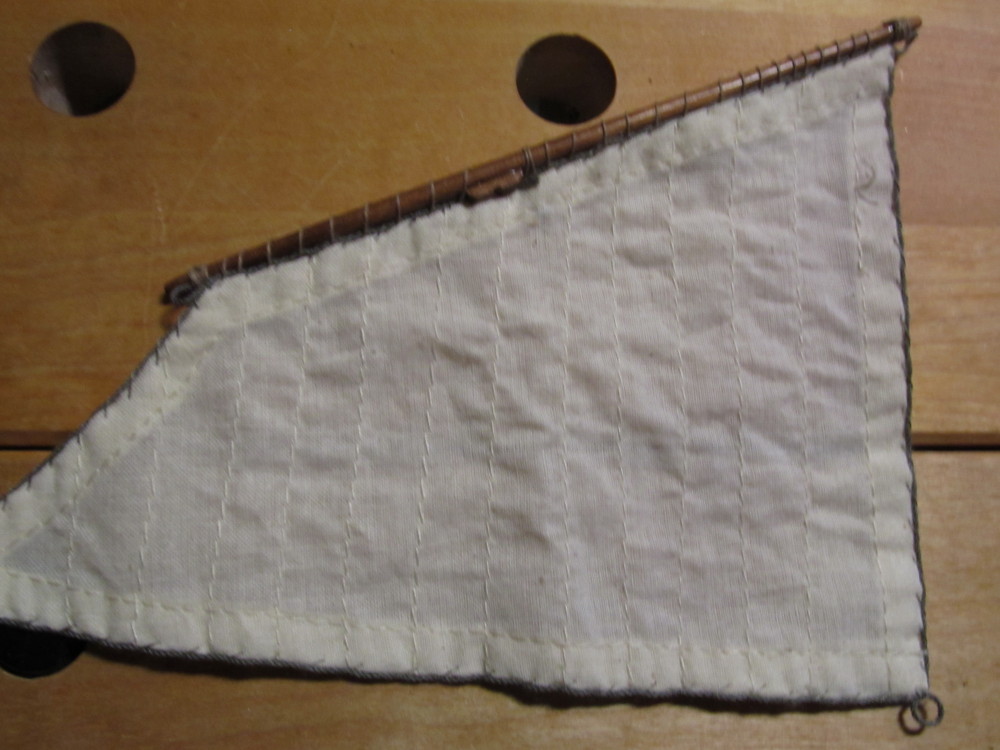
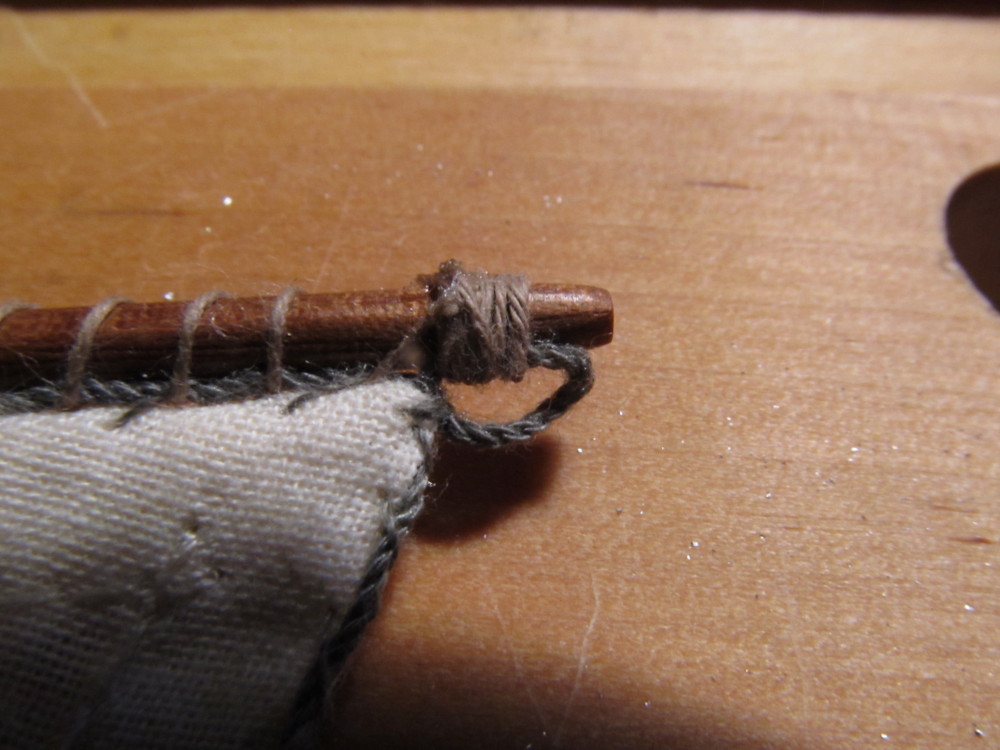
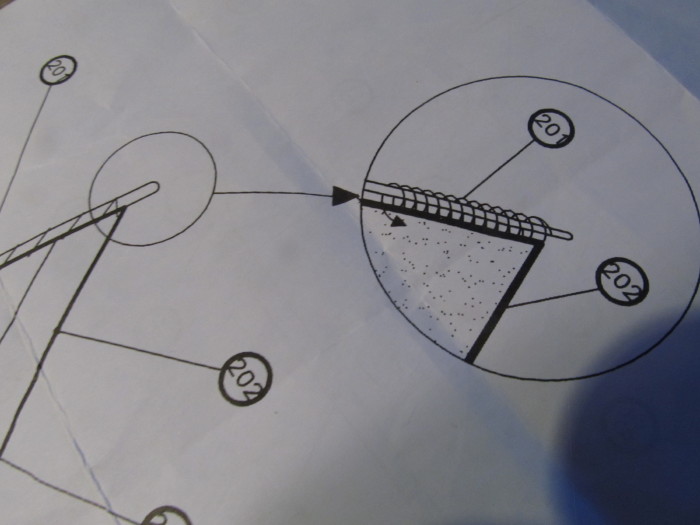
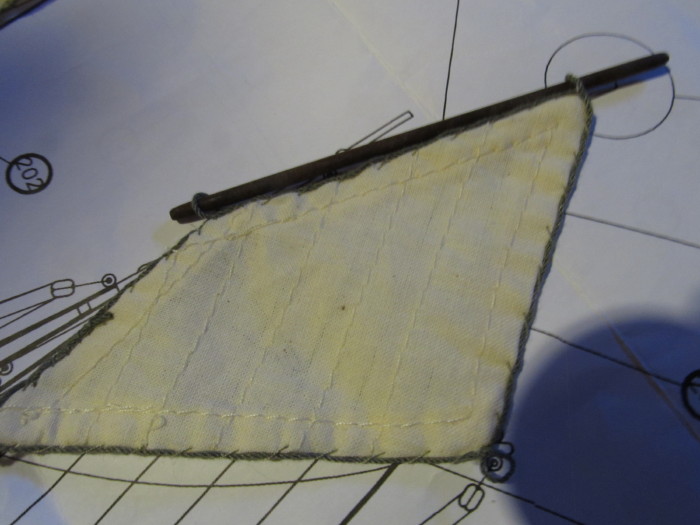
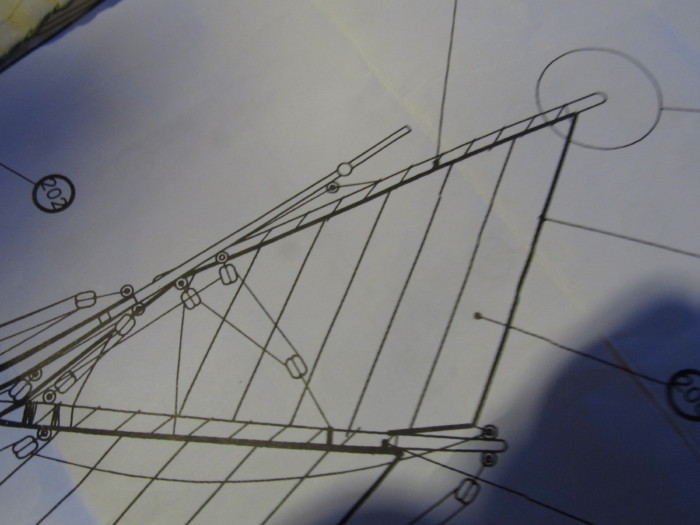
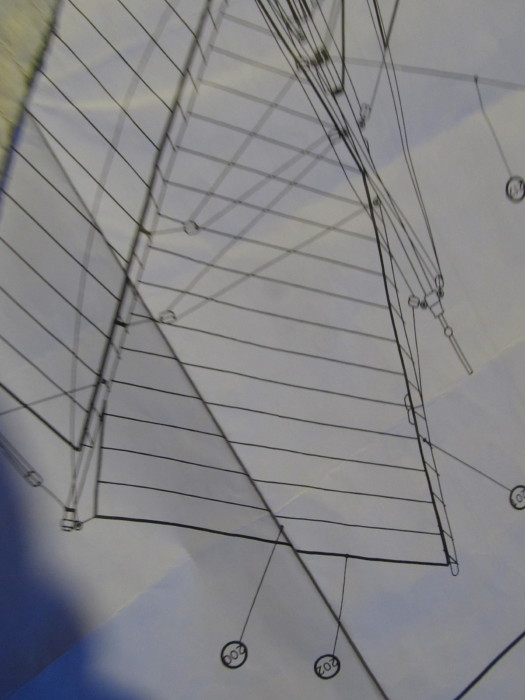
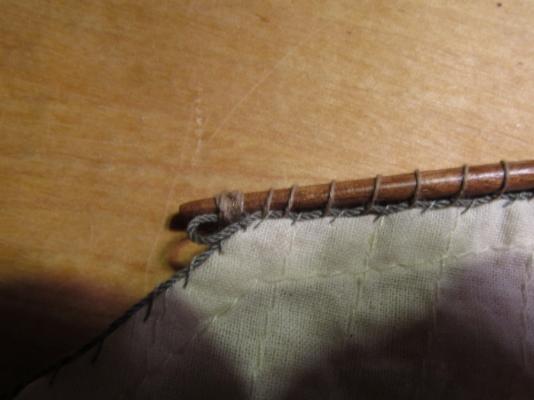
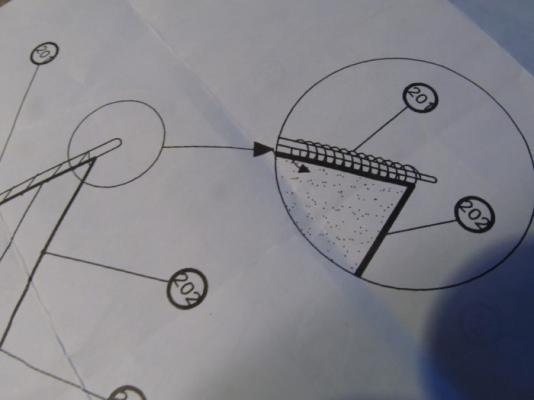
I'm looking at the plans for my AL Marie Jeanne and it shows the sails being lashed to the spar in a sort of circular loop stitch. However it does not show how the top two bolt rope loops are attached. My thinking is that the spar goes through the loop and the remainder of the sail/bolt rope is lashed. See attached photos: Plans depict the attachment as shown below. Note the bottom corner loop attaches to the end of the gaff of the lower sail. But nothing is shown for the two upper corner loops This is the other spar In most of the models I've built with pre-made sails with bolt ropes there has been some attachment point for the loops either to a lower level gaff/yard or some point (pulley block) on an adjacent mast. What is the correct way?


-
Looks good to me Piet. I agree with Remco about the shark's nose.
-
Ken, I'm finding a long soak time helps deepen the color. I will definitely be making a duplicate sail for the dyeing process and leave the kit supplied sails as a pristine backup. Right now I'm using small scrap pieces of the same cloth to get the dyeing process down. I'm experimenting with a different color combo other than the blue and red. From pictures I found of actual boats it seems they color the mizzen and foresail (one immediately aft of the jib) and not the mainsail.
- 203 replies
-
- 4
-
-
- artesania latina
- marie jeanne
- (and 1 more)
-
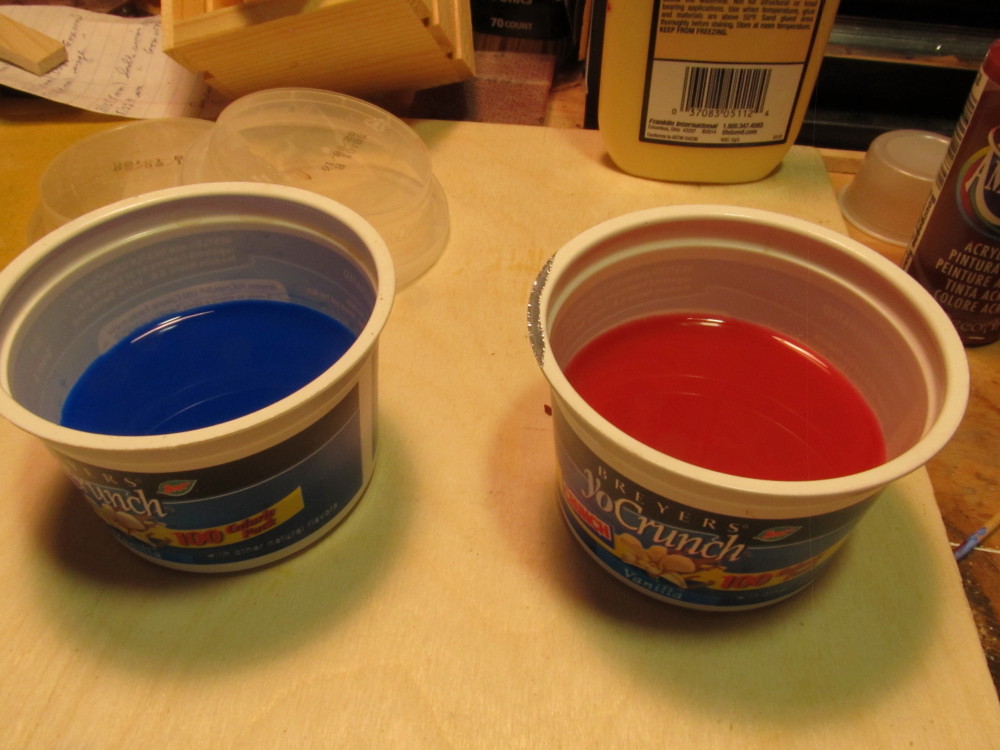
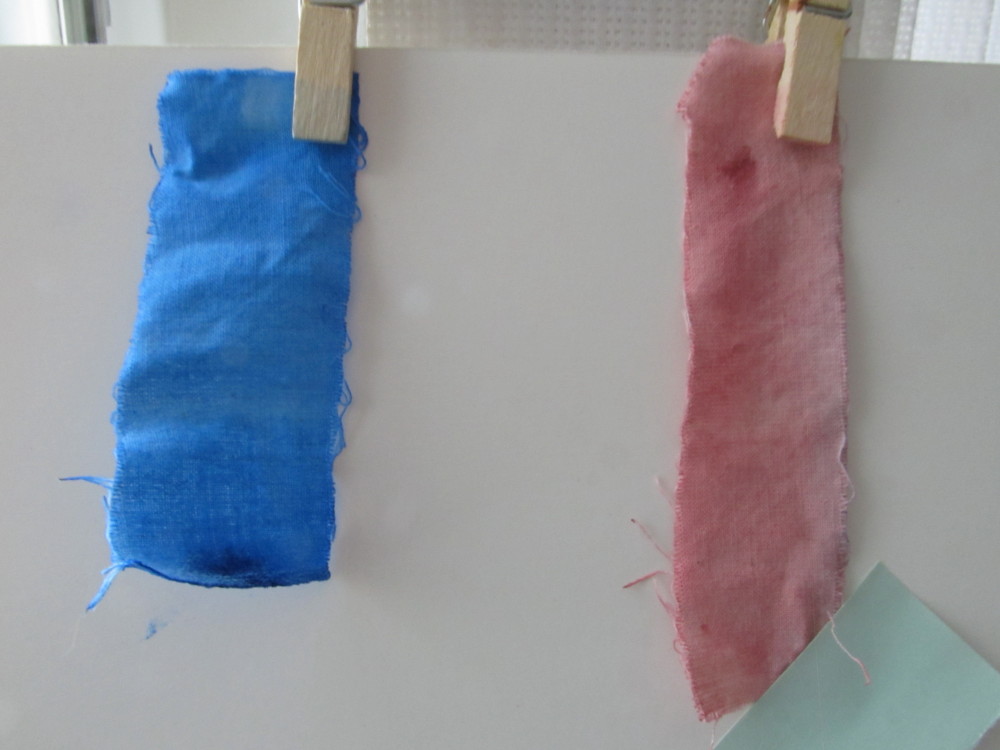
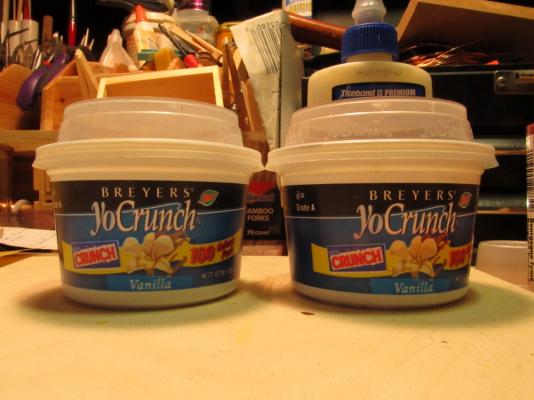
Small update: I found some sail cloth remnants left over from a build I did with a friend. There is a large enough single piece from which I can cut the mizzen spanker sail and one of the top sails, but I don't think the piece is large enough to get a mizzen and main sail from it. In addition to the large remnant I found some 1 inch and 2 inch wide scraps of sail which I had saved to use as hammocks or whatever. So with the cloth in hand I started experimenting with the dyeing process. Following my son's (the artist) suggestion I took some of those small cups you get with store bought yogurt filled them 3/4 full of water and took Michaels store brand acrylic paint, added about a dozen drops of each color to two separate cups, mixed it until I had a very dilute paint mixture. Then I placed a short strip of cloth into each cup and let it soak for probably 3 hours, removed it and let it dry. The blue is not too bad but the red came out way to light. For the red color I used a Red Burgandy but I'm not pleased with the results. More experimenting is required. Here's some photos of my setup and the results (I should add the photo of the cloth was taken next to a large window with sunlight as the light source).


- 203 replies
-
- 9
-
-
- artesania latina
- marie jeanne
- (and 1 more)
-
Mobbsie, Ofencer29350, my dilemma at the moment is there is only one set of very well crafted kit supplied sails for the model. There are, of course, templates in the plans from which one can make a set of sails. However, I am not that good a sailmaker and finding the right material for the sails may be an issue. So if I mess up the coloring of the kit sails I've just ruined a good build. Hence, my hesitations. However, the suggestion of colored sails does pique my modeling interest, so the door is not closed yet. I just have to figure out my alternatives in case I mess up.
- 203 replies
-
- 6
-
-
- artesania latina
- marie jeanne
- (and 1 more)
-
Thanks for the info Mobbsie. Very interesting !
- 203 replies
-
- 3
-
-
- artesania latina
- marie jeanne
- (and 1 more)
-
what is the significance of the colors red and blue ? Is one sail dyed one color and the other sail the second color ? (Last sail is called Mizzen Spanker)
- 203 replies
-
- 3
-
-
- artesania latina
- marie jeanne
- (and 1 more)
-
Ken, it works well on the ropes, blocks, lashings, etc. It's slow drying, stays flexible and the needle point applicator is really good. I only use it for the "ropes" to secure the knots, etc. nothing else. For metal to wood or metal to metal I use Medium CA, otherwise it is all PVA - Elmer's yellow carpenter glue.
- 203 replies
-
- 3
-
-
- artesania latina
- marie jeanne
- (and 1 more)
-
Ofencer29350, why red and blue? And which sails ? All or just some ?
- 203 replies
-
- 2
-
-
- artesania latina
- marie jeanne
- (and 1 more)
-
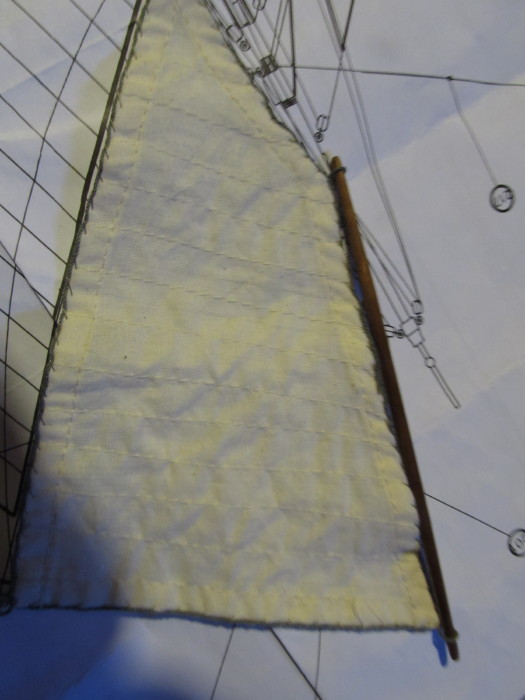
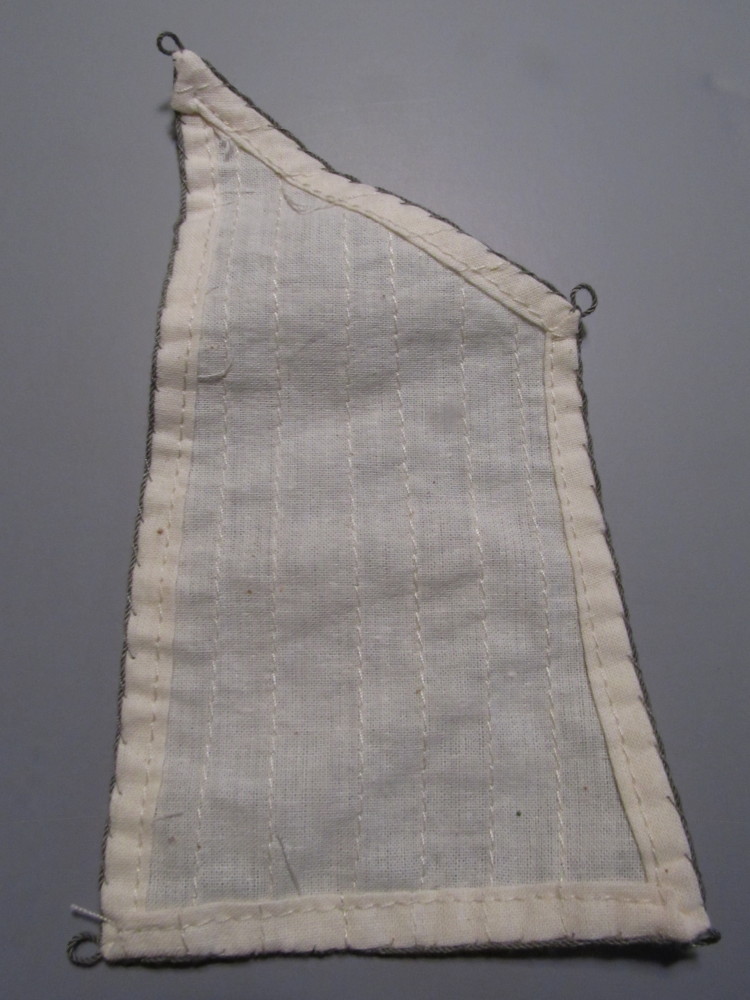
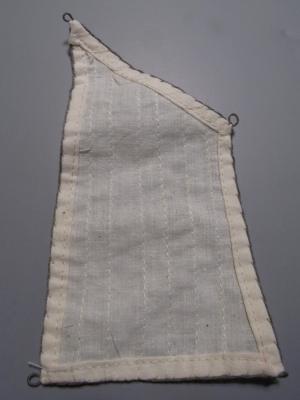
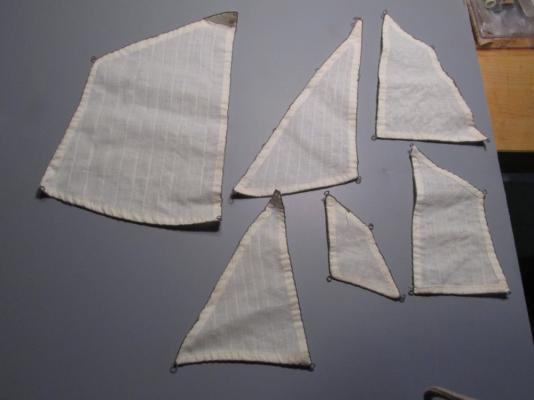
Thanks George. Small update Here's some pictures of the kit supplied sails - nicely sewn
- 203 replies
-
- 12
-
-
- artesania latina
- marie jeanne
- (and 1 more)
-
Bug, I too am glad to see you completing Augie's build.
- 2,191 replies
-
- 12
-
-
- confederacy
- Model Shipways
- (and 1 more)
-
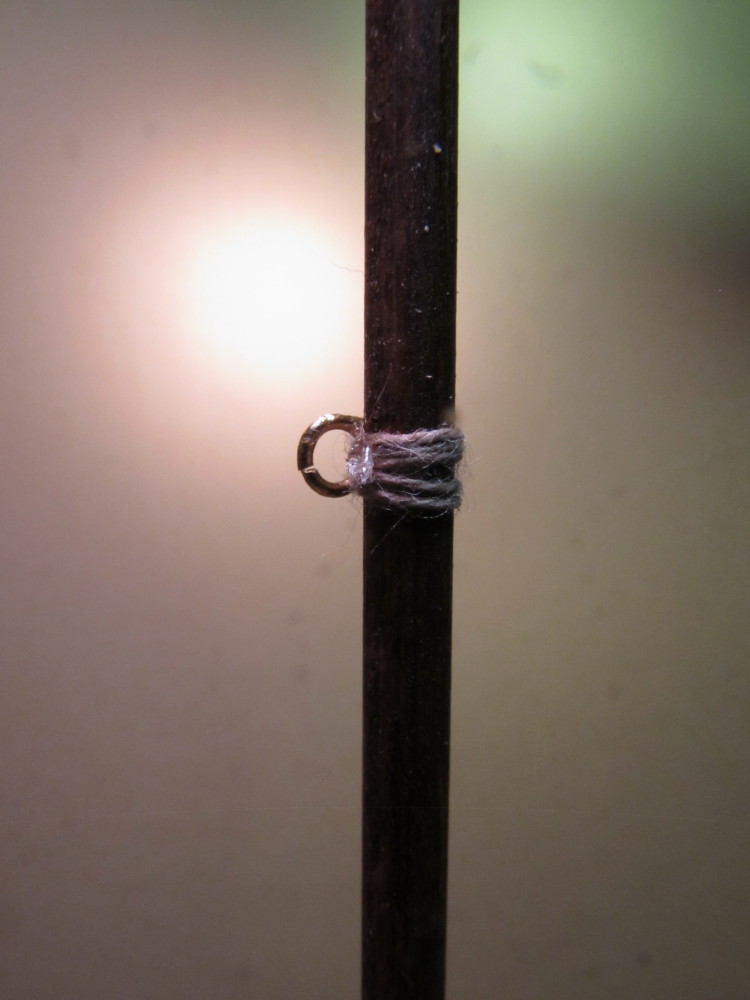
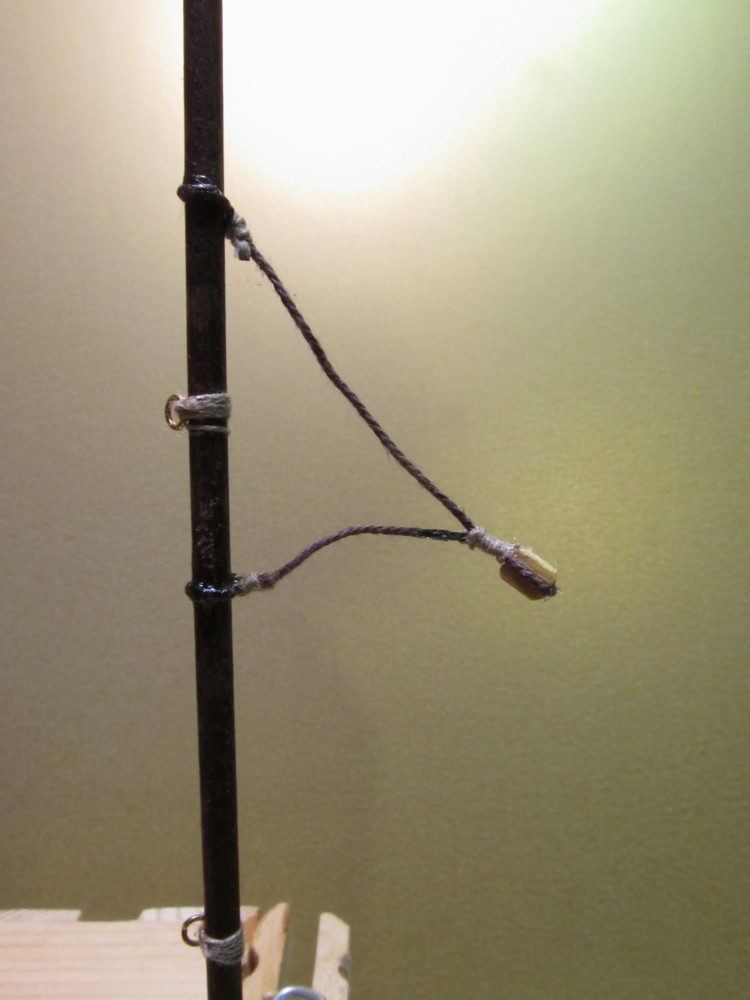
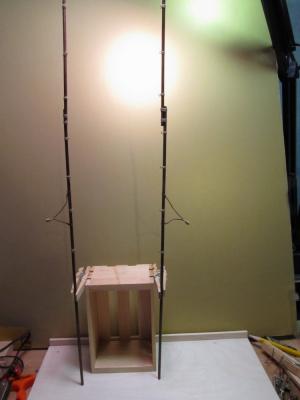
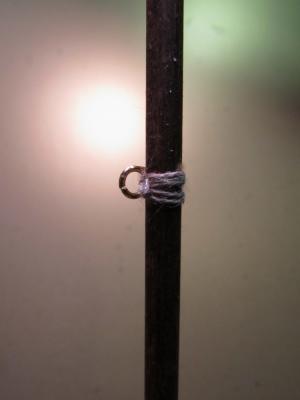
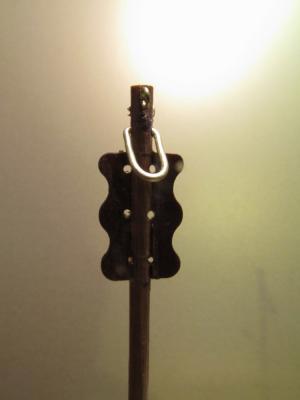
Thanks Frank for the compliment and all who clicked the LIKE button. Continuing on: Finally completed all the masts, spars, booms, fishing poles, and the like. For the first time ever, AL shorted me material (I think). Since there is no itemized parts list (like some kits have) only the balloons with numbers which reference a parts list by number which in turn only gives the finished dimensions, I couldn't detect it till I got near the end. The fishing poles are two parts and there are two of them. The parts lists calls out the longest piece as 335 mm in length, the actual plans measure 328 mm in length; however all I had left were 3 - pieces measuring 300 mm in length. In an offline (PM) discussion with George (GLAKIE) we decided to substitute 1/8 inch dowels and use English Chestnut to try to match the walnut kit supplied dowels. Found 4 ft lengths of 1/8 inch Poplar dowels in Lowes for 55 cents each - good ! Cut the 2 parts of each fishing pole to their respective lengths from the Poplar dowels and stained them as George suggested and it's a near perfect match. Thank you again, George for the suggestion. The fishing poles are equipped with 2 mm rings lashed with rope to the poles at intervals along the length. The plans called for 0.015 mm thread for the lashings. I decided the easiest way to lash them was to form a clove hitch thru the center of the rings such that the overlapping of the clove hitch occurred inside the ring; I followed this up by doing a half-hitch with one tail of the lashing above the ring and another half-hitch with the other tail belong the ring. Worked pretty good and locked the ring in place. Sealed the ends with a drop of G-S Hypo Cement. Completed spars, poles, etc Fishing Poles Remaining Spars and booms Next up is attaching them and the sails to the model.


- 203 replies
-
- 12
-
-
- artesania latina
- marie jeanne
- (and 1 more)
-
Mark, just catching up. The liquid glass in the windows came out nice. I like the effect, very old and wavy looking.