HOLIDAY DONATION DRIVE - SUPPORT MSW - DO YOUR PART TO KEEP THIS GREAT FORUM GOING! (89 donations so far out of 49,000 members - C'mon guys!)
×


hof00
-
Posts
1,647 -
Joined
-
Last visited
Content Type
Profiles
Forums
Gallery
Events
Everything posted by hof00
-
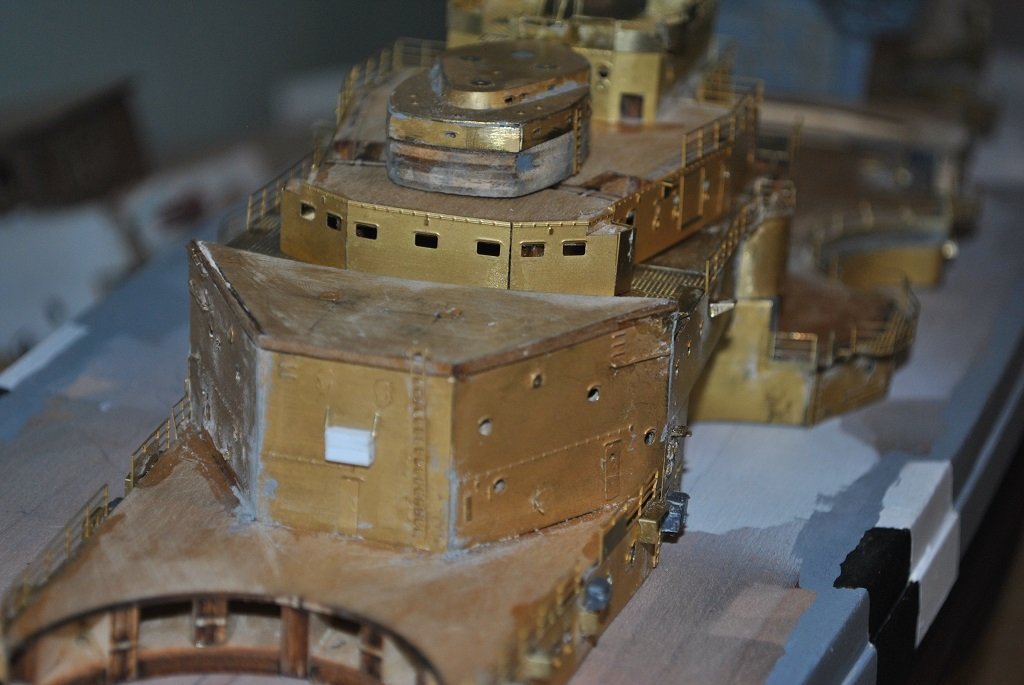
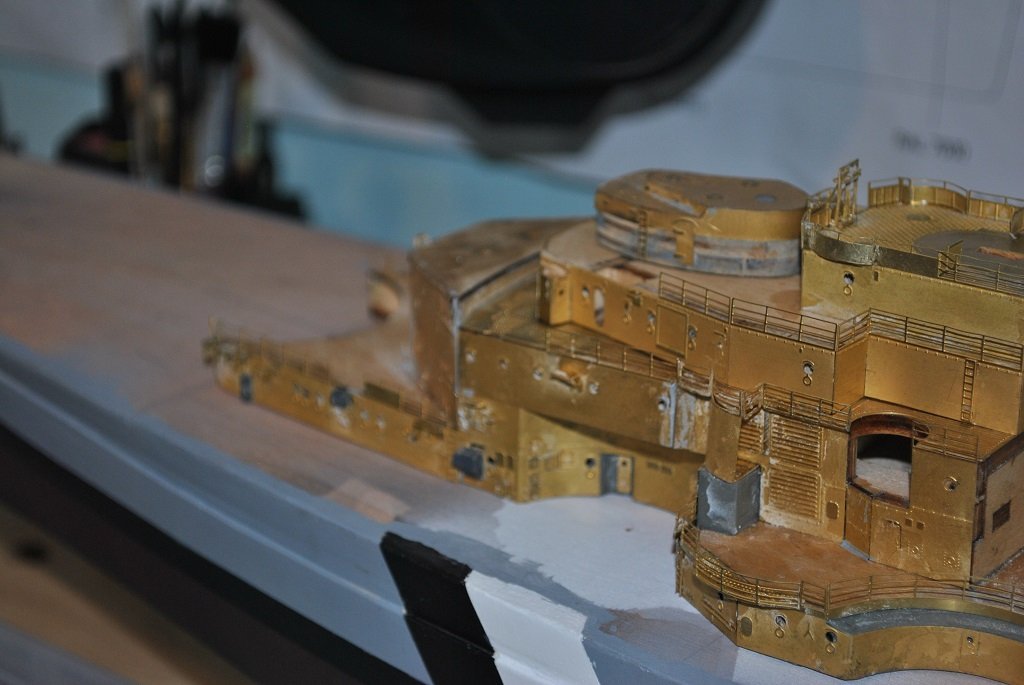
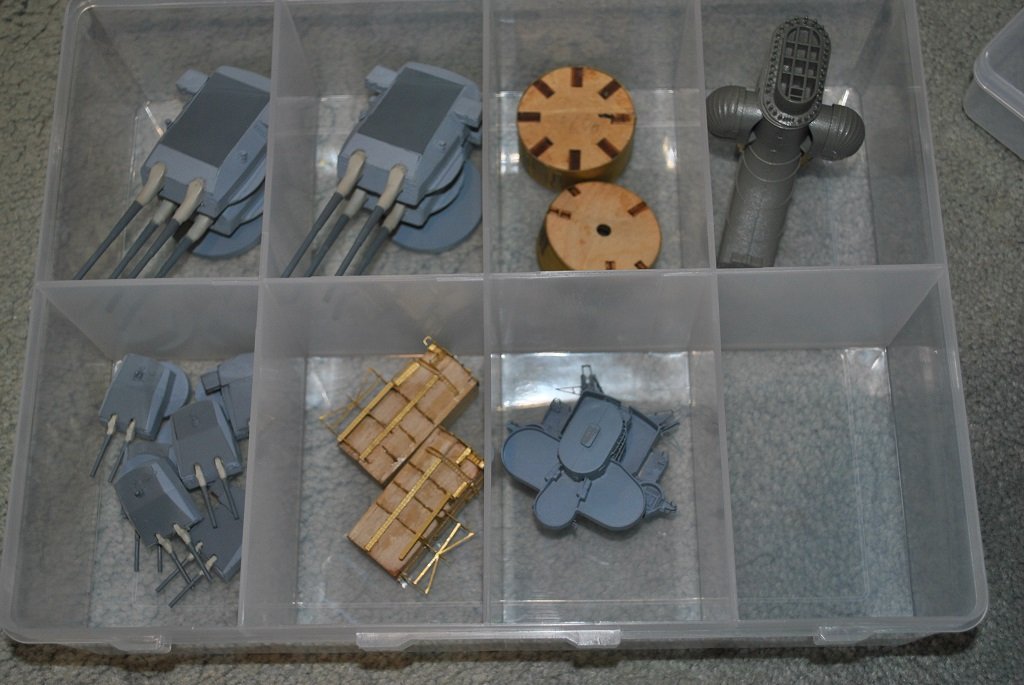
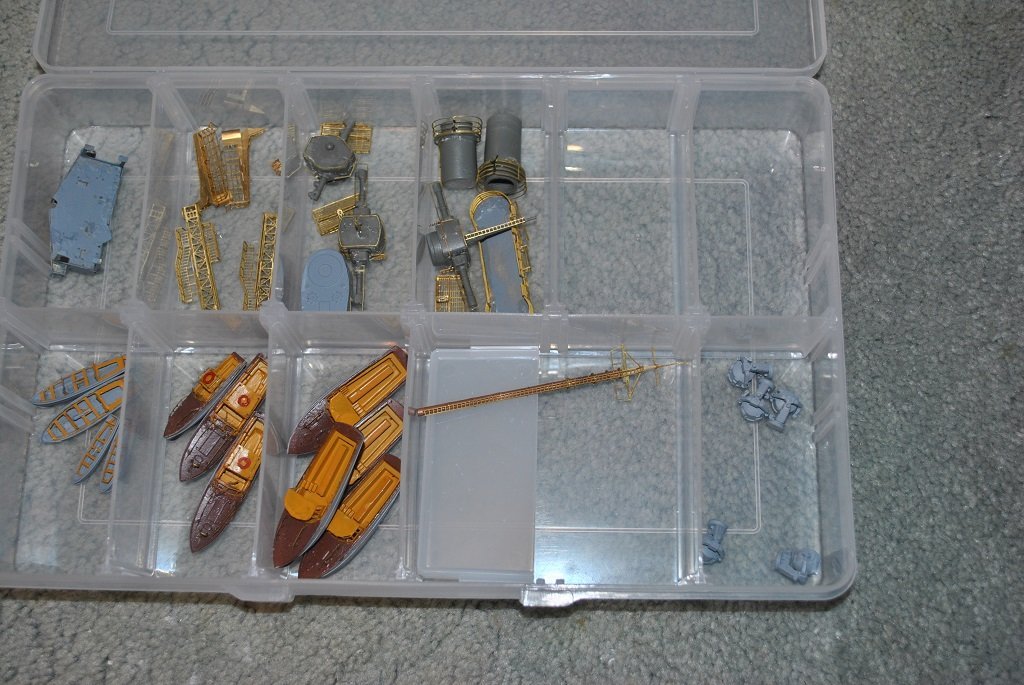
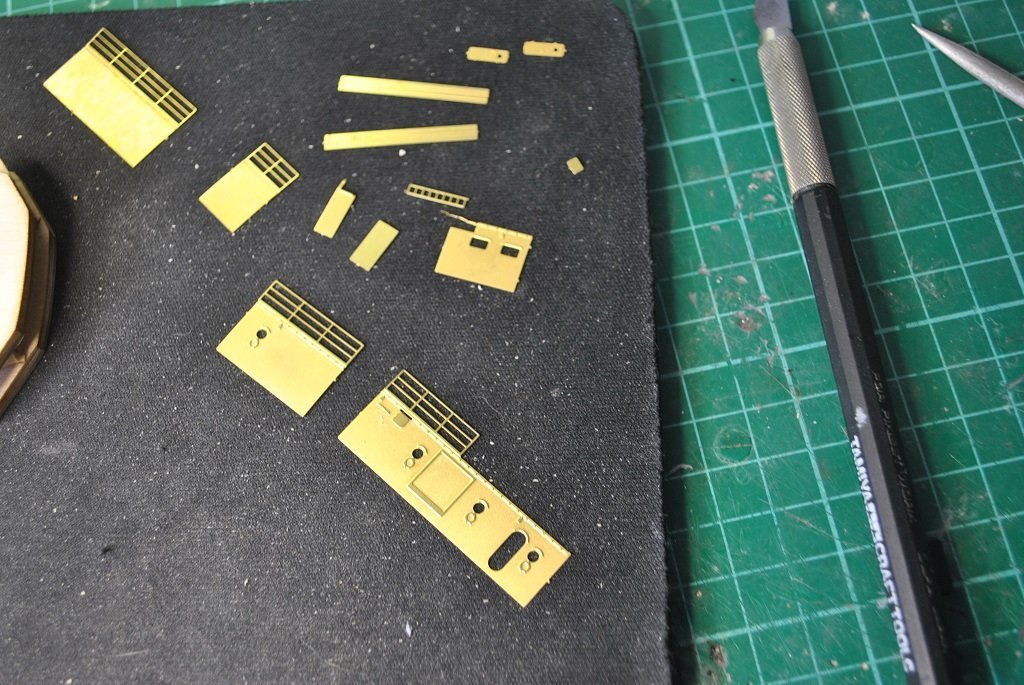
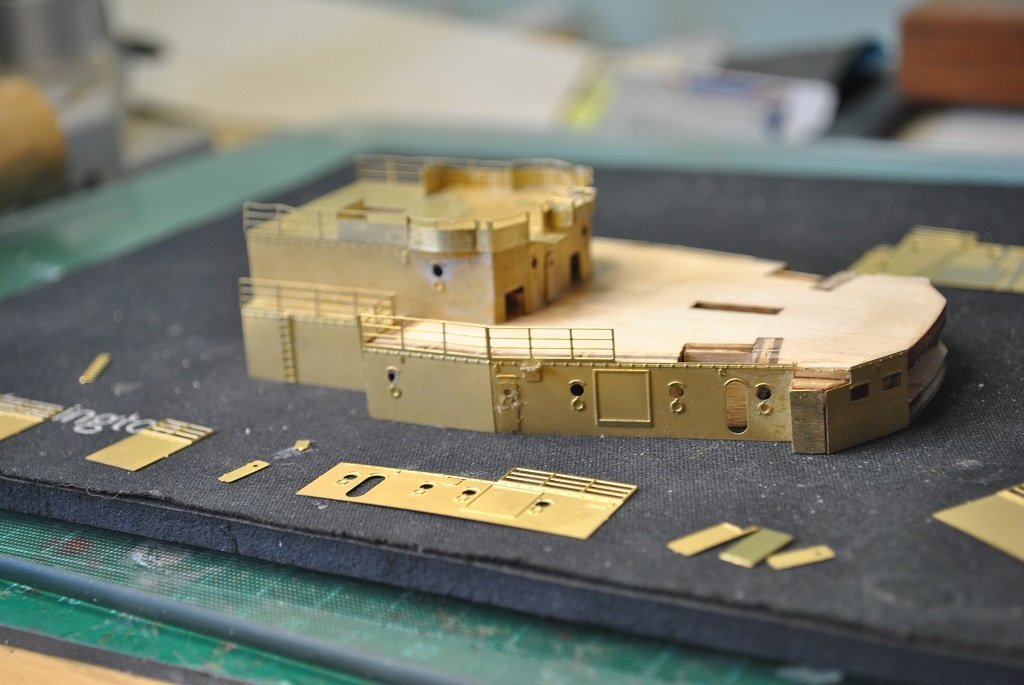
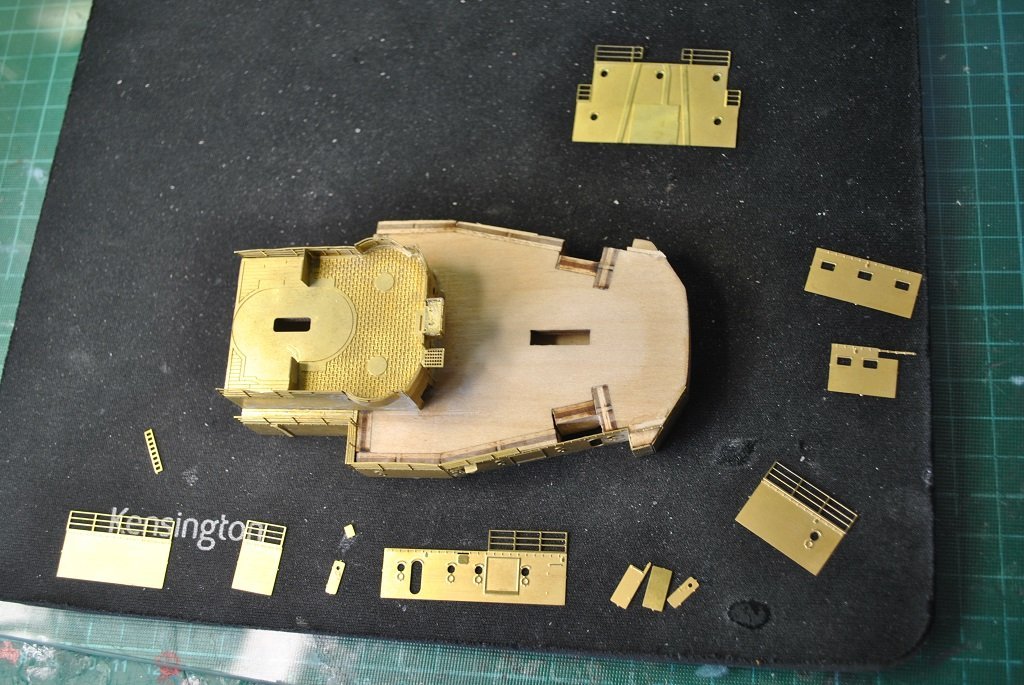
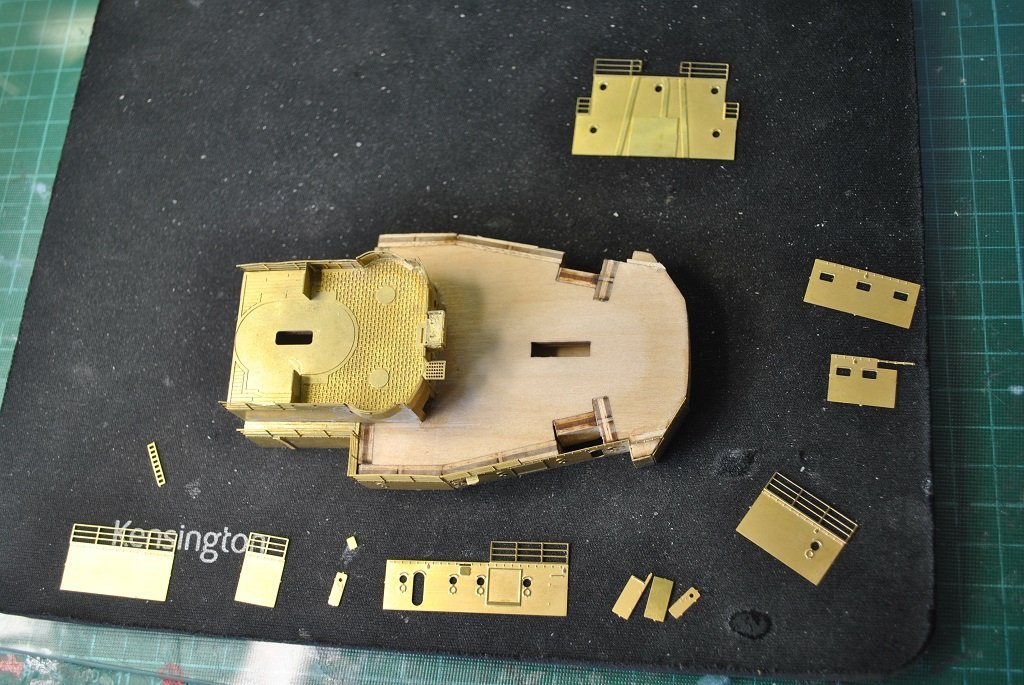
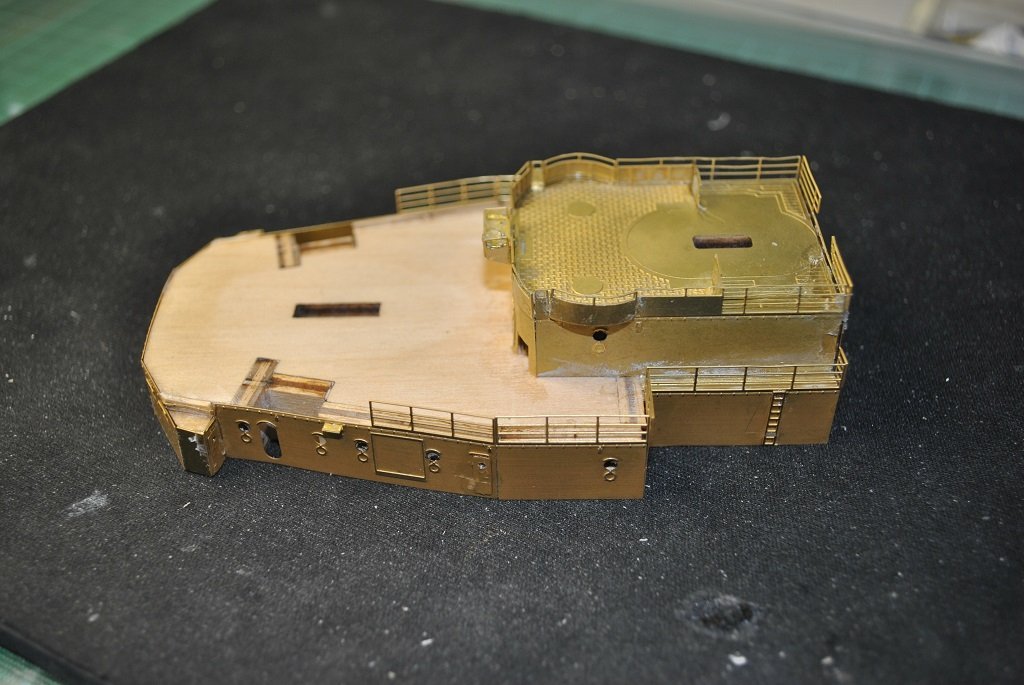
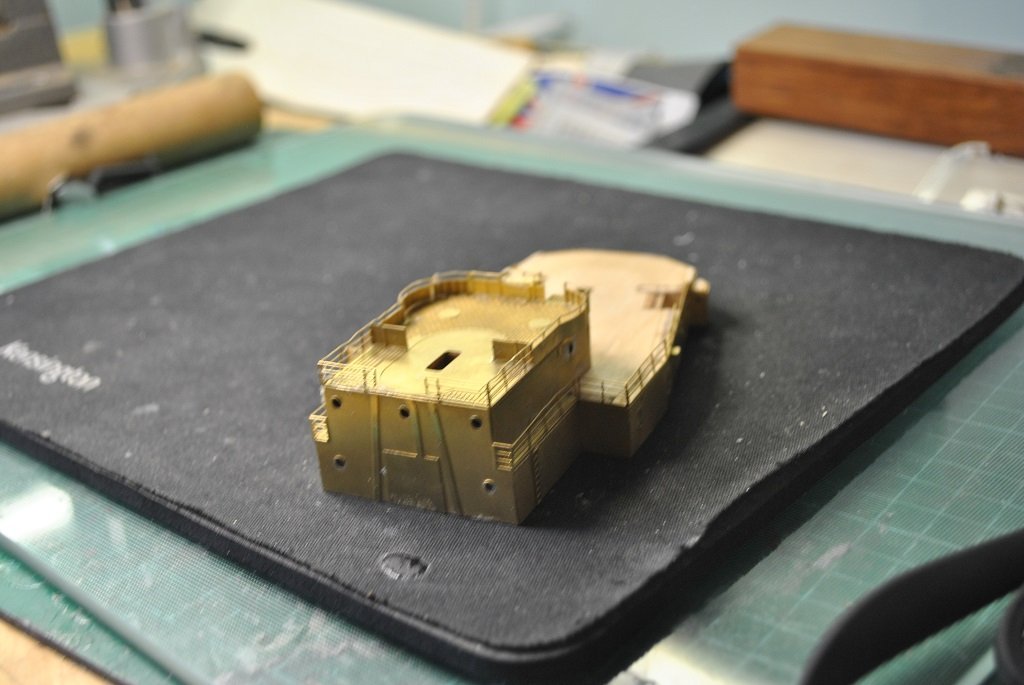
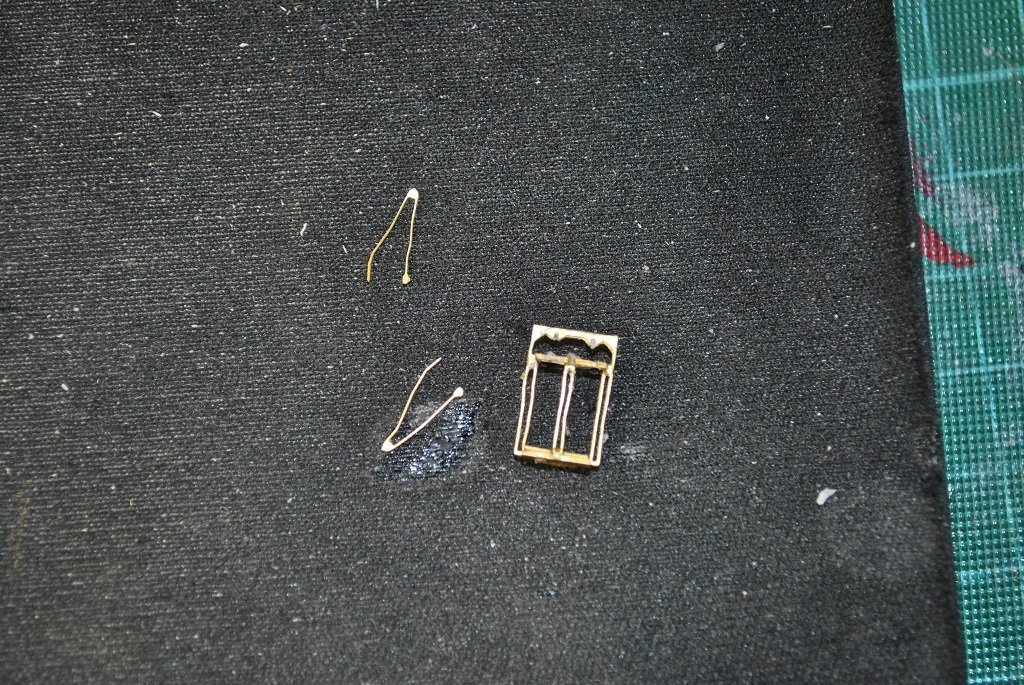
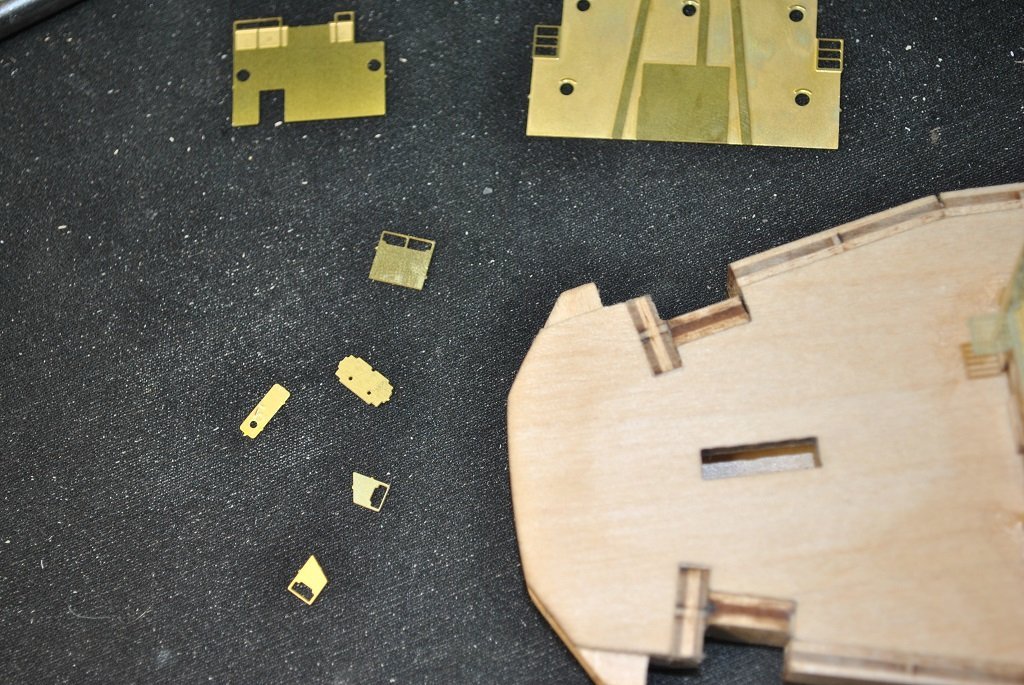
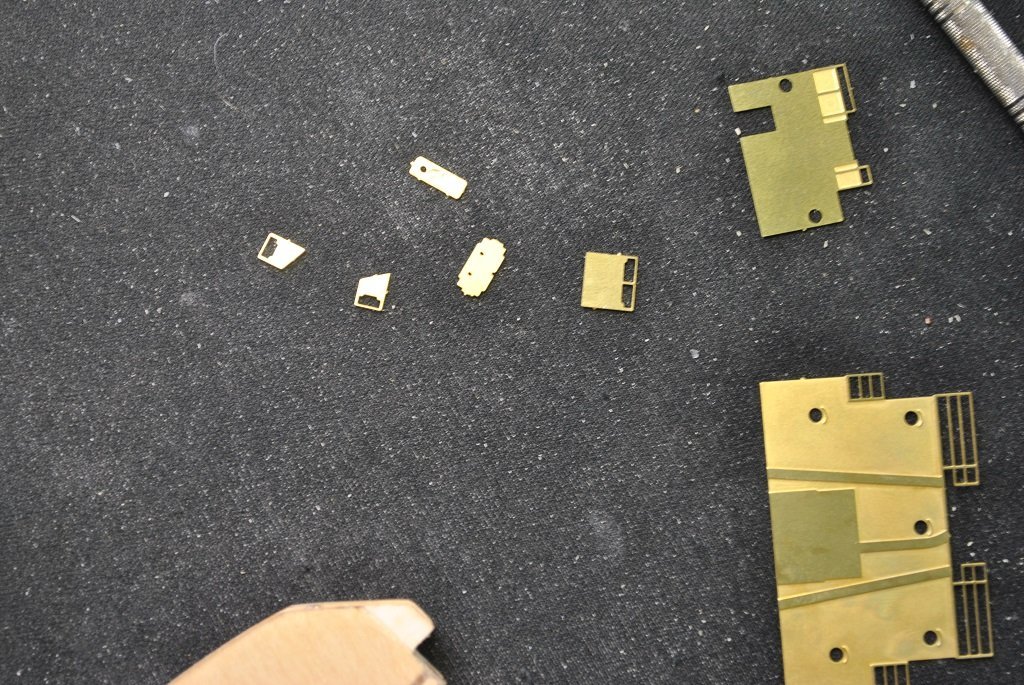
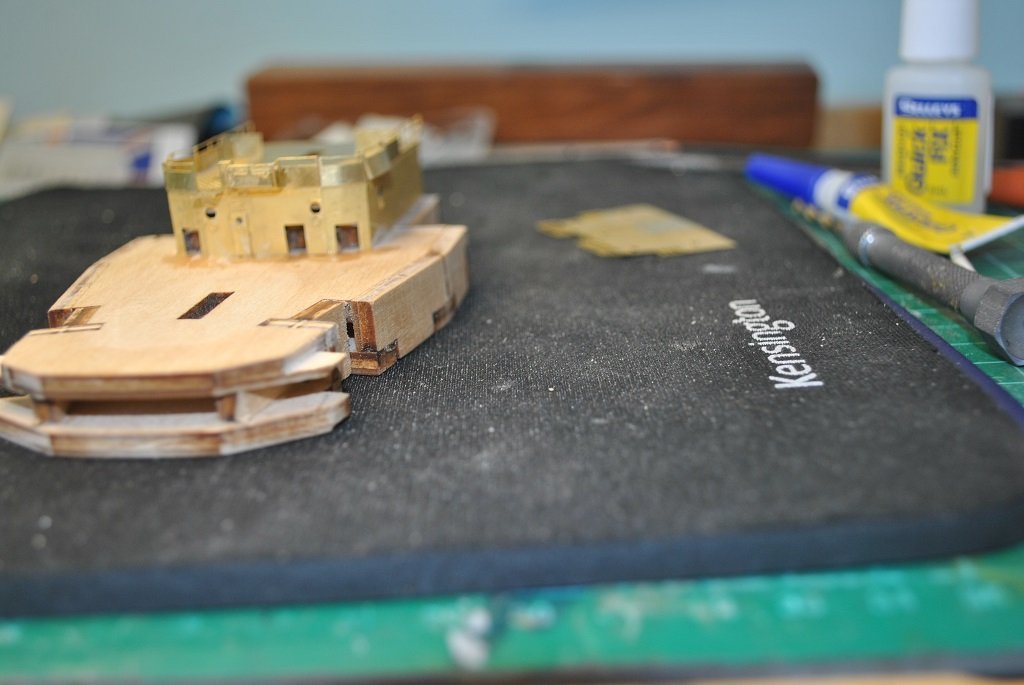
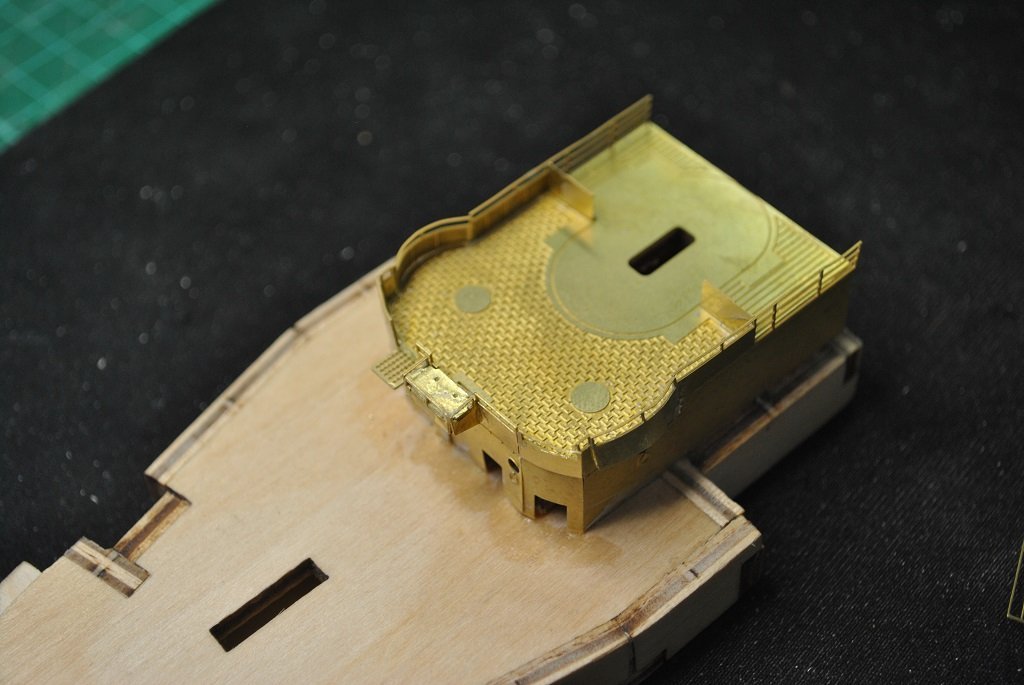
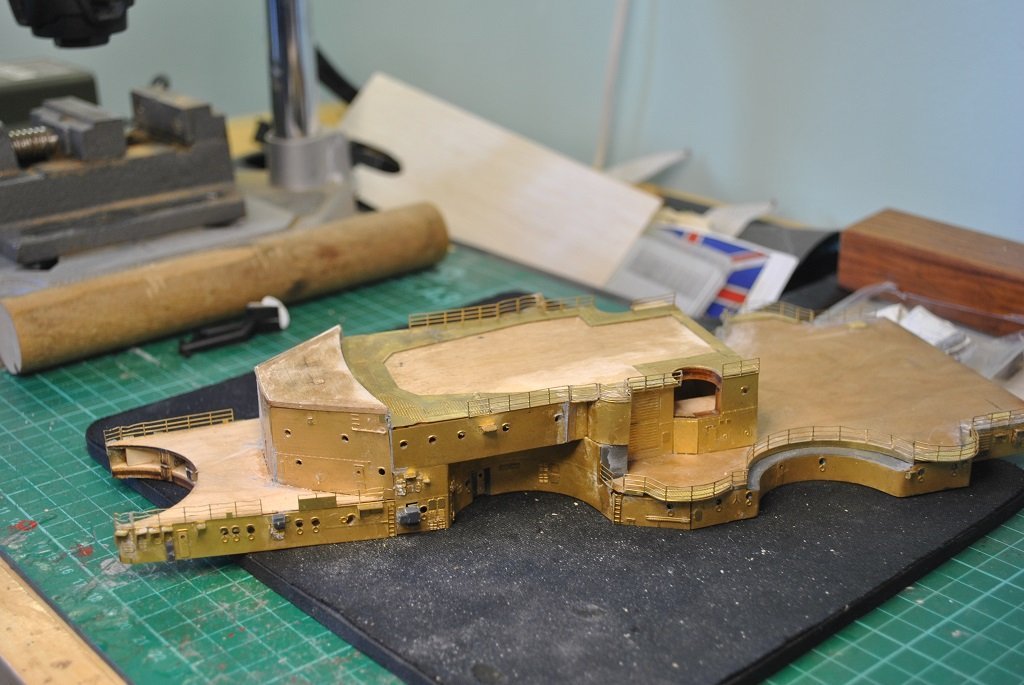
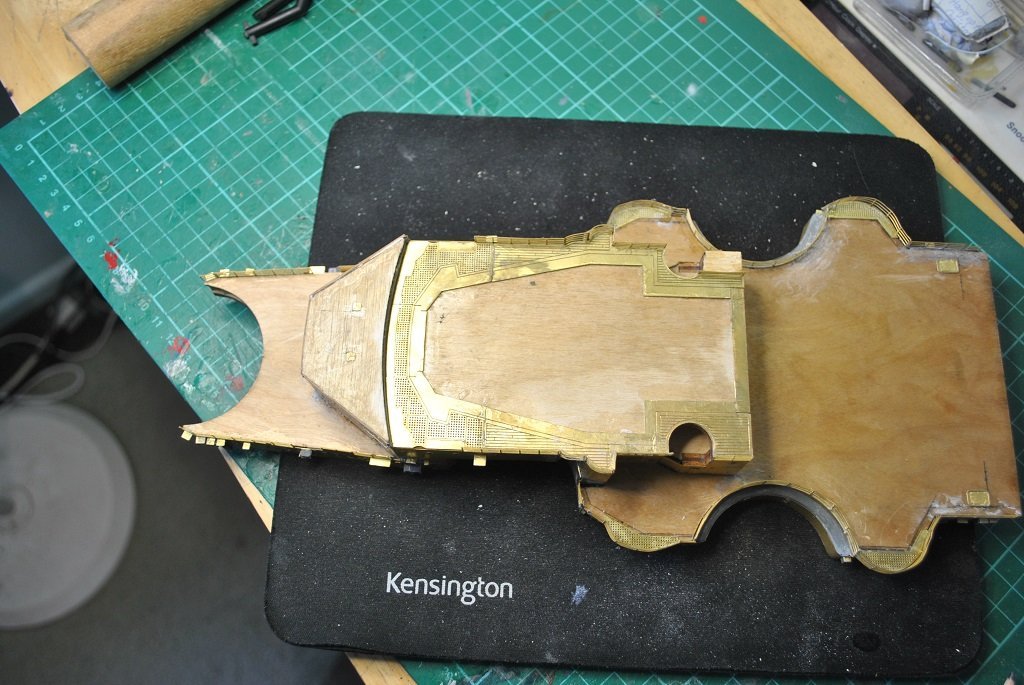
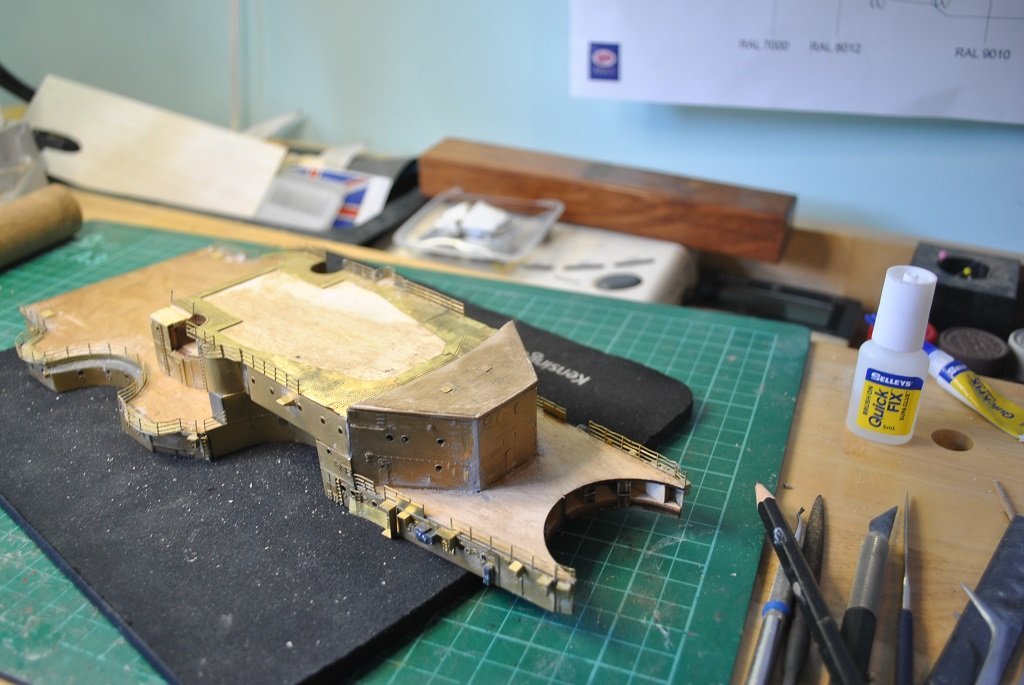
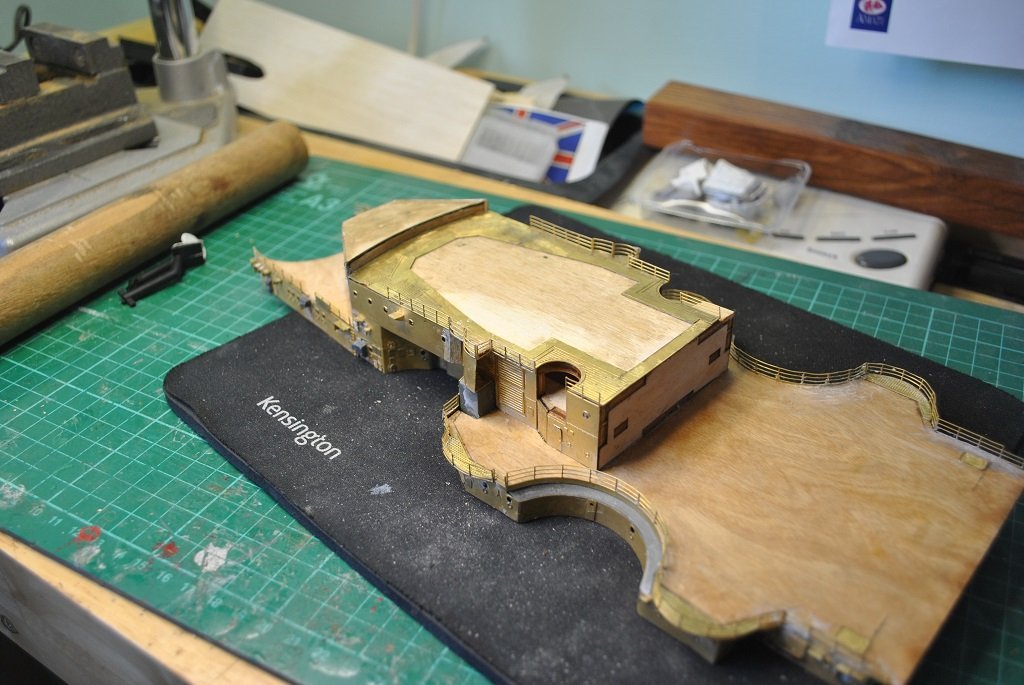
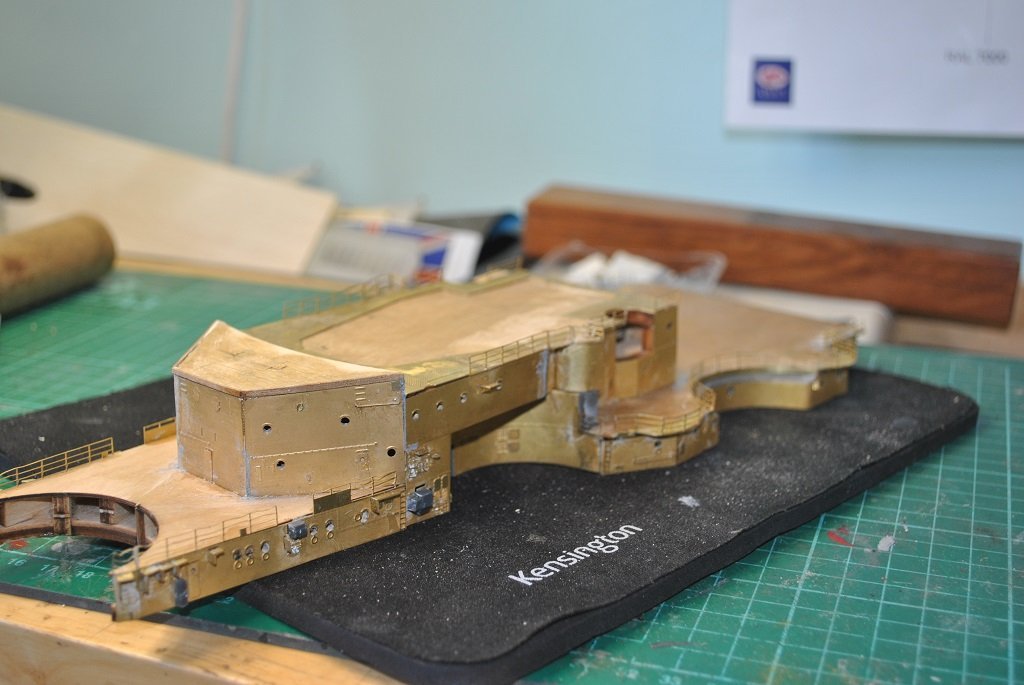
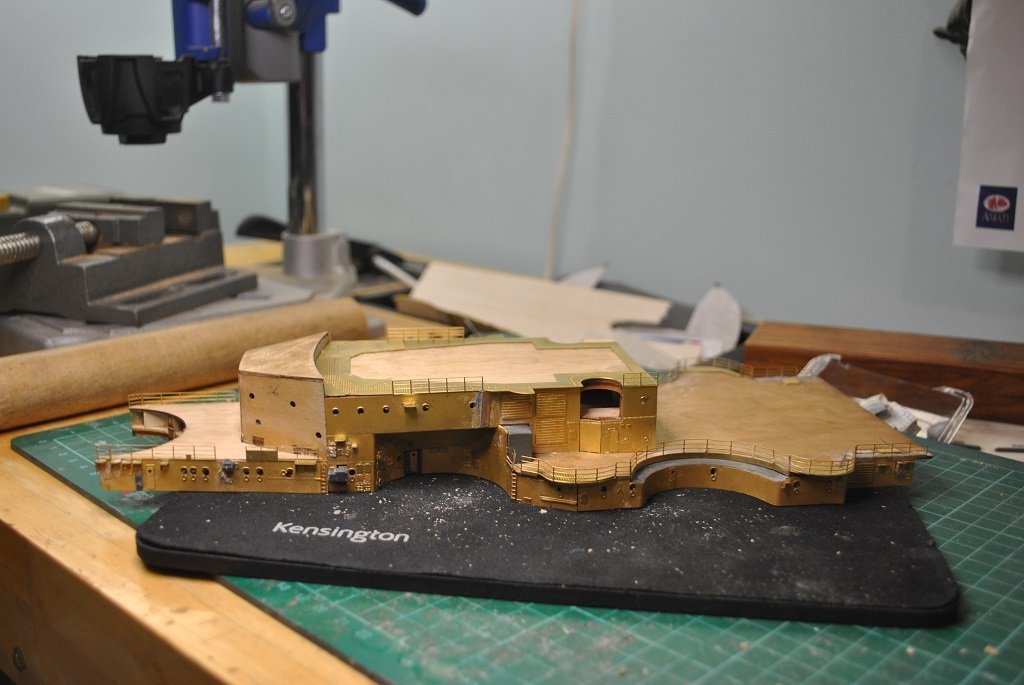
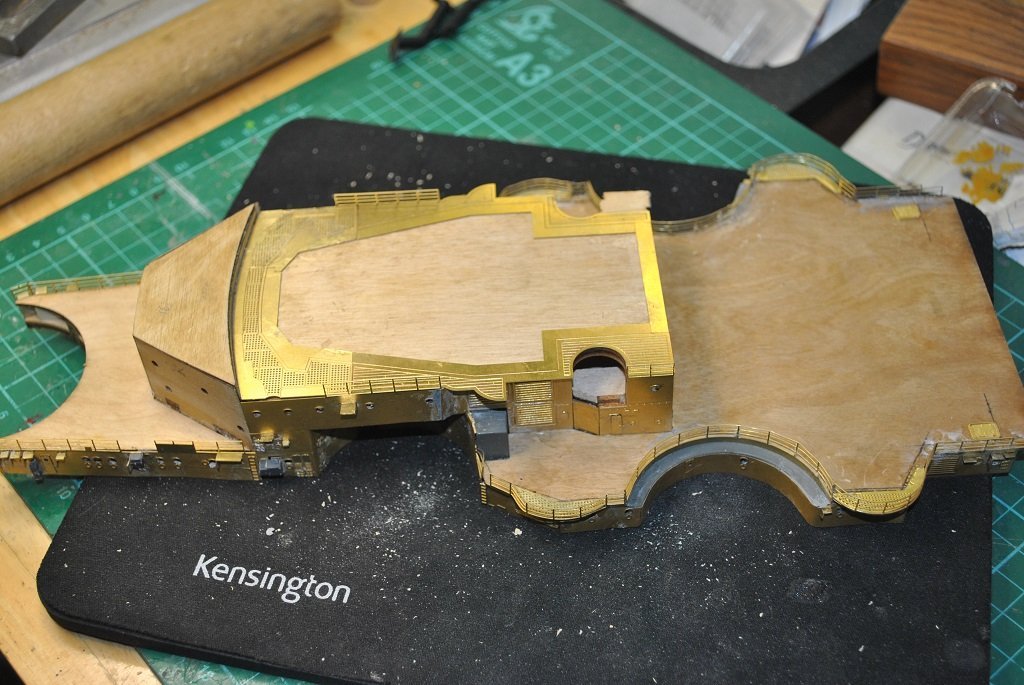
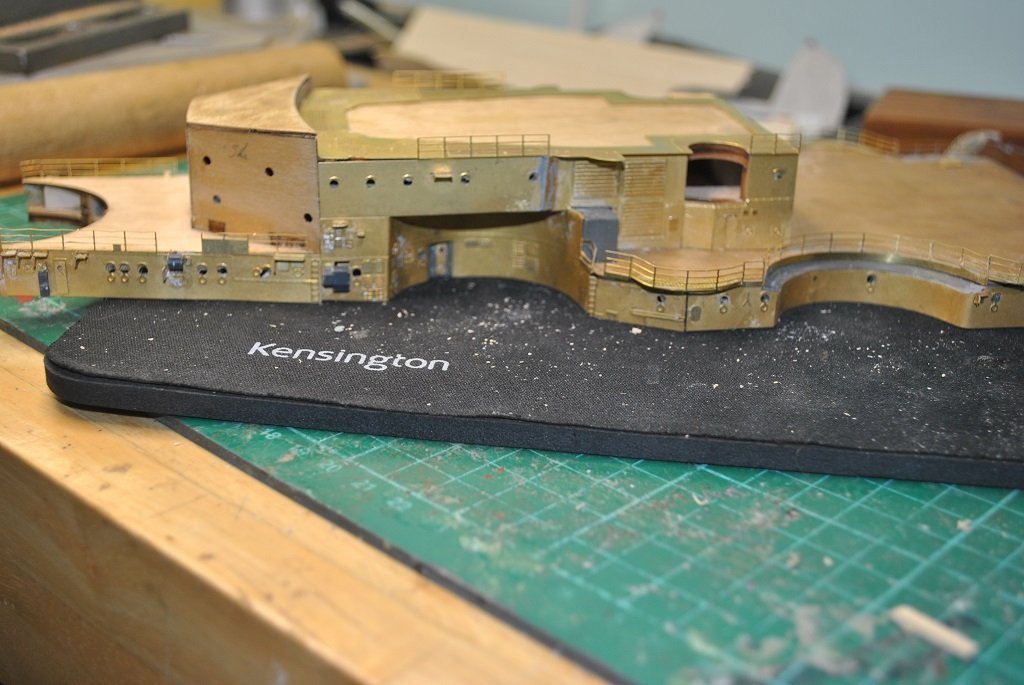
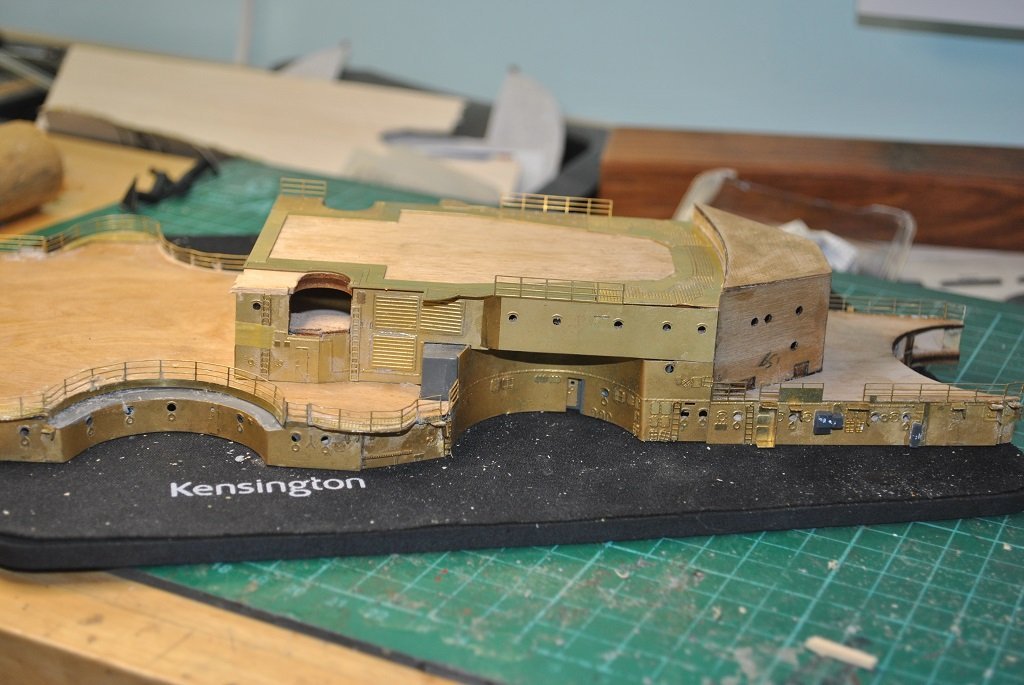
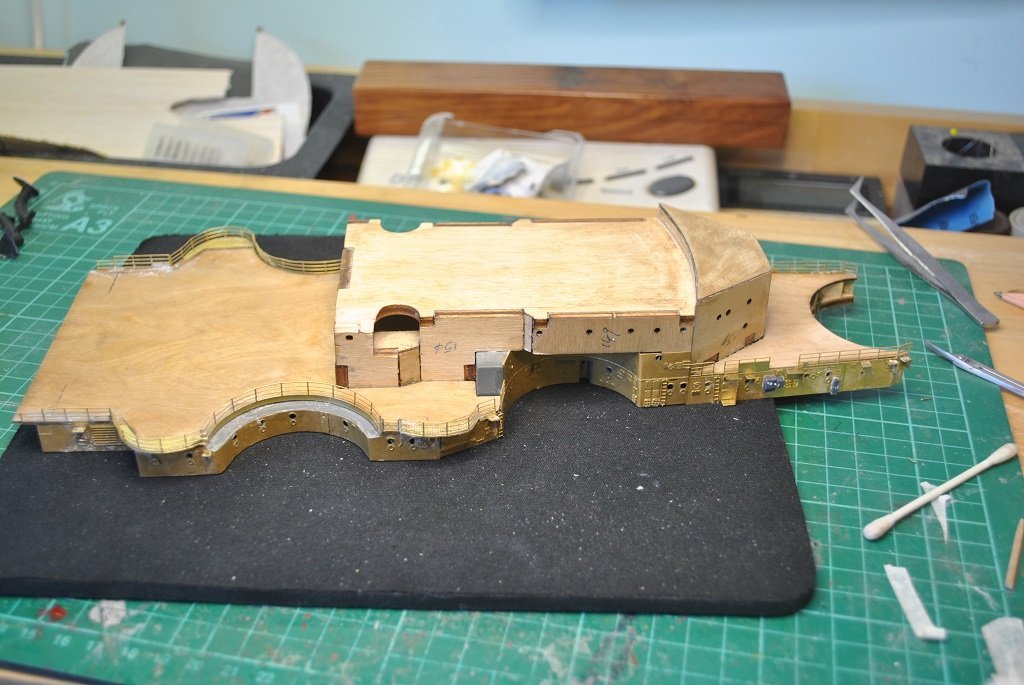
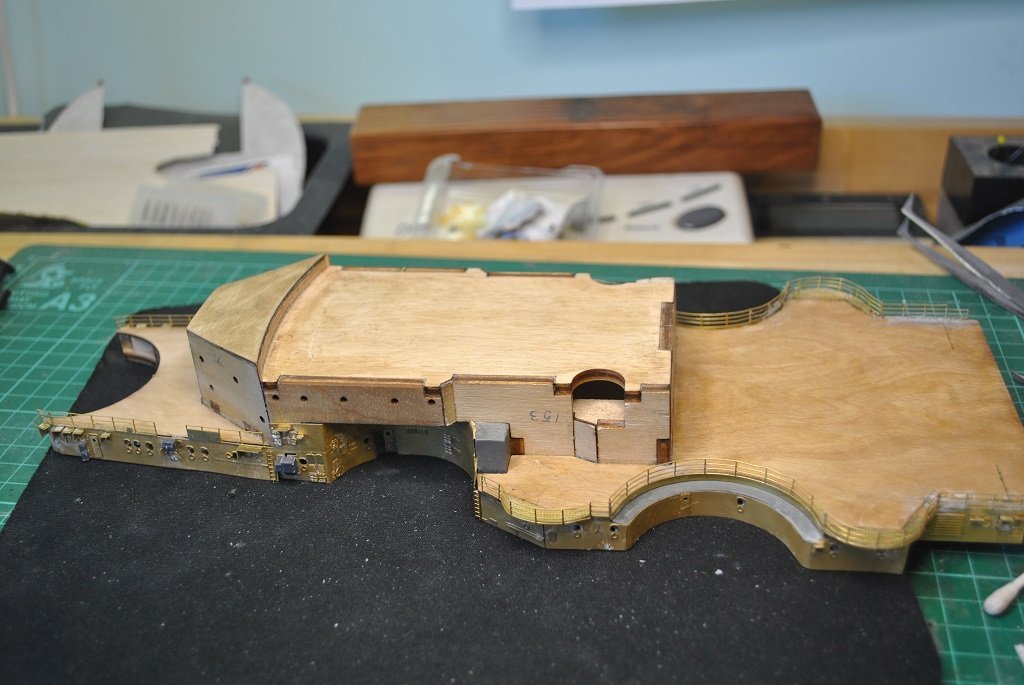
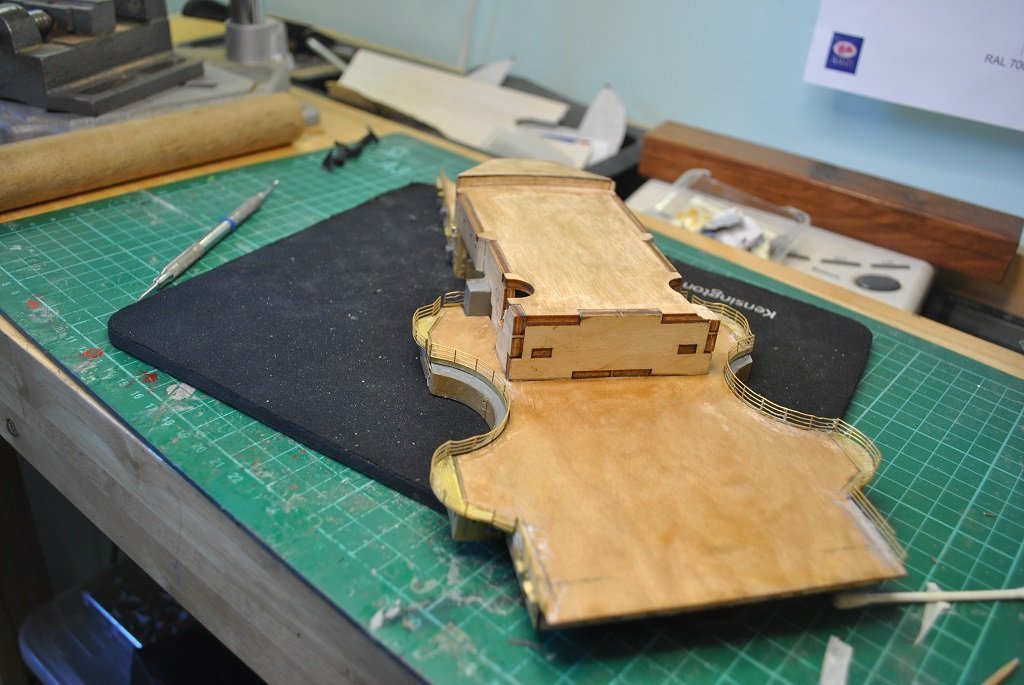
 Hi All, Small update: Fwd Superstructure tidy up/finishing, (Perhaps), day today.... Installed Ammunition Hoist forward most part of Tier 4. I decided against using the "Whisker thin PE bits and substituted 0.25mm Brass wire, much easier. 🙂 Tier 1 and 2 got the last bits installed on the very front of the Superstructure. (I lost the folded Brass box, Rod, (rvchima), provided the dimensions, (Thanks heaps Rod!!!), and made a replacement from Styrene. (The superstructure look a little "Scrappy" but I am confident once primed/painted, it'll look much better.) I think tomorrow I'll spray completed sub-assemblies with Acrylic Satin Polyurethane, something that needs to be done and it'll give my eyes a much needed rest.... 🙂 I have pretty much caught up with the "Issue" sequence. (Now up to "Issue" 121 out of 140, this really doesn't mean that I am close to completion.... I have had a look at the remaining "Issues" and there are many rather detailed and complex bits to install, inc. Decks, Painting, Etc, Etc. Included with the photos, I have included photos of my sub-assemblies, just in case anyone was wondering, "Where's the rest of it?" Cheers....HOF Photos:
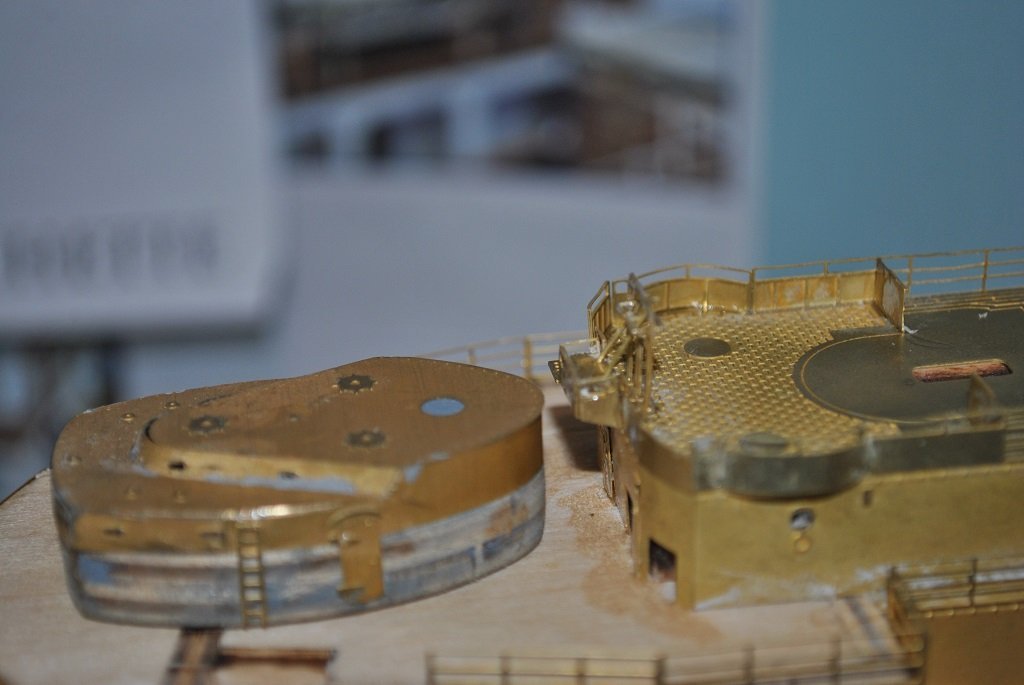
- 544 replies
-
- 10
-

-

-
Hi All, Update: Completed cladding, Tier 3 and 4. Not too many issues. Last photo is the Ammunition Hoist that gets mounted on the front of Tier 4. (The "Legs" need to be straightened.) I am thinking about replacing the "Whisker" thin PE bits. (Rod, (rvchima mentioned that this structure was "Difficult.") Cheers....HOF. Photos:

-
Thanks OC, Yup, Railings integral with the cladding is definitely an advantage.... I still need to watch where my fingers go.... 🙂 Cheers and Regards, Harry.
-
Hi Rod, I was actually wondered this morning when you'd build the Aircraft. (Are you intending a folded wing version also?) Interesting issues there and I'm happy that you have had a go before I get involved with these items. Your Catapults are substantially longer than my "Kit." I only get the end section with the two platforms.... Maybe it'll be o.k. 🙂 (I'll be referring to your photos for sure!!) Cheers....HOF.
-
Thanks Marc, Agreed, it is definitely a "Process" and I think that I'm getting a little better at working with PE. Like anything, when it's going together well, it's more enjoyable. I had a quick count of the "Part-work" issues left to go, around twenty or so out of 140. Am I close to completion? Too early to say.... 🙂 Cheers and Regards, Harry.
-
Sorry Chap.... High Intensity LED and simple Flasher circuit perhaps? Cheers....HOF.
-
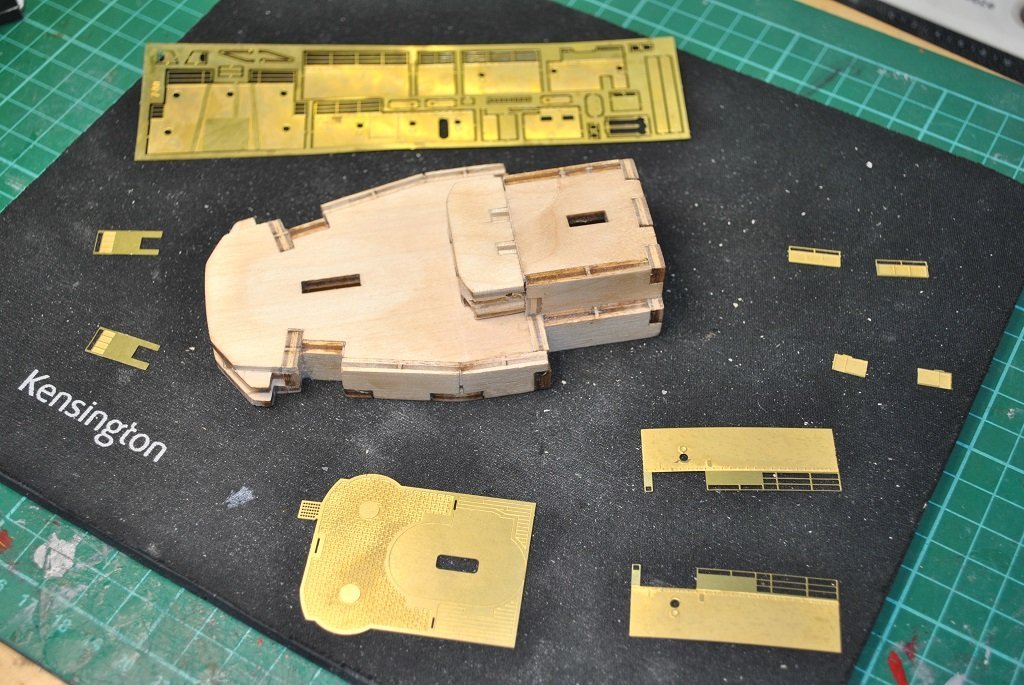
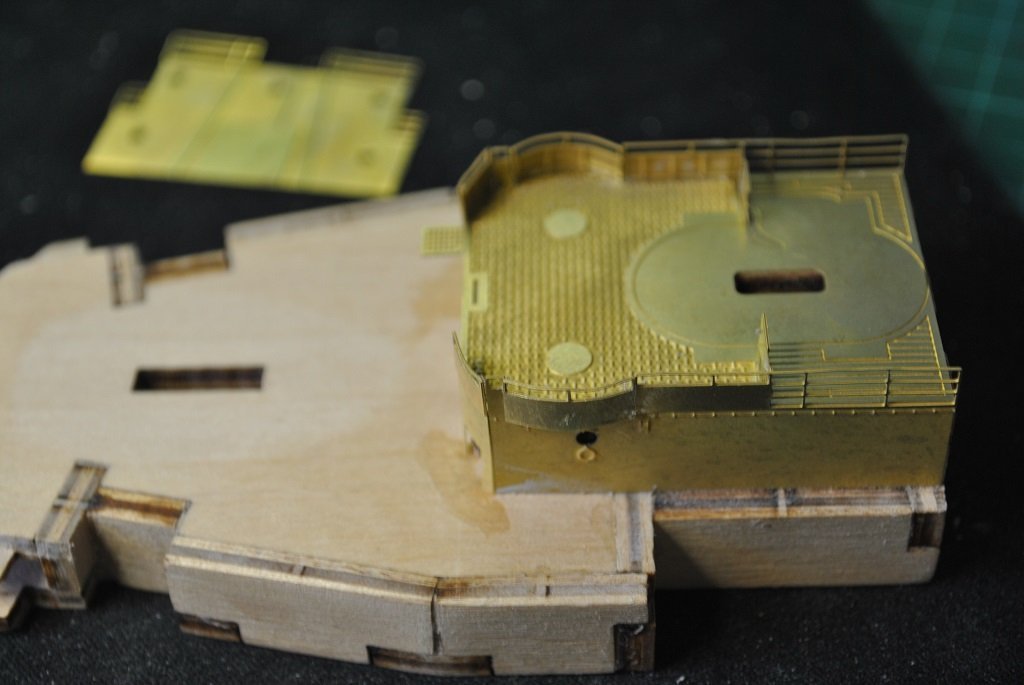
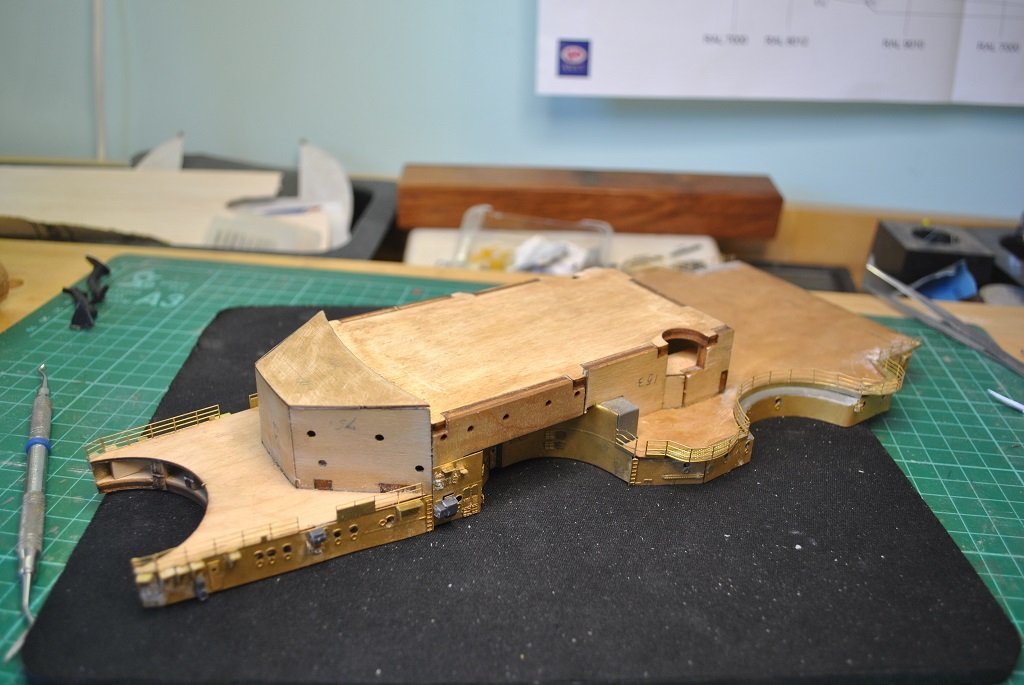
Hi All, Second update for today: I have begun working on the FWD Superstructure, Tier 3 and 4 and I decided to post photos of cladding in progress.... (Just ignore if they seem a little repetitive.... 🙂) It starts with Tier 4, I'm happy about this as it means that I won't inadvertently damage Tier 3. (Anyway, enough for today, Tomorrow, Tier 3.) Cheers....HOF. Photos:
-
Hi All, Update: Almost completed Tier 2 of the Fwd Superstructure, two Hand Rails, a Ladder and a folded Brass Box that I seem to have lost.... (I'll build a new Box....) The work was concerned with the very forward cladding. I began by placing PE detail components on the flat cladding, makes things so much easier. There were a few really tiny bits, Cleats. I did manage to install these but I ask myself was it really worth it? You can't see them. I guess I know they are there. Installing the cladding was a little problematic, there were a couple of gaps in the joining corners, these got filled and filed. A very thin strip of wood was installed at the very top of the Brass and levelled with the Roof. (I'll install the last components on this once I an happy with filling any gaps. Cheers.... HOF. Photos:
-
Nice!! Are you going to install a "Working" light? (Sorry, just had to ask the question.... 🙂) Cheers....HOF.
-
Hi Rod, Looking good!! The photos are excellent, thank you, and a great source of reference.... 🙂 Cheers and Regards, Harry.
-
Hi All, Small update: Still working on the Fwd Superstructure, Tier two. PE decking done for this level, it took me more than one attempt to get these pieces properly aligned and flush with each other, I used CA to attach with the "Capillary" action thing from both sides of each PE Deck piece. Attached Railings for this Tier two. These were a real mission, Starboard side anyway.... Port was easier. I wasn't happy with the Starboard Rails, I de-bonded about 1/3, got rid of the excess CA on the Brass Deck and re-installed, better but not perfect.... 🙂 (I'm pleased they are done, and, with limited damage to Tier one Railings, just a couple of Rails bent, easily straightened.) Tomorrow's task will be the forward-most cladding, Tier two. (I'll be attaching PE detail to the cladding before installing.) I'll get some photos done when this is completed. Cheers....HOF.
-
Thanks Rod, Last time I dry fitted the Deck, there was a gar of about 2.0mm on the Bow section, the rest were flush.... It's going to be interesting to get a 1.0mm gap on either side. of the Deck I'm not yet sure how I will approach this.... Thanks for the advice regarding the Stanchions right up against the Decking, it makes sense, not only from a drilling perspective but in placing these also. Cheers and Regards, Harry.
-
Hi Chap, Looking good from this side of the world!! No boredom at all!! Cheers....HOF.
- 201 replies
-
- 4
-
-
- SD 14
- Marcle Models
- (and 1 more)
-
Hi Marc, I'm pleased you have sorted your rigging issue. (You are not the only one to "Not be able to see the wood for the trees!!" 🙂 Your Bollards look great and much improved over the kit castings. Good to see your Lathe is getting some exercise. Cheers and Regards, Harry.
- 525 replies
-
- 1
-
-
- cutty sark
- mantua
- (and 2 more)
-
Hi Chap, Haven't seen you here for some time!! Yup,, sort6ing "Post" move takes a bit of Time.... Currently working on a 1/200 Bismarck, (On here), learning the "Dark" art of Multi-Media and PE. Hope you get things sorted soon....🙂 Cheers and Regards, . Harry.
- 118 replies
-
- 1
-
-
- sanson
- artesania latina
- (and 1 more)
-
Hi All, Small update: Still working on the Fwd Superstructure, Tier 1/2 Not much to say really, PE cladding continues.... 🙂 Cheers....HOF. Photos:
-
Hi Yves, Is the finished article "Static?" Just thinking it would make for a pretty awesome RC model. Cheers....HOF.
-
Hi Rod, Some really good work there!! The Bridge Wings look good.... I constructed my set some time ago, just the way the "Part-work" thingy goes.... Cheers.... HOF.
-
Hi All, Small update: Completed the 1st tier Railings, it took me a few hours, primarily as I was not happy with yesterdays work, Port side. So out with the De-Bonder and re-applied about 1/3 of this. Starboard took me significantly less time to achieve a satisfactory result. Just a few touch-ups required and a tad of filler around the redoubt PE and Deck. (Some Railings also need a "Tweak" here and there.) Prepared the PE cladding for tier 2, attached all the Ventilators, doors, Ladders, Etc. I should be able to install this cladding tomorrow. So, after six or seven hours today, it's time for a break.... 🙂 Cheers.... HOF. Photos:
-
Thanks Rod, I'll "Stick," (Pardon the pun), with the wax pencil for now. I got quite a few for $10.00 or so on-line. Yup, thanks, well over the COVID thing, like the worst ever head cold/ flu.... (I think I picked it up at a recent funeral, hardly anyone was "Masked Up.") Thank you for your kind comments. re: cladding. I'm still learning. (BTW, I look at your Bismarck and am in awe!! 🙂) I have a couple of questions for you.... What gar do you arrive at between Decking and edge of the Hull? 1.0mm or greater? Do the Stanchions butt up against the Decking? (Thinking ahead for the Stanchions.... ) Cheers and Regards, Harry.
-
Thank you for the advice, appreciated. I decided to work on the 1st level tier, AA Platfo9rms, Doors and Railings. I don't have the luxury of building off the superstructure as the pieces are attached directly to it. With todays efforts, I needed to turn the structure upside down to assist in placing/gluing bits, so, I think I made the correct call today. Port/Starboard AA Platforms and Port side Railings done, tomorrow, Starboard Railings. (I might even be able to attach more superstructure PE cladding.) Curving and installing the Railings is not my favorite task by a long shot.... 🙂) I'll gat some photos tomorrow also. Cheers and Regards, Harry.
-
Thank you Sir, The Boats are just "Placed" to ensure fit and no fouling... 🙂 I'm looking forward, (Sort of), to the remainder of the Fwd Superstructure cladding. (The Aft Superstructure cladding was mainly one tier's worth, so, a no brainer, the Fwd, is at least two tiers.: I am in two minds to complete the 1st tier Platforms/Railings or work my way upwards in the order of instructions. Which ever way I go, I need to be mindful of how fragile the Railings are. (As your good self would be only too aware. 🙂 ) I also need to be able to "Handle" the structure with a little bit of confidence. Anyway, trying to mitigate any potential risk. Feel free to offer any advice, that also extends to anyone who might be interested.... For now, I'll sleep on it. Cheers and Regards, Harry.
-
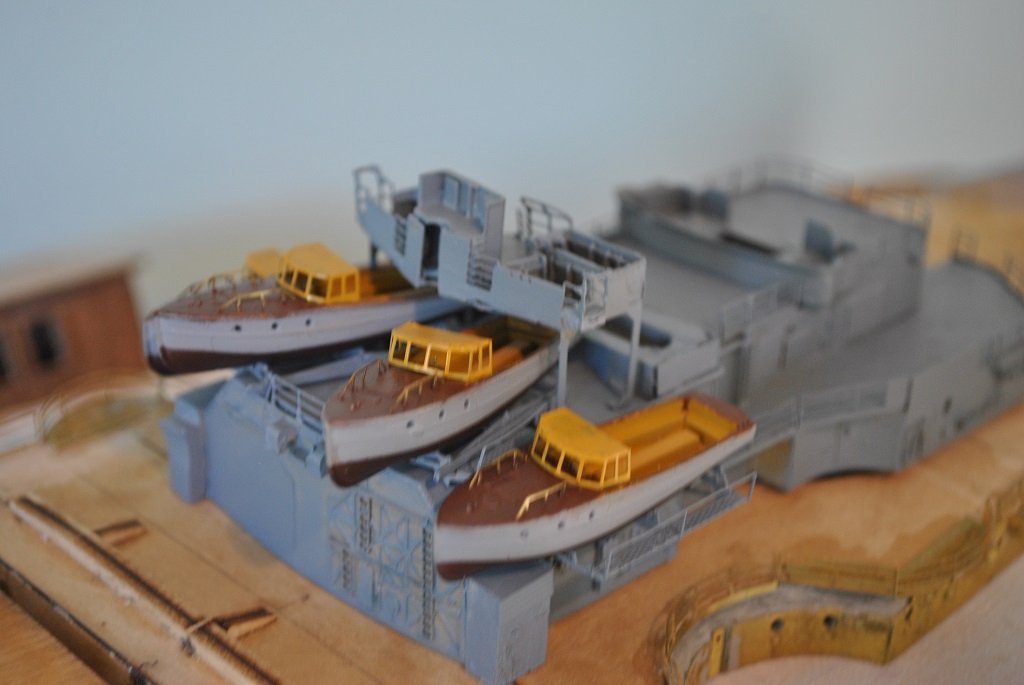
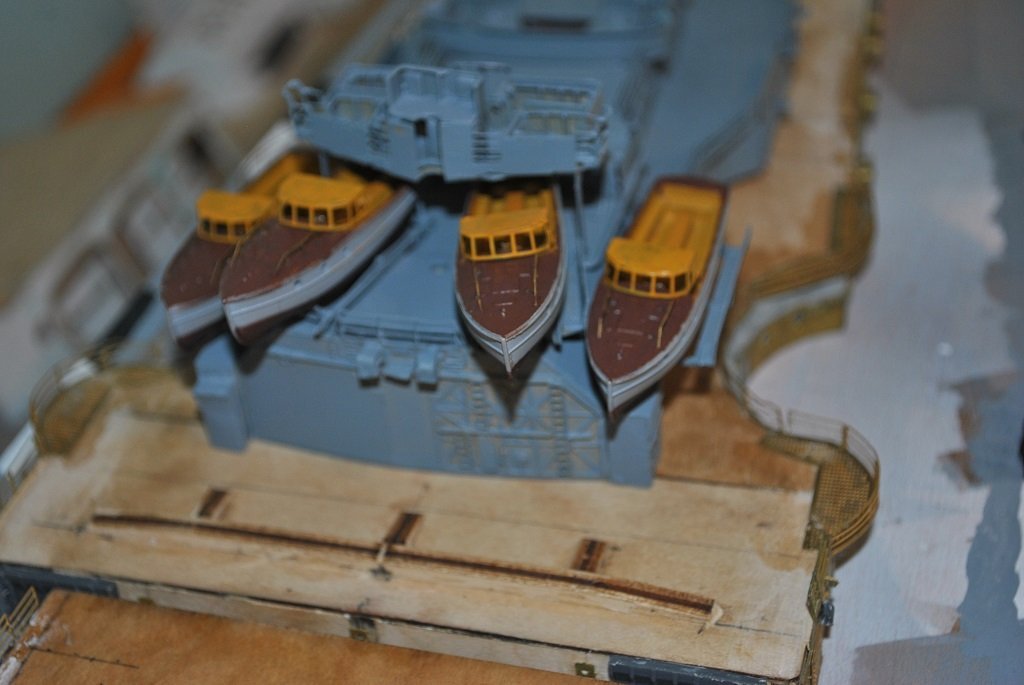
Hi All, Small update: Installed cladding for the remainder of the 1st tier, Fwd Superstructure (I should have taken a photo of that but once I get the next tier PE cladding installed I'll get some photos done.) So, I got sidetracked with "Issue 119" which concerns mainly the Main Hanger Boat Skids that I was part way through. (This was bugging me and needed completion.) I had already built the four Skids and just had to mount them. The two that hang off the sides, I initially installed about 2.0mm too far Aft and after checking the instructions and Rods' photo, (rvchima" Thanks Rod), I got out the "De-bonder" and re-installed in the correct place.... Skids on top of the Hanger were not too difficult. I Primed the structure and the Aft Signal station. Photos show the above with the Service Boats placed on thier Skids to ensure that I got things more or less correct. (I like the small bit of color against the grey of the model.) I'll carry on with the Fwd Superstructure tomorrow. Cheers.... HOF.