Justin P.
-
Posts
1,008 -
Joined
Content Type
Profiles
Forums
Gallery
Events
Everything posted by Justin P.
-

Trying to understand white balance
Justin P. replied to Gaetan Bordeleau's topic in Photographing your work. How to do this.
I do too. Quite frankly, if I had to use a regular camera, the process of transfer and all that would likely lead to far less content in my build logs. What helps motivate me to post, is the ease with which I can quickly shoot as Im working and move to my computer and already have the images waiting for me on the laptop. I don't have to do anything but quickly review them and choose which I will use. I use a mirrorless DSLR for Gallery images though, set my white balance to auto on my Fuji XT-2 using a 35mm lens, set up a cheapo DIY studio in the garage and shoot. The results are better than an Iphone as they convey depth a bit better. Not research worthy images at all, but nice to look at on an internet forum - which to me is the main goal. -
Welcome from Hood Canal.
-
Trying to understand white balance
Justin P. replied to Gaetan Bordeleau's topic in Photographing your work. How to do this.
I assure you "technical photography" is very real. Reams of literature on the subject and many, many practicing technicians in the world. However the term is used rather loosely when compared to things like "creative photography." One can be both a technical and creative photographer. In an effort to express themselves artistically, many photographers utilize highly technical skills and knowledge with their chosen equipment. With "technical photography" as I use the term, the goal is to capture and record information - as accurately as possible. Much like "forensic photography" described by Kurt, there are rules - lots of them. Much of the creativity employed in this arena surrounds sometimes very challenging scenarios. The technical photographer uses a sort of creative engineering to capture the images at the required standard even when studio conditions are not available. https://chsopensource.org/1-technical-photography-tp/ I also agree the much of what @Dr PR has said. Color rendition and perception is a fickle beast. In my particular field the main goal of "chasing our tails," is to have as accurate a record as possible of a given objects state of condition. It is not a perfect science to be sure - but every effort is made. The information we collect is only part of a larger set of data used to make decisions about what is happening in an objects life and what effects its environment and/or preservation are having over time. So even if the color of something is not perfectly captured, if the same exact parameters are employed a year later, we should have a reliable record that we can use for comparison. This is just one piece. We might have also employed a color-densitometer - which is a harder tool to fool than the human eye. I suppose the main difference here is that you are creating a record not a work of art. To return the original post - my only piece of advice, based on my personal understanding of photography of objects is to set your white balance in camera. The auto features usually do a pretty good job - but sometimes dont - and if you are having trouble, an alternative to expensive software is to just try setting the white balance yourself. For most cameras this process is straightforward, is well described in your manual, and all you really need is a white sheet of paper to do a better job than "auto." -
Trying to understand white balance
Justin P. replied to Gaetan Bordeleau's topic in Photographing your work. How to do this.
I totally agree. I wasn't suggesting a right way to do things. I was simply offering a different perspective - one where post-processing is taboo and color correction, in particular, is avoided at all costs. There are many standards that stipulate the rules on these things, many of them specific to the types of things you are photographing. Everything is stipulated ahead of time. My own ship modeling photography is not to this standard. While technical photography can be beautiful, it rarely allows you the freedom to highlight specific details over the whole in creative and beautiful ways. I have no opinion on what is best... -
Trying to understand white balance
Justin P. replied to Gaetan Bordeleau's topic in Photographing your work. How to do this.
This is the key point. Technical Photography is a very different beast. I preform technical photography at work on institutional collections. The main rule - no matter how you achieve it - is that colors must be recorded as accurately as possible, whether for facsimile production or documentation purposes. We mainly use white-balance in the camera, using tunable LED panels set at 5500K, shot tethered to a system with calibrated monitors. We also use color checker cards by X-Rite, and do minimal post-processing in Lightroom. The standards say that if done correctly, you really shouldn't be doing any "correction" after the fact. If all goes well and you've got a good color profile and a nice printer you should be able to reproduce those colors in print very accurately. -
You both are kind. Building something when you have plans is fairly straight forward I guess. Building something - like a case - simple a structure as it may be, is still a mystery with no plans to go by! The glass, determining how to set and mount the glass, etc. Im not saying that I cant/wont try - but I am saying that I have no idea where to start.
-
Oliver, your updates are quickly becoming my favorites! The photos, workmanship and precision are wonderful. Cant wait for more.
-
Hey thanks man! Im following your Triton build pretty closely, referring back often. A owe you a great deal of thanks for an excellent build log with many salient tips! I have to say the display case you made is likely well outside of my ability but something I hope to learn how to do one day as well.
-
My step-dad (pediatric surgeon, ret.) used to practice on grapes. Of course now they do this with robots! New modeling tool anyone?
-
Harold Hahn method
Justin P. replied to Essayons's topic in Building, Framing, Planking and plating a ships hull and deck
For anybody who (like me) immediately went looking for it: -
I have both. The MF70 is a fun tool and does small milling task well. However for Triton I used my drill press and the DIY spindle options FAR more than the mill. I think the mill came in handy on one task which is easily replicated with a good home made scraper. If I were to invest in one or the other ahead of redoing the build I would go with the drill press. If you are interested I can send a full list of stuff I got for the drill press. If you have the Byrnes saw, you likely don’t need a mill after some practice for that keel. I should add that the MF70 won’t have the lateral horse power to do any kind of decent spindle sanding. You will really want something beefier if you want go the sanding route. The MF70 relies on high speed and sharp milling bits, it’s not really a workhorse. The press will go for hours and not complain at all.
-
Harold Hahn method
Justin P. replied to Essayons's topic in Building, Framing, Planking and plating a ships hull and deck
Completely agree. I find the constantly variable definitions a little confusing. I’d like in the future if I could accurately describe a model I see or made as one or the other such style…. Yet find becoming knowledgeable in this area a little mysterious. -
That looks wonderful Matt, I would be very pleased with that result.
-
Harold Hahn method
Justin P. replied to Essayons's topic in Building, Framing, Planking and plating a ships hull and deck
I see. Well I cant say that Ive been drawn to these sorts of design choices (seen or unseen). On a POF model though, I had assumed that the lower decks should be framed out properly. Or is this the level of unnecessary detail we are talking about? I would think where a modeler may choose to plank above the waterline, half the upper deck and the majority of the details appropriate for the scale on the upper deck (I dont know what style this is) - that they would at least fully-frame the lower decks. No? -
Harold Hahn method
Justin P. replied to Essayons's topic in Building, Framing, Planking and plating a ships hull and deck
Im having a hard time following this conversation. What current fad? -
Im in! Id love to follow along. Sound like you went through or are going through a lot of the same thoughts that I did. I settled the other-way around and went with Triton first - but am looking forward to how you get on with the Echo. Funny how we all interpret things differently... I actually though (having no previous experience) that Triton looked to be an easier first foray into scratch building, despite all the supporting materials provided by Admiralty! I dont think you need a spindle sander. I had similar workshop space considerations to deal with and ended up decided on a bench top drill press that can be used as a spindle sander. My drill press/spindle sander deal cost me about $150 all-together and got both tools (more or less). I did all my Triton frames this way. You dont need it, but it does save time - and if you can combine tools you save space.
-
Looks like a lot of Model Shipwright titles…. Somebody better jump on that soon!
-
Made my night…
-
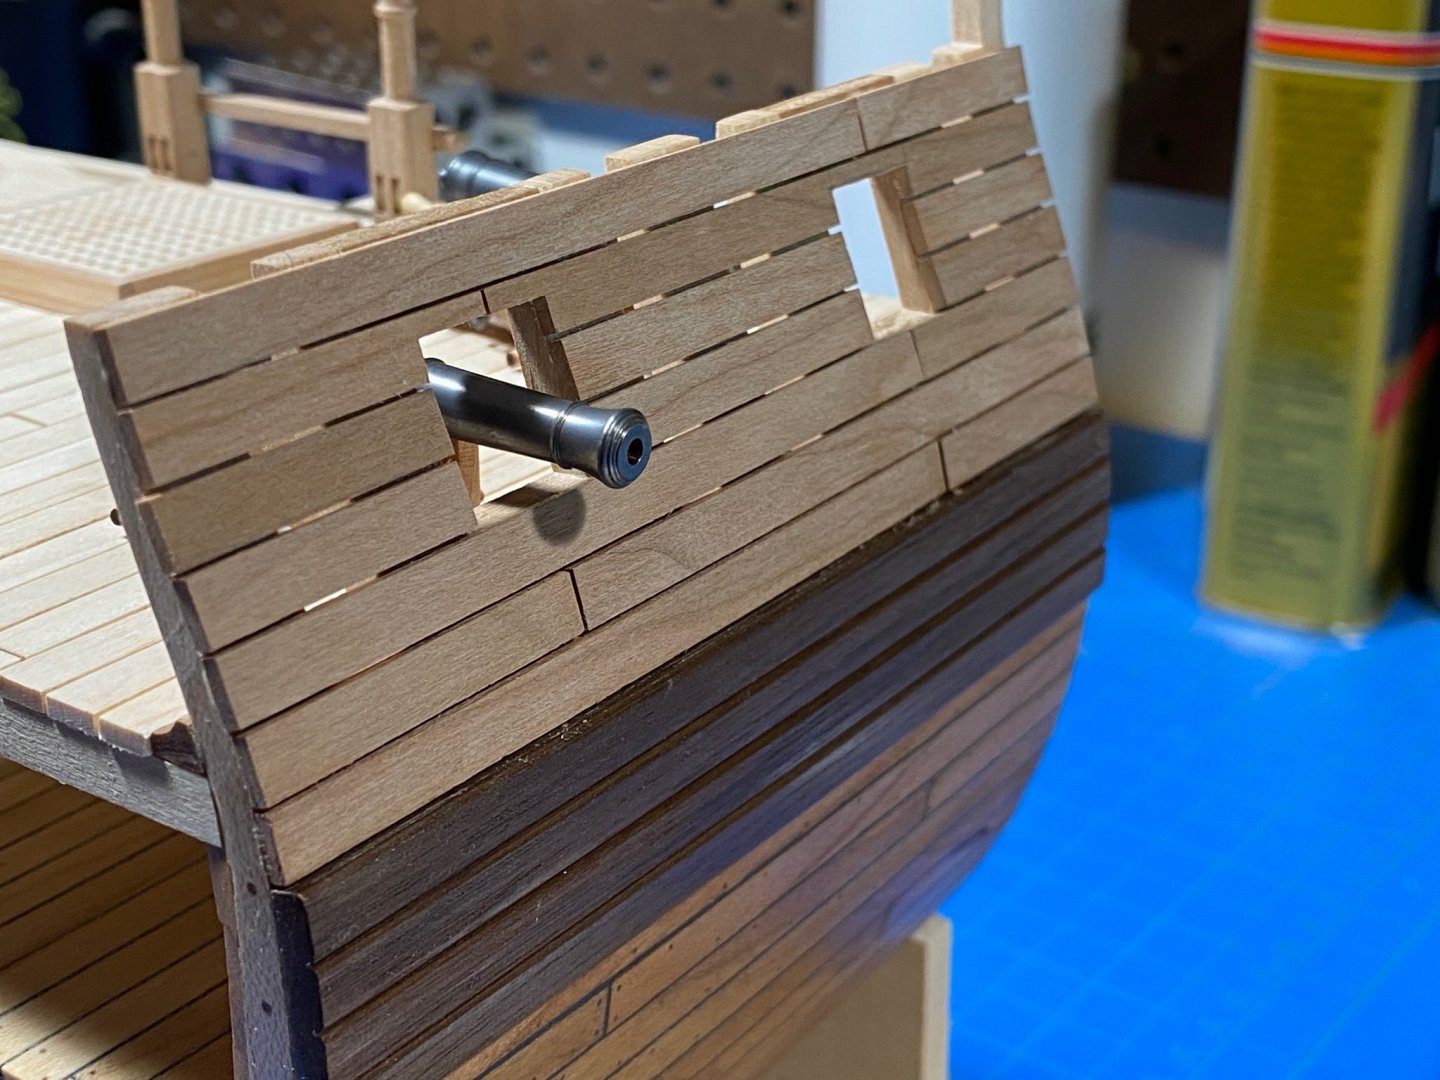
Thanks Mark, what are your thoughts about the plank ends meeting in the area of the gunport frame? I admit I did this wondering if it was correct, but couldn’t find anything definitive that says special care would have been made to ensure planks did not meet in this way. Thoughts?
-
Wow!
-
Hi Bob, I don't know about brand. The stuff I use sells through amazon from Rockler. Interestingly they dont list it on their actual website, but do sell it through Amazon. https://www.amazon.com/8-oz-Brass-Darkening-Solution/dp/B001DSZSQE/ref=asc_df_B001DSZSQE/?tag=hyprod-20&linkCode=df0&hvadid=532952400236&hvpos=&hvnetw=g&hvrand=8217704862455578212&hvpone=&hvptwo=&hvqmt=&hvdev=c&hvdvcmdl=&hvlocint=&hvlocphy=9033309&hvtargid=pla-1225493476318&psc=1
-
Just catching up! Wow. Your carpentry is superb and the detail... this is going to be quite the piece. I look forward to following along.
-
Thanks! I dont know if I do it the right way... I use brass ager, diluted in water and then do successive treatments until its as dark as I want it.
-
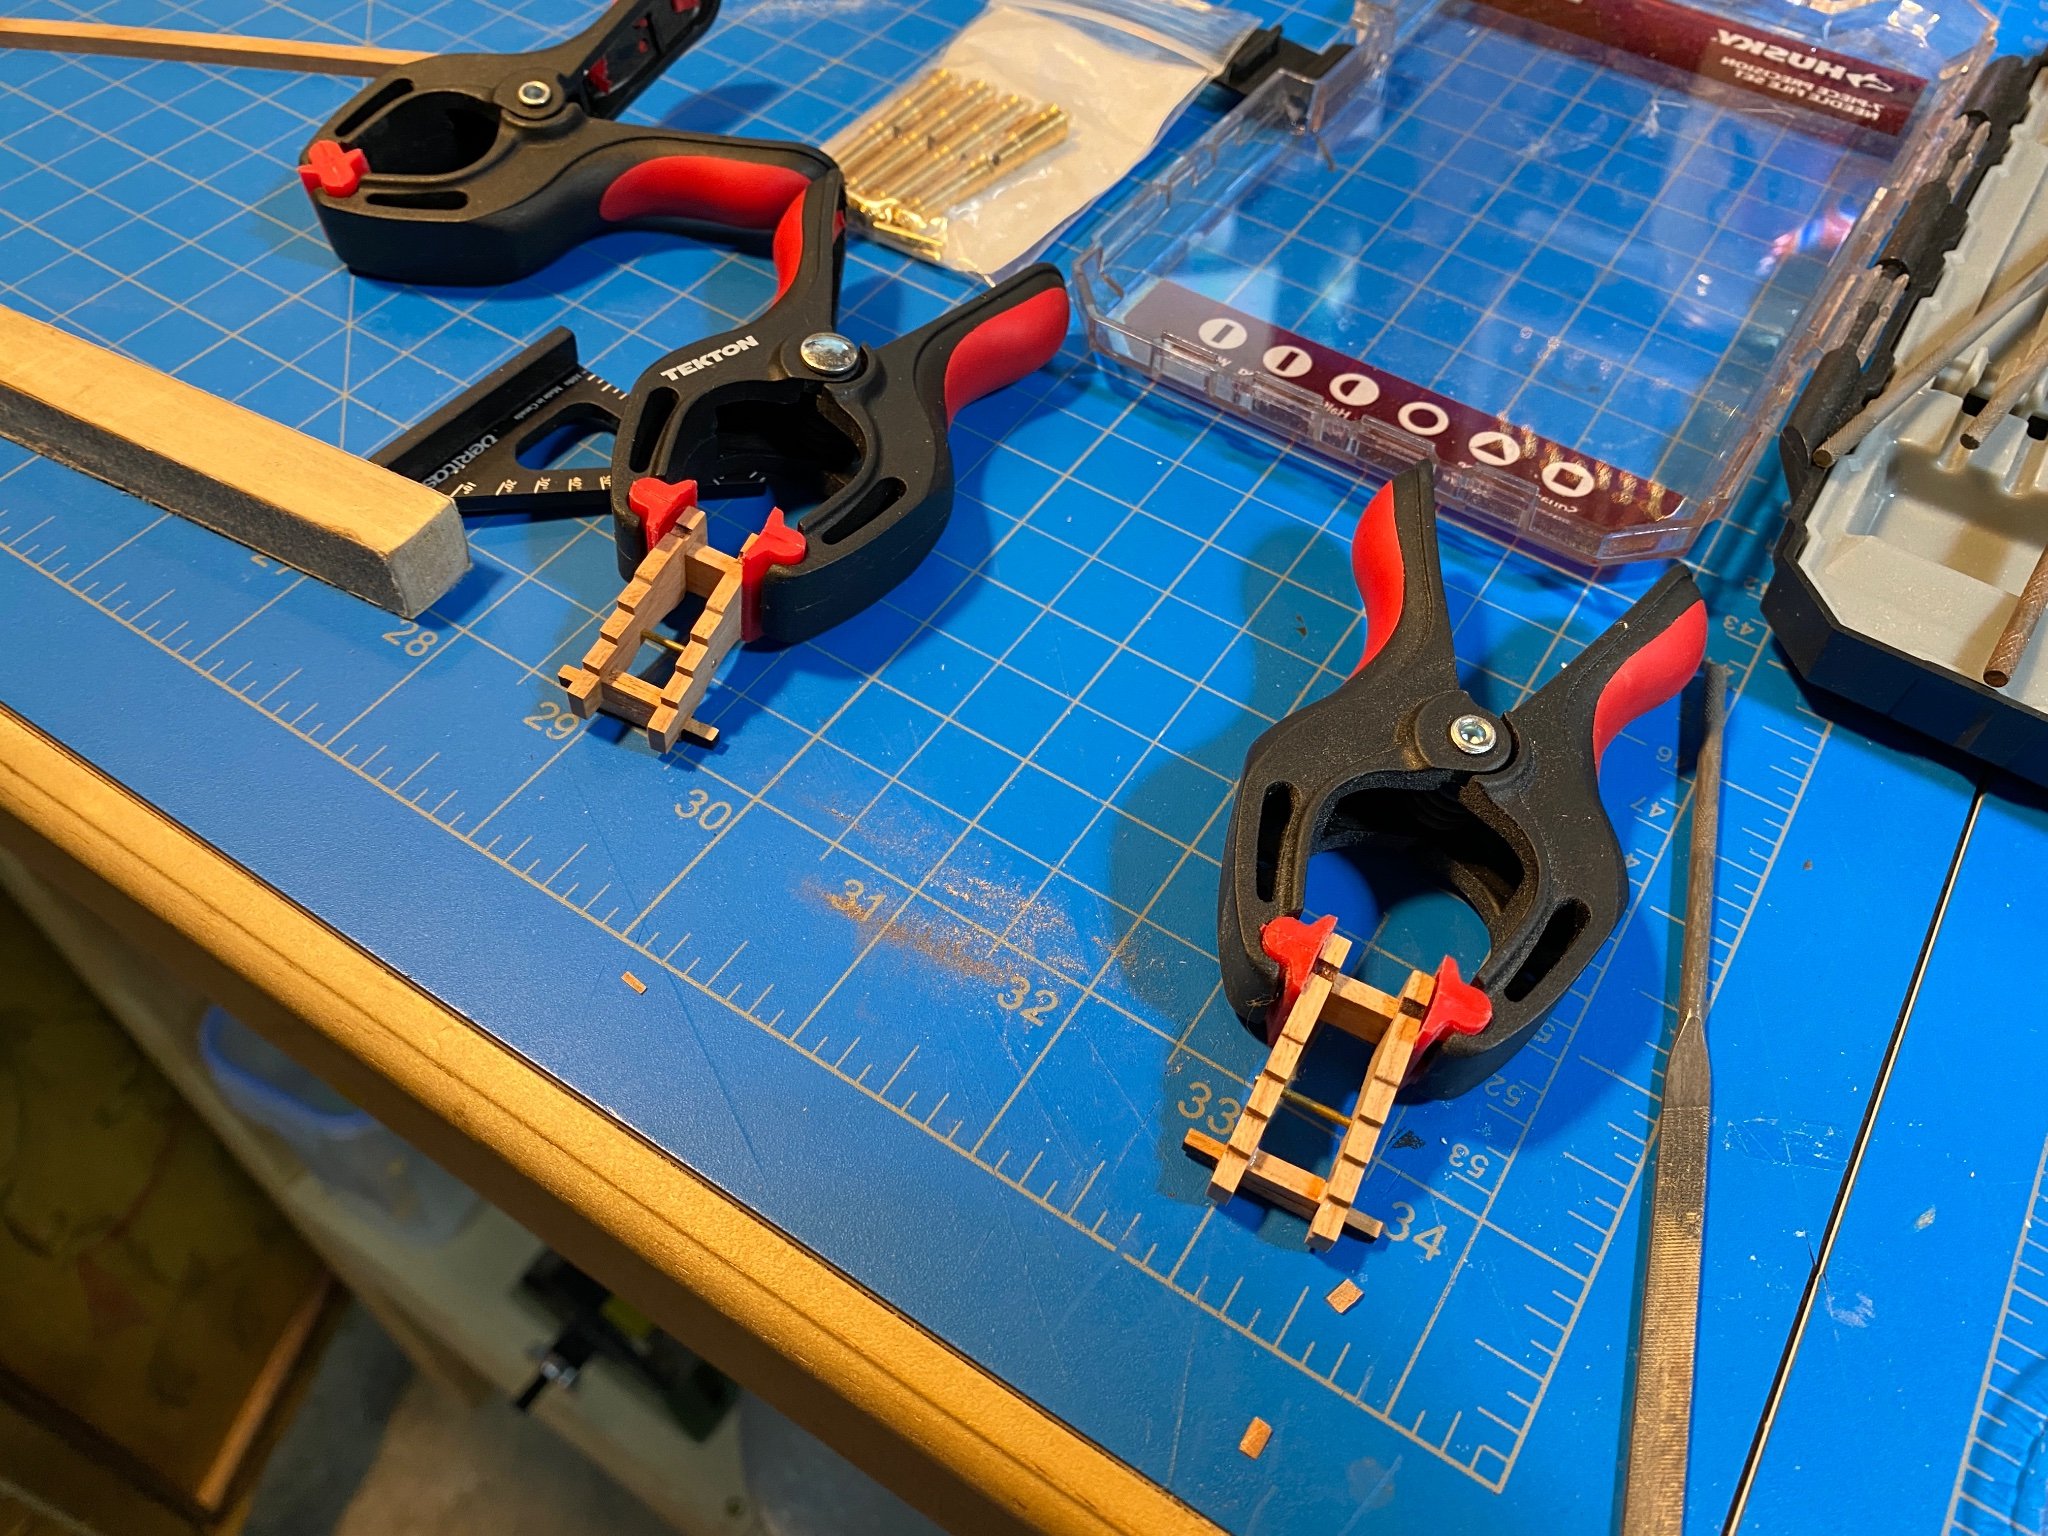
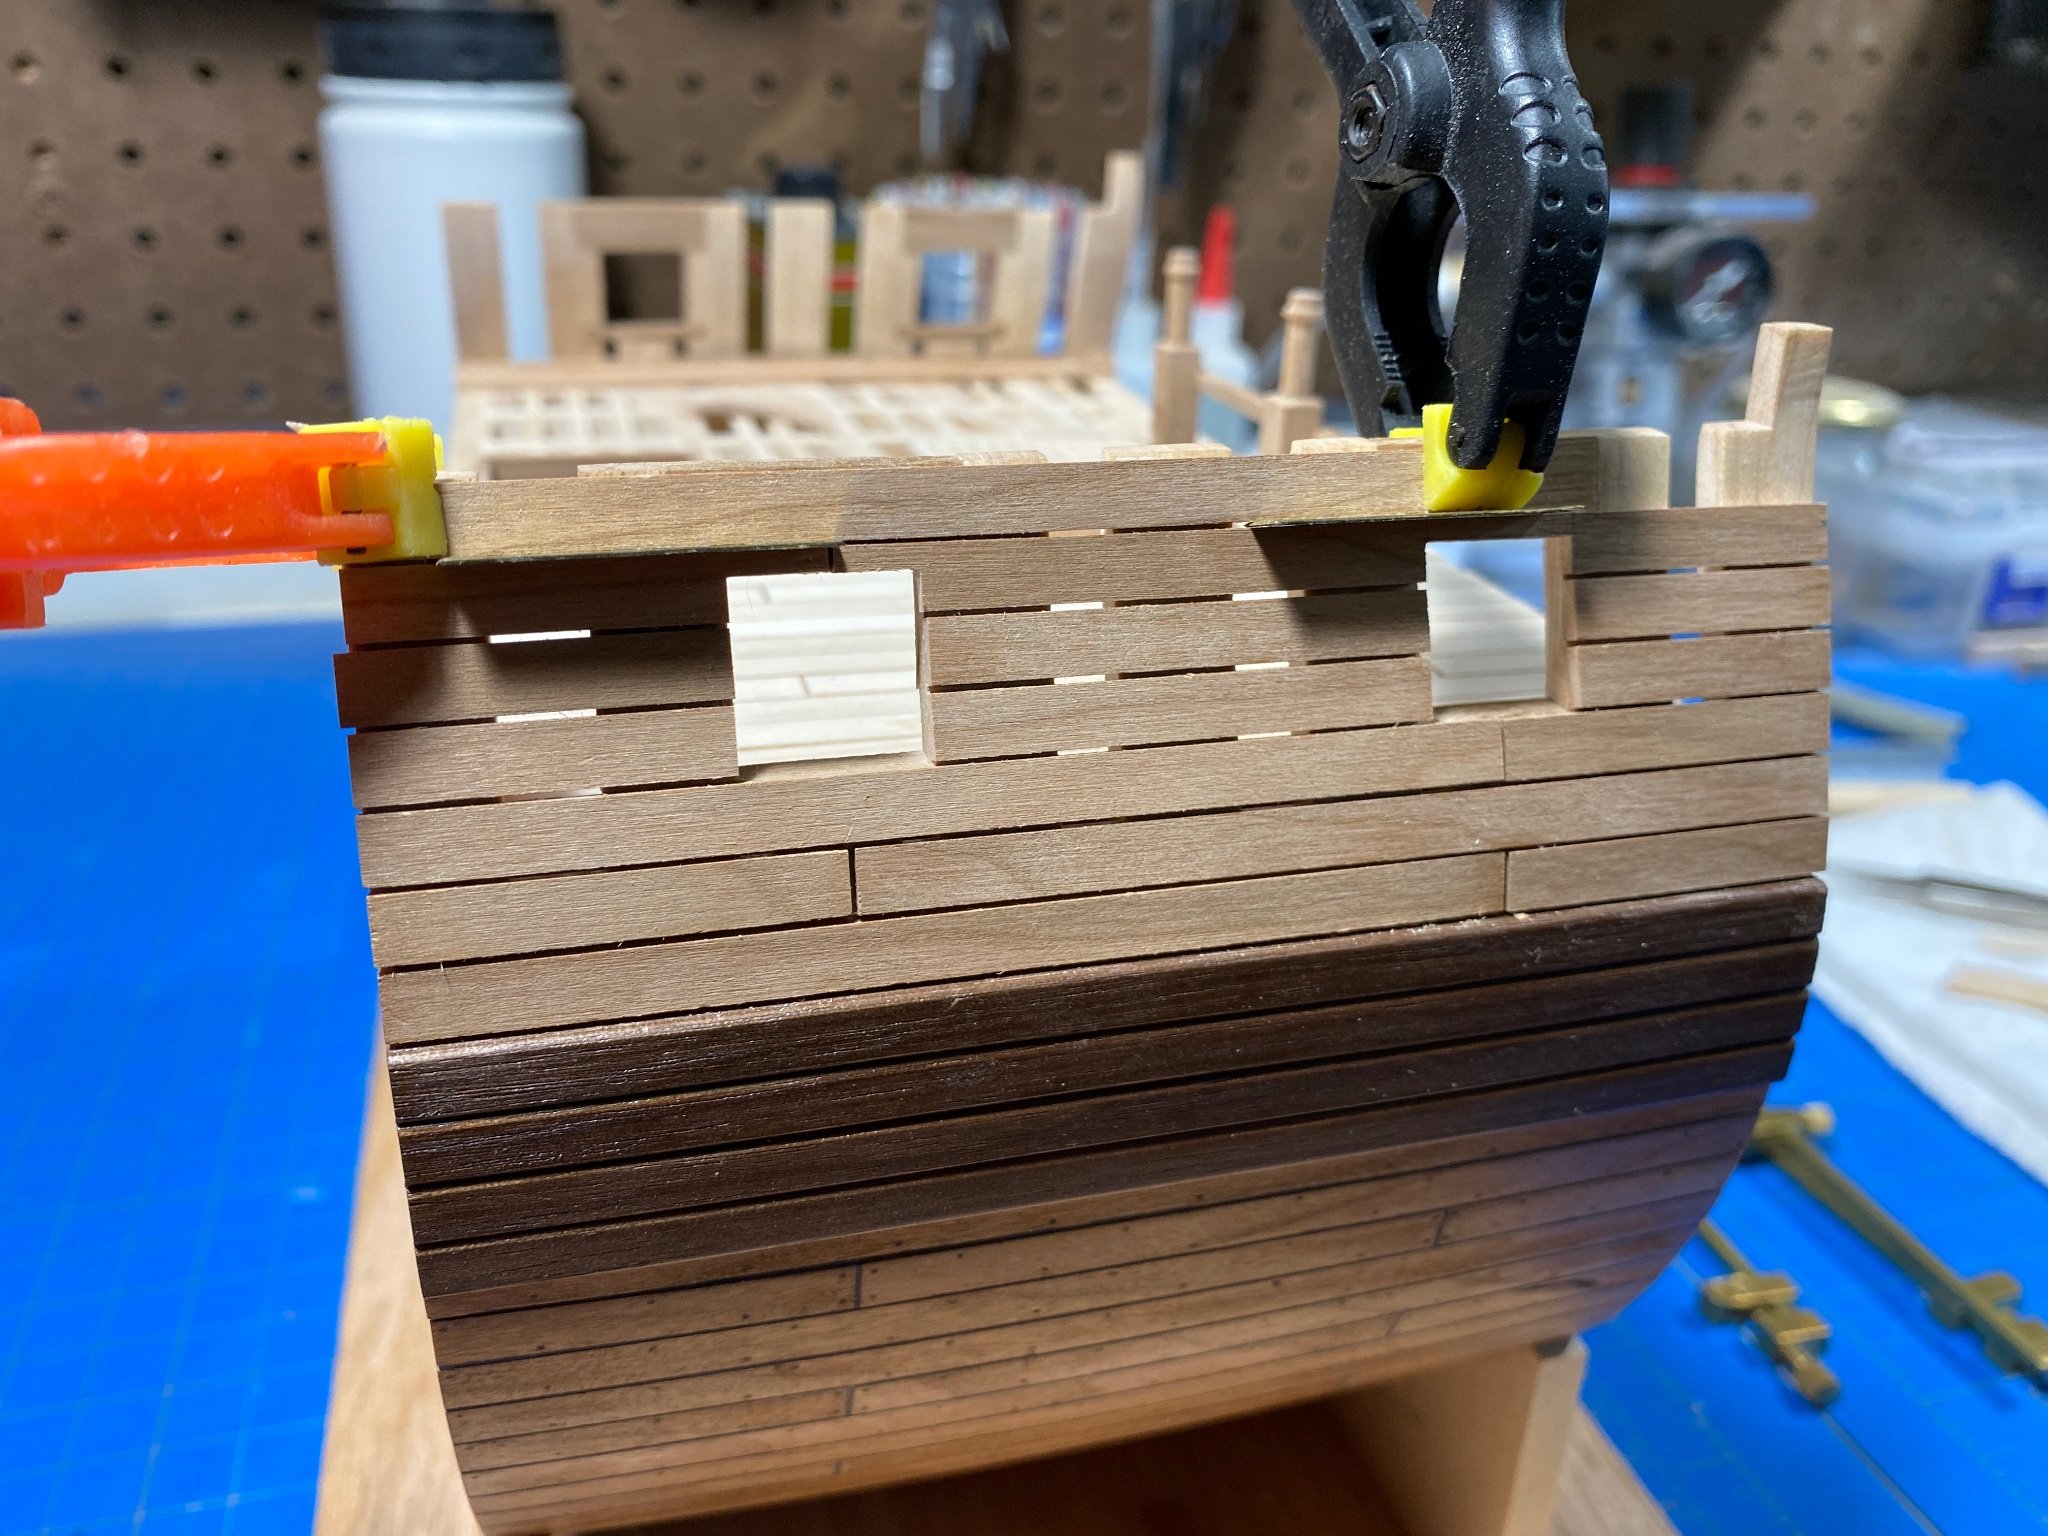
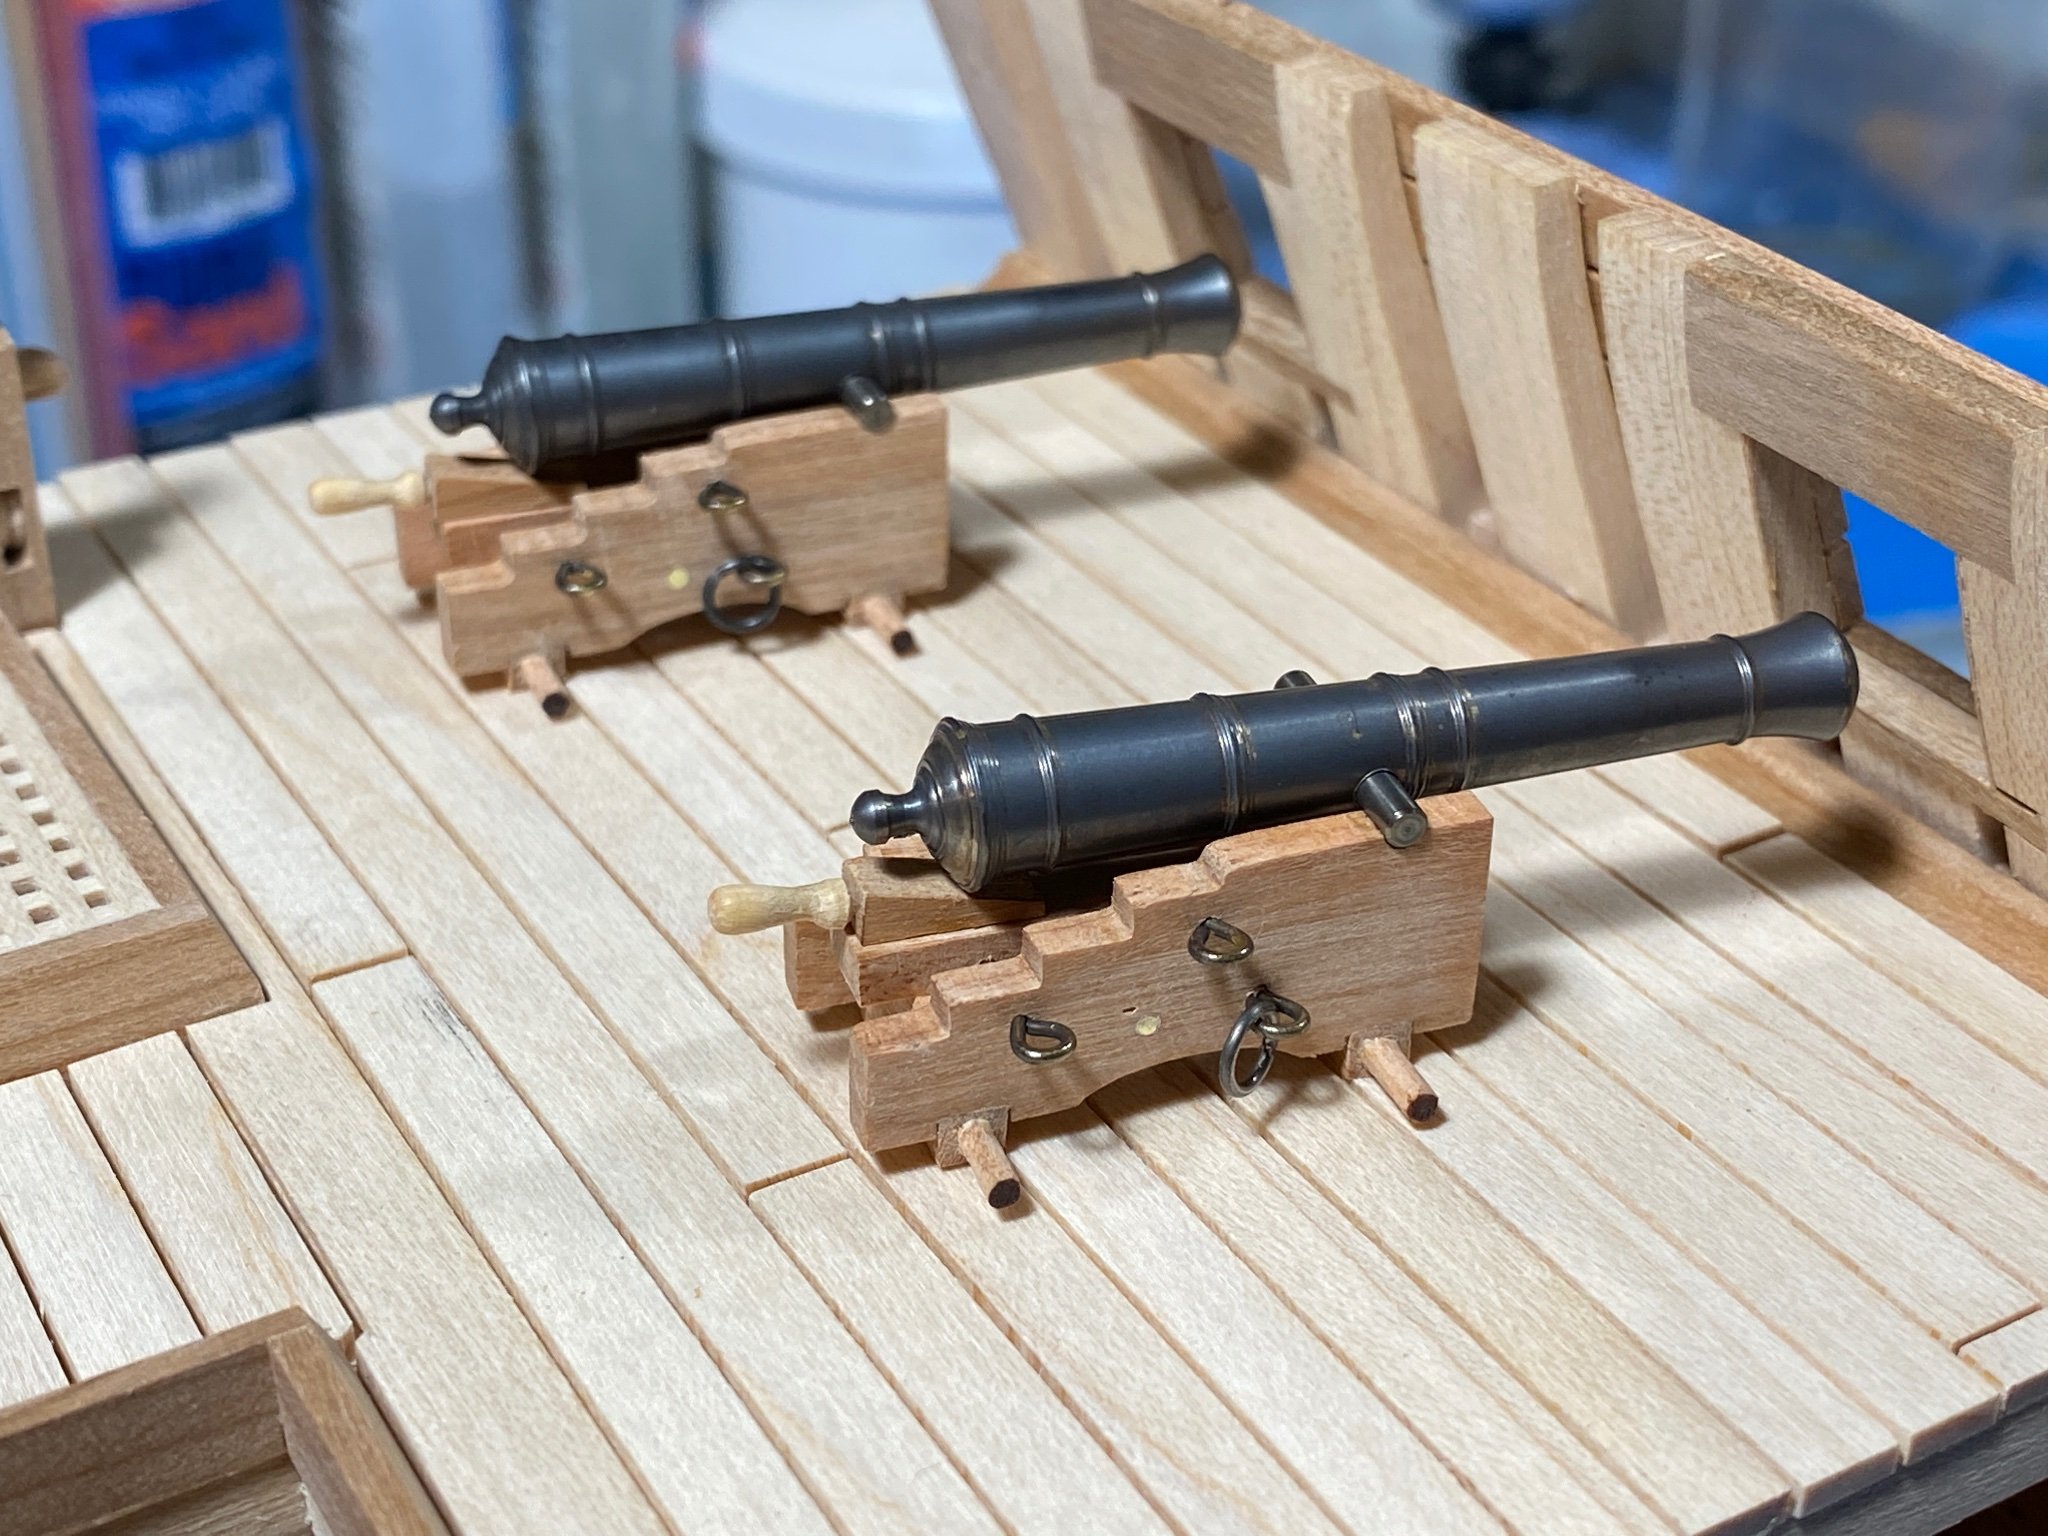
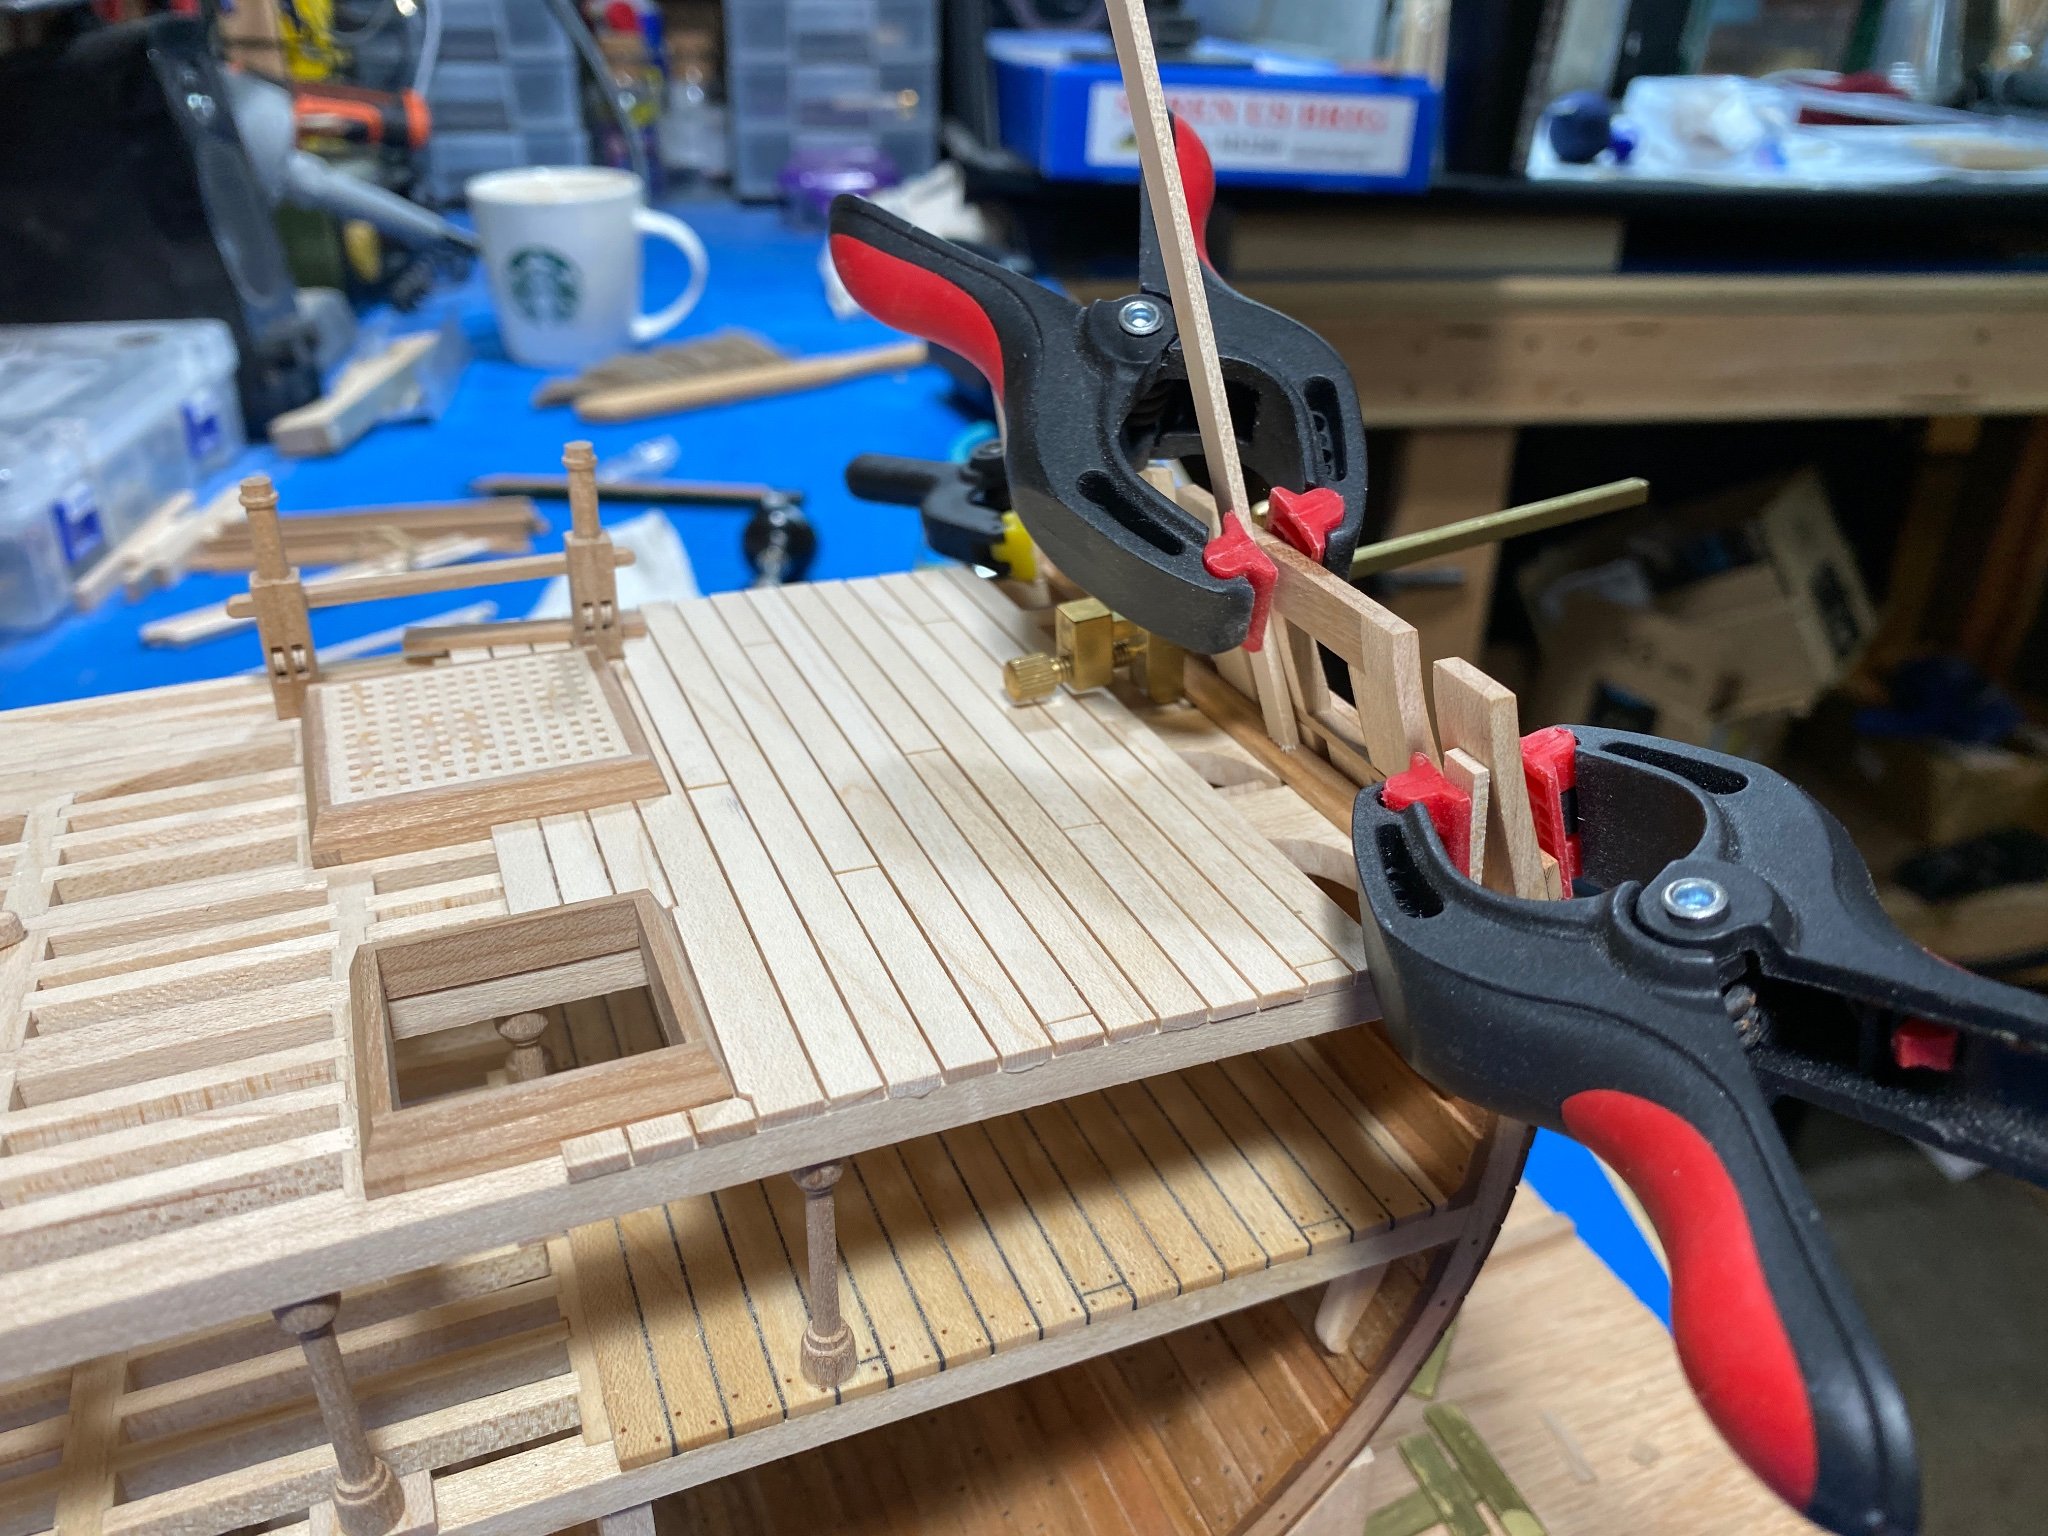
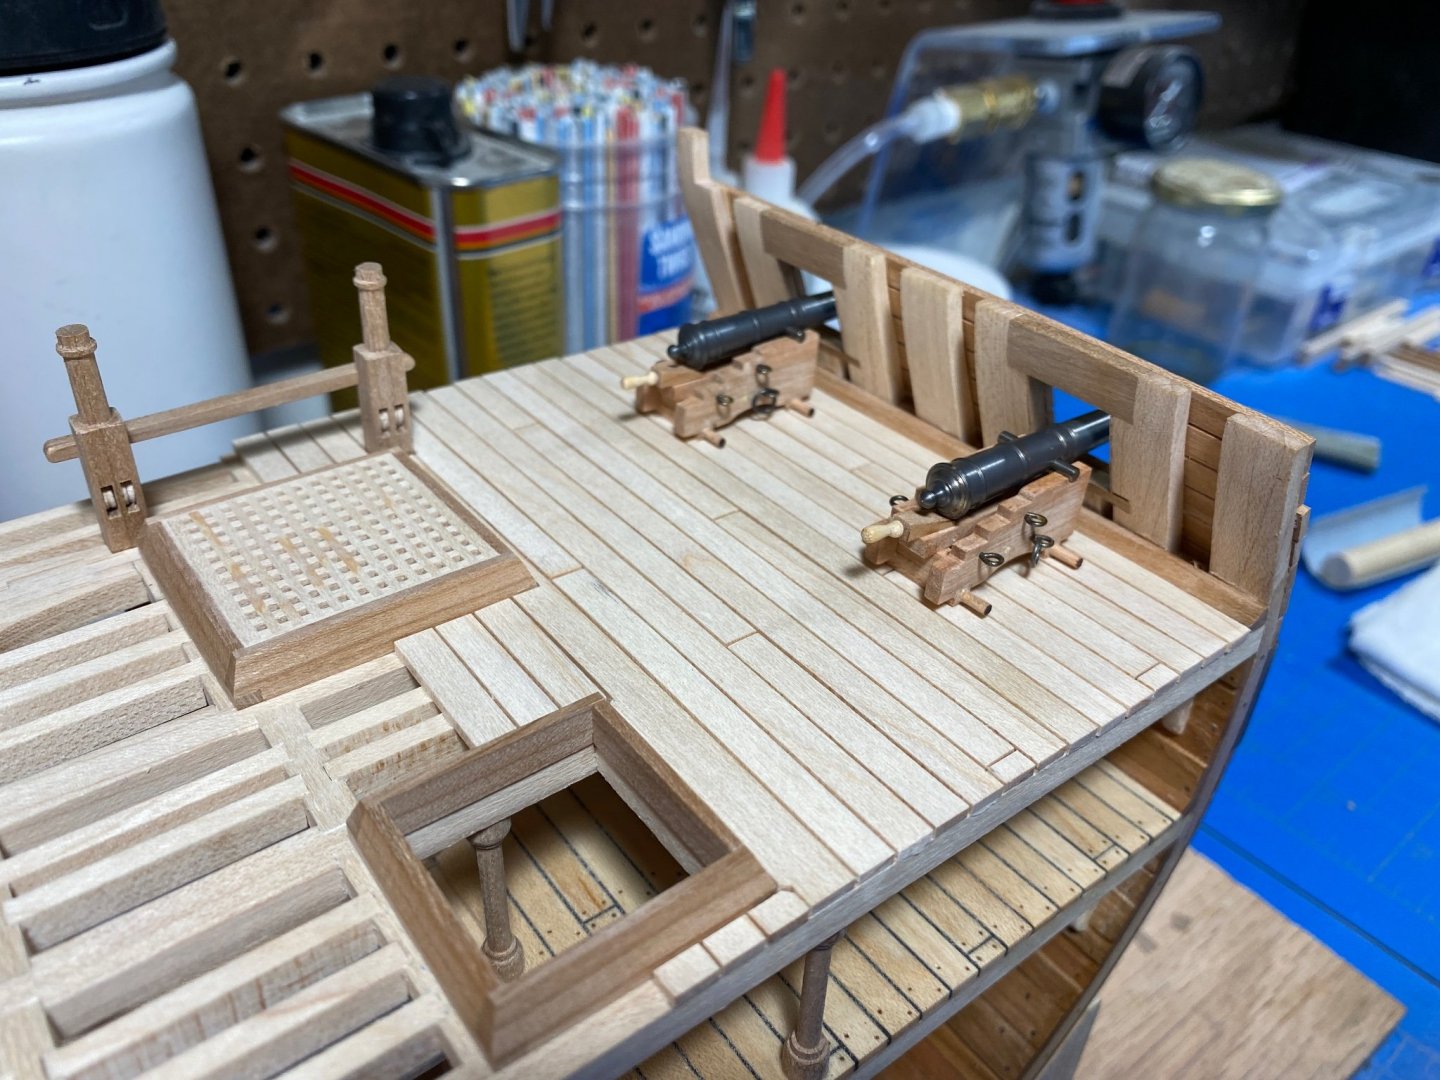
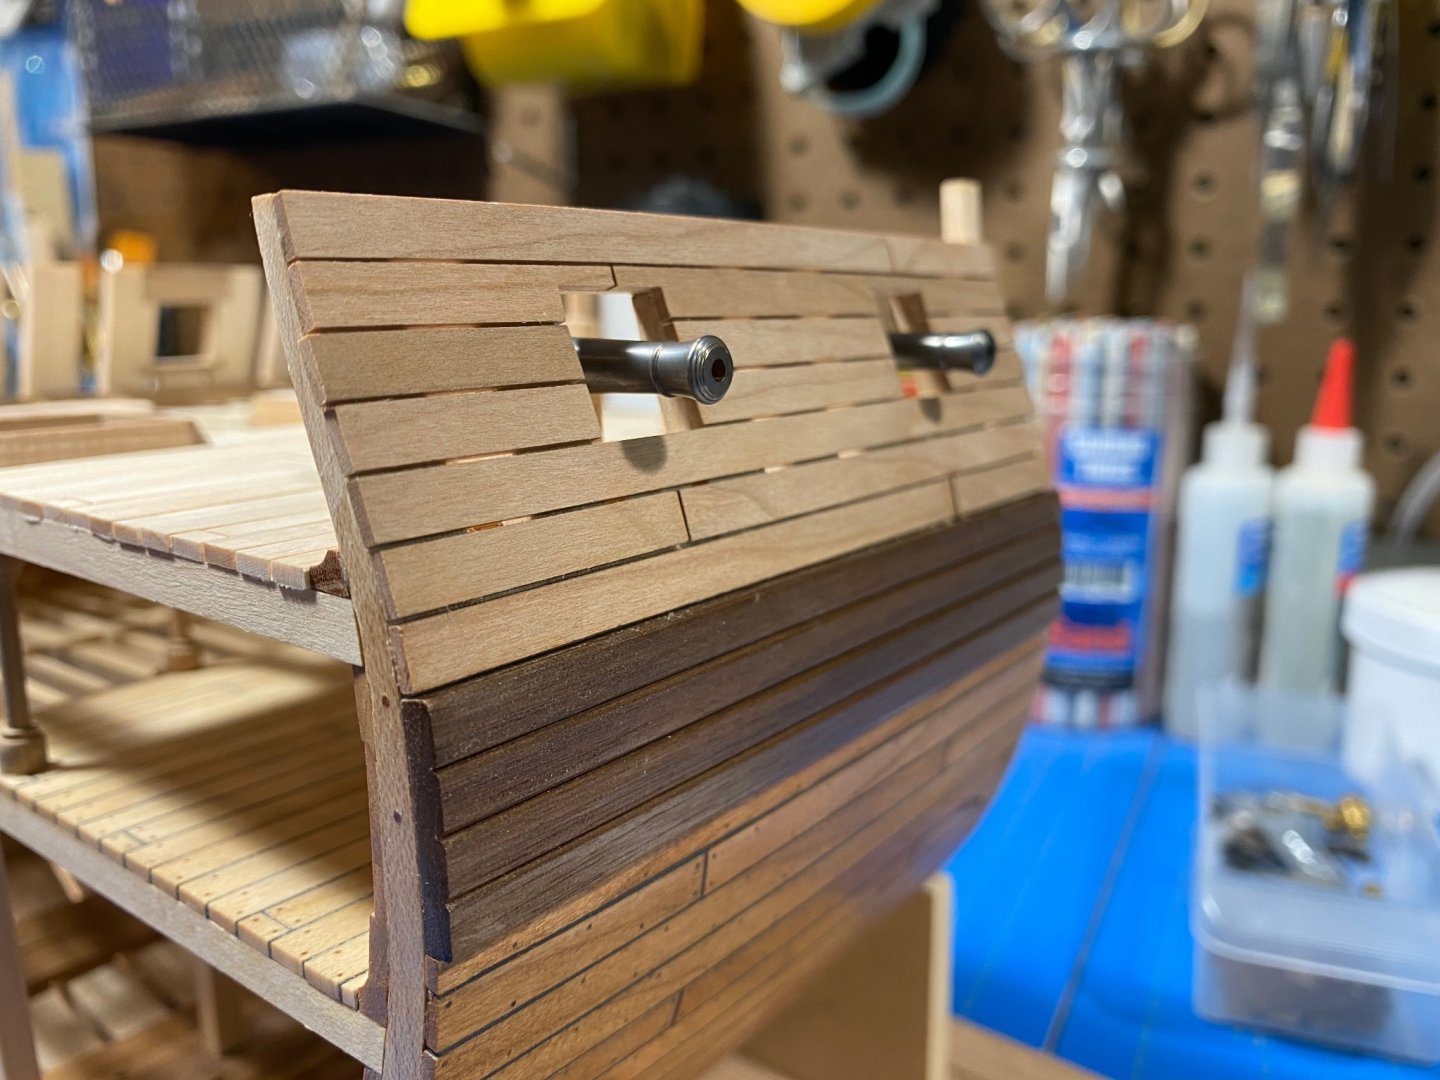
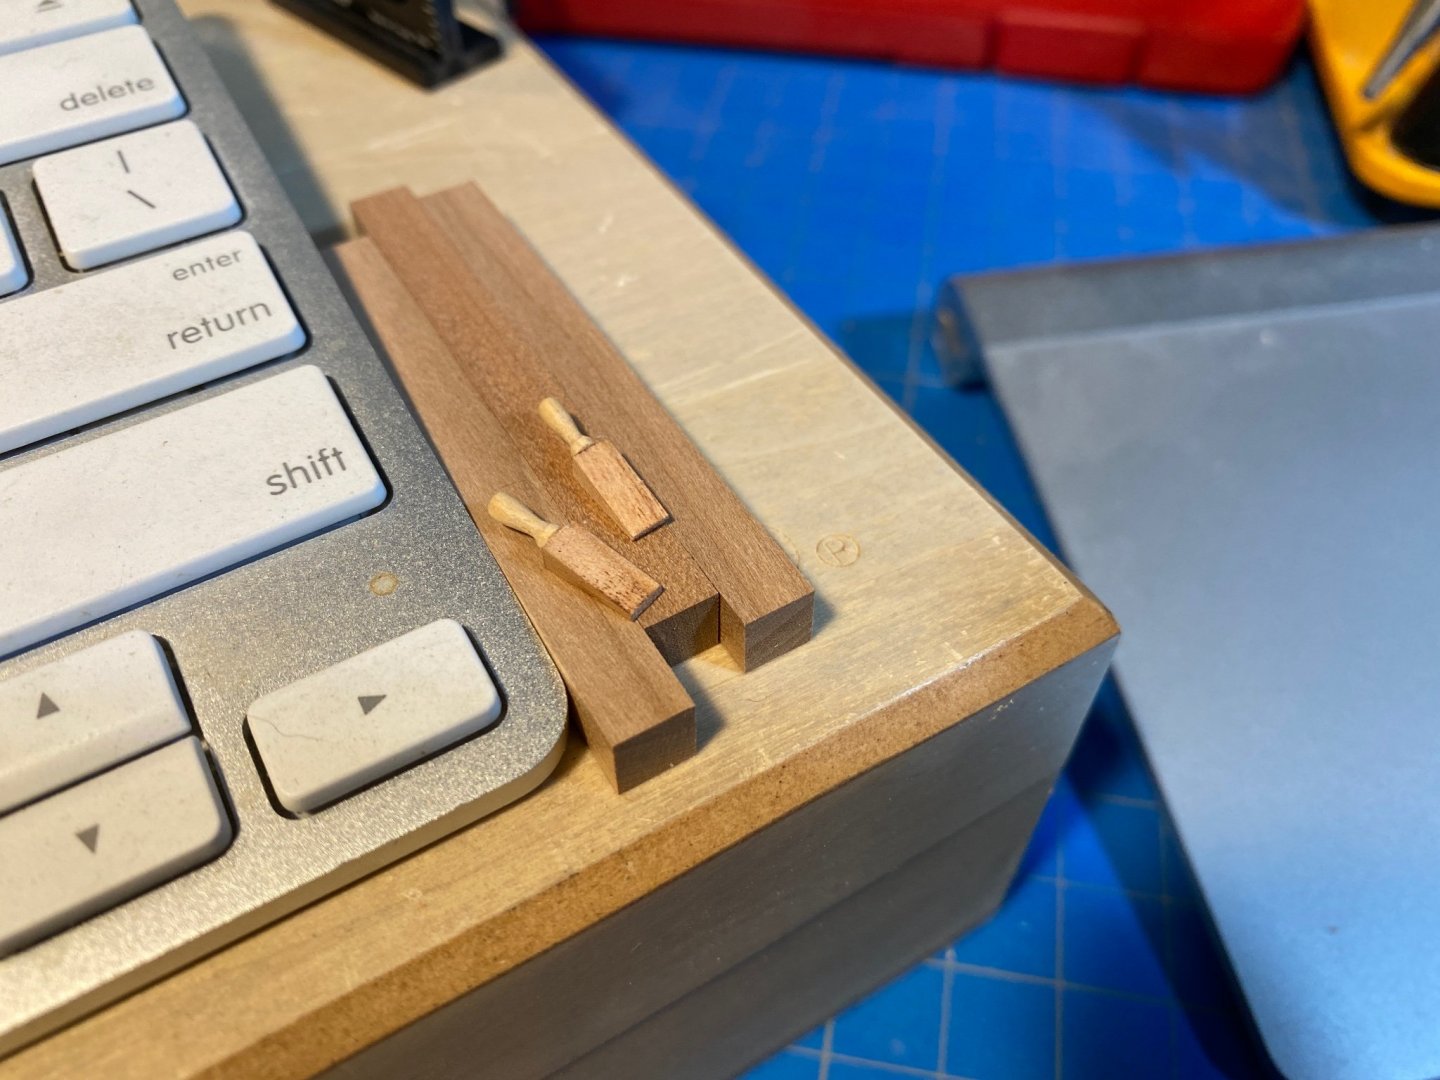
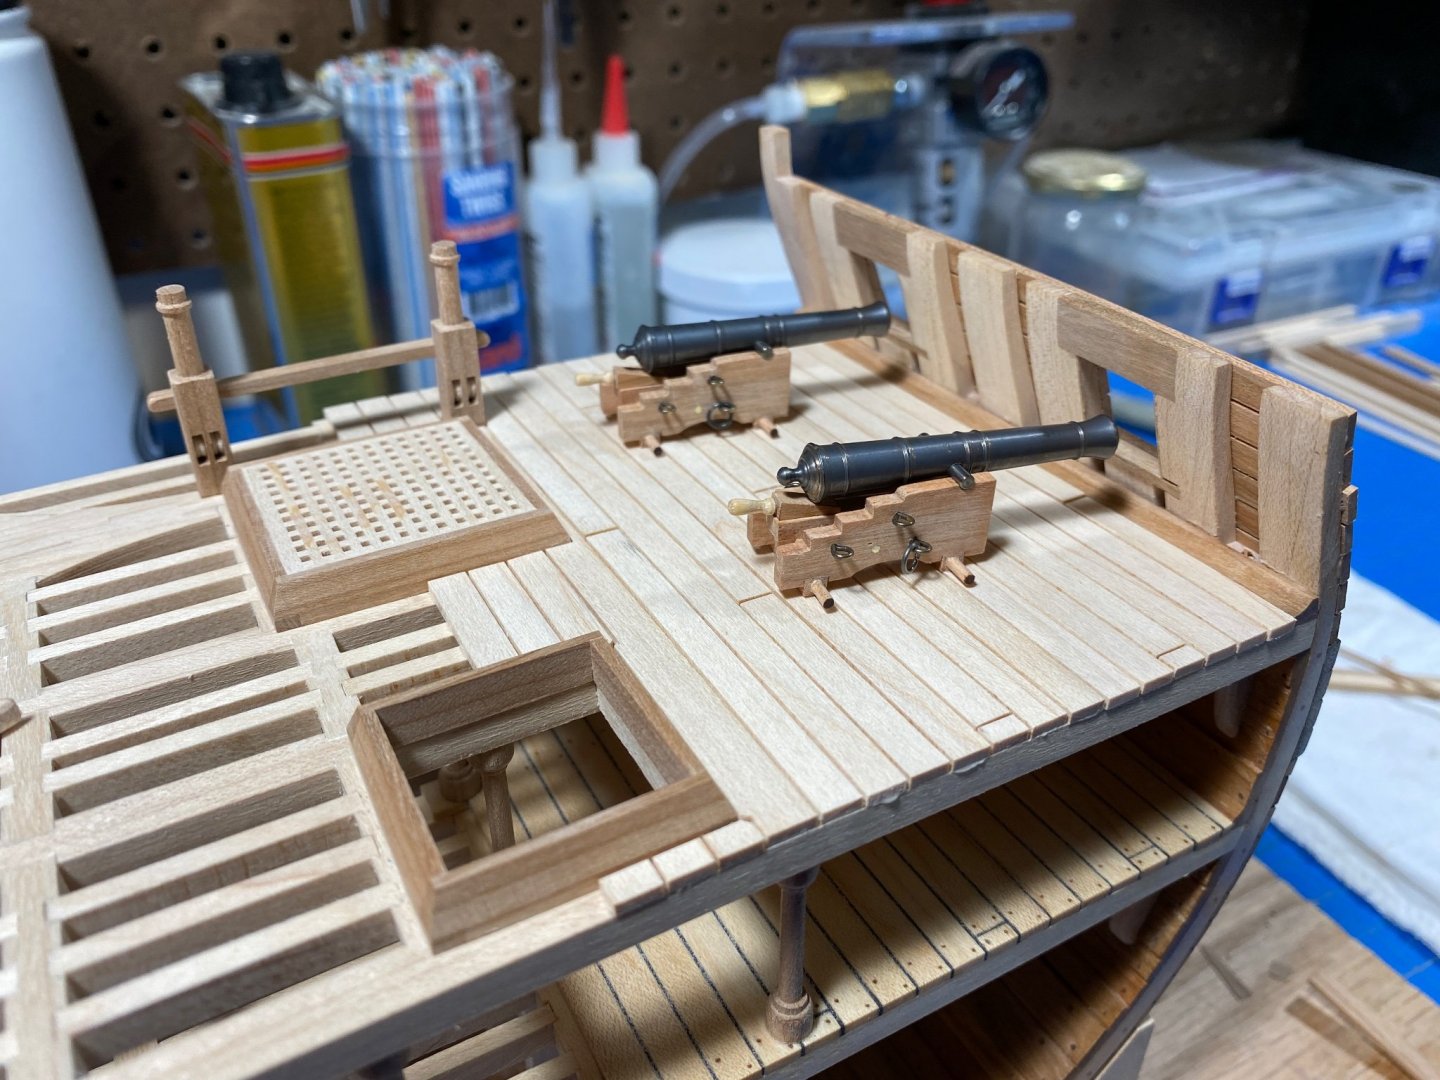
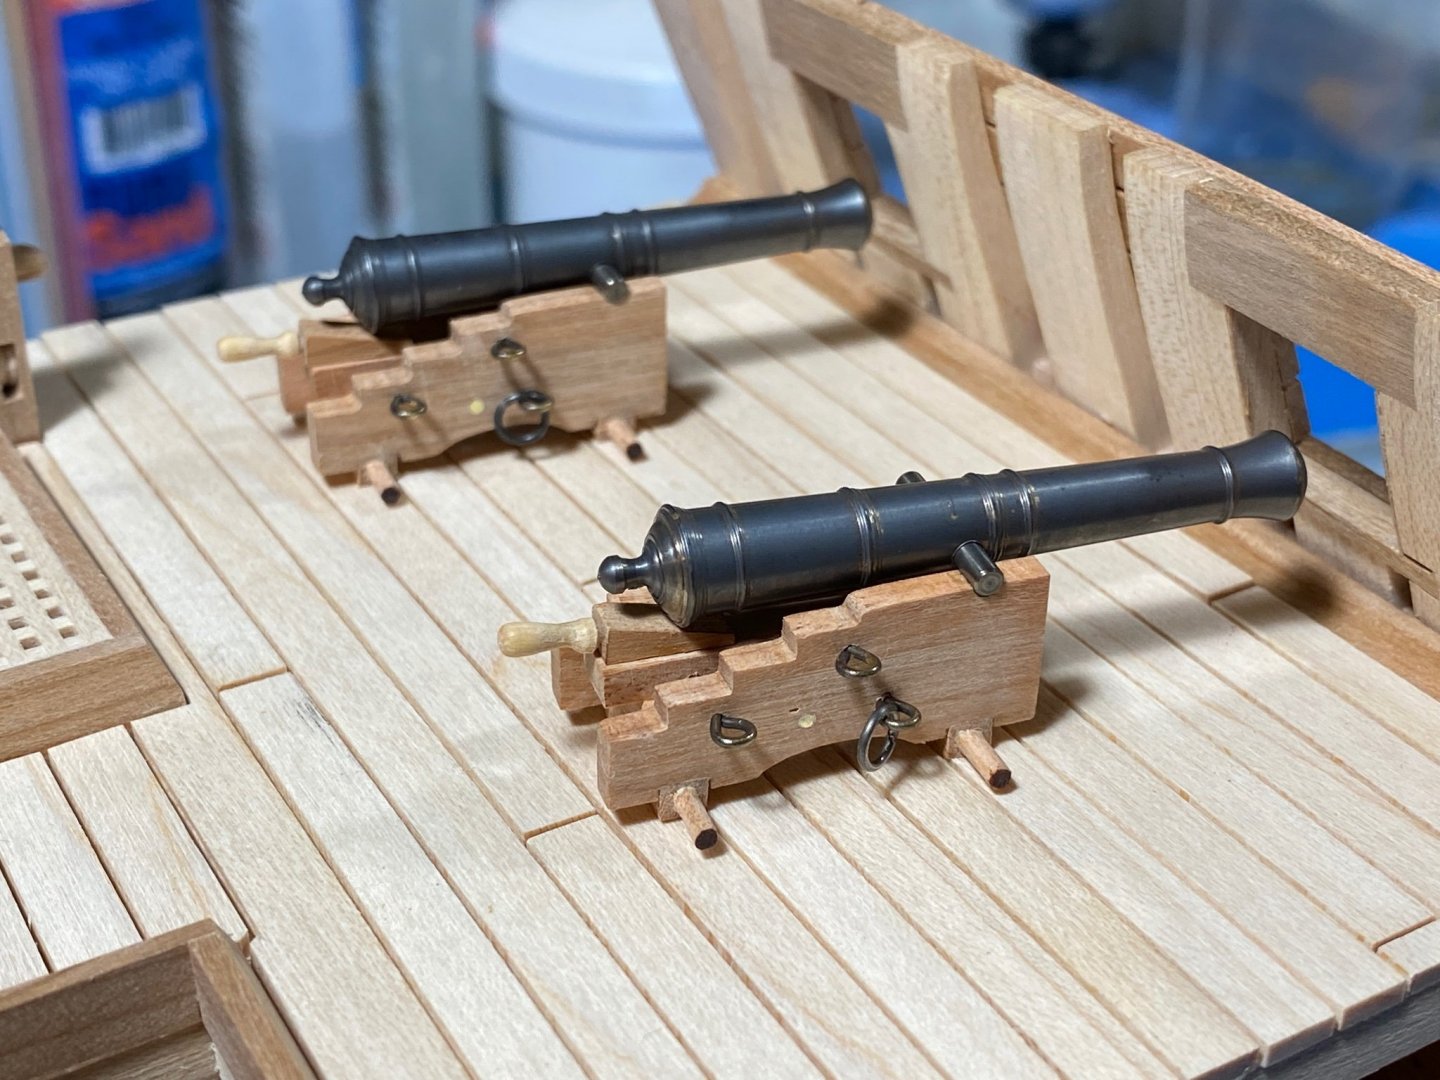
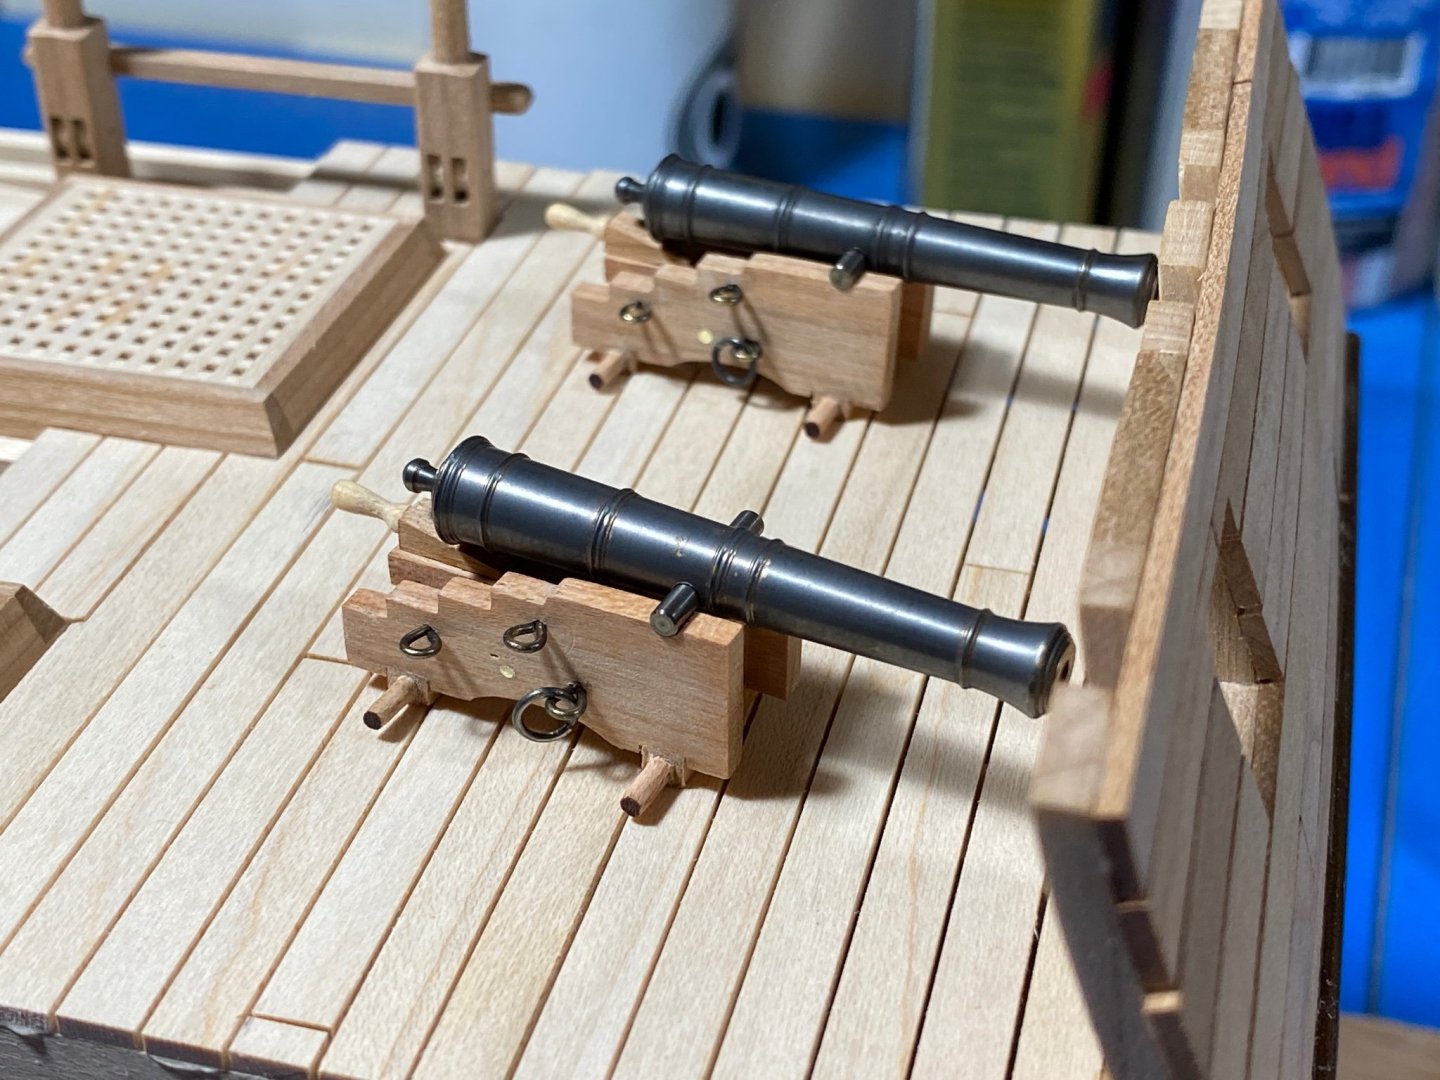
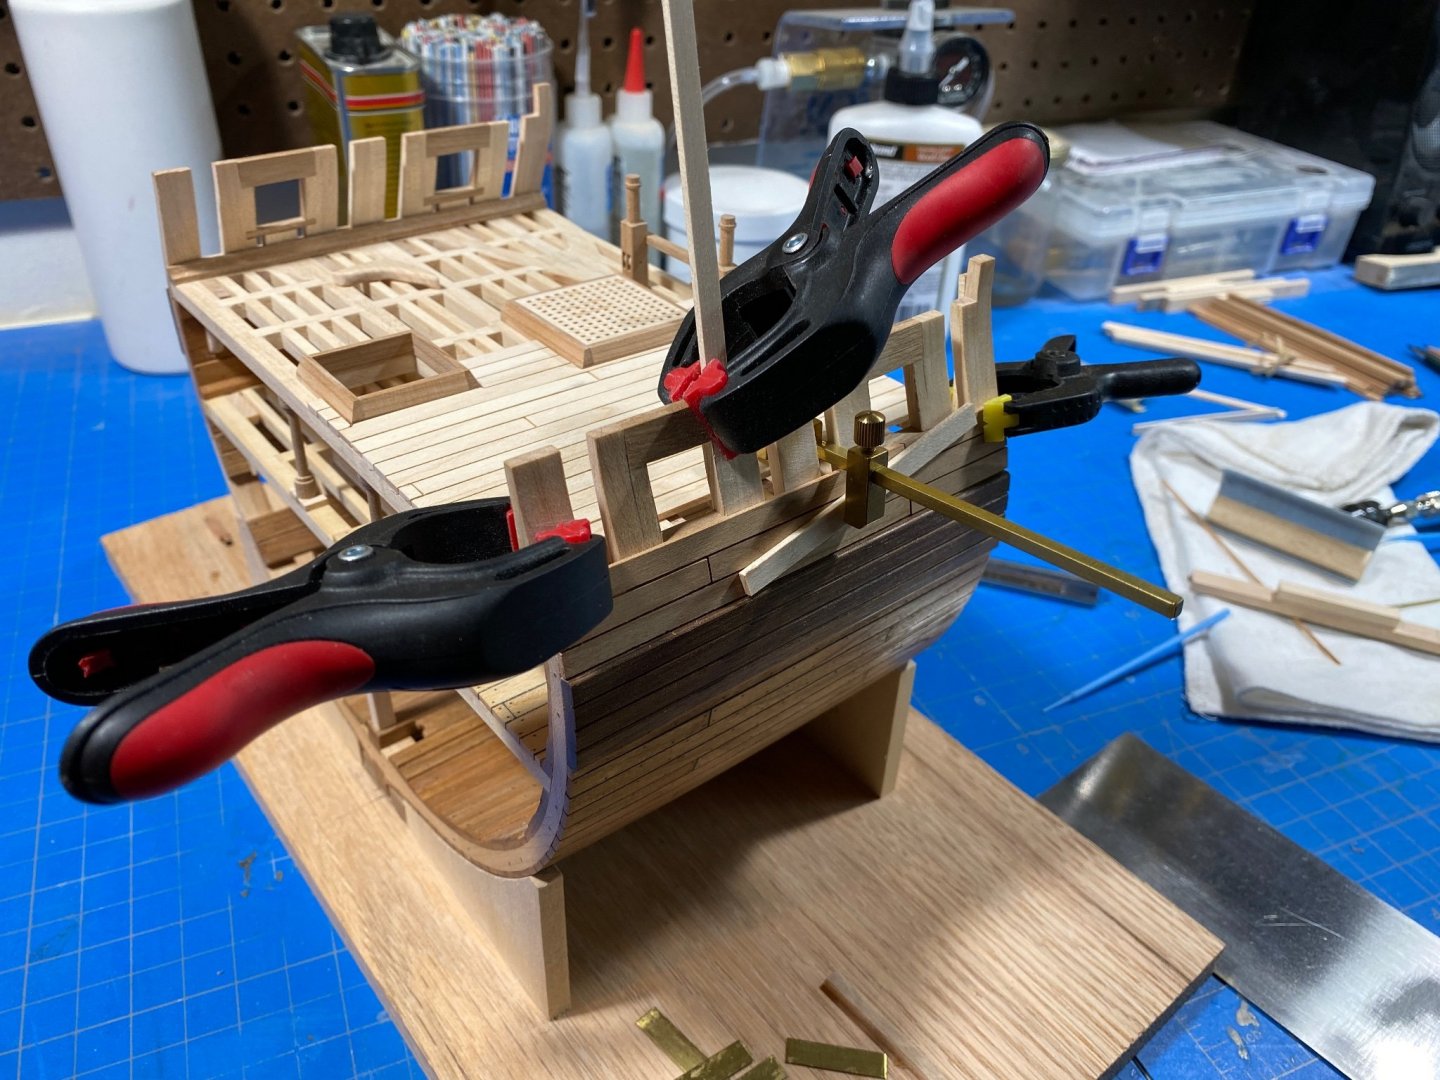
More planking and a bit of fun - Guns! Got a little headway with the rest of the gun deck planking and started assembling guns. Probably a bit early for guns at this point, but I was excited to see them come together so went ahead anyway. I went back and forth wondering if I would be "cheating" on a scratch build by buying a gun kit, as I have no experience turning brass and am not even sure I could do it on my MIDI lathe. Ordered these from Syren, along with the carriage kits in cherry. I actually spoke with Chuck about this to check in about size in relation to the Triton plans, and got some good input on what blocks sizes would be appropriate as well as rope. The plans are a bit dodgy with regard to some of these details. Otherwise, the cherry kits from Syren align quite well with the plans in terms of size of guns, carriages and so forth. I feel better actually knowing that despite being a kit they still required quite a bit of work to get them right. All the hardware has to be made yourself, along with assembly and removing char. It actually did take me quite a while to get them this far - while also adding a few planks in between stages to both the deck and the exterior. Still some cleaning up on this work before I move on but I'd call it a productive weekend. I did some blackening and tiny turning to get the Quoin right. Aside from the basic construction of the carriage nothing is glued or permanent. I think there are few elements that I should think about a little longer. 1. The quoin is in a contrasting wood color to the rest of the assembly. For whatever reason I thought this would give the overall assembly something more interesting but I dont know if it really makes sense. 2. The eyes look a little large. I may need to pull them and make a small channel so they can recess a bit more. OR, I may need to scale them down farther. Perhaps @Chuck has an opinion. Also worried a bout about the height of the guns in relation to the ports. Once I add the wheels, I may be relying on the quoin to point the guns back down to center in the port... not sure if this will look ridiculous. 3. The exterior planking runs split at the edges of the gun ports... I wonder if this is a detail that needs to be fixed. I did some digging in the various books and couldn't find anything that specifically deals with this and whether it would have been avoided. If anyone has any input on this, I would appreciate sounding it out.


-
Focus Stacking
Justin P. replied to Dennis P Finegan's topic in Photographing your work. How to do this.
Well... I think we can agree to disagree. I didnt mean to offend anyone with my rail suggestion. Its a minimal investment, and if used correctly can be very helpful - hence, my suggestion. It is afterall, only my opinion. You are absolutely right, a rail isnt helpful if you dont have one. I personally would not use a macro lens or a telephoto lens to shoot something like a model ship If I were going to be focus stacking (unless I was doing close-ups on some detail, but still never a telephoto). While its true that I do shoot museum pieces for work, I only brought that up as an example that you can shoot things that are complex 3-d objects of the same size as a model ship using a rail with no problem. It isnt complicated and does not require anything expensive or special. The rail we use in my studio at work is the same I use at home... $25, and about 10" long. We use pretty standard cameras, lights... nothing specialized. Its a common misconception that good photography requires heavy investment. It is true that you can get good results using all sorts of methods - from precision rails on a $400 tripod, to standing on your head in a 20 knot wind. There hasnt been a photography thread that isnt rife with 5 different methods and 20 different opinions. I was just offering one.