


michael101
-
Posts
425 -
Joined
-
Last visited
Content Type
Profiles
Forums
Gallery
Events
Posts posted by michael101
-
-
Very nice job Roberts !
about the twist at the bow you will not be able to fix it after gluing the bulkheads !
take your time to fix it now, just don’t run ,rushing is not the name of this game
")
the best thing is to take the L supports from one side out and draw the rest of the line until the end of the bow ,
and make a big L supports to hold the beginning of the bow between them (put it in the very beginning of the bow to be able planking the ship without disconnect the supports , BTW I did the same thing also at the stern )
The next stage is to work on the bulkheads ... and after glueing the bulkheads in place put som wood supports between the bulkheads for holding the shape permanent you can see it in my build log
but we will talk about it later on when you will be at this stage ...
Best regards
Michael.
-
Hello Roberts
welcome to the journey of building the HMS VICTORY im calling this project a "life project" !
there is a lot to learn and think before each step !
so take your time and enjoy the moment
about the bulkheads ..
before starting anything you must make a stand for the keel to insure straight keel ..
made it by using a plate of birch plywood and 90 degrees L supports
from the picture you uploaded I can see that the keel is not straight (its very normal when having very large keel ...)
but you can fix it by making the stand ...
also if you asking me when you will have the stand ready .. don't glue the bulkheads from inside the slots just dry fit them and glue them from outside by using timbers of 10*10mm
its a bit hard to explain but you can see my build log (my model its a caldercraft one , but the first stages are the same )
you can check the pictures at post no.2 and post no.11at this link
and if you need anything you can pm me
best regard
Michael.
-
-
-
-
12 hours ago, ccoyle said:
Hard to tell for sure from your photos, but it looks like you may need some additional bulkhead beveling at the bow and stern.
Im agree with you,
there is a little surface beveled ,
im always beveling 3/4 from the thick of the bulkhead (leaving about 1/4 for reference to know that im not beveling to much ..)
Best regards
Michael.
-
-
Hello friend ,I hope all of you are well and safe at this days
Here is a little update for my build log,
I have done it a few month ago but not had the time for sharing with you
So now before starting the next stage on my victory I had to share with you guys a new method for drilling the holes in a perfect way inside the gunport for the cannons
until now I saw a lot of beautiful build logs and a lot ways for drilling this holes for the cannons but I wasn’t happy with non of them
I saw some people who used a water level and other who used the stand of the proxxon drill but you can’t get the perfect central hole in the middle of the gunport with this methods....(and there is also other problems with this methods ,I will speak about them later,)
So before starting expanding what I have done
I will start talking about the issues in this matter
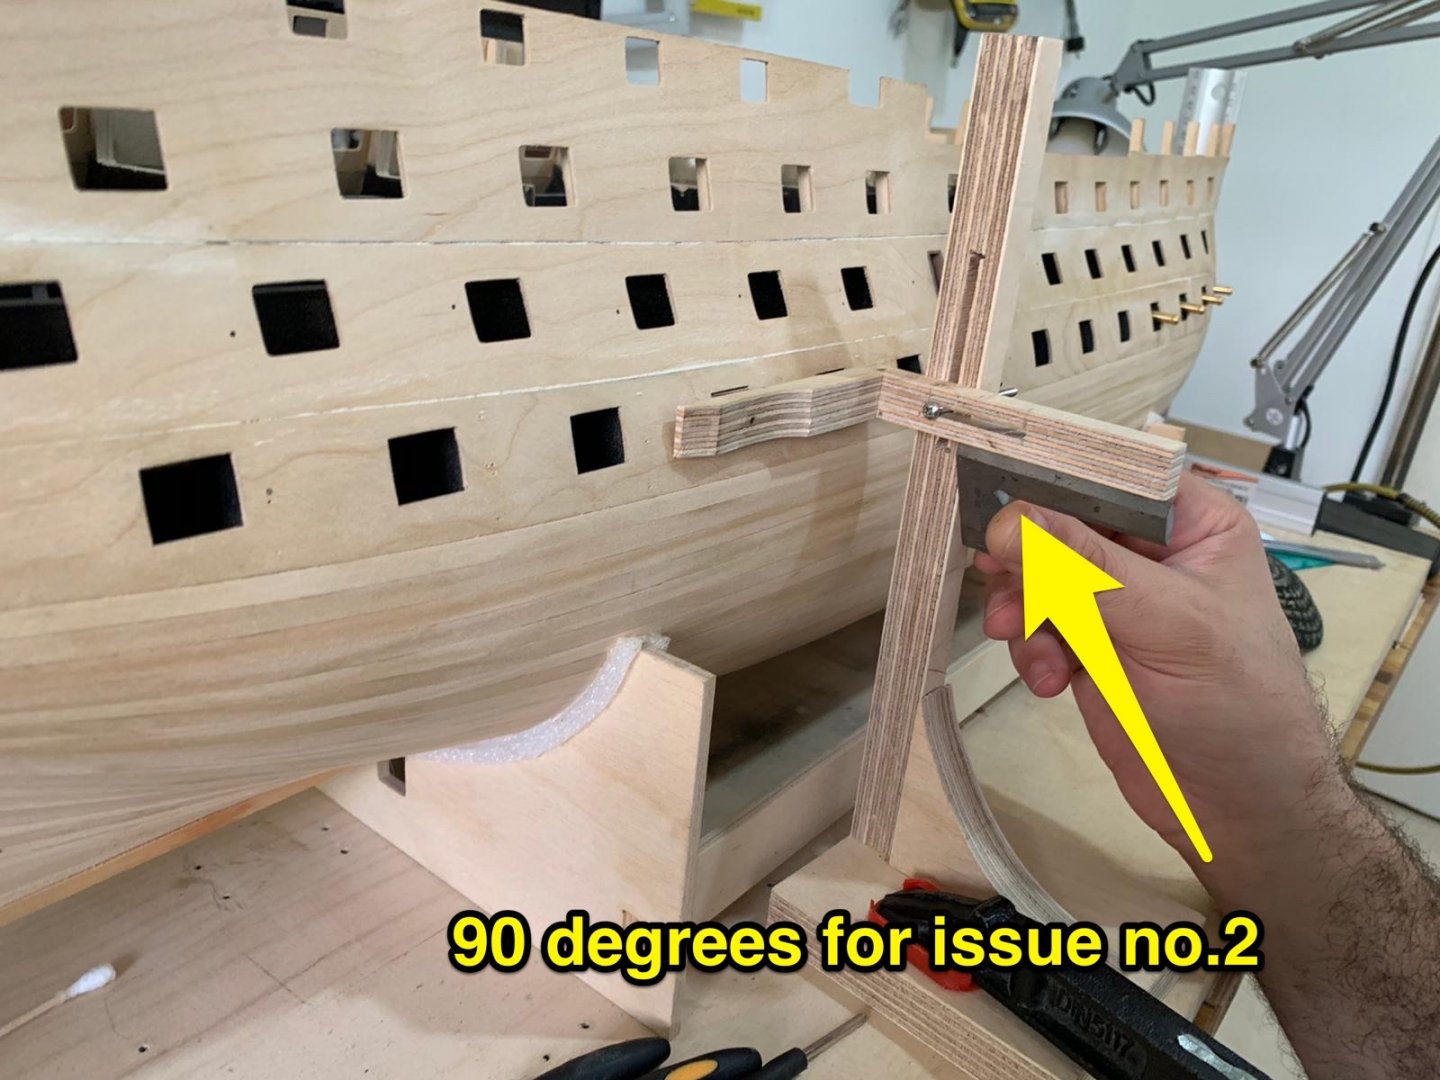
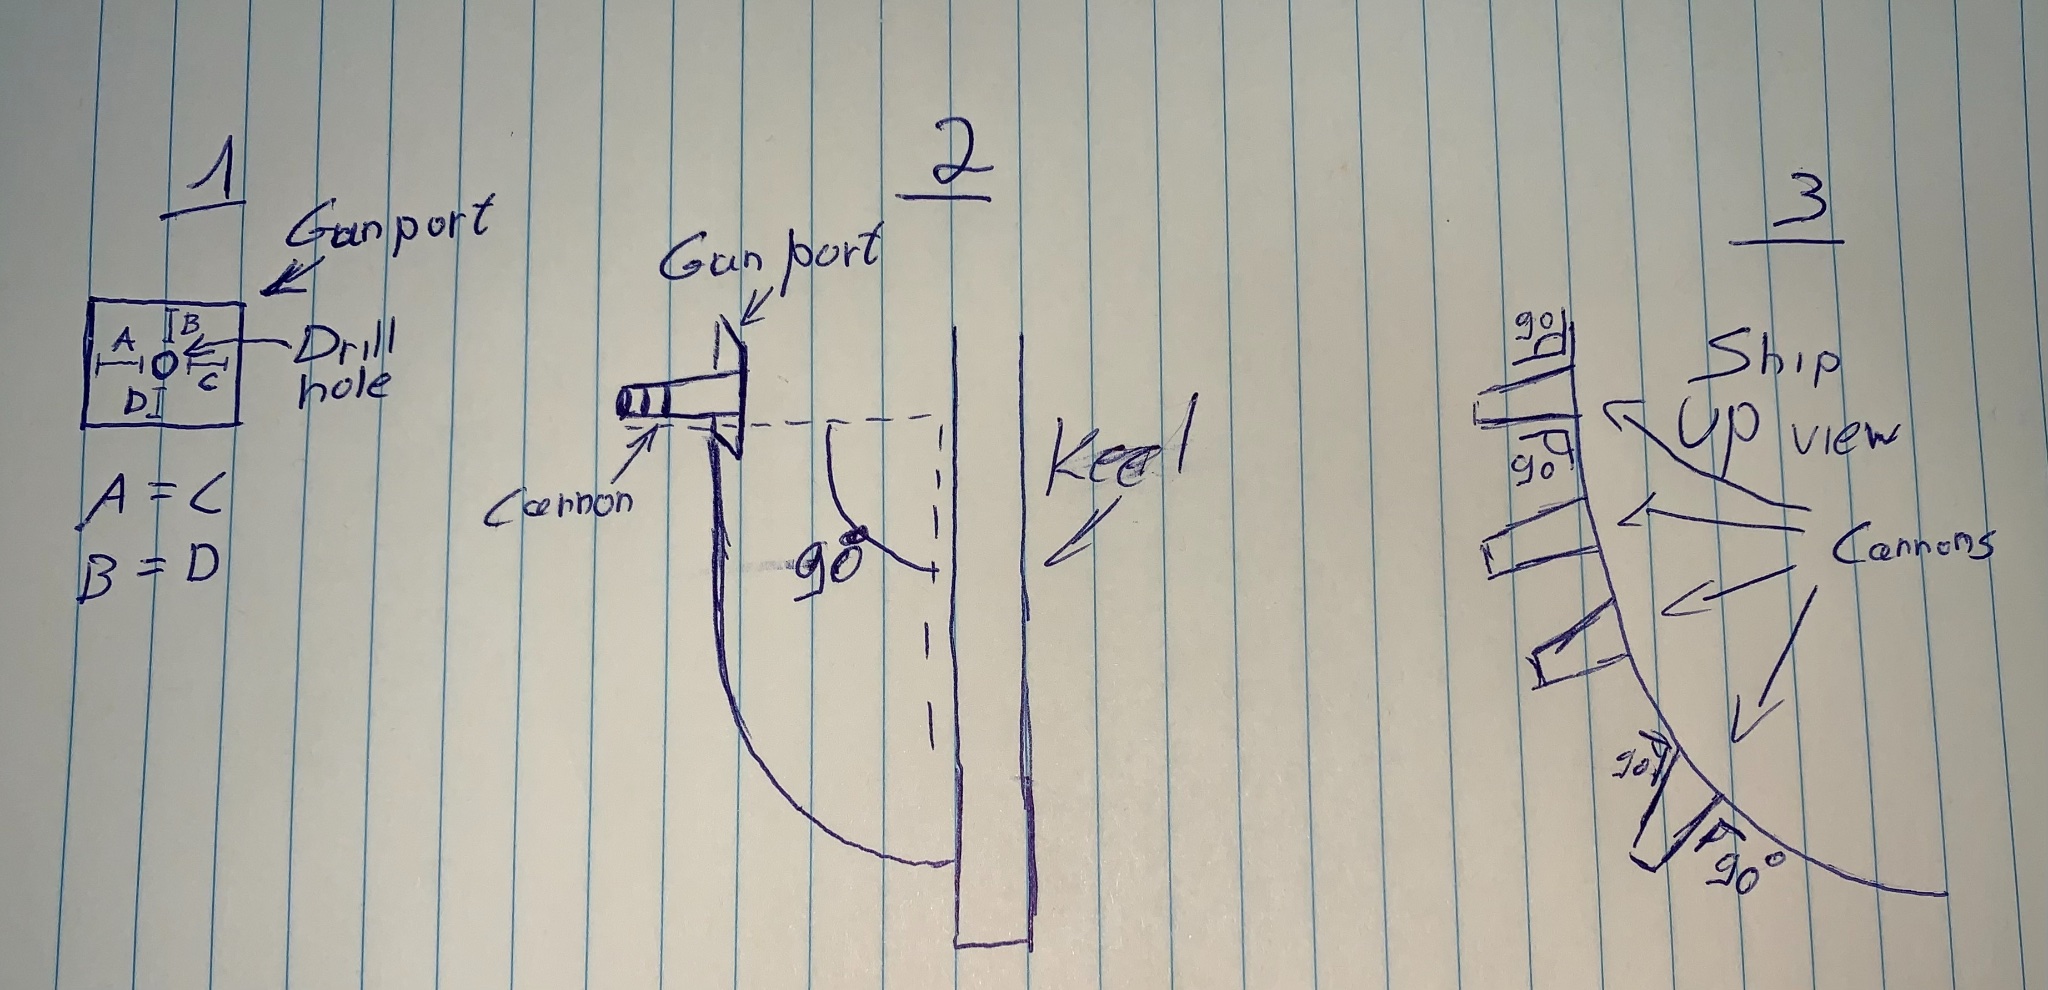
- The cannon must be in the middle of the gunport
- The cannon also need to be 90 degrees from the keel ( vertical ) and the problem is- the gunport is not square with the keel and each ship has his shape ....
- And also the cannons need to be 90 degrees horizontal from the sides of the gunport (before at issue no.2 I was talking about the 90 degrees from the keel and I was referring vertical ! and now in the second issue I’m talking about the horizontal way means the cannons must run smooth with the curves of the bow and the stern ) here you can see the issues :
So like I said I saw who the builders dill with the drill holes
some of them used a water level but this level can’t be precise for our needs , also I saw other who used the stand of the proxxon drill ,that one maybe can be ok only for the issue no.2 but not good for the other problems ....
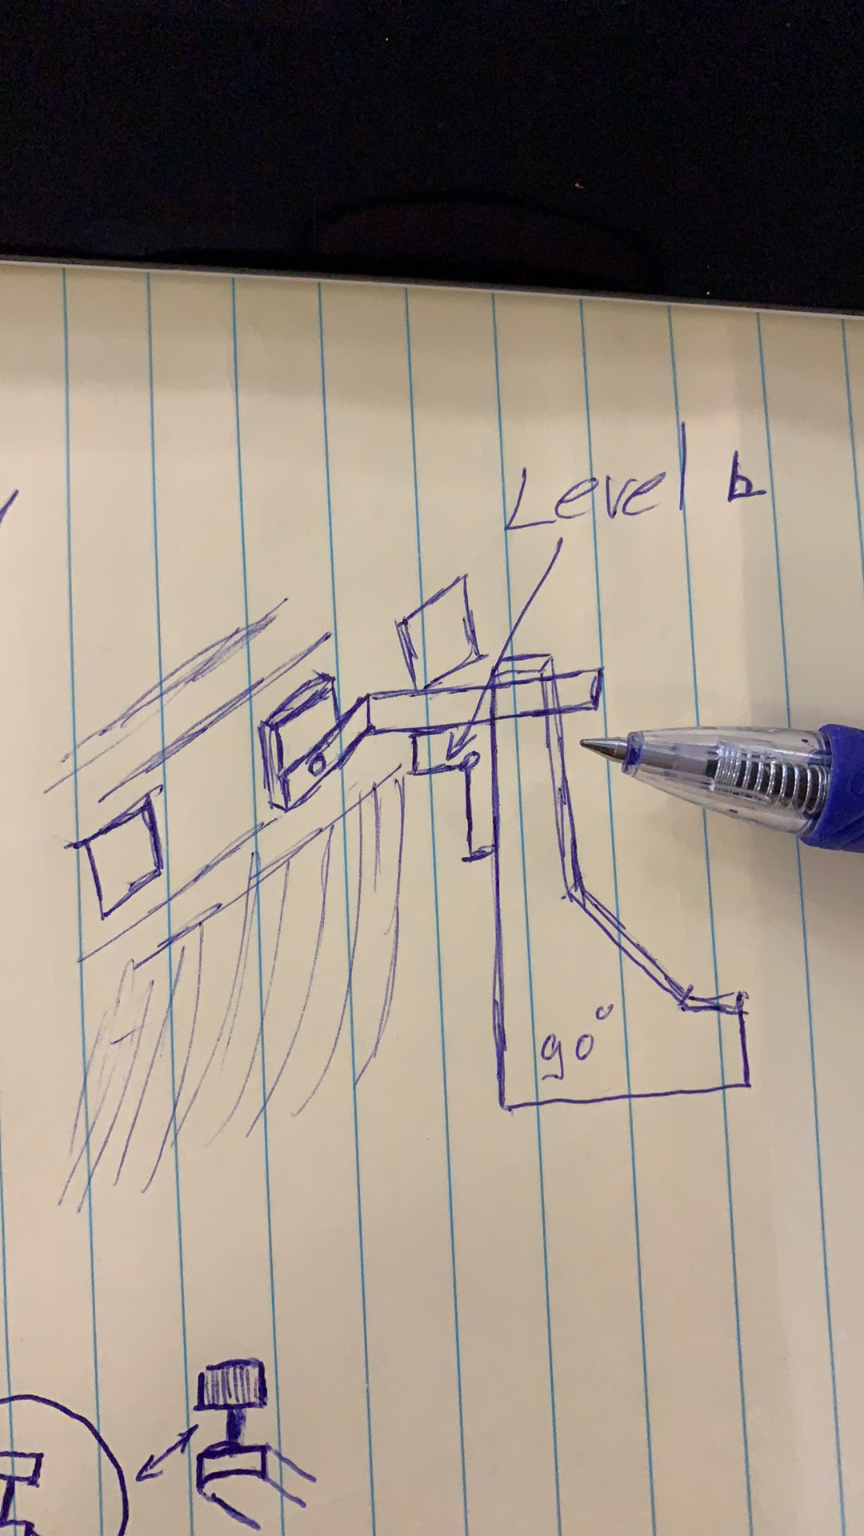
All those issues above made me to think a lot about the solution
and after a lot of thinking I made this jig for my drill who going to resolve all those issues
I will cut the words and will show you some pictures

 -
-
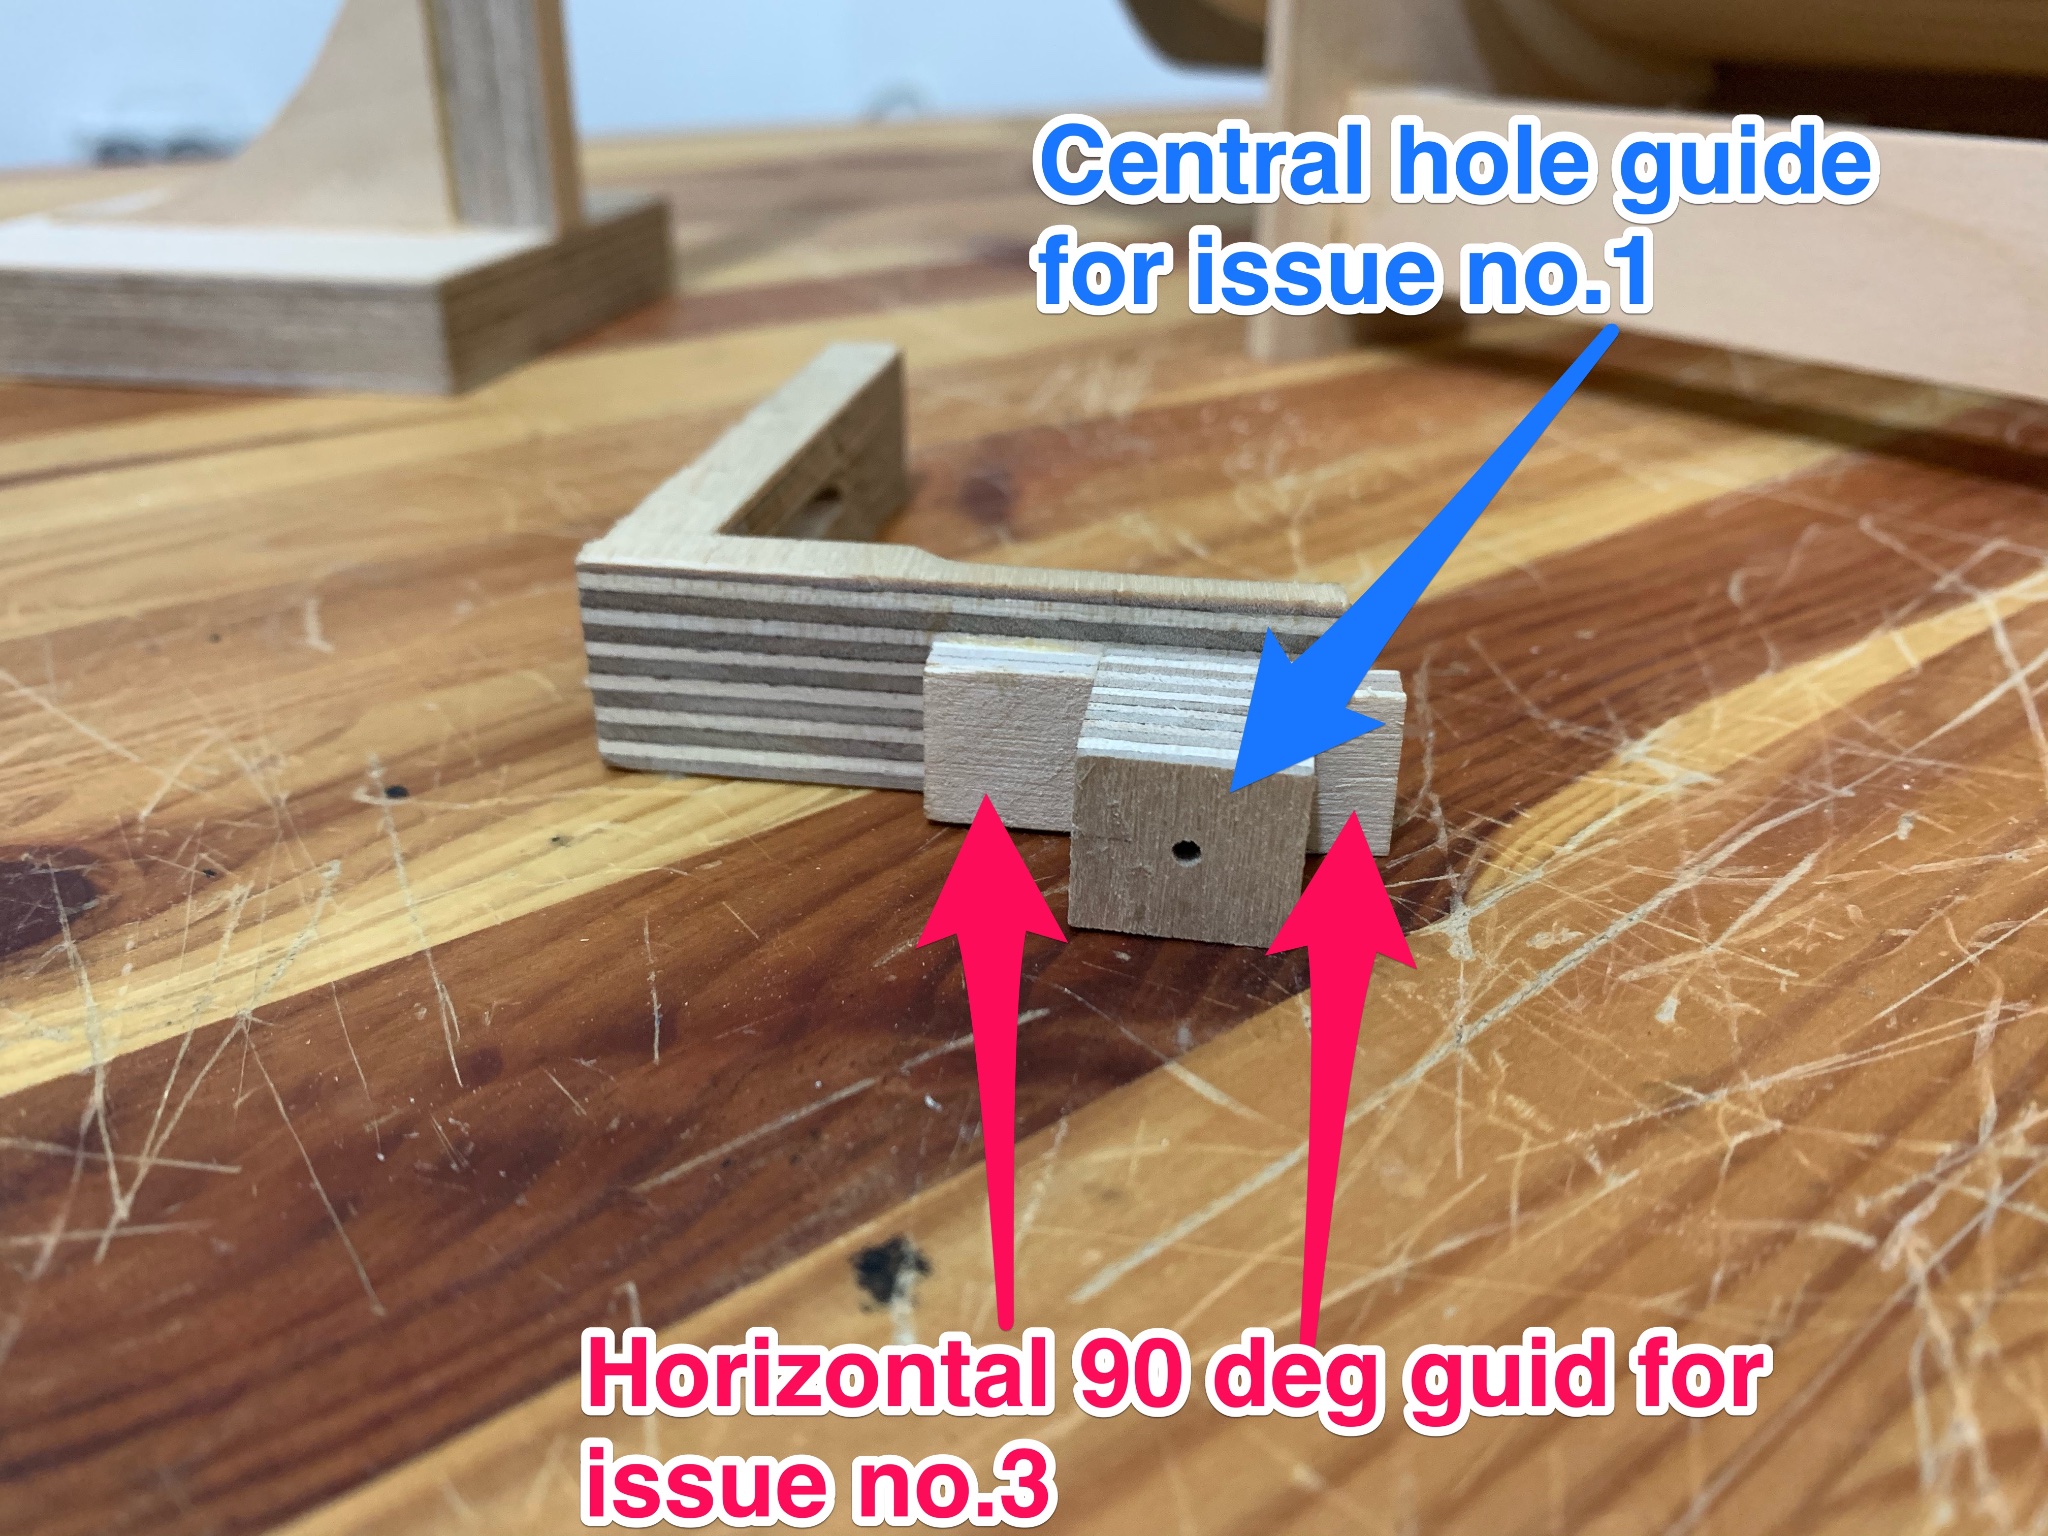
And after all here is the result :
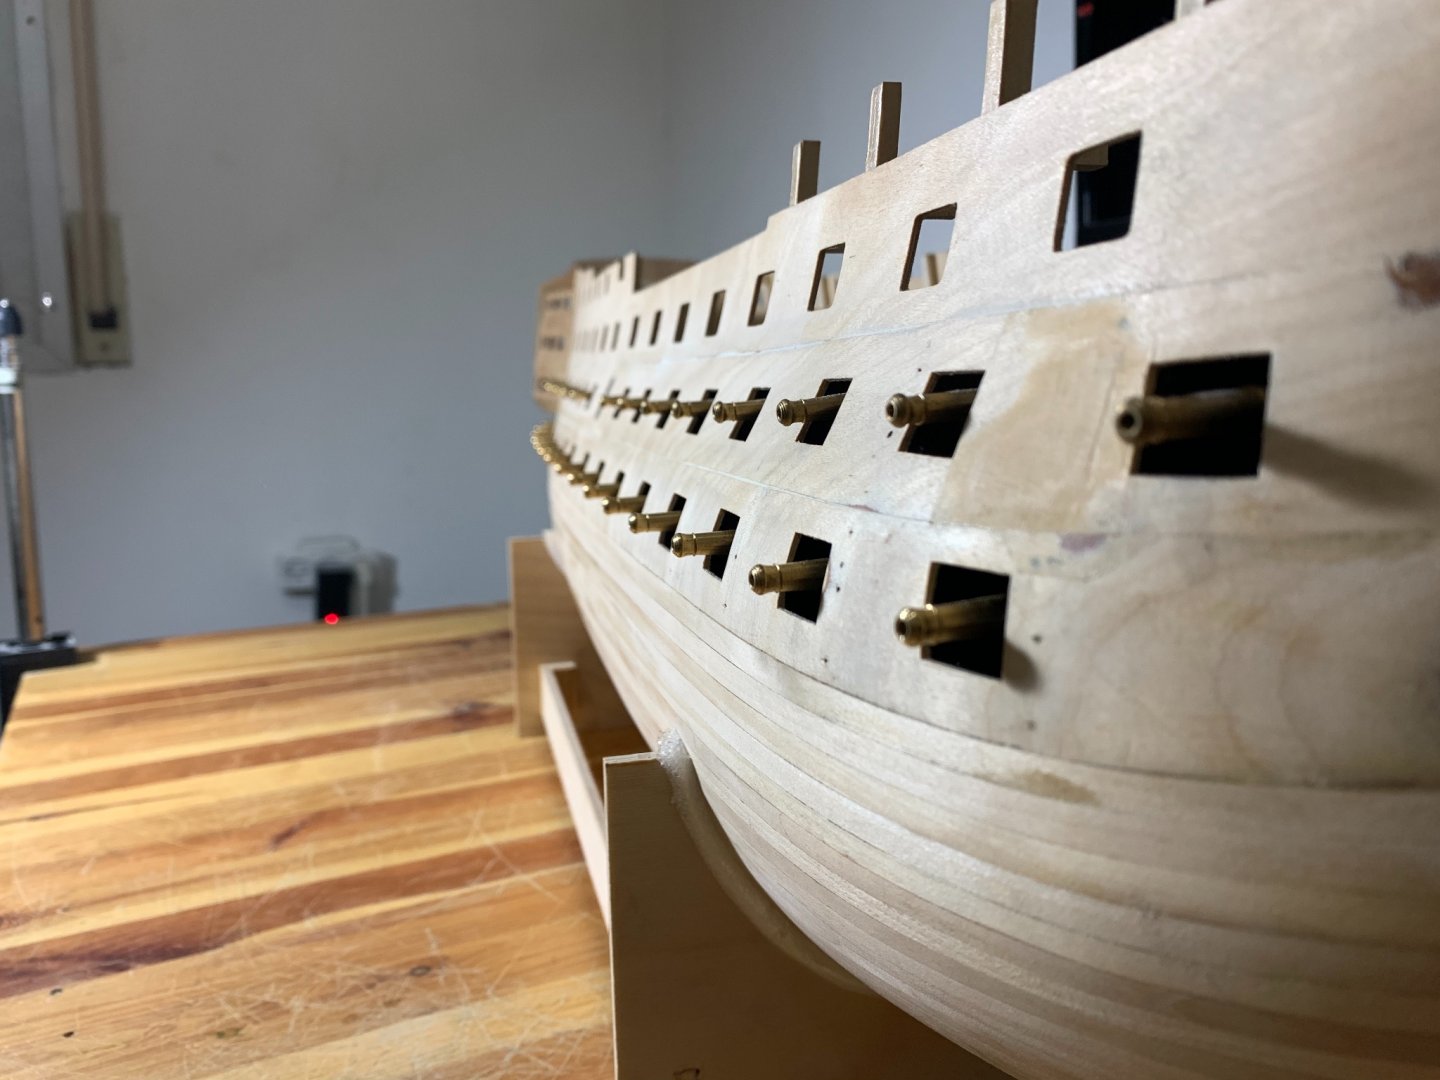
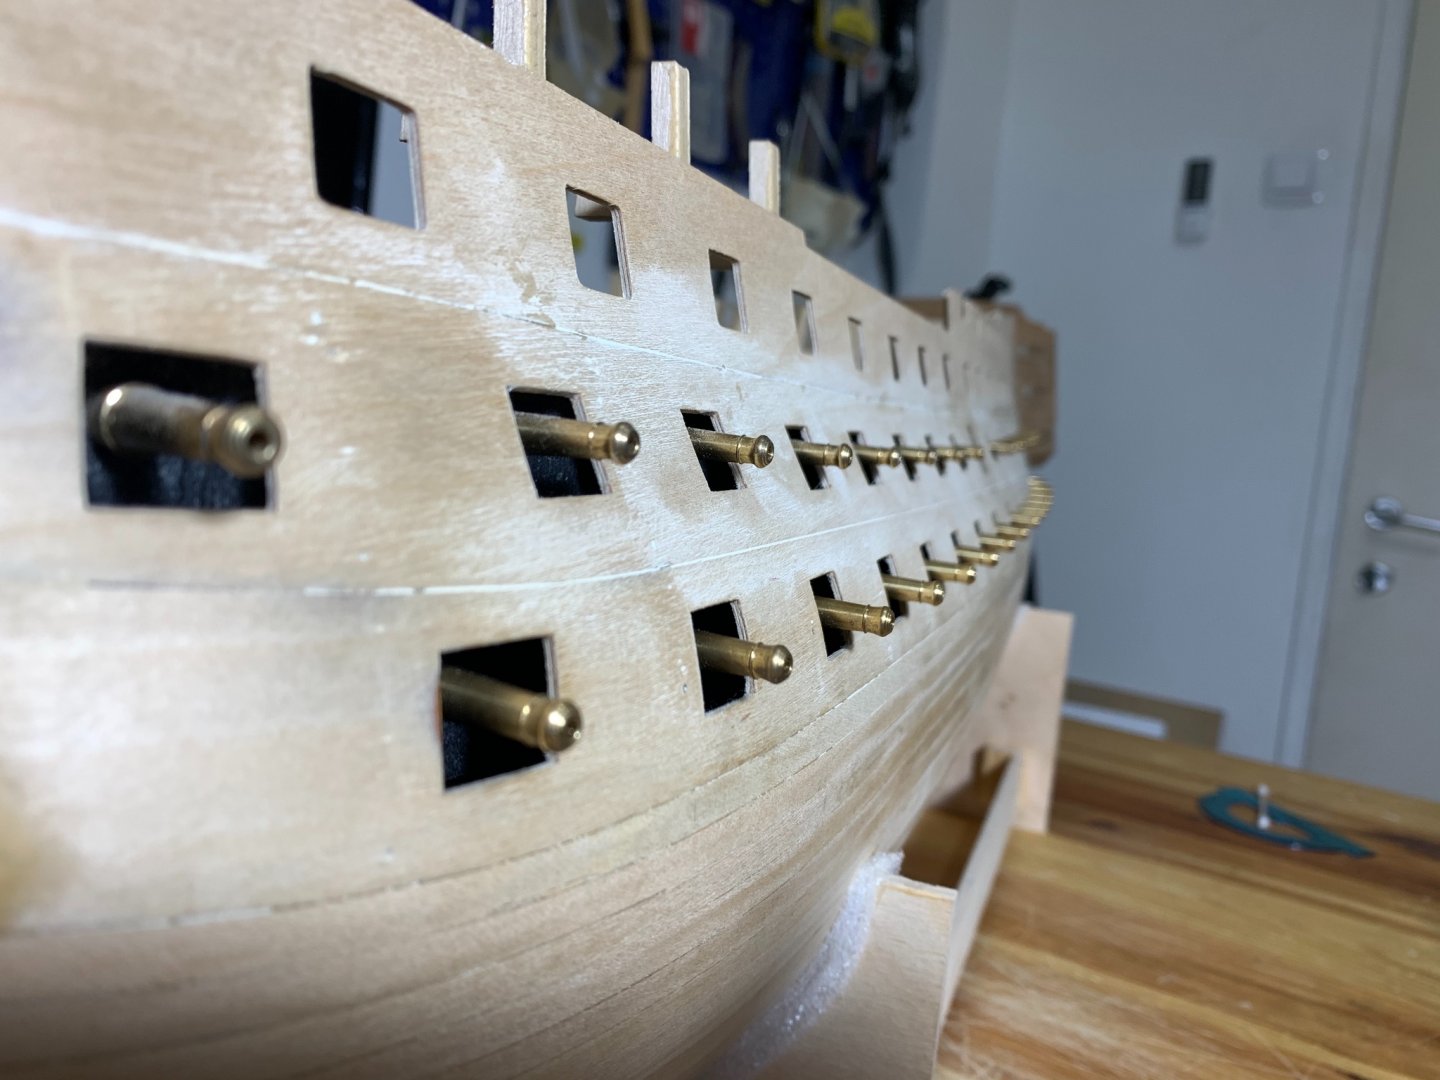
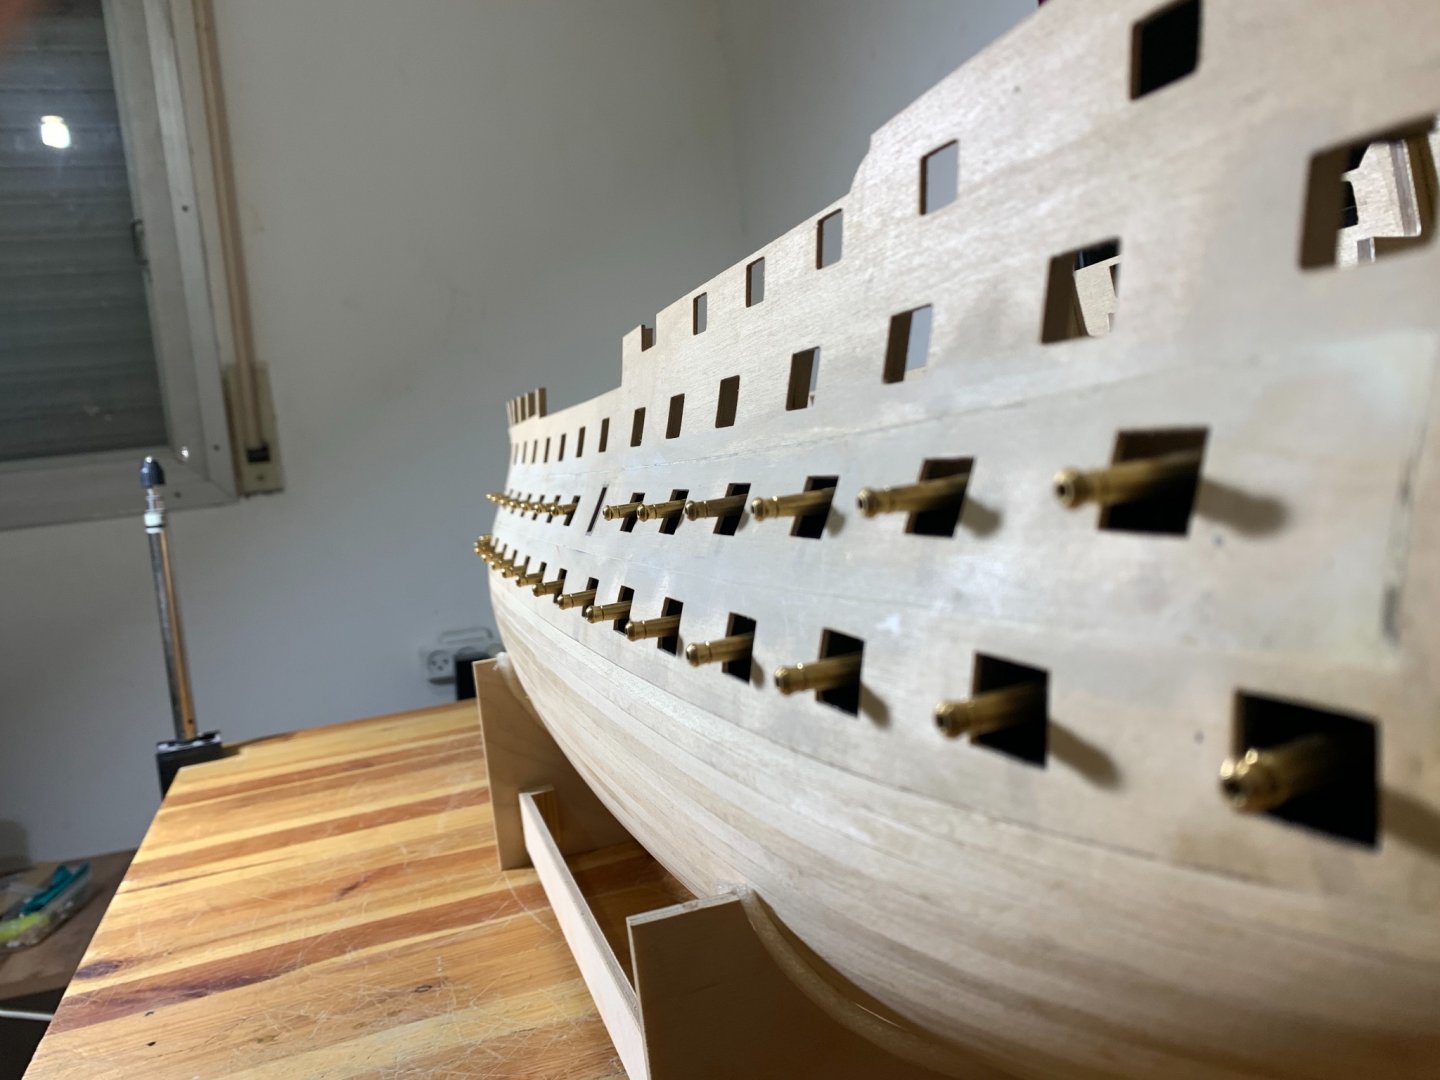
I hope this guide will help you out
Best regards,
Michael.
-
Thank you 🙏
-
Thank you 🙏
- mtaylor, popeye the sailor, Egilman and 3 others
-
 6
6
-
Hello friends ,
I just finished a nice project
and want to share with you
all made of 18mm birch plywood
and painted by airbrush
hope you enjoy the video
-
20 hours ago, Bob Cleek said:
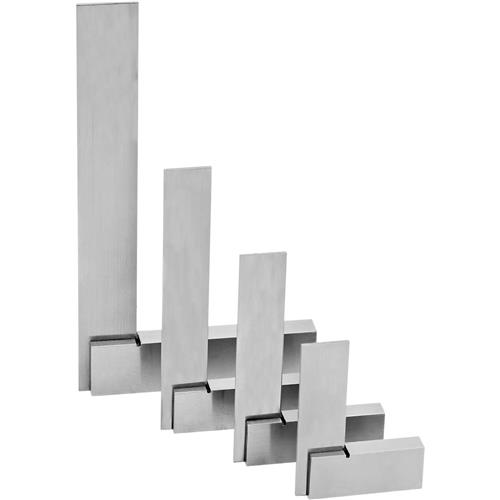
If I understand correctly what you want to use it for, the proper tool for that job is a machinist's square. The come in many different sizes and prices, but are all perfectly accurate, or should be, unless you drop them. The beam (wide leg) is designed to lay on the flat surface, such as a saw table, and the blade is designed to stand perfectly normal (at a right angle) to the flat surface.

Thank you ,
i prefer the flat ones but like i wrote before i dont know why but there is a lot of bad comments in AMAZON about different company who making this ruler
im still keeping searching for a good one
so if someone hear has a accurate one i will be more than happy to know hat company is it..
-
-
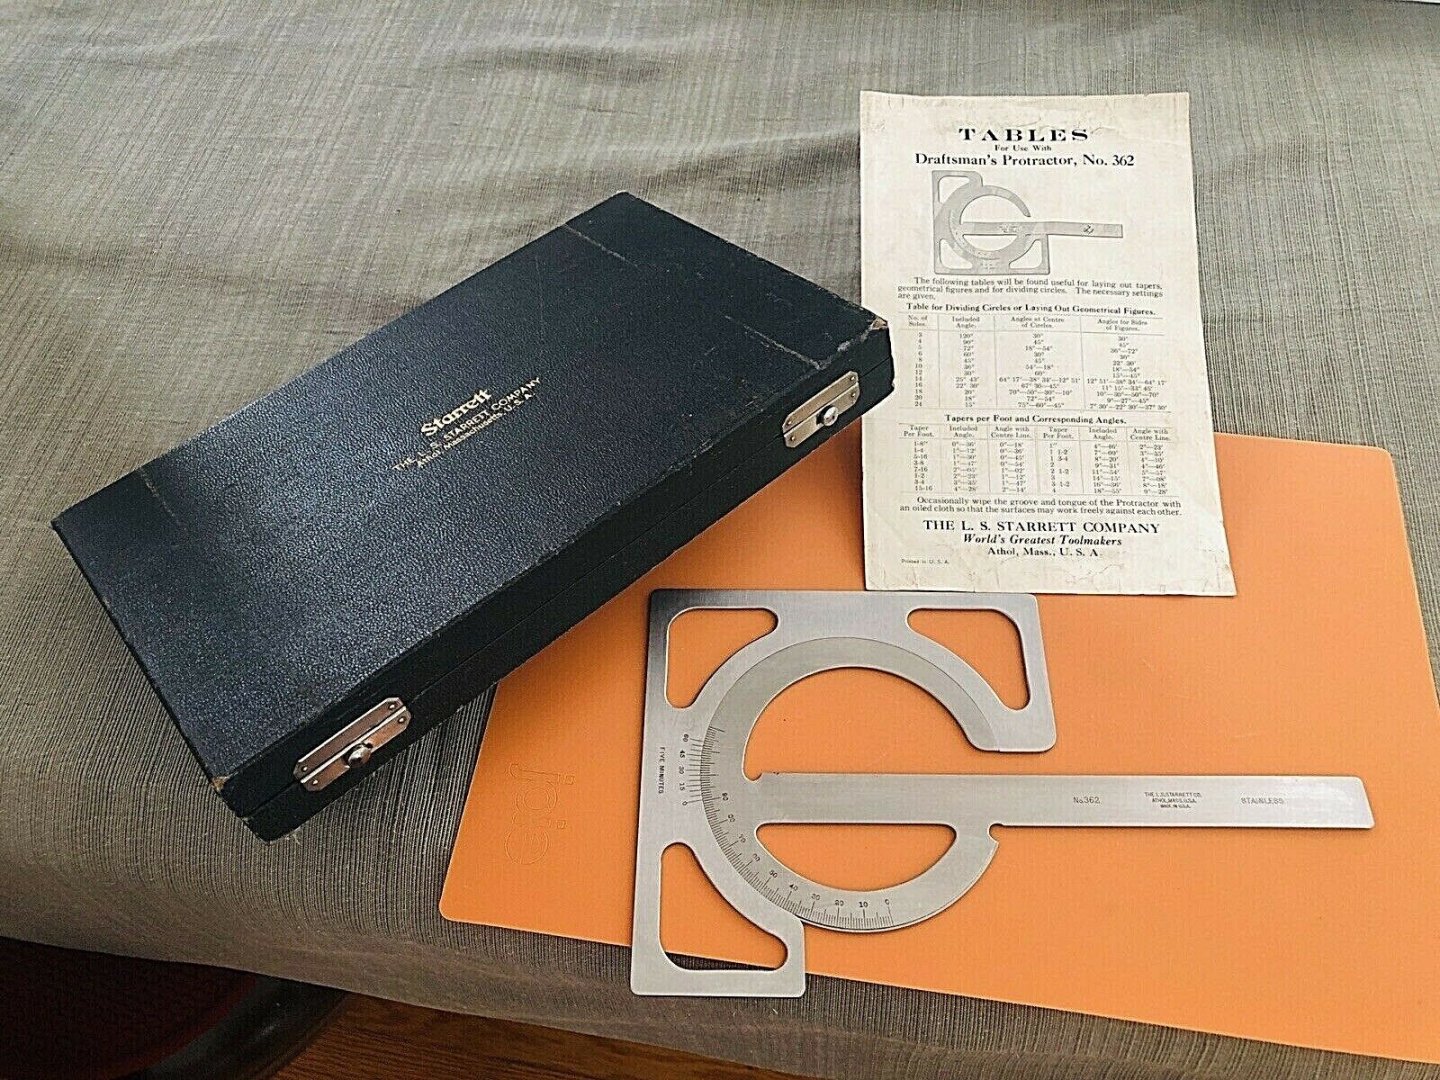
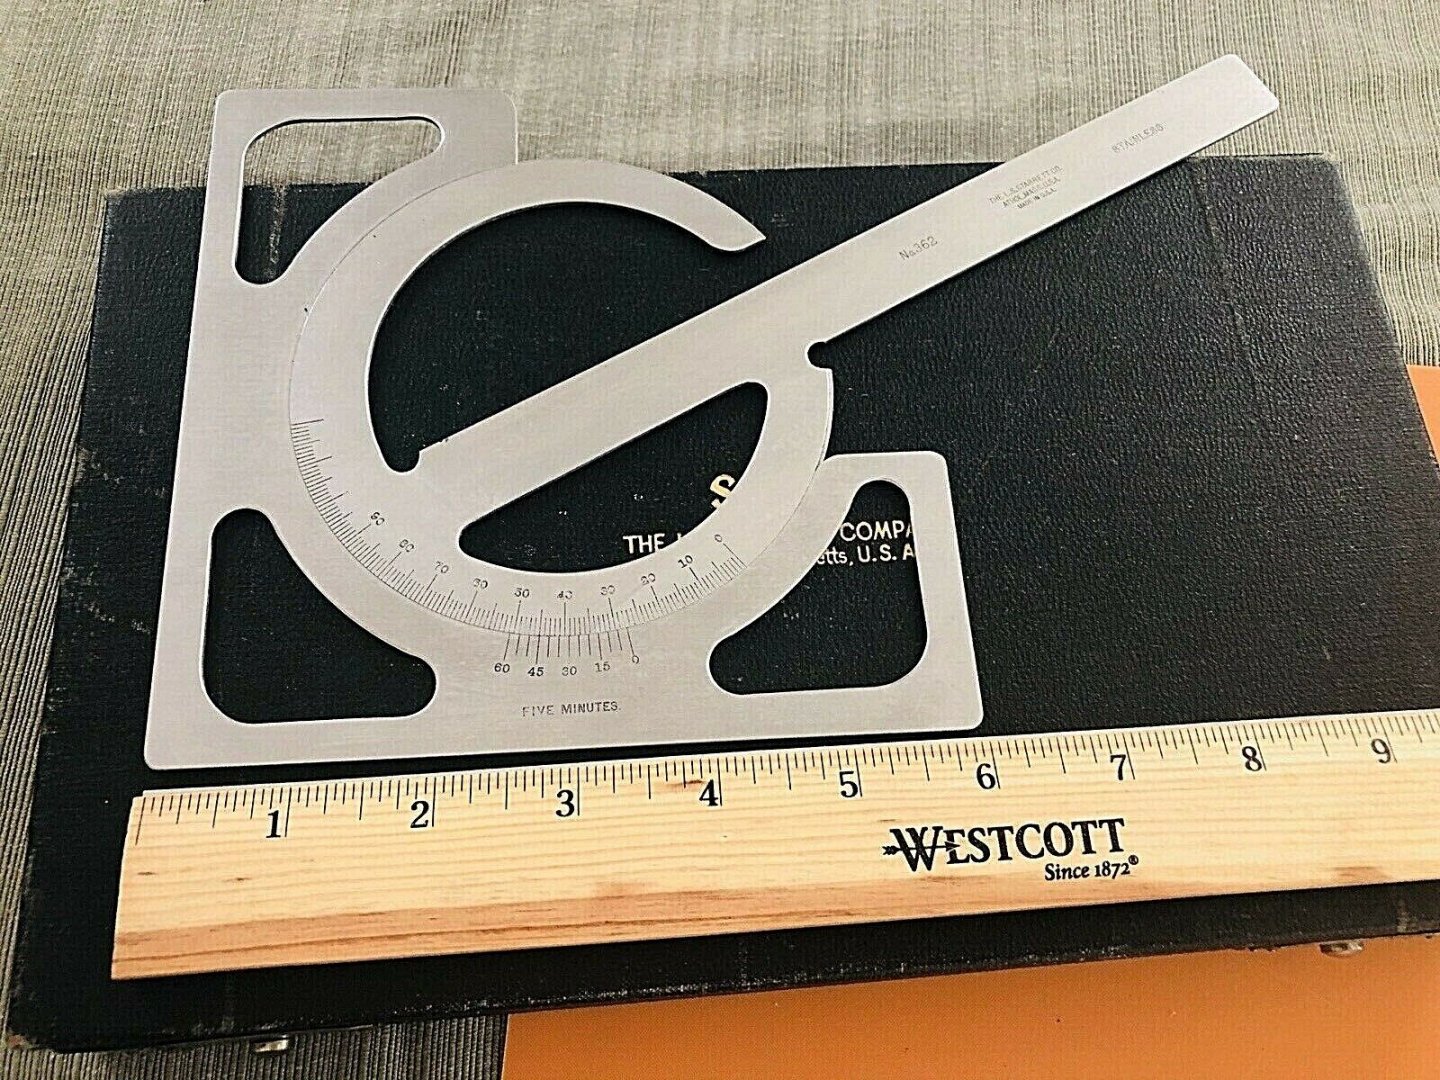
I have found this tool who got a beautiful reviews about the calibration !!!!
here is the reviews:
and there is also a store how sale that in Europa:
you can also get with it CALIBRATION PROTOCOL
now im wasting to the sore so send me the shipping cost ..
----
but again if someone still can recommend other tool i will be happy to hear
Best regards
Michael.
-
-
8 hours ago, Bob Cleek said:
The Theodore Alteneder and Sons drafting instrument company made stainless steel drafting triangles years ago. They came in various sizes. Alteneder made some of he highest quality drafting instruments in their day. https://www.worthpoint.com/worthopedia/drafting-triangle-with-handle-theo-alteneder You'll have to track the eBay "drafting instruments" offerings for a while before you come across one these days. (In the last few years, high quality manual drafting instruments have become very collectible and can be surprisingly expensive, although there are still a few bargains to be found by the knowledgeable buyer.) Metal triangles can also be sometimes found on eBay in the machinist's tools section.
I'm somewhat confused by your report of accuracy problems on internet reviews. It's not rocket science to produce a 12" 90 degree triangle out of sheet metal. I'd expect most sheet metal shops worth their salt would be able to turn one out for you in a few minutes. What kind of accuracy are you talking about? A Starrett or Brown and Sharpe (these are identical products) draftsman's protractor is accurate to five minutes of arc. (It was Starrett's catalog item No. 362.) This is the instrument that would have been used by a draftsman who wanted the most accurate instrument available. They were frequently used to replace triangles. They come up on eBay with some frequency, or used to. They sold for $75 bucks in the 1960's. A mint example in a good condition velvet lined fitted case may now set you back $100+, but who knows on any given day on eBay. It's a lovely instrument with classic Starrett aand Brown and Sharpe "finestkind" quality.
Thank you !
i need it to be a perfect straight without any bend and also to be a perfect 90 degrees
for caliber my proxxon machines like a table saw scroll saw disc sand act.. so your beautiful tool cant help with that because it not has a sharp corner
but thank you anyway !
-
Hello friends
im looking for an accurate drafting triangle square in size of 12’’ [30cm] 90 degrees made of metal
but in each one when I’m looking at the reviews over the internet the said it’s not accurate …
can someone recommend about a very accurate one?
best regards,
Michael.
-
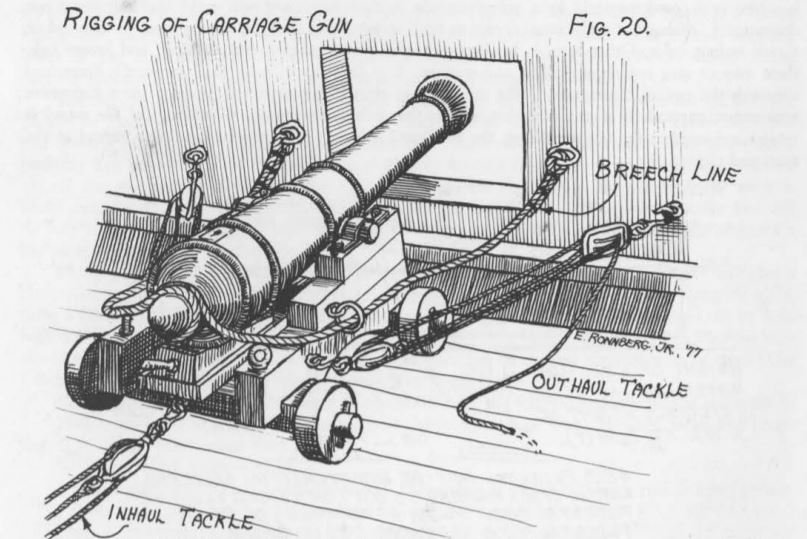
9 hours ago, mtaylor said:
To "rotate" the cannons there was a set of "training/outhaul tackle" on each gun. Most models only show the basic one for recoil. The training tackle had pulleys and they also used a handspike to move the rear of the gun for training. The outhaul could be used for training. On some ships, there was an extra eyebolt on each side further from cannon to make training easier.
Thank you !
its very interesting !!
-
25 minutes ago, Morgan said:
Michael,
In practice the cannons could be moved several degrees from centre so they could in theory, and subject to the curvature of the hull / width of the gunport, all fire at 90 degrees to the ship, but I think this would look wrong on the model and you should, in my opinion, go with 90 degrees to the hull at each gunport location, as per the real ship has them displayed.
Gary
Thank you Gary I have think about that but I wasn’t sure if the cannons can be moved to the sides because the Wheels are directed forward so how did they change the degrees ?
-
-Hello there ,
I am bout to drill the gun ports holes on my HMS Victory but I’m not sure about the position of the cannons
in the bow the gun ports getting the same curve of the ship so the big question is if to drill the hole for the dummy barrel parallel to the cannons of the middle or maybe I need to drill it 90 degrees from the gun port it means that the cannon in the bow will not be parallel to the same line of the cannons in the middle
in the sheets of the caldercraft the cannons looks all parallel the cannon in the bow and the cannon in the middle they are the same
also you can see here a picture from the book anatomy of the ship that all the cannons they are in the same angle
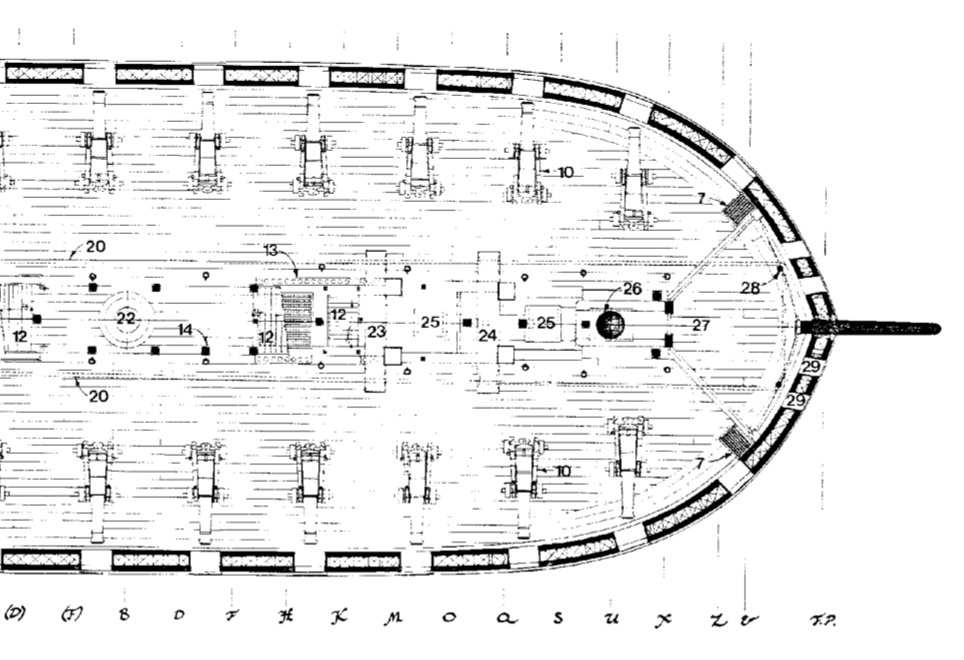
but in the real ship it looks like the angle is changing in the bow and the cannon gettin 90 degrees from the curve gun port !

So about the bow I think we have the answerbut I have the same question about the stern there is also a curve in the ship and I’m not sure about the cannons , in the sheets of caldercraft and also in the book of anatomy of the ship ,they looks parallel to the cannons in the middle
but I can’t take reference from the real ship because they removed the cannons from the gun ports in this section of the ship
so I’m not sure what to do,
if you have any proof about the position of this cannon in the stern I will be more than happy to hear that
Best regards
Michael.
-
Its always a pleasure to watch your work !
Just beautiful !!!!
-
-
Thank you Very much !! Im glad you like my work ,
to be honest it took me long time to do it i took each plank as a project
i think the secret for getting proud of your work its to do part by part plank by plank as a project by itself without to think when im going to move to the next plank ...
just to do your work without rushing at all , its an hobby not a business , just relax and put all your mind on the little thing that you doing and think about that as a project by itself
BTW i saw your Vasa and it looks amazing ! So im sure your second plank on your current model will be perfect !
Best regards ,Michael.
- Landlubber Mike, Helli, EJ_L and 1 other
-
4
-
4 minutes ago, md1400cs said:
Michael,
BTW you hull planking work is also so perfect. I also like your method for fitting in the keel - Super nice work.
Are you going to hide everything with copper?
Thank you for your kind words
about the copper , I do not going to use copper plates at all ,
BTW on top of this planks going to be second plank (walnut)Michael.


HMS Victory by Roberts Orca - Corel - 1:98
in - Kit build logs for subjects built from 1751 - 1800
Posted
very nice work !
now you have a very good starting
if you have any question don't hesitate just ask")
Best regards
Michael.