MORE HANDBOOKS ARE ON THEIR WAY! We will let you know when they get here.
×


Louie da fly
-
Posts
7,985 -
Joined
-
Last visited
Content Type
Profiles
Forums
Gallery
Events
Everything posted by Louie da fly
-
 That's a beautiful bit of bodging, Johnny. You're a braver man than I, sir. And better at figuring out 3D puzzles as well. I find it hurts my brain. A rough job, and sometimes an ad hoc job done on the spot without drawing up plans (at least here in Oz, and I think also in the UK) is referred to as "bodgy", or a "bodge job". The word goes back to at least the 16th century (how appropriate) when a bodger was someone who assembled new garments by pulling apart other, second or third-hand garments. But back in the 1960's teenage gangs in Oz were referred to as bodgies (the boys) and widgies (the girls). I have no idea if there was a connection with the other meaning of the word. Steven
- 45 replies
-
- 1
-

-
- Great Henry
- Henry Grace a Dieu
- (and 1 more)
-
I think we are talking about two different things. I mean the one about halfway between the pergola and the funnel.
-
Thanks, mate. Do my beady old eyes deceive me or is the mast coming up through the huge vent? There appears to be a vent just forward of the steersman's pergola in the second picture, and the big vent forward appears in the last photo (and the garden shed appears to have been mostly demolished to make room for it), but not in the third. I think I'll probably work with the second photo as my version of choice, but I don't know about doing that mast coming up through the front turret with the weird ball thing on top. I want to have enough fiddly details (particularly on the upper deck) so she doesn't look too boring, but I'm not prepared to put in too much, as it's not likely to be appreciated. There are two cubical "deckhouses " at the top of the two sets of steps, which should be easy enough to make. I'm still trying to nut out how to do the railings and the davits without either doing a ton of work or having them look crappy. Steven
-
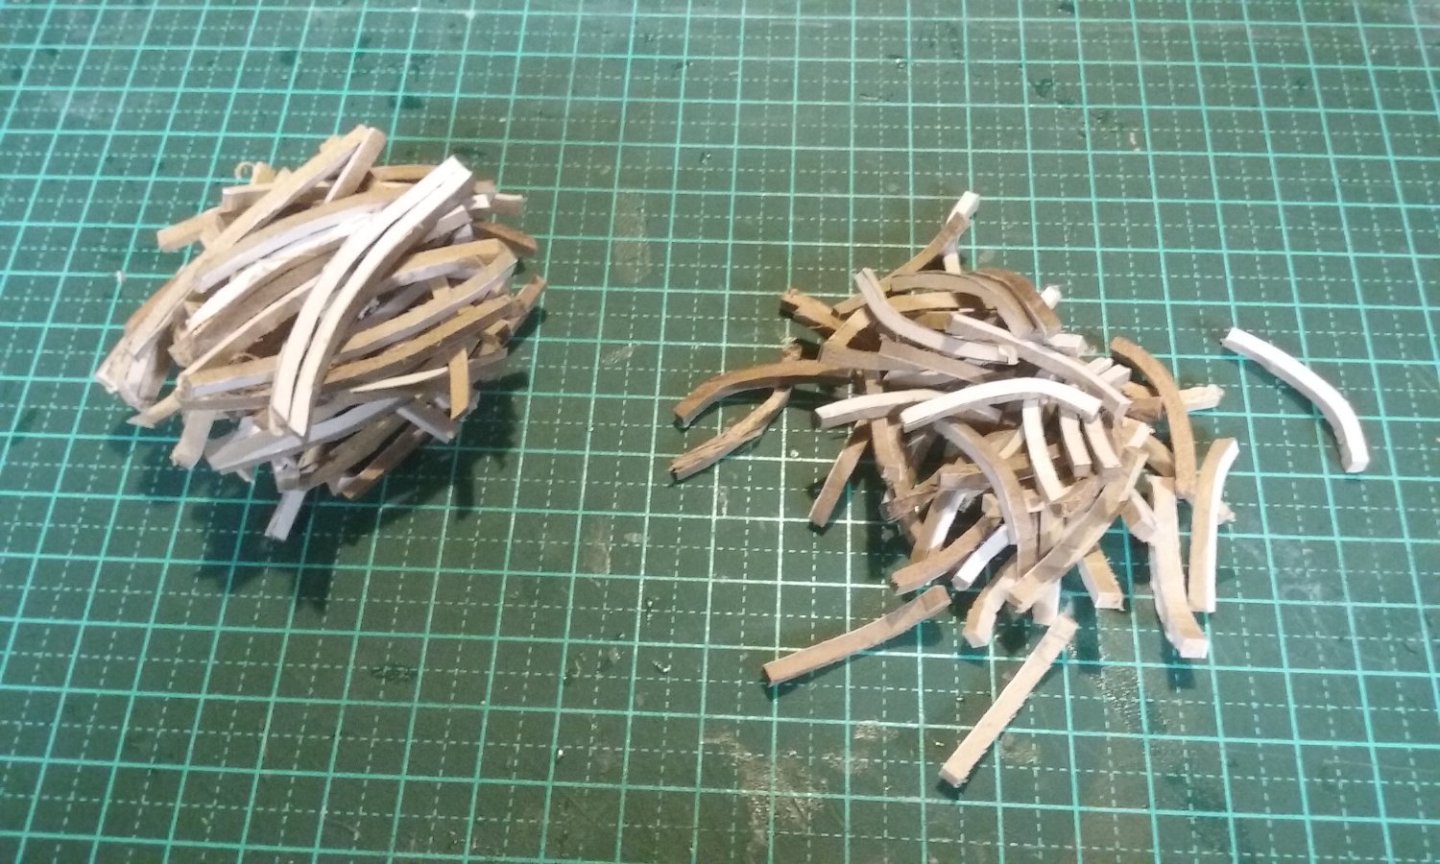
That's for sure. Does she have a wheelhouse at the fore end of the upper deck (as shown on at least one set of plans) or doesn't she? How many vents (I don't know the correct term - those big vertical tubes with a "hockey-stick" bend at the top coming up out of the deck and leading down to the interior) does she have in front of the funnel, and how many aft of it? I think there are two fore and two aft, but it's very hard to work out from the plans and the photos. In the meantime I've made a bit more at the Men's shed - I'm trying to make the whole thing using scrap timber so it's all profit except for the time I invest in it, but they don't have any dowel, so for the skylights on the fore and after decks I've had to bodge some up. I saw a similar skylight on Brunel's Great Britain in Bristol when I went to visit the UK back in 2009. Very cool. Steven

-
So, the keel is now complete. Due to its complex shape the stempost had to be built up, using scarph joints to join the individual elements. And here it is all assembled and glued together. Starboard side: Port side: And starboard side with the paper sanded off. Next step is to assemble the frames. I have yet to determine the shape of the frames which attach to the stem and sternposts, as the hull rises and narrows at bow and stern. That'll take a little while to work out. Steven
-
I'm very pleased to hear it. Steven
-
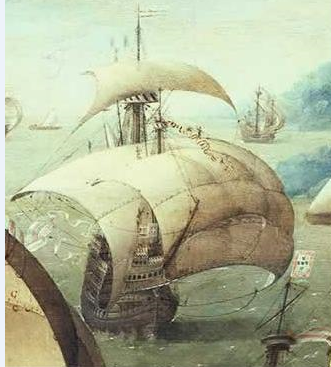
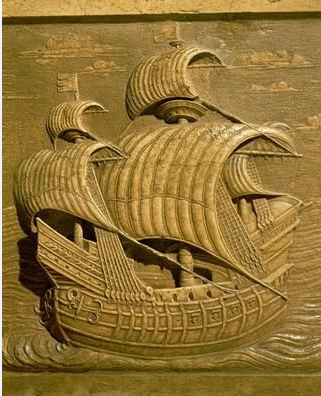
It's looking really good so far - nothing to complain about - quite the contrary. But I was wondering what you had planned for the forecastle. As you're probably aware, I have a bit of a "thing" about the forecastle. Earlier models, such as the one at the Mary Rose Museum and the available kits have a forecastle reminiscent of a galleon, but more recent opinion is that the shape was much closer to that shown in the Anthony Roll and in many "great carracks" of the time, such as the vessels pictured in the painting of the Santa Catarina do Monto Sinai and the Venetian ivory from the tomb of Alessandro Contarini of 1553 (below) Not trying to twist your arm, you understand . . . Steven
-
Why am I not already following this? How did I miss it? Wonderful work, mate. Really wonderful. Steven
-
Thanks very much for this information, mate, and the thorough research involved in obtaining it. Steven
-
Warrnambool's a beautiful town. I've been there several times. The Maritime Museum's well worth seeing. Great that you have a lathe. That will help a lot. Oh, and here's a bit of Shakespeare to inspire you as you work. Only a few archaic words might be a problem, but I think it's possible to get the sense of it very well. The language has changed so little since Shakespeare's time that it is counted as Modern English. Chaucer is Middle English and Beowulf is Old English. Waes Thu hael! Steven
- 177 replies
-
- 3
-
-
- Perseverance
- Modellers Shipyard
- (and 1 more)
-
Well, congratulations to you too! Good to see younger people in the hobby as well as us old f*rts. Ferrus, nice work on the rigging. I had to wait till now to get into it in that kind of detail. The first time I'd been prepared to nut out the full rigging on a square-rigger was about 2 years ago, towards the end of my Great Harry restoration. So you're well ahead of where I was at this age. Steven
- 279 replies
-
- 2
-
-
- Spanish Galleon
- Imai
- (and 1 more)
-
Yes, the word sounds somewhat rude, doesn't it? You have them making up the frames, and the shrouds that lead from the mast just below the fighting top to the outside of the top itself are called futtock shrouds You're doing very well with this build. Hard to believe this is your first model. I hadn't come across it until you pipped Ferrus Manus at the post with regard to age, but now I'm following it with interest. Where in Victoria are you? As you can see, I'm in sunny Ballarat. And there are quite a few of us Mexicans on MSW. Steven PS: While a lathe is certainly useful, it's not absolutely necessary. I've made masts for several models by the traditional method - start with piece of wood with a square section, take off the corners so you have an octagonal shape, then take those corners off so it ends up circular. Perhaps a bit more work, but many masts weren't circular for their full length anyway.
- 177 replies
-
- 2
-
-
- Perseverance
- Modellers Shipyard
- (and 1 more)
-
Like I said - not a brawl, just a difference in interpretation. I think you must have been watching too many action movies Steven
- 740 replies
-
- 6
-
-

-
- Tudor
- restoration
- (and 4 more)
-
Dick, where do you keep on getting these amazing pictures? Absolutely wonderful! Thanks very much for them. Greatly appreciated. Yes, I'd thought of hogging myself. Rather like (in reverse) the way the bed of a large flat-bed truck is curved upwards, so when it is under load it straightens out. But not . . . Steven
-
You can also make filler from sawdust and weak PVA (white) glue, particularly if you're trying to match the colour of your wood. Dunno about the ramen, though. I thought that was some kind of Japanese noodle. Well, I can't say I agree with that fellow. If you go see a Shakespeare play, most of the time you can follow what's happening very well. I remember when I was a schoolkid and we went off to see the Scottish play (don't call it MacB*th - it's bad luck) and some of the kids (who'd been studying the play, for heaven's sake) came back and asked why it'd been re-done in modern English - it hadn't. It's just that when you hear it spoken on stage it's a lot more understandable. But yes, jargon - a bo'sun is a boatswain - and as we all know, a swain is a man (Old English Sweyn, probably from Old Norse Svein). The word is still used today in poetry, but usually ironically (as in a lovelorn swain). In a document I came across from 16th century Scotland the word used was botisman (i.e. boatman). And then there are futtocks (would you believe foot-hooks?). Steven
- 177 replies
-
- 2
-
-
- Perseverance
- Modellers Shipyard
- (and 1 more)
-
Hardly an argument, simply a difference in interpretation. Your idea has merit, but without a time machine there'll never be a definitive answer. Steven
-
Congratulations. That possibly makes you the youngest member of MSW (at least that I know of!) About the same age as I was when I built my Great Harry. Steven
- 279 replies
-
- 1
-
-
- Spanish Galleon
- Imai
- (and 1 more)
-
Well, this is looking very good. It's a huge project adapting the kit to become something very different, and 'bodging' the bulkhead shapes, learning as you go. Having gone through a similar process, I feel I understand what you're going through. In such a case, I think you're right in allowing yourself some leeway between the original kit on one hand and perfect 'rivet counter' historical accuracy on the other. I'm following with great interest. Standing on the sidelines applauding. Steven
- 45 replies
-
- 2
-

-
-
- Great Henry
- Henry Grace a Dieu
- (and 1 more)
-
Thanks for that information about the support above the turret. I hadn't noticed that. It's just a pity that they decided to sink her instead of preserve her back in 1926. (sigh) Steven
-
She's looking good, mate. A very pretty hull. Looking forward to seeing the next steps. Steven
-
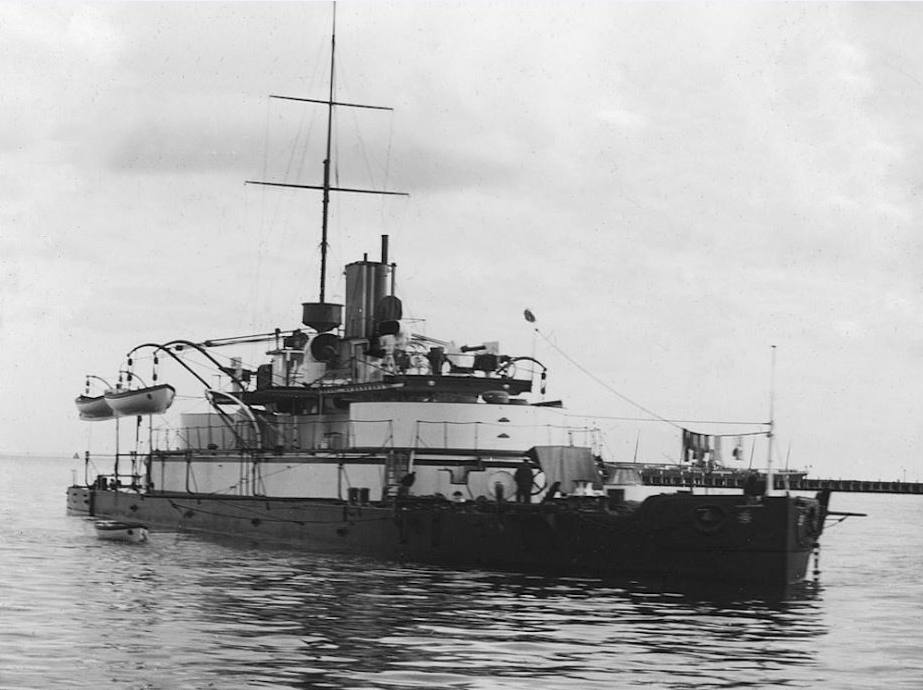
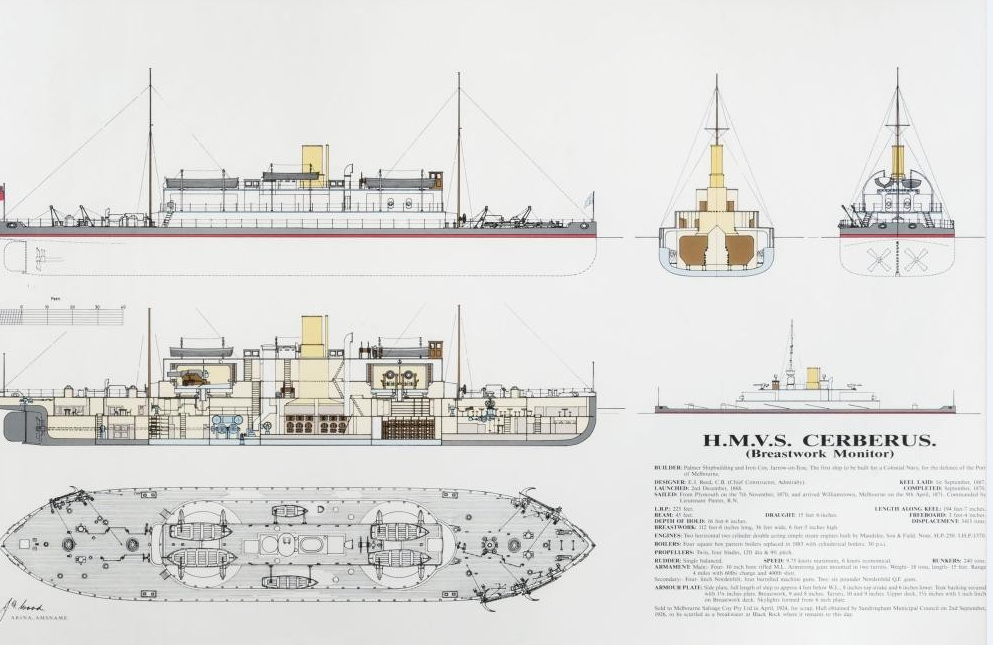
Thanks, mate. I note that contrary to the plans I've seen, photos the upper deck is cantilevered over the fore turret, not supported on columns at the front (which would improve the field of fire but means the upper deck must have been pretty heftily built). But to be honest, this is going to be quick and basic, and I'll probably be leaving out a lot of detail. It just seemed like a nice way of combining my hobby with a fundraiser. No idea if the model will sell once complete, but I'll have some fun doing it. Steven PS: Such a shame that she ended up as a breakwater and is now unsalvageable.
-
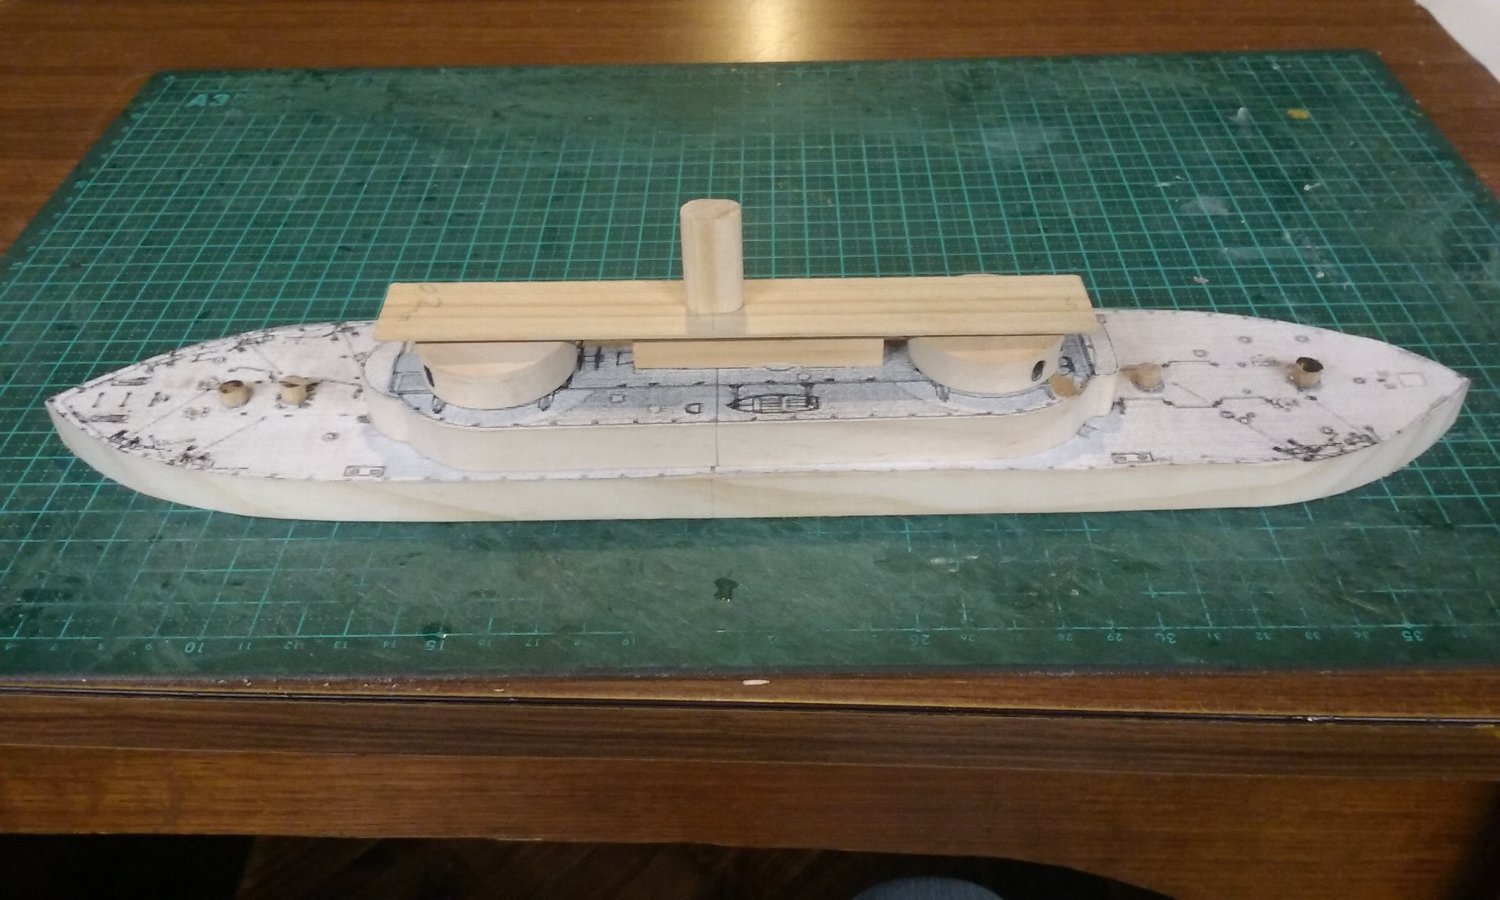
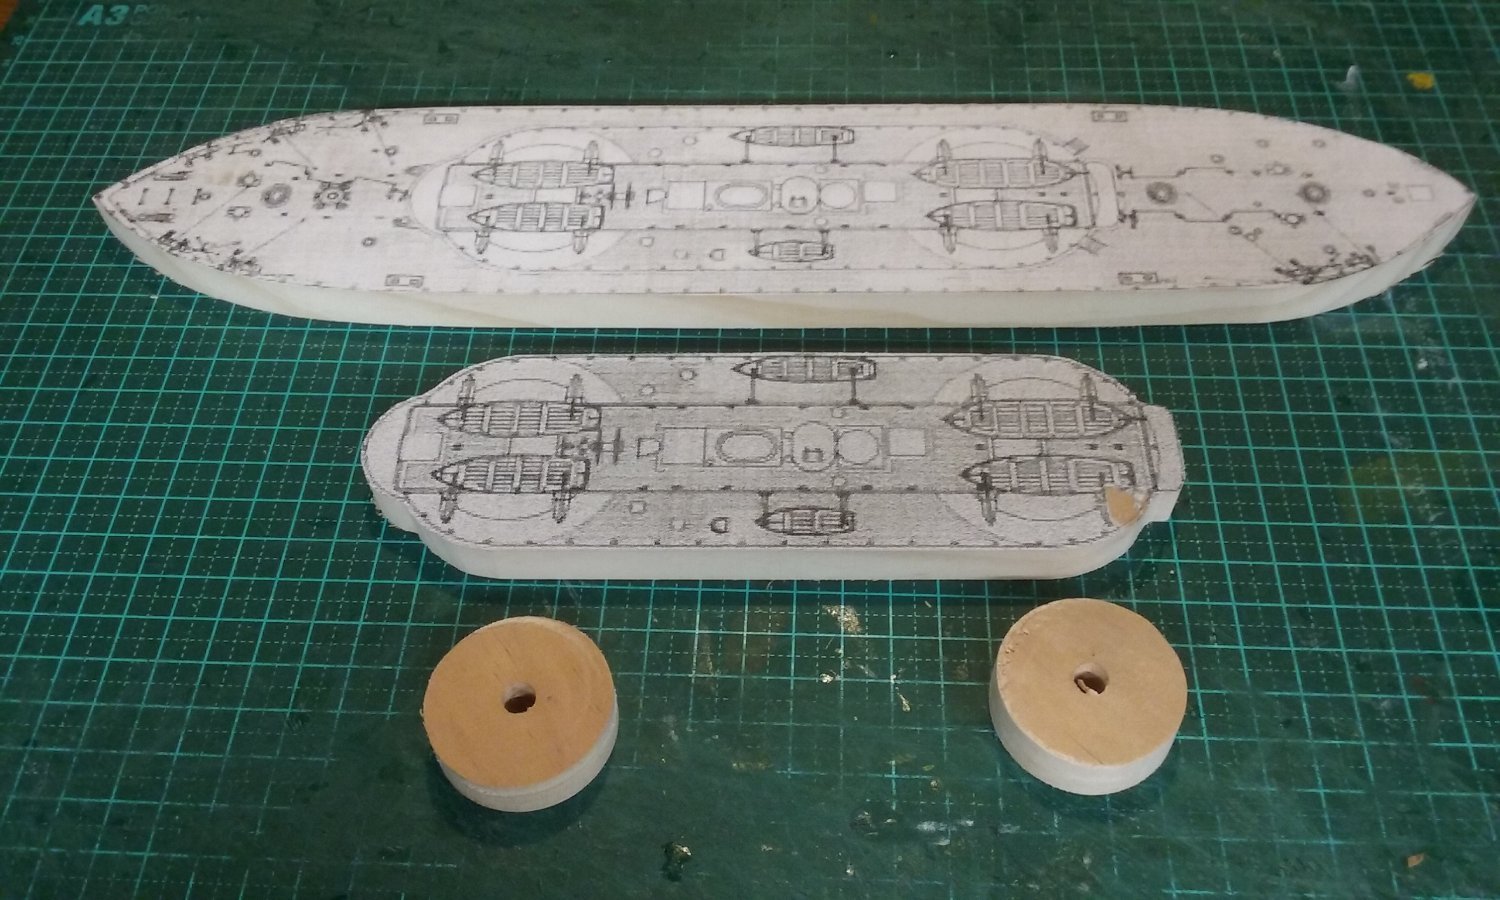
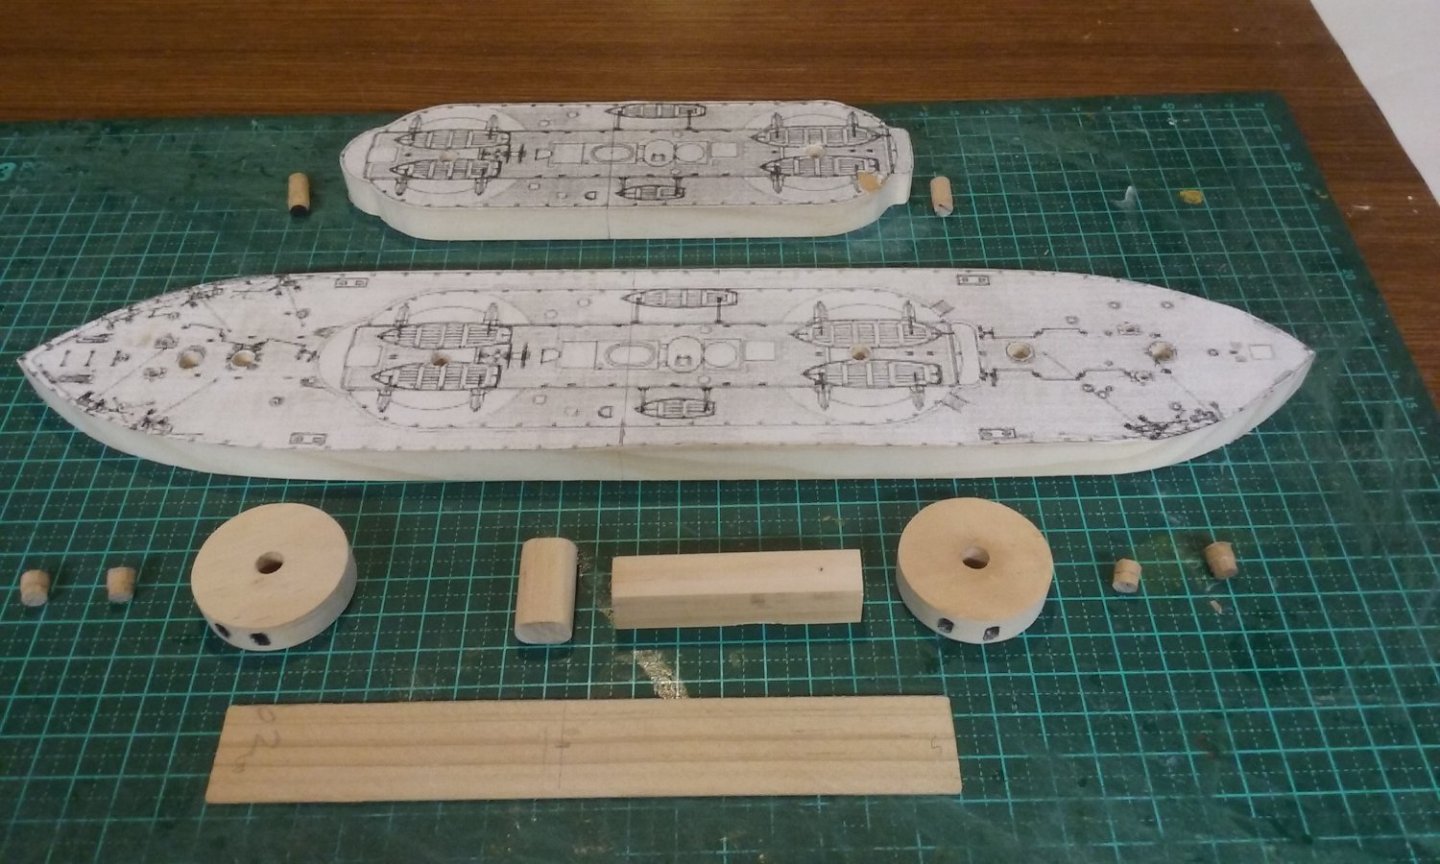
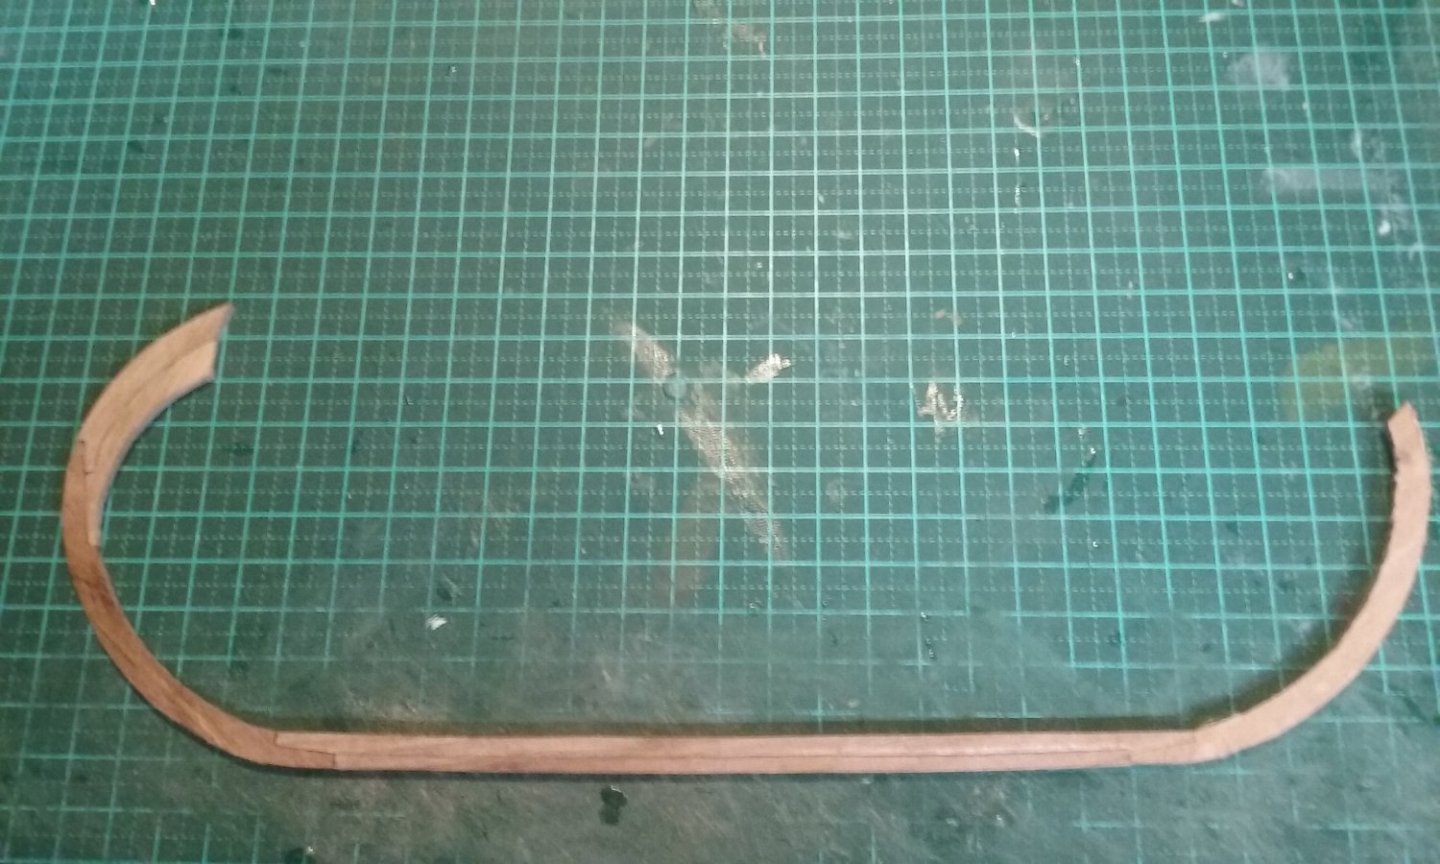
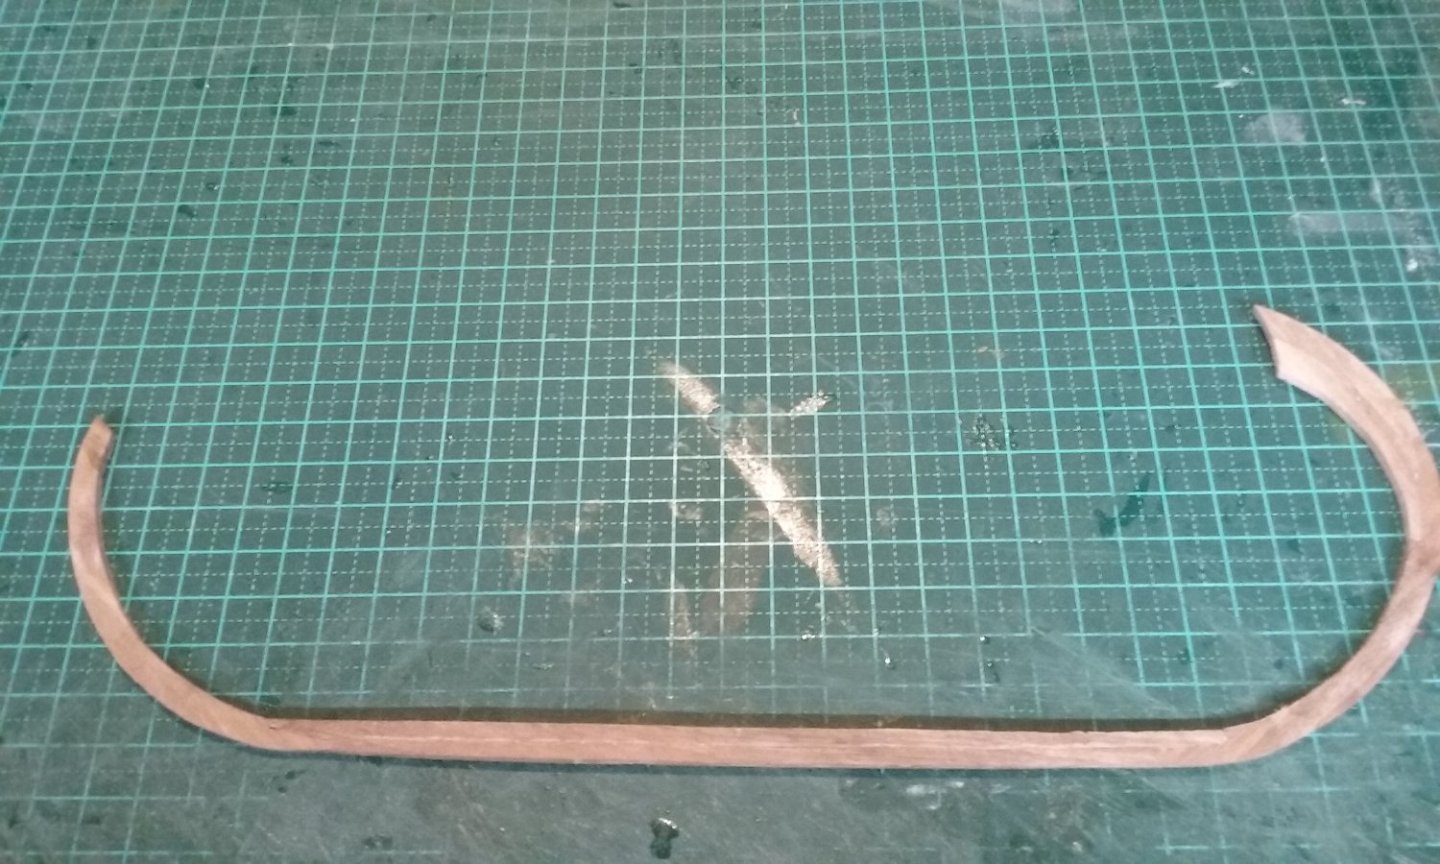
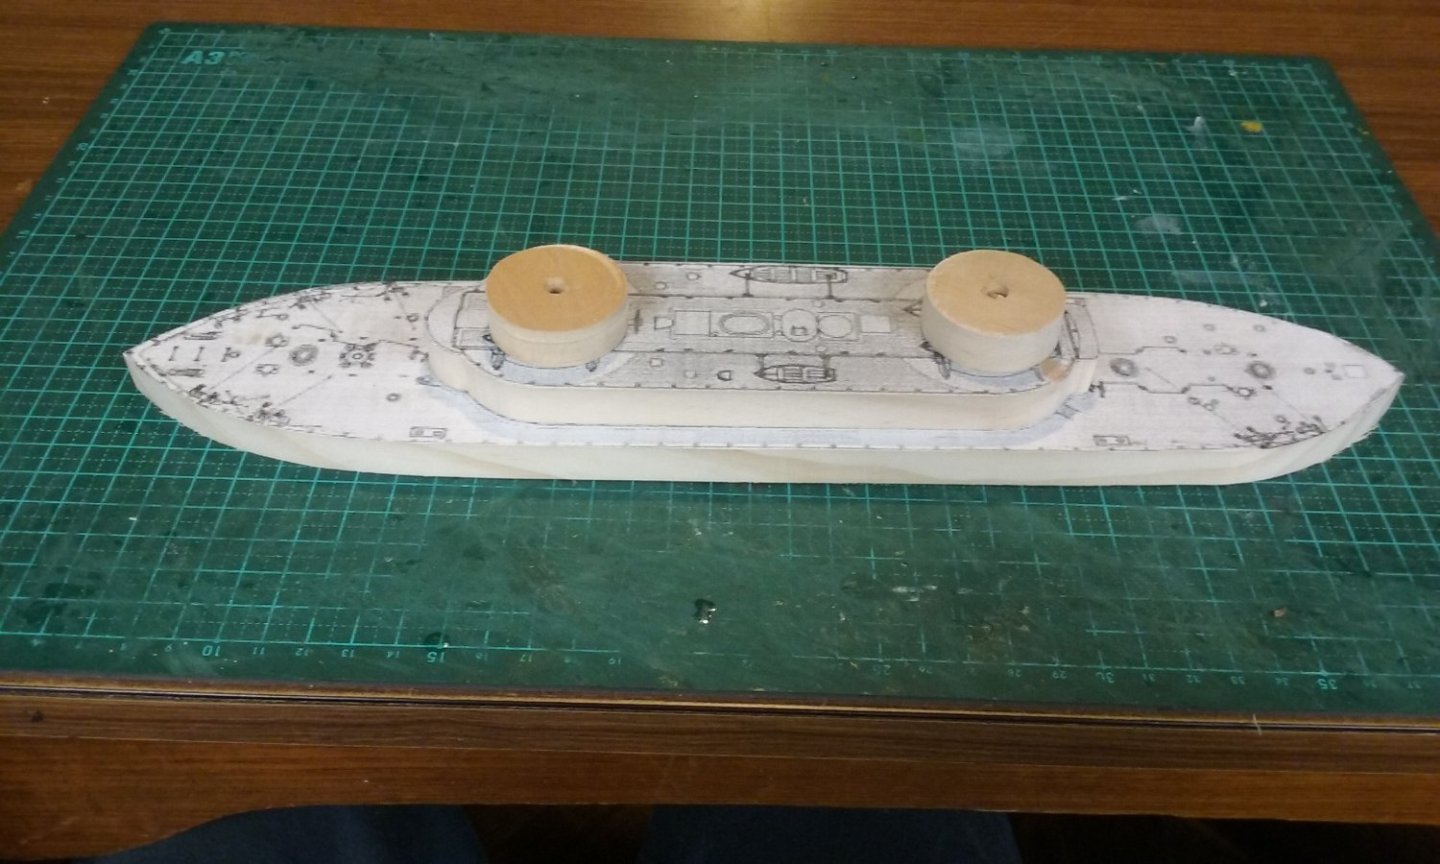
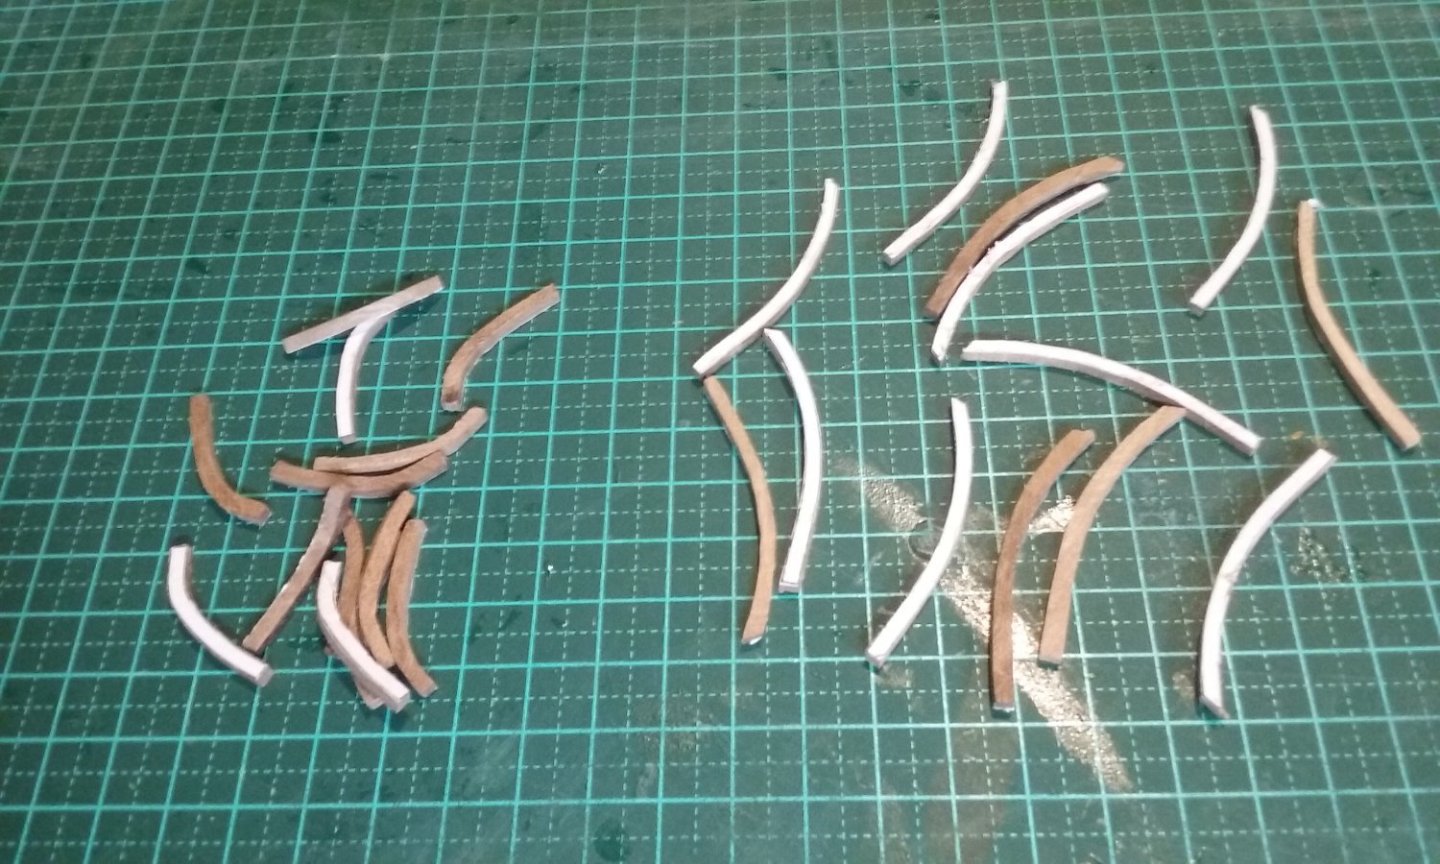
I just joined the local Men's Shed - this is a common set-up in Oz, where men can get together, talk about men's stuff, tell a lot of lies, and make stuff. The local one is in the woodworking section of a local high school which has now been converted to a community centre, and has an amazing array of equipment and facilities - carpenters' benches, planes, chisels, drill presses, bench and drop-saws, lathes of various sizes, thicknessers, disc sanders (my current favourite!) etc etc. As it's a fairly informal community group they're always short of funds and they make things to sell, to fund their activities - timber cutting boards (bread-boards), birdhouses, that kind of thing. It occurred to me that (not really wanting to make bird-houses, though I might be persuaded to make possum-boxes to put in trees to provide homes for the local wild-life), I should do something more in line with my own interests. Which led to the HMVS Cerberus, a coastal monitor built in England in 1870 for the fledgling navy of the colony of Victoria, Australia. https://www.navy.gov.au/hmas-cerberus-hmvs Fortunately, I was able to find this on-line: Looking at the plans, I realised she could be made quite simply as a "bread and butter" model, cut from 10mm sheets of pine with my new Precious (scroll saw), with only a little fiddly work to do the additional bits of pieces - the masts and skylights etc (which I will probably make out of bamboo kitchen skewers of various sizes.) I blew the plan view up on the photocopier, and glued the copy onto a bit of pine I had lying around. So, off I went, and here is the beginning of the build. The turrets were cut from the same sheet of pine, using a hole saw attached to my electric drill. More to come. Steven PS: Dan Vadas (sadly missed) made a model of the Cerberus out of card - you can see the build log if you do a search).

- 28 replies
-
- 12
-
-
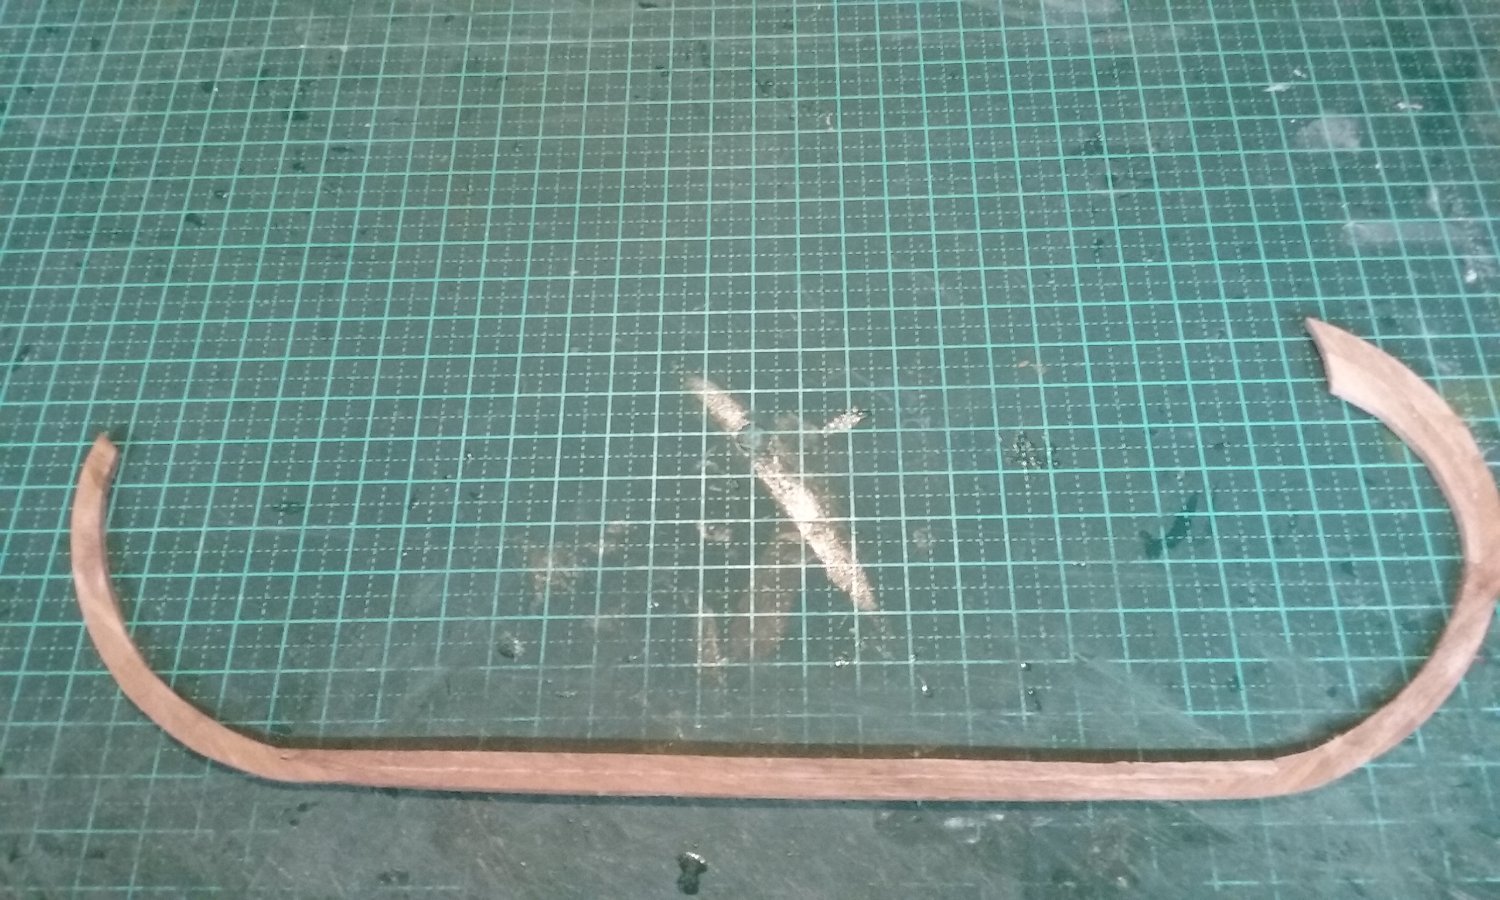
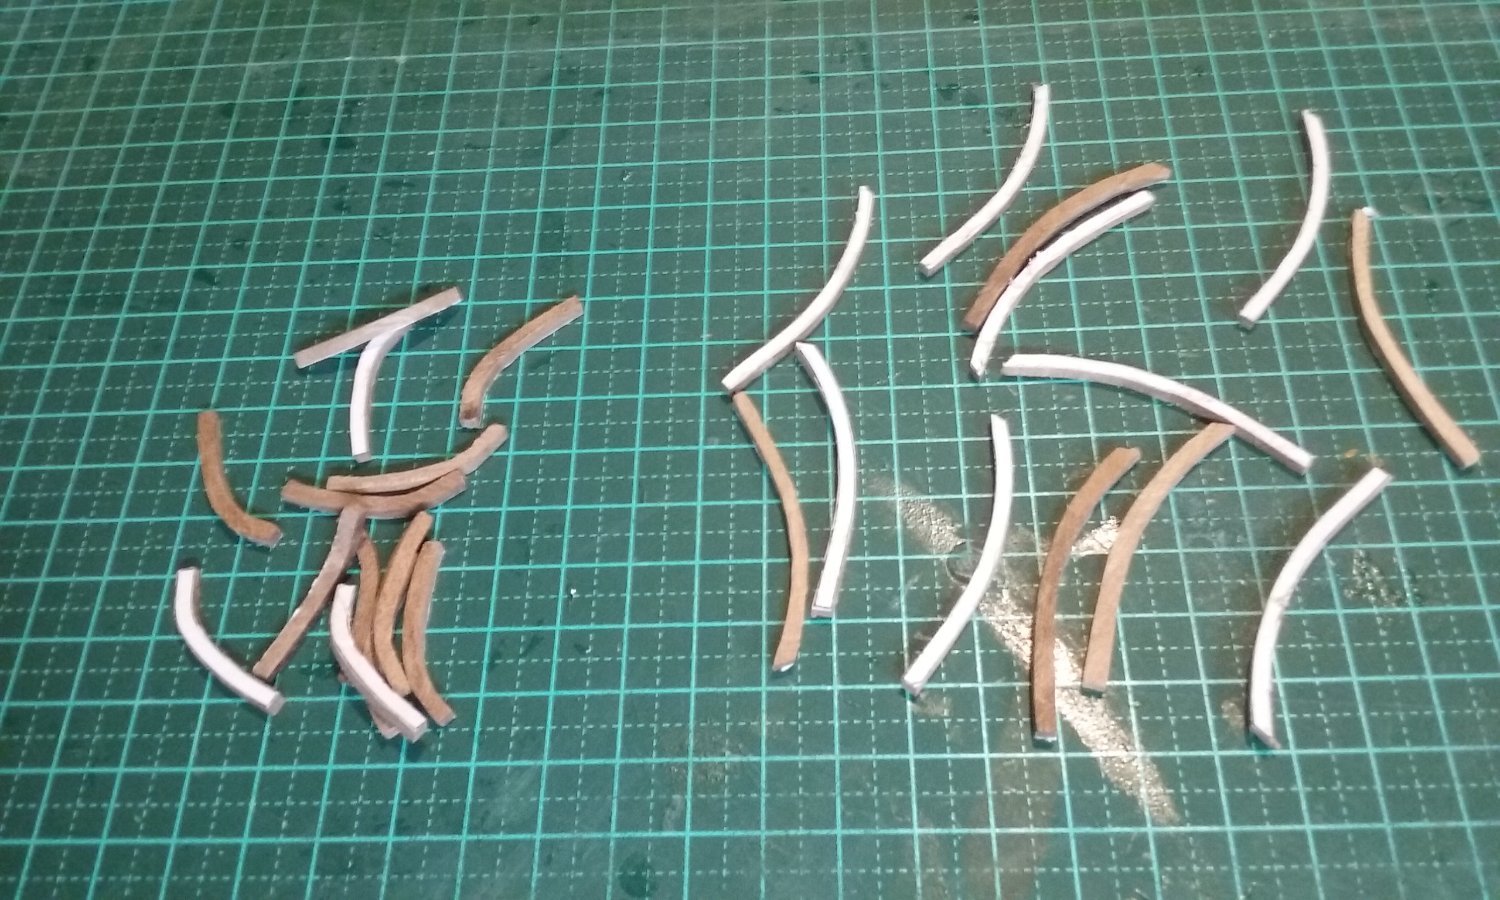
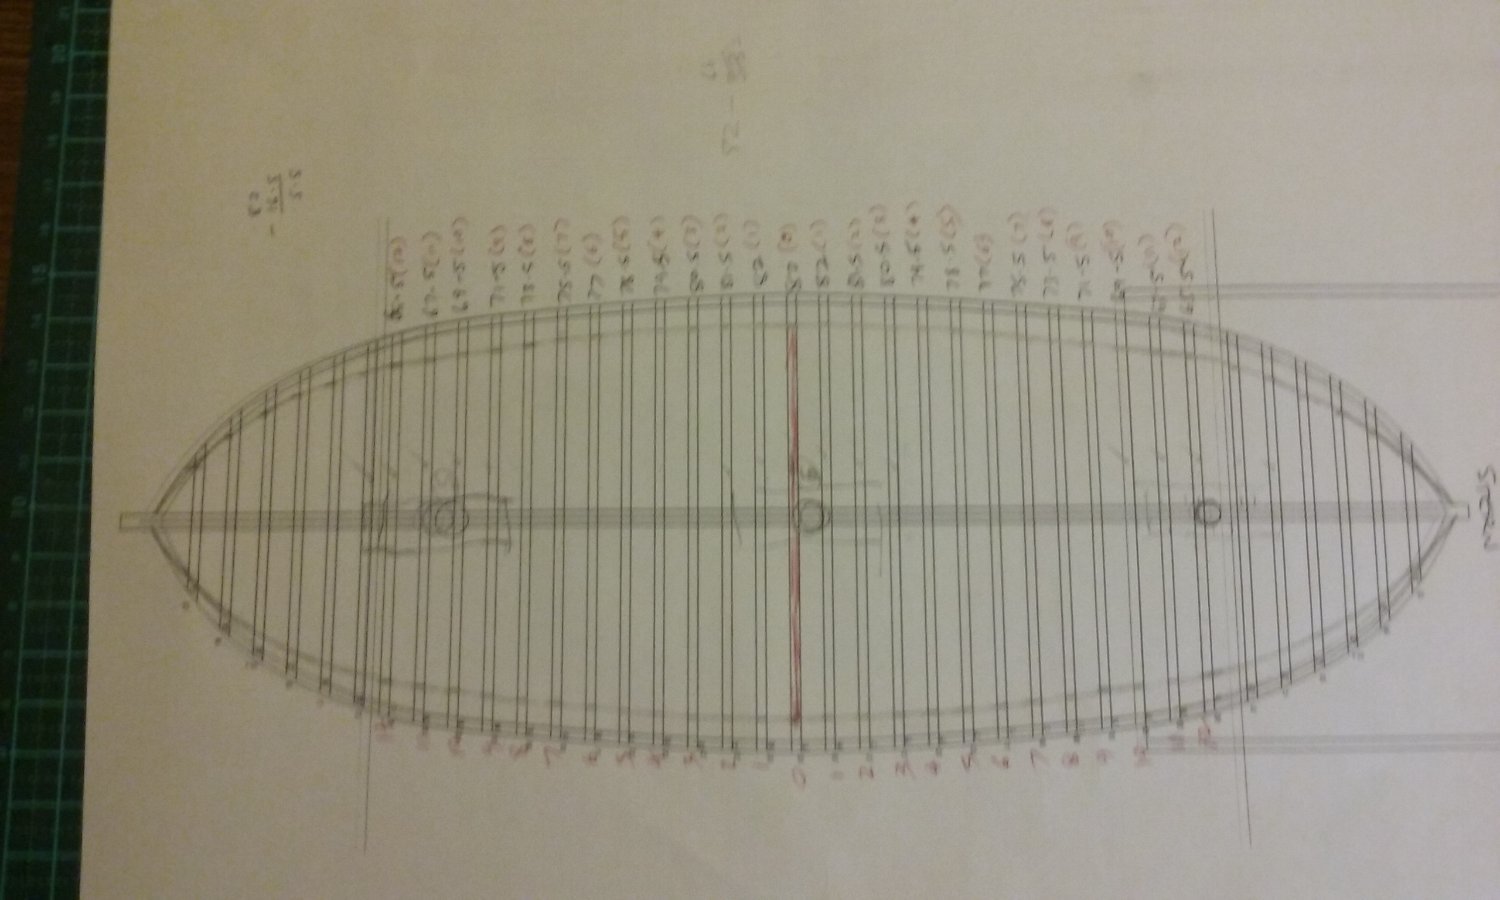
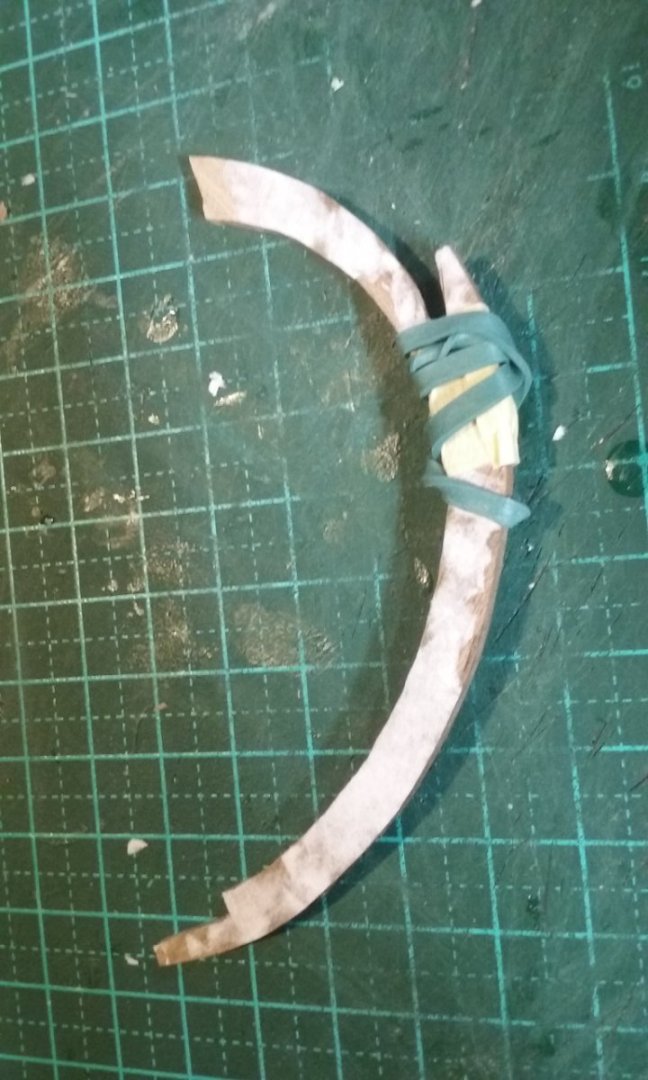
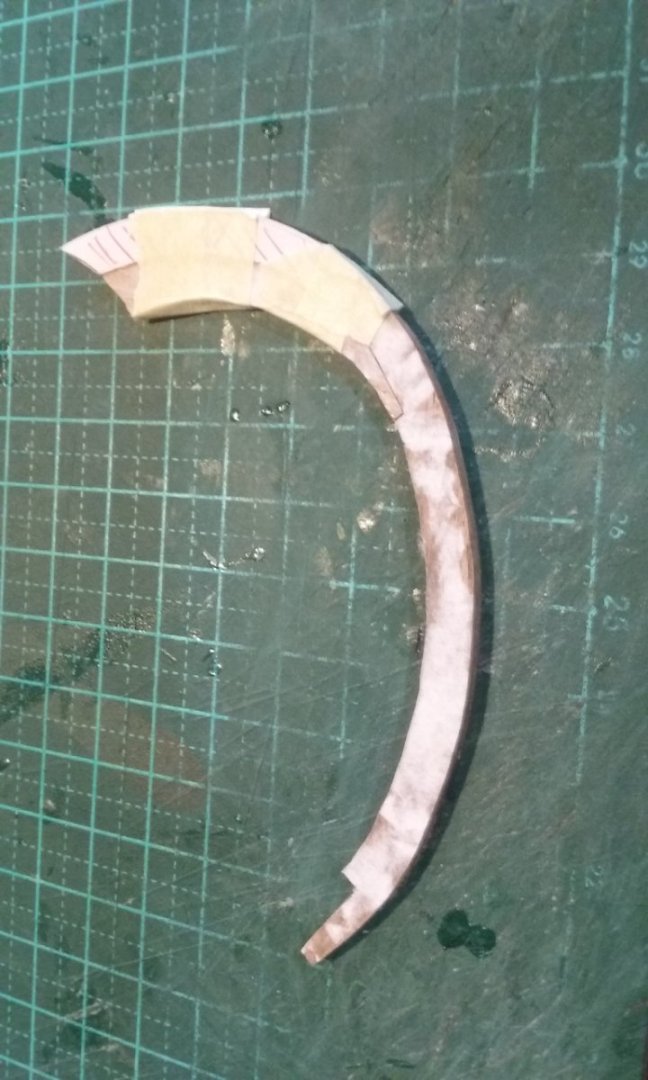
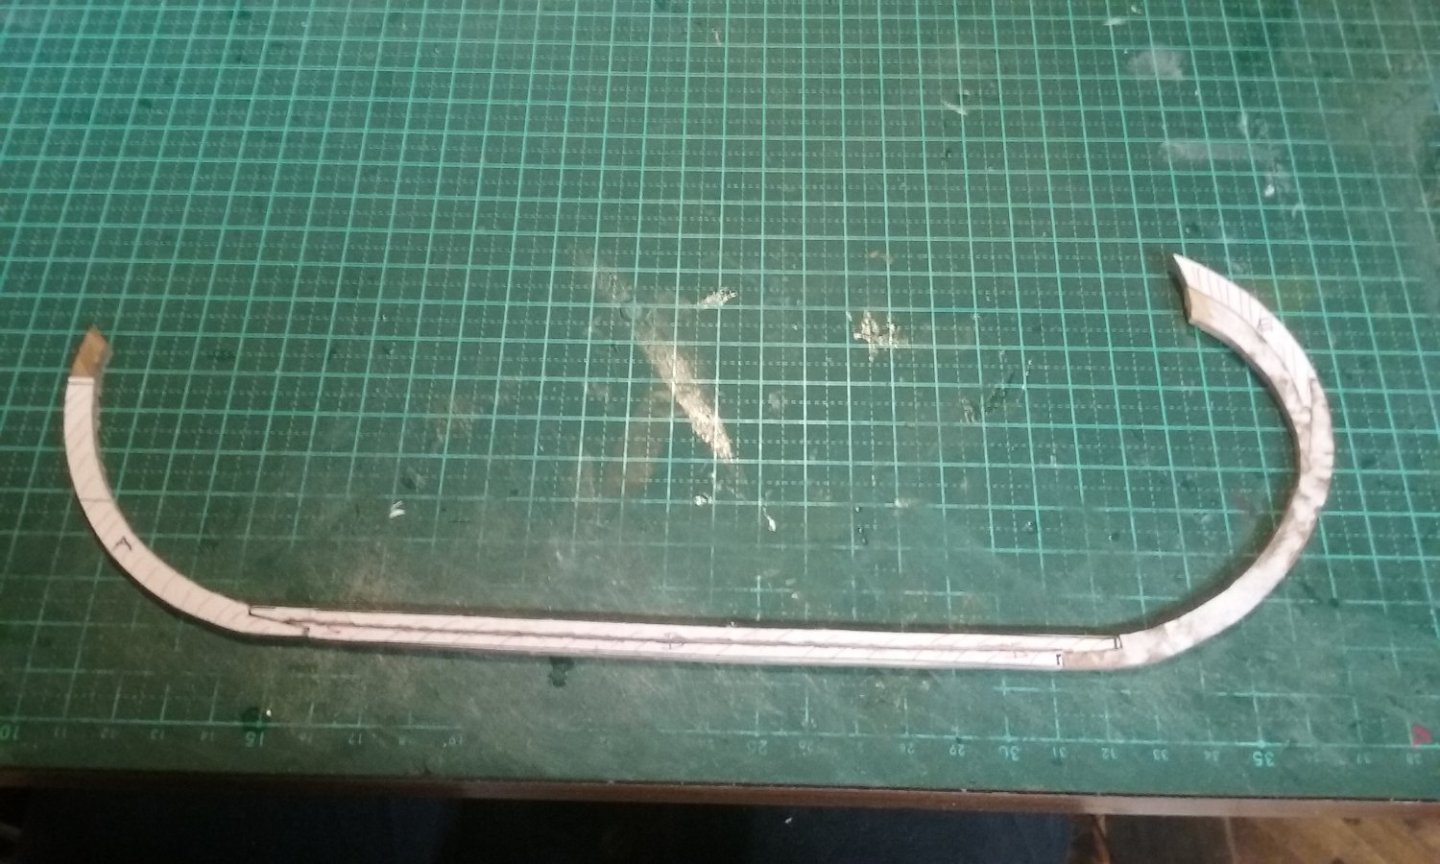
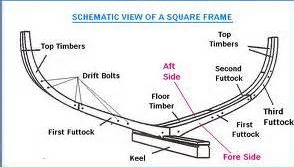
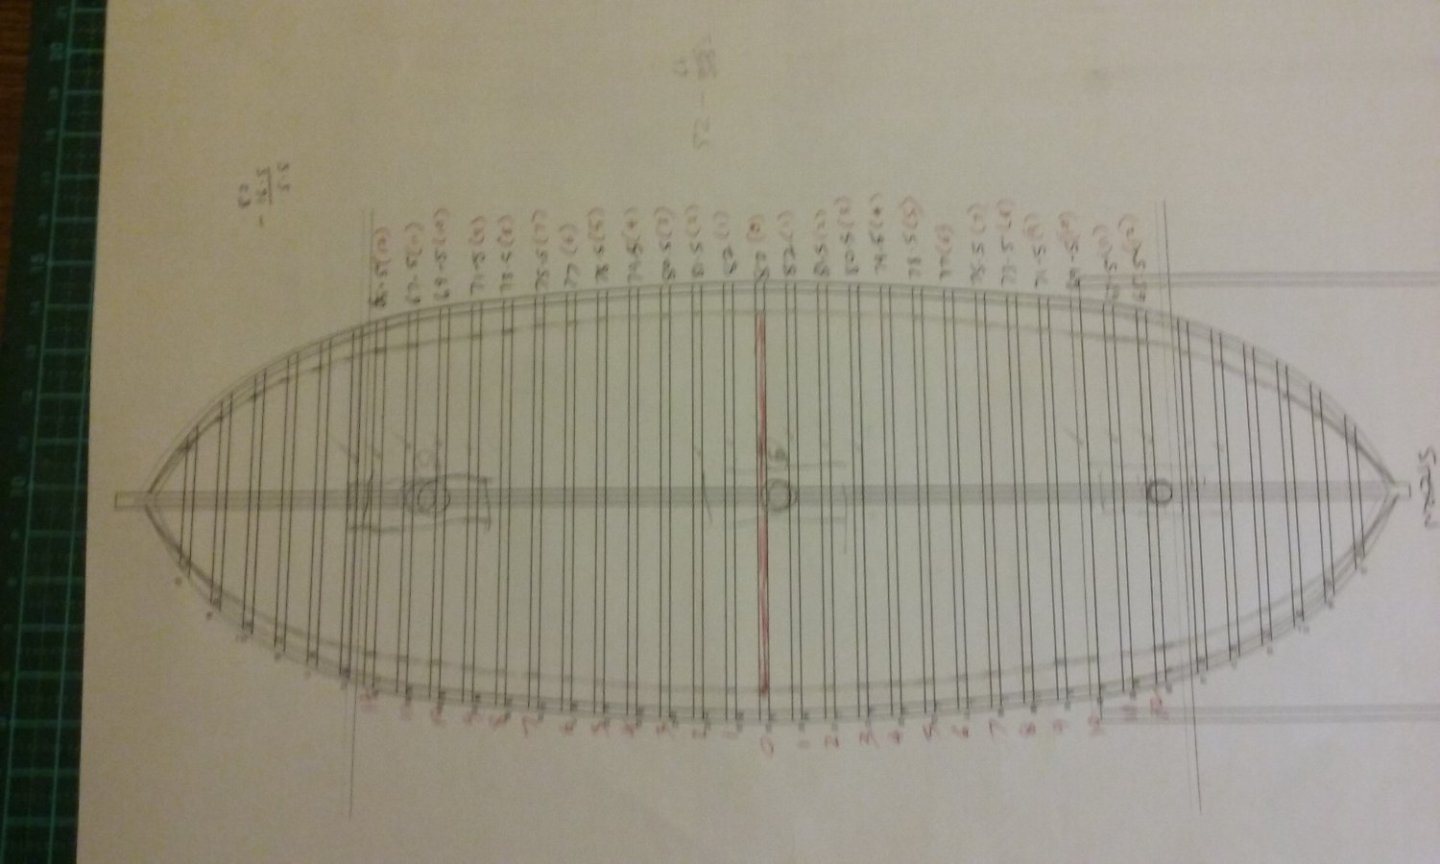
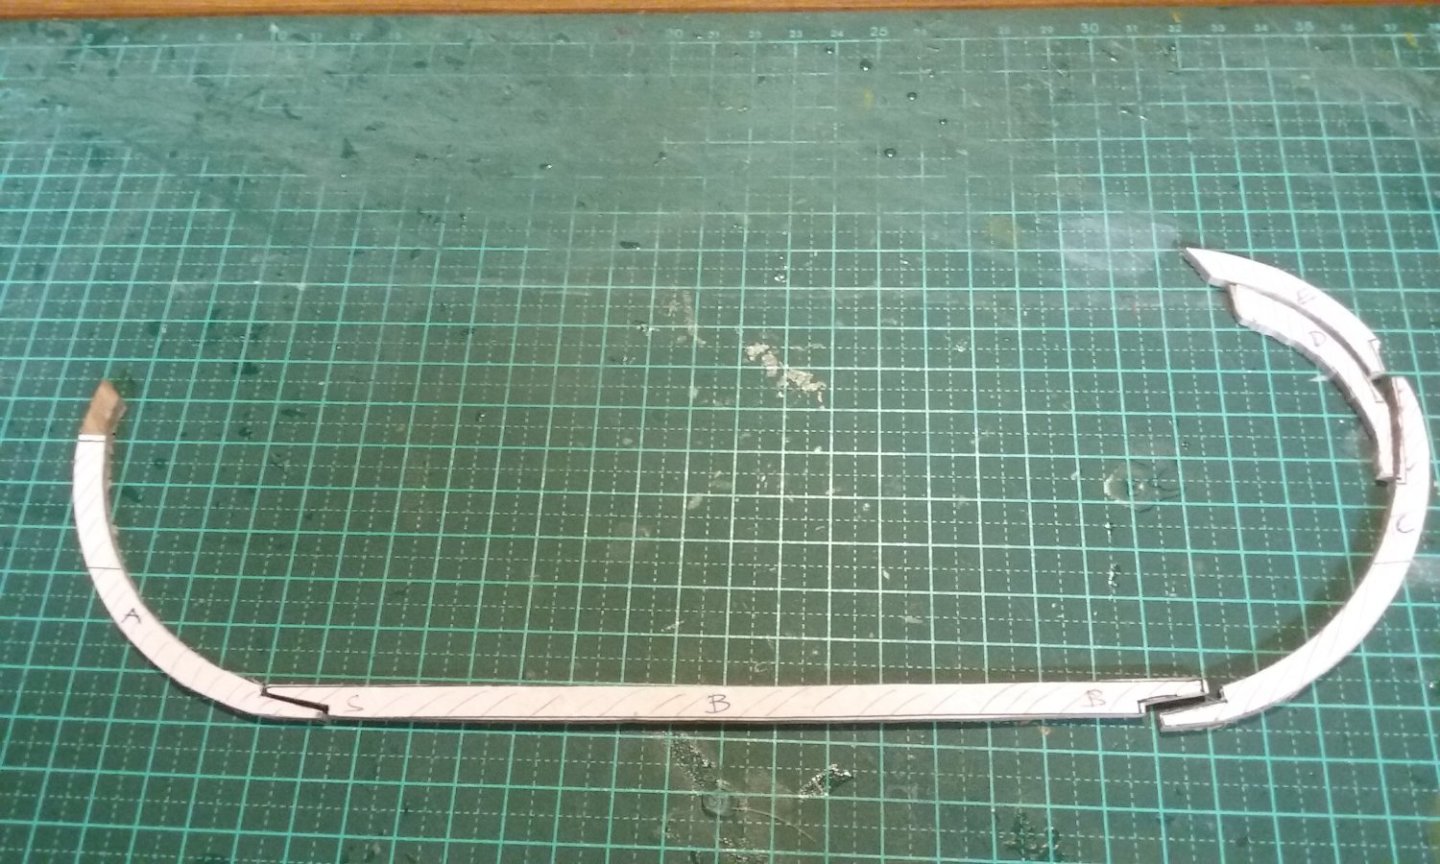
Yes, I see them now you point them out! Naturally my question was prompted by wanting to do the floor timbers and get them right. BTW, as far as strange ways of fitting mast steps, at least one of the Yenikapi ships had a mast step that was totally free-floating - not fixed to the hull at all! No idea how they made that work. Now some progress on the model. On coming back to it after several weeks, I decided the hull was too tubby and re-calculated the shape using the Mezza Luna method. You can see the new outline offset somewhat from the original. (sorry, it's a really rubbish photo). Using My Precious, I cut a bunch of futtocks and then smoothed them off, as being very inexperienced with my new toy I cut well outside the lines: Then I cut out the parts of the keel and stem and sternposts. And courtesy of the local Men's Shed I was able to smooth them down with their nice disc sander. (When you asked me earlier if I had one, I thought you meant a sanding disc, such as you'd attach to an electric drill. I've certainly got one of those, but the disc sander is so much better.) And yes, there's a very mild catenary to the keel. And I cut and smoothed off all the rest of the futtocks. That still leaves the floor timbers, and the frames for the bow and stern to do, but it's good having finished this part of the project. It means I'm now free to go ahead with the next steps. Steven Steven
- 508 replies
-
- 10
-
-
Thanks, Dick. That's what I'd thought I'd seen on your model, but I wasn't sure. I agree - it does seem a bit of a strange way to do things. Steven