Louie da fly
-
Posts
7,993 -
Joined
-
Last visited
Content Type
Profiles
Forums
Gallery
Events
Everything posted by Louie da fly
-
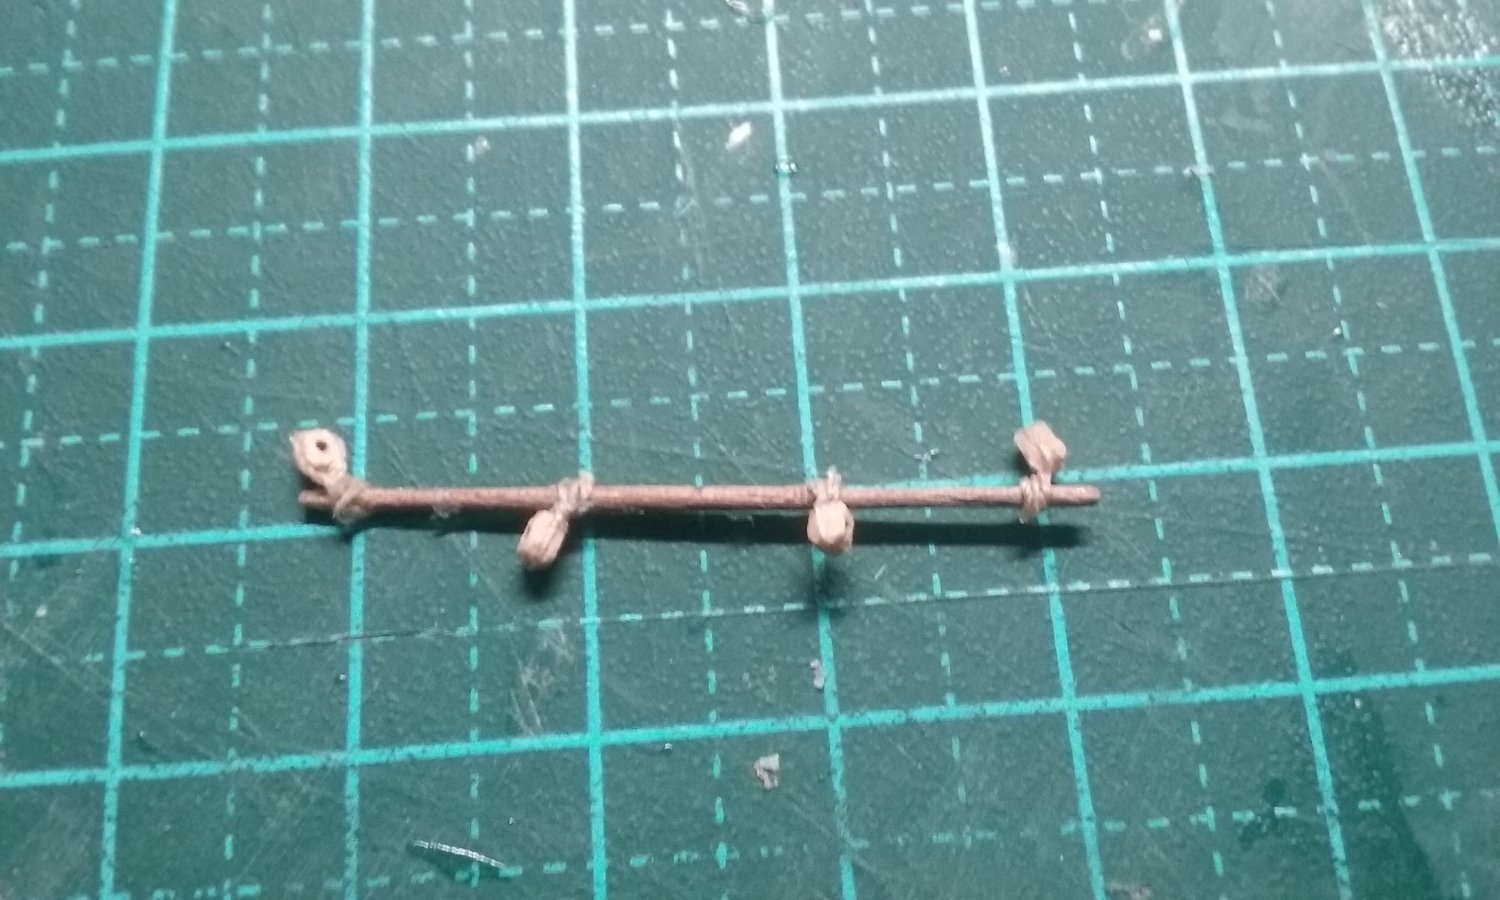
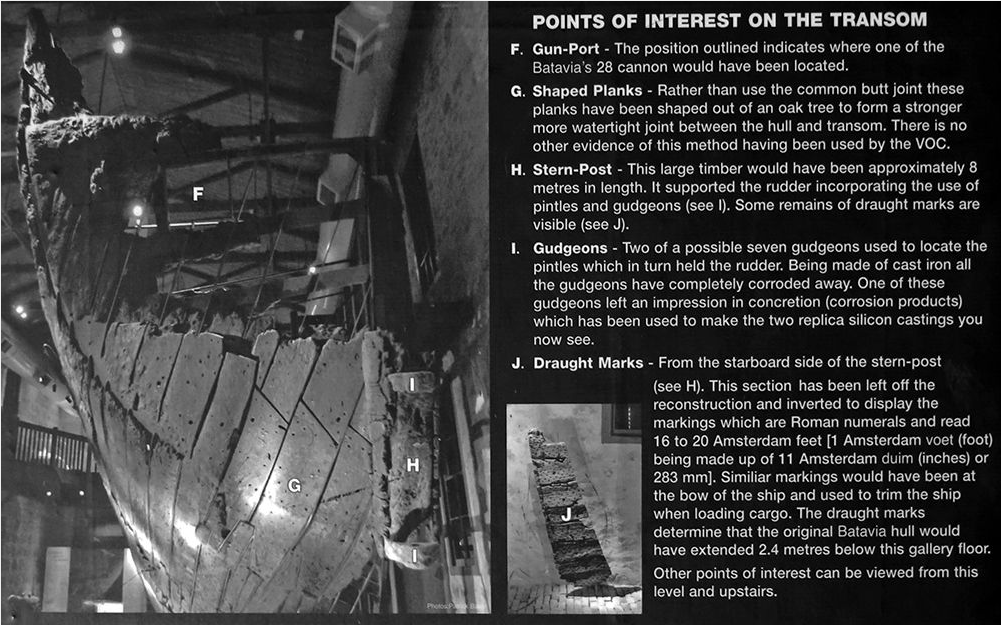
 Though it is from a different nation, and built in 1629 not 1637, the stern of the Batavia may be informative - see https://www.donsmaps.com/batavia.html - here's a couple of photos from that site - Steven
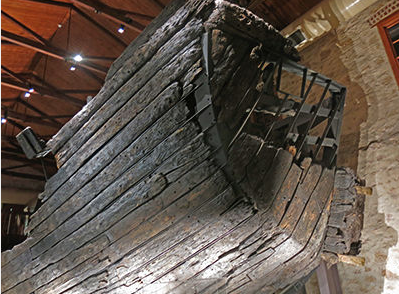
-
Mary Rose – an English ship of the Mediterranean concept
Louie da fly replied to Waldemar's topic in Nautical/Naval History
Waldemar, my understanding is that this technique was not purely Mediterranean - have you seen Brad Loewen's work on Hauling Down the Futtock vs Espalhamento - https://journals.lib.unb.ca/index.php/MCR/article/view/17791/22170 ? Steven -
Found this ship in dump
Louie da fly replied to Santa Rogge 1600's topic in New member Introductions
I agree with Jaager - the value to me is in restoring a model of this type to its original glory, rather than to try to make it "more authentic". I had a similar problem with my Great Harry restoration - I built it back in about 1967 when I knew a lot less, and my restoration is mainly bringing it back to the way it was when I built it, rather than to "correct" things I didn't understand at the time (I have to say I haven't been totally consistent with it, but generally I've tried to keep it to that.) However, as this is Santa Rogge's thread I feel that if we want to continue talking about Keith's build it should go onto his build log from now on. Steven -
Found this ship in dump
Louie da fly replied to Santa Rogge 1600's topic in New member Introductions
I'd vote for sails, despite the problems of having to make new ones and their hiding stuff. That's the way the ship was originally presented, and to be true to her you should probably go that way, though "weathering" the sails to duplicate the patina of the rest of the ship would probably be best. Regarding the rigging, again it would probably be best to duplicate as far as possible the way it was first done. My opinion only, however. Steven -
Found this ship in dump
Louie da fly replied to Santa Rogge 1600's topic in New member Introductions
Keith, did you ever finish restoring the Amelia? I was following with great interest. Steven -
Here's the history of the roundel change due to friendly fire: https://forum.warthunder.com/index.php?/topic/490321-272020-raafcommonwealth-roundel-on-us-aircraft/
- 88 replies
-
- 4
-

-

-
- Australia II
- Finished
- (and 2 more)
-
Found this ship in dump
Louie da fly replied to Santa Rogge 1600's topic in New member Introductions
Hello and welcome. I fully agree with Bob Cleek's analysis. It's not a duplicate of a real ship, but it has racked up almost 100 years and should be appreciated if only for that. There have been a reasonable number of these "decorator" models restored by MSW members - for example and and Your restoration is nowhere near as complex and difficult as the projects above. Your model is in remarkably good condition considering its age - the masts, ropes and sails are all amazingly intact - and in my opinion all you really need to do is dust and clean it. I've had great success with the saliva method on a restoration of my own - the only advice I'd give is spit into a small bowl or something similar to use as a reservoir - DON'T put the q-tip back in your mouth after cleaning the dirt off the ship . . . (yuk!) By the way, the name-plate on the stand is in a difficult script - it actually says "Hansa Kogge" (the Hansa ports on the German coast were a major trading consortium in the Middle Ages - their name got incorporated in the name of the airline Lufthansa). Problem is, it's not anything like a Kogge (or cog) - they looked like this: Your model looks like it's (very loosely) based on a galleon from the late 1500's. But have fun with it. I think it's a very worthwhile project and familiarity with this model will give you a bit of a basis for understanding the way a ship like this works, when you come to build your own. Best wishes with it, Steven
-
You're doing a very nice job of this. Caravels are such beautiful vessels. Steven
- 179 replies
-
- 4
-
-
-
- Second Build
- Pinta
- (and 2 more)
-
Welcome to MSW, from sunny Ballarat! Where in Sydney do you live? I was there for some years in the 70's and 80's. Great photo. HMAS Australia II had a very honorable career, and it's nice to see a member of the crew working on a model of her. Have you decided what kind of ship you want to build? Steven
-
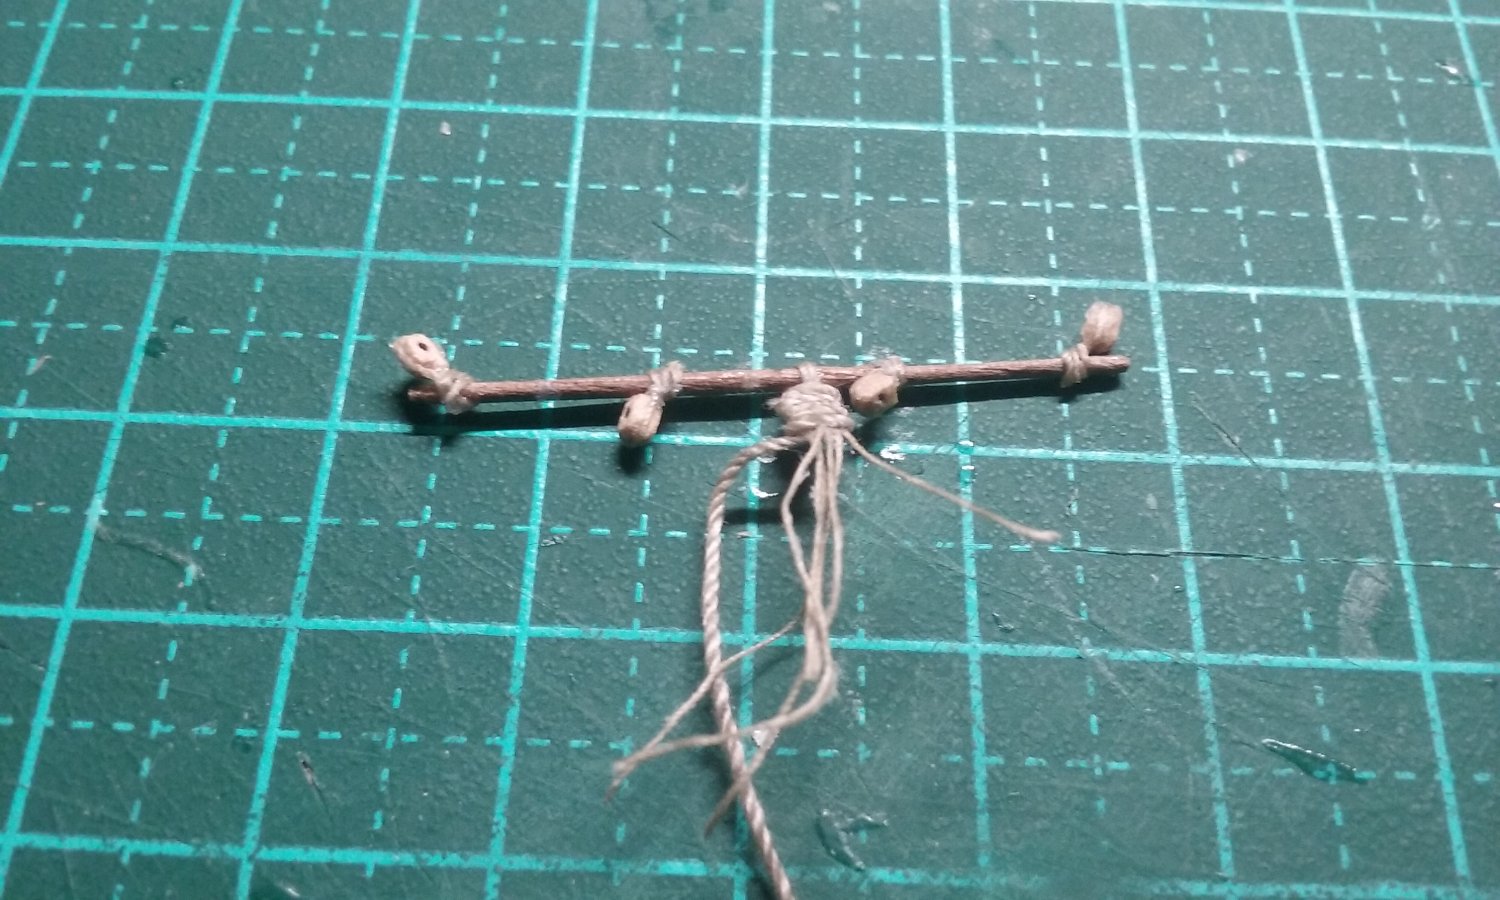
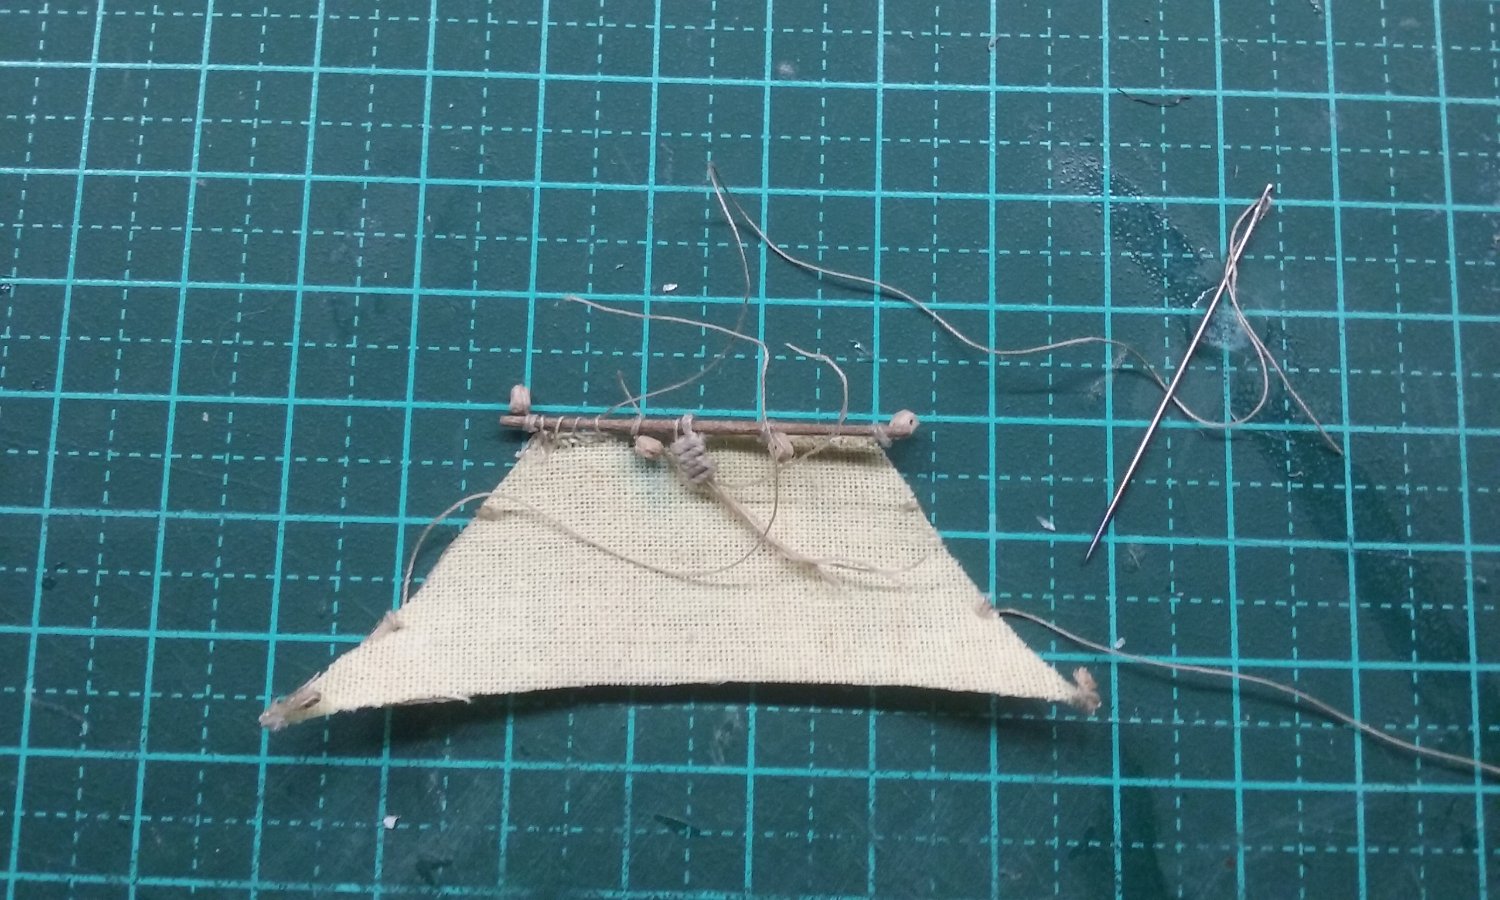
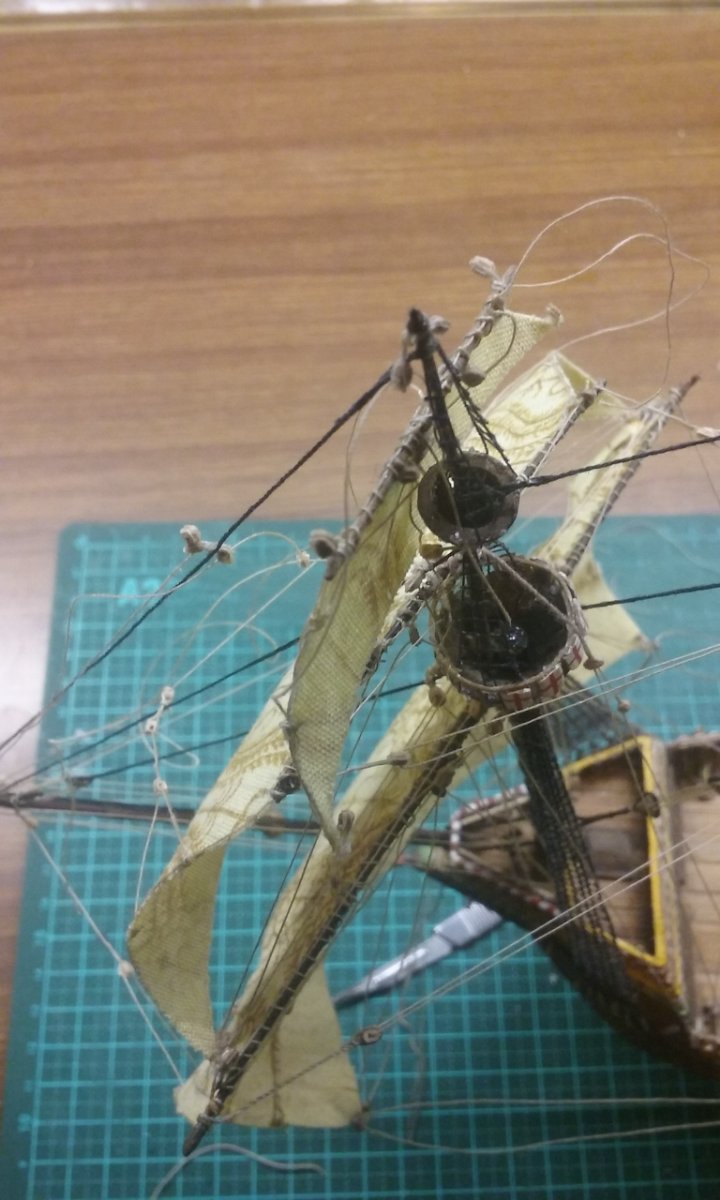
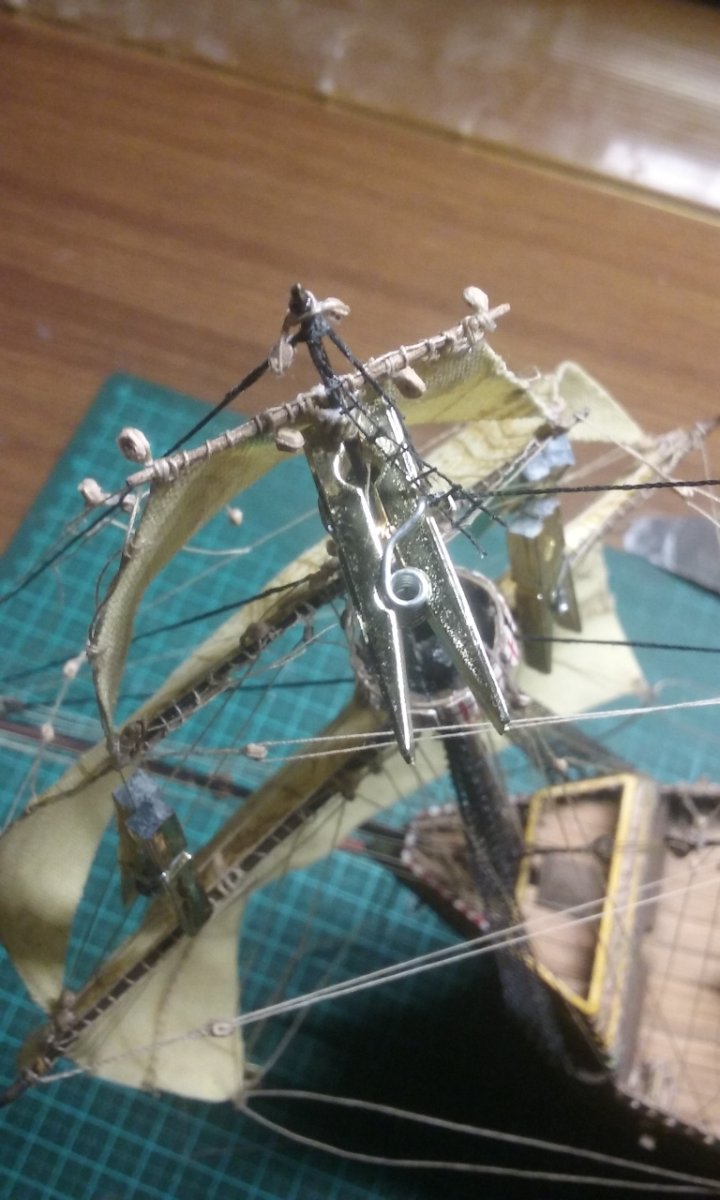
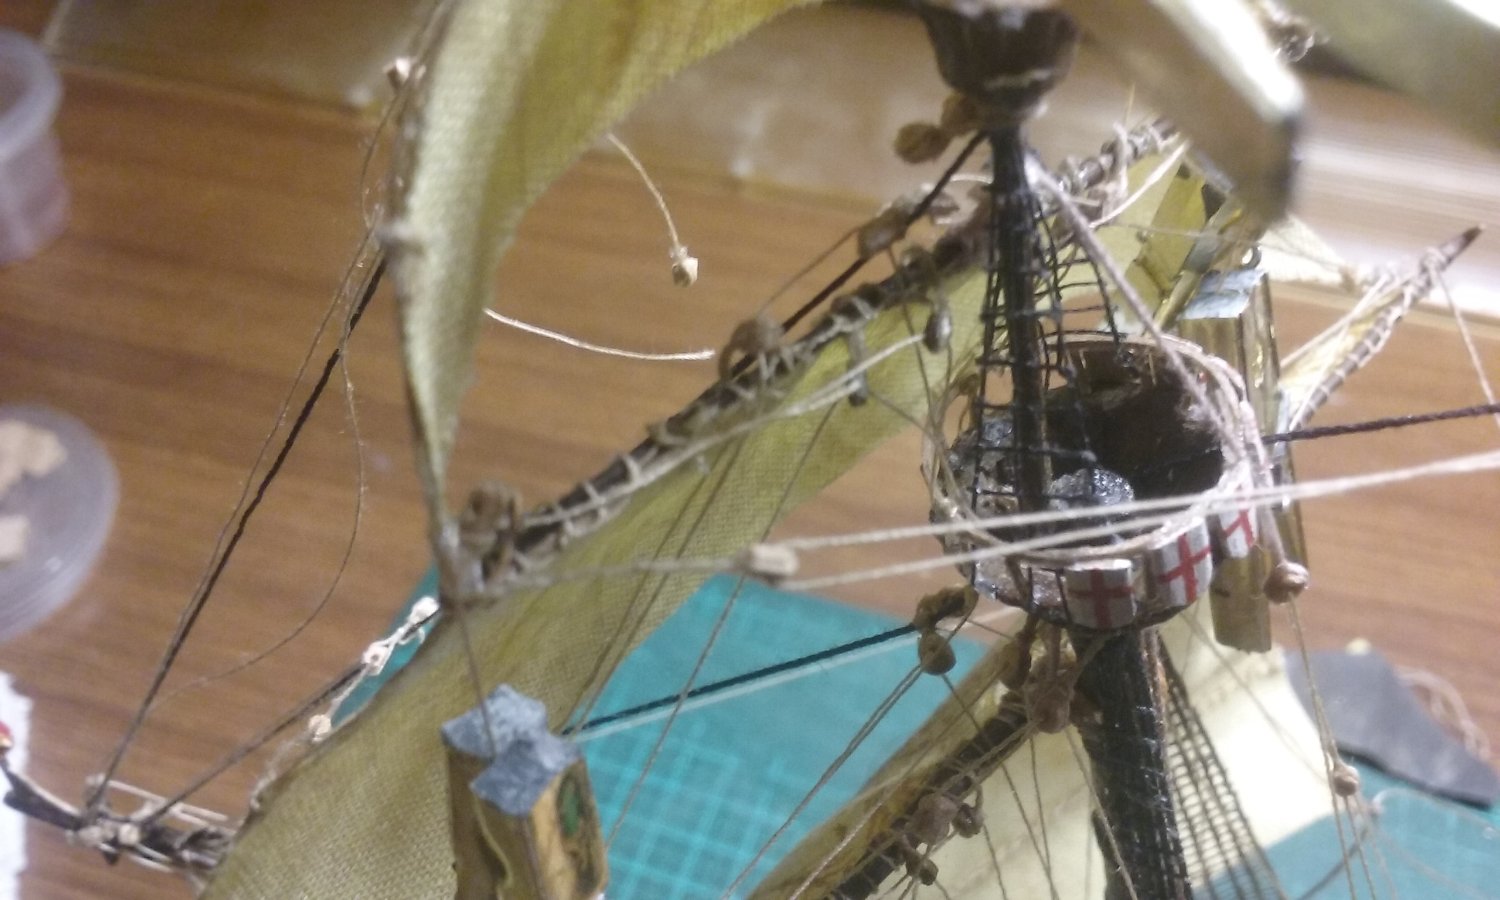
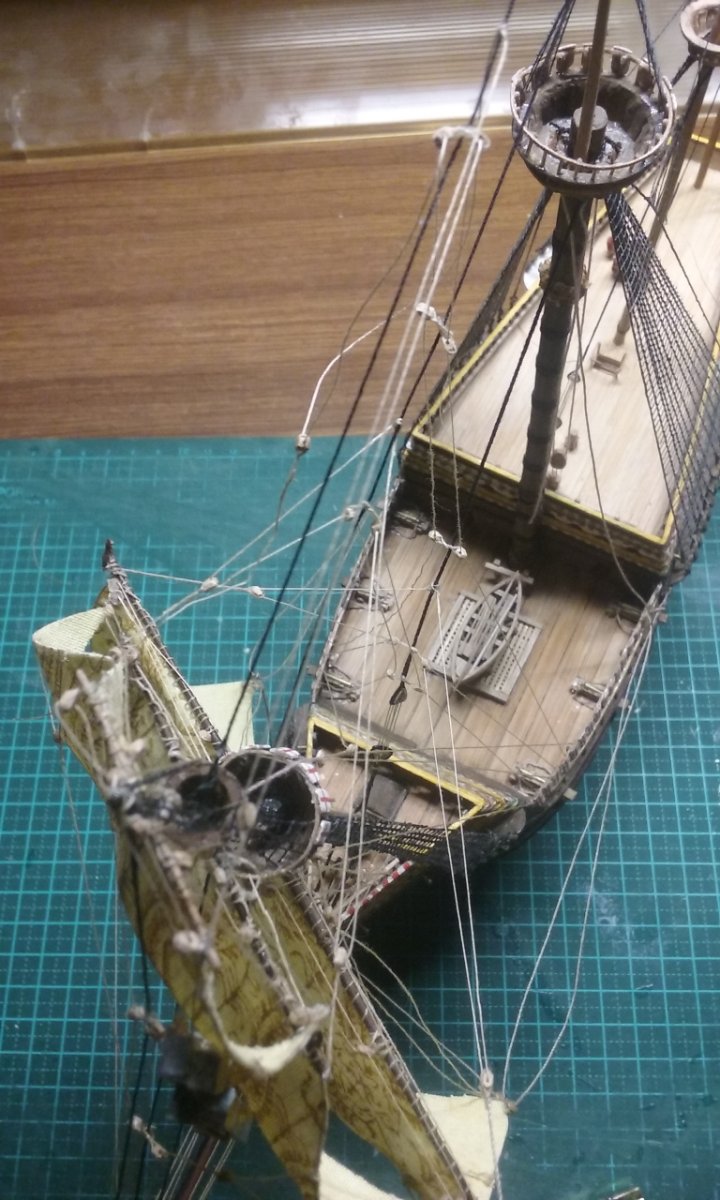
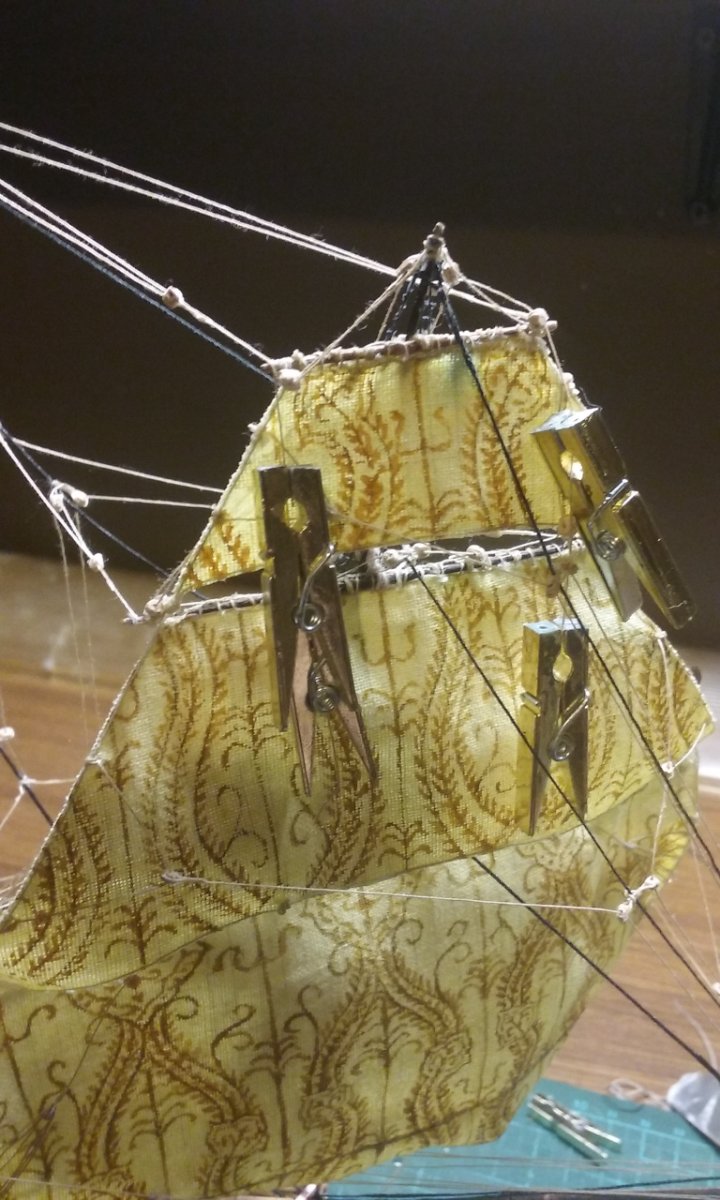
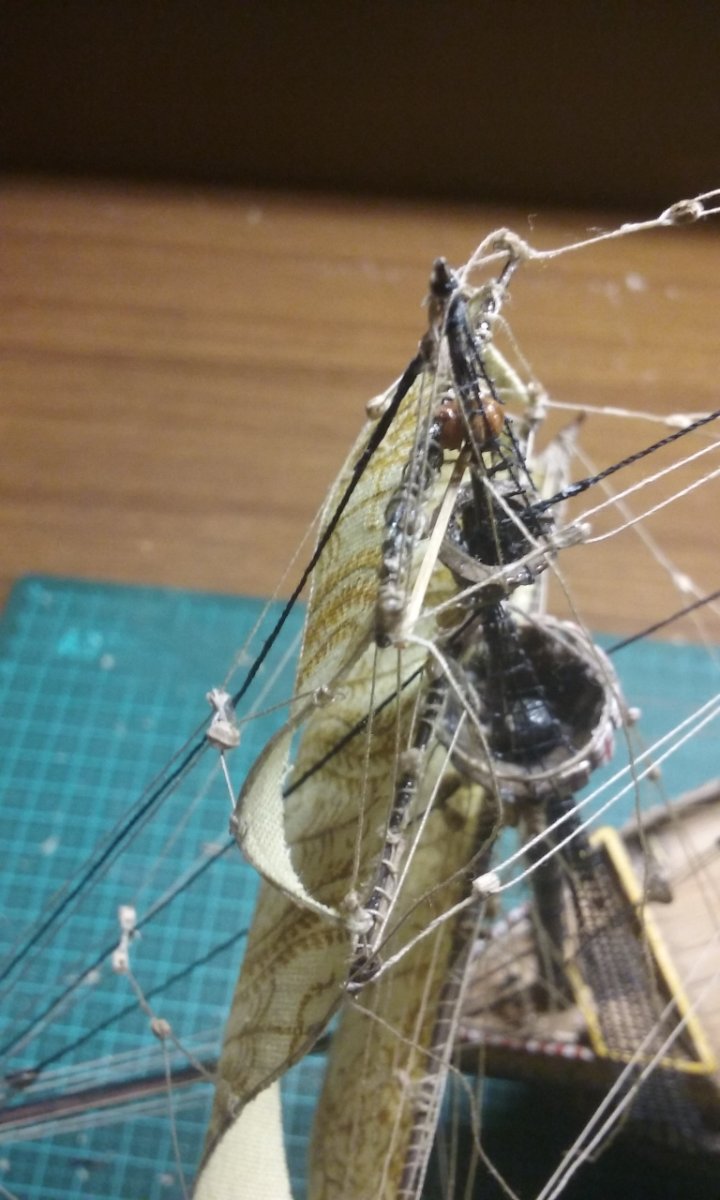
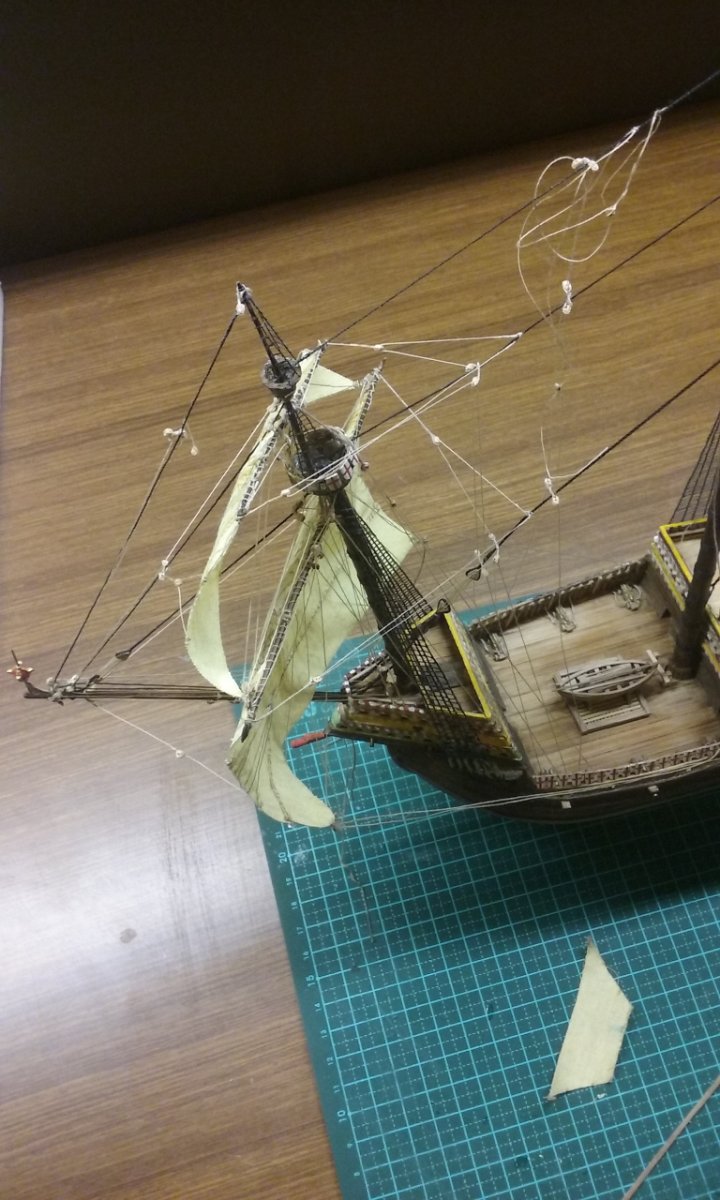
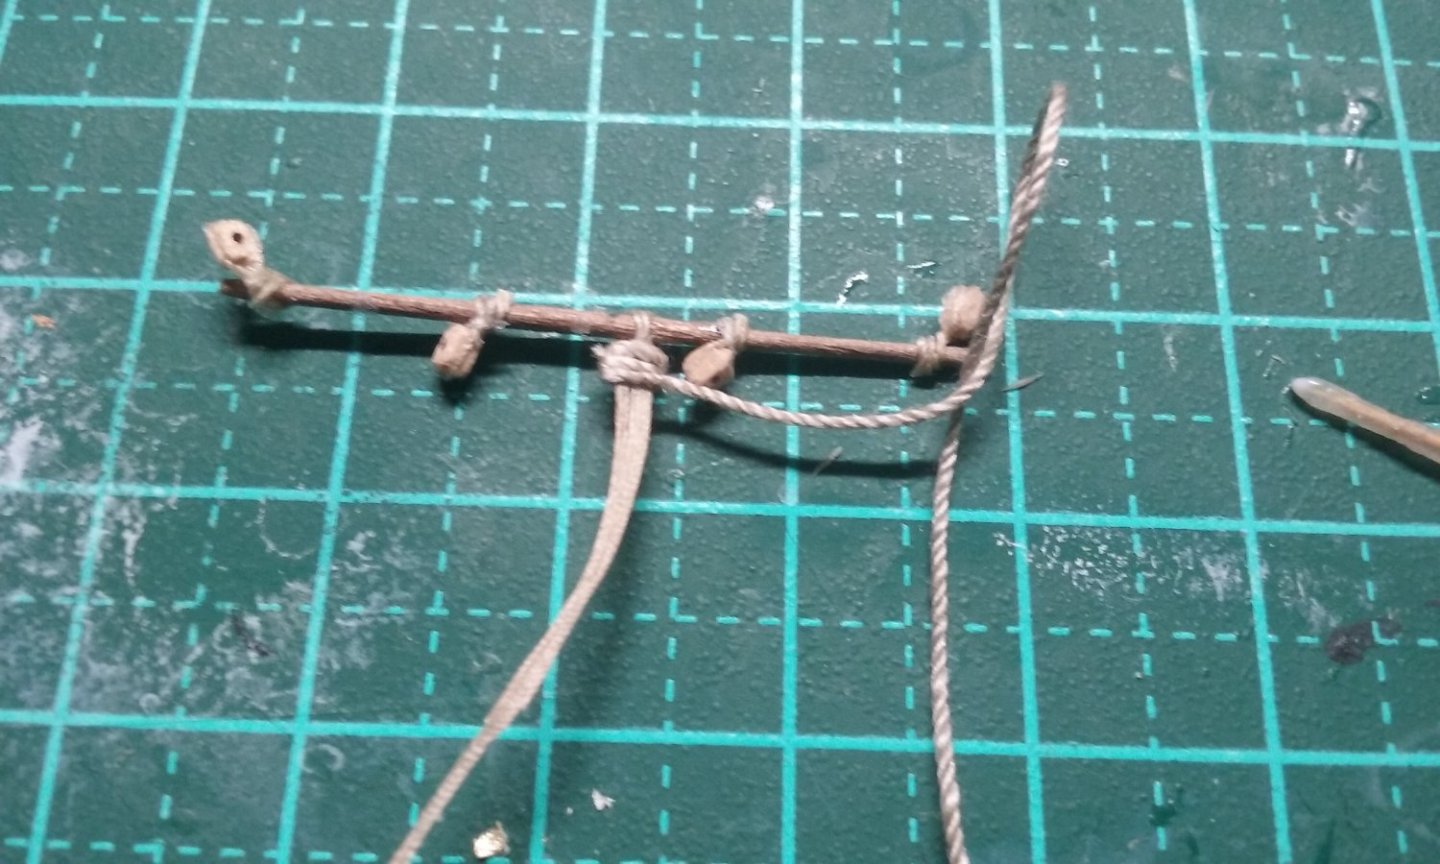
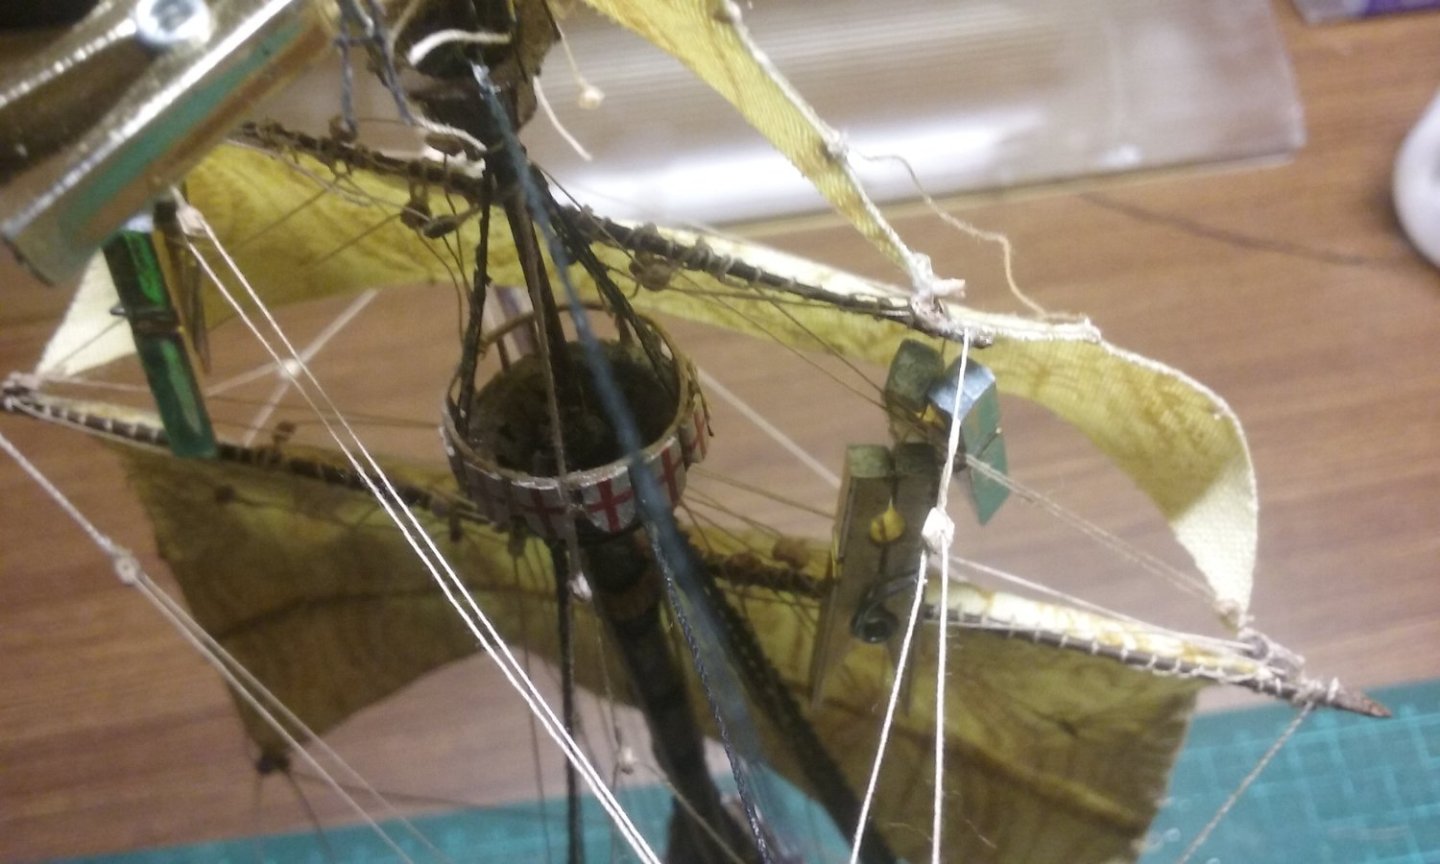
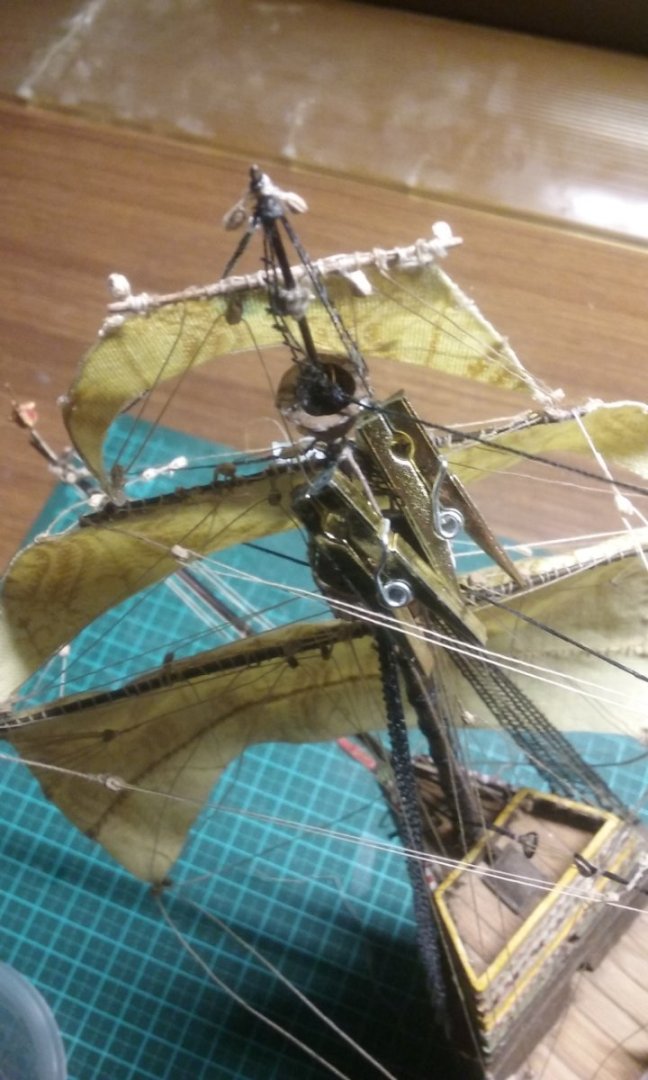
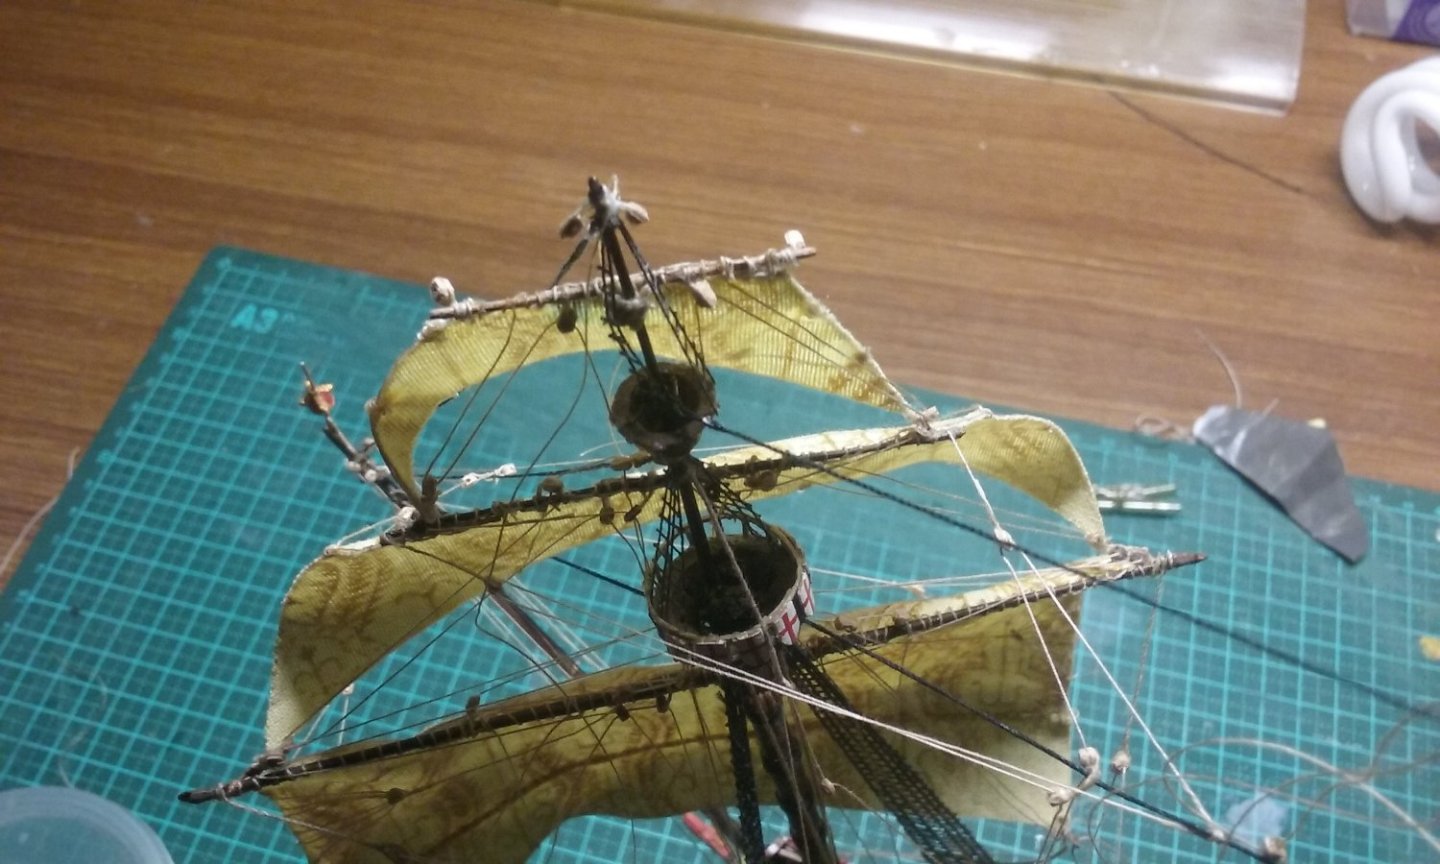
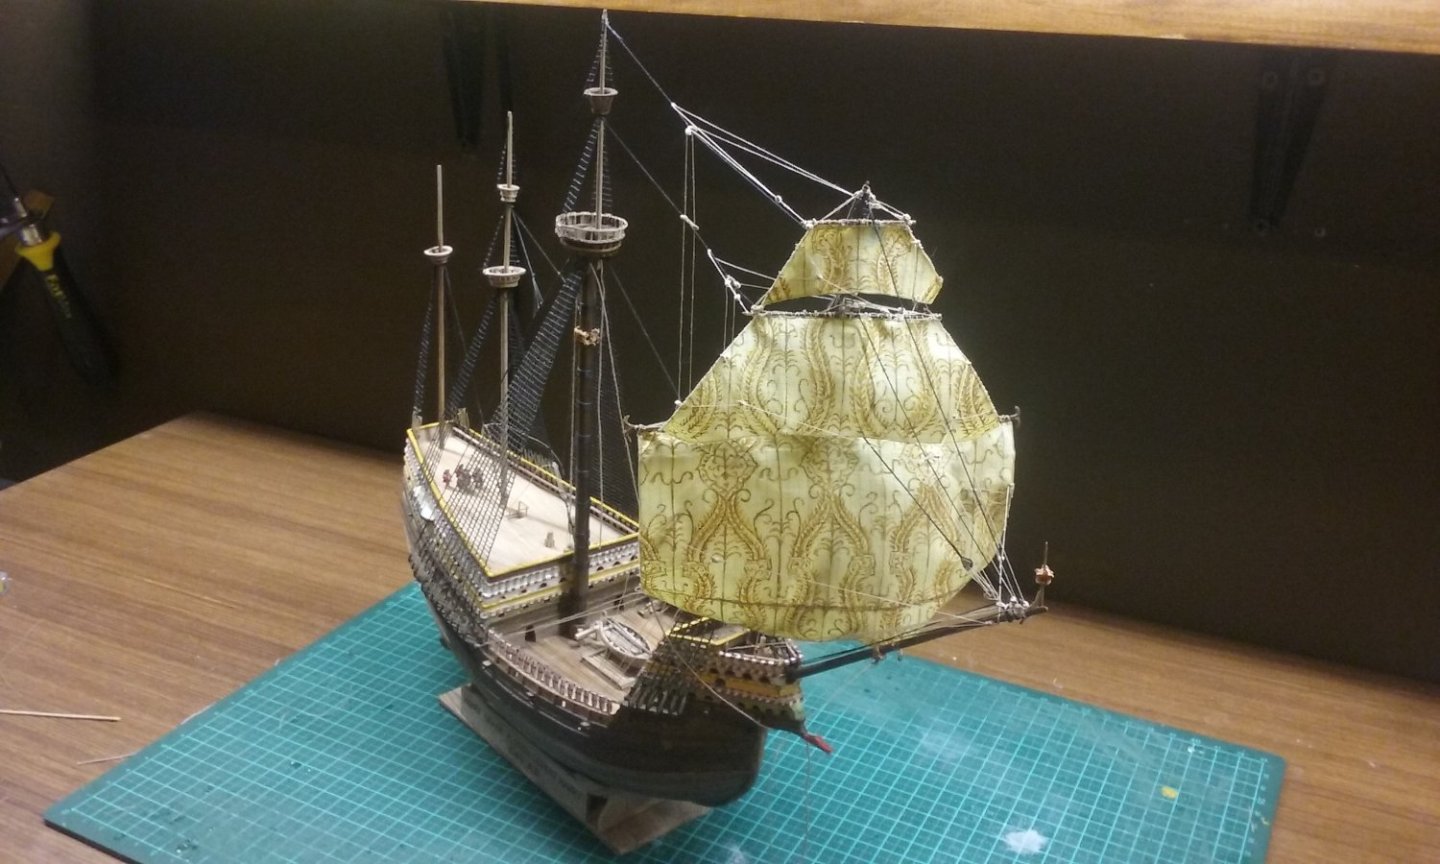
Thanks for all the likes and encouragement. I was never going to give up on this - I'd put too much into it. But I'm glad I took a break - it had stopped being fun and had become a chore. So, here's the progress in getting back to where I was before the topgallant yard broke: First I had to replace the parrel truck - I'd had to destroy it to get the yard off. As I hadn't even understood what parrel trucks were when I first built the model, or how they worked, I just made what they looked like to me from pictures. When replacing this one I basically made it the way it had first been made, by wrapping a thread around the ropes that were to hold it to the mast Sail being attached A loop around the mast to locate the yard and then roll the "parrel truck" around the mast and fix in place with CA. Replacing the controlling ropes - sheets, clewlines, lifts (I had to unglue the bottom of the shrouds for access to the upper top). Tiny pegs used as weights, to tension the ropes. Adding the lifts And braces And finished, ready to move forward again. Steven


- 740 replies
-
- 11
-
-

-
- Tudor
- restoration
- (and 4 more)
-
I just came across one myself, on Facebook, but from the bow - along with the usual rubbish about the "dead riveter between the hulls", which I'm pleased to say was dismissed by several posters. Steven
- 1 reply
-
- 3
-
-
Thanks everybody for the likes. Druxey - probably - now that its too late . . . Thanks for the supportive comment. Steven
- 740 replies
-
- 4
-
-
- Tudor
- restoration
- (and 4 more)
-
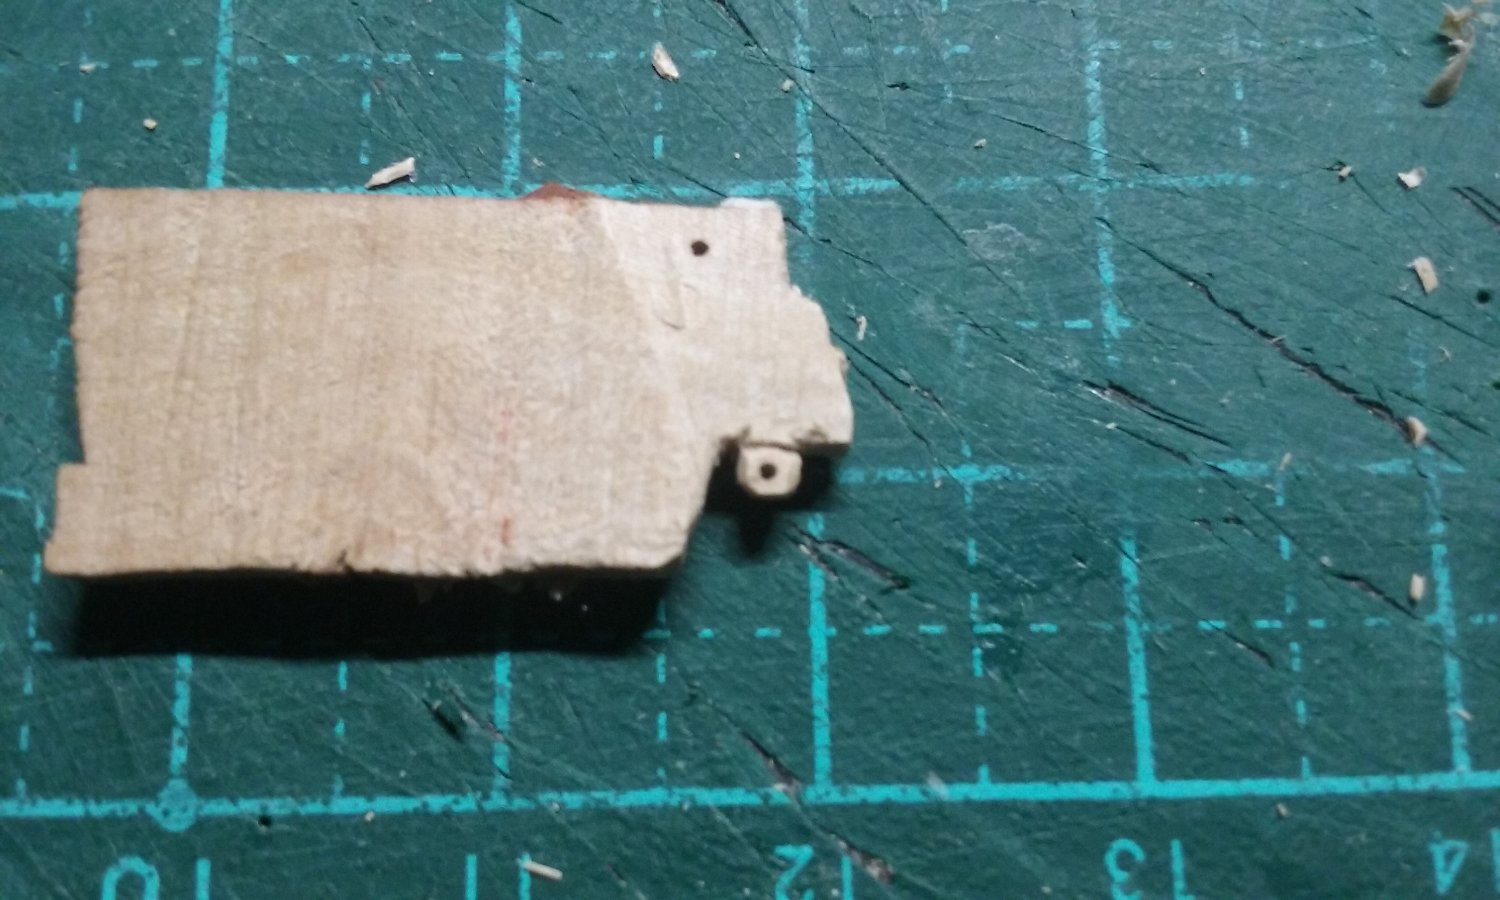
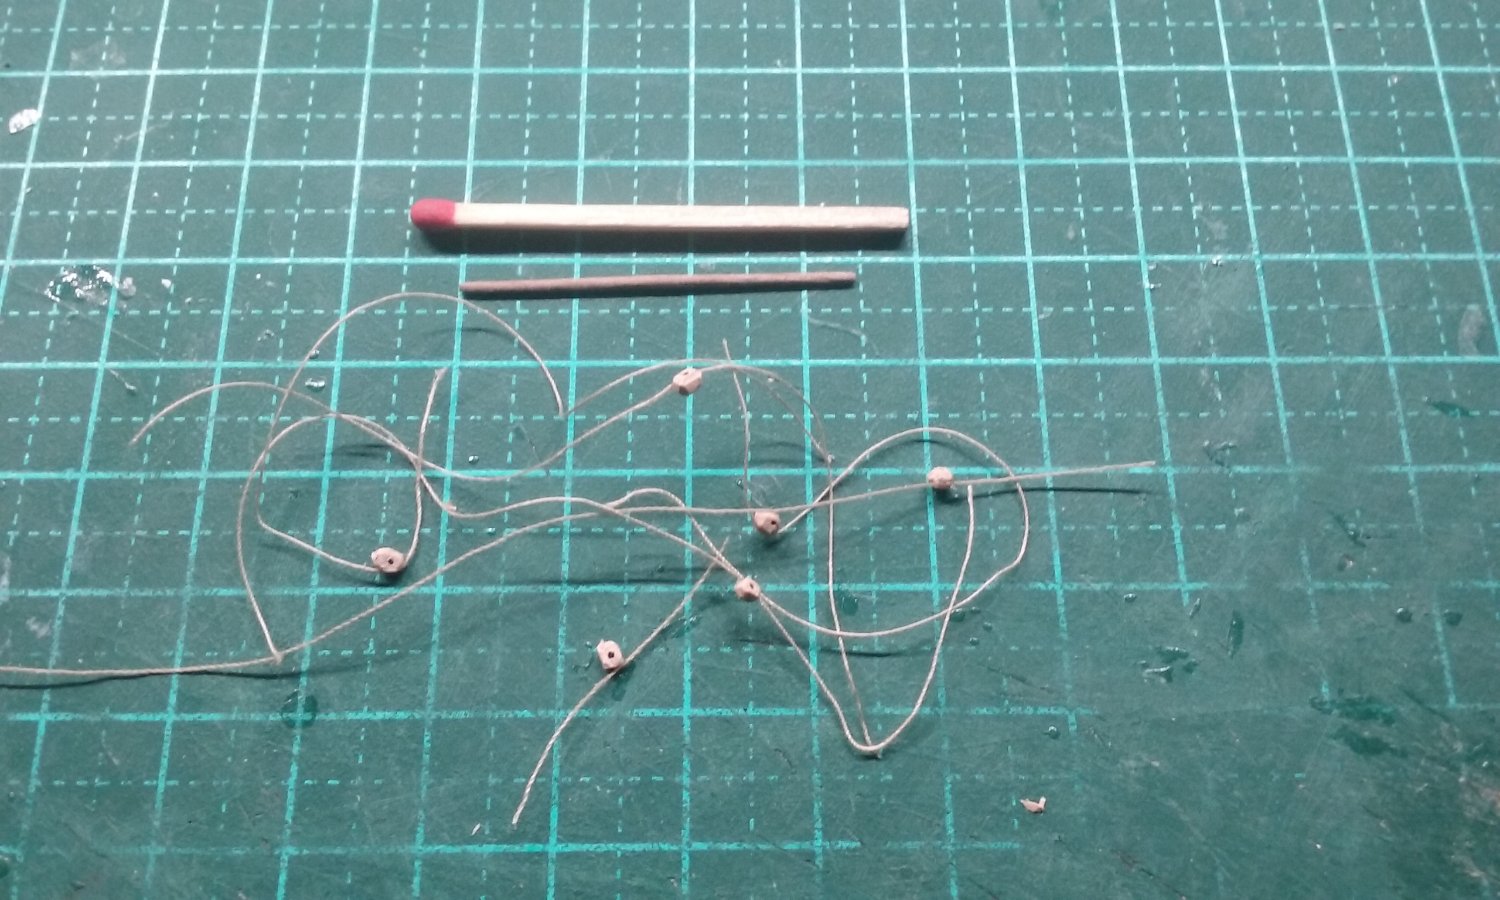
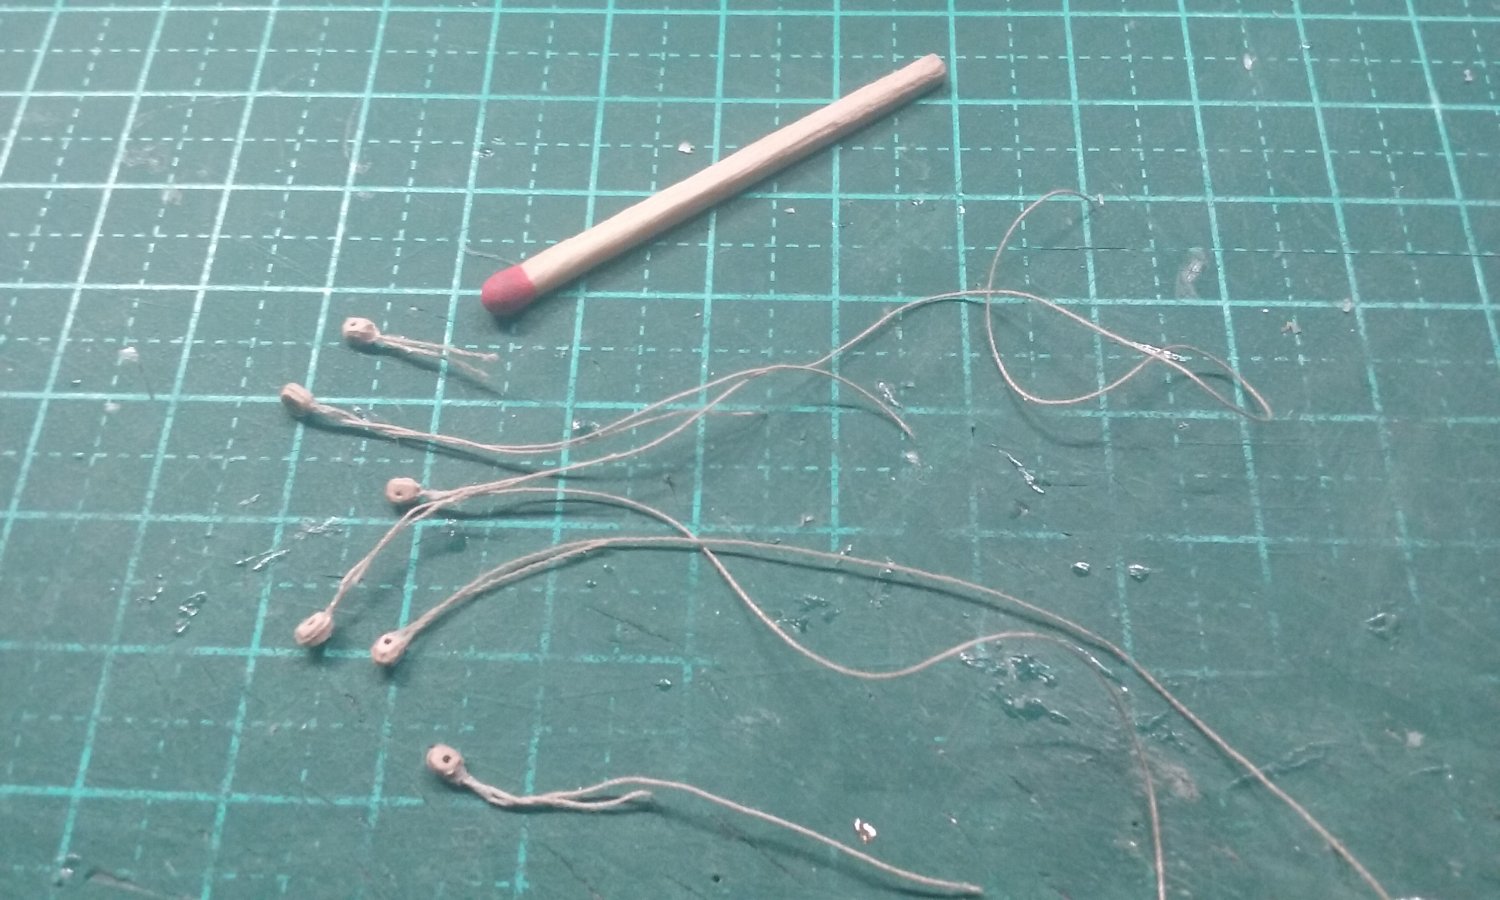
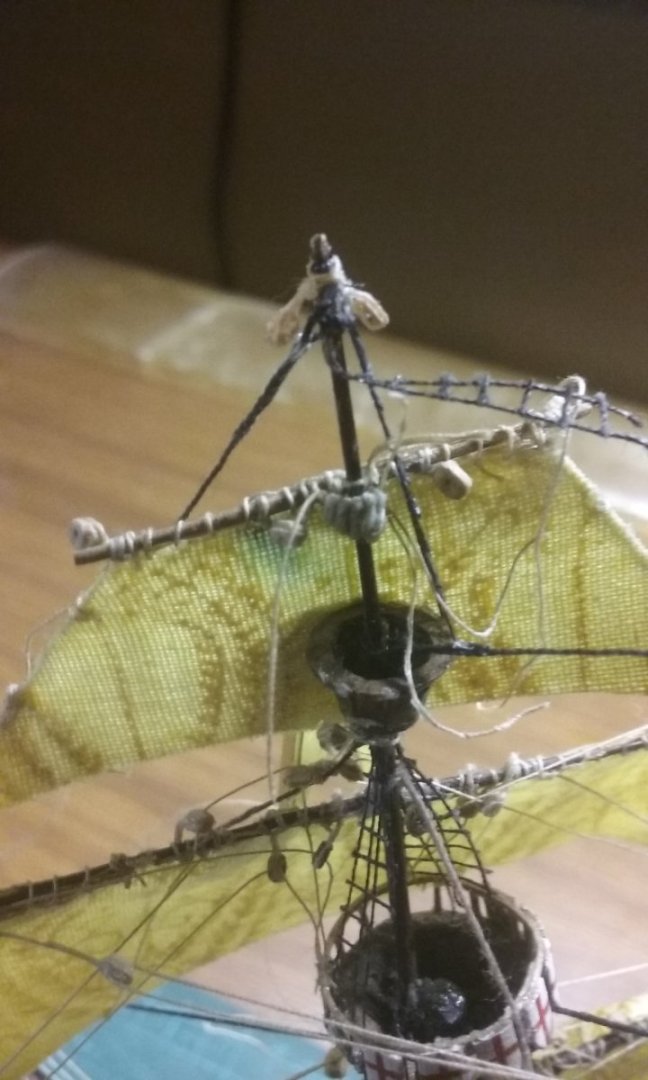
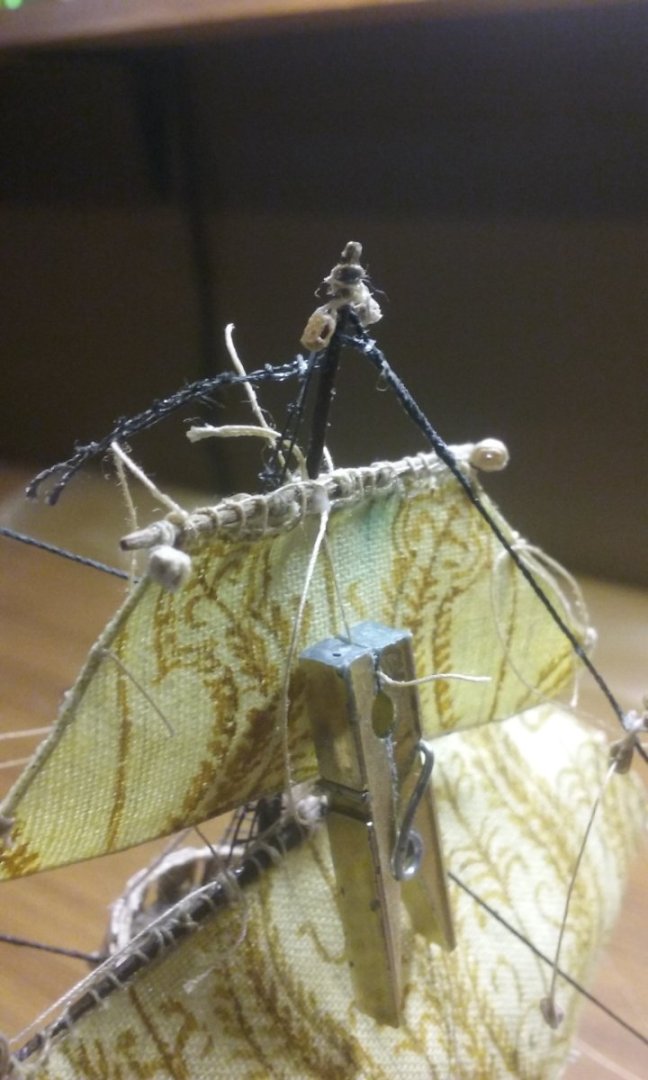
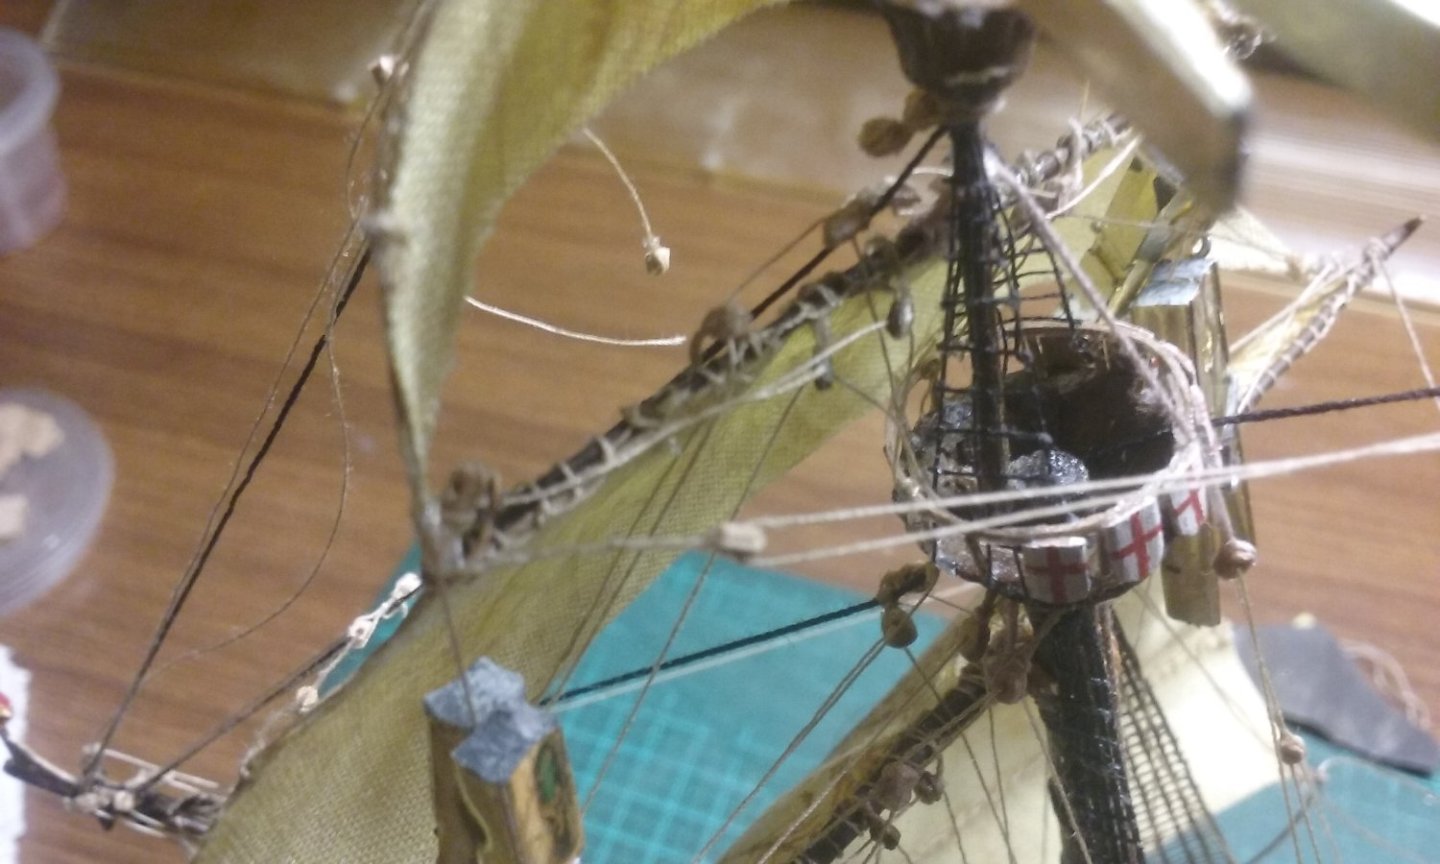
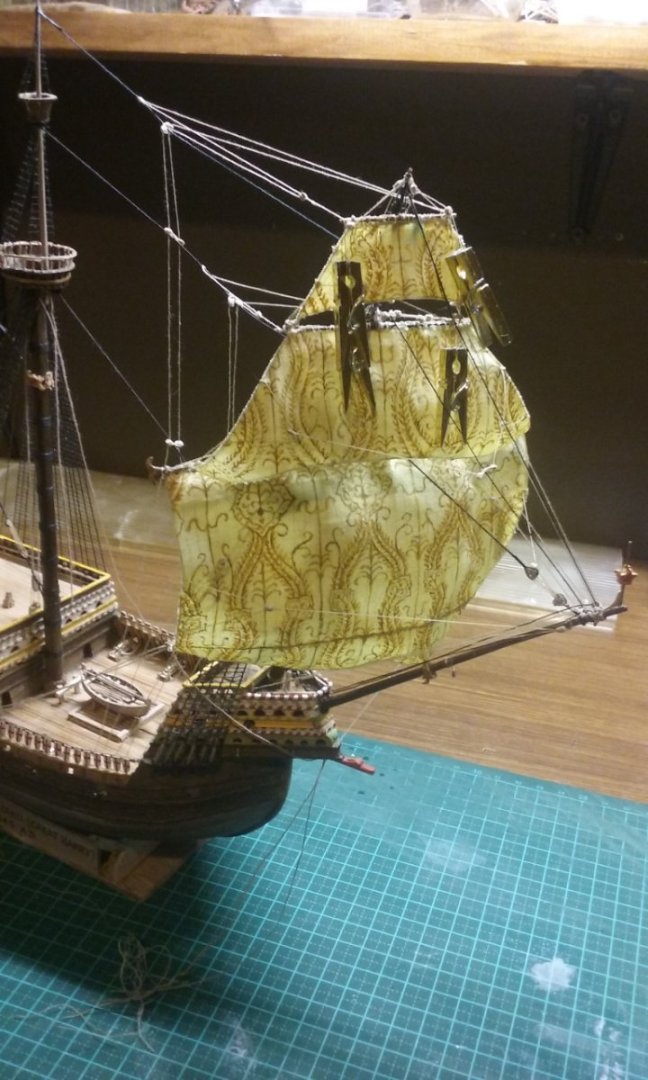
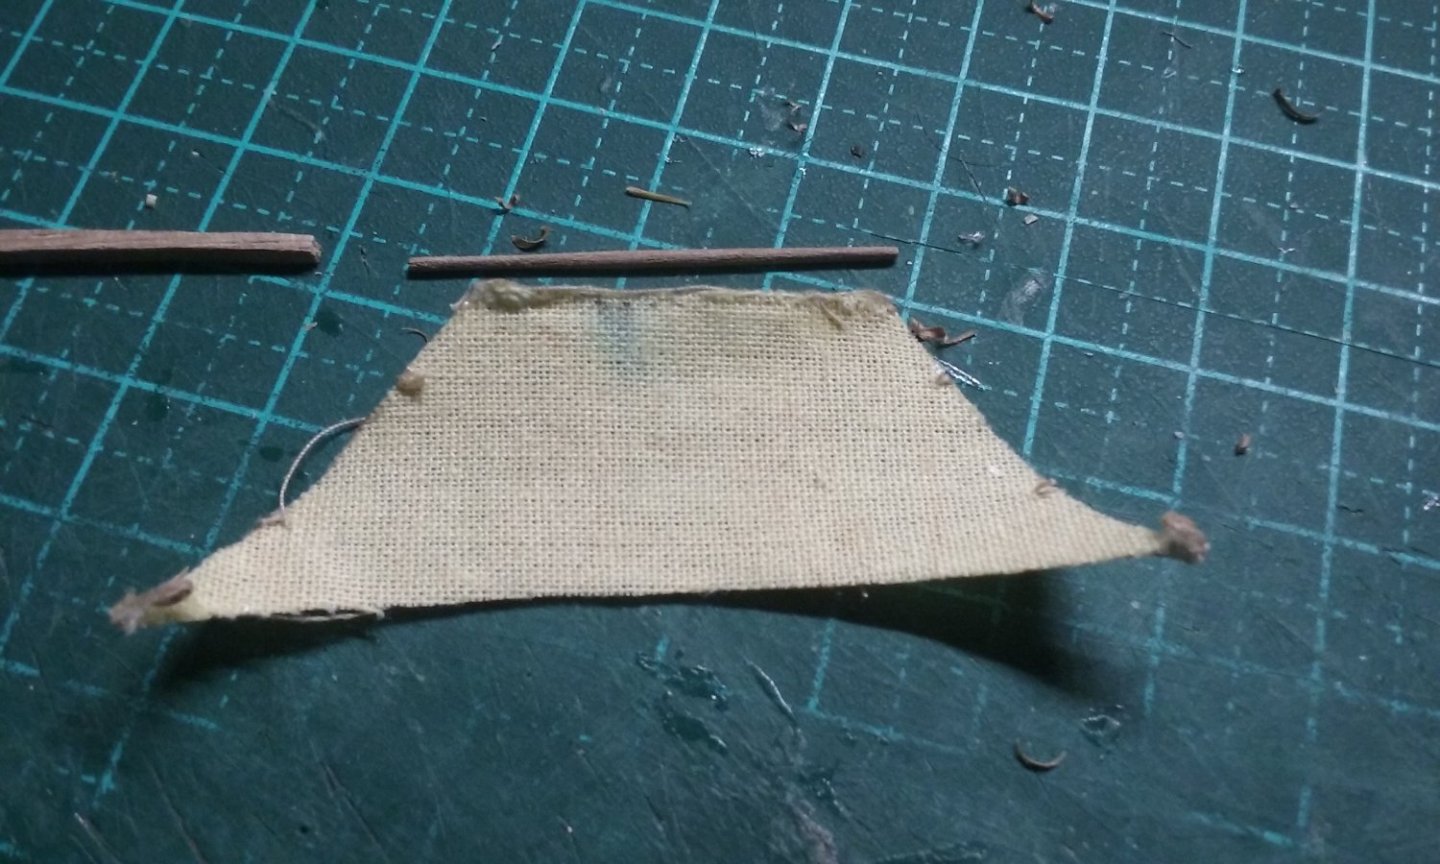
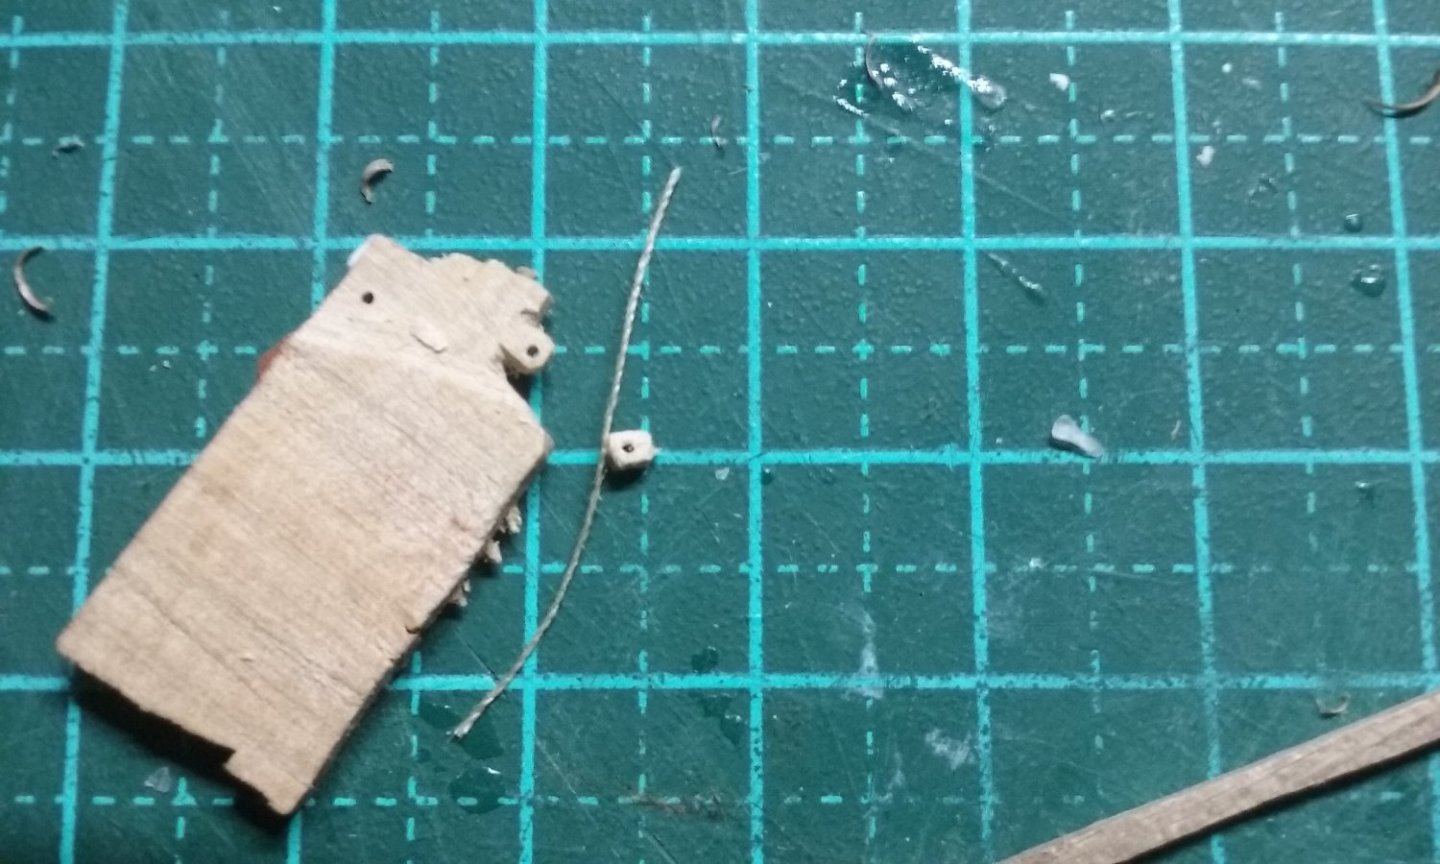
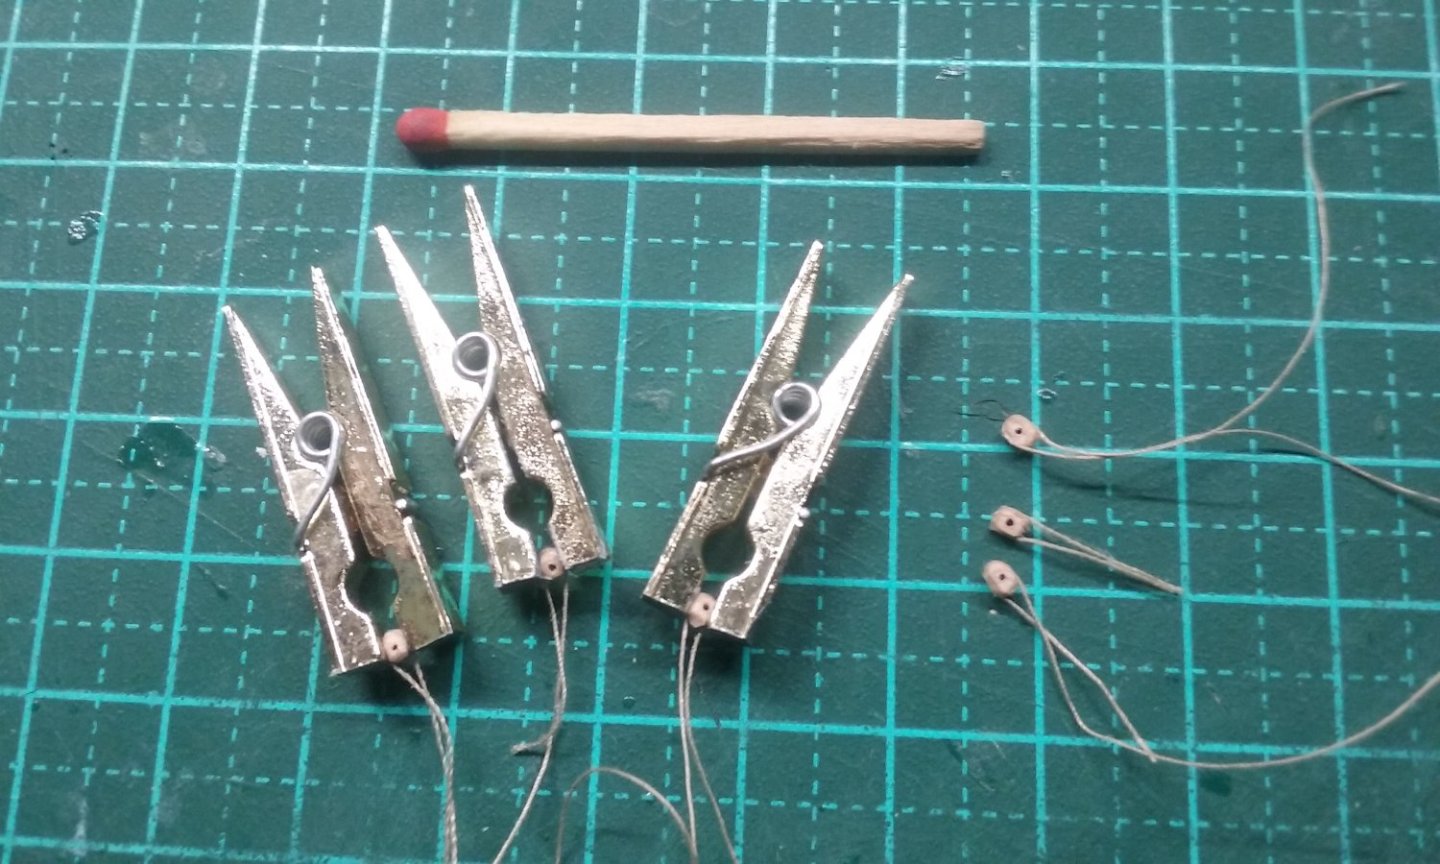
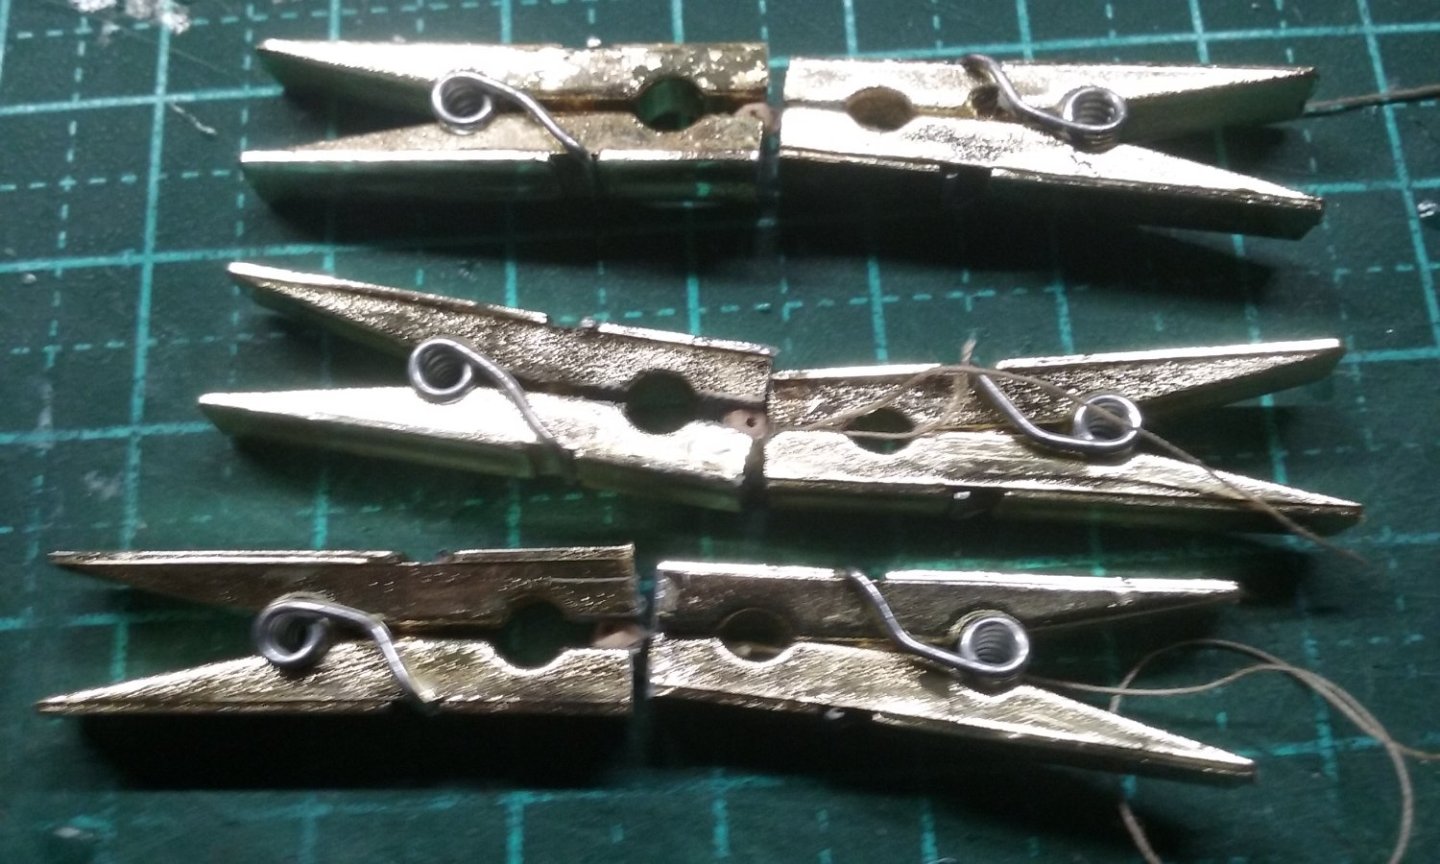
Well, I took a few weeks' break - it'd stopped being fun. One of the problems was that the fore-topgallant yard broke just after I'd tensioned all the lines leading to it. It had been broken when I started repairing the ship, and I'd glued it back together, so of course it failed just as I'd finished all the fiddly stuff attached to it. You can see the break in the yard about halfway between the mast and the end. I tried fishing it - you can see the attempted fish is the lighter (straight) piece of wood behind the yard. Didn't work. So I undid some of the lines, and cut the robands, intending to sew around the fish and hold it to the broken yard. No good. Eventually, I decided the yard was beyond saving, so I removed it and made a new one, whilst cutting as few lies as possible to reduce the work I'd have to do to put it all together again (for example, I kept the sheets and bowlines attached to the sail), so all I'd have to do would be to sew the sail onto the new yard. Nup. No good. I ended up cutting or undoing all the lines - it was just too ridiculously fiddly. So I made a whole new yard, sanded it down, made it very pretty but a little thicker than the original so it would be stronger. Added the blocks for the lifts and the clewlines. Looked really good. Left it on the cutting board overnight. Came back in the morning and moved the cutting board further back on the table, then went and did something else. Came back later - where's the yard? GONE! Huge search. Never found it. I think it must have got caught on my sleeve when I moved the cutting board and dropped off somewhere in the house - it certainly wasn't in the workshop. So I gave up and watched Youtube videos for about a week. Day before yesterday I'd recovered enough to start again. Only took me a few hours to complete. So here's the progress of the new topgallant yard (plus blocks). Yard made (with the piece of wood it was carved from off to the left.) One block carved and attached to its strop on one side, plus another block in the process of being made. Second block ready to be cut off and finally shaped. Yard and all the blocks with strops partly attached (plus two spares, just in case) - with a giant match to show the scale. My patented method for holding the strops while they're wrapped around the blocks and the glue dries. And tightening the strops around the free end. And ready to attach. Blocks in place for the lifts. And finished. Topsail clewline blocks. Voila! Naturally, I've put this in a safe place where I can't lose it again. Next step is to attach the sail, add the parrel trucks and attach to the mast. Starting to become fun again. Steven


- 740 replies
-
- 16
-
-
-
- Tudor
- restoration
- (and 4 more)
-
Wonderful!
-
Well done, sir! Steven
-
1200-Year-Old Wreck Discovered in the Eastern Med
Louie da fly replied to CDR_Ret's topic in Nautical/Naval History
Here's some more on this wreck - it seems a little surprising that it's only getting this news attention now - they've been working on the wreck for some years. https://honorfrostfoundation.org/2018/10/03/the-maagan-mikhael-shipwreck/ https://onlinelibrary.wiley.com/doi/full/10.1111/1095-9270.12331 Steven- 1 reply
-
- 4
-
-
I went on board the replica when she was still under construction in Fremantle, Western Australia. It was a wonderful experience, but she was tiny! I have a souvenir - a small oak offcut with the name Duyfken burnt into it. Steven
-
Hi Jake, from a former (short-term) East Grinstead resident. The Victory is a very difficult model to take on as a first build, but if you persist, and take advice from other Victory build logs, you should make your way through it with success. And if you have questions, don't hesitate to ask the forum members, who are very experienced and helpful. It would be interesting to see photos of your 'O' gauge railway - there's a section for such things at https://modelshipworld.com/forum/73-non-shipcategorised-builds/ Steven
-
Swivel guns
Louie da fly replied to tlevine's topic in Discussion for a Ship's Deck Furniture, Guns, boats and other Fittings
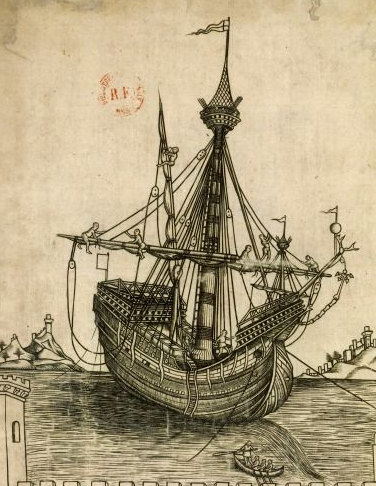
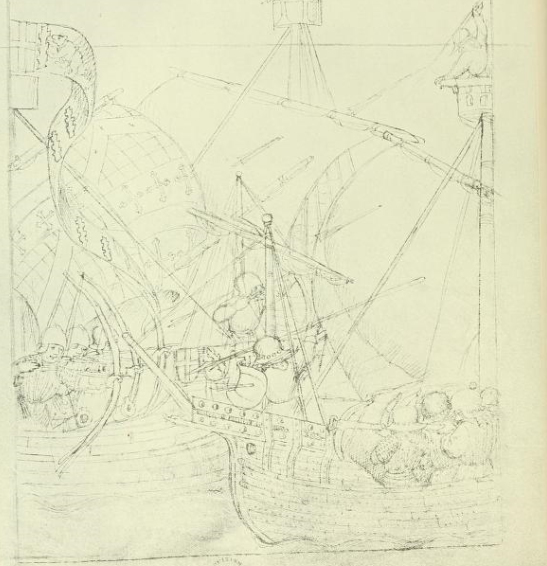
Hard to say, and it would depend on the period of the ship. What century? In the 15th century they began to have gun(!)wale-mounted swivels, but unfortunately the contemporary pictures aren't representative enough to show how they relate to the height of the people on board (people are routinely shown bigger than they are). And try as I might, I haven't been able to find any contemporary picture from this period showing someone on board ship firing a swivel gun, or even in the same pic as one (except ones like the pic above where the proportions are obviously seriously wrong). However, what we do have is what I believe are pretty reliable pics of ships with swivel guns mounted directly on the gunwale . . . and others which show what I believe is a reasonably accurate idea of the size of people in relation to the ship . . . This might be of use in working out the height of a swivel gun, at least in the 15th century, but I'm afraid it's not all that helpful. Steven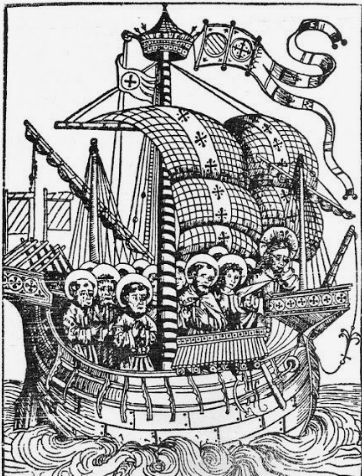
-
Could we have a UK members section?
Louie da fly replied to JDillon's topic in New member Introductions
Hi JDillon, and welcome to MSW. Trouble is, it would make things very complicated to have separate sections by geography. We have people all over the world. I'm in Australia and we have people all through Europe, the U.S., you name it. But in the "Wood Discussion" and ""Modelling tools" sections, you'll find these kinds of questions being discussed, and you can ask the questions yourself in those sections if you need to. Steven