GuntherMT
-
Posts
2,213 -
Joined
-
Last visited
Content Type
Profiles
Forums
Gallery
Events
Everything posted by GuntherMT
-
Lovely work on the hull, looks great!
-
Nice idea on the brass for the rudder. Looks good.
-
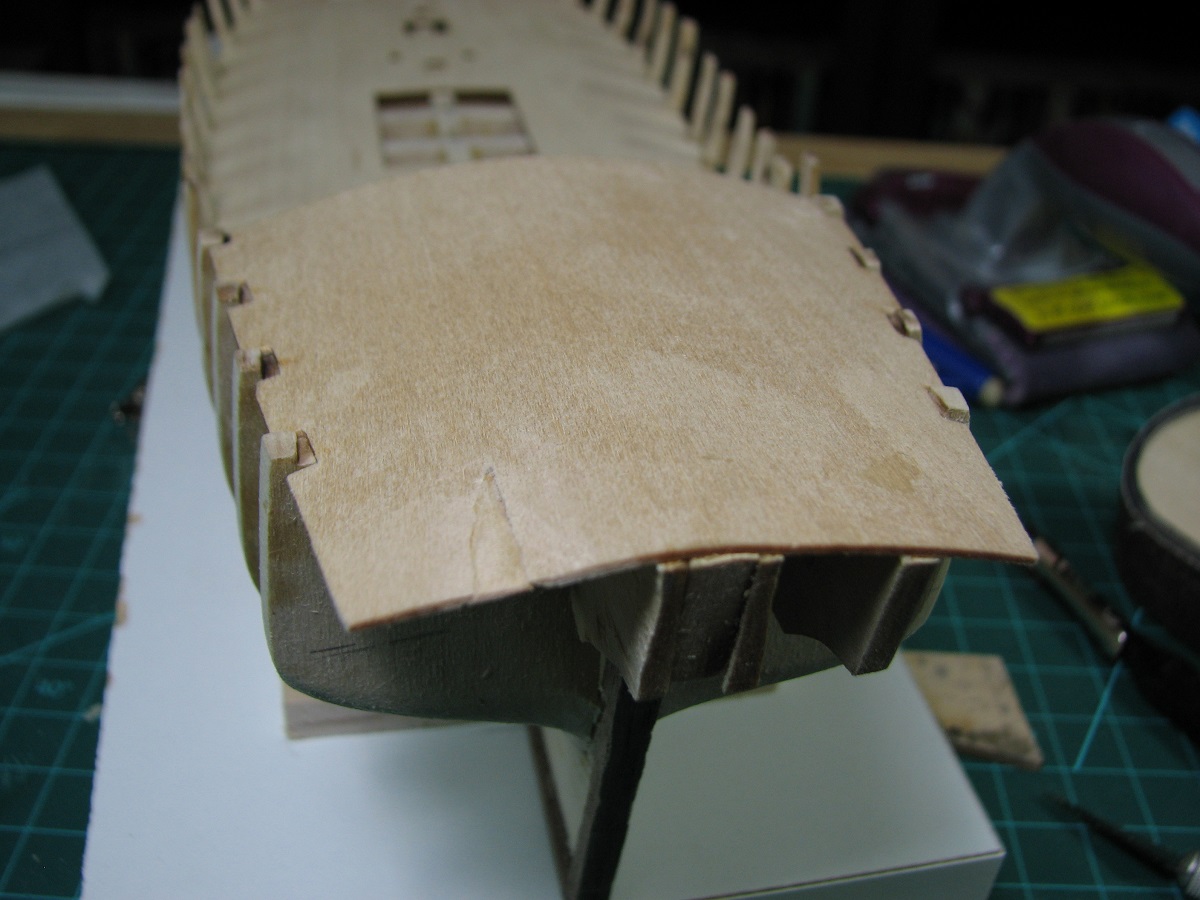
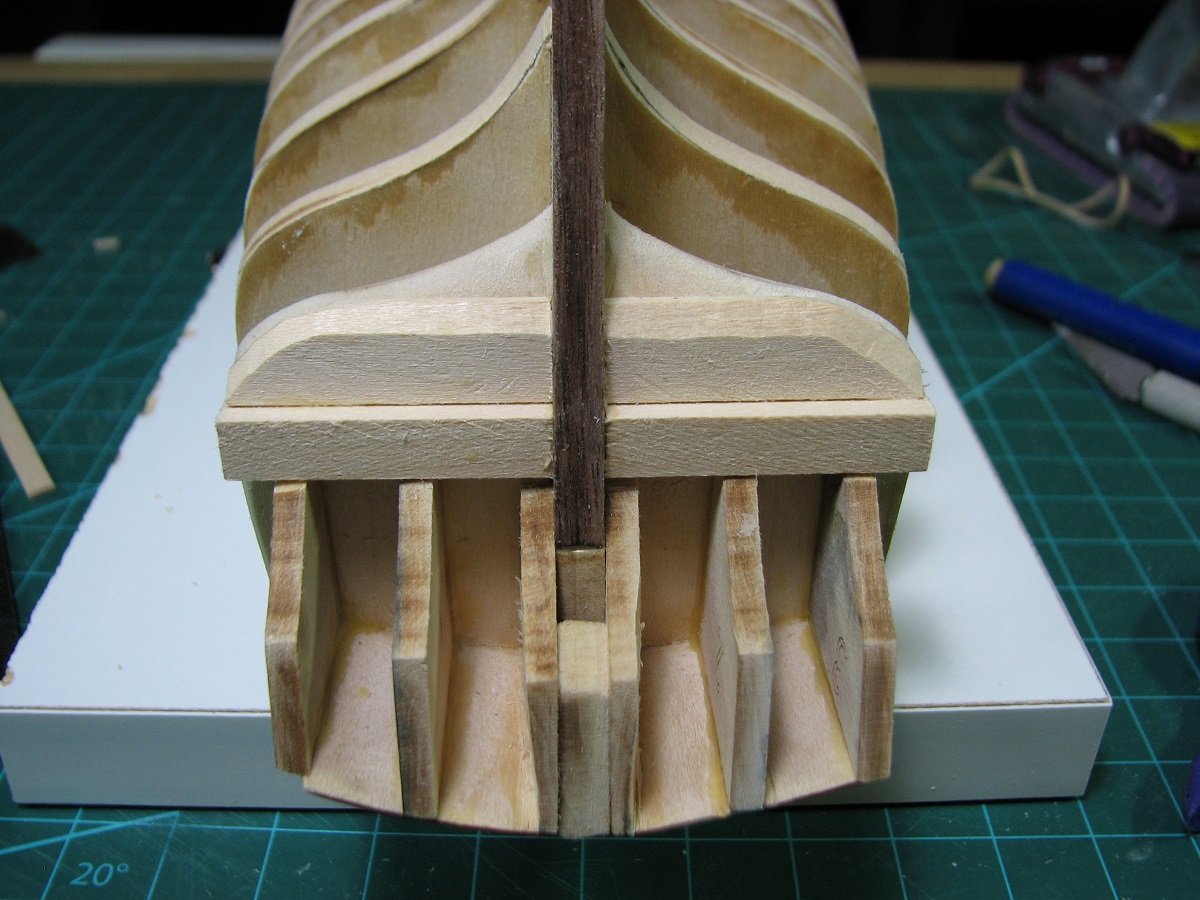
Thanks Russ, So I seem to be making a habit of doing stuff wrong and then having to fix it. This one was annoying, but not damaging at least - after my update I was staring at the plans again, specifically the planking cross section, and it dawned on me that the 1/16" measurement for the bevel on the top of the waterway is measured from the outside edge, leaving the bevel running from the spirketing plank to the deck plank with no 'flat' visible on the waterway at all. I had measured from the inside edge, meaning that I was leaving a flat area between the spirketing plank, and the beginning of the bevel. So, another hour or so later, I've completely re-beveled that port waterway to a new mark, 1/16" from the bulwark edge. Time for bed now before I find something else wrong!
- 831 replies
-
- 1
-

-
- Armed Virginia Sloop
- Model Shipways
- (and 1 more)
-
Hi Vivian, You said you waxed the false keel. I've never seen anyone mention doing that before, what is the purpose if I might ask? Thanks!
-
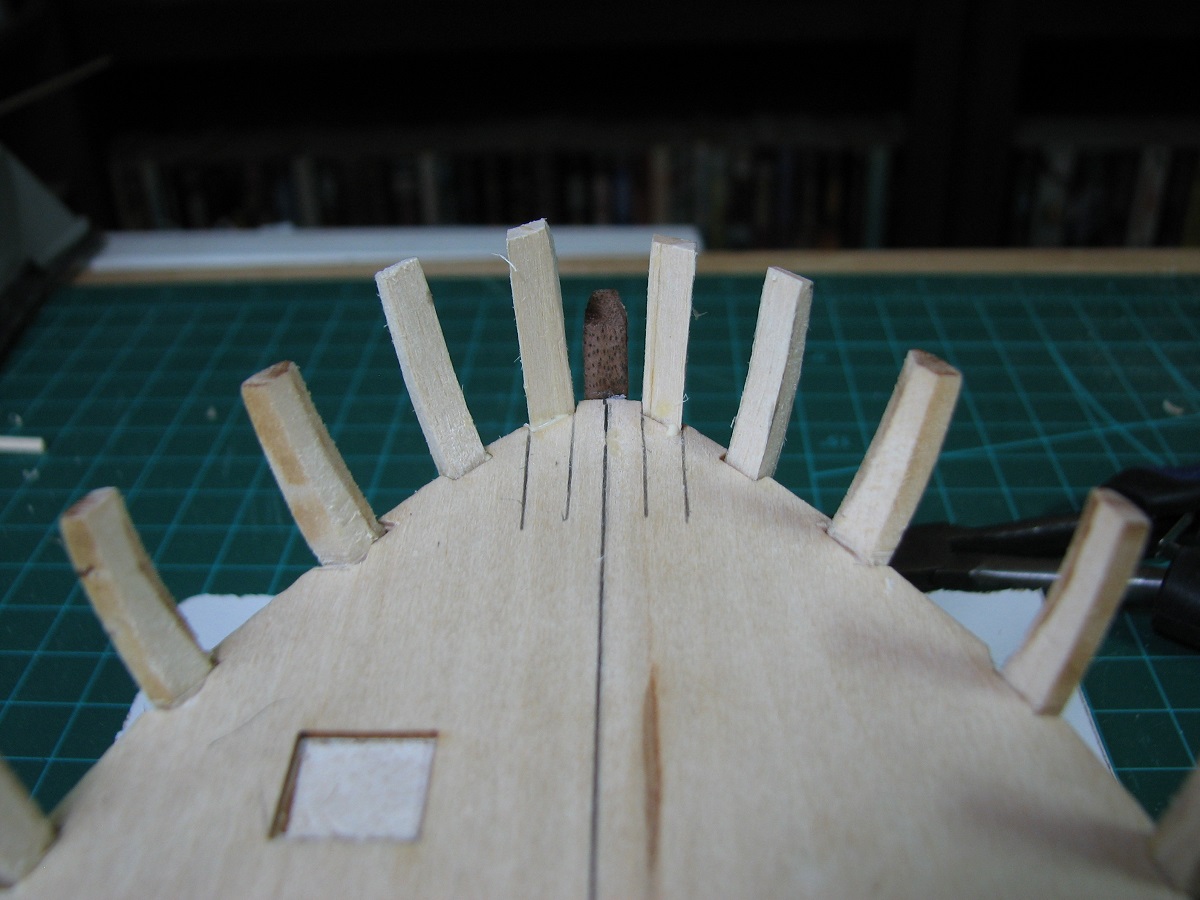
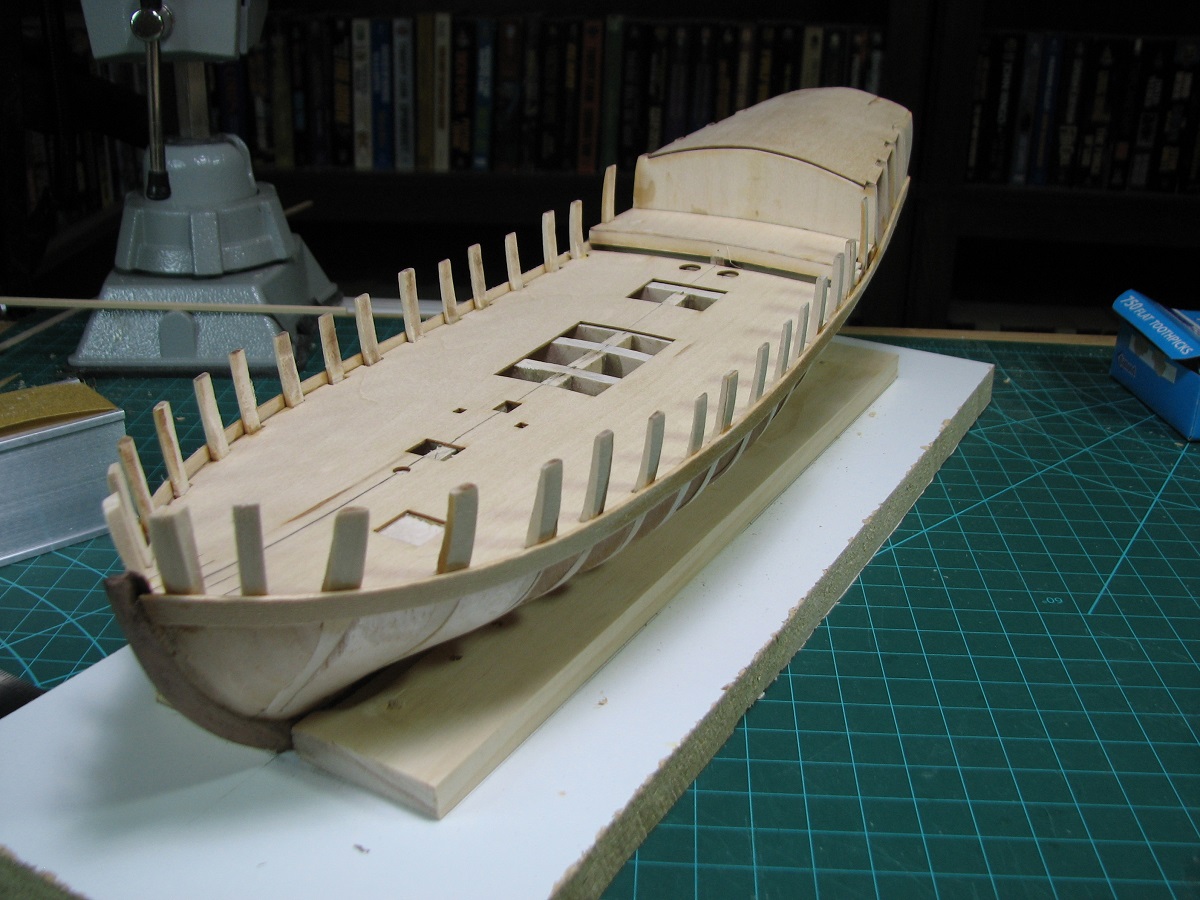
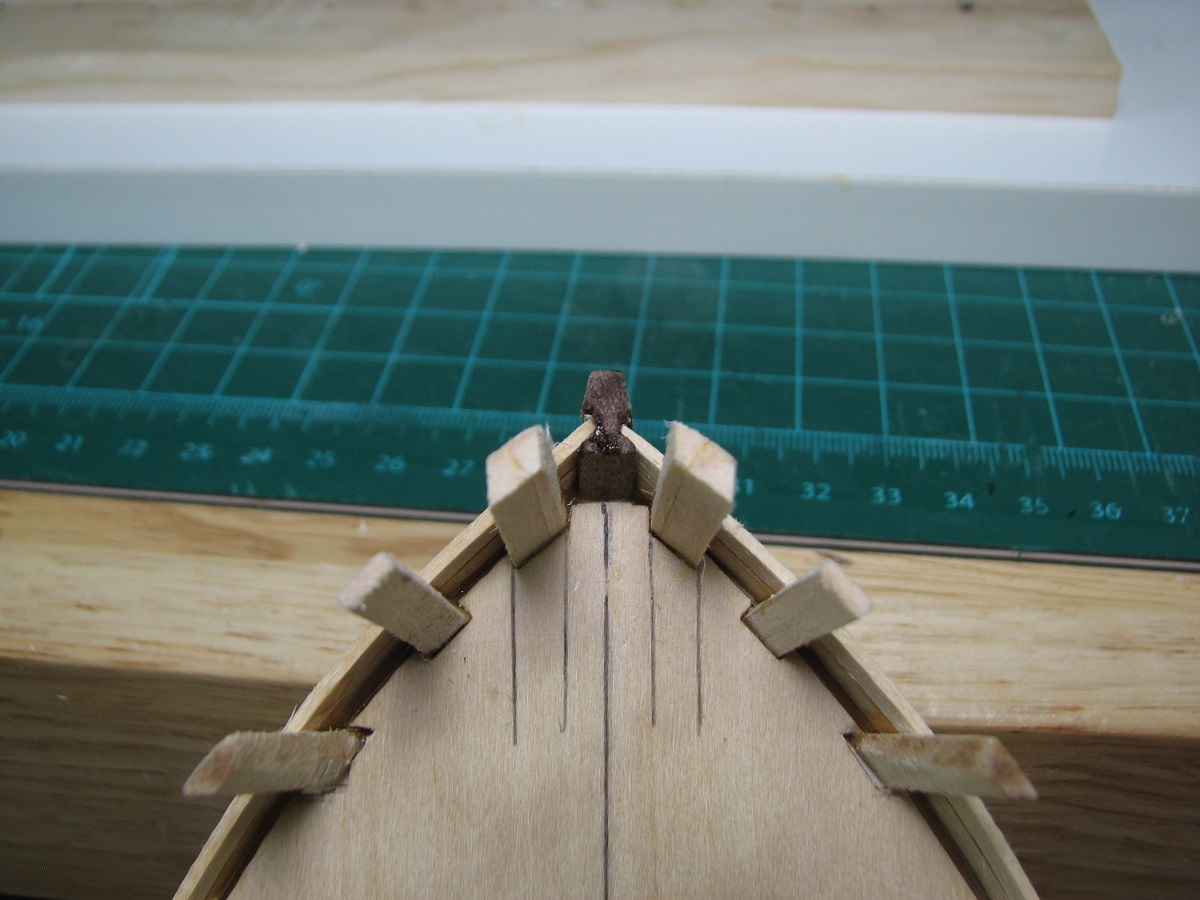
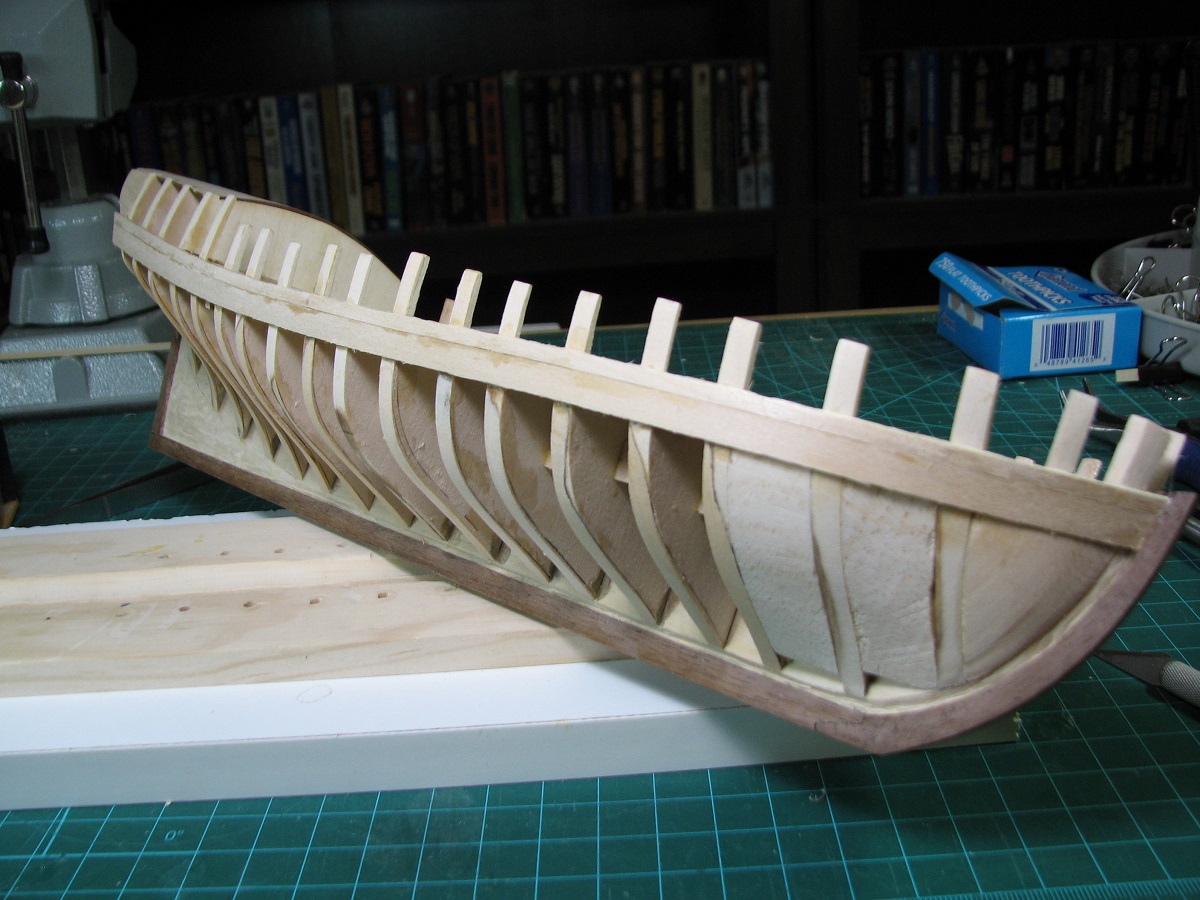
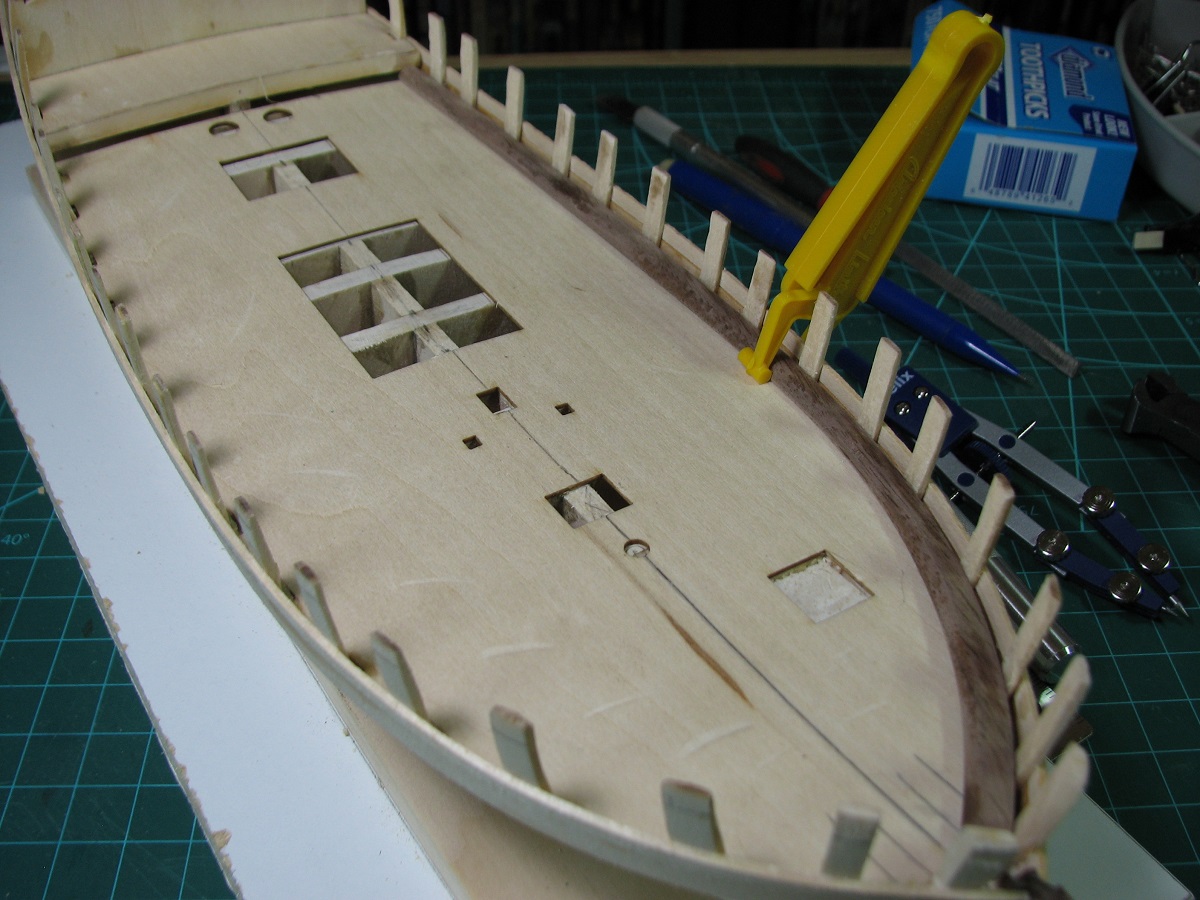
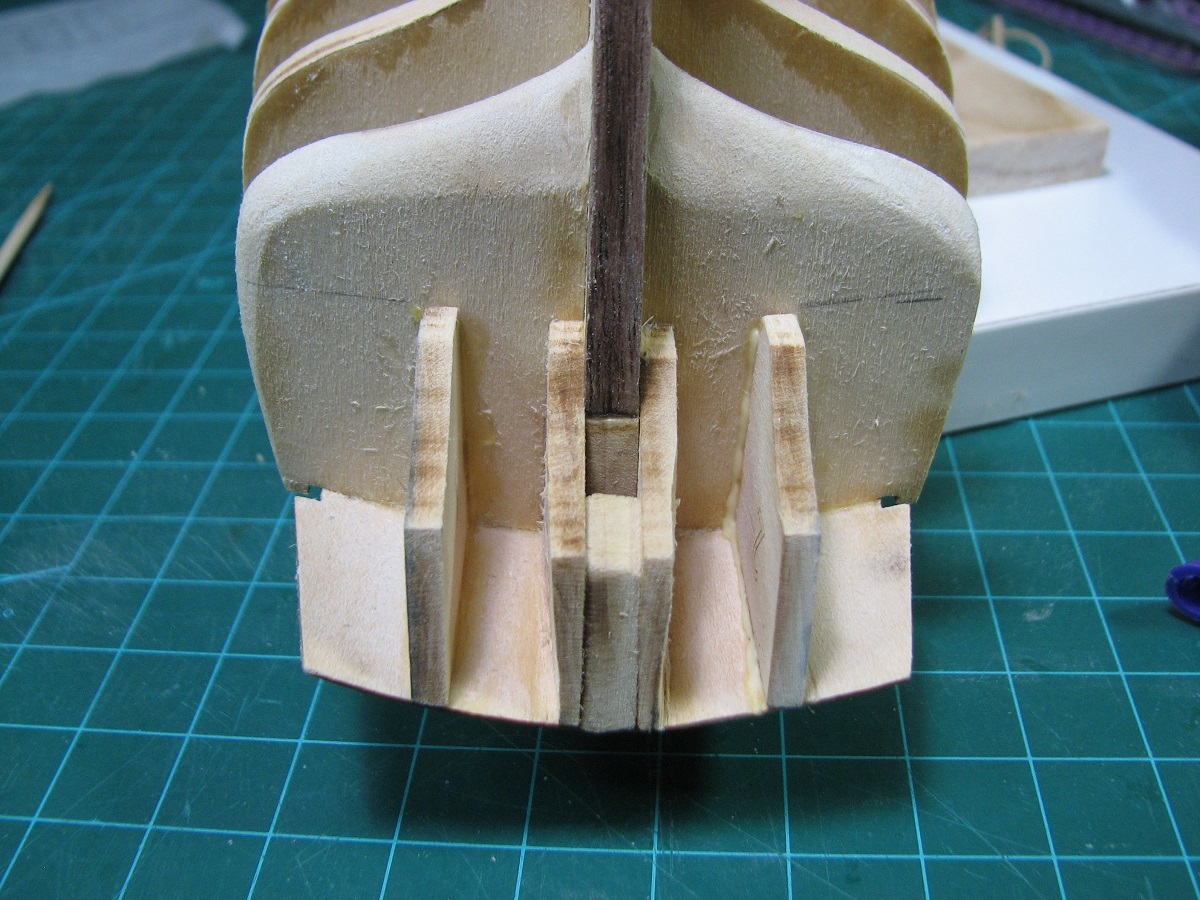
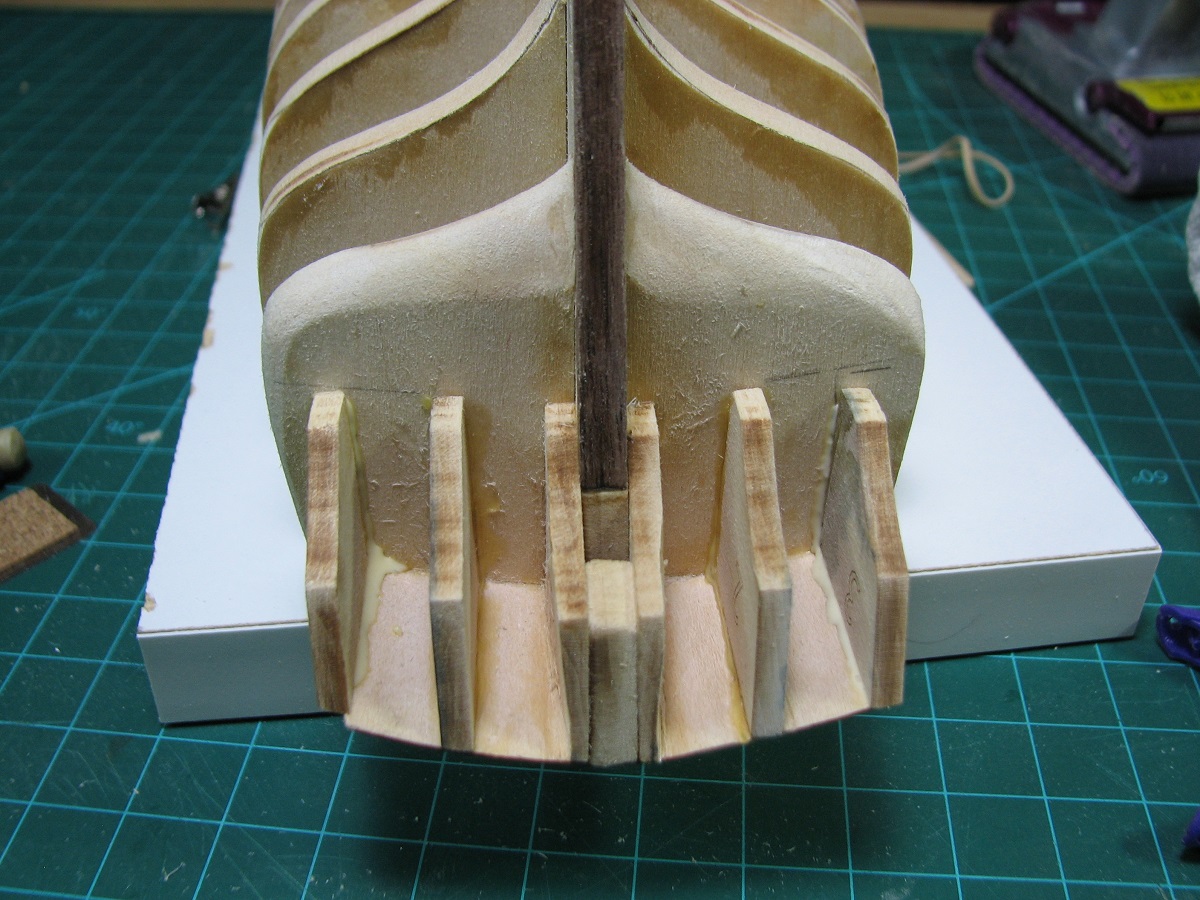
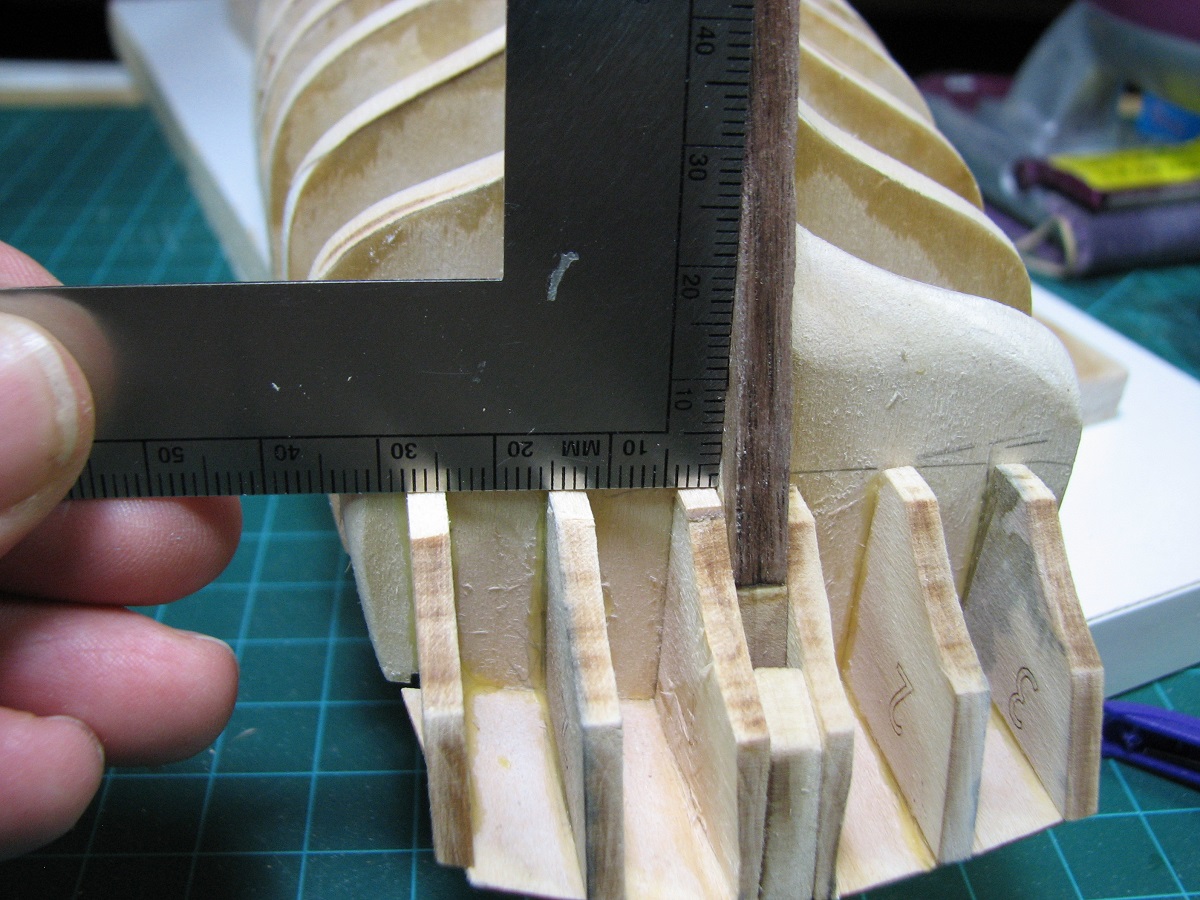
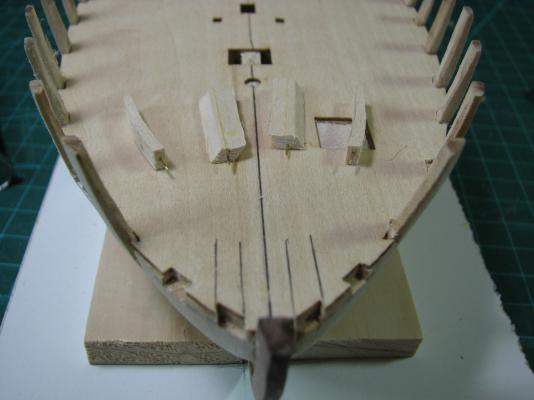
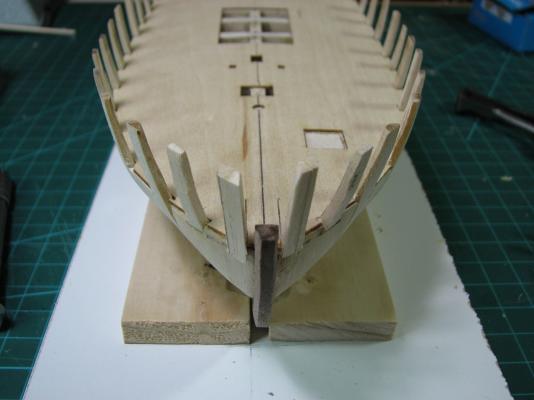
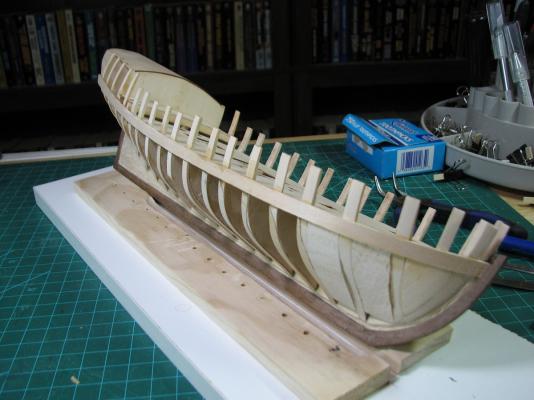
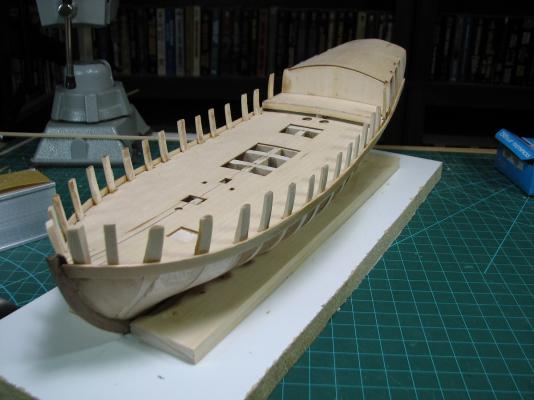
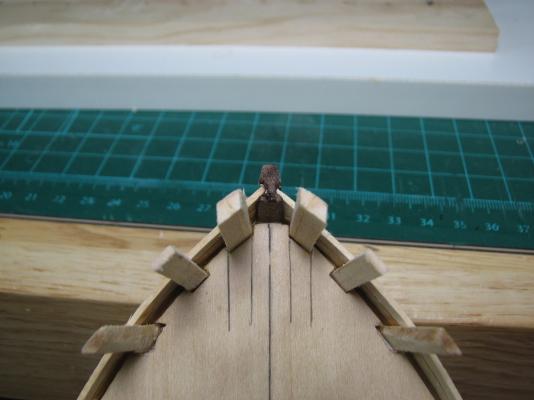
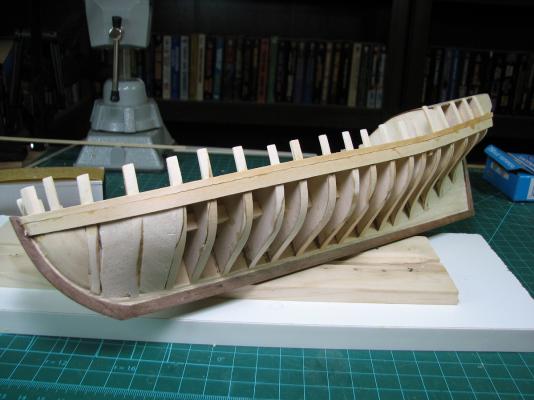
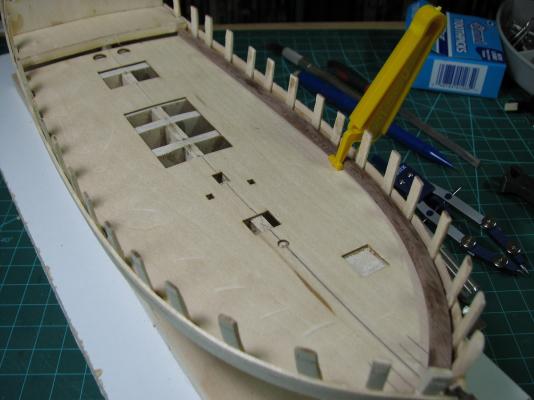
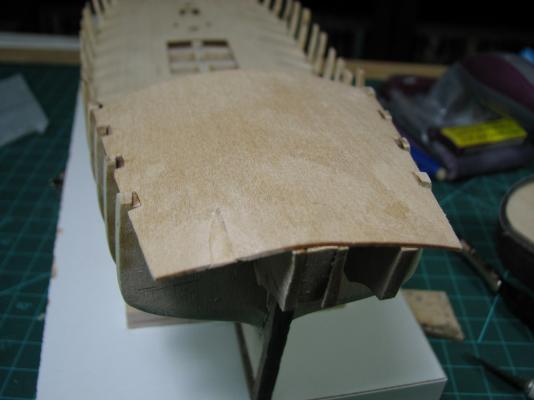
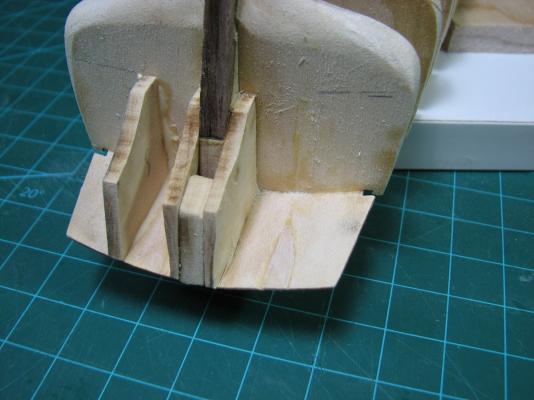
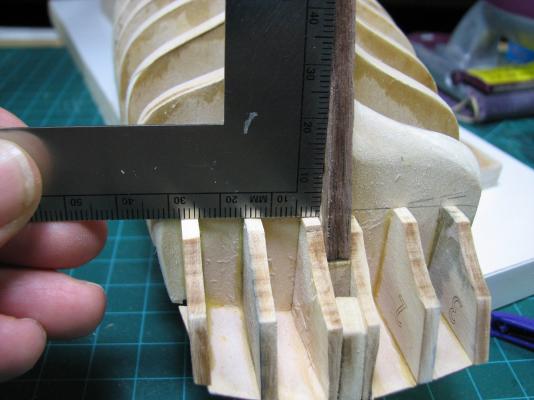
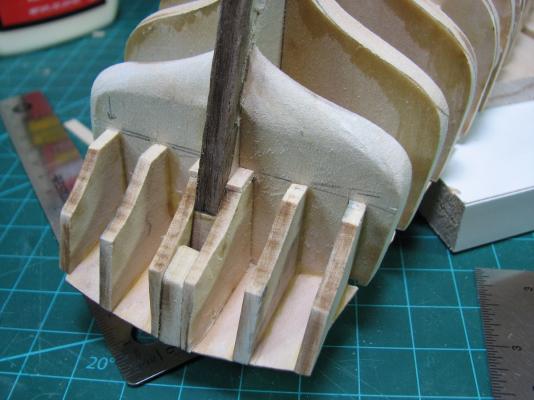
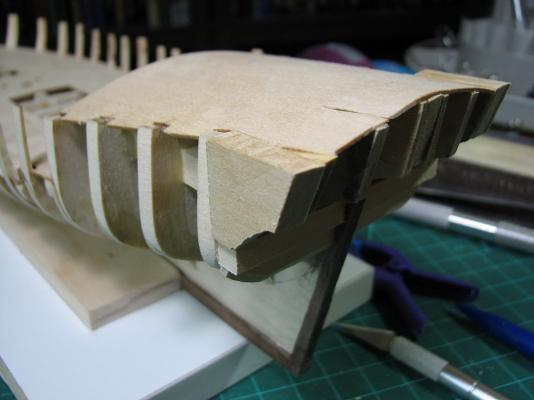
Slow progress continues as I move on from the stern today, and begin work on the timberheads and knightsheads. I cut out the rabbets for them to glue into, and shaped the knightsheads, but the timberheads require a wider piece of wood than the kit provides because of the odd parallelogram shape, so I doubled up the wood and glued them together. After getting them shaped to fit, but not 'thinned' down, I decided that there was no way that these would not get broken off by my ham fists, so I drilled them for pins before placing them into their final resting places (hopefully). At this point all of the bulkwark extensions need to be faired on the inside, but given how thin they need to be made, they are sure to be quite fragile and break, so a 1/4" wide plank is placed to bridge the sub-deck line. Before placing that plank, the timberheads and knightsheads are faired into the outside hull shap. Then another 1/8" plank is placed above the 1/4" plank, and now even if the fairing process of the extensions is done terribly (which I did manage on a couple of them), they won't go anywhere or break off, as they are secured by the outer planking. Also, before the planking can begin, the stem needs to have the rabbet extended through it, as the outer planks set into it above where the false keel is. After the bulkhead extensions were faired on the inside (no pictures, as they don't really seem like something that would show up well in photos, or be very interesting, so I didn't take any), then comes the waterways. These pieces are laser cut walnut, and mine were quite badly laser burned and double cut for about half the length, so they are probably slightly narrow, and were a massive pain to clean up. The outside edge needs to be beveled to fit up against the bulwark extensions snugly, and I did this with a hard sanding block without too much difficulty. The inside top needs to be beveled as well, 1/16" in from the top edge, down to where the deck planking will meet it on the inside edge (3/64" planking). I used a compass to mark the 1/16" line along the top, and then used a piece of 3/64 basswood planking with a fine .05 mechanical pencil to mark the inside edge. I beveled the inside edge using a scalpel type X-acto blade. After about 30 minutes I decided I really don't like the waterways. After a bit over an hour I finished the port side, and now my hand hurts (from holding the blade - I somehow managed not to slice part of my anatomy off doing this), so the starboard one gets to wait for tomorrow. Alistair and some others may recognize that my sequence of construction is following the Bob Hunt practicum (mostly, I'm deviating here and there), which I did decide to get and use for this build. Not sure if I mentioned that before.


- 831 replies
-
- 9
-
-
- Armed Virginia Sloop
- Model Shipways
- (and 1 more)
-
Congratulations. She's beautiful and something to be proud of. Enjoy your next endeavors!
-
Coming along nicely. I just looked at this kit for the first time last night, and spent a while on the internet reading her history, so nice timing updating your log!
- 69 replies
-
- 1
-
-
- fair rosamund
- occre
- (and 1 more)
-
Thanks Russ, and I'm done for tonight, so it will be waiting for tomorrow in any case! Alistair, thanks for posting those for me, they and Barehooks photo's were very useful to me both in working on the stern, and for mentally getting a picture of how it might look with my ideas for the stern treatment. Hopefully it won't be too terribly long before I'll find out if my idea is any good.
- 831 replies
-
- 1
-
-
- Armed Virginia Sloop
- Model Shipways
- (and 1 more)
-
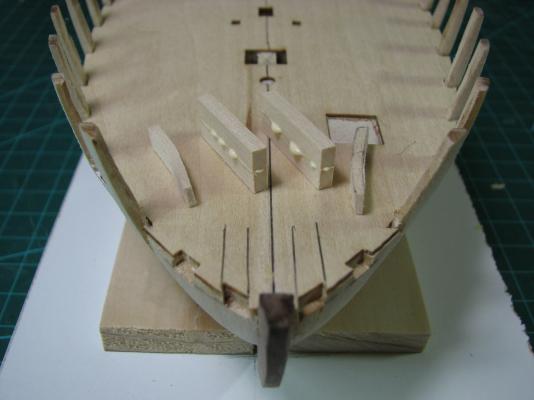
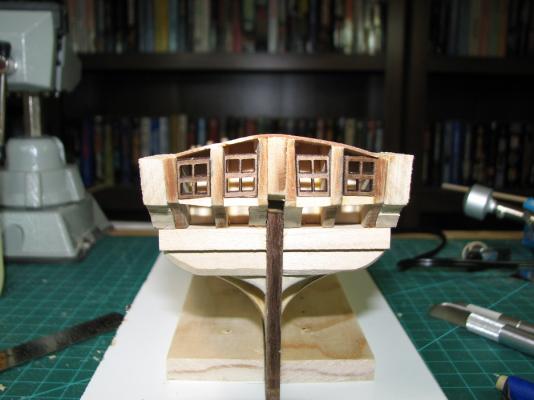
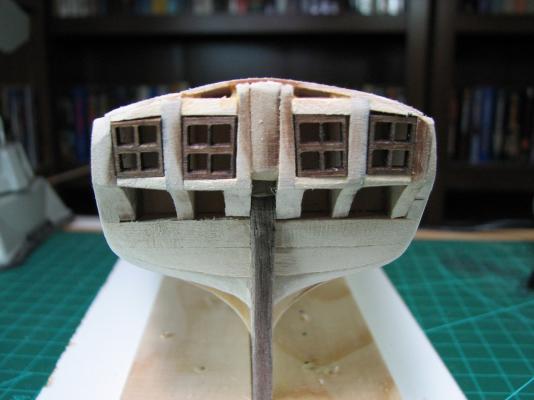
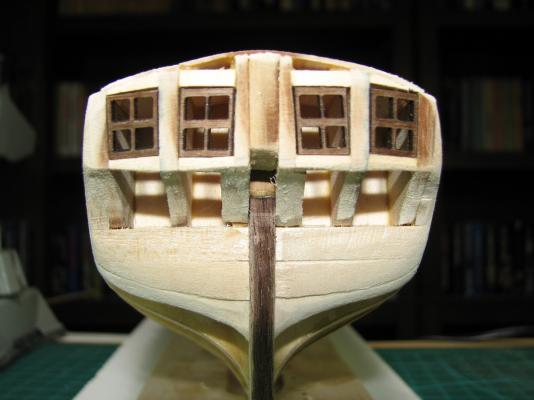
So I went with Russ and moved the middle windows up a bit, but the port outer window was still out of alignment and I couldn't really figure out how it wasn't like the other side, until I really started looking at all angles, and realized that I had managed to sand back the port side of the transom farther than the starboard. So, I shimmed out the entire outer left transom quarter around the window frame, then took another run at it. After much shimming, tearing out, trimming, re-shimming, etc. I think it's going to stay like it is right now. I'm not sure I can get it any better without screwing up something else, so I'm just going to finish it off in this position by adding a bit of shim above the inner-port window, and some very slight trimming around the outer port window to hold it in the current position, as it's a bit loose now.

- 831 replies
-
- 6
-
-
- Armed Virginia Sloop
- Model Shipways
- (and 1 more)
-
Welcome! I've never done a section model myself, only now starting on my second model of wood at all, but I'll certainly enjoy following along with you as you build this. Only real tip I can share right now is - Take your time, and if you post plenty of pictures here and ask for advice when you get in a pickle, someone (or multiple someones) will chime in with plenty of advice. Good luck!
-
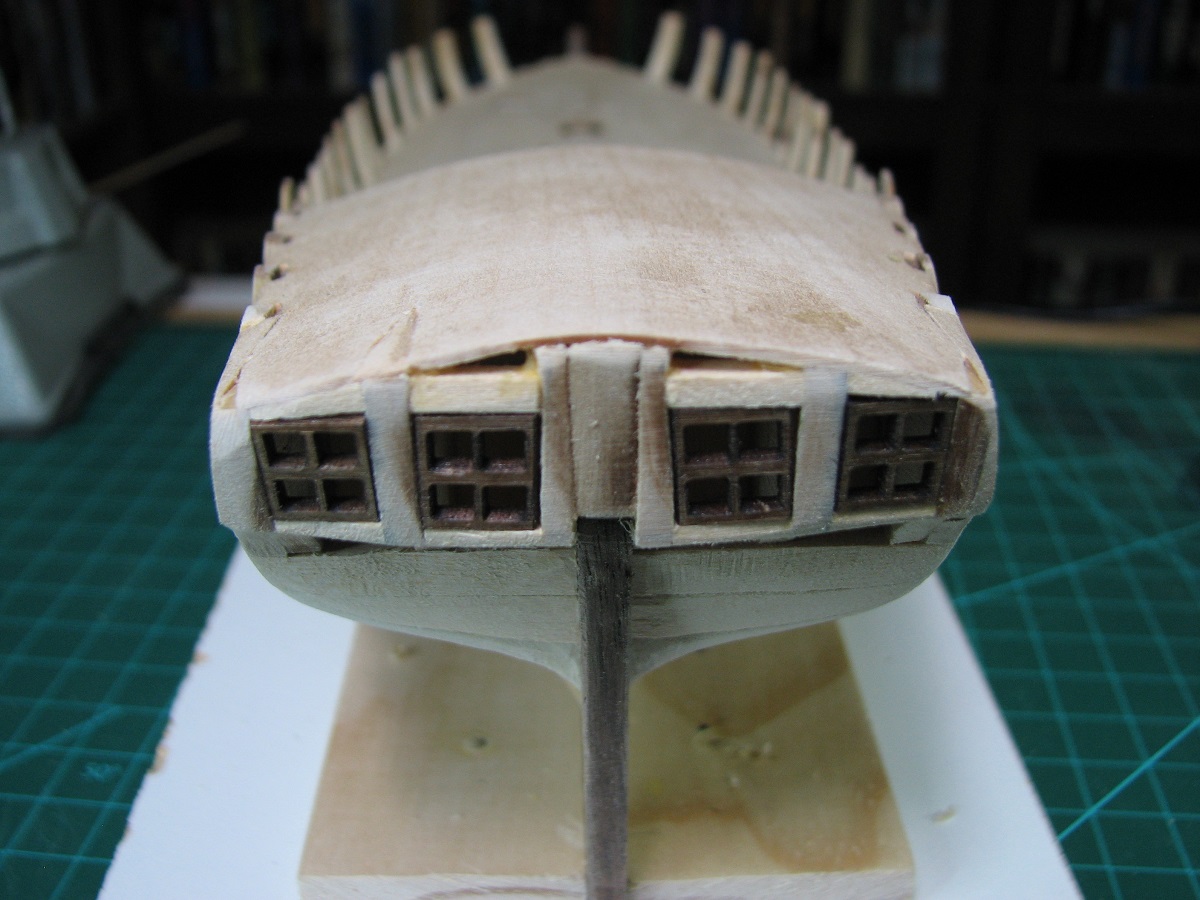
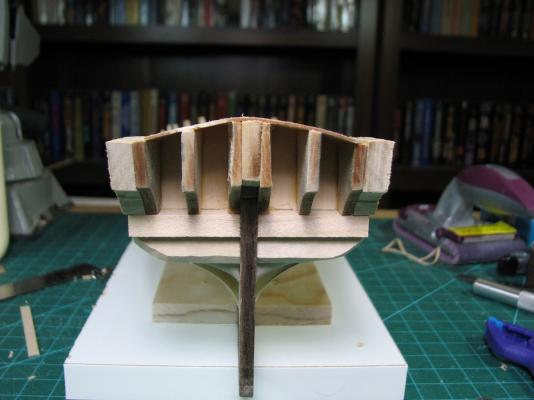
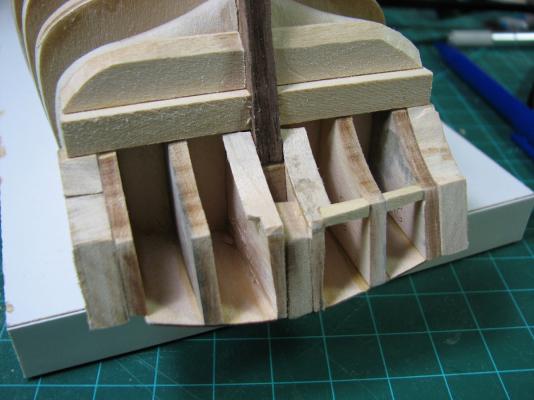
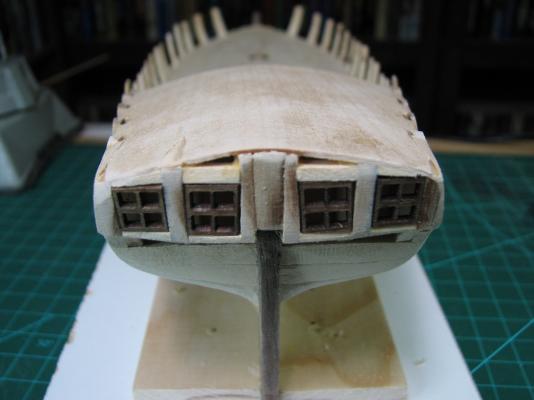
Stern work continues. I put a bit of wood in to patch the poop deck where I tore it up, it's not pretty, but since it will be completely covered up by planking, no biggy. I angled the two #1 frames next to the keel with a #11 X-acto without removing them from the ship. The picture makes it look like they are curved for some reason, but they really aren't. Went ahead and attached the other frames using the windows for each slot as a guide as I went. I then used a small square to establish a flat line against bulkhead R so that I knew what I needed to adjust on the bottom of each frame. Both #1 frames were shimmed, the #3 frame with the arrow was trimmed a bit, and the 2 frame on that side was used as my 'reference' point for the line because the #3 frame on the other side matched it for height, so the #2 frame on the other side was trimmed slightly. After that was done, I added the counter and stern filler (roughly shaped first). Added the port and starboard fillers as well. Moved on to placing the window frames, starting with the bottom frame. As I got to the center I determined that to keep the frame at the same height as the outer two frames 'corner', I needed to shim both of the #1 frames. I used 3/64 basswood, bent it using water and heat, then trimmed it, glued in place, and then final trimmed it up after the glue was set. After all four frames were in, I test fit the windows and made some adjustments to get them aligned right (or so I thought) before moving to the upper frames. I then sanded down all the fillers and counter to finish out the stern. Once that was complete, I put all the windows back in for a test fit, and the macro camera shot tells the tale.. ...somehow they are no longer aligned the way they were in the previous picture. Both of the outer windows appear to be higher than they should be, although the angle looks good I think. I decided to take pictures from some different angles after this to see if the camera angle was causing the difference between the two tests. So now I think I'm going to lower the outer two windows slightly. I think I can do this by simply shaving a tiny bit off of the bottom frames, and then adding thin shims to the top. The starboard upper frame needs a shim anyway, or simply replaced, as it somehow didn't come out right.


- 831 replies
-
- 10
-
-
- Armed Virginia Sloop
- Model Shipways
- (and 1 more)
-
This looks like quite a lot of interesting kit for a pretty low price (just over $75 through the end of October with their 40% off sale). I really may have to pick this up and put it in the queue as my first PoF build. It certainly looks like it's a very interesting build, and I'm glad you are posting it.
-
Looks very interesting. It now appears that you are doing a full scratch build in the kit area to keep us all confused.
-
Fair enough. Sort of figured that's what I'd need to do, but it just looks.. odd.
-
Wait, you got numbers? Haha.. the Carmen didn't even have that, just a single plan sheet that shows lines, although they do have little drawings of a few specific details for routing, but most of it I just had to look at pictures and try to figure out or guess at.
- 1,756 replies
-
- 2
-
-
- constitution
- constructo
- (and 1 more)
-
Personal Messages
GuntherMT replied to aliluke's topic in Using the MSW forum - **NO MODELING CONTENT IN THIS SUB-FORUM**
Sent a new test message to Alistair, and he got it and responded, and I can still open that conversation, but the two we 'lost' still don't show up in my conversation list, and if I use the email notification link to attempt to get to it, it gives the no permission message. Thanks for trying to help! -
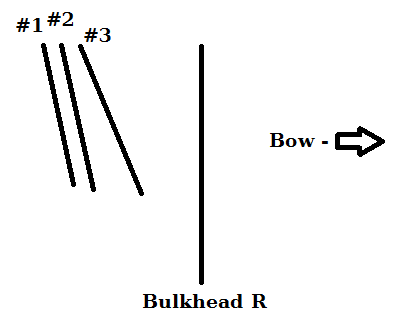
Alistair, Here is a terrible paint drawing to try to better describe what I'm talking about. The angles and distances relative to each other is exaggerated here for clarity. Frame #1 and the keel extend the farthest to the rear. Frame #2 is almost identical in angle to frame #1, but does not extend quite as far to the rear. Frame #3 has a much shallower angle, and doesn't extend as far to the rear as frame #2.
-
The Byrnes Saw "inside and around"
GuntherMT replied to nobotch's topic in Modeling tools and Workshop Equipment
Come to MSW to build little model boats, learn how table saws work. -
Personal Messages
GuntherMT replied to aliluke's topic in Using the MSW forum - **NO MODELING CONTENT IN THIS SUB-FORUM**
IE is the devil's handiwork, and no sane person would use it given a choice. I'm using Firefox because I'm too stubborn to switch to Chrome. -
I think it looks good, and thanks for posting it. I mostly wanted to see a good shot of the finished stern to give me a better idea of whether my idea for the stern treatment/colors on mine might look good or not. Hopefully I'll know sometime in the next month! I've rebuilt the stern on mine to the point where I have all the frames on, but I never could get them to align properly, so I'm just going to trim and shim as needed after the glue has dried in order to make them how I want in the end. Hopefully! Right now the line I've drawn requires shimming the bottom of both #1 frames, shimming the bottom of one of the #3 frames, and trimming the bottom of the other one, and using the #2 frame bottoms as my level point for both sides, as they are very close to exactly equal to each other as far as bottom height on the bulkhead R. The far aft angle for both frames #3 seems shallow compared to the other 4 frames, is the transom somewhat compound curved as it nears the outboard edges (i.e. the vertical angle changes along with the slight horizontal curve from the keel to the outboard edge)?
-
The Byrnes Saw "inside and around"
GuntherMT replied to nobotch's topic in Modeling tools and Workshop Equipment
Excellent link, completely explained it. I assume then that the 'kerf' is the width of the cut that the blade makes in the wood. -
Hi Daryl, this is a really nice build, and I'm amazed at how you dealt with the massively warped frames. You posted months ago that OcCre was going to replace them, did they ever send you replacement parts? I for one will be very interested in reading your report to OcCre when you are finished!
-
Personal Messages
GuntherMT replied to aliluke's topic in Using the MSW forum - **NO MODELING CONTENT IN THIS SUB-FORUM**
Can you 'unblock' me? I don't show you as blocked, when I click on your profile I have the option to block you, not unblock. Edit: Not when I click on your profile, but when I look at the top of our conversation from yesterday, under your name I have the 'block' option. -
The Byrnes Saw "inside and around"
GuntherMT replied to nobotch's topic in Modeling tools and Workshop Equipment
So I've never used a table saw (and probably won't in the near future either) - what is the purpose of this splitter or 'riving knife'? -
Personal Messages
GuntherMT replied to aliluke's topic in Using the MSW forum - **NO MODELING CONTENT IN THIS SUB-FORUM**
14%, not the issue, and it's doubtful that it would have affected both Alistair and myself simultaneously.