GuntherMT
-
Posts
2,213 -
Joined
-
Last visited
Content Type
Profiles
Forums
Gallery
Events
Everything posted by GuntherMT
-
Your attention to the tiny details continues to make this fairly basic model kit stand out and look fantastic. Hand carving your chocks was amazing, but then the addition of the tiny brass pins just puts it over the top. On your other note, I think it got down into the 60's this morning.
-
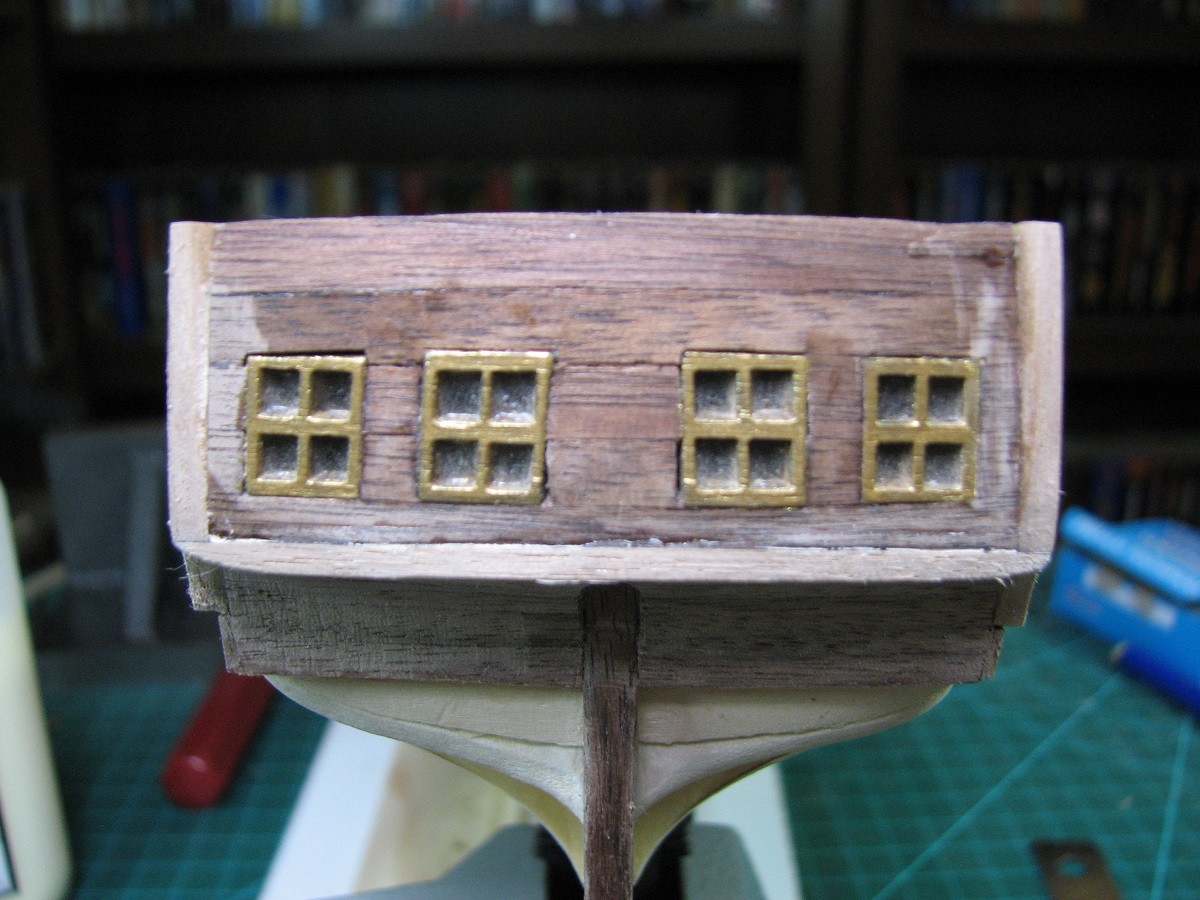
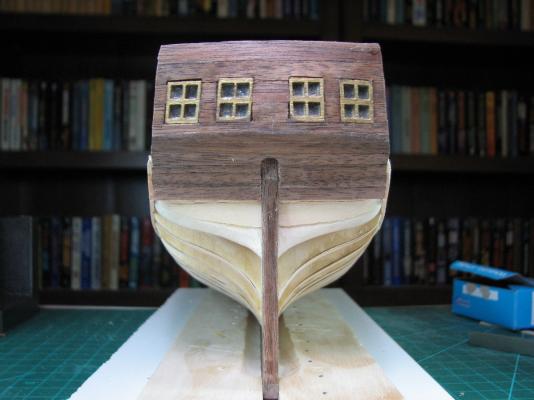
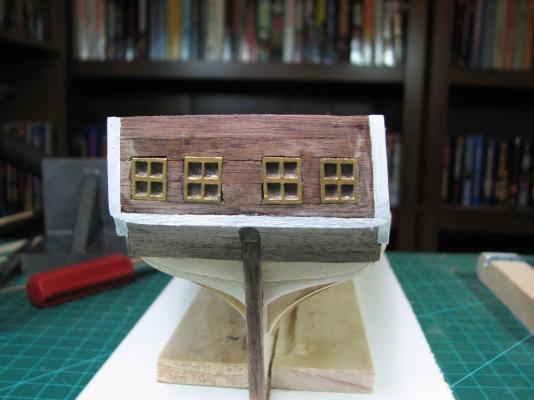
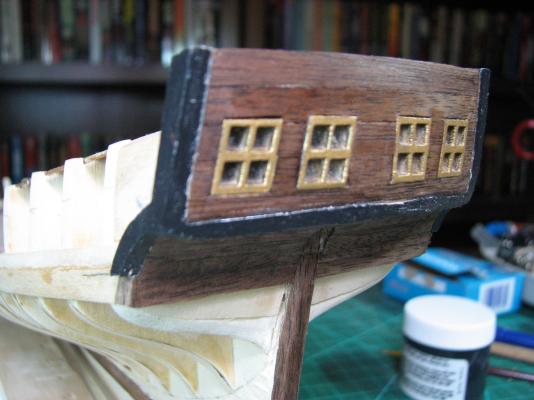
Lesson I learned after seeing the final photo's in that last post - once the windows are placed, they should be covered with tape or something or they'll get filled with sawdust, which doesn't seem to want to come off since the surface is basically 'glue'. Chalk it up as another lesson learned, and it isn't a huge tragedy, just something to keep in mind the next time.
- 831 replies
-
- 1
-

-
- Armed Virginia Sloop
- Model Shipways
- (and 1 more)
-
Oh yea, I also did a remarkably stupid thing today. For no real reason at all, I put all of the receipts I've spent on stuff since I bought the Carmen kit back in August into a spreadsheet to get a total. Boy that was dumb, that number is really quite a bit larger than I expected. Buying random clamps, pliers, glue, tape, bits of wood, fittings, etc. adds up even when no single purchase is all that much.
- 831 replies
-
- 4
-
-
- Armed Virginia Sloop
- Model Shipways
- (and 1 more)
-
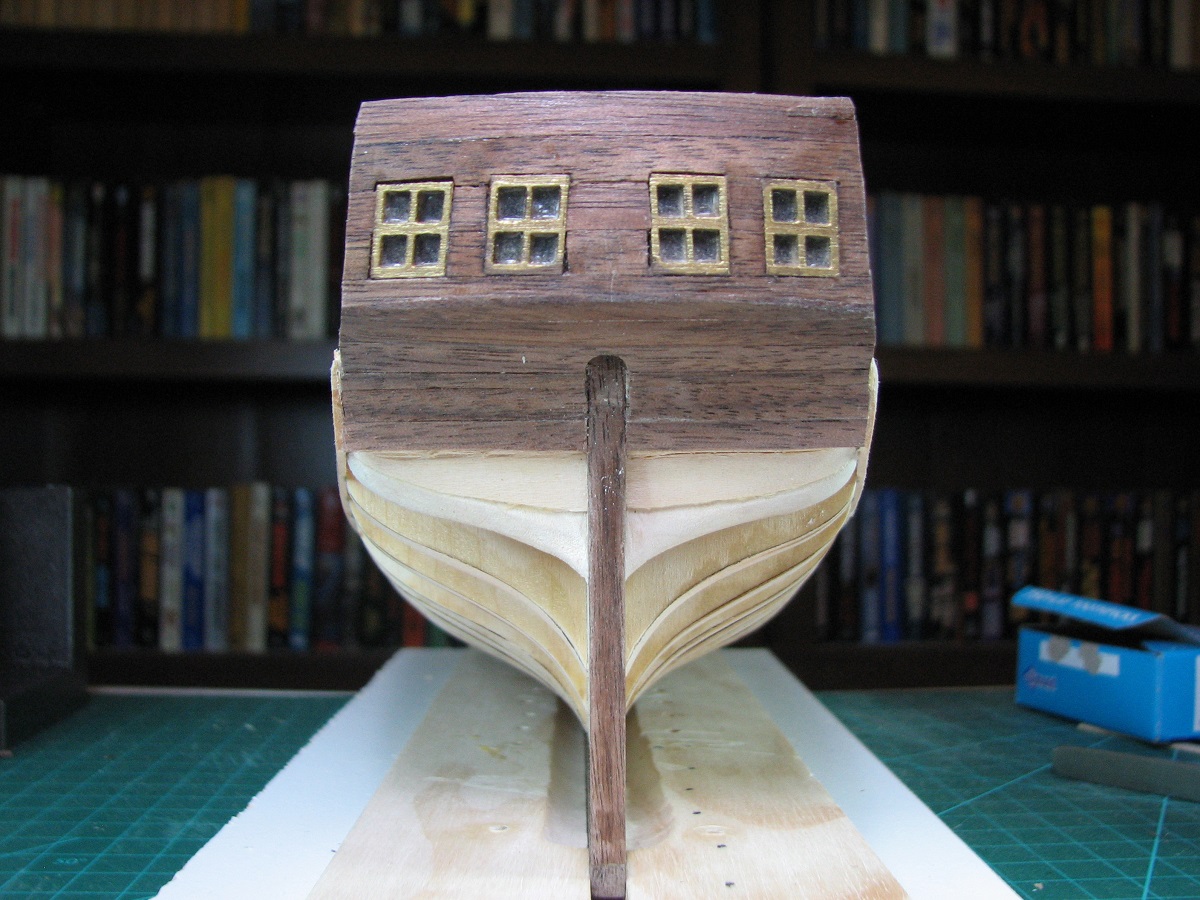
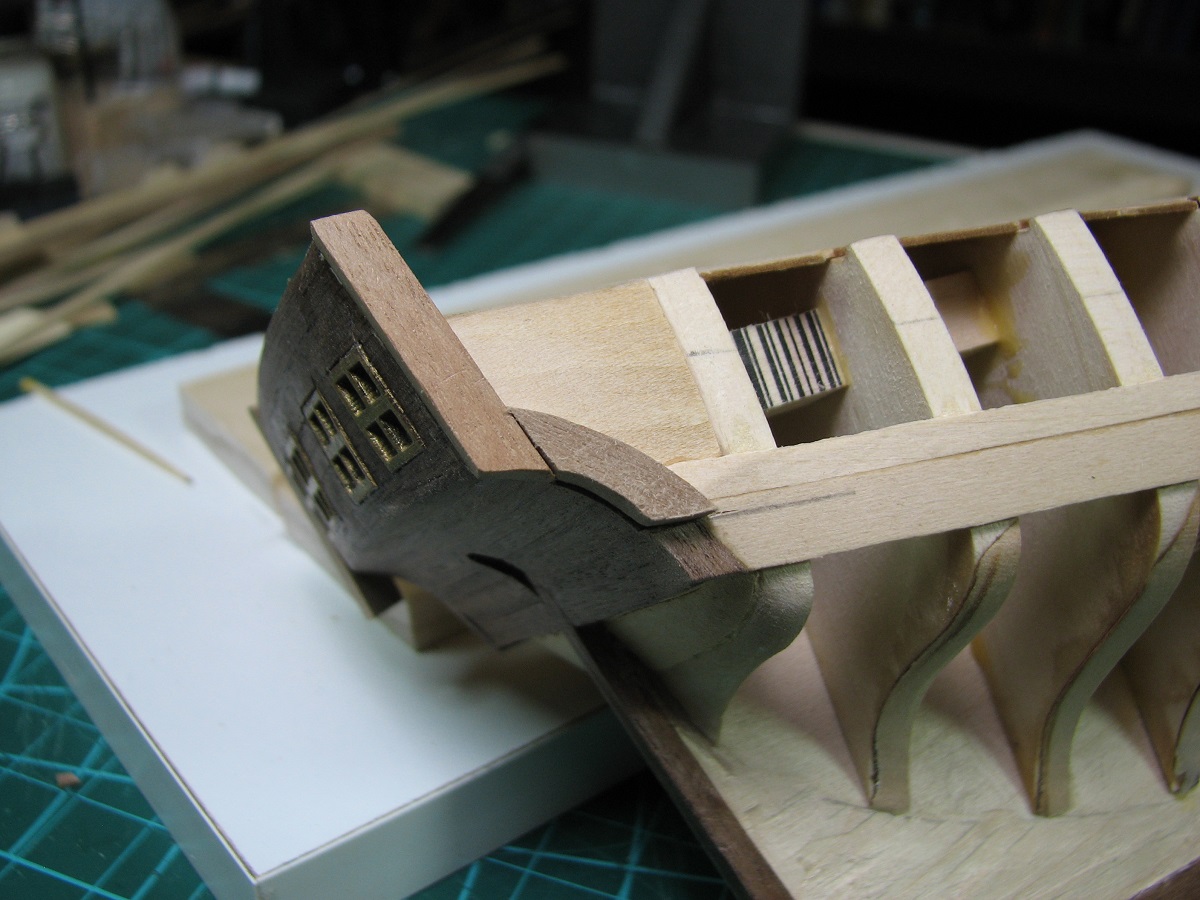
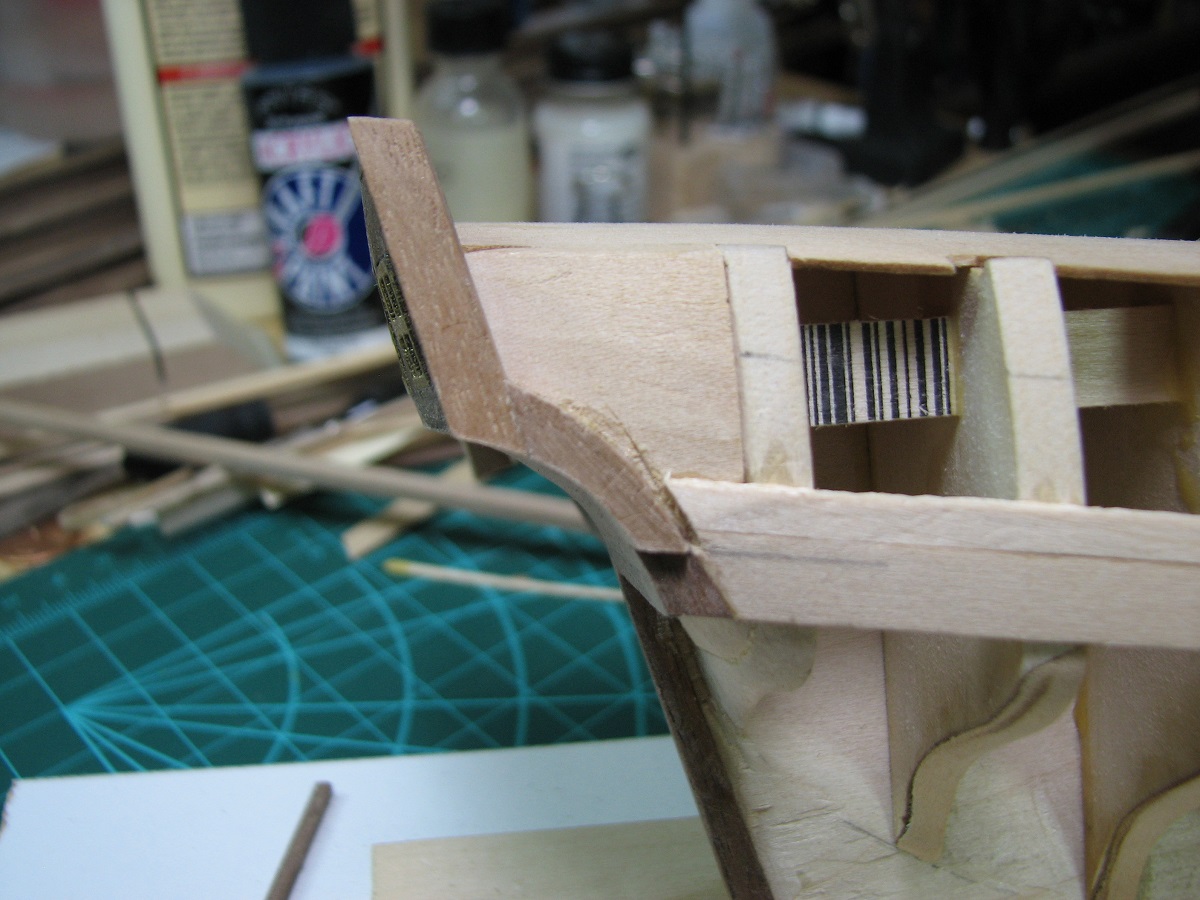
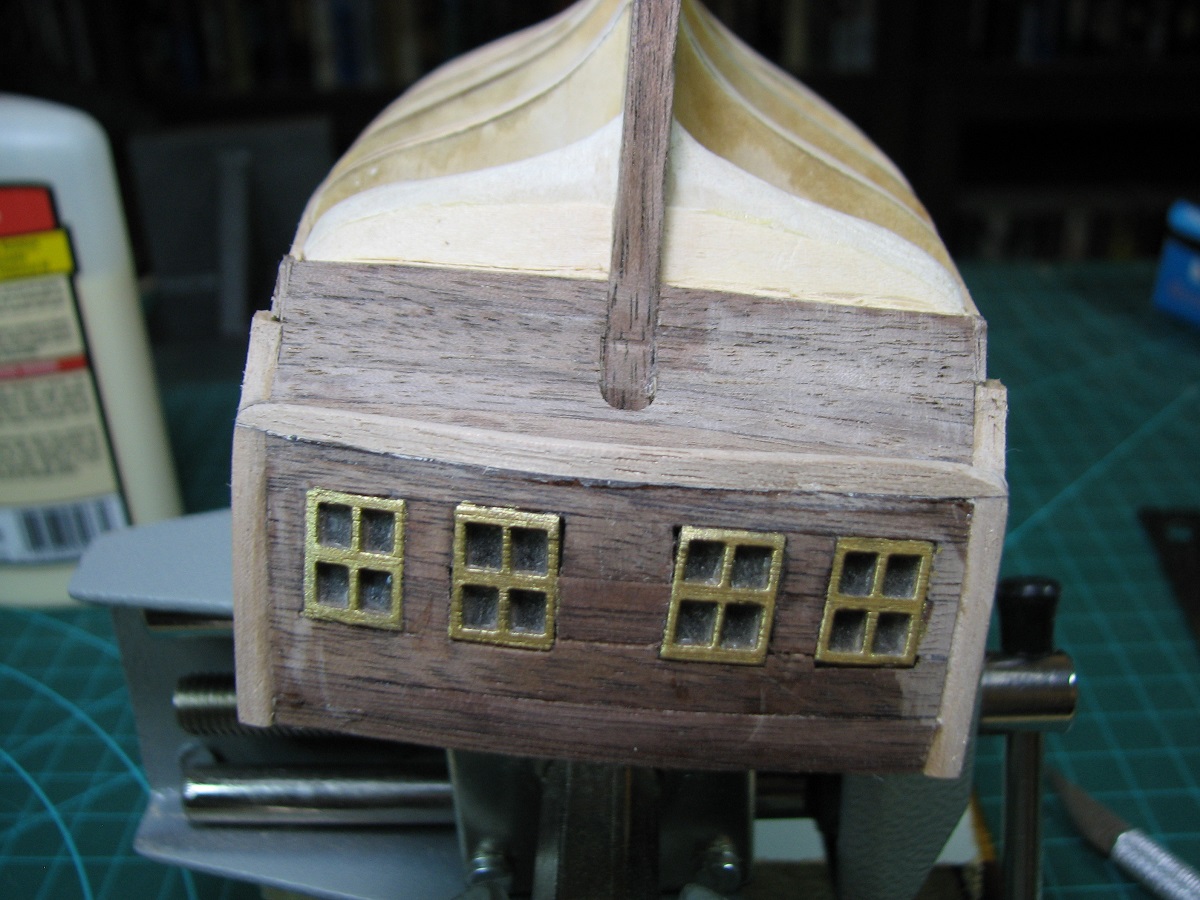
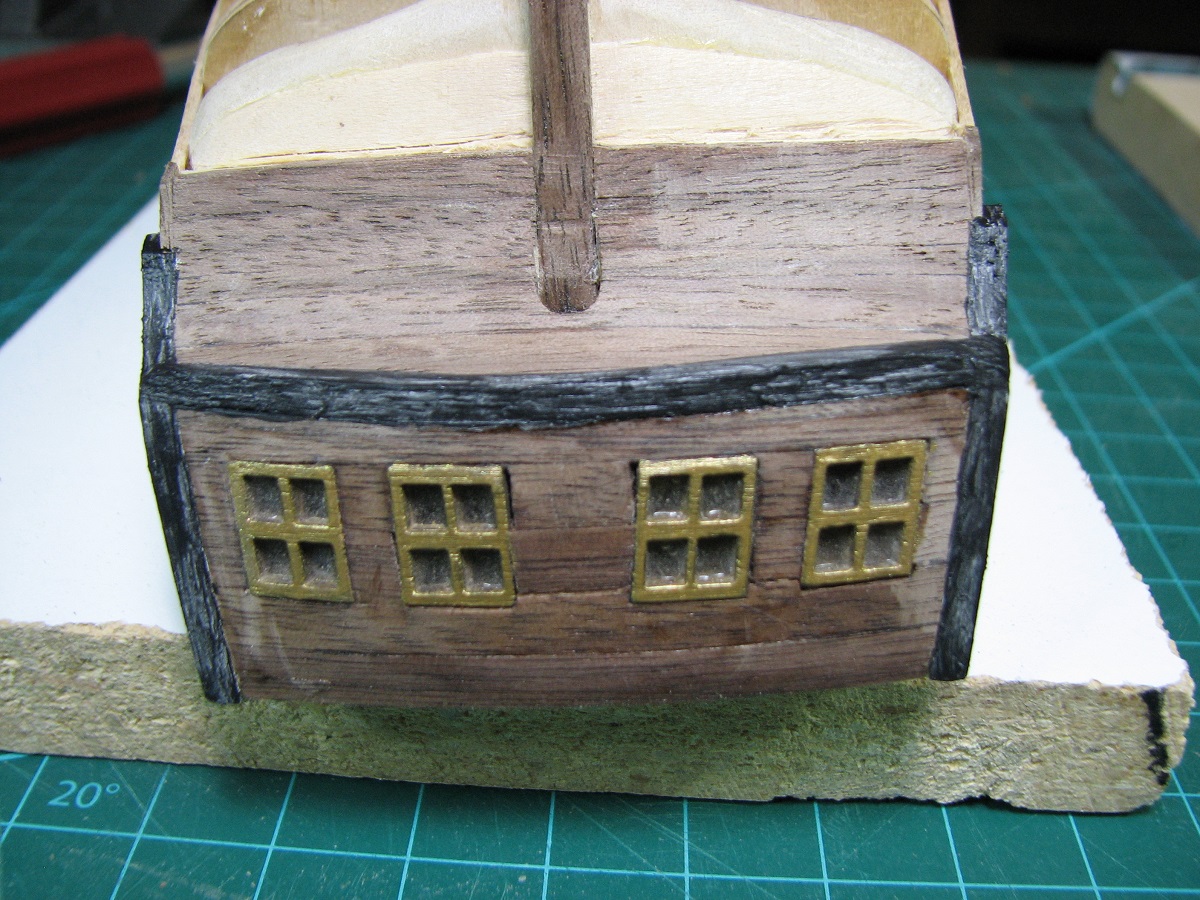
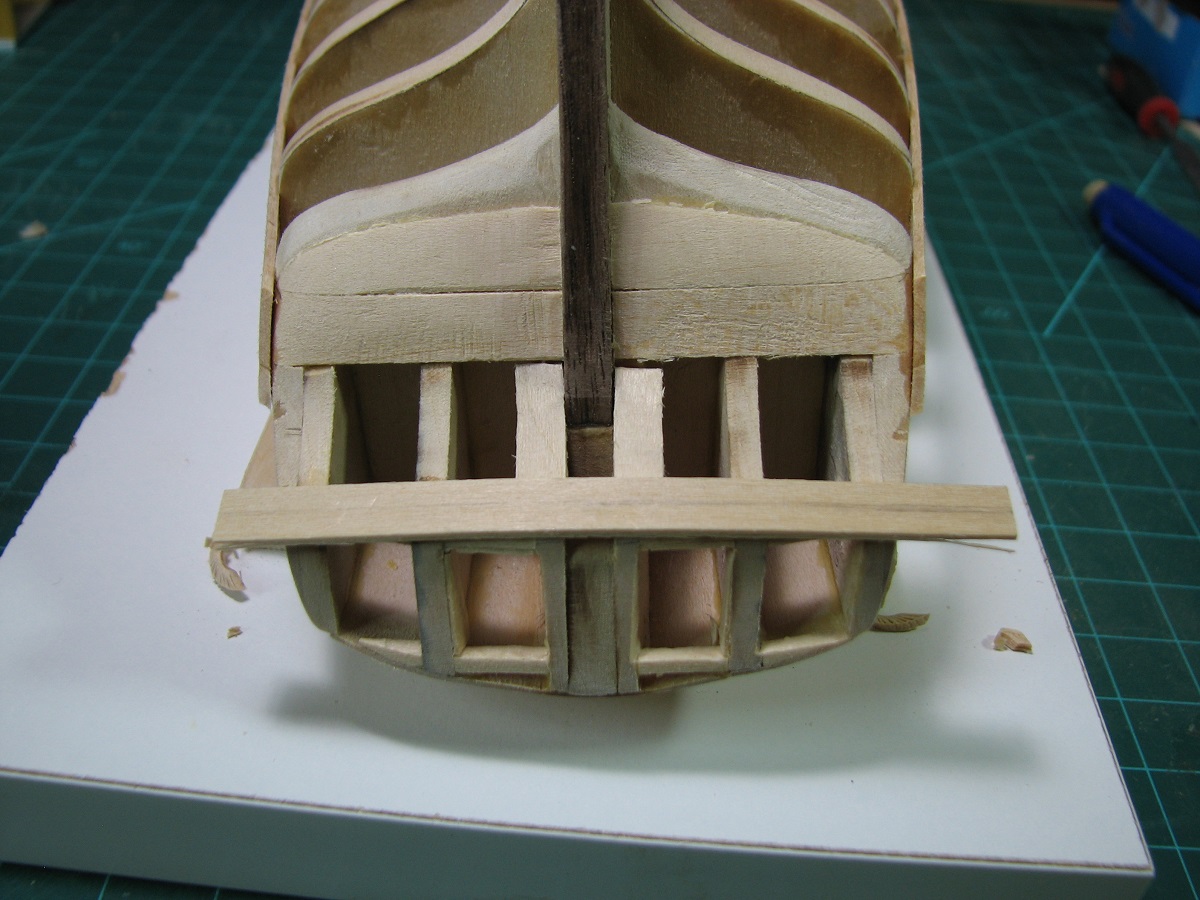
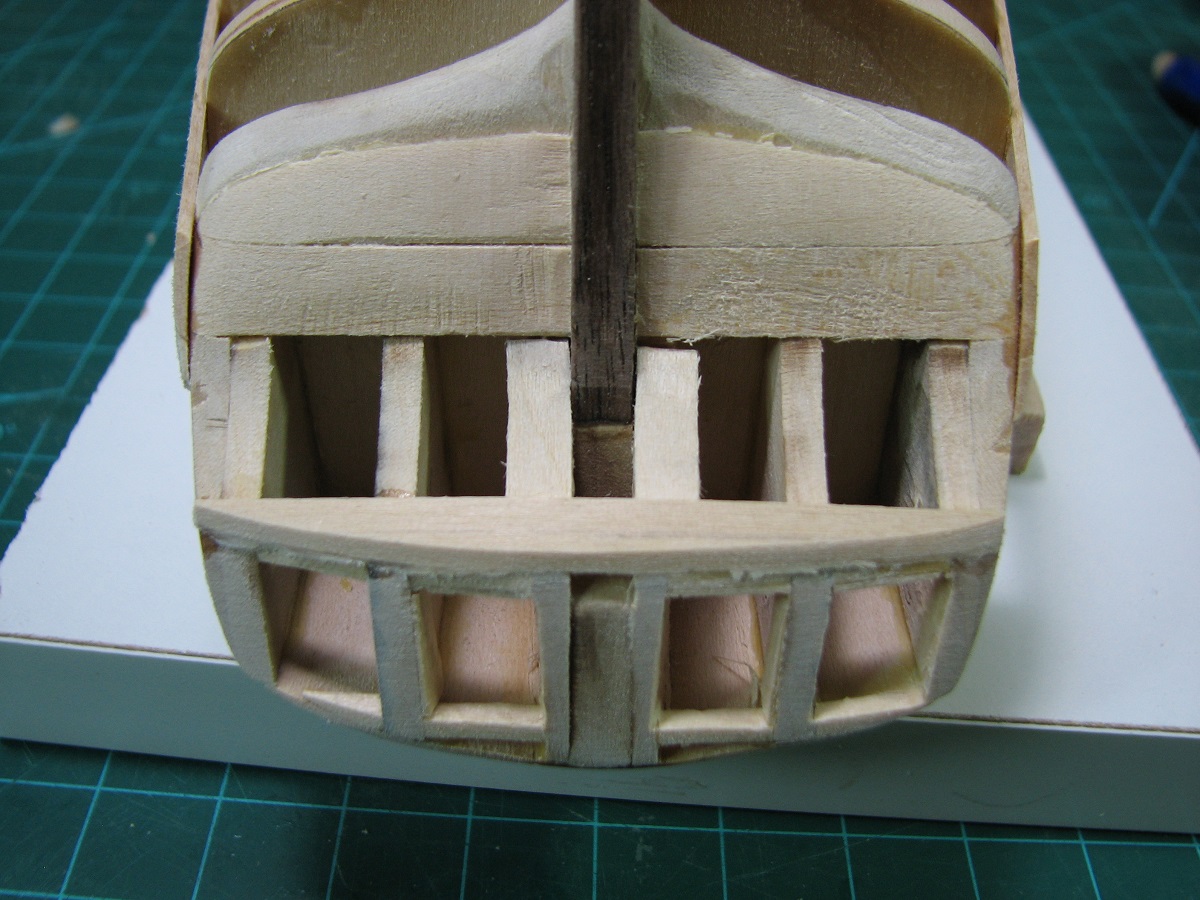
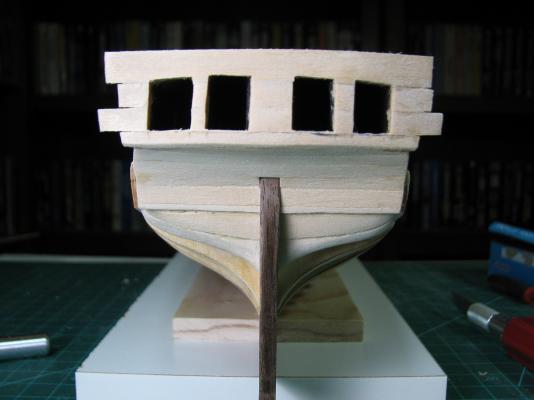
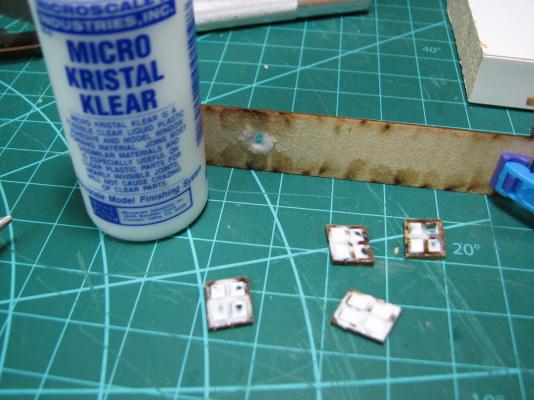
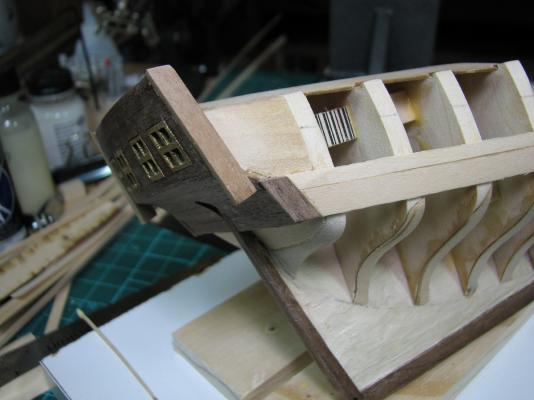
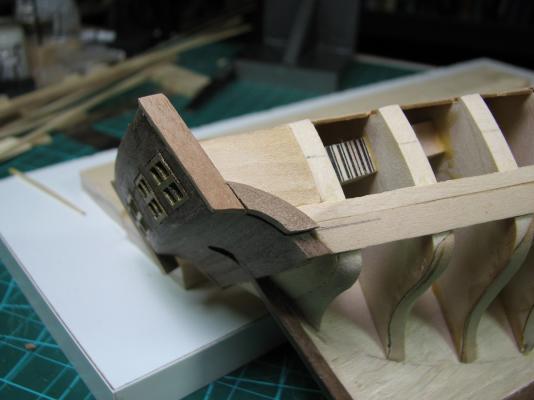
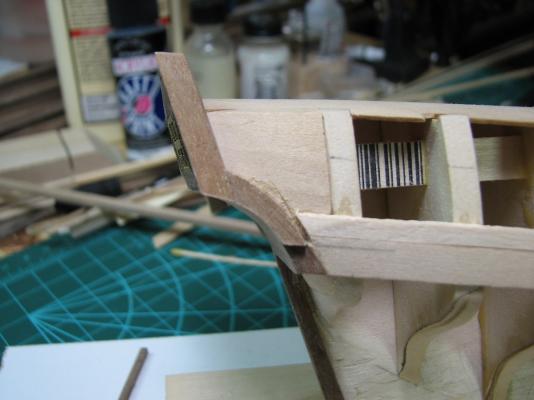
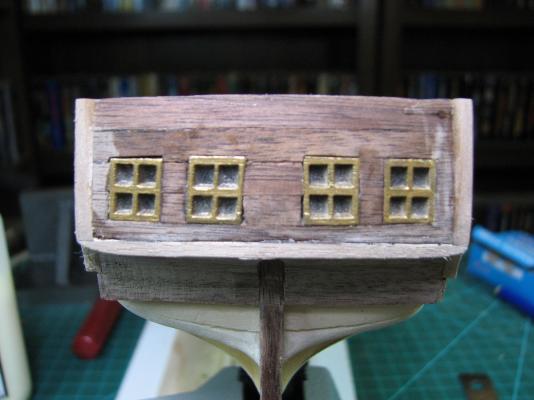
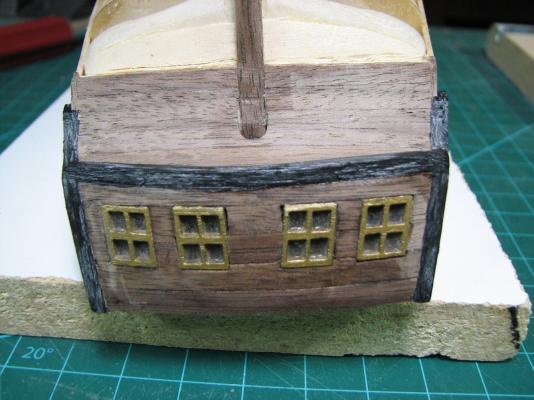
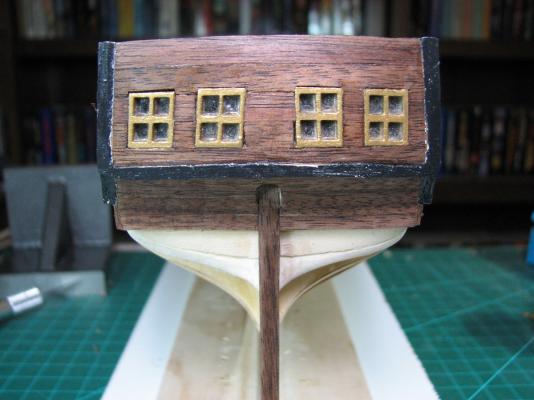
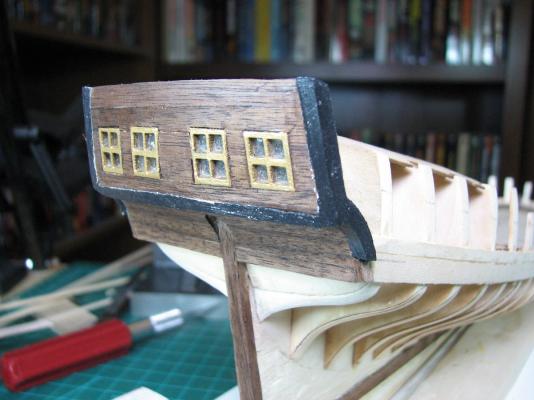
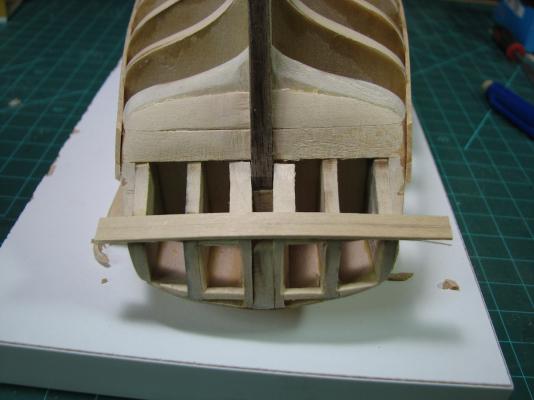
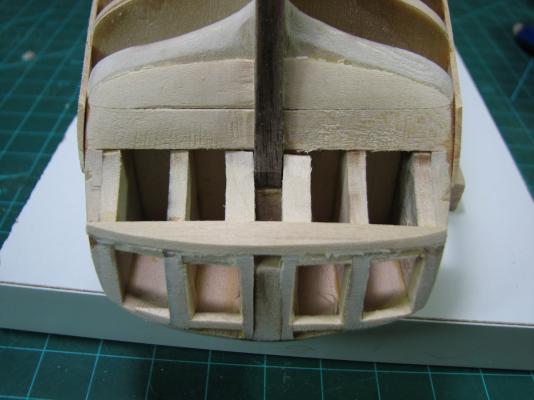
So the stern has been an interesting experience. I continued by planking the transom with basswood, marking each plank where the window openings are so that I could open them up when all the planks were in place. I did not trace the windows based on the marks, but rather opened a narrow opening in the center of each, and then slowly opened them out until I was happy with the window fitment and alignment in each opening. After joining MSW, I read in one of the threads about stuff that could be used to make window glass, and less than a week later I was in a hobby shop and saw a bottle, so I bought it. I finally got to use it! Works fantastic. As I started to try to get the windows placed, I quickly realized that it was going to be a pain in the rear to get the windows in without accidentally pushing them too far in, as the nice window glass that was now in place prevented me from holding onto the inside frames with tweezers. I cut off small bits of planking basswood and glued them into the top and bottom of the openings as window stops. Looking back I wish I'd brought them out slightly as I think the windows might look better if they protruded from the transom slightly. Oh well, next time! I first tried to place the walnut planks in a single piece, and then cutting in the window openings, but after breaking the narrow parts repeatedly, I gave up and glued the windows in, and then placed short planking sections between them. I am not really happy with some of the gaps I've left though. Since I used CA to place these (in retrospect, I should not have done that) because of trying to maintain the slight arch, re-doing them would be quite difficult, so I left it and will think about how to address the gaps with some kind of filler later on. Next I added walnut filler pieces on the stern end of the currently placed hull planks, and put the transom side fashion pieces on. I then started working on the counter fashion pieces. My first attempt didn't make me terribly happy, it just didn't look right to me. It doesn't look all that bad in the picture now that I'm looking at it, but I tossed it. The mark on the planking is where the top of the wale should be later. My fashion pieces seemed too short compared to the plans and photo's I've looked at, and I think I figured out what is different about my stern (or at least part of it). Somehow when I did the walnut planking on the counter, instead of grabbing another piece of .030 walnut, I picked up a full thickness walnut plank (about .048) which made the entire counter thicker than it should be, pushing the trailing edge of the fashion piece back a bit. I figured I'd just go with it this way, since it really shouldn't affect anything except make my stern shaped slightly different. For my first 'intentional' change to a model, I've decided to 'box' the transom by adding another 'fashion piece' (for lack of knowing what it should actually be called) at the top of the counter. I had to soak this piece of walnut for about an hour, and then I sort of steamed it by placing it in the microwave for a minute wrapped in a wet washcloth. It was still pretty hard to get to take the bend, but it didn't splinter at all, so I'll take it. As part of my change to 'box' the transom, I intend to extend the black from the black strake to all the fashion pieces and the taff rail. I decided to paint these pieces now, prior to adding all the other planking that will butt into them, and I started with primer. I then started with the black. I think I need to do some research on prepping wood for paint, because I'm really not happy with how the paint looks, it's very rough compared to most of the painted builds I've seen here. The first coat of black didn't cover well at all. I ended up with 4 coats of black. Painting has never been a strength for me in modeling, and it showed as I managed to get paint where it shouldn't go in several places. After the black had dried, I tried to clean up the areas where I got black on the planking, but I think I screwed up and exposed more primer and fashion piece wood than I cleaned up on the planks. Oops, hit post too soon, adding pictures. I will revisit the stern later and clean up the fashion piece painting, as well as hopefully figure out a way to do something about the gaps around the windows. I think I'll probably sand the fashion pieces all down smooth and try again. For now though, I'm moving on, as I'm kind of tired of messing with the stern.


- 831 replies
-
- 13
-
-
- Armed Virginia Sloop
- Model Shipways
- (and 1 more)
-
I tried to use some of the Model Shipways rigging line from the AVS in my Carmen build, and I thought that stuff was just horrible. If you manage to make good looking rigging out of that stuff without pulling all your hair out, then you have super powers that I do not possess. Good luck, certainly paying attention here!
-
If I've learned one thing while watching this amazing build (great painting btw), it's that I am never, not in a million years, going to get this kit.
- 249 replies
-
- 1
-
-
- billing boats
- vasa
- (and 1 more)
-
Kind of hard to tell on the stains with the lighting in the pictures to be honest, but I like the lighter colored deck and I'm not sure I see much (if any) difference between the un-stained deck and the one on the left, other than consistency, but that could be simply due to using a single piece of planking for the test sample vs. the many pieces in the deck. I think the differences between the different planks on the deck look good though, so who knows.
-
On glue, I've tended to use almost nothing but Titebond wood glue (although I'm using quite a lot of CA - Zap-A-Gap medium on the stuff I'm working on right now) so far. If you get a nice thin coating on both pieces and let them tack up just a little, it grabs quite nicely in just a couple of minutes as long as the pieces don't have lots of tension on them requiring long term clamping. Glue seems to be one area where everyone has different preferences, but the consensus that I've picked up here is that as long as whatever you are using works well for you, then it's the "right" glue to use.
- 114 replies
-
- 1
-
-
- swift
- artesania latina
- (and 1 more)
-
Nice first post in your log. Look forward to seeing this, as you appear to have a very meticulous approach which should serve you well. To add to your points in squaring up the bulkheads, also check that they are centered side to side, as some models do not have the slots centered, and in the case of one that is loose like you indicate this is, you can easily get them off-center. On the 10 picture limit, I've posted plenty of times with more than 10 pictures in a single post, so I don't think that limit really exists.
-
I think it looks very striking. I'm a terrible person to ask if it's "right" though, as I'm less than two months into this hobby, and I've seen all kinds of different 'looks' on decking and trenails. There are some great tutorials on planking that talk about various ways of doing it right here on the forums in the planking subforum - look in the stickied posts and read all of those tutorials/guilds, and go with what you personally like the best, in my opinion.
-
I hope the mahogany resting place has a very prominent place of honor in your home, it certainly deserves it. Look forward to the next one!
- 555 replies
-
- 2
-
-
- sovereign of the seas
- mantua
- (and 1 more)
-
Hi Keith, Am I allowed to say Wow in response too? Because wow.. that's a post! Actually I started the Carmen on August 15th, and found this site a week or so later via a referral. So yea, it's been less than two months believe it or not. Seems longer indeed. I haven't actually taken Chuck's blocks out of the packaging yet to compare them to be honest. Rigging is still a long ways off, so I put them all into a parts bin with the rigging line until they are needed. Maybe I'll do a comparison this weekend. As far as rope walks, I'm considering a serving machine, but I don't think I'm going to go into the rope-walk area, as sourcing the thread and figuring out how much and what types of thread in order to make different sizes of rigging just doesn't sound like fun at all to me. Scratch building isn't in my near, or even reasonably far future. The early portion of those builds that requires extensive research, as well as laying out all the parts and cutting them is not only something I don't really think I'd have the patience to do, but I also don't have any sort of reasonable workshop or tools to be creating my own bulkheads or frames, etc. So for a while I'm going to be sticking to kits. Obviously I'm not above changing the kits to some degree with better materials, I really haven't "scratched" anything (I don't really think shimming stuff counts), or even really needed to make any serious replacement parts. I have decided that an empty pair of gunports on the AVS is entirely unacceptable, so I've orders materials to rectify that little problem so my AVS will have 8 long guns, instead of 6 (hopefully, if they'll fit). On the photography, I'm using an old (as in from the late 90's I think?) Cannon Powershot S3 point and shoot camera that's working pretty well, but it has some serious limitations. This goofy hobby may make me finally break down and get a DSLR, as I've taken more photo's in the last two months than in the last 10 years. Every time I look at Dubz photo's I drool a little bit over his picture quality (not to mention his build quality). Thanks very much for the lengthy note and comments. My reaction while reading this really was 'Wow'. I tip my hat to you sir and look forward to the future here on MSW as I continue to pour ridiculous amounts of money into silly little wooden boats. Also thanks to all the others who have clicked like on various things in this log, they are noticed and appreciated!
- 831 replies
-
- 2
-
-
- Armed Virginia Sloop
- Model Shipways
- (and 1 more)
-
Thanks Brian. You chose a much more difficult kit than I did for a first build. The Carmen is not only much simpler than the Niagra, it's also much smaller, and mistakes are not as visible as on a larger kit I believe. Keep at it and you'll get there, and if it's too much, set it aside and tackle something simpler to get your skills up, and don't be afraid to tear down and redo stuff. I've done a fair amount of that even on the Carmen. As far as stealing it, the Carmen now lives at my office, which is in a secured building, so I'd recommend against the attempt. Carlmb - thank you for the kind words.
-
I shimmed a bunch of the bulkheads on my AVS for the same reason giantdog, and I believe that it's the right way to proceed. Worst case is you end up sanding the shim all back off. Take a look at the early parts of my current AVS build if you'd like to see pictures of the shimmed bulkheads and how they ended up fairing.
- 153 replies
-
- 1
-
-
- swift
- Artesania Latina
- (and 1 more)
-
Agreed, superb job on the boats.
-
Looking good. I plan to tackle the Niagra at some point in the future, so watching this (and all the other Niagra builds) with great interest.
-
Rick, thanks for that tip, I will have to remember it for the future. Dave, that's exactly what I did - I shimmed almost every bulkhead at the bottom after getting the tops aligned to the keel. I think I detailed that in the log, and it worked out nicely. When fairing, I simply faired the bulkheads down until the highest bulkheads were showing original bulkhead material instead of shim to get the final fairing level to something near the original bulkheads size (i.e. to prevent the bulkheads from being too 'fat'). Currently I'm still working on the stern, and having some difficulty getting things to line up to where I'm happy with them, but plodding along, so nothing really new to report today. Getting close to one of our periodic releases at work (software update release) so less time to tinker with the ship (I'm actually taking a short break from work at home right now, then will get back to it tonight). Still expect to finish up the stern in the next couple of days, hopefully with nothing planned on Saturday I can muddle through it and have something to post for an update. Thanks all,
-
Looking very nice. I like the stitching together of the pictures to form a progress 'movie'.
-
Alistair, I have nothing to blame but my own ham fisted handling of the ship for breaking the extensions. While holding the hull to work on the stern (or the waterways the first time) I simply applied too much pressure with my holding hand instead of keeping the holding pressure to my fingers that were not against the extensions. Thanks for the likes and following along everyone,
- 831 replies
-
- 1
-
-
- Armed Virginia Sloop
- Model Shipways
- (and 1 more)
-
I'll bring you some more at the meeting in a couple weeks.
- 1,756 replies
-
- 2
-
-
- constitution
- constructo
- (and 1 more)
-
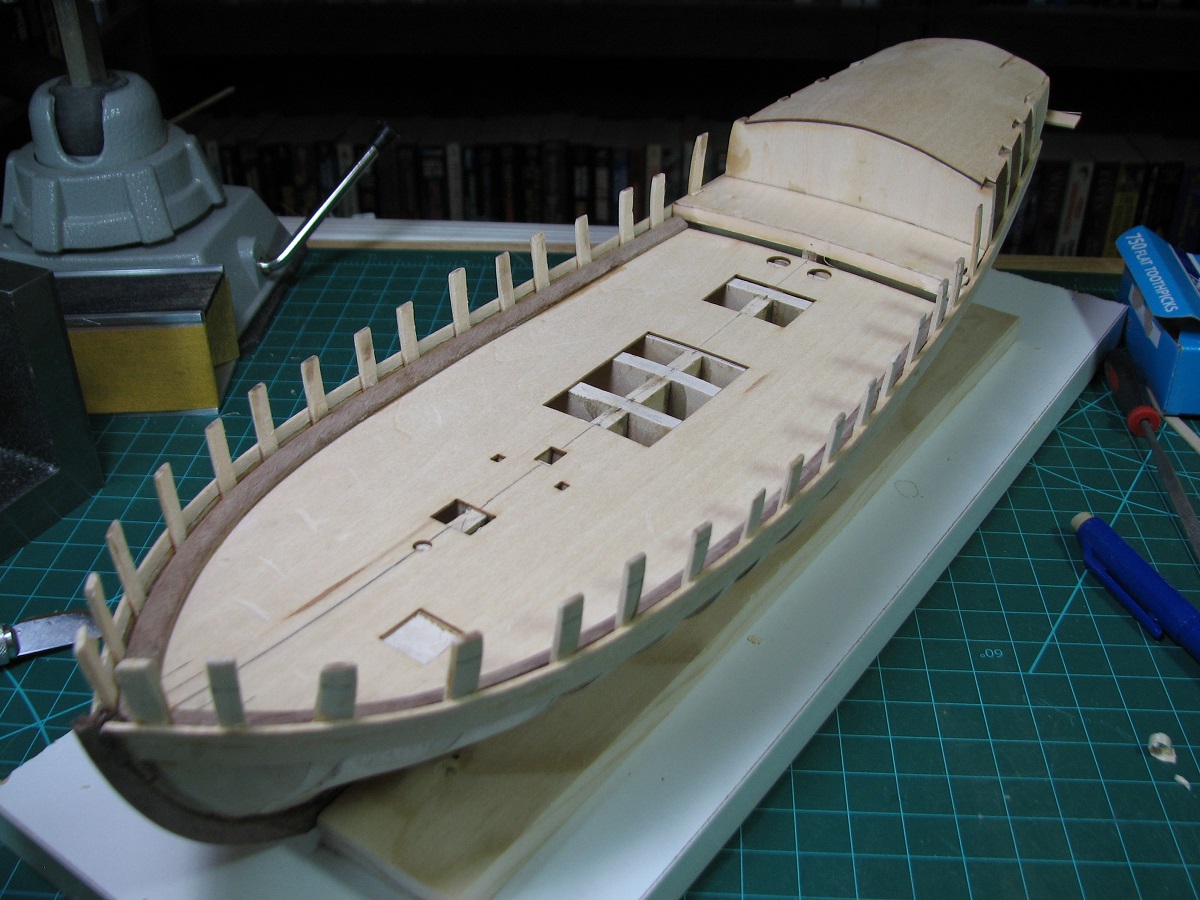
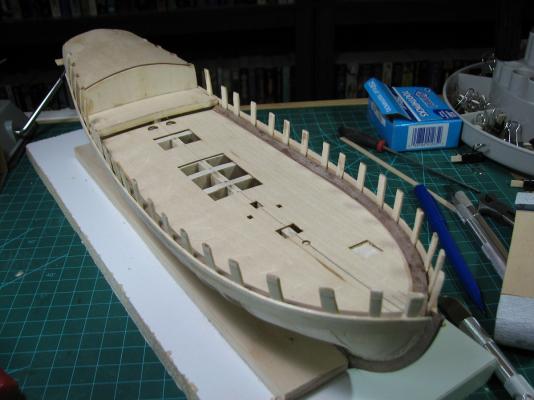
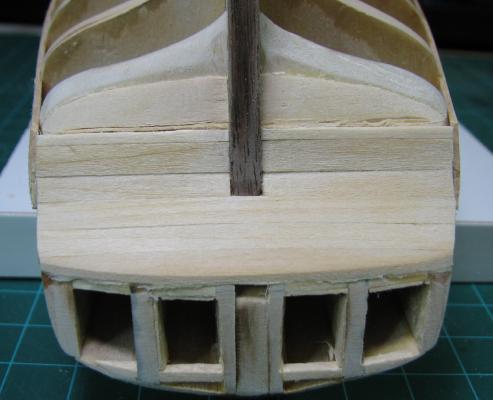
So took last night off as I worked late and was tired, so didn't feel like I should tackle the other waterway shaping. Tonight I shaped the second waterway, and then placed both waterways on the sub deck. In the process of trying to hold one of them tight while the glue took a set (really have no idea how I would get a clamp on these, so I used CVA with CA at the points that didn't want to stay down on the deck) I managed to break my first bulkhead extension. It didn't break all the way off, and broke right at the top edge of the waterway, so I was able to just inject some CVA between the extension and the outer planking and hold it there for a couple minutes to repair it. I then placed the first of the transom planks using an oversized plank so that it could be trimmed down after. And then I completed the transom planking down to the bottom of the wale. While trimming the transom planks, I managed to break another bulkhead extension. This one is on the quarterdeck, so no real way to repair it right now. I'm just going to try to be very careful and not finish breaking it (like the other, it's cracked, not broken completely off) before I get the upper planking in so I can glue it to the outer planking. I trimmed the basswood planks I had previously placed a little bit short of the transom planking, as the plans show that I need to add a short 'false plank' section out of walnut at the stern end of those planks as the basswood will show from the stern. I am not going to try to place those walnut pieces right now, but will wait until I can see what is actually exposed and how best to do it.

- 831 replies
-
- 10
-
-
- Armed Virginia Sloop
- Model Shipways
- (and 1 more)
-
Fantastic looking, and great details!
- 31 replies
-
- 2
-
-
- new bedford whaleboat
- model shipways
- (and 1 more)
-
Hi Robert! I somehow have not seen this build before. Looks like a nice ship to model, and I look forward to seeing it progress. 1:35 is a nice scale too, don't think I've seen a ship of this type in that large of scale before, only the ships boats, and the gunboats. Looking great so far, and nice save on the keel.
-
Nicely done so far. I really like your painting method on the decorations, and thanks for explaining it.
-
That's fantastic work on the blocks/pulleys. However, I'm pretty sure this may be an indicator that you are crazy.