HOLIDAY DONATION DRIVE - SUPPORT MSW - DO YOUR PART TO KEEP THIS GREAT FORUM GOING! (Only 75 donations so far out of 49,000 members - C'mon guys!)
×


GuntherMT
-
Posts
2,213 -
Joined
-
Last visited
Content Type
Profiles
Forums
Gallery
Events
Everything posted by GuntherMT
-
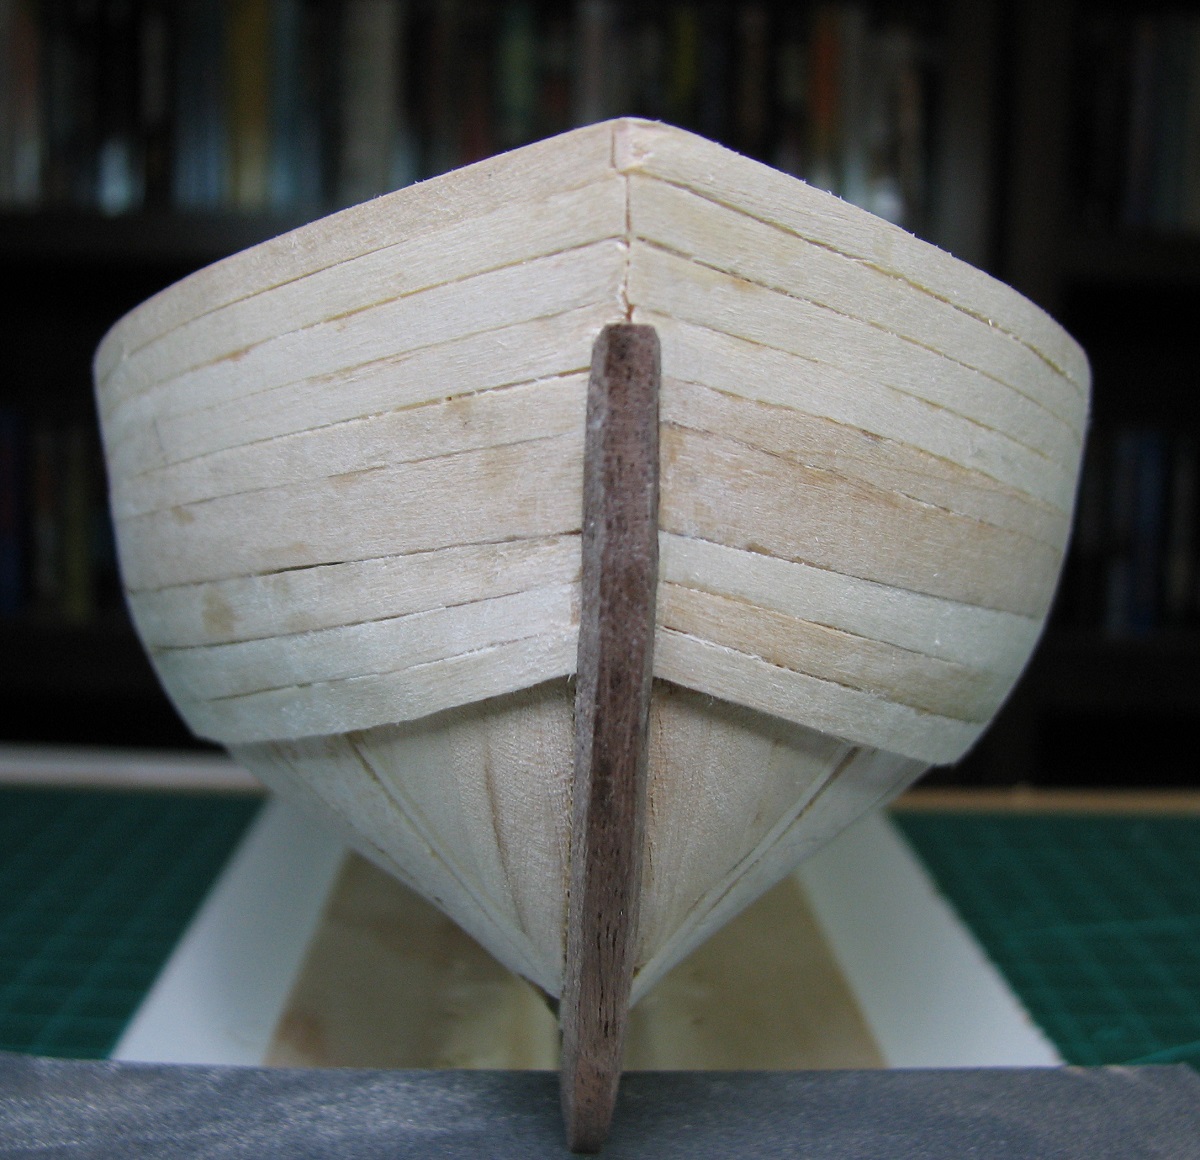
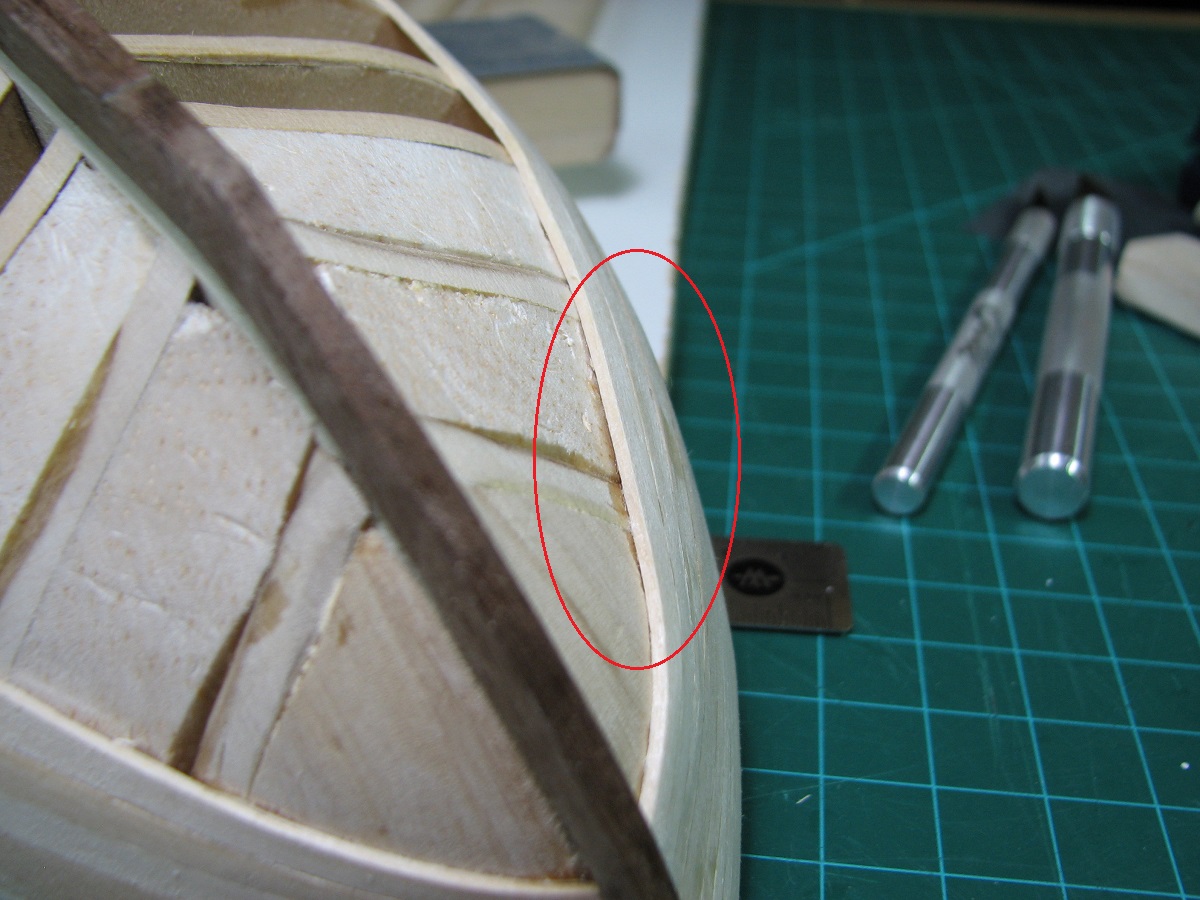
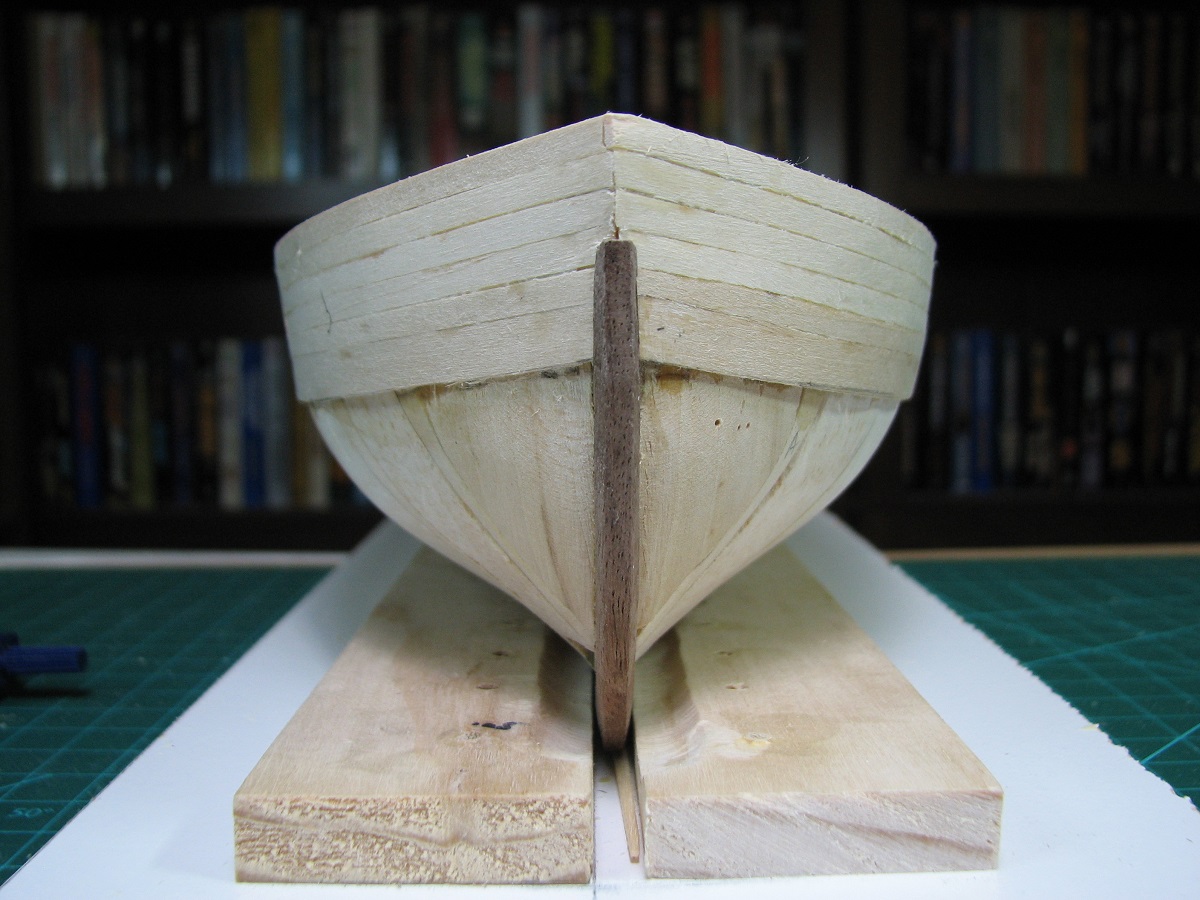
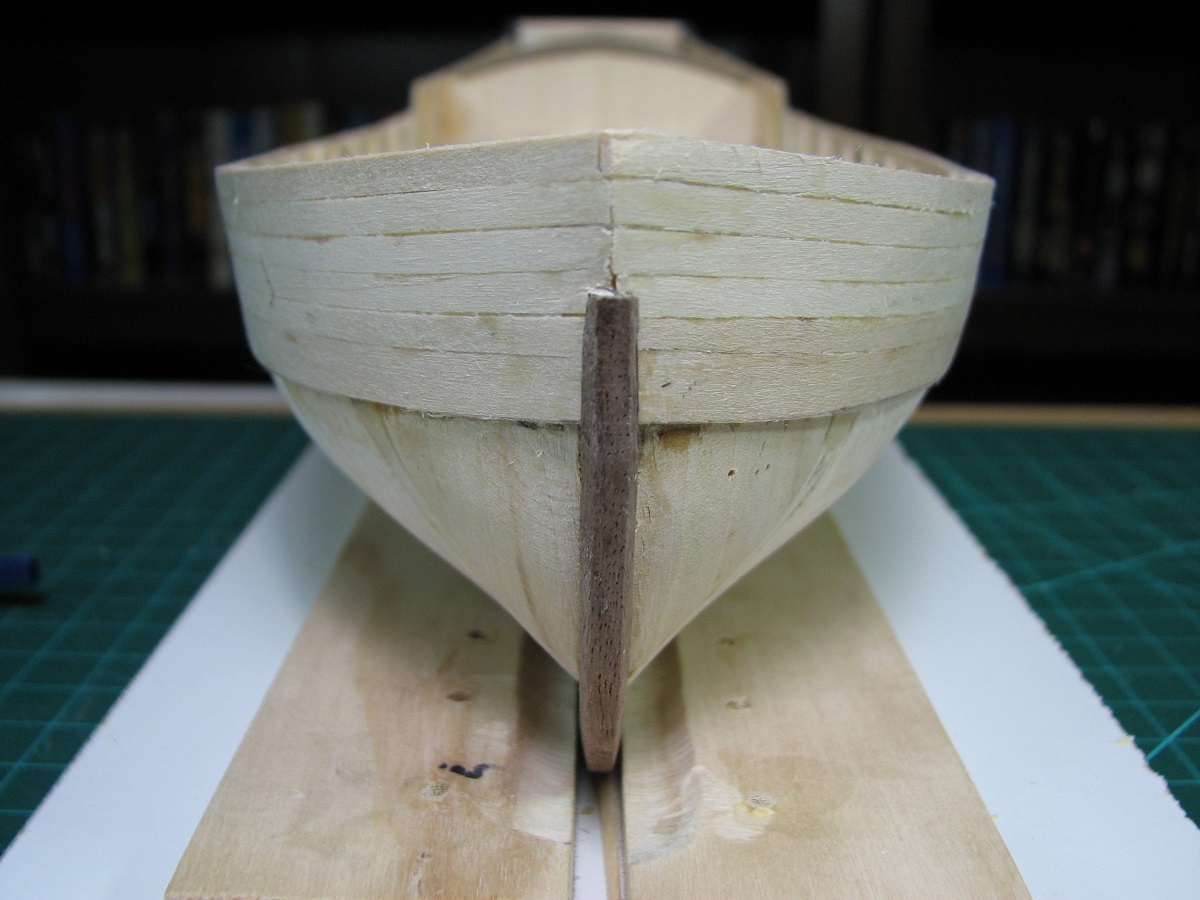
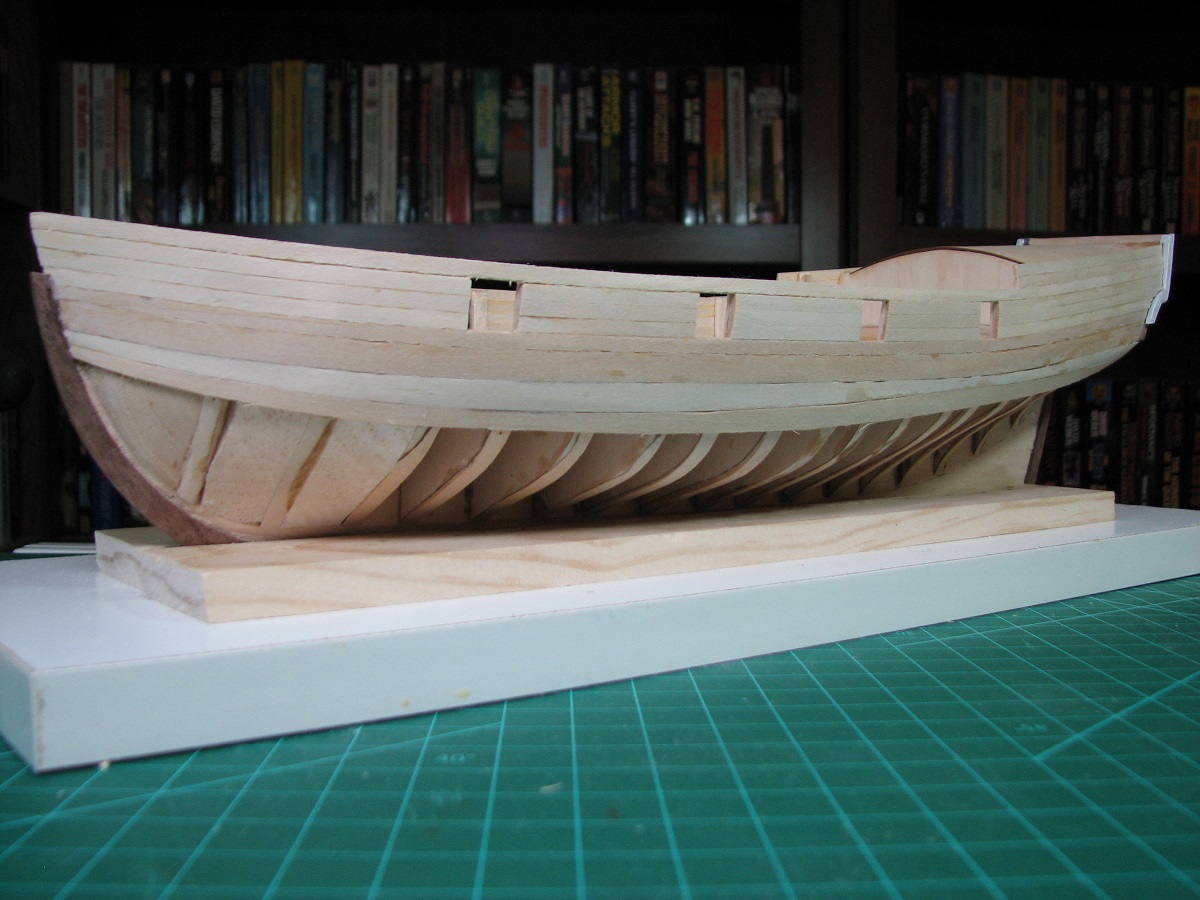
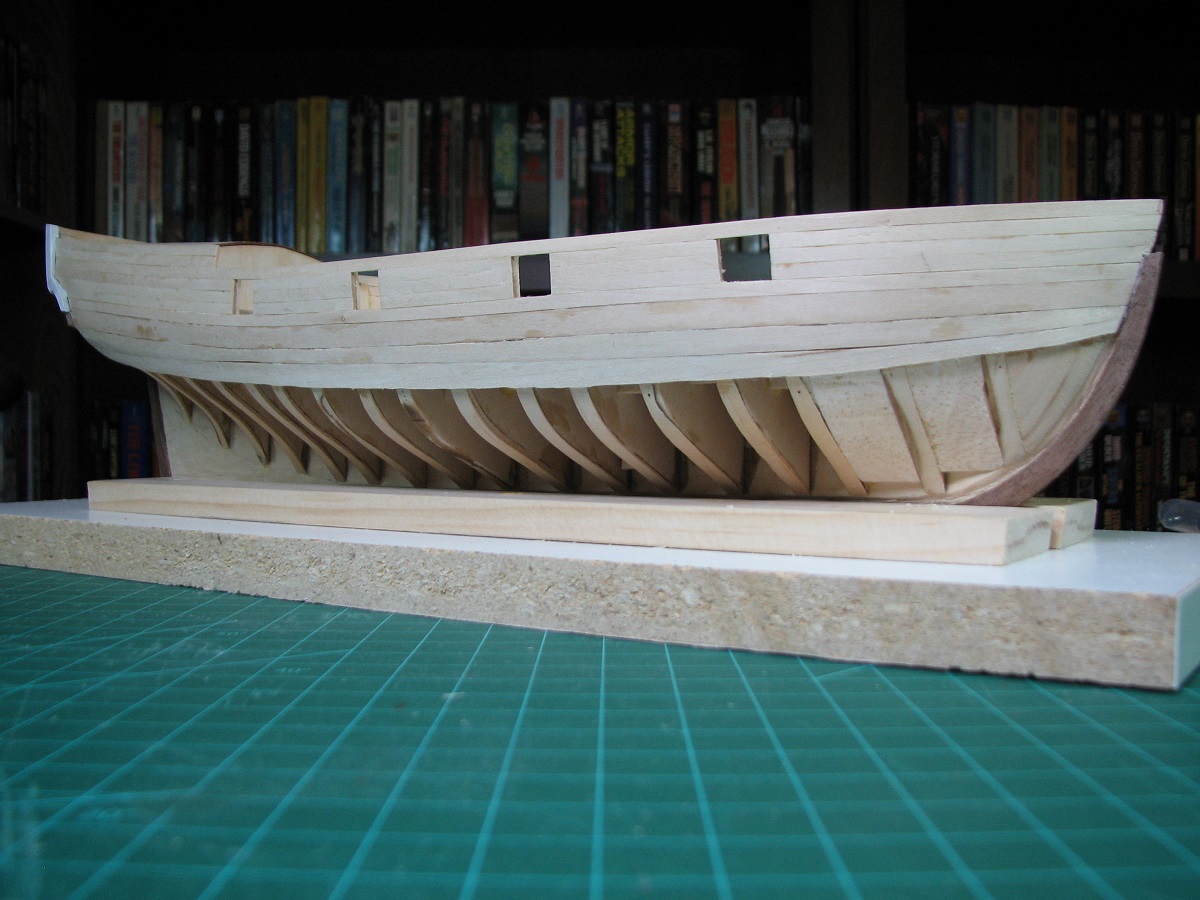
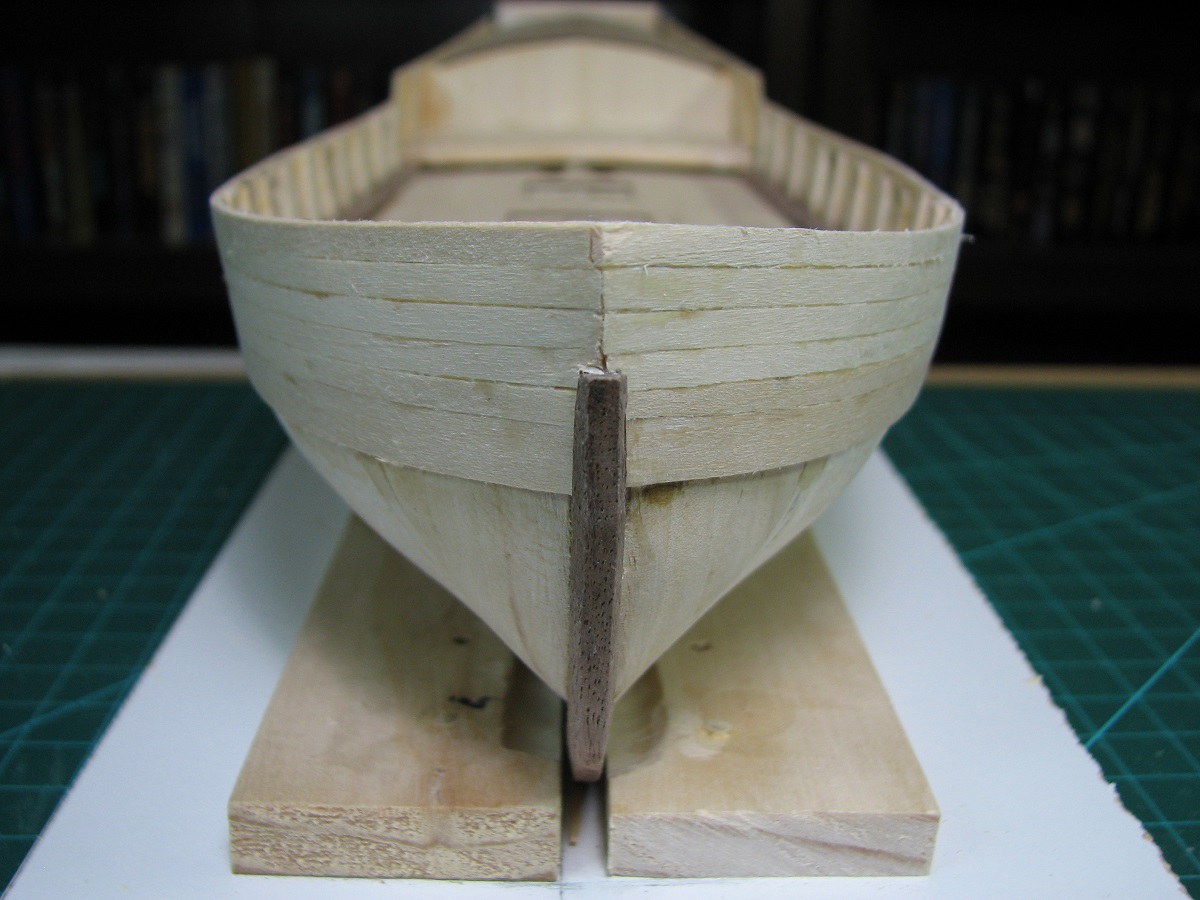
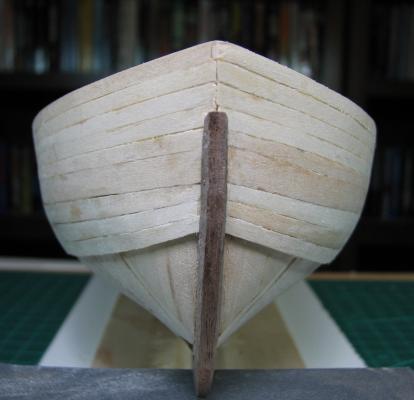
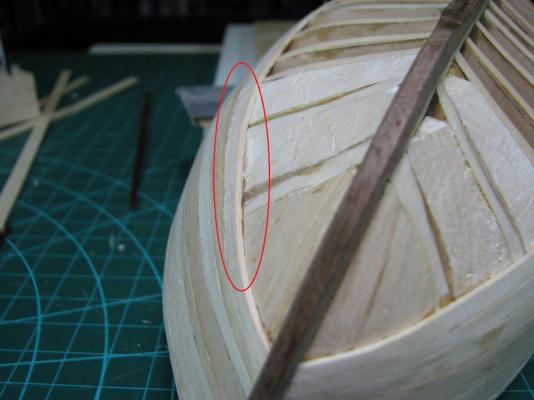
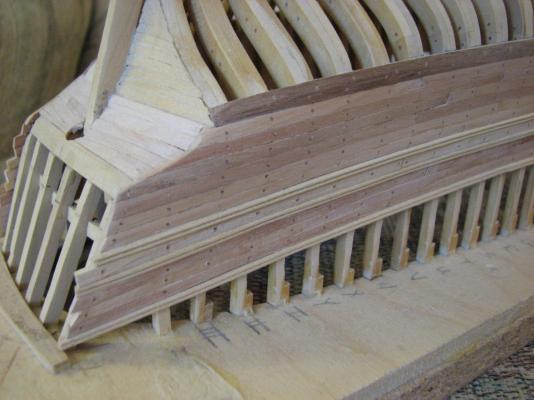
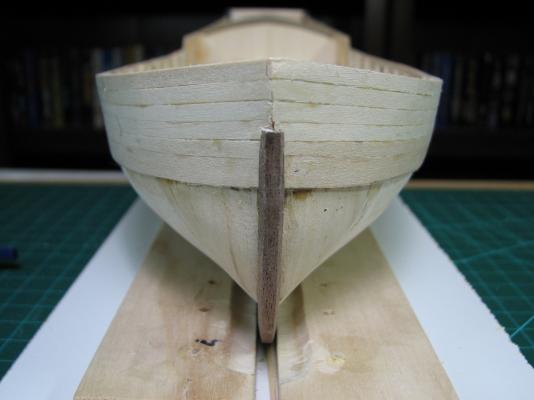
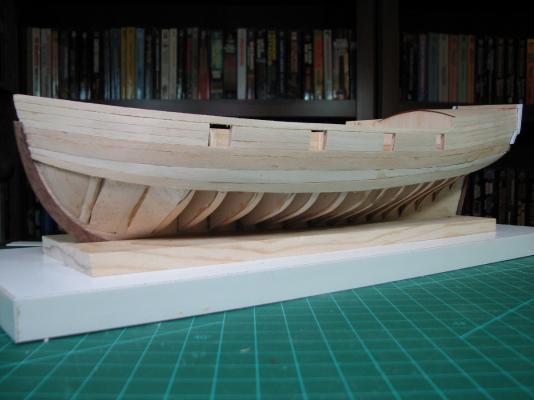
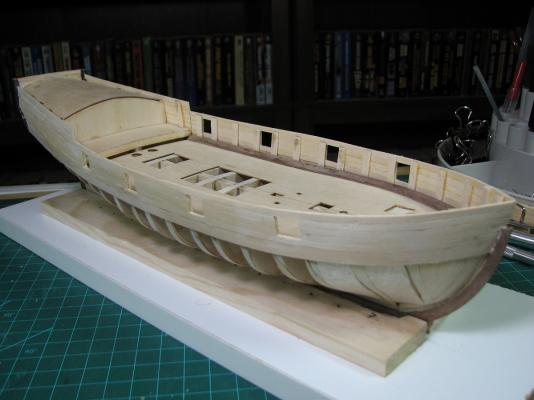
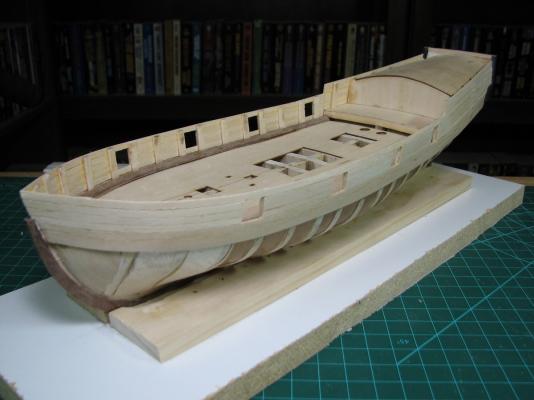
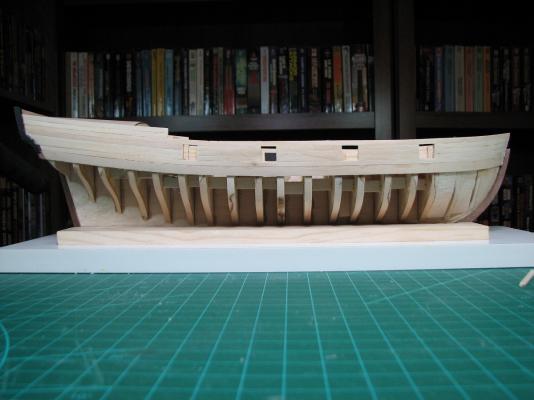
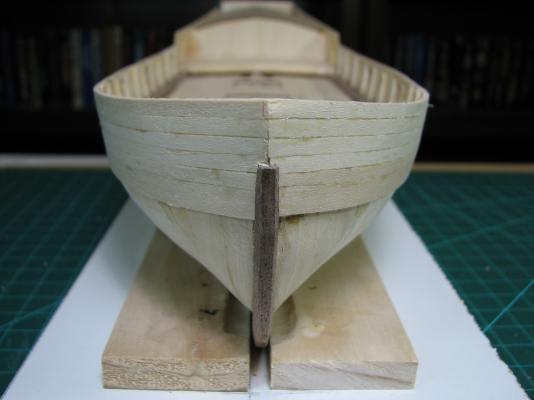
So as I get farther into the planking, it's becoming obvious that I needed to spend more time on the hull fairing, or rather, I need a better understanding of the plank flow when I'm placing test planks for the fairing, or something. I'm getting quite a dip in the planks on both sides just aft of the bow, and the planks at the stern are nowhere near symmetrical side to side - I'll need a stealer on one side to even them out at some point. Here you can see the dips on both sides where the fairing was done incorrectly. Luckily this is a double planked project so I'll be able to fill these, but it's a bit of a disappointment to me, as I was hoping that this first planking would have been good enough to be a final planking, as a personal goal. The planking if you only look at the stem area is still pretty nice though! I'm still doing a fair amount of edge-bending to get the planks to come in at the stem, even spiling them to 1/2 a plank width on every plank so far, although it is getting less pronounced on this 3rd one. The stern would require severe edge bending to get them to stay at full width, so they are getting spiled which is why I'll need a stealer at some point on at least one side, possibly both, on this upper section.

- 831 replies
-
- 8
-

-
- Armed Virginia Sloop
- Model Shipways
- (and 1 more)
-
Those look fantastic. How do you go about trimming/adjusting the completed floor board assemblies? Do you use a saw or knife or what? Seems like it would be very easy to trash the entire assembly doing the trimming.
-
Joe, I'm undecided on the Hannah, as I feel like it will be some time before I'm comfortable tackling that build. Where there is a lot of really nice wood here, until I can figure out what is not part of the Hannah kit, most of it will not be touched, at least for now, as I want to make sure the Hannah is completable, either by myself, or someone else in the future. On the other hand, there is a fair amount of wood that is clearly not part of the Hannah parts list (which I have), and I can use for whatever. There are various sizes of boxwood, cherry, poplar, walnut (both light and dark), ebony, and also lots of unmarked stuff that I don't know what is, but is not on the Hannah list. In any case, I've got plenty of time to figure it out, as the AVS is obviously not going to be completed in the super-fast time that the Carmen was, and I've taken advantage of the huge Model Expo sale and now have 'other projects' waiting for when the AVS is completed. The Hannah has been mothballed for at least 10 years, so it probably isn't going to suffer any by waiting some more at this point. Edit: Also, I'm really kicking myself for the camera thing. I'm going to have to email him and ask if he has any photo's I can share.
- 831 replies
-
- 1
-
-
- Armed Virginia Sloop
- Model Shipways
- (and 1 more)
-
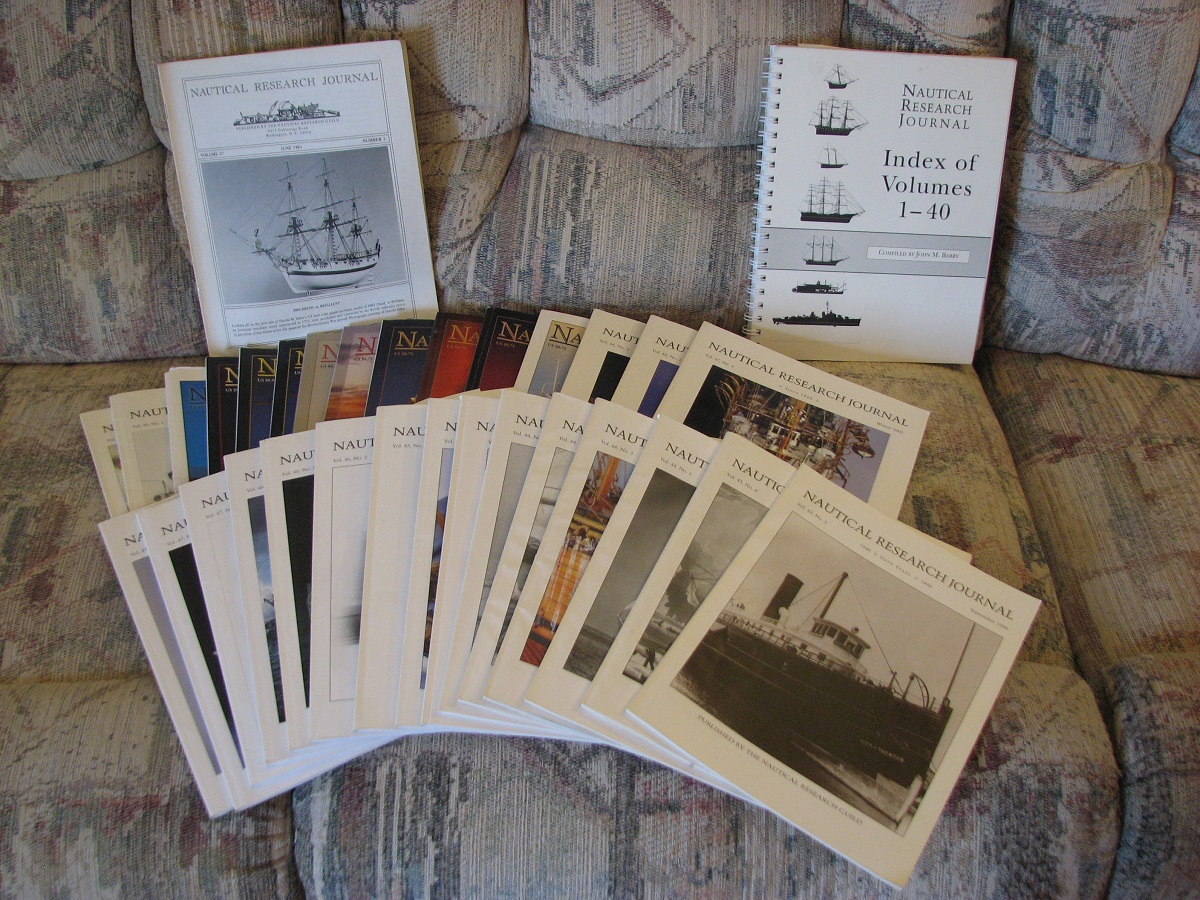
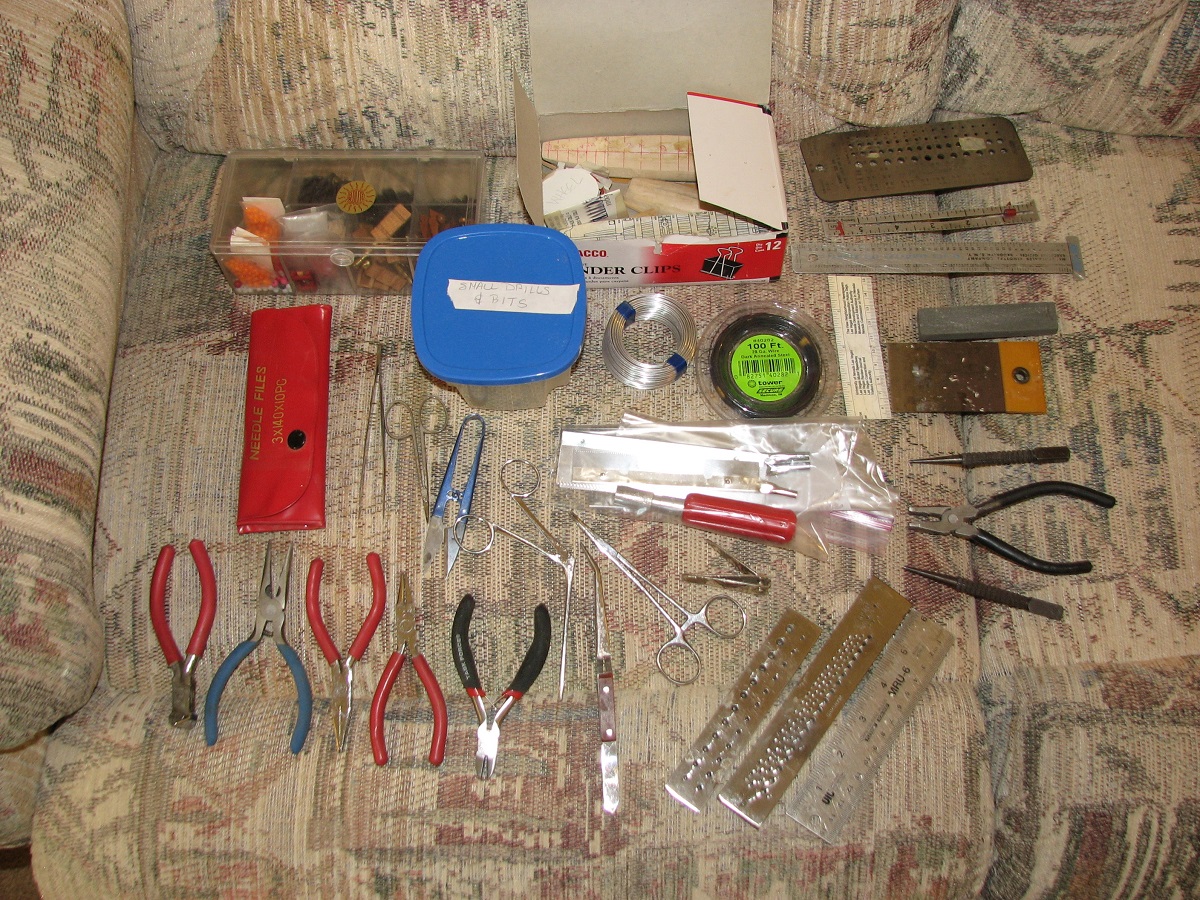
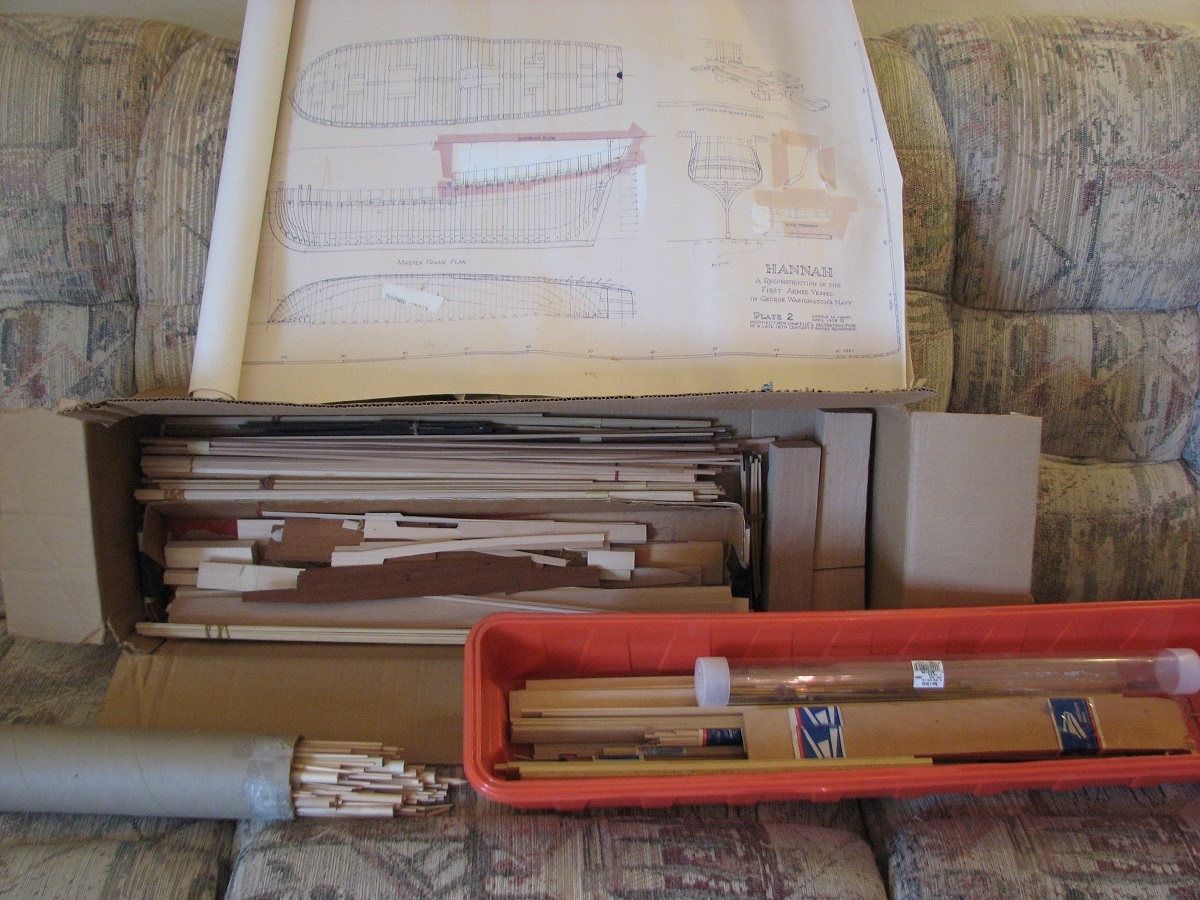
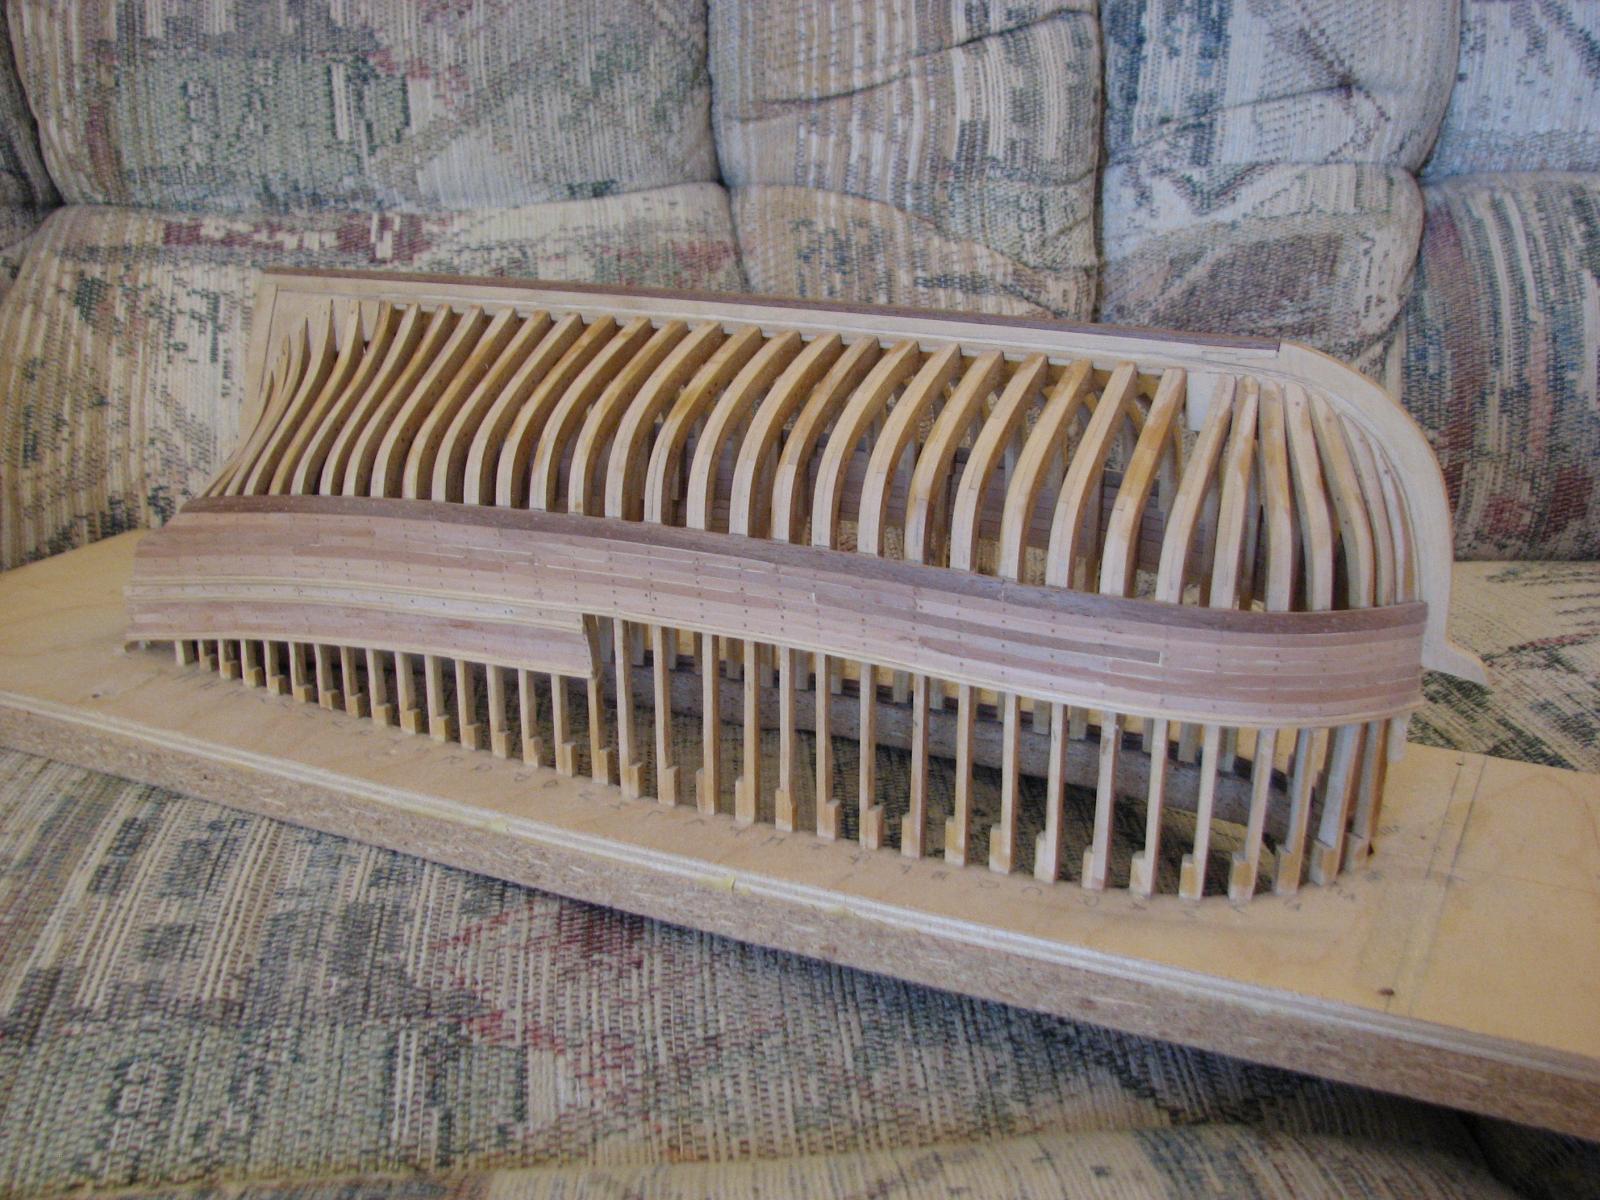
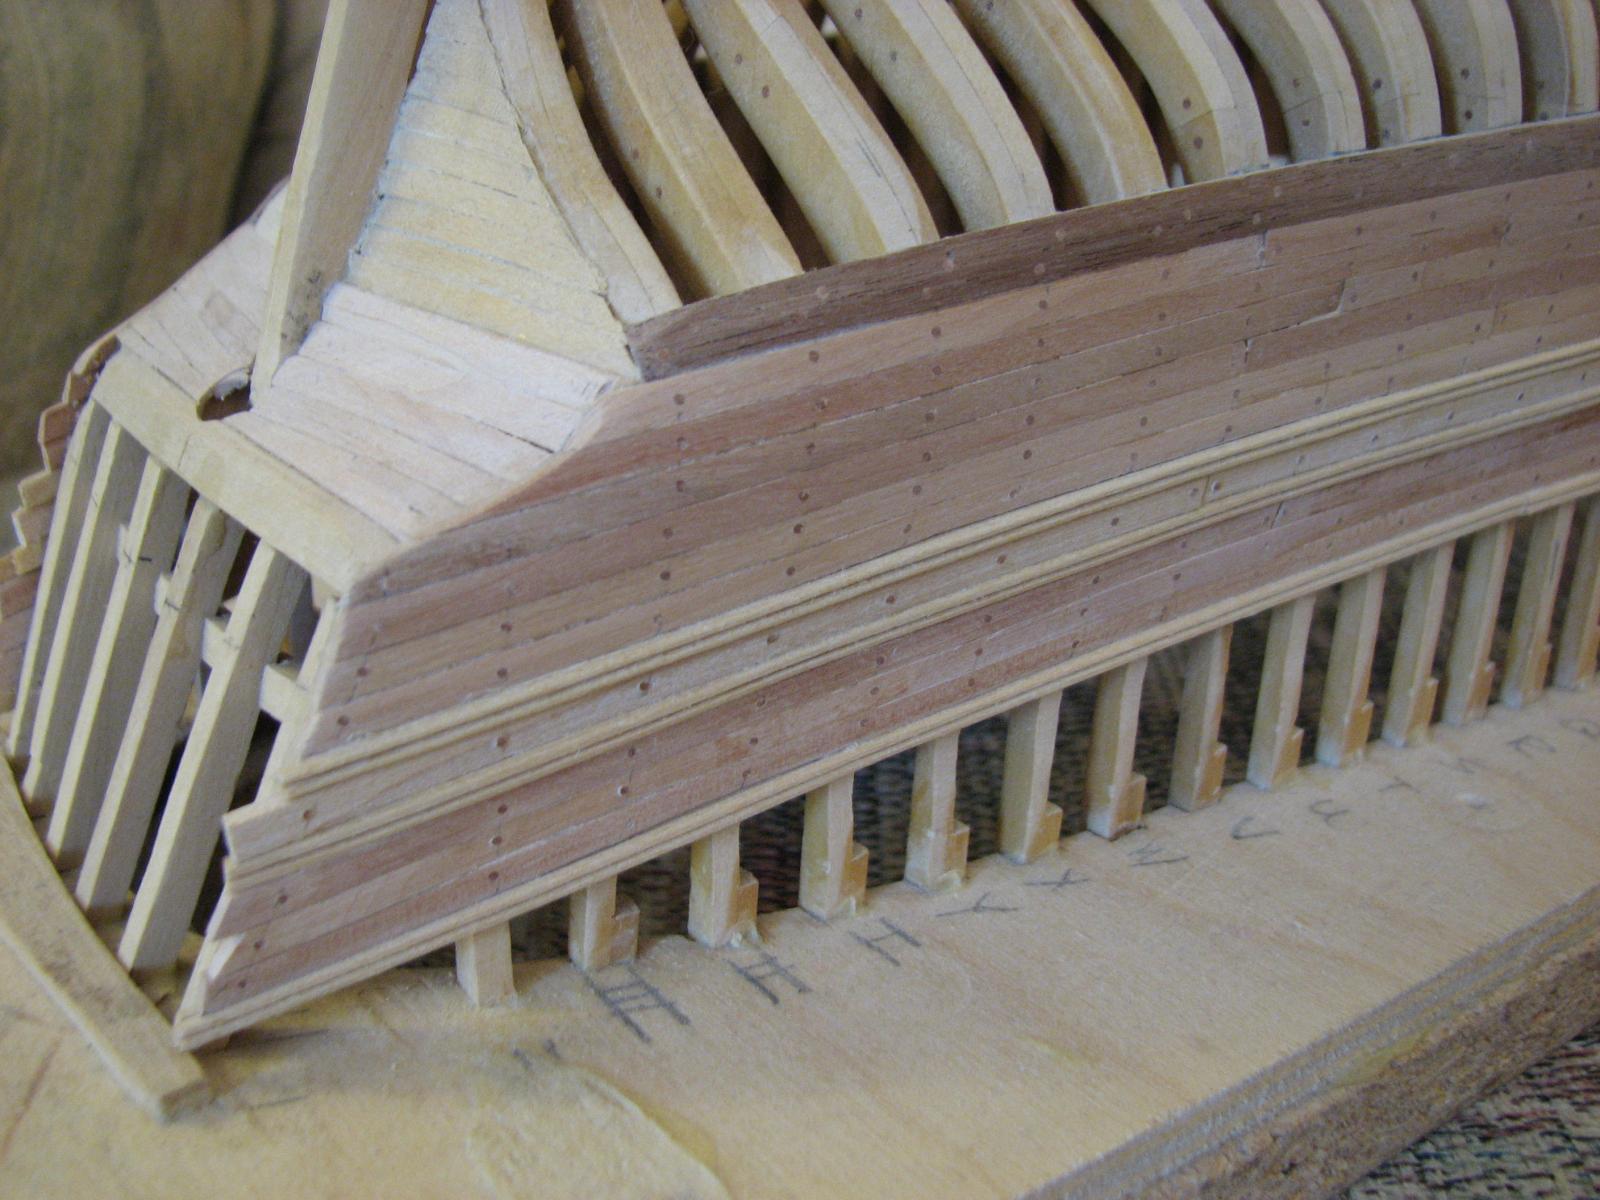
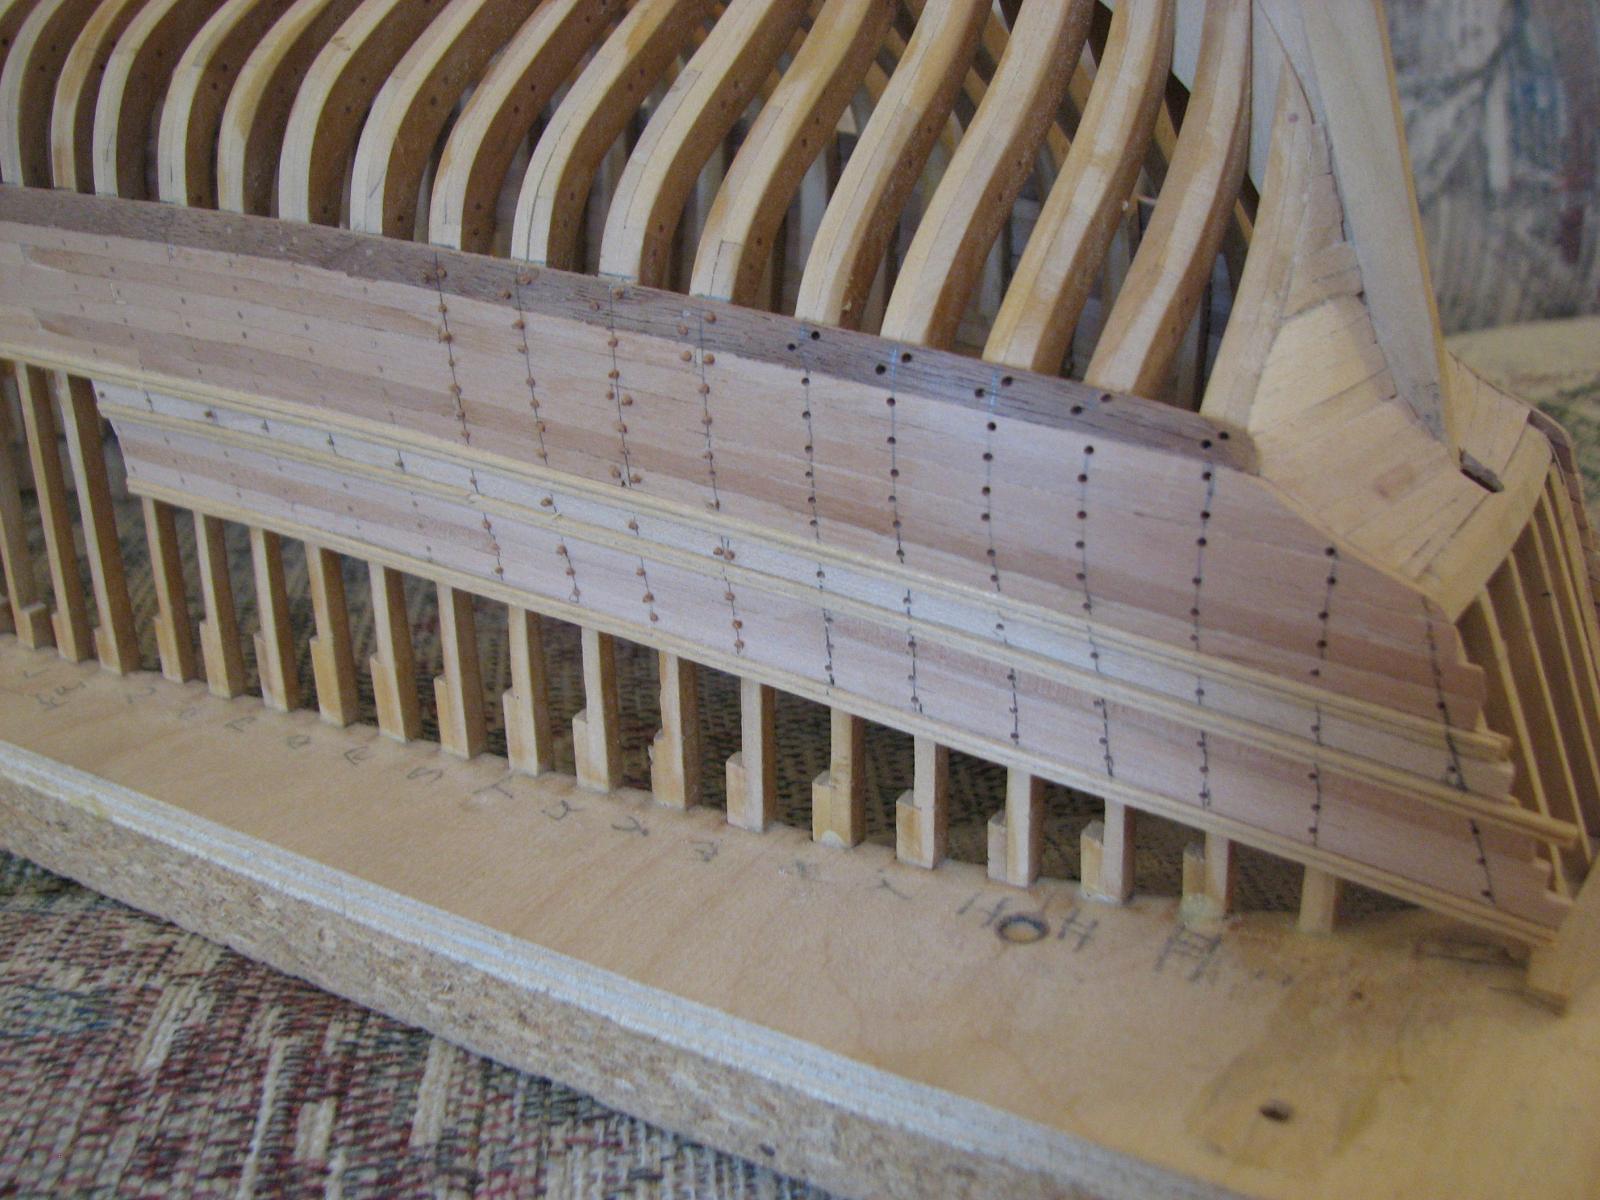
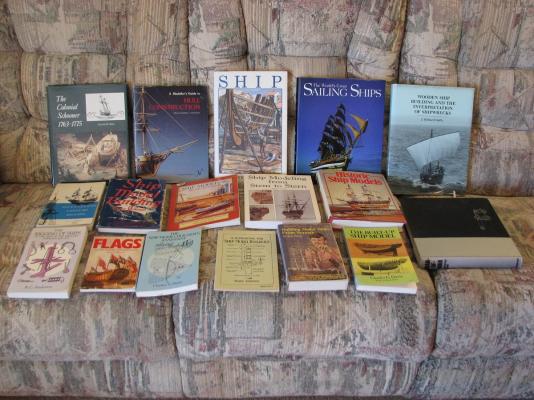
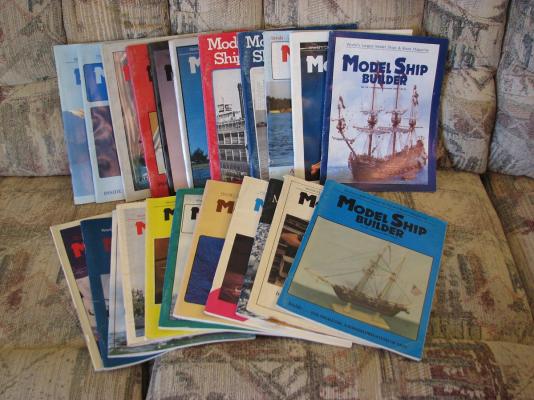
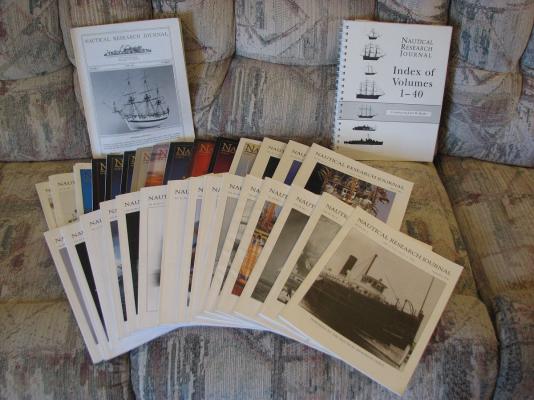
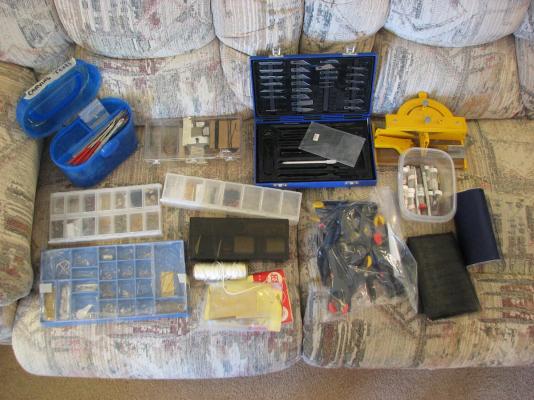
Side trip - and update not about the AVS, but my trip through the forsaken wastelands (also known as Nevada). The gentleman who was divesting himself of his years of shipbuilding is doing so for multiple reasons. Something over 10 years ago he and his wife moved 500'ish miles to a smaller house, so all of the shipbuilding stuff was packed away. At about the same time, he took up the new hobby of writing books, and discovered that he apparently had both a taste, and talent for this, as he now has 6 books published, mostly historical biographies it appears. In retrospect, I should have planned for another day, as the length of the journey left me with very little time to visit, and he was an incredibly nice guy. Honestly I could have spent the better part of a day looking at the 4 models he had left (the rest having been sold when he moved) on display in his house. On display he had a fully rigged semi-scratch (or heavily kit-bashed) Charles W. Morgan, a very detailed large scale model of one of the whaleboats (other than the color scheme, reminded me very much of the recently completed one here in this very forum), and two admiralty style models - the HMS Druid, and the Confederacy - both of which were from the Lumberyard plans and wood. All four of these models were simply gorgeous, and I'm the dumbest person around for not taking my camera on the trip to get some pictures. He began modeling in the early 70's, and the Morgan was his final completed model, in the late 90's. He had started on the Hannah when he moved. Everything you see is what I collected and packed back to Arizona, and it was all given for free, no strings attached, although on the pay-it-forward principle, I'll do my best to pass everything along if/when I decide I don't need it. I'll start this next weekend by taking several of the books that are duplicates of ones I've already purchased, to the new Arizona Shipwrights club meeting, and giving them to whoever wants them. Onward to the stuff. Books are always good, as well as magazines of course, especially older ones that contain so much wonderful knowledge that was used to create models back before this awesome thing called the internet. A fair assortment of miscellaneous tools, most of which will be useful, and some will replace existing tools as they are higher quality. Also included in all the little plastic containers are the left over fittings and all kinds of random parts from approximately 12 builds including cannon and carriages, eye-bolts, deadeyes, blocks, rigging, chain plates, etcs. And finally, the partially completed Hannah, as well as all of the wood, plans, and instructions to finish her (in theory). Also included is all of the left-over wood from his other builds, and I have no idea what is what. There appear to be enough dowels to build masts and yards for about half a fleet. It was certainly an interesting trip, and I'll get some use out of a lot of this stuff. From a purely financial perspective I'm not sure the trip made a lot of sense (my car went into the shop the day before I left with an engine warning light, so I had to rent a car), although the total value of everything I have pictured here is certainly higher than the cost of the trip, and I enjoyed meeting an older and very experienced ship builder. I don't regret making the trip, but it did teach me that as I'm getting older, making crazy long 14+ hour days on the road is something I should not do anymore if I can avoid it. I started my day Thursday when I left my house around 7:45am to do a couple stops before picking up the rental car, which promptly started getting engine warning lights and shutting off the cruise control barely 50 miles out of town. I swapped the car at the airport in Vegas, which cost me about 90 minutes probably, and checked into a hotel outside of Reno just after Midnight. Trip home was fairly uneventful, but of course took about the same amount of time, after loading the car and visiting for a while, I left Reno around 10:30, and got home about Midnight. Returned the rental car yesterday morning, ran some errands, and took a long nap. Now I need to catch up on laundry and stuff, and then I'll see about starting back in on the AVS.


- 831 replies
-
- 9
-
-
- Armed Virginia Sloop
- Model Shipways
- (and 1 more)
-
Best of luck Joe - Will miss watching your workmanship.
-
The Victory is coming along nicely. As to not buying immediately, remember that ME has everything on sale for 40% off through the end of October. I'm not sure how often they do that kind of a discount, as I'm new to this hobby, but if it's rare, you might consider buying it now and putting it away to save $180.
- 1,319 replies
-
- 1
-
-
- caldercraft
- Victory
- (and 1 more)
-
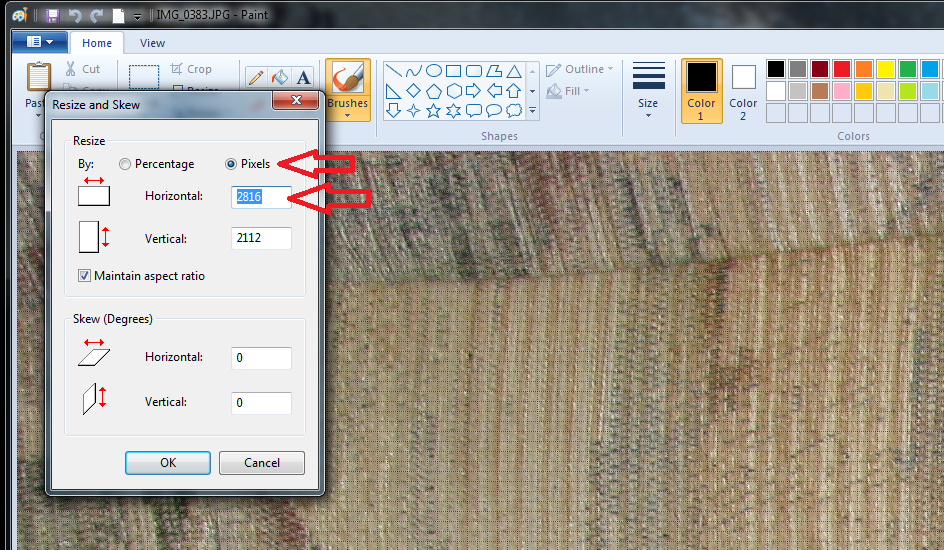
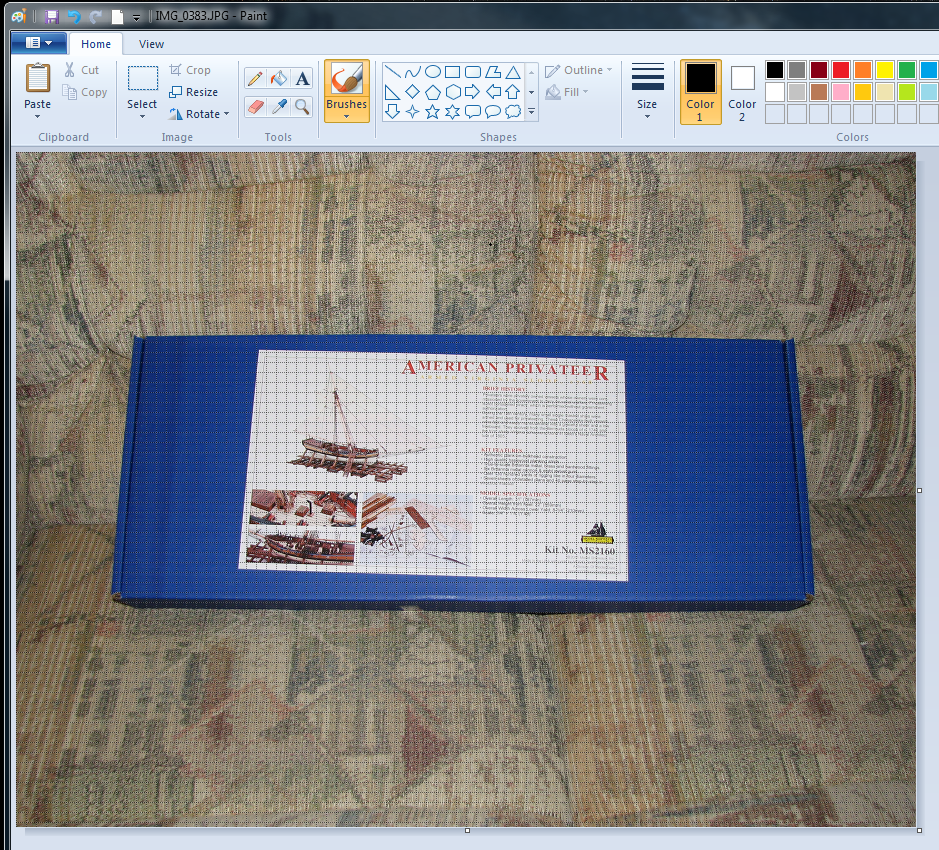
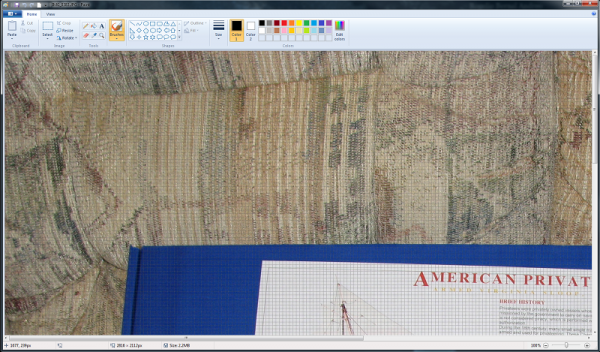
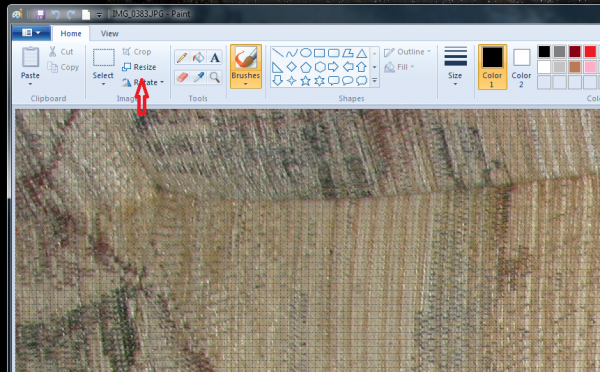
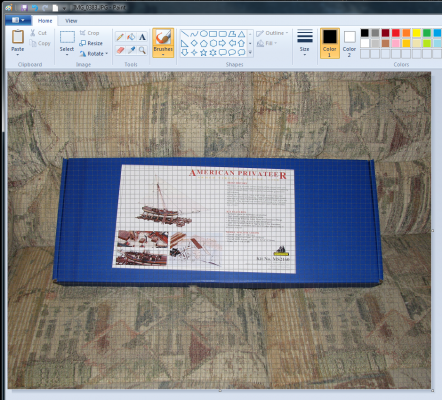
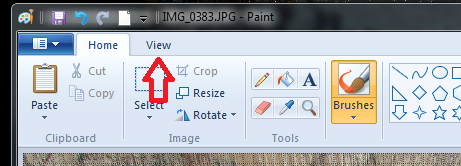
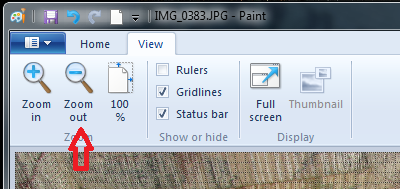
Paint will not resize the image to fit your screen automatically. The entire image is there, you just have to scroll around to see it all. Quick Paint tutorial for resizing. Step 1 - Copy your original image to a folder to edit it from (you can also just do a 'save as' after editing, but if you forget and just click save, you'll over write the original). Step 2 - Open your copied image in Paint. This image will be far too large to see all at once, so it will look something like this (my Paint after opening an original sized image): Now if you don't want to crop or rotate first, just click on the 'Resize' button: That will bring up a pop-up menu as seen here: Click on the little radio button for "Pixels", enter the pixel value you want in the Horizontal box (leave the Maintain Aspect Ratio check box checked), then click on OK at the bottom of the pop-up. The result should be your image resized to the new size. If that new size is too big to fit inside the window of Paint, then you still won't be able to see it all at once. Here I've resized down to 900x horizontal, and as you can see it now all appears inside the window, whereas the original 2816x did not. If you want to see your entire image, even if it's too big to fit in the window, change to the 'View' tab: Once on the View tab, click on the Zoom Out button once or twice until you can see it all. Edit: If none of this helps, or even if it does, let me know when you are done with it and I'll delete this post.

-
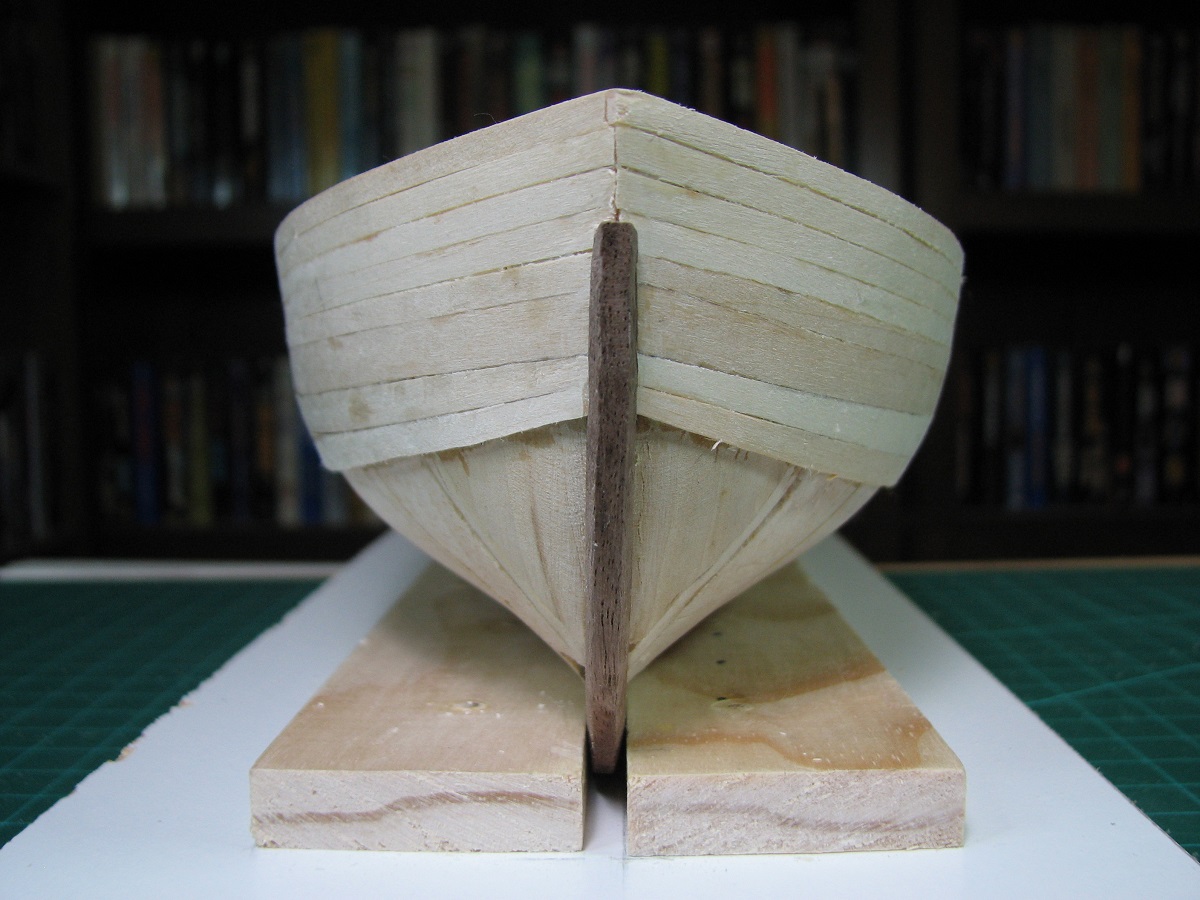
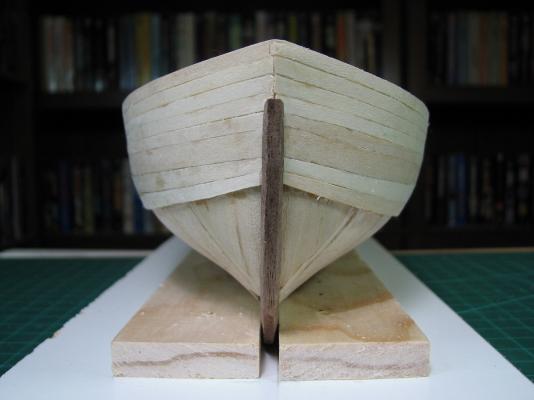
Thanks for the kind comments gents, and for the likes everyone. It's been a crazy week at work, 13+ hours Tuesday and I was actually supposed to be on vacation today, but worked instead kind of crazy, so not a lot of time spent on the AVS. I did start doing the lower planking, and have now been introduced to the weirdness that is spiling. I started out by evening up the existing planks at the bow. I did this by measuring all over the place to determine that the top of the 1/8" blank just above the 1/4" plank was correct along the entire top (at least as far as I could tell), and then using a compass to mark the long lower side based on the measurements from the other side, as measured from the top of that 1/8" plank. If that makes any sense at all. After marking it, I just carefully trimmed it with a razor knife. Seems to have worked out well enough. Next I added two spiled planks below this, and that was.. interesting. One side spiled completely different than the other side between those first two planks, and I think I'll have some odd cleanup to do at the stern, but the 'finished' bottom line of the two sides is oddly even, even though the spiling was completely different. Strangeness is afoot! I also stripped off all the black paint from the stern fashion pieces, sanded everything again, and applied a coat of primer. I won't be touching this again until Saturday, as I'm headed to Reno tomorrow morning where I'll be picking up the entire collection of books, magazines, fittings, wood, tools, and even a partially completed Hannah model from a gentlemen that wants to get rid of his entire 30 year accumulation of ship building stuff. I guess I'll know sometime Friday morning what treasures (or not) I might be loading into the car for the long road trip home! Until Saturday, happy shipbuilding!


- 831 replies
-
- 10
-
-
- Armed Virginia Sloop
- Model Shipways
- (and 1 more)
-
It was there after you posted, but it's gone now.
-
Seems to work just fine. I typically use 1200x900 in my log, but I've seen others use larger like yours. I like the 1200x size myself just because it fits nicely on the screen, but is still fairly large. Of course I'm spoiled and have 27.5" monitors, so I guess I should consider that a 1200 pixel image on my screen might be larger than a 1200 pixel image on someone's smaller screen. I also keep all the original image files from my camera in a separate folder, so I can always get back to the original image size without any editing, which in the case of my old camera is 2816 x 2112.
-
For simple image resizing (and rotating and cropping) I just use Paint. If you have Window's, you have Paint. For a Photoshop equivalent if you want to do more advanced stuff, check out GIMP 2 ( http://www.gimp.org/ ), it's a fantastic program that's probably at least as powerful as Photoshop (your mileage may vary, I'm not an expert) and it's free.
-
The Syren looks like a great kit. I look forward to watching yet another one take form on here, and looks like you've made a great start. Also, I have no idea what a Jenga block is other than a wooden block as pictured. Guess I'll have to Google that.
- 659 replies
-
- 1
-
-
- syren
- model shipways
- (and 1 more)
-
I like Titebond wood glue, but I'd suggest switching to the original Titebond, as when you mess up (if you are like me, it will happen), the original Titebond can be freed up by soaking with water. Titebond II like you are using is waterproof, so will be much more difficult to do any needed deconstruction, and there should be no reason to need to waterproof a static wooden model like this.
-
That's fantastic. So much detail packed into what is conceptually such a simple model. Great job, and I'm glad you've shared it with us.
- 31 replies
-
- 1
-
-
- new bedford whaleboat
- model shipways
- (and 1 more)
-
Thanks Chuck.
-
What do you use to cut such fine (small) shapes into the razor/scraper - just small files? I've not been able to find files small enough for a lot of that detail, especially in a round shape.
-
According to Wikipedia (yes, I know it's not exactly a 'research' source): HMS Ajax was an Ajax class 74-gun third rate ship of the line of the Royal Navy. She was built by John Randall & Co of Rotherhithe and launched on the Thames on 3 March 1798.[2] Ajax participated in the Egyptian operation of 1801, the Battle of Cape Finisterre in 1805 and the Battle of Trafalgar, before she was lost to a disastrous fire in 1807 during the Dardanelles Operation. This is corroborated by multiple sources on the web via a quick Google search, including the book -"A history of the sailing ships of the Royal Navy by Michael Phillips" and Ships of the Royal Navy: The Complete Record of All Fighting Ships of the Royal Navy From the Fifteenth Century to the Present. by Ben Warlow, Naval Institute Press, 1987. ISBN 0-87021-652-X. Edit: As to the question of whether there was a different ship - a frigate - bearing the name of Ajax at the same time, the book listed above by Ben Warlow from the Naval Institute Press says: Eight ships of the Royal Navy have been named HMS Ajax after the Greek hero Ajax: HMS Ajax (1767) was a 74-gun third-rate ship of the line launched in 1767 and sold in 1785. HMS Ajax (1798) was a 74-gun third rate launched in 1798. She fought at the Battle of Trafalgar in 1805 and was burned by accident in 1807. HMS Ajax (1809) was a 74-gun third rate launched in 1809. She was converted to screw propulsion in 1846 and broken up in 1864. HMS Ajax was a 78-gun third rate launched in 1835 as HMS Vanguard. She was renamed HMS Ajax in 1867 and was broken up in 1875. HMS Ajax (1880) was an Ajax-class ironclad battleship launched in 1880 and sold in 1904. HMS Ajax (1912) was a King George V-class battleship launched in 1912 and broken up in 1926. HMS Ajax (22) was a Leander-class light cruiser launched in 1934. She took part in the Battle of the River Plate and was broken up in 1949. HMS Ajax (F114) was a Leander-class frigate launched in 1962 and broken up in 1988. HMS Ajax (S125) is planned as the seventh Astute-class submarine.
-
That's quite a nice scale, 1" = 1'! Opportunity for lots of detailing, look forward to seeing this one go forward.
-
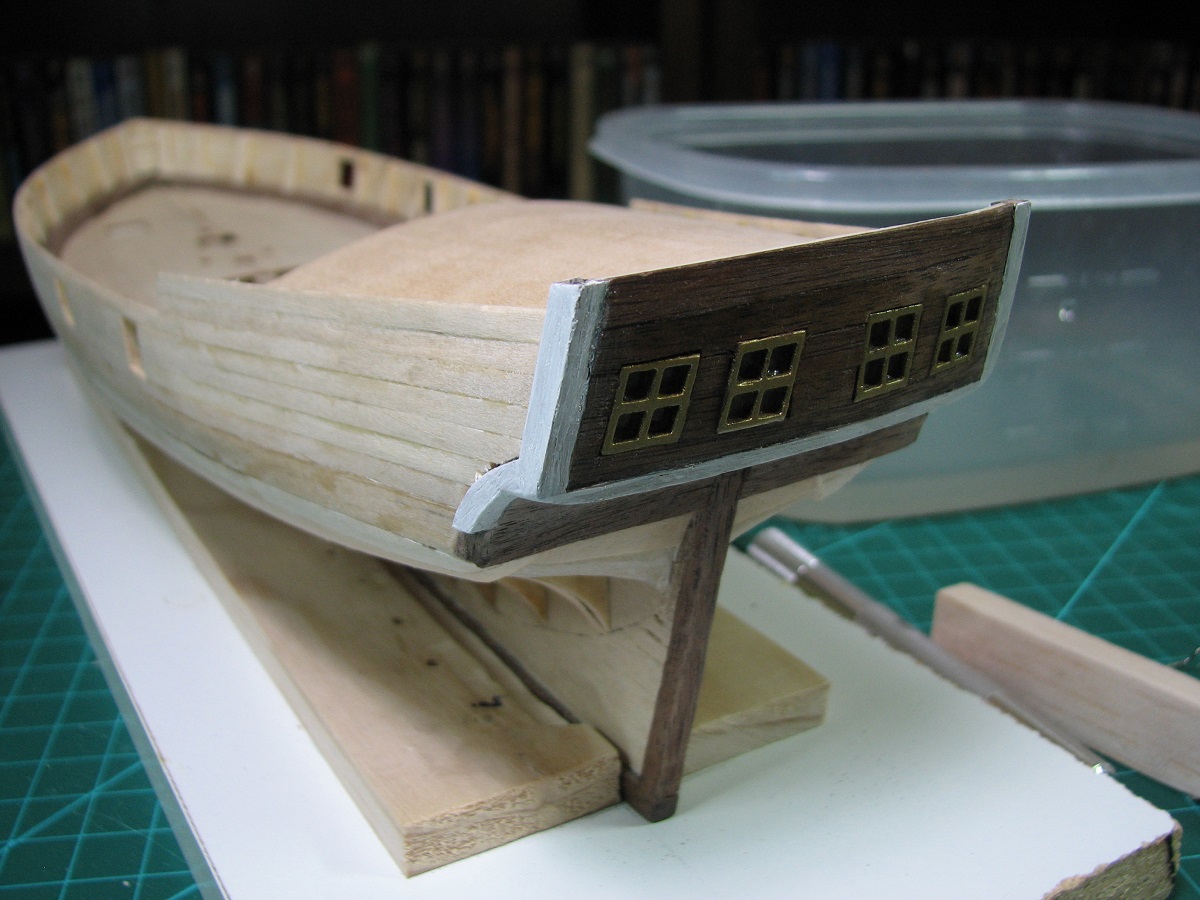
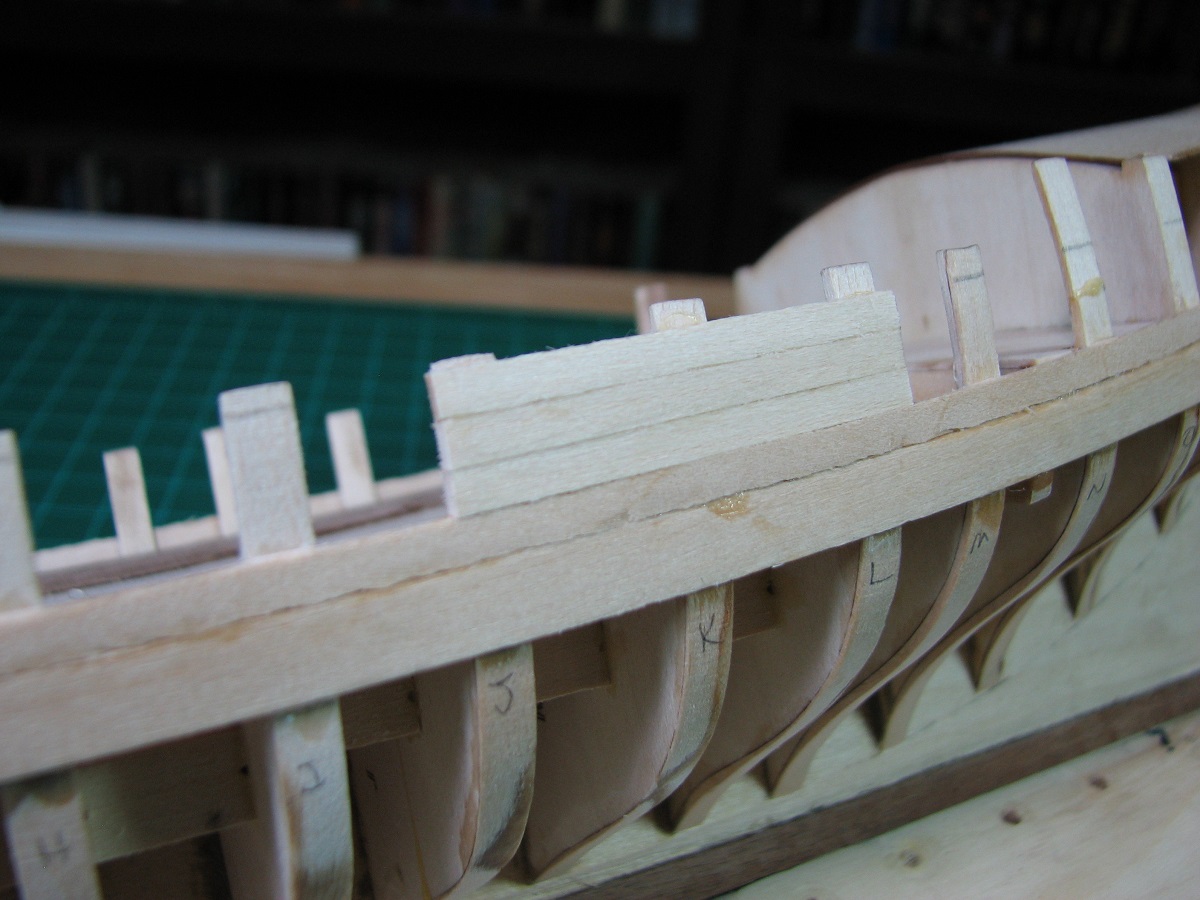
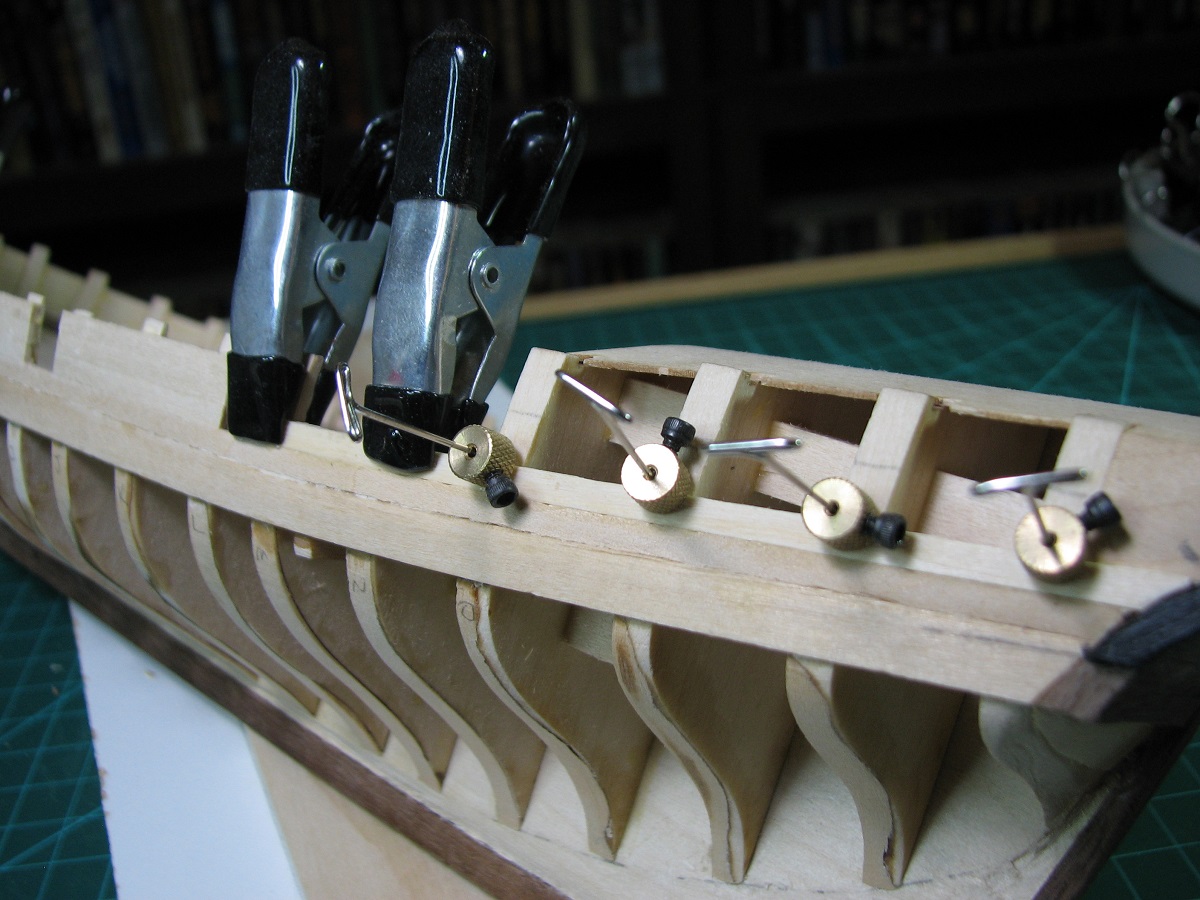
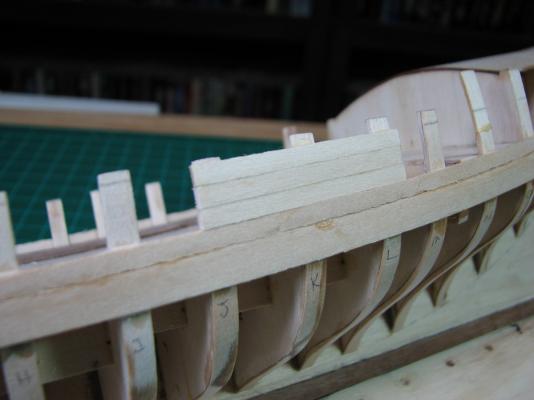
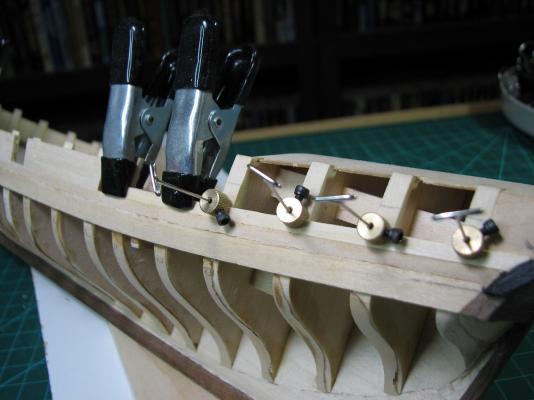
Today I moved on from the stern. I'll revisit it later once I decide what I really want to do as far as trim, paint, name, etc. No warship is complete, not even a small sloop, without gunports! So today I did upper bulkhead outer planking, first layer. I quite enjoyed this part of the project, and other than the fact that it's apparently completely impossible to eliminate all the fuzz from basswood, I'm pretty happy with the outcome. I took a ton of pictures, but when I started to edit them to post I realized that they are all really pretty much repeats of each other just on the next section, so I cut it down to just a few. First section, and then with three sections completed: The stern required a bit different approach, as I there is no way to get clamps on the planks, so I used some pins. One of the things I may possibly have spent a fair chunk of that money mentioned earlier on, a little bit at a time, is clamps. For the first month I was doing this new hobby, I would grab every clamp that looked like it might possibly be useful, and that I didn't already have. Some people would say I now have far too many clamps, but I say, there is no such thing as too many clamps! Cut to the chase, as it's past my bedtime now, and nobody likes a grouchy ship builder at work on Monday morning. Hrmm.. looking at that last picture, I didn't get the earlier planks on quite even at the bottom. I'll have to measure and fix that before I begin lower planking. Until the next time, happy modeling everyone, and thanks for the looks, likes, and comments!


- 831 replies
-
- 15
-
-
- Armed Virginia Sloop
- Model Shipways
- (and 1 more)
-
Dave - I saw his clips somewhere in another thread I think where he explained putting them together - they use the handle from another clip inside of the intact clip to hold the planking down. You can really use anything that sticks out, I made some by using short pieces of wood super-glued into the binder clips, but I think the handle of another binder clip works better as it doesn't need to be glued as the ends hold it in.
- 1,350 replies
-
- 1
-
-
- constitution
- model shipways
- (and 1 more)
-
I've yet to rig a gun, but I think I saw in someone else's log on here that they got the measurements for the line, then rigged it completely to the gun with the eye-bolt lose, and then put the gun into position and secured the eye-bolt with the rigging already complete.
-
I think it looks just fine. The pencil lead is an interesting idea, maybe if you were able to sink it below the deck surface slightly and then seal it with some sort of clear glue before sanding it might keep it from spreading onto the deck if you use that idea for a future build?
- 153 replies
-
- 1
-
-
- swift
- Artesania Latina
- (and 1 more)
-
Thanks Gents, Keith, there is no window trim in the plans. I already created some very tiny trim pieces out of Brazilian Cherry and put them on one window with a very small bit of CVA, but I didn't like the look so I removed them, and either I forgot to take a picture, or just didn't bother because I didn't like it. I do think they could use "something", but I haven't decided what that is yet. I plan to create some sort of a name plaque to go above the windows, but I'm still trying to find a source for decent rub-on type lettering (haven't really looked that hard other than skimming Amazon) to use. All the one's I've found online so far don't bother to say what size they are, which is really a fairly important bit of information that I would think they would include in the description for an online purchase!
-
Such a beautiful piece of work, always happy to see more pictures of this.