


Ryland Craze
-
Posts
1,442 -
Joined
-
Last visited
Content Type
Profiles
Forums
Gallery
Events
Posts posted by Ryland Craze
-
-
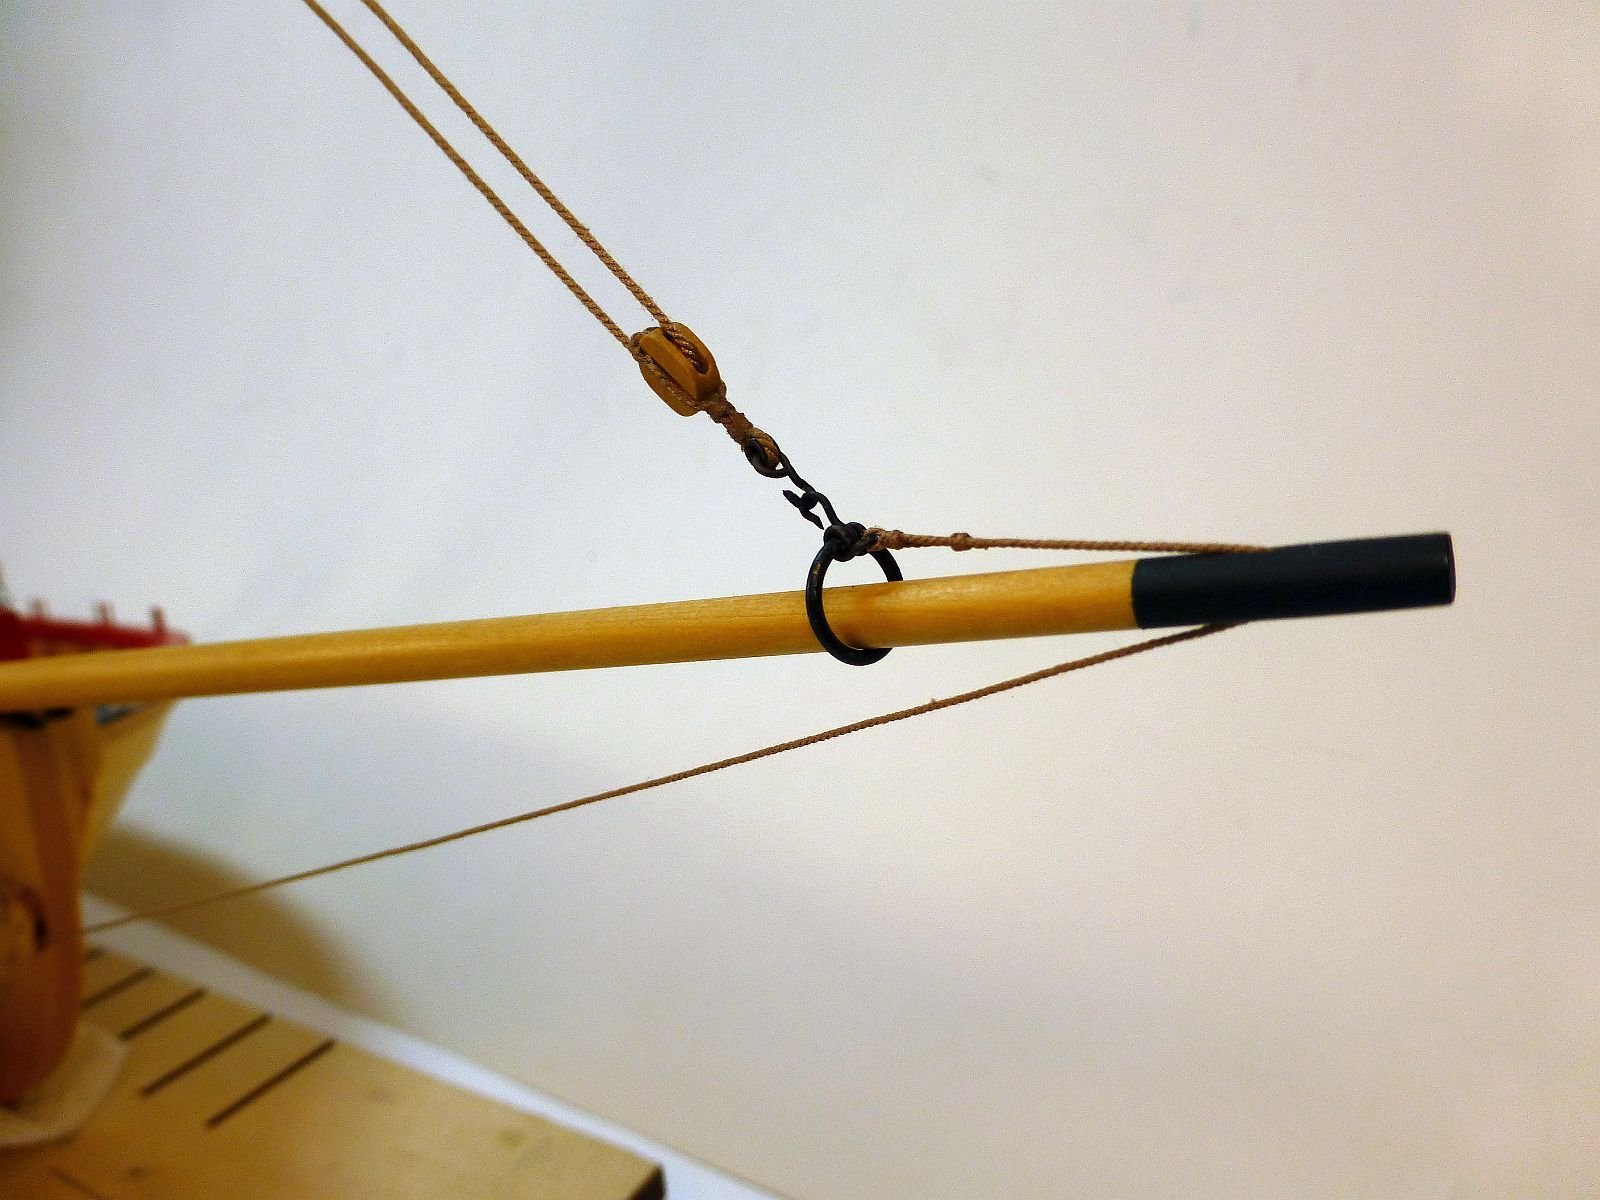
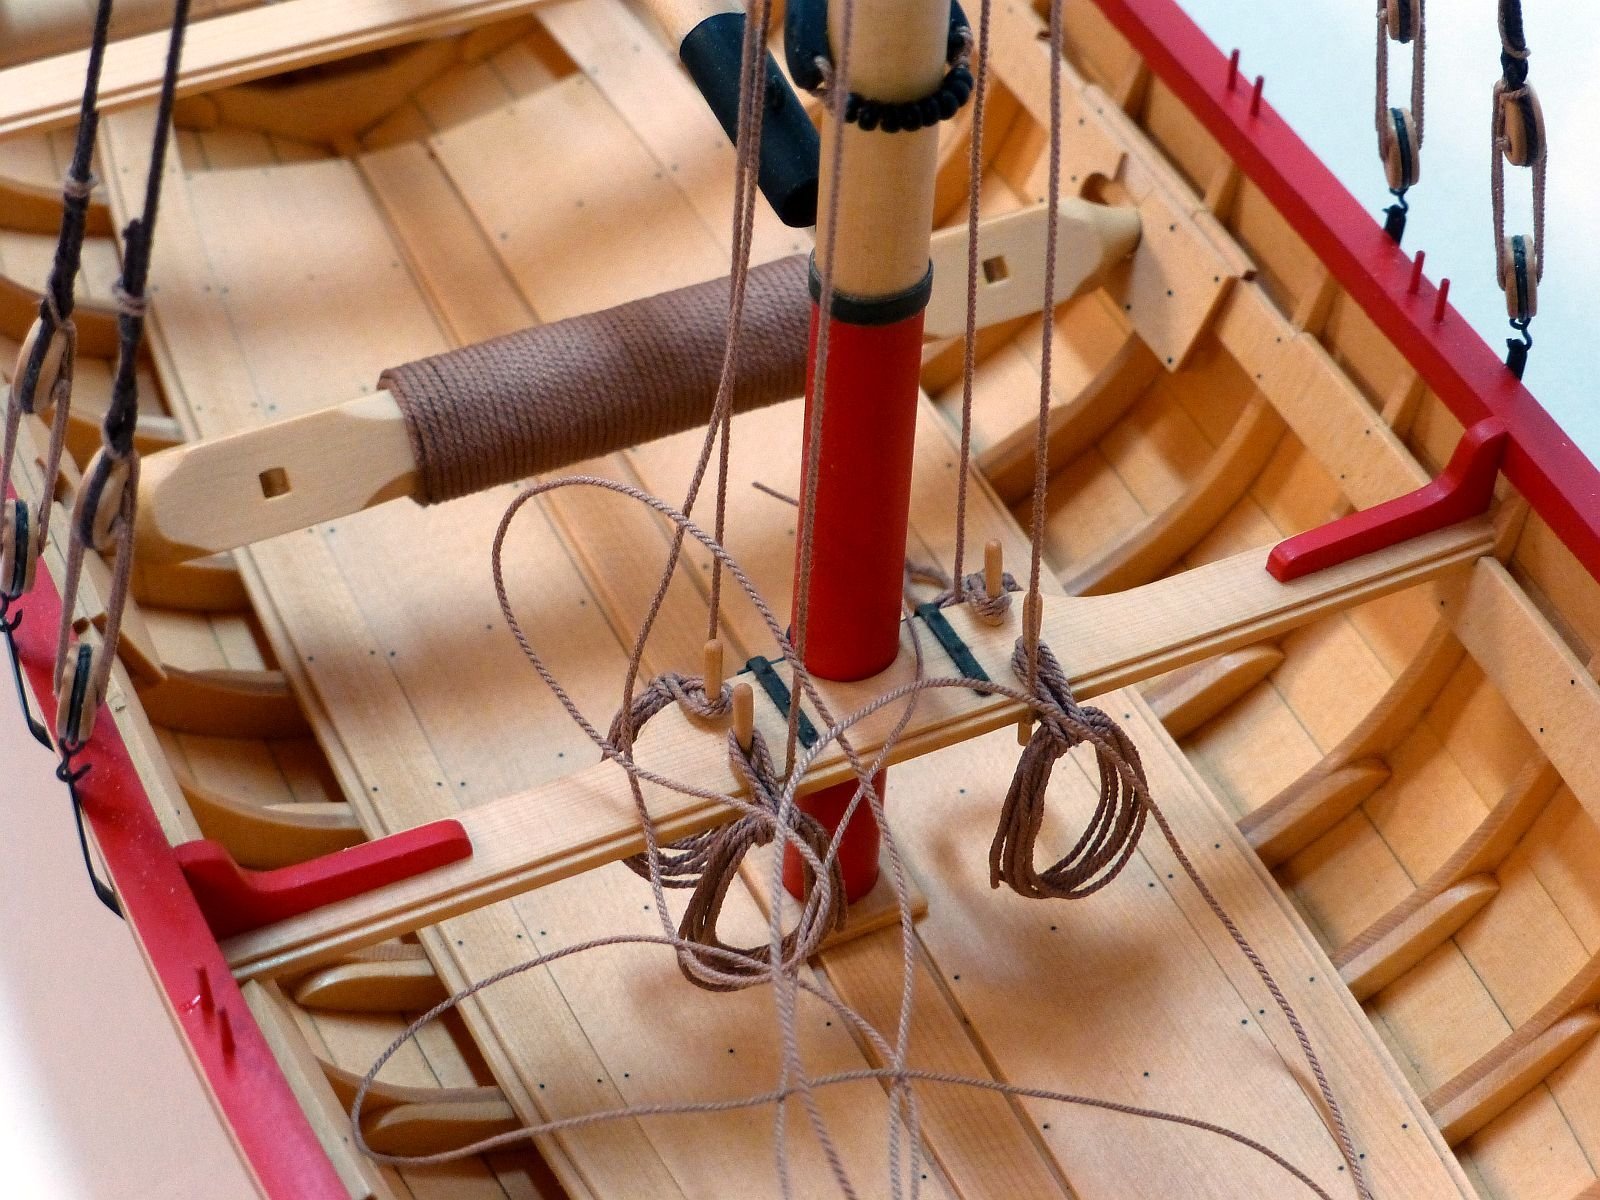
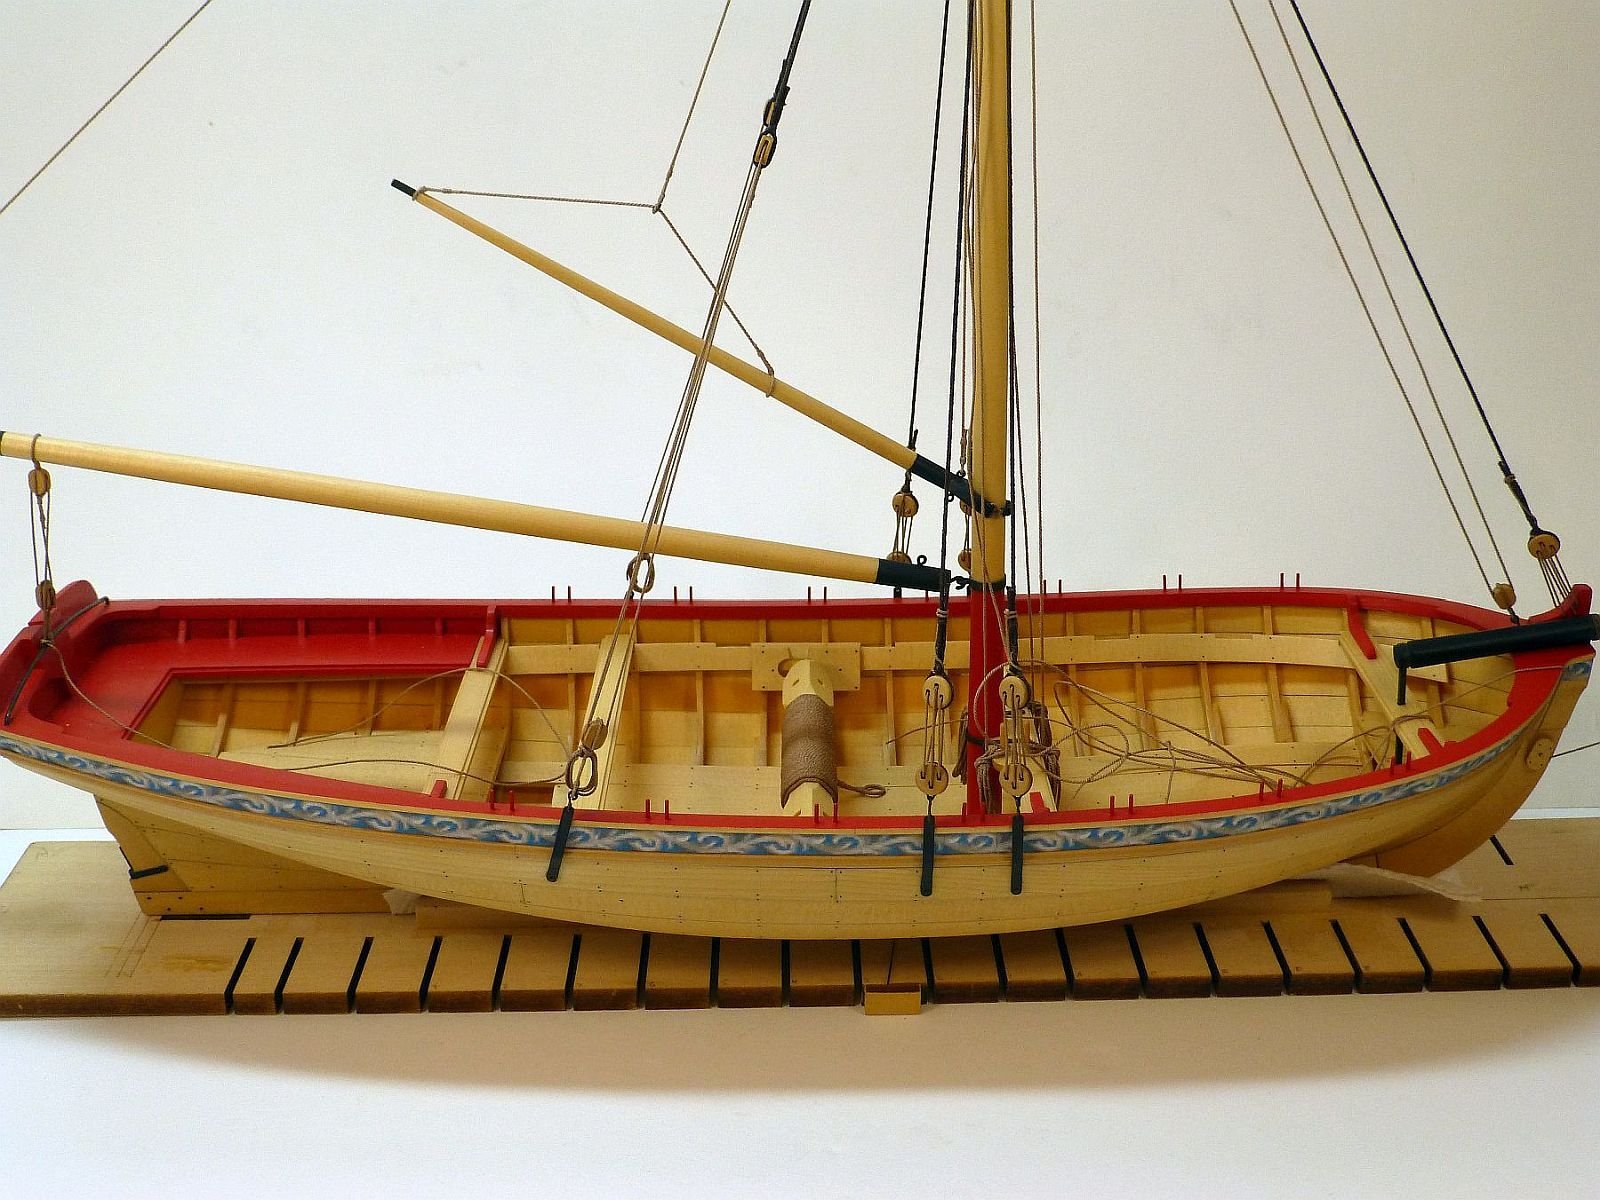
Work continues on my Medway Longboat. I made the traveler ring and a couple of hooks and then rigged the jib halliard and outhaul. This finished up the rigging.

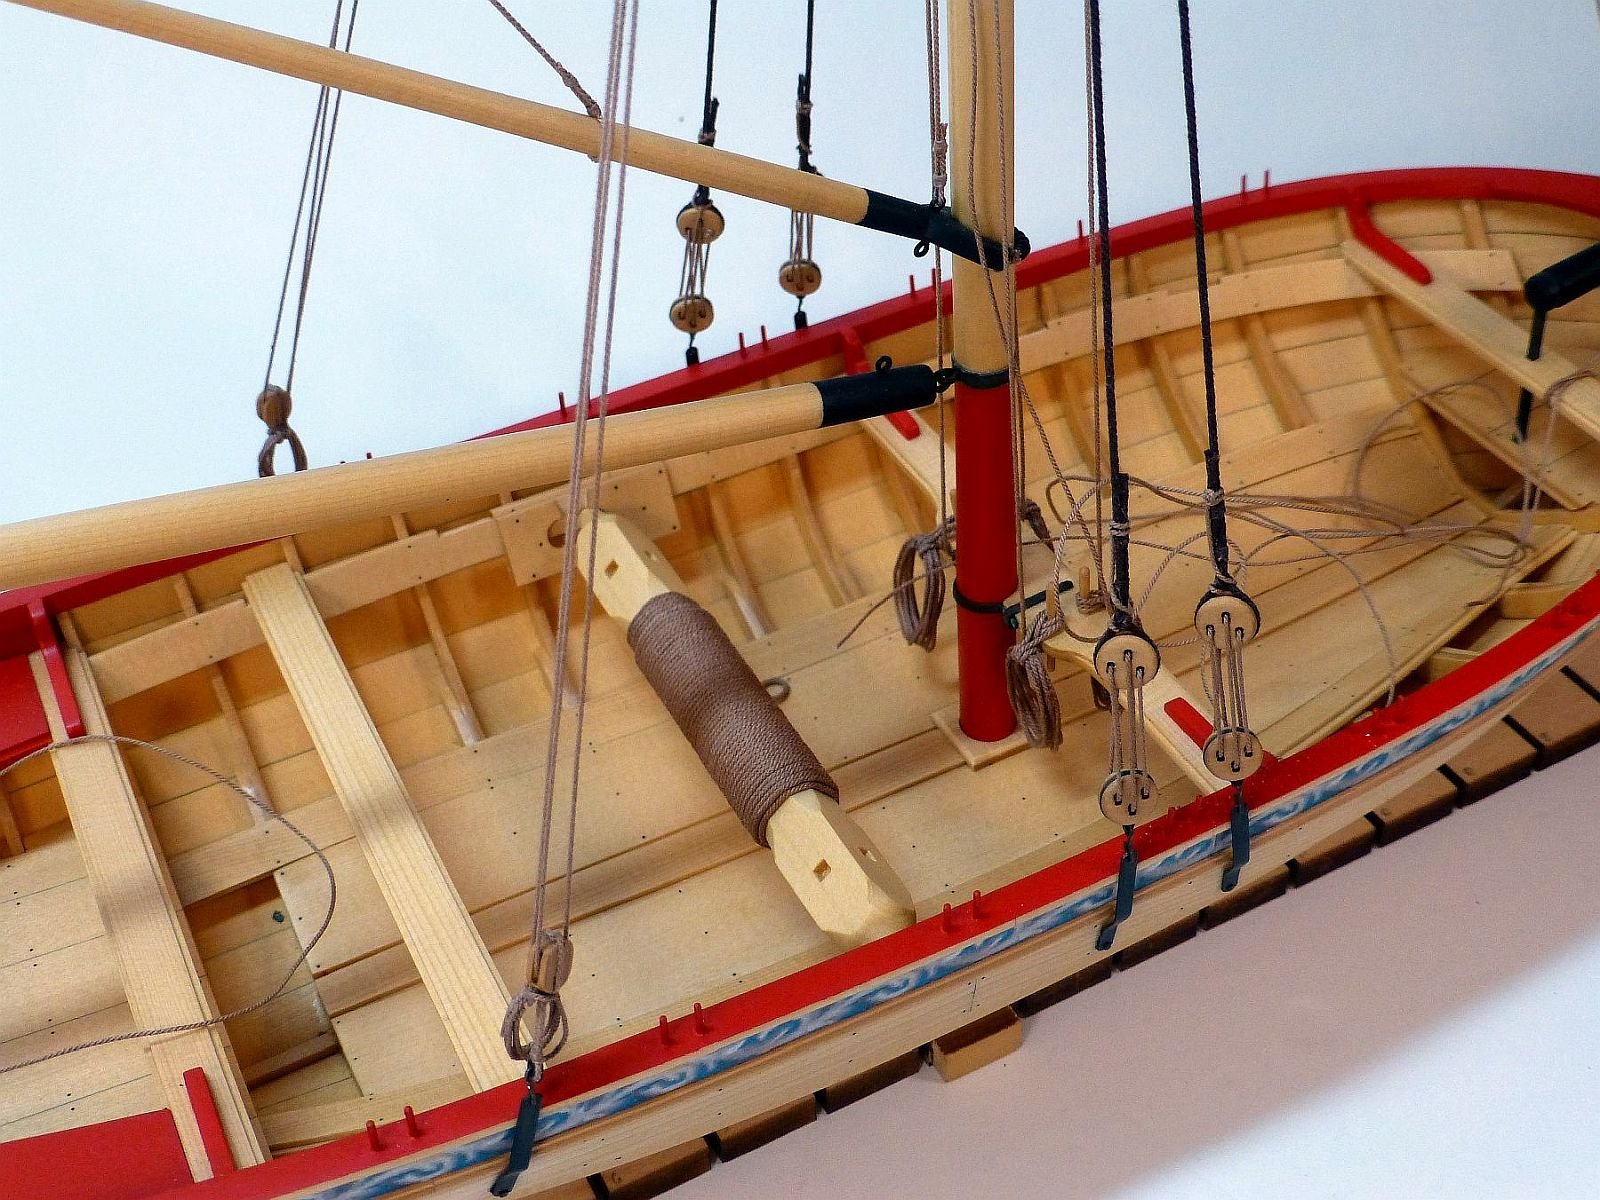
The next step was to make up some rope coils for the belaying pins. I also decided to wrap some line around the windlass. Assembly of these was made easier by not having the thwarts installed at this time. Once the coils are completed, the remaining thwarts will be glued to the risers.


Here is a picture of the model as it now looks:
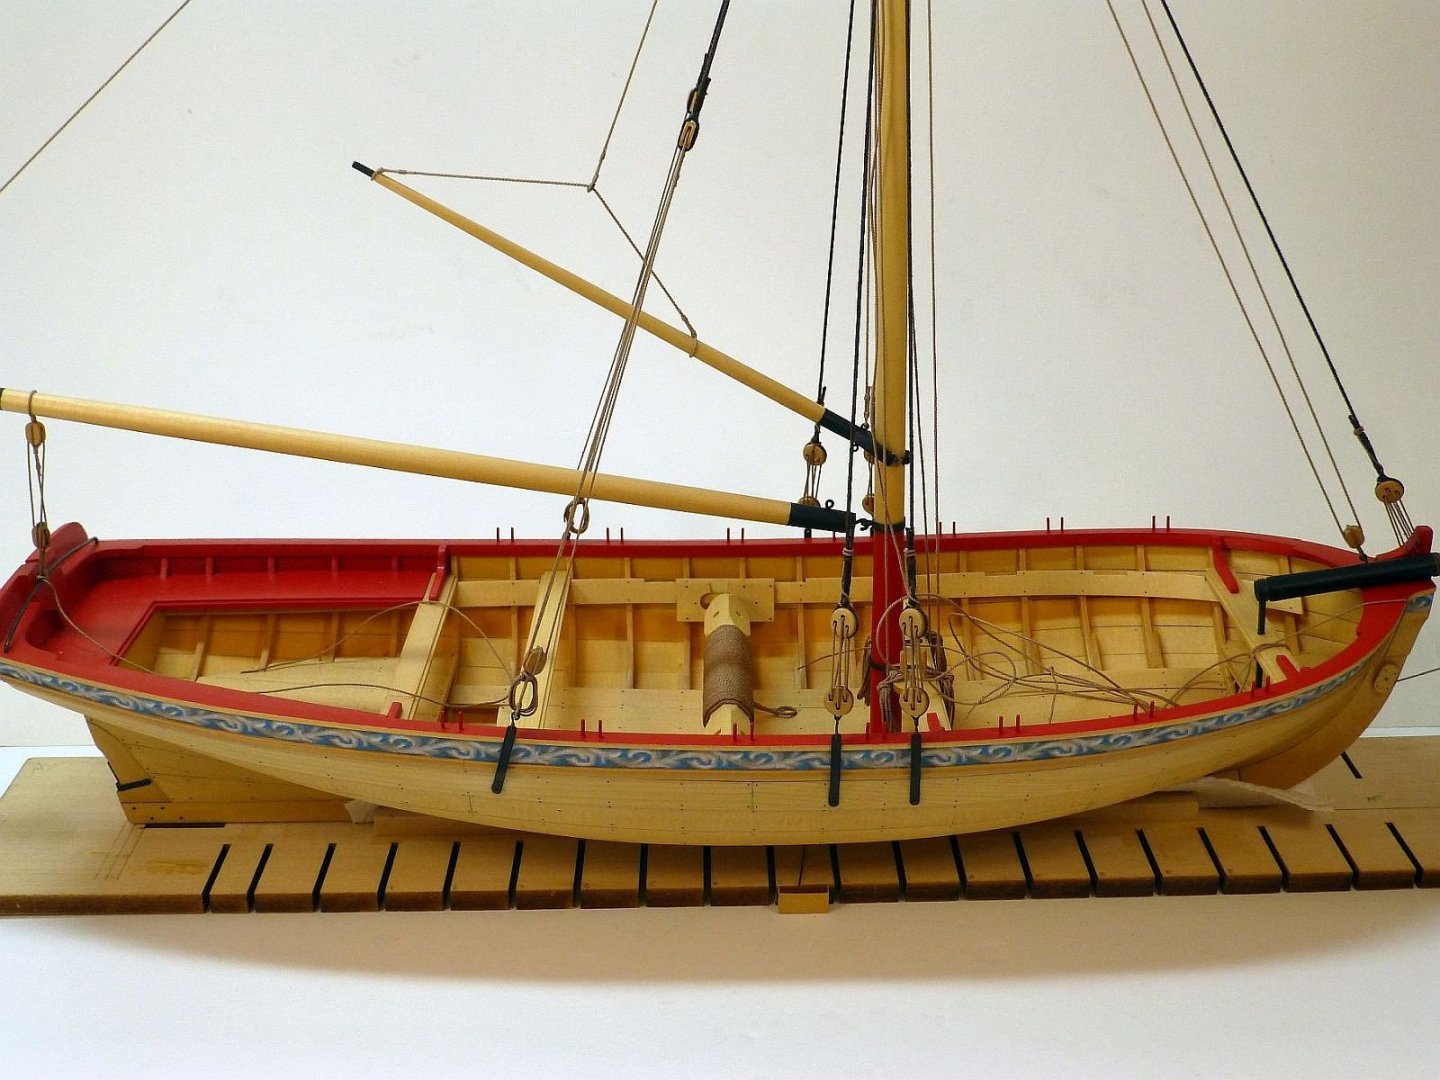
All that is left is to make three more rope coils, six oars, install the flag and the display stand and this model will be finished.
- Boatsinc2000, svein erik, JeffT and 18 others
-
 21
21
-
Beautiful model. I have enjoyed following your build log and intend to reference it when I build my Queen Anne barge model.
- Blue Ensign and Jack12477
-
2
-
Very nice model. Your work looks crisp and I am glad you decided to fix the paint issues.
-
Congratulations Derek. I am going to miss your updates and the discussions that your posts generated. Your build log is packed with many tips, photos and techniques and will serve as a valuable resource for a modeler building a ship model in this era. You have built a model that you will be proud of and will bring back many wonderful memories every time you look at it. I am looking forward to your next build, whatever it may be. Thanks for letting us follow along on this build.
-
-
-
-
That is quite an honor.
-
1 hour ago, fnkershner said:
Dam I just glued the 1st thwart into place. And of course the next thing I read it nope should not have done it. I should complete my rear seats this weekend.
Should not be a problem. I am sure that most builds had the thwart glued to the hull before drilling the hole for the brace. I sometimes do it differently than what the instructions call for. Sometimes it works out for me, sometimes not.
-
-
Thanks Chuck and Grant for your comments and also for the "Likes".
Chuck, my goal is to have it finished for Modelcom in Philly in three weeks. A little rigging, some rope coils and finishing the oars is all I have left to do plus the stand.
-
Hi Joseph and welcome to Model Ship World. The Constitution by Revell is a nice kit to get started in this hobby. I look forward to your build log.
- Joseph1137 and mtaylor
-
2
-
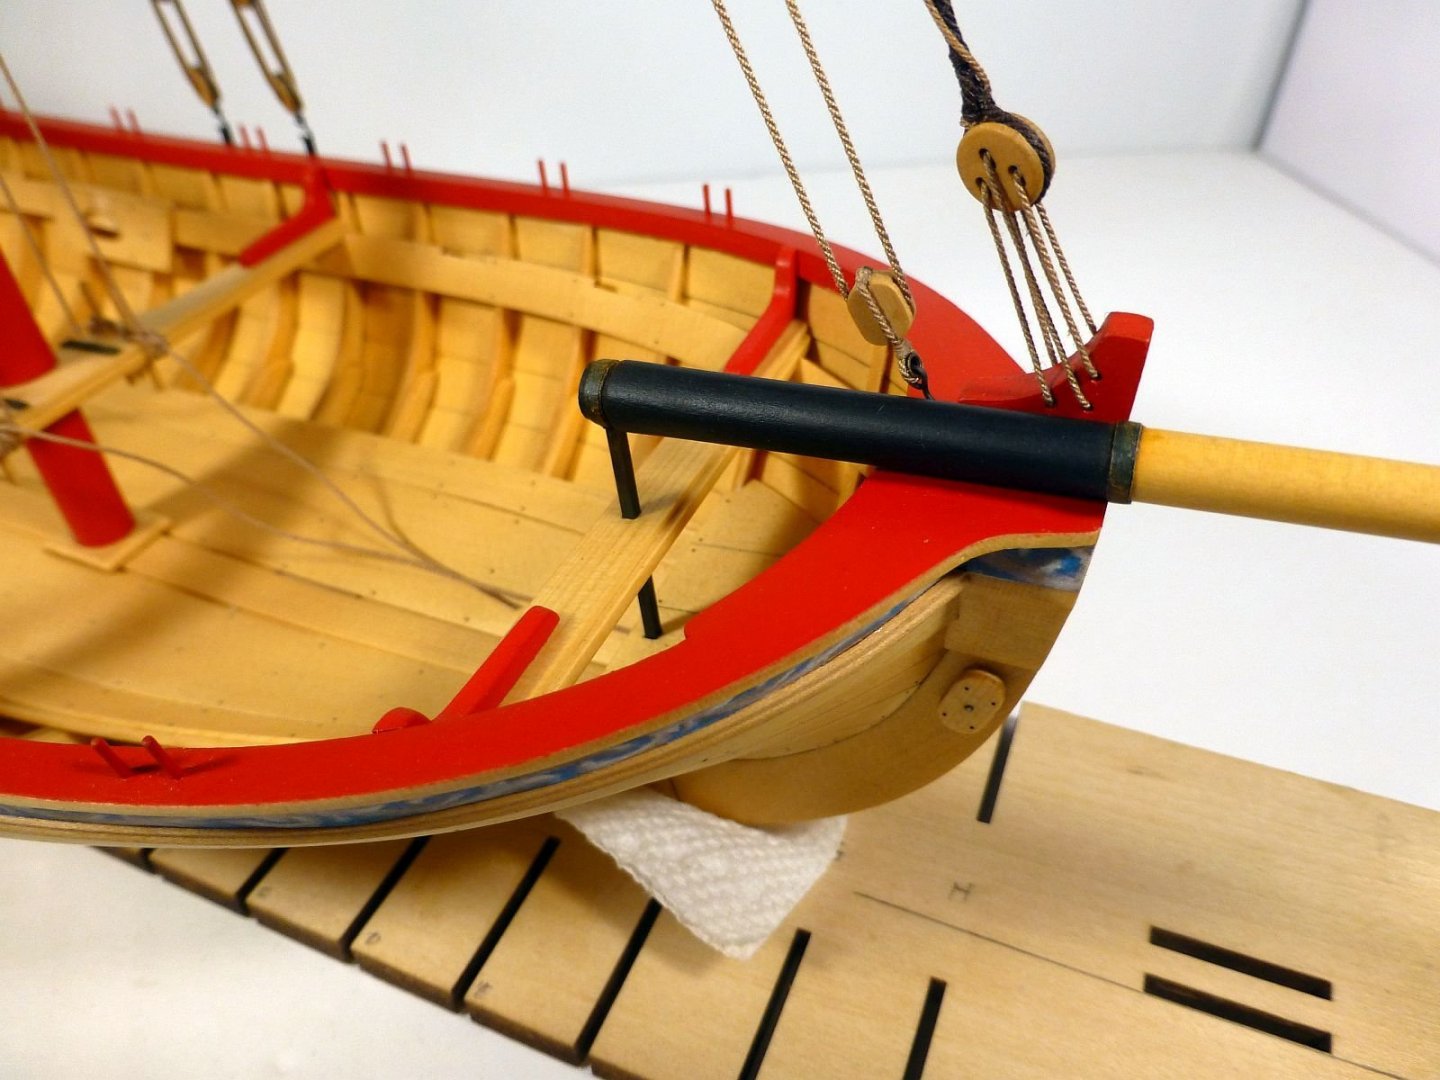
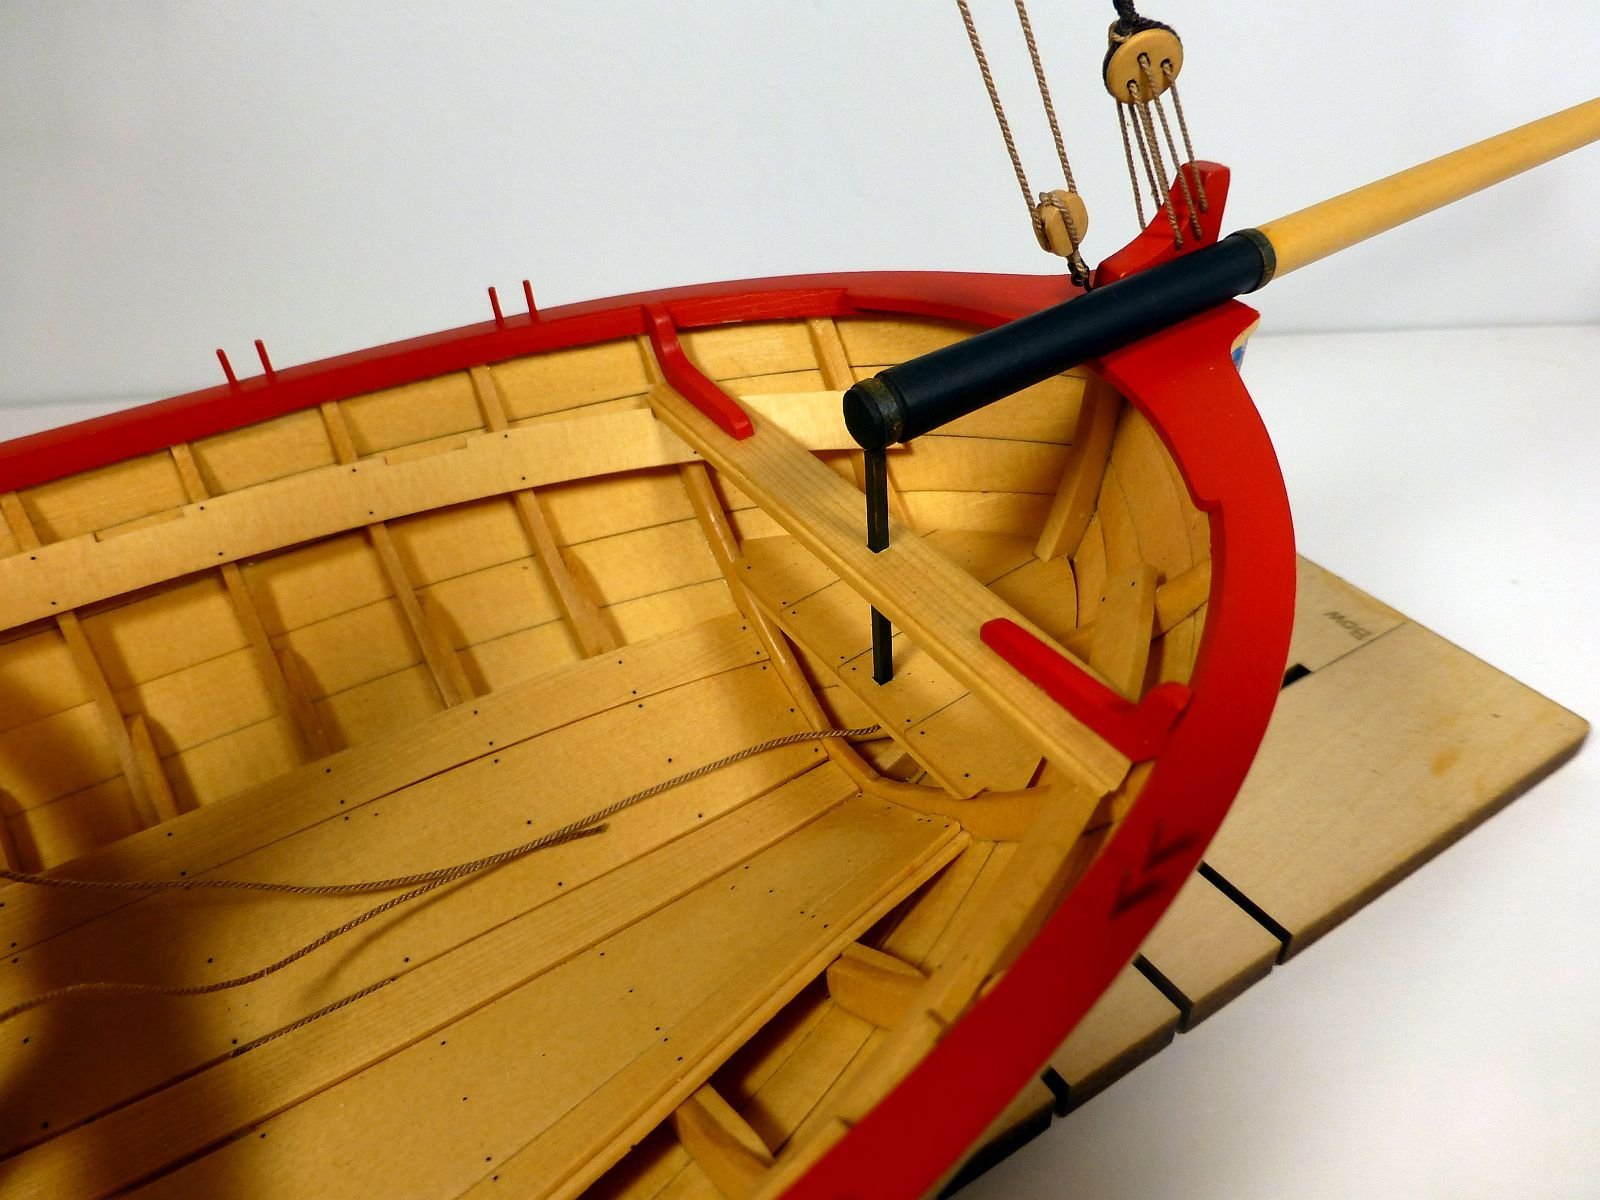
A little progress on my Medway Longboat. I have finished the ironwork on the bowsprit, installed the forward thwart and knees and installed the bowsprit. I used a miniature jewelers file for the support brace hole in the thwart and forward platform. As Chuck said in the instructions, you only have one chance to get it right. I was glad that I had not glued the platform and thwart to the hull as I was able to work with these off the model. I took my time and was happy with the outcome. I blackened the support bar and used some weathering powder on it. I also pinned the bowsprit to the caprail where it would not be seen.
Next step is to make the traveler ring and a couple of hooks and then rig the jib halliard and outhaul. Only two pages left in the instructions.

-
-
Looking good Lynn. The learning process is the fun part of building these models.
- lraymo and Keith Black
-
2
-
-
-
Welcome to Model Ship World Ian. You have a lot of experience with modeling and you should do just fine building a wooden ship model. There are many build logs of the Caldercraft Sherbourne on MSW which should aid you in building your model. The best advice I can give you is to start a build log of your Sherbourne. Here you will be able to post your progress and ask questions about your build. Our members are all willing to help.
-
-
Congratulations on completing this model. It is very well done and you should have no problems building the pram.
-
-
Nice work Jeff. I am glad to see you back on-line.
- mtaylor and Boatsinc2000
-
2
-
-


Medway Longboat 1742 -1/2" scale - by Jeff
in Medway Long Boat - 1742 - Public group project.
Posted
I know the feeling. Sometimes, a plank becomes very difficult to install. Start at the rabbet and slowly work your way back. You will have to try fit the plank, sand a little and refit and repeat this process as many times as needed to get the plank to fit. Just keep working slowly at it and it will eventually fit. I have even taken some wood off of the plank you are fitting it to, which I do not like doing, just to get the plank to fit. Good luck on this.