


Ryland Craze
-
Posts
1,442 -
Joined
-
Last visited
Content Type
Profiles
Forums
Gallery
Events
Posts posted by Ryland Craze
-
-
2 hours ago, Diver said:
I am happy with most of it but am wondering if that last bit of char on the transom will be a problem.
I would finish fairing the last bit of the transom where the laser char is, especially at the top of the transom where the "ears" are. It appears that the aft portion of that area needs more taken off near the ear. It may be the photo, but the transom edges look somewhat flat instead of angled. You have done a good job on the fairing and it looks like you have reinforced the bulkhead tabs nicely. This definitely helped keeping the bulkheads from splitting. I can tell this is going to turn out to be a nice build.
-
-
Welcome to Model Ship World. As Michael said, please start a build log of your dingy. We all like to see the work of others.
- JeffT, mtaylor and Edwardkenway
-
 3
3
-
Your build looks nice. You are making good progress. Your work area looks very clean and organized.
-
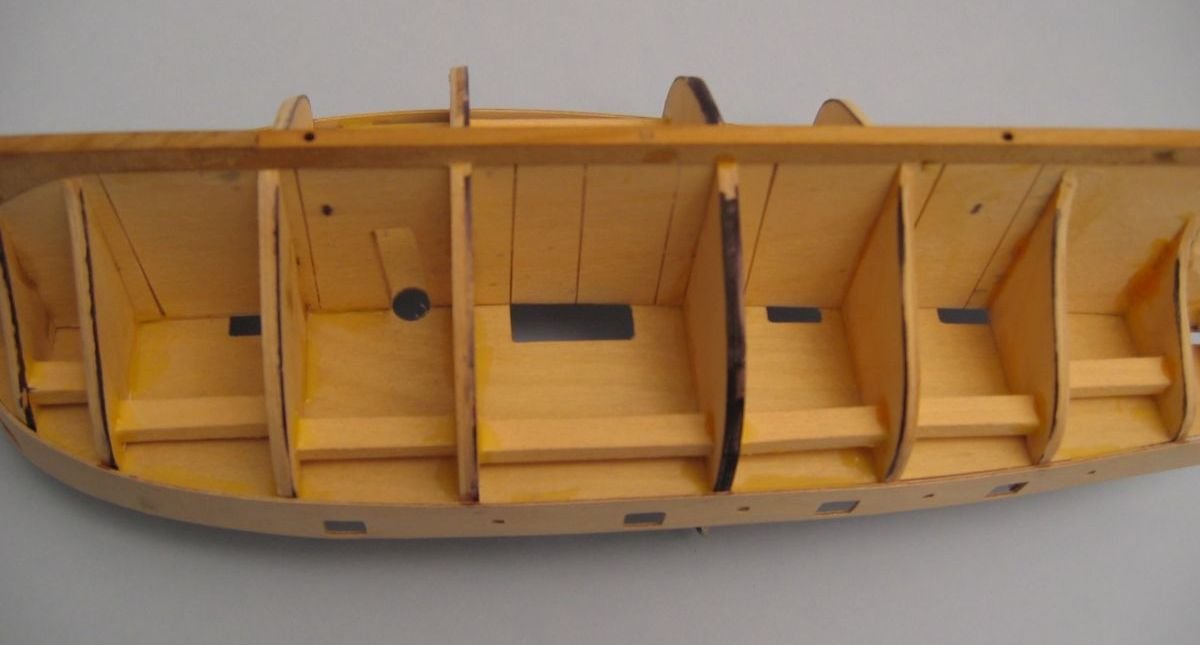
I did not completely fill in the space between the bulkheads, I planked over what you see in the picture. I did not varnish any of the wood. I believe it is the lighting that makes it darker. Here is another picture where I used more lighting:
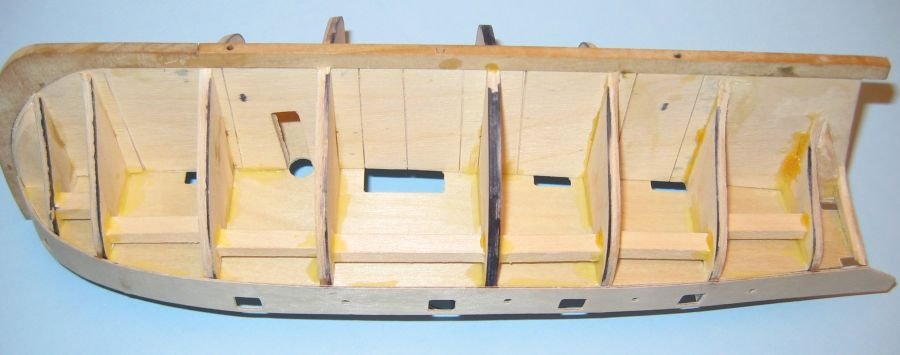
Notice that I used a black felt tip marker on the outer edges of the bulkheads. This let me know that when I faired the bulkheads, as long as I had some black remaining on the edge of the bulkhead, I knew that I had not over faired them.
-
7 hours ago, Riotvan88 said:
Thanks, How did you solve it on your kit?
I made vertical cuts using a razor saw on the first layer of the plywood false keel to make it more flexible. I then put it in a jig to hold the false keel straight. After I installed the bulkheads, I placed wooden fillers between the bulkheads to make the assembly rigid. Once the false deck and the gunport patterns were installed, I had no problems with warpage. I have attached a picture showing what I did to the false keel.
-
-
-
1 hour ago, Diver said:
The newbie question is what is the best direction to sand, keel to sheer, or stern to stem or a combination of both?
Like Bob, I also "start in the middle and fair the frames towards the bow and then the middle to the stern or visa versa but start in the middle". I use nail files that I purchased from a beauty supply store. They are somewhat flexible and contour to the frames. I have also made my own using 1/8" plywood, rubber cement and various grits of sandpaper. I start with the 180 grit and finish up with 240 grit for the frames. I use nail files for most of my sanding needs. Just go slow and use gentle pressure as you do not want to flex the frames. Let the grit in the files do the work.
- BobG and EricWilliamMarshall
-
2
-
-
-
5 hours ago, Diver said:
Quick question, what glue did you use to glue the transom support blocks to the build board?
I used Titebond. I placed my support blocks aft of the transom to lock it in place. Just remember that you have to remove the support blocks aft of the transom before you remove the keel and frame assembly after faring from the build board.
-
-
Looks nice. You are making a lot of progress.
-
Thanks Peta for the how-to guide on making rope coils. I will refer to this when I get to making rope coils on my build. Your Avos is looking great.
- hollowneck and Peta_V
-
2
-
Nice job on the head. It reminds me of the original one that I saw at Mystic Seaport when they were refurbishing the Morgan.
-
-
Looks real good Michael. I cannot wait to see it with the WOP on it. It will really bring out the beauty of the Cherry wood.
Glad to see you have some time to work on this project as I know you must have some huge challenges at work. You guys are my hero's during this crisis and I appreciate all that you are doing for the public. Just be careful and stay well.
-
-
13 hours ago, Diver said:
Maybe I am overthinking this.
Diver, you are off to a good start. I agree with Chuck in that you need more frames installed on both ends of the build board. I would complete all of the frames and install them onto your build board. The you can start tweeking the frames to get them to set properly in the keel slots. I used blue painter's tape to hold the frames to the build board as there is some slight side to side adjustment built into the frame slot. The design of this kit almost insures that everything will fit just fine.
- BobG and EricWilliamMarshall
-
2
-
Sounds like the frame is not setting in the slots properly. 3/16ths of an inch is quite a difference. Is there a gap between frame H and the build board when it is inserted with the letter forward? Posting a picture would help to figure out why this is happening.
-
-
-
I am looking forward to seeing this model in person. Truly a work of art.
- Jack12477, FriedClams, druxey and 4 others
-
7
Picket Boat by Turangi - FINISHED - Model Shipways - Scale 1:24 - Small
in - Kit build logs for subjects built from 1851 - 1900
Posted
You are doing a fine job building this Picket boat. I am enjoying following your build log.