hornet
-
Posts
697 -
Joined
-
Last visited
Content Type
Profiles
Forums
Gallery
Events
Everything posted by hornet
-

Precision router base for Dremel 4000 etc.
hornet replied to vossiewulf's topic in Modeling tools and Workshop Equipment
Dupree I have found one advertised on eBay if that is any help to you. Cheers Steve http://www.ebay.com.au/itm/Precision-Router-Base-For-Dremel-Tool-Freehand-Routing-Inlaying-Luthier-Tool-/111179440399 -
Pink cannon, cool
-
Precision router base for Dremel 4000 etc.
hornet replied to vossiewulf's topic in Modeling tools and Workshop Equipment
Hi PeteB I found this one on the Bunnings website. Not as good as the one above but once you add shipping to the $55 US price tag of the Stewart MacDonald version I think it would be about 1/3 the price. https://www.bunnings.com.au/dremel-plunge-router-attachment_p6373700 I found a YouTube clip as well https://m.youtube.com/watch?v=oqu-Ni12oic Cheers Steve -
Precision router base for Dremel 4000 etc.
hornet replied to vossiewulf's topic in Modeling tools and Workshop Equipment
I built my own router table for my proxxon mini router, but that looks like a great addition. I will investigate Thanks Steve -
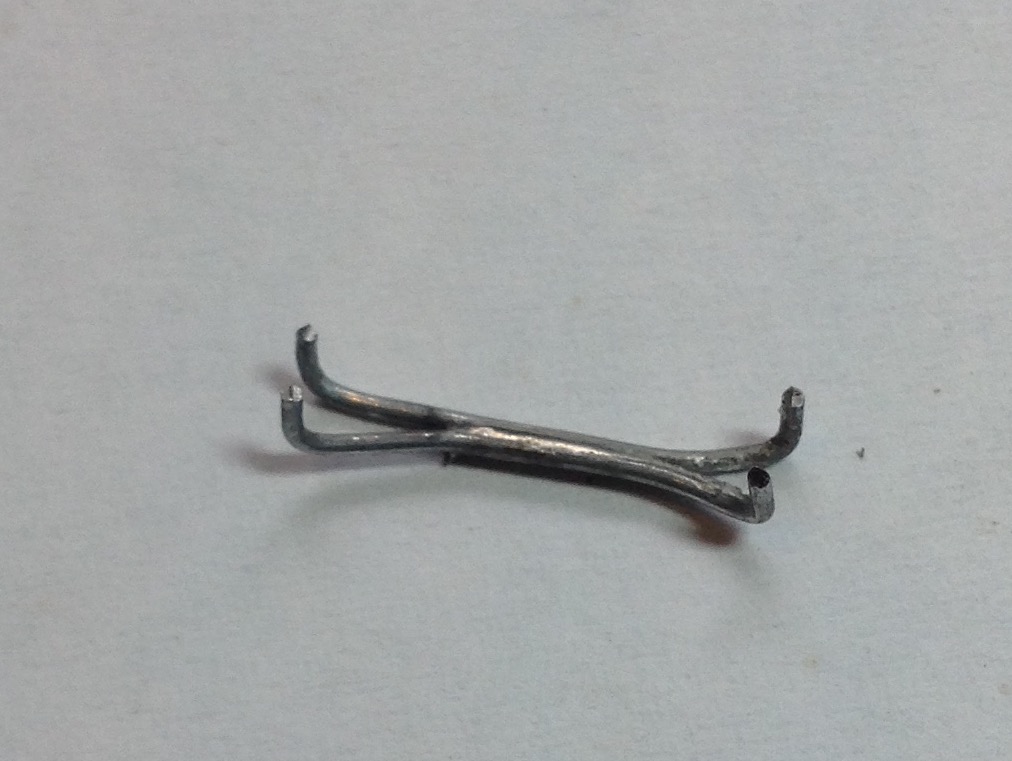
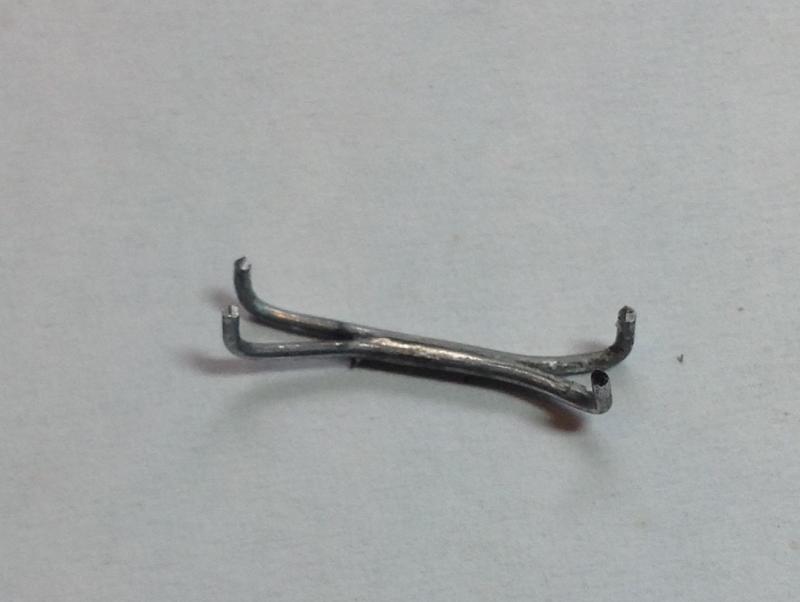
I usually knock up a few of these deadeye holders or resize ones I have used on past builds. They are made from tie wire which is cut to the appropriate length. The ends are then bent and silver soldered together so as to hold two of the holes in the deadeye on either end - you could probably twist the wire instead of soldering it. Mount the lower deadeyes on the channels/strops then fit the wire to them ensuring the length of each is the same. You can then proceed to adjust your shrouds/top deadeyes to the appropriate length. Cheers Steve
-
Making Rope
hornet replied to ca.shipwright's topic in Rope Making/Ropewalks's Discussions about Rope Making
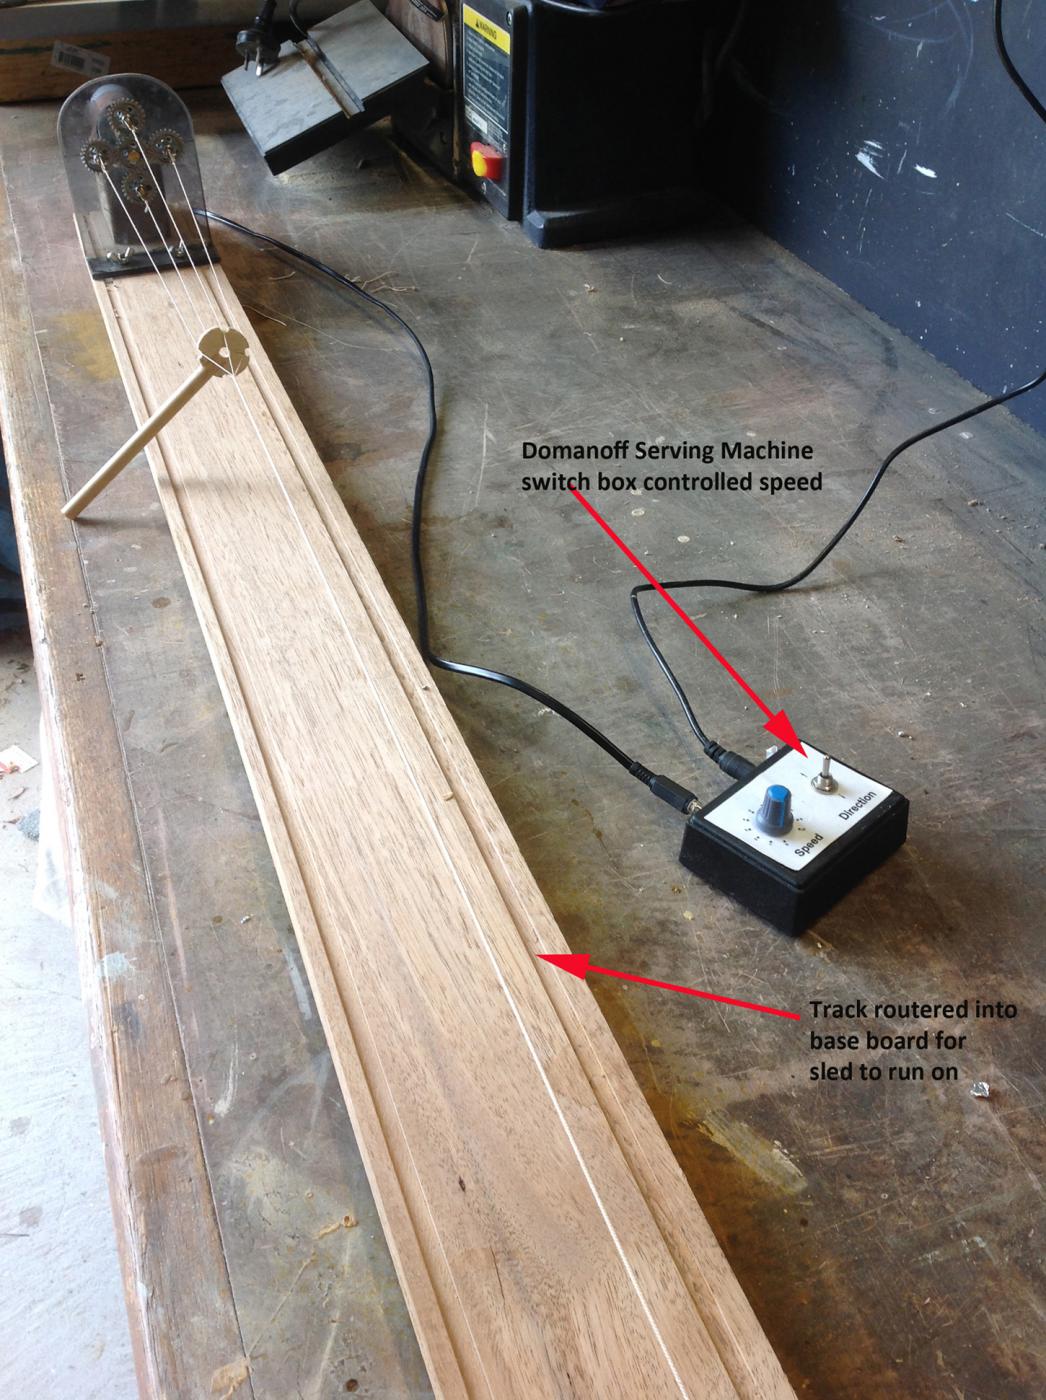
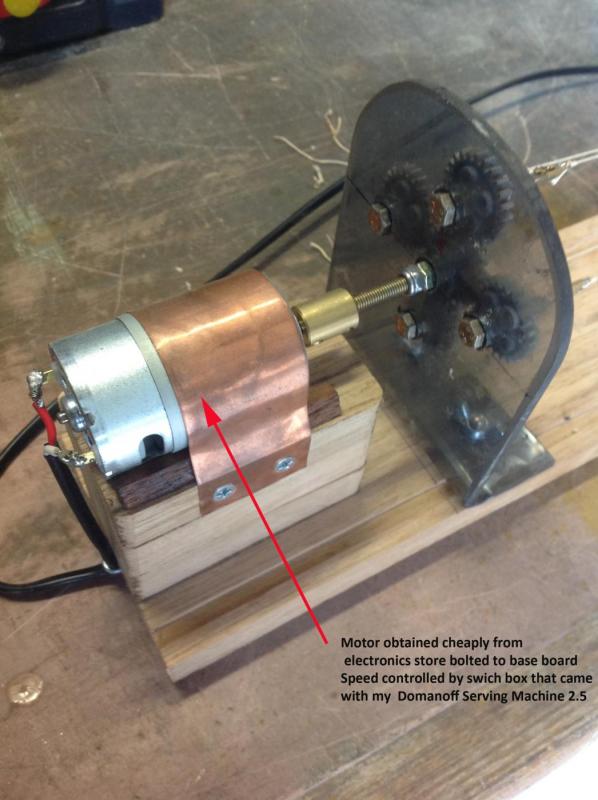
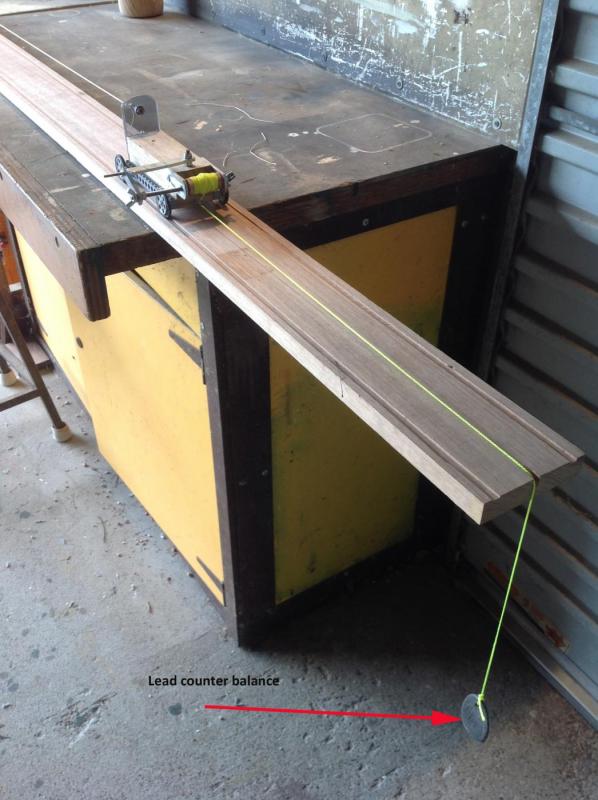
When I first constructed my rope walker (see link below) I intended it to be hand powered. This proved to be impractical so I ended up using the dial/variable speed controller from my Domanoff serving machine coupled with an inexpensive motor from an electronics store. I had intended to use a sewing machine motor and control pedal but I found that once the correct speed is selected there is little need for adjustment - just switch it off when complete - therefore a foot pedal was unnecessary. I know that you can get these type of dial/variable type speed controllers from any electronic store. Maybe this would be a simpler method you could consider. http://modelshipworld.com/index.php/topic/14464-inexpensive-powered-rope-walker/ Happy New Year to All Steve -
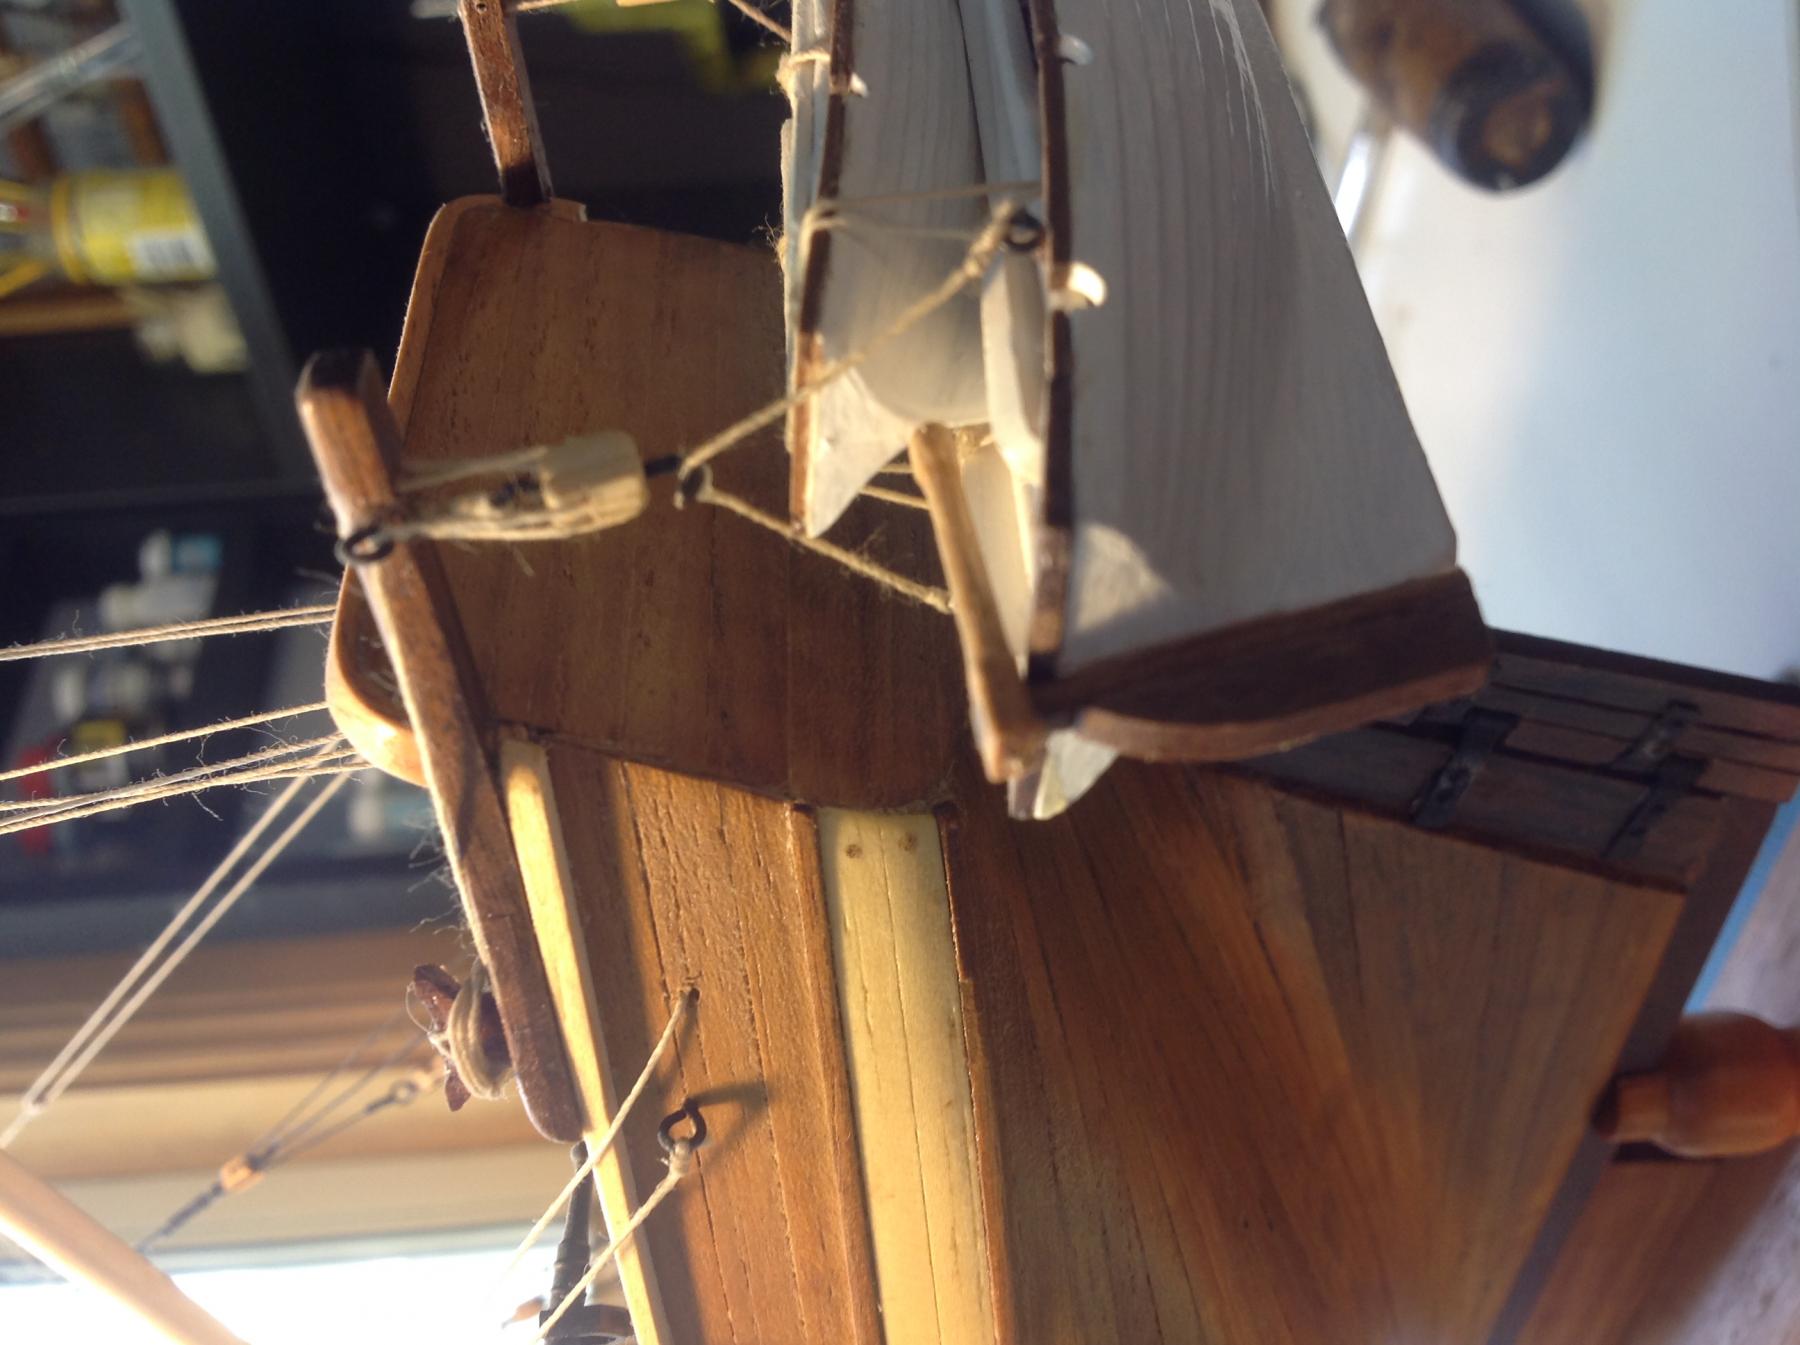
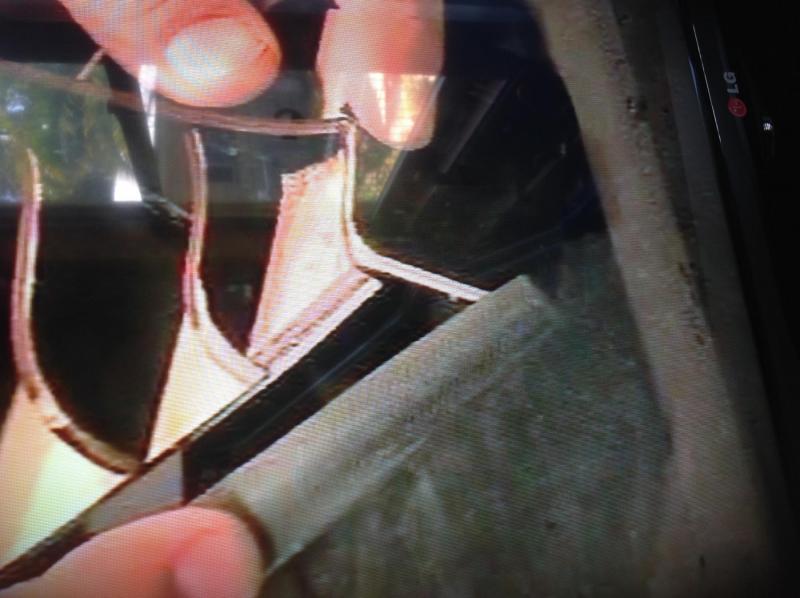
Hi Rick. You say that you 'shaved' your deck area down suit the transom. That is what I am suggesting too That is how I would describe what is done on the video. The ply deck and the ply support underneath is faired (shaved) to meet smoothly with the transom. The edge of the transom is also faired so as to allow for a smooth run of planks. I have taken a photo of the transom of my Mermaid. See below. Cheers Steve


-
Hi Cabbie. It's been a while since I finished my Mermaid so I went back and had a look at the video on the ship's construction that I bought from Modeller's Shipyard to remind me what I did with this problem. In the video the deck is faired back to the transom. I took a photo of my tv screen on pause at this point in the video. See it below. Hope this helps. Steve
-
Hi Tom Miniature Steam - also based in Melbourne selling online - also stocks Admiralty Paints. These paints are acrylic, have excellent coverage, are historically accurate and work very well in an airbrush. Link below. http://www.miniaturesteammodels.com/admiralty-paints Cheers Steve
-
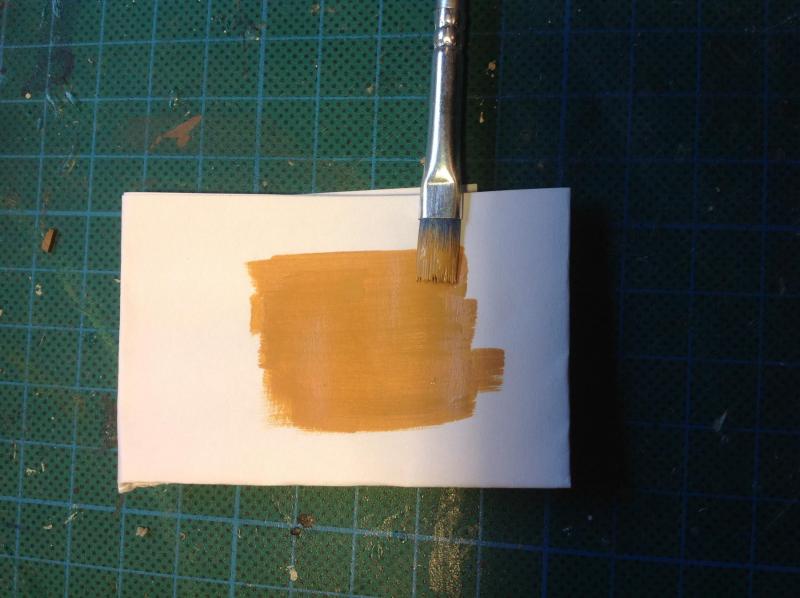
The paint that is sold by Caldercraft/Jokita is Admiralty Paint. It is acrylic and has very good coverage. The colours are supposedly accurate for 18th century ships. The yellow ochre is NOT bright yellow. I would best describe it as mustard. I have painted some on a slip of paper below. Total accuracy online is difficult to achieve because it very much depends on the screen you are viewing, but you get the idea. I have used it on my Caldercraft 'Supply' if you want to check it out, go to my gallery link below. Cheers Steve
-
Inexpensive powered rope walker
hornet replied to hornet's topic in Modeling tools and Workshop Equipment
Thanks Mark. Post some pics when you've build yours. Cheers Steve -
Inexpensive powered rope walker
hornet replied to hornet's topic in Modeling tools and Workshop Equipment
Nah Brian, I'll leave the commercial side of things to others who are much more qualified than I. I've got lots of great ideas from this site so I'm just sharing an idea that may spark others to create something similar - or better - for their own use. Cheers Steve. -
Inexpensive powered rope walker
hornet replied to hornet's topic in Modeling tools and Workshop Equipment
Ha Ha Brian. Building one was enough. Cheers Steve -
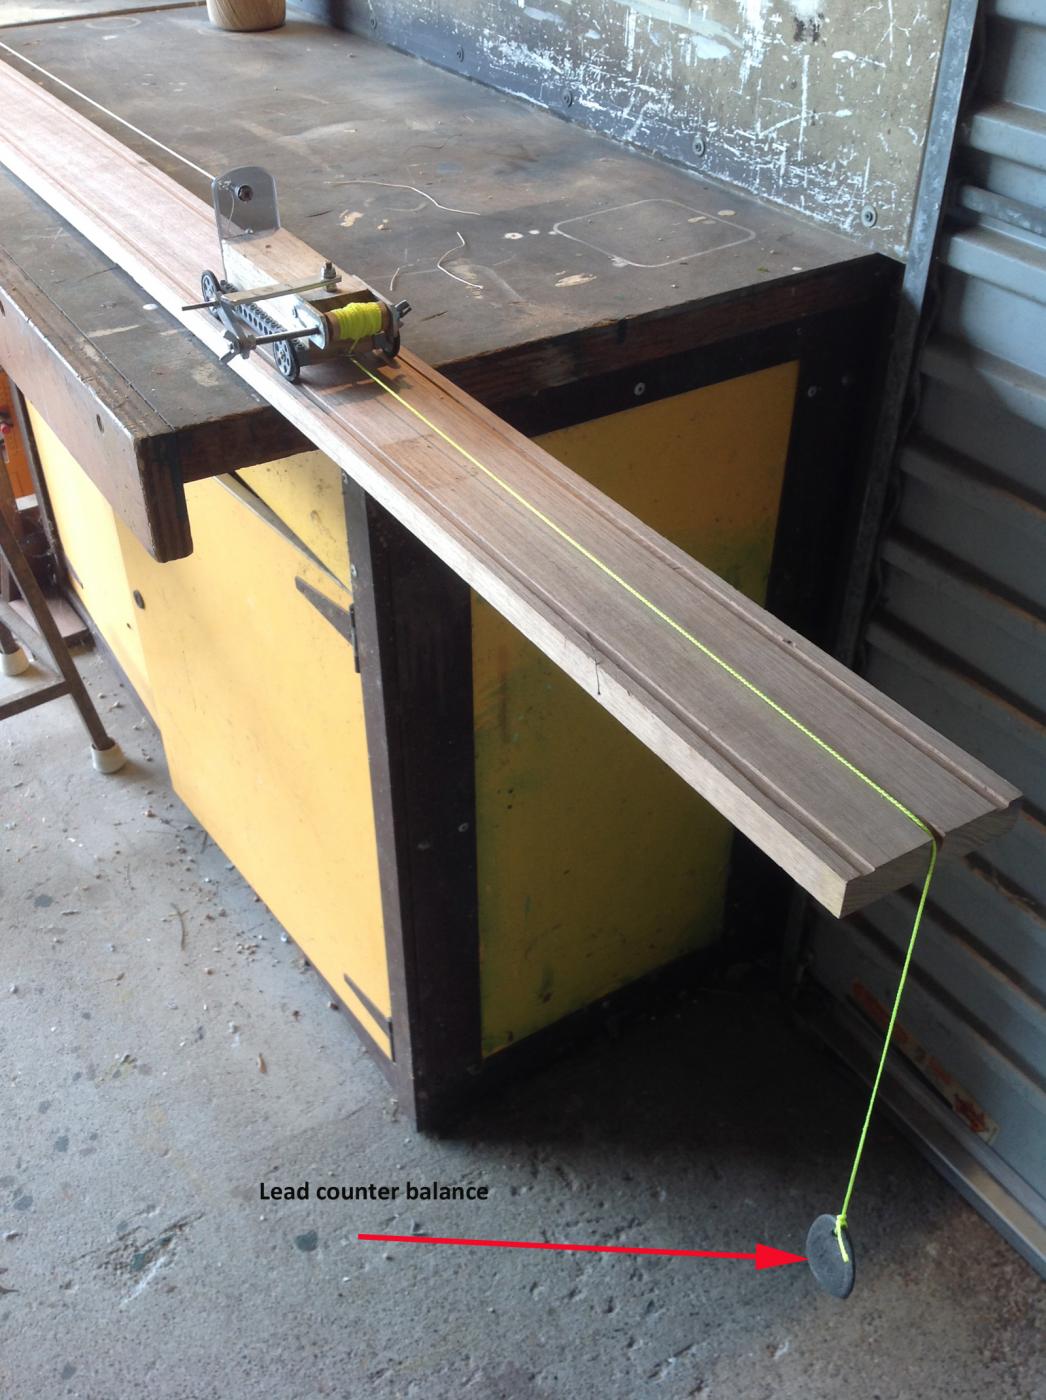
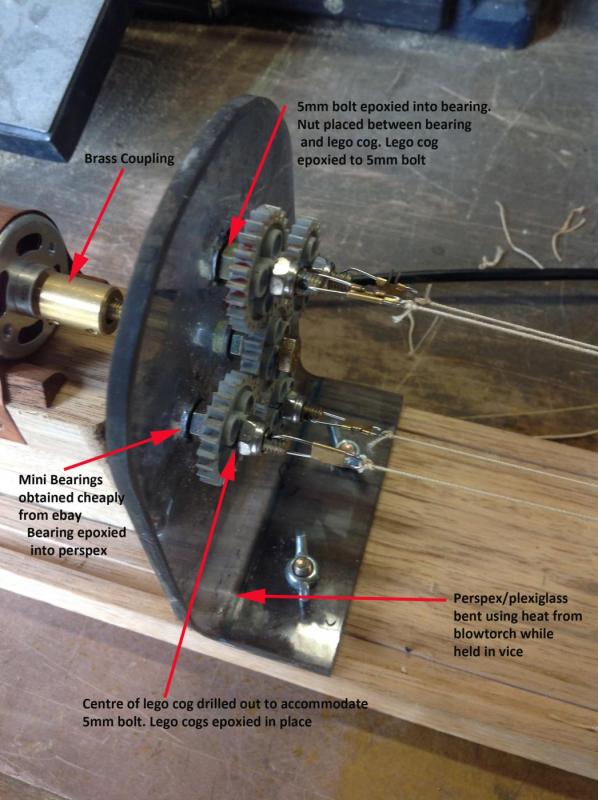
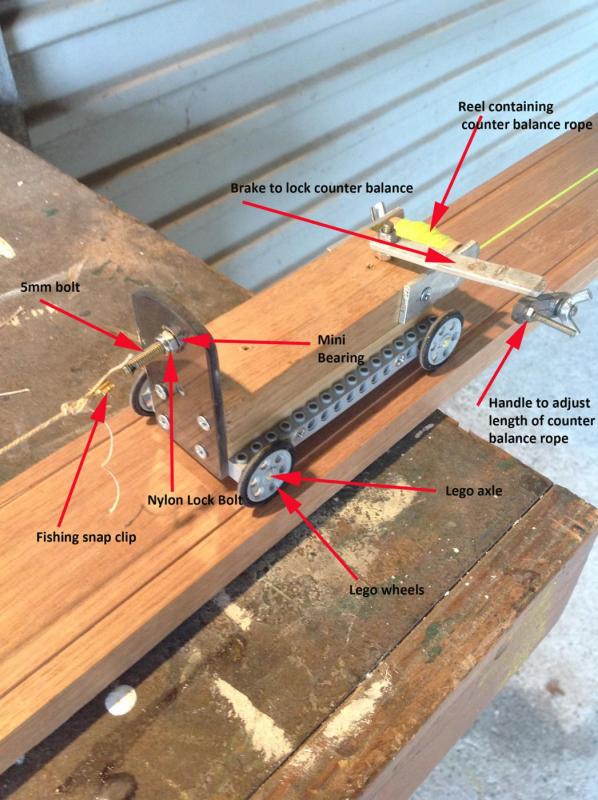
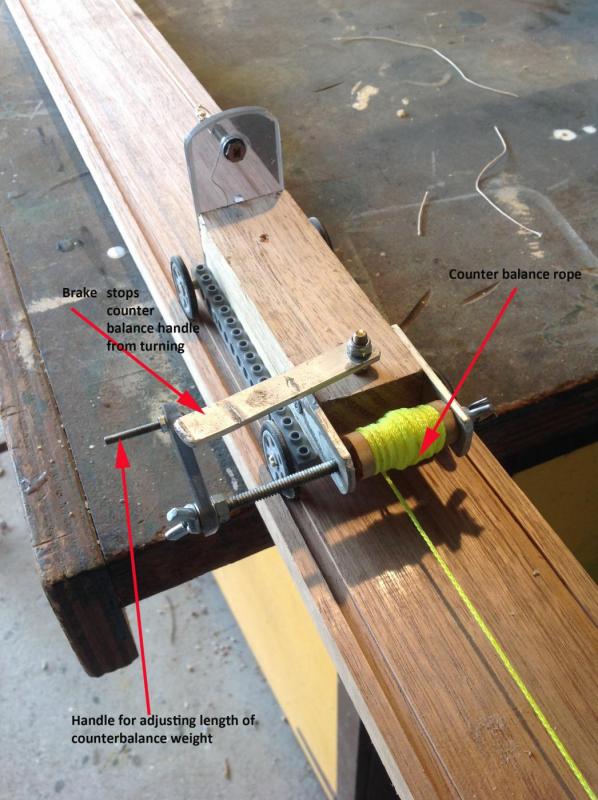
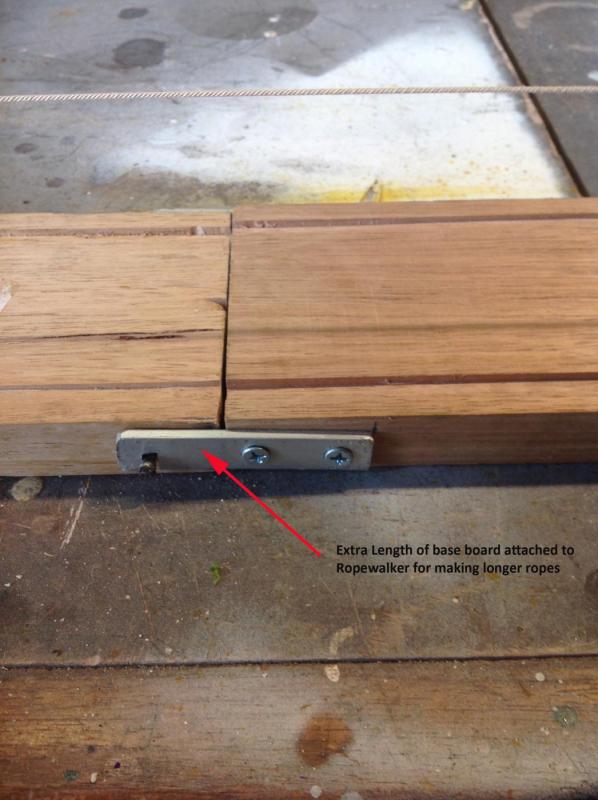
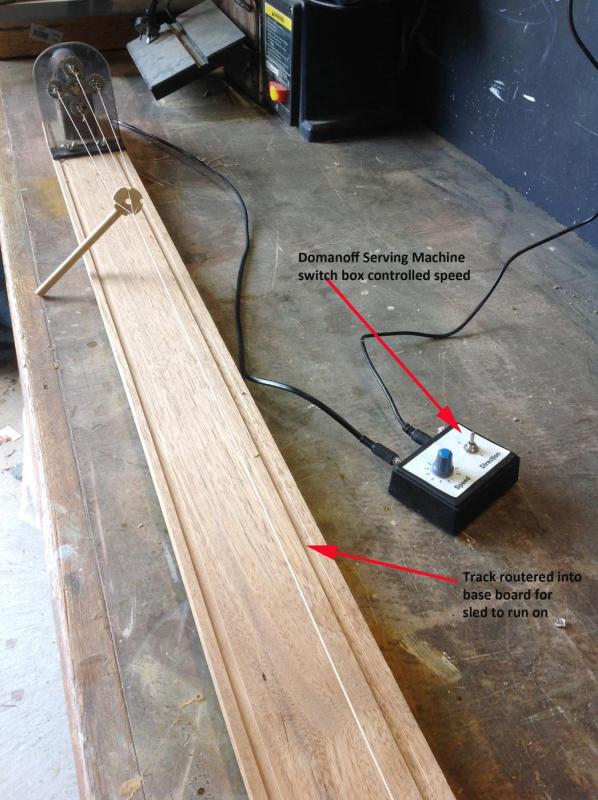
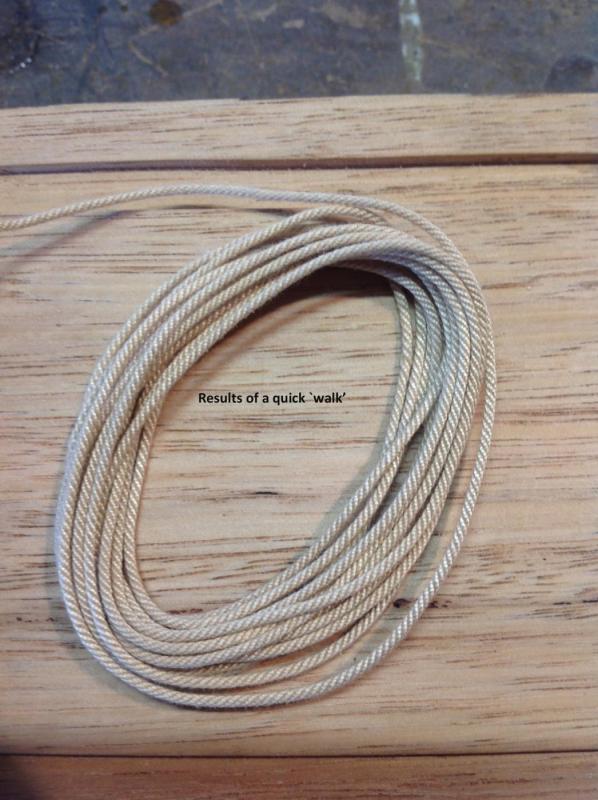
While completing my previous build, I was very unhappy with the anchor ropes supplied because they were completely out of scale. After some research I decided to build my own rope walker. It only cost me about $50 AU to make. The main cost was the motor and coupling. Perspex I had left over from another job and the variable speed/on off attachment from my Domanoff Serving Machine proved most useful. Mini bearings were very cheaply sourced from eBay. I have labelled each picture in an attempt to show how it was constructed. I intend to make as many ropes as possible for my current build - Caldercraft's Bounty when the time comes. Hope somebody gets some ideas from this post. Cheers Steve

- 10 replies
-
- 34
-

-
In Praise Of Lacquer
hornet replied to Julie Mo's topic in Painting, finishing and weathering products and techniques
Julie Mo Yep you are probably correct for modern boats such as those you have pictured. However, for period models (which take up a large portion of this site) gloss is not appropriate. I think that is what Jaager was trying to say anyway. I usually apply matte or satin polyurethane 50:50 with low odour turps using an airbrush. I apply 3 - 4 coats to the hull sanding very lightly between coats. Cheers Steve. -
In Praise Of Lacquer
hornet replied to Julie Mo's topic in Painting, finishing and weathering products and techniques
Agree with Jaager, matte or satin finish. Never gloss -
Transform a brass chain into iron chain
hornet replied to MESSIS's topic in Metal Work, Soldering and Metal Fittings
There are some good suggestions on using Birchwood casey on this thread. I love the stuff Cheers Steve. http://modelshipworld.com/index.php/topic/9781-blackening-brass-problem/?hl=%2Bbirchwood+%2Bcasey#entry289798 -
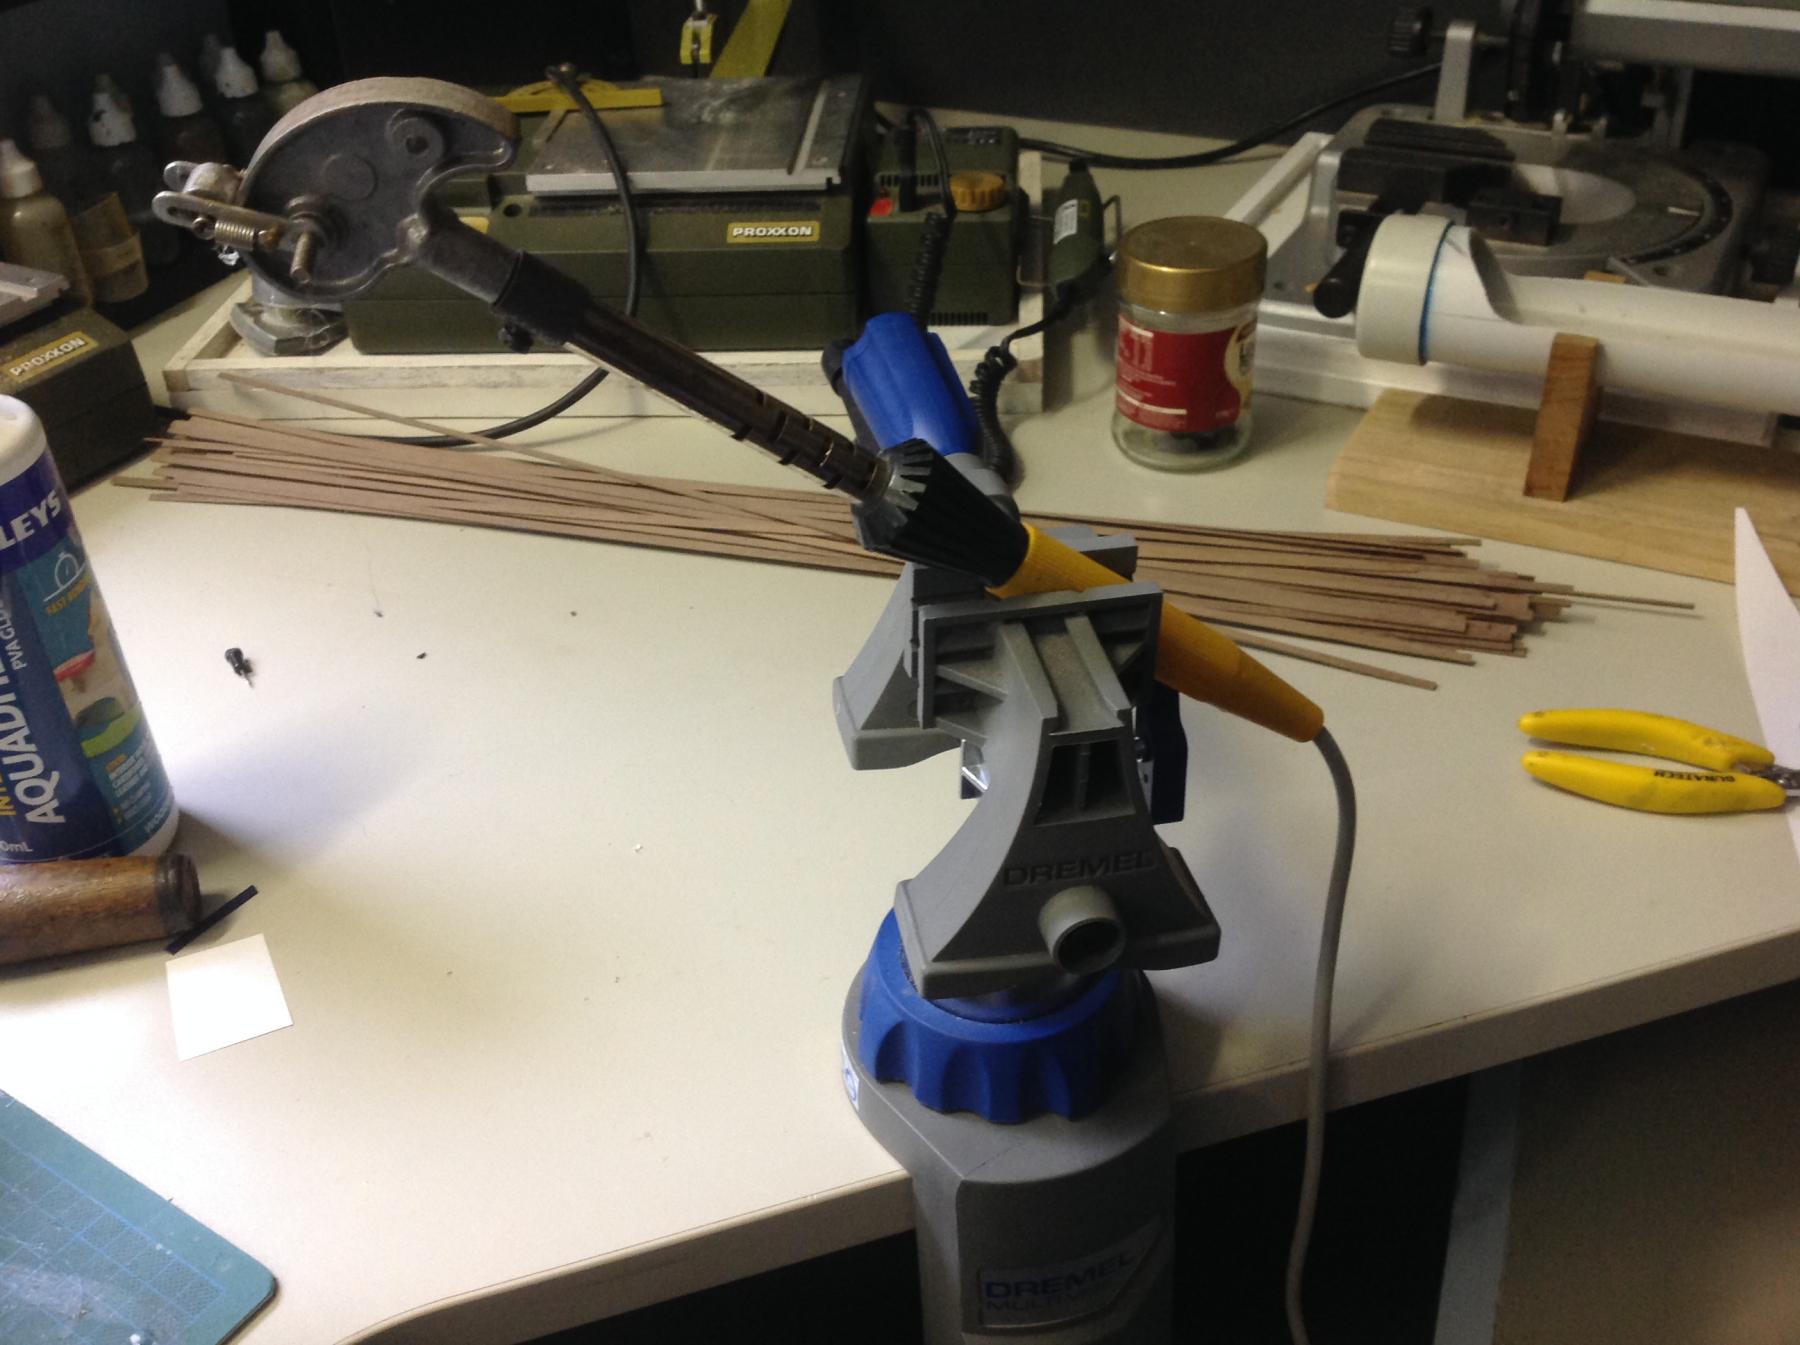
Steam Bending
hornet replied to Julie Mo's topic in Building, Framing, Planking and plating a ships hull and deck
I use a plank bending tool. It heats up like a soldering iron. I have had it for over 30 years. It came from aeropiccola - not in business any more.
-
Red Paint or Red Ochre
hornet replied to davyboy's topic in Painting, finishing and weathering products and techniques
We've got a bit of red ochre down under as well. It is commonly known as Central Australia I took a pic of a sample on a recent trip. The rock in the background is quite well known.
-
Steam Bending
hornet replied to Julie Mo's topic in Building, Framing, Planking and plating a ships hull and deck
I built something similar to what Bluenose2 describes. It works well. I ended up putting a tap in one end for easy draining because the Admiral got somewhat sick of me spilling water all over the floor. Cheers Steve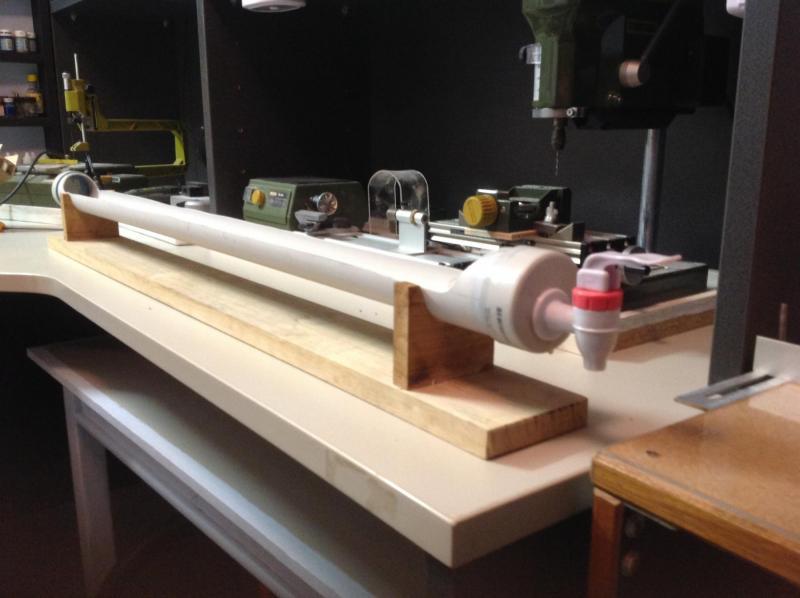
-
Lennarth Peterrson's 'Rigging Period Ship Models' is usually on my bench when rigging commences. Few words but excellent diagrams.
-
soldering iron or torch? advice please
hornet replied to Mark Pearse's topic in Metal Work, Soldering and Metal Fittings
Mark I have done similar jobs using silver solder. You can purchase what you need - including a micro torch - from Jaycar. Cheers Steve. -
Get yourself a cheap fly tying vice - used to make flies for fishing. There are plenty of cheap ones available on eBay. I use mine extensively when rigging. Steve
-
I am currently building the Caldercraft version. I'm happy with the quality except for the walnut planks included or the second layer of planking. I've built the Caldercraft Supply and have the Caldercraft Endeavour on the shelf. This is an ongoing issue with Caldercraft. I wish they would look at improving the quality of this timber. The only consolation is that they provide plenty of planks. Plans are OK but I am using the the A.O.T.S - Bounty - as well. I will also probably scratch build many of the fittings. Steve
-
This clip should help you. It's the method I use too. https://m.youtube.com/watch?autoplay=1&v=WUrRb66VSSE Steve