


Ronald-V
-
Posts
1,930 -
Joined
-
Last visited
Content Type
Profiles
Forums
Gallery
Events
Posts posted by Ronald-V
-
-
Well done! Congratulations on finishing such a monumental task. Looking good
")
-
Somehow your model looks way bigger with all the details then the 1:78 it is. Very well done!👌
- Knocklouder and BLACK VIKING
-
 2
2
-
-
I love the flow of these planks, looks like a really nice hull to plank👍
-
You will learn a lot with how the planks behave on this particular hull!
- Paul White and Nightdive
-
2
-
-
11 hours ago, Der Alte Rentner said:
I would be curious to know if the original Sphinx had mitered corners. I suspect they would have been problematic. Does anyone have photos of the original anywhere?
As far as the model is concerned, I think a mitered corner would be absolute perfection.
However, as I am constantly being reminded by others, no one is going to look that closely. And judging from what I've seen on other models at model ship world, the butt joint seems to be in the majority.
Done well, both work. Done poorly, reach for the paint can? 😆
I don't think you will be able to verify such small details...and it comes down to what you like/find beautiful. Maybe there was a general practice with shipbuilding and trim edges, who knows.

Coincidentally, I was discussing this with someone yesterday...that it won't even really be visible in the final result unless you really pay attention. But even then, it probably won't be...damn, look at that stupid butt joint over there😆.
No, I see it more as an interesting challenge to make a small part of the ship beautiful, or as best as I can within my capabilities. If you do that as often as possible (and as long as it's still fun), I think you'll end up with a very nice overall result. And whether that little thing stands out or not in the final result...it doesn't really matter. If you can enjoy making something in the moment, then I think it's already achieved its purpose.
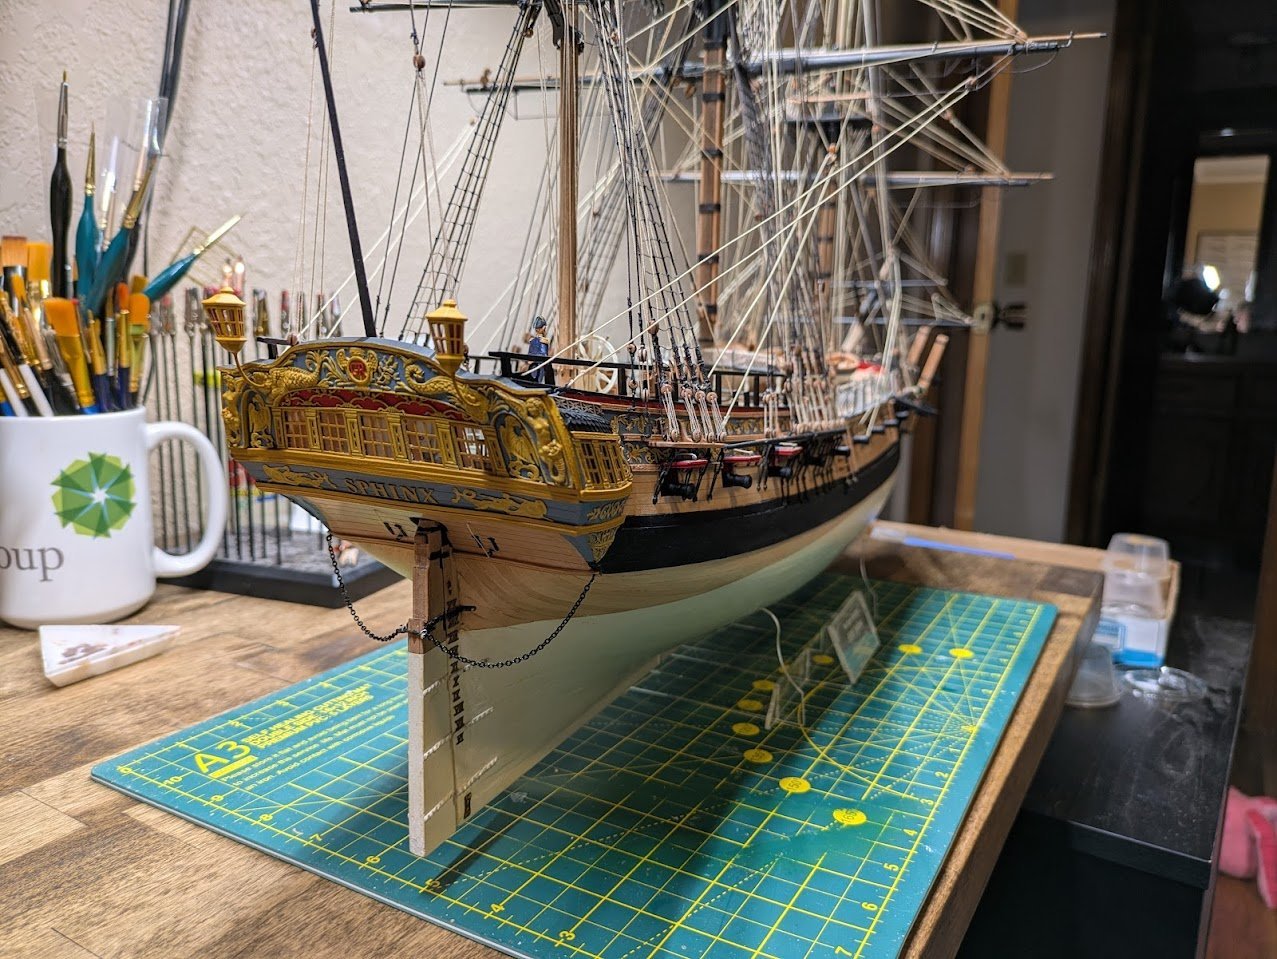
When I bought this ship, I thought...if this is going to be the only show-stopper I make...to the best of my ability, and work on it like I have endless time...let's see how far we get. So that's kind of my approach (also to justify the high cost of the kit to myself, because they are not cheap for me
).
By the way...now that I've made considerable progress with the build, my thoughts are starting to wander to what I'd like to build next, but that will happen naturally. I'm still a long way from that!
And again...thanks everyone for taking a look and liking...I really appreciate it!
- Frecap, Bryan Woods, vvvjames and 5 others
-
8
-
-
-
Welcome to MSW! I really like your topic title
Ship modeling is indeed a hobby you have to experience to get better at (with many things, of course), and it sounds like you've already learned a lot with your first model! You've already made it beautifully. I hope you enjoy reading and building here.
-
The quality of this new generation kits is so high! Great to see
-
1 hour ago, TJM said:
I also think what you have looks very good. I see the point of the end grain - a miter connection would have been ideal I guess, but personally, I would be happy with the joint you have. I like the wood look, as long as it does not have obvious laser char, but you always take care to remove this so all good!
Whatever you go for, it will look great 😄
Thanks for your thoughts! I'm experimenting at the moment with making the rails myself to get a nice joint on the corner. If I can pull that off...then I will decide further on color.
-
Welcome! And that's a nice model you have build
-
-
Interesting experiment! Curious how this goes
A tip...work as if you have infinite time, then everything will work out fine.
- AJohnson and JacquesCousteau
-
2
-
2 hours ago, Der Alte Rentner said:
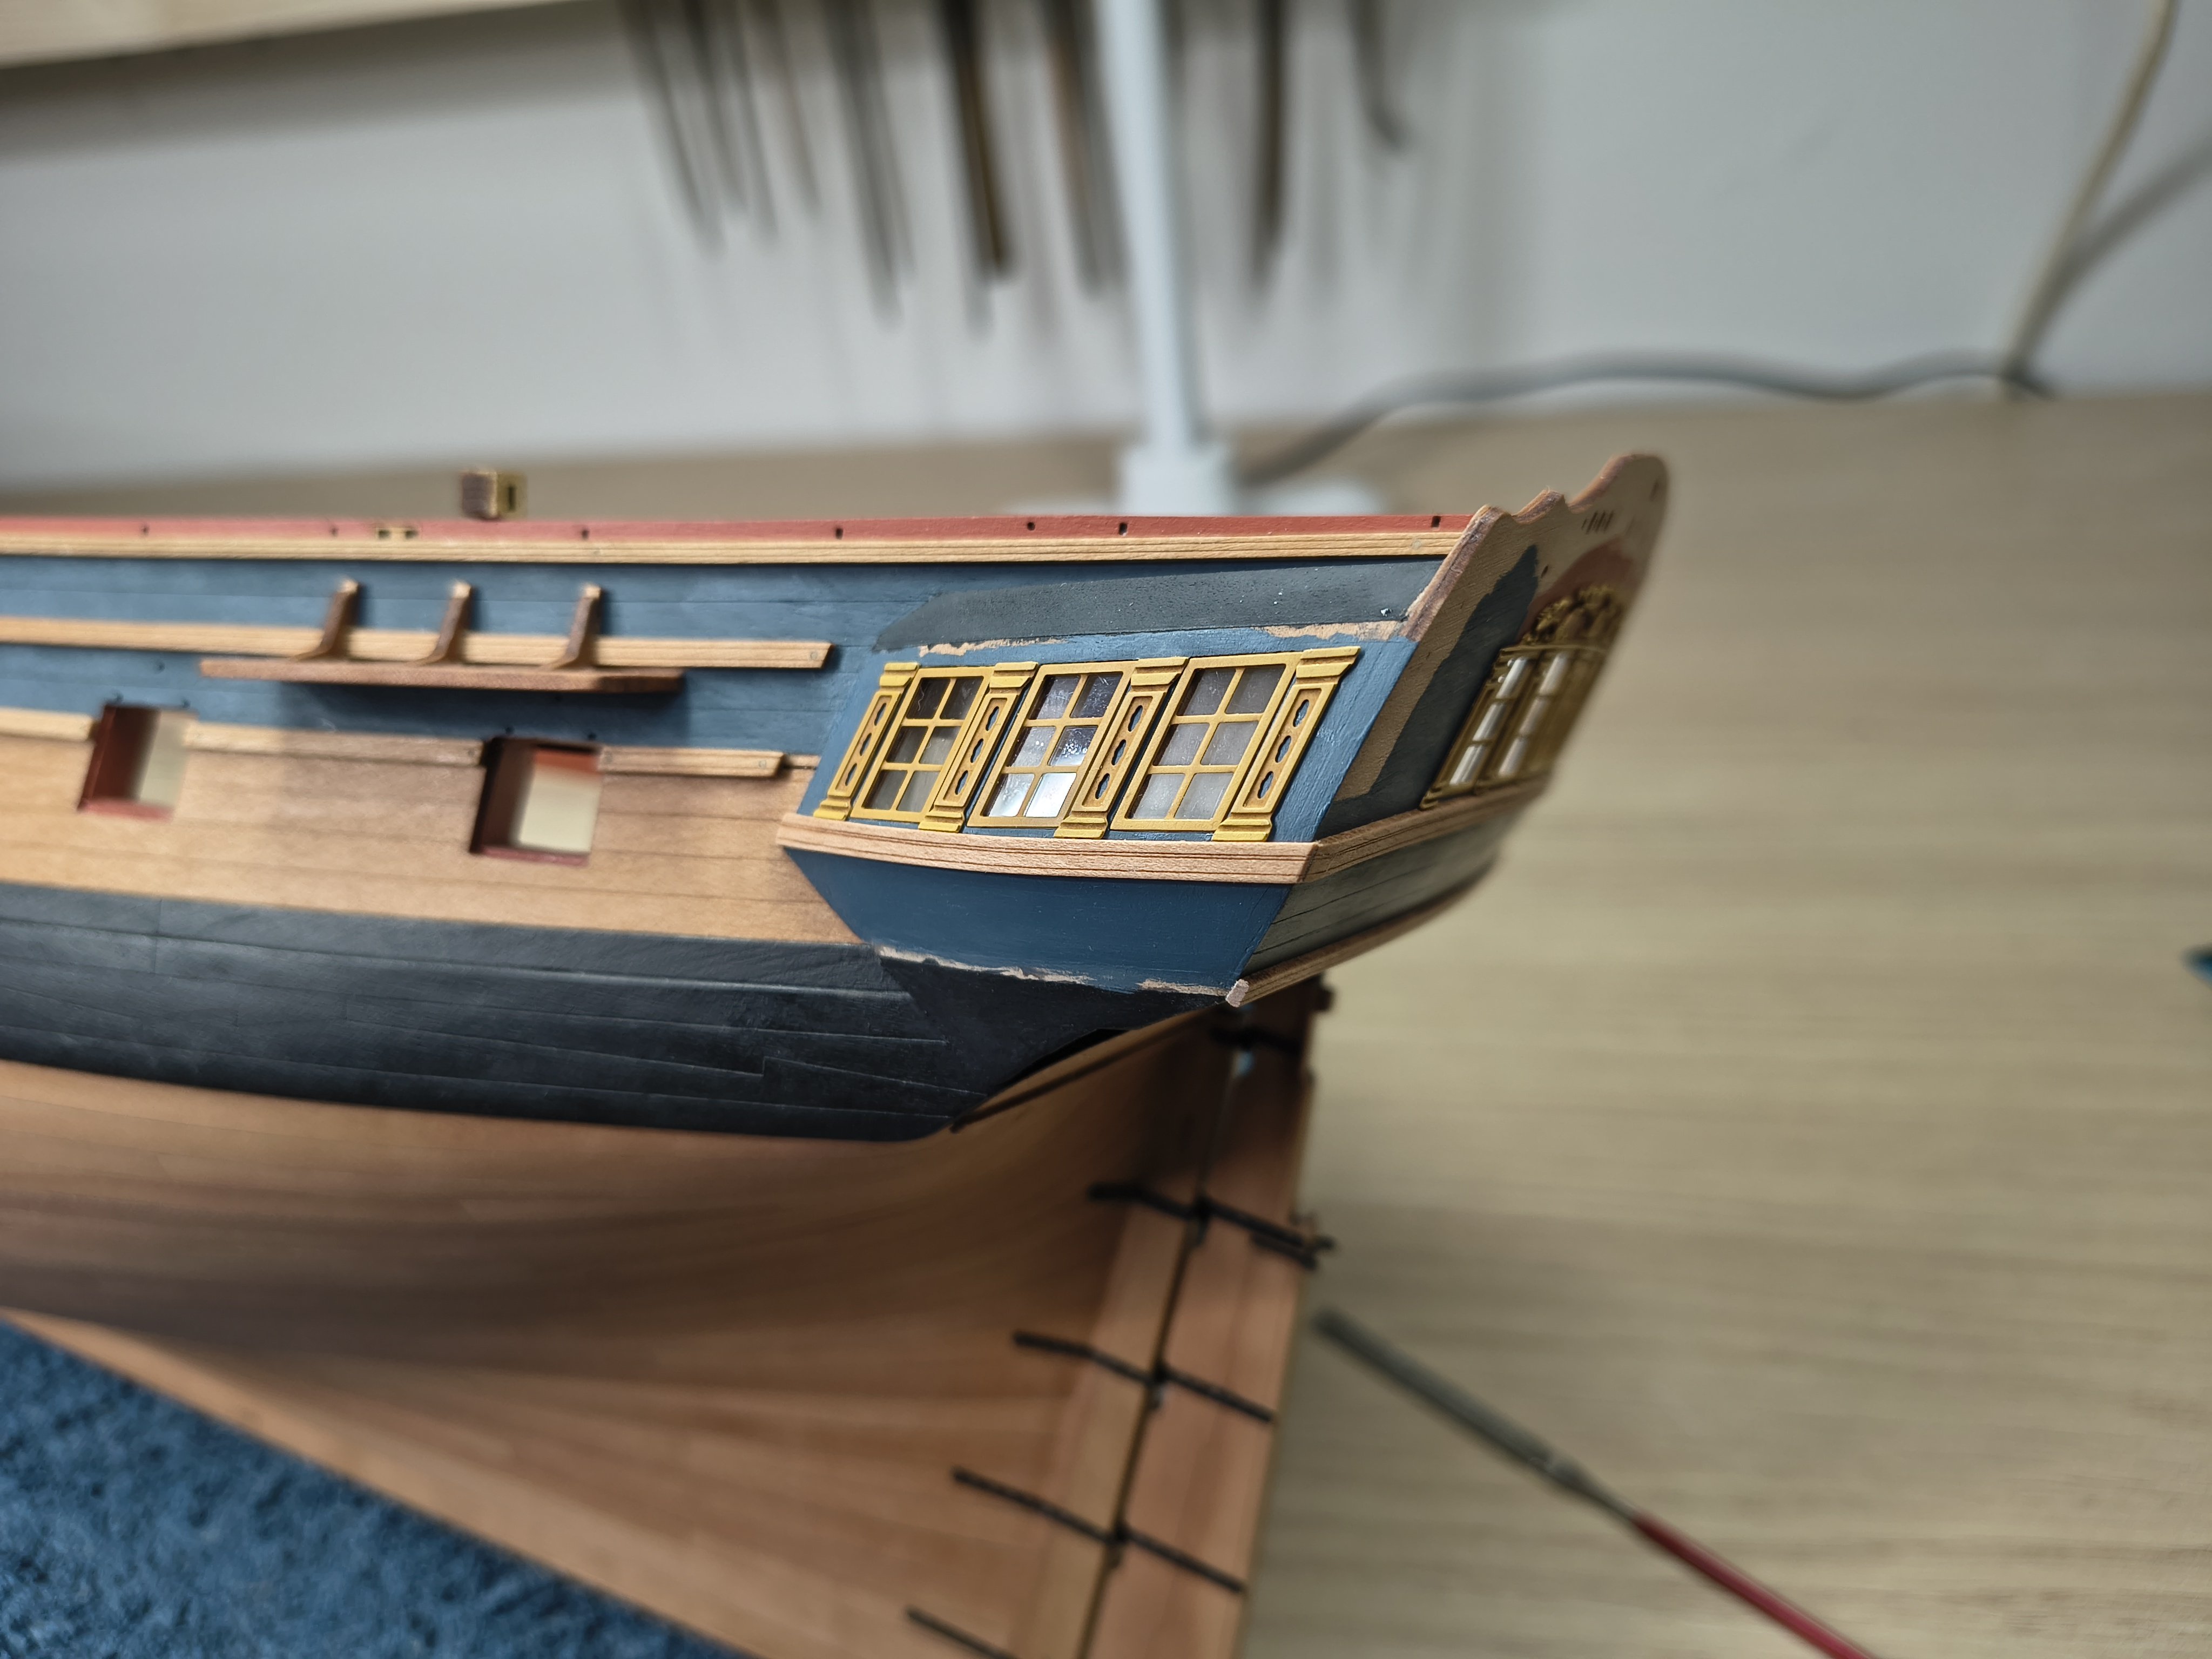
I think you're going to have to take a much closer photograph of the problem area for me to be able to see what it is that bothers you so.
In the photo above, even zoomed in as far as I can, I don't see the end grain issue you're concerned about.
But guessing that you don't have a miter joint there, I'm going to assume the kit didn't give you enough extra laser-cut trim to be able make a corner wedge to hide the end grain. As a bit of a perfectionist struggling with natural finish issues myself - as opposed to painting over flaws, I completely understand your desire to achieve the look you want.
I guess you'll be making new trim strips from scratch. Looking forward to seeing the results. Best of luck in that endeavor.
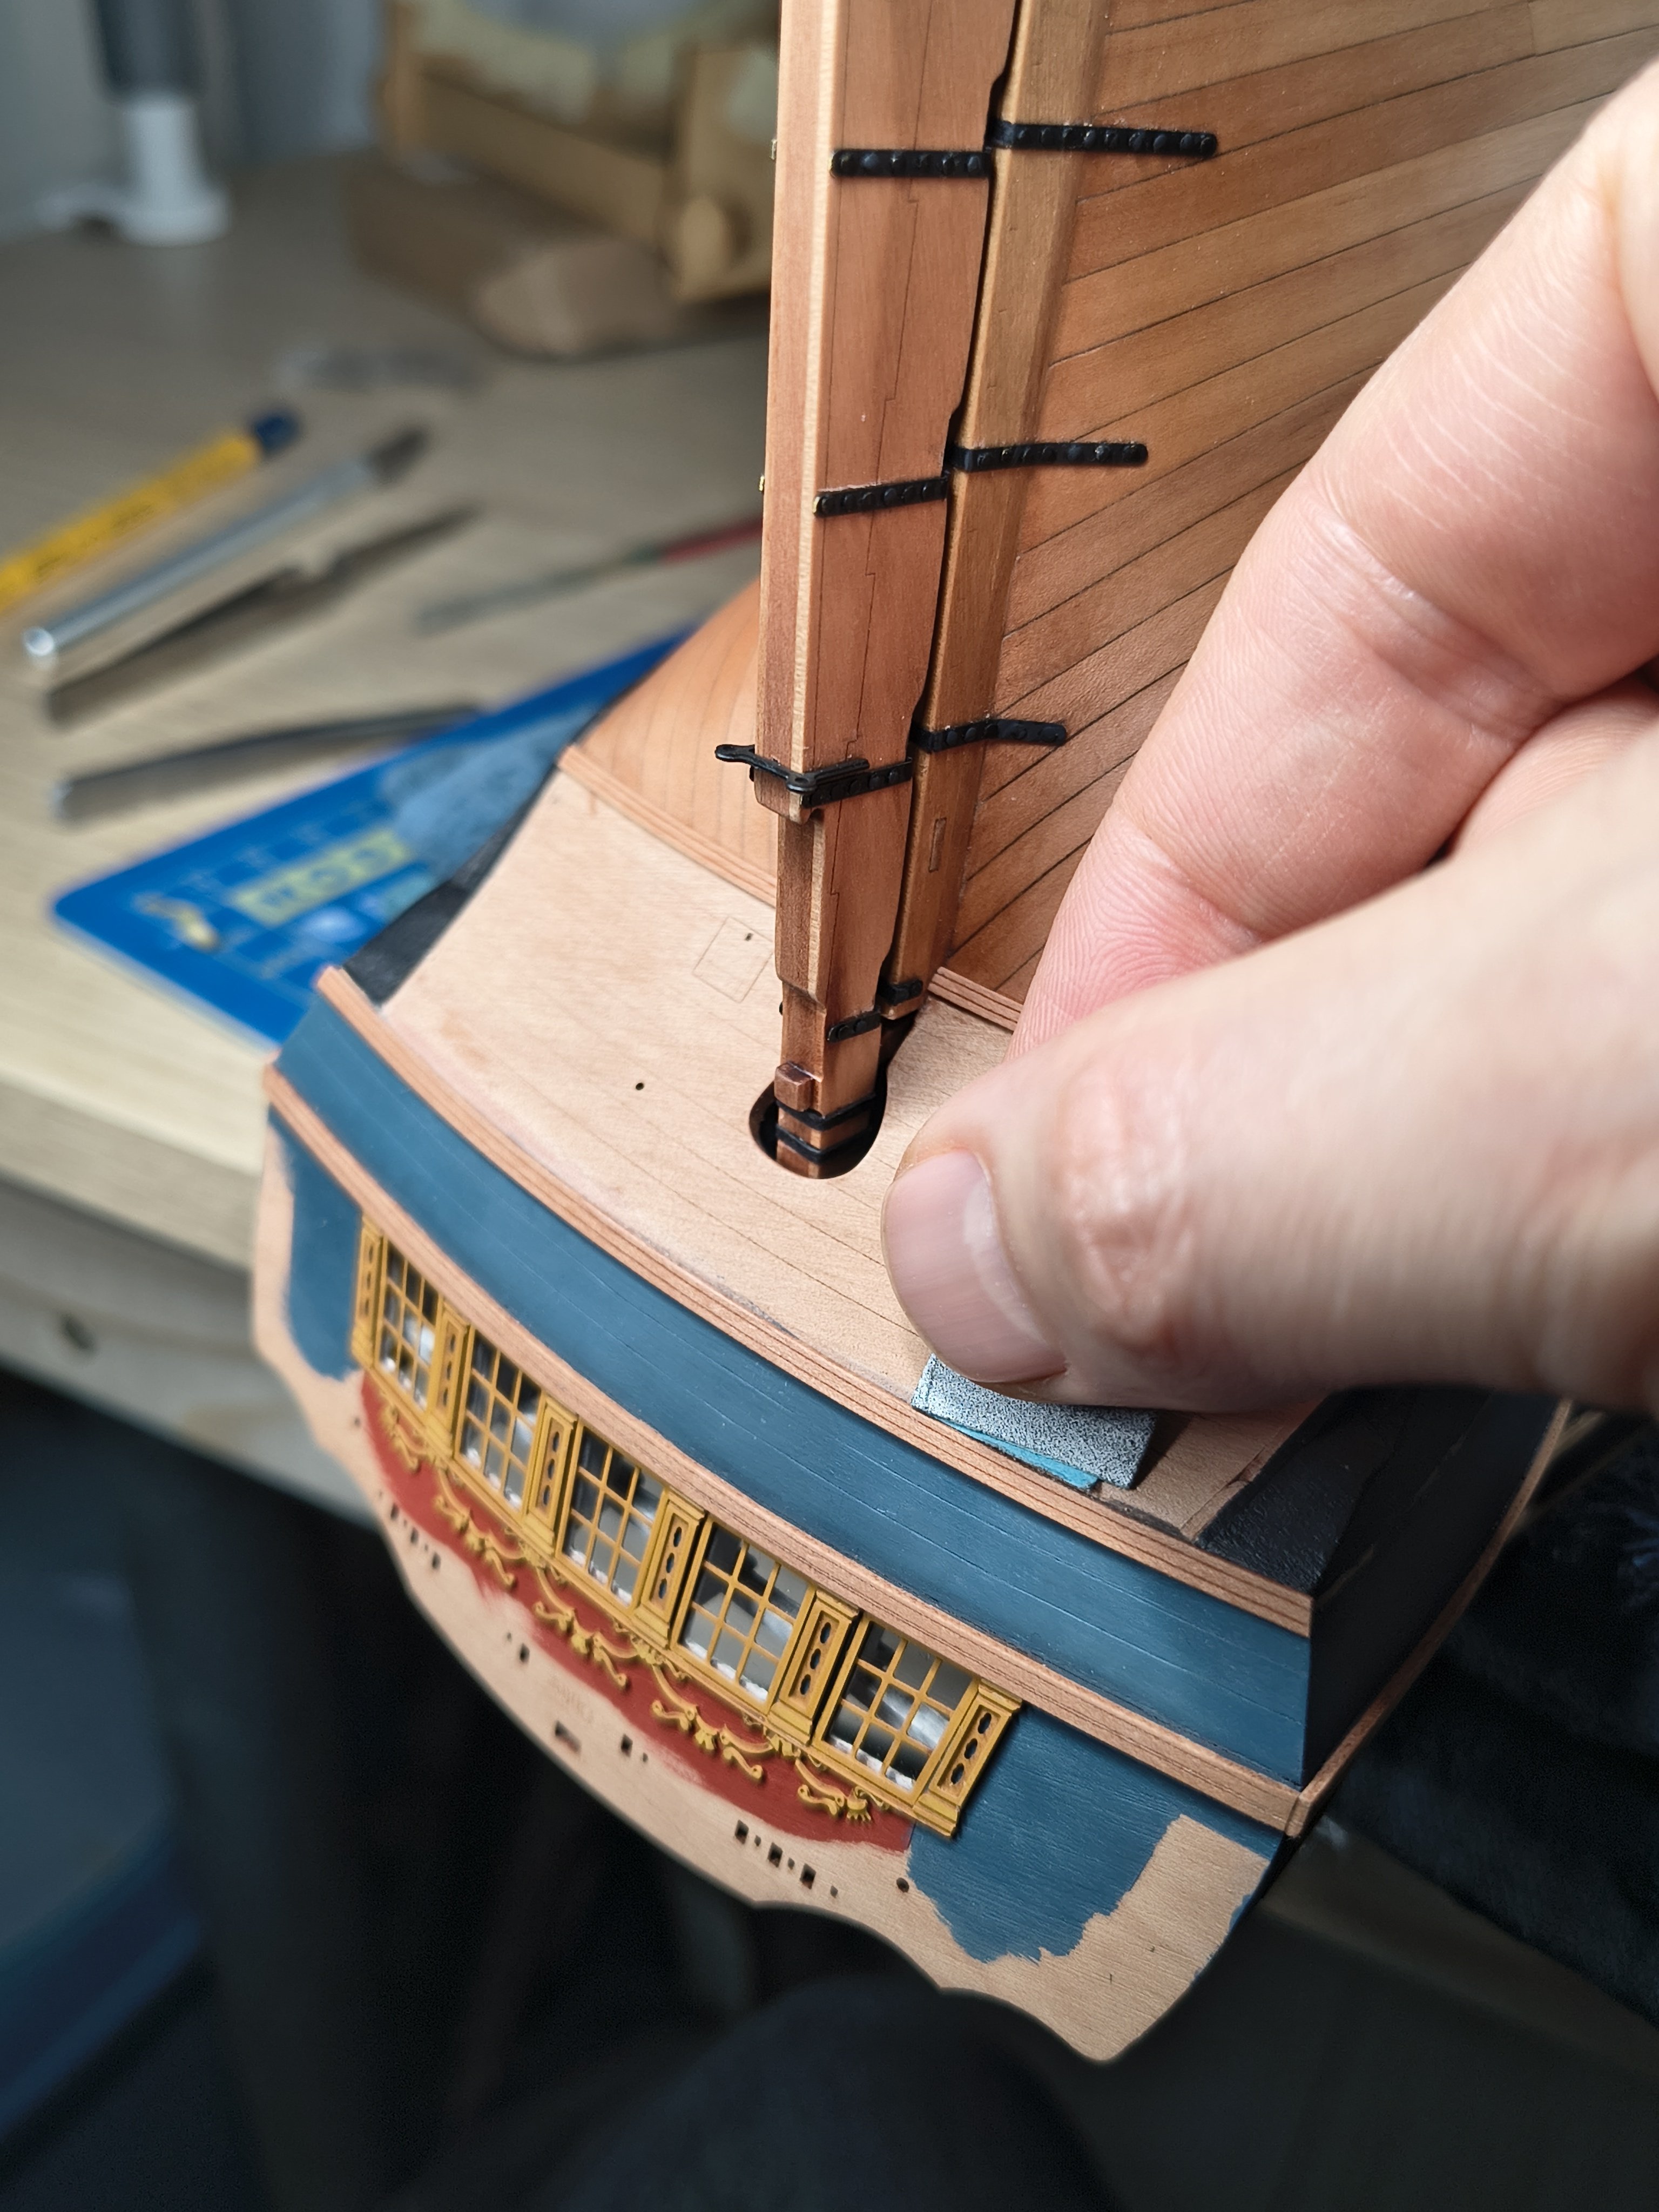
That first photo was more to show that the wooden trim wasn't perfectly parallel to the windows. This wasn't the fault of the laser-cut trim, haha, but my incorrect placement
In the photo below (ignore the hand), you can see the corners better, which I don't particularly like. The bright light makes the end grain hard to see, but I don't think the corners are very well executed anyway. 😜

-
1 hour ago, Frecap said:
I looked at the photos on the Vanguard Models website, and the trims are not painted. It looks good overall. But you have a very beautiful color for the columns, and I think that with careful painting to avoid damaging the relief, the overall look will be stunning! It's worth trying)
Yours sincerely, FriCap
I completely agree with you. The only thing I'm a little hesitant about is that the rest of the rails on the side of the ship is only varnished (and i'm not going to paint these). And how the richly decorated painted side gallery won't look too mismatched with those rails...but I'll only find out by trying.
-
10 minutes ago, Frecap said:
I'm sorry, Ronald, but I really misunderstood! Translation costs( And in fact, In my opinion, painted trims on the Brunnels model look more harmonious. Perhaps it depends on the perception of the model as a whole, but also on the fact that they are in the same color scheme with the columns between the windows. Although, on your model, the trims color is different from the Blue Ensign color. If, as you say, you have removed the trims so far, maybe try to paint one strip and attach it, see how it turns out?
Yours sincerely, FriCap
Thank you for your time reacting! 🙏
That was my plan indeed...the original trim can't be used in there natural color anymore, because of the modifications I would do. So I can paint them yellow anyway and if it's not to my liking...make different trims from scratch
-
6 minutes ago, Frecap said:
Ronald, Hi!
In my opinion, a three-dimensional decor looks much better than an applique. I think that it is unlikely that you will use flat images when building such a magnificent model. Yes, you've talked about it yourself)
Yours sincerely, FriCap
Thank Frecap, but I showed the examples of Blue Ensign and Brunnels for the colors of the wooden decoration strips under and above the windows, natural or yellow painted. If your answer was about that, then I misunderstood it
-
Okay...I'd already added quite a few extra elements, but...as you can see, it doesn't quite align great under the windows. The more I added, the more it started to look....meh, not so great to me, because everything just piles up, more things getting not aligned. I also wasn't entirely happy with how the wooden trim on the corners of the stern and side gallery connected. Because the trim on the stern side was laser-cut to size, you can see the end grain of the trim connecting from the side gallery. And because it's varnished, it really stands out. I saw Blue Ensign ran into this problem in his blog post as well.
Yesterday, I removed everything you see here except the windows and am starting over. Possible solutions are: making the trim myself, as Blue Ensign has already demonstrated. Or using the old ones and painting them yellow, as Brunnels showed in his blog post. (This would also be accurate compared to the paintings of the Sphinx). It just depends on what I like. I'm going to put the ship aside for a few days, because it all feels a bit much at the moment and when I feel a bit fresher I'll see what I'm going to do.

I'm also adding the two examples from Blue Ensign and Brunnels as a reference to what's possible. I'm also curious to know what the preference of you guys is
Blue Ensign with self made trims and natural pear
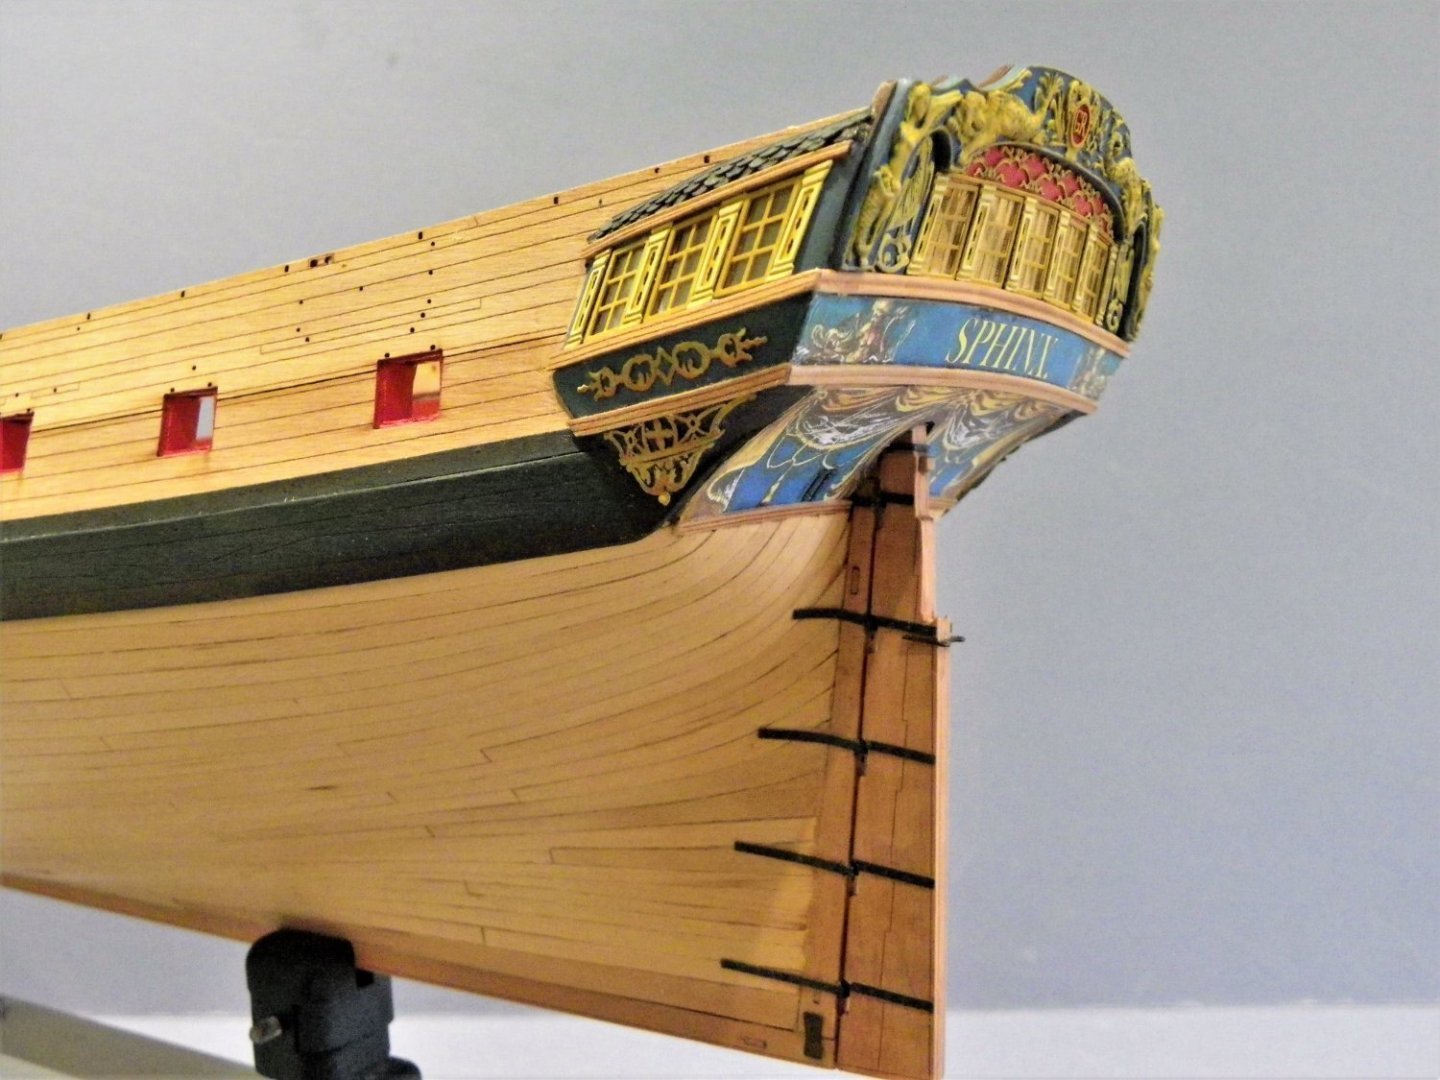
Or Brunnels painted trims
-
This must be really fun for you to design these little gadgets I asume
- Chuck, Ryland Craze, cotrecerf and 4 others
-
7
-
Very nice website! Wish you all the best with this new endeavour 🙂👍
- scrubbyj427, Canute, thibaultron and 1 other
-
4
-
Lovely paintjob, nice matt black!
-
2 hours ago, TJM said:
Nice!
Do you always brush it on, also on the large surfaces like the main hull, or do you ever use an airbrush?
Also, what varnish are you using? It looks great!
It's a homemade wipe-on poly. So I thinned a polyurethane varnish with thinner that you can use like you would use wop. But for these small areas I use a brush and wipe off the excess after a few seconds. Never used a airbrush for this, because after a few coates it looks really equal in coverage. And because I have it quite thin...it doesn't look thick or something. So I don't see the need for an airbrush here 🙂

Christiania 1774 by TJM – approx. 1:67-1:64 – Danish Light Frigate based on Vanguard Models HMS Sphinx
in - Kit build logs for subjects built from 1751 - 1800
Posted
Very nice! ✅