


Ronald-V
-
Posts
1,442 -
Joined
-
Last visited
Content Type
Profiles
Forums
Gallery
Events
Posts posted by Ronald-V
-
-
-
16 hours ago, Loracs said:
it indeed worth the extra work... it does show. ;_)
Thanks Loracs!
16 minutes ago, Nearshore said:Hi Ronald,
Your Sphinx is looking absolutely gorgeous. I like the attention to detail you are doing on this ship.
Nearshore
Thank you for your kind words!
And thank you all for the likes!
")
-
Well done! Curious how it's going to look when attached on the masts 🙂
-
2 hours ago, SaltyScot said:
Nice fix, Roland. I have found that in situations like this a wooden tooth pick works well also. Yes, they may need to be stained a little to match the wood but, as they are tapered at the ends anyway, I found them very useful for plugging holes.
Good tip! I can try that too. I just have to see if I can get the color right with a layer of WOP, since toothpicks are a bit lighter in color I think
-
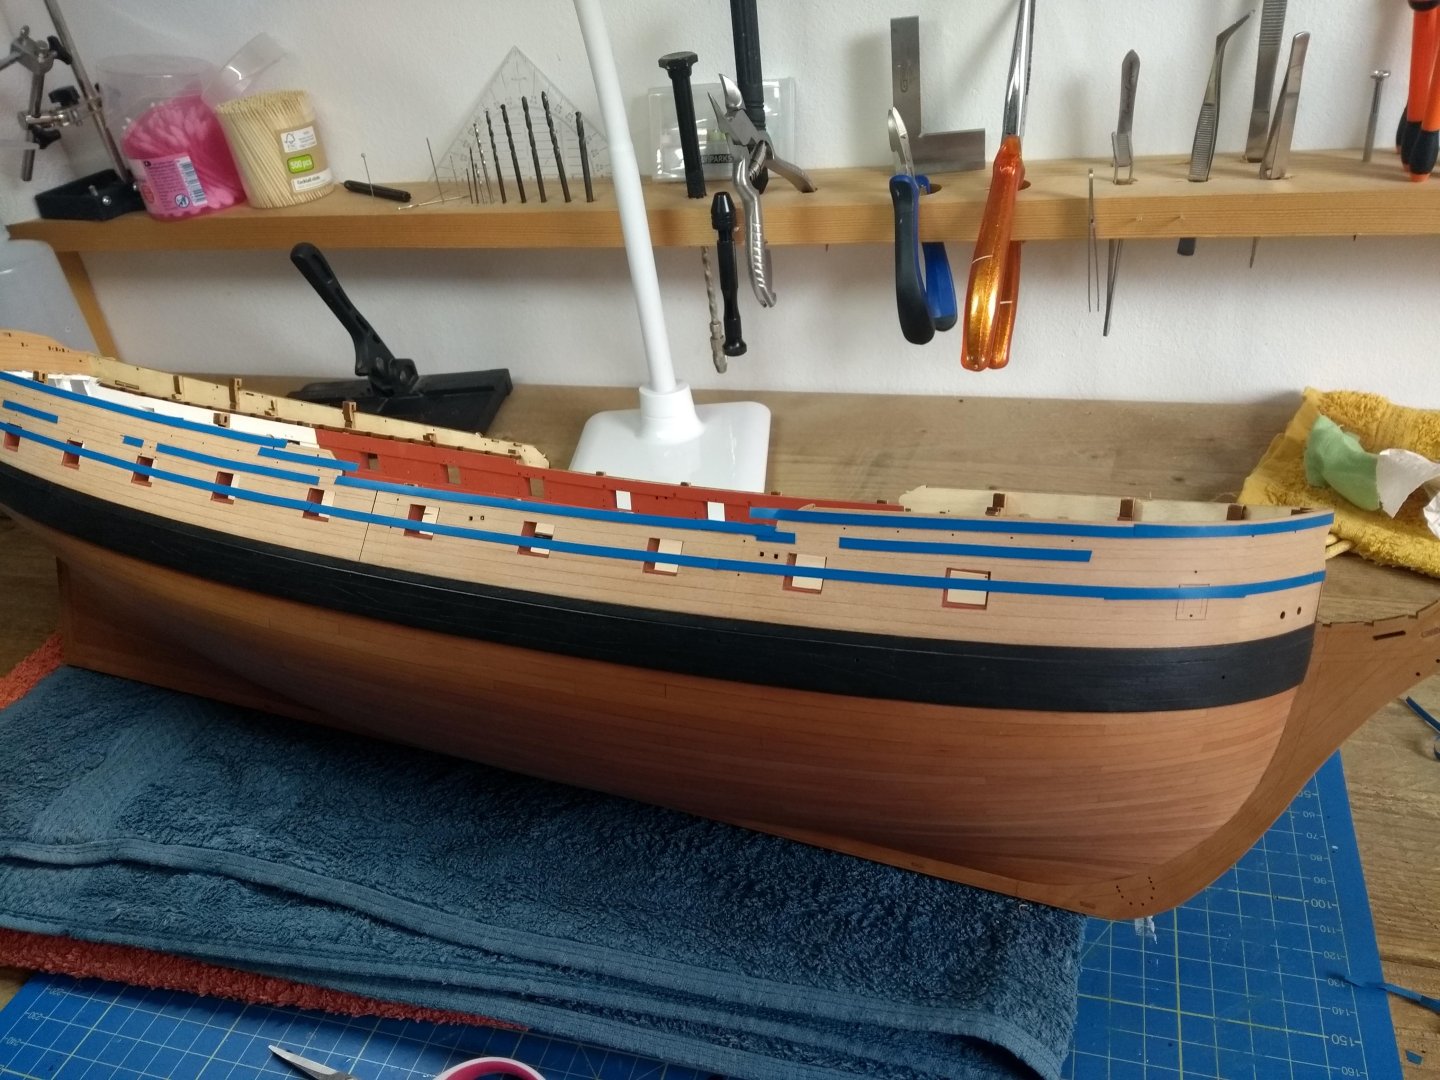
Just a little update before I have attached all the rails.
I had almost all the rails attached except for the big complex one on the bow. I didn't really know how to get them on properly without getting everything covered in glue. I then looked at other logs including Bleu Ensign and he cut the whole thing up and glued it on piece by piece. I don't know why I didn't think of this myself?!
Too bad I only read this at the end because then I think the rest would have been easier to attach to the hull. I read that Chris also considered this and ultimately decided to attach everything together. Personally, I think it would be easier to do it in segments, since they are already lasered in the right shape/radius. But of course, these are preferences that everyone has to determine for themselves.
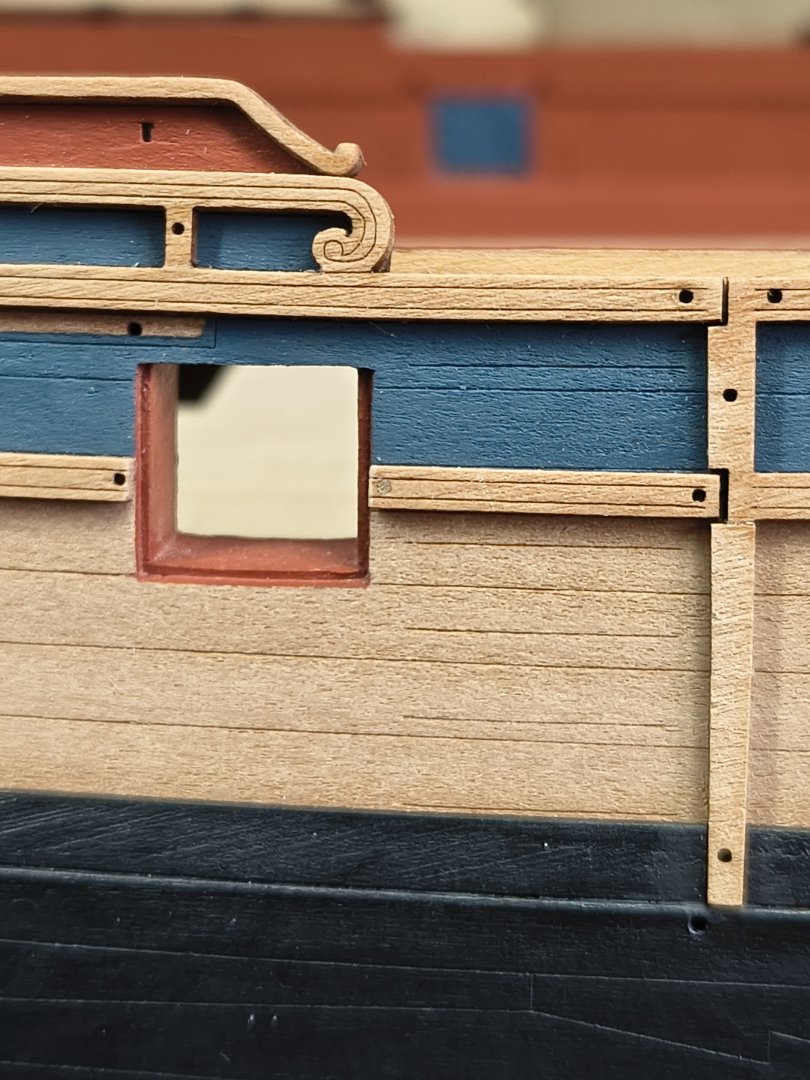
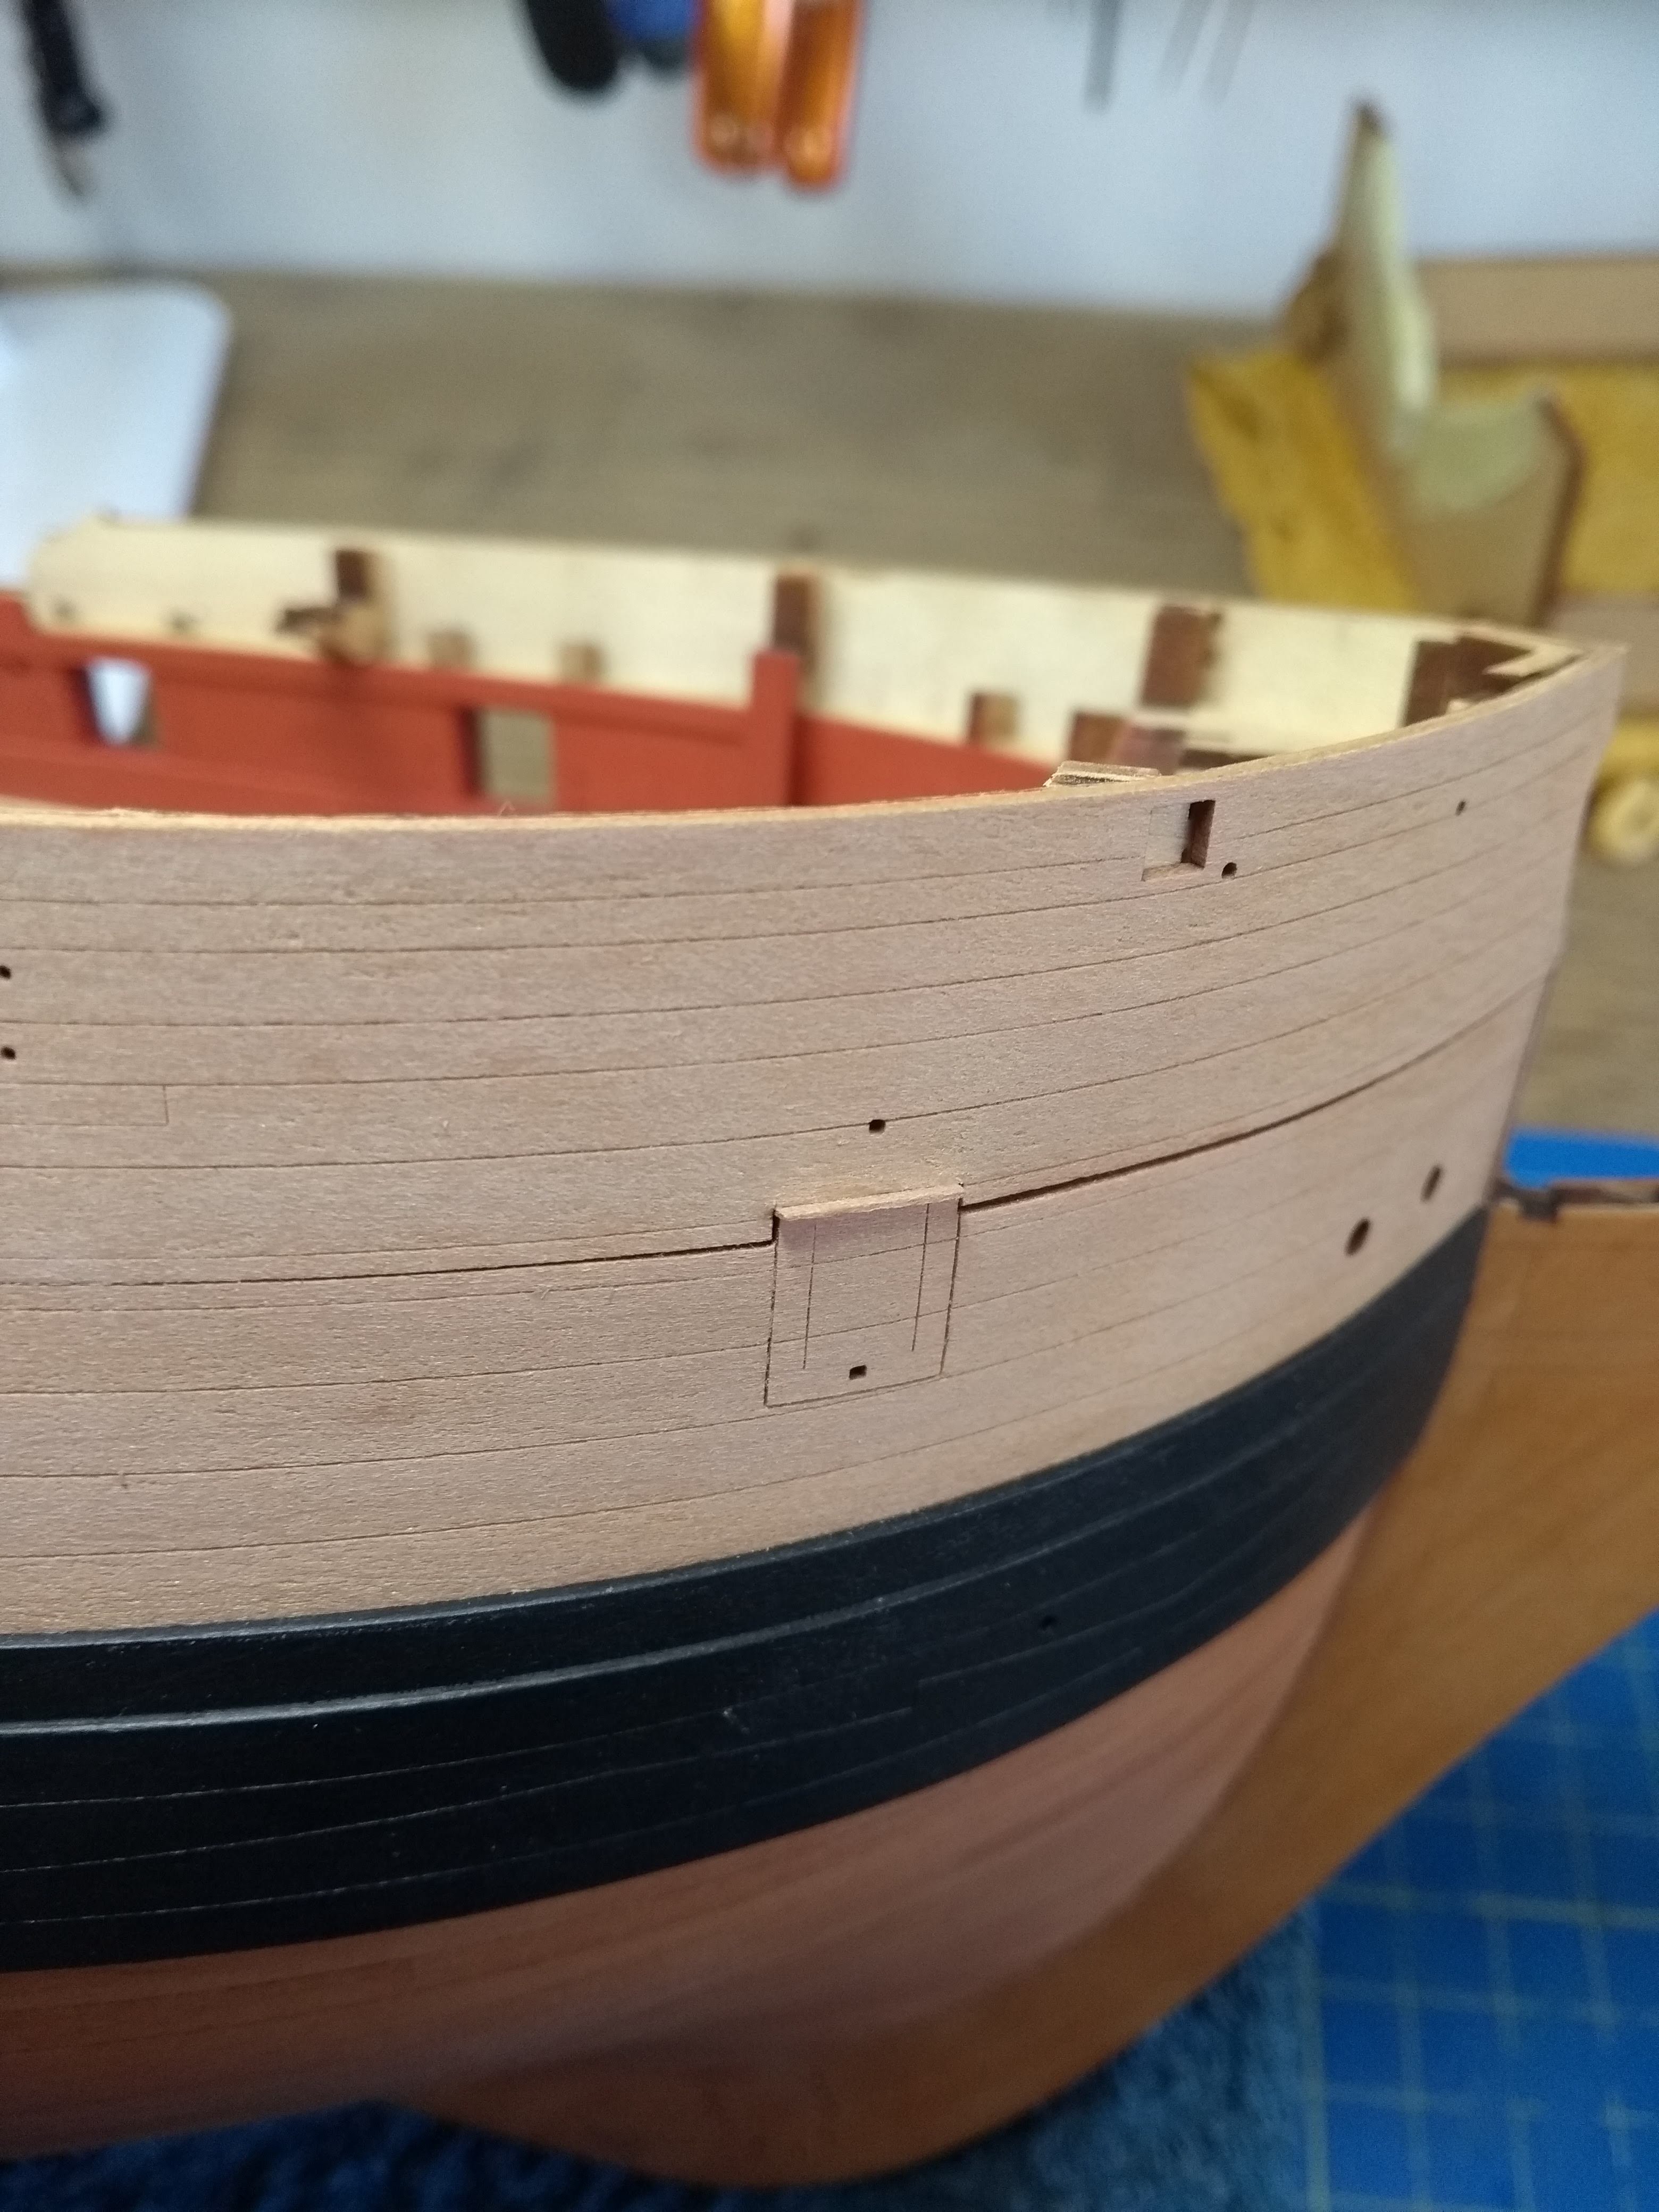
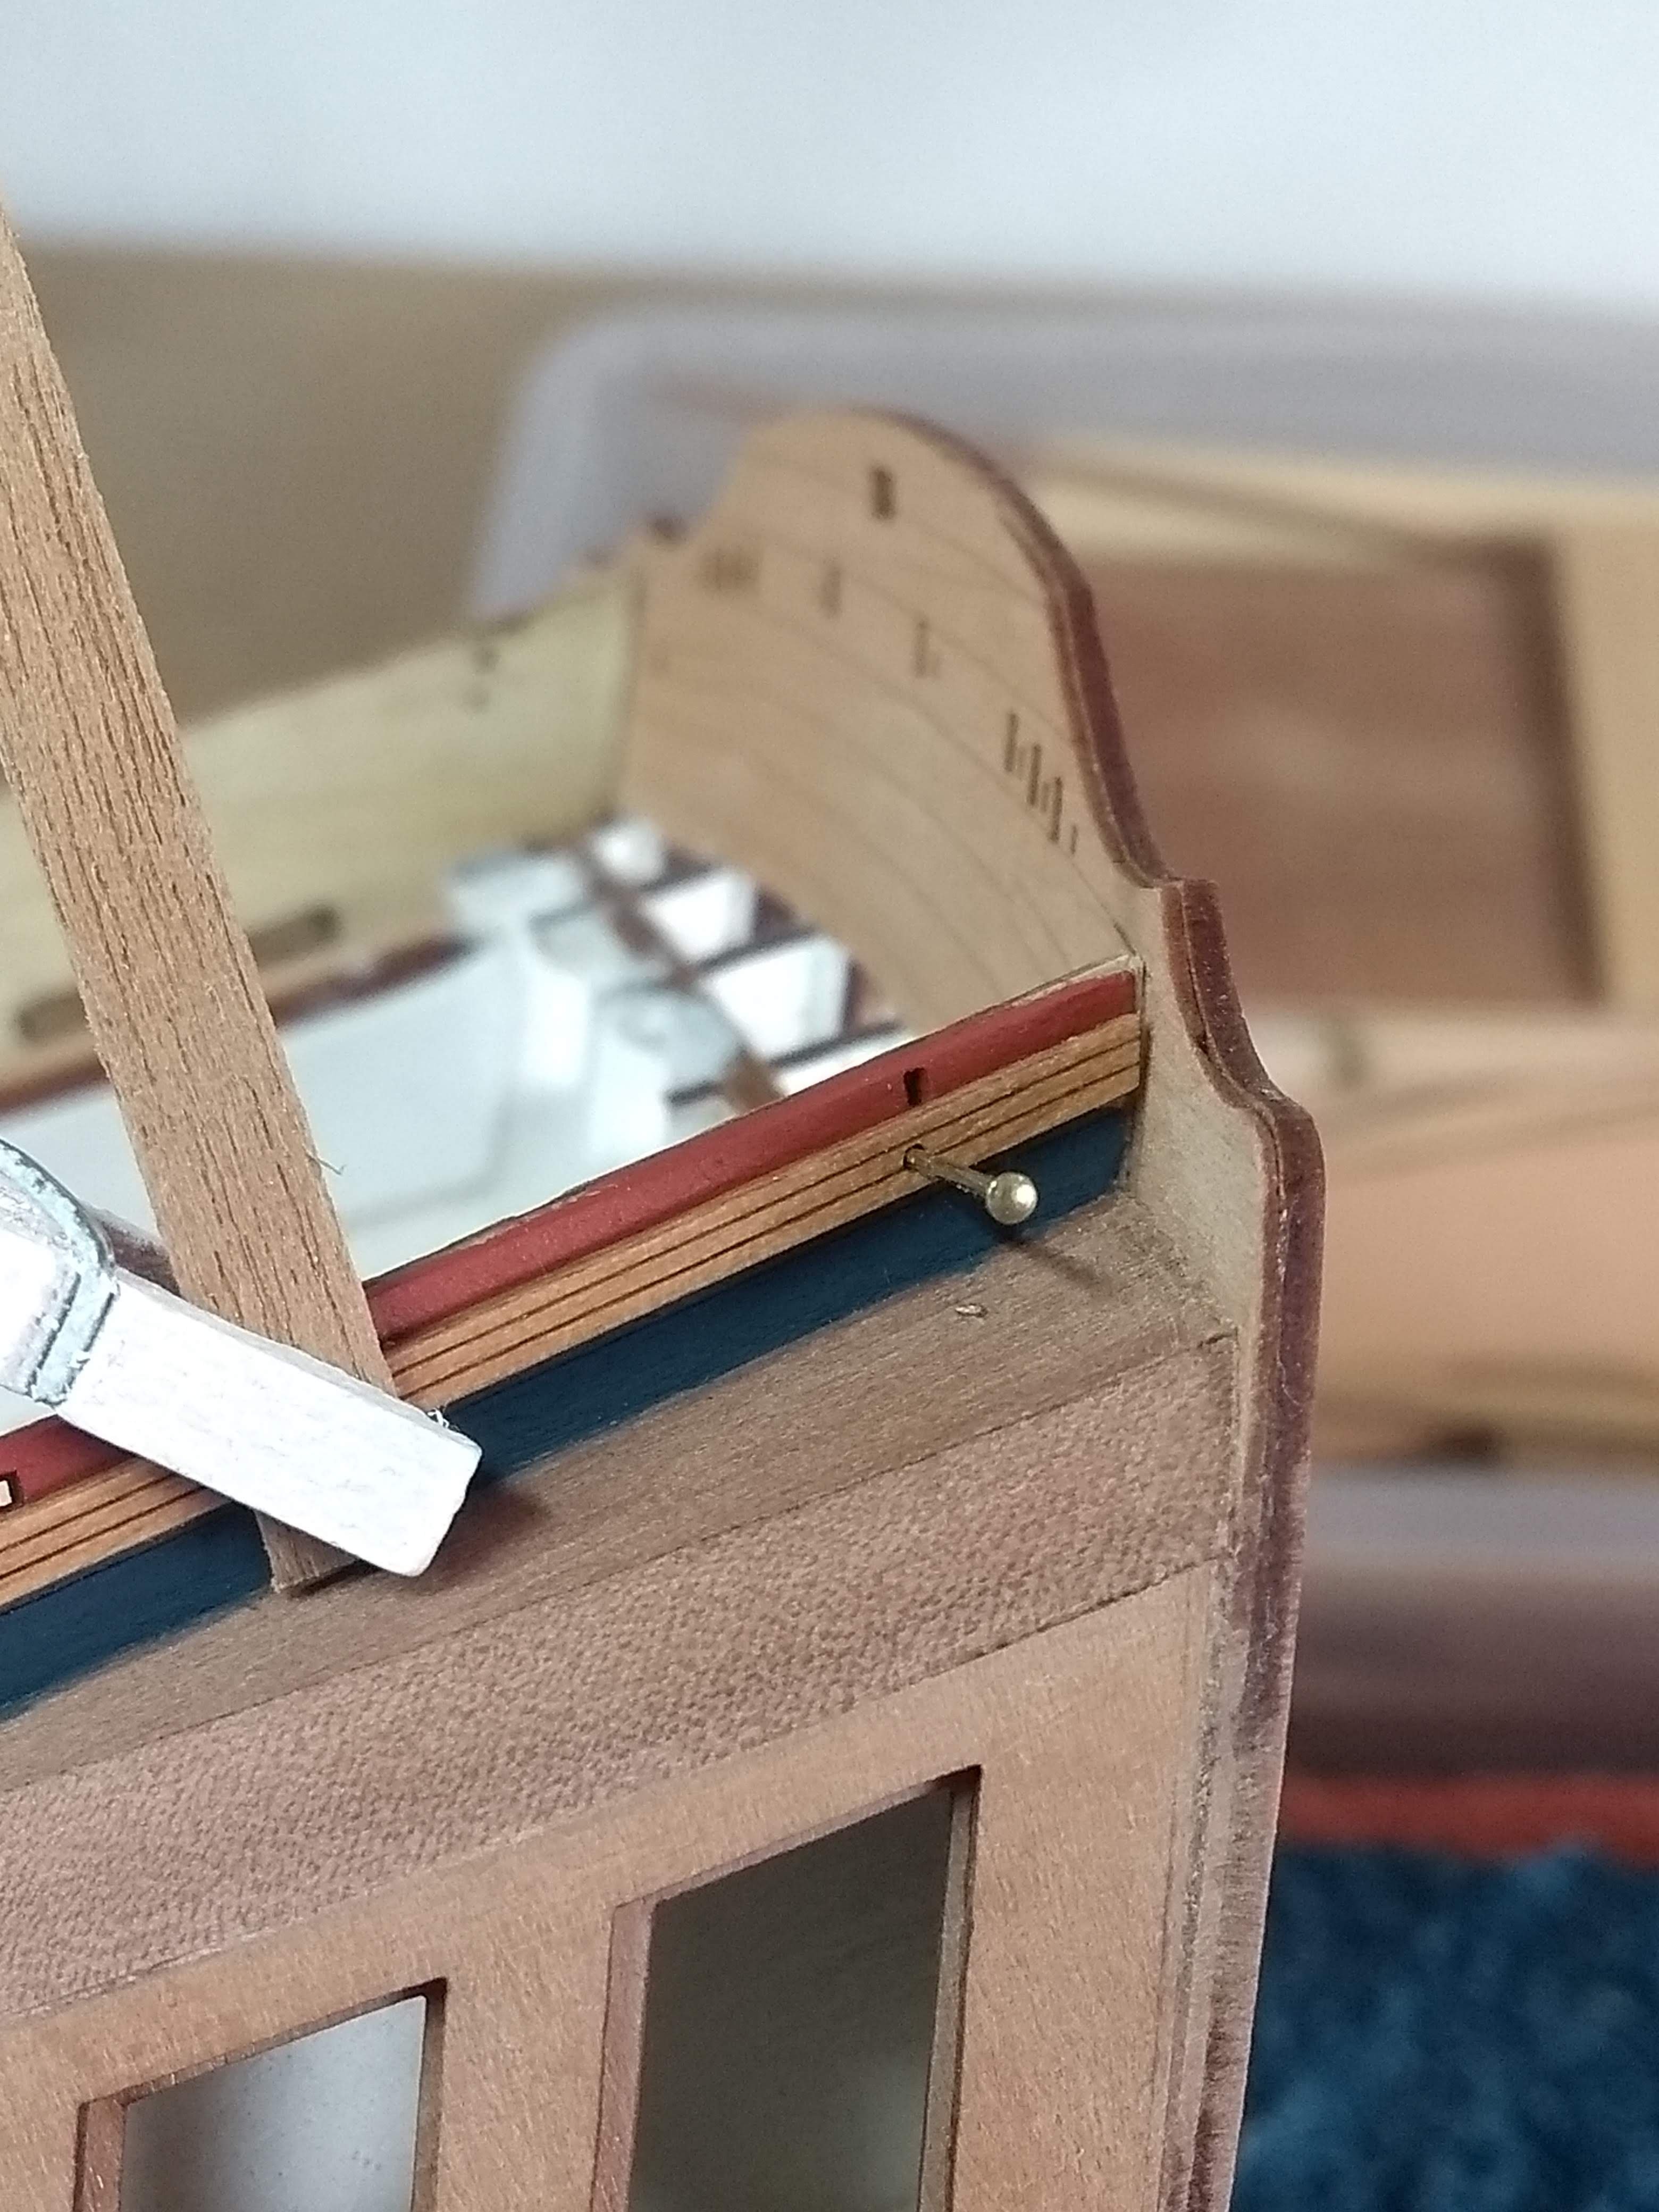
The problem I now encountered was that the holes (to center the rails) sometimes ended up exactly on the edge of the gun port as in the example below. If I were to cut that away, a half moon would remain, which is of course not so nice.
Anyway, I noticed that certain parts of the rails didn't "come out" nicely this way. So I carefully removed all the rails around the gun ports with some alcohol and adjusted them in the following order.
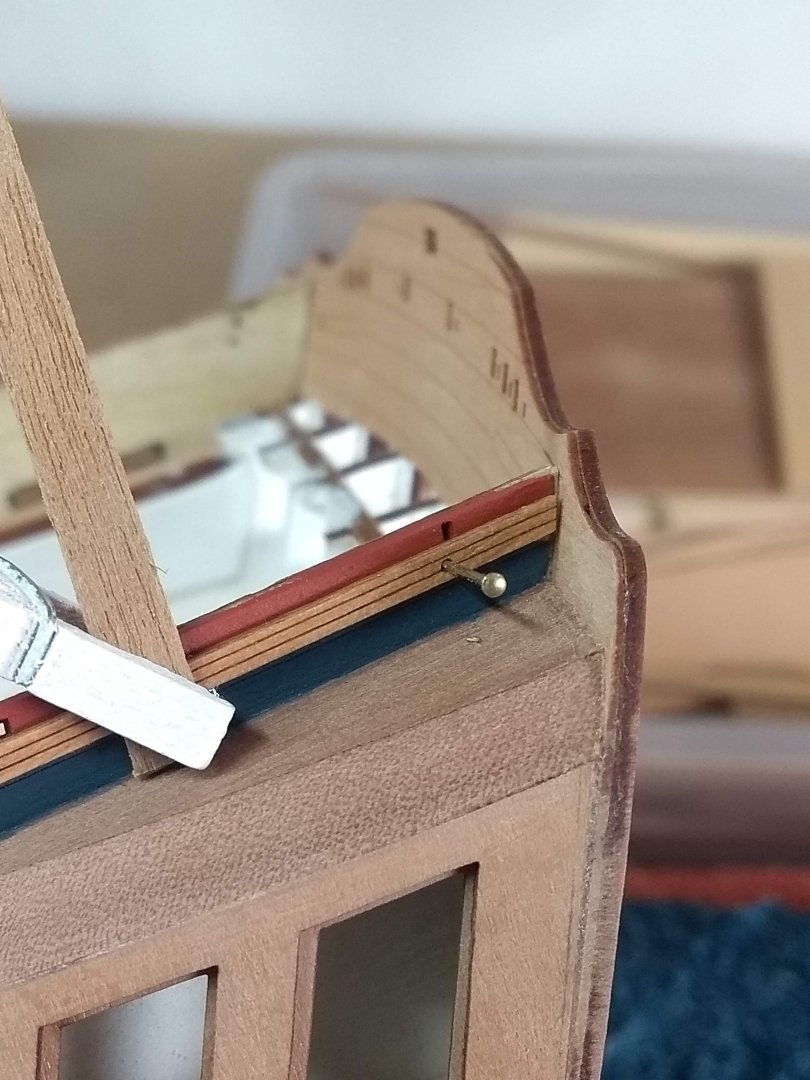
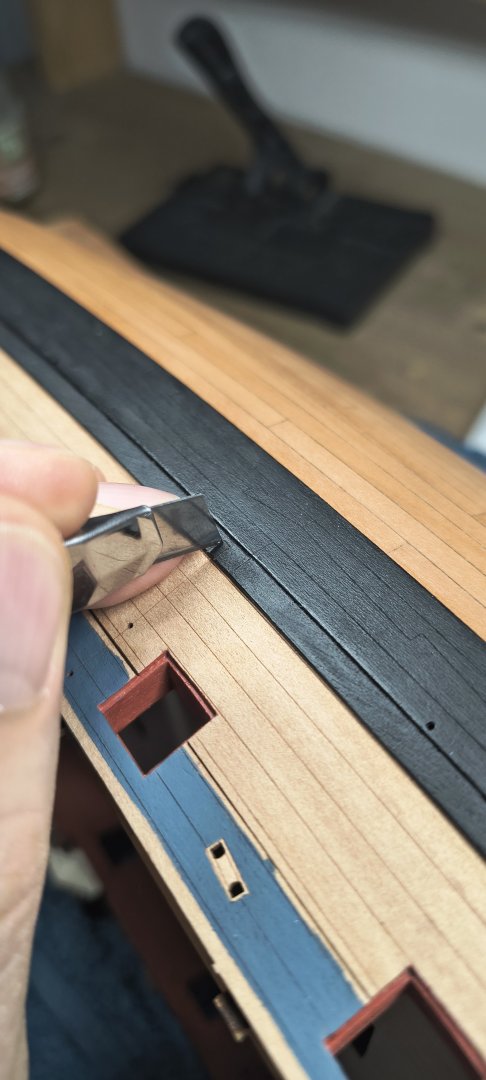
First sanded away the piece with the hole that would not fit well with the gun port edge.

Then glued a piece of scrap wood on top.
Sand it to size and score the decorative lines with a knife.
And of course a little WOP over it so that it is protected and the difference is minimal.
The decorative lines on the applied piece are not that visible in this photo, but you can see them in real life.
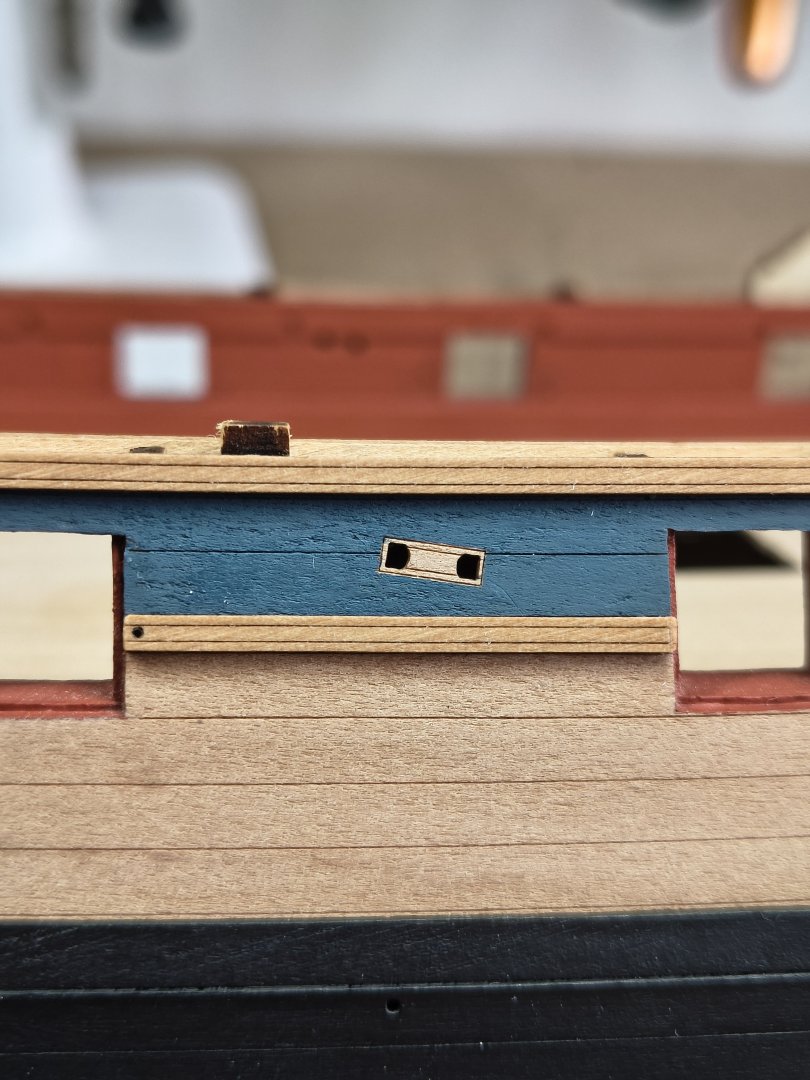
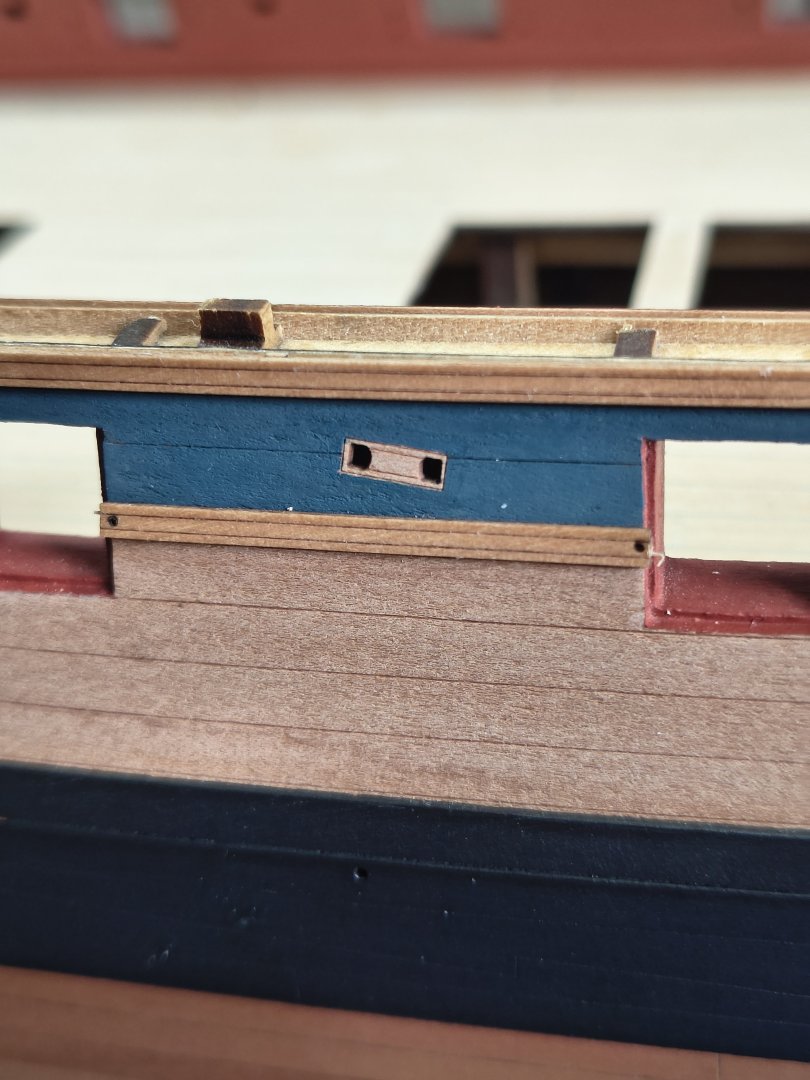
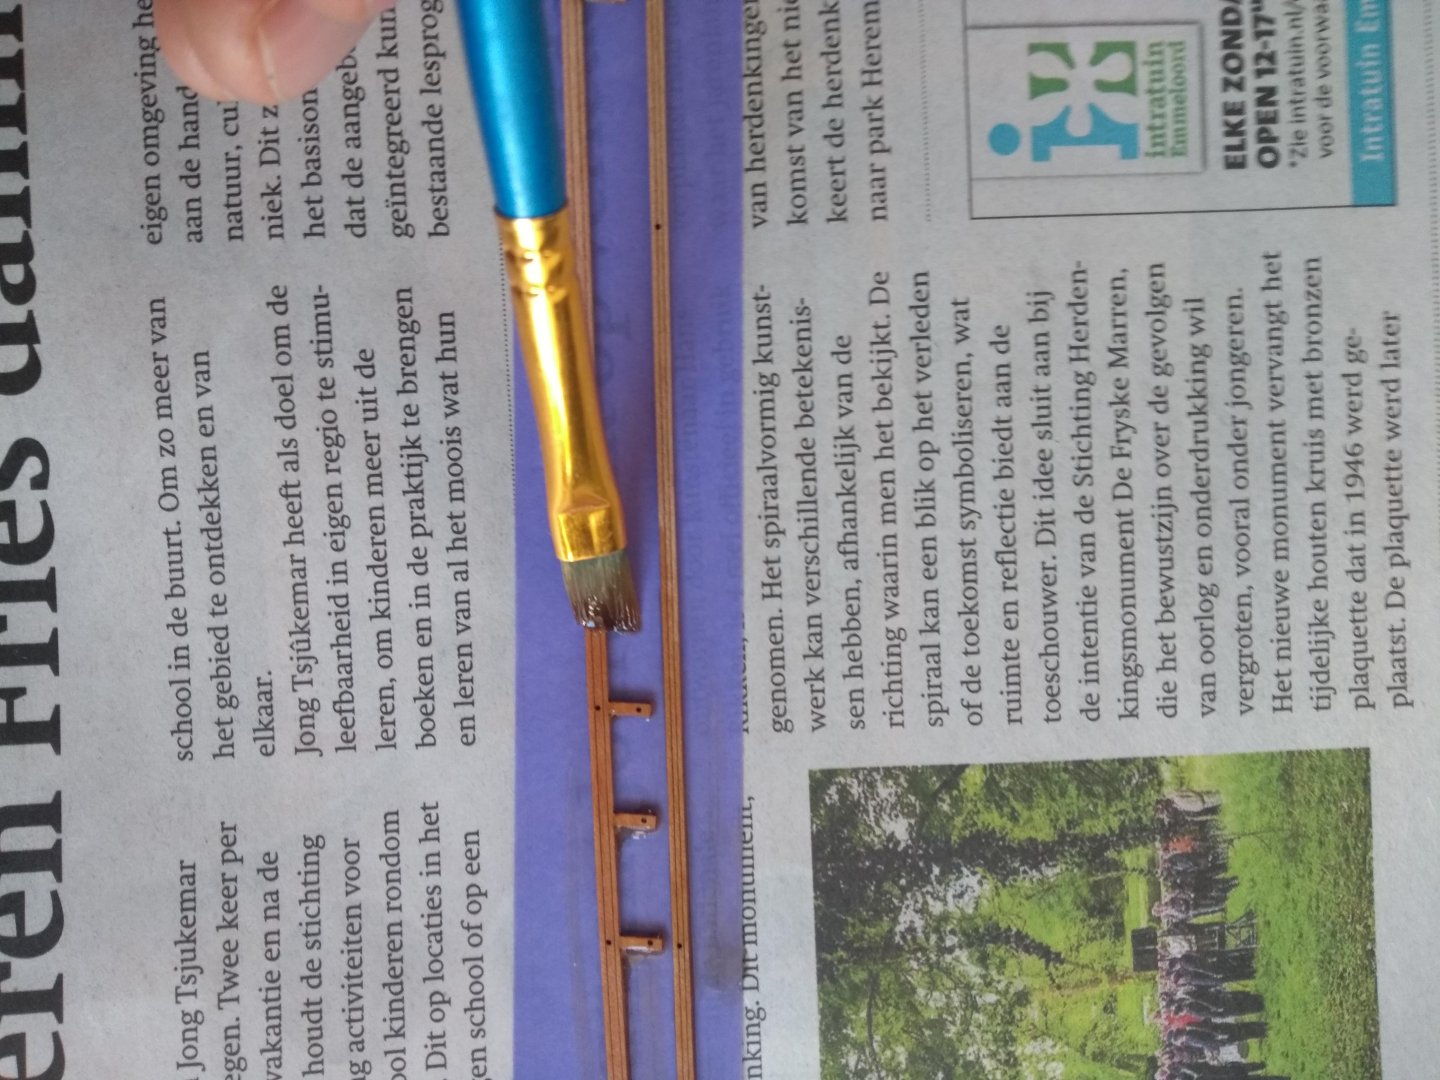
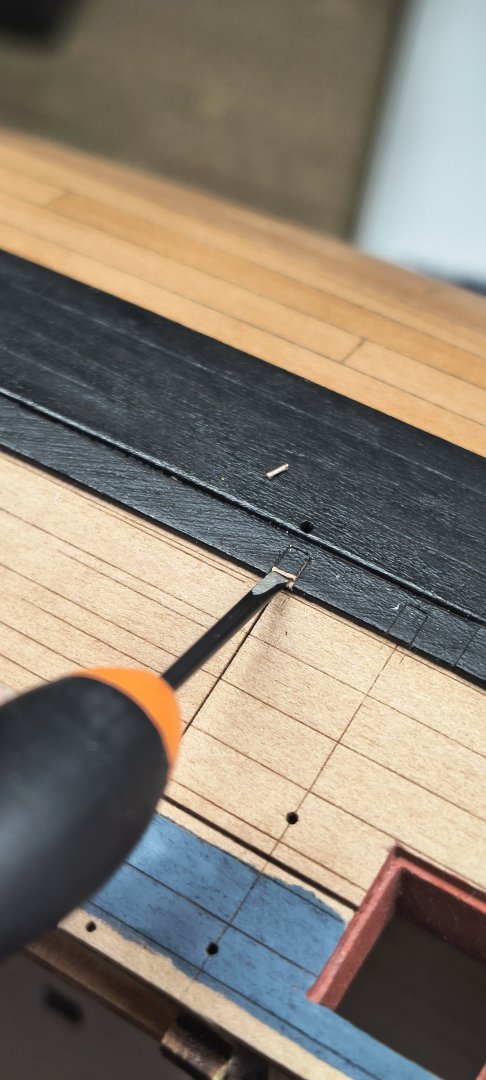
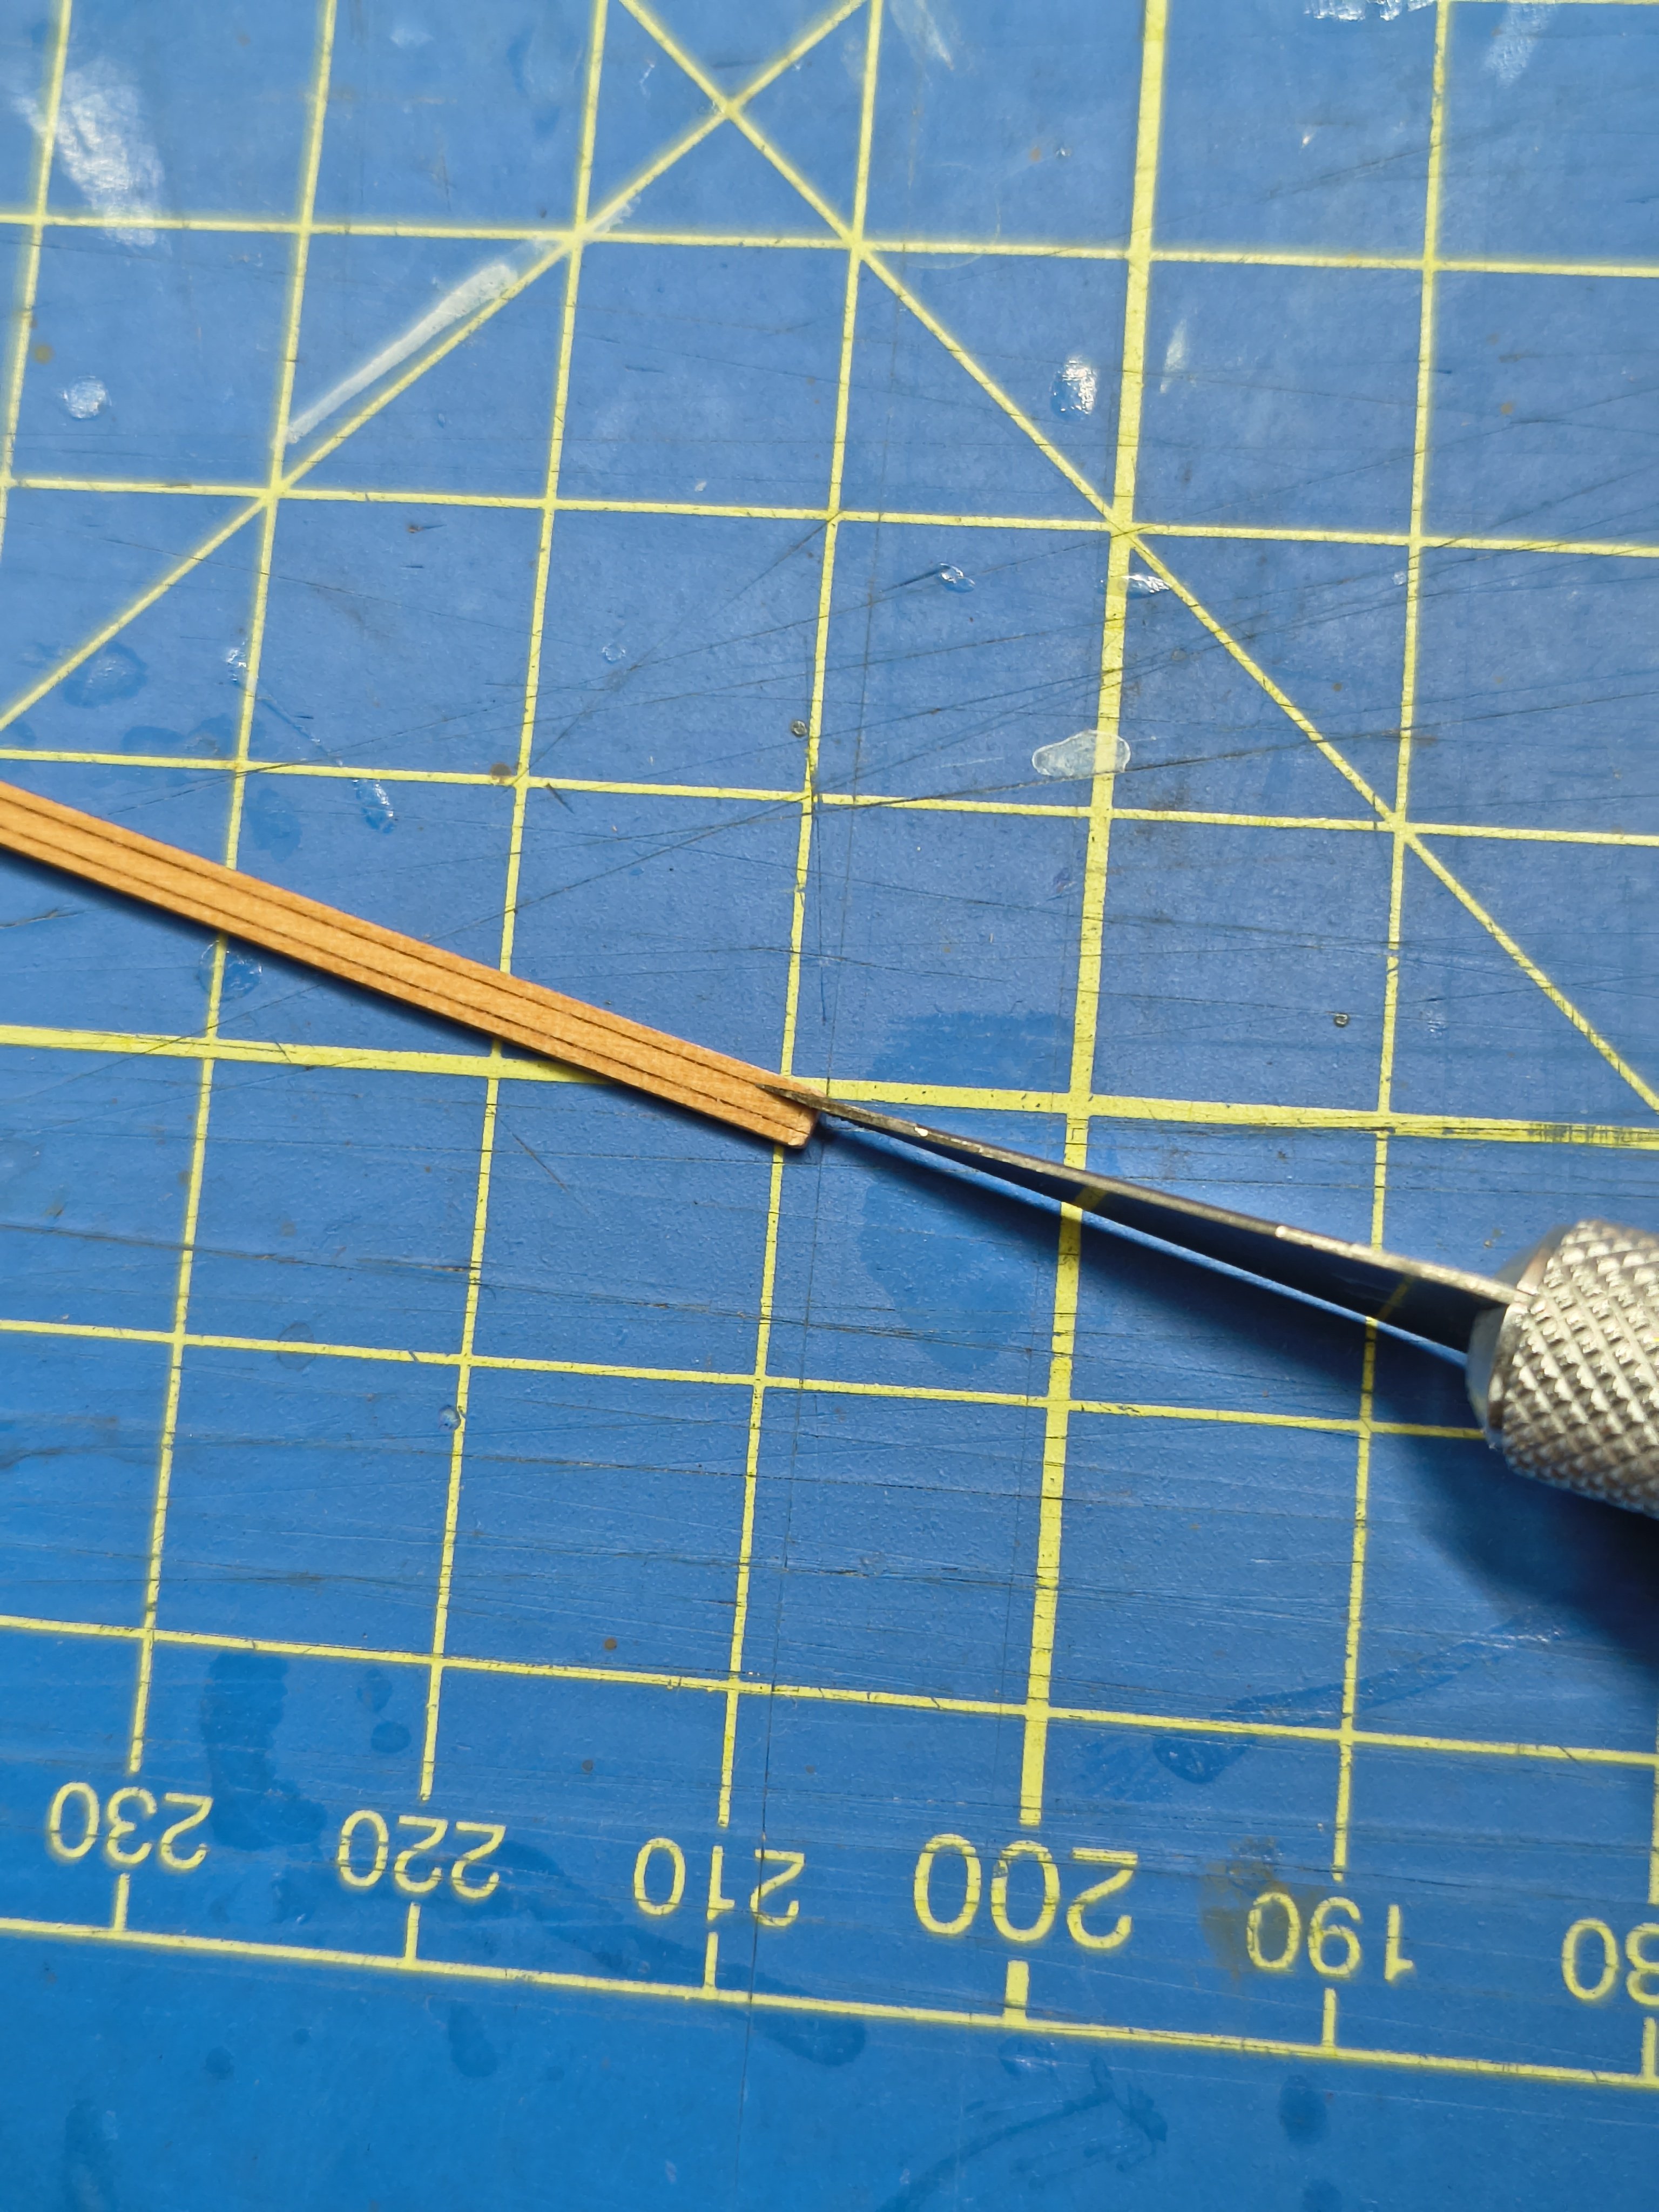
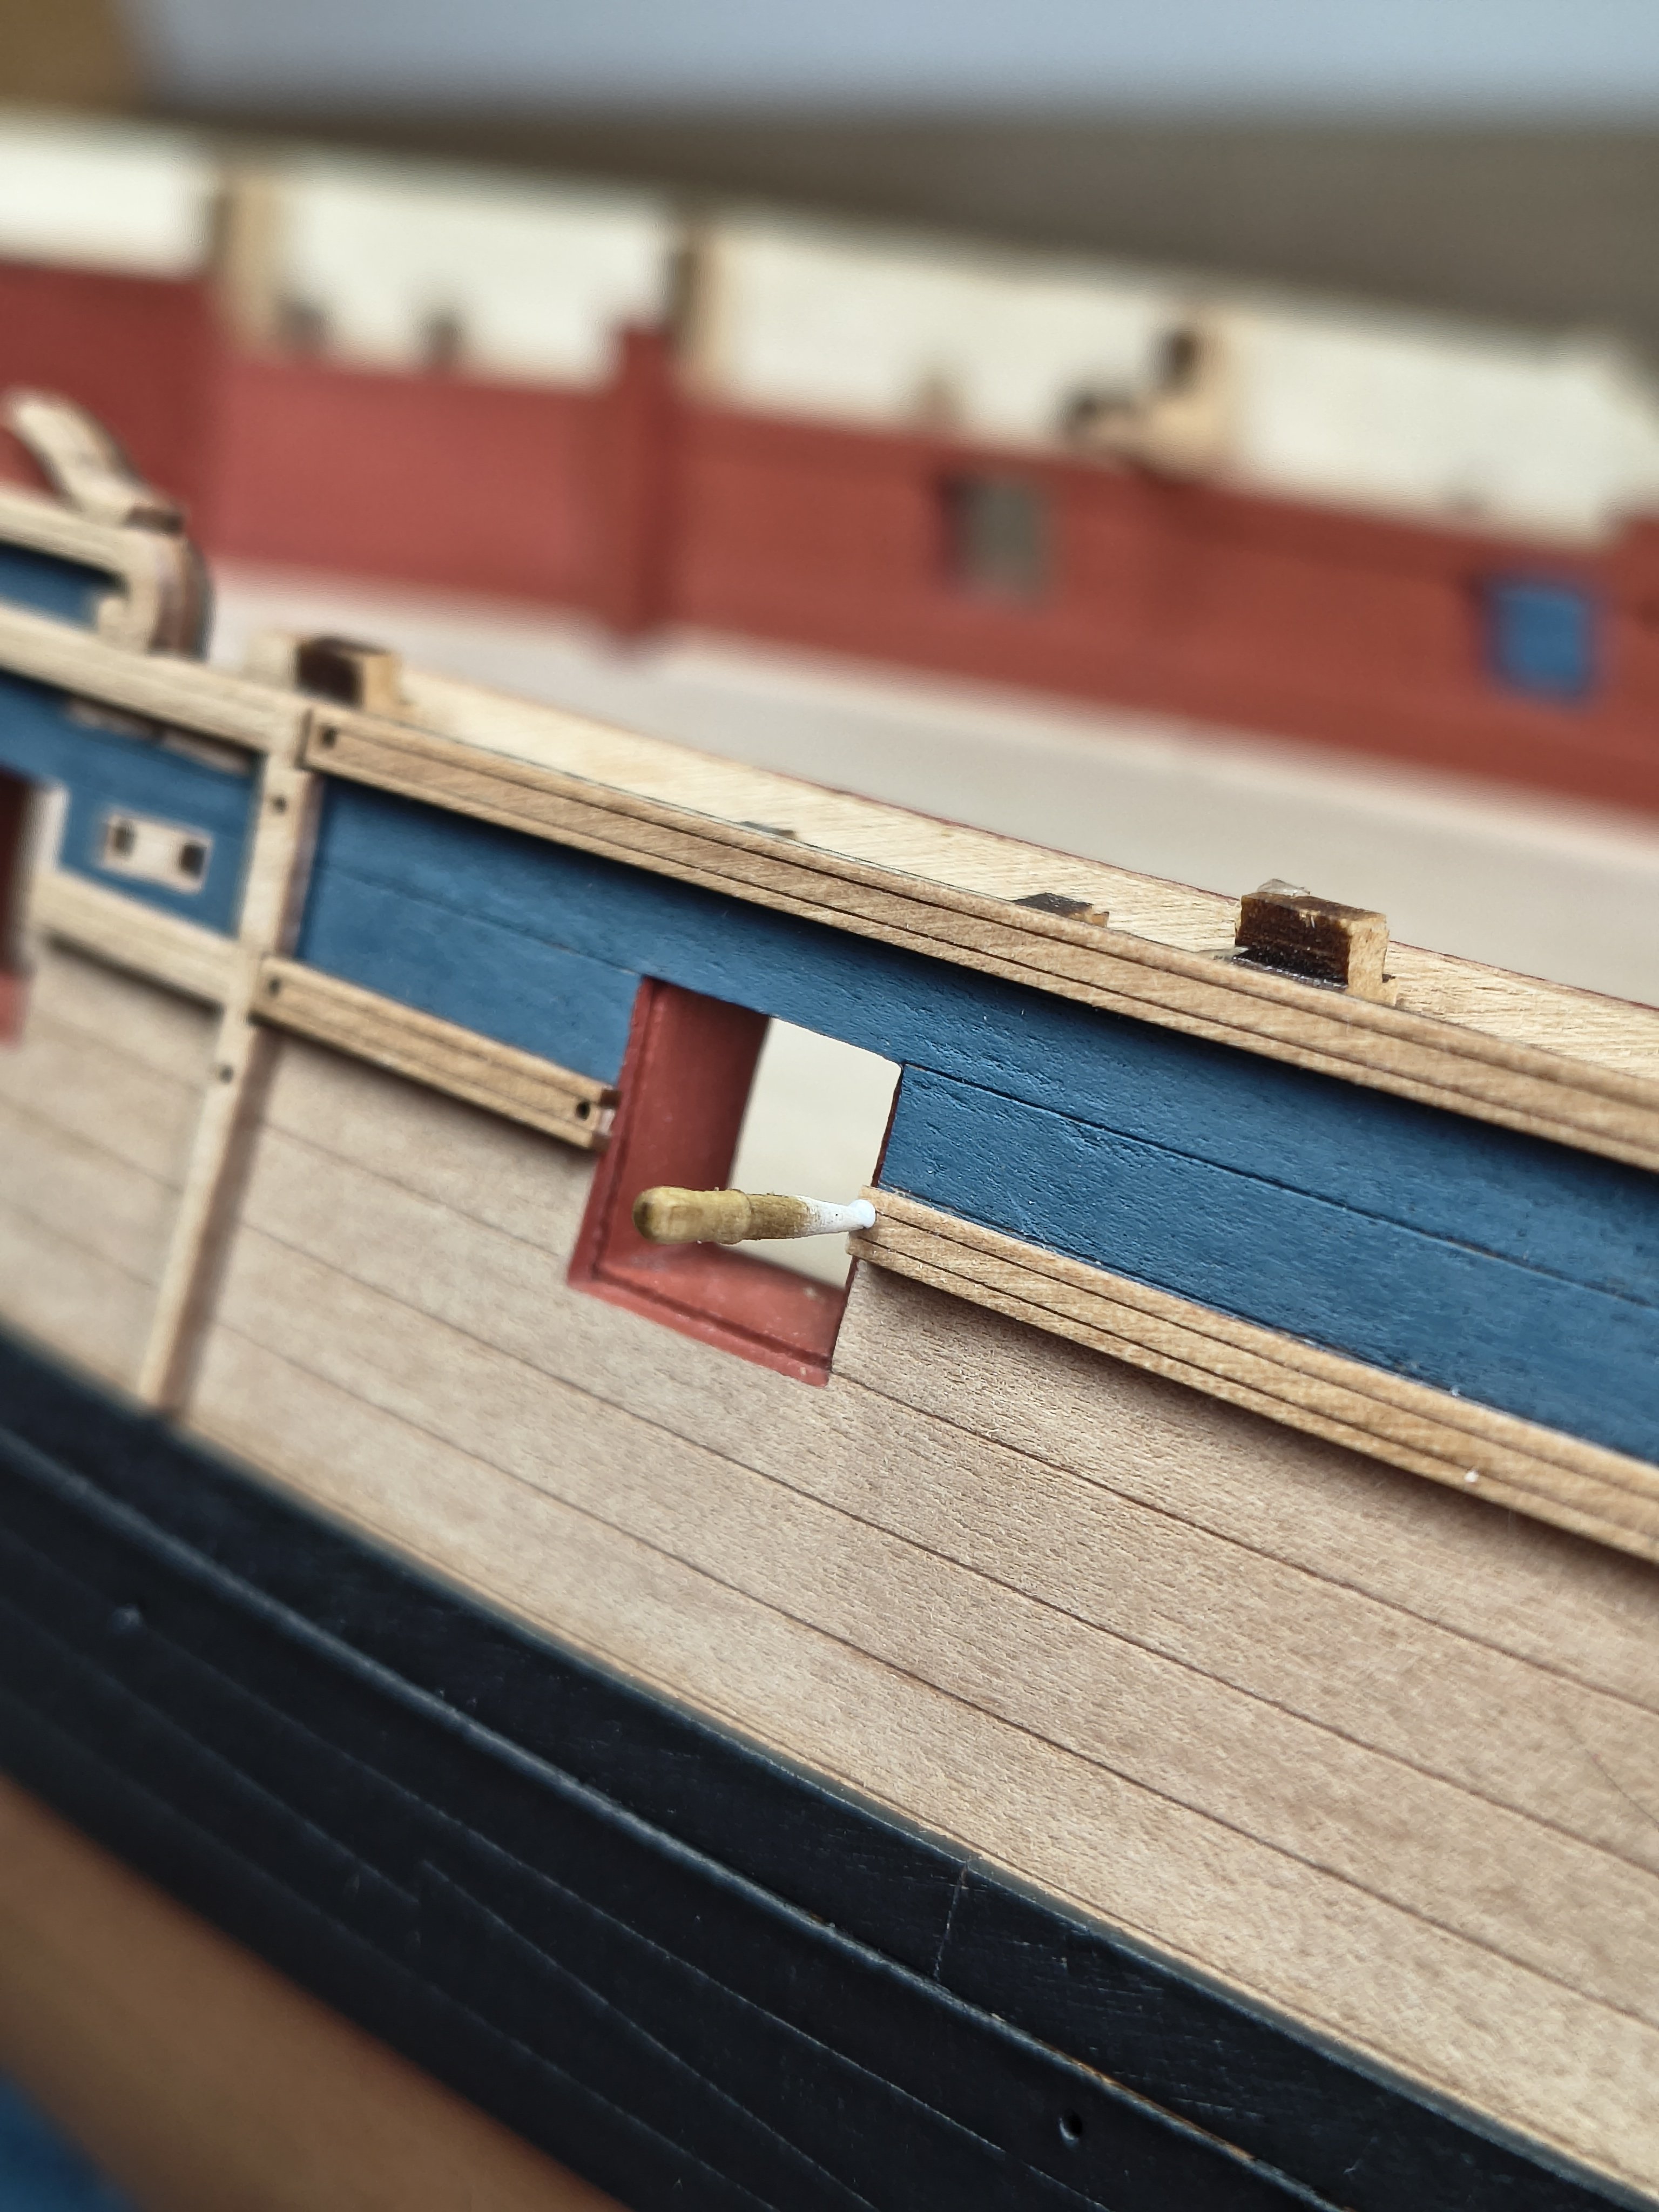
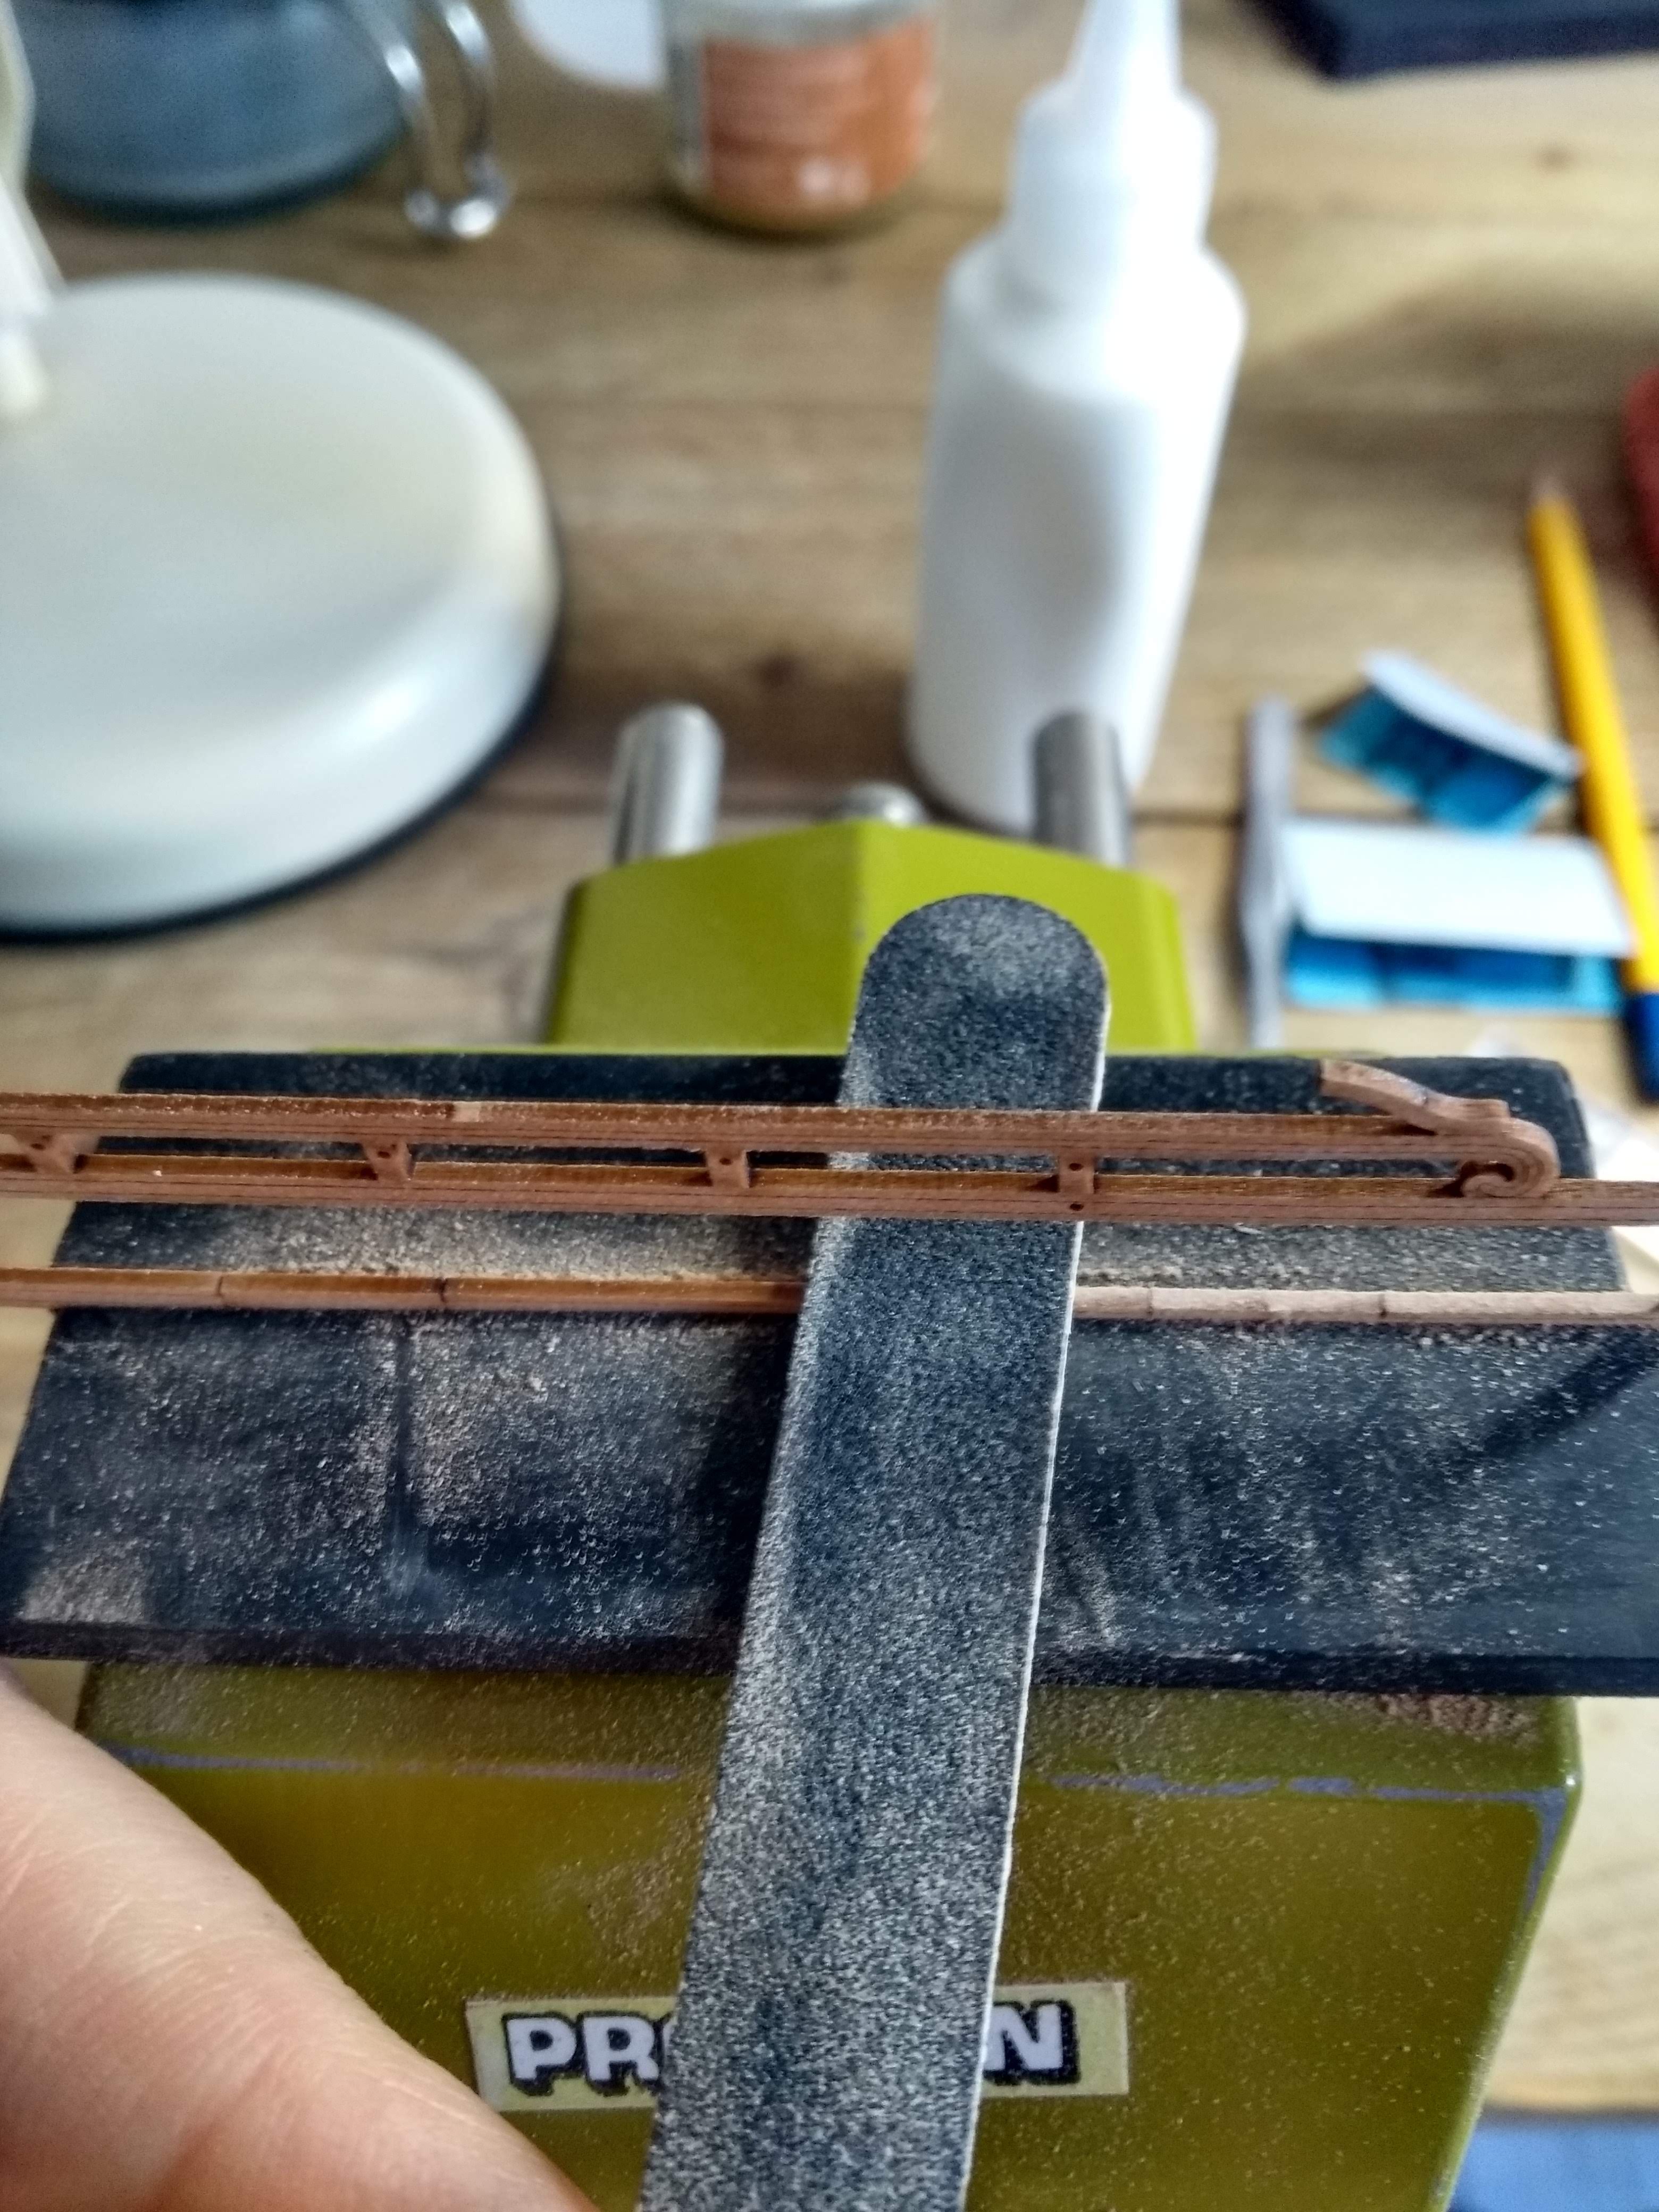
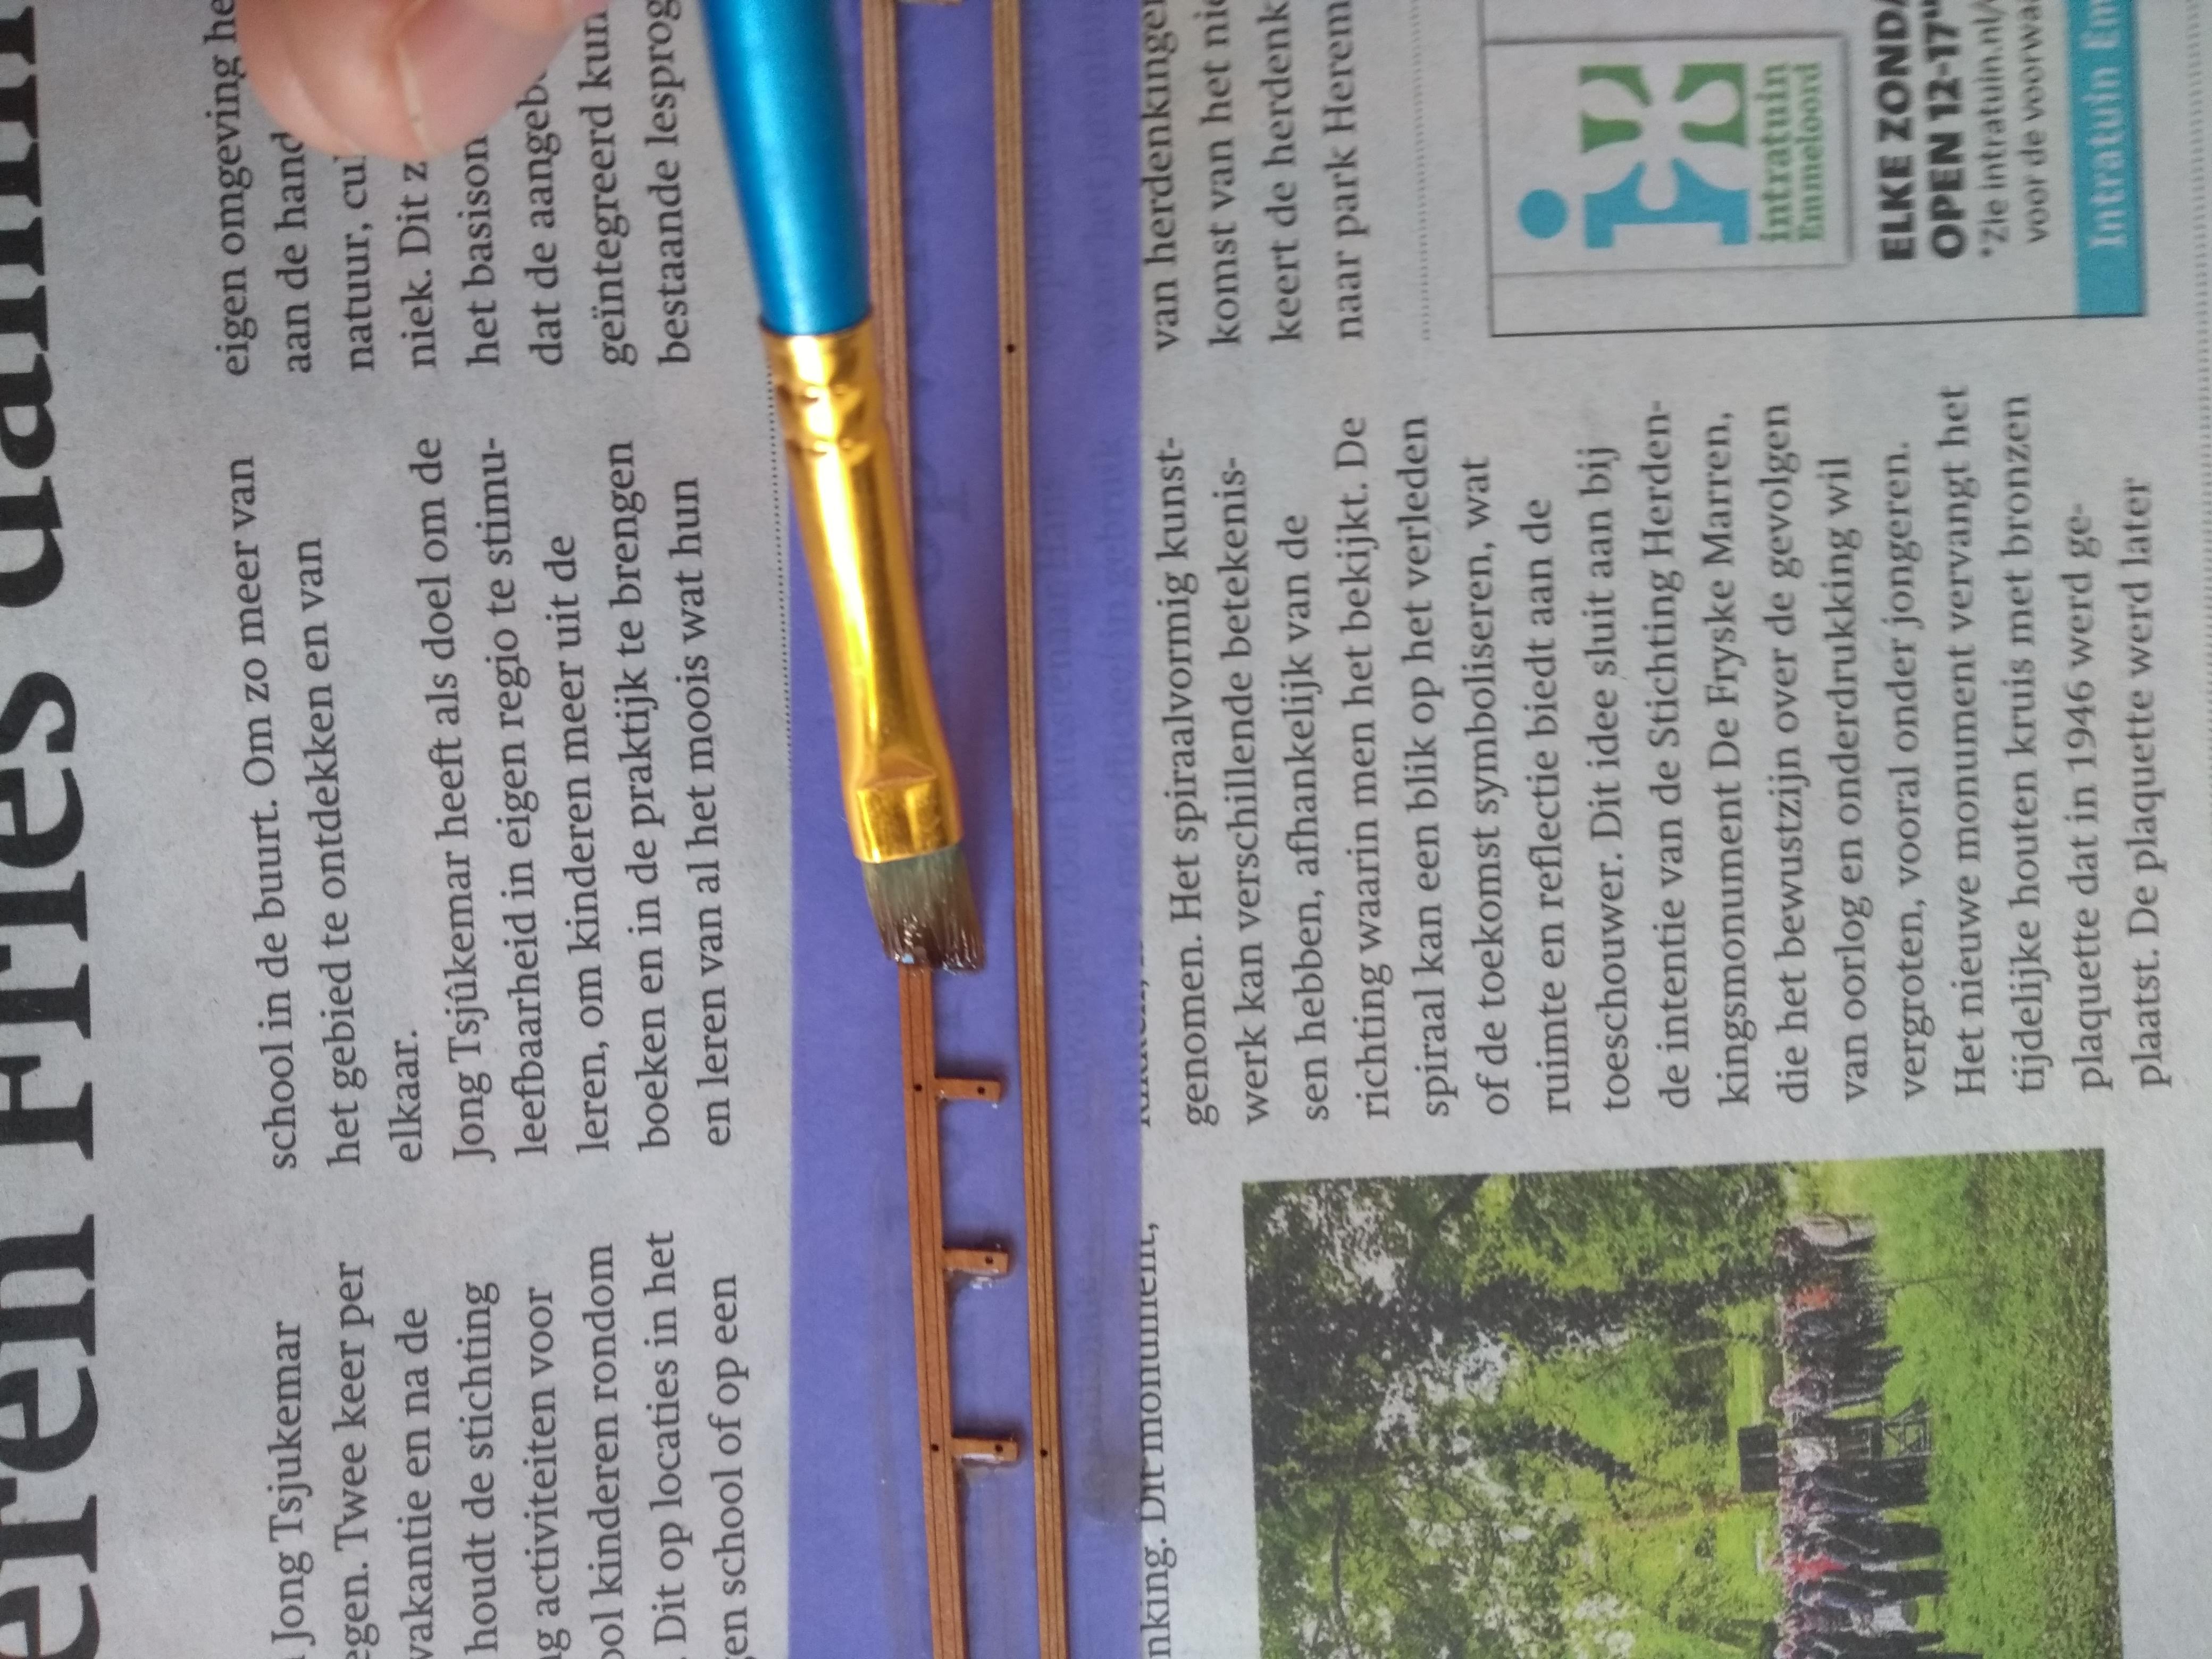
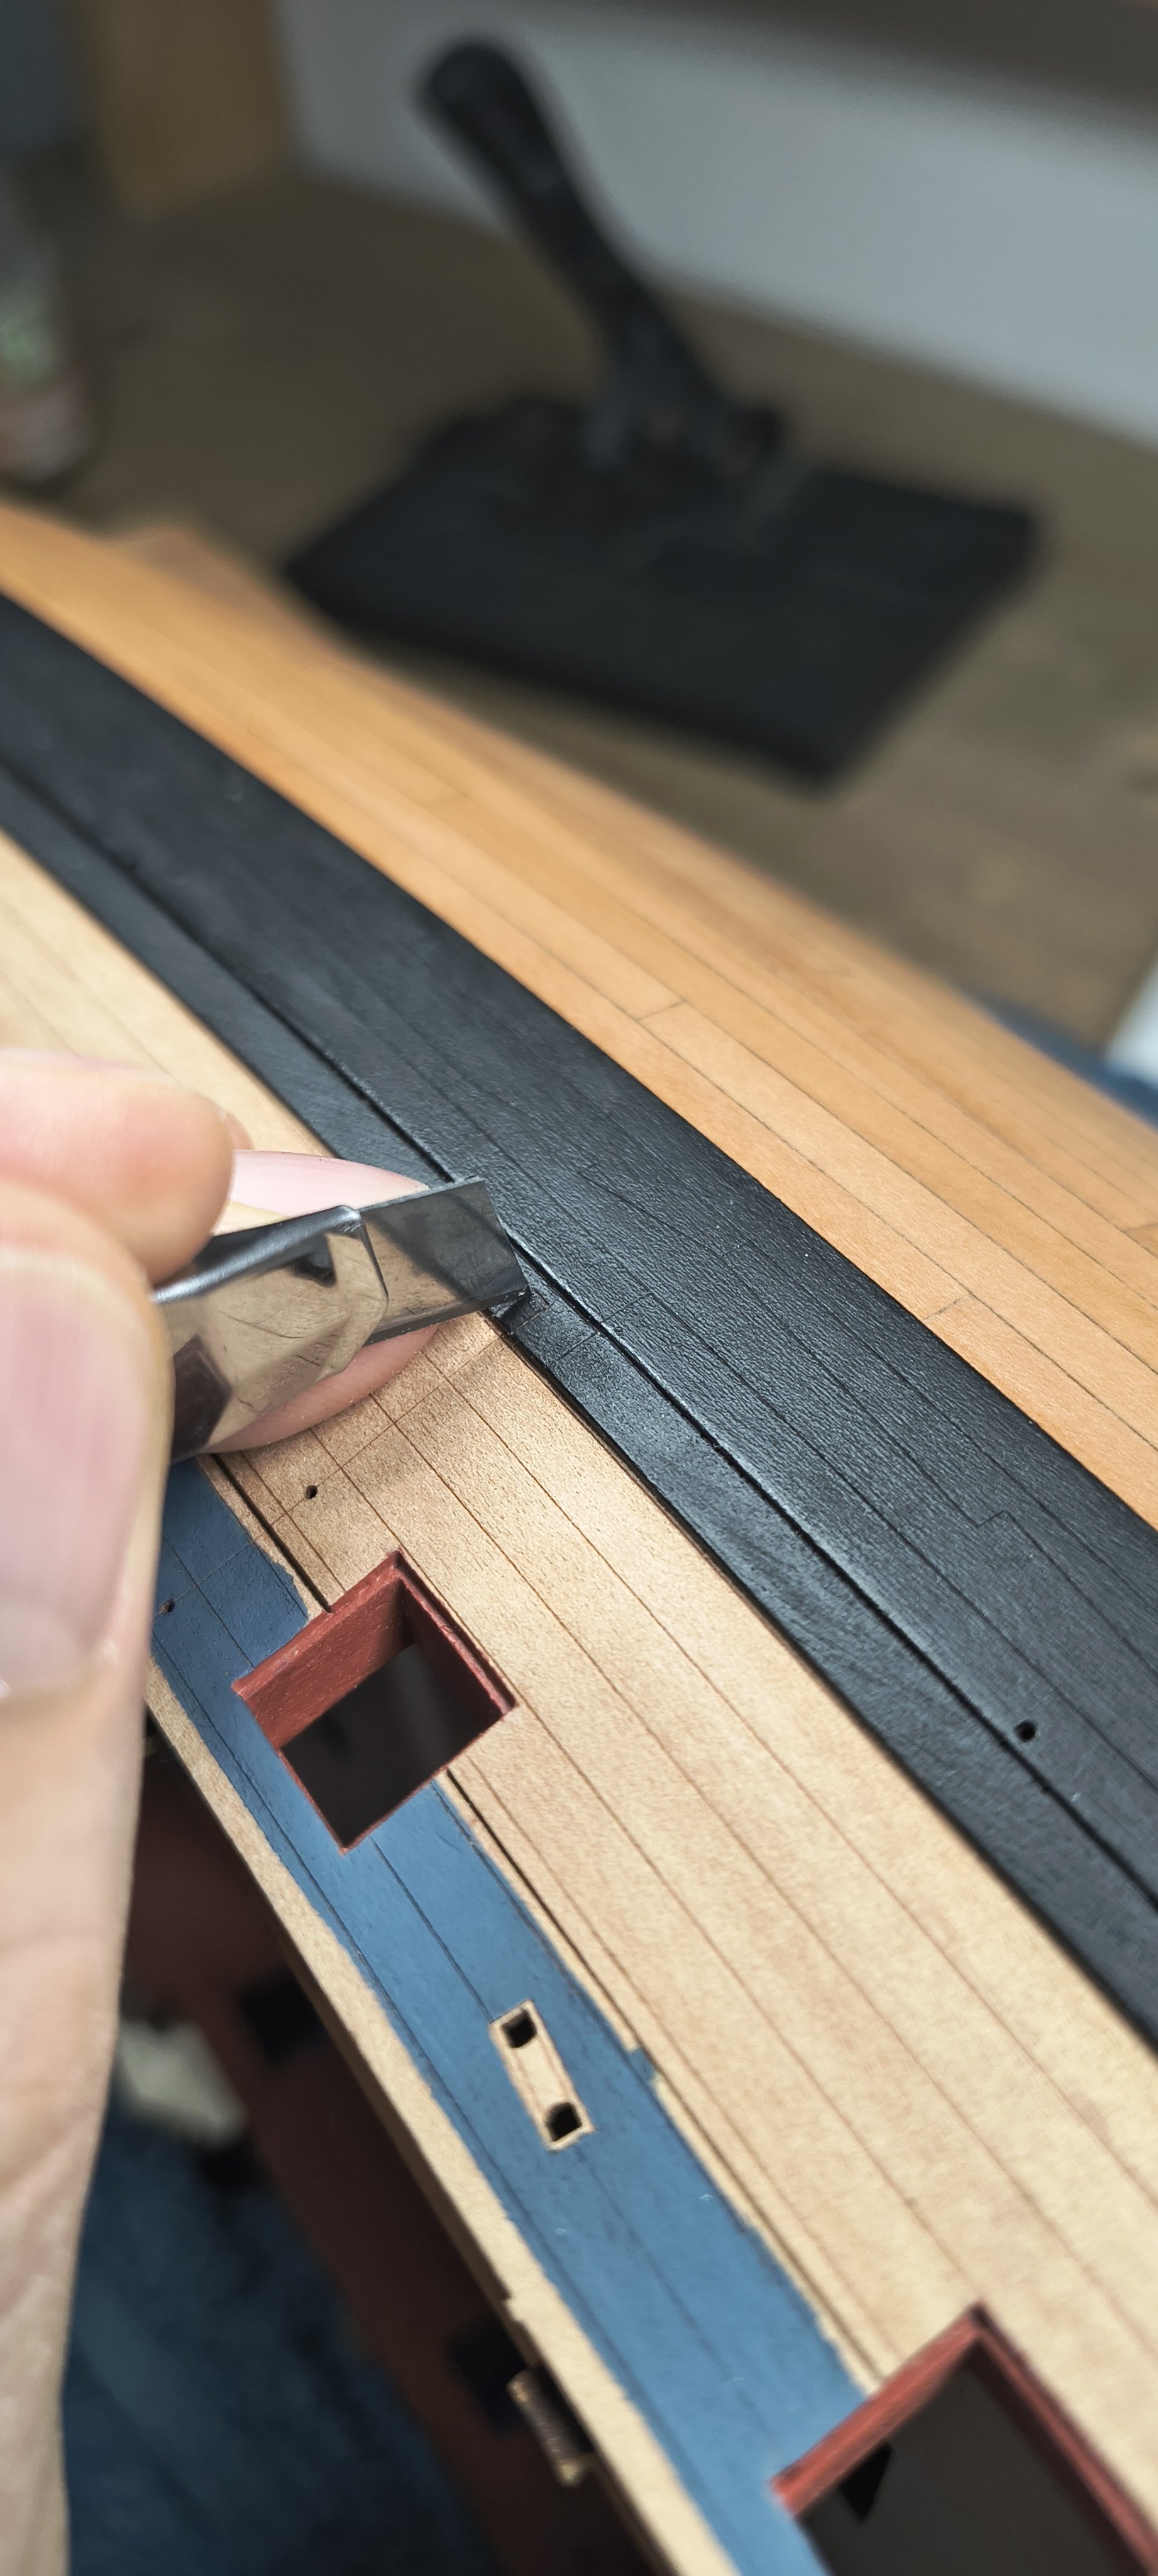
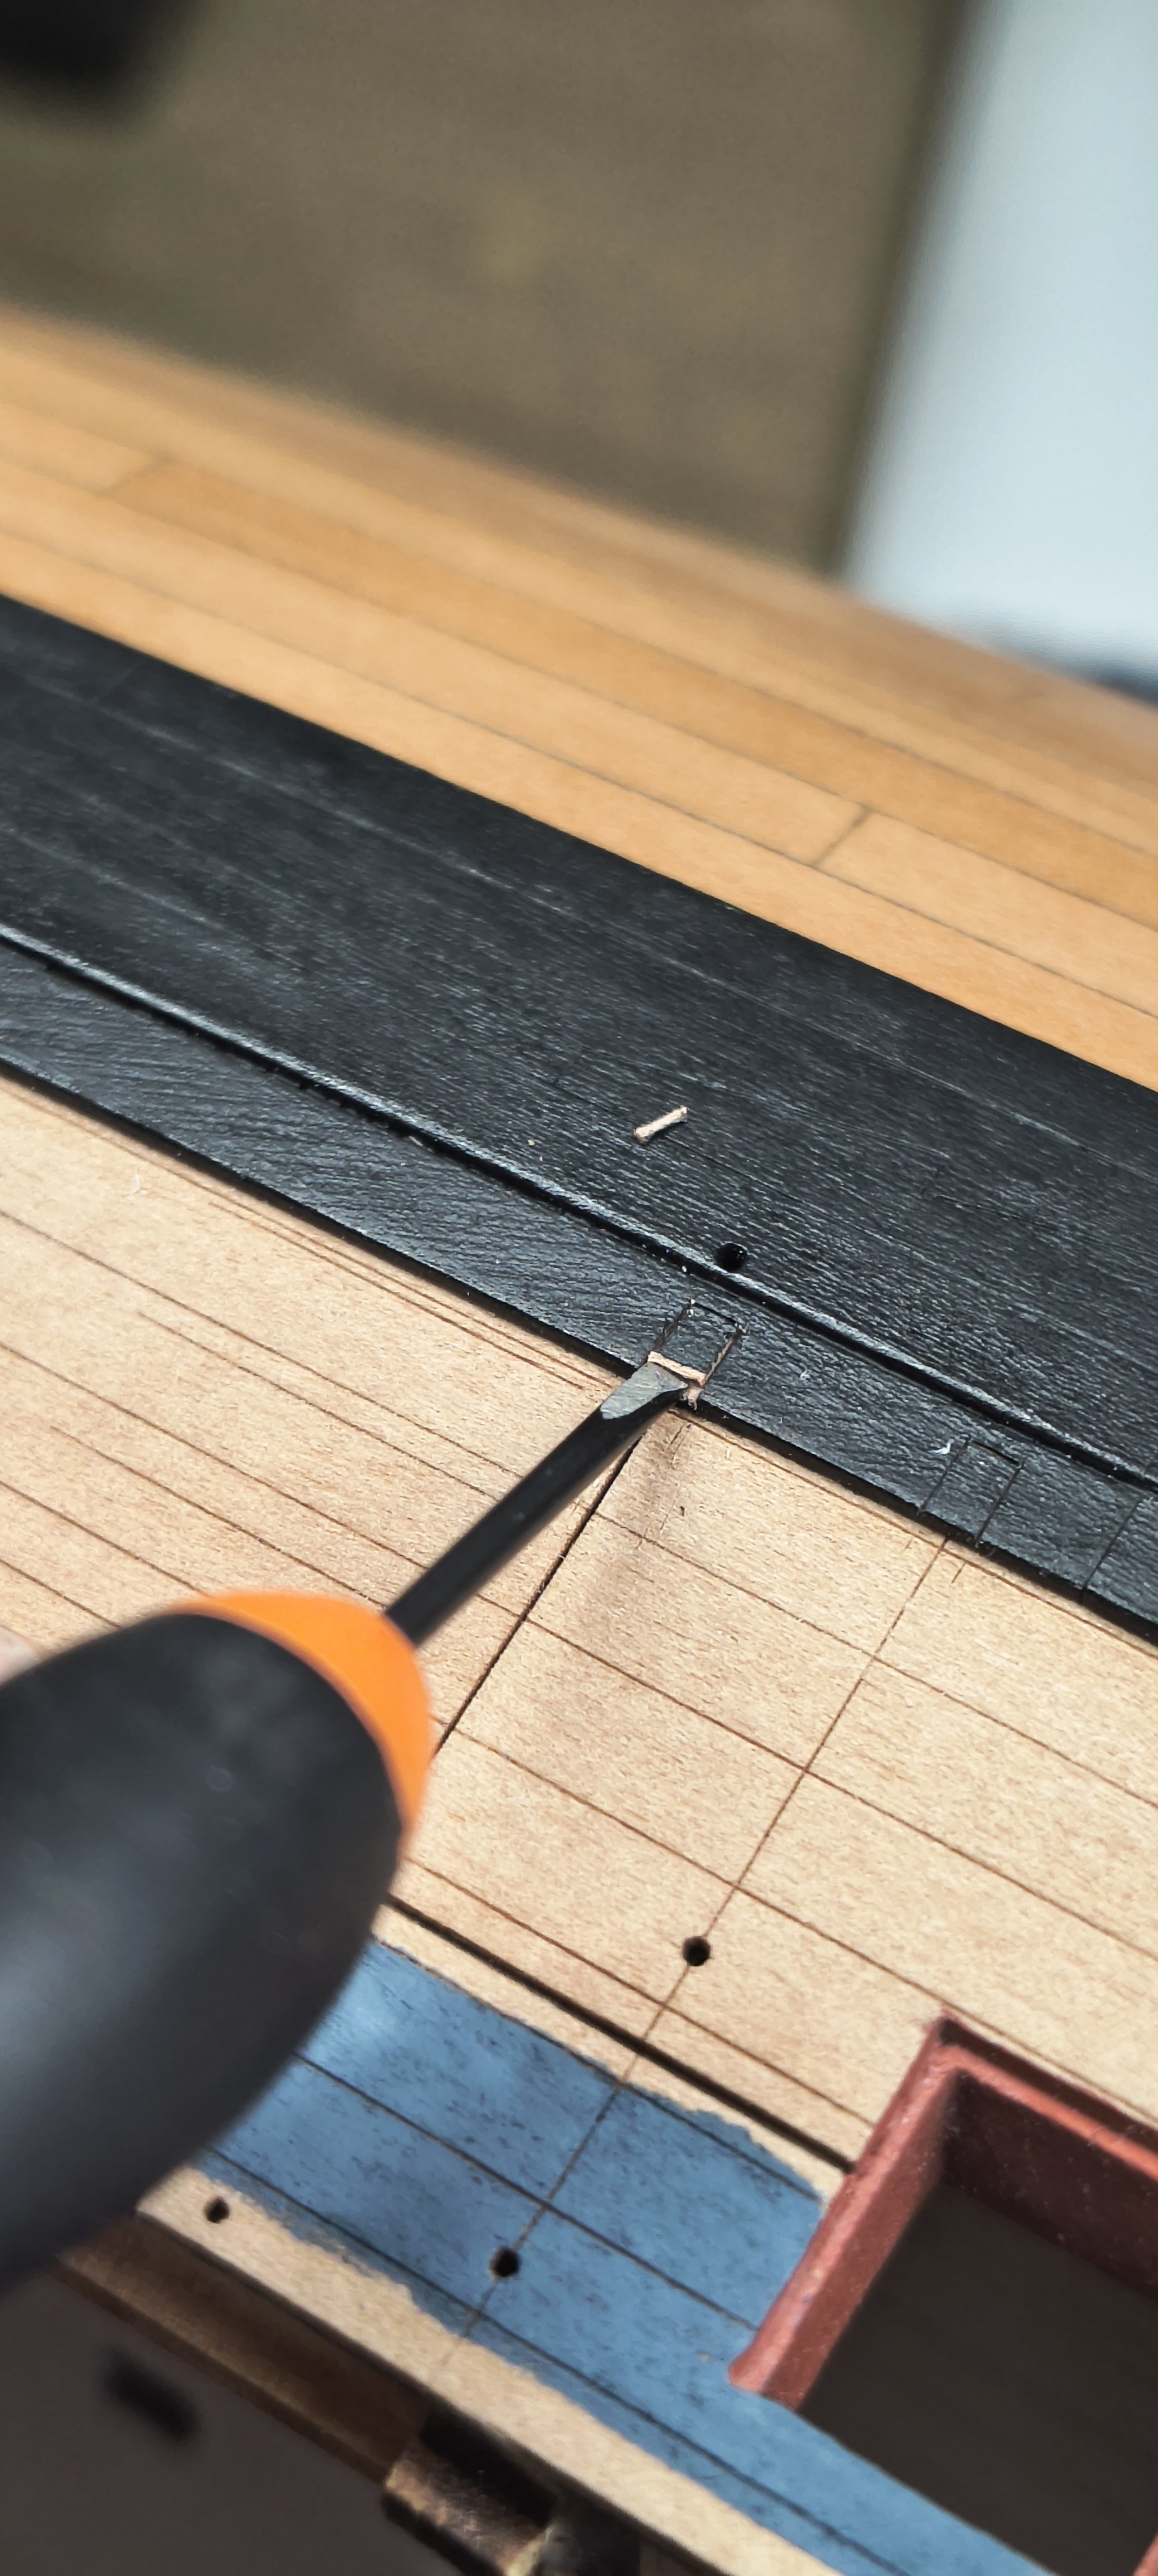
The second thing I am currently working on are all the center holes. I have to say they were great for positioning all the rails, but I personally want them to be hidden so you get a nice clean look.
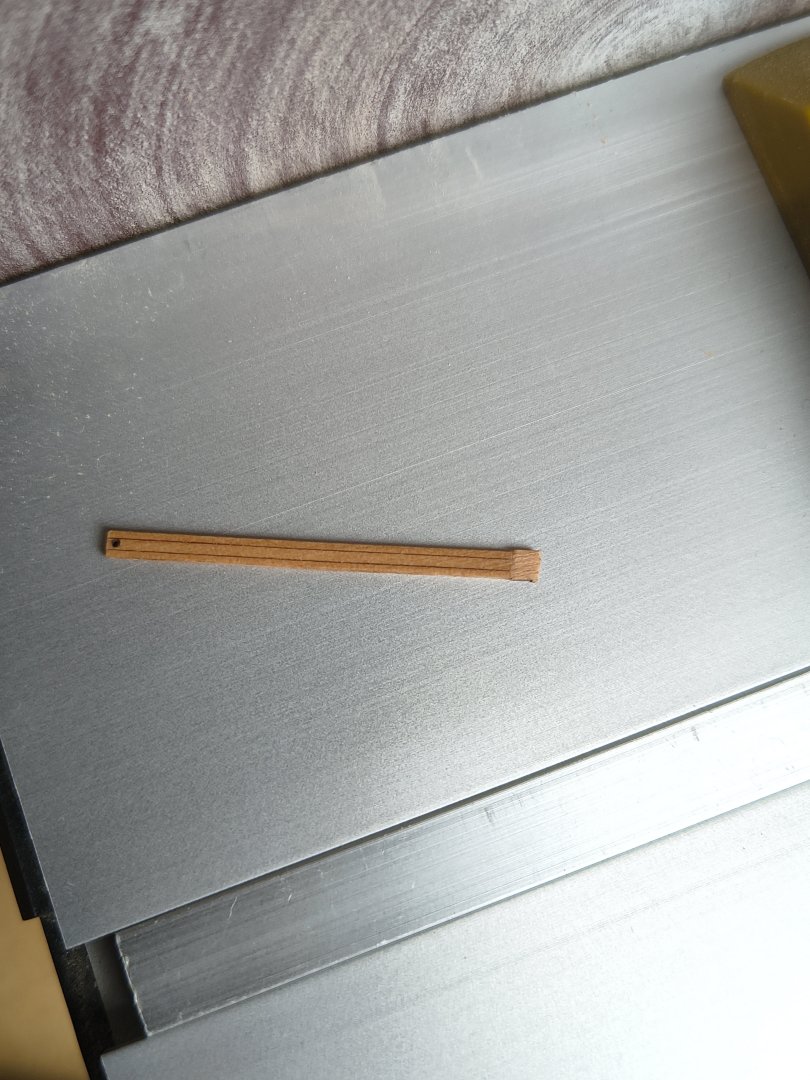
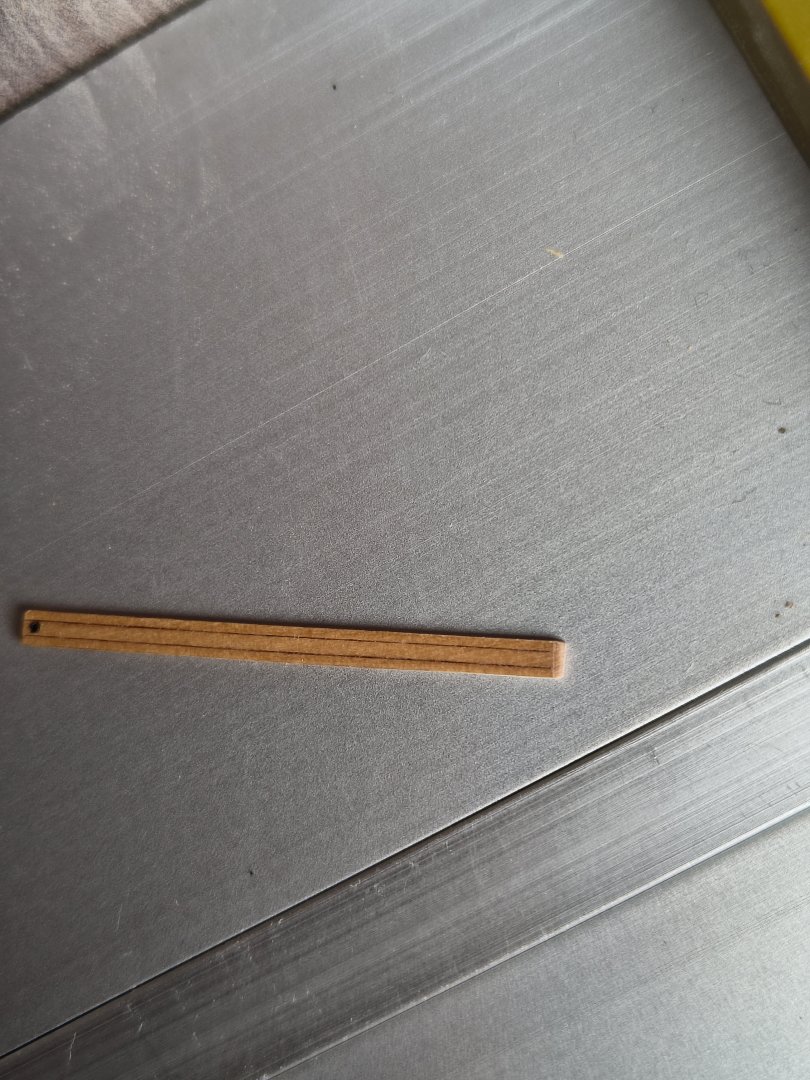
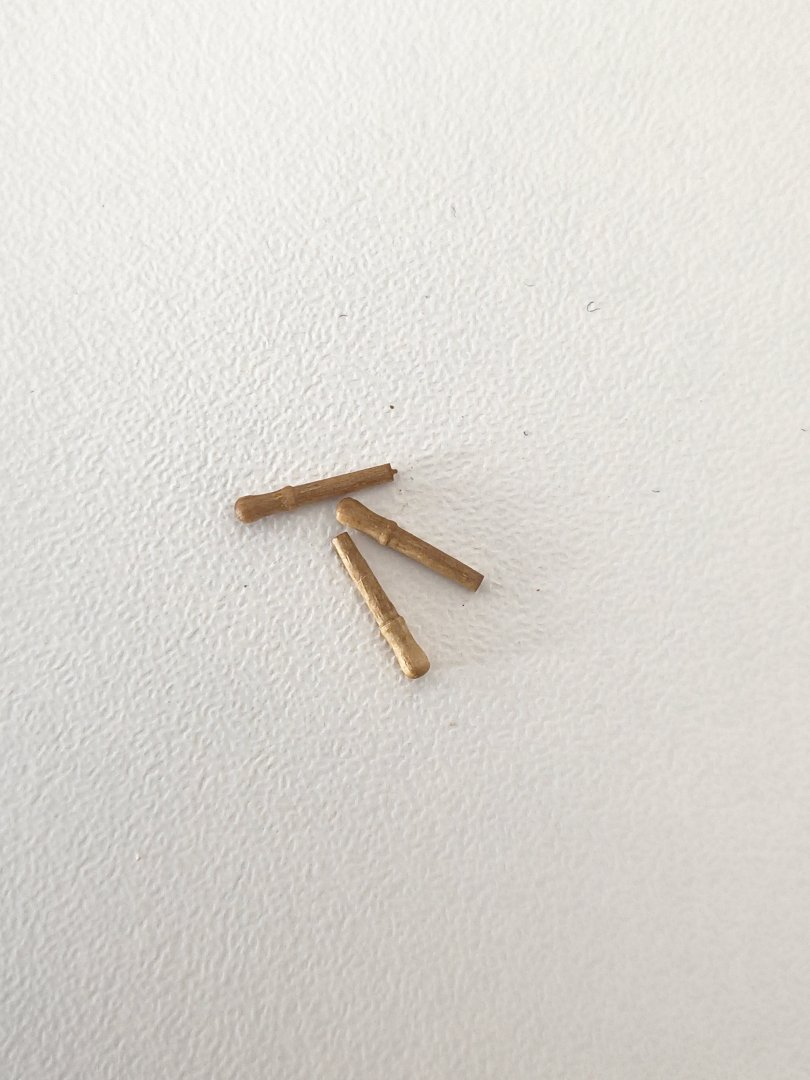
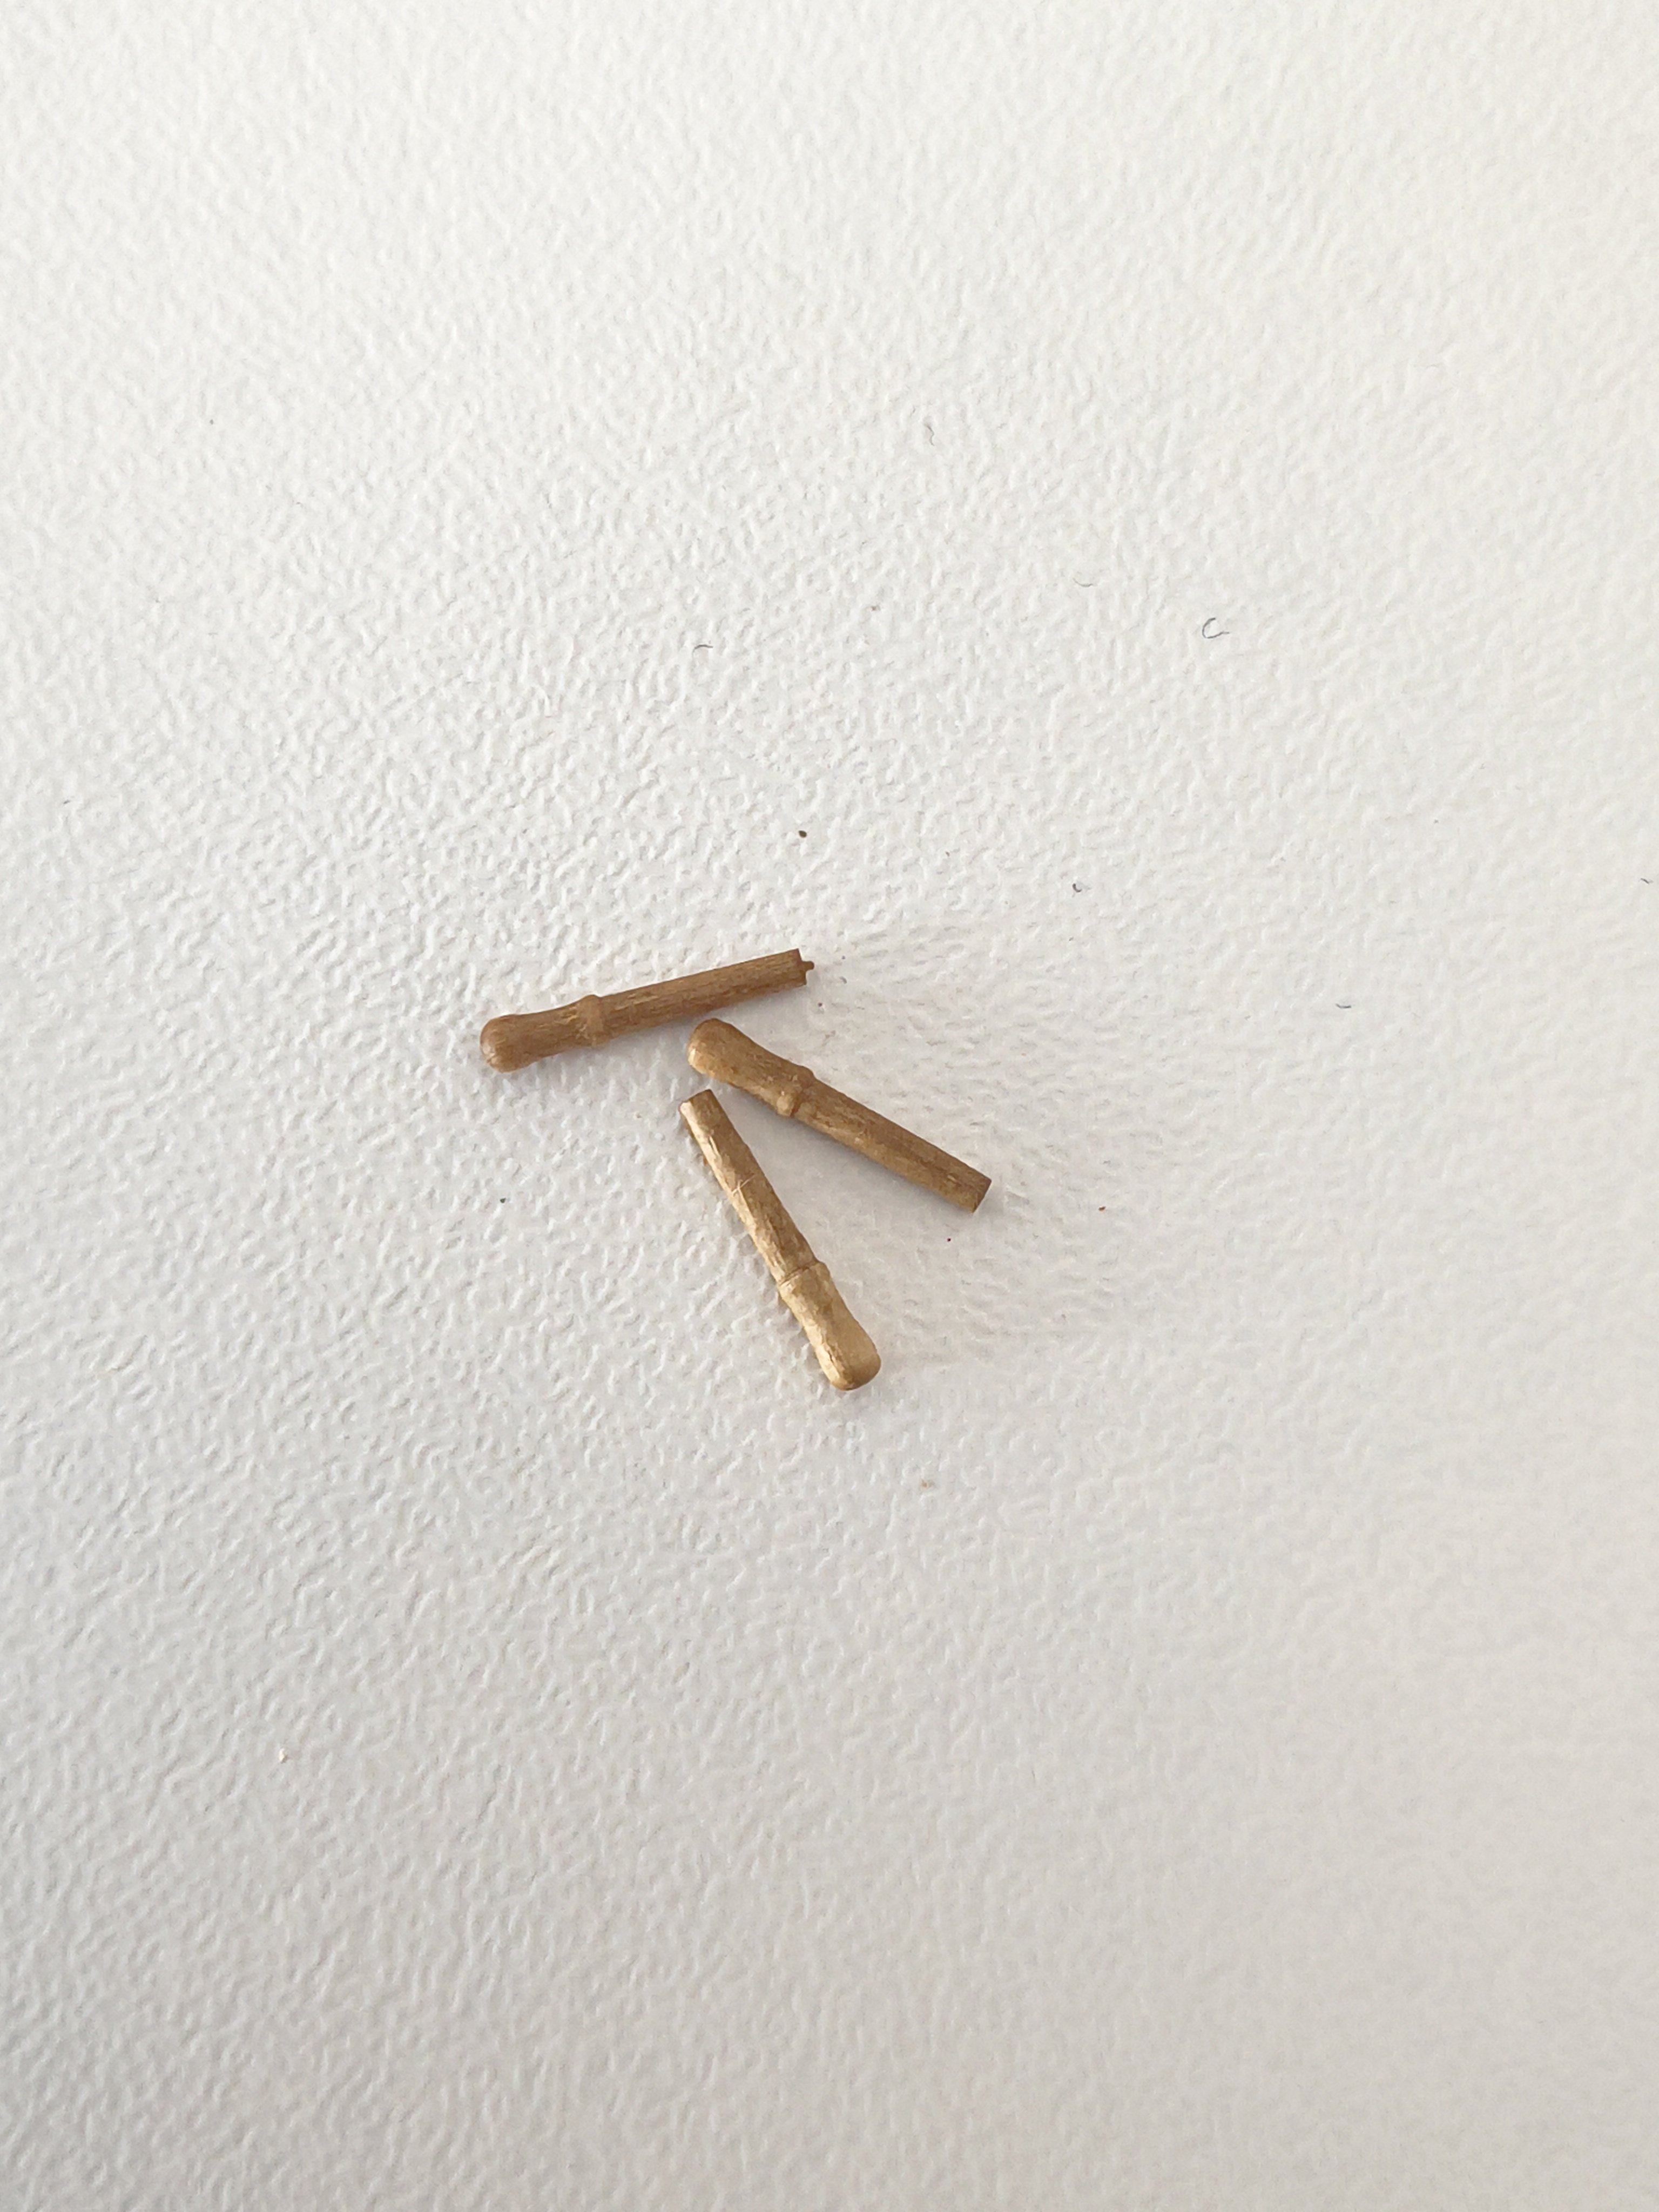
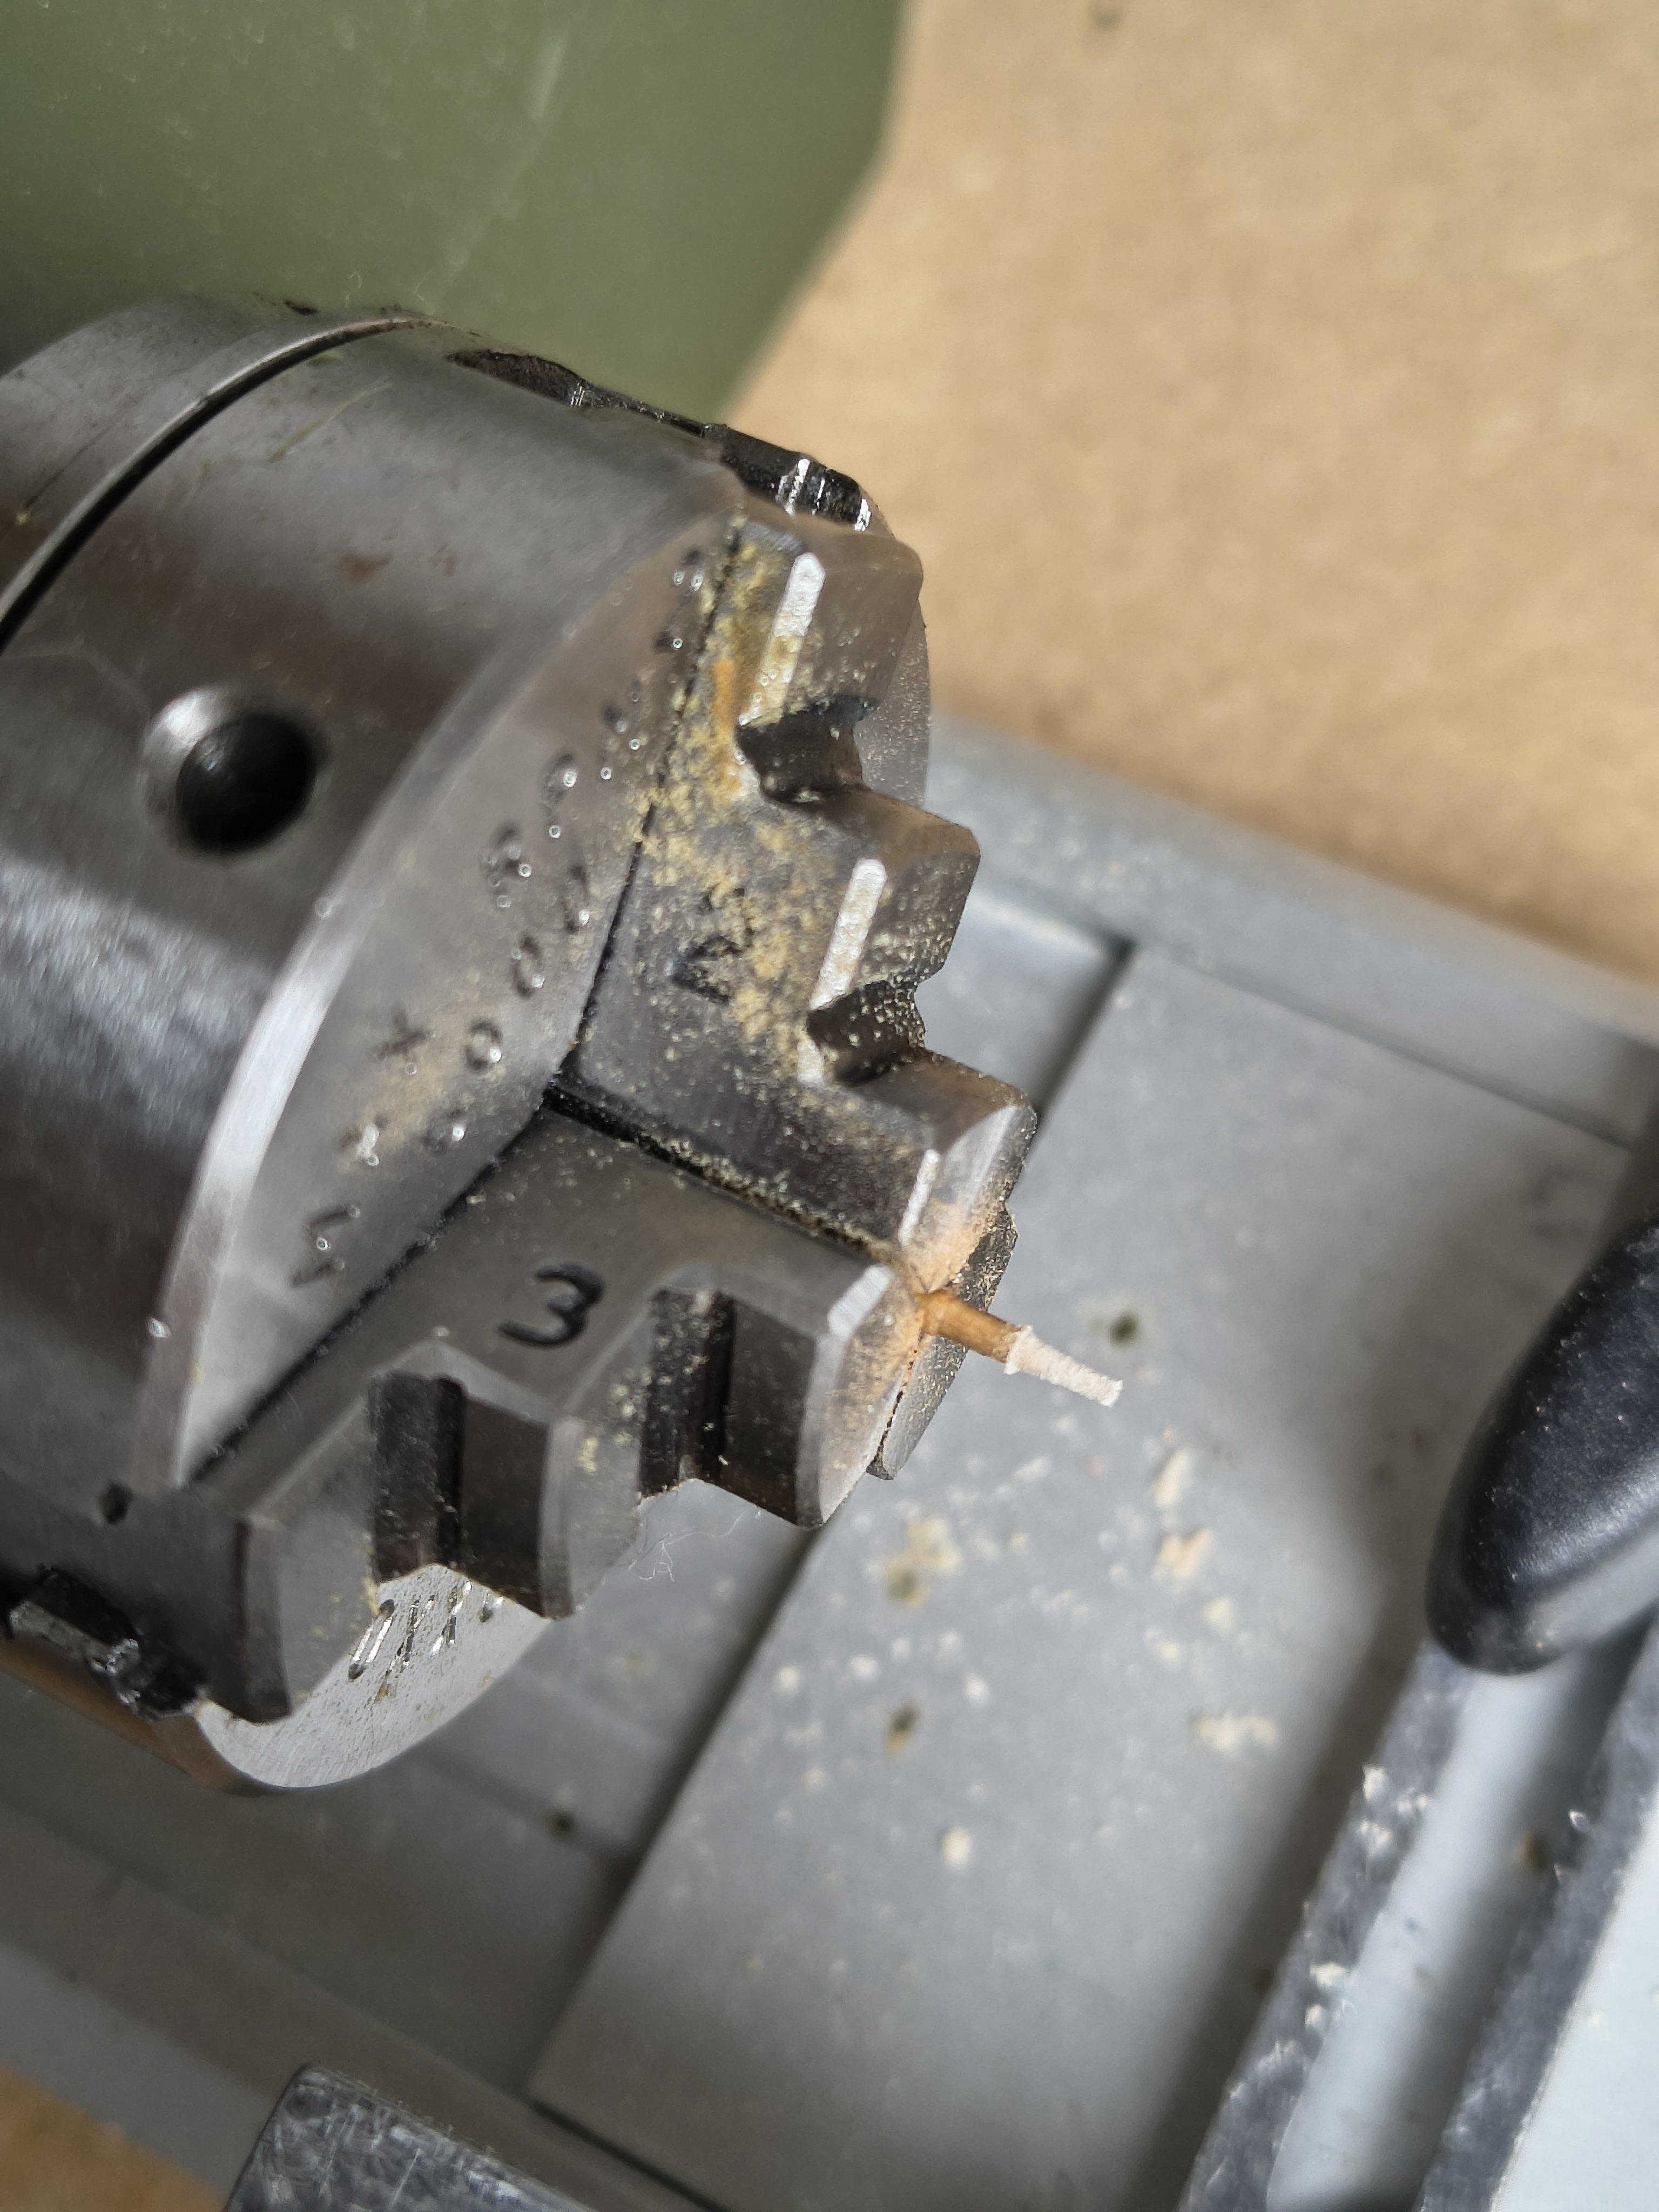
For that I am sanding down a few belaying pins on the lathe (left over from my HMS Pickle build)

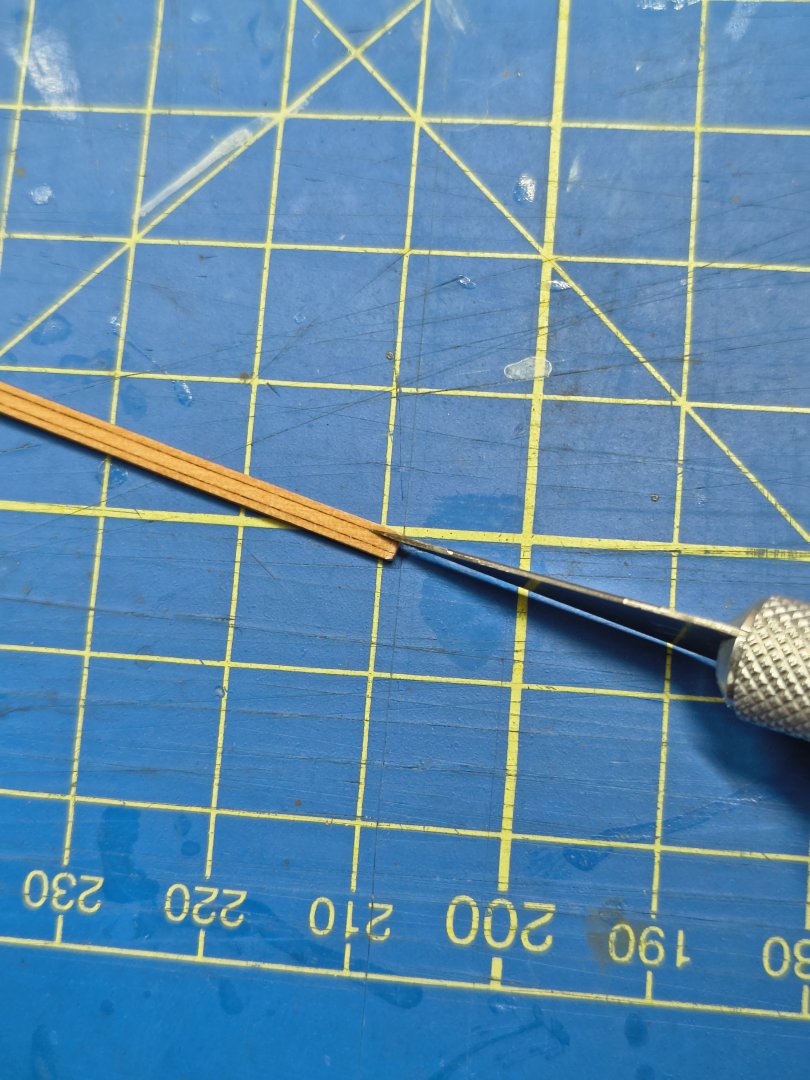
I glue them into the holes with a dab of glue.

And when the glue is dry, cut it off with a knife and of course finish it with a little bit of WOP. The end result is at normal viewing distance very fine in my eyes. But still have to fill a lot of holes this way, so I'm still busy for a while.
")

All in all some extra work...which of course is not necessary, because you can just leave it as it is of course. But I myself think it adds something if everything looks nice and tight and neat...plus you have even more fun with such a kit
-
-
Well done Kevin! She turned out wonderful! Also nice to see the scale photo with yourself 👌
- Kevin and chris watton
-
 2
2
-
That's some nice planking! Are you going to leave it natural?
- Mr Whippy and Paul Le Wol
-
2
-
-
Lovely work on your ship, and what a nice workplace!
- SaltyScot and Keith Black
-
1
-
 1
1
-
-
-
1 hour ago, Kevin said:
there is so much lovely work going on in this build
Agreed! It's such a fascinating build
- yvesvidal, Paul Le Wol and Kevin
-
2
-
1
-
-
29 minutes ago, TJM said:
Really great explanation and it looks very good. I lover your choice of blue colour!
Thank you!
And thanks everyone for the likes, really appreciate it.
- Knocklouder and TJM
-
2
-
-
-
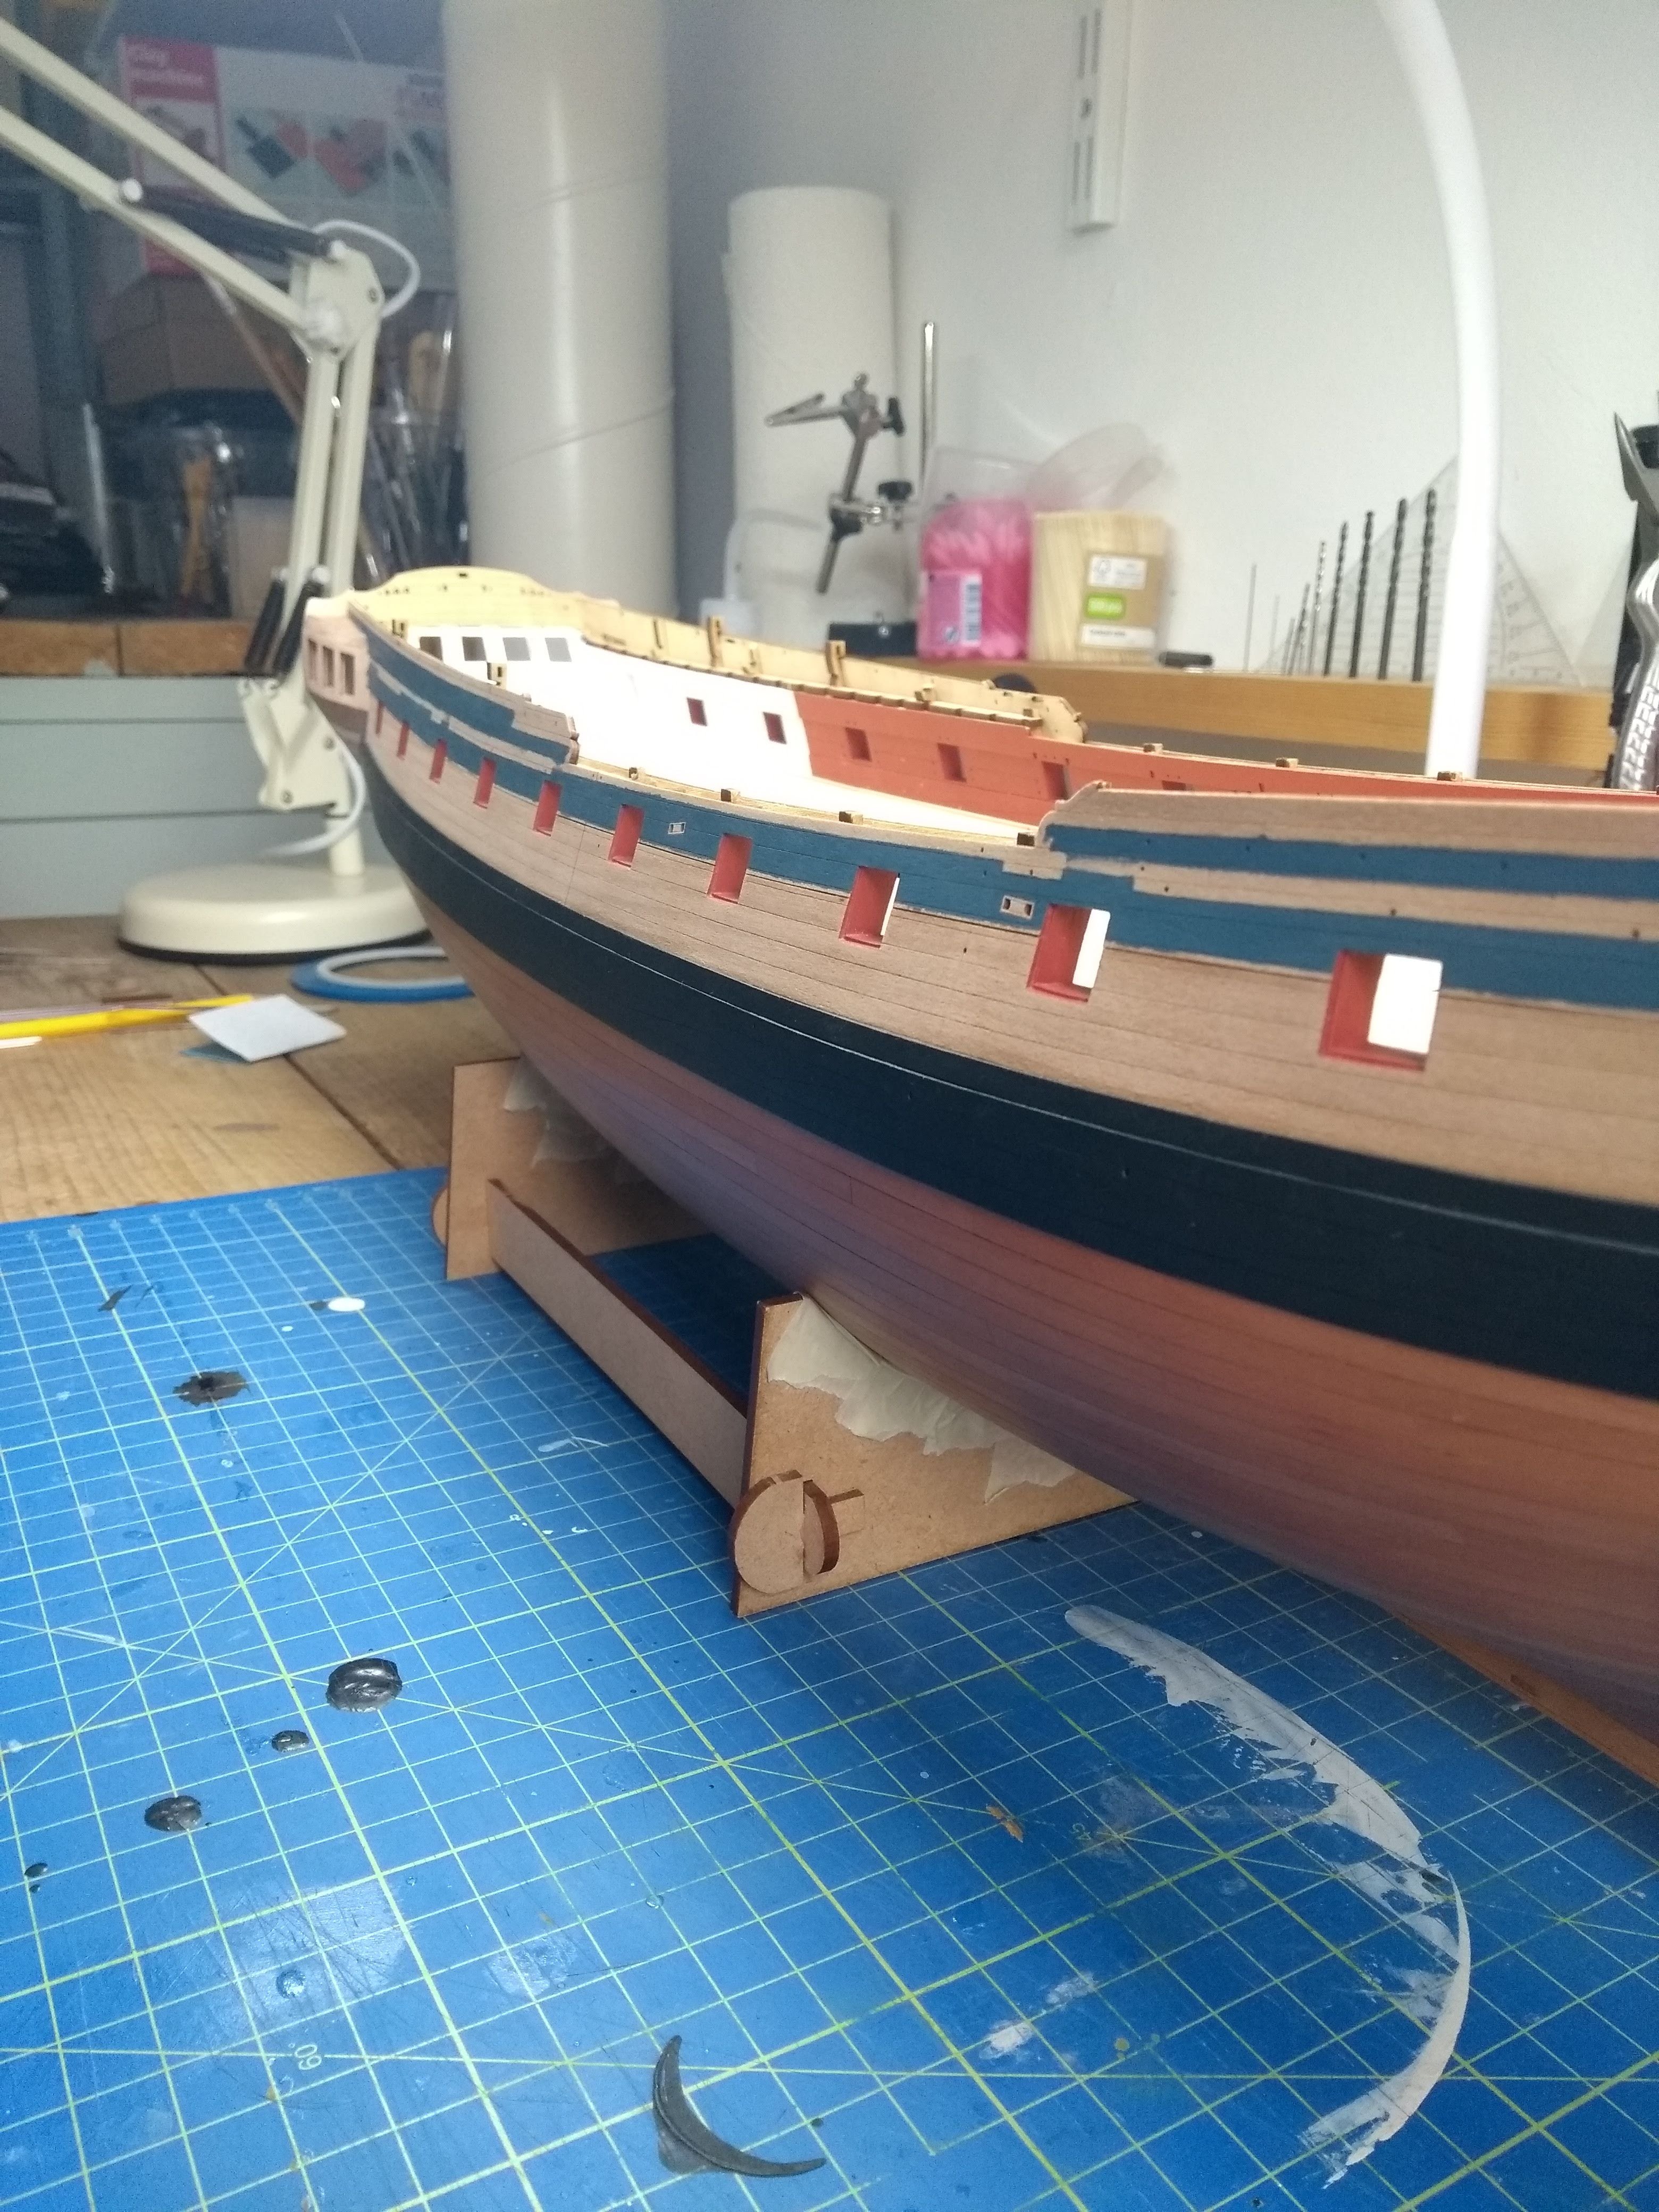
Little inbetween update:
I wanted to give a little update to show what I'm working on, so the post wouldn't become too long.
The work isn't going very fast at the moment, but I'm making steady progress.
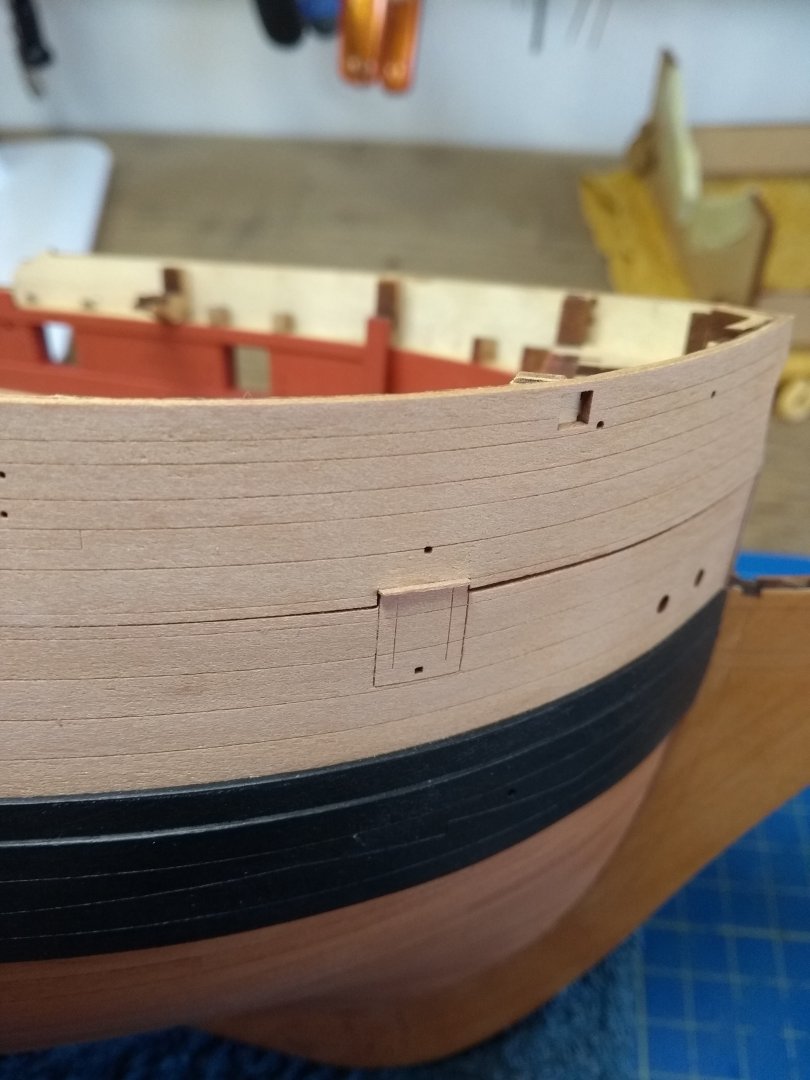
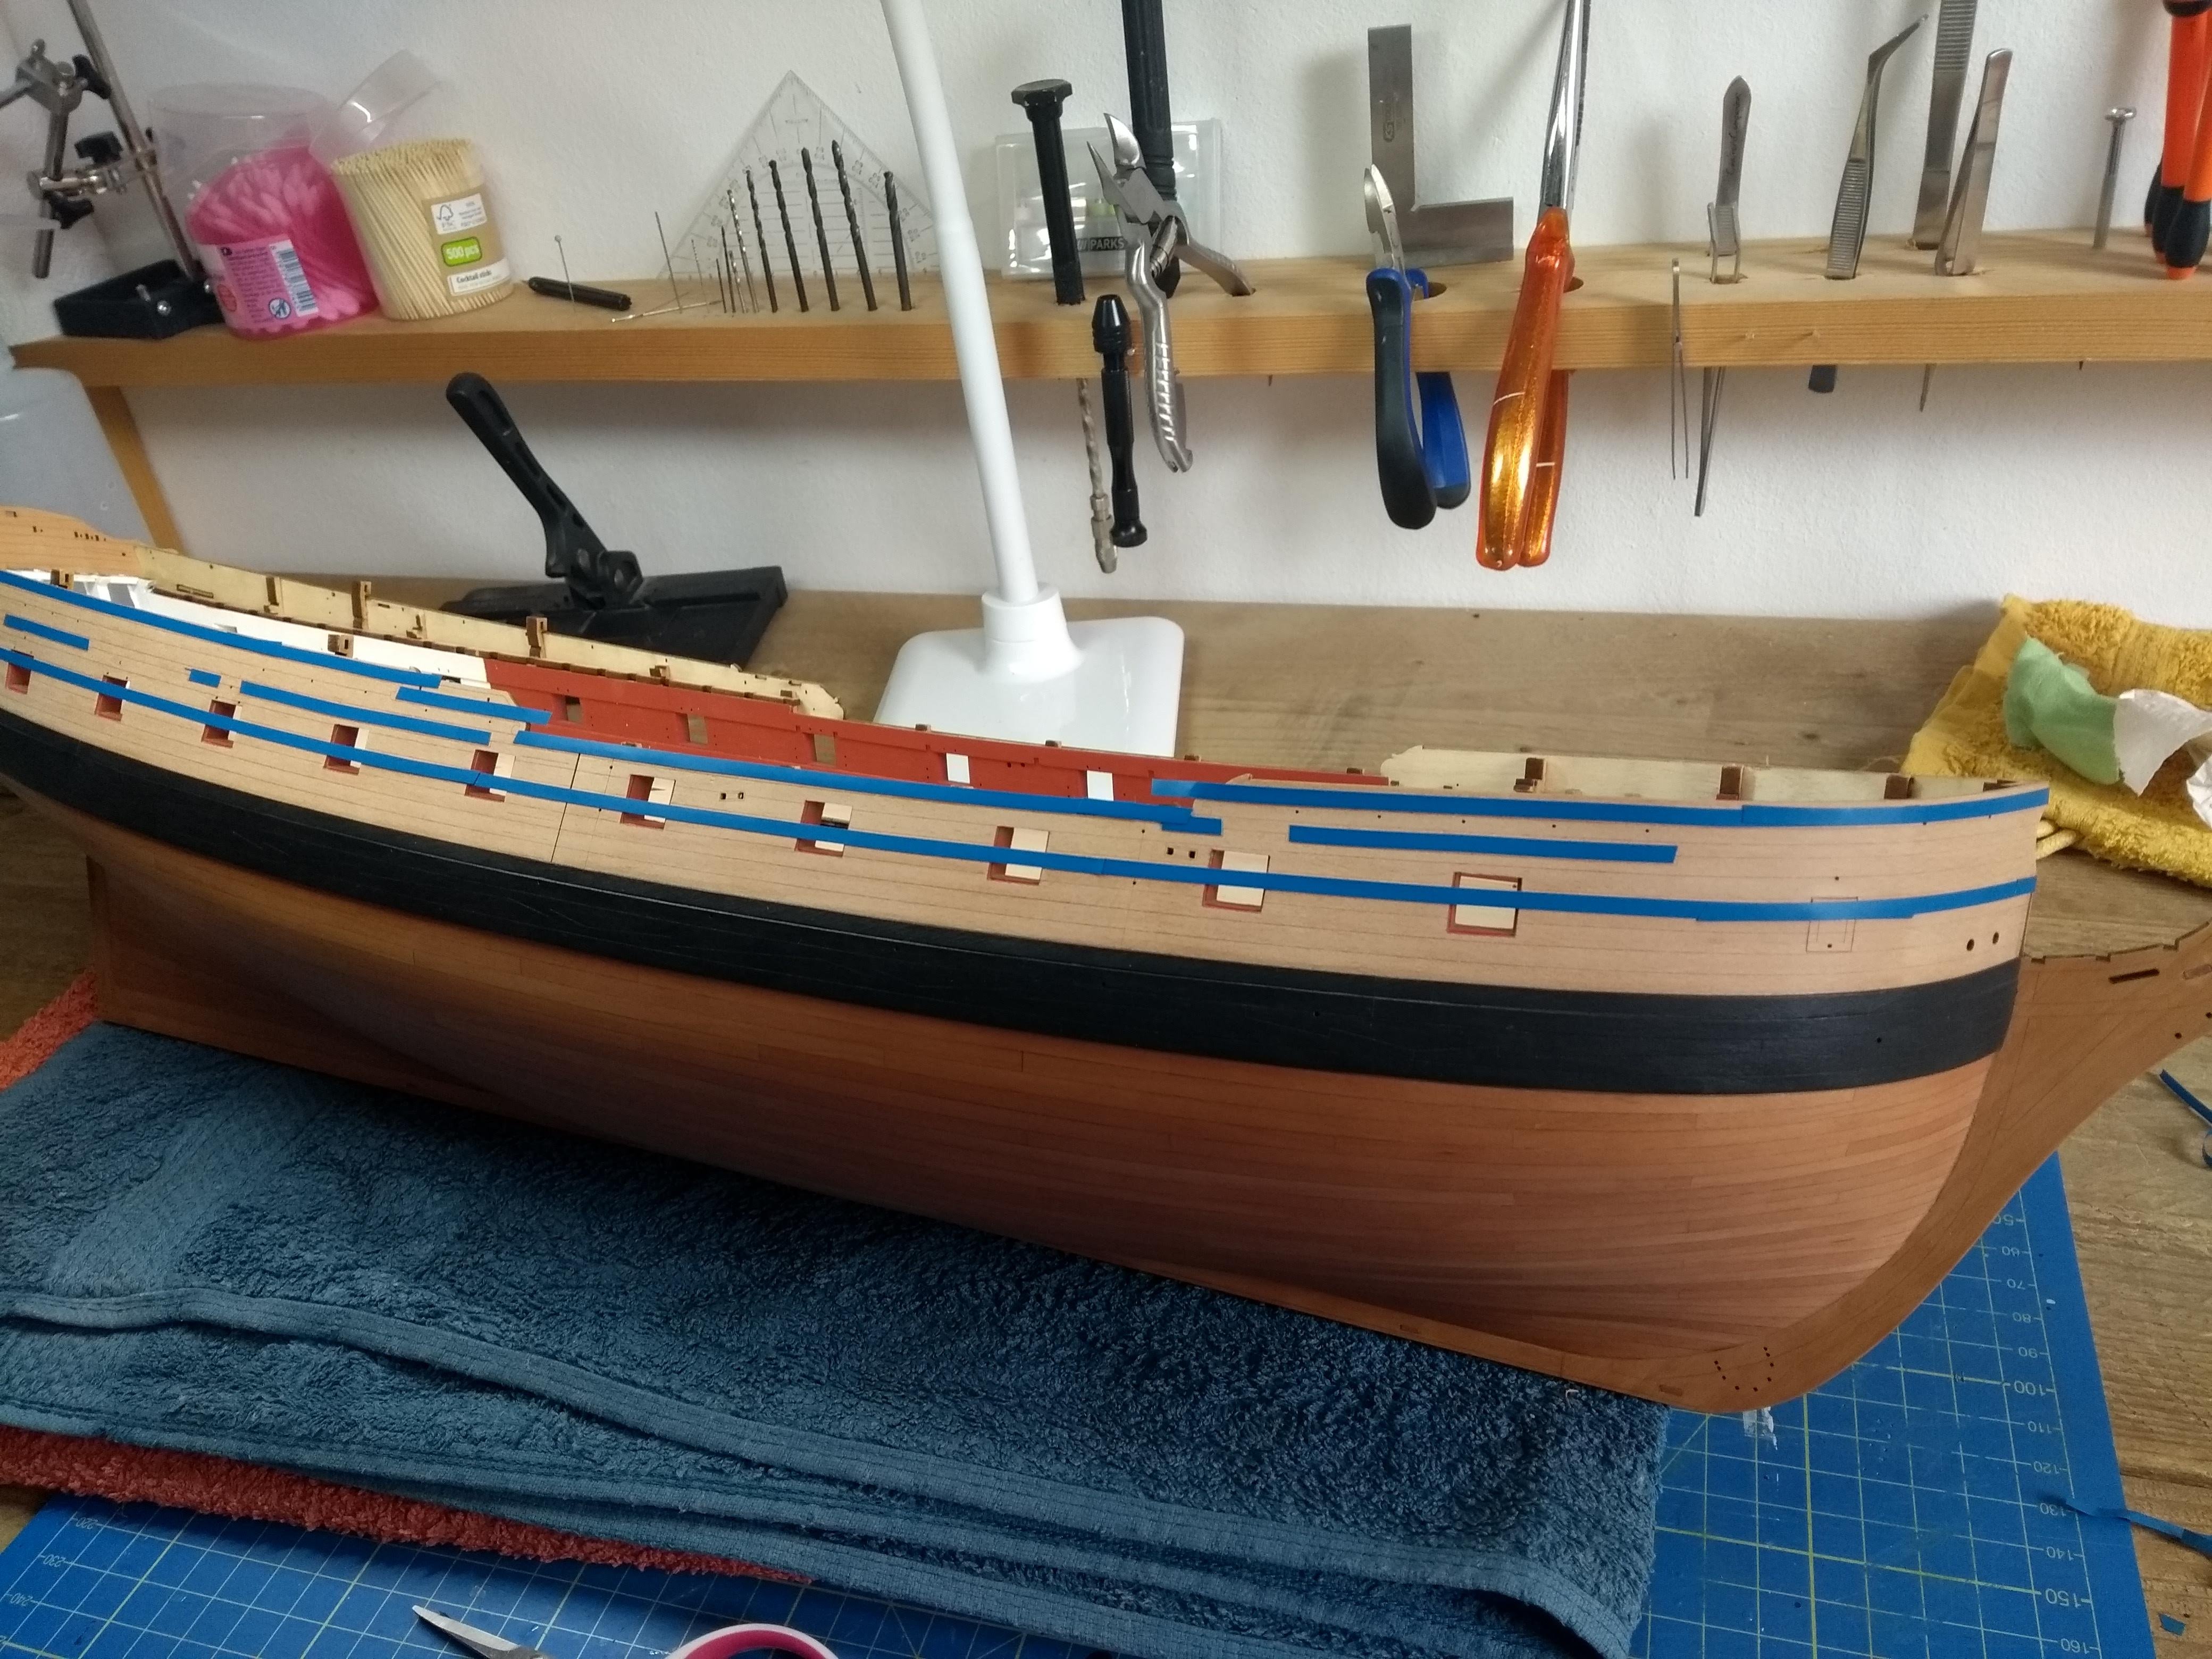
I am now busy attaching the rails on both sides. First I wanted to tackle the seam above the front gun port.
I had a considerable seam here and I filled it with a piece of scrap wood. Then I ran a knife through it to give the impression that it is a gunport lid.

.jpg.37852c998c389502a12e108a0f1b7bdf.jpg)
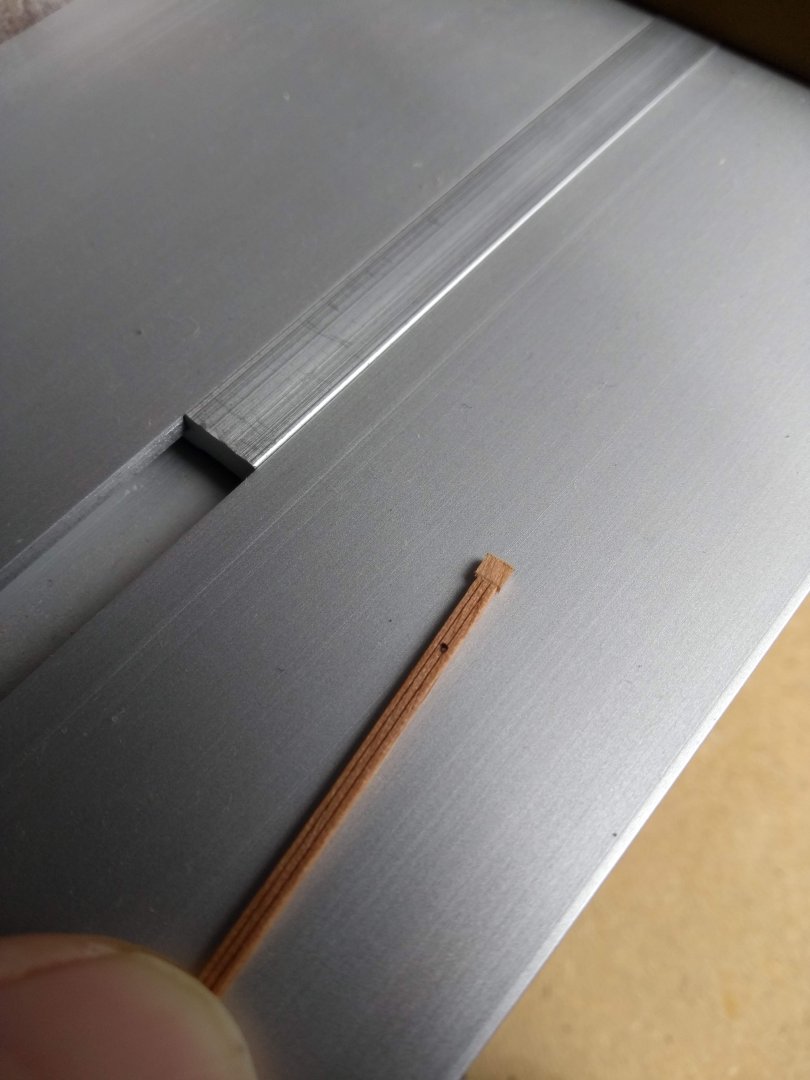
From this point I had to soak the front rails and attach them to the hull to get the shape in (without glue of course). First of all I removed all char from the laser. This by means of sanding stick, files etc. If you decide to remove the char beforehand... be very careful, you can bump into it in a careless moment and it breaks...


Then finally apply some color to the hull. So that the rails will finish the lines nicely and you don't have to paint very precisely along a rail... ideal! For this I used "Admiralty Red Ochre" and "Tamiya Medium blue XF-18". I thought these colors went very well together (inspired by the HMS Jason from Beef Wellington here on the forum). I used a little masking tape where possible. This to make it a bit easier for myself with the painting.

After removing the char from the rails beforehand, I gave it two layers of WOP. By sticking them on a piece of tape, the bottom was somewhat protected from oil so that the glue can adhere well. Plus it is also easier to handle when they are stuck on a piece of tape.
The reason I gave them a WOP layer beforehand is so that the blue and red paint do not get under the varnish. I checked on a test piece beforehand whether I would like this... and I did not think it was really right. I thought the paint color became too shiny and the WOP did not absorb well into the acrylic paint (logical I think). That is why I varnished the rails beforehand.

I noticed that the top rails didn't quite fit the counter, so I glued a small piece of scrapwood to the rails, sanded it, re-scored the lines with a knife and applied two layers of WOP. The end result is still not perfect haha, but these are fun little challenges in between (that take way too much time lol)
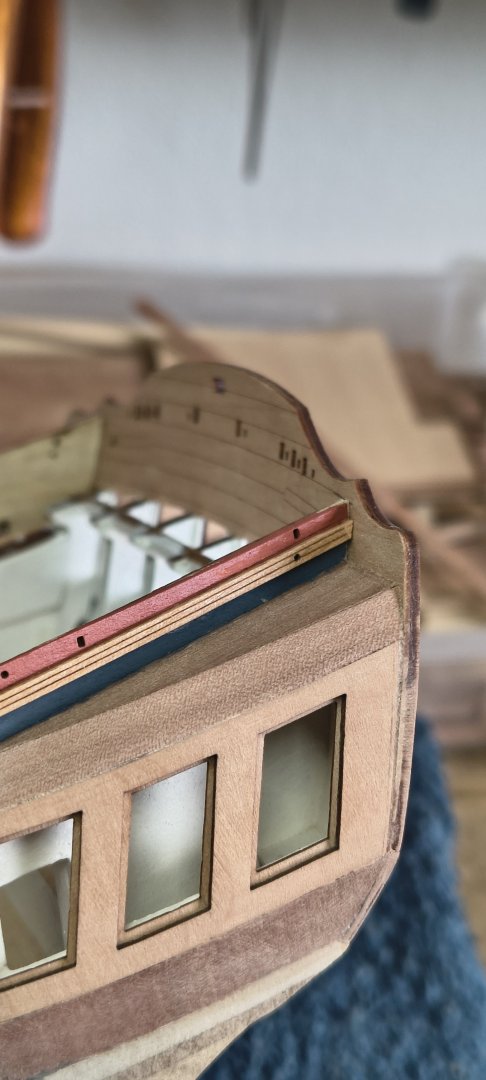
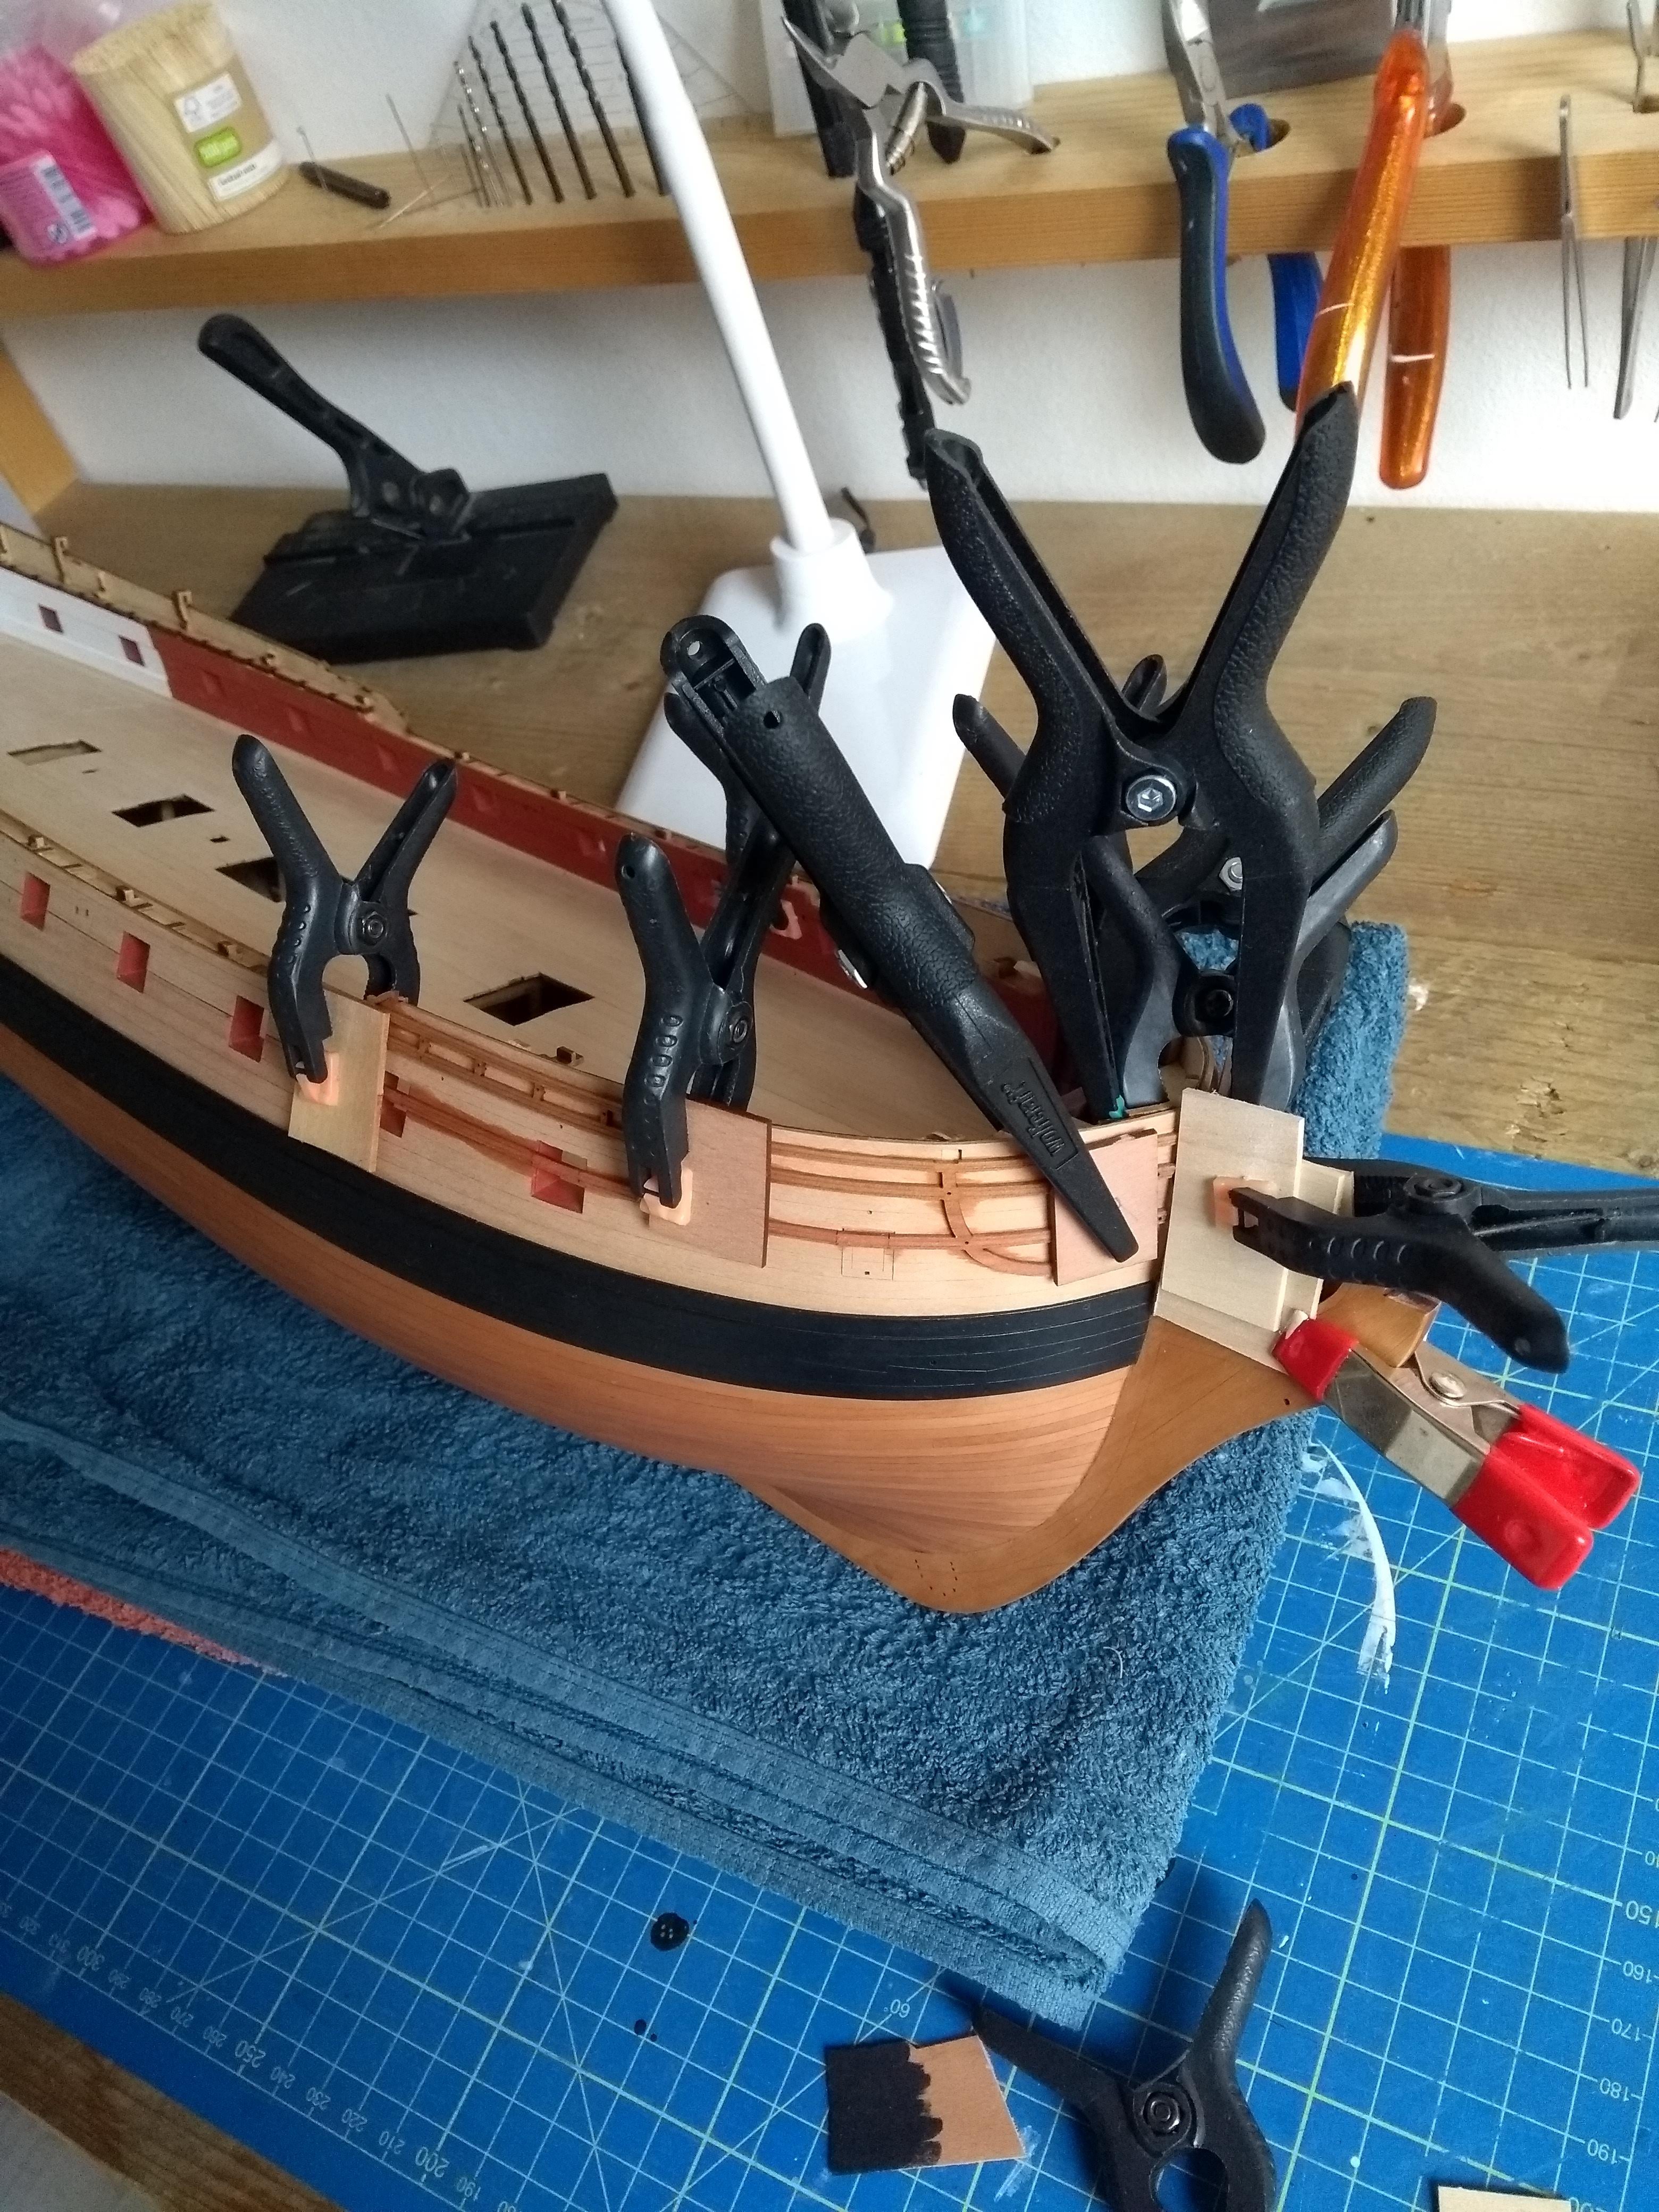
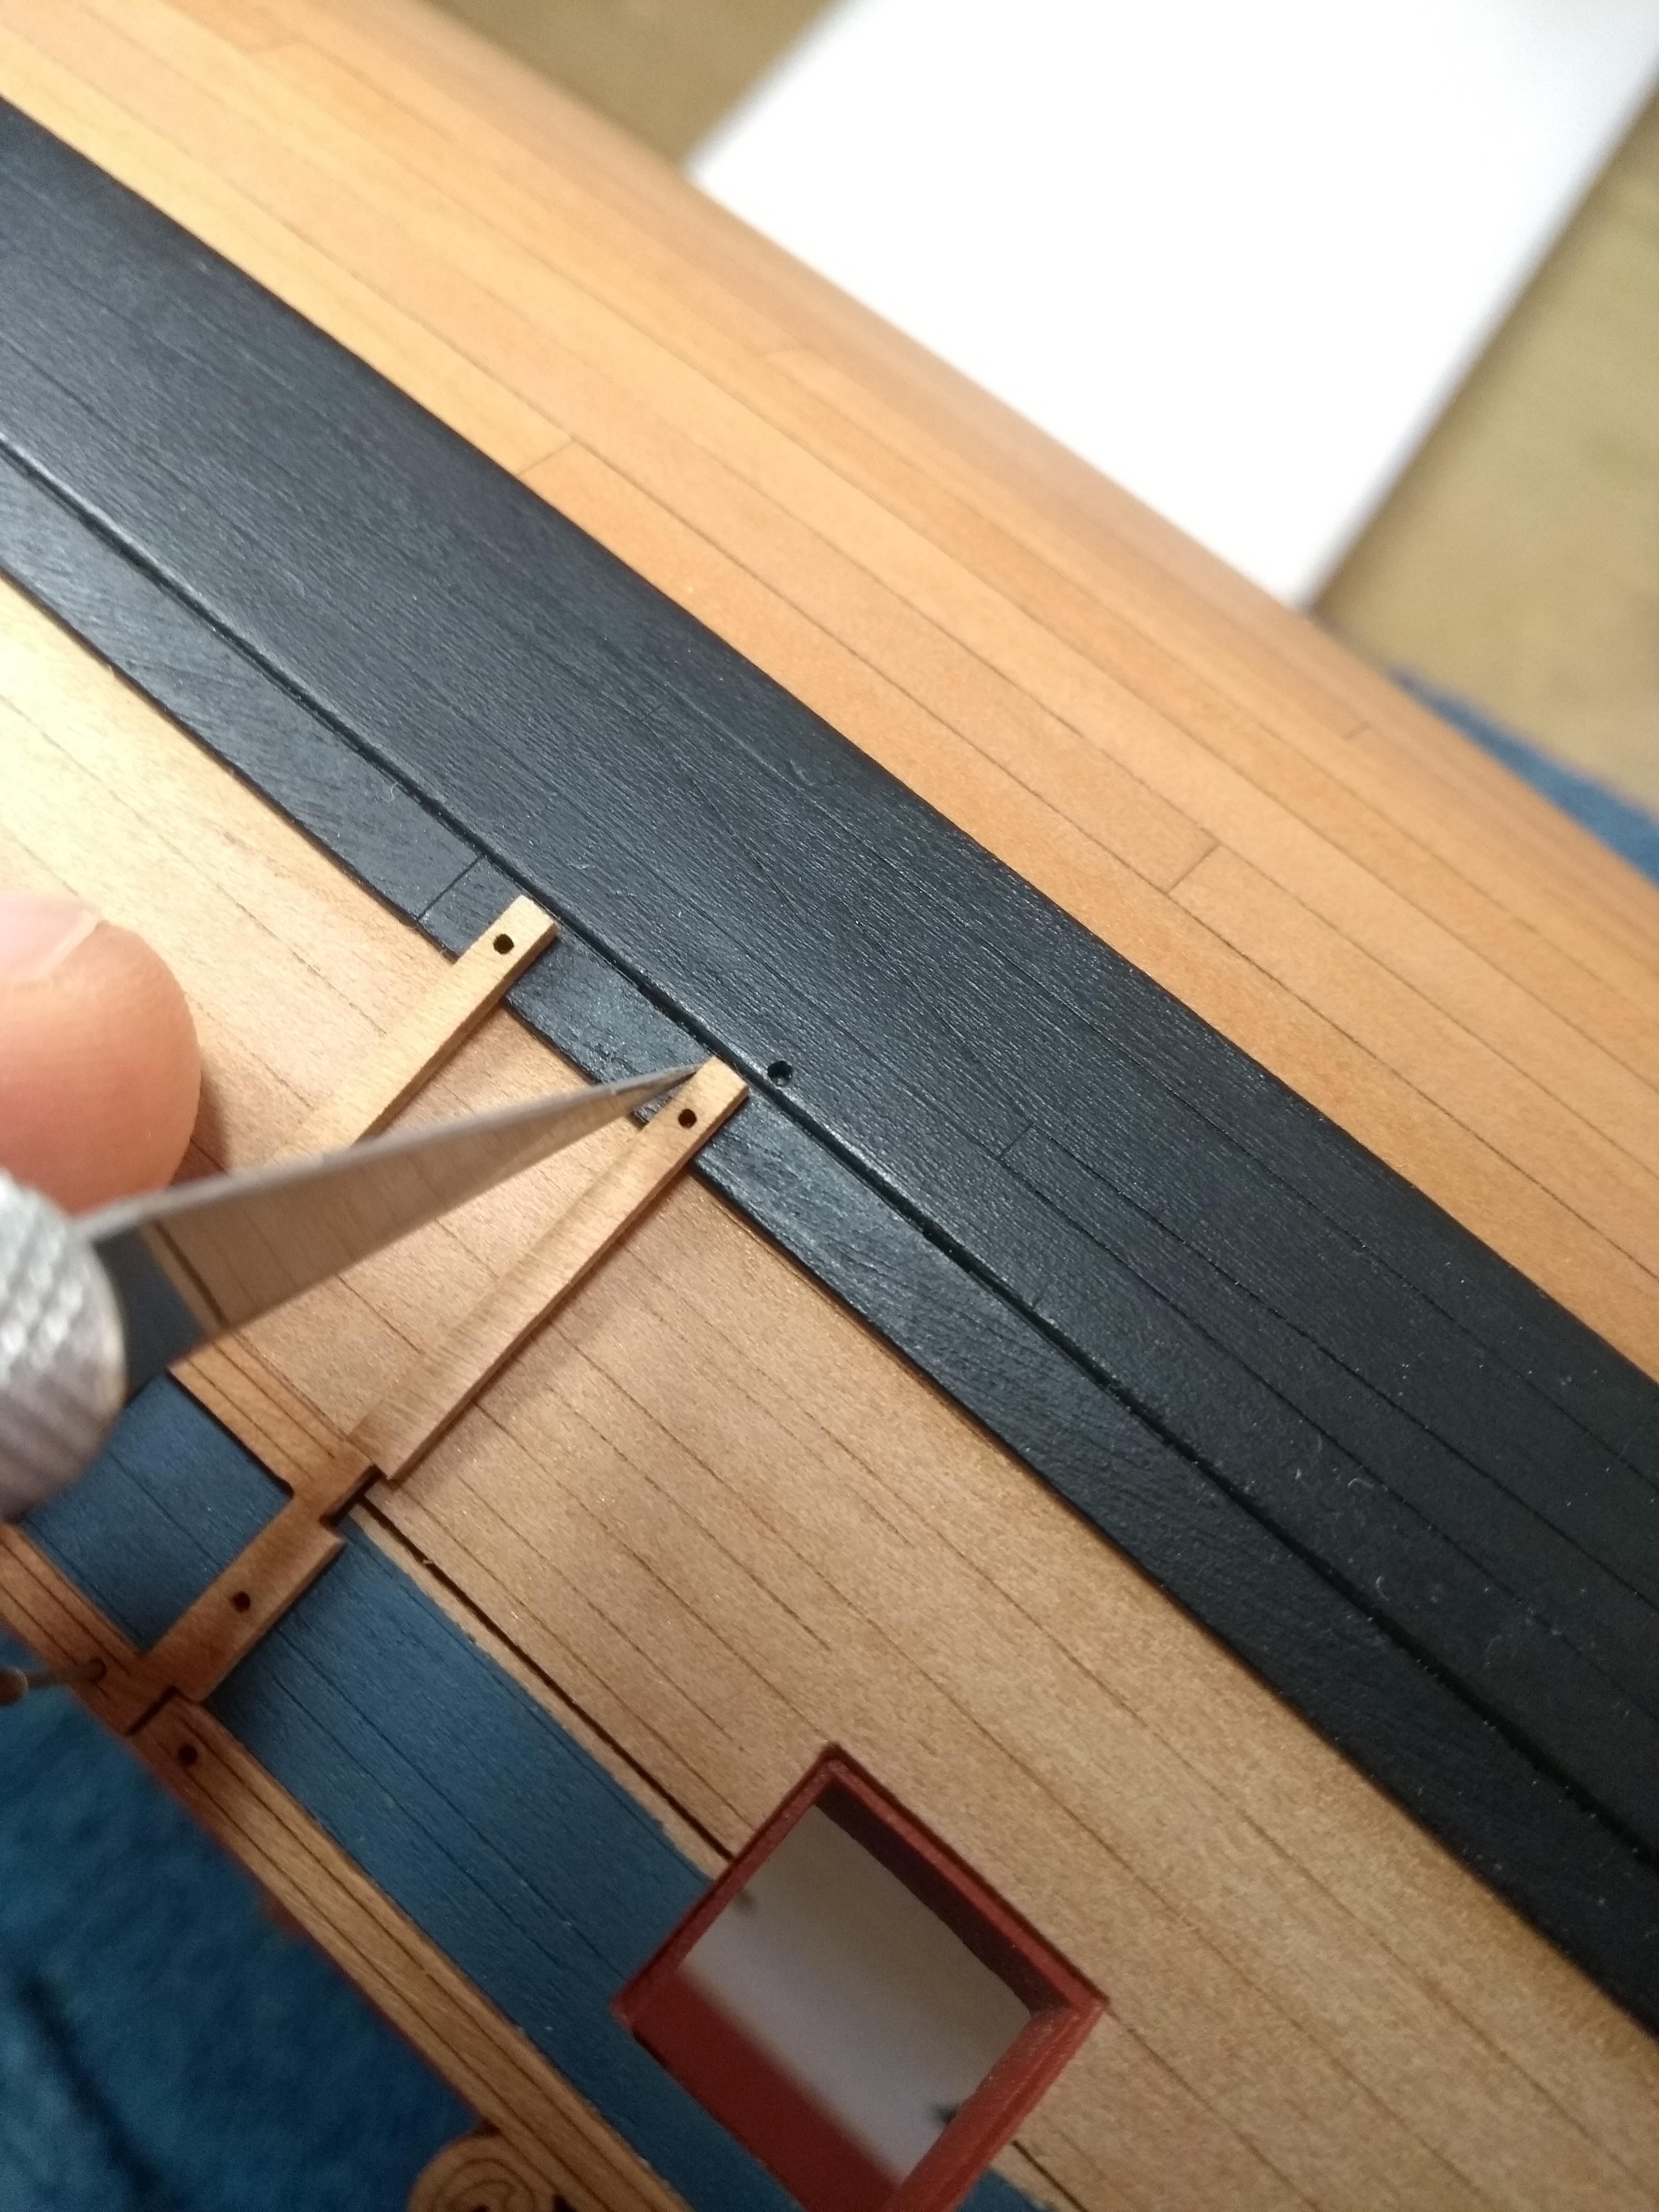
The middle rails required me to make two small recesses in the upper wale. First marked with a small knife and then with a small knife carefully scored the lines on the side and then with a small chisel (I ground a small screwdriver down to a fine chisel) very carefully removed the middle wood. From this point on I also finally got a better camera, so hopefully the pictures will be a bit better.

Here I clamp the middle rail piece. I glue it with diluted PVA. I diluted it so I have more time to apply it with a brush (otherwise it is already dry before I have spread all the glue on).


And at this point I am now...kind of halfway through all the rails
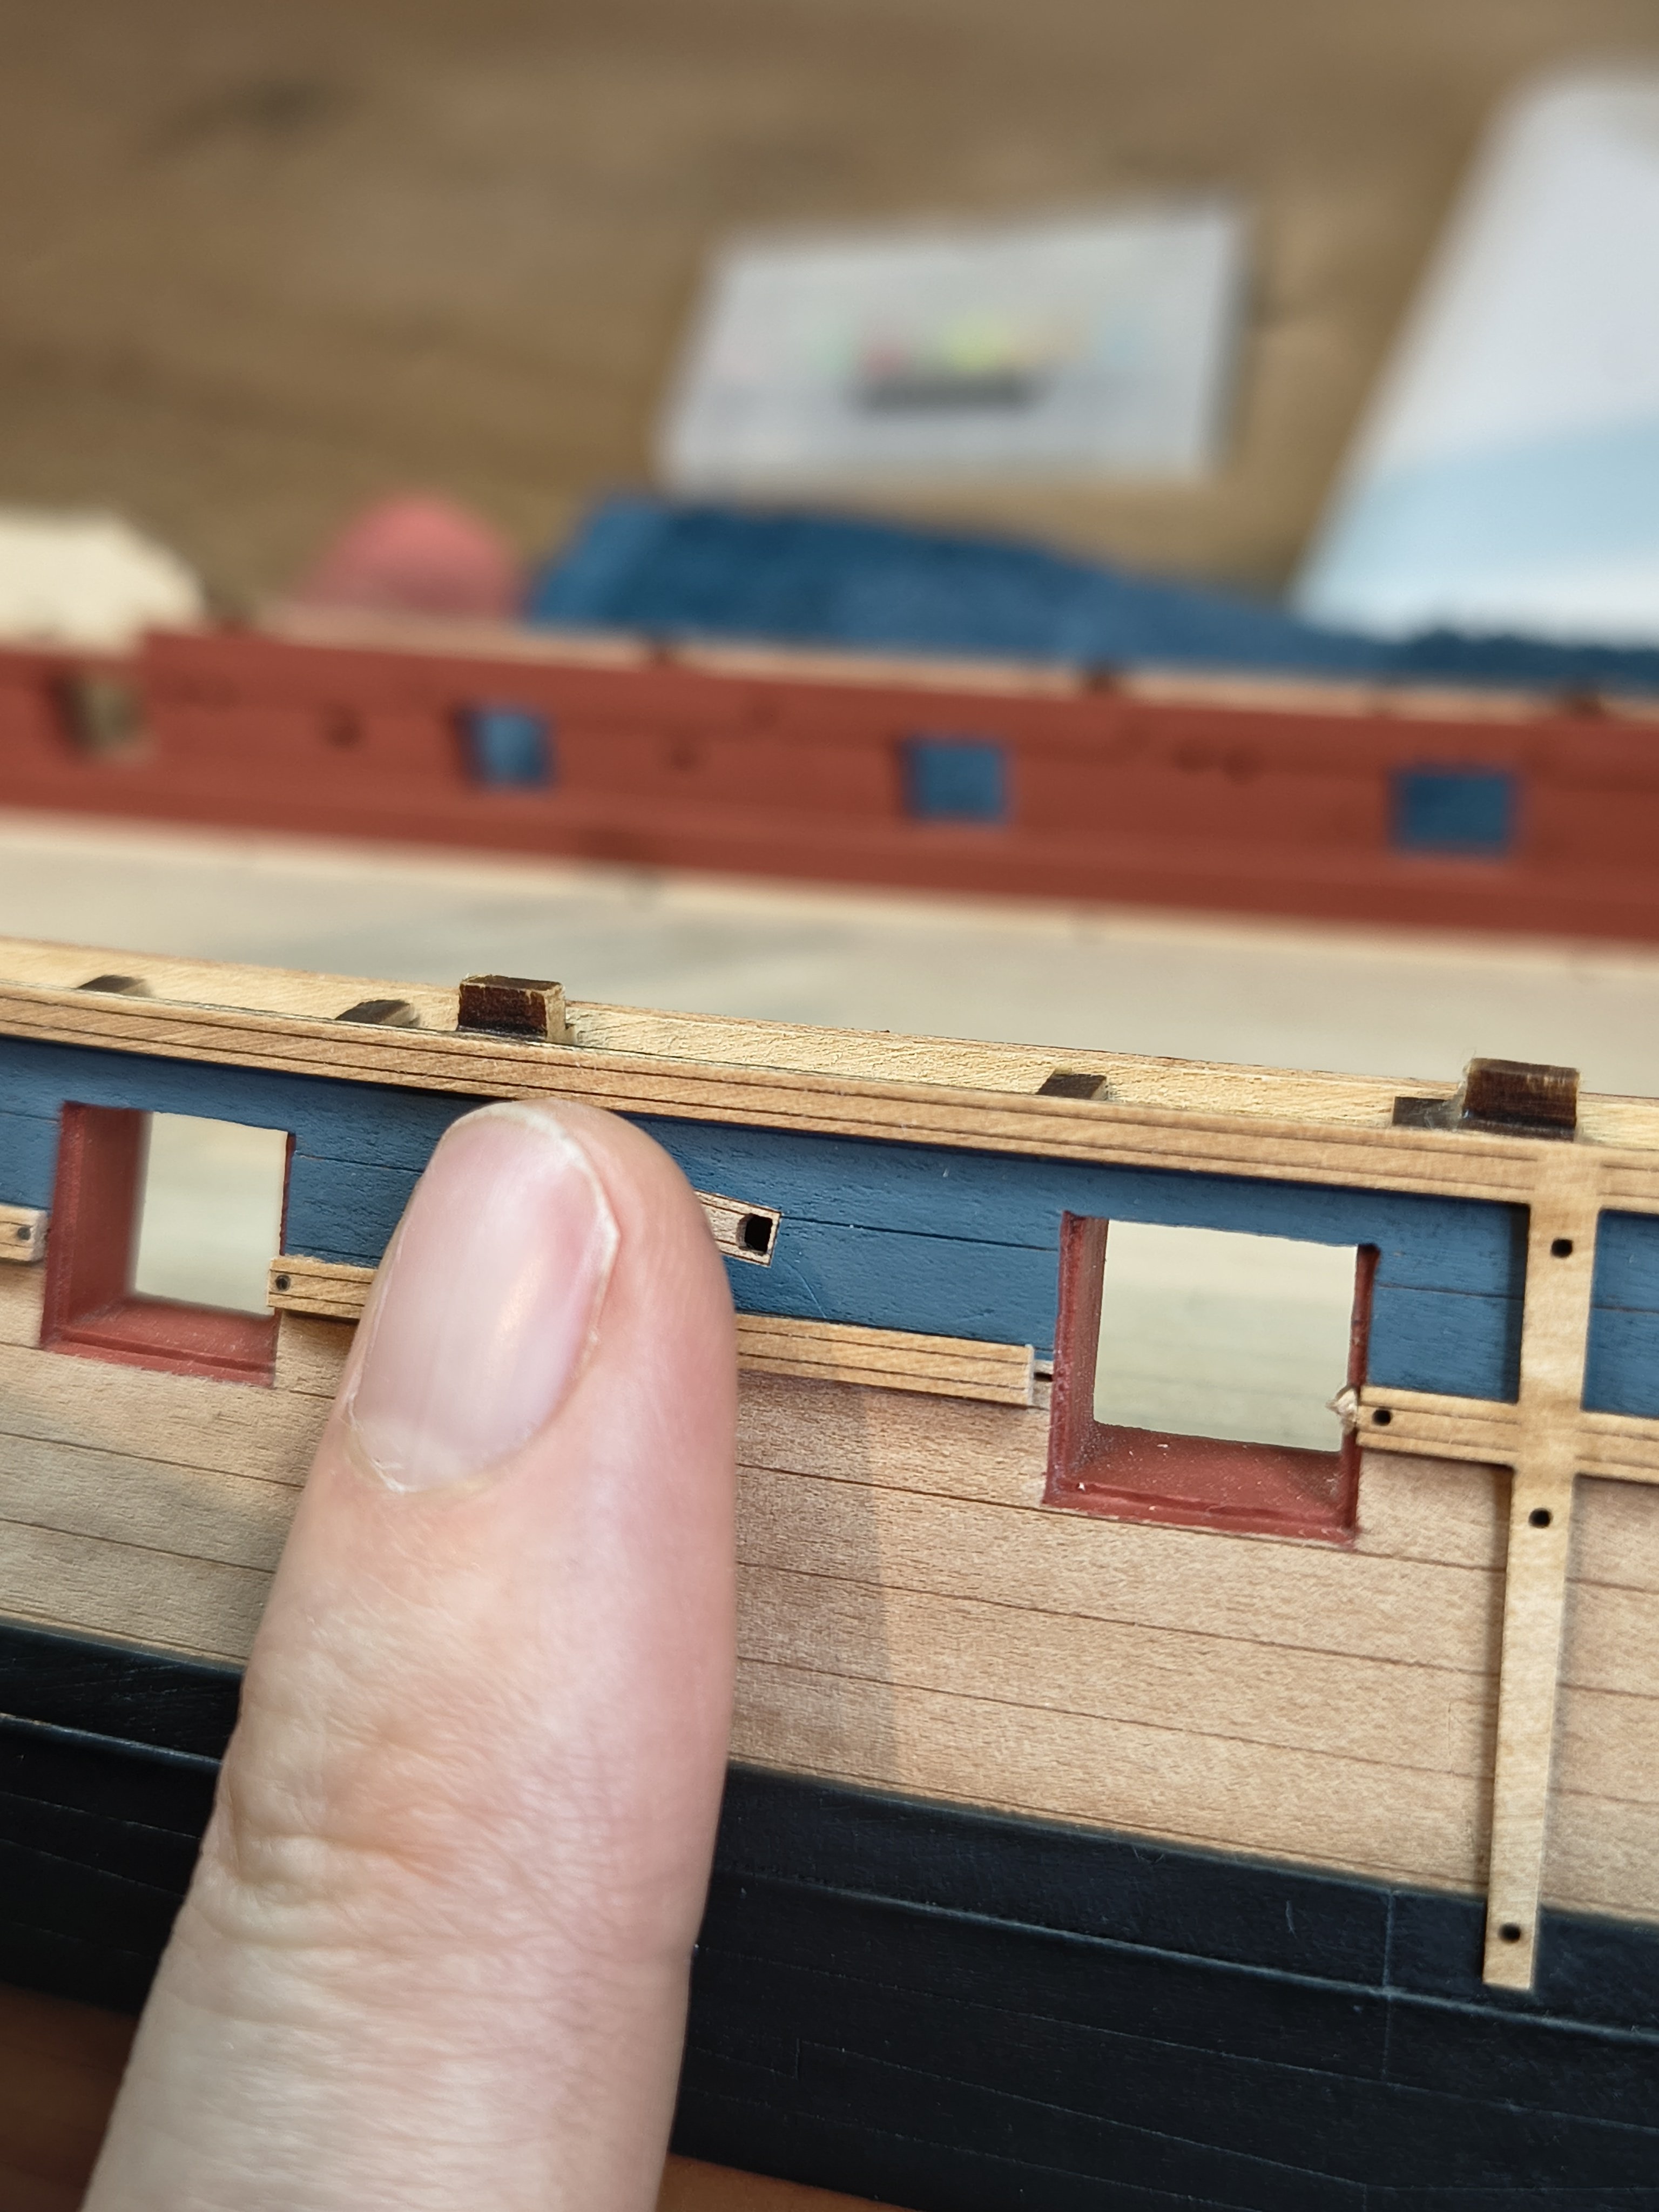
Sidenote: the little holes Chris put in the rails to get them in exactly the right place... genius!
- Thukydides, Knocklouder, dunnock and 23 others
-
18
-
 8
8
-
Good luck on your next journey!
- RossR and Paul Le Wol
-
1
-
1
-
-
-
I had the same problem with my Sphinx, only the big difference was that it was my first planking layer and not the 2nd one. That is the disadvantage if you only have 1 layer...it has to be right straight away! But...it is nice that you are tackling it now, instead of looking at it later and not being satisfied.
- Zarkon, Paul Le Wol, Nirvana and 1 other
-
4
-
Welcome!
- Keith Black and mtaylor
-
2
-
There are already some very good tips given above. What strikes me (at least it seems so in the pictures) is that the fairing of the bulkheads looks very minimal.
In addition of course the tapering of the planks and side bending will help really well with the clinkering effect.
The easiest way of side bending for was like the video below:
https://www.youtube.com/watch?v=atXqH0GWLL8
- scrubbyj427, Gregory, Ryland Craze and 1 other
-
4


Grand Banks Dory by palmerit - FINISHED - Midwest Products - 1:12
in - Kit build logs for subjects built from 1851 - 1900
Posted
Very nice looking model! Well done...and I like the photo where they stand together 👌