Ronald-V
-
Posts
1,780 -
Joined
-
Last visited
Content Type
Profiles
Forums
Gallery
Events
Everything posted by Ronald-V
-
 Really cool to follow the design progress! 👌
 -
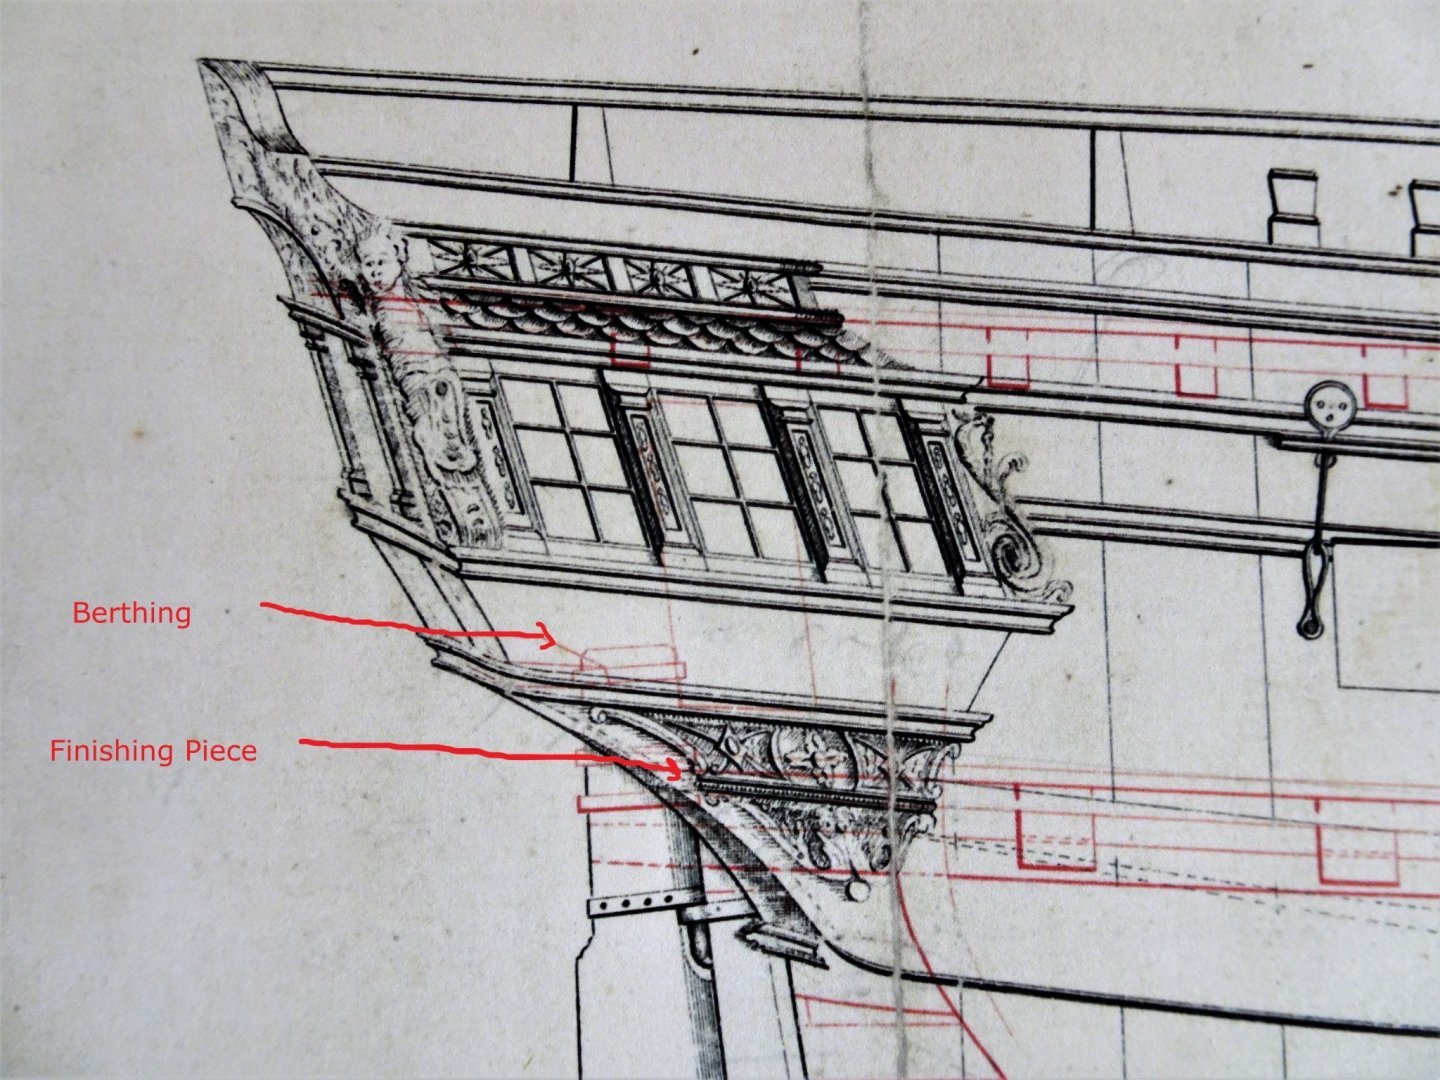
Had a closer look at how Blue Ensign tackled the above...he also added 2 images that I think make it a bit clearer. The whole thing even seems to have to lean a bit more towards the bow side, and doesn't really seem to have to follow the curve of the stern. I will see if I can make a paper template of the PE decoration that sits on top, maybe that can assist me with the positioning.

-
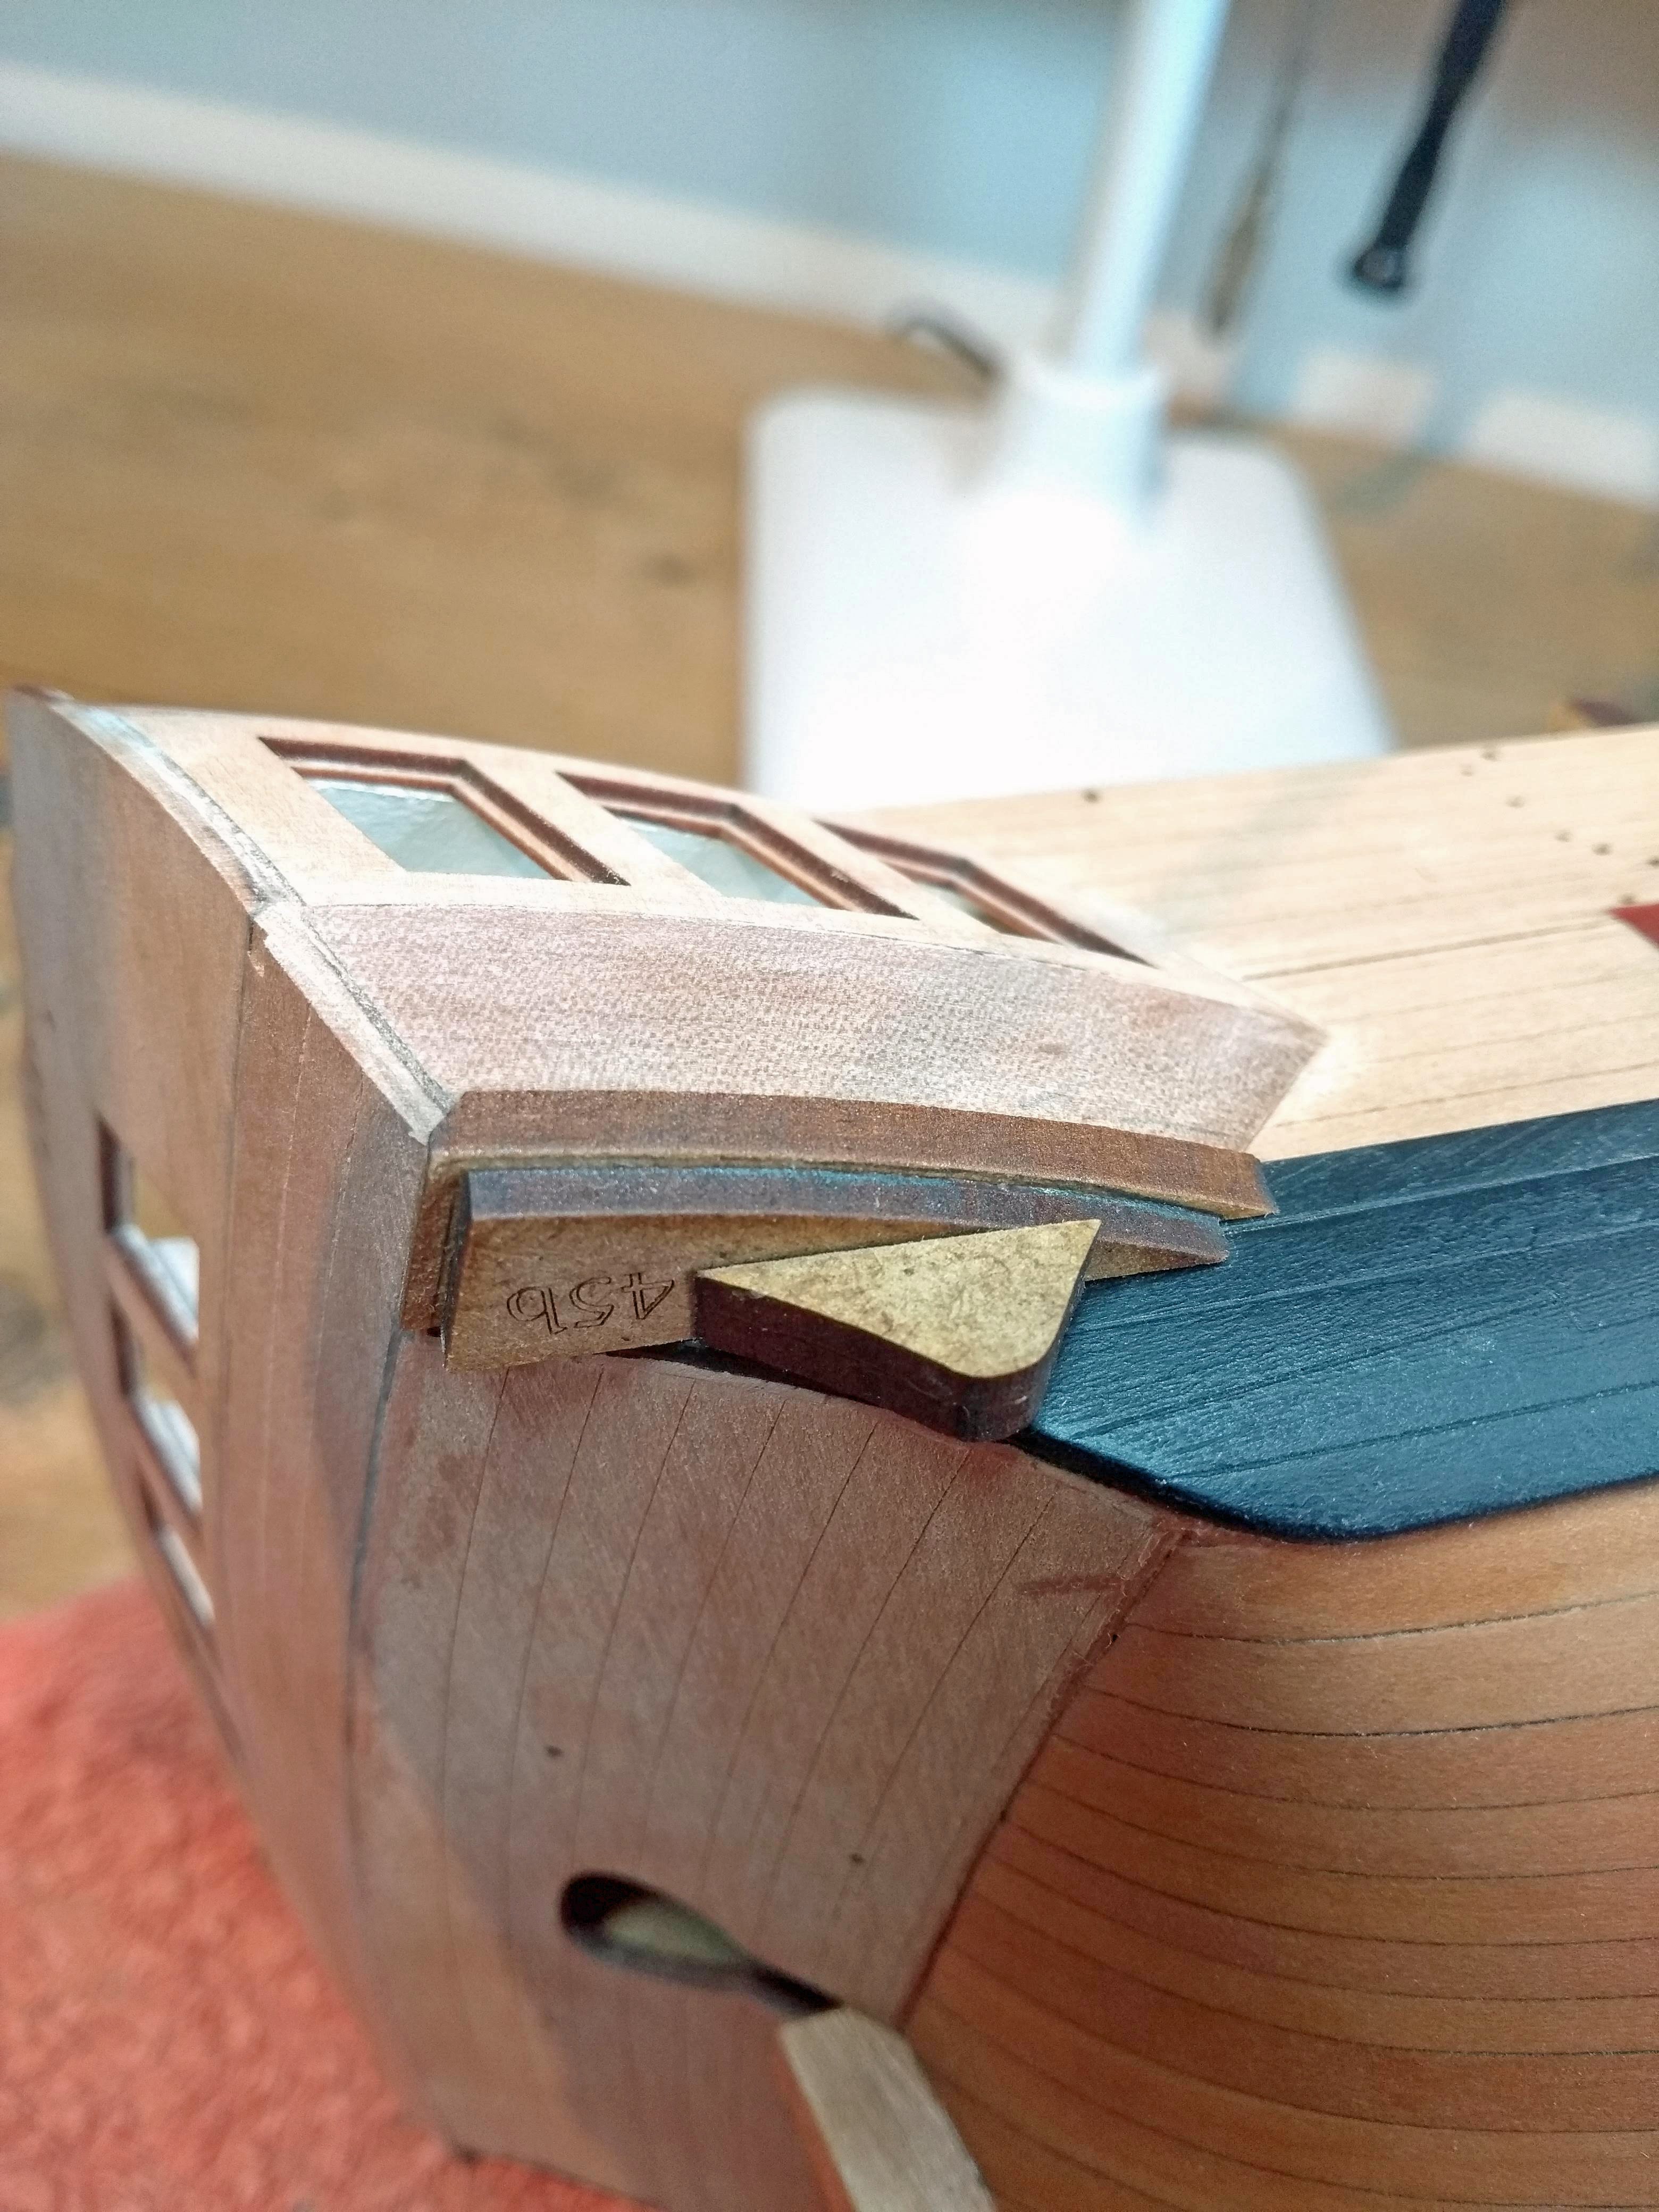
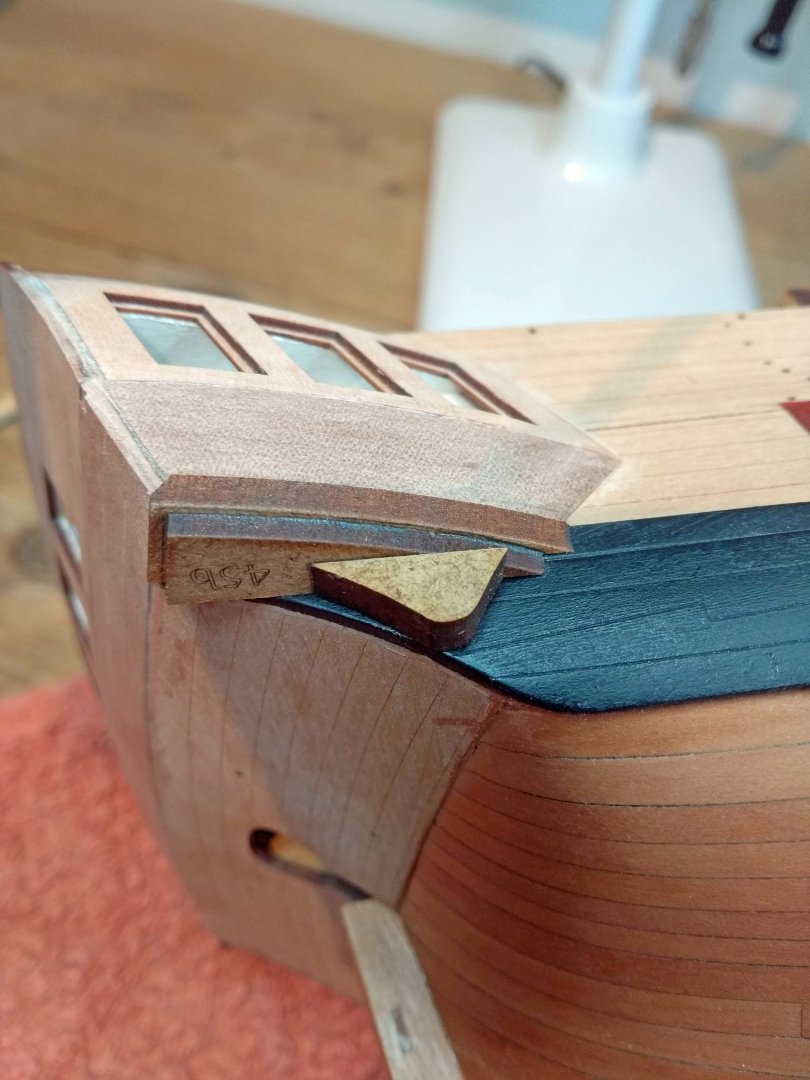
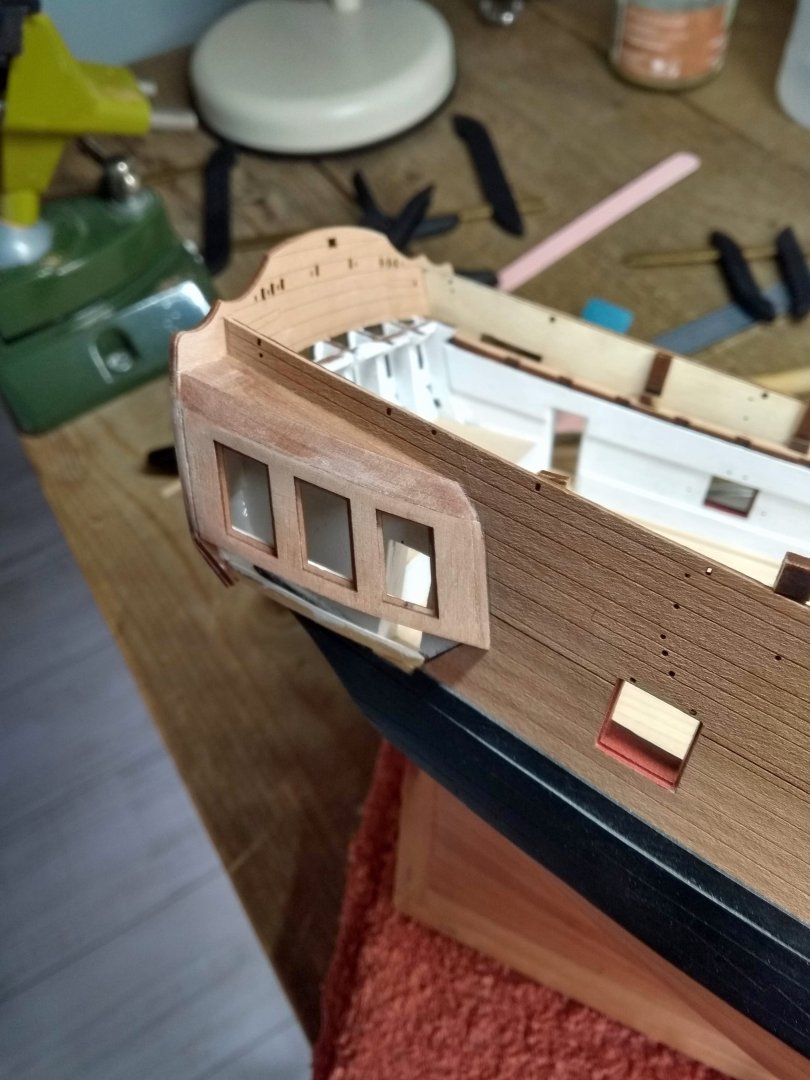
Hello everyone, I'm running into a ambiguity and couldn't really find a good unambiguous answer in the other Sphinx build logs. It concerns the "Quarter gallery lower finishing patterns"...and in particular the "teardrop shape" at the bottom. Should this follow the contours of the stern counter as in photo 1? Which results in the bottom being a bit more pointed than the lasered shape is because it protrudes a bit. Or is it the intention that I place the teardrop shape a bit towards the bow side so that the teardrop shape is retained but some of the wales becomes visible, as in photo 2? Hope the question and photos are clear enough. Maybe @chris watton or @James H can shine a light about this

-
Nice clean white hull! Looks great Agree with Brunnels...those little seams need to be filled.
-
Just a very small update to show what I'm working on. Installing the quarter galleries, or at least one of them. Took me quite a few days to really figure out how it should look exactly (my head is a bit messy at the moment, so a bit difficult to concentrate). But I'm starting to get the hang of it. Also with the help of the other Sphinx build logs. It looks like I've added just a millimeter to the length of the quarter galleries compared to the original that James built, but that doesn't seem to have any real implications going forward. Will do a more extensive report from the other side so it's clearer how I'm approaching it. (spoiler alert...pretty much the same as Blue Ensign did it)
-
Fantastic result Brunnels! You can be very proud of her! She looks so beautiful Well done!🏆 And have fun with the exciting times ahead with the little girl
-
Lovely planking so far Zarkon! Not easy to go straight to the final layer without a base of a first one. It's going to be beautiful when it's fully planked!
-
Your "Fryslân" is looking good so far! (Fryslân is Friesland in the actual language that they/we are talking here )
-
What a lovely work you did Brunnels! She looks so good now...great to see your progress
-
Thanks Thukydides! Pff not sure if painting the decorations myself would be fun haha, but it's worth considering when I get that far. For now I was thinking about using multiple tones of color on the etched decorations to give them more depth. But I'll think about it!
-
I bought them on Amazon...I still see them although they are quite expensive at this specific seller. Maybe there is a cheaper dealer somewhere on Amazon. https://www.amazon.com/Wolfcraft-B3431-Micro-Spring-Clamp/dp/B0001P19IQ/ref=sr_1_37?crid=2VJQGFBAQJG9G&dib=eyJ2IjoiMSJ9._qJCDFyzGgOpQyWmJEweM75FguvXG8XfJ1TaCHbNUK1LD6F58ptwtztOsgFNivx_IlIOy5qI2bfglS73AbtjQeHaXd4-PwaQjdOTIJY4GVFSJ09aSoX3rS_QPrOGIRZjJlGnr2u-BC6xpw2EuTIRj41ZFil_fKKQ6PwbbAolkrNcqTkt3-xOiRZRbGYtDUSugyS9KAI3lVdBHiViAfWKnryMRha8MXRFS9oQvUfdVQIm8p7znlarE3o1fHOBGA97aQAy4lU-bJyPEG3lPj-HqbPBagBTXcBbvac5Q1X9COc.8UgZOr1TyulAKRF58QFweNfcRaq1qt3kJ6cV76pgvUU&dib_tag=se&keywords=wolfcraft+clamps&qid=1743767638&sprefix=wolcraft+clamp%2Caps%2C174&sr=8-37
-
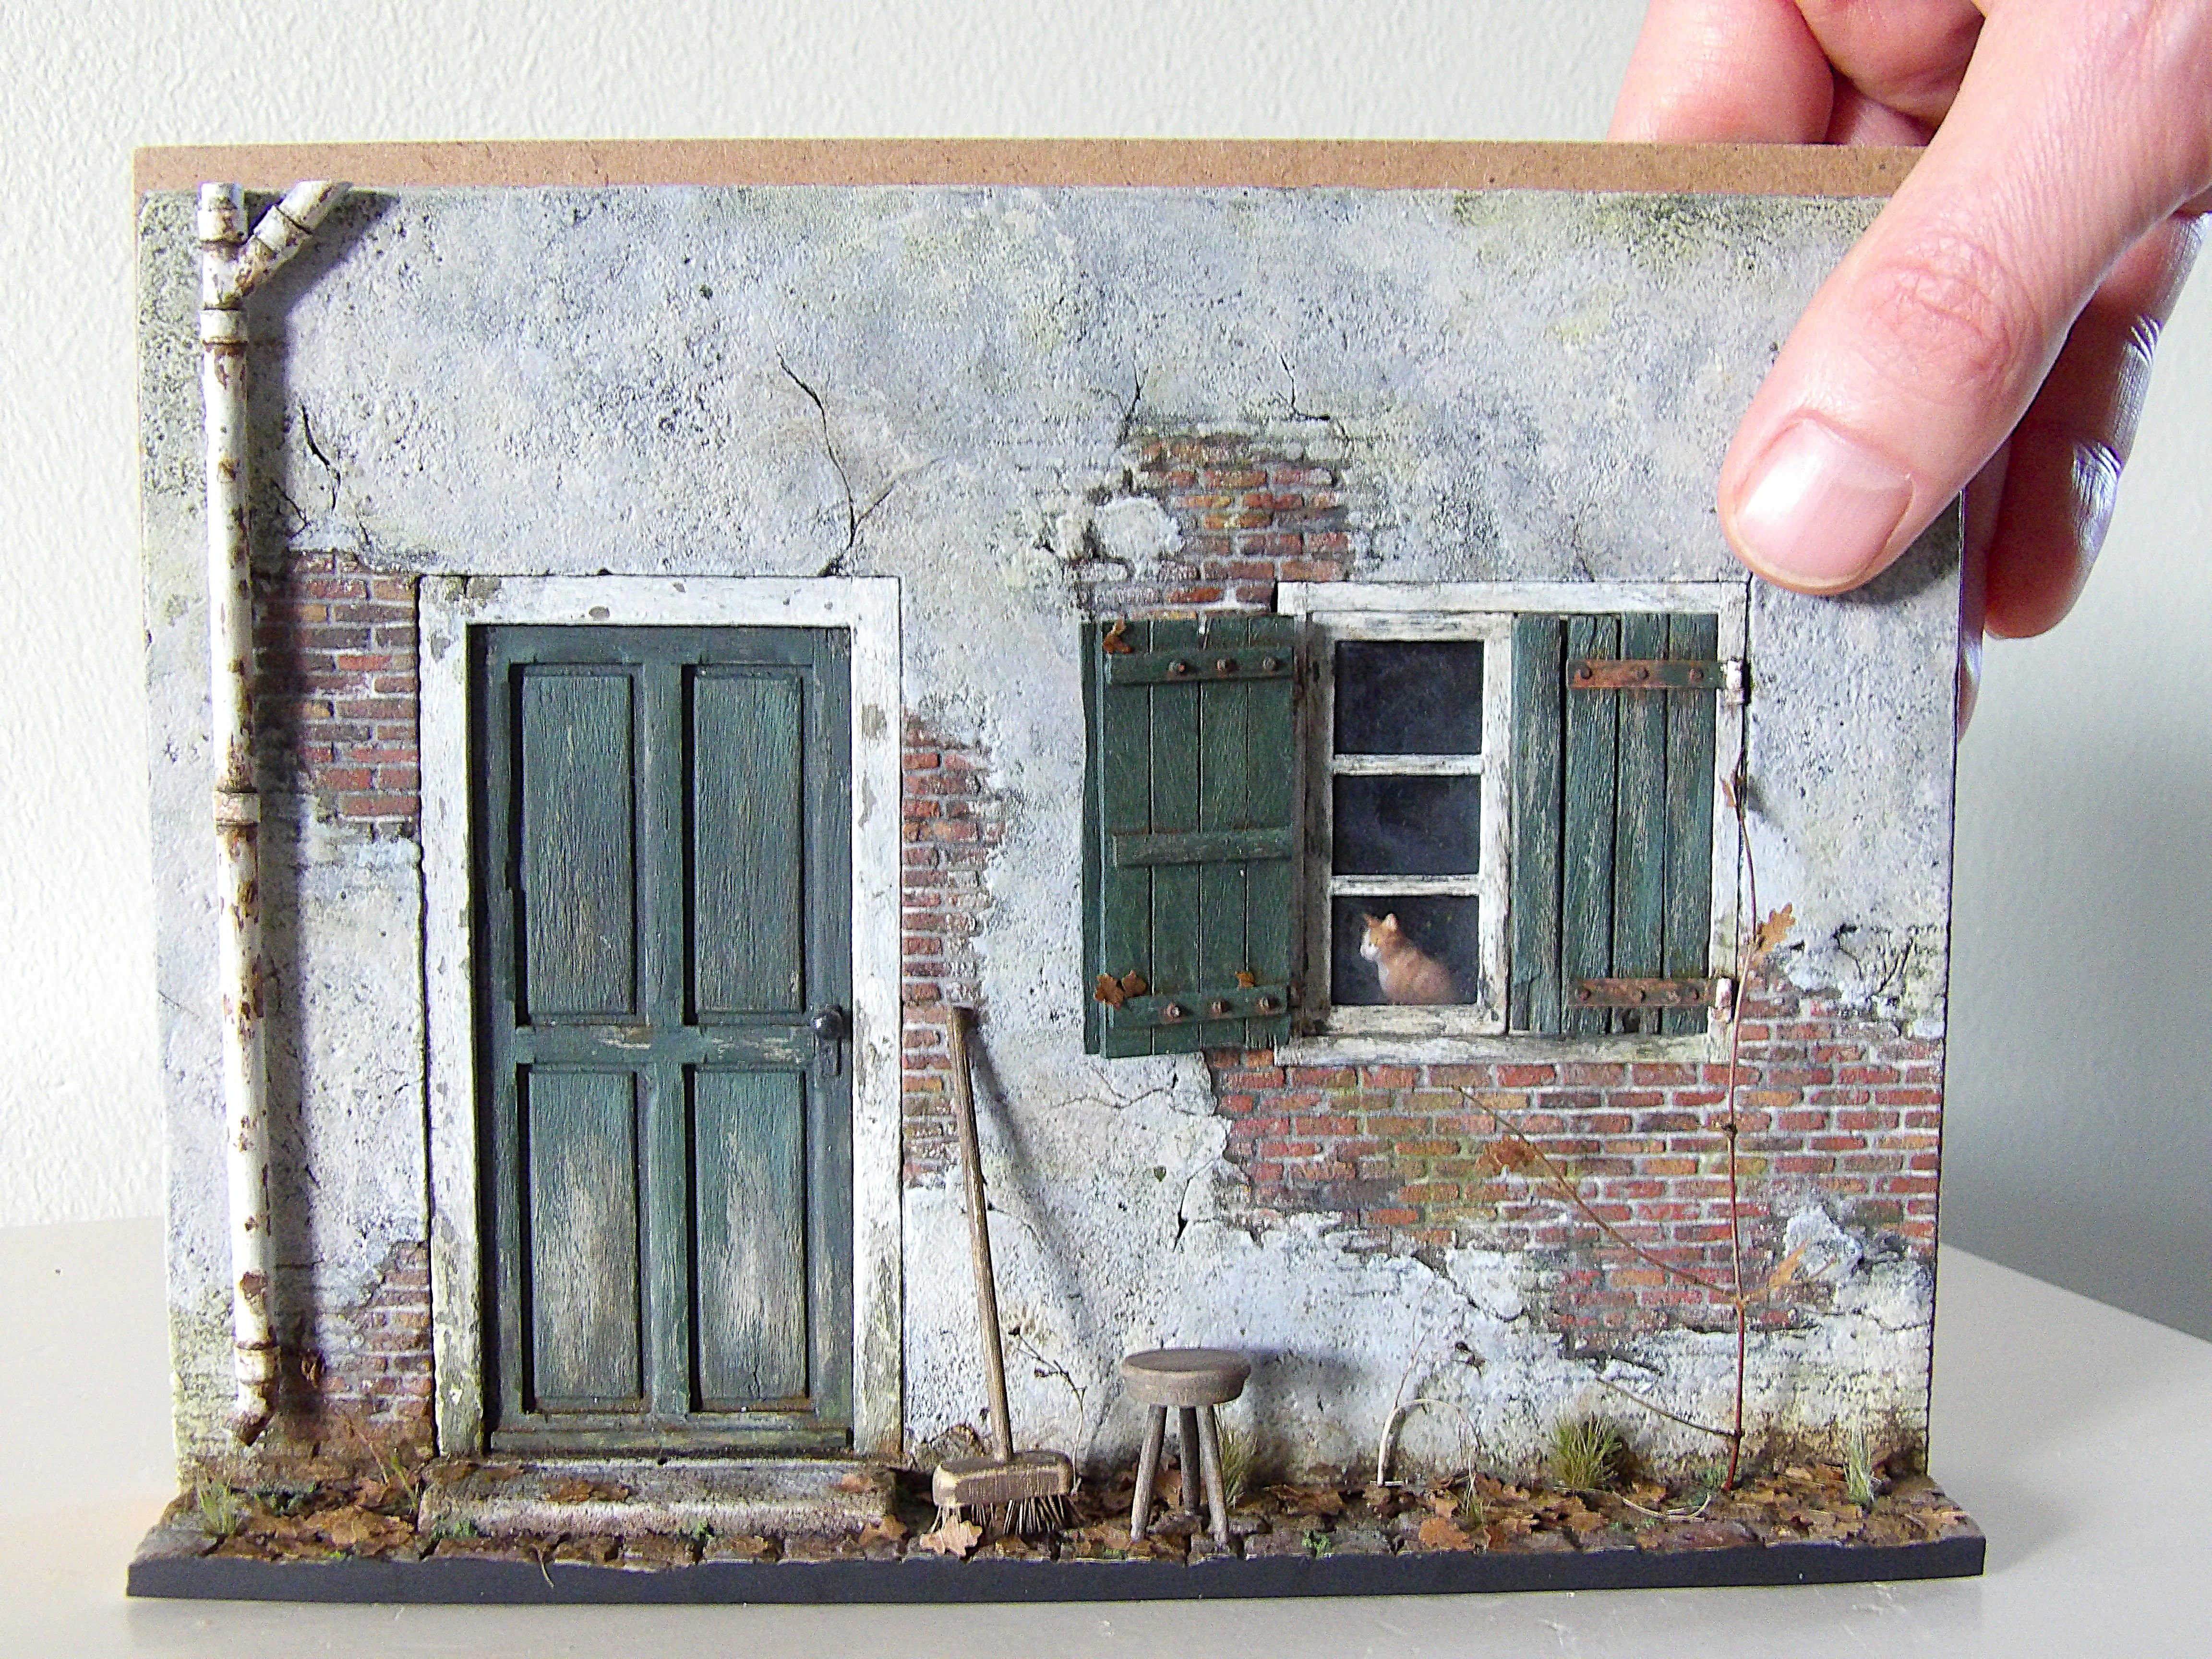
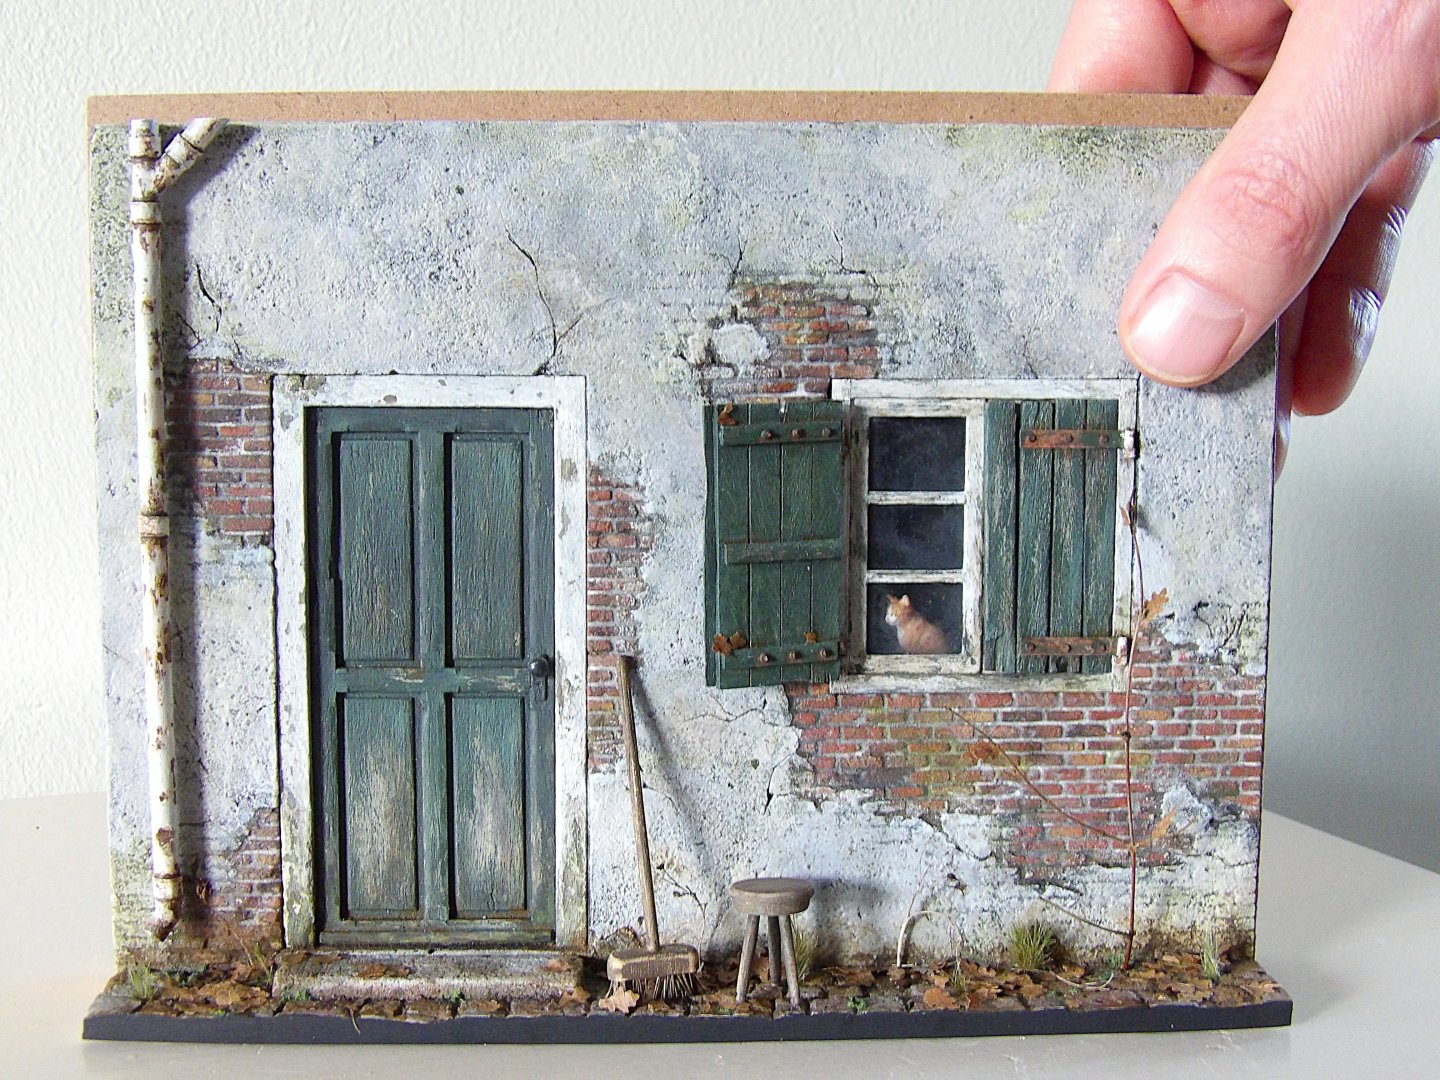
Been a little busy with other things in life. Also side tracked a bit with exploring other modelling things. Made a "facade" in 1/24 scale. Was fun to do and liberating not to care about measurments etc. . Will definitely make something like this in the future again. Now trying to get back in the Sphinx

-
Great result! And she looks beautiful in her display case, very well done! I need to try and get back on track with mine
-
Very nice result! Love the sharpness that comes through with the oil. Well done
-
Love it! Very nice done, congratulations on finishing
-
Lovely planking, but also a nice red color, very well done!
- 87 replies
-
- 2
-

-

-
- Lady Nelson
- Amati
- (and 1 more)
-
Sorry for your loss! Must be very difficult to say goodbye after such a long time together. Wish you all the strength in this upcoming time. The little ships look beautiful by the way...
-
Very exciting new build! Wish you all the best and fun with this one
-
Really...really nice build! Congratz with finishing and with the medal
-
Congratulations on the sale! I can imagine that at some point you have to sell models because there is simply no more room for them, especially this one! But it will indeed hurt a little bit, because you have put so much time and energy into it. Especially if it is gone so soon!
- 587 replies
-
- 3
-
-
-
- Indefatigable
- Vanguard Models
- (and 1 more)
-
Congratulations on finishing this masterpiece Glenn! Superb
- 840 replies
-
- 3
-
-
- winchelsea
- Syren Ship Model Company
- (and 1 more)