Ronald-V
-
Posts
1,934 -
Joined
-
Last visited
Content Type
Profiles
Forums
Gallery
Events
Everything posted by Ronald-V
-
 Lovely flow of the planking! Nice
 -
Thanks B.E.! Your build log helped me a lot!
-
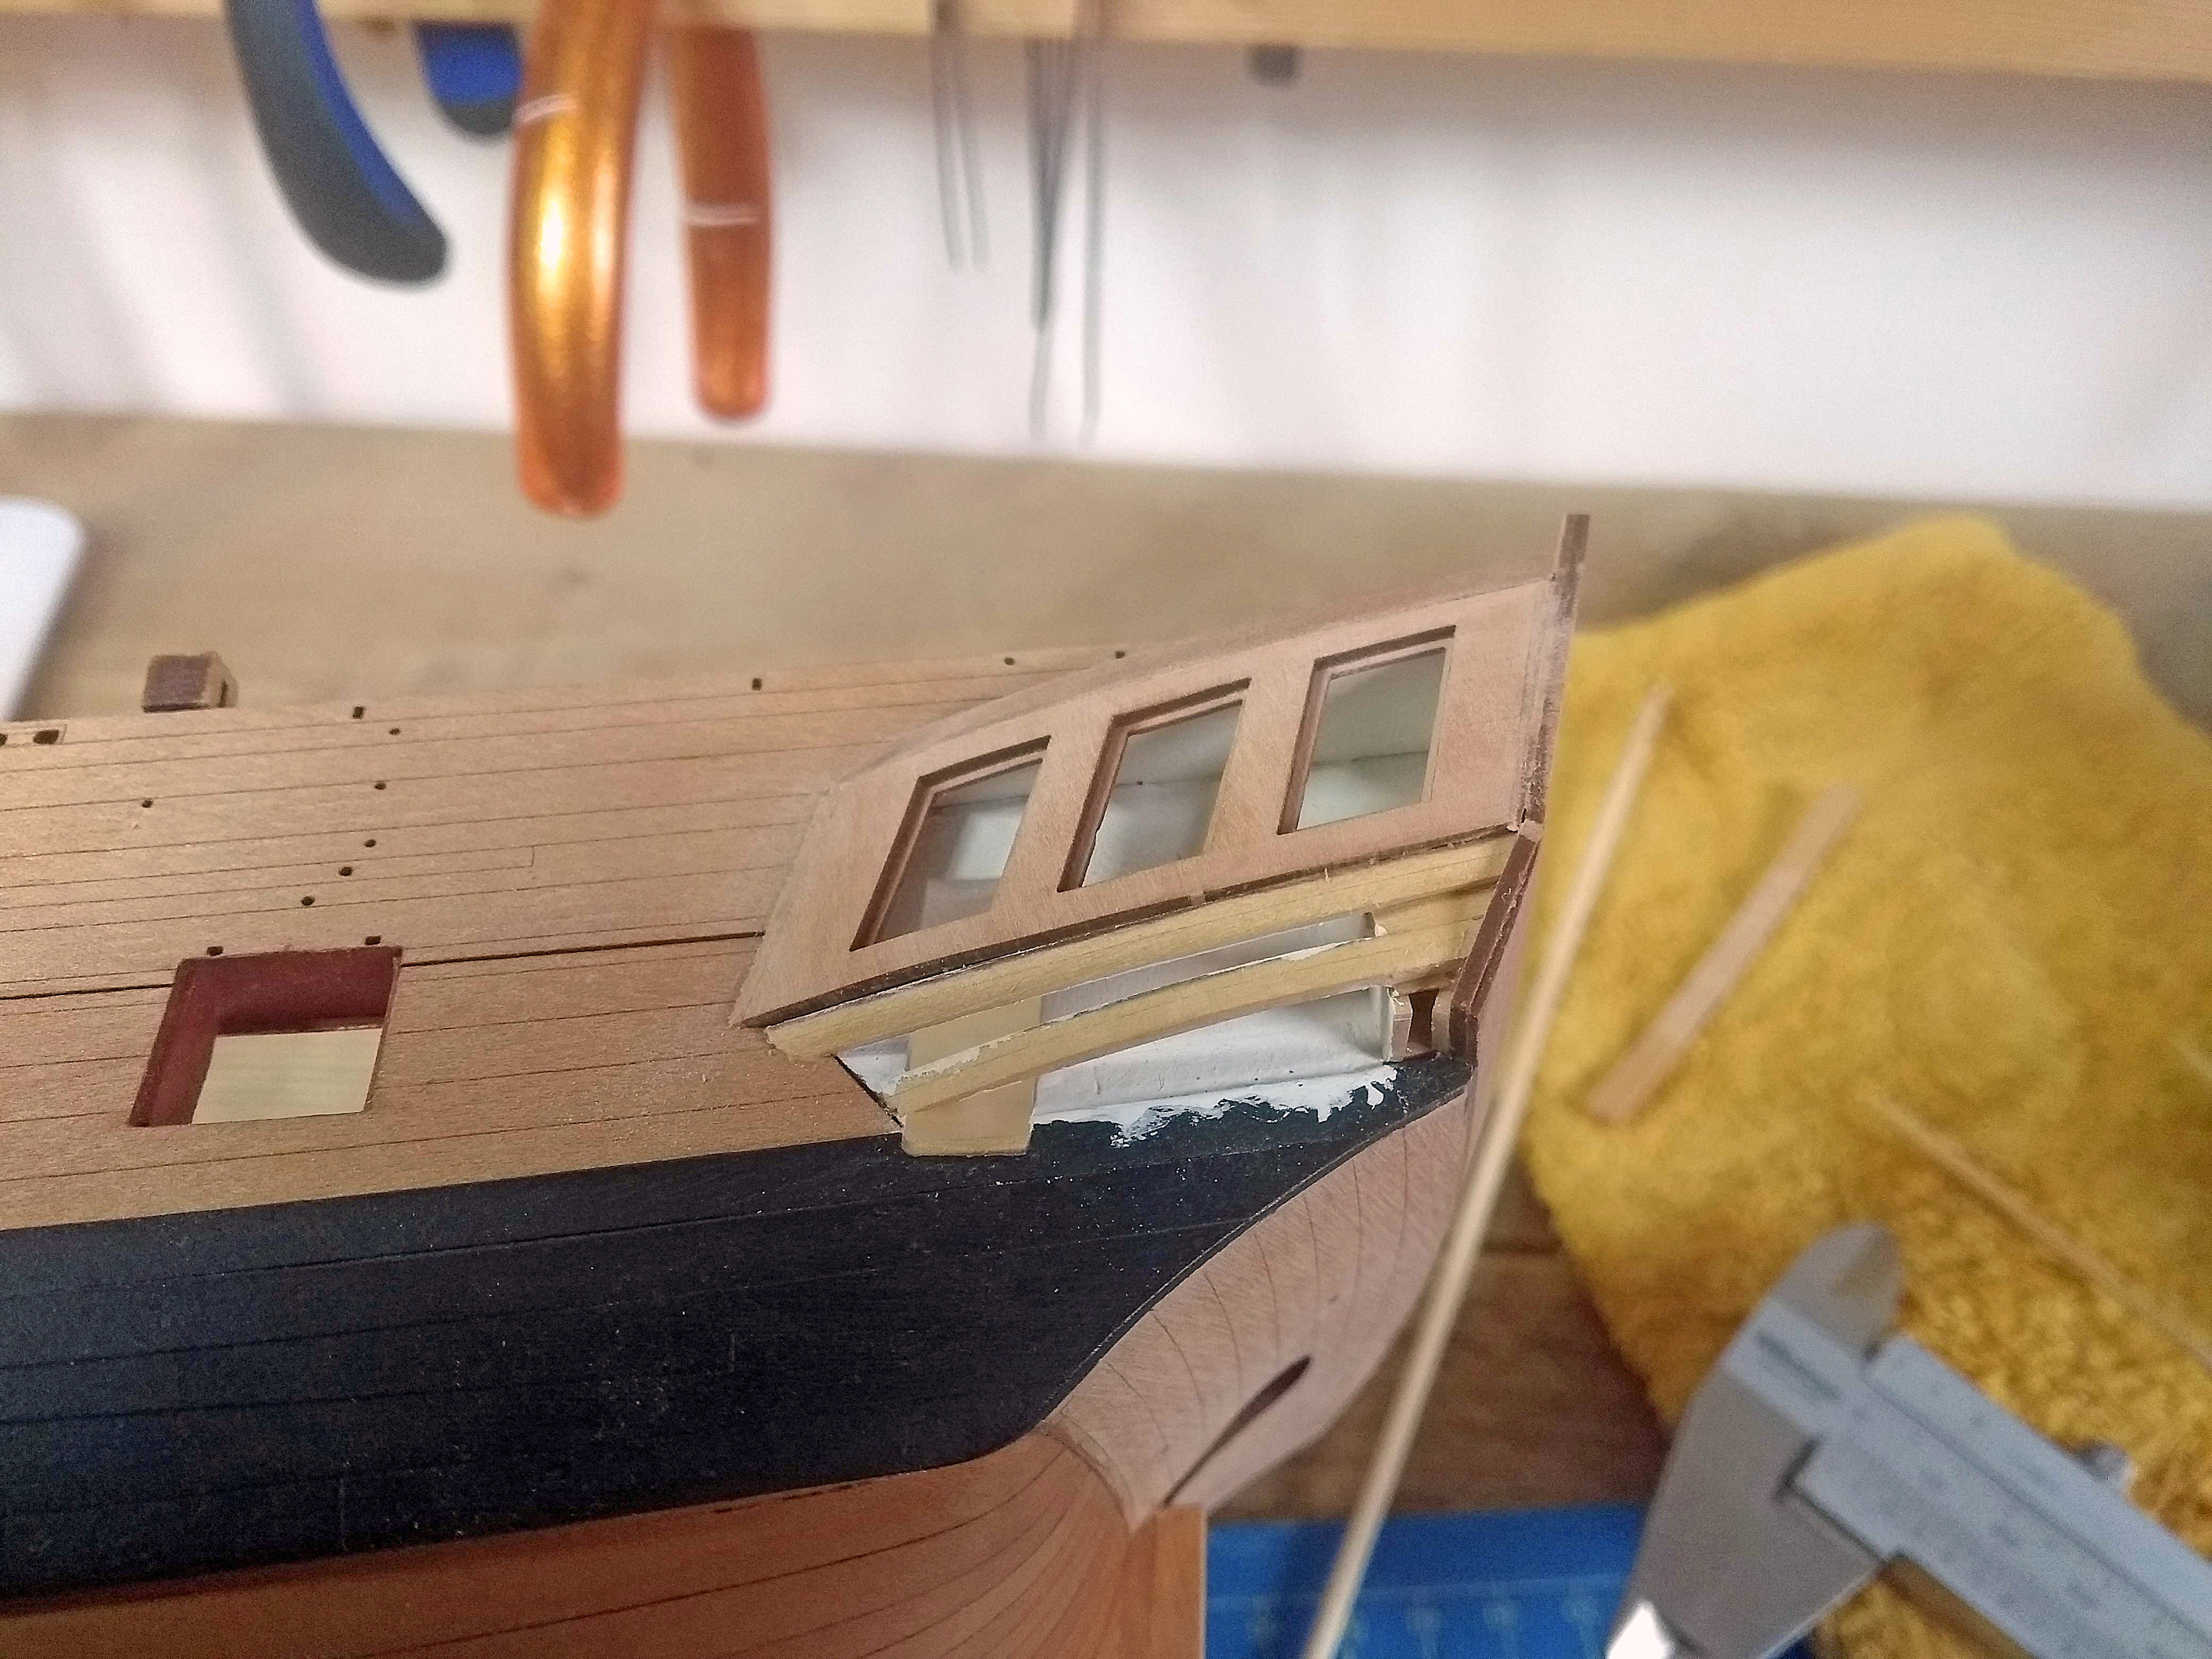
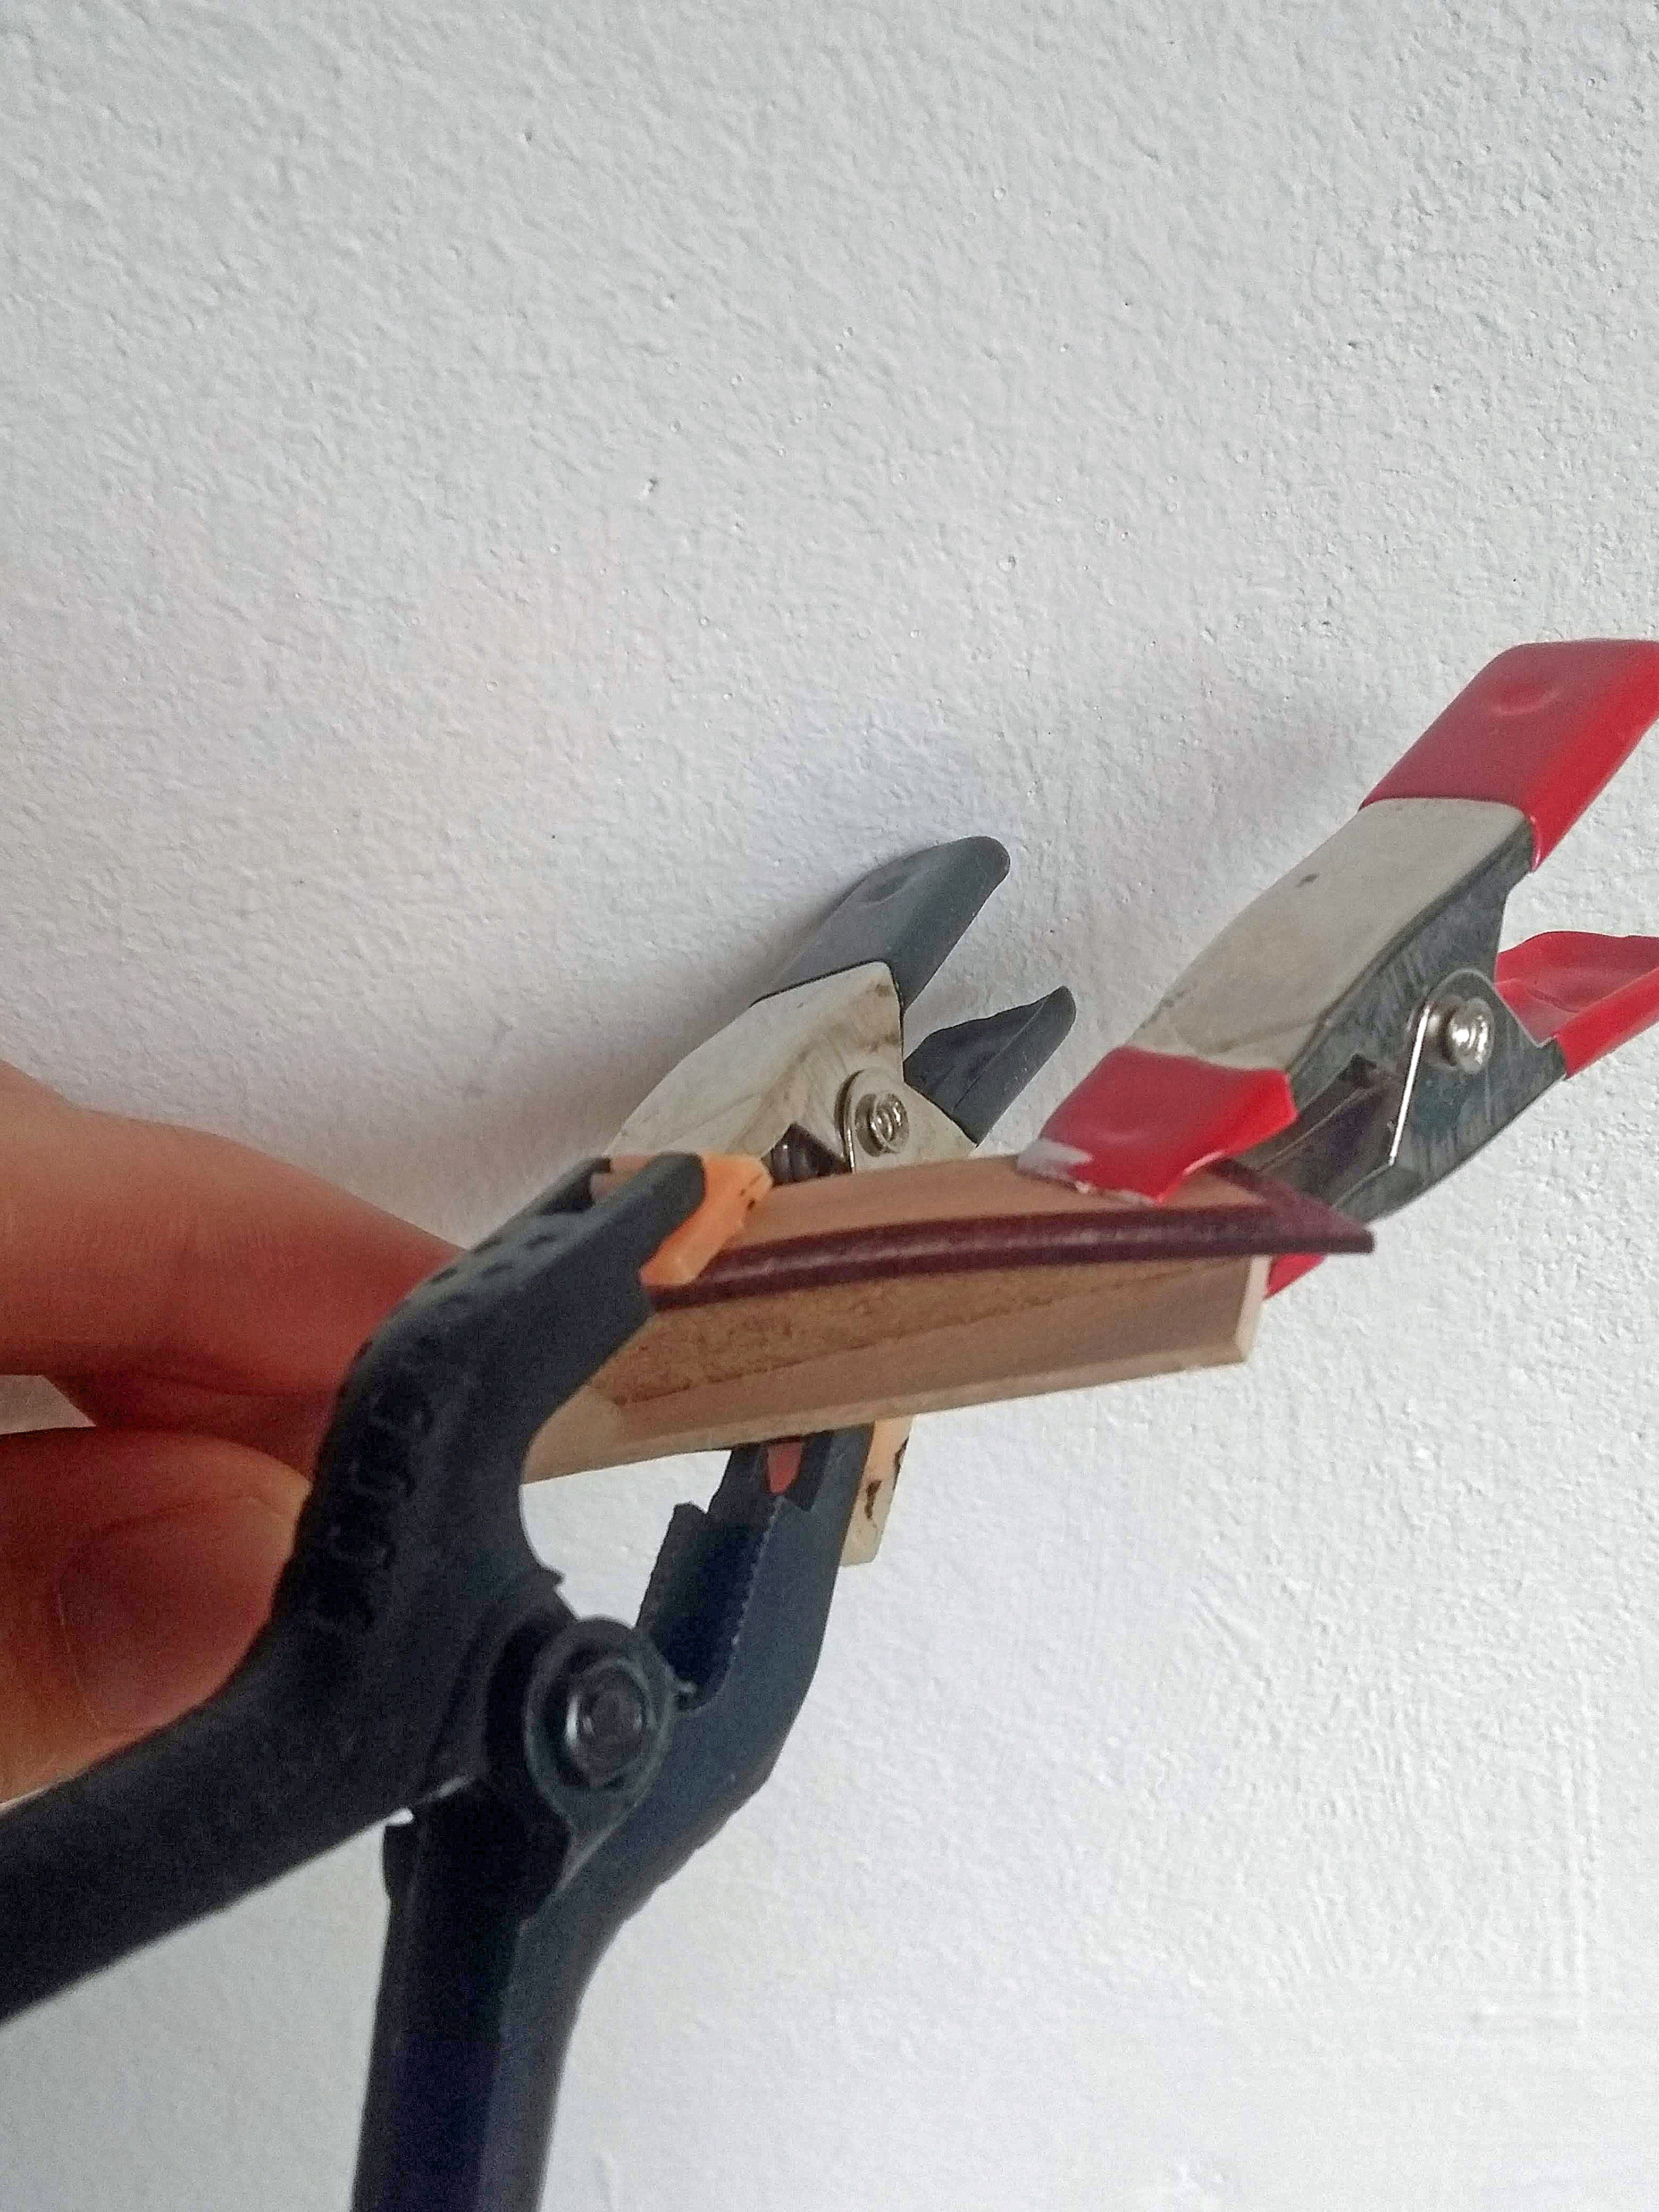
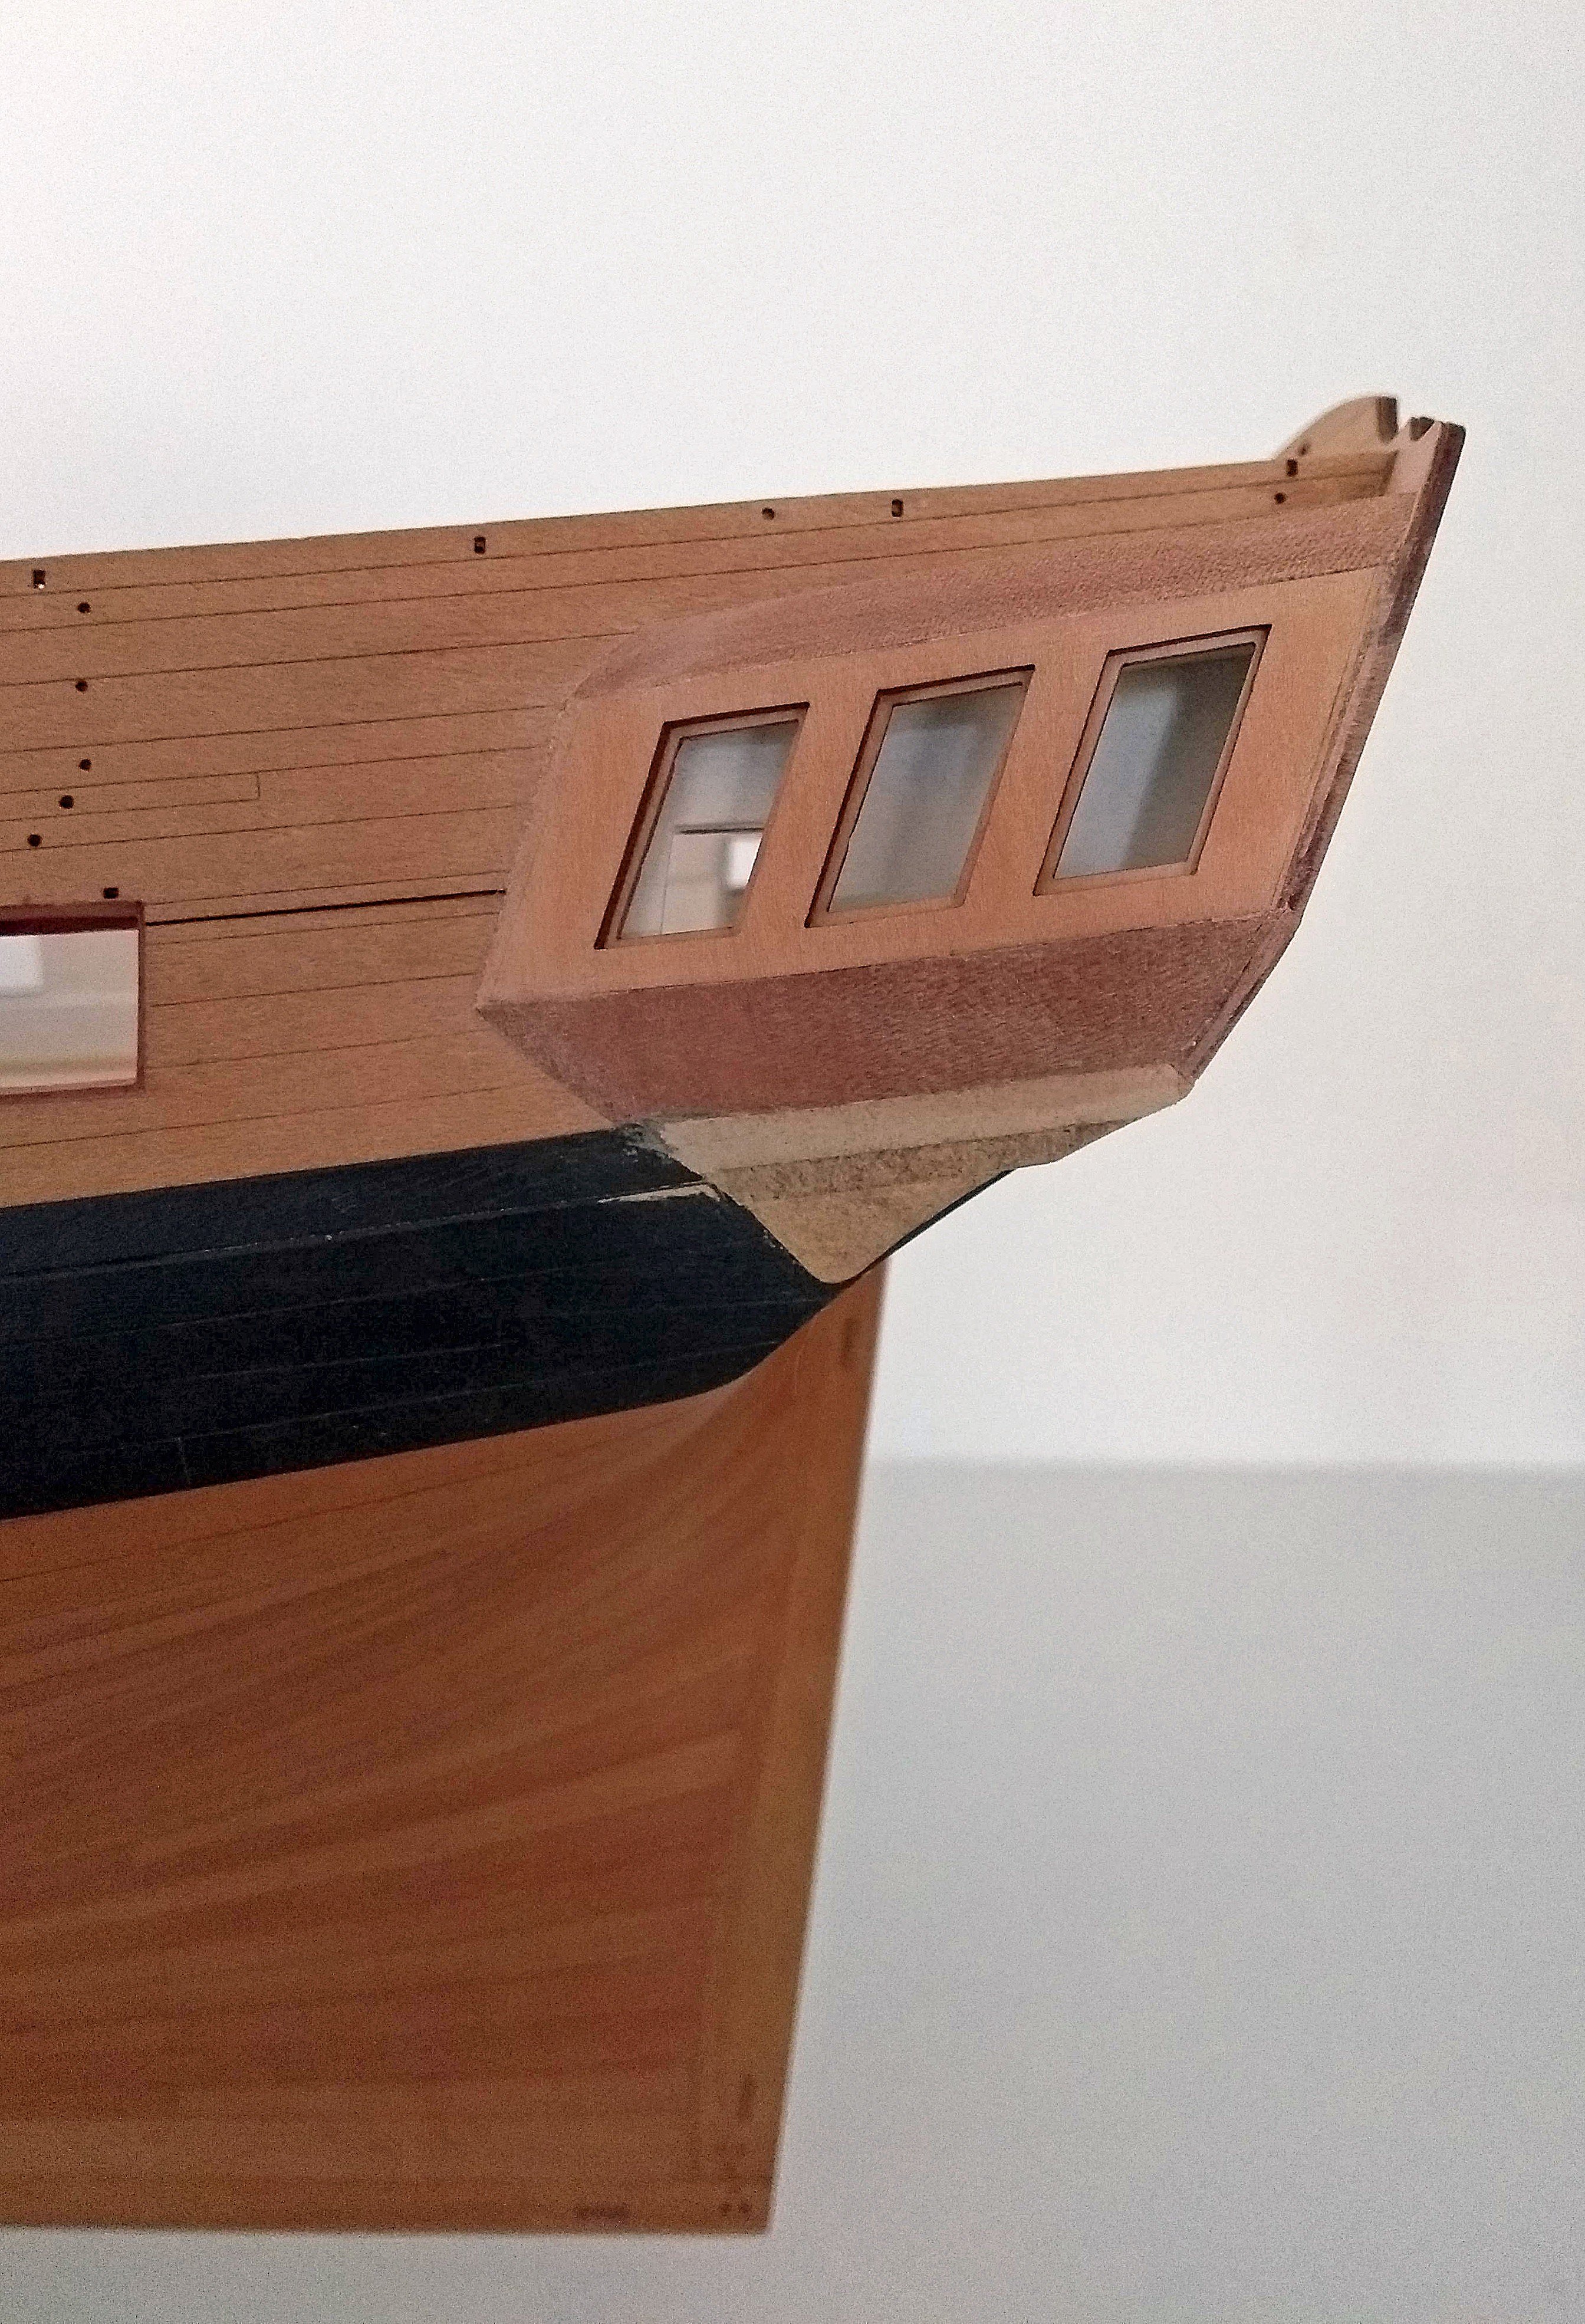
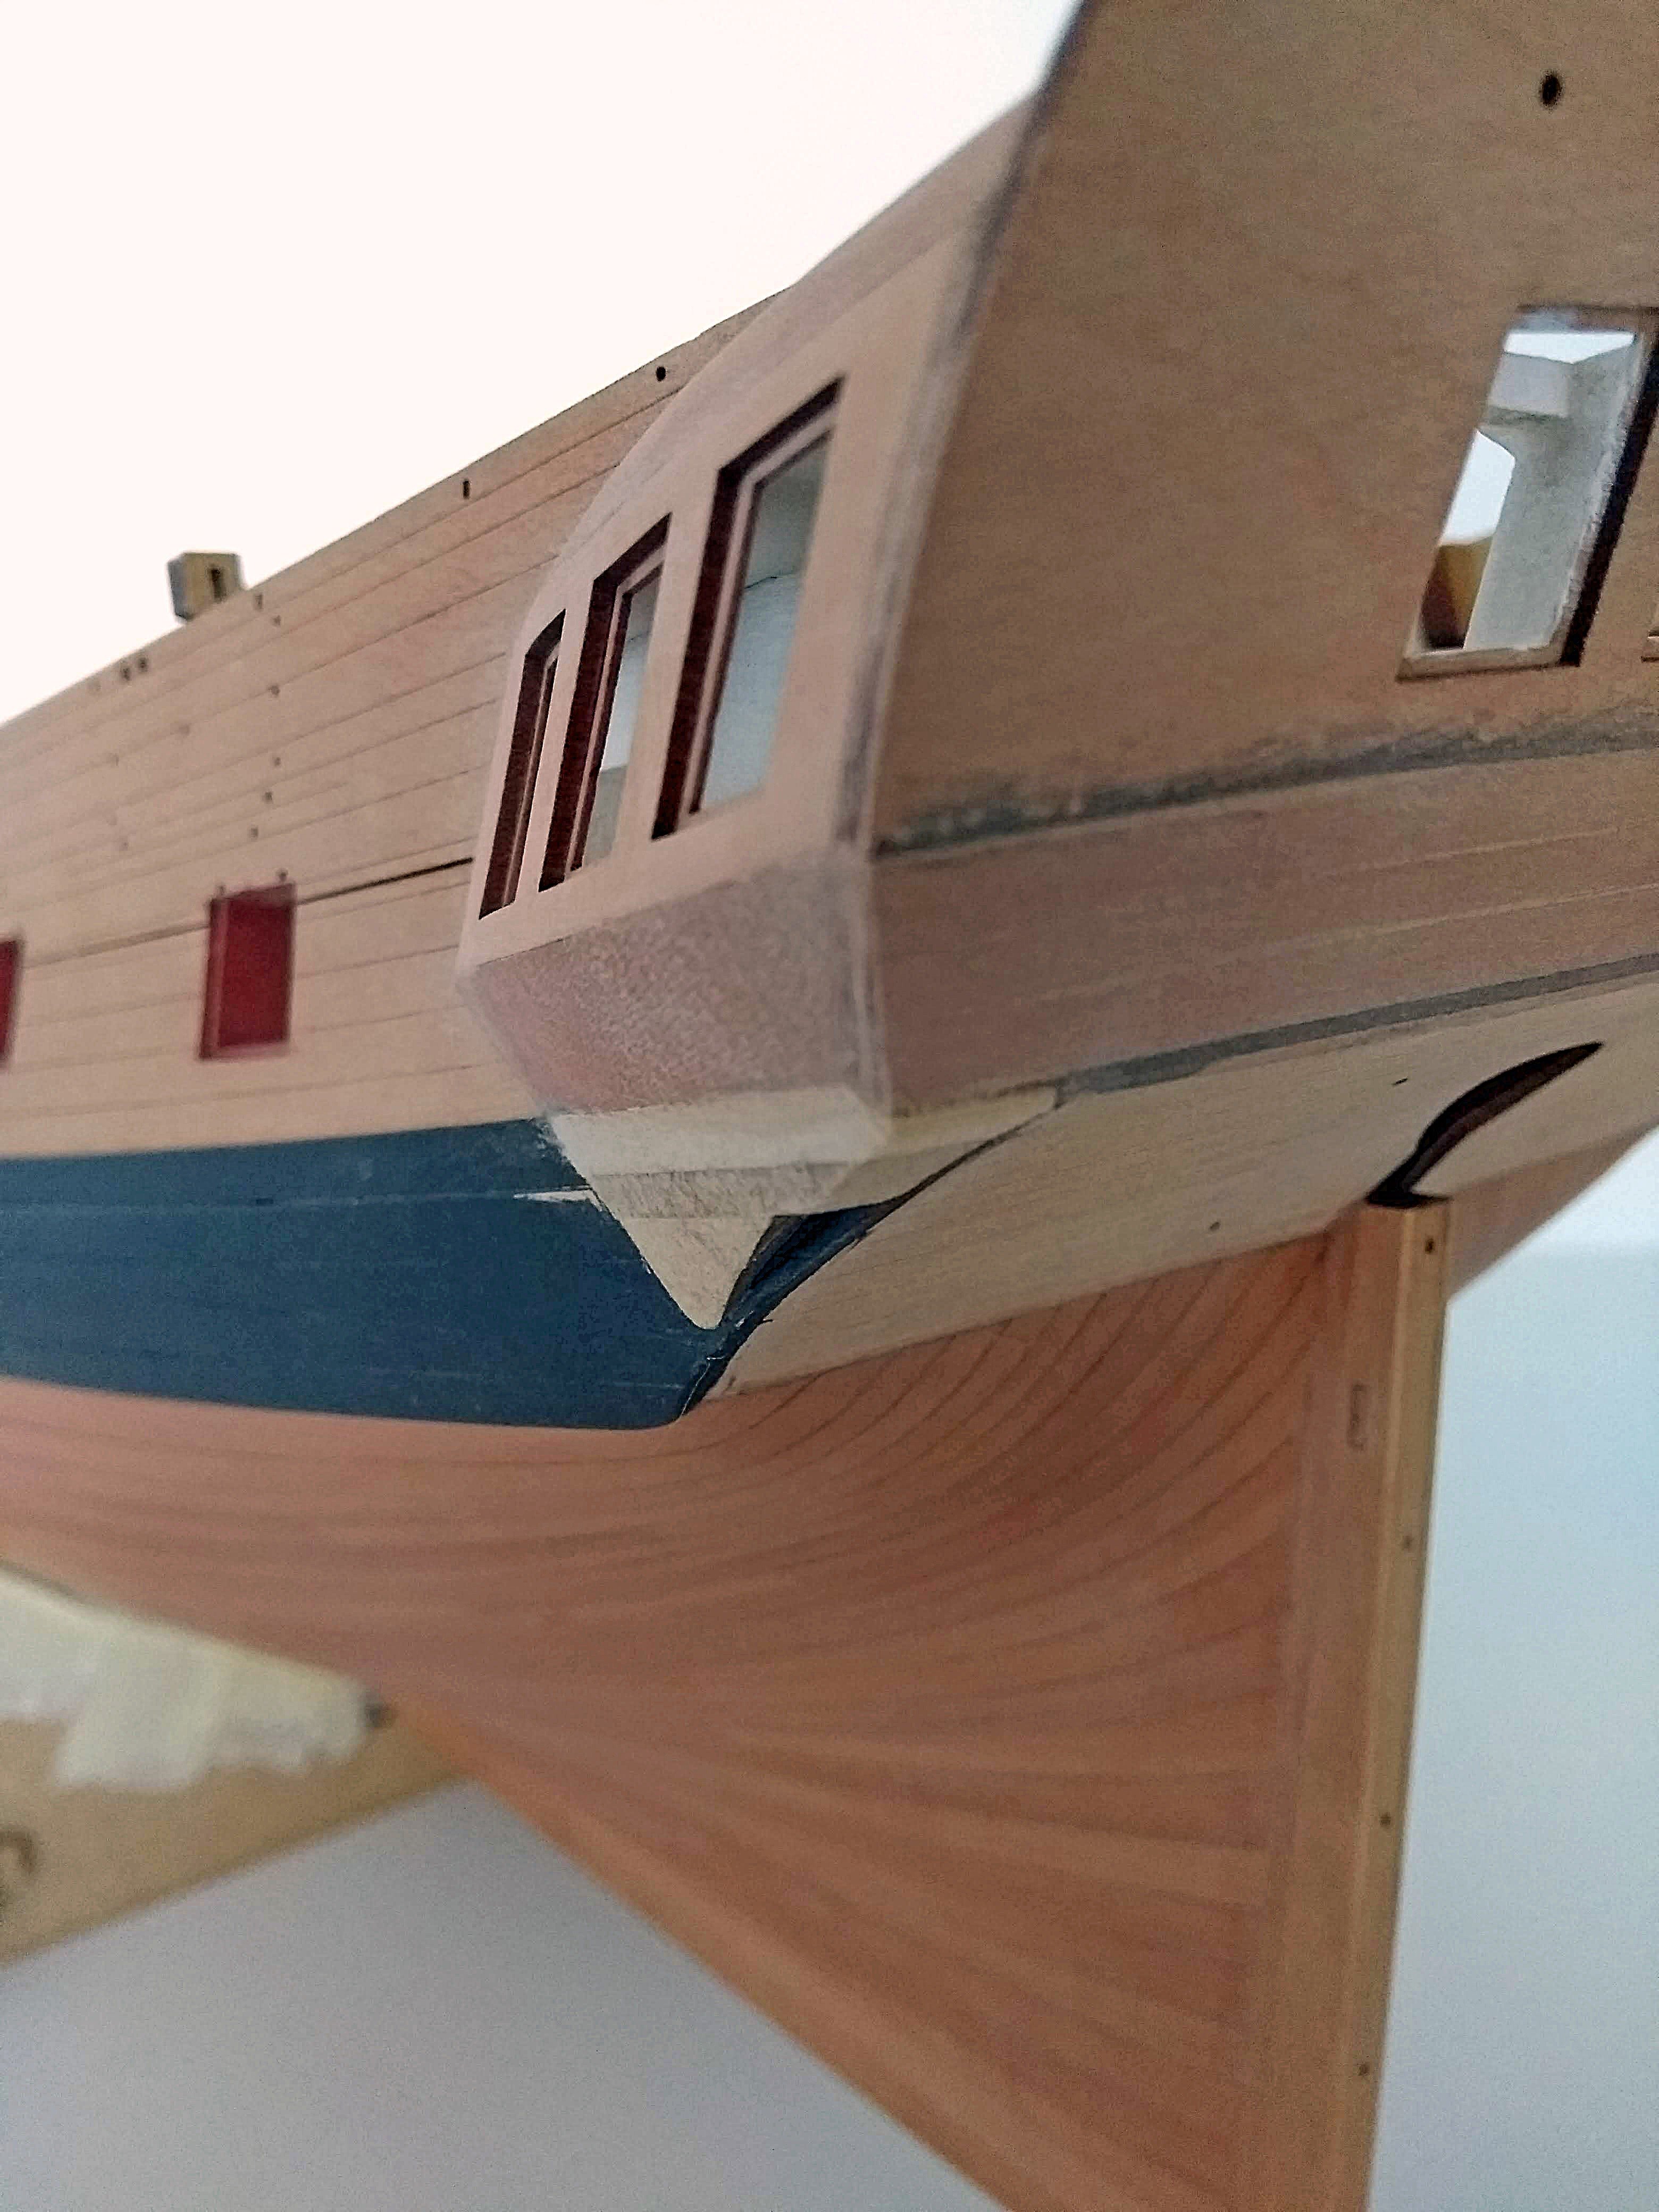
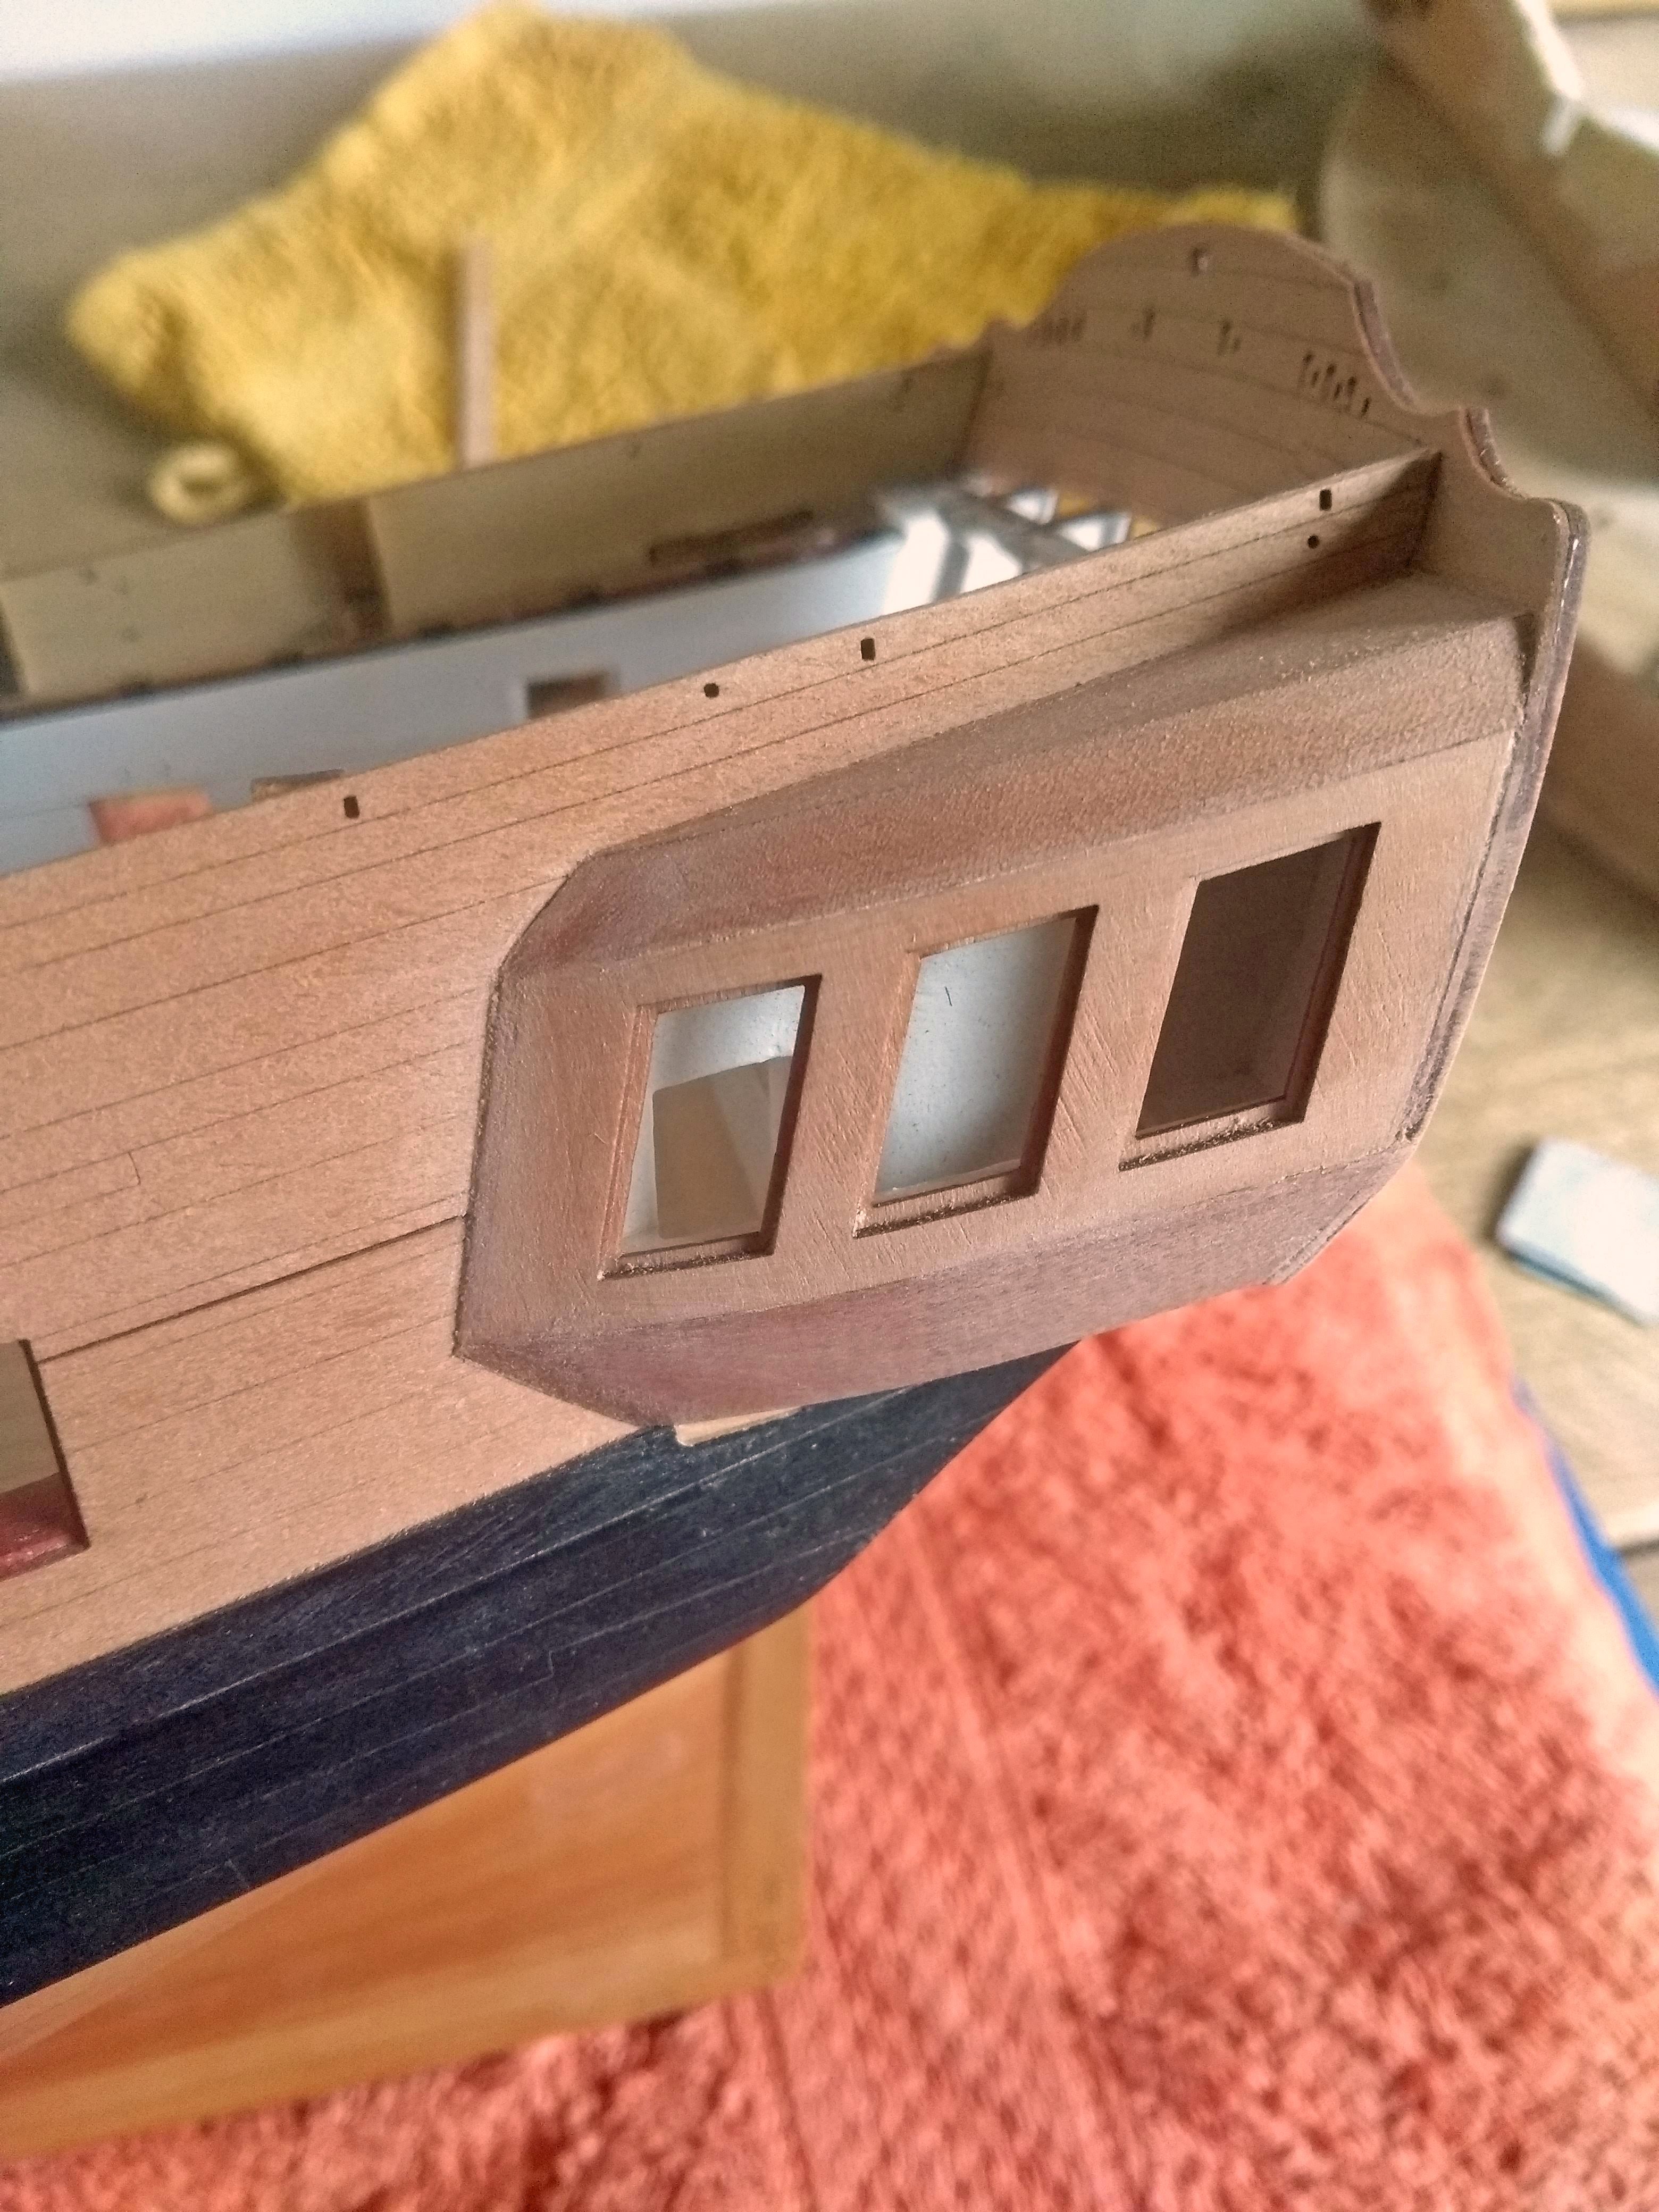
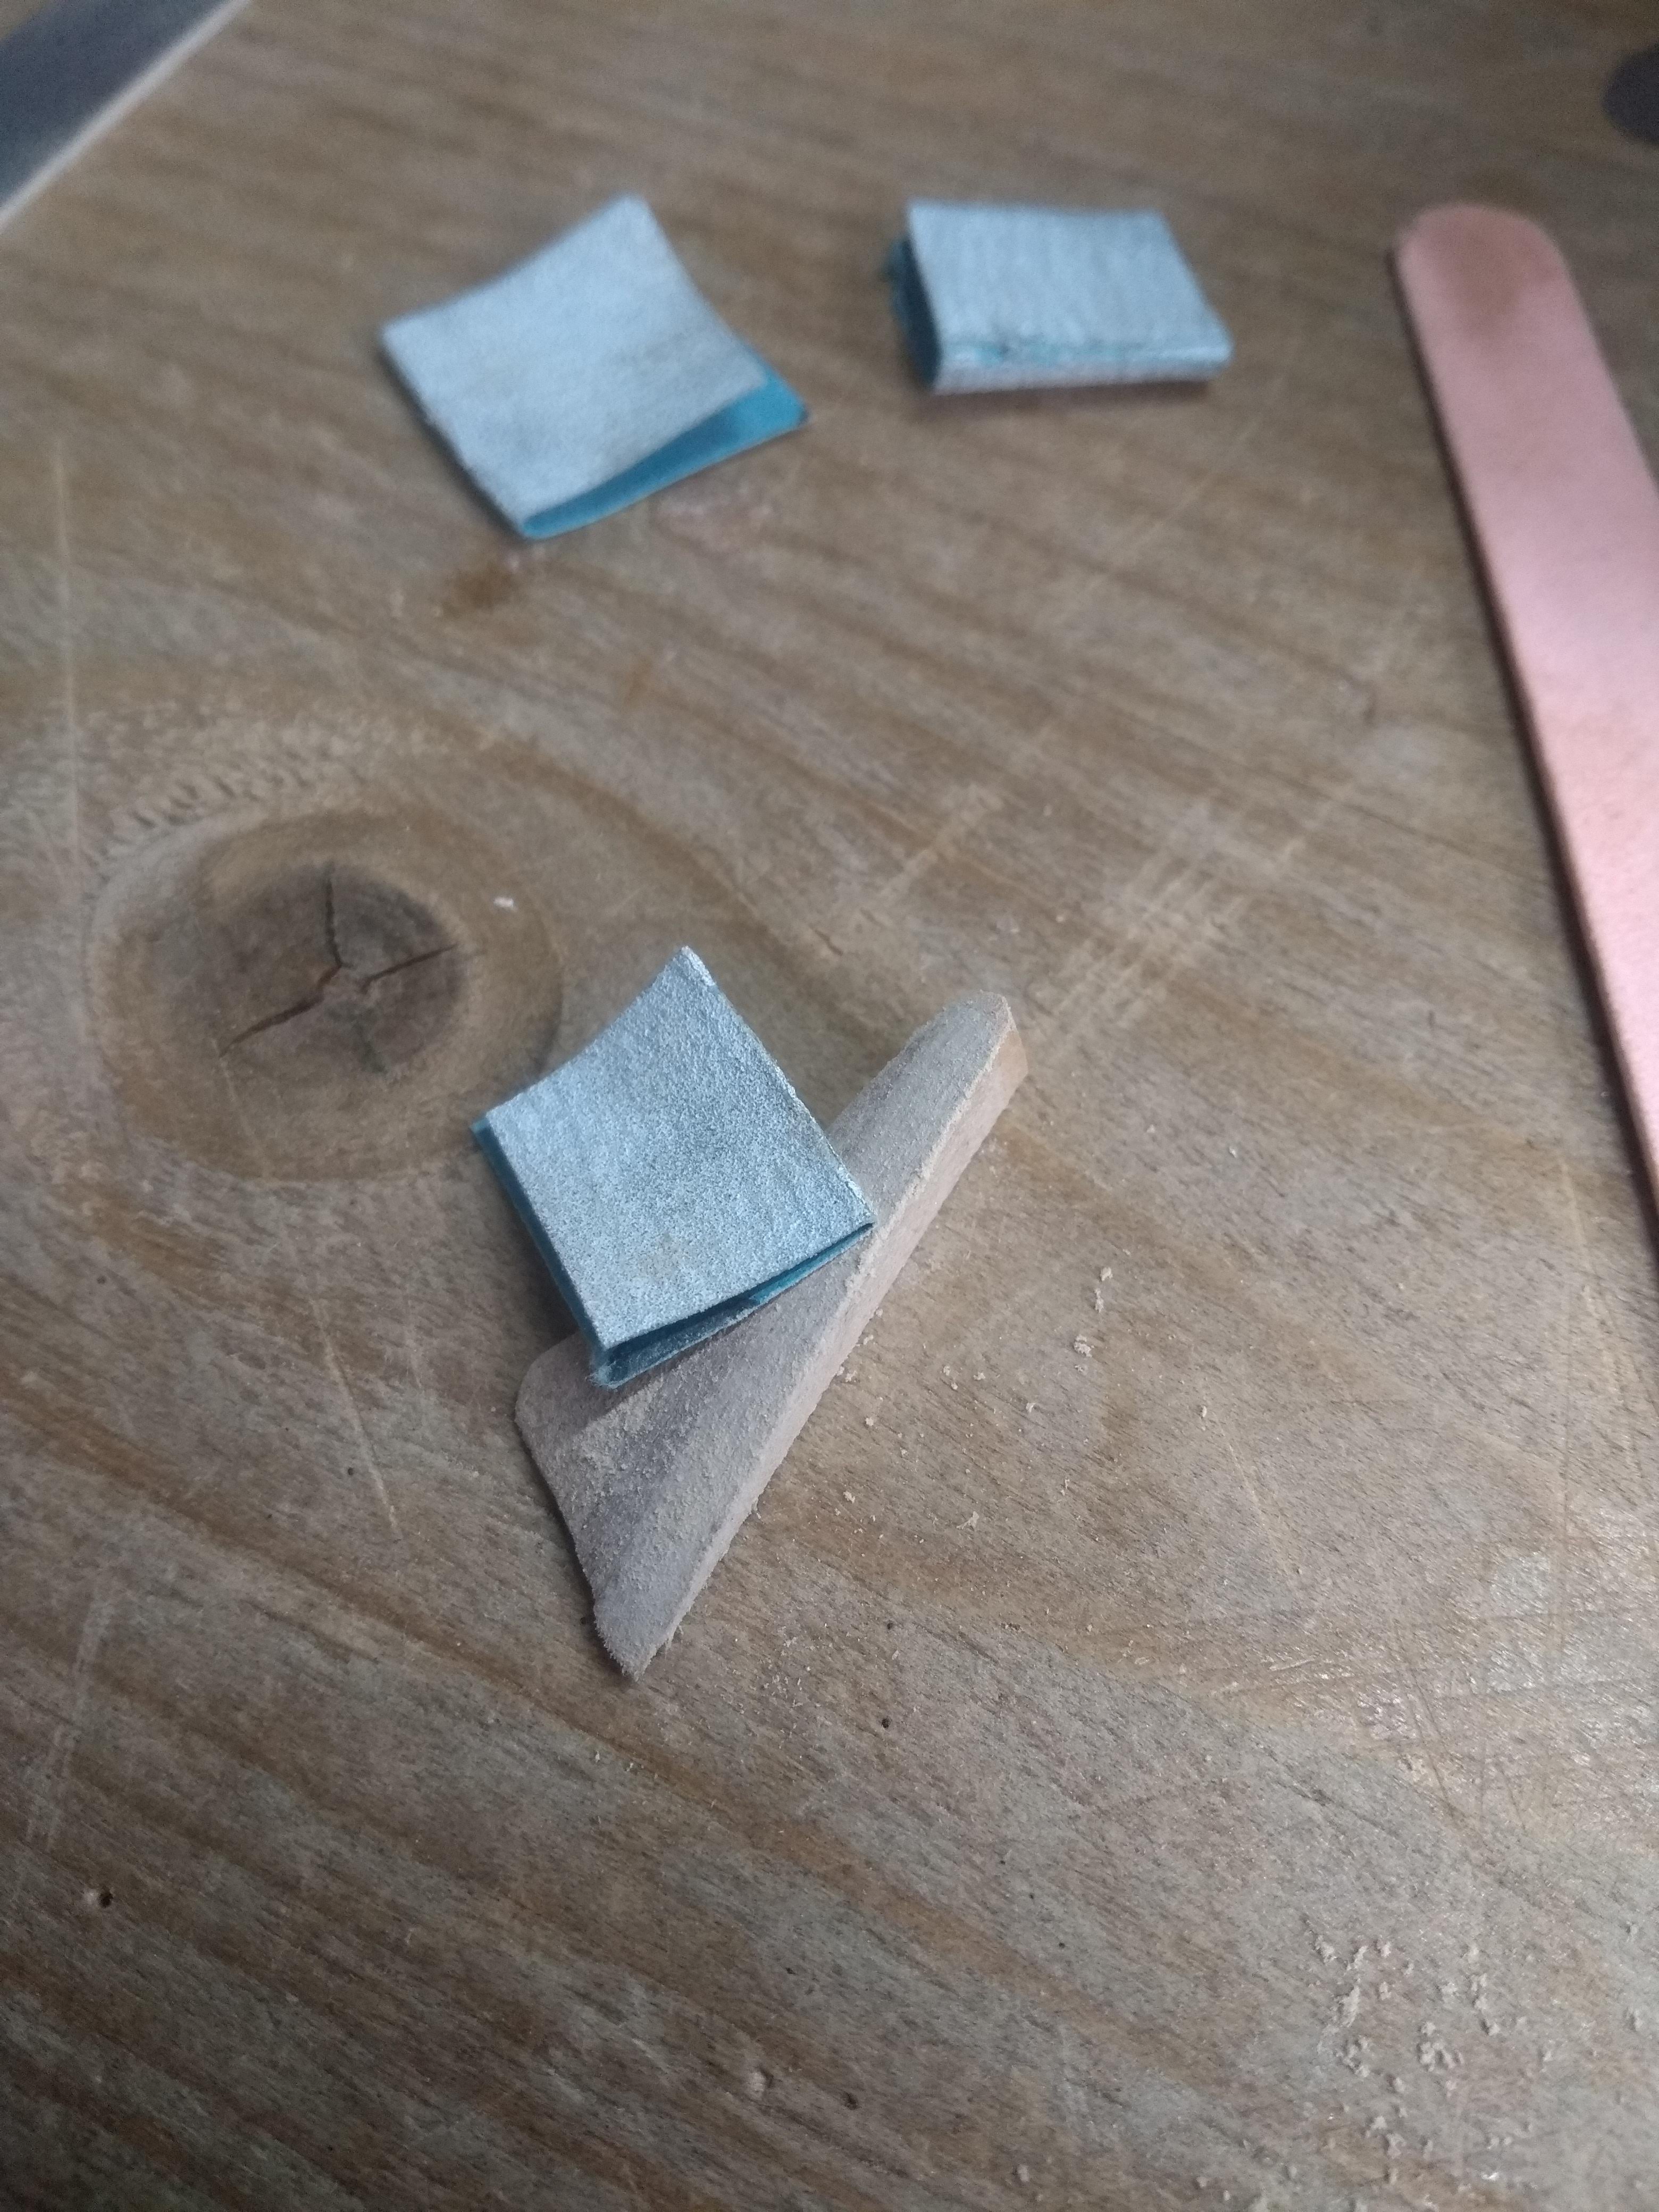
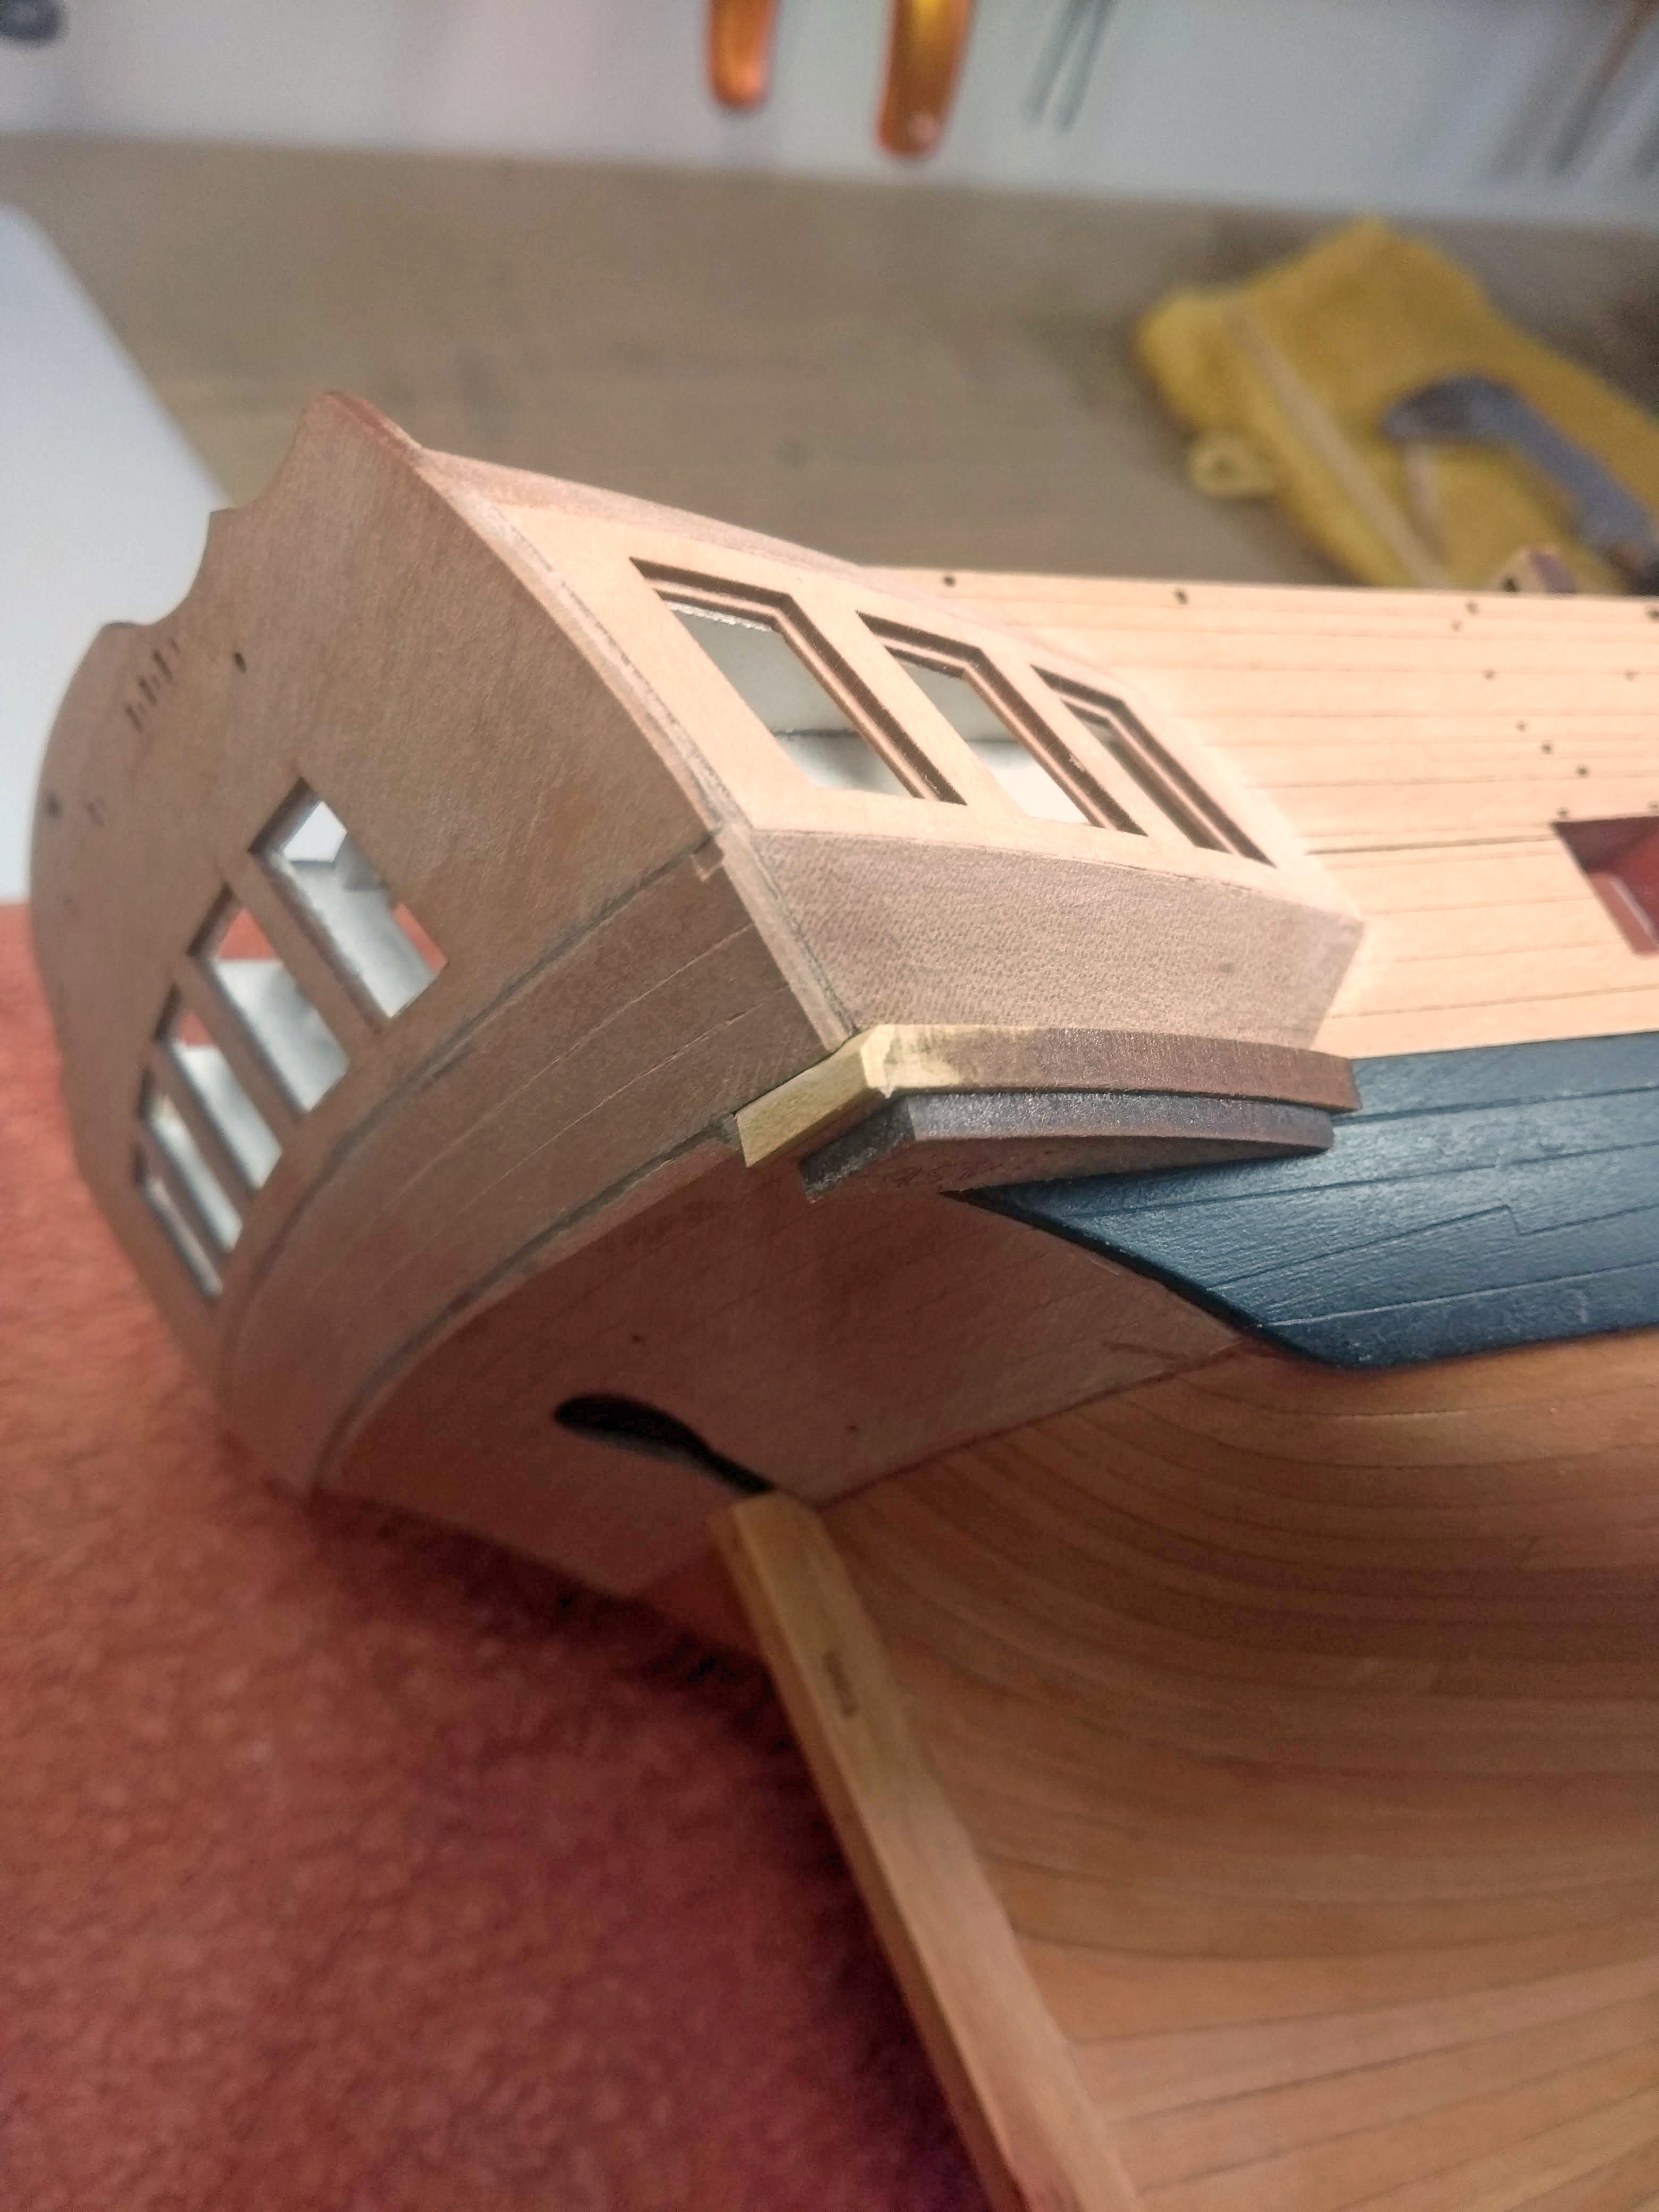
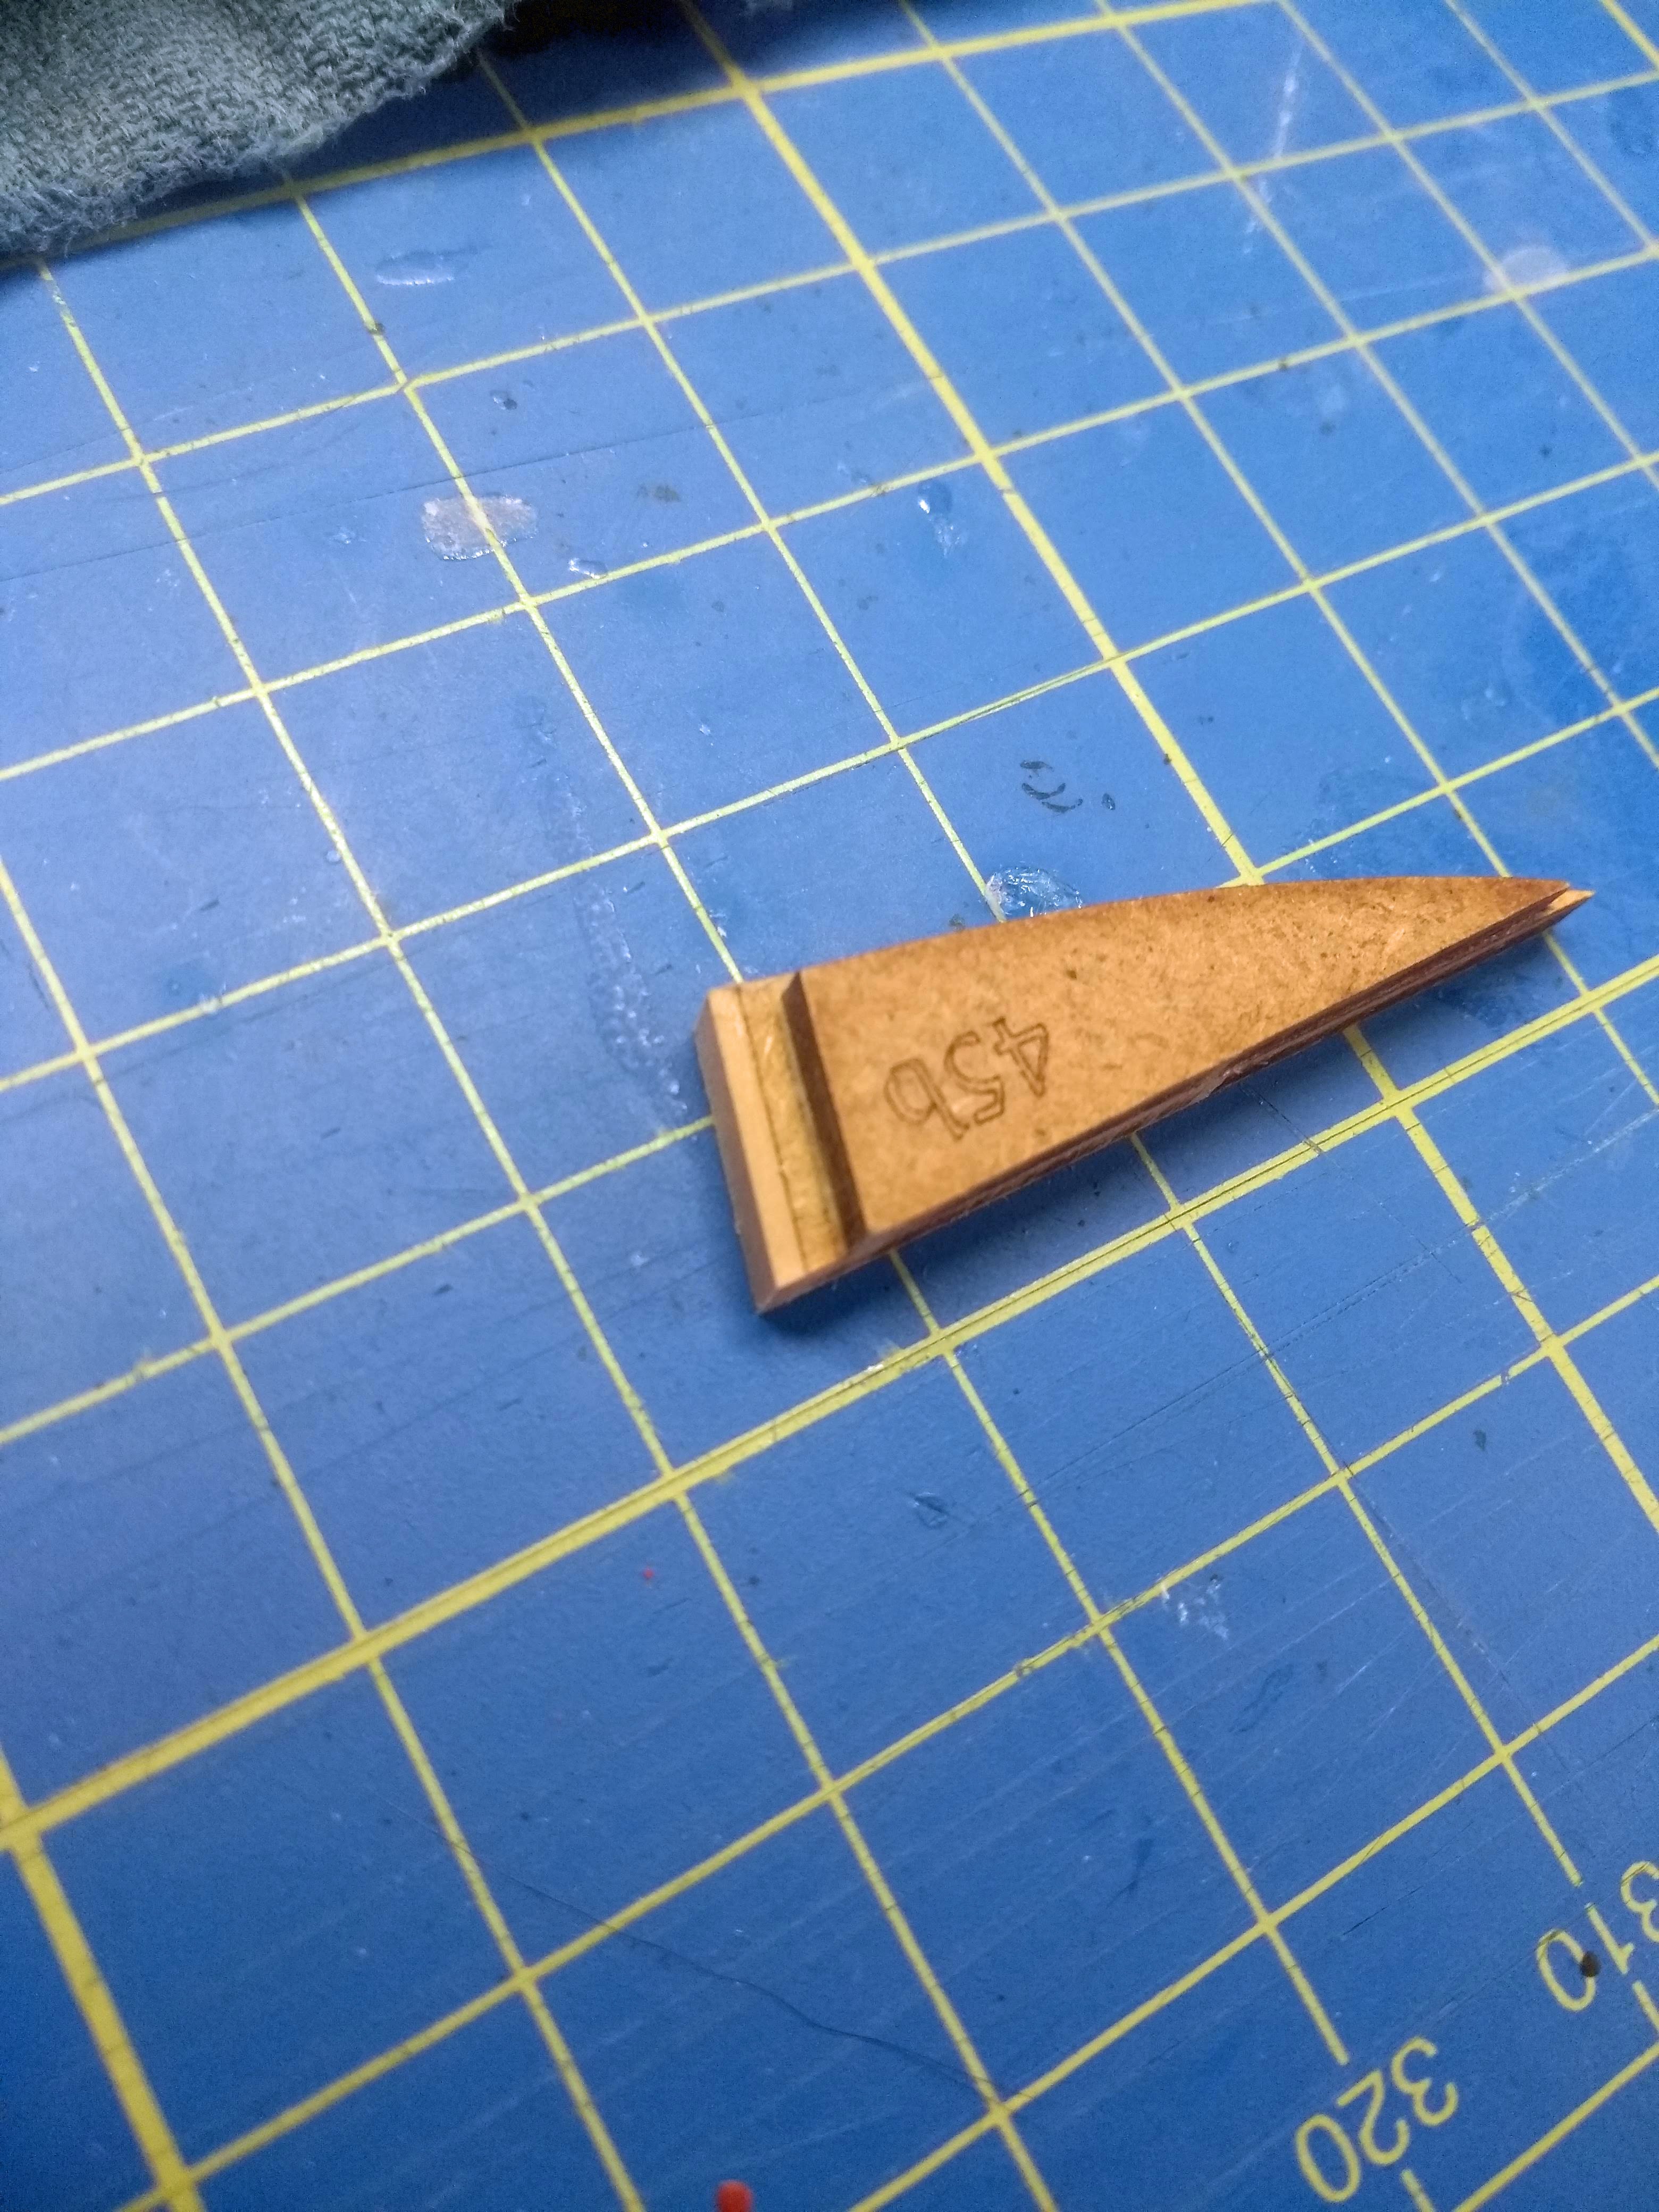
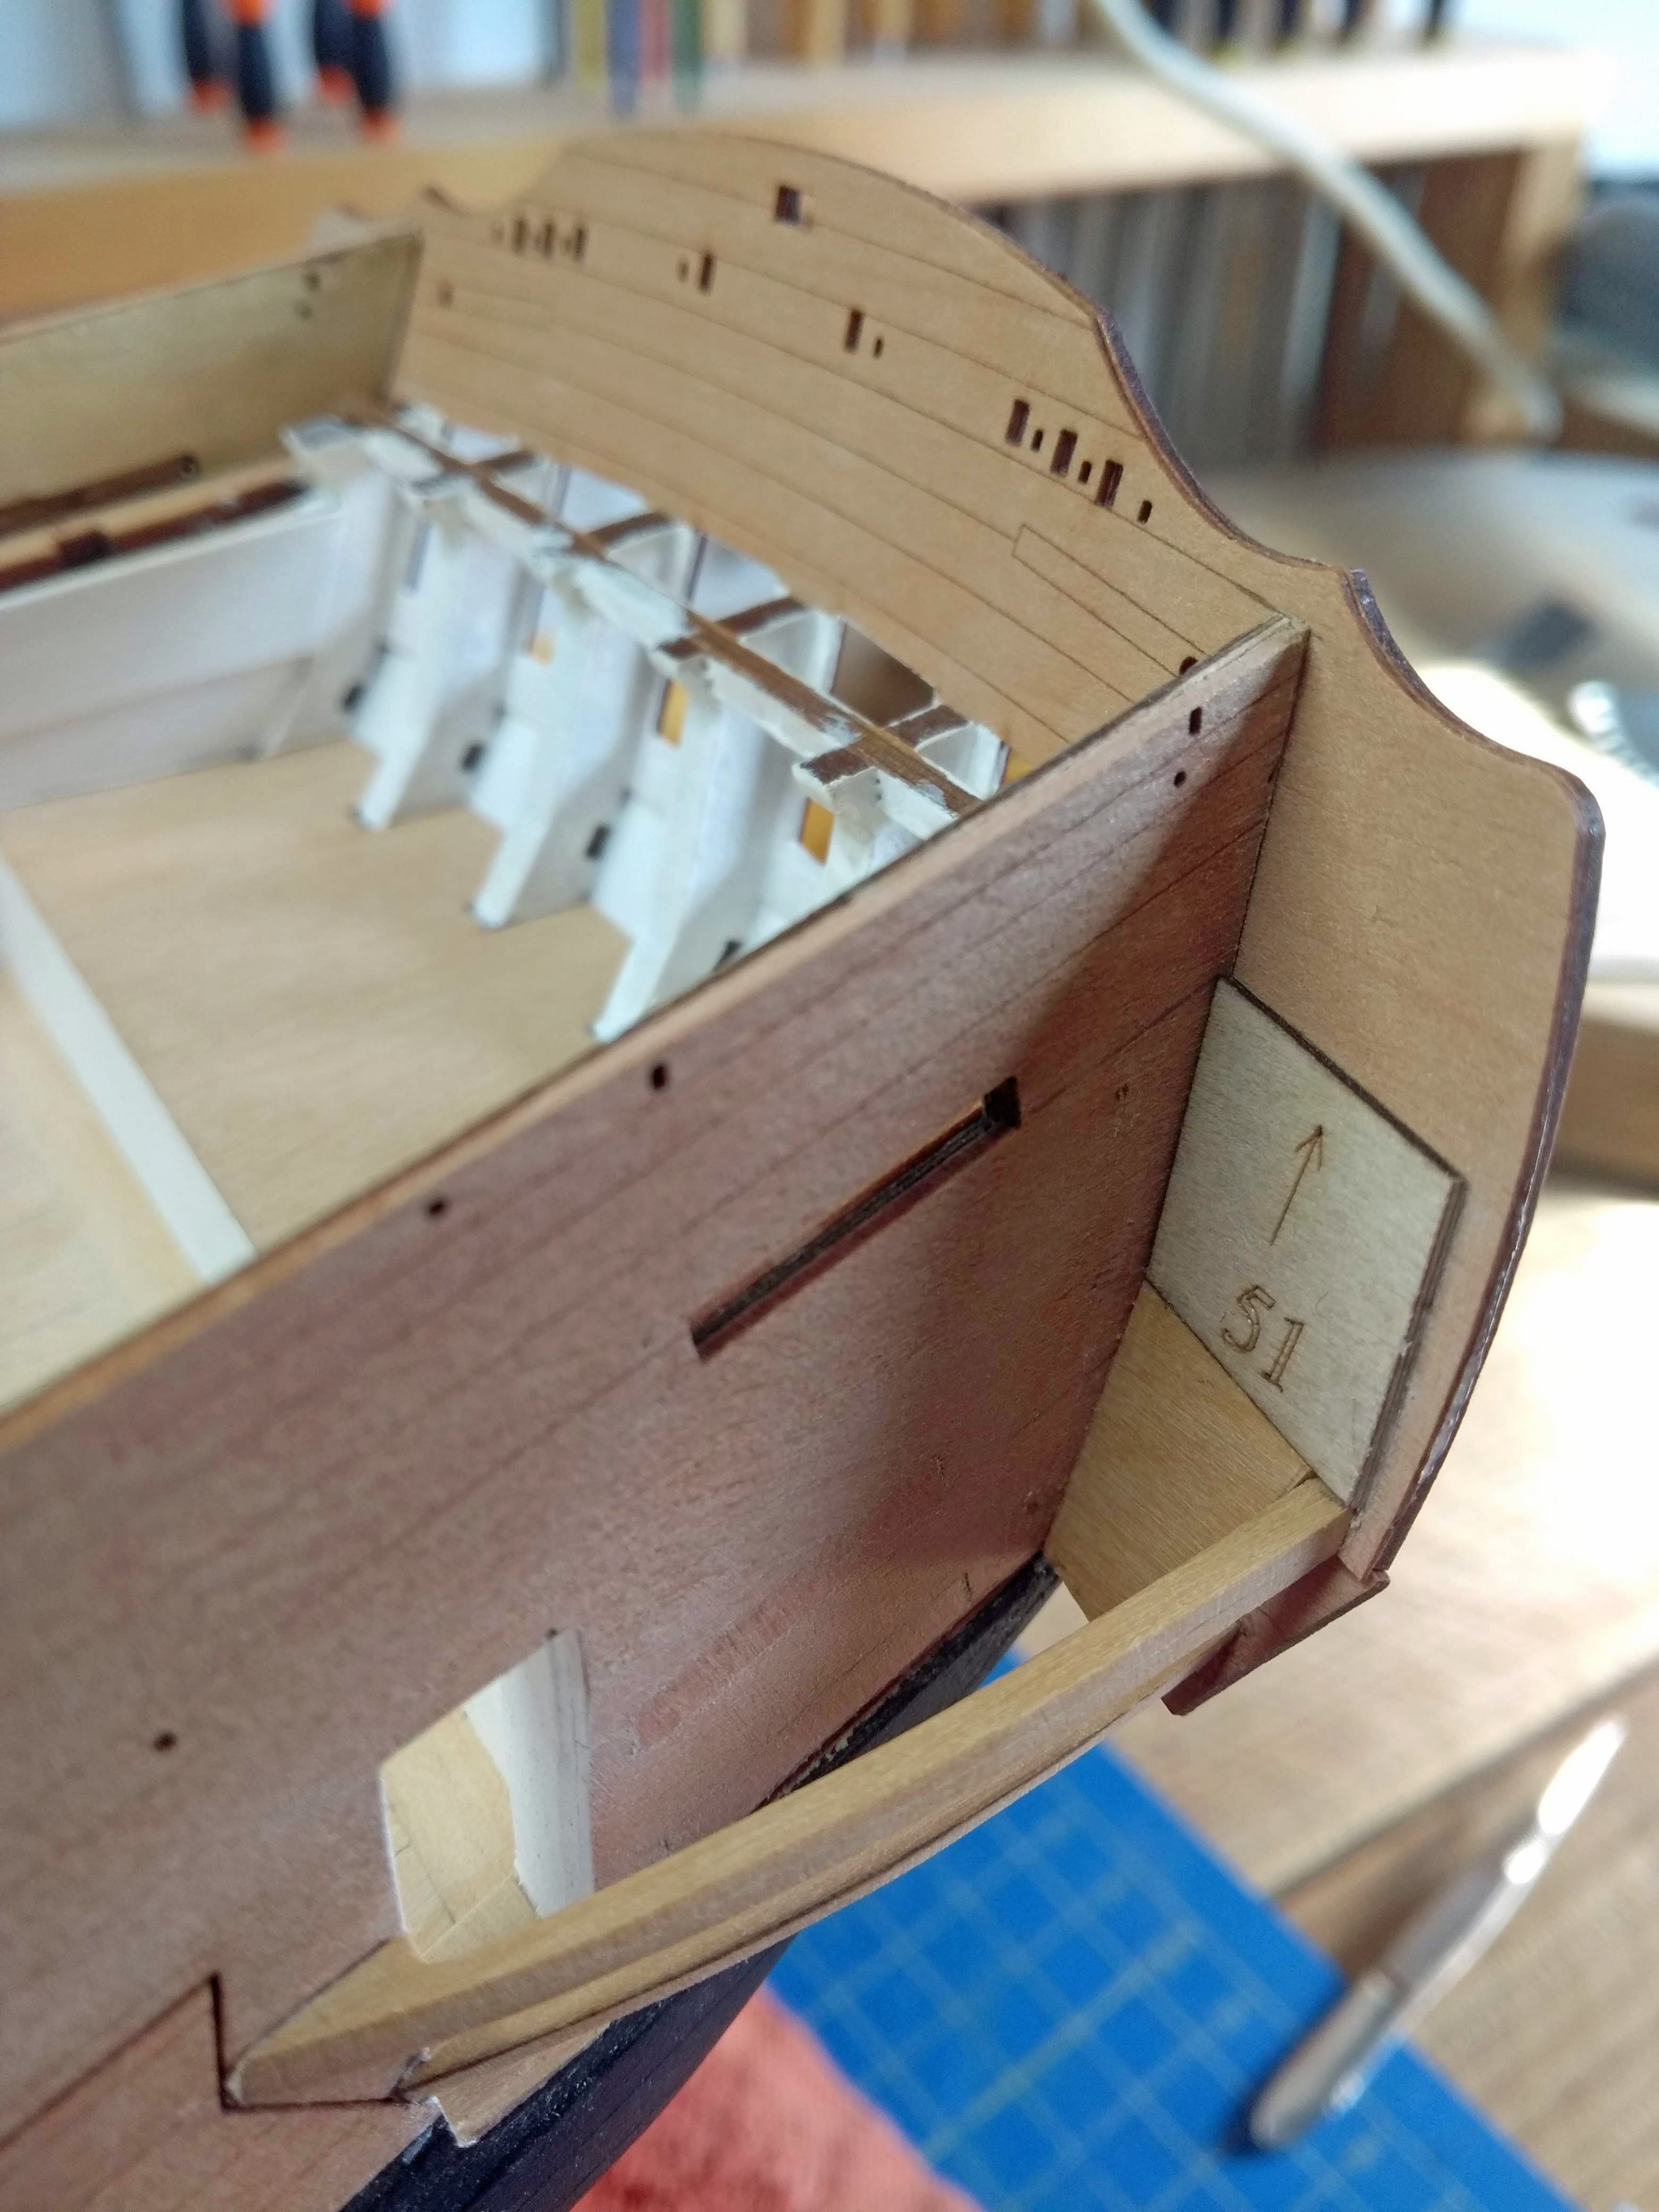
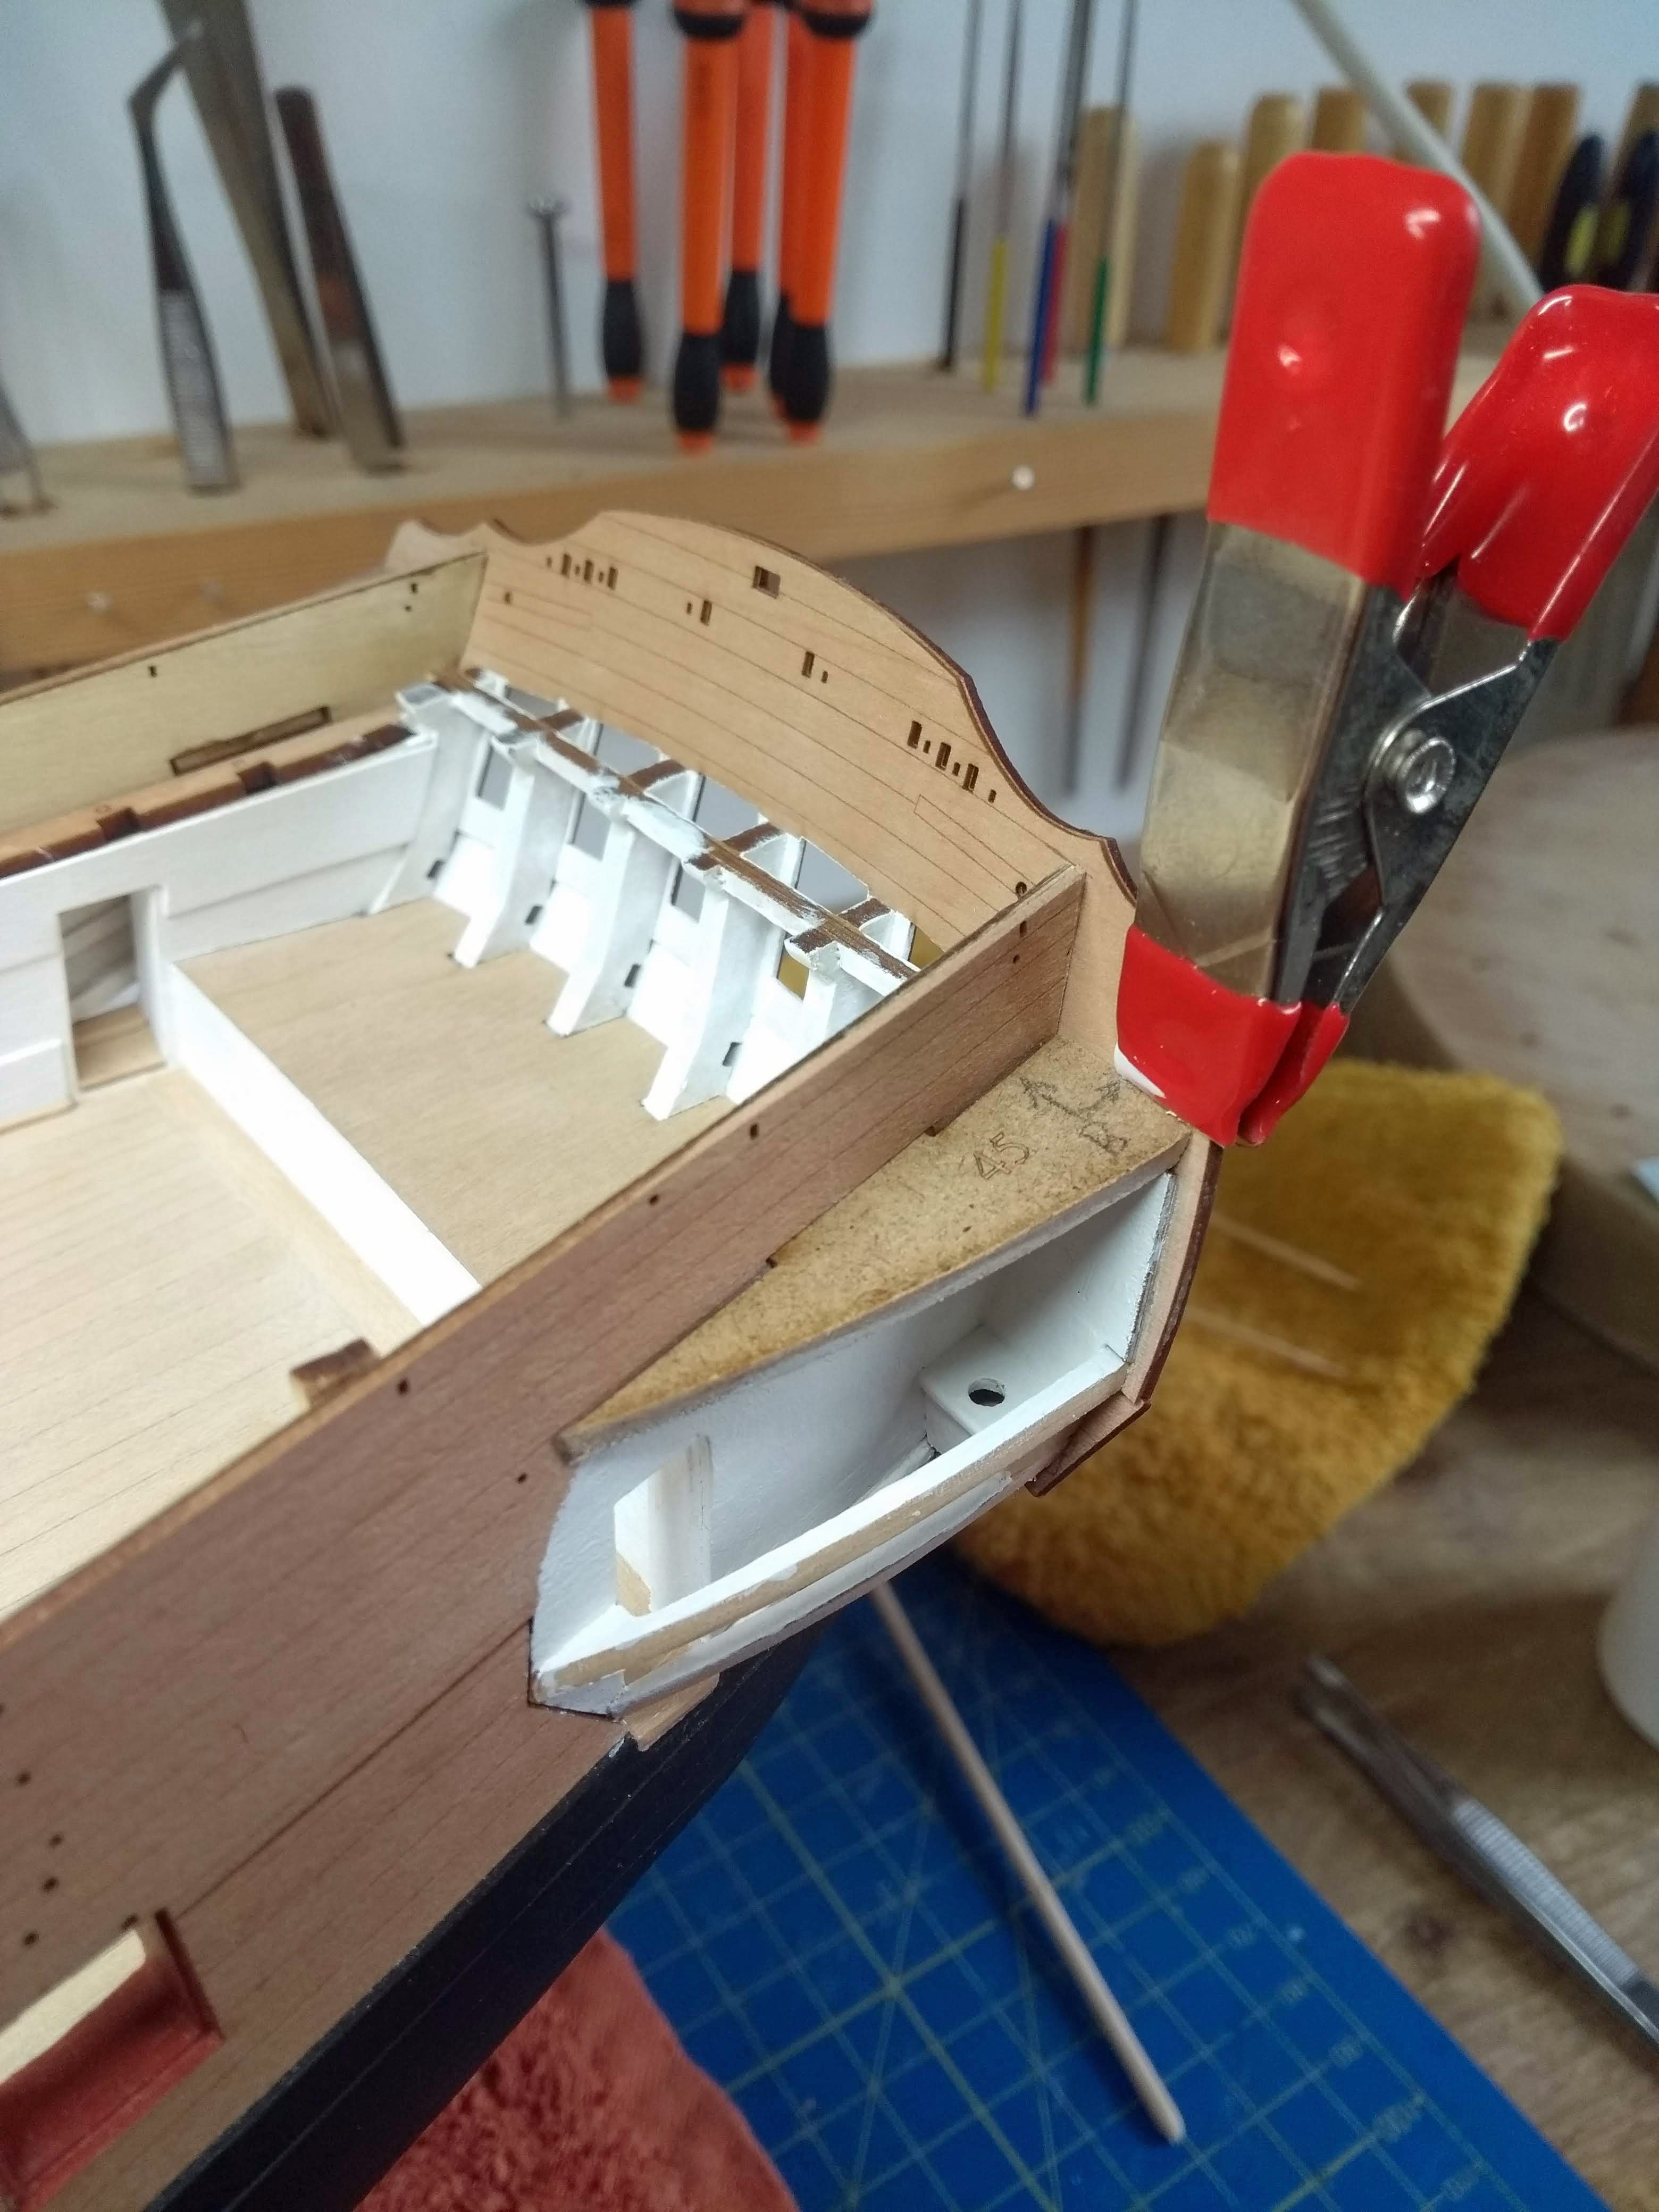
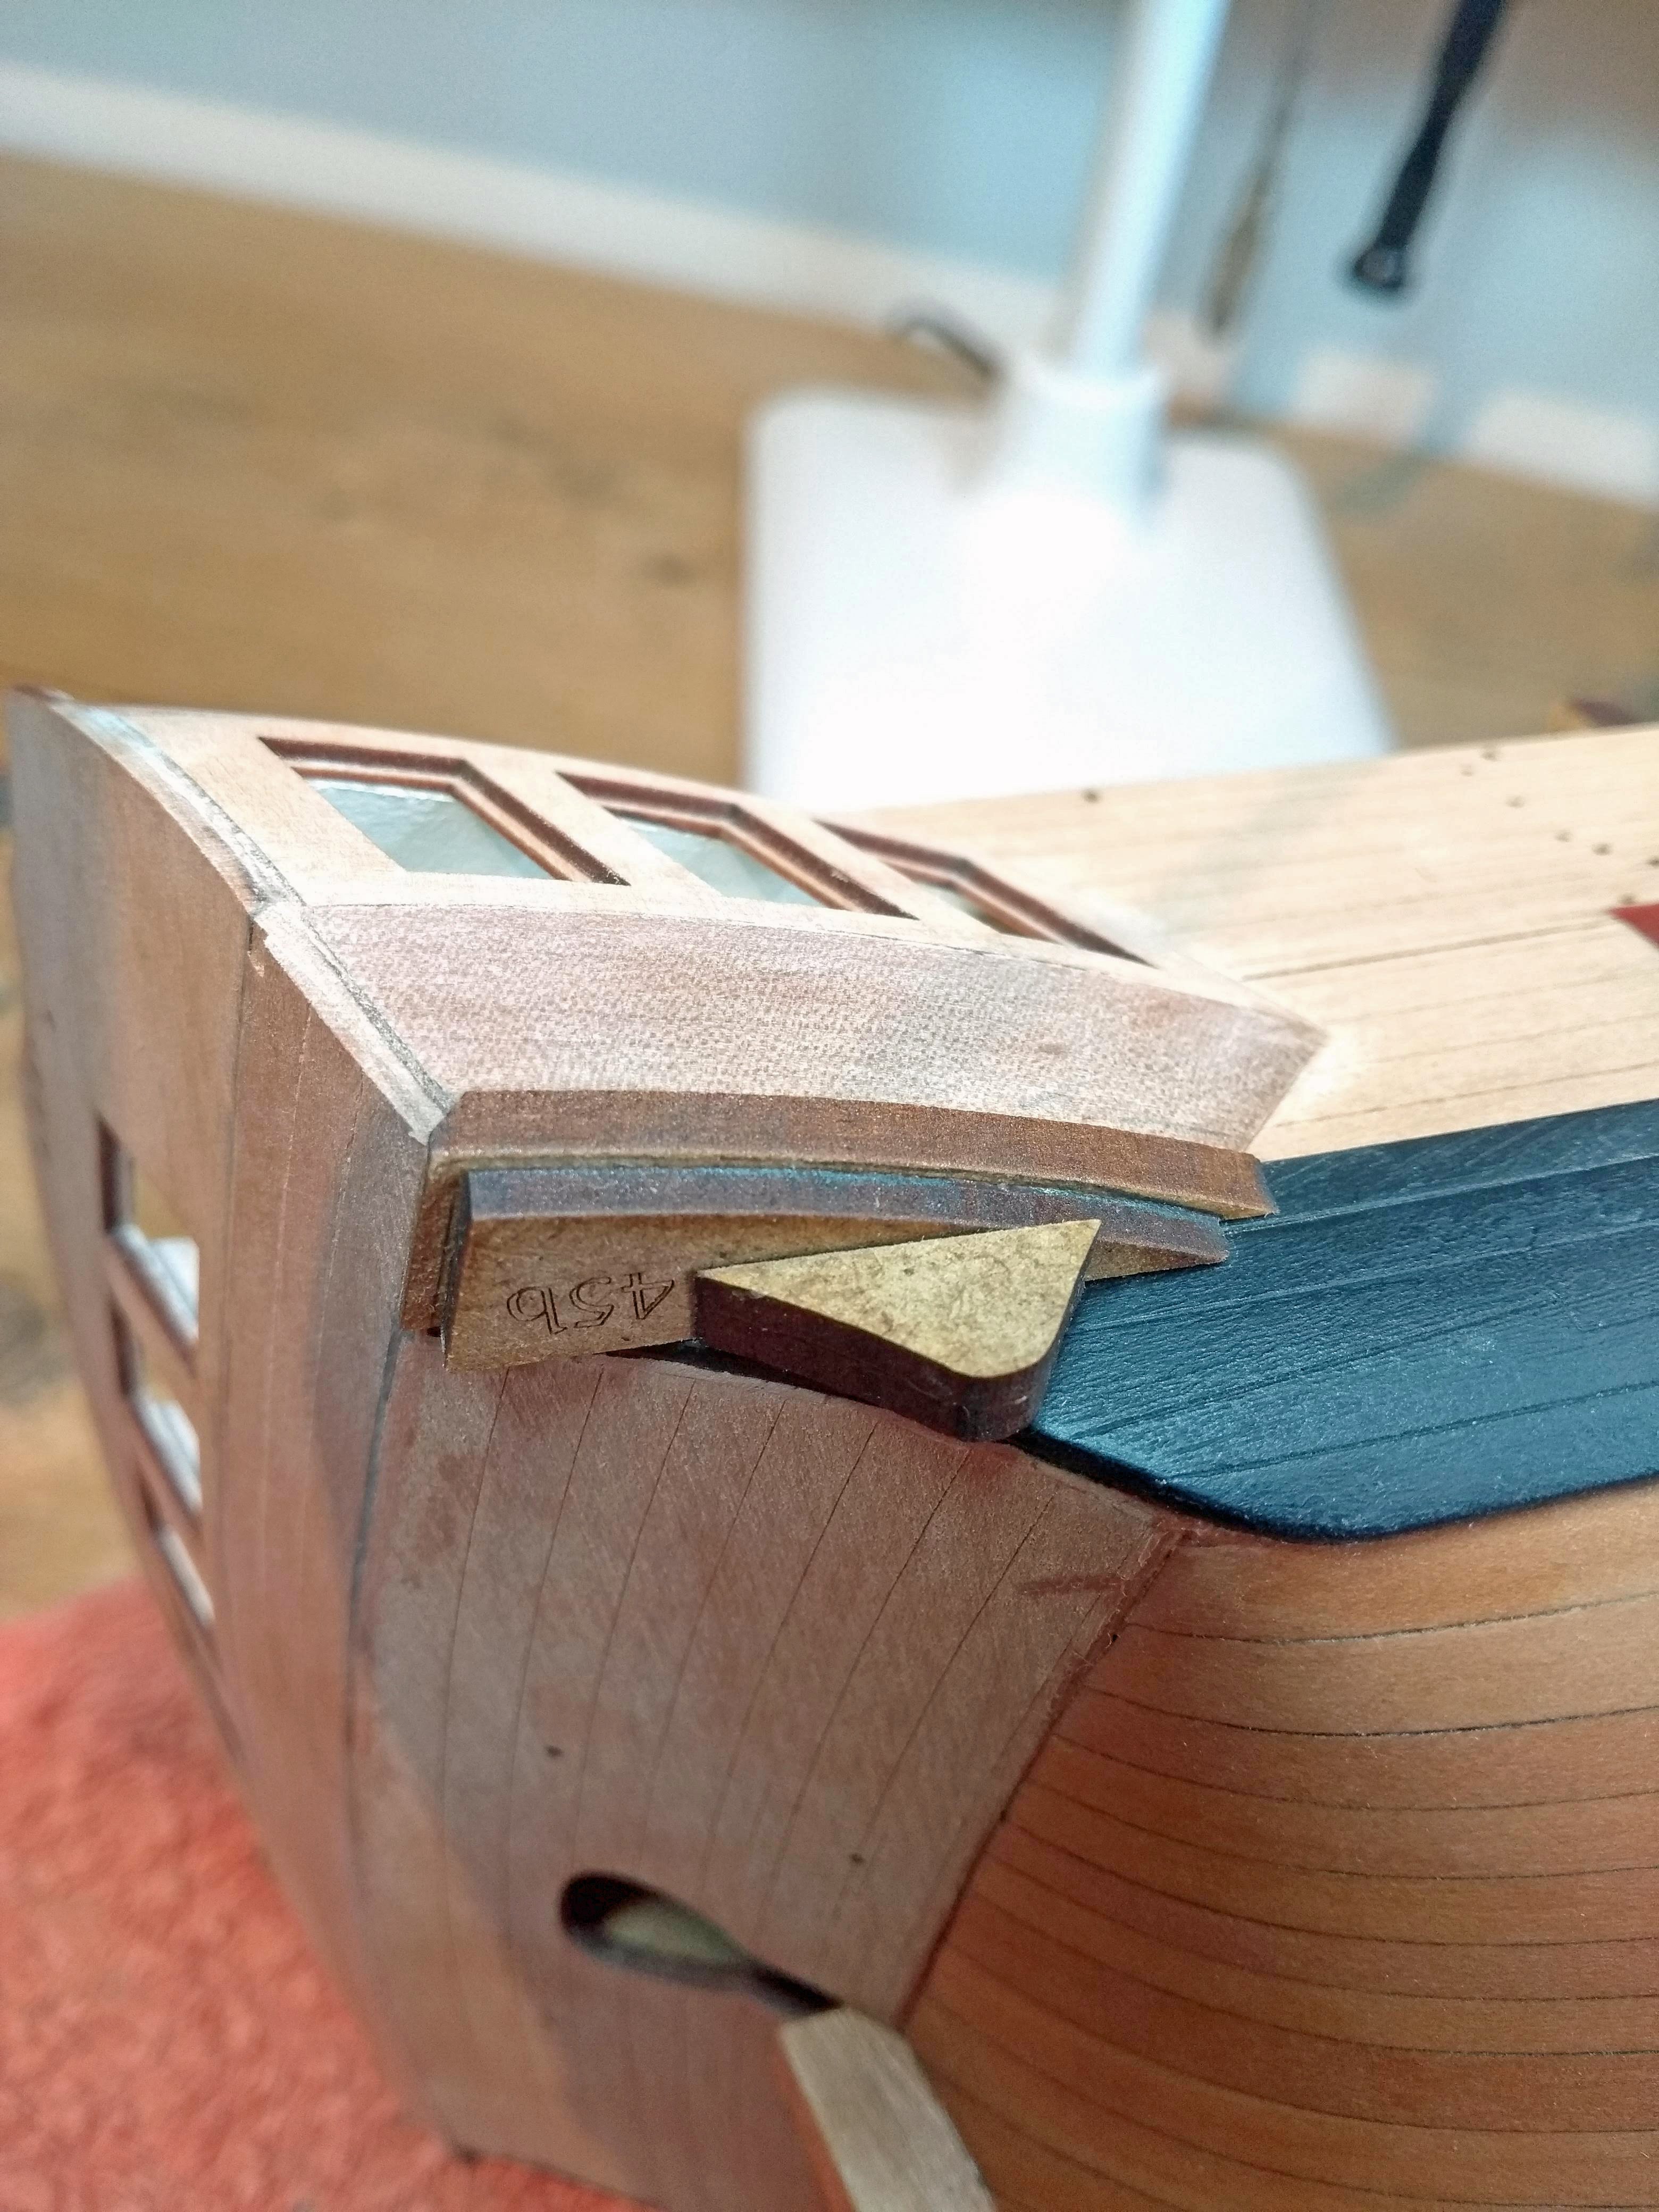
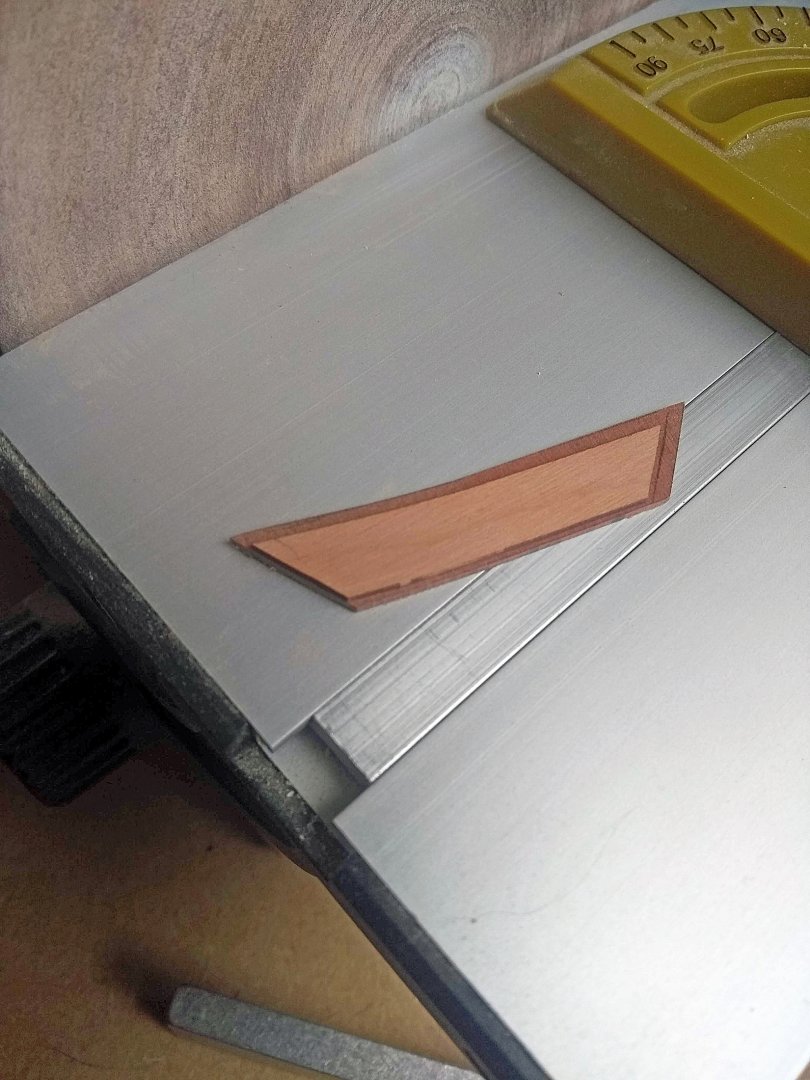
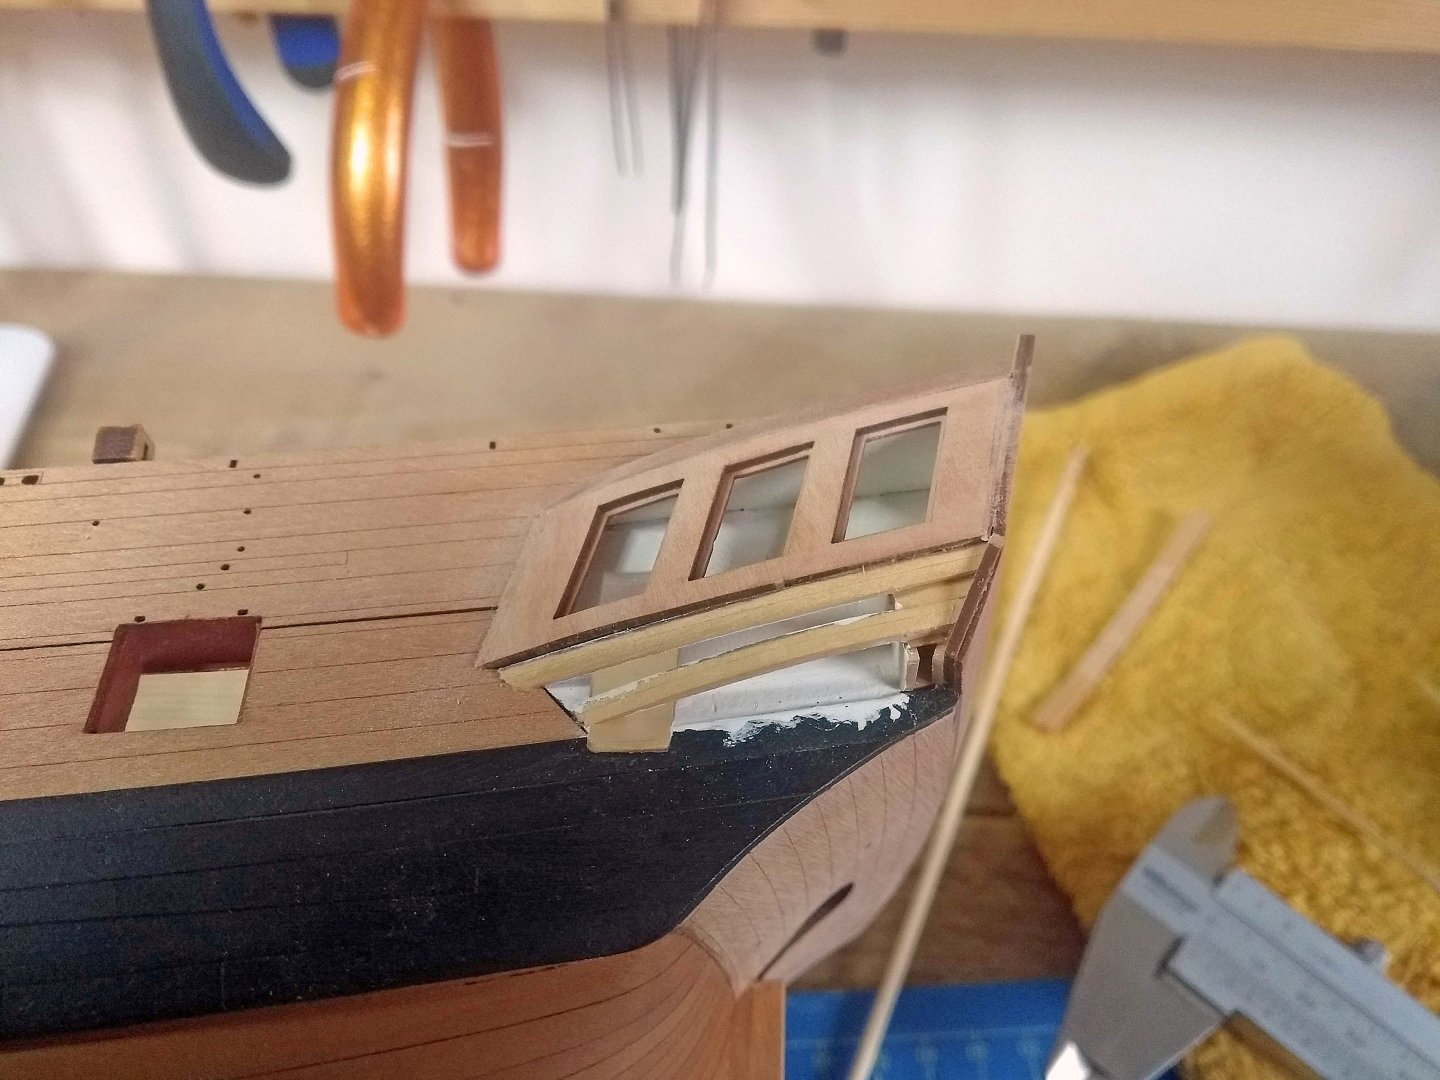
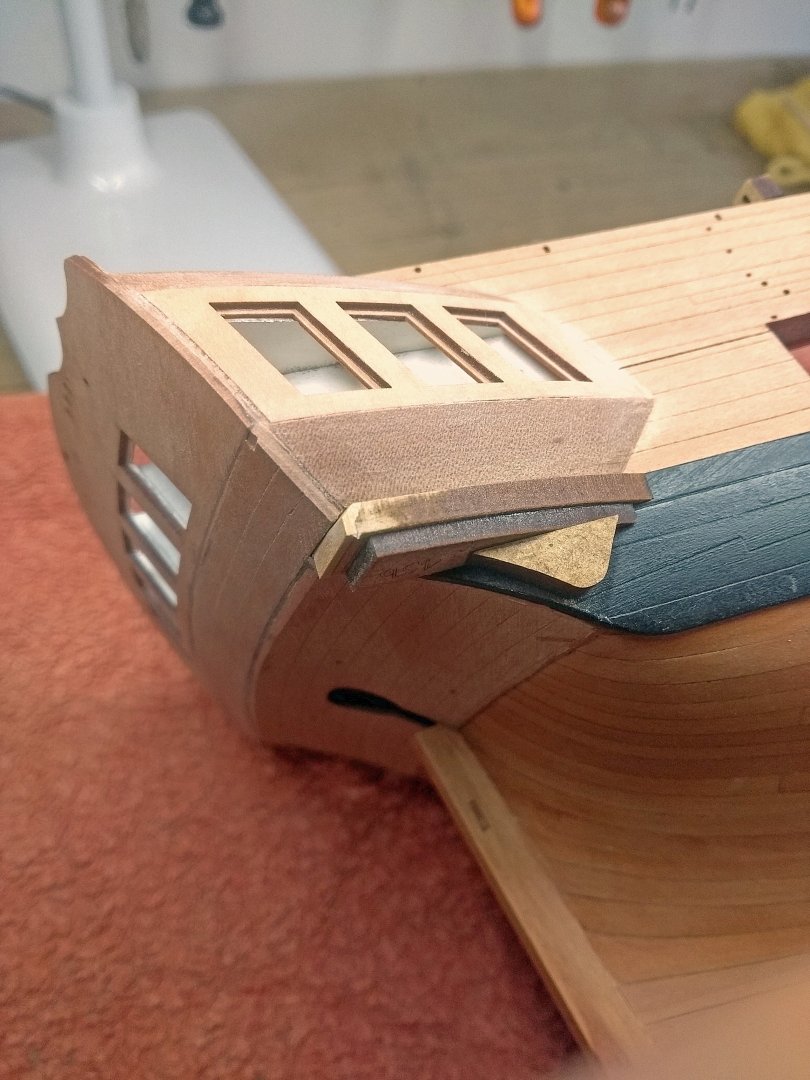
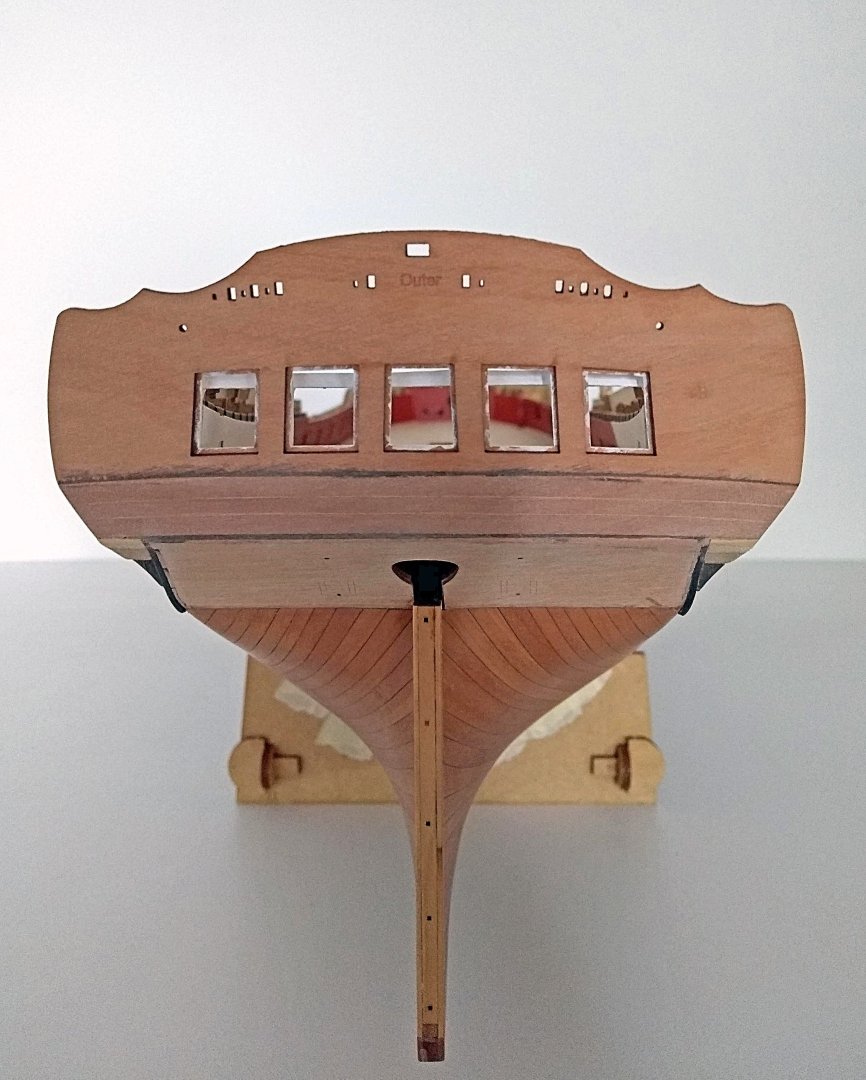
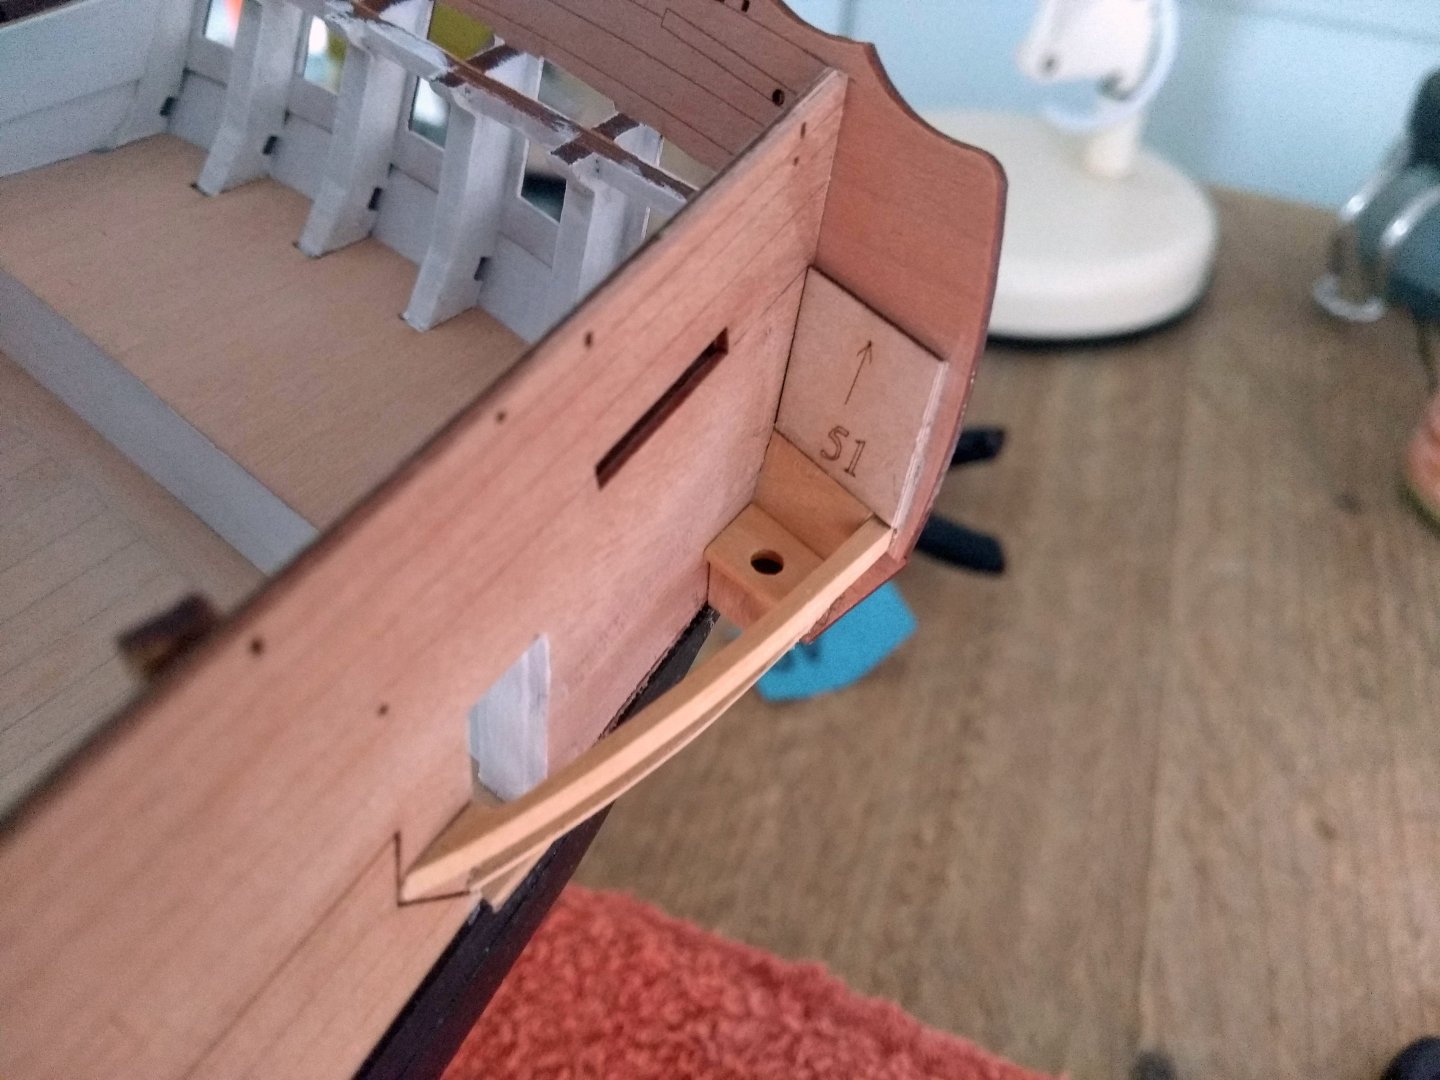
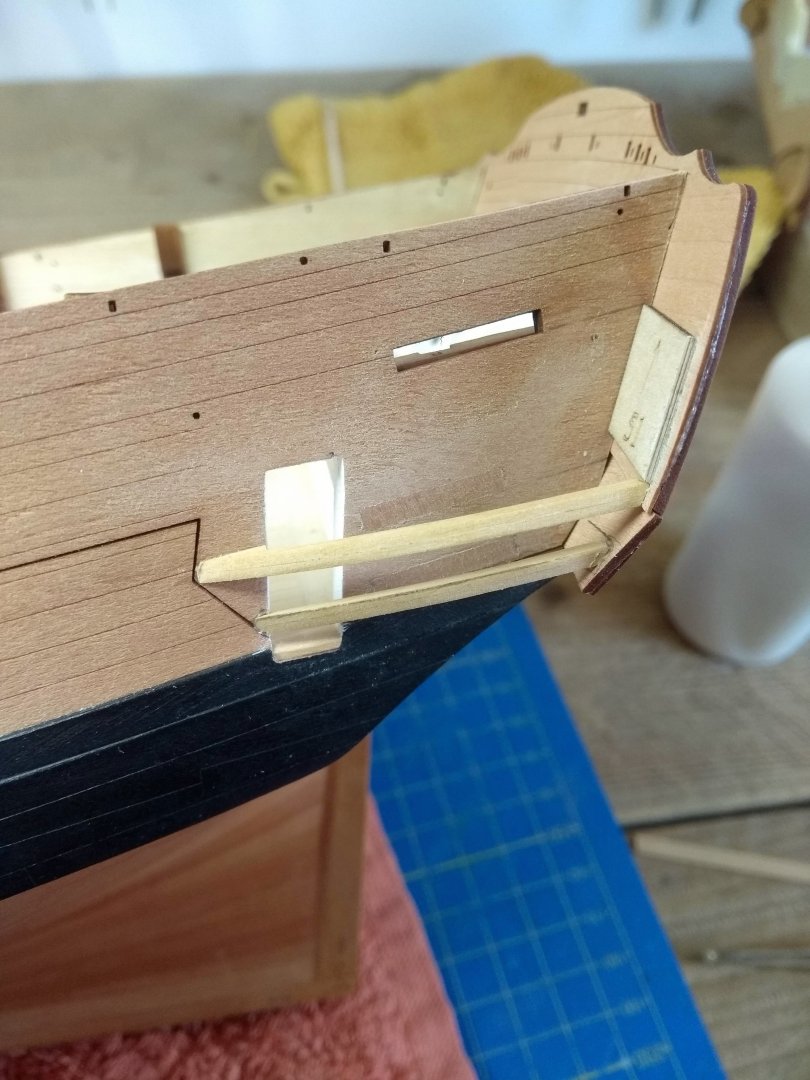
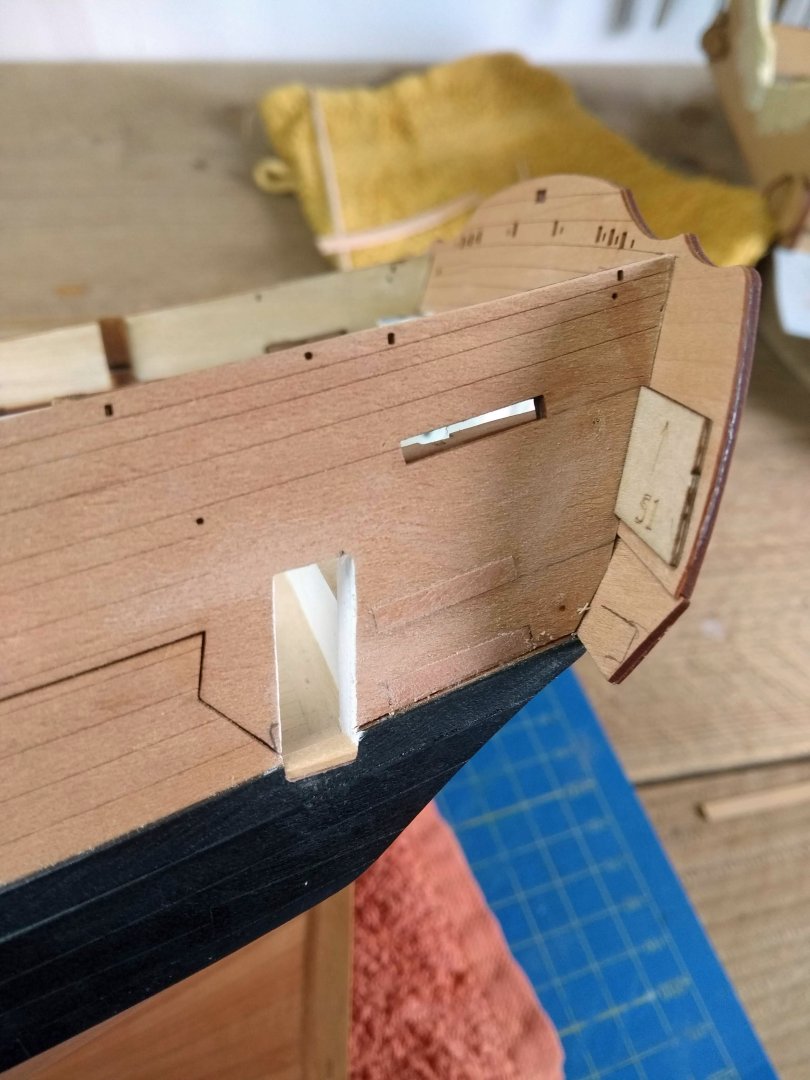
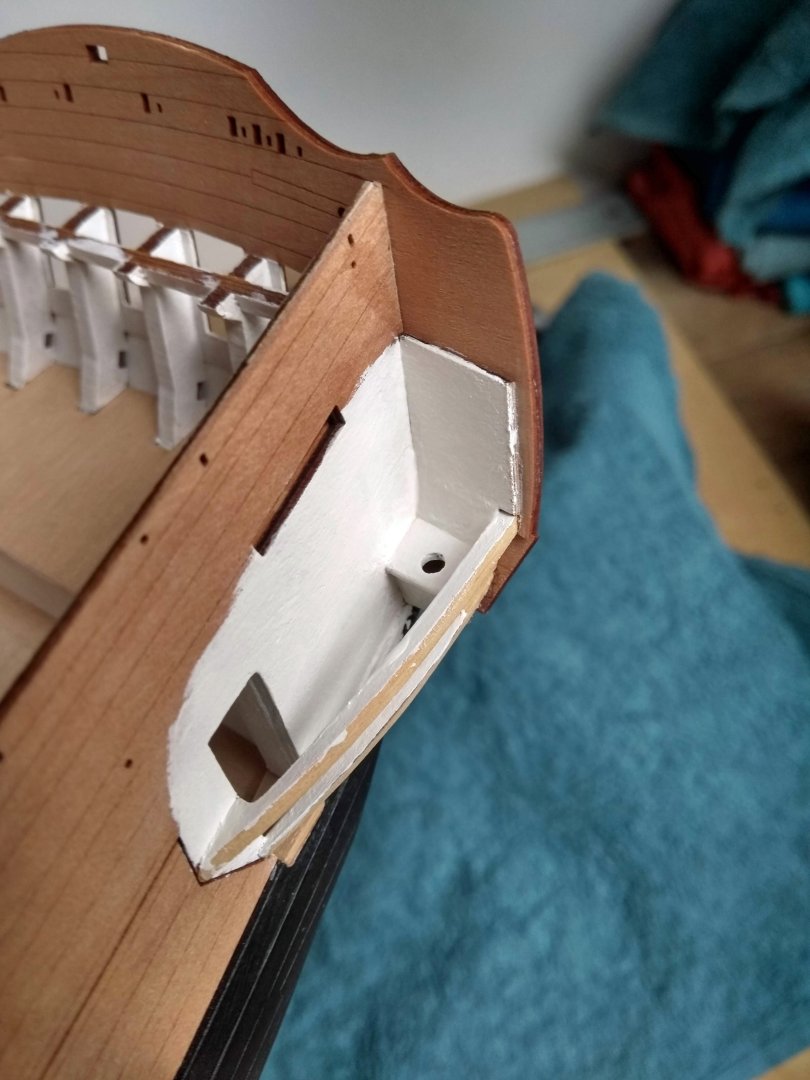
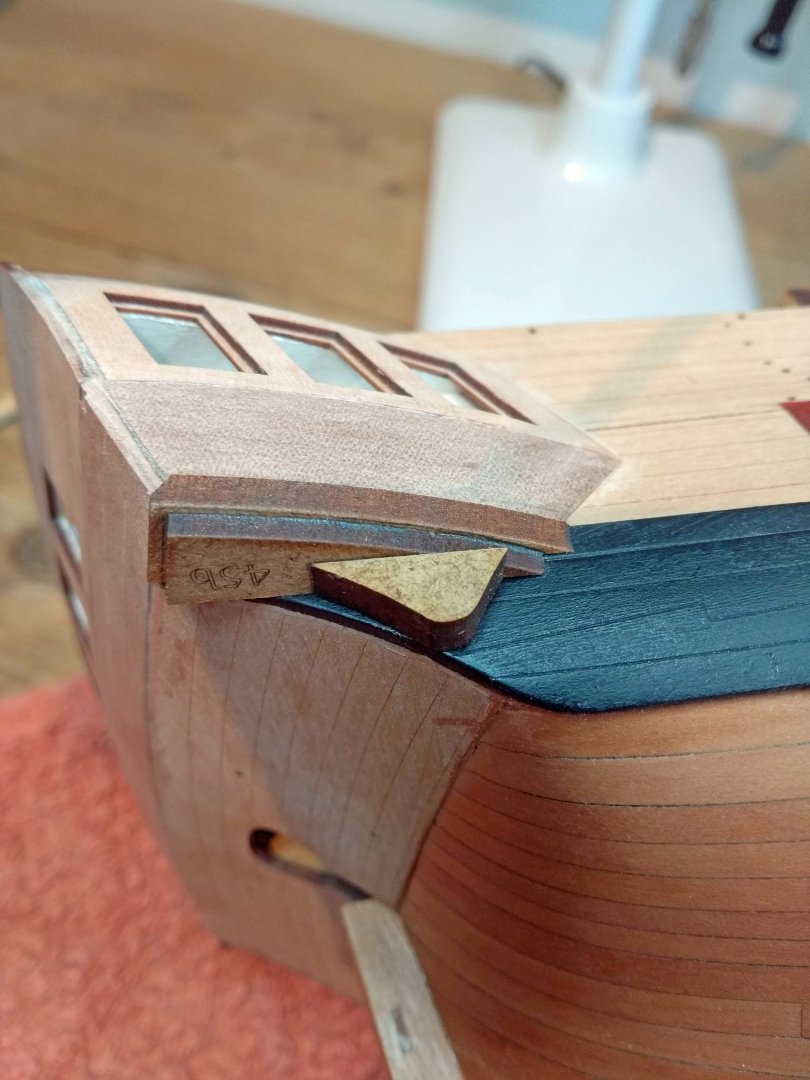
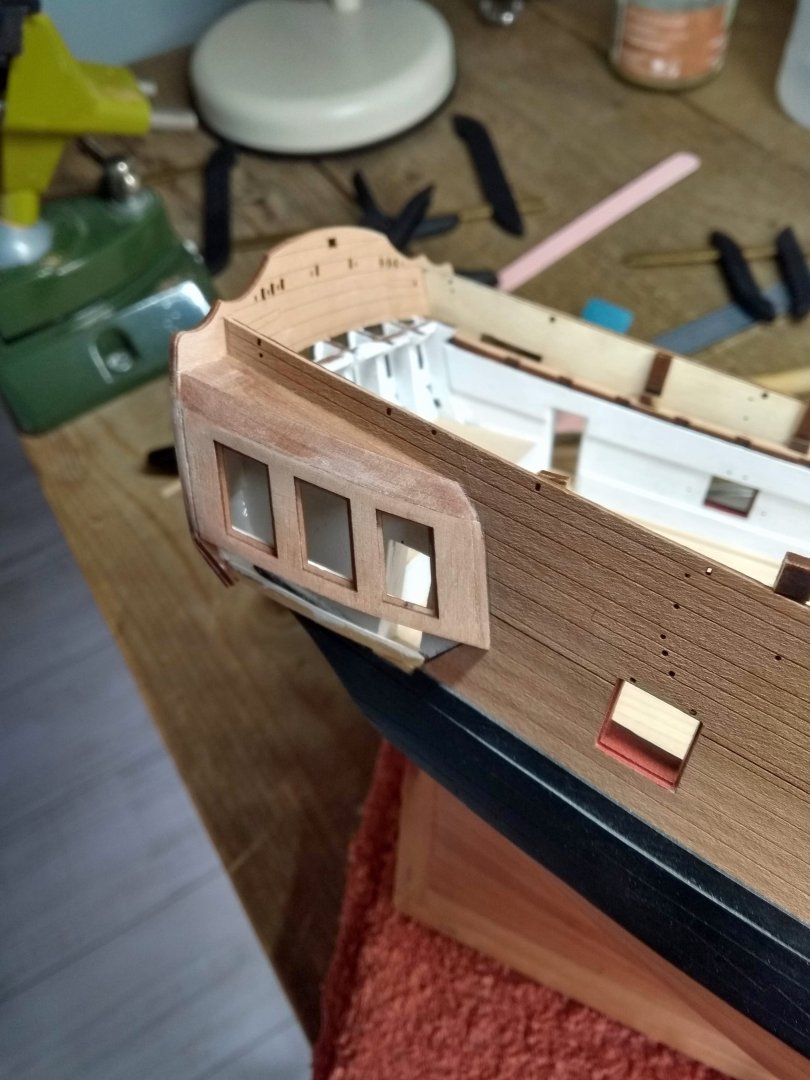
New update: Finishing the lower part of the quarter gallery. First of all some support for the lower part. Again made from boxwood and of course the dimensions taken from the original kit parts Then I copied the "berthing patterns" but with larger dimensions so that I have room to make a seamless connection with the top and bottom of the quarter gallery. Maybe it would work with the original part, but personally I find this easier. And with a table saw and sanding disc it is almost no extra work A bit of bending with the original MDF parts glued to a piece of scrap wood. It's not all super precise but that's not a problem. I noticed that with a plank nipper from Amati I did get the final curves that were needed Fits nicely! Here and there I cheated a bit with some glue and sanding dust. I try to make it very precise, but it doesn't always work out as intended. Beyond my skills haha. Then it was time for the "lower finishing parts". Again a piece extended at the front with a piece of boxwood, so that I could get a reasonably close connection with the "stern upper counter pattern". I placed these parts loosely on the wales and glued them there on each other (so not on the wales, but on each other). This is because the wales have a vertical curve and you also need this in the "quarter gallery finishing patterns". Especially the "drop shape" must be sanded at a slight angle on the top so that it lies flat against the wales and pieces 29 and 45b. Most of this rough shape sanded away with the sanding disc and the last with some sandpaper. Of course left something so that when glued to the hull it can get its final shape Just glued here but not yet in its final shape The final shape was obtained with a mix of small files and sandpaper. As you can see the wales are a little bit damaged in terms of paint, but that can easily be touched up. I used a little bit of filler on the front of the finishing pattern, where it flows into the "berthing patterns". This is because the berthing patterns are lower because they are lying against the wales and the finishing patterns are ON the wales. So I had a bit of a strange transition there..solved with some filler. By the way, I think this should be approximately the shape that the whole thing should have. I didn't find it the clearest and it seems that there are some differences between many builders. The most important thing I think is that it should look aesthetically pleasing, so a nice flow with the rest of the quarter gallery. I chose to place the drop shape at the bottom a little forward (towards the bow), a small millimeter from the upper counter. This is because the PE decoration that comes on top had exactly the shape of this drop. So it was important to keep the shape (this also answers the question I asked myself in post #280) Hadn't shown a photo of the stern yet. Here too all the seams have been worked away with filler, so everything looks nice and tight. By the way, I thought the view over the deck through the windows was nice in this photo. (quality of the photo is a bit bad because I had to sharpen it quite a bit) Oh yes...a nice glimpse into the "seat of ease"


-
Very nice finished boat! Well done, love the colors also
- 47 replies
-
- 5
-

-

-
- Annapolis Wherry
- Chesapeake Light Craft
- (and 1 more)
-
Congratulations! Very well done! Must feel nice to complete this one
- 114 replies
-
- 3
-
-
-
- Vanguard Models
- Speedy
- (and 1 more)
-
Very cool those decorations in combination with the windows! And the figurehead looks also very good! Well done!
- 142 replies
-
- 1
-
-
- Christiania
- Vanguard Models
- (and 1 more)
-
I found it really helpful with my Sphinx build to approach the first planking like it was the second. Yes it takes more time, but I made some valuable mistakes that helped me to get a better second layer. And I really began to understand how everything works regarding planking. But I haven't had a ton of experience at forehand so maybe you yourself don't need it
-
Fantastic! That will look so good with a finish on it!
-
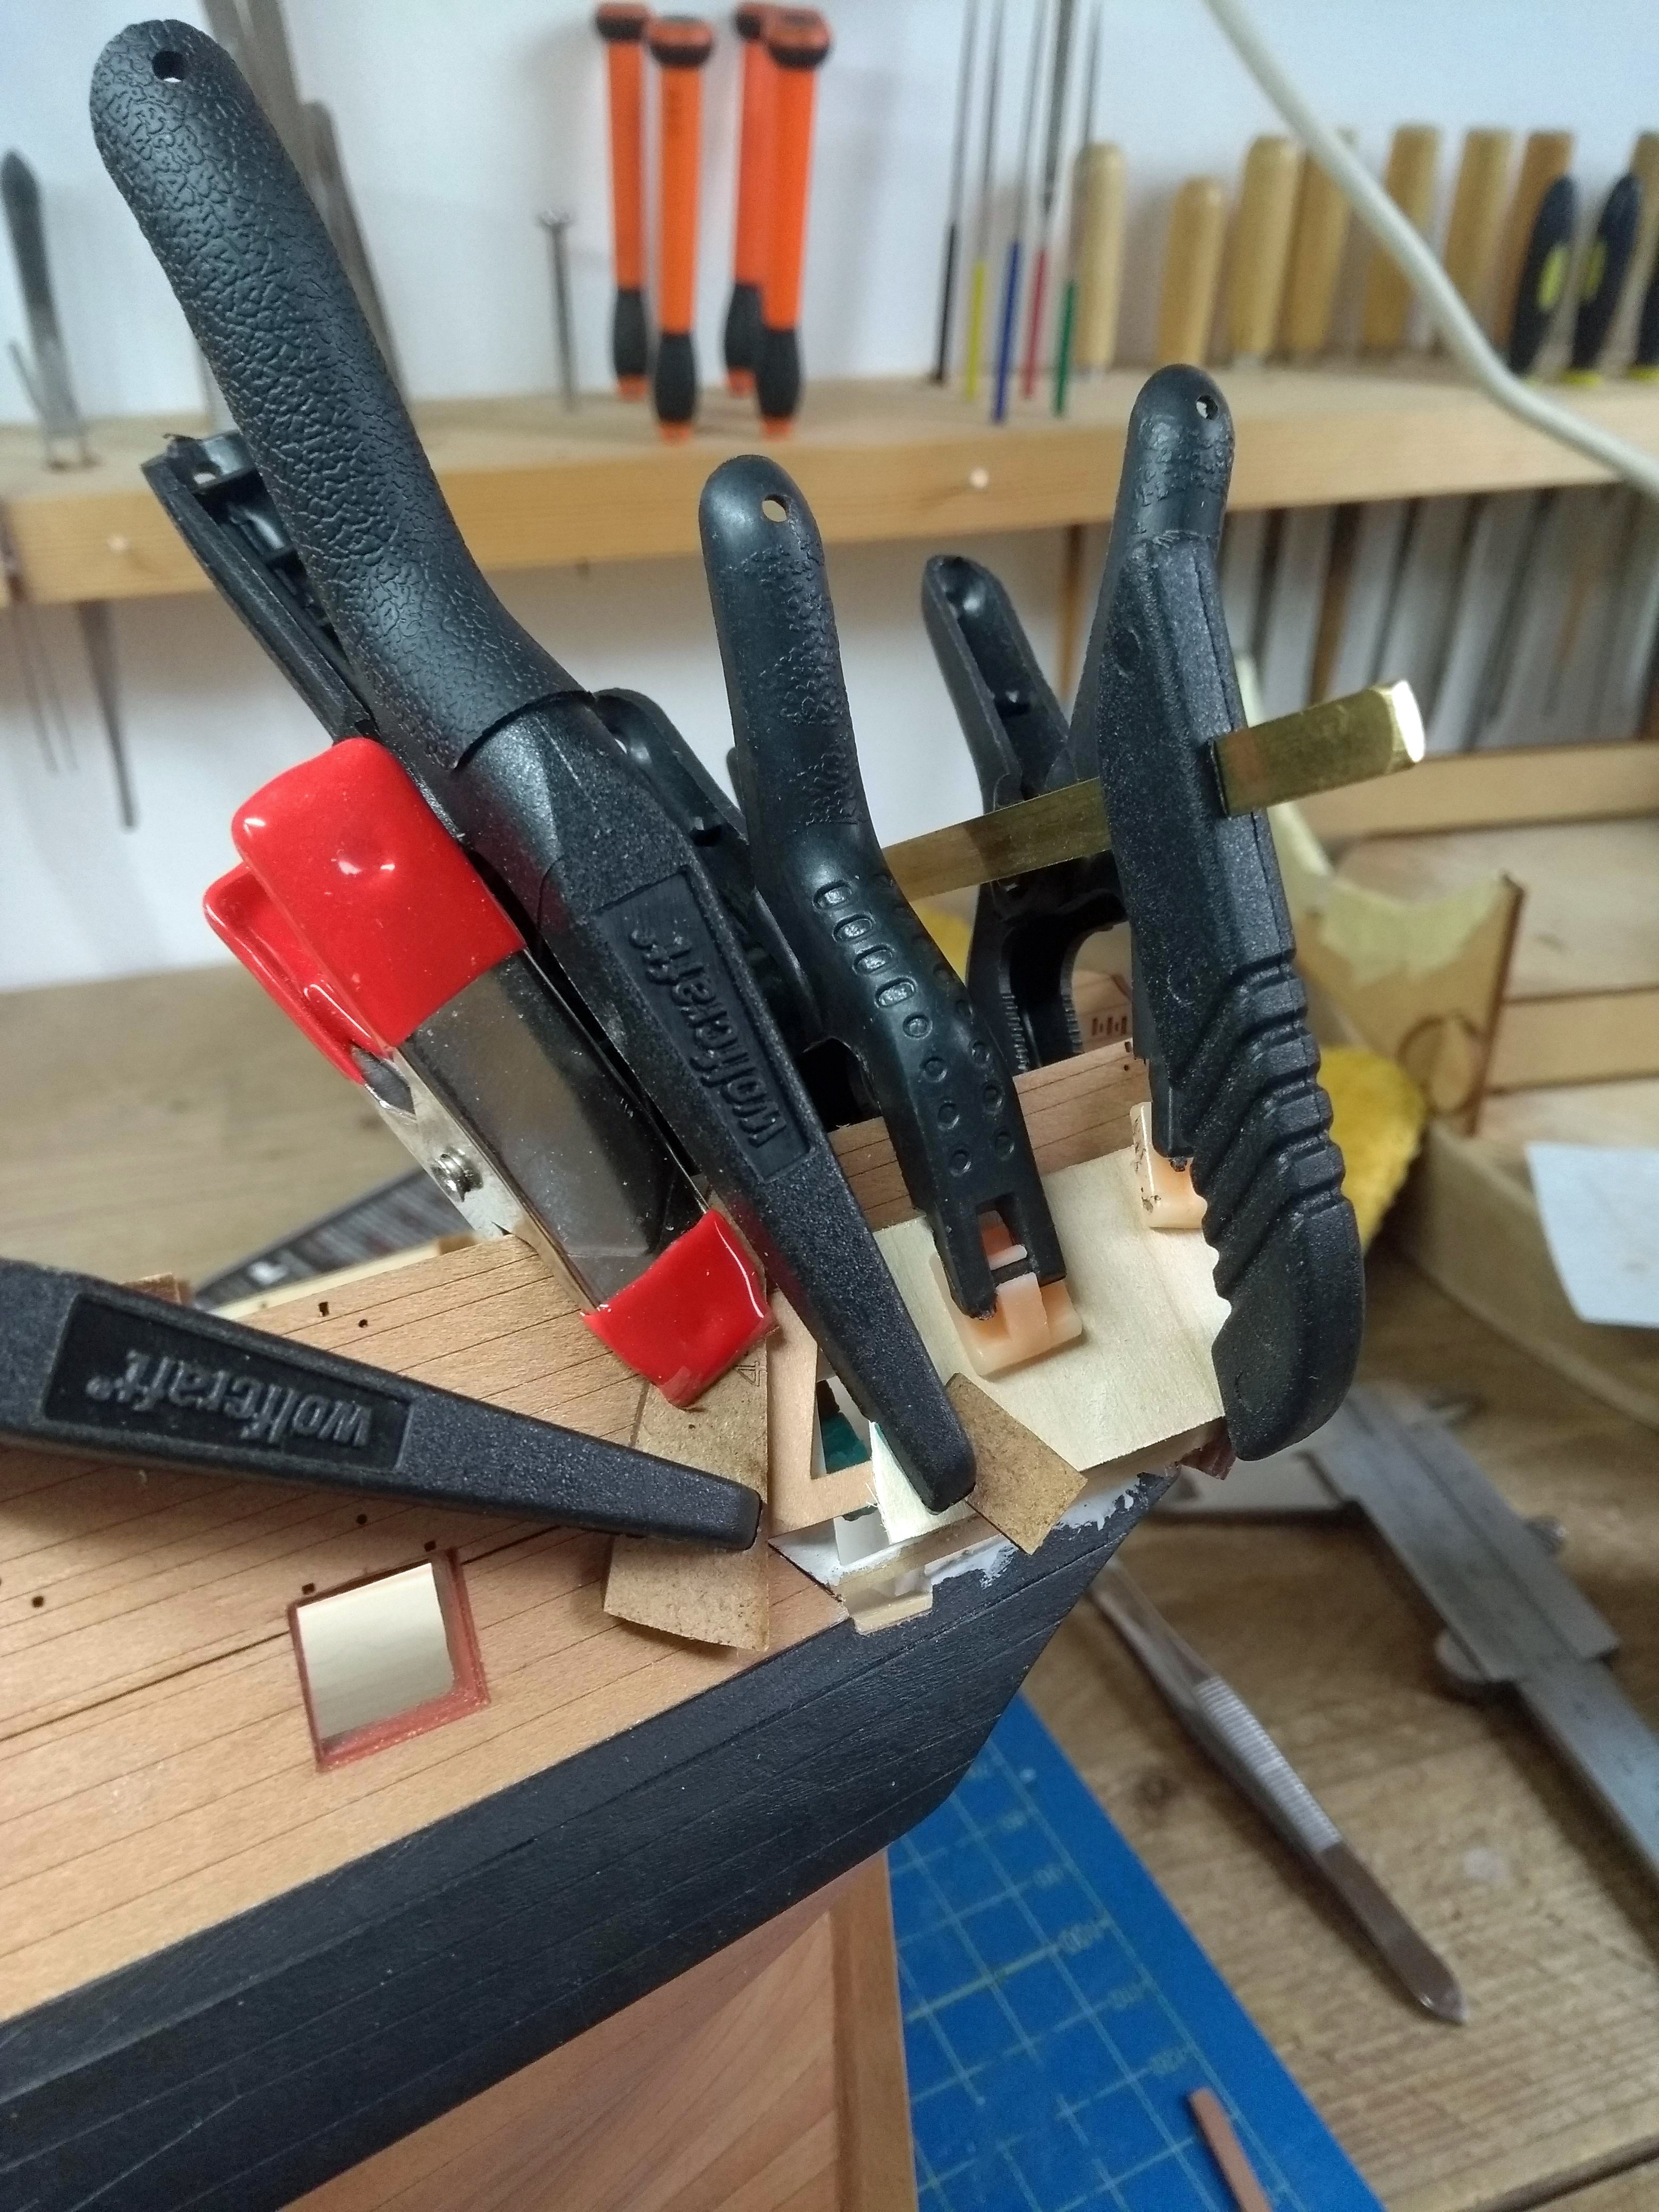
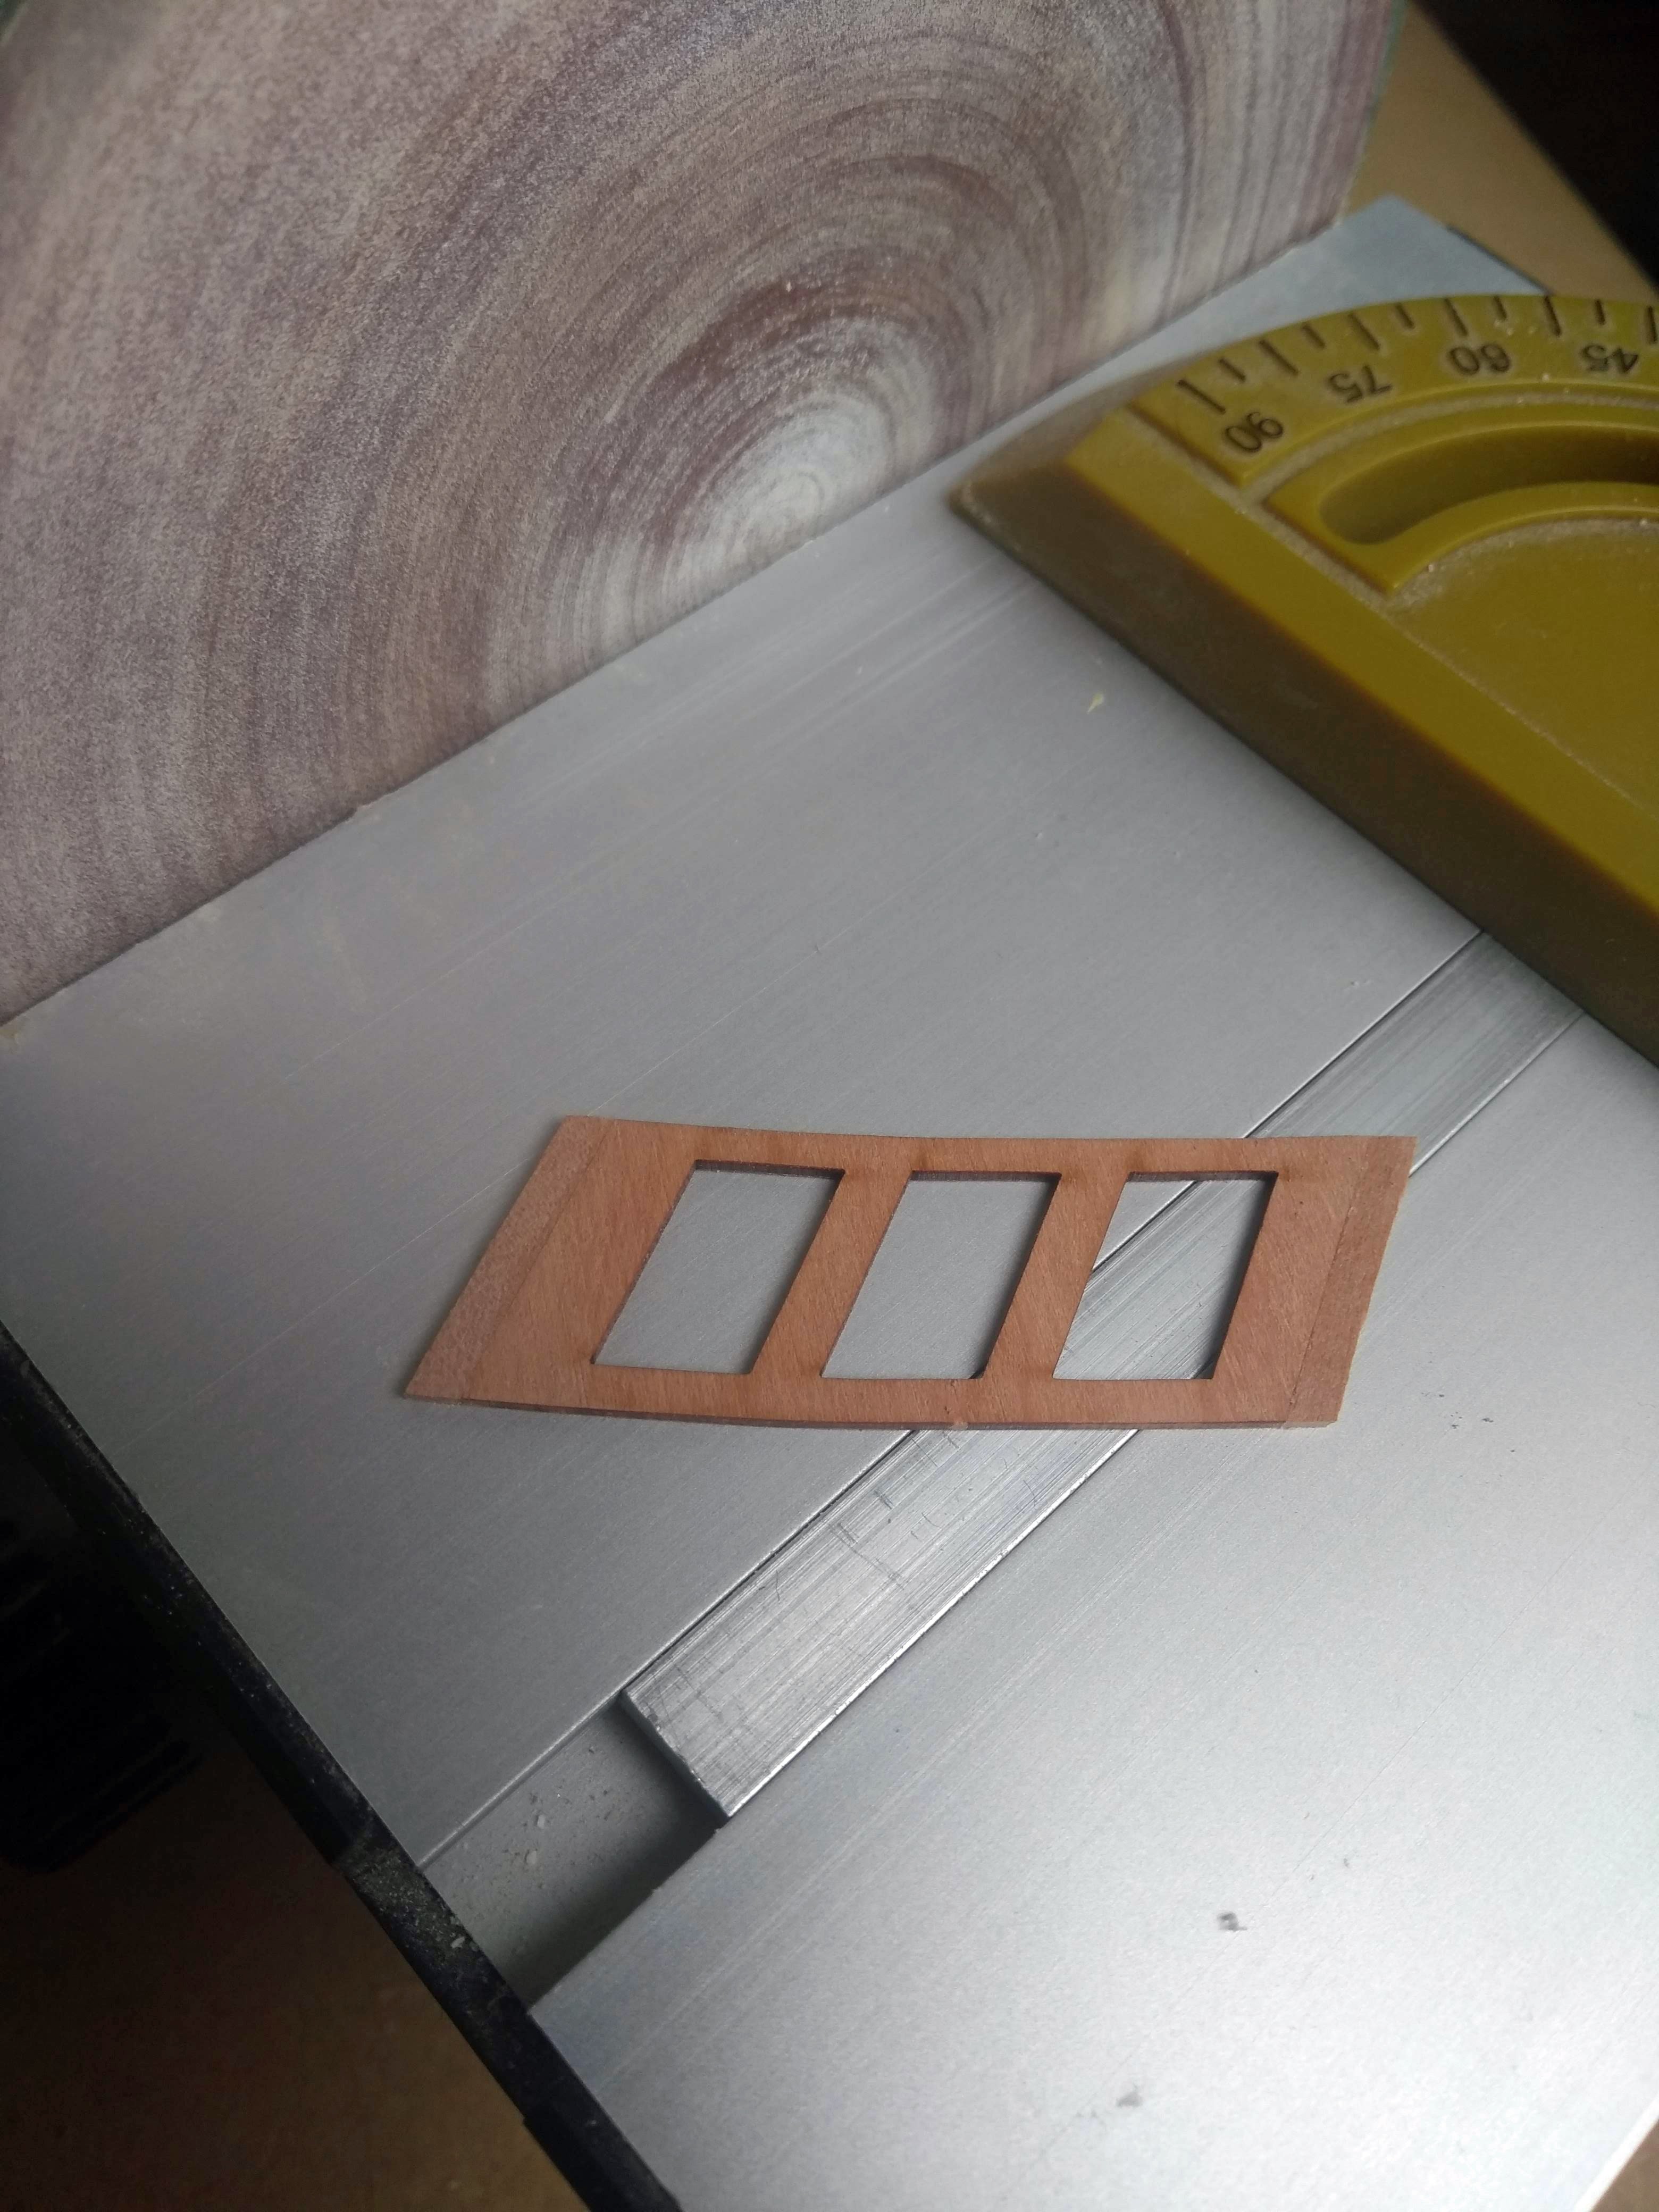
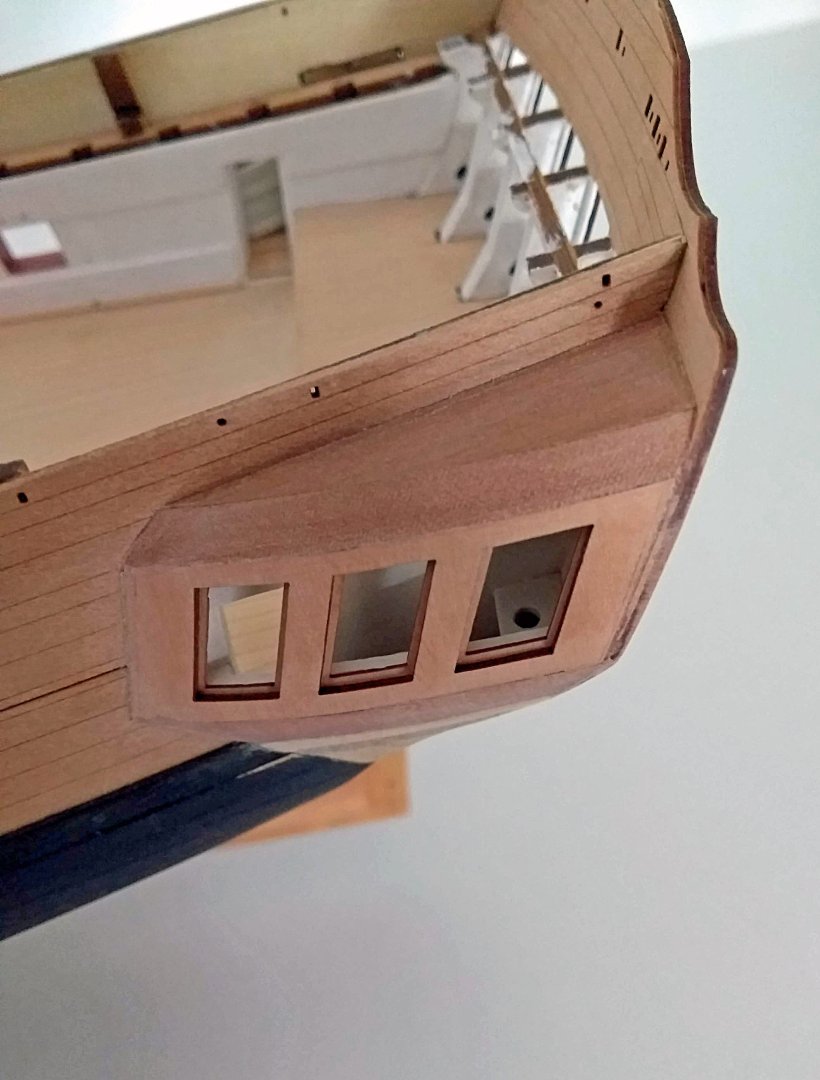
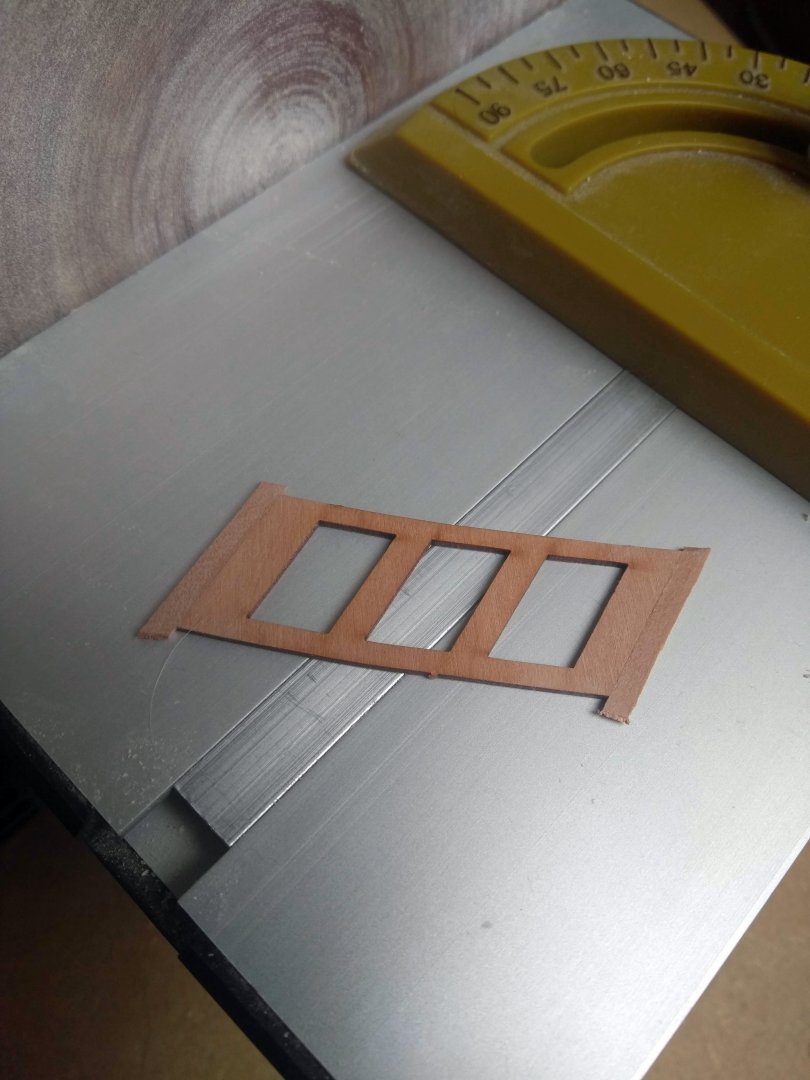
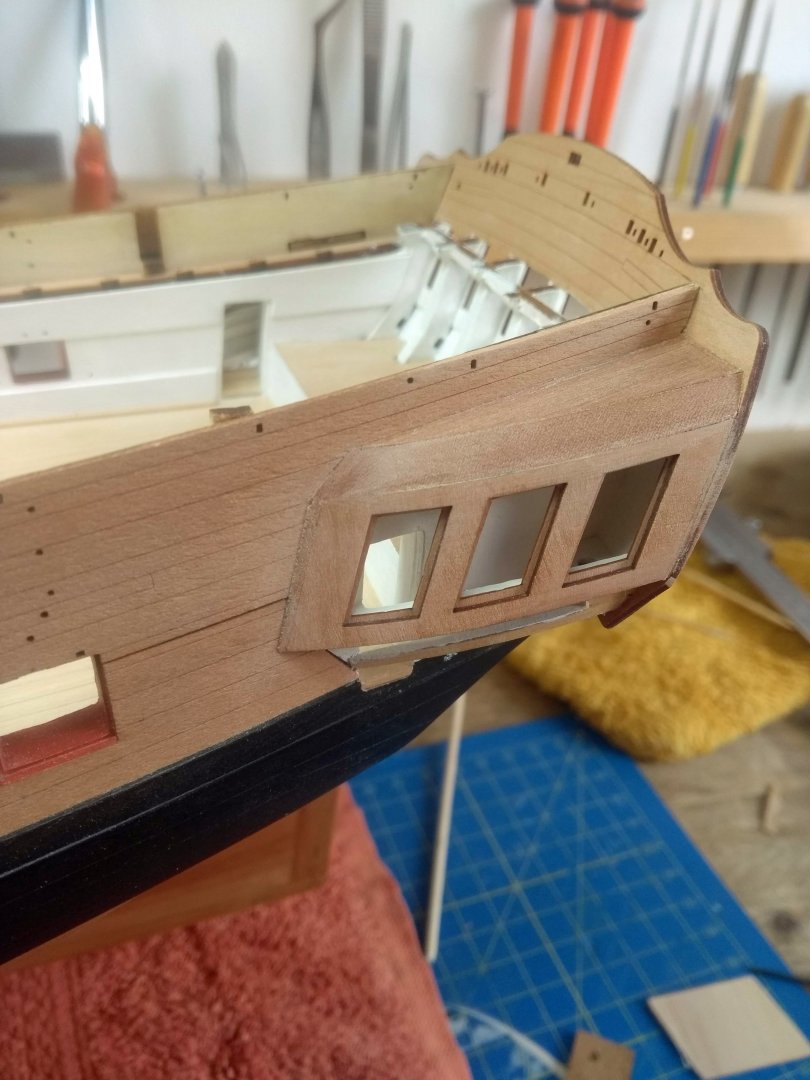
Update: Okay...The last few days I've been busy with the quarter gallery on the port side. Now halfway...and here's a small photo report Started by filling in the slots where the parts that would normally be used without the openwork galleries would go. First check carefully where exactly they should start and end so that you know later where the replacement parts should go. Copied the pieces (used boxwood for this) Then started with the construction of the "seat of ease". First a base plate on the back so that there is a flat surface The "seat of ease" made from various pieces of boxwood. I found the sanding disc easy to use here to get the right angles. Just work your way up to it slowly instead of sanding away large chunks. Painted it a nice coat "off white", like the rest of my interior Rooftop piece: Then the first underlying window piece. Used many different clamps here to get it right. Tip: practice clamping without glue beforehand...so you know when you're working with the glue where everything should go...less stressful I extended the window piece that goes over the base layer because I want to use as little filler as possible afterwards. This way I can slowly work towards the perfect shape. To be honest, I have to say that it didn't work out as well on the port side as on the starboard side. I was still a bit too impatient or something and had a small seam here and there . I worked these away with some glue and sanding dust. Eventually there will be a layer of paint over it anyway so it doesn't matter. But I think these are fun challenges (which don't always turn out well haha ) Finally the roof placed...not much to tell about that other than slowly working towards the final shape. For the most part used the sanding disc again. That's it for now. Will continue with the bottom part and post an update later. Haven't placed the floor of the quartergallery yet. I personally think it's easier if I place it together with part 29 (it will become clearer ;) )


-
What a beautiful work James! Lovely kit so far! 👍
-
Thanks for your answer Chris 👍
-
Really cool to follow the design progress! 👌
-
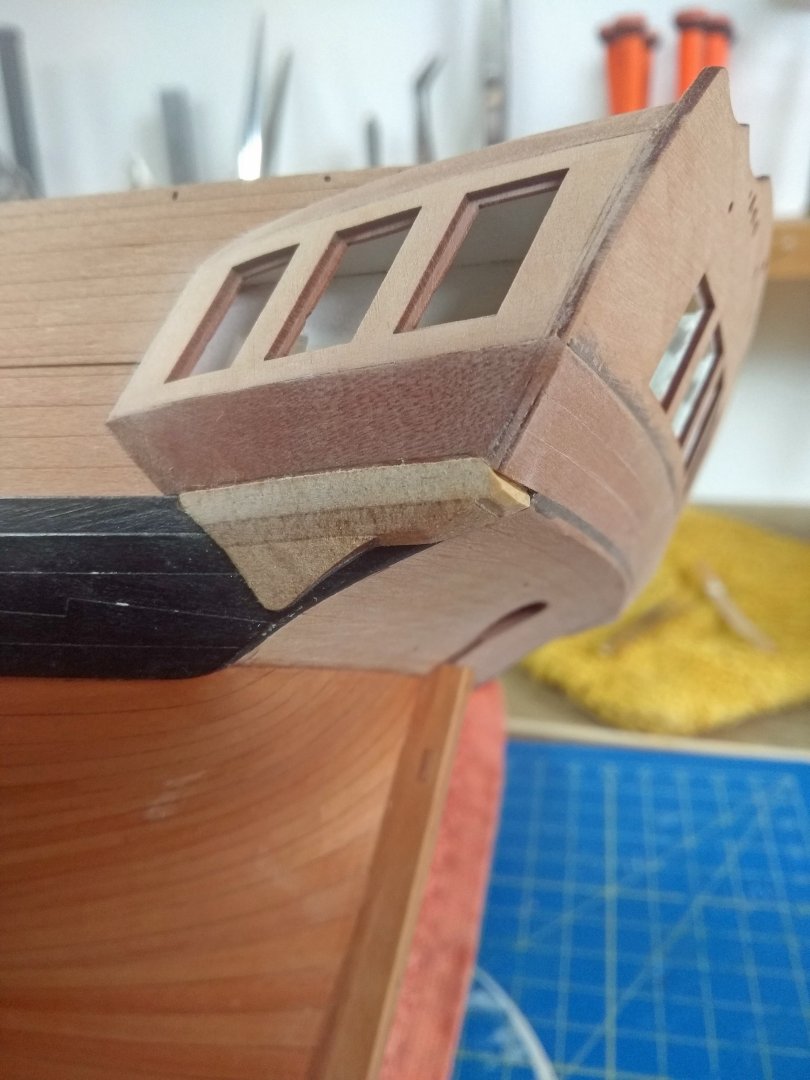
Had a closer look at how Blue Ensign tackled the above...he also added 2 images that I think make it a bit clearer. The whole thing even seems to have to lean a bit more towards the bow side, and doesn't really seem to have to follow the curve of the stern. I will see if I can make a paper template of the PE decoration that sits on top, maybe that can assist me with the positioning.

-
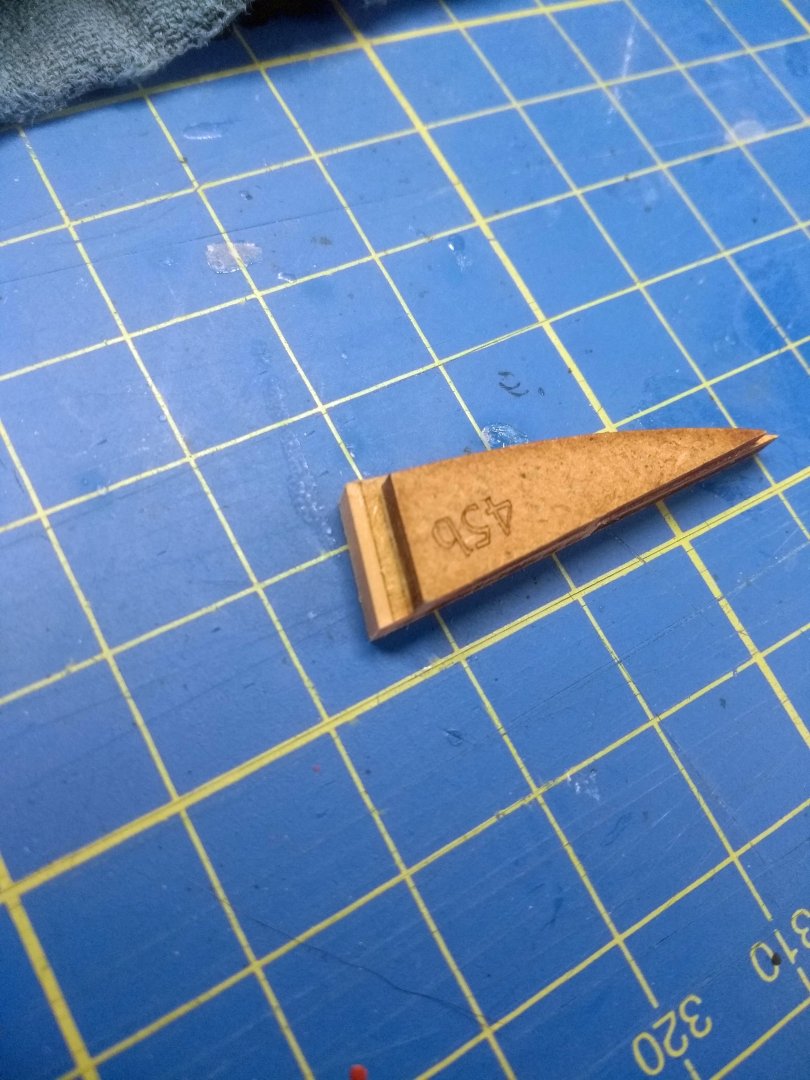
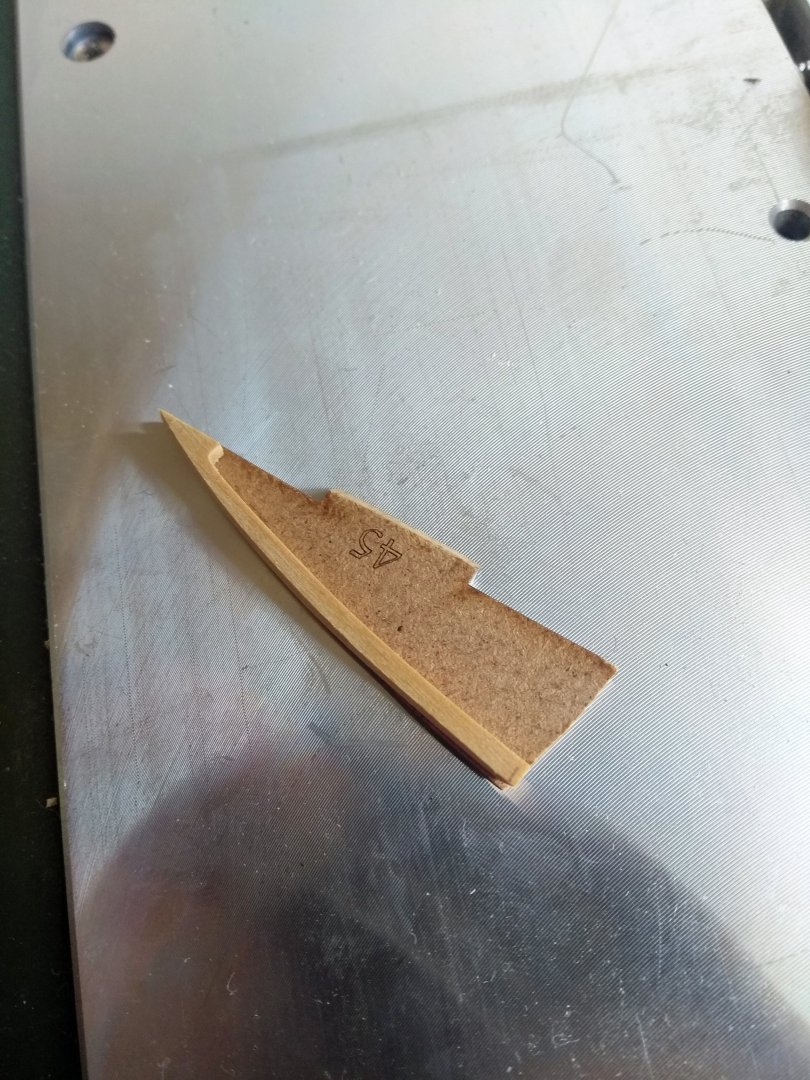
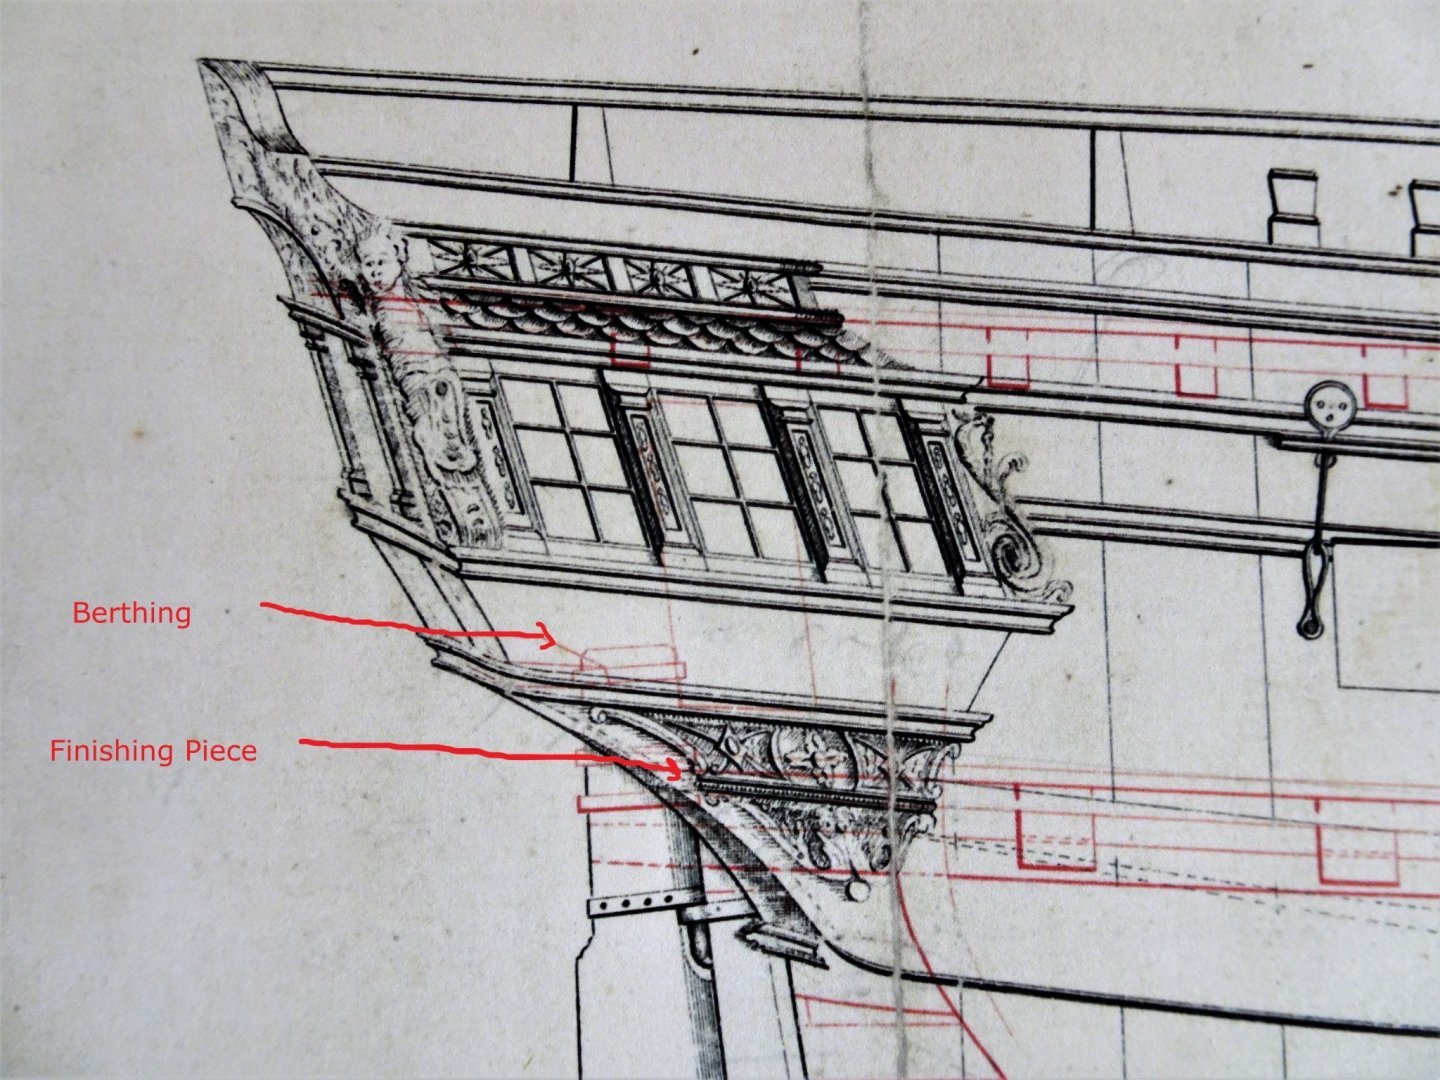
Hello everyone, I'm running into a ambiguity and couldn't really find a good unambiguous answer in the other Sphinx build logs. It concerns the "Quarter gallery lower finishing patterns"...and in particular the "teardrop shape" at the bottom. Should this follow the contours of the stern counter as in photo 1? Which results in the bottom being a bit more pointed than the lasered shape is because it protrudes a bit. Or is it the intention that I place the teardrop shape a bit towards the bow side so that the teardrop shape is retained but some of the wales becomes visible, as in photo 2? Hope the question and photos are clear enough. Maybe @chris watton or @James H can shine a light about this

-
Nice clean white hull! Looks great Agree with Brunnels...those little seams need to be filled.
-
Just a very small update to show what I'm working on. Installing the quarter galleries, or at least one of them. Took me quite a few days to really figure out how it should look exactly (my head is a bit messy at the moment, so a bit difficult to concentrate). But I'm starting to get the hang of it. Also with the help of the other Sphinx build logs. It looks like I've added just a millimeter to the length of the quarter galleries compared to the original that James built, but that doesn't seem to have any real implications going forward. Will do a more extensive report from the other side so it's clearer how I'm approaching it. (spoiler alert...pretty much the same as Blue Ensign did it)
-
Fantastic result Brunnels! You can be very proud of her! She looks so beautiful Well done!🏆 And have fun with the exciting times ahead with the little girl
-
Lovely planking so far Zarkon! Not easy to go straight to the final layer without a base of a first one. It's going to be beautiful when it's fully planked!
-
Your "Fryslân" is looking good so far! (Fryslân is Friesland in the actual language that they/we are talking here )
-
What a lovely work you did Brunnels! She looks so good now...great to see your progress
-
Thanks Thukydides! Pff not sure if painting the decorations myself would be fun haha, but it's worth considering when I get that far. For now I was thinking about using multiple tones of color on the etched decorations to give them more depth. But I'll think about it!
-
I bought them on Amazon...I still see them although they are quite expensive at this specific seller. Maybe there is a cheaper dealer somewhere on Amazon. https://www.amazon.com/Wolfcraft-B3431-Micro-Spring-Clamp/dp/B0001P19IQ/ref=sr_1_37?crid=2VJQGFBAQJG9G&dib=eyJ2IjoiMSJ9._qJCDFyzGgOpQyWmJEweM75FguvXG8XfJ1TaCHbNUK1LD6F58ptwtztOsgFNivx_IlIOy5qI2bfglS73AbtjQeHaXd4-PwaQjdOTIJY4GVFSJ09aSoX3rS_QPrOGIRZjJlGnr2u-BC6xpw2EuTIRj41ZFil_fKKQ6PwbbAolkrNcqTkt3-xOiRZRbGYtDUSugyS9KAI3lVdBHiViAfWKnryMRha8MXRFS9oQvUfdVQIm8p7znlarE3o1fHOBGA97aQAy4lU-bJyPEG3lPj-HqbPBagBTXcBbvac5Q1X9COc.8UgZOr1TyulAKRF58QFweNfcRaq1qt3kJ6cV76pgvUU&dib_tag=se&keywords=wolfcraft+clamps&qid=1743767638&sprefix=wolcraft+clamp%2Caps%2C174&sr=8-37