MORE HANDBOOKS ARE ON THEIR WAY! We will let you know when they get here.
×


Keith_W
-
Posts
1,145 -
Joined
-
Last visited
Content Type
Profiles
Forums
Gallery
Events
Everything posted by Keith_W
-
 I'm sorry, I just realized that I only answered half your question. You can buy stains in Bunnings. You can also buy varnish. I normally use Wattyl Estapol Satin, but Bunnings have stopped stocking that in spray form. They have an alternative brand which I have not tried. For hobby paints, I visit my local hobby shop: http://metrohobbies.com.au/hobby-supplies/paints.html They stock a choice of paint brands - acrylics, enamels, and so on. Which type of paint, and which brand of paint is really a personal preference. We can have LOOOOOOOOONG discussions on the subject. The brand of paint which I like and use most are Vallejo acrylics.
 -
You have a Bunnings in Coffs Harbour! I know, because i've been there Go to Bunnings, and look for this: http://www.bunnings.com.au/feast-watson-50ml-teak-brown-prooftint-interior-stain_p1569948 They have a variety of colours. If you look at my Bounty Launch build log, you can see how I mixed up my own stain from these samples.
-
Very nice! Where did you get your pico LED's from?
-
Staining basswod
Keith_W replied to etsinko's topic in Painting, finishing and weathering products and techniques
I prefer the deck to have different coloured planks myself. -
Hi Daryl, seem to have missed the start of your build log. Keep the updates coming. You bringing your model to the next club meet?
-
Just beautiful, Alexei. For some reason your build log isn't getting the love it deserves. Everything is so neat. I love it!
-
Arrr, welcometh to the hobby Josayer. I thinkst that this Bounty Launch is an ideal boat for beginners. Thy father is already making one, why not asketh him what he thinketh? Maybe a whale boat?
- 625 replies
-
- 3
-

-
- bounty launch
- model shipways
- (and 1 more)
-
Herr Katze-kopf, if you look at my Bounty Launch, I sanded and re-stained it probably 4-5 times. It looks OK.
- 83 replies
-
- 2
-
-
- bounty launch
- model shipways
- (and 1 more)
-
Thanks for the suggestion, Nigel. I saw Dr. Mike use that technique. As a MD myself, I have a near limitless supply of hypodermic needles In fact, I appropriated some from work to try. I have a selection of 18G (the largest), 2G, 22G, and 25G. I think i'll start at 22G (blue needles) and work from there. I am not sure if I have enough pear to waste on making treenails. I would rather use a cheaper wood species if possible.
-
Brian, I don't have any Boxwood. I have Pear! I am trying to decide if I will proceed with treenails or not. It all hinges on whether I can successfully pull scale treenails through my Byrnes drawplate. At the moment I can only get it down to 0.7mm ... try anything smaller than this and the rate of breakage is very high. I think it might be my choice of wood species - at the moment I am trying to draw Mahogany through it. It is really brittle, I lose half the length just through breakages. I wonder if I can impregnate it with PVA. That might make it stronger. Anyone have any tips? I was at Float-a-Boat yesterday and bought some Walnut strips as well. I am pleased to say that I am able to rip 1mm square dowels with my Byrnes Saw. Amazing. I think I may be able to get it thinner, if I can get my fingerboard to sit flush on the table. I will do some experiments with Walnut vs. Mahogany treenails and make a decision.
-
Sorry to hear, Cathead. Why don't you try this: brush a diluted 80:20 PVA to water solution over the gaps. Wipe off the excess with a damp cloth. Wait until the glue goes tacky, then sand. The sawdust will clog up the PVA and create a filler the same colour as your wood.
- 83 replies
-
- 3
-
-
- bounty launch
- model shipways
- (and 1 more)
-
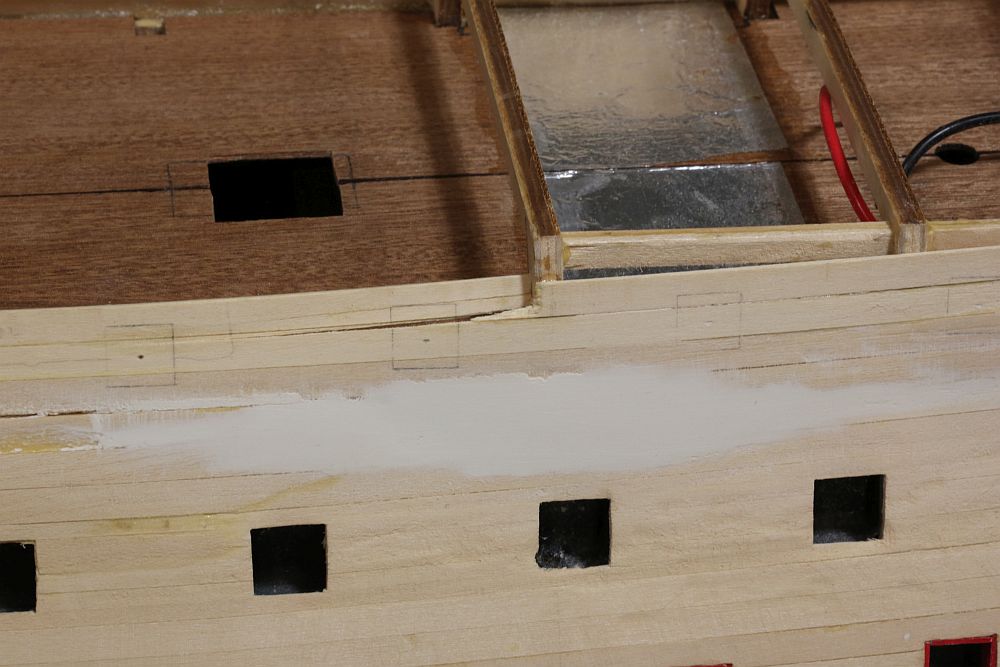
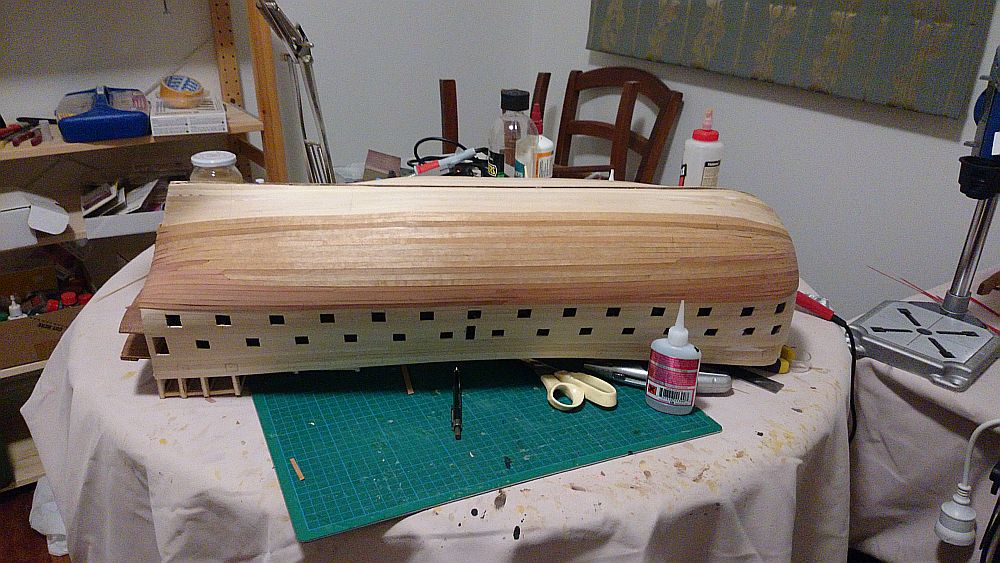
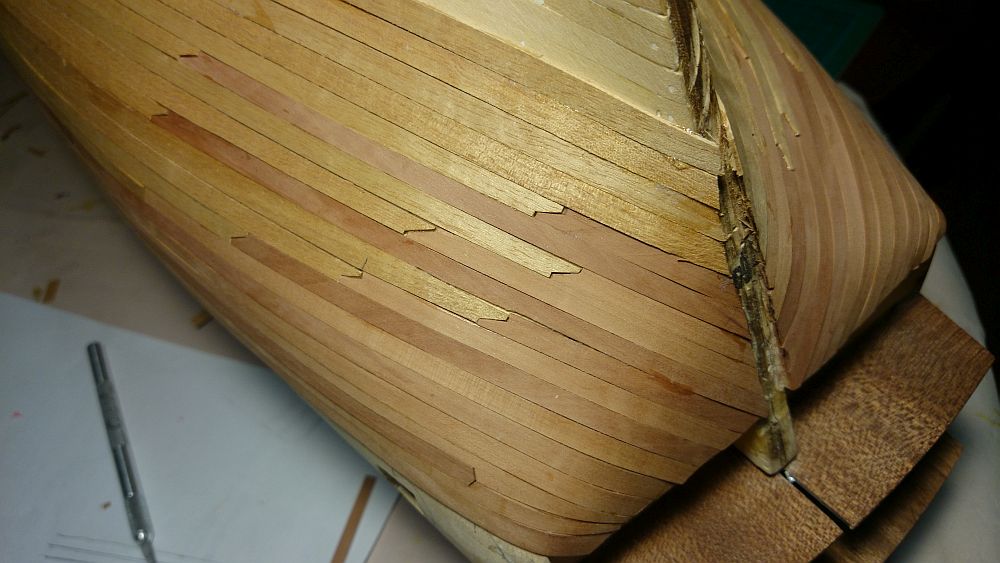
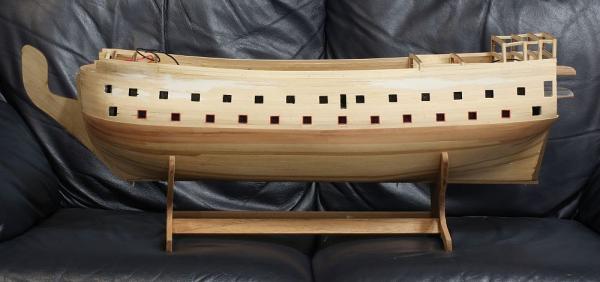
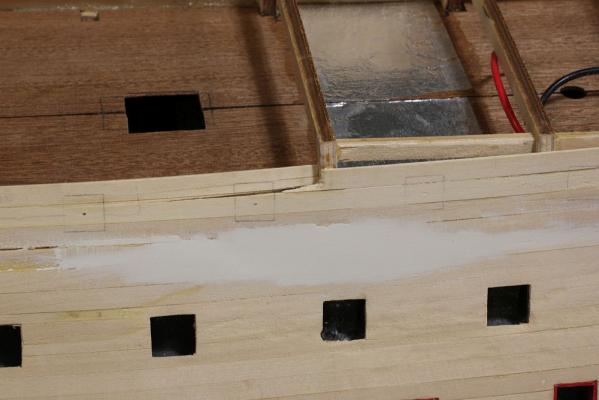
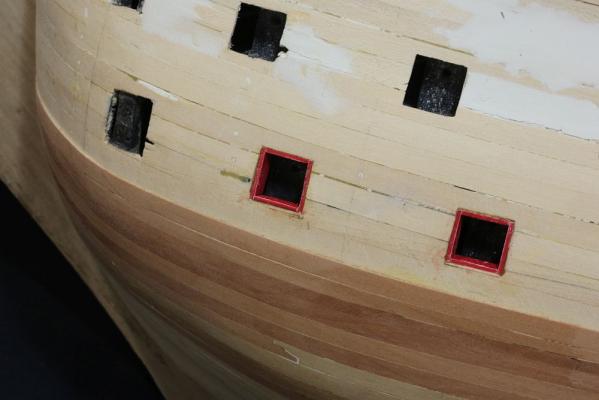
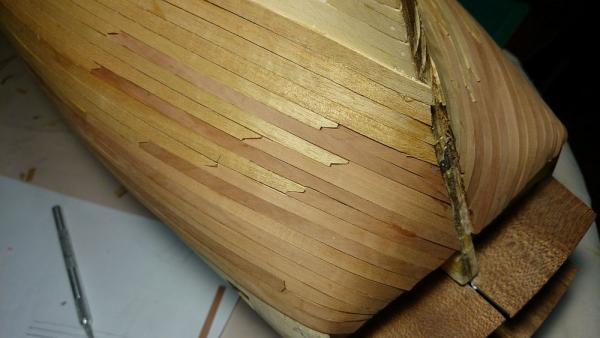
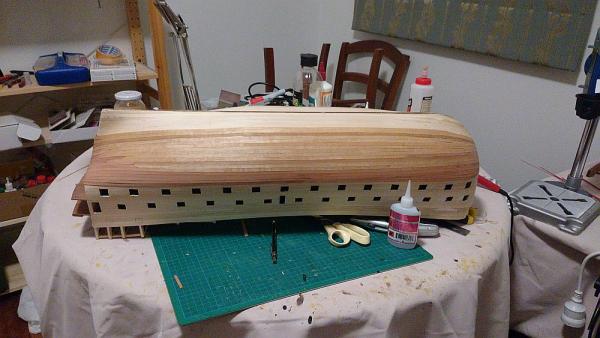
No work today. Hit the workshop after dinner. Before I knew it ... it's 4AM!!! In any case, made some nice progress. All planking below the waterline is done, and the hull sanded down. It is smoooooooth. I made a decision to stop all work above the main deck level and complete planking below the waterline first. This was because I knew I had to invert the ship and did not want the delicate structures above the MDL to be vulnerable. As you can see, this planking is unsupported. The planking above MDL survived ... until I inverted it to sand the bottom. Because this generates so much dust, I do it outside. CRACK, the inevitable happened. I was never happy with the planks above the MDL anyway. I will rip out both sides and start again. I also made a start with the gunport lining. I am not sure of the shade of red I have chosen (Vallejo Flat Red). To me it looks a bit like lipstick. I have a more dull red in my cabinet (Admiralty Models Red Ochre) which IMO is too dull. I might persist with it for now.
-
Wow, did it take you one whole year to nail the hull! It look spectacular!
-
I know, Brian. That's why it's below the waterline Ed, got it!
-
Hi Greg, the planking supplied by the kit is OK ... by kit standards. But it does not come close to some of the finer grade wood that other builders on MSW use. Look at this picture: On top left is the wood supplied in the kit. It's nice enough. On the bottom right is milled pear wood, from Hobbymill: http://www.hobbymillusa.com/ Note that it is much more fine grained, tends to hold cuts cleanly, and gives you a really sharp, clean finish. Of course the wood is not yet sanded in this picture, but you will see it better once it is sanded. Sadly you can't order from Hobbymill any more. They have closed. Ed, thanks for dropping in. What book did you order? I don't think I listed any books!
-
Thanks Denis, but I already have the disc sander. The thickness sander is in the mail. About the only Byrnes piece I do not have is the rope walk.
-
This is what I use: - Canon 5D Mk.3 with these lenses: 100mm f/2.8L IS Macro, 50mm f/1.2L, 85mm f/1.2L, 580EX flash (x2), tripod. - Olympus XZ-1 point and shoot - Sony Xperia Z2 phone (for when I can't be bothered pulling out the big rig). The problem with the DSLR is that the depth of field is very shallow. Very good for taking portraits, but when aiming it at a ship, I have to stop it right down to gain DOF. The trouble is, when you stop it down, you start struggling with light. That's when the flash comes in. The phone and the P&S have much greater DOF, so more suitable for taking pictures of my model. Because of my problems with DOF with my current lens lineup, I am thinking of getting a wider lens. Maybe a 35mm f/1.4L
-
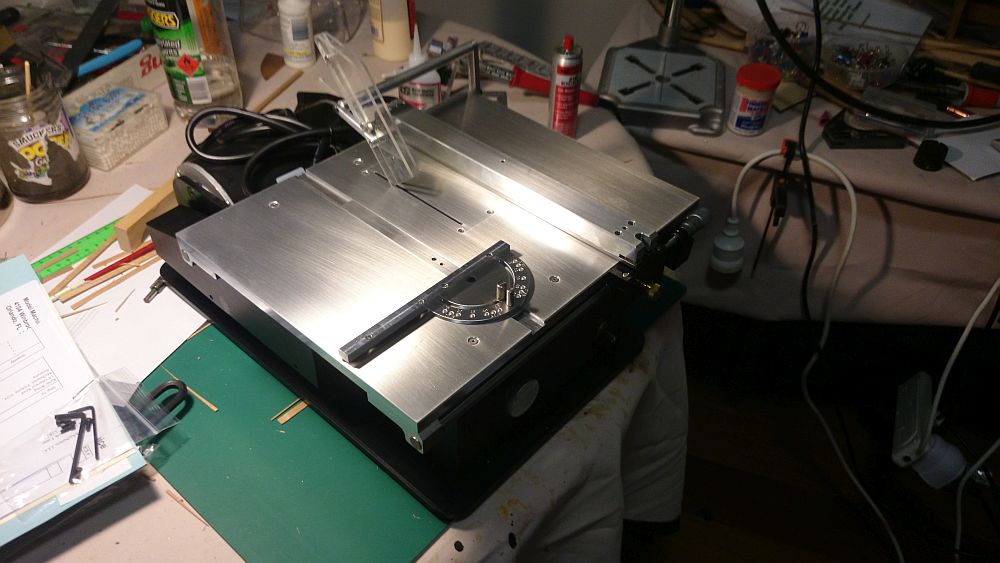
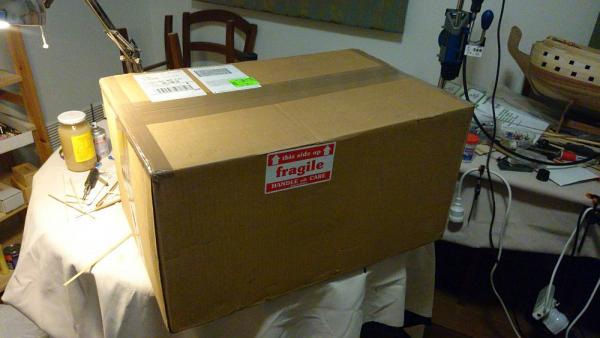
Hi Greg, I do have some fancy toothpicks which I picked up from a thrift store. It did not occur to me to stiffen them with 50/50 PVA prior to turning - thanks for that idea. My efforts at turning toothpicks thus far have been extremely disappointing. The wood does not hold a sharp edge, has too many fuzzies, and splinters too easily. I think I must have turned 10 of them before I got on which was remotely acceptable. Given that I will need about a hundred of these, I do not fancy trying to turn 1000 toothpicks to get what I need. I'll see if your idea works, otherwise i'll go with my beads. Since you asked for an update, here it is. But first, let me show off a little addition to the household: I love it when the postman brings me something other than bills! Particularly exciting when it is big, heavy, and comes from the USA! What's inside? Why, it's a BYRNES TABLE SAW!!! So shiny, i'm in love! The purchasing process went by without a hitch, except for the website going down when I tried to place the order. I rang them the next day and spoke to Donna. She was really apologetic. Order placed, money sent, saw is mine! The second layer planking has almost reached the keel. Why so slow? This is because I have cheaped out and i'm using the kit supplied second planking material for all planking below the waterline, which will be painted white. This meant splicing the kit strips with the pear strips I bought from Hobbymill. I should be able to reach the keel sometime this week. After that, lots and lots of sanding. Then I will line off the gunports and start the second planking upwards.


-
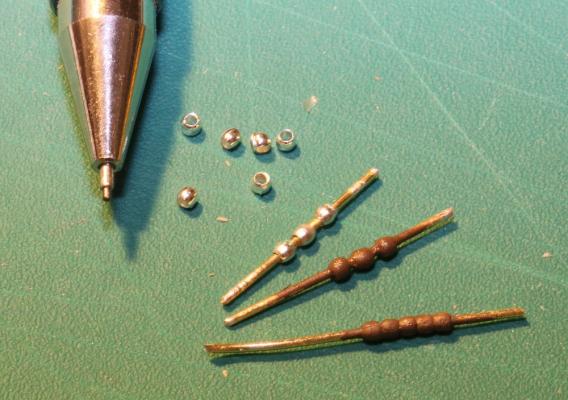
I think I might have come up with a solution for the balustrades. As you know, the kit does not supply any. It is difficult to source balustrades which are the right scale, most aftermarket balustrades seem to be rather large and out of scale. Solution? Visit my local bead shop. These beads are 1mm in diameter! You can see them compared to the tip of my mechanical pencil, which uses 0.5mm lead. Thread a few of these on wire, fix with superglue, and they look OK when painted. Yes, I know it looks disturbingly like poo, or maybe meatballs on a stick, but that was the only shade of brown I had in my cabinet! They have beads in all shapes and sizes. I think I will go back and see if they have any square ones. This will surely beat trying to turn out dozens of these little bastards on my lathe.
-
Yes, good pickup by Mike. Good thing you haven't gotten very far with the rigging, Pat. If you had your duplicator custom made, then I suppose no duplicator for me
-
Hey Pat, I am VERY INTERESTED in that duplicator! I am thinking of turning a whole bunch of balustrades, that duplicator would certainly come in handy. Where did you get it from?
- 517 replies
-
- 1
-
-
- Endeavour
- Artesania Latina
- (and 1 more)
-
Not sure how I missed the start of this build. She look great, looking forward to further updates. Oh yes, and seeing it in person in a club meet
-
Hey Pat, great to see a new worklog. You served on these boats in 1973? You don't look that old! I think I have more white hair than you! If you need brass barrels of that size, why not turn them? You have a Sherline lathe, don't you?
-
That has to be the most beautiful windlass I have ever seen, Matt. How did you make those ratchet wheels?
- 425 replies
-
- 4
-
-
- bounty launch
- model shipways
- (and 1 more)
-
Thanks for your reply, Greg! I am not sure what a finger bun is. I presume you mean the polycarbonate packaging that comes with some food. I did think of painting over some plastic but I will conduct some experiments when I come down to having to actually fabricate the windows. Any chance you could show a picture of your result? Sorry to hear of your Parkinsons. I presume you are on all the usual good stuff .. Sinemet, Cabergoline, etc. I don't have Parkinson's. But I think I am doing a pretty good job of making my model look as if it was built by someone with pretty severe Parkinson's.