HOLIDAY DONATION DRIVE - SUPPORT MSW - DO YOUR PART TO KEEP THIS GREAT FORUM GOING!
×


Keith_W
-
Posts
1,145 -
Joined
-
Last visited
Content Type
Profiles
Forums
Gallery
Events
Everything posted by Keith_W
-
 Hi Christine, to bend your planks, use a steam iron after soaking them. Turn your iron on to maximum, then place your soaked planks under the iron for a few seconds. Then, move you iron away whilst using the edge of the iron to bend the planks. Most people would recommend that you NOT nail the planks to the frame. Rather, you should glue the planks using PVA (white) glue and clamp it until the glue is cured. You can make a simple clamp out of paper clips, like this:
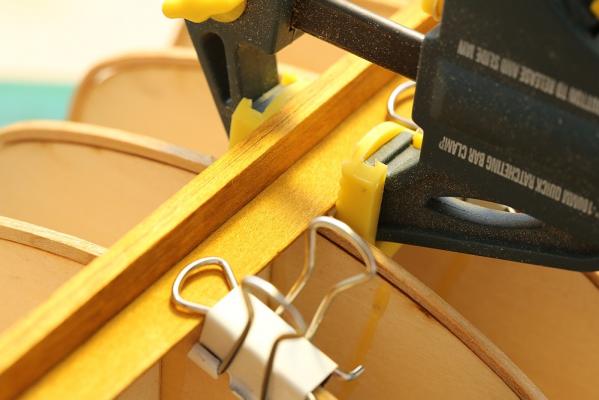
-
Amazingly accurately constructed. You are doing a great job.
- 346 replies
-
- 1
-

-
- terror
- polar exploration
- (and 2 more)
-
Rick, I am somewhat confused by your message because you have already sent me a Paypal invoice for the gunport hinges, and I have paid it?
-
I'm looking forward to following your build. You are right, there are MANY inconsistencies between what's shown on the plan, and what is supplied. Good luck with it.
-
Arrrr. She's a fine boat, she is. Well done, Cap'n.
- 625 replies
-
- 3
-
-
- bounty launch
- model shipways
- (and 1 more)
-
Hi Ray, it's time for me to jump in. A few days ago, I thought I would research this frigate as my next build. A search brought me to your log, which I have read every evening before going to bed. You may have noticed from the "likes" you started receiving for posts made a couple of years ago Congratulations on your build, she is a masterpiece and something for all of us to aspire to. And thanks for sharing with us.
-
3D Printing - Not Just Yet!
Keith_W replied to dvm27's topic in CAD and 3D Modelling/Drafting Plans with Software
Some months ago I started that other thread on 3D Printers. After doing some research and looking at actual 3D printed samples, my conclusion was the same as Pat's. Affordable 3D printers are a waste of time if you are a ship modeller. The resolution is too low, and the parts are too crude to be of any use. At this point in time, it is better to pay someone to make the print for you. -
Thomas, on my Bounty I failed to edge glue the planks. That's why over time, the gaps between the planks appeared. If I were to do it again, I would definitely edge glue the planks and wipe off the excess. As for what's inside, once you build it up and fill her with barrels, stones, etc you won't see the other side of the planking - so don't worry about it. More important to make sure those planks are snug and well glued.
-
Crack out the drugs, poor Boyd has caught the illness! Mate, you've bought the tools, you've started detailing things most people will never see ... you're well on the way to the asylum. All i'll say for now is ... welcome to the asylum. You're doing a great job, please keep posting.
-
GO START YOUR BUILD LOG NOW!!!!!!!!!
-
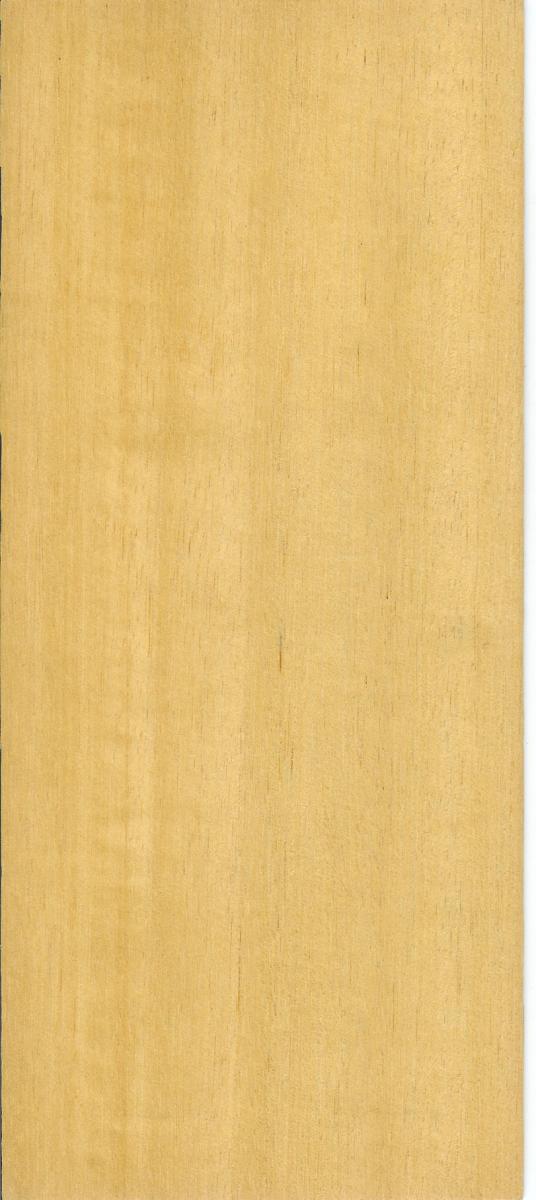
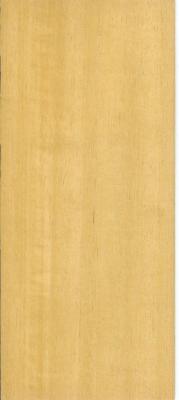
Ramin is a yellow coloured wood, which is medium grained. This is an image I pulled off a Google search, and is a reasonable approximation of what AL typically supplies in their kits: As for 6mm x 5mm x 730mm, time to get your ruler out. That is an almost square dowel. Pull out all the long yellow squarish dowels from your kit and measure them. (EDIT) I should note that 6mm x 5mm x 730mm seems like a very odd shape. If it is for planking, are you sure that the instructions don't say ... 6mm x 0.5mm x 730mm?
-
Izzy, I agree with Jason. I prefer Vallejo. Before this, I used Tamiya and Mr. Hobby. The advantage of Vallejo is that they come in squeeze bottles, meaning that they won't dry out and cause the cap to be stuck to the glass jar (anybody who has ever used Tamiya paints will know this!). They are also really finely ground, and spread very nicely. I squeeze out a tiny bit of paint directly onto the model, or onto a piece of cardboard, depending on how much control I need over the paint.
-
Arrr, Salty Dog. Them structures be seats of ease. Toilets. They should be installed straight. Carve some wood or use some filler and paint to fill in the gaps. Great subject by the way ... how about more pictures of your build?
-
Perhaps I am a little influenced by Chris Watton's comment on the other thread where he says that his new HMS Prince kit is nearly the same size as the old kit, despite the new kit being designed for a larger scale. When I asked him why, his reply was that the older kit was not accurately scaled, along with some other mistakes.
-
Congratulations, Vince. You do know that Chris Watton is working on a new HMS Prince to replace the one Amati removed from the catalogue, don't you. That one seems to be a few years away, but it's on my bucket list.
-
How do you break a laser machine, out of curiosity?
-
Anton, are you human? Your first picture showing the bashed boat and sprayed grey with primer ... is only 2 hours earlier than the painted and finished boat. Paint doesn't dry that quick, let alone painting detail upon detail, and time spent photographing and uploading pics to MSW. In the same amount of time, I have had a relaxing dinner and opened a bottle of wine. I feel so unproductive compared to you!
-
I am interested in this build as well. It would be great if you could post updates here as well as your blog. You'll certainly get many more visitors here.
-
OK Denis, but your legion of fans who sit by patiently waiting for updates will not be happy Very soon the pitchforks will be out!
-
Not sure how you do it, Anton. It takes me a whole day to make one of those parts. You do it faster and more accurately than I could ever dream of doing! Maybe I need more tools to compensate!
-
Hi Denis, may I suggest two things. 1. Increase your feed rate. That will reduce the risk of melting the metal. 2. Try introducing a coolant. I use liquid soap. It works really well. How about a sexy picture of your model as she is now?
-
That looks really good, Tom. I'm staying tuned!
-
Great start, Thomas. I will be following your log with interest. Just a note - the plywood laminations can still be seen after staining with walnut. On my build, I decided to leave it alone - to my eternal regret. If I were to do it again, I would cover up the plywood with something else.
-
Geez you are quick. I've been working on my ship for three quarters of a year and i'm nowhere close.
-
Thanks for the update RMC, she's beautiful. This ship is on my bucket list (I have a very big bucket) but i'm not sure if I should even attempt it given that yours is likely to be the definitive Vanguard build