Thistle17
-
Posts
1,054 -
Joined
-
Last visited
Content Type
Profiles
Forums
Gallery
Events
Everything posted by Thistle17
-
 When i said keep the information coming I had no idea all this was out there. Thank you all so much for your reference and real life information. Joe
 -
I am so taken by the responses I am getting from all of you. You bring life and breath to this endeavor. I certainly hope we can live up to expectations and we do you all proud. Keep your experiences and memories coming it speaks and means so much to us. Joe
-
Atlantis by Thistle17 - FINISHED - Robbe
Thistle17 replied to Thistle17's topic in RC Kits & Scratch building
Pat I had seen your planking photo on line before. Splendid execution and results. The Atlantis doesn't have teak as best I can tell. It is more like weathered pine and of poor quality. The ends of the planks look like they were chopped and poorly so. I scrapped the material and used box wood and mahogany. I will be putting up the results shortly The client apparently lost the bulwarks pieces so I am fabricating them at this very moment. I am using straight grain maple milled to fit the rabbet on the hull and adding a basswood height extension as my maple material was only 3/4". The basswood will also allow me to add a mahogany cap rail to this improvisation when all is said and done. This would have been infinitely easier had the parts been available. I have contacted Krick in Germany who bought out Robbe and they have indicated they will be sending the masts in a shipment to Ages of Sail and then onto me. I hope!!!!!! Luckily I have the instruction manual and drawings. The drawings are not to scale so I am having to apply some relative size approximation for sizes and adjust for parts I can find on line. The bulkwarks and stanchions are a good example of this. And thank you for the link to your build. It will help. -
Thank you I just didn't dwell long enough on the sequence to get the logic.
-
Something bizzare happening on the PBR Mark 1 blog. Sometimes the title is bold and sometimes not. Any ideas? Joe
-
Ken it adds another dimension to this project when I hear of folk involved in this or any other conflict for that matter. I must admit I never served, as I was in ASW engineering when this conflict arose. Hence I was never drafted. I would further relate I have great reverence for veterans of this or any other campaign! I was a babe in arms during WWII so when I began reading about those that served I tend to get pretty emotional. In Ian Tolls, trilogy, Pacific Crucible and The Concurring Tide, (one more volume to come) I pause when reading his account of Navy pilots flying off carriers with only enough fuel for a one way trip. Who were these folk!!!!!!!!! Joe
-
Thanks all for the great photos Kurt and Jud and the directives. Jud it is an honor to communicate with you as one who was there! Yes I recognize the prior photo is a Mark 2, I am learning fast. I assume the transom overhang on the Mark 2s took the place of the "trim board" on the Mark 1s. Stern photos of the Mark 1 are quite revealing as our drawing graphics does not show that much detail. Certainly "miles to go before we sleep". Joe
-
Patrick it is an odd color indeed and as of this time we do not know. I have contacted Patriot's Point ,Charleston South Carolina's and I will try to remember to ask.
-
With the imminent departure of the USS Langley model from the Military History Society museum, where we hold our meetings, a huge display area will be wanting. The director of the Society, a Viet Nam Special Forces veteran, has longed for a model of the first generation of the River Patrol Boats introduced to combat coastal and river combatants some 60 years ago. The scale chosen allows the outfitting of the model with some pretty amazing components. The model will be a waterline model of mixed materials built to as much accuracy as possible given the "plans" available to us and the many on line pictures and videos thus far discovered. These vessels were the first builds for the "brown water Navy" in 1965 by United Boat Builders of Bellingham Washington. This company was well into the construction of a number of fiberglass hull pleasure and work boats at the time and was awarded a contract to build 120 of the Mark 1's. It is believed the hull is a direct takeoff of their 32 foot Sports Sedan as the lines and forward deck area appear to be almost identical. The company was later renamed as Uniflite Corporation and appears to have built a number of the follow on PBR Mark 2's as well as other naval support craft. Almost to a boat these vessels were left in Viet Nam but some did find their way to the US and have become either individual or club restoration projects that are fully operational today! The mission of these vessels was to provide patrol duty to deny Viet Cong and North Vietnamese operations along the coast and inland water ways of the South. These vessels were typically operated by a crew of 4 and patrolled with another PBR. Often the conditions of sea to shore interdiction dictated that helicopter gun ships were called in to assist the PBRs. We have included the following photo and specification of the PBR Mark 1 as reference. As we learn more of these vessels we will provide further background. Craft Stats Featured: MK1 PBR Type: Patrol Boat, River Length: 31 feet Width: 10 feet 7 inches Weight: 8 tons (loaded) Draft: 2.5 feet Speed: 30 mph Range: 574 km (355 miles) Armament: 1 twin M2HB .50 Cal turret (forward) 1 single M2HB .50 Cal (aft) 1-2 M60 .30 Cal (side mounted) 1 40mm MK19 Grenade Launcher (1968 and later) Location: Vietnam Experience Exhibit Source: This patrol boat is on loan from Naval History and Heritage Command.
.jpg.522d3d93488febad54bf366e400d35ea.jpg)
-
Danny I had concluded that would be the end result. I don't think it will be an issue for the others involved and I certainly will be giving credit where it is due. Joe
-
Chuck I am near to posting a new thread for the build of a PBR Mark 1 River Patrol Boat by a number of members from our model ship group Model Shipwrights of Western NY. It will be for the museum where we hold our meetings. I will probably do most of the postings but others who are members on MSW may also do so. My question is " It's not really just by me, it is a group build by a subset of our members. What is proper for the 'BY' in the title?" Joe
-
There is something fascinating about restoration of a model. I have done 2 for an individual in our city that were termed "sailors models" and as such were a bit rudimentary in comparison. Your uncle was accomplished and your work on this gem is outstanding. Those who sailed aboard these ships were indeed remarkable people and your work honors them!
- 53 replies
-
- 5
-

-
- clipper
- restoration
- (and 1 more)
-
Atlantis by Thistle17 - FINISHED - Robbe
Thistle17 replied to Thistle17's topic in RC Kits & Scratch building
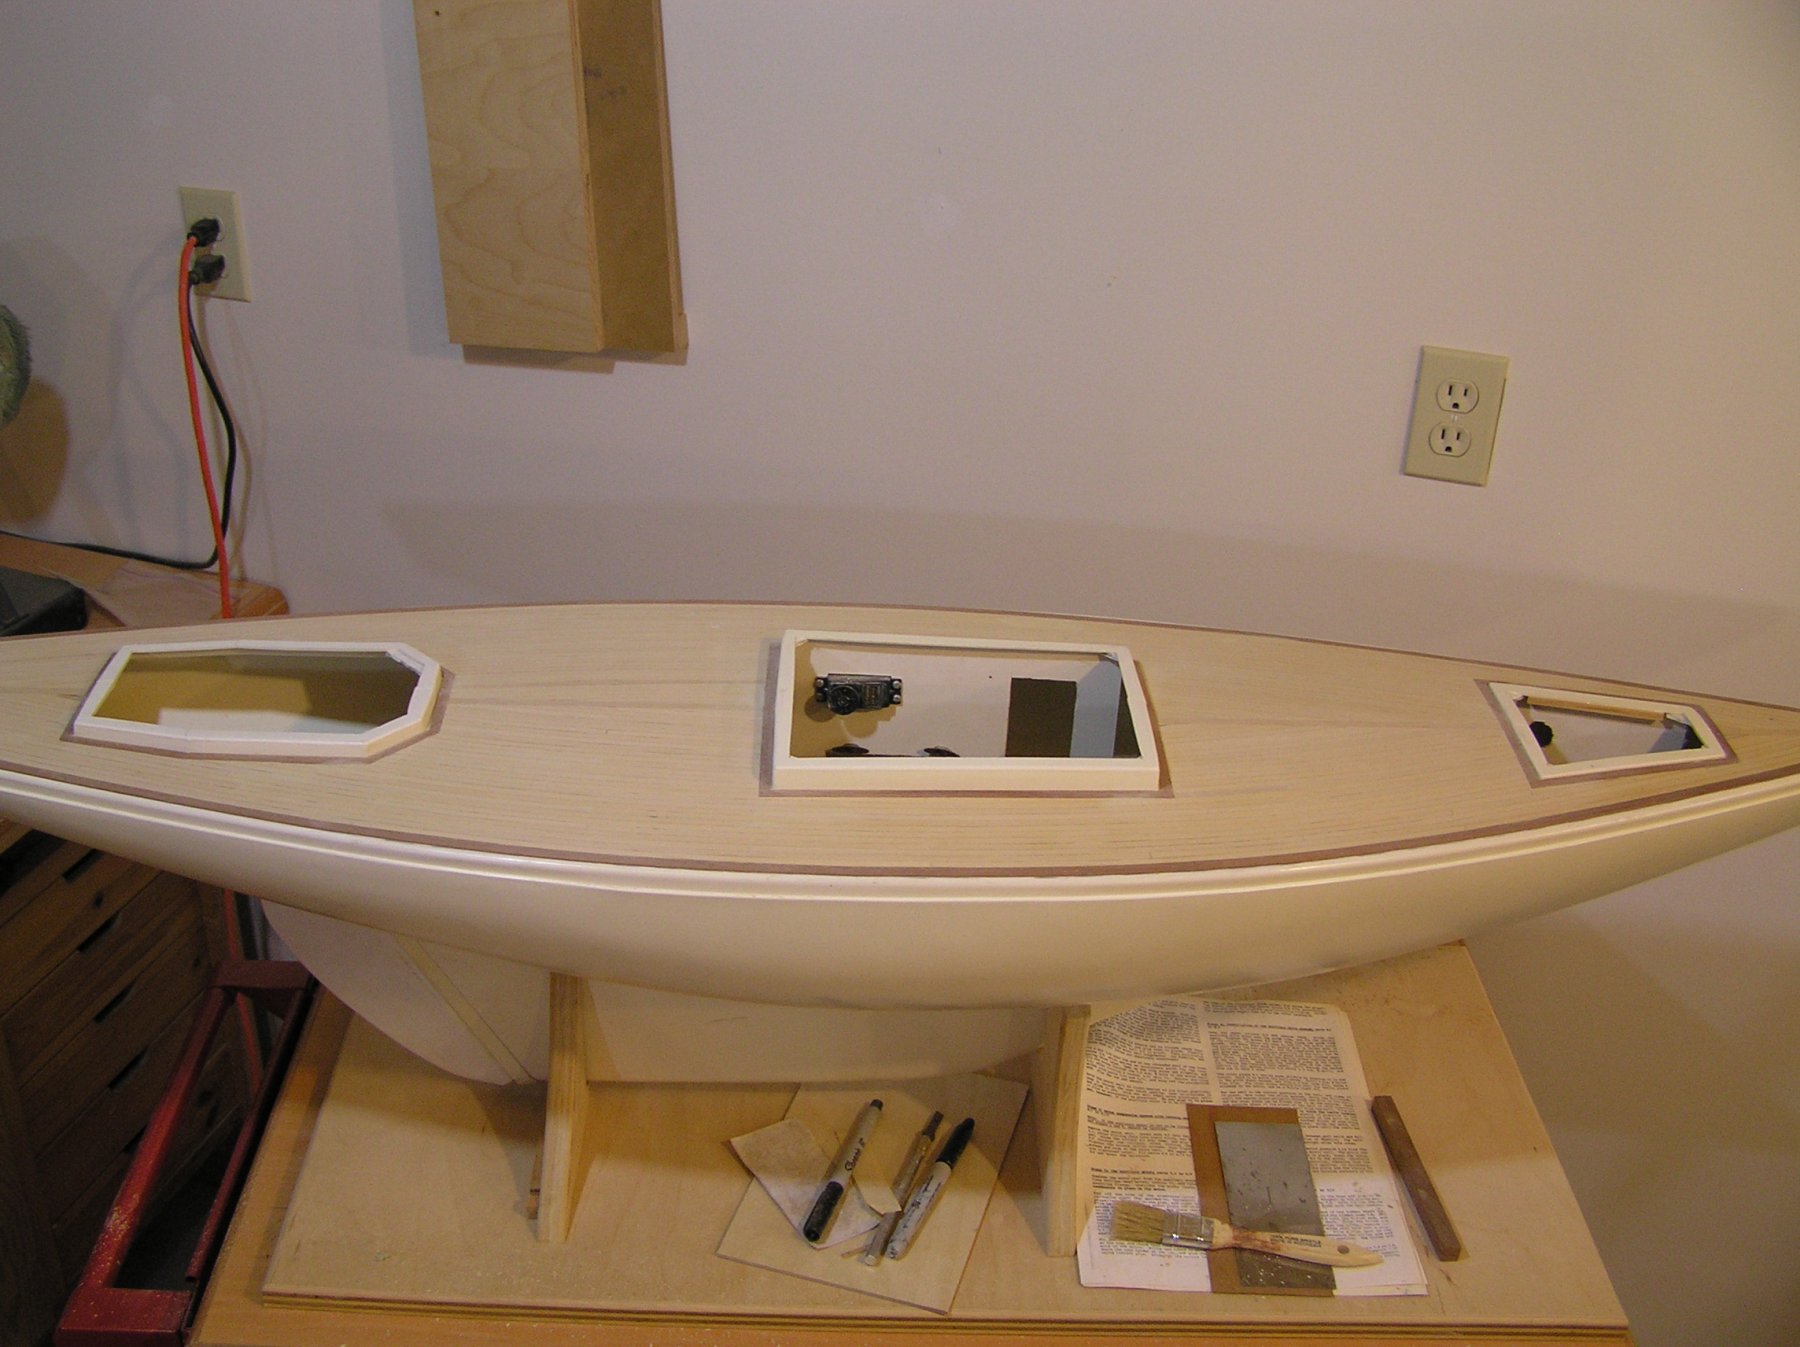
Well after more hours than I care to add up I finished sanding the deck planking. As I mentioned earlier I foolishly laid planking without checking its thickness over length uniformity and as a result had quite a time of leveling the planking especially on the starboard side (that is where I got a bit wiser). In addition to material problems I ran into 2 other problems with the hull. The first is I discovered that the hull 'half's' port and starboard were slightly different. This in combination with plank over plank placement/tolerance build up became a real challenge to give a completely matched deck pattern along the center line of the hull. It came out relatively well but there was a price to pay doing so with a combination of pattern making to nicely fit the planks. Secondly the hull deck (substrate) was slighltly concave just forward of the mid cabin on the starboard side. I managed to get most of it out but there is still a slight depression to my touch. I am now faced with a dilemma with simulated deck plank length. The material used in planking was 12" long so there are a number of butt ends at non uniform places along the beam. Most modelers I have seen on line ignored how a real boat is built and so paid no attention to where the deck beams might have been. The end result was the planking on other models looks like a herring bone pattern. I am working to scribe in some simulated planks obeying some semblance of uniformity. I have included a picture of results to date. Hard to see the plank ends though.
-
Old Floquil paints?
Thistle17 replied to MEDDO's topic in Painting, finishing and weathering products and techniques
Ken can you give a specific "pointer" on the mentioned web site regarding the mentioned booklet. I signed up and scanned forums and blogs and didn'tfind it. Thanks Joe -
I am a late adopter by nature and have just started the Cheerful (now at the planking stage). Seeing the incredible result you have produced, amongst others, I am inspired to go on. I realize I am among masters and that is always a welcome challenge for me. Incredible work Chuck!
- 1,051 replies
-
- 6
-
-
- cheerful
- Syren Ship Model Company
- (and 1 more)
-
Old Floquil paints?
Thistle17 replied to MEDDO's topic in Painting, finishing and weathering products and techniques
Here is a cross reference chart I ran across attempting to provide modelers alternatives in terms of manufactures of paint as replacement to Floquil. I would just add a caution as I do not know when this chart was generated and was cautioned by a model shop owner that the Floquil paints went through an evolution within themselves. Lastly this may be the same reference as published in the model railroad magazine. I do not subscribe so hopefully this does not add noise in the system. https://www.microscale.com/Floquil Color Chart.pdf Joe -
about handplaning to thin stock
Thistle17 replied to Bob Blarney's topic in Modeling tools and Workshop Equipment
Would you mind showing the setup with stock and substrate aligned in the jig ready to plane as I am not quite getting the setup. Thanks. Joe -
I too was fascinated with the period novels of O'Brian and Kent. In the past years I have gravitated to more Non Fiction reading as I find the accounting more exciting, emotional and educational. Here is a series of books I found worth reading: Ian Toll: Six Frigates Tim McGrath: John Barry An American Hero Ian Toll: Pacific Crucible/The Conquering Tide/TBD (Trilogy) > WWII Pacific Campaign James Hornfisher: Neptune's Inferno/The Last Stand of Tin Can Sailors/Ship of Ghosts Doug Stanton: In Harms Way Roy Adkins: Nelson's Trafalgar Stephen Taylor: Commander Tom Chaffin: H.L.Hunley Hours and hours of engaging reading! Joe
-
Atlantis by Thistle17 - FINISHED - Robbe
Thistle17 replied to Thistle17's topic in RC Kits & Scratch building
I have run into a problem with the boxwood planking made from purchased sheet goods. I ordered 3/64" (.047) sheet material and ripped the planking. To simulate the original material that came with the Atlantis I cut the 24 inch planks in half. As I began laying the planks I noticed significant variation in thickness of the planks across the 12" length. At first I thought is was the roughness of the ABS hull after I had sanded it down. I finally measured the plank thickness end to end and found as much as 10 thousands variation. I have learned that the vendor does try to control its variation =/- .005. I have been working with the vendor to try and correct this problem. I now will measure all stock upon receipt and will be the wiser for doing so. The vendor is sending on a new batch of sheet stock for which I am grateful. In the meantime I have a good deal of sanding ahead of me. -
If you can get your hands on Model Shipwright, now out of print you will find a treasure trove of incredible models and building. The publisher also released 4 annuals, Shipwright, in 2010 through 2013 which are equally rich. They too have ceased the annual publication. Try a query to Conway Press in the UK. They may be of help. Joe
-
I have the kit. It is likely late 1980's in age in the original yellow box and complete. If you are interested I can send you a digital pic of the contents via the internal messaging system. Joe
-
Can't think of a more peaceful venue to build a ship model save down by the sea. Great start on this model. Hope to see more in the future. If you are an upstate New Yorker certainly like to hear from you via the messages icon in the tool bar. We have a thriving modelers group in Rochester NY. Here is our web page modelshipwrightguildwny.org. Joe
-
White glue can soak into the porous wood and swell and buckle it, If it is loose underneath I'd be tempted to experiment with CA glue, the very viscous, fast setting, type and squirt it underneath carefully and pressure hold that section for a few seconds. I don't think I would add more water to the decking as you describe. If it is not loose but buckled I a tad try sanding as your last step. If all else fails (and we all have had that) I'd rip it up and start again. Also white PVA glue can be softened up somewhat with heat (try a hair dryer) and then use the CA technique approach. Hope this helps. In terms of what won't stick to the material when weighted down you can use wax paper. And as far as hold downs go try those squeezable pressure clamps (see ERIK, Cutter Cheerful) and a thin plywood spanning port and starboard over the wax paper.
-
Rusty I want to be just as good as you when I grow up. Only one problem my "shot clock" is ticking down! Outstanding work! You are an inspiration to all of us including the group. Anxious to see the subject in person. Joe
- 310 replies
-
- 2
-
-
- cheerful
- Syren Ship Model Company
- (and 1 more)
-
Atlantis by Thistle17 - FINISHED - Robbe
Thistle17 replied to Thistle17's topic in RC Kits & Scratch building
In applying the decking (wood) to the hull surface I asked DAP about Rapid Fuse General Purpose adhesive bonding integrity. The return stated that Rapid Fuse General Purpose will adequately bond wood to ABS plastic. I further asked about the bonding property of Styrene and ABS. The answer was that the bond was inadequate. This pretty much removes the plan to make the bulkwarks out of Styrene. I have been decking this large model in boxwood and mahogany as disclosed earlier. This DAP Rapid Fuse adhesive is growing on me. Small amounts applied to the decking and held for 30 seconds (cure in 30 min) works well. As a matter of fact the adhesive quickly becomes tacky when the planks are laid down. To continue the case for this adhesive, one can lift and reposition the planking, if misaligned, soon after it is laid. No further adhesive is required. If it gets on the topside of the plank it does sand. Otherwise it behaves as CA does especially on one's skin.