Thistle17
-
Posts
1,054 -
Joined
-
Last visited
Content Type
Profiles
Forums
Gallery
Events
Everything posted by Thistle17
-
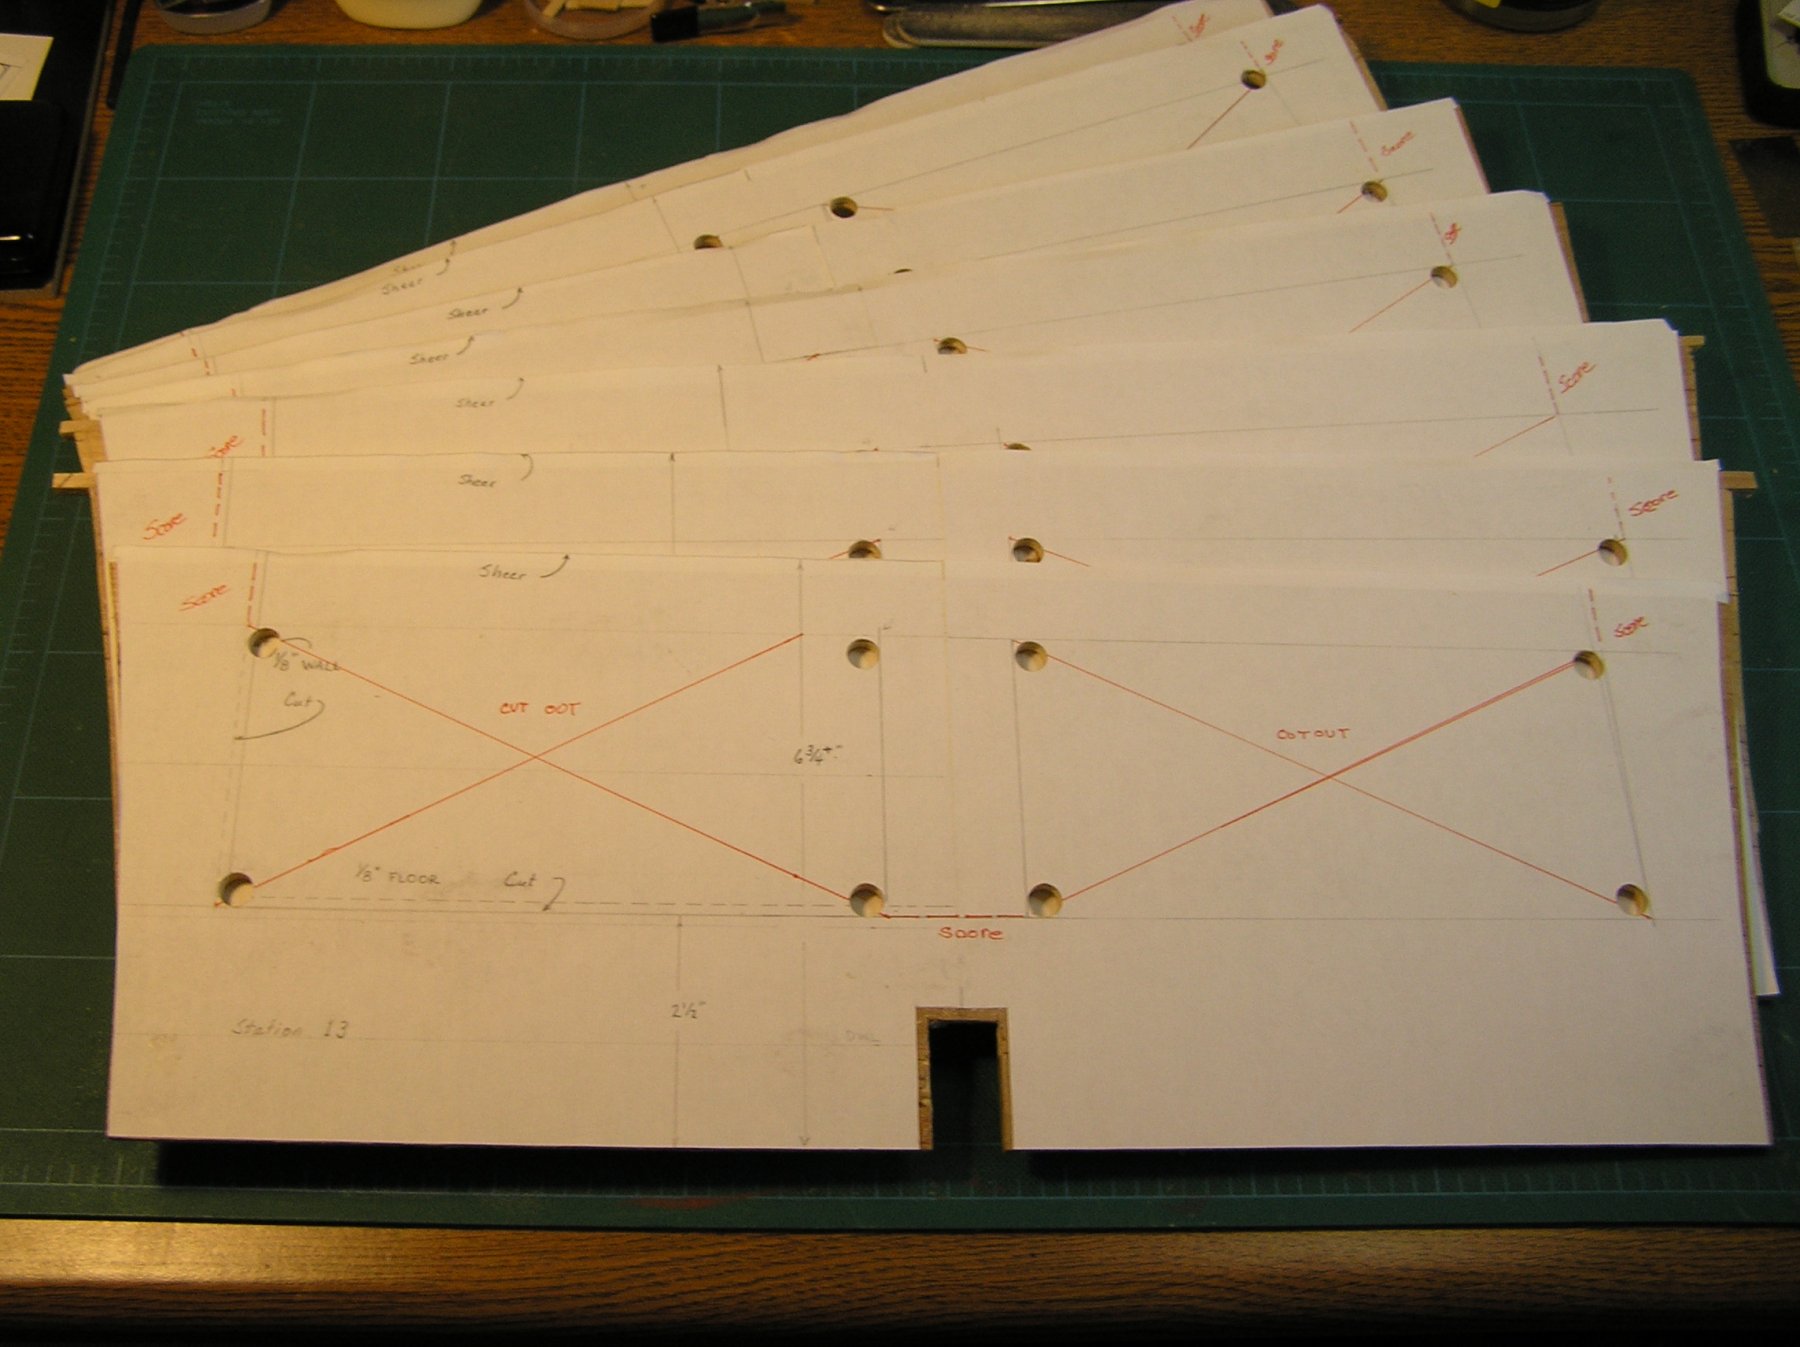
 A good deal of prep work has gotten us to a stage where the group build with "volunteers" in the club can participate. Thanks to our very able, retired Navy member, bulkhead patterns were drawn up that included a size reduction to allow for the 1/16" planking to be applied. These have been affixed to the over sized bulkheads and are ready for initial trim and fairing to the pattern outlines. Shown in the attached photo are bulkheads 9 through 15 which all require a cutout to the pilot and aft deck level. Note there will be some preliminary "off keel" cutting out of the bulkheads, but saving some stiffener material until the hull is fully planked. When it comes time to remove the stiffeners earlier scoring, as shown, will ease removal. The transom requires special treatment due to its convex shape and slanted rise. At this point a jig is being considered that will support a vertical "stave" construction that can be carved and sanded to shape and attached much as the stem has been treated. I believe at this point the hull material will be bass wood as the team thinks we should be resin coating the entire hull.
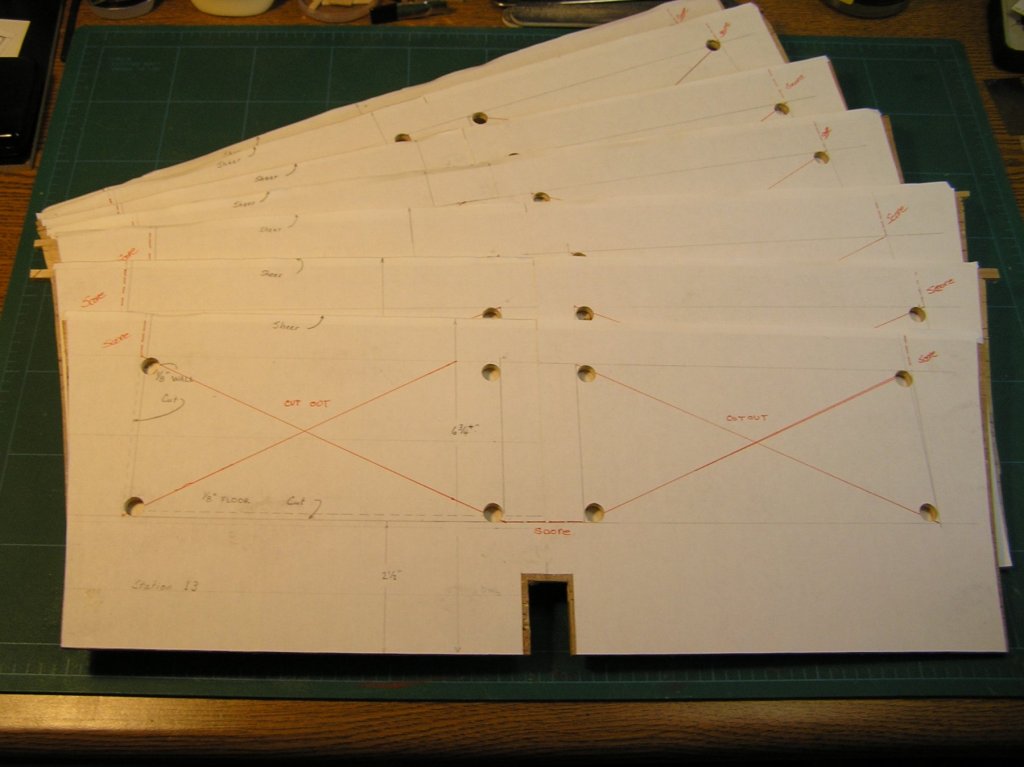
-
Disregard the above message as I was using the wrong mechanism to reach you. I have sent you a response the correct way.
- 4 replies
-
- 1
-

-
- flex drive
- table saw
- (and 2 more)
-
Landlocked123 I sent you a message but my mailer dameon rejected it via Model Ship World saying you do not exist on that communication channel error 550. Joe
- 4 replies
-
- 1
-
-
- flex drive
- table saw
- (and 2 more)
-
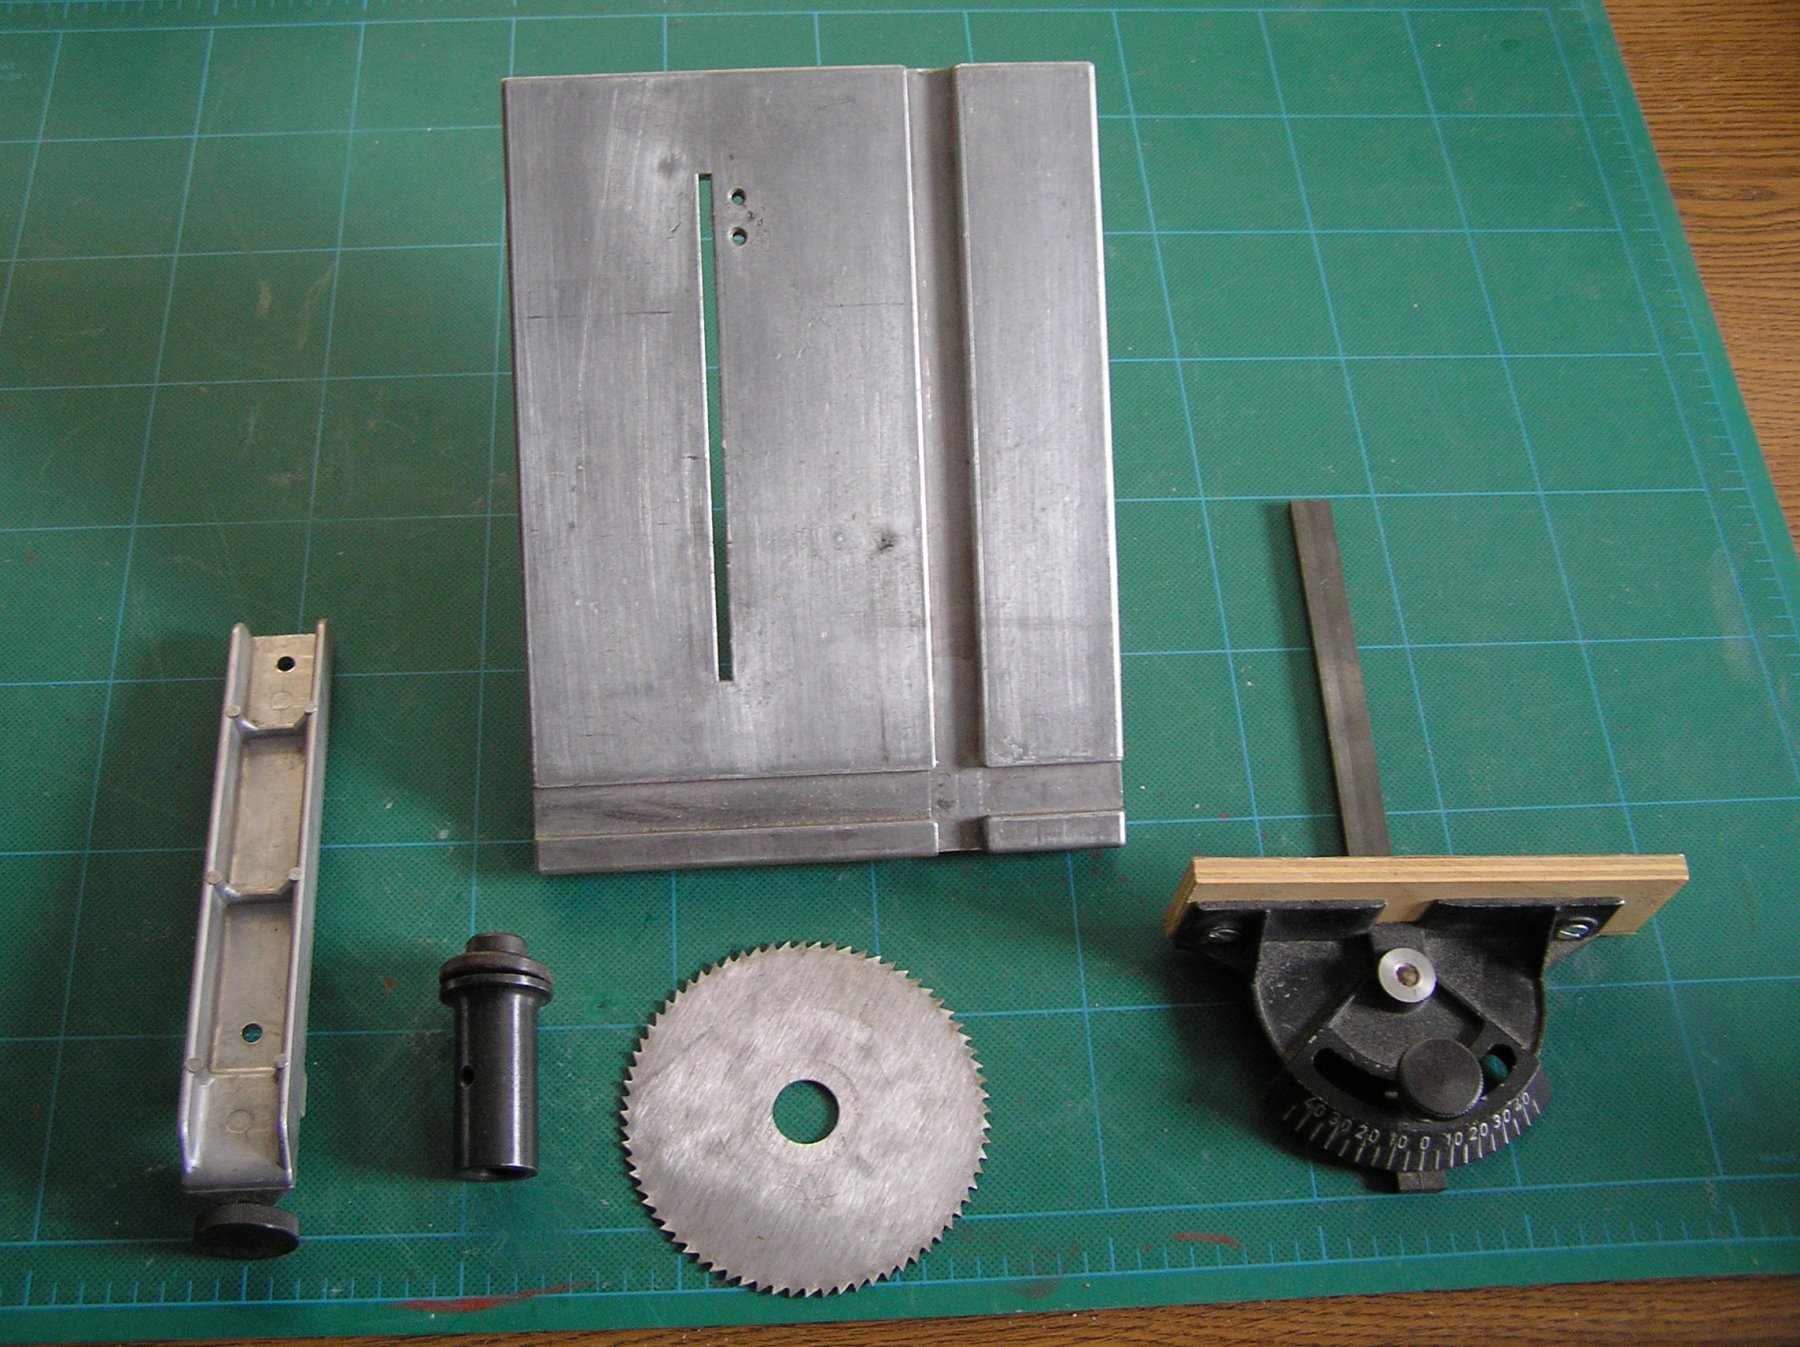
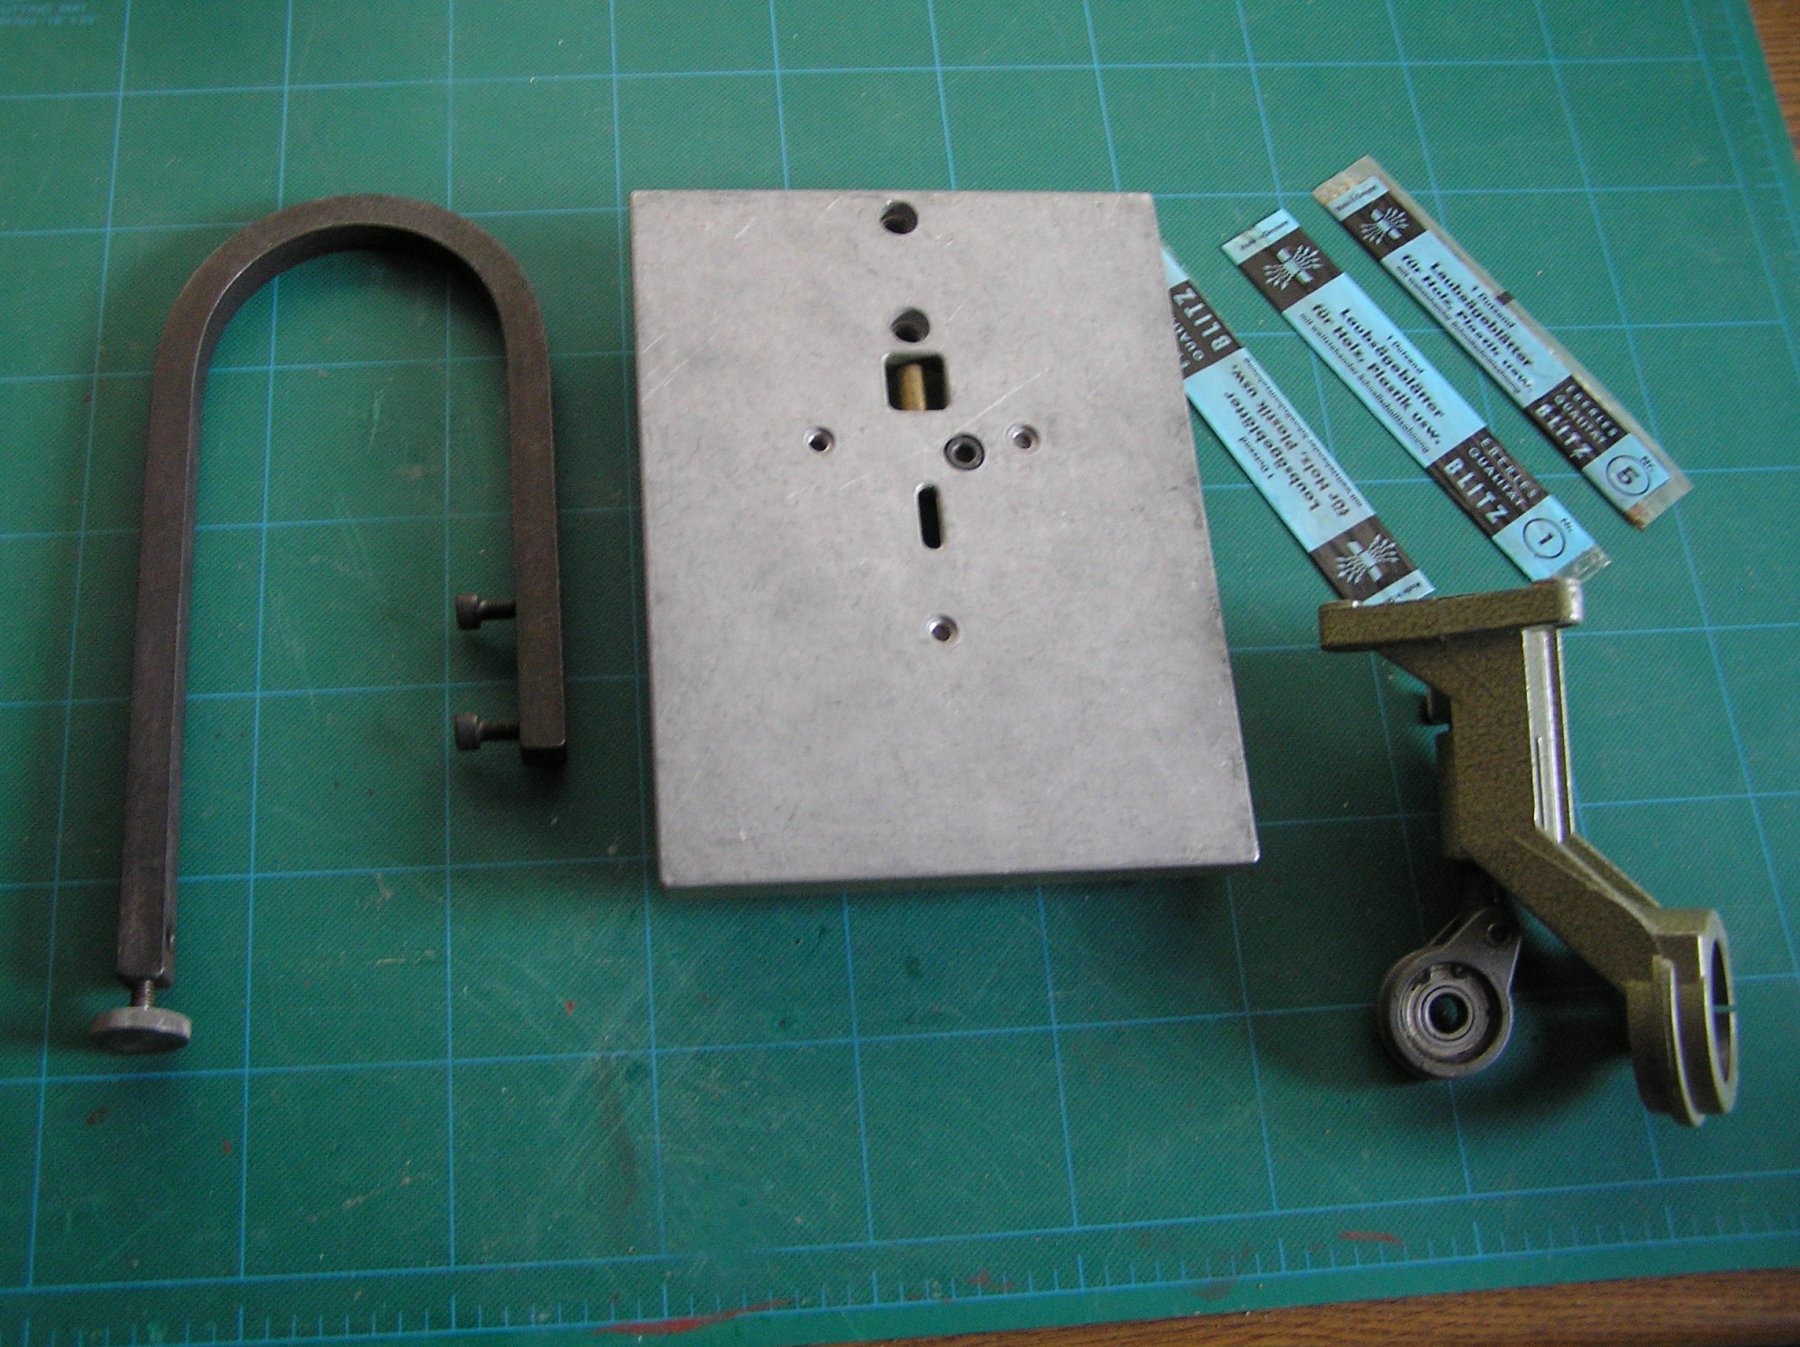
With the new year came an assessment of my normal size shop tools and some of my modeling tools. I have a Unimat SL1000 lathe that I have used since I bought it in the 1980's. Sometime after that I bought the following Unimat accessories/attachments: 1. Table saw with miter gauge, fence and spindle attachment for blade; Used very lightly, next to new 2. Jointer with cutter; Used very, very little, next to new 3. Fret Saw; Never used; still in the oil wrap 4. Flex coupled attachment; Next to new; just can't recall if I ever used it still in the box The vintage is the hammered green finish. I cherish my tools and they are well kept. None of these accessories show any signs of abuse or rust. Some still in their original oil wrapping. Cherish them I do believe me but there comes a time when we have to push back and take a horizon view of these treasures. I am willing to sell them singly or as a package. Please contact me through the e-mail channel if interested. I can send photos to interested parties. This an update pictures follow. I mislabled the sabre/jig saw. It is a fret saw. The jointer, fret saw and flex drive still have the original boxes.


- 4 replies
-
- 3
-
-
- flex drive
- table saw
- (and 2 more)
-
Incredible work on one of my favorite work craft. Certainly a candidate worthy of a museum home! Joe
-
I am going to need to see a therapist. I still have to continue the work on Cheerful and now my mind is racing ahead to The Barge. I am hopelessly addicted. I will be in your fulfillment log this year after I order the remaining Cheerful parts. Good to see more upbeat news from you! Joe
- 269 replies
-
- 9
-
-
- Queen Anne Barge
- Syren Ship Model Company
- (and 1 more)
-
Antonio I used Tamiya Acrylic paint in a brush on mode straight out of the bottle. I had primed on a light grey and the white just didn't cover. I then sprayed on Tamiya white primer and it still took 4 coats of the white overcoat to satisfy me. I too could still see a slight grey through the white primer. The thinning just didn't work for me. I did not apply heavy coats Here is a reference to a painting guide via model railroaders that we posted on our web site: https://www.modelshipwrightguildwny.org/resources-shopnotes See Painting Shop Note and look at the second PDF. I would give you the direct reference address but I forgot how I got it. It is a free publication. Joe
-
Support model ship world´s ban of certain manufacturers
Thistle17 replied to Manuel Luis's topic in Wood ship model kits
The US of A and Europe are not a perfect marketplace but by and large one can be assured that the work products hold up to quality and integrity checks. Not so with China and a few others. Stealing one's intelec or by passing tried and true manufacturing practices seems to be a way of life for certain earth dwellers. Case in point beyond the pirating you have read about on this web site is the recent discovery that Lumber Liquadator's was purchasing laminate flooring from China only to find buyers here were getting sick from it, due, if I recall, incredibly high formaldehyde out gassing. The manufacturer lied ( and so did the reseller) about the product to inspectors. In our economy we do not need to deal with such problems. You were wise to reconsider! Joe -
You have a gift! More than one I should say! Your miniature carving capability is magnificent and your tooling is equally so. I was intrigued with your copper plate bench top tool. Is the die replaceable for different scale and patterns? And what thickness copper do you normally use as the tool looks pretty formidable. I would like to try to make one. Thanks. Joe
- 27 replies
-
- 4
-
-
- carrvring
- micro wood carvring
- (and 3 more)
-
There are a number of ship modelers/clubs in the Chicago area. Try contacting them through a Google search. Also you can contact the The NRG chairman and I am sure he can advise. Good luck. Joe
-
Steve at this point I might try the following. But I would recommend you experiment off the hull first. Lay up some planking of the same material on a flat service. Treat is as you did on the model. Then sand it down as "hornet" recommends. Then experiment with Trans Tint dyes. Instead of water use alcohol on the experimental plate. Given the "oil" application I would be tempted to wash/wipe the hull down after sanding with lacquer thinner to remove as much of your overcoat that penetrated. You can mix these dyes and get just about any tint you wish. That may (or not) give you a colored substrate of more even coverage. Pine, cherry and even maple and some other woods can give blotchy and unpleasant surface coverage when stained. Other possible options within the reovery process; Kilz Sanding Sealer, wood bleach (be careful with this as it removes the tannin in the wood and gives a very dull washed out surface which must be colored again. I did an oak tool chest that had awful grease, rust and dirt on it. But once finished correctly it was quite a different piece. Good Luck! Joe
-
So looking at the line heap it looks like almost all of the running rigging didn't survive or did you decide it was easier to start anew? How about the standing rigging? Joe
-
Many thanks Jud and Kurt we are beginning to pull together a decent reference library. Jud I had misinterpreted the first and last photos in your Sunday post. Joe
-
Atlantis by Thistle17 - FINISHED - Robbe
Thistle17 replied to Thistle17's topic in RC Kits & Scratch building
I have begun the deck furniture and as I said I could not deal with the shoddy materials, fit etc of the kit so I began building them anew. The process is going slowly as there are no dimensional drawings so with a combination of existing die cut parts and measurement of deck opening I have begun pretty much "building in place". This is not ideal as one can imagine as the deck furniture forms were slightly titled in the vertical plane on all sides and the hull mold isn't exactly uniform about a center line. The first photo is what would have been realized using supplied parts of the kit. Pretty ugly even in its unfinished form. Oh, I forgot to add there was no trim accessory pack in what I took in. The second photo is my built up version using boxwood and mahogany materials. It is yet to be fully detailed but I think you get the idea. I would again add I discarded the acrylic forms shown earlier as they just didn't work with this method. I do appreciate that if one were to sail this model they would have possibly been more appropriate as these new elements are all assembled using "yellow" glue. Joe The Robbe Atlantis.pptx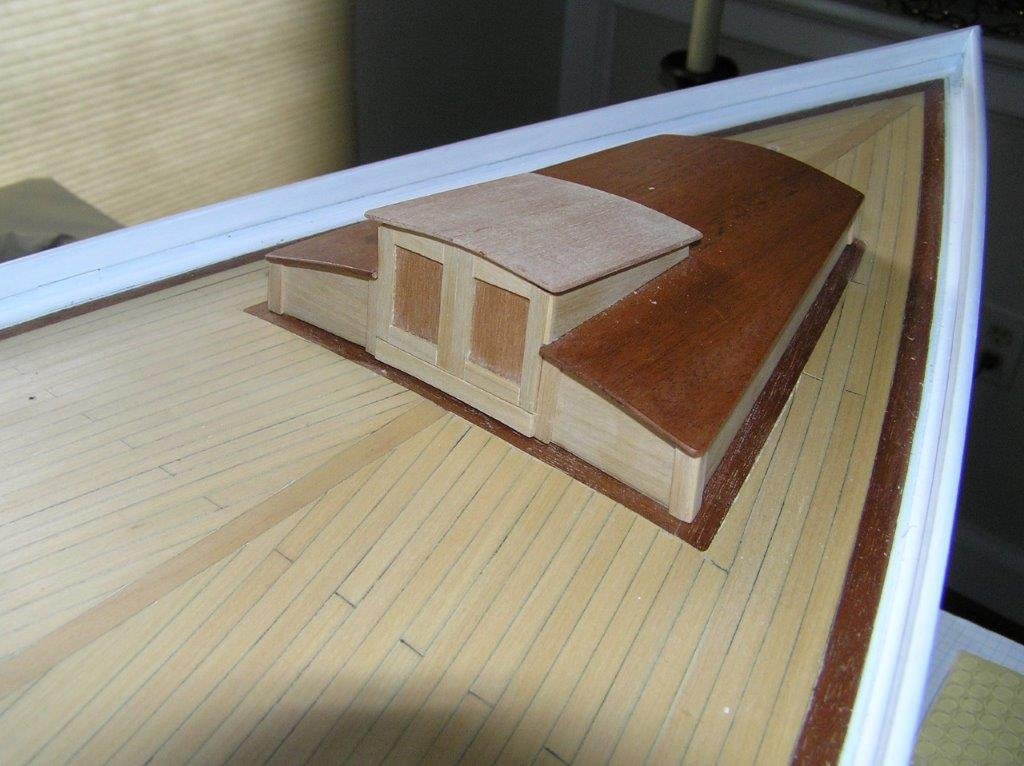
-
Jud and Kurt thanks for the photos especially the Mark 1 photos they all help. As you might guess we are starting a library of photos, documents etc etc to advance the build datum. One question that just came up today was did the Mark 1 have 2 or 1 50 cal forward? Seems to be some confusion here. Also we haven' gotten to the point to determine if we are replicating an as built version or one with field upgrades at some TBD point in time. Knowing the Navy there was always some upgrade program afoot. Joe
-
With your permission I would like to post some of these photos on our web site gallery Rusty. Ok? Joe
- 310 replies
-
- 2
-
-
- cheerful
- Syren Ship Model Company
- (and 1 more)
-
Jud we have been collecting photos from any sources we can find since both the Maryland Silver and even the Navy releases to us don't tell it all. This is especially true for some of the deck details. For instance the forward gunner detail isn't that apparent. We just realized yesterday that the gunner sat in that tub and we are trying to figure out how the "twins" were mounted. So any deck photos are especially important.
-
Knowing your demeanor I can't imagine you took this catastrophe in stride. But knowing your demeanor I know you have already heaved a sigh and will have at it. Restorations have their own special place in our endeavors and I am sure you will do a terrific job. I for one will be watching. And here I thought you only did admiralty models!!!!! Joe
-
Jud, I can't detach myself from those who served when participating in this model for the museum. You all were cut from some special cloth! Your words will be repeated to our group especially if we get bogged down. Thanks. Joe
-
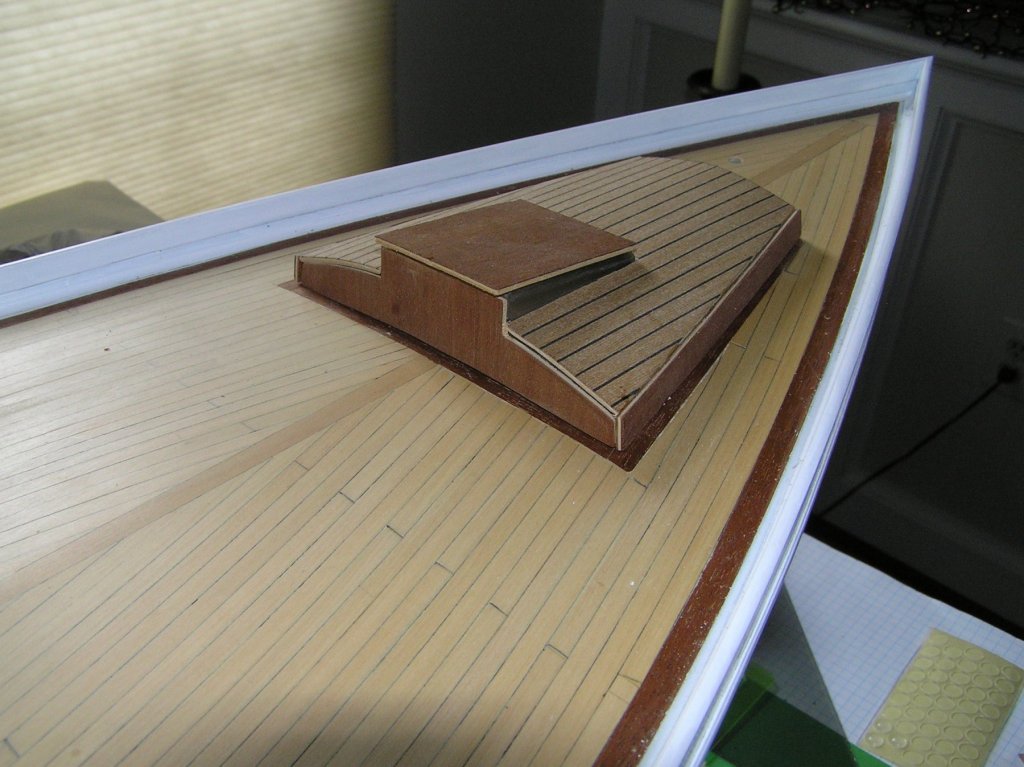
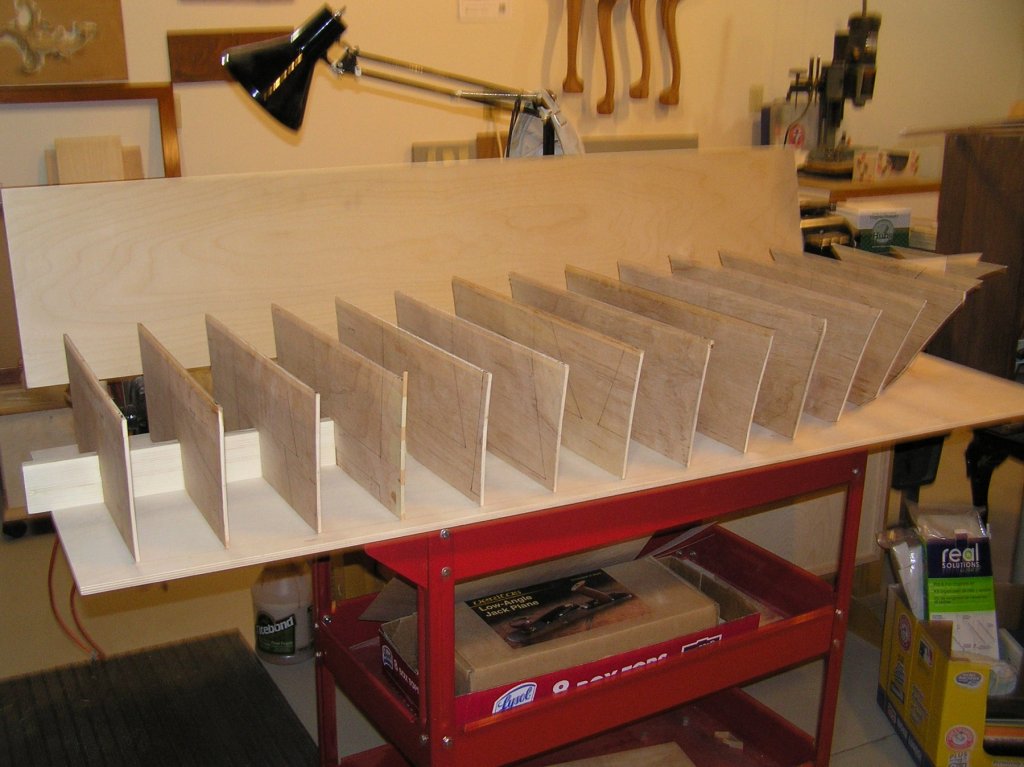
Work has begun on the 1/6 scale model of the Mark I PBR. Using the body plan obtained from Maryland Silver, the bulkheads were fashioned for the waterline model. A keel like former was milled (its height was determined to be the floor of the aft gun deck minus the actual simulated deck plating) and slotted to receive the 3/16" plywood bulkheads. The stations were slotted to fit onto the "keel" in the fashion of today's kit manufacturers. The base plate, 3/8" baltic birch was laid out with the corresponding stations and water line contour. This will be a permanent substrate when cutout and will mount to the display base. At this stage the transom is missing as it has some slight contour and detail not yet worked out. The stem was made out of basswood and awaits the rabbet for planking. One gets a pretty good idea of its size by the shop cart it is temporarily laid on. Yet another large modeling project of awkward size! Just can't seem to escape them. When we are confident in the bulkhead shapes, thickness and fairness we will move the model to the museum for further participation in this group build. At this stage of construction I find I am always conflicted with plank on bulkhead construction. I can imagine the end point but the crudeness of this stage always dismays. I guess it is because it is like the human, a skeleton with no character. Oh well onto the next steps which will be fairing the forms, drawing up the forward gun tub , pilot house, engine compartment and transom. Getting those correctly located and determining further work on interfering bulkheads. Then we can begin fastening the assembly down. At this stage we can start a BOM for planking and decking materials and missing parts needed. The museum has purchased some excellent accessories so we do have a head start there. At this point we are of a mind to use Alaskan Yellow Cedar for the planking. It is a denser wood than Basswood and has a very tight grain that does not produce "hairs" when sanded. Joe
-
That was a great response Rusty! I have not had a reaction like yours but I am not surprised by what happened to you. When I am working on any wood milling projects big or small and I start sneezing it is a warning for me. Case in point I bought some BNM(Bud Nosen Models) mahogany for the project I am working on. It is not like any mahogany I know and it has a weird smell when cutting, almost perfume like. It too was a warning to me to be careful. Joe
-
I will always remember Portia Takakjian, the noted and talented researcher, illustrator, author and modeler died at the age of 61. I believe it was from emphysema. I was told, some time back, toxic wood dust may have been a contributor. Just google the web for the lists on wood toxicity, they are out there. I am particularly sensitive to this danger as my mother died of the same affliction at an early age. She worked in a fabric mill in her early years when there was no OSHA compliance. Most wood dust of 1 micron or less particle size gets into lungs and can create havoc and disease. It is always advisable to wear a dust mask or respirator and to collect the saw dust. Most dust collection systems now advertise particle capture in the one micron range. Whether that is true or not I do not know. In addition my shop as well as many others is in the basement and the house air is conditioned by heated/cooled air. It is so easy for those particles to make it into the HVAC through duct voids etc. and that ends up in the living area. So the long and short of it is take saw dust control seriously. Joe
-
Chad a project, case and all extremely well done! Anyone who spins in the MSW orbit cares! I don't know how old the children are but I find it puzzling that "younger folk" can' seem to relate to exquisite work of this nature. When I was a kid I marveled at this sort of thing. I was inspired even then. Your reflections are dead on though. Joe
-
My, my you have been busy since last we met! It must be bitter sweet to be nearing the end. It is such an interesting model that it deserves a good home. If you haven't got one I know of one!!!!!!! I am so far behind you and my shot clock keeps ticking along. I will need another lifetime to catch up. Soooo now what is on your next to do list? Joe
- 310 replies
-
- 2
-
-
- cheerful
- Syren Ship Model Company
- (and 1 more)
-
Mike just a few added comments. I received an order from Wood Project Source just last month. It came within 2 weeks of order placement. If you are of a mind to mill your own lumber look for a "Makers" operation in your area. You can go in and rent the machine time. Surely in metro DC there is one as we have here in Rochester NY. Joe