davec
-
Posts
383 -
Joined
-
Last visited
Content Type
Profiles
Forums
Gallery
Events
Everything posted by davec
-
 amazing work. those look like microscope slide glass cover slips- how did you cut them?
 -
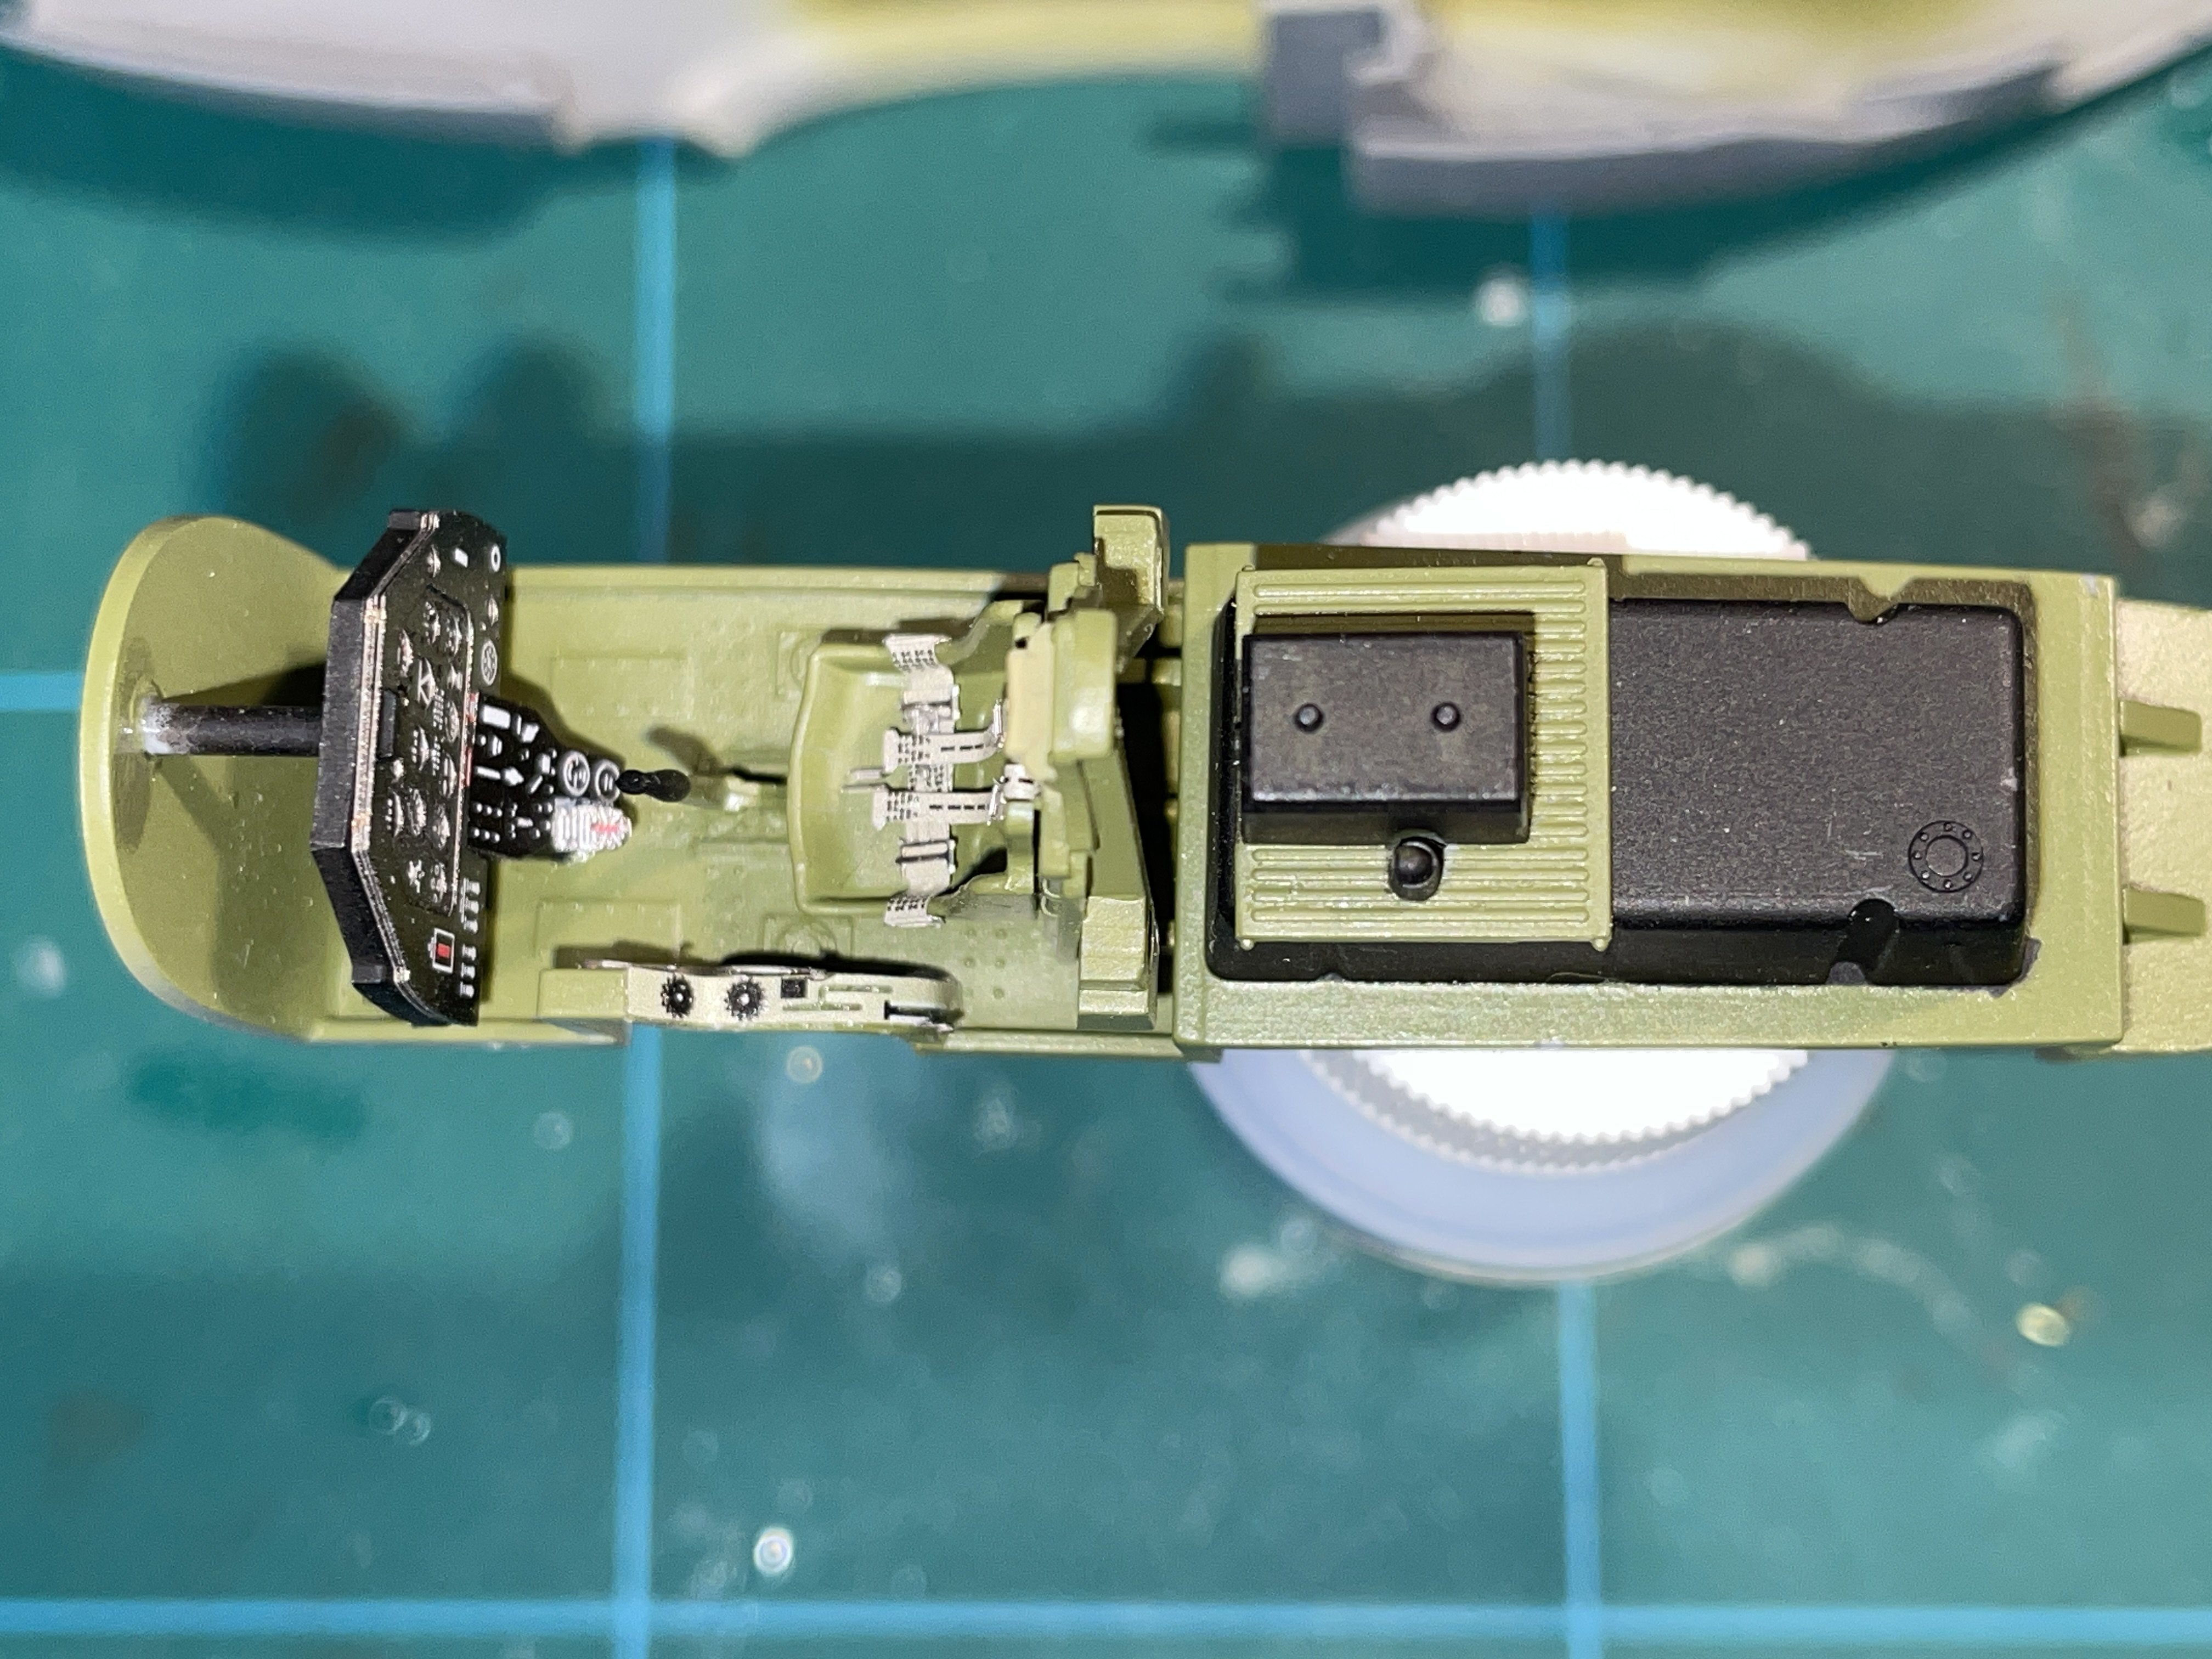
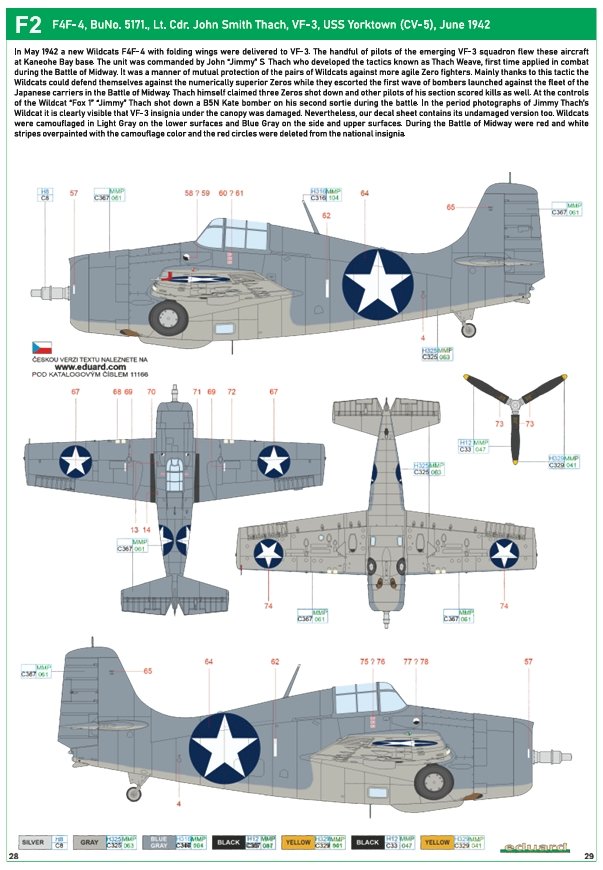
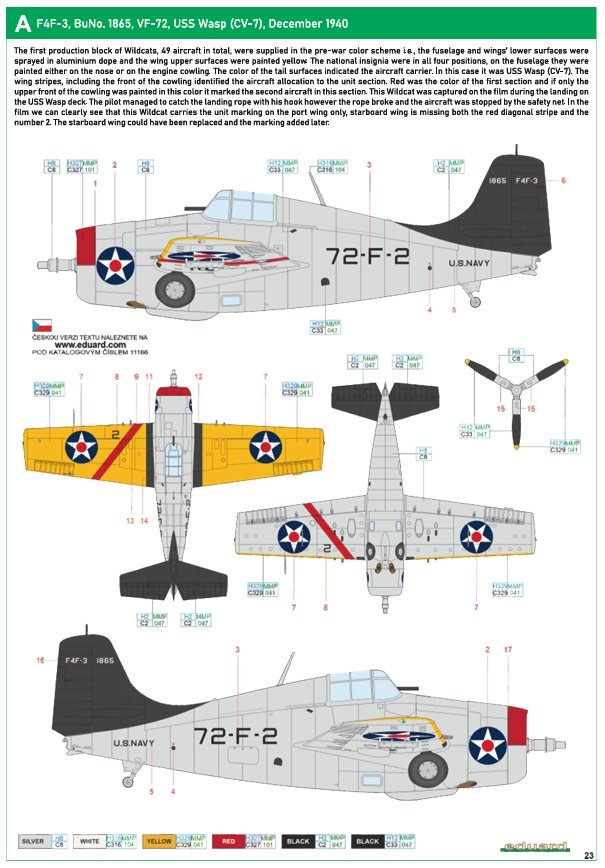
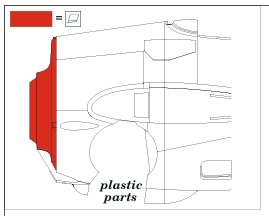
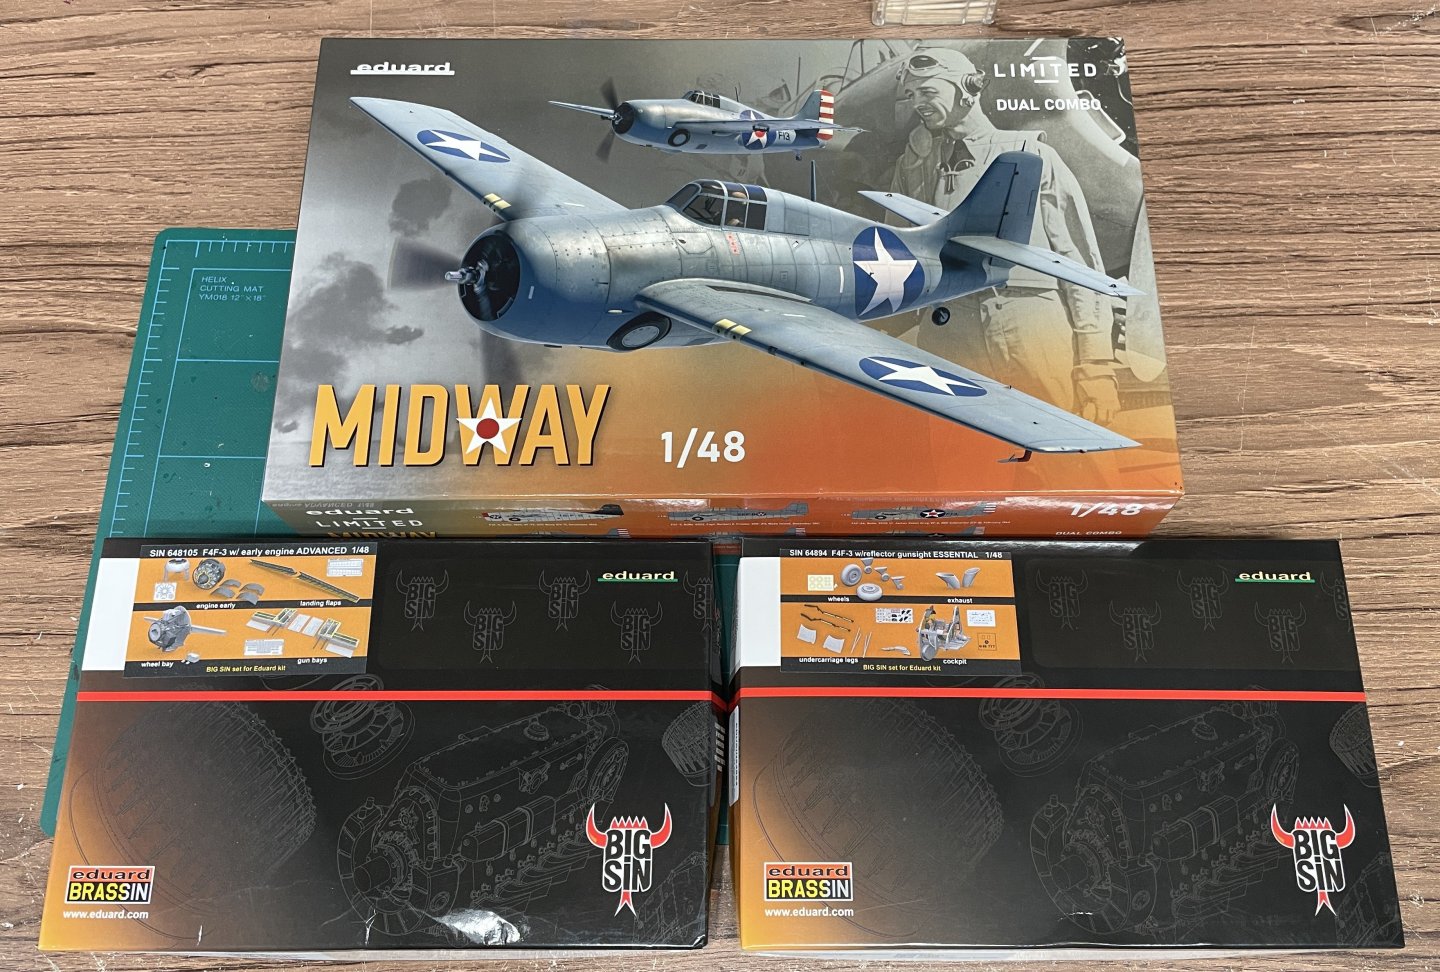
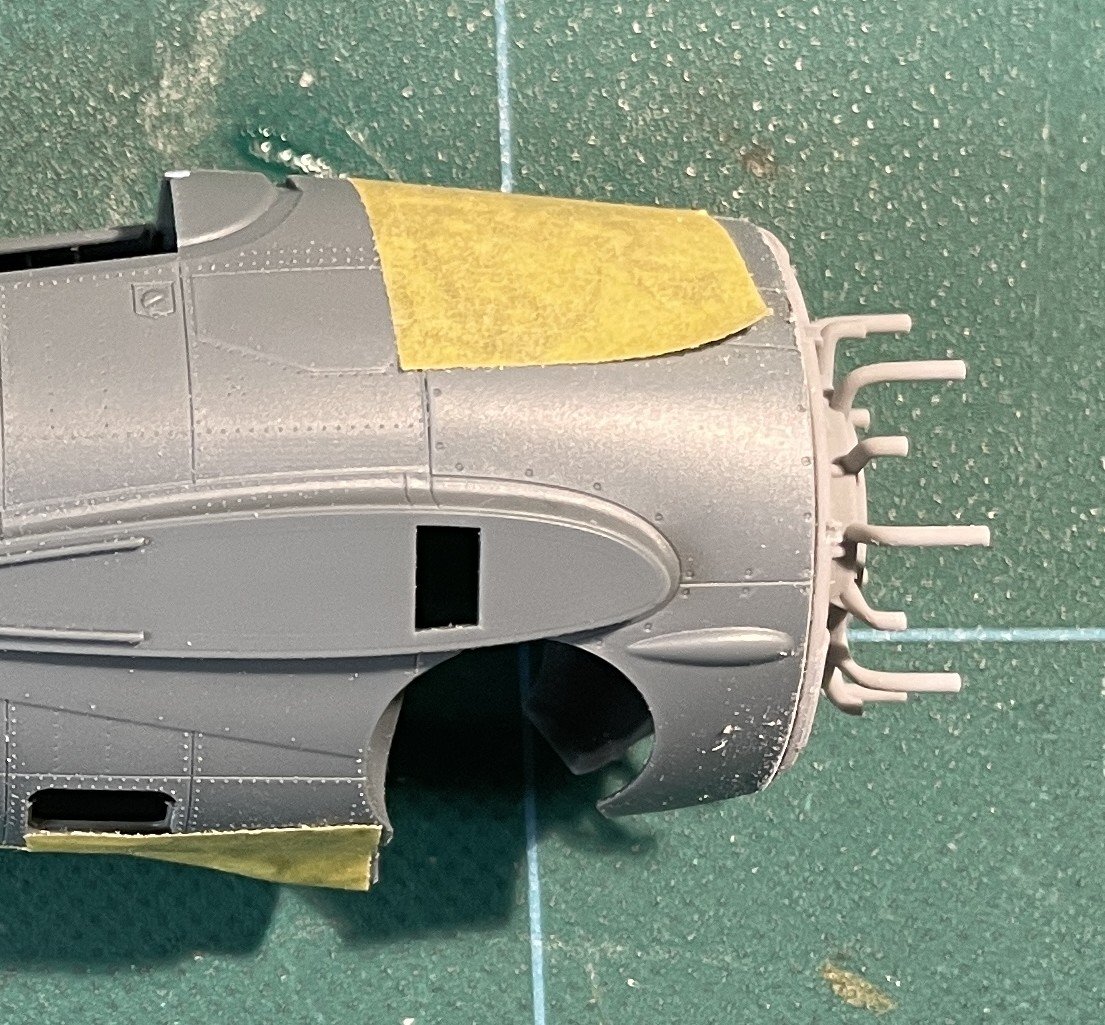
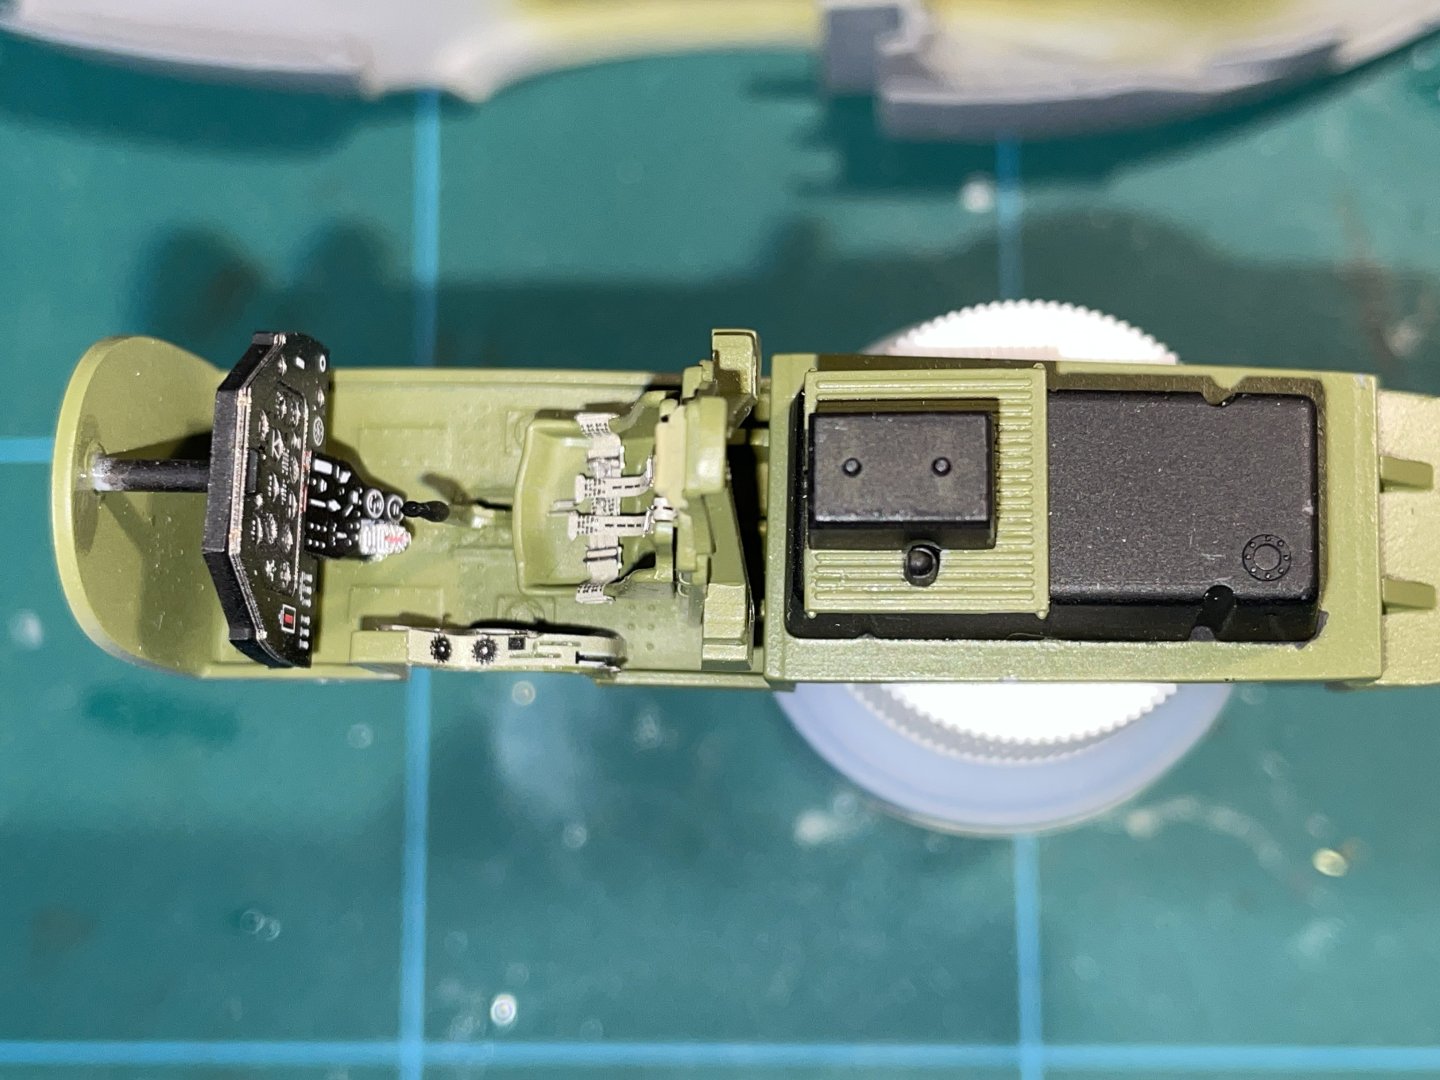
My next project is the Eduard 1/48 F4F. I wanted to try some of their 3D printed parts, so went a little overboard and got most of the add-ons for the early F3F. I’m not including a lot of pictures of kit contents as there are professionally done photos on the eduard website. I will include some along the way showing the incredible detail in the printed parts and their comparison to the merely superb detail in the kit parts. I really like the prewar yellow wing paint schemes and wanted to build option A. The kit comes with parts for both an F4F-3 and F4F-4. I bought the double kit with two thoughts: 1- Most of the parts are the same. If I was struggling with the modifications for the 3d printed parts, I could use the extra parts to make sure I had was able to finish one model. 2- If I got past the big part modifications without problem, I could build both models. This would give me a chance to compare using the printed parts with building the kit out of the box (which in this case includes photo etch). The biggest modification to use the printed engine is to cut off the firewall from the kit parts and get the 3d printed firewall to fit in its place. I’ve included pictures of the new firewall and the unmodified fuselage. I cut off part of the old firewall with a razor saw, used a sanding drum on a rotary tool to remove much of the rest of it, then used sandpaper glued to a board to remove the rest really slowly, being careful to sand parallel to the panel line that I was aiming for. It came out OK, so I think I am OK for two models. The second one will be Lt Cdr John Thach’s plane as it was marked at Midway – seems appropriate as this is the anniversary of the battle. I’ve been incredibly impressed at the detail in the printed parts. I’ve just started on the two cockpits and will post pictures of them side by side as work continues.


- 1 reply
-
- 14
-

-
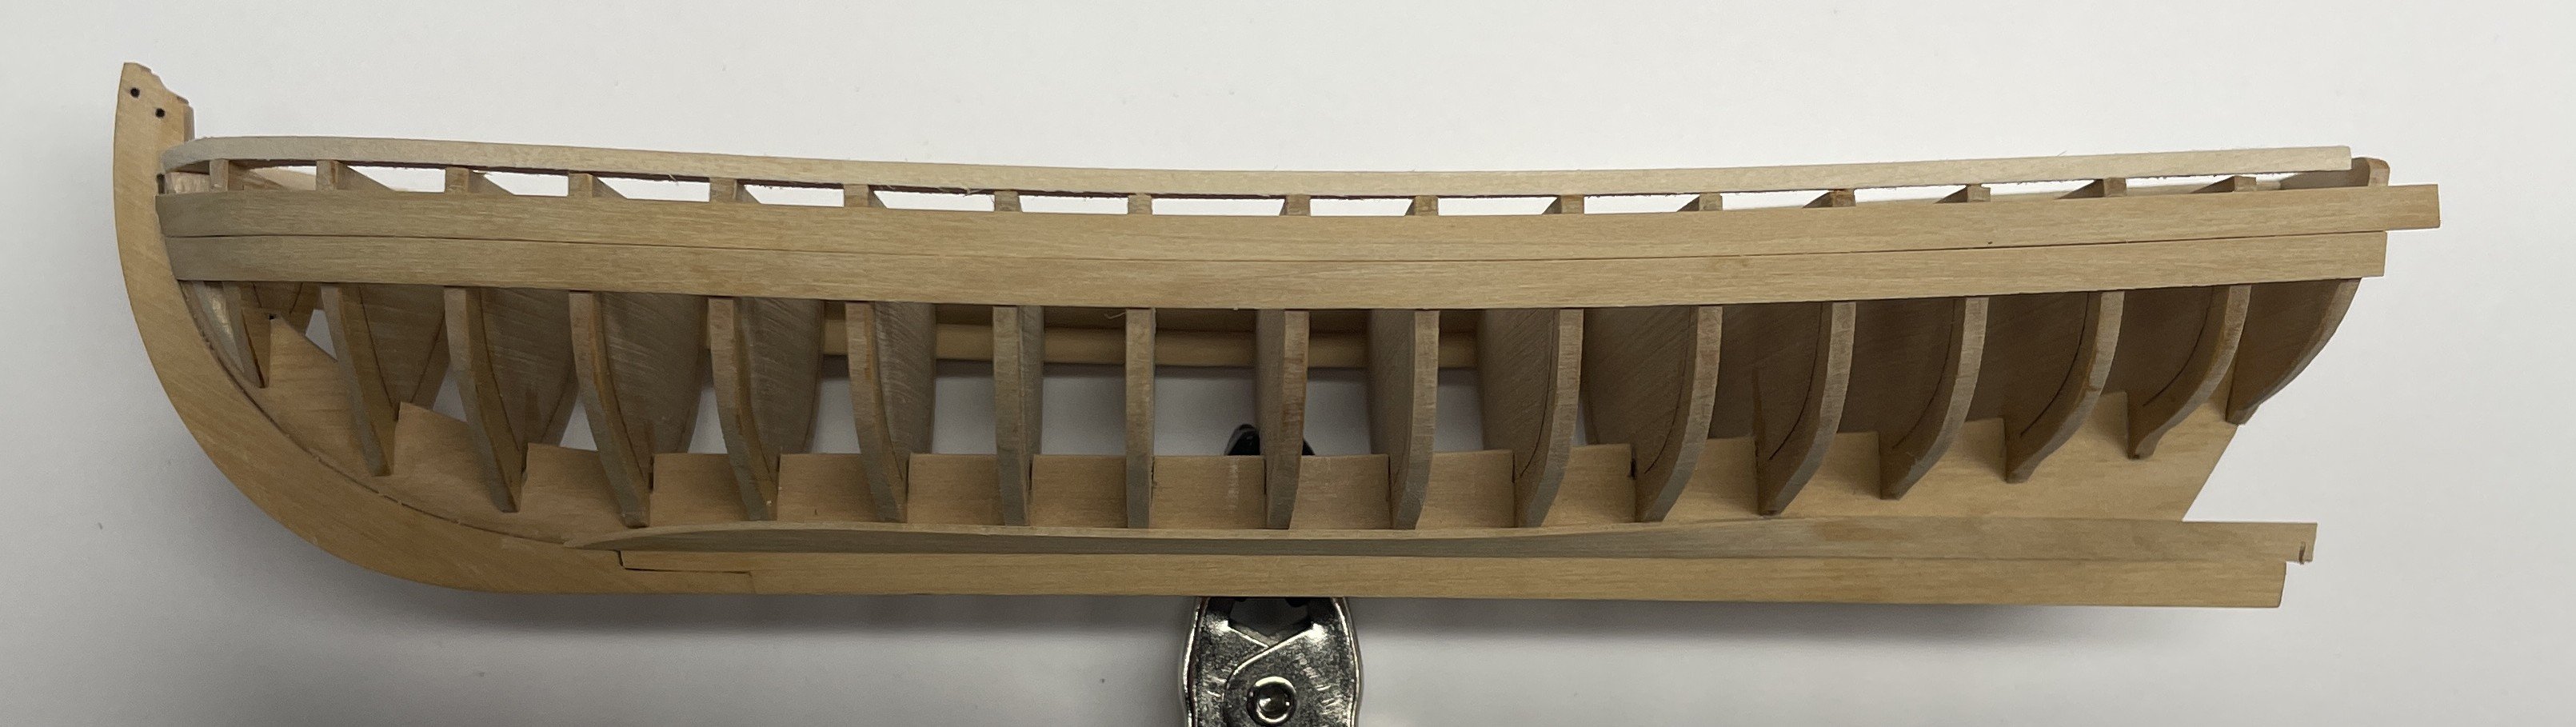
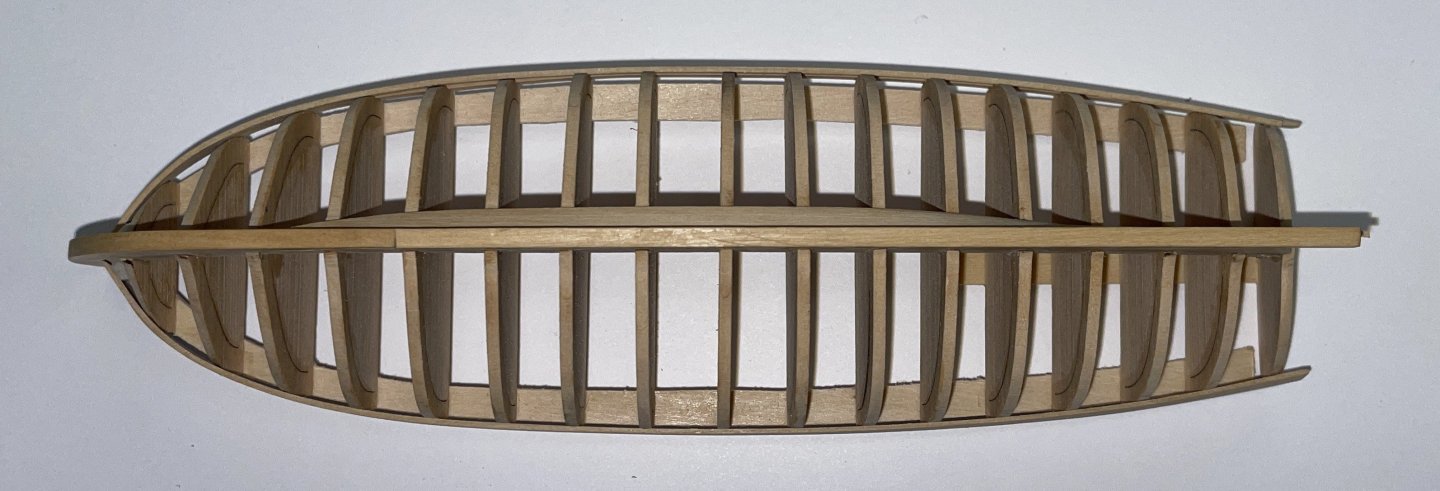
I've restarted work on the long oat. I'm not sure how it sat for an entire year. Somehow the rhythms of my work and personal life made it a lot easier to migrate to my plastic models. I've added the two upper non-tapered planks and the first of the garboard planks. I'm happy with how the garboard runs looking at it from the top and bow. This is the first time I've seen it from the side without clamps obscuring most of it. I'm not sure about how the lower planks will run viewed from the side and will need to see after a couple are in place.

-
Looks great! Congratulations on finishing! Dave
-
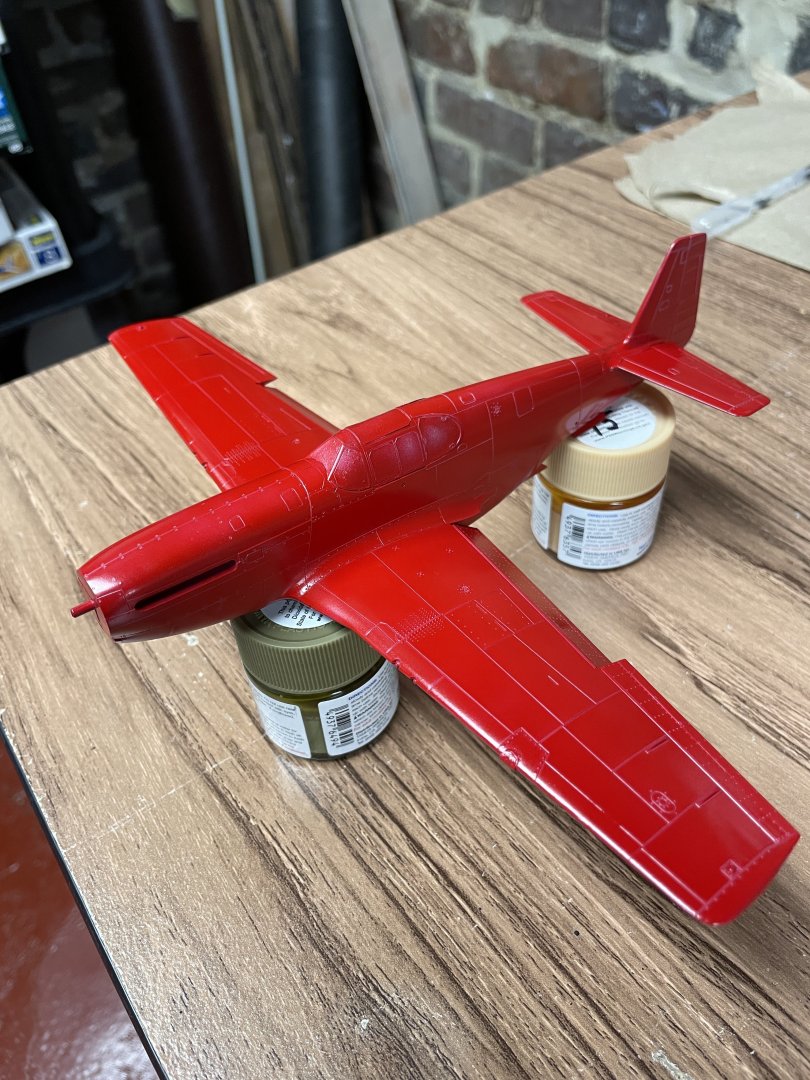
Thanks everyone for the very kind and appreciated likes and comments. I think I am in a better place than I was preop, and once I catch up on 6 weeks of my regular job, will be back in the workshop more regularly. I plan to get back to work on the long boat and start Echo (I haven't forgotten that this is a model ship website). In the interim, I'm almost done with the P51. I had a little setback - I experimented with some panel line wash and don't 100% like the effect. I'm trying to decide whether to reprime and paint, or just finish the model so I can start from the beginning on something that won't feel like a recovery project.
-
I had my surgery and when I started feeling better started work back on the Halberstadt. I was already a little frustrated with it, which was why after I ran into problems with the decals on the upper wing I didn't just strip them and order new ones, so I didn't feel to bad working on it while not at my best. The spinal surgery was very successful, so my left hand and forearm are back to 100% for the first time in two years. Trying to rig a biplane while wearing a cervical collar is not something I recommend, but I did get a lot of peace when I was able to get down into my workshop again. Not my best work, but the whole point is to have fun, and it was really helpful with the rest of my recovery. I'm working on a Tamiya p-51 that my son had barely started prior to giving up building. It was started under the same recovery conditions with the same goal of keeping me sane. He had purchased decals for the P-51C Excalibur III in the NASM, so I'm working on that plane. I disassembled what he had started so I could use the Eduard photo etch set. I don't plan a build log for it.
- 40 replies
-
- 11
-
-

-
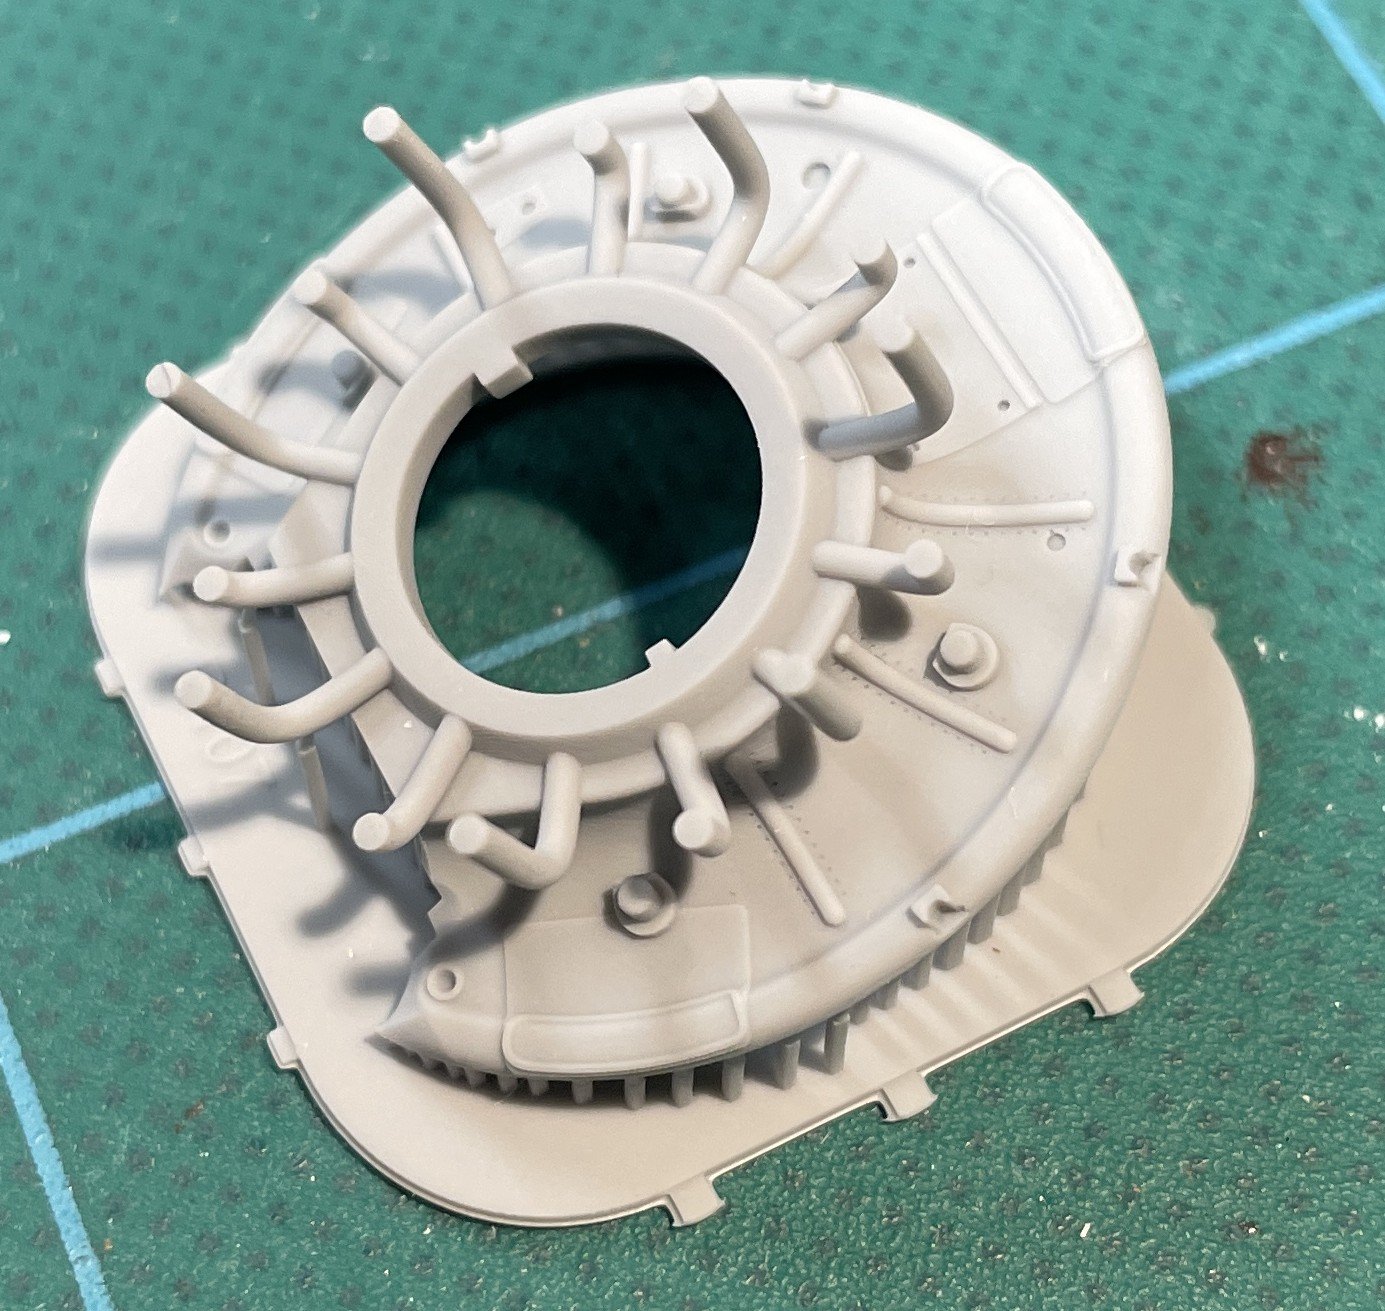
Welfalck- again, many thanks. I have some small rotary cone bits, although I don't know about quality. I just had some surgery , so it will be about a month before I get back to my workshop. Will give it a try then. Looking forward to seeing if seating 30 4 mm tubes in the pin vice for using the rotary tool is easier or harder than holding them by hand and using a hand held drill. Dave
-
The tube segment that need deburring are .5 mm tube (.3 inner diameter) and are 4 mm long. Is there a rotary cone bit small enough? I can see using a rotary tool on the free end before cutting the segment, but any suggestions for holding the short tube to use a rotary bit on the second end once the segment is down to 4 mm? thanks!
-
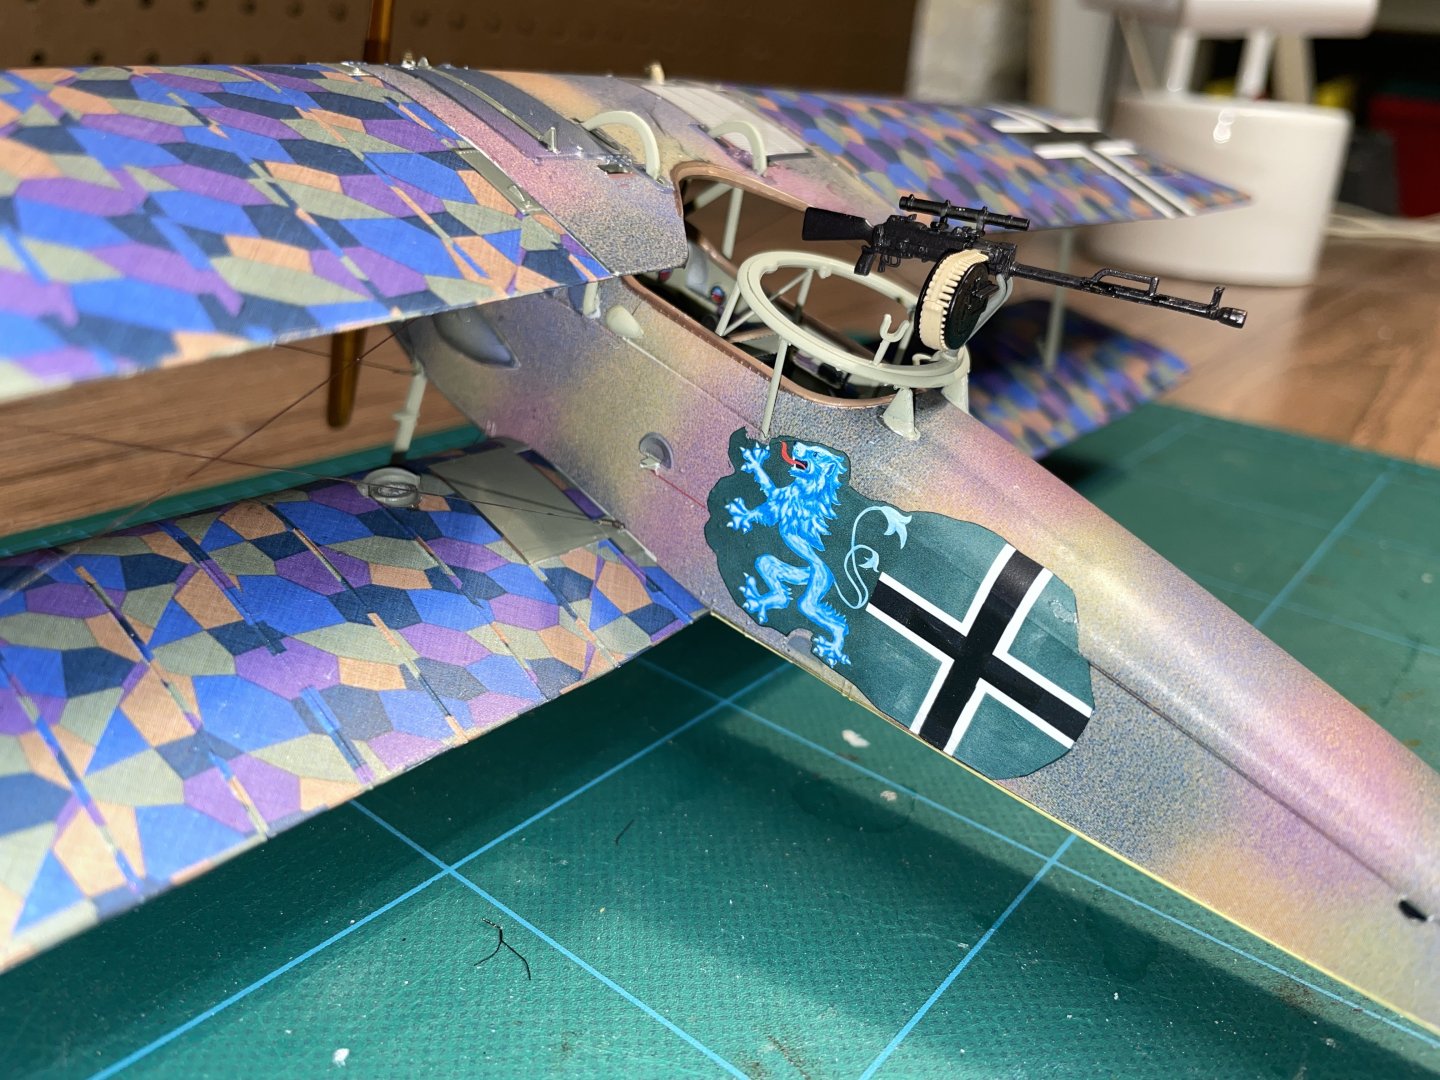
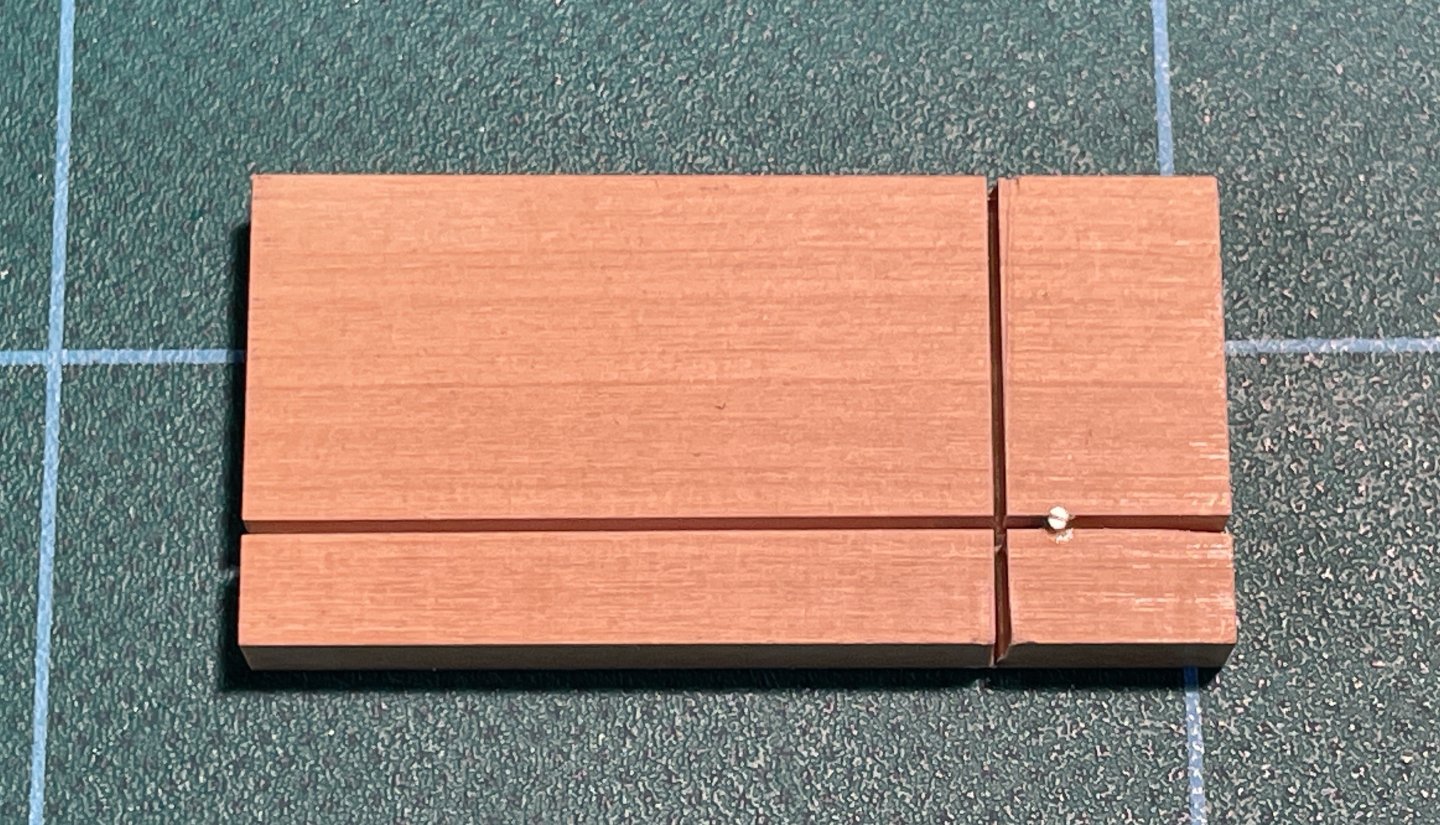
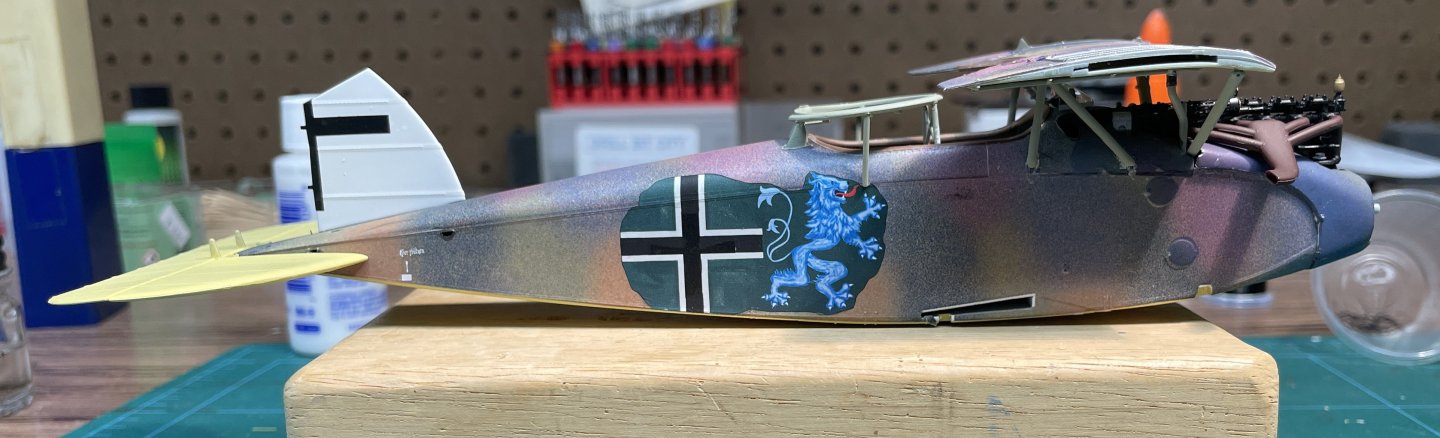
Hi Rob - I think it was you who gave me the idea for using the bigger drill bit. I couldn't remember where I saw it or the specific size. I'll experiment with some other sizes, but am already really happy with the improvement with the size I am using. I made a jig for cutting the microtube: The horizontal slot is a few thousandths wider than the .5 mm microtube so it can roll while I am cutting with the scalpel. The scalpel fits in the vertical slot. The brass pin is 4mm from the scalpel cut. This gets me equal sized 4 mm tubes (I had a hard time getting them the same size when I was rolling them on the mat), is quick, and keeps the tube from flying away at the end of the cut. I think because the boxwood is a firmer backing than the mat, it gives me a little better cut. I don't have to do a ton of clean up, but the small amount makes a big difference in threading the line. I was planning to leave the sharp demarcation between the green insignia field and bordering camouflage. I don't have a good photo of the original airplane, but the Ronny Barr drawing shows it sharp. My best guess is that the field was painted over the camouflage, likely with a brush, so a sharp line feels right. The colors are awful bright which does give more contrast than it probably should have. I'm open to suggestions. I have so many things on this model that I'd like to cover over that I've given some thought to trying to weather it, although that's not something I usually do. Dave
-
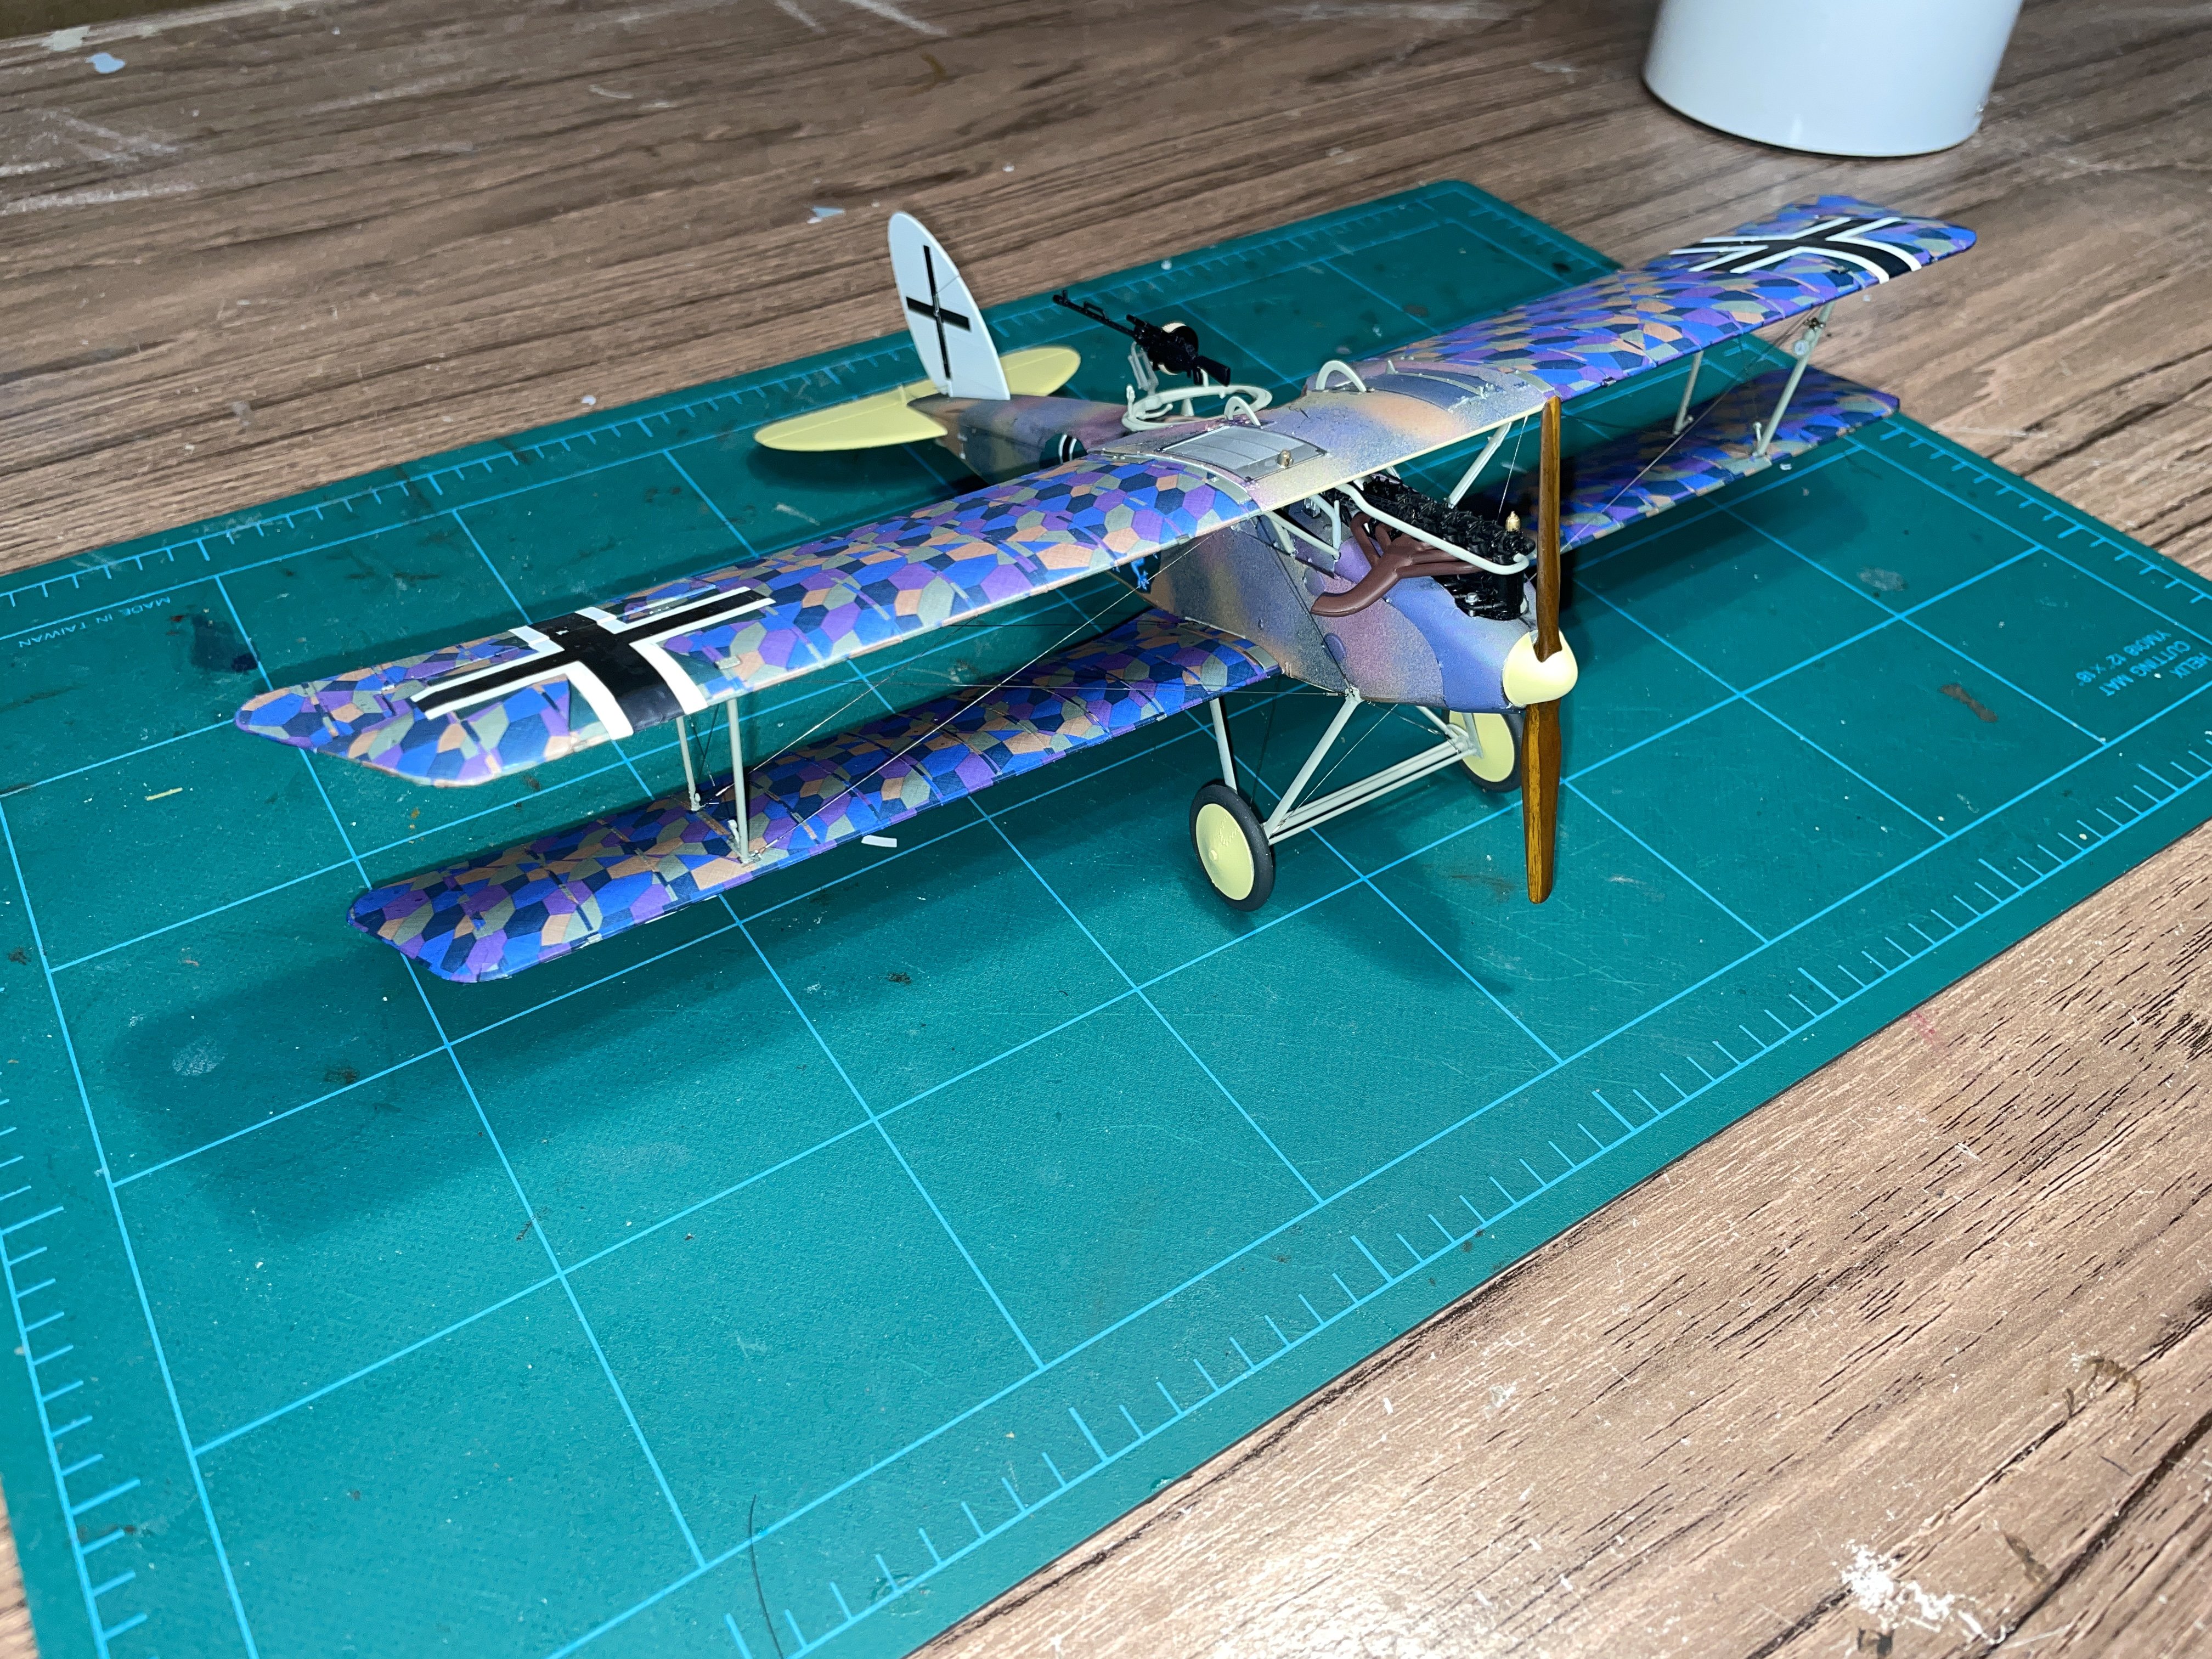
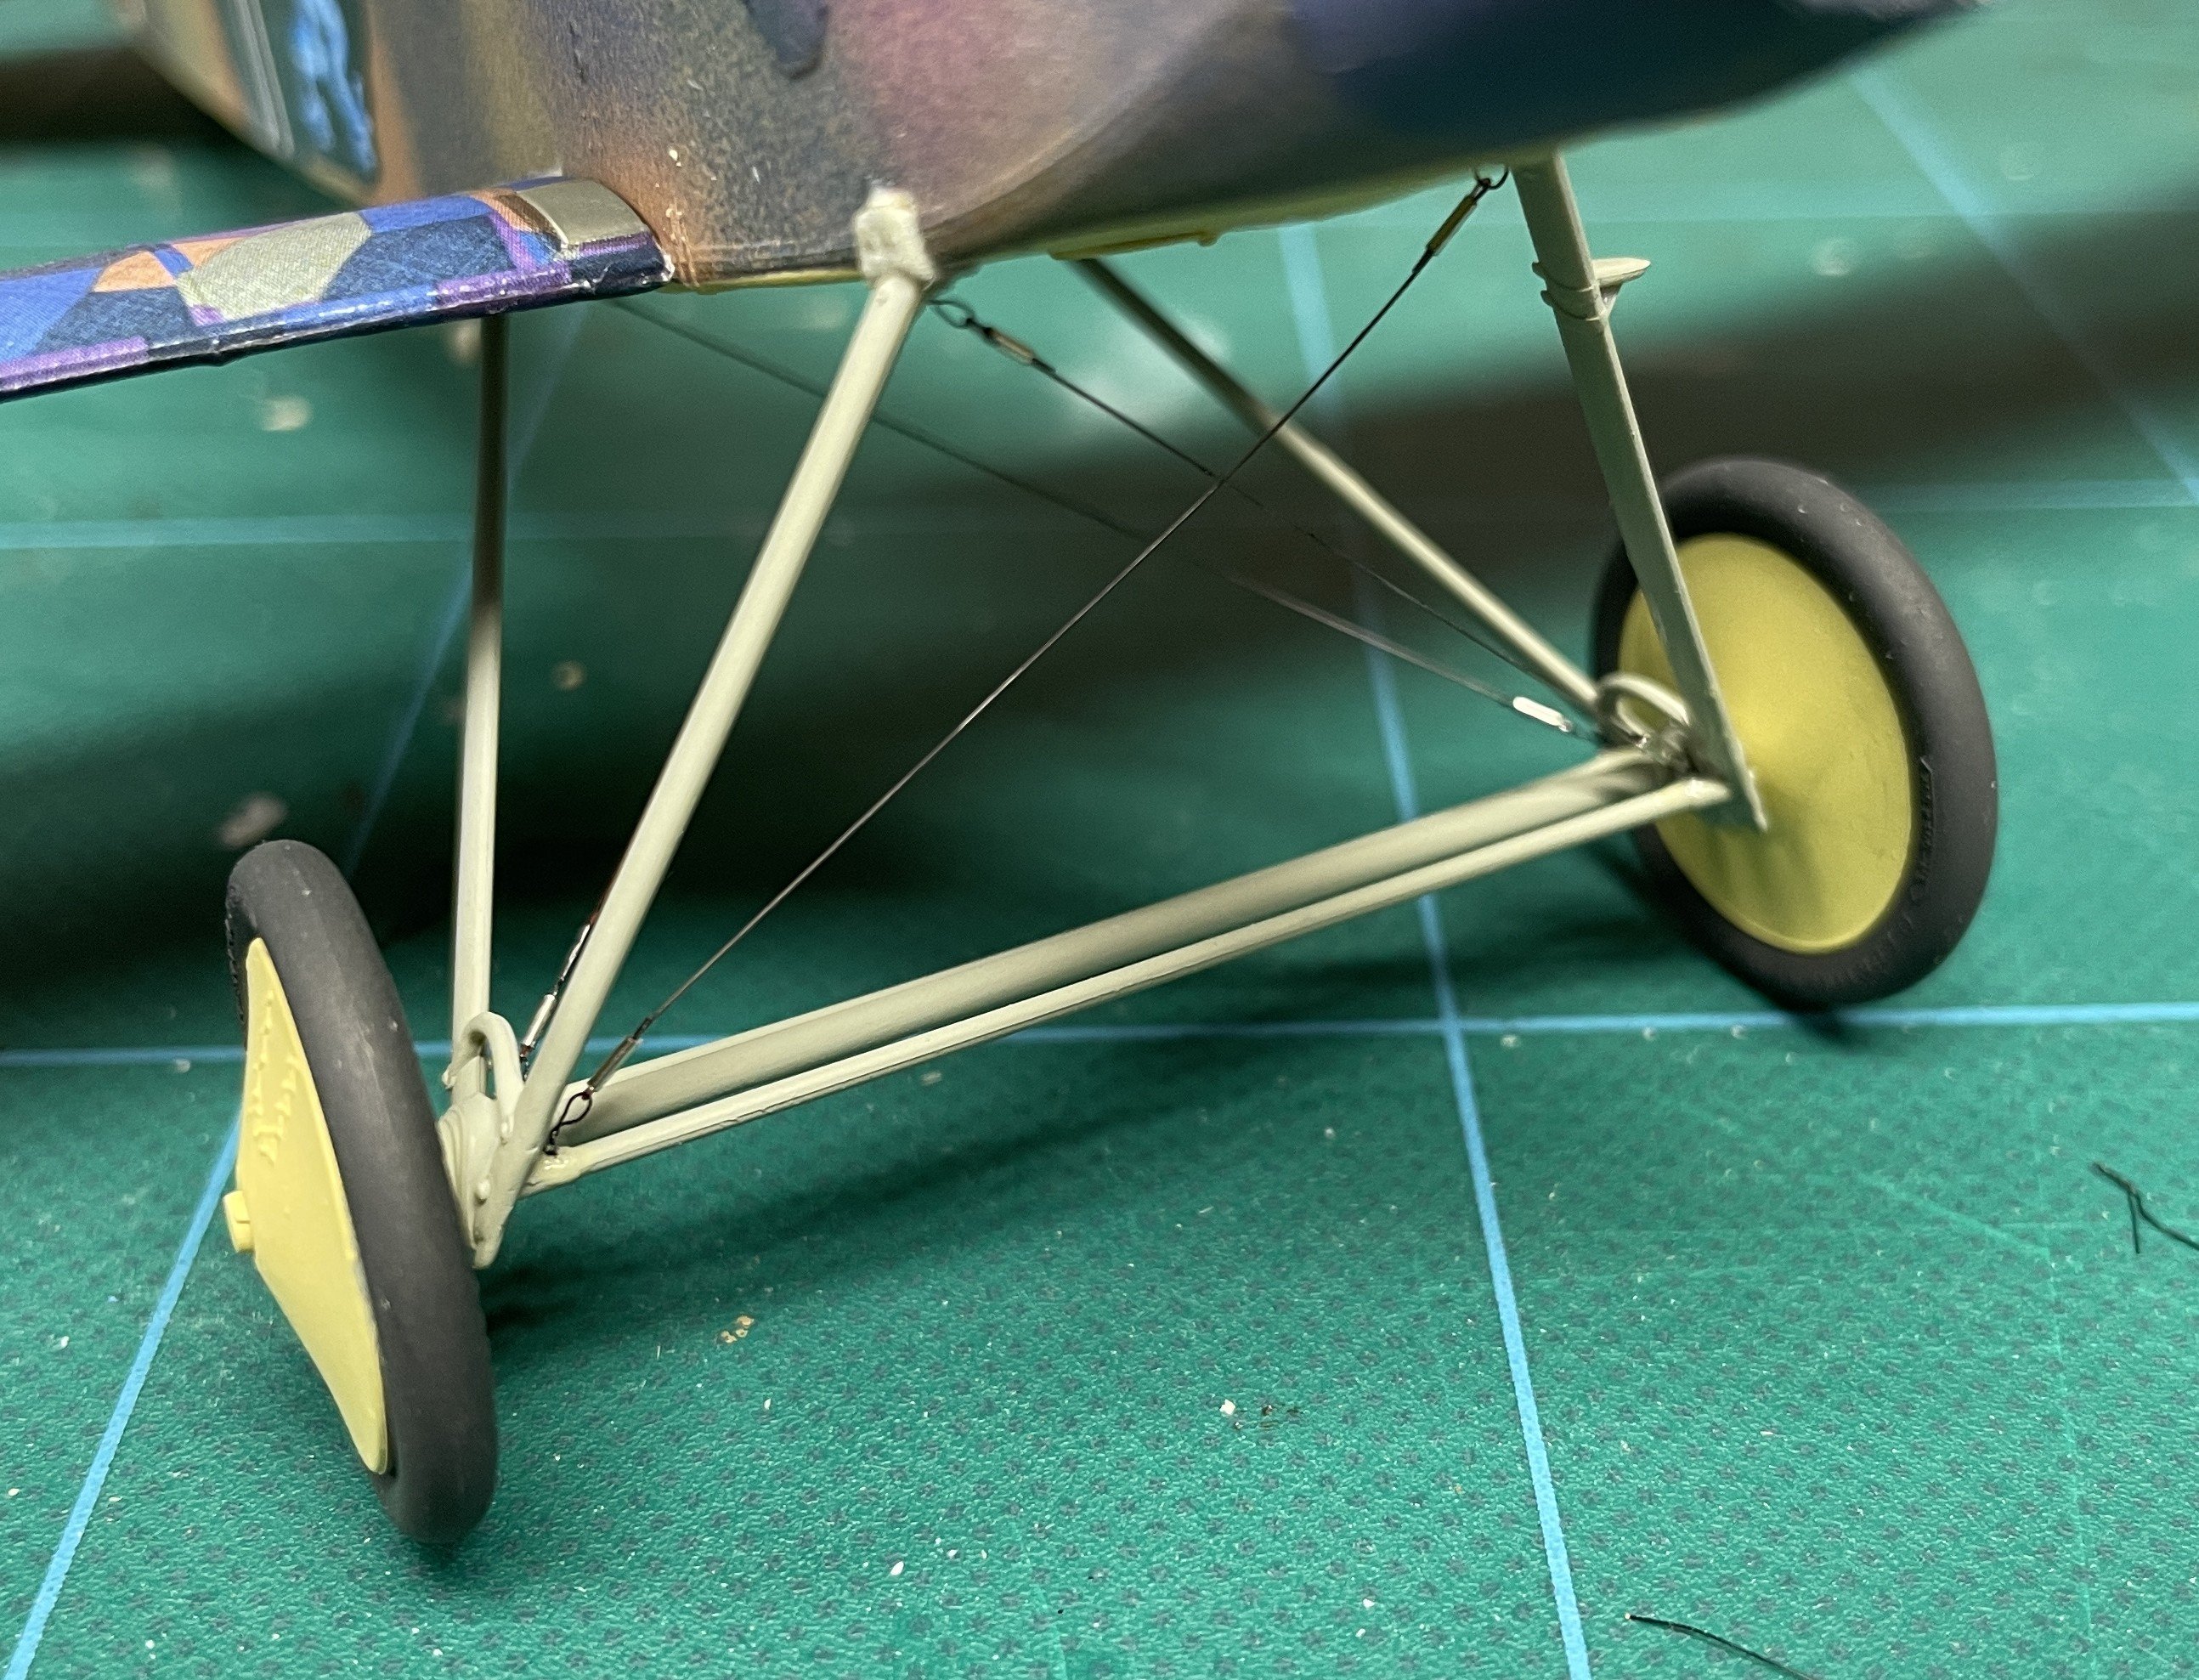
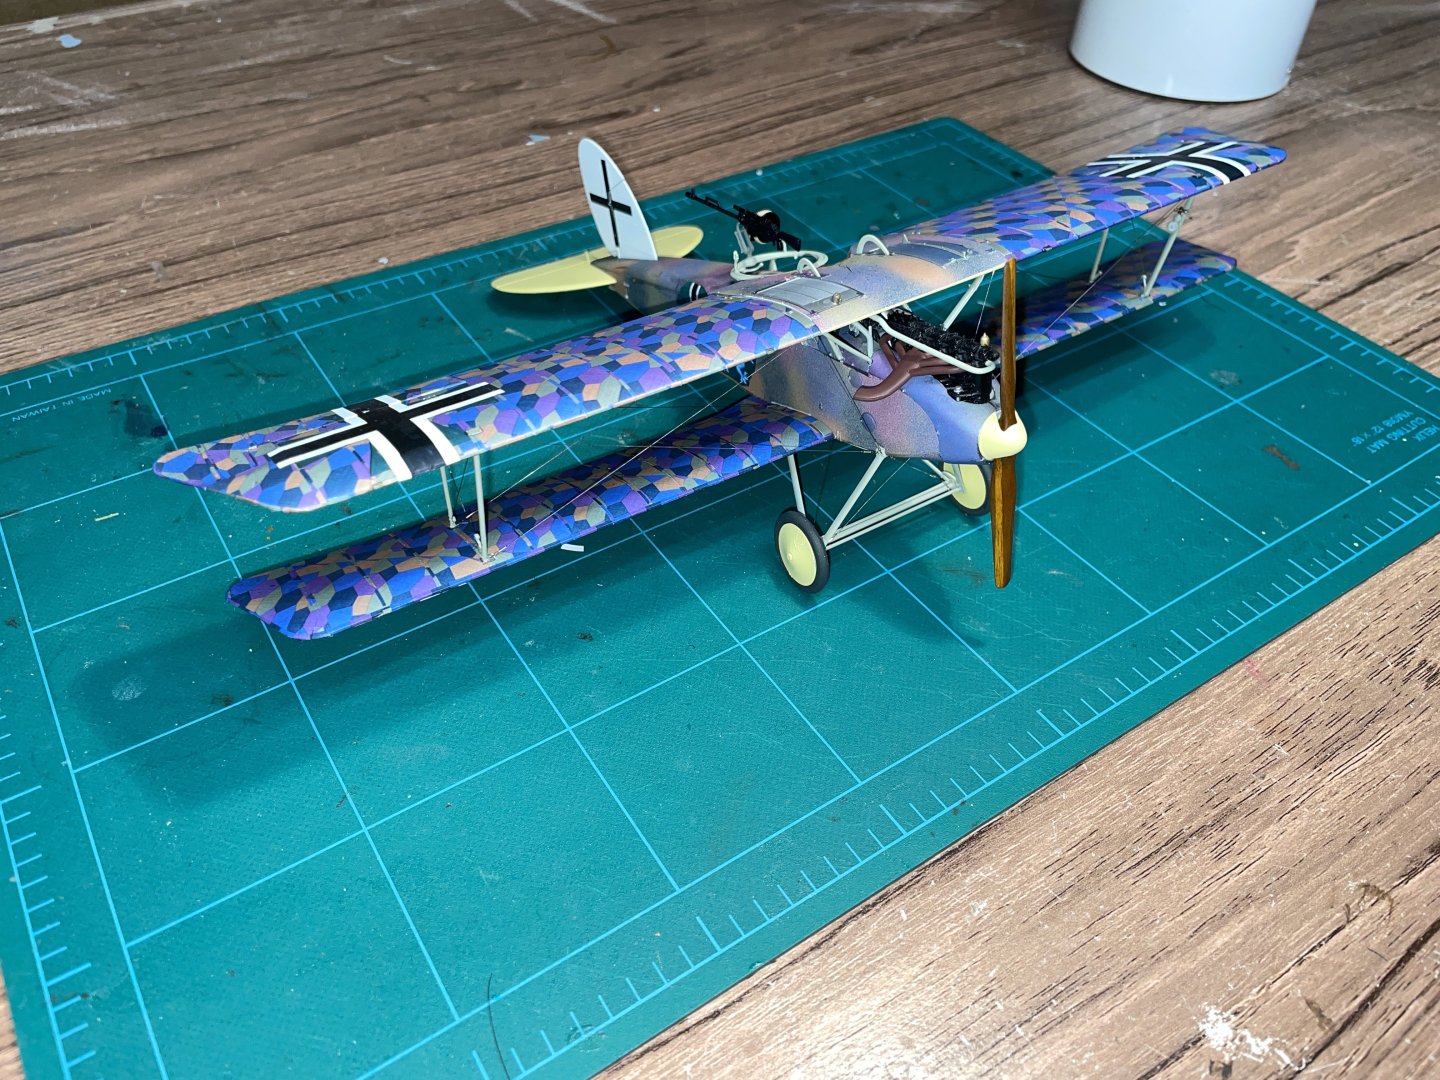
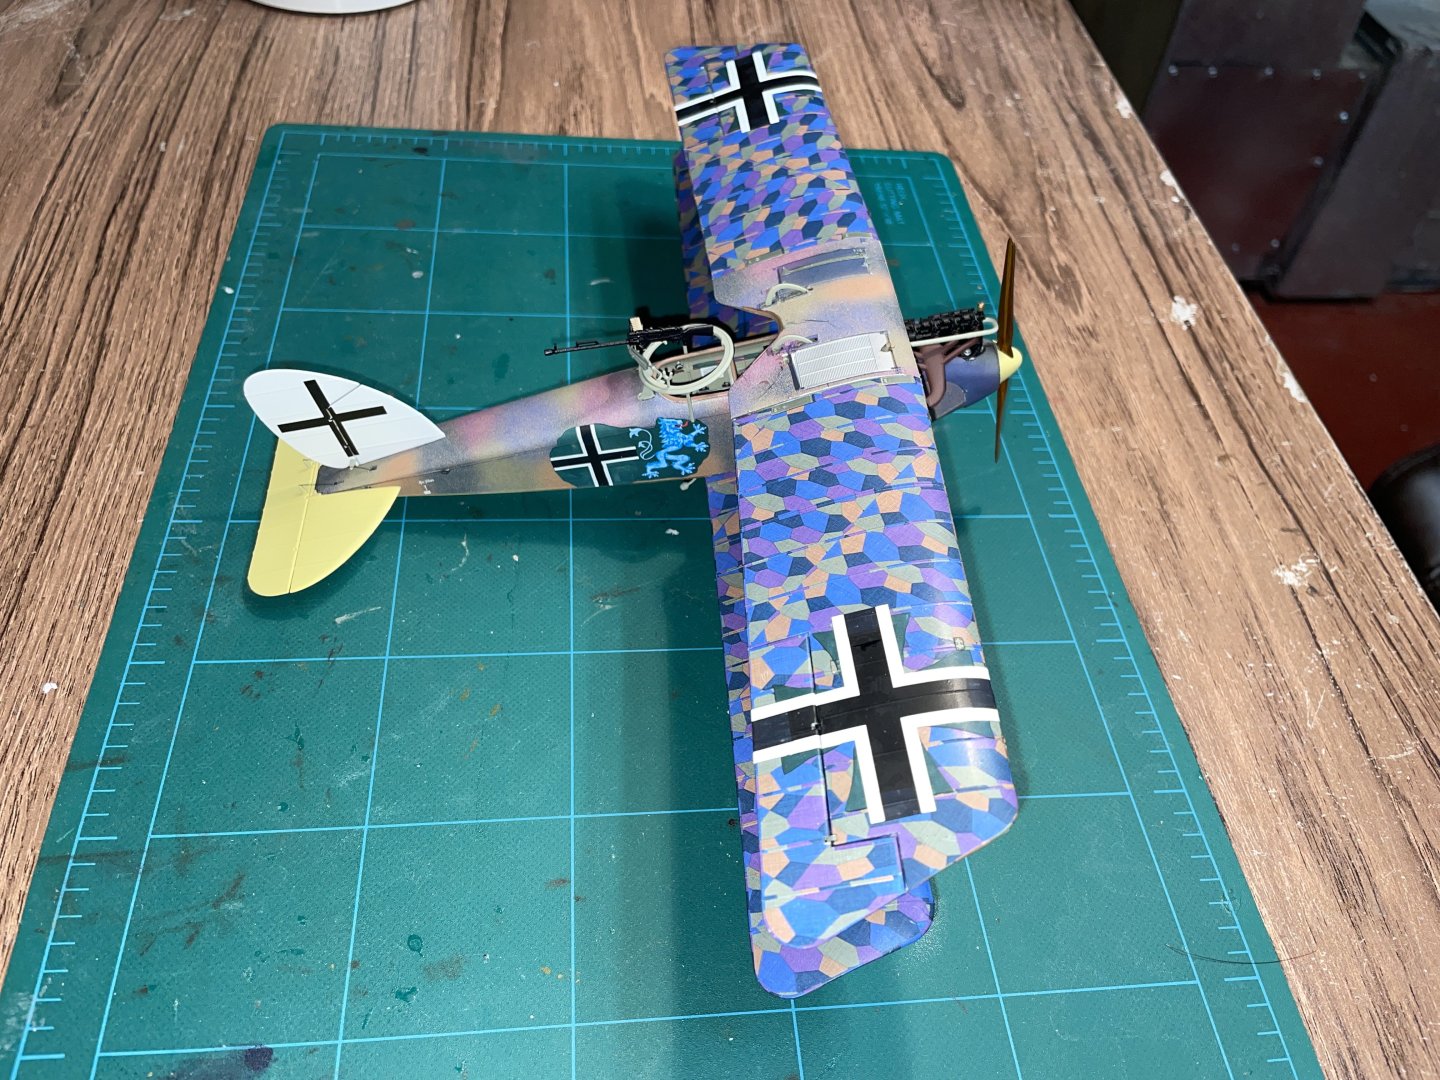
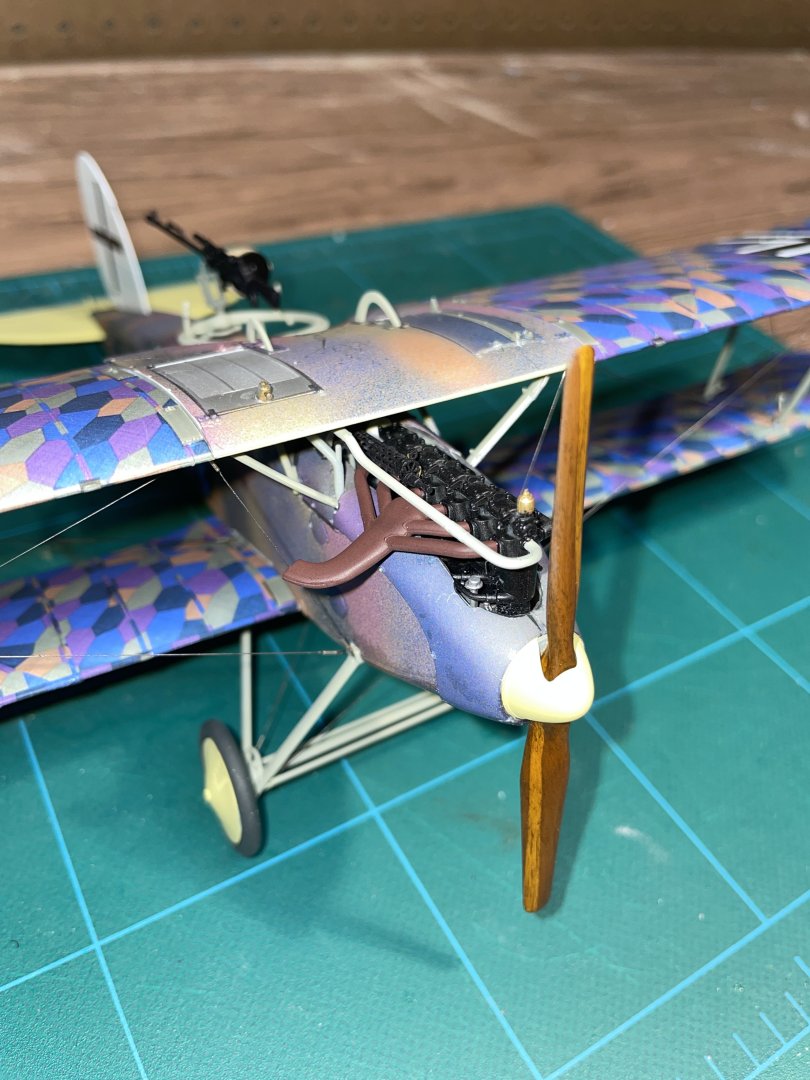
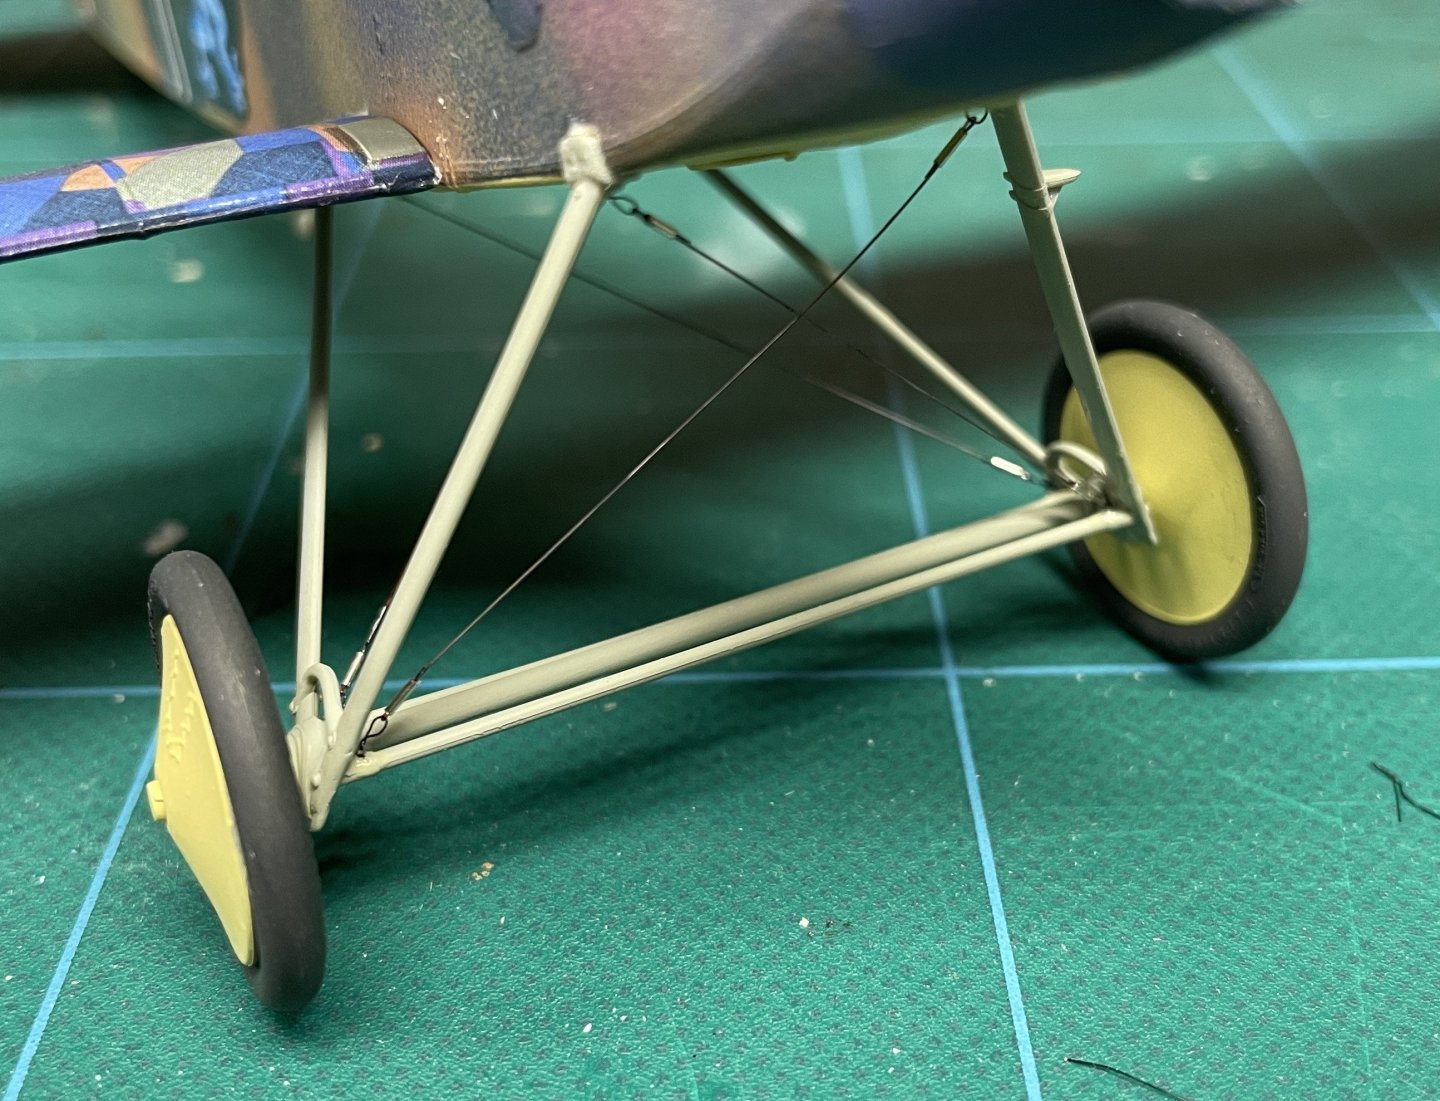
I've added landing gear and rigging. I can't remember where on this site I read about using a .35 mm drill to clean the ends of the microtubing after passing a .3 mm drill through it, but I am very grateful to whoever suggested it. It turned threading the fishing line through the tube from almost impossible to just a little bit tedious. I also added the other pieces to the bottom of the plane. After knocking the upper wing loose a few times, the repetitive reattachment of the struts led to it being pretty crooked. I was able to break the glue joints where the struts met the fuselage and realign them. I'm hoping with a little touch up and clear flat the areas where they were reattached and the decals were disturbed won't be too distracting. The build has had a series of frustrations, but I'm glad I've kept working on it. It's beginning to look like an airplane and the color and camouflage overall effect is pretty good.
- 40 replies
-
- 15
-
-
-
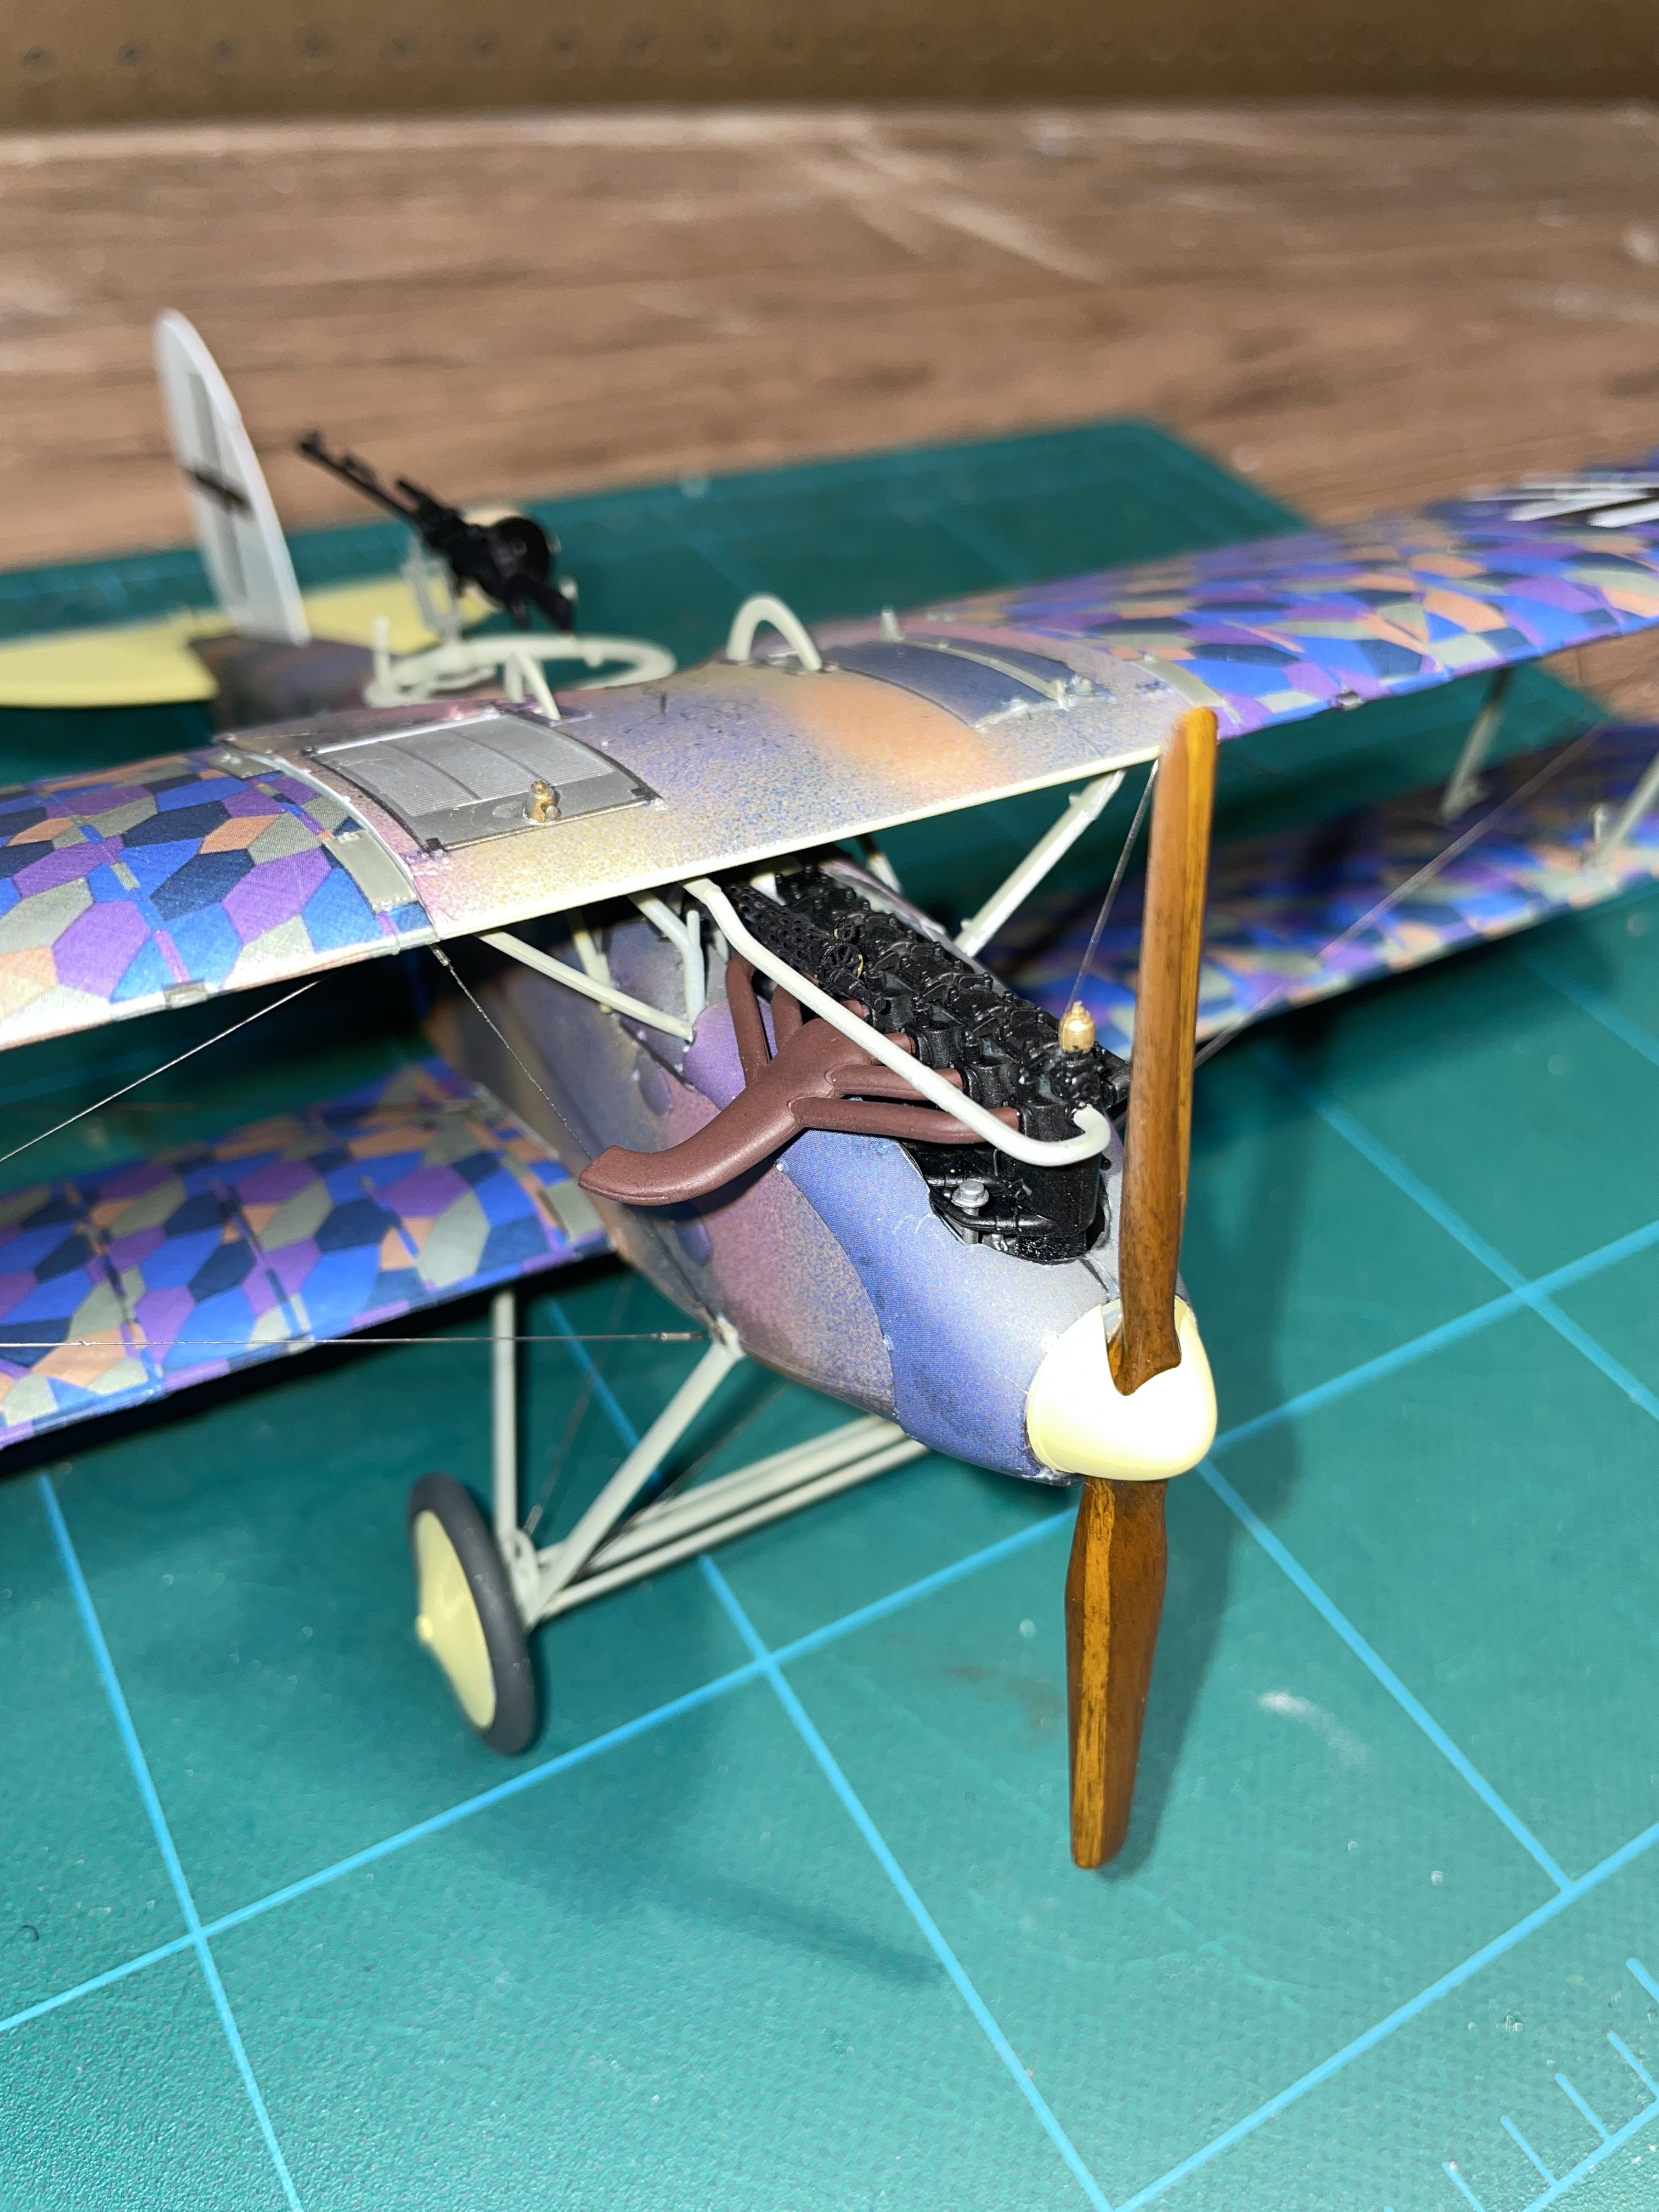
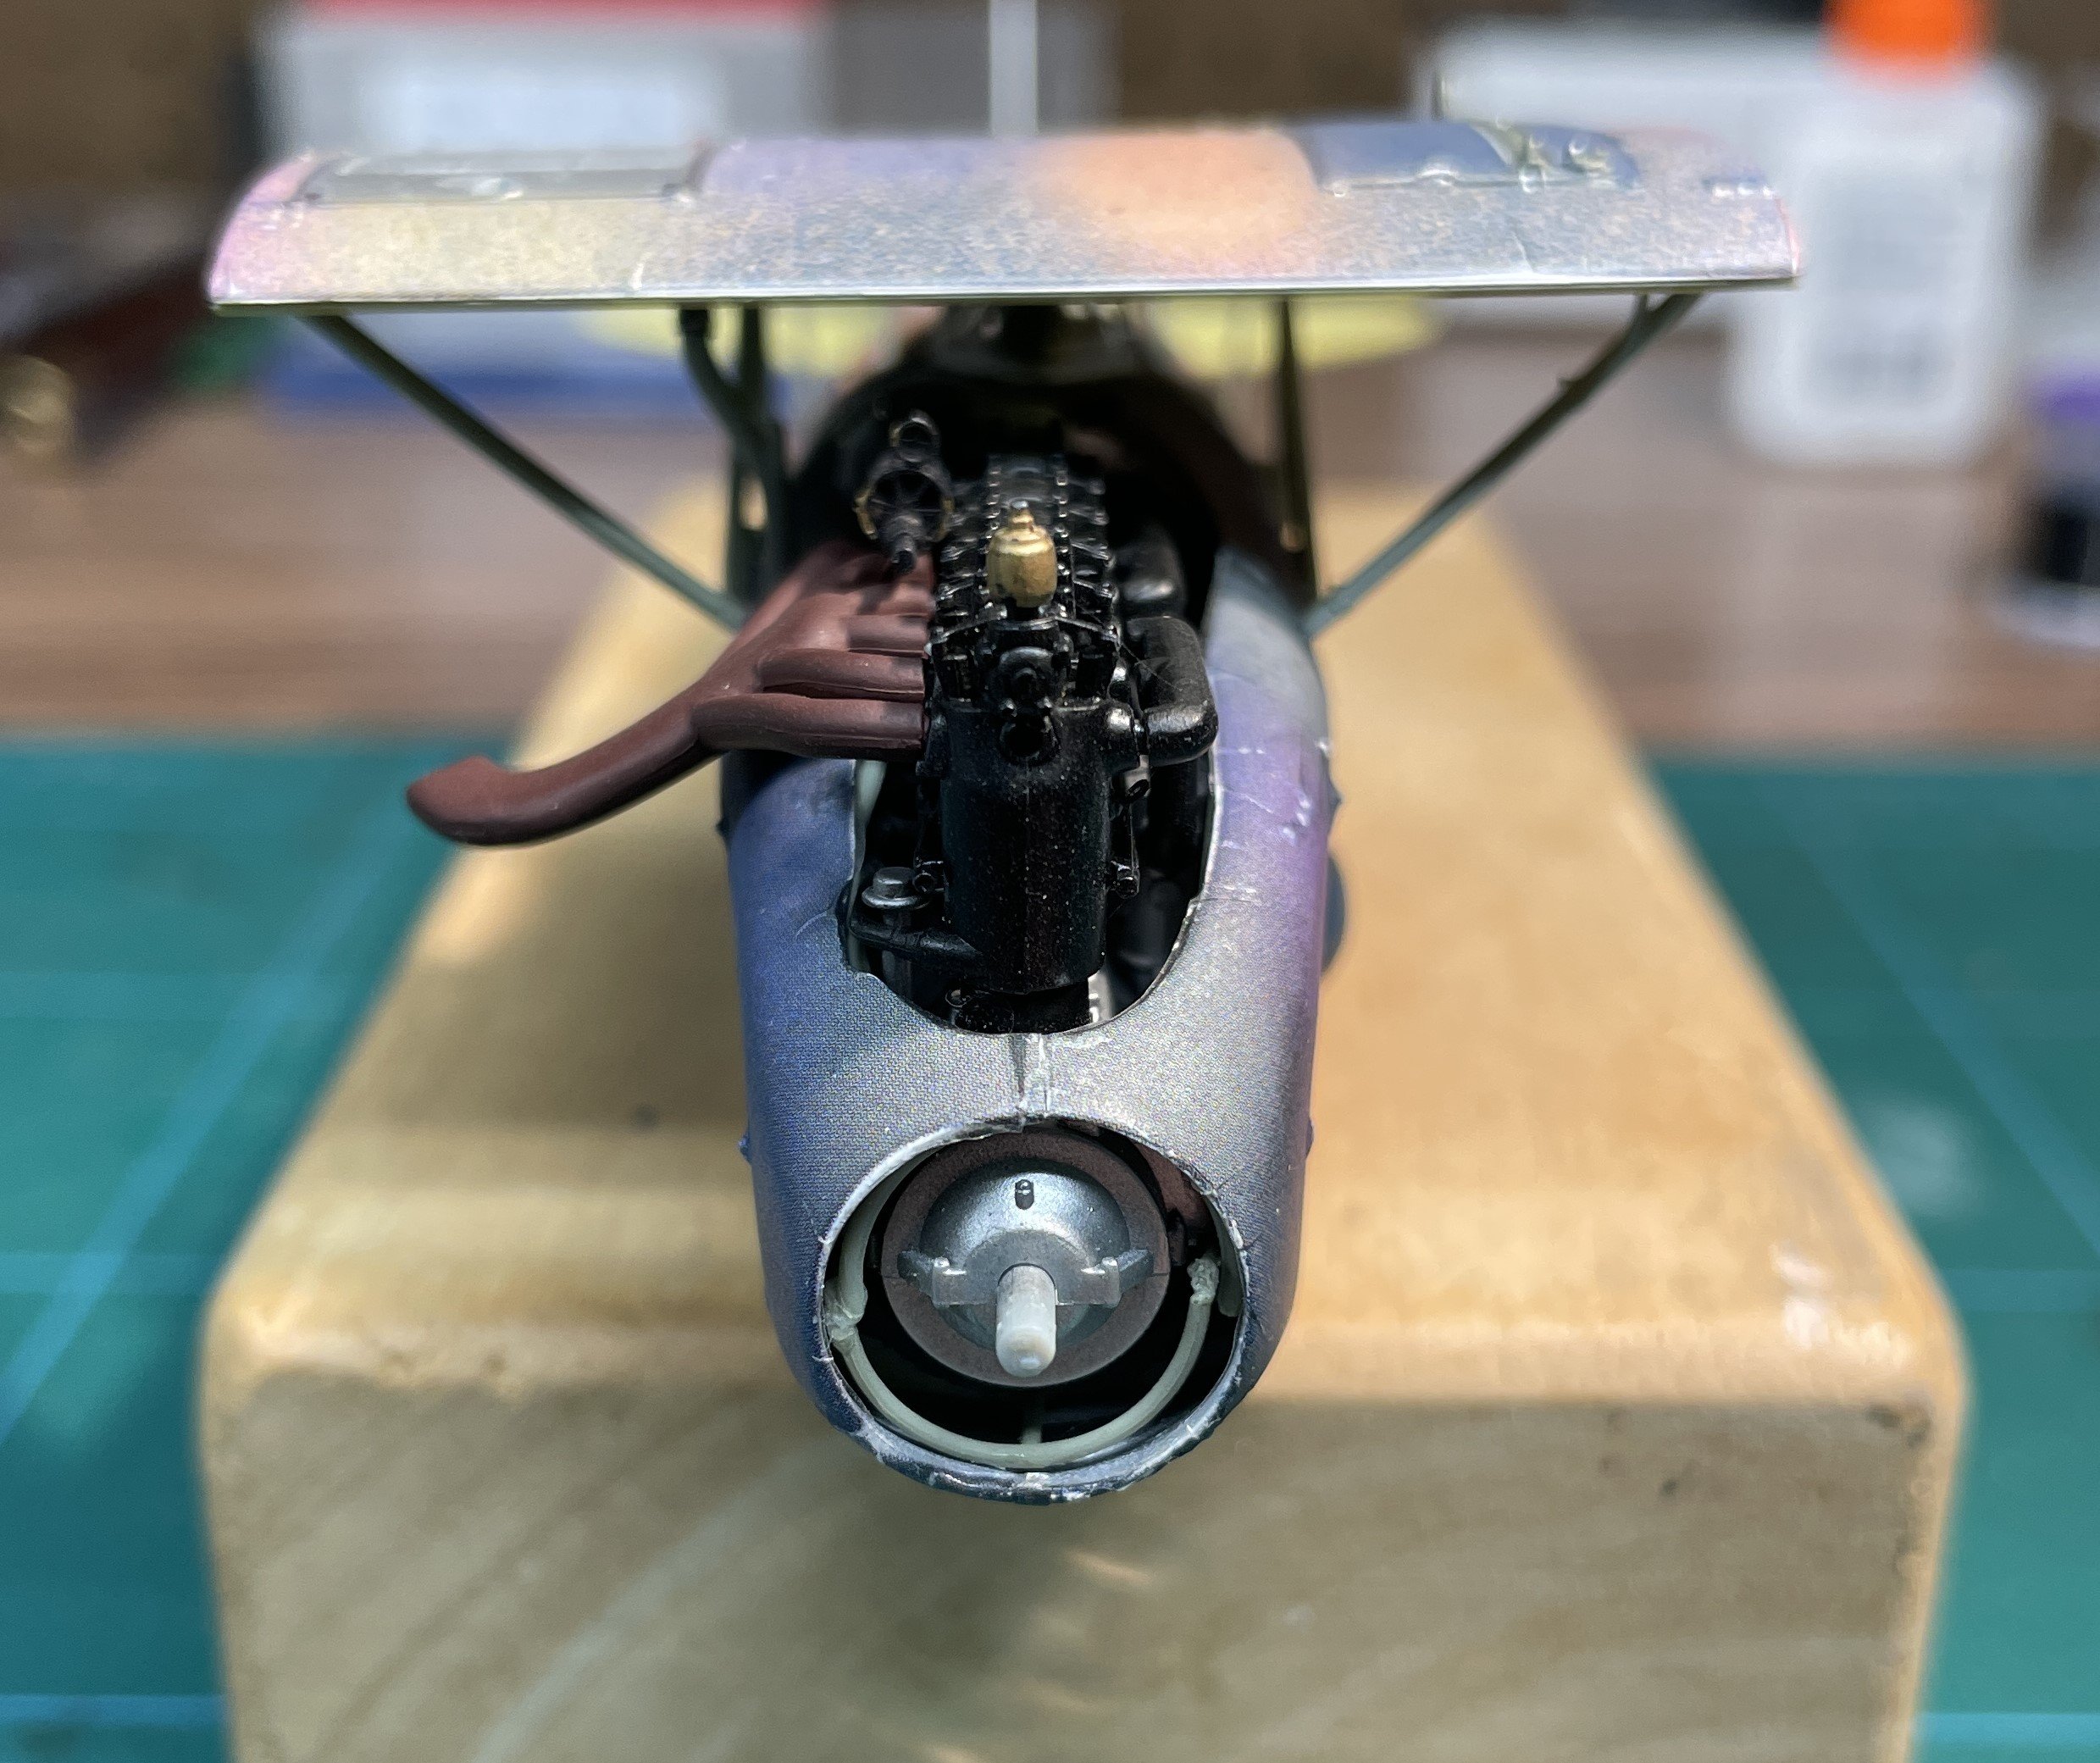
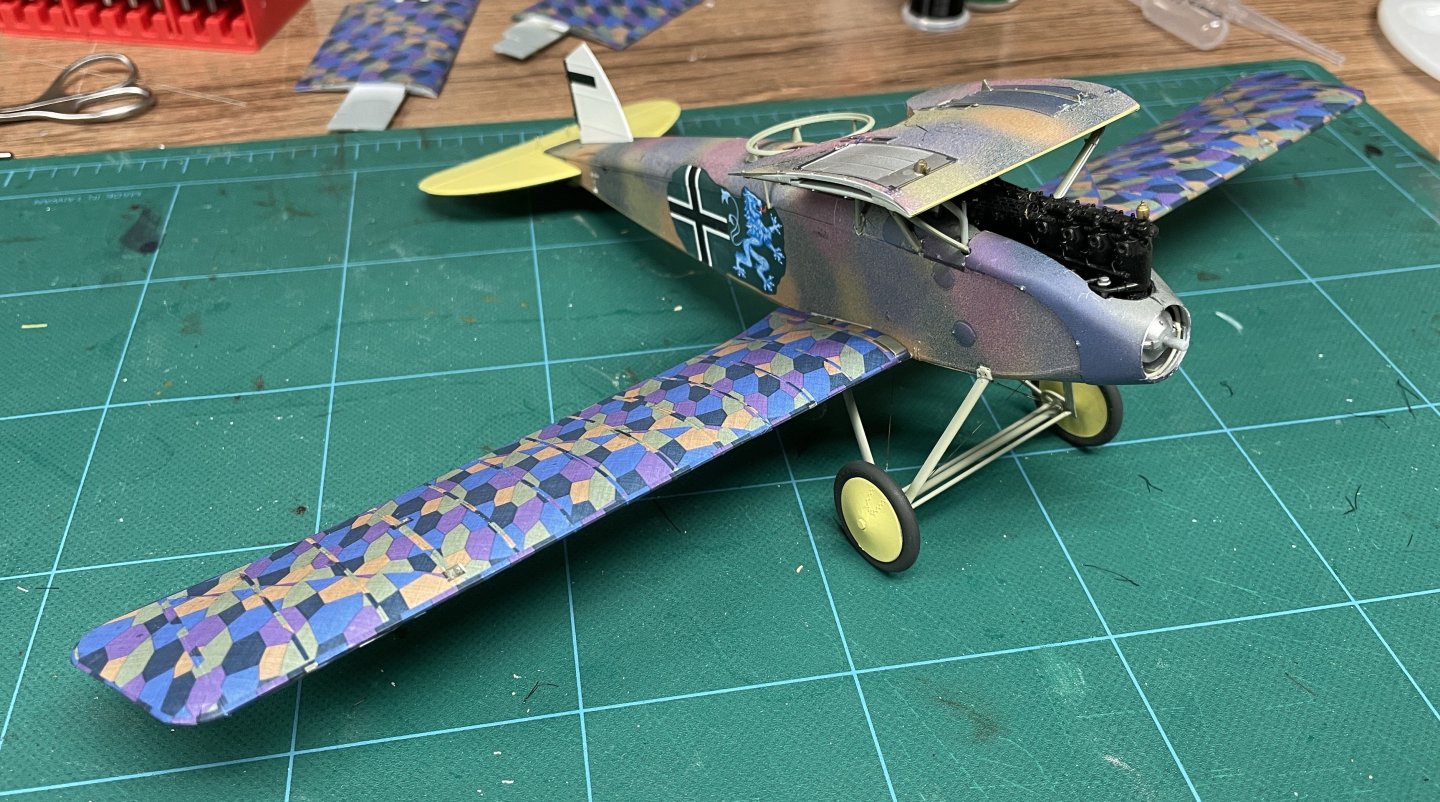
Windscreen, exhaust, and upper mid wing section added. This was the last part I anticipated problems with and it went OK. I'm glad I added the midsection before assembling the rest of the upper wing. It was a lot easier to manage aligning all the struts. When I took the picture I saw a band of exposed primer that I missed on the leading edge of the wing. I'll paint it the same color as the bottom of the wing. I just need to be really careful that the masking doesn't lift the decal.

- 40 replies
-
- 13
-
-
She came out great! Congratulations on finishing!
- 39 replies
-
- 1
-
-
- Norwegian Sailing Pram
- Model Shipways
- (and 1 more)
-
Quality does sometimes come up on ebay. I watched for a while before the Grobet set I wanted came up for auction. It wasn't cheap, but it was a lot less than buying new.
-
Thanks everyone for the likes and the comments. I really appreciate them. Robert - next up is finishing the two projects I have on the bench (longboat and Halberstadt airplane). The Halberstadt is close. Once I finish the longboat, I will start the fully framed Echo that I have been planning for a few years. Thanks! Dave
- 32 replies
-
- 6
-
-
- Grand Banks Dory
- Model Shipways
- (and 2 more)
-
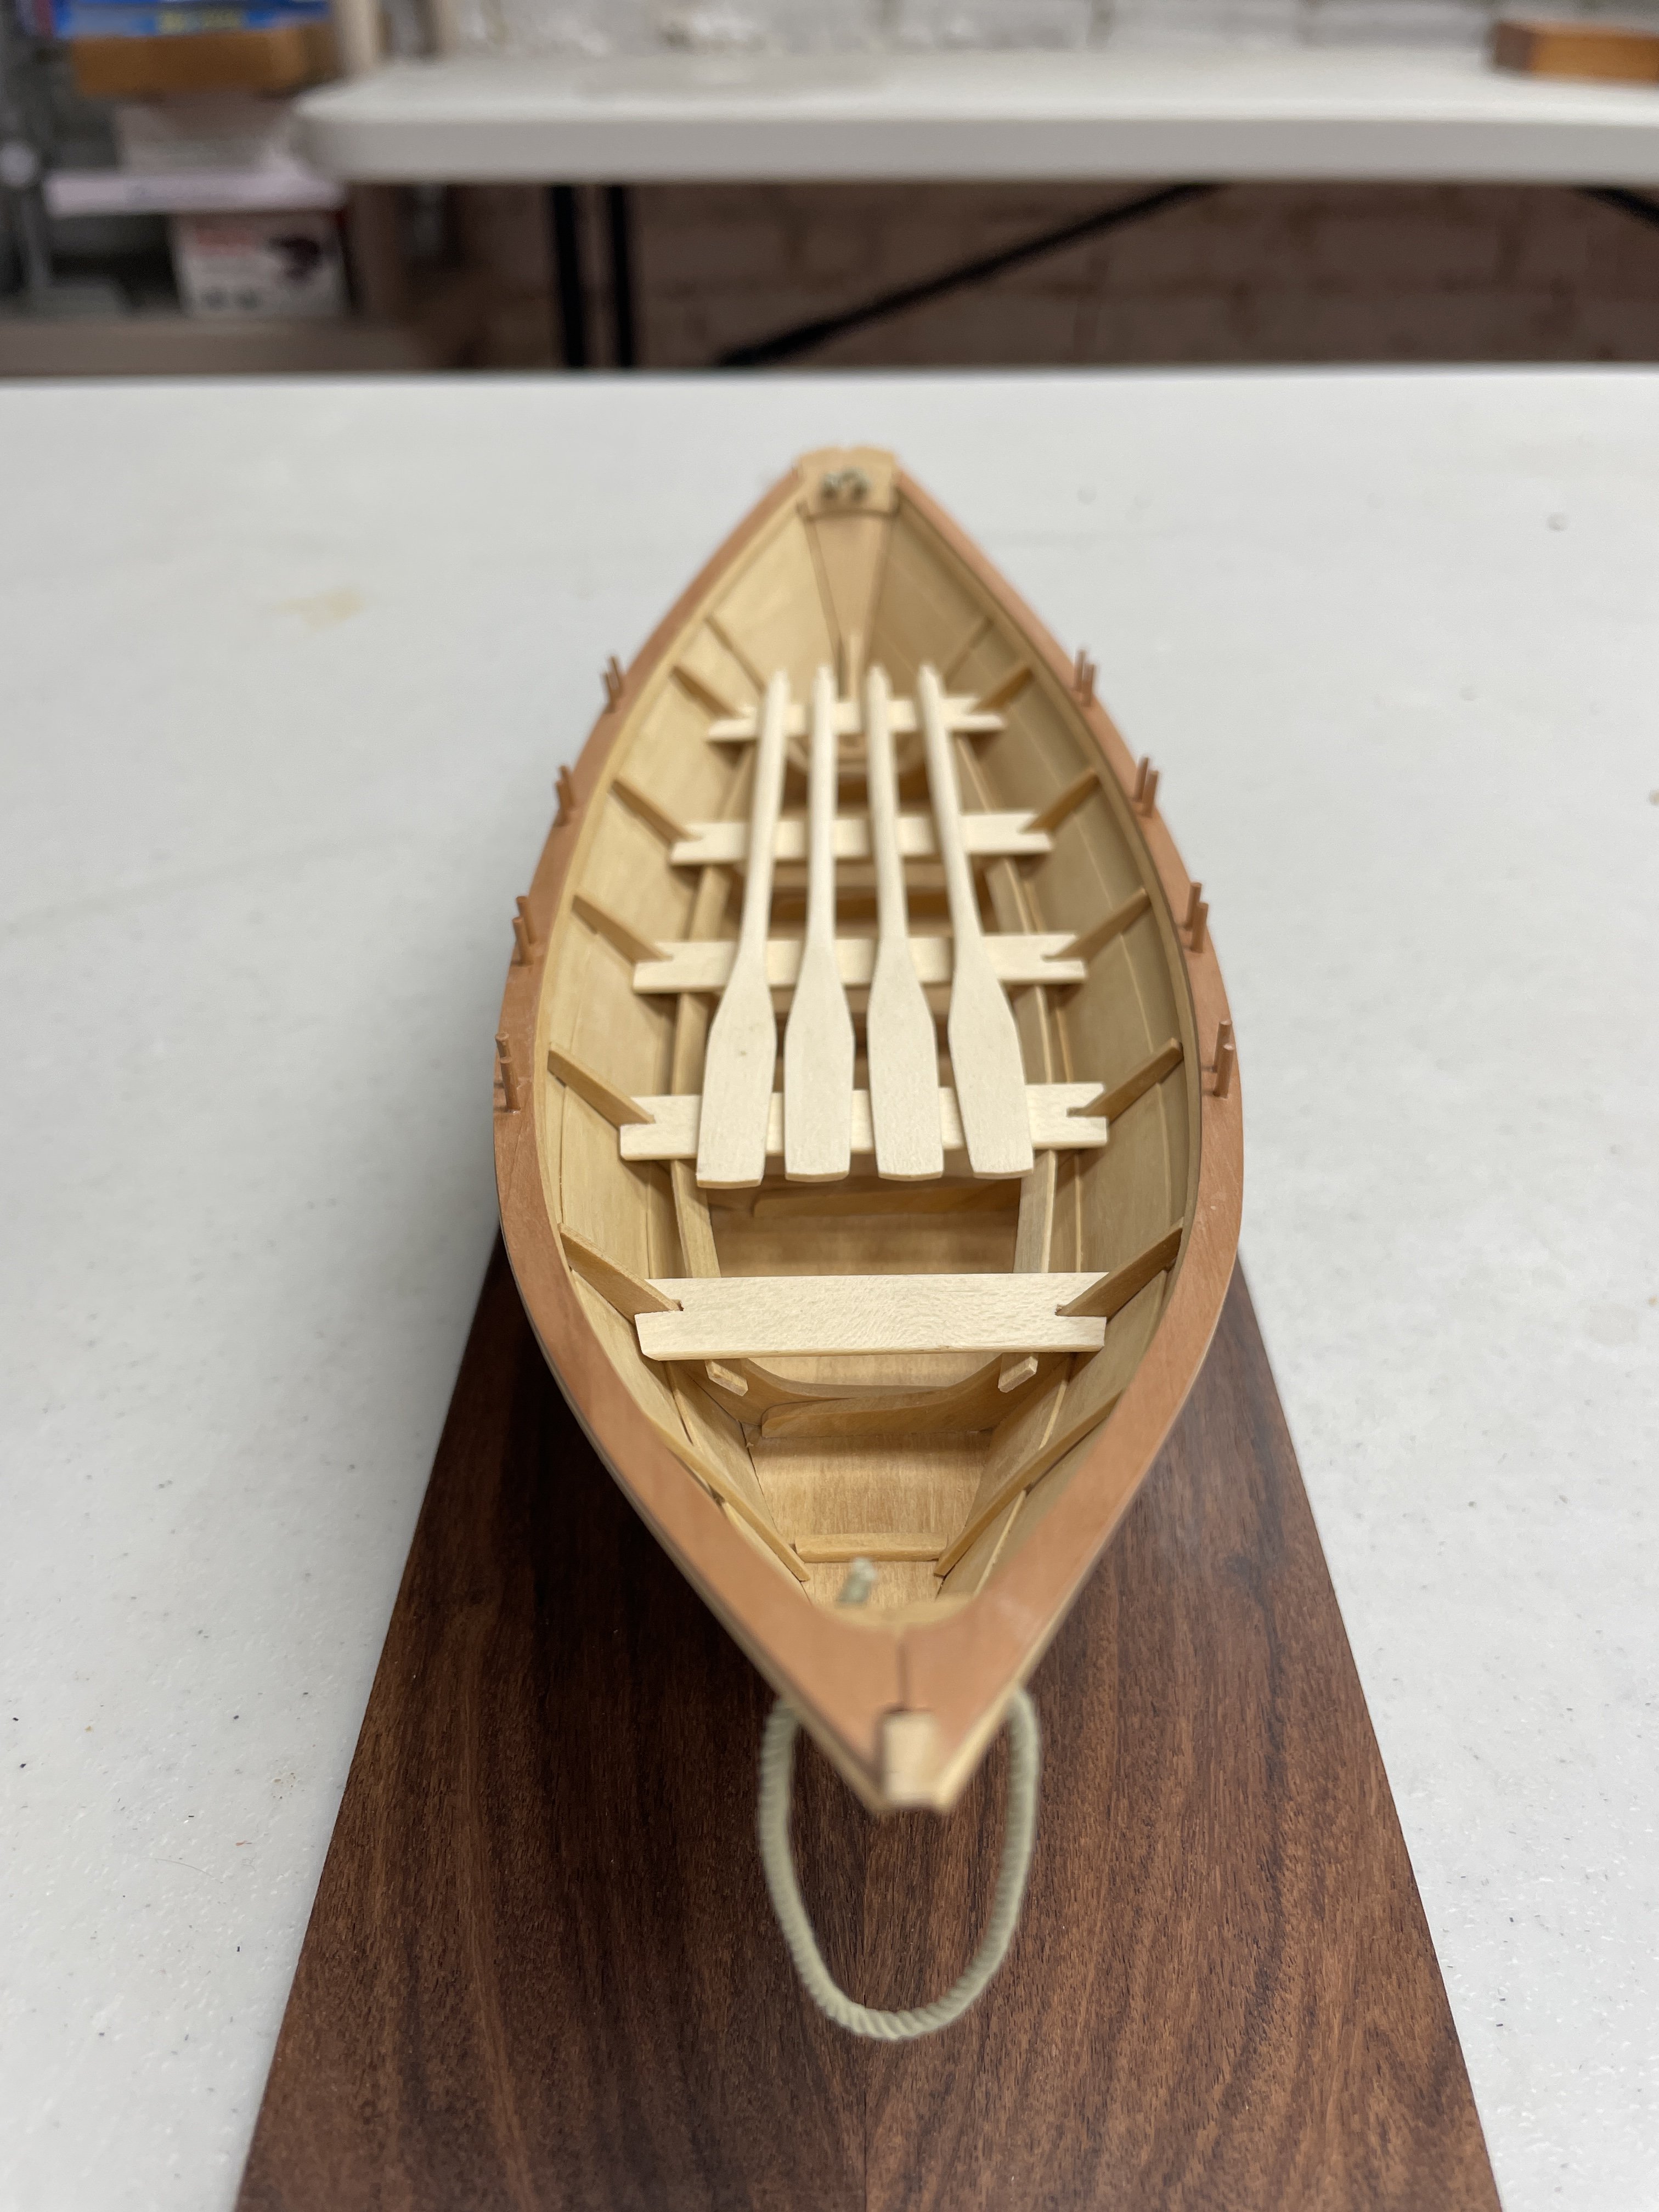
The decal issues are touched up as well as I can do and I’m moving ahead to finish the model. I’ve added the kit decals, applied micro crystal clear to the lenses, done more touch up, attached the rudder and a few other parts, and sprayed everything clear flat. I also spent an evening twisting 40 eyelets for the rigging. The cartograph decals felt much different than the aviatic ones – much thicker and took longer to soak before they were workable. It was a lot easier to deal with the smaller decals.

- 40 replies
-
- 12
-
-
-
I just wanted to second Druxey's escapement file recommendation. I bought a set on ebay for my model ships and they are one of my favorite and most frequently used tools. I use them on my plastic models all the time - they can get into places that sanding sticks and regular jeweler's files can't reach.
-
Wow - beautiful build! Congratulations on finishing!
- 201 replies
-
- 5
-
-

-
- Oyster Sharpie
- first scratch build
- (and 1 more)
-
Your planking looks great!!
-
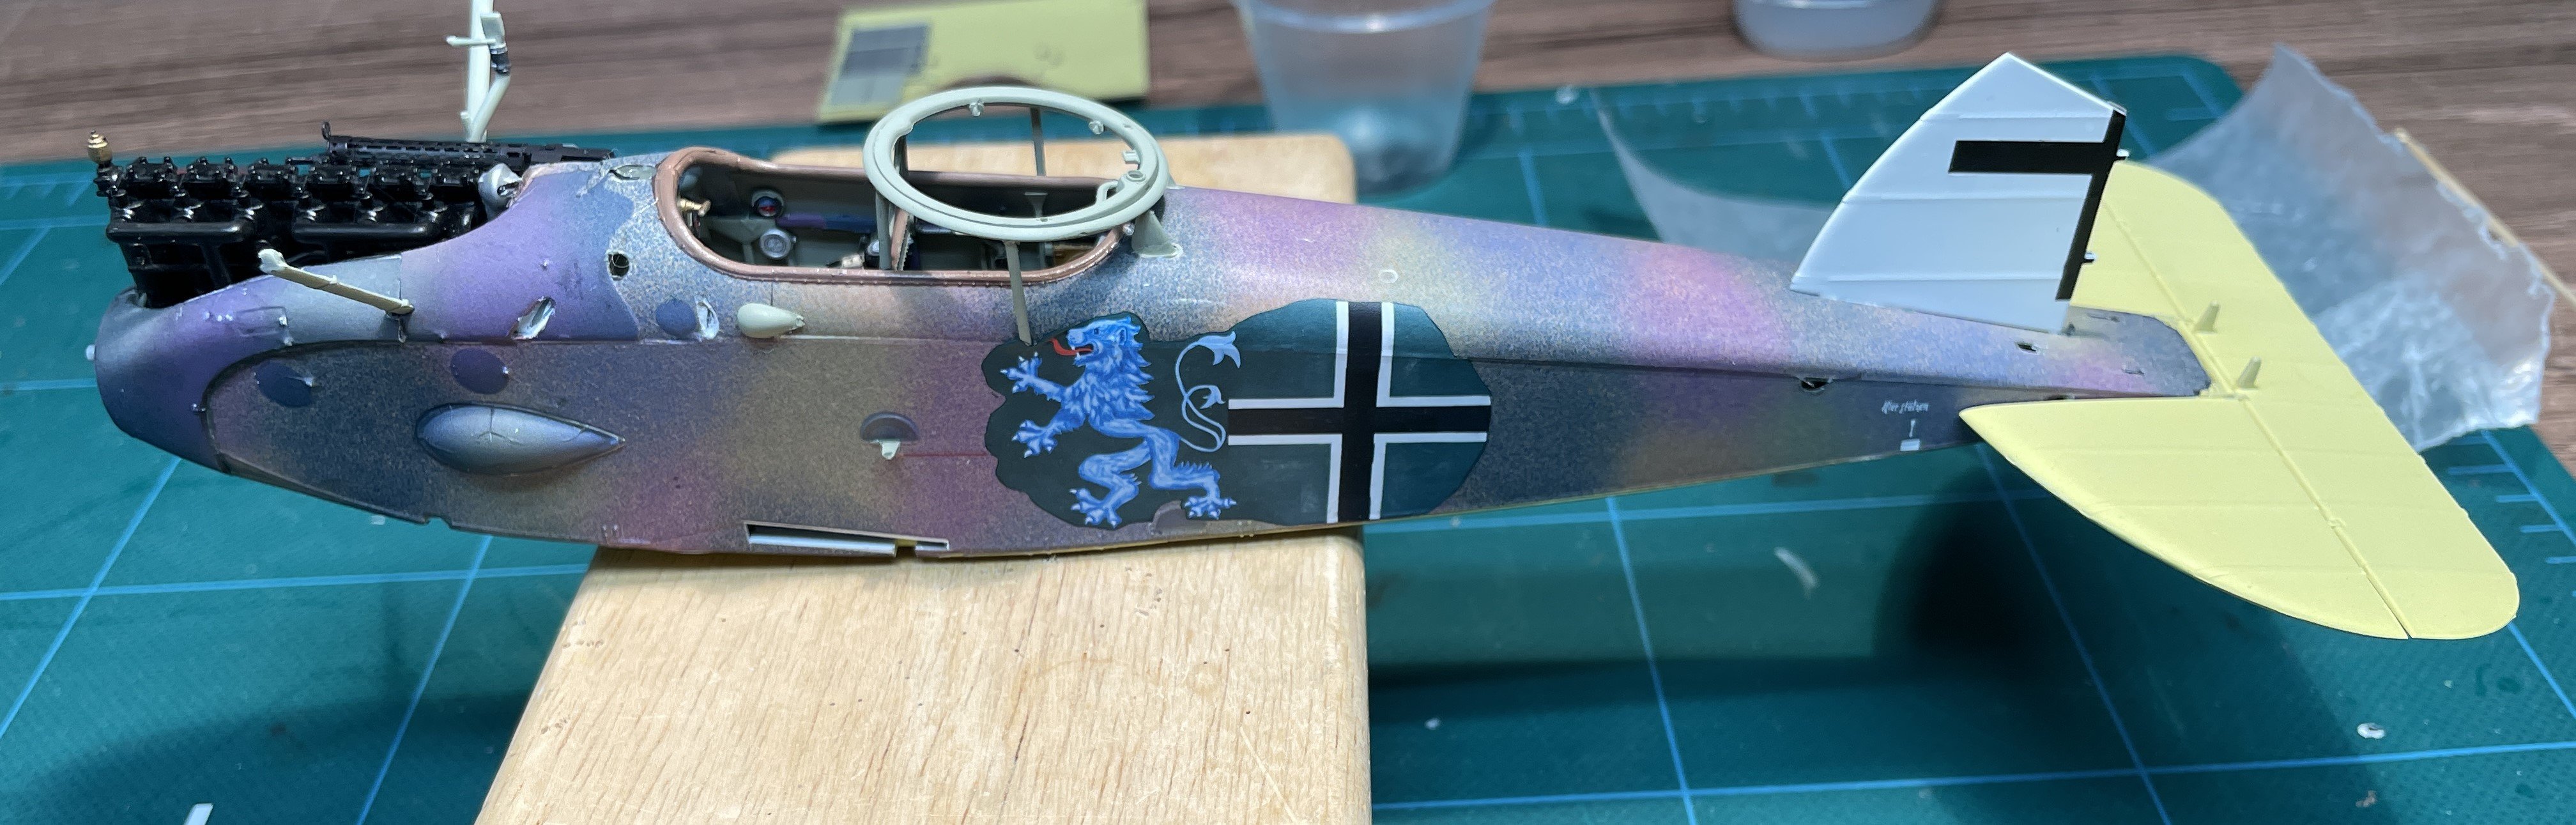
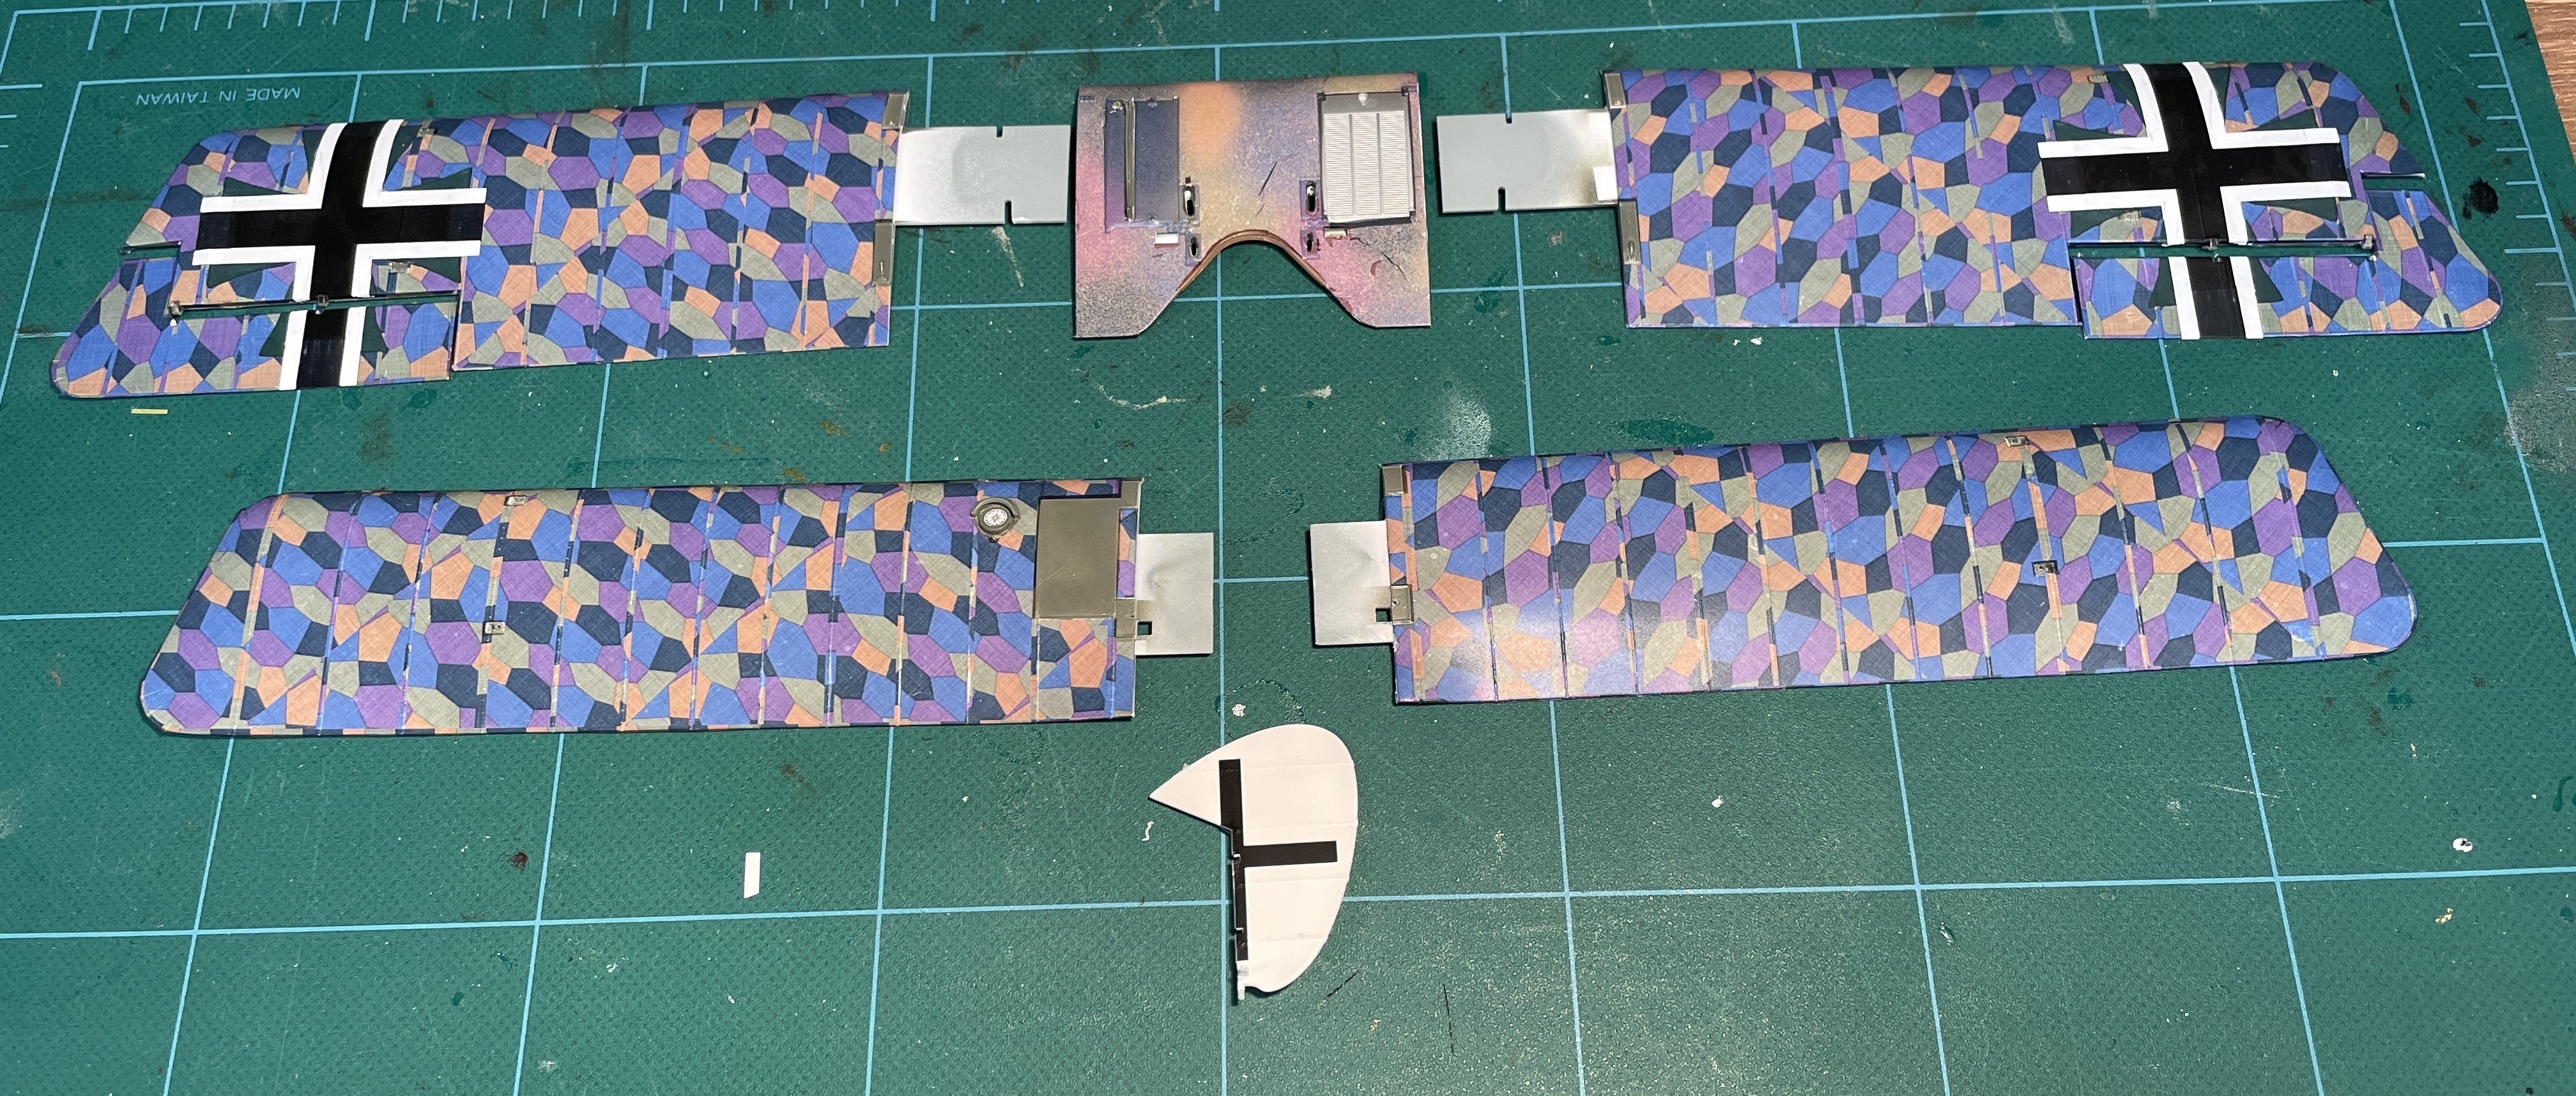
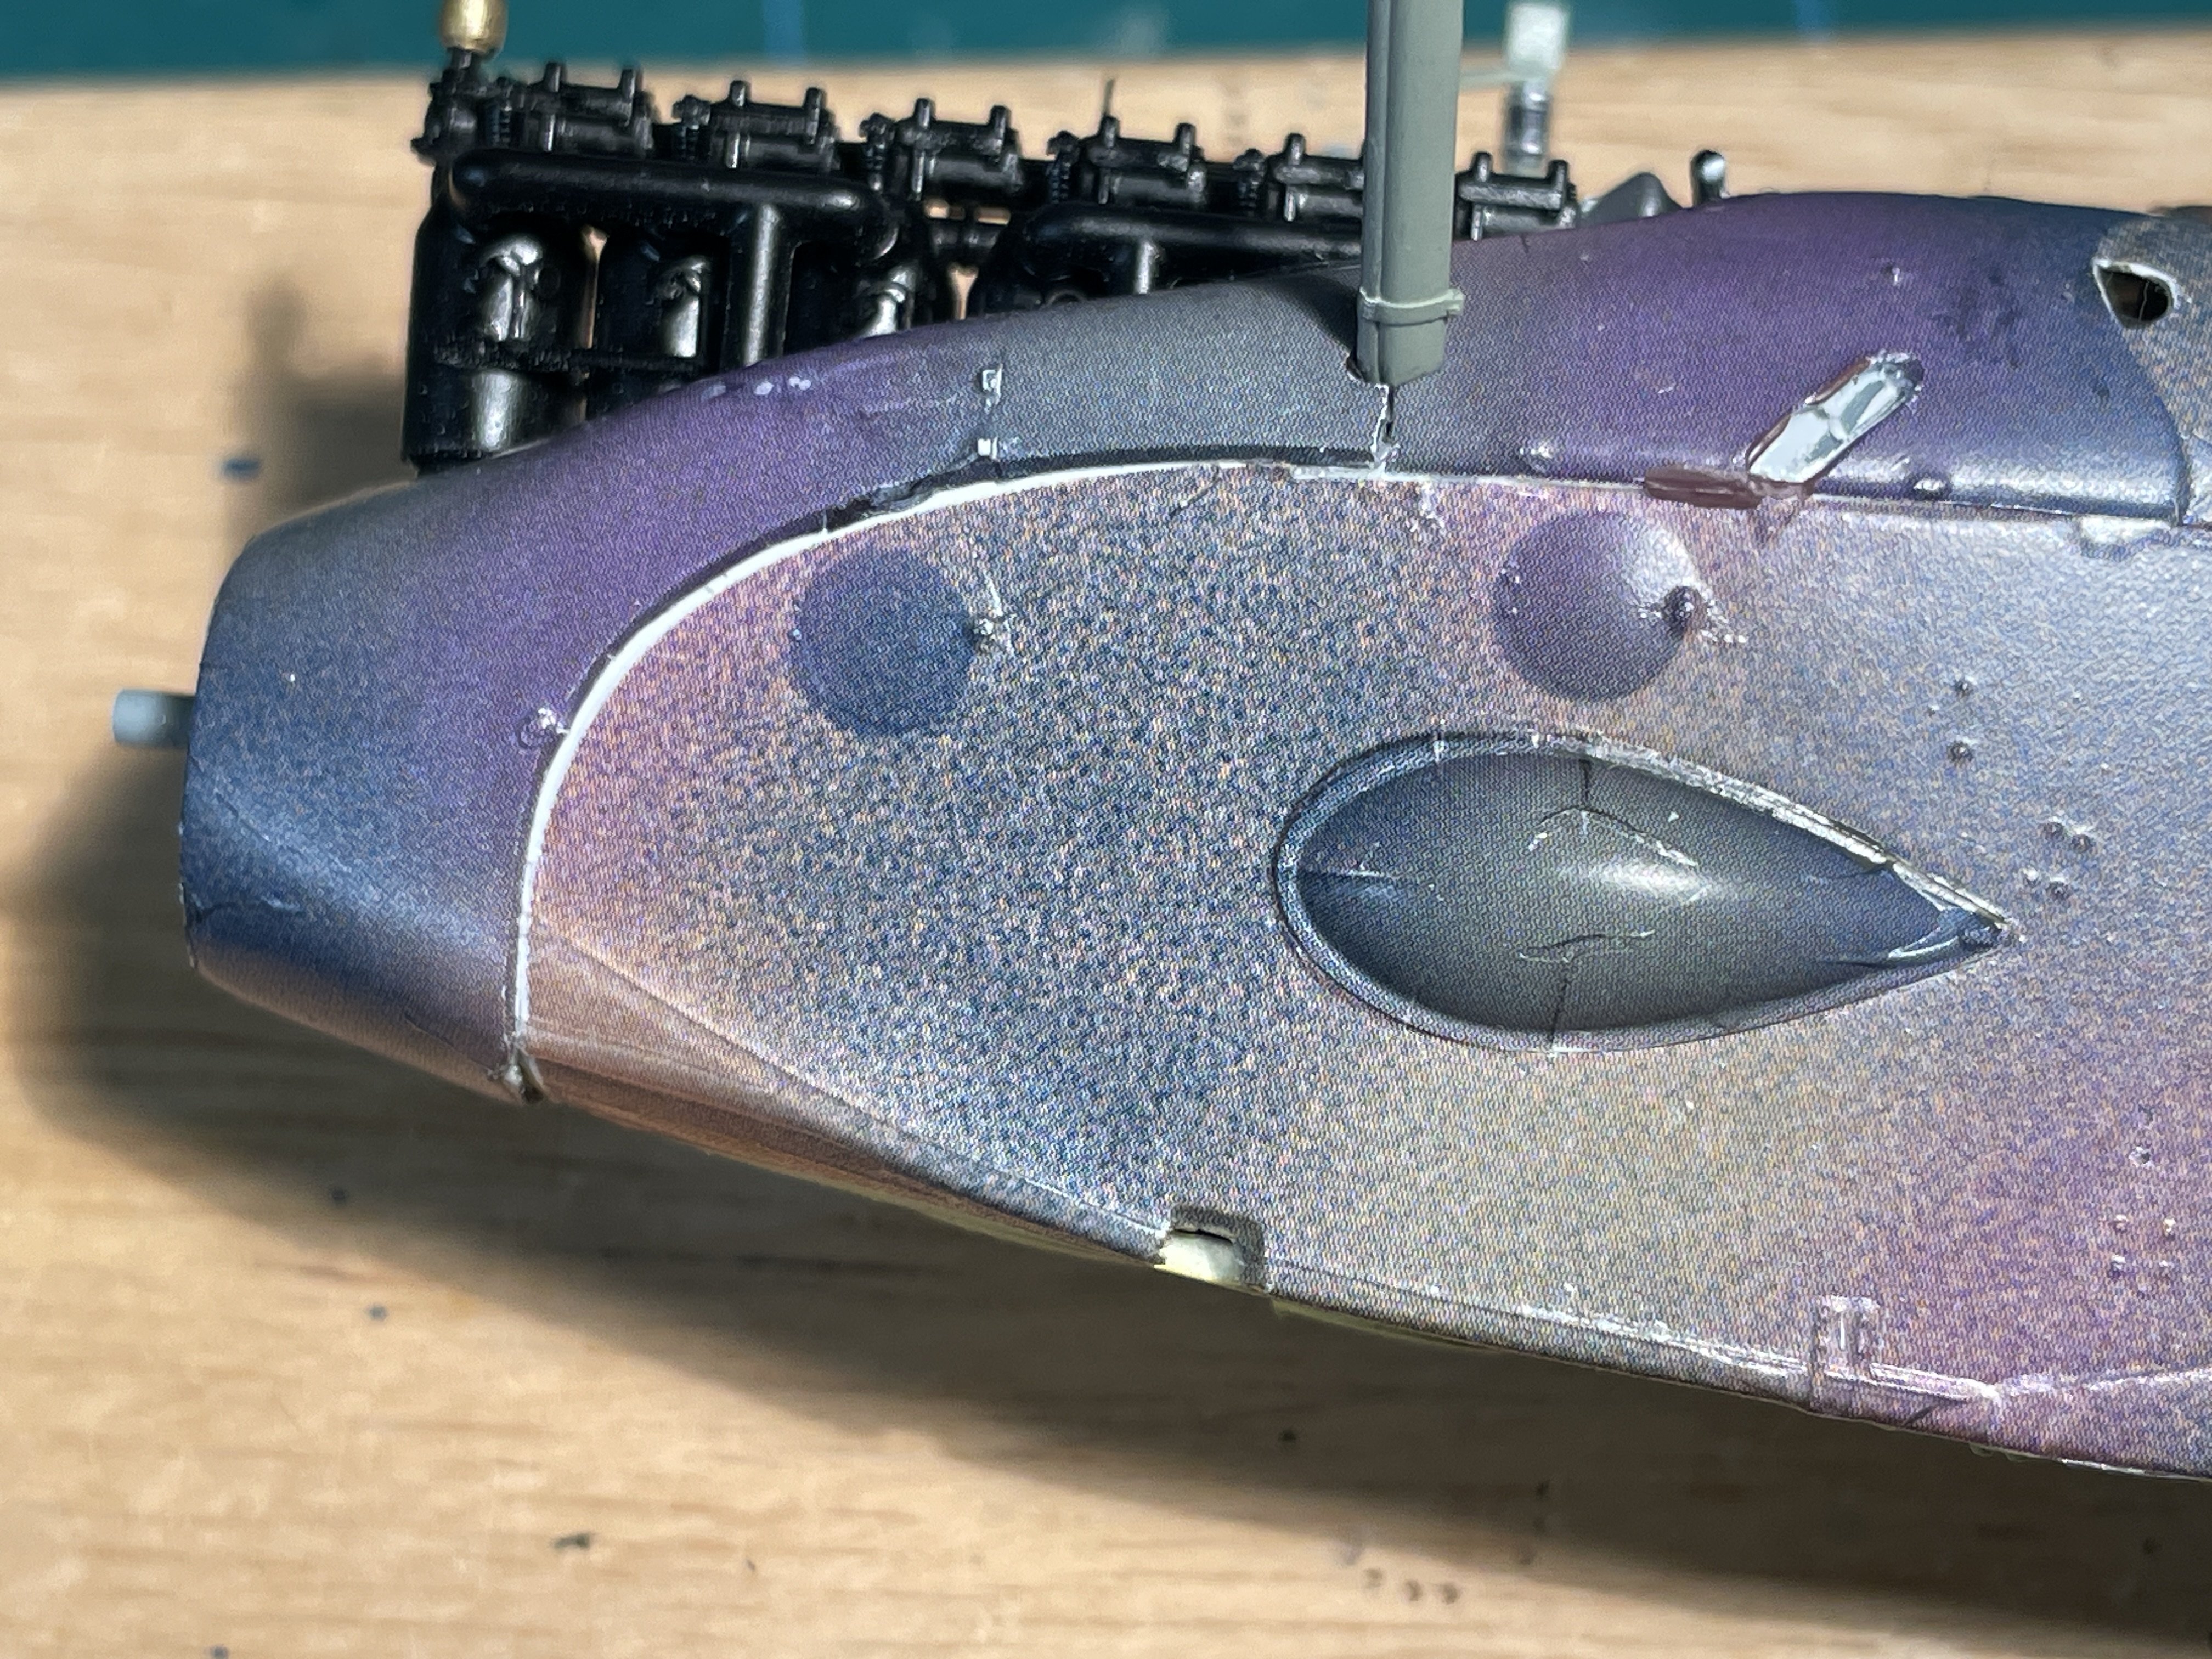
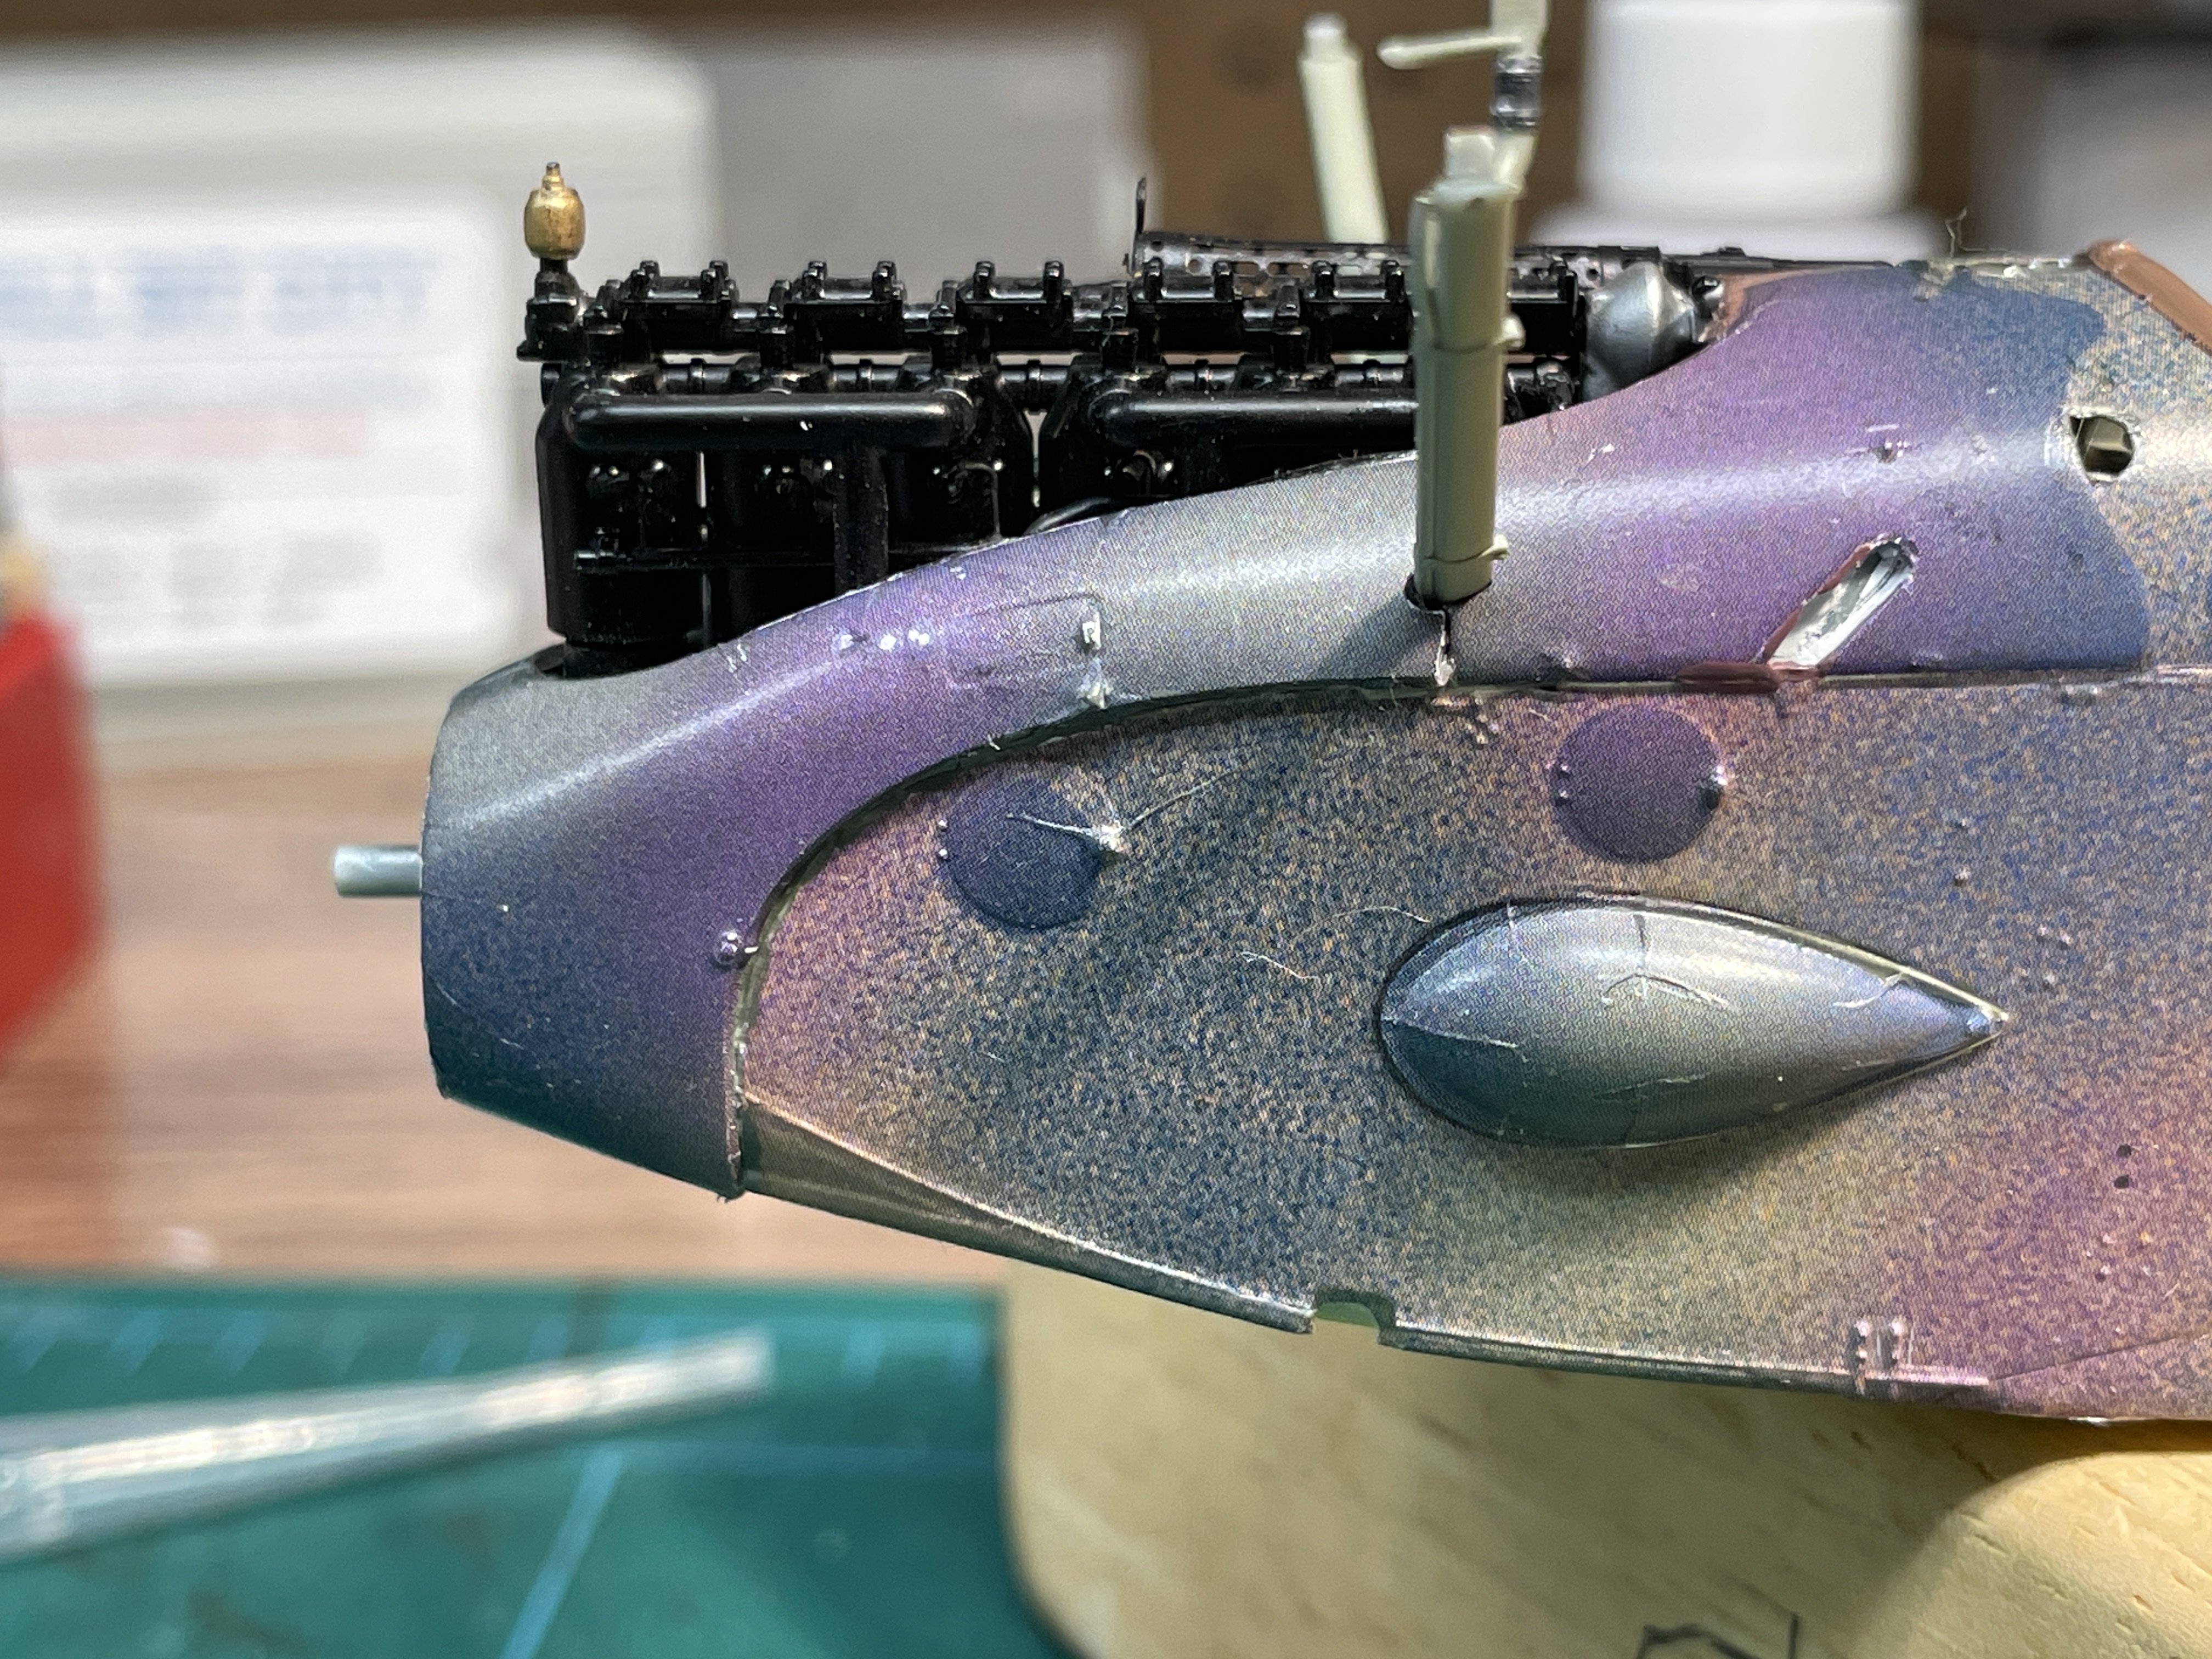
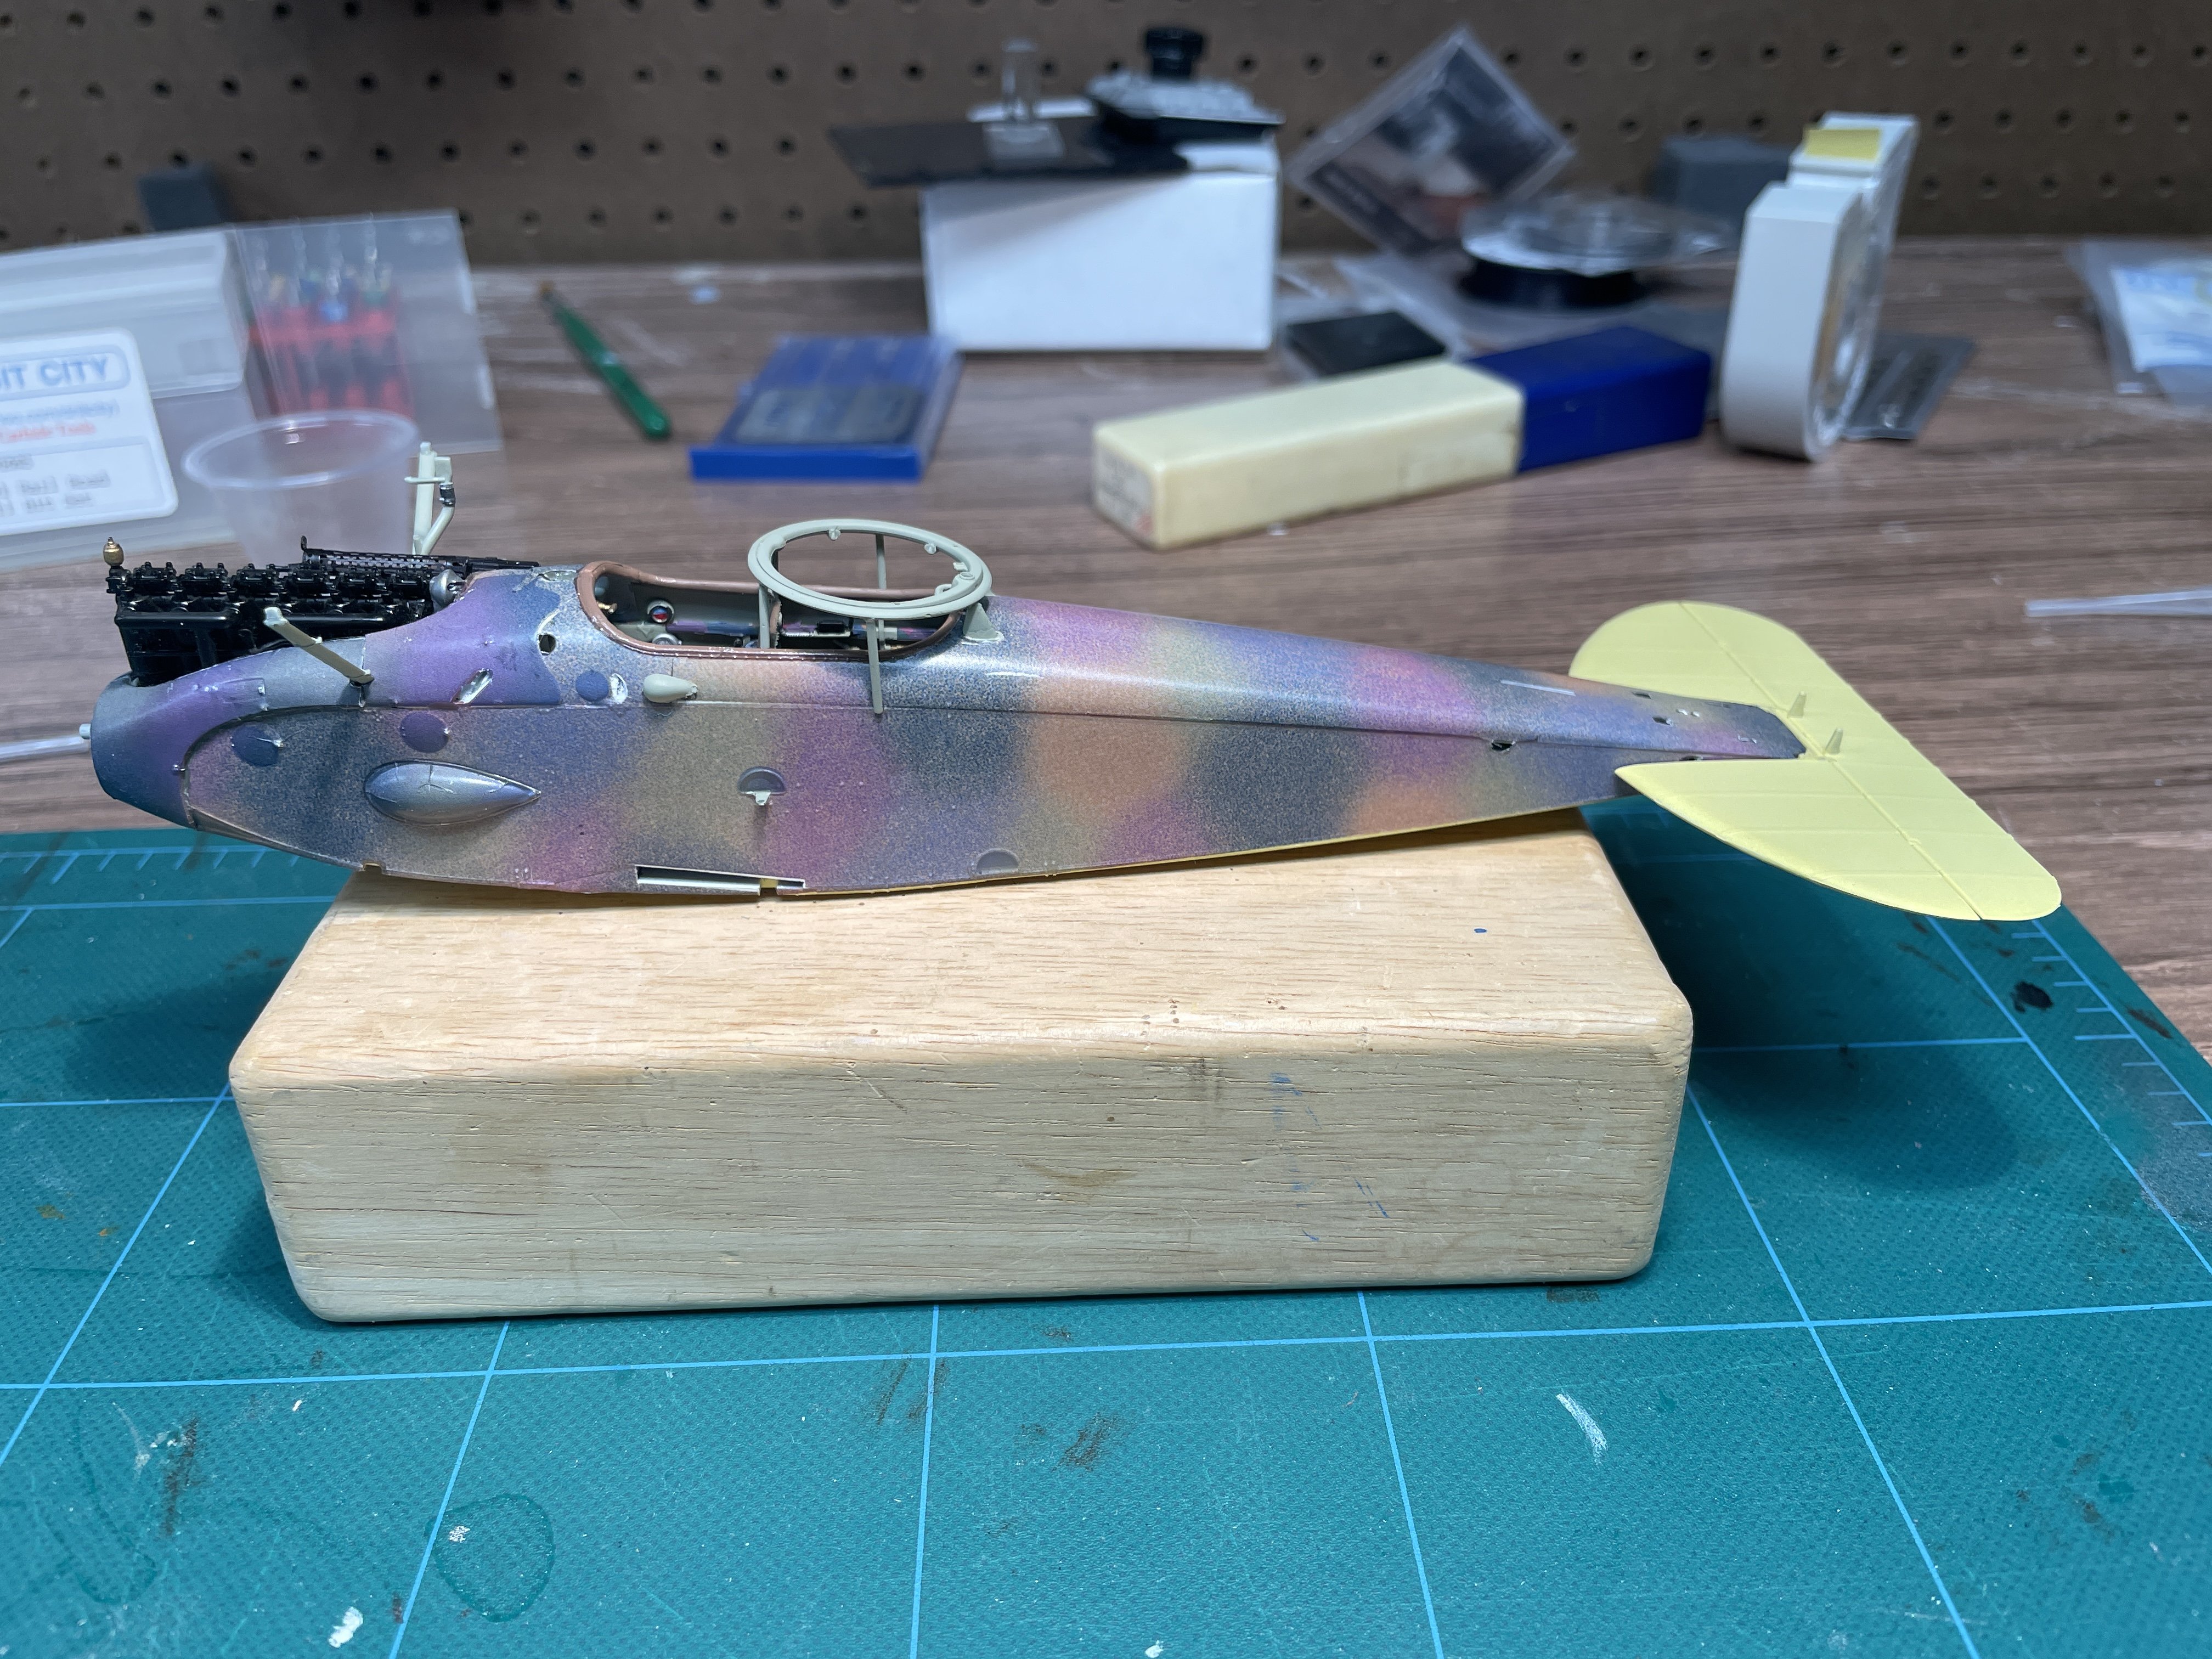
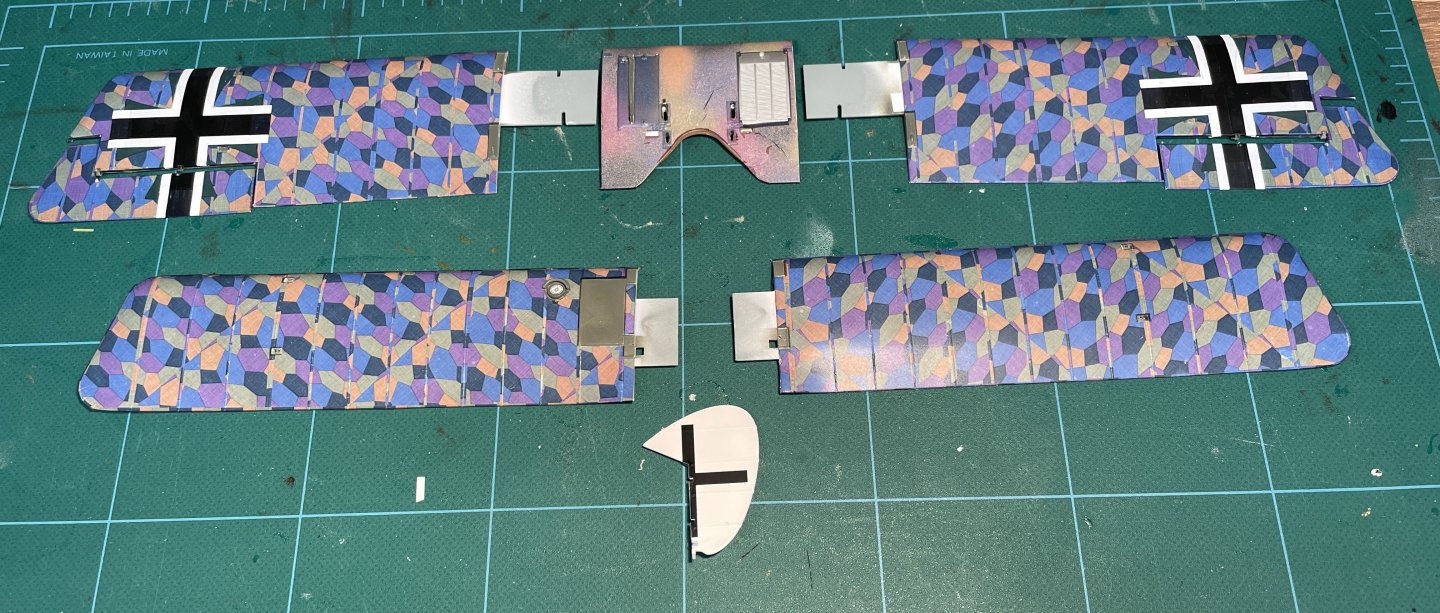
I'm back at work on the Halberstadt. Things got delayed by holidays, finishing the Dory, and a city-wide water outage that lasted almost a week, but mostly by trying to figure out what to do with places where the primer showed through the decals. This happened in a few areas where I had trouble placing the decal like on the center upper wing or near the cowl, where I misaligned the placement: The area near the cowl was the worst. I tried a couple of things. Trying to cover with scrap decal worked poorly because the pattern did not line up and any place the decals overlapped caused a dark purple area. Trying to match the color with paint was even worse because even when I got close with the color, the pattern was way off. The thing that ended up working adequately was just brushing with neutral Tamiya X-22 grey which is used on a lot of the metal fittings. It isn't perfect, but I think it is adequate: The extreme closeup unfortunately highlights some decal flaws that fought the heat and decal softener and won. They are a lot less obvious without magnification. The good news was the modifications I made to the cowl when it didn't fit at the dry fitting stage all worked and it fit on nicely. The white area was decal misalignment, not an issue with the cowl. The decal on the other side fit perfectly. I aligned this side with the openings - the opening for the big nacelle looks aligned correctly, so not sure why I had the big gap when I glued the cowl on. Anyways, some additional assembly. Stabilizer and gun ring have been added. Most of the decal flaws and touch up start getting a lot less visible as the magnification drops. I think I will add the upper wing center section before attaching the upper wings. I think it will be easier to get all the struts aligned. I started painting the propeller and laying down some gloss for the rest of the decals.


- 40 replies
-
- 12
-
-
I also really like the natural wood and think it would be a shame to hide the precise and careful planking. I had the same dilemma with my first ship and left it natural. Since then I've used different color woods to try to create a little bit of the impression of the painted ship without using paint.
-
Looks great! Congratulations on finishing! If the fogging was from the glue, canopy glue will prevent it next time.
-
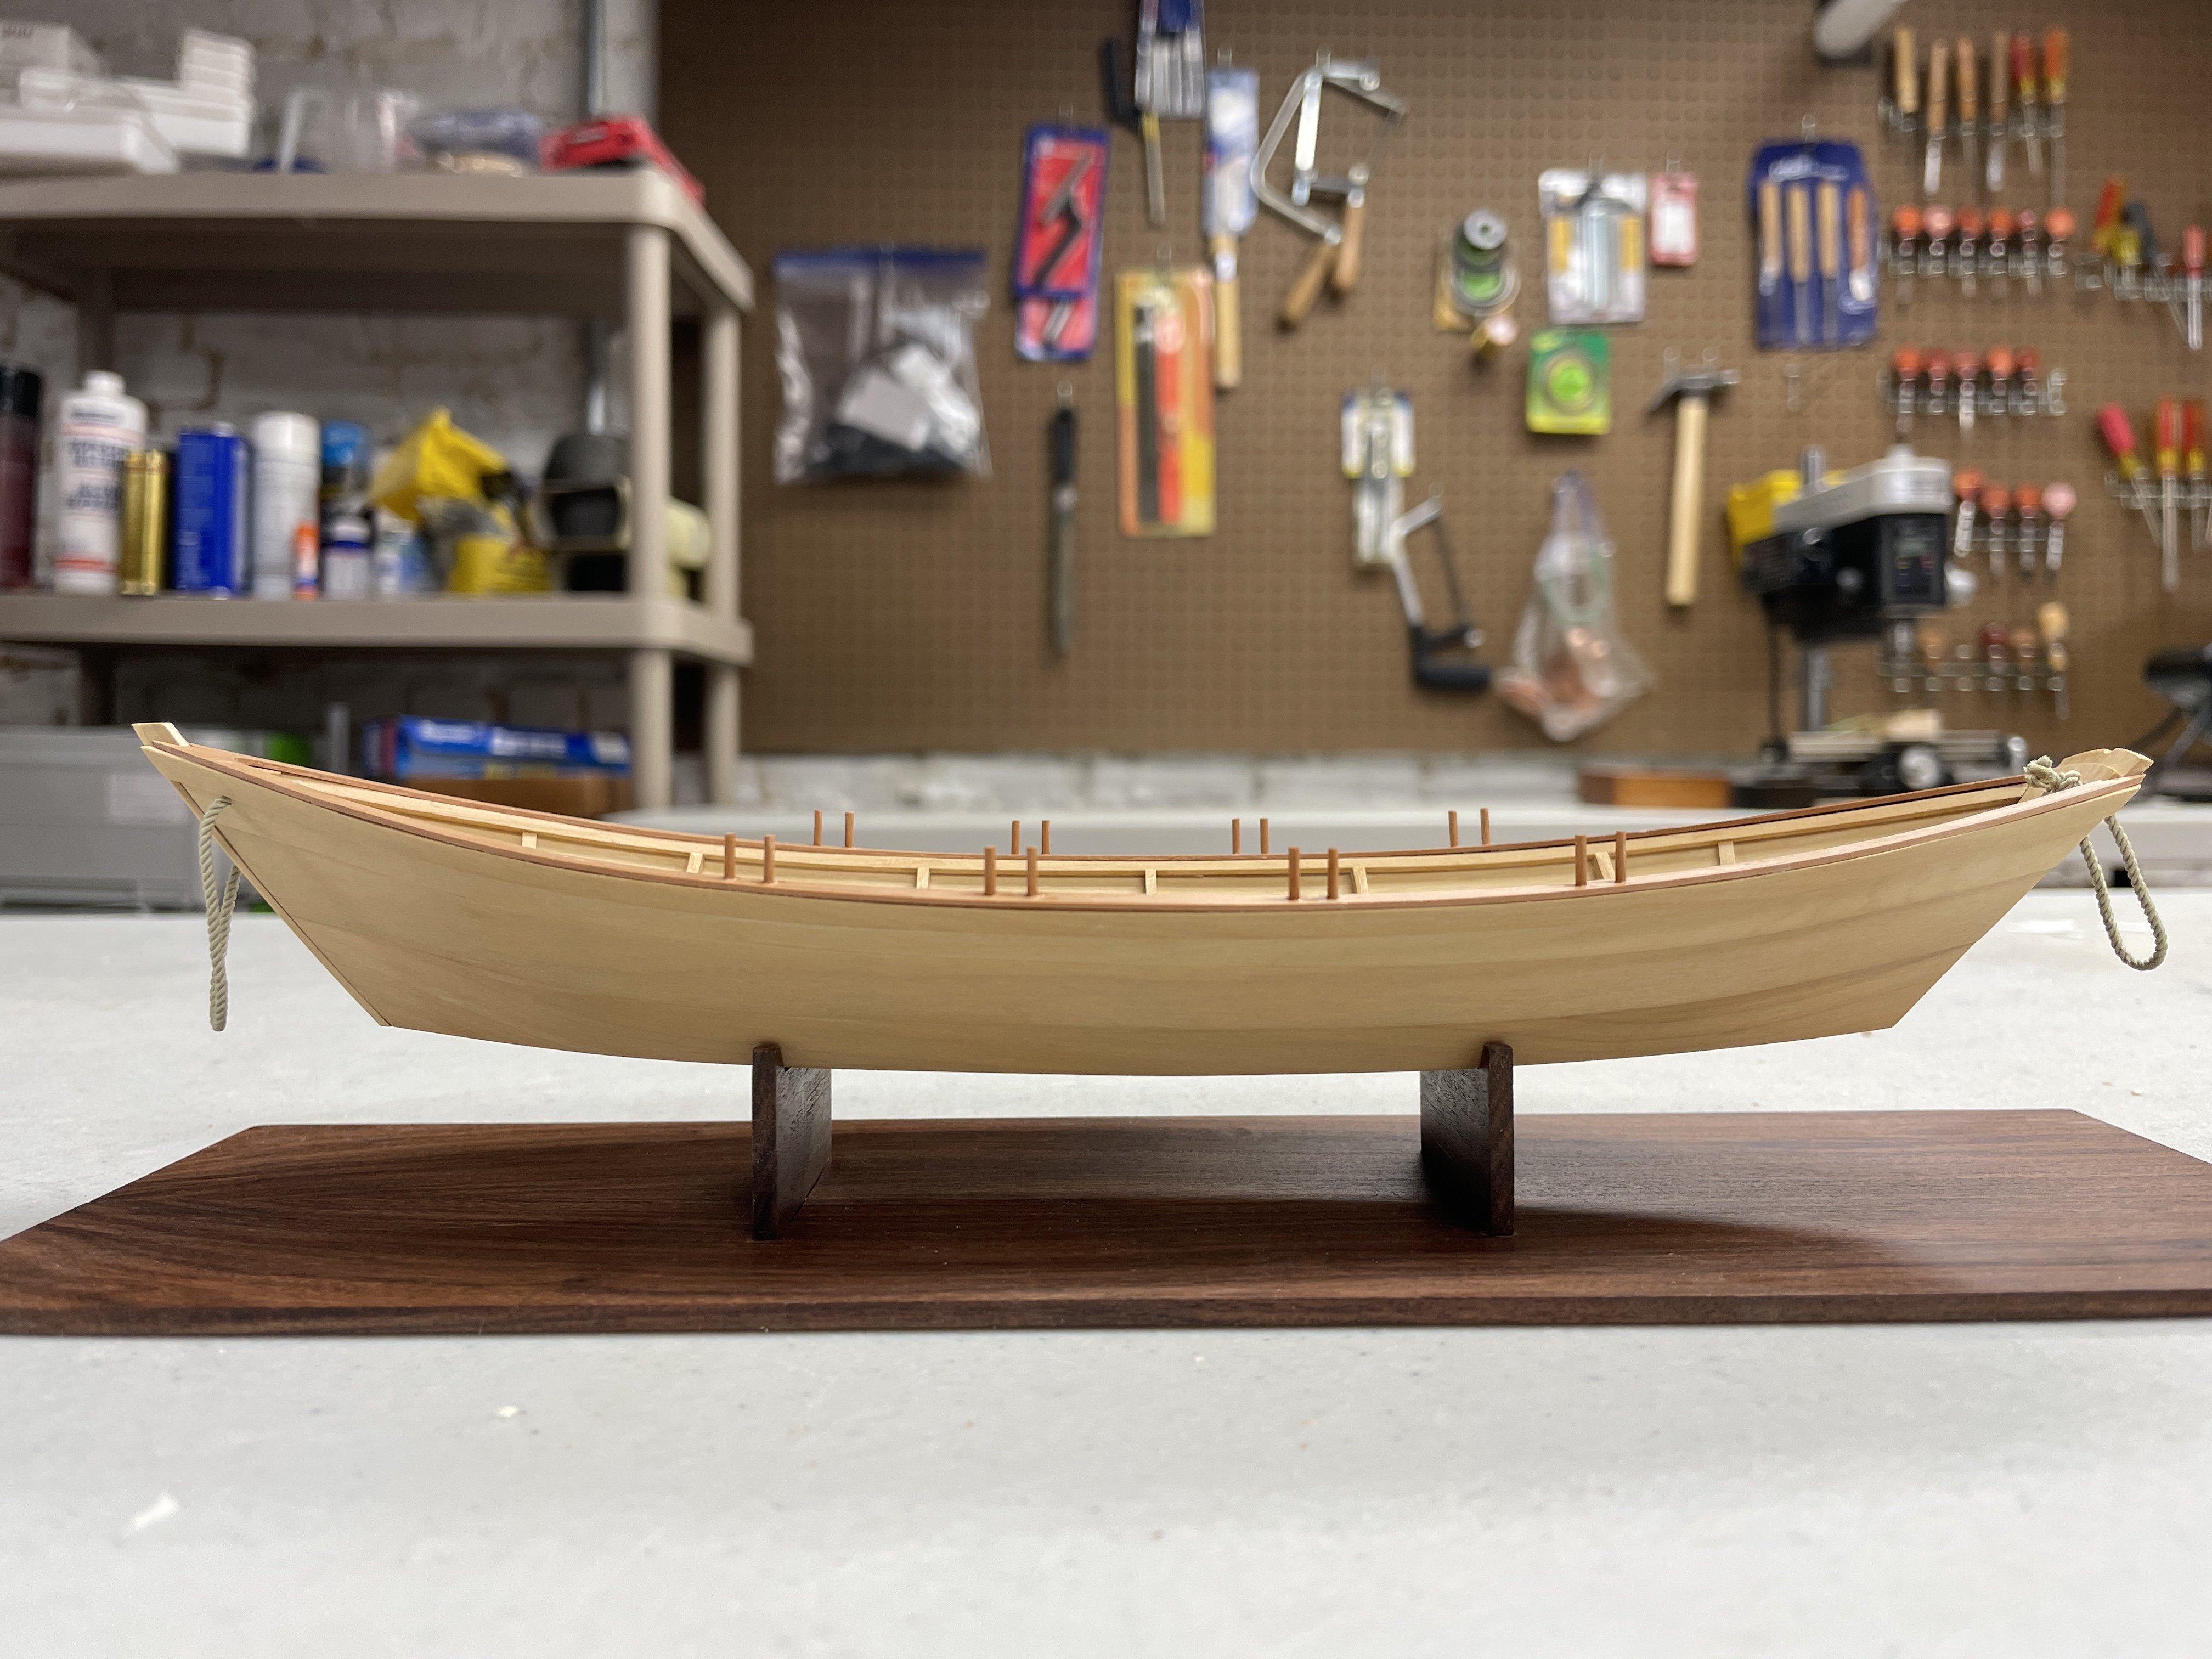
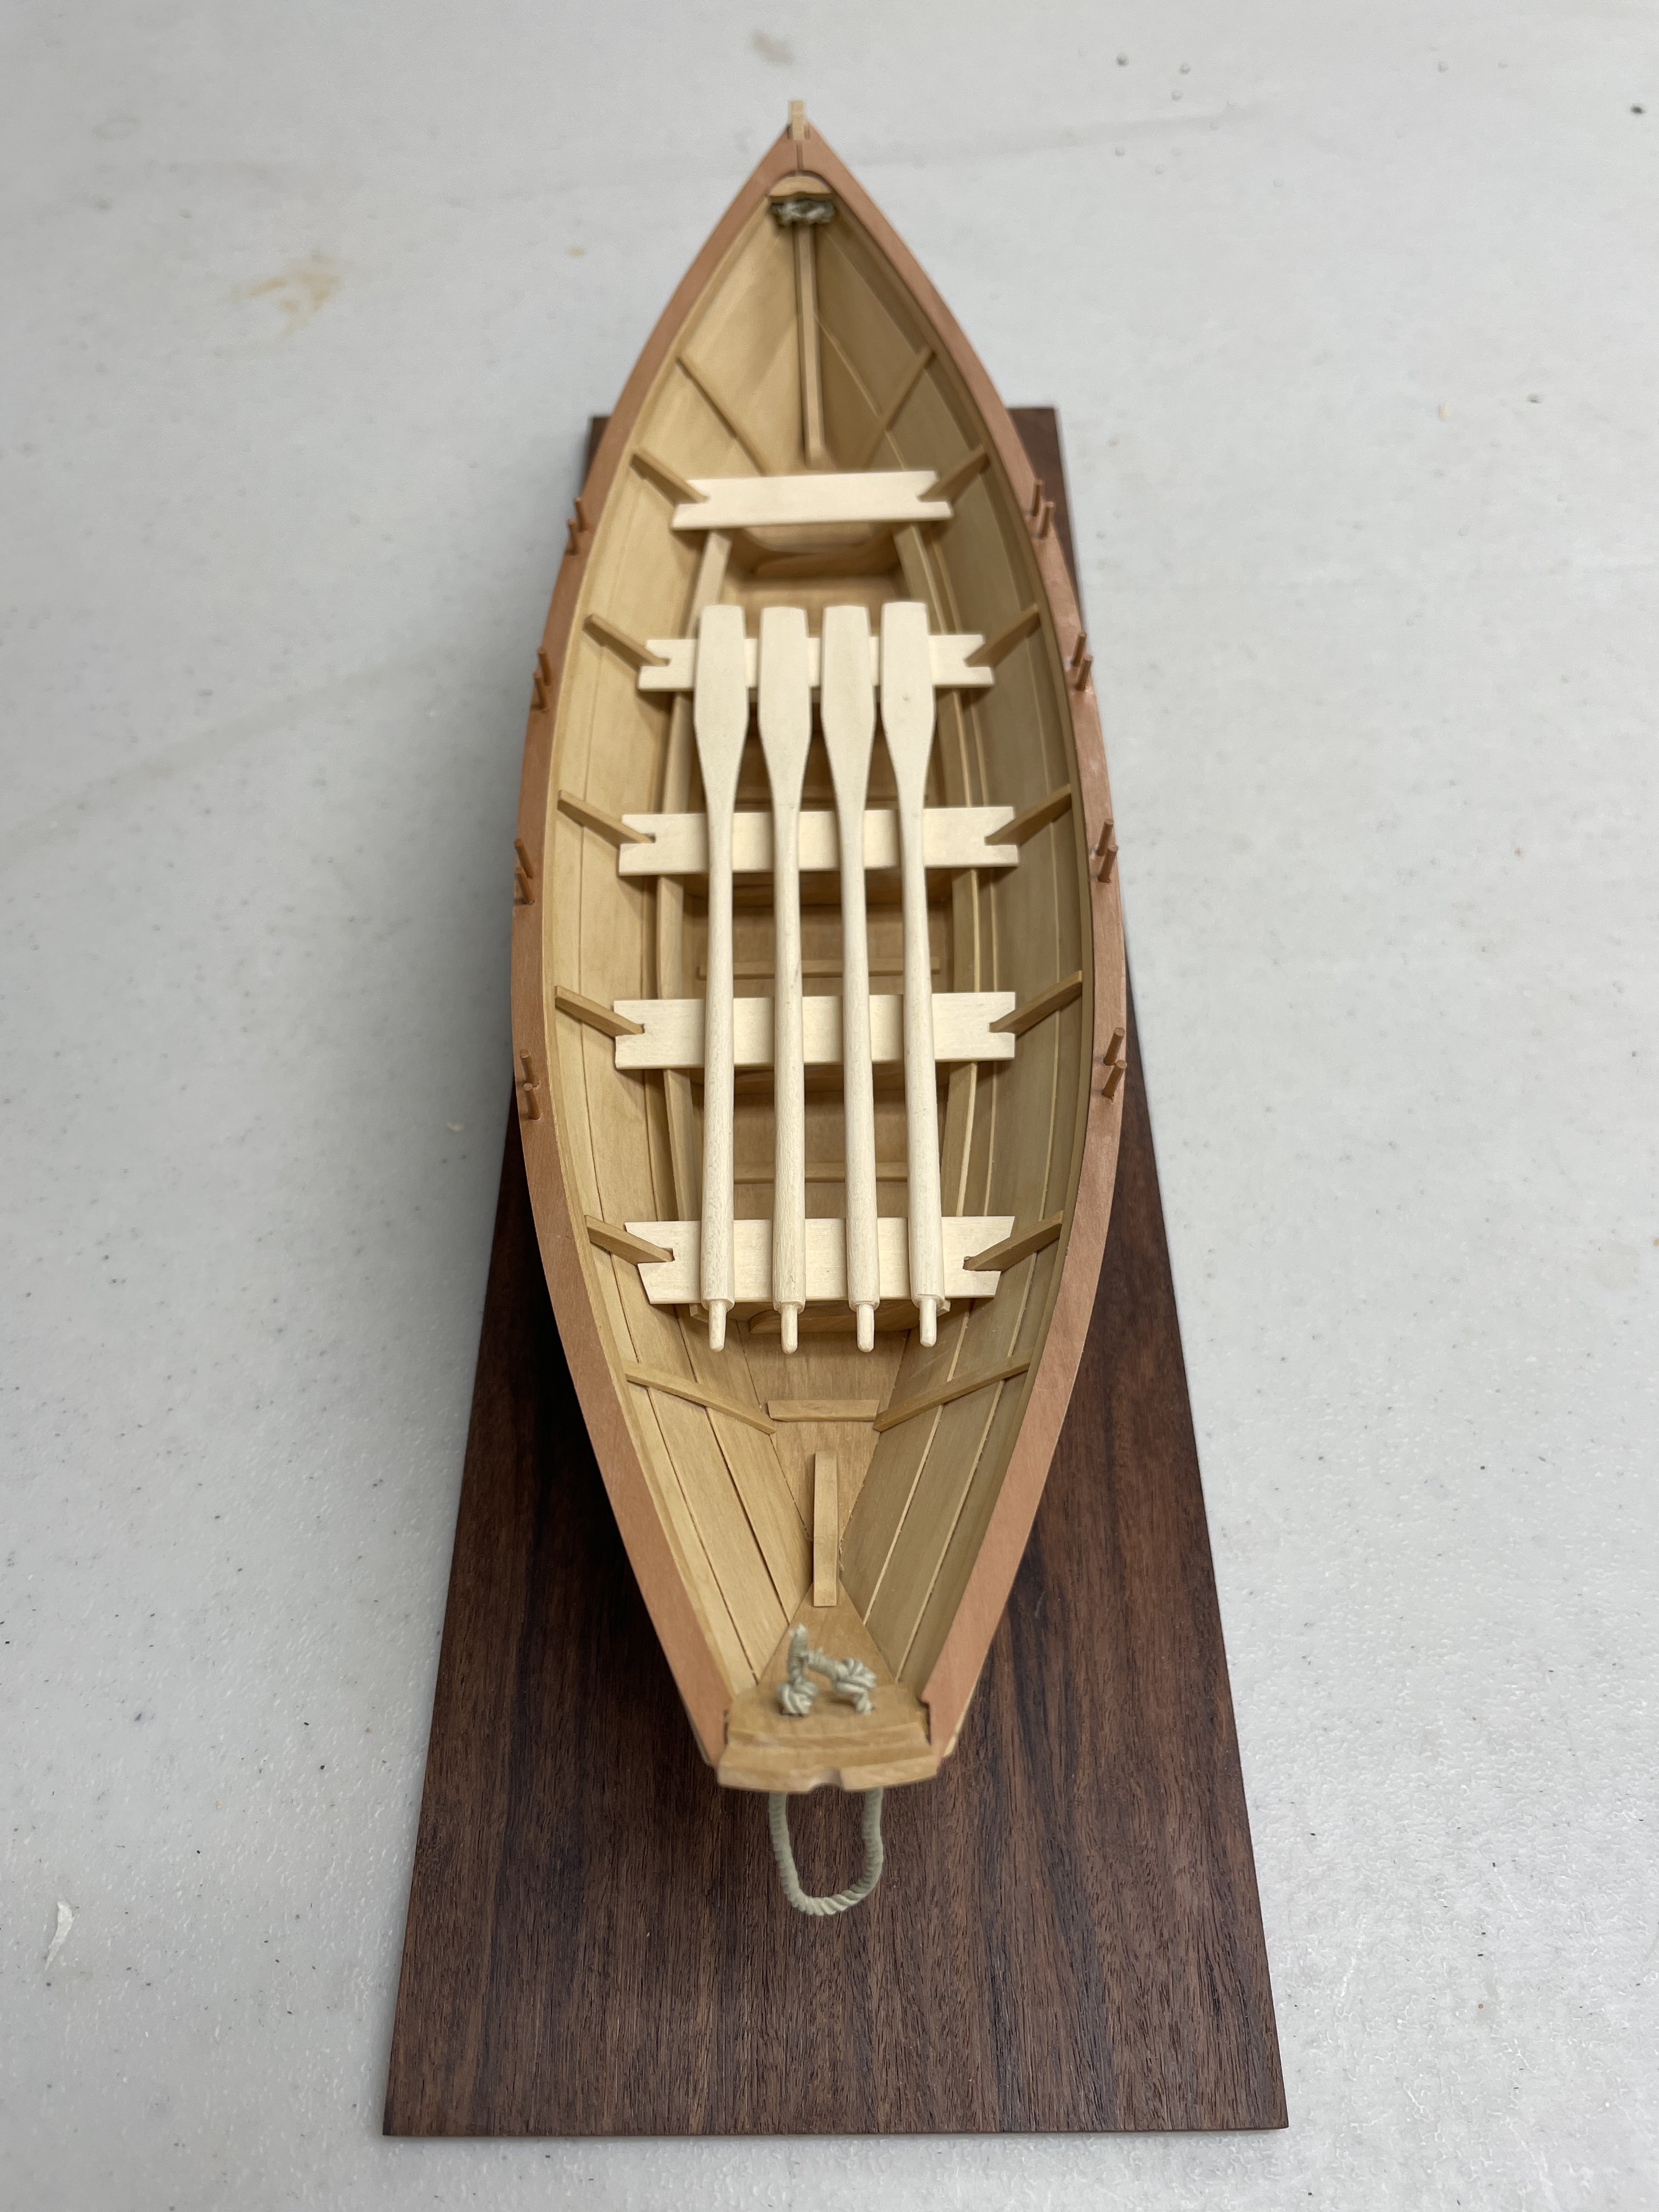
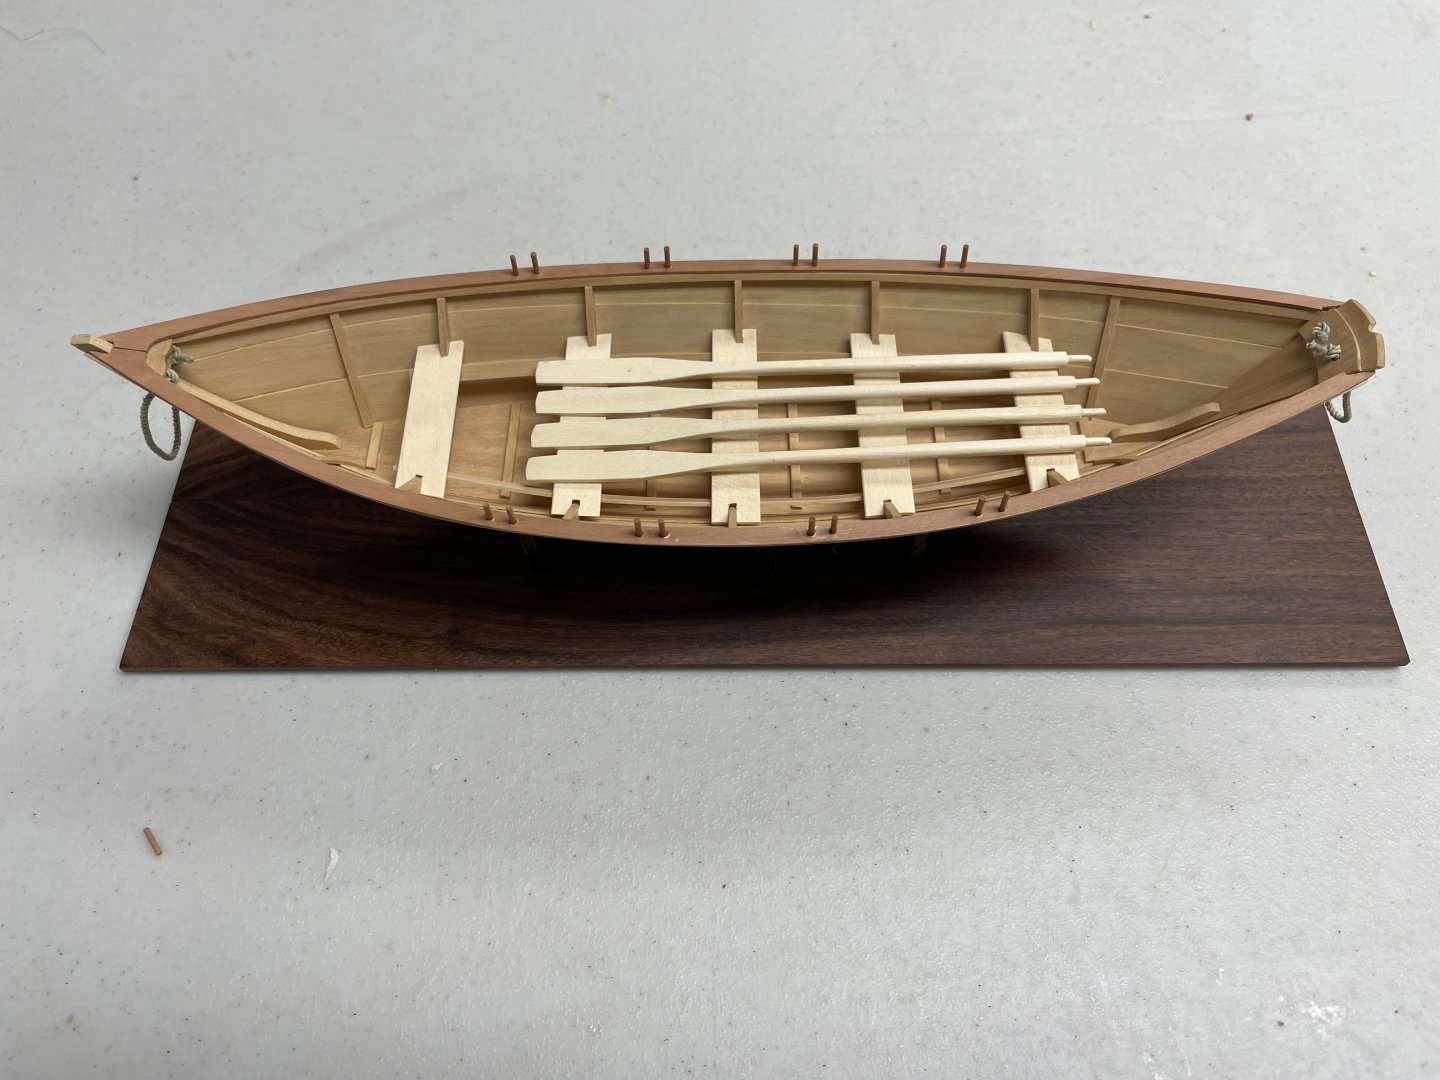
My dory is complete. When I started it in March, I didn’t expect to spend 8 months on it, but I had a lot of fun. I’m pleased with the final product. It is time to get back to the longboat, finish the Halberstadt, and finally start Echo.


- 32 replies
-
- 11
-
-
-
- Grand Banks Dory
- Model Shipways
- (and 2 more)
-
Your Dory came out great! Congratulations on finishing!
- 28 replies
-
- 2
-
-
- Lowell Grand Banks Dory
- Model Shipways
- (and 1 more)
-
Beautiful work - great to see the model so close to being finished!
- 201 replies
-
- 5
-
-
-
- Oyster Sharpie
- first scratch build
- (and 1 more)