ccoyle
-
Posts
10,556 -
Joined
-
Last visited


About ccoyle

- Birthday 08/15/1963
Recent Profile Visitors
18,454 profile views


-
 Ab Hoving reacted to a post in a topic:
HMS Sussex by Ab Hoving - FINISHED - A dockyard model from card
Ab Hoving reacted to a post in a topic:
HMS Sussex by Ab Hoving - FINISHED - A dockyard model from card
-
Canute reacted to a post in a topic:
Bluenose by Admiral Rick - Model Shipways 2921 - Scale 1/64 - Canadian Fishing Schooner
-
Canute reacted to a post in a topic:
USS Bagley (DD-386) by catopower - 1/200 - Avangard - CARD
-
ccoyle reacted to a post in a topic:
Messerscmitt Bf-109G-5/G-6 by BLACK VIKING - Airfix - 1/24 - PLASTIC
-
ccoyle reacted to a post in a topic:
HMS Sussex by Ab Hoving - FINISHED - A dockyard model from card
-
catopower reacted to a post in a topic:
USS Bagley (DD-386) by catopower - 1/200 - Avangard - CARD
-
GrandpaPhil reacted to a post in a topic:
USS Bagley (DD-386) by catopower - 1/200 - Avangard - CARD
-
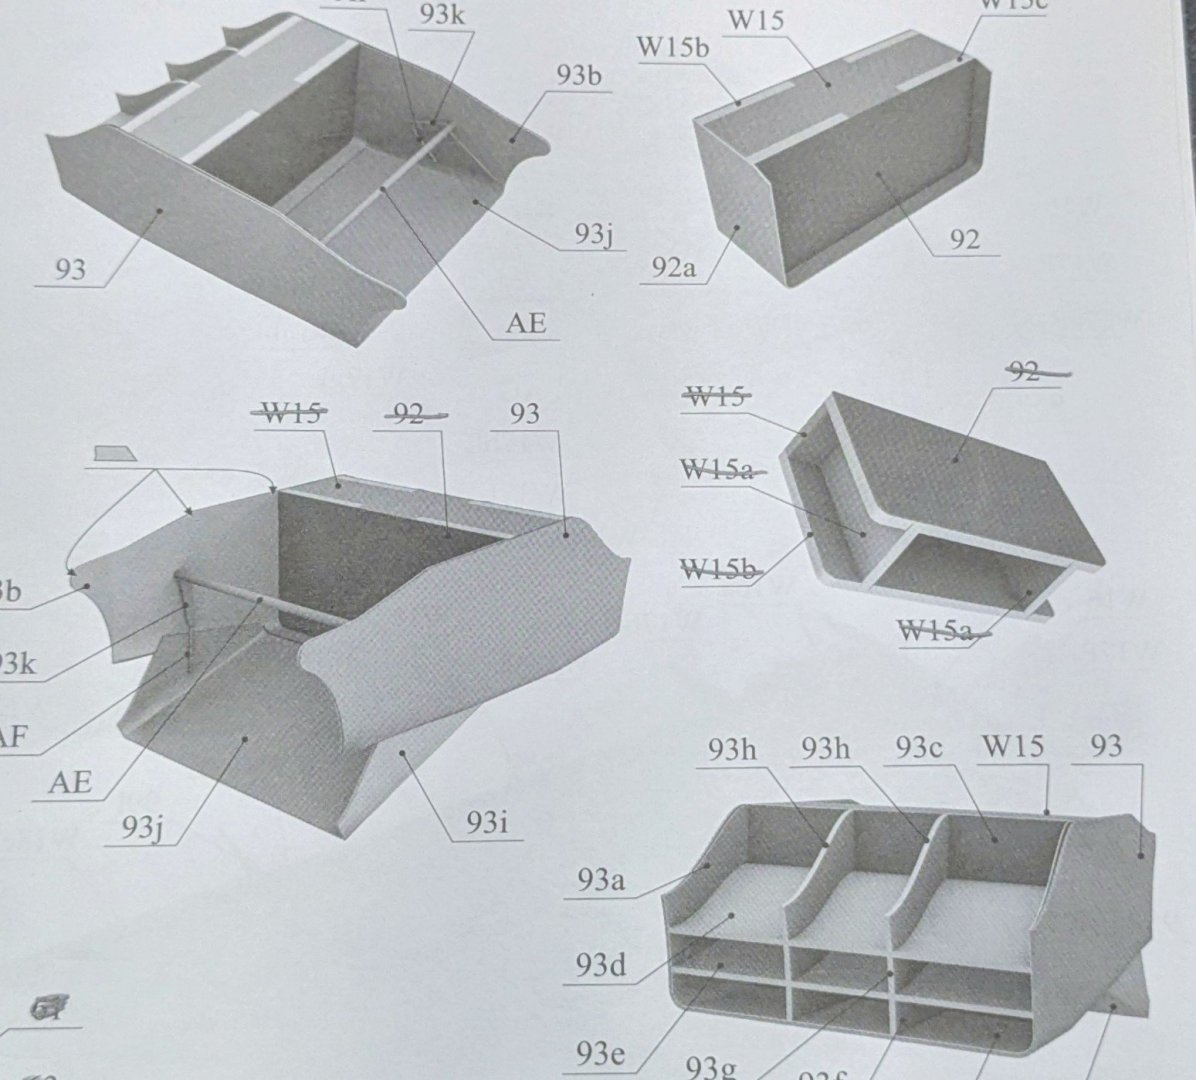
 It's a hawse pipe, and the black line is a fold line. The triangle is the flat, back portion of the pipe, and the rest gets a U-fold, bringing the far edge of the part back around to meet the triangle's edge on the opposite side. Had this part been used, it would, of course, have been rolled so that the color ends up on the inside of the rolled part.
 -
ccoyle reacted to a post in a topic:
USS Bagley (DD-386) by catopower - 1/200 - Avangard - CARD
-
Admiral Rick reacted to a post in a topic:
Bluenose by Admiral Rick - Model Shipways 2921 - Scale 1/64 - Canadian Fishing Schooner
-
Old Collingwood reacted to a post in a topic:
Kawasaki Ki-61 Hien "Tony" by ccoyle - Halinski/Kartonowy Arsenal - 1/33 - CARD
-
ccoyle reacted to a post in a topic:
HMS Erebus by Ship_Right - OcCre - Scale 1:75
-
ccoyle reacted to a post in a topic:
Duchess of Kingston 1798 by Glenn-UK - Vanguard Models - 1:64 - Commission Build
-
ccoyle reacted to a post in a topic:
Duchess of Kingston 1798 by Glenn-UK - Vanguard Models - 1:64 - Commission Build
-
You got it for a great price! Though I would hardly describe it as 'vintage' -- sellers do use that term far too extensively.
-
ccoyle reacted to a post in a topic:
Bluenose by Admiral Rick - Model Shipways 2921 - Scale 1/64 - Canadian Fishing Schooner
-
ccoyle reacted to a post in a topic:
USS Constitution by g8rfan99 - BlueJacket Shipcrafters - 1/98
-
ccoyle reacted to a post in a topic:
U-47 by RVB (Rick) - Amati - Scale 1/72 - Length 92.4cm or 36.38 inches - marketed by Model Shipways c. 2013
-
So that we don't sound completely like a Vanguard Fan Boy club (and there is no argument that Chris is on the cutting edge of kit design), allow me to toss out a couple of items for consideration: You are wise to forego Rattlesnake in favor of a simpler subject. Something with a single mast, like the aforementioned cutters or fishing vessels, is a good step up. Depending on how you feel about different kinds of hull construction other than the usual strip planking, there are some other options. One is kits with pre-spiled planking from companies like Master Korabel or Falkonet. I'm building one such kit now, MK's Phoenix. You can see what this method of construction looks like by checking my build log (link in signature). I will say up front that MK's instructions, being translated from Russian by a non-native English speaker, can be a bit torturous to decipher, but they have very good pictorial instructions as well. Another company, Shipyard, offers several wooden kits that are based on traditional card modeling methods -- they're a sort of hybrid construction method. Everything in the kit is laser-cut. I have built one of their kits, the Wütender Hund. Shipyard also includes pictorial instructions, and they are quite good. Vanguard is definitely top of the heap for strip-planked kits, but -- if you find a subject that you really like from another company, don't be entirely put off by the prospect of having to wrestle with a kit that may not have the best materials or instructions. With three completed builds under your belt and the help of the vast quantity of experience represented on MSW, you probably have the skills needed to overcome such challenges. Have fun deciding!
-
Welcome aboard!
-
Very nice work so far! My admiral would have a conniption if she found out I were planning to build something that large!
-
When you say 'resin', I assume you mean 3d-printed?
-
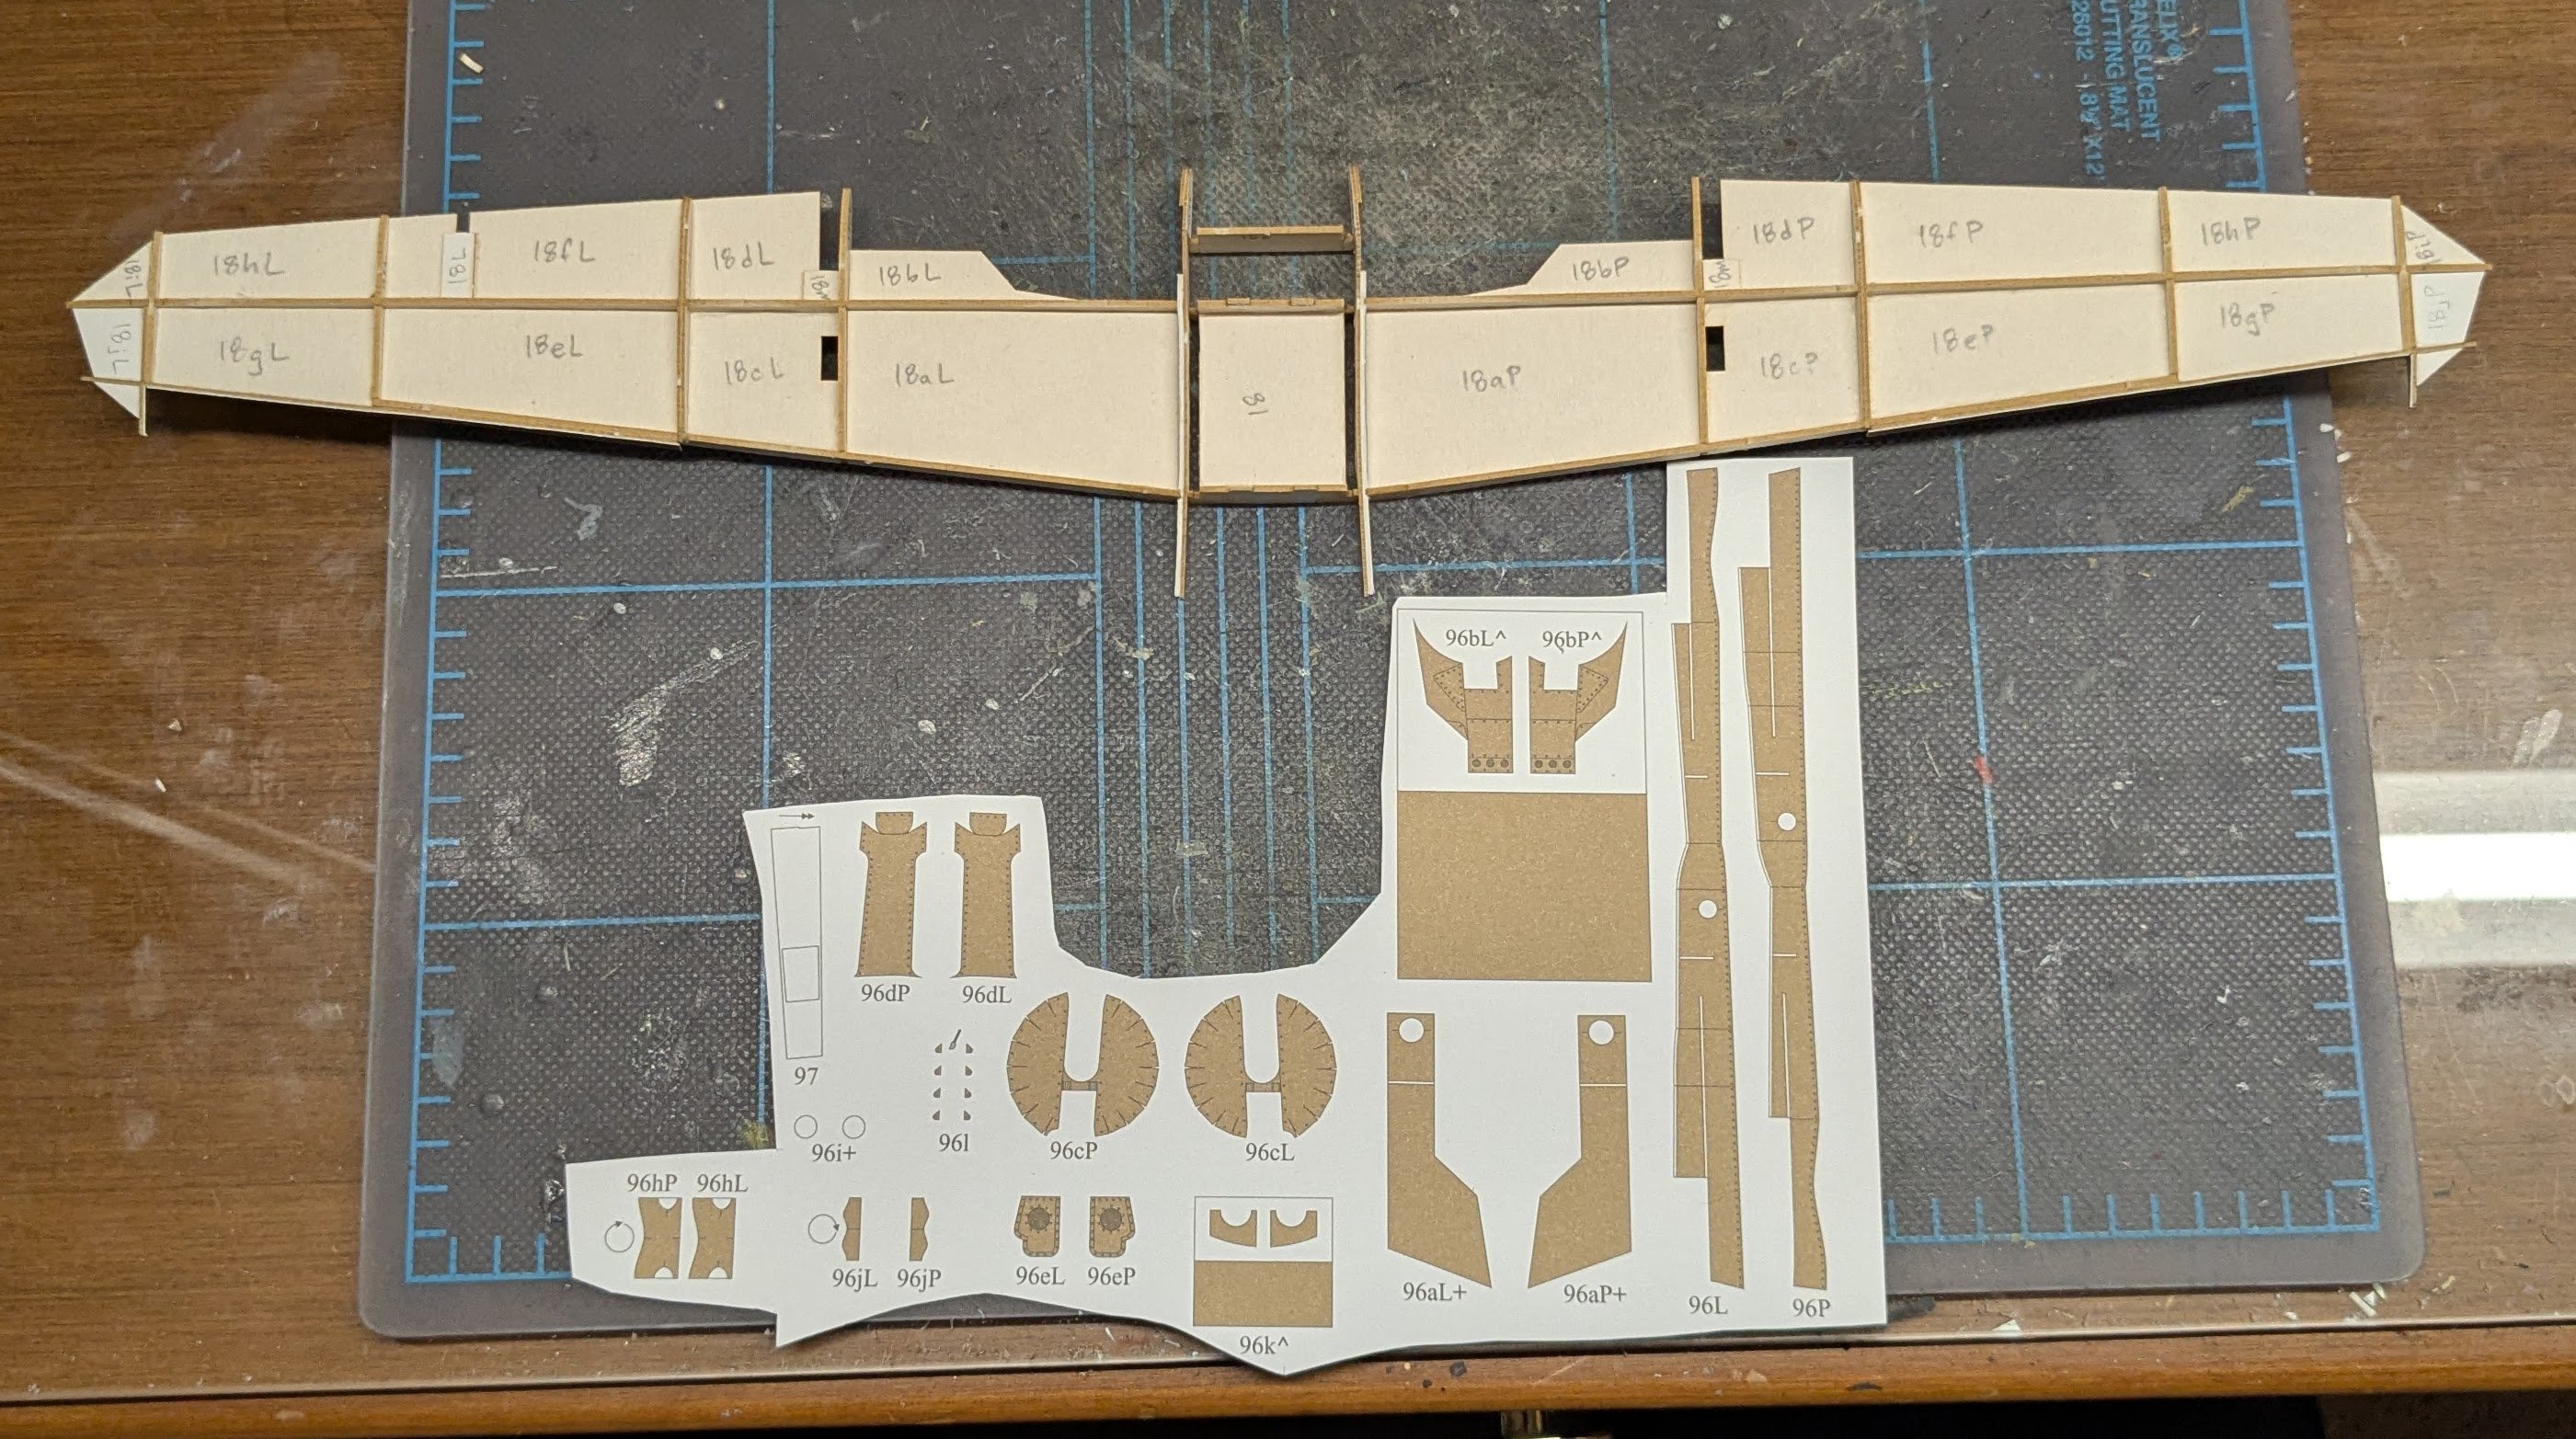
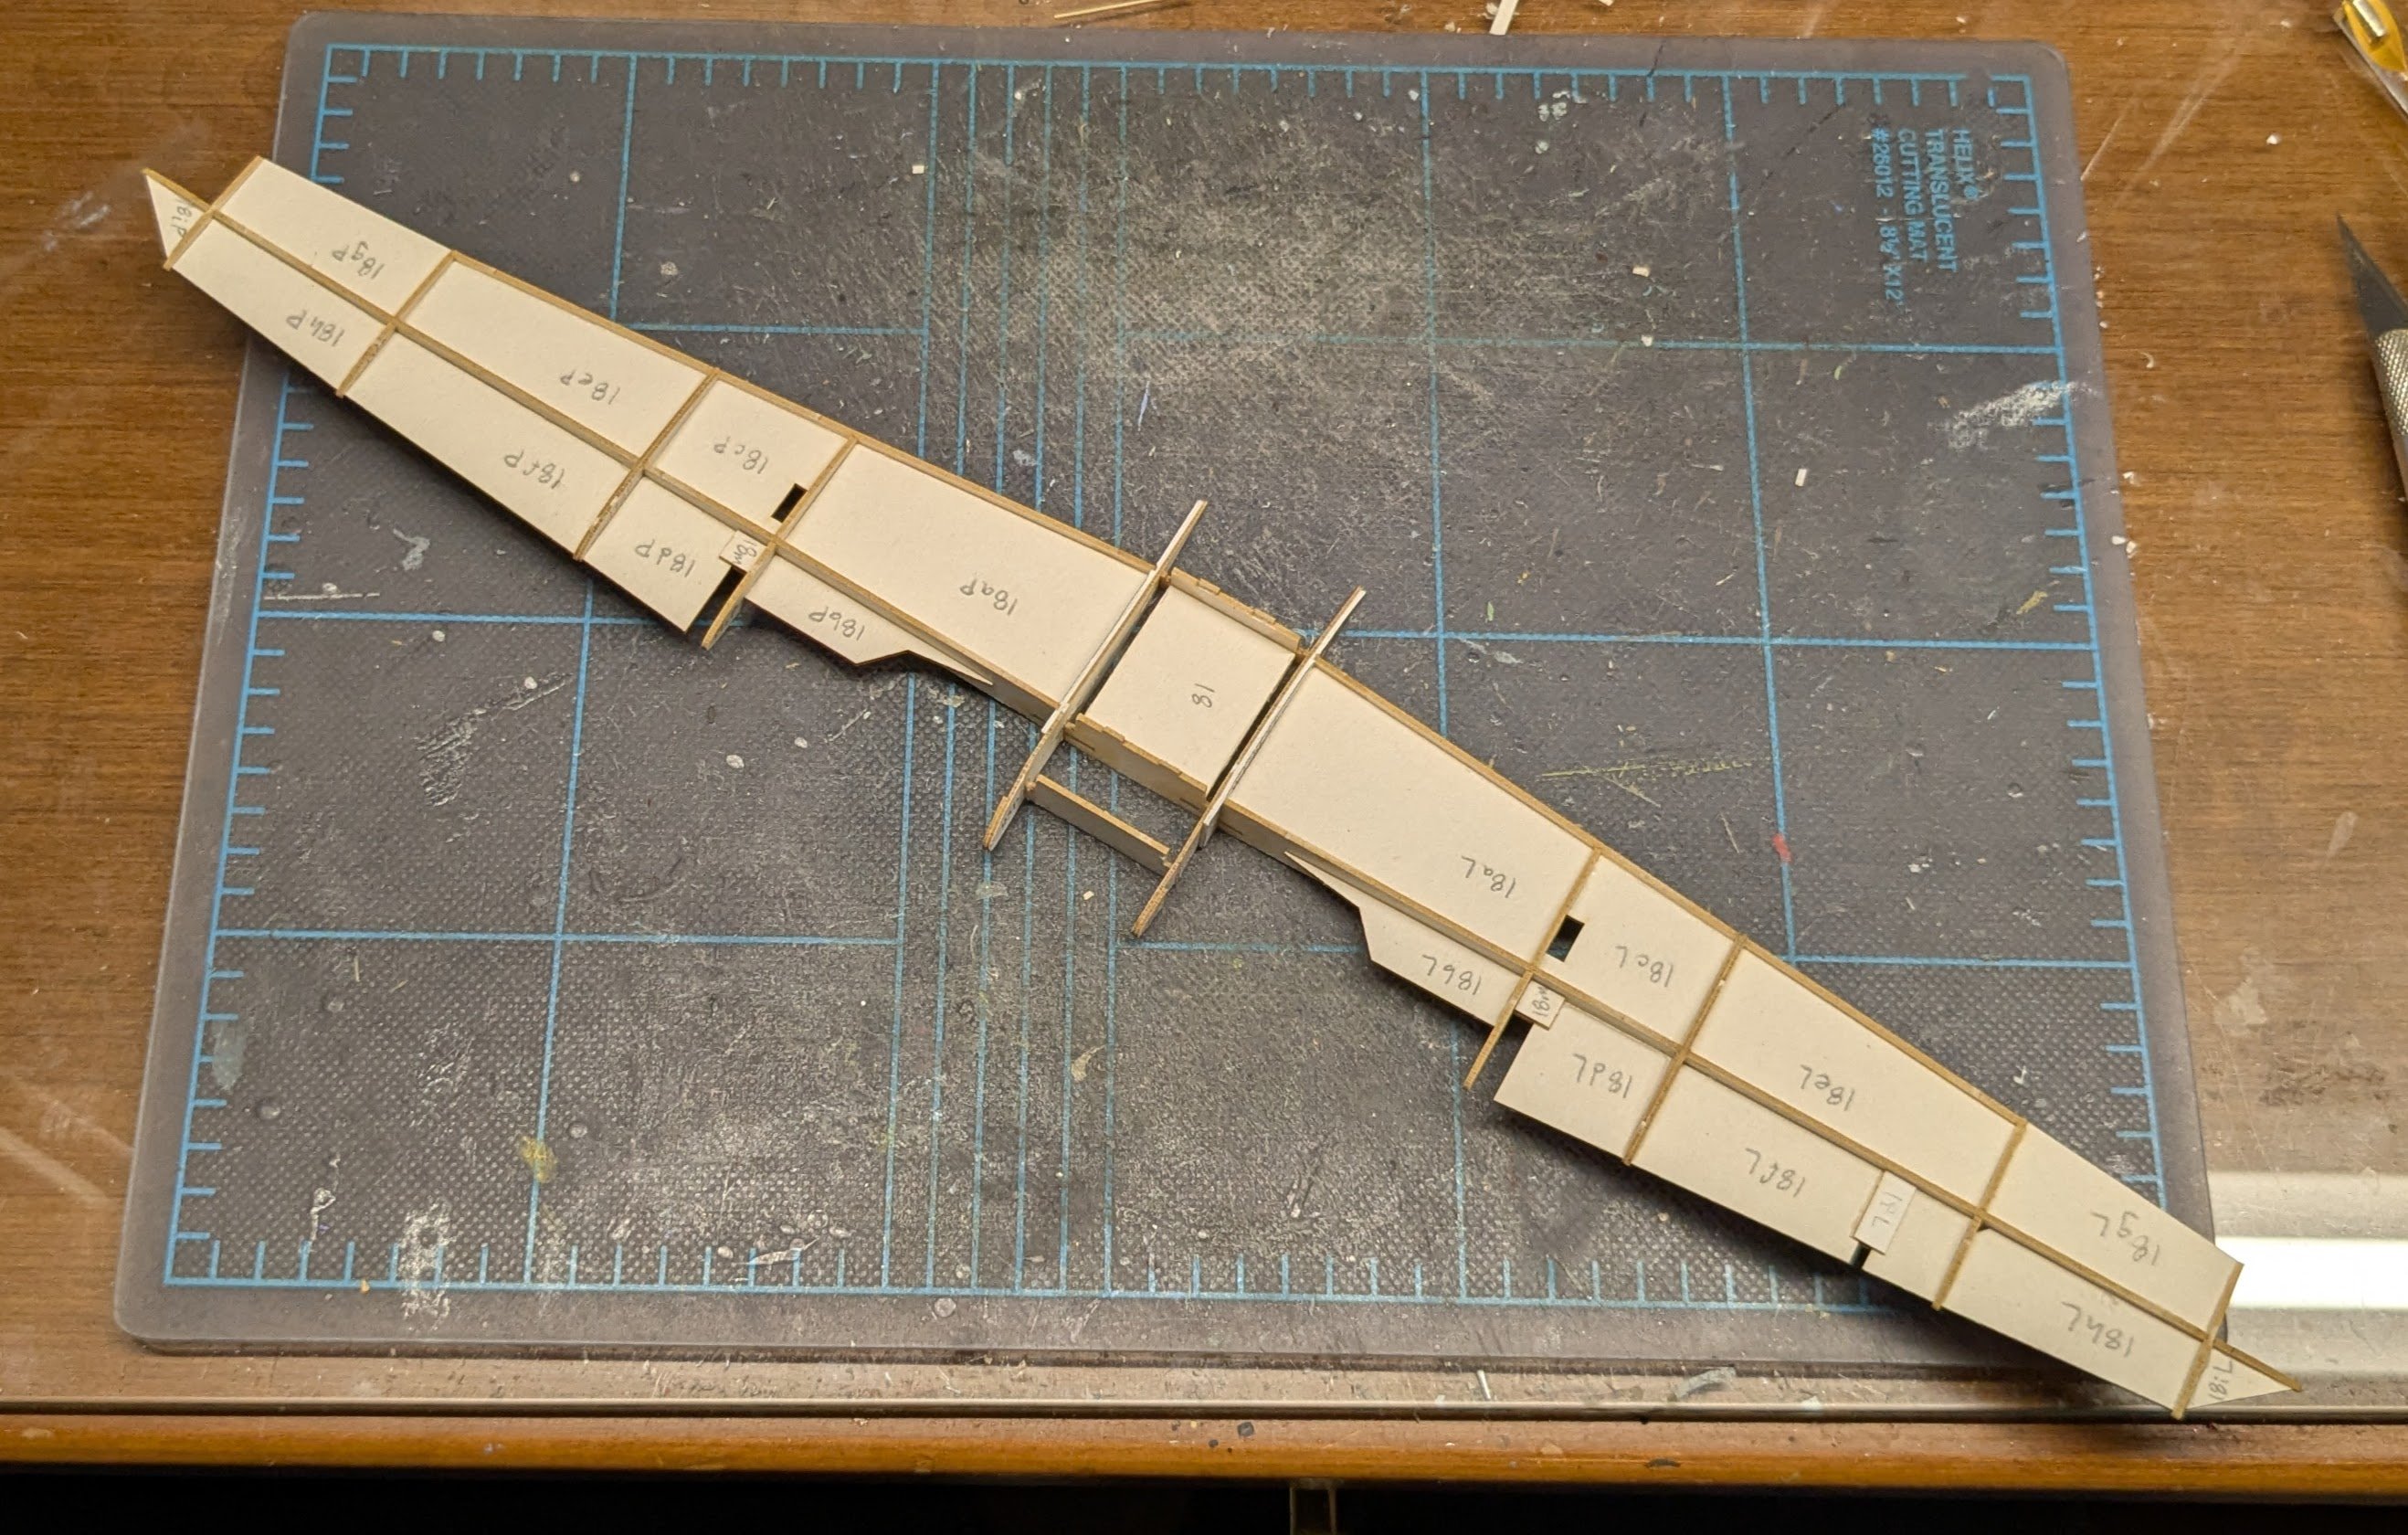
Wing framing begins. I might have had the wing framing done today except for the fact that I glued the first half-dozen parts together incorrectly and had to gently disassemble them before I could start over with attempt #2. I'm just glad I discovered the problem before I had gotten any farther! 😮

- 88 replies
-
- 17
-
-
Love a good pre-Dreadnought! I took the liberty of editing your title to reflect the fact that the kit is intended to depict Tsesarevich as he (the Russians use masculine pronouns for ships) appeared in 1917; he was launched in 1903. Cheers!
- 3 replies
-
- 3
-
-
- Tsesarevich
- Trumpeter
- (and 2 more)
-
In which offense is taken (or, "hey! I resemble that remark")
ccoyle replied to Cena's topic in New member Introductions
Welcome aboard! And I do hope you prove me wrong -- as I noted, there are exceptions to the general rule! -
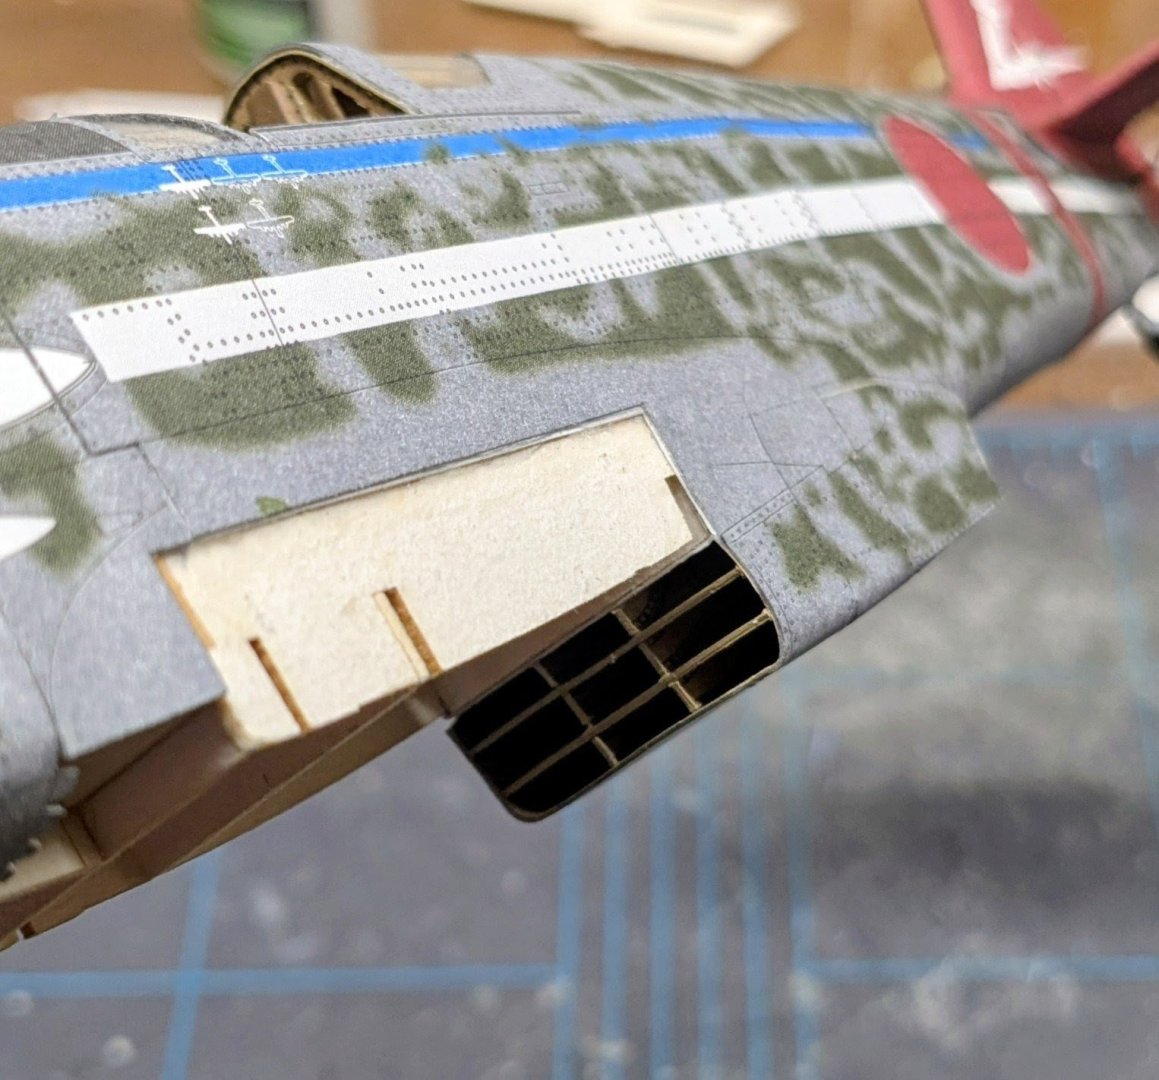
The radiator is finished. Looks simple enough, until you look at the diagrams. One can build the model with the radiator air flow control flap open or closed. I chose to show it closed. I realize that if the flap is hydraulically controlled, that it may drop open if the aircraft loses hydraulic pressure when the engine is cut off, like when the aircraft is on the ground, but I just like the closed look better. Same thing goes for flaps, when I get to those; they can be built in the open position, but at the cost of a LOT more work! Here is the finished radiator. And the radiator on the model: That hideous seam is partly the result of the little bit of error that cropped up when I skinned the cockpit. Remember when I said I hoped it wouldn't eventually bite me in the butt? Well, it did -- but ultimately not too badly. Most, if not all, of this will eventually be hidden by the wing. Just for fun, here's what the seam looks like after being treated with my phone's "magic eraser" editing function: As The Old Man in Das Boot would say, "Clever trick!"


- 88 replies
-
- 16
-
-
In between models, obviously!