MORE HANDBOOKS ARE ON THEIR WAY! We will let you know when they get here.
×


ccoyle
-
Posts
10,212 -
Joined
-
Last visited
Content Type
Profiles
Forums
Gallery
Events
Everything posted by ccoyle
-
 The amount of enjoyment you may or may not miss out on depends solely on the builder. Some are happy using whatever materials come in the box, others go all-out to super-detail their models, and many fall somewhere in between those two extremes. Anyways, as to replacement blocks, there are several suppliers in the US. Model Expo is the place if you want to get the usual kit-grade blocks. If you want to up your game, you can try boxwood blocks from Syren Ship Model Company. There are more options from overseas suppliers, but check out these two first. Cheers!
 -
Welcome and good luck on your project!
-
The other two bits are blocks, single and double according to the number of sheaves. Wooden blocks and deadeyes are available from a number of sources. Let us know where you're located so we can save you some postage by finding a source near you.
-
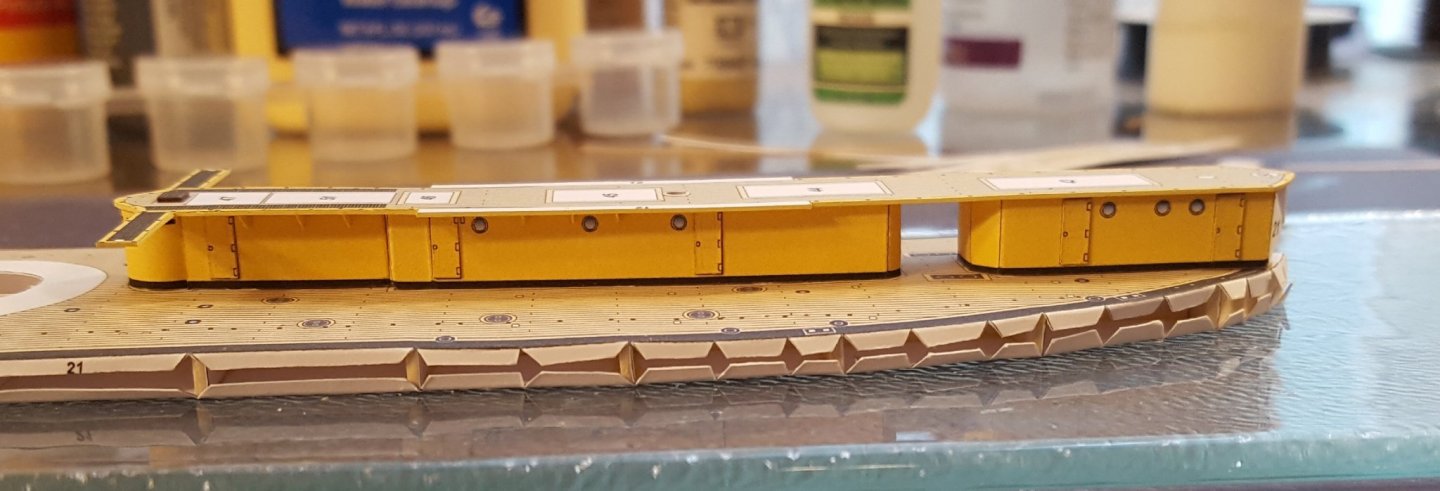
Forward superstructure dry fit -- can't glue it down until some fiddly bits that go beneath it are finished (parts in the background).
- 45 replies
-
- 8
-

-
- Tijger
- Paper Shipwright
- (and 2 more)
-
Nice work, Tomek! I like how the stern carvings turned out.
- 26 replies
-
- 1
-
-
- Seahorse
- De Zeven Provincien
- (and 2 more)
-
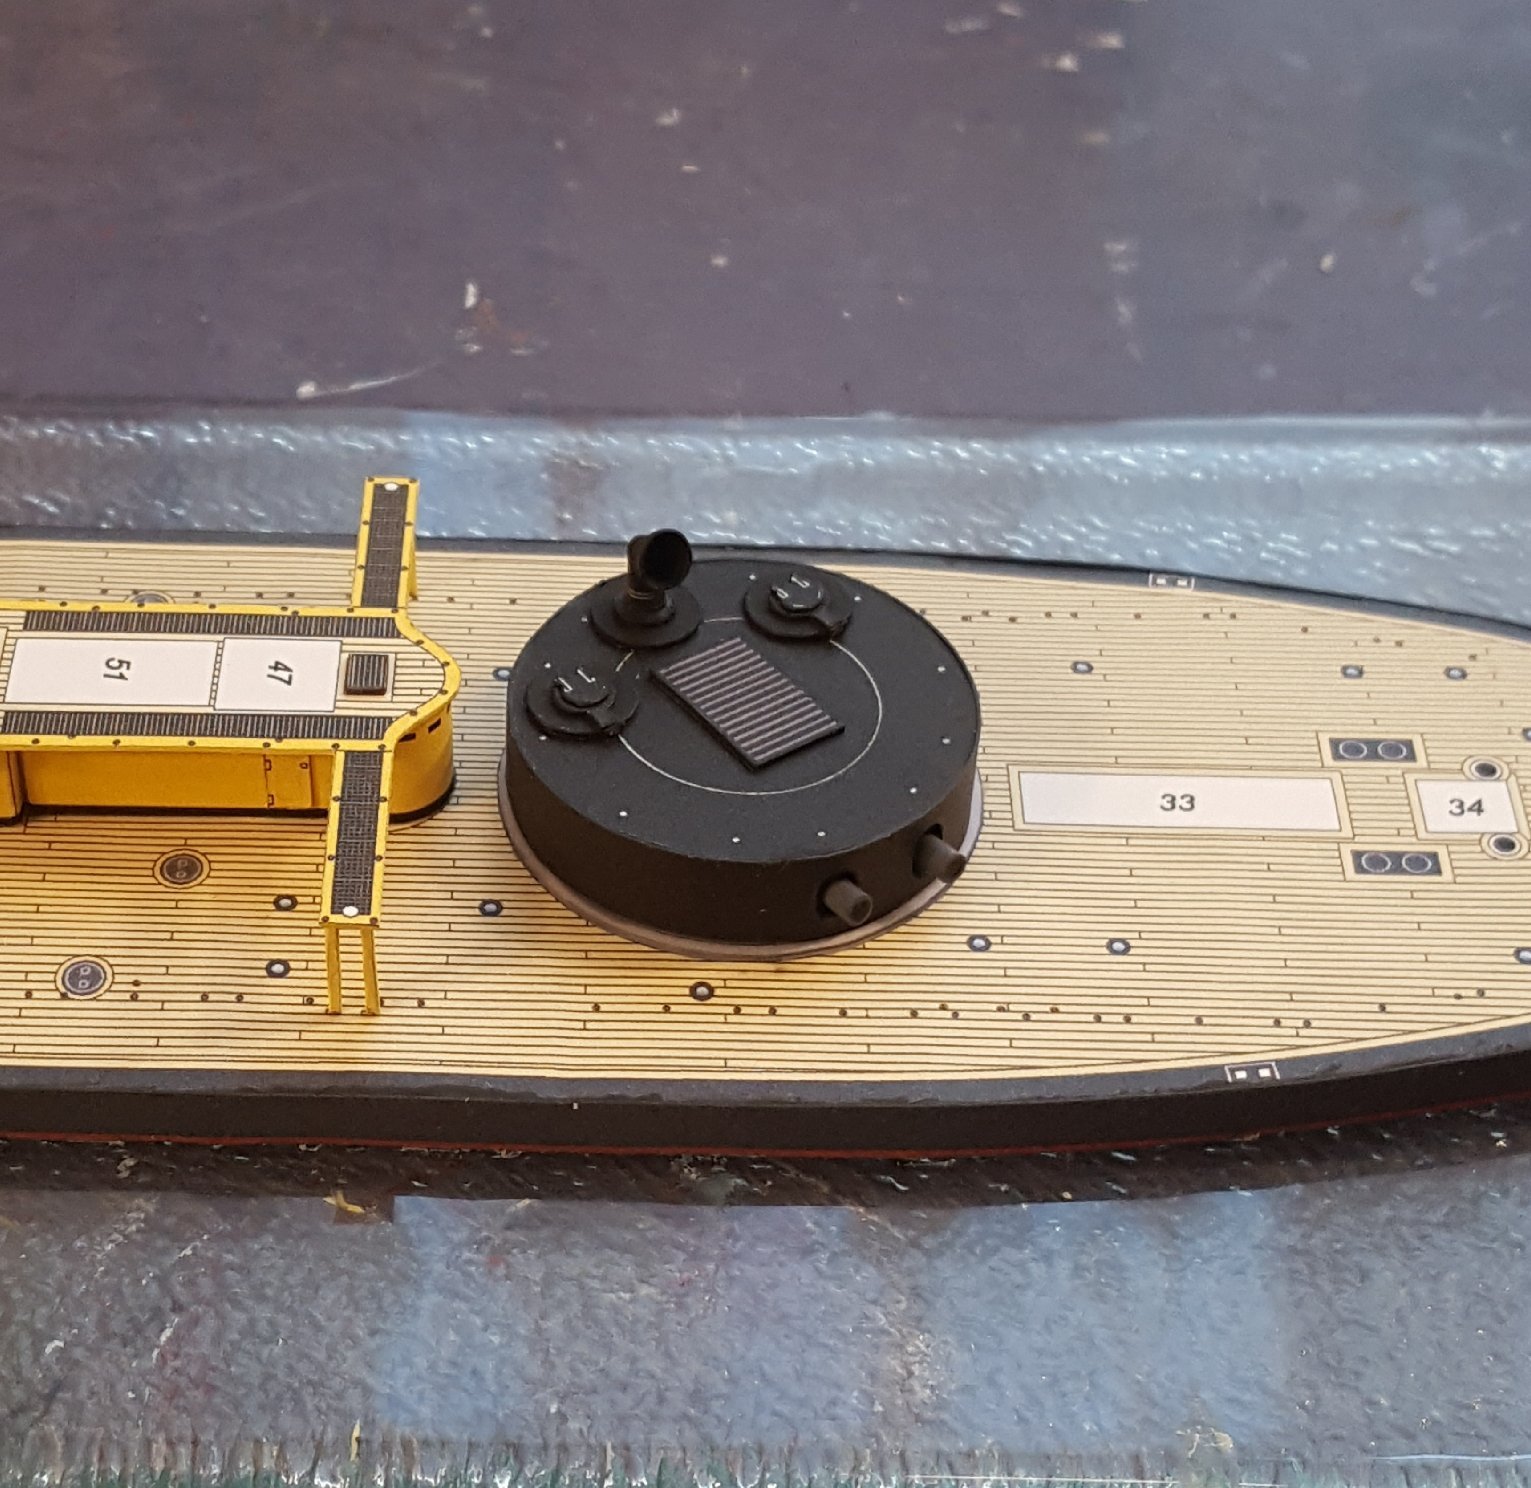
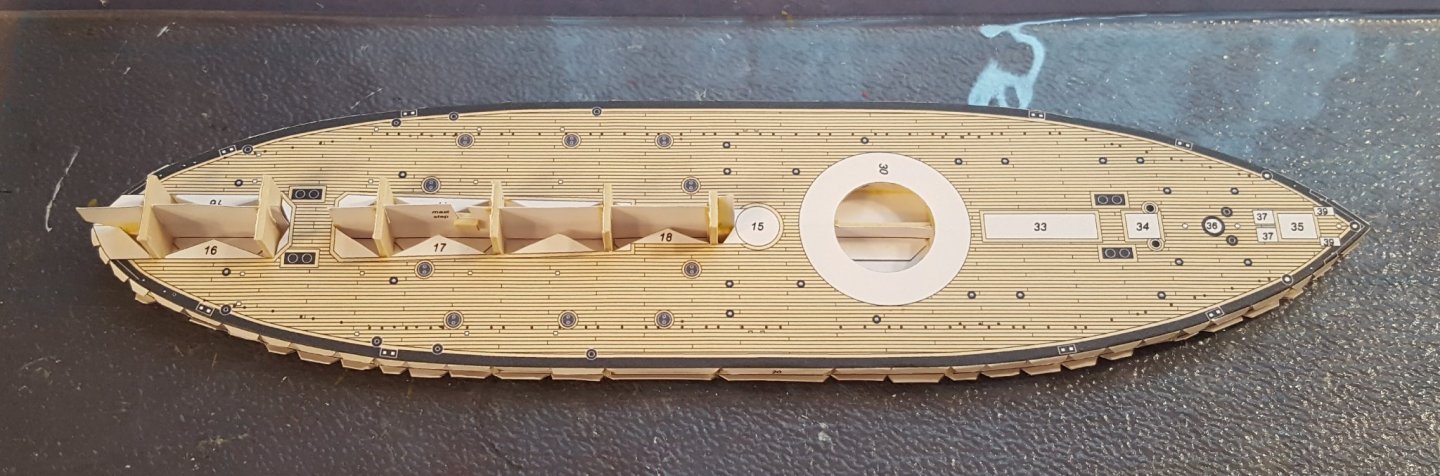
Hull sides, bridge wing struts, and hammock lockers added. Turret is up next.
- 45 replies
-
- 10
-
-
- Tijger
- Paper Shipwright
- (and 2 more)
-
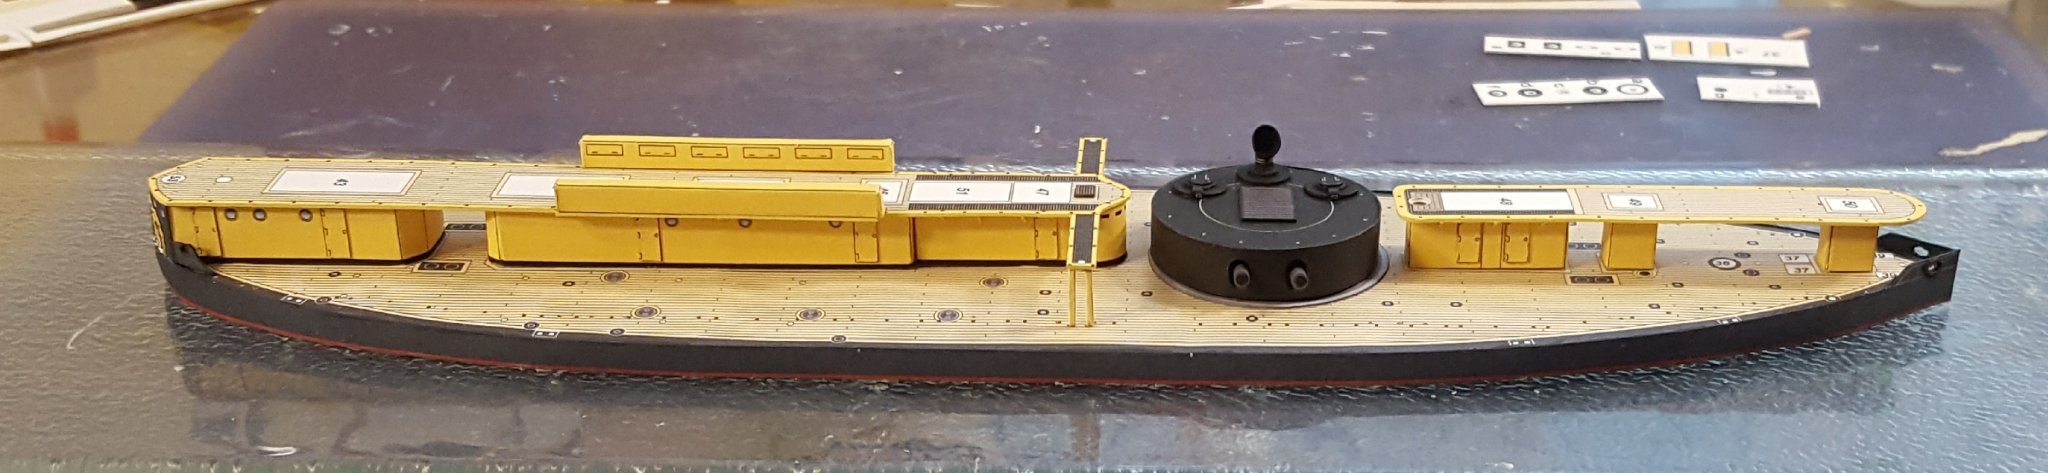
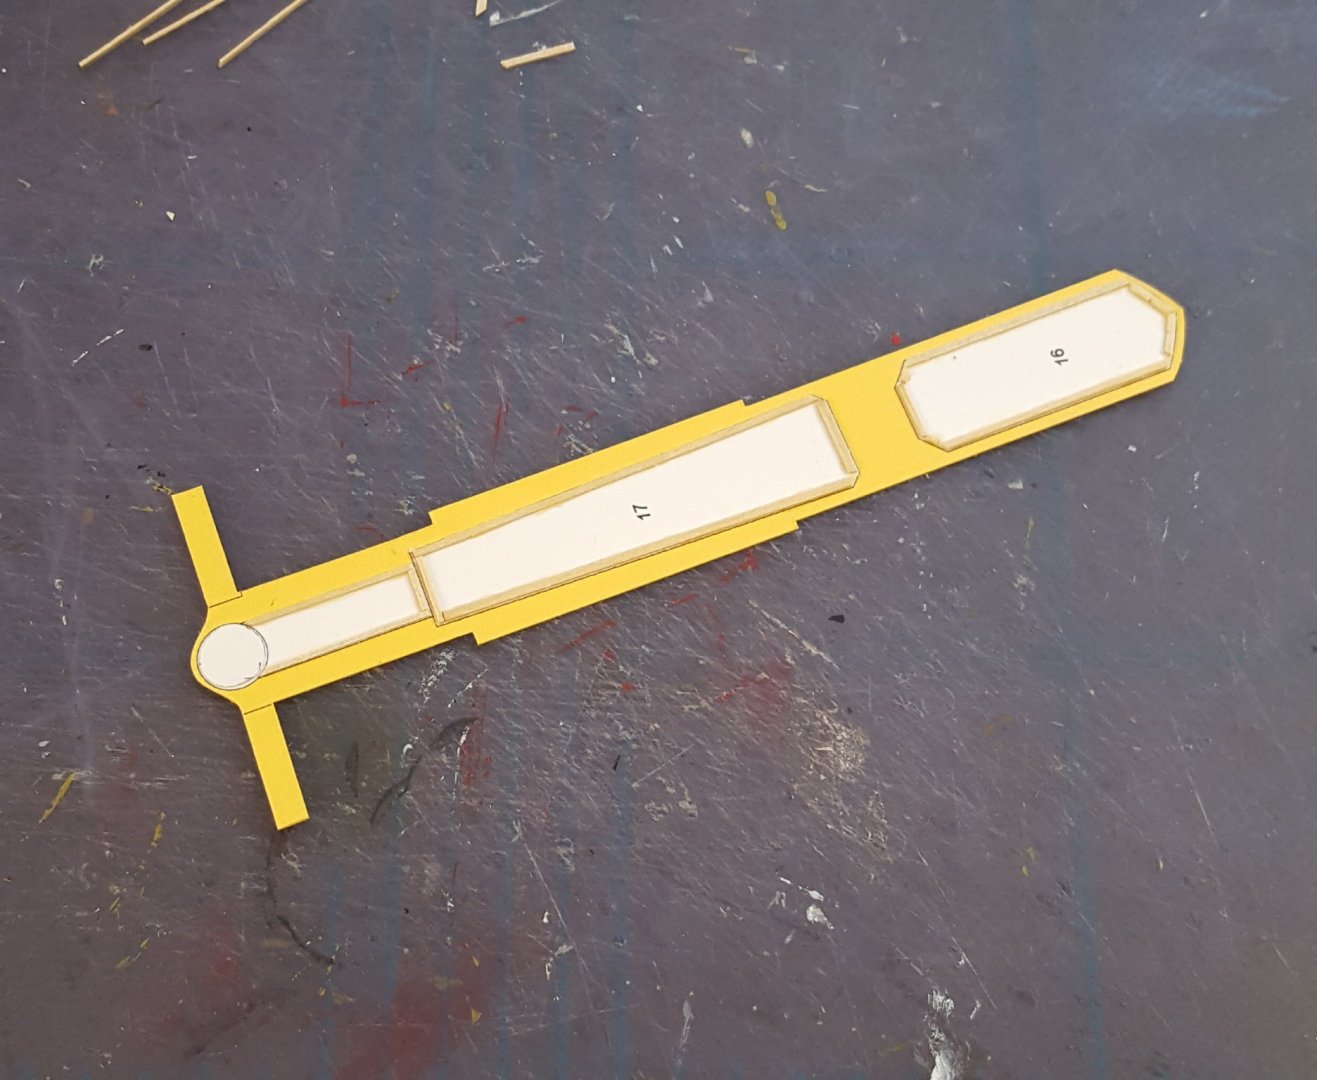
Moving right along to the aft superstructure. The kit uses gluing tabs on parts like this, which I don't care for. That's not a knock against David's design, since lots of other kits use this same technique. But as I explained in my V-108 tutorial, these tabs act like little springs and don't allow structures to seat as well as they could. What I do instead is cut all the tabs off, then use furring strips cut from scrap material to line where the parts will be glued down; each strip acts as both a part locator and a gluing surface and should produce minimal seams between the glued parts. I did both the main deck and the underside of the superstructure deck in this manner. And here's the aft superstructure glued down to the main deck. It doesn't look like much, but there are 30 parts in the sub-assembly. The doors are doubled. The tiny little braces on either side of the structure were not included in the kit, but the superstructure walls were marked for something, and braces were my guess based on similar ships from the same period.
- 45 replies
-
- 12
-
-
- Tijger
- Paper Shipwright
- (and 2 more)
-
Hi, Meredith. It looks like at least some of your build log photos may have been lost in one of our software updates a while back. It might be helpful for interested folks if you could post a couple of pictures in this thread.
-
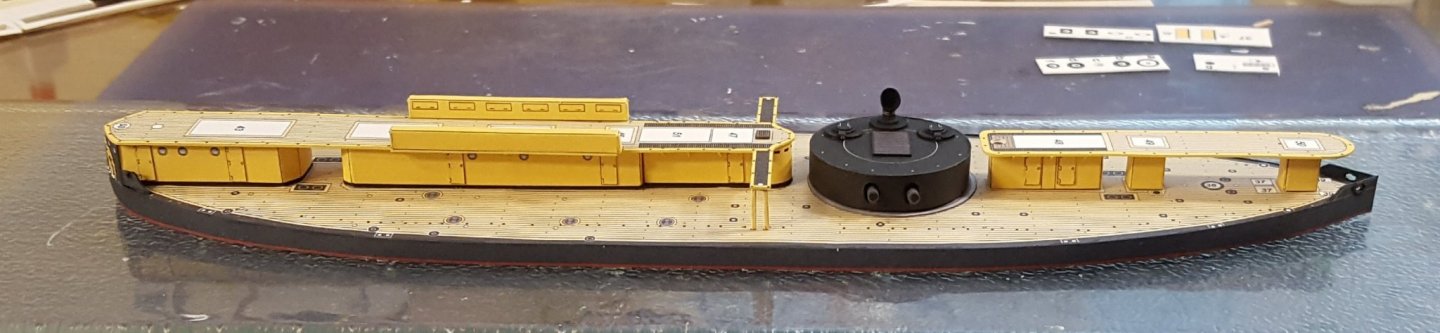
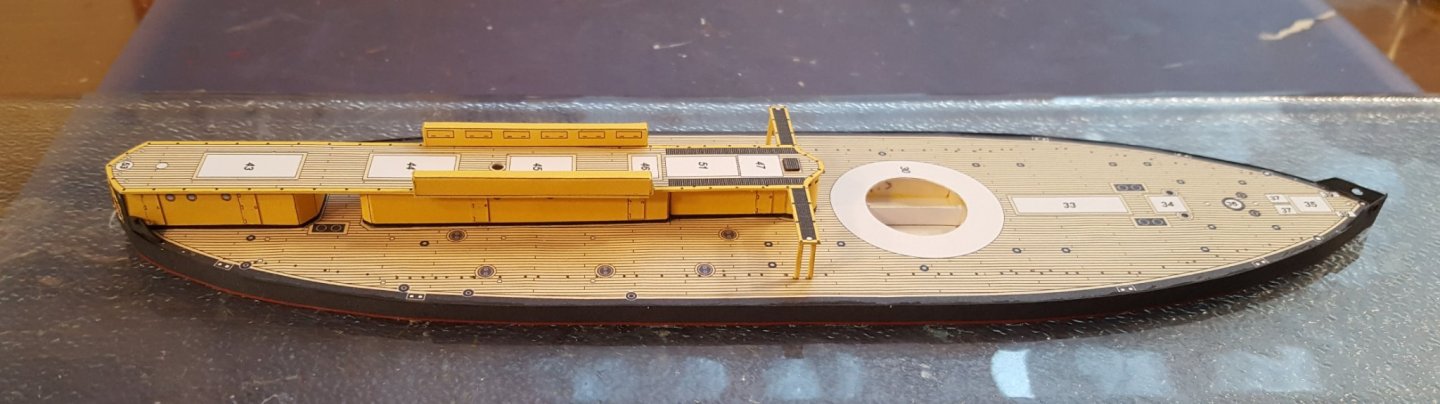
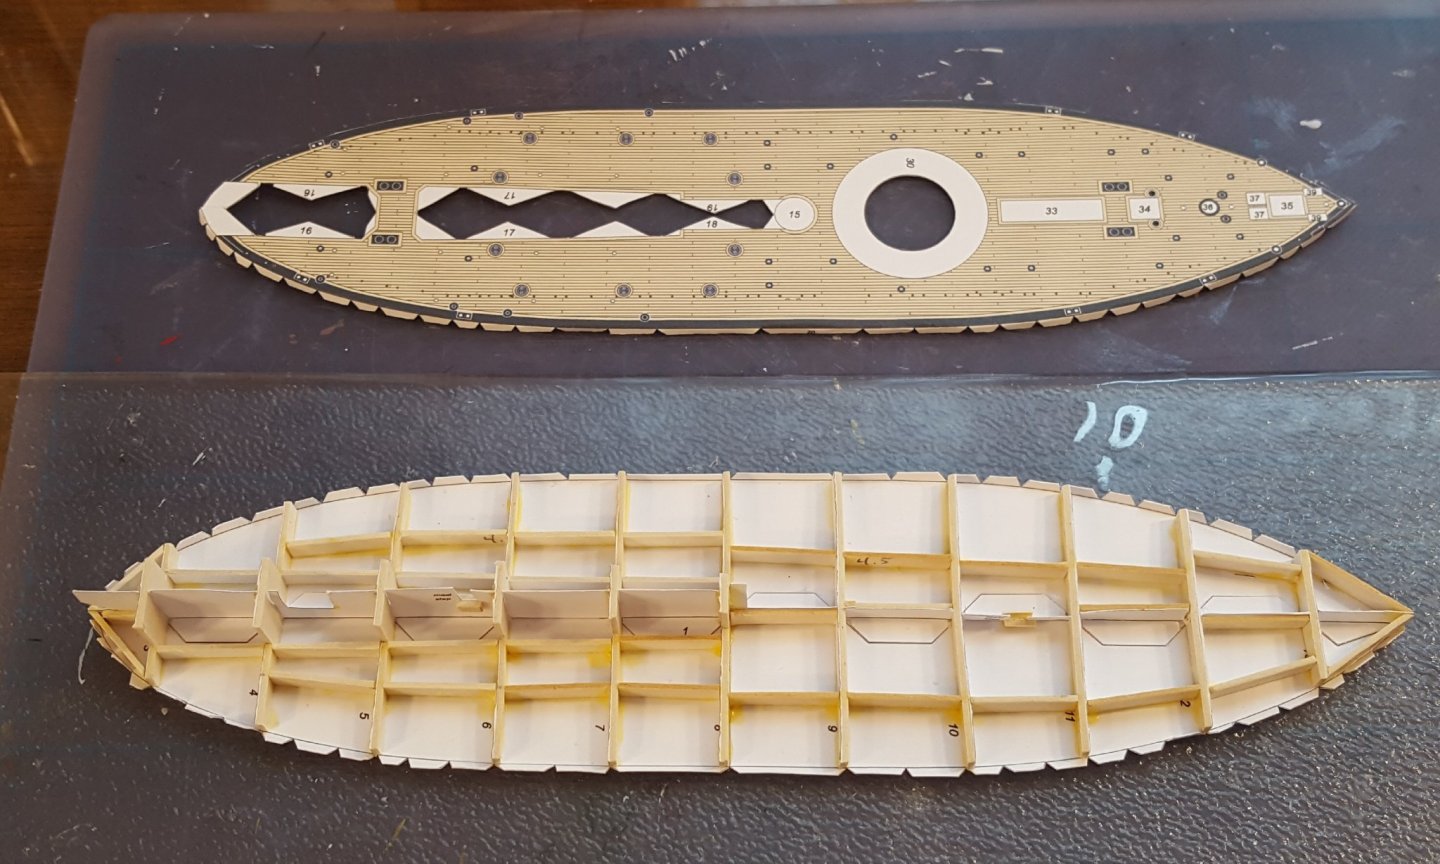
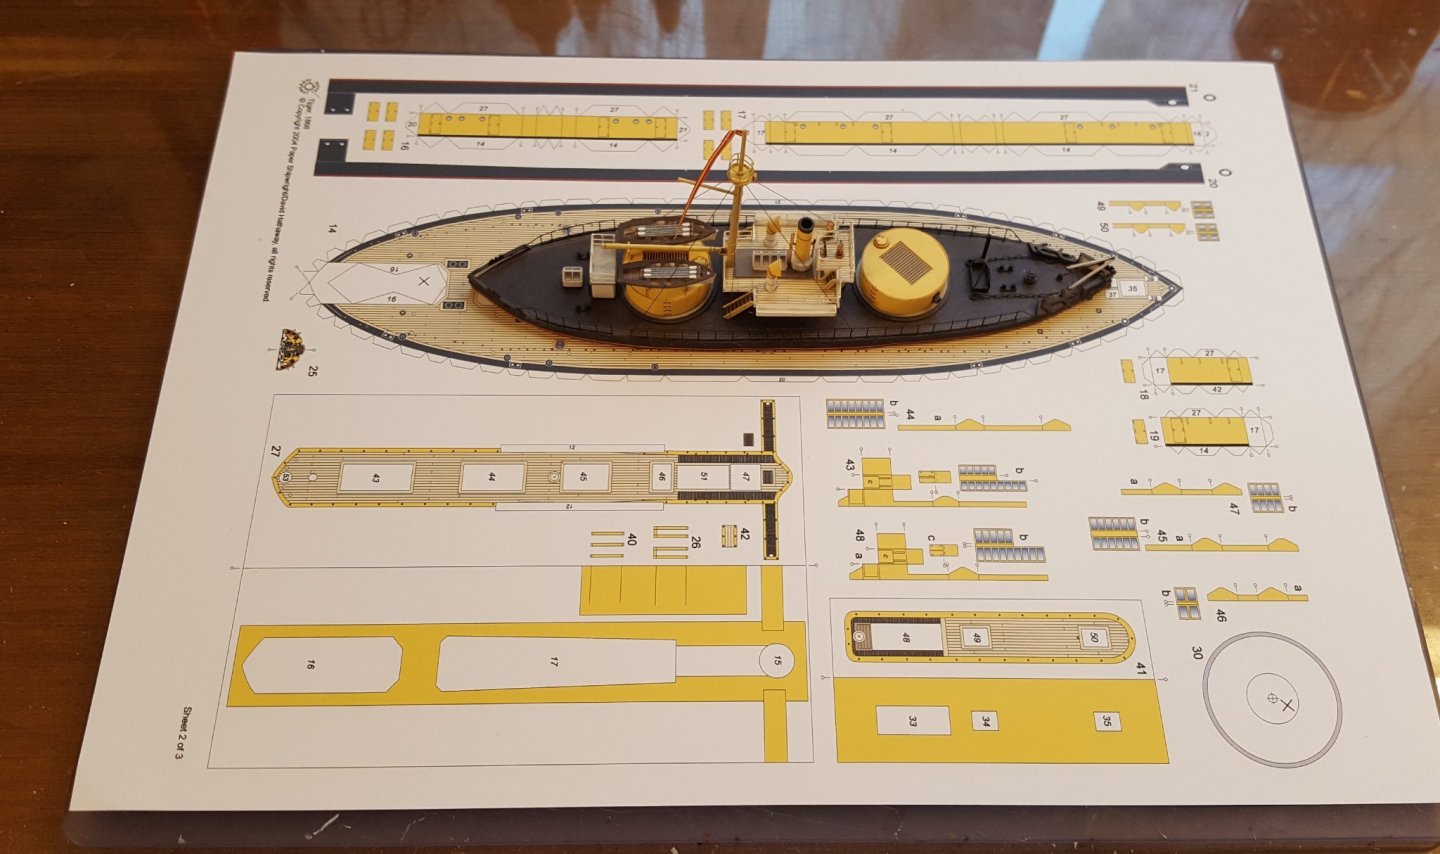
First step was to cut out the base plate and temporarily fix it to a piece of glass to keep it flat during construction. Then came the hull formers. I never have much luck with using the plain card pieces by themselves -- I always seem to get some "starving cow" sagging between bulkheads. In fact, one reason why I chose Tijger as my next project is because I mistakenly assumed the deck is flat; I was going to see about getting a piece of wood planed to the correct thickness and create a solid hull. But, in fact, the deck has a slight bit of camber, so I went with option #2, which was to glue the formers to some leftover laser-cut sheets (this is where hoarding comes in handy) before cutting them out, which produces a sturdier sub-structure and provides more gluing area. Before attaching the deck, I had to cut out the recesses for the aft deck houses and turret; the latter action is optional depending on if one wants the turret to be able to rotate or not. I'm going for the rotating turret. I also located and made holes for the future mast shrouds and stays. Then the deck was carefully glued on. Can't complain too much so far.
- 45 replies
-
- 13
-
-
- Tijger
- Paper Shipwright
- (and 2 more)
-
That's the only one I'm familiar with.
-
Hello, Ian. You have made a very good start on this kit. You might not know that this kit is an early design effort by Chris Watton, who is a member here and now runs his own company, Vanguard Models. Many design compromises were made for Sherbourne with the intention of making the kit easier for beginners to complete, so yes, there is plenty of room for improvement in the level of detail. A big help for me when I built mine 20 years ago was a volume from the Anatomy of the Ship series on the cutter Alert; the two ships are not exactly alike, but the book can help you with detailing the model. One thing that you might wish to consider is making the rig more period-appropriate. You can see what this looks like on my example in the gallery here. Again, this modification was done using the Alert book as a source. But, do as much or as little extra detailing as you like. The main thing is to enjoy the build. Cheers!
-
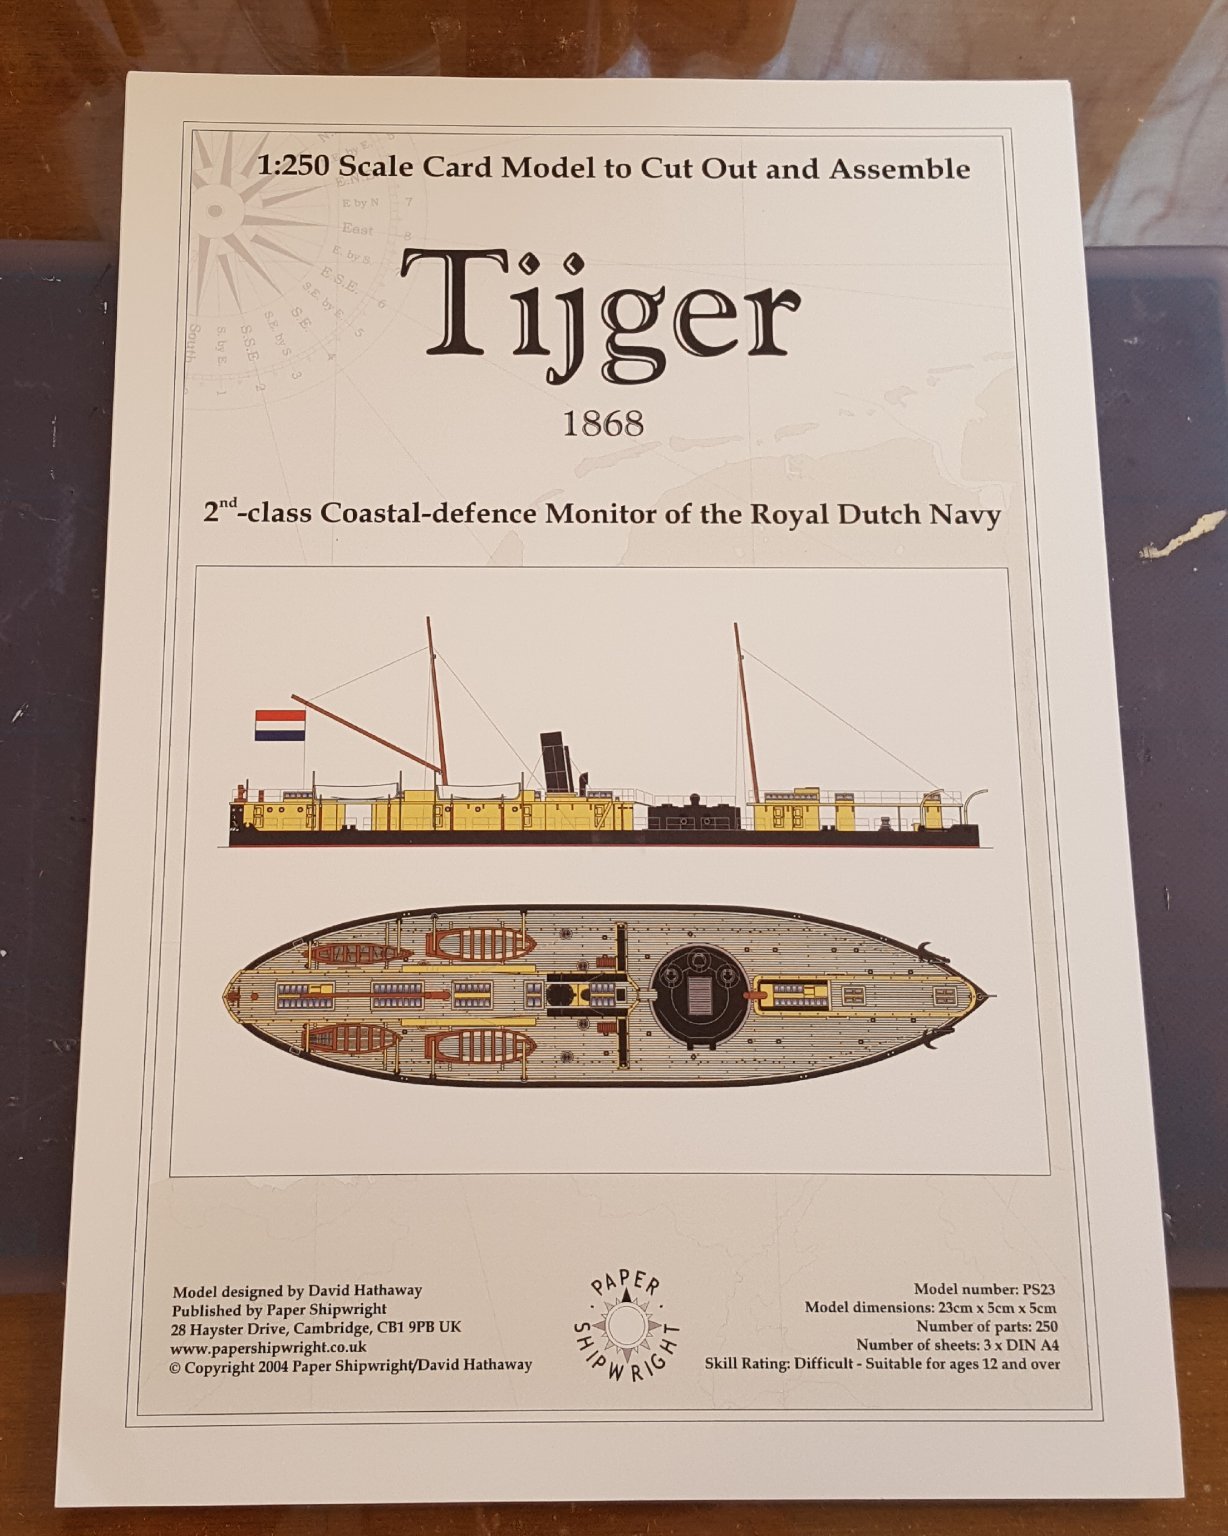
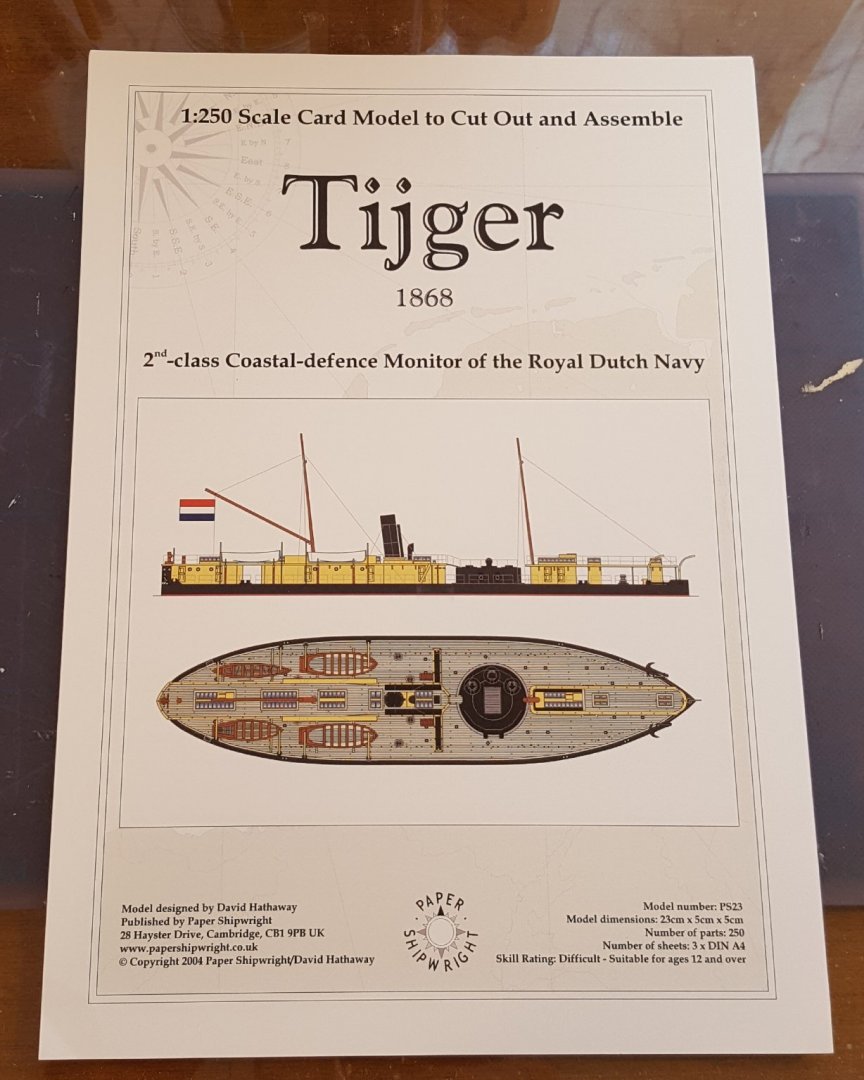
Well, not resting on my laurels here -- moving right along to the next project. I wanted to get back to ships and do something not terribly difficult. Tijger fits the bill, so off we go. Tijger was one of five Heiligerlee-class monitors laid down for the Dutch navy in 1867. Roughly 192 ft in length with a beam of 44 ft, they had a draft of only 9 ft 9 in, displaced 1555 long tons, and carried a pair of 23 cm guns in a single turret. Tijger was auctioned off in 1895. At 1/250 scale the finished model will be 23 cm long. In the second photo you can see one of my earlier models, the Spanish monitor Puigcerda, sitting atop Tijger's deck for a size comparison. Build pics to follow soon. Maybe. P.S. My understanding is that HNLMS (His/Her Netherlands Majesty's Ship) is an international prefix for Dutch ships, and that internally the Royal Netherlands Navy uses the prefixes Zr./Hr. Ms. (Zijner/Harer Majesteit's). Here in the American Deep South we would probably just call them "Y'All's Ship," as in, "Y'all's ship is blockin' muh party barge."
- 45 replies
-
- 10
-
-
- Tijger
- Paper Shipwright
- (and 2 more)
-
Acrylics and regular ol' acrylic matte clear spray.
-
Nope. The parts sheets were sealed before construction started.
-
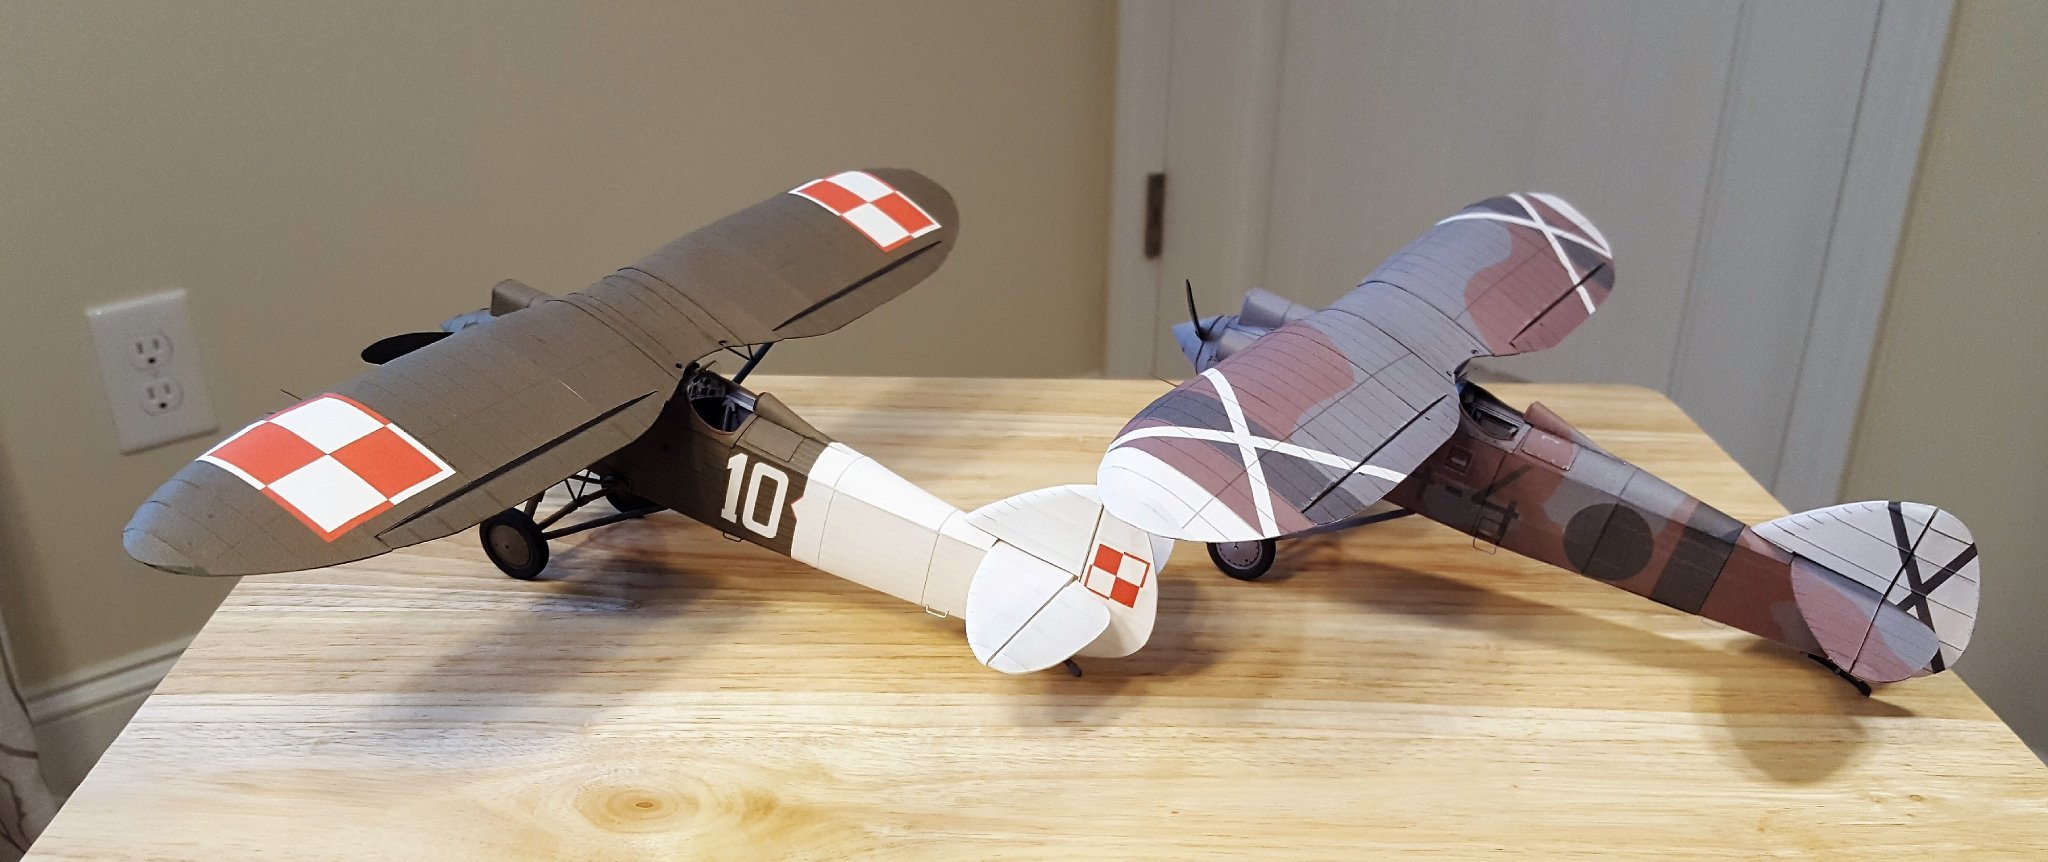
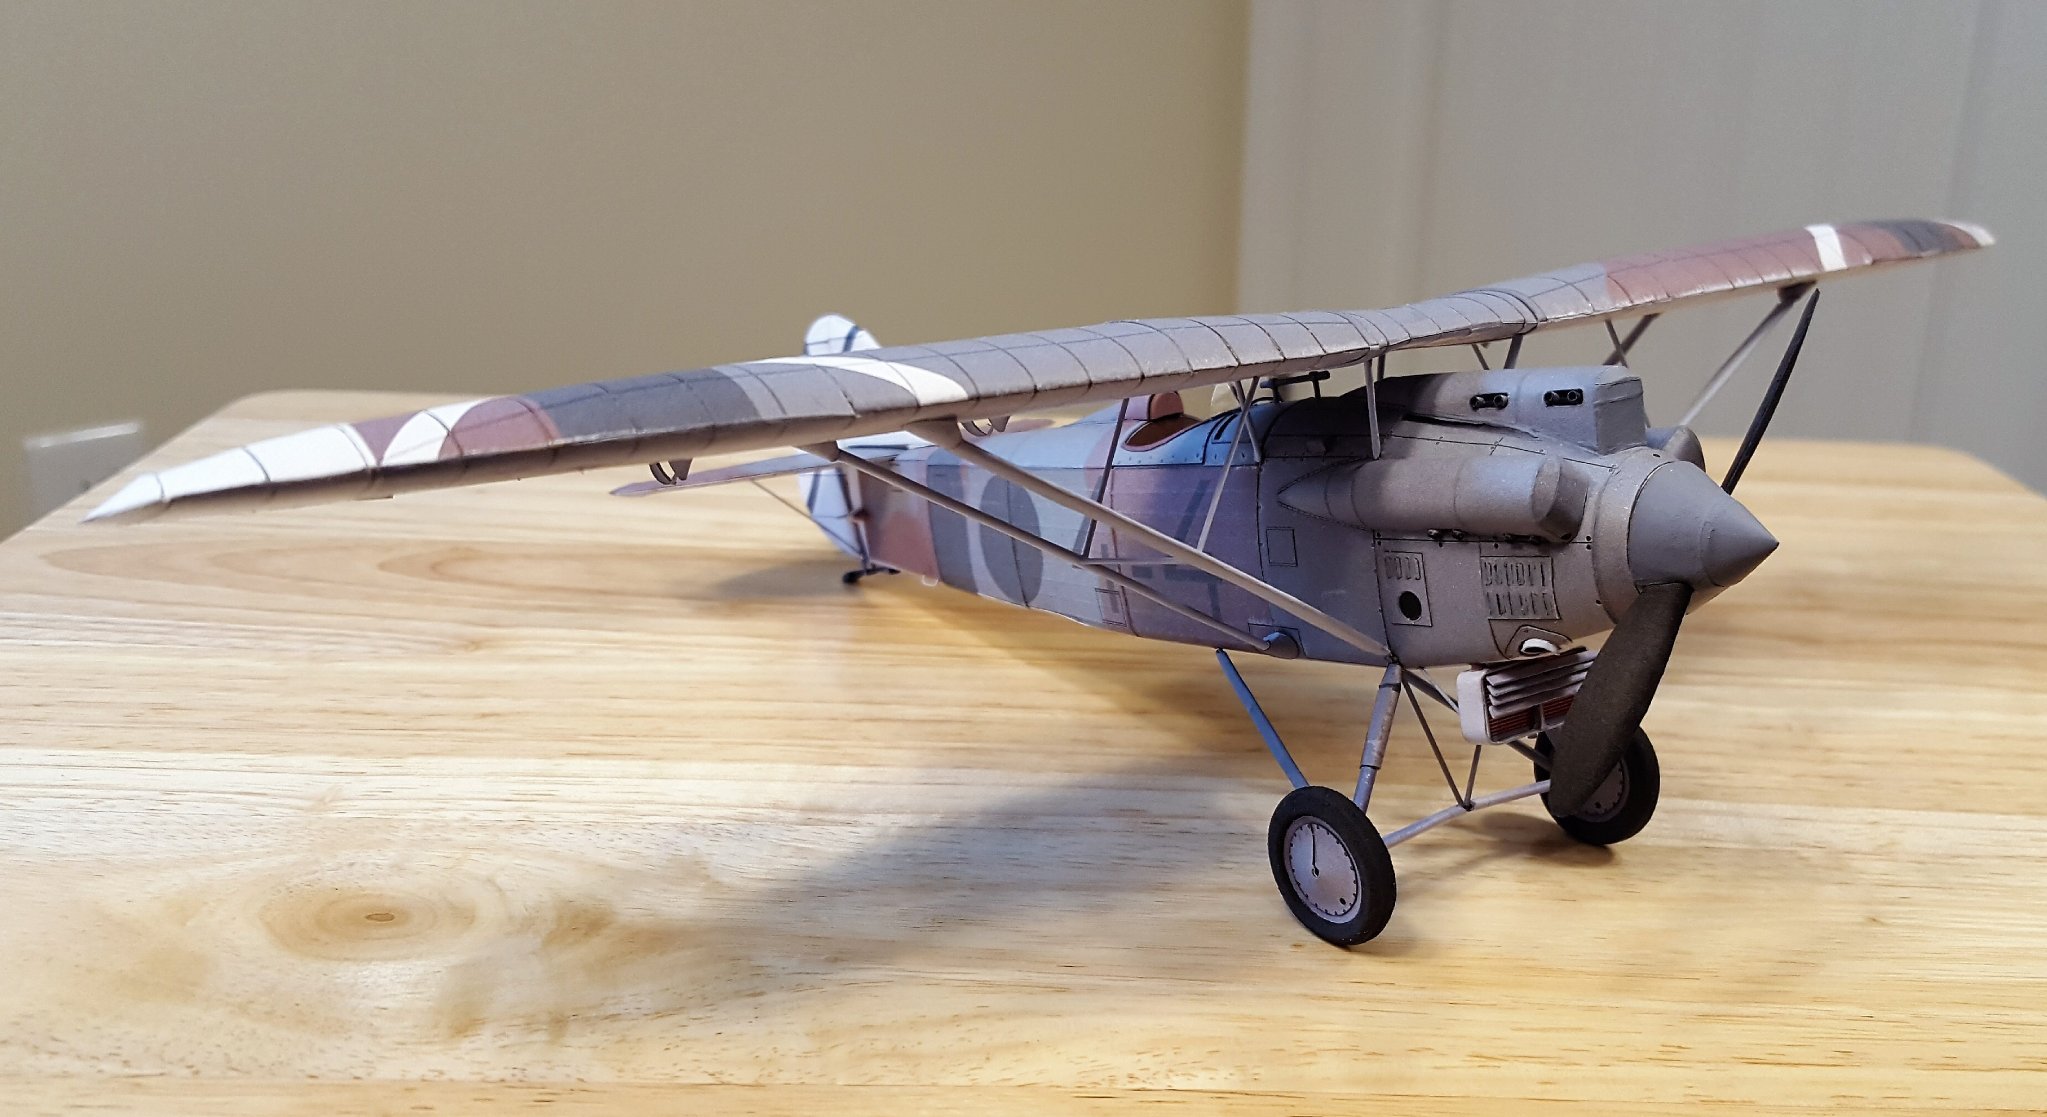
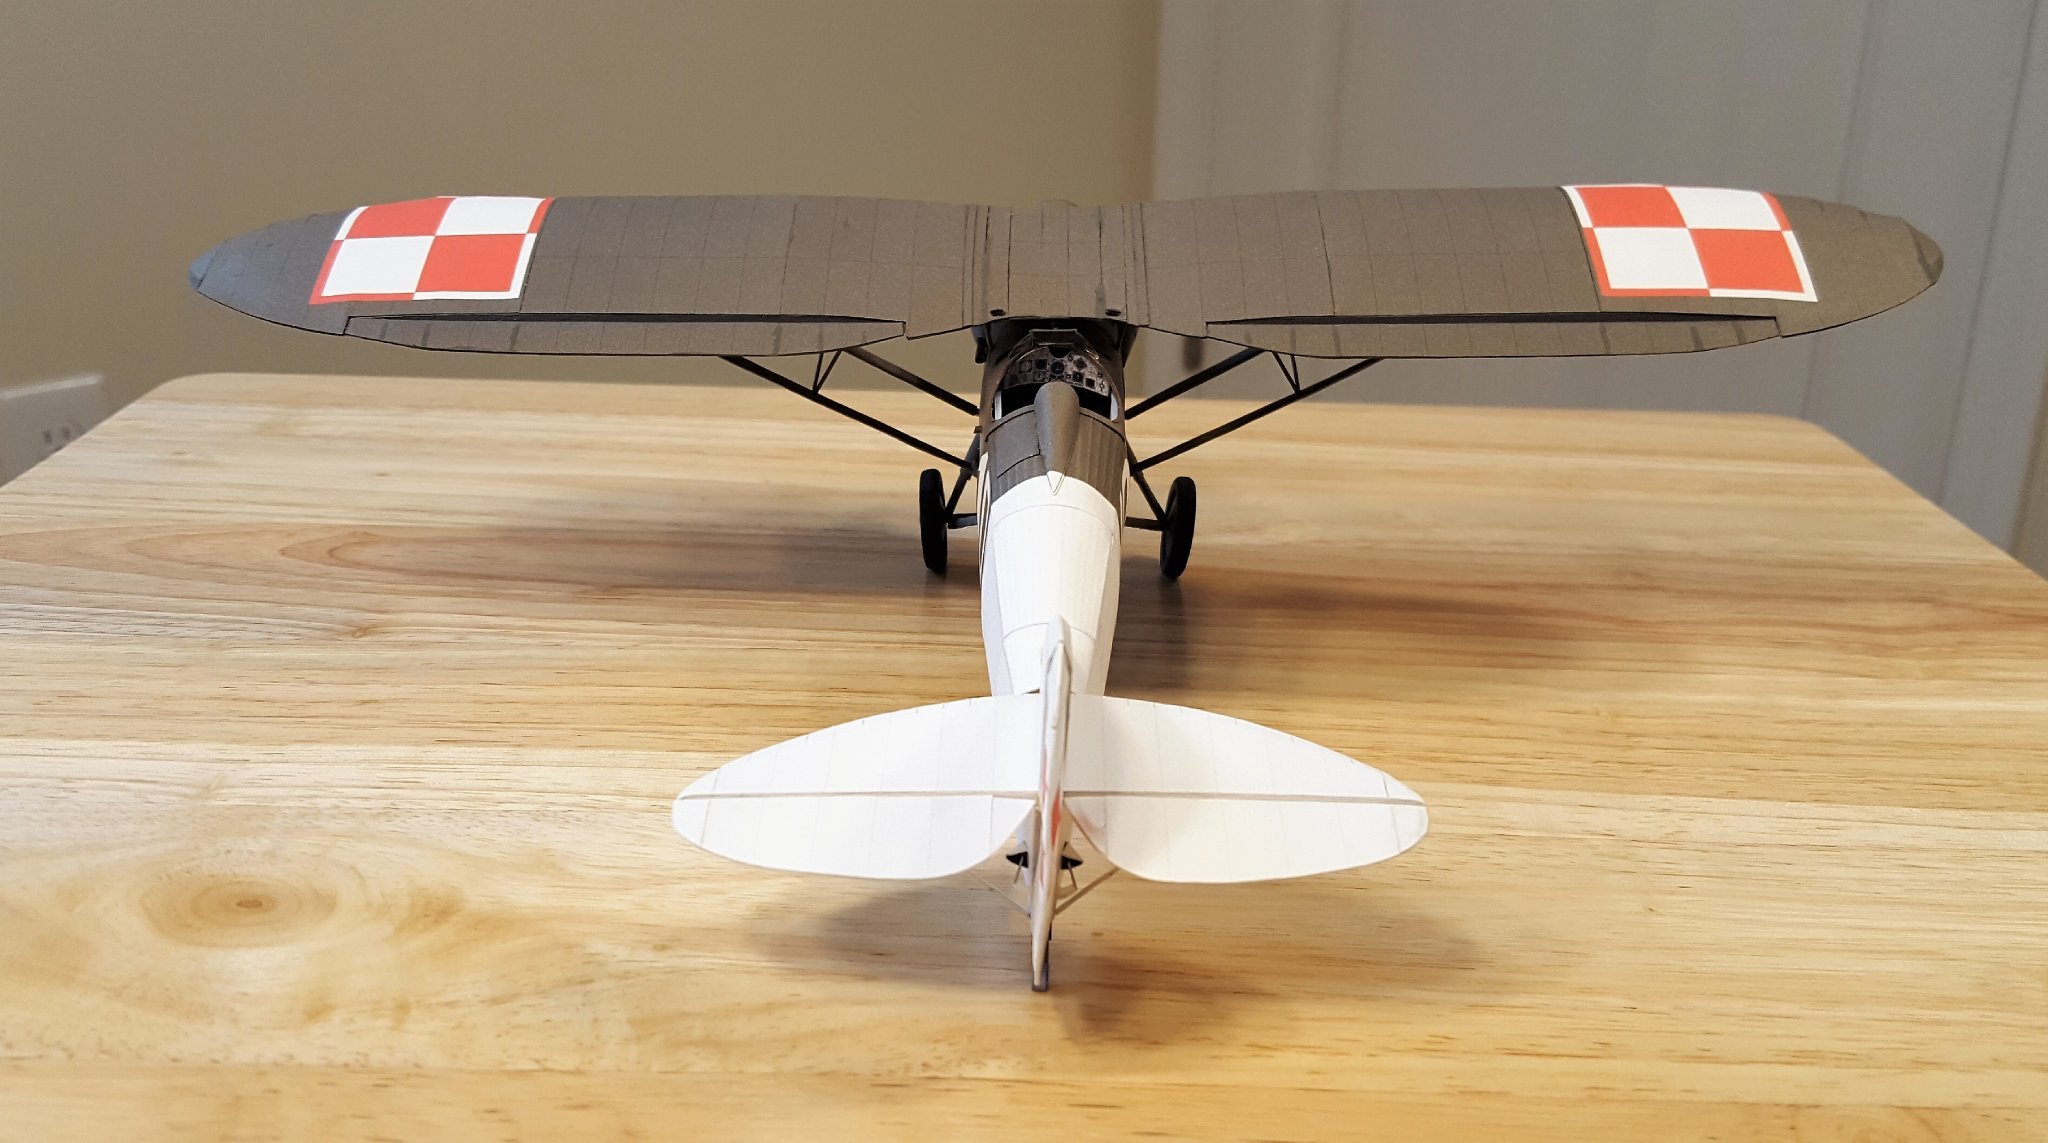
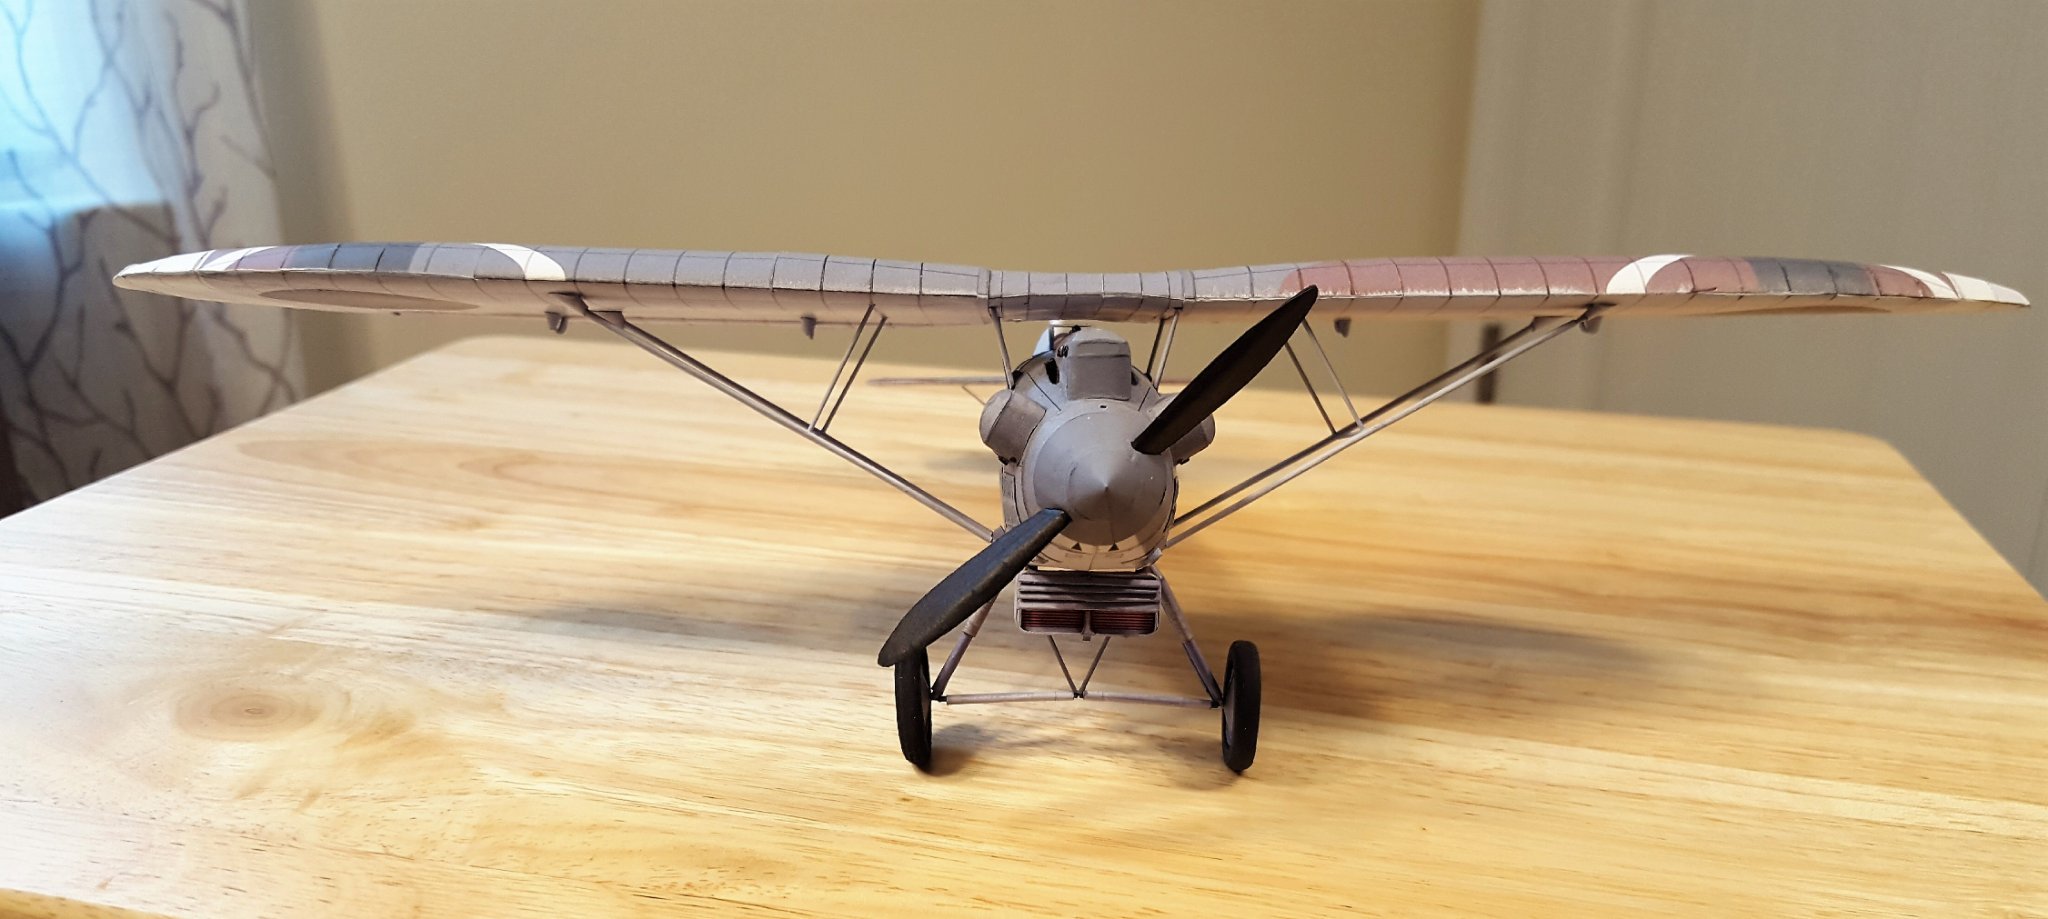
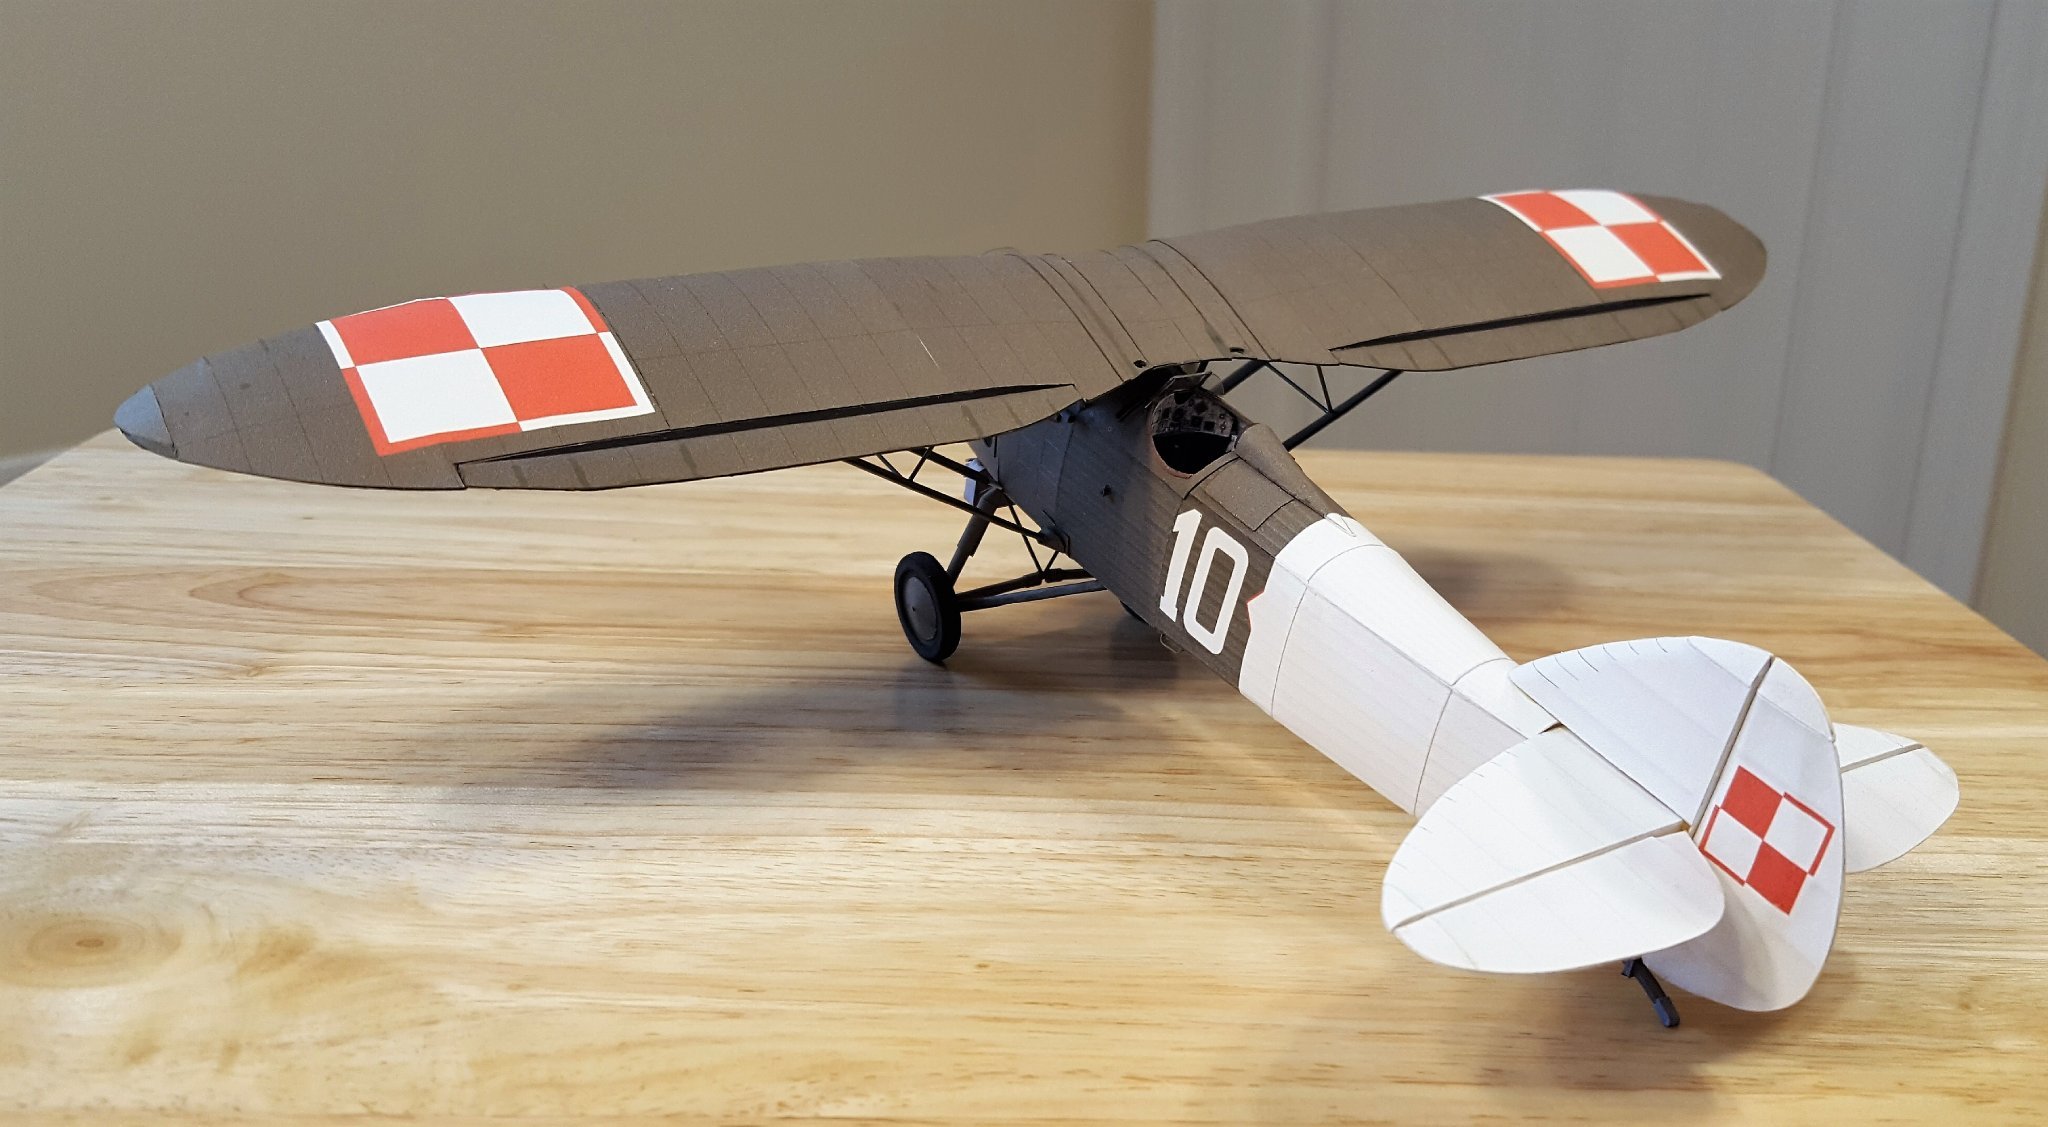
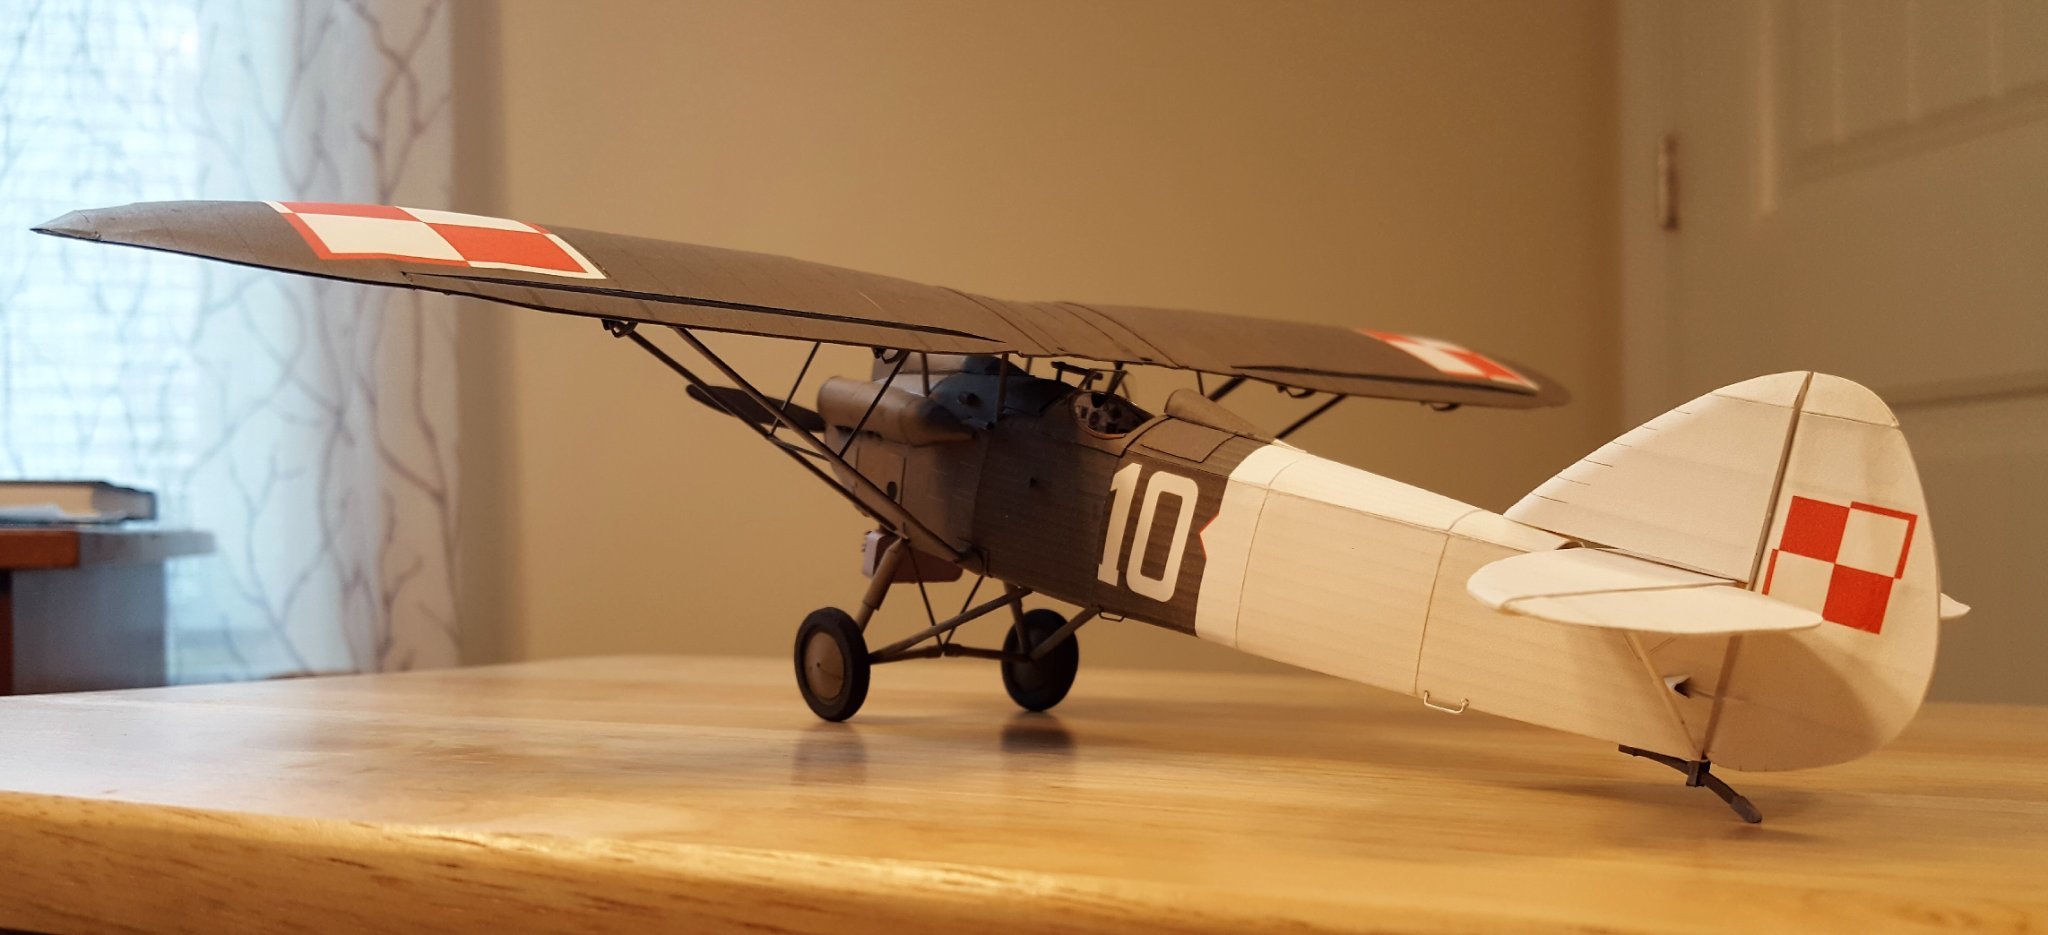
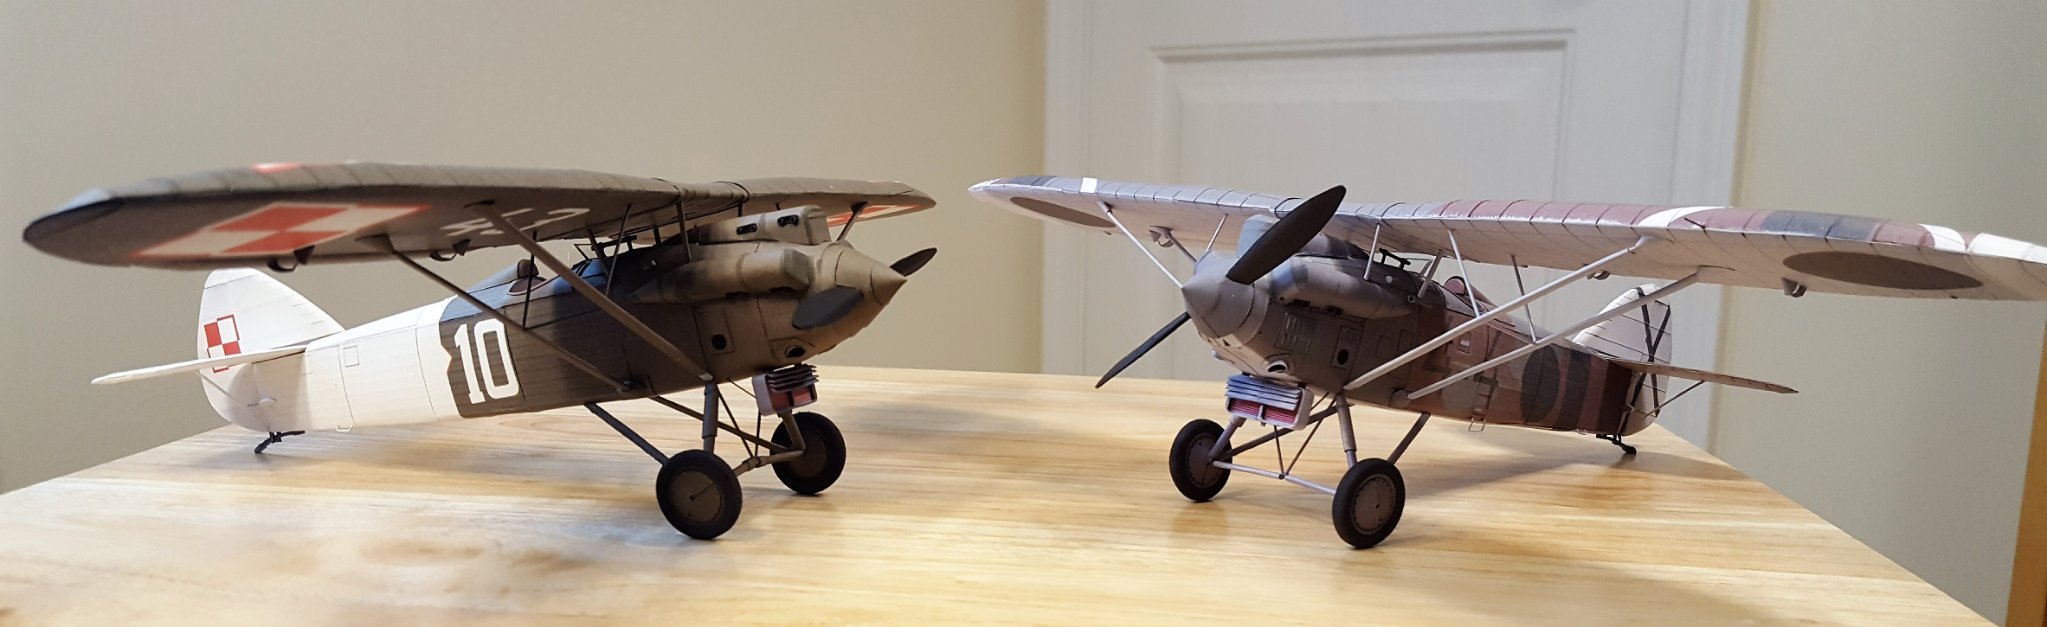
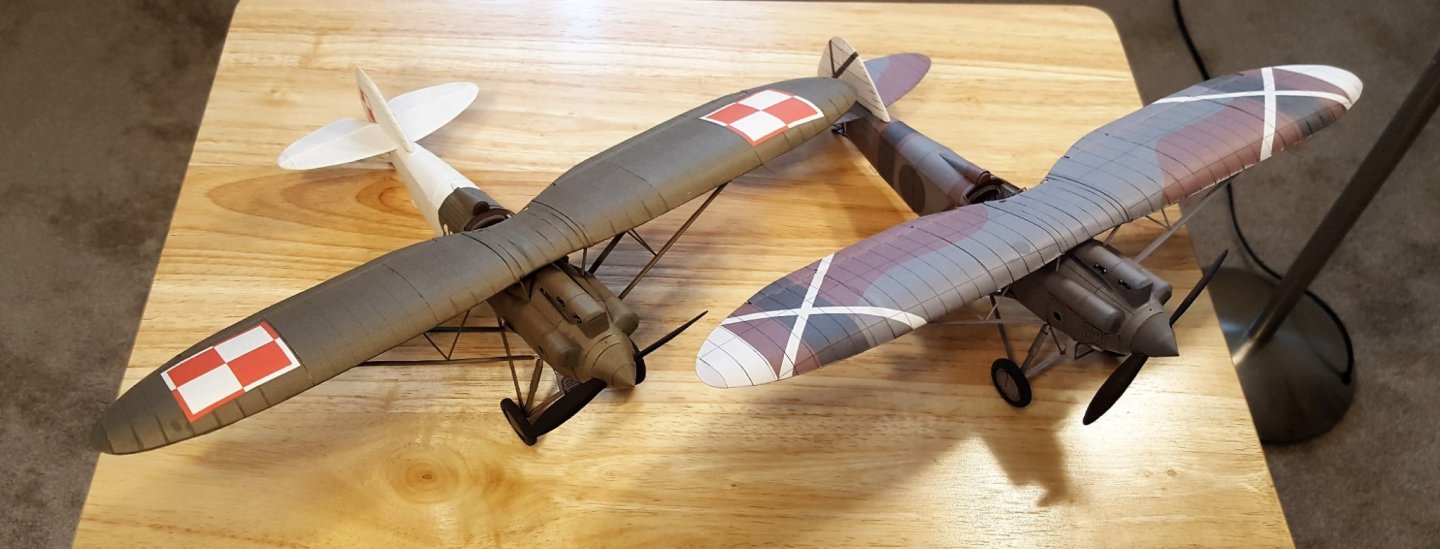
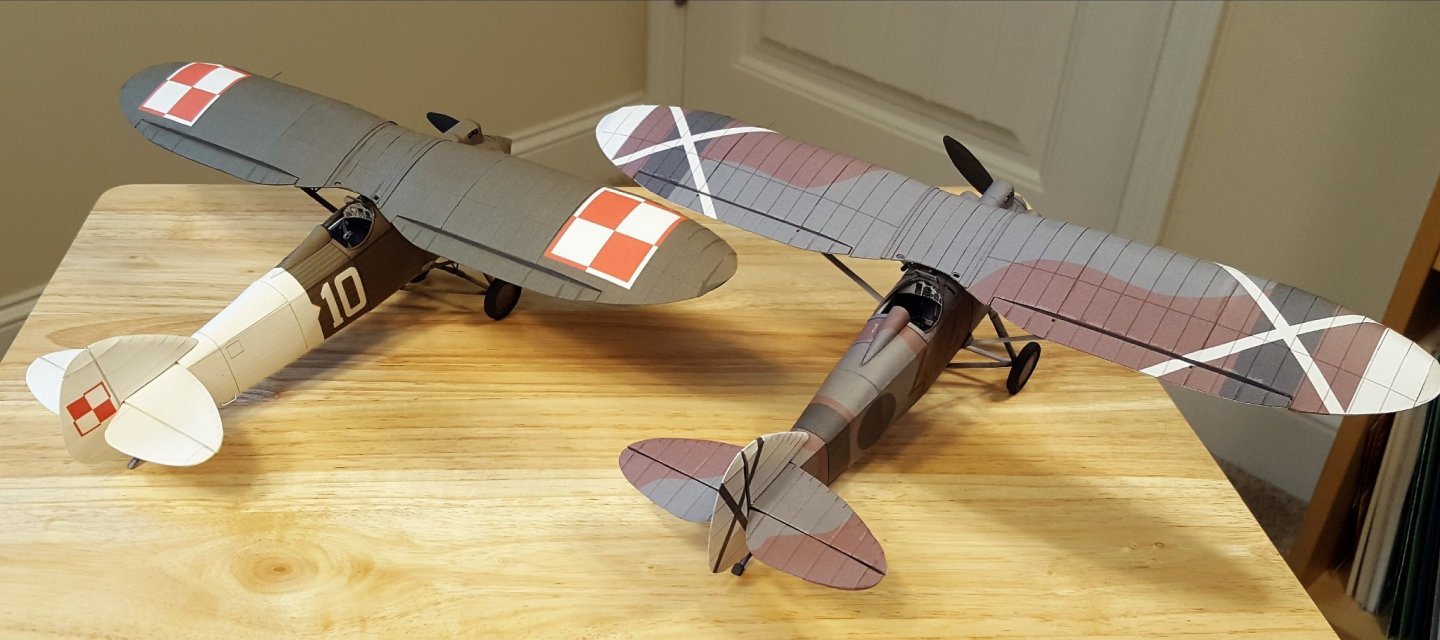
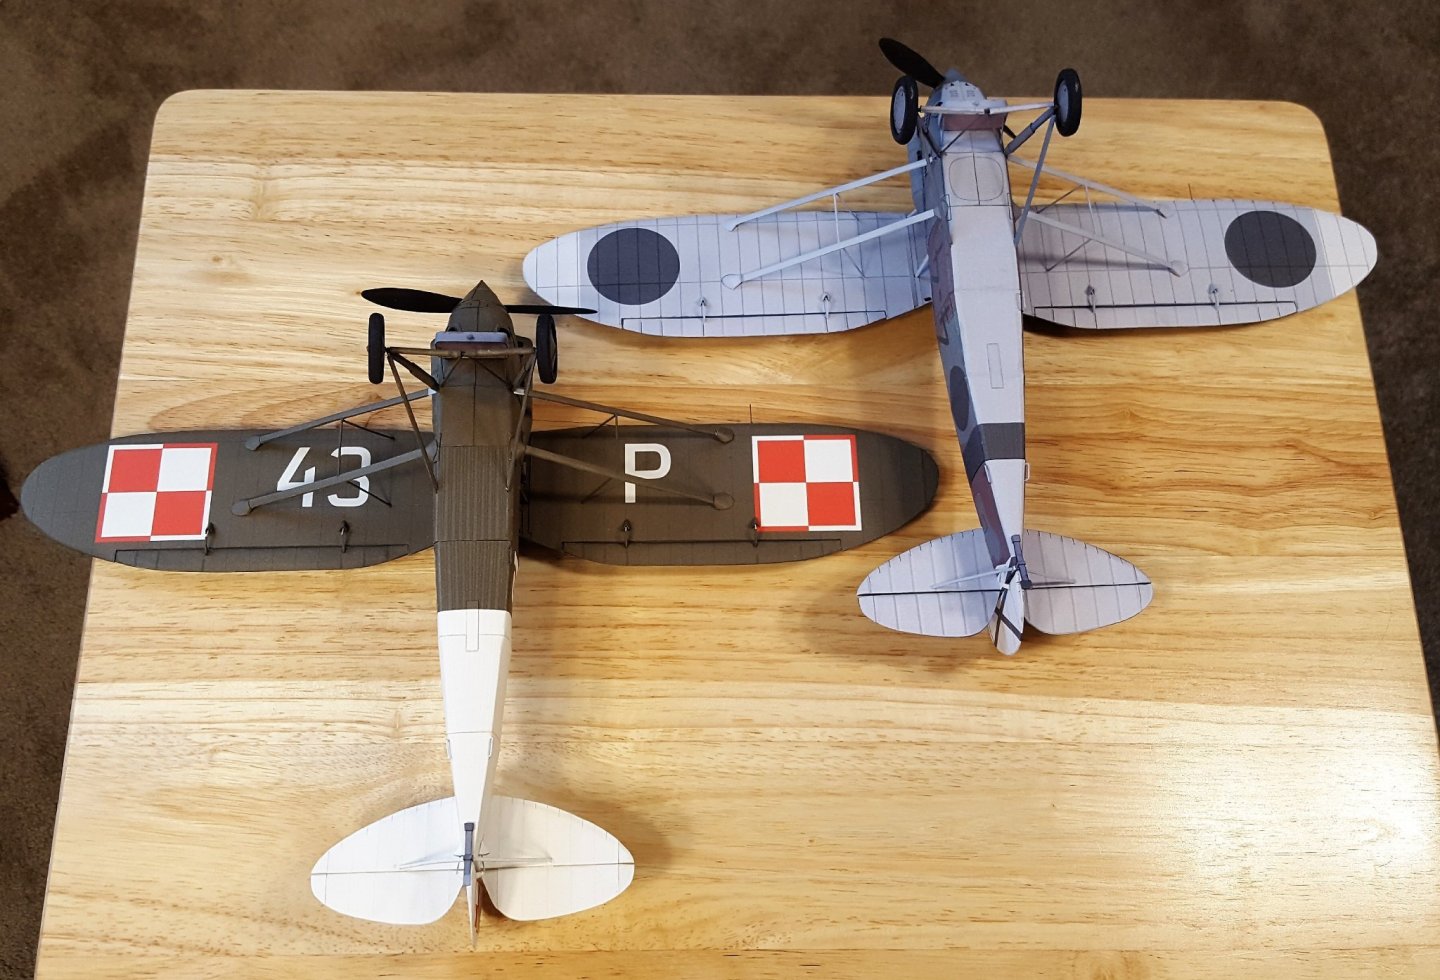
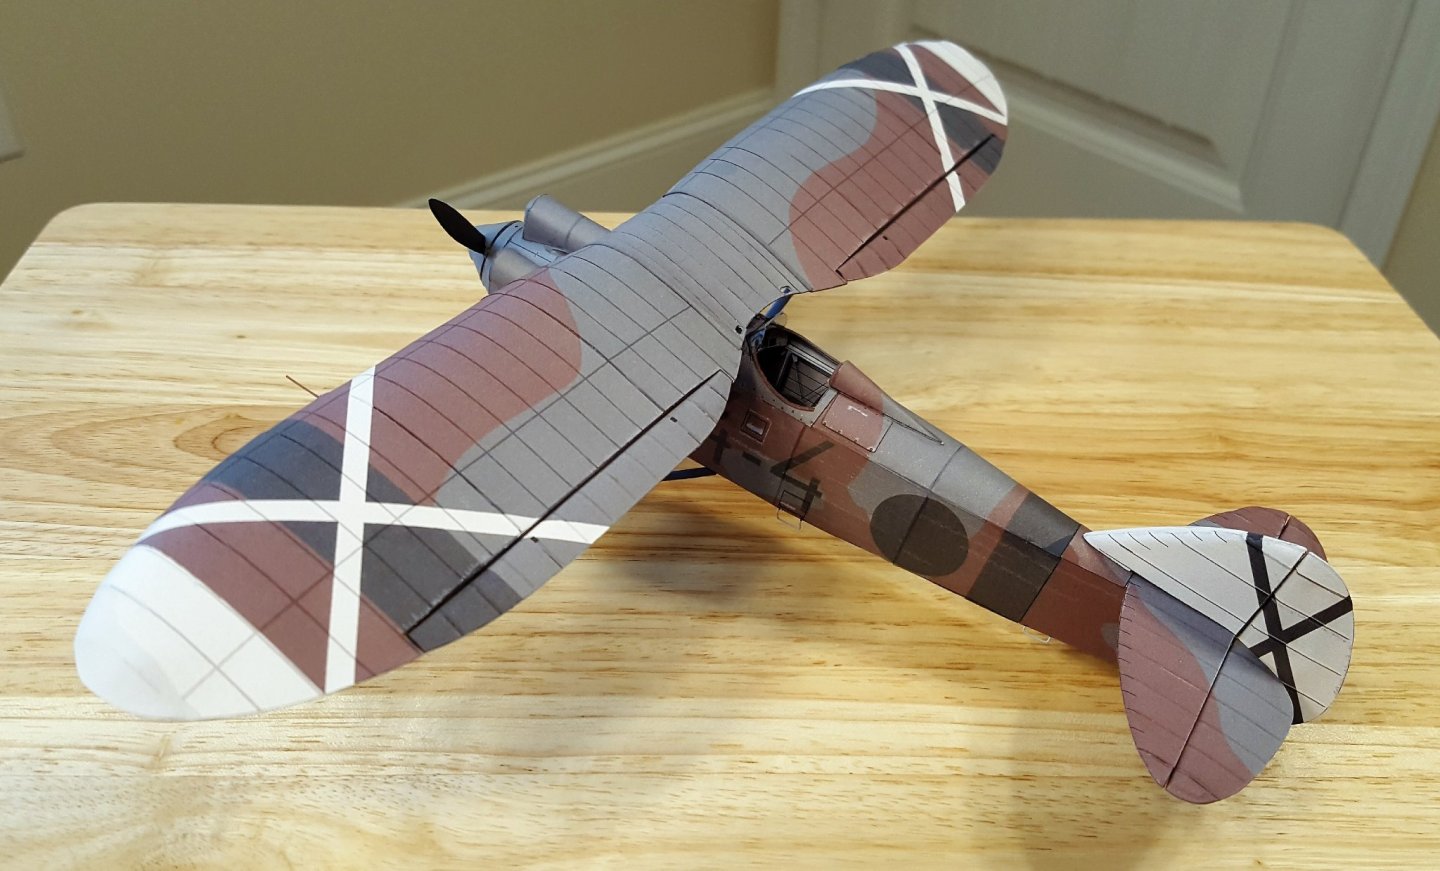
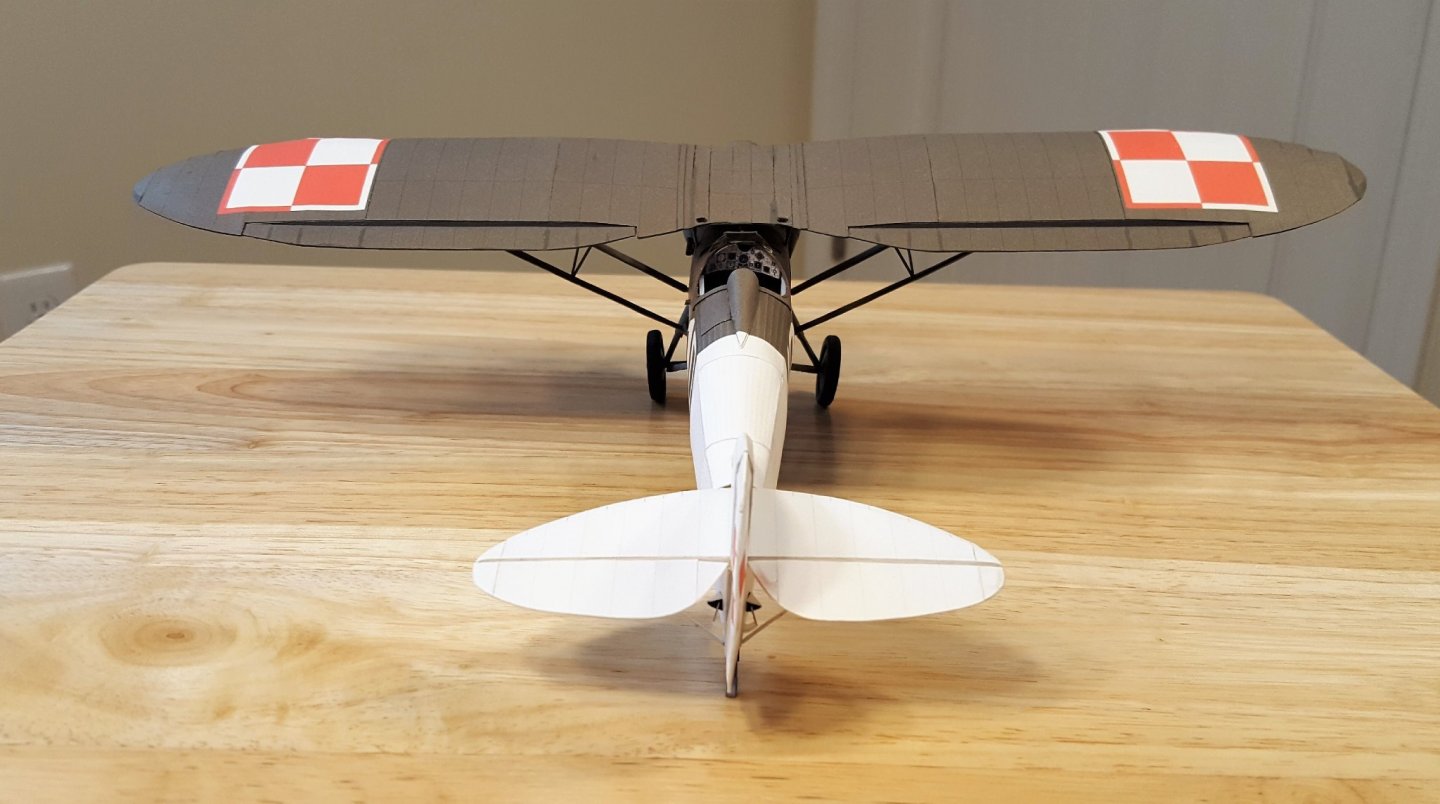
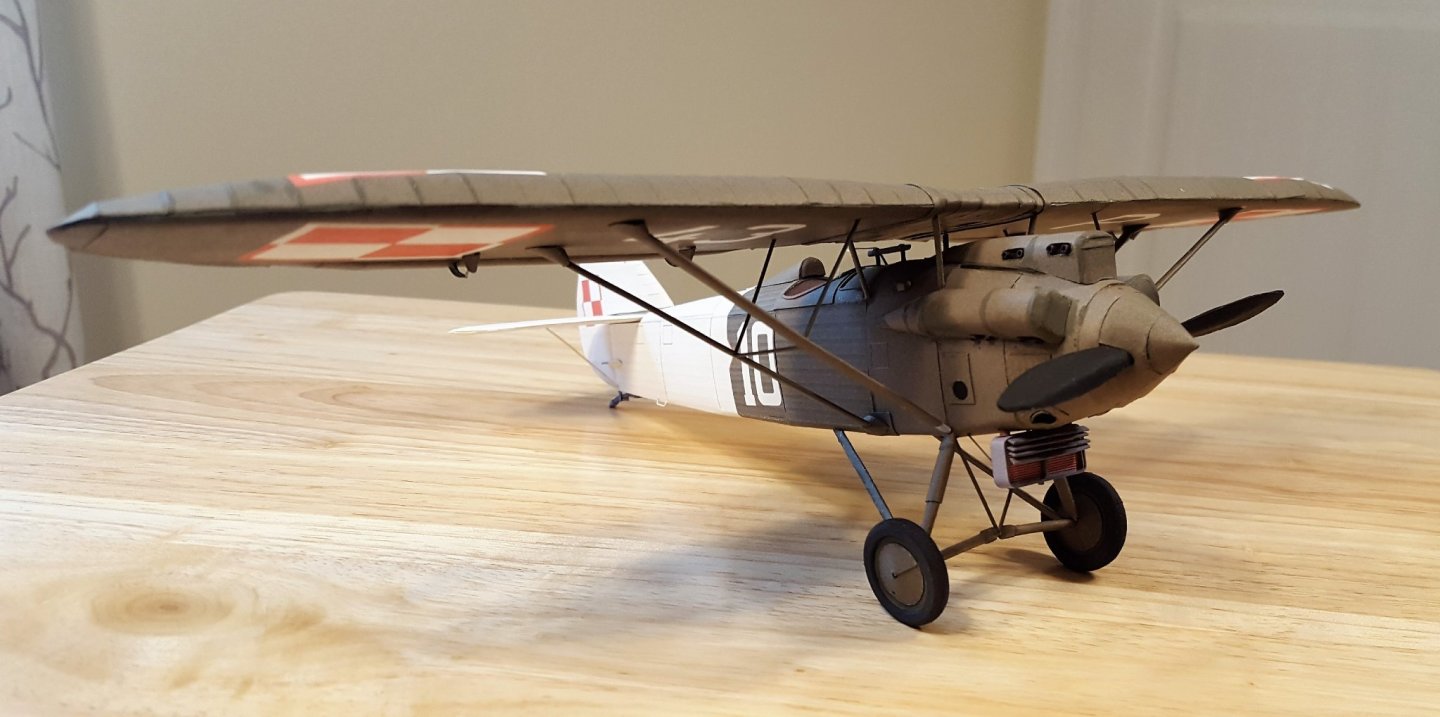
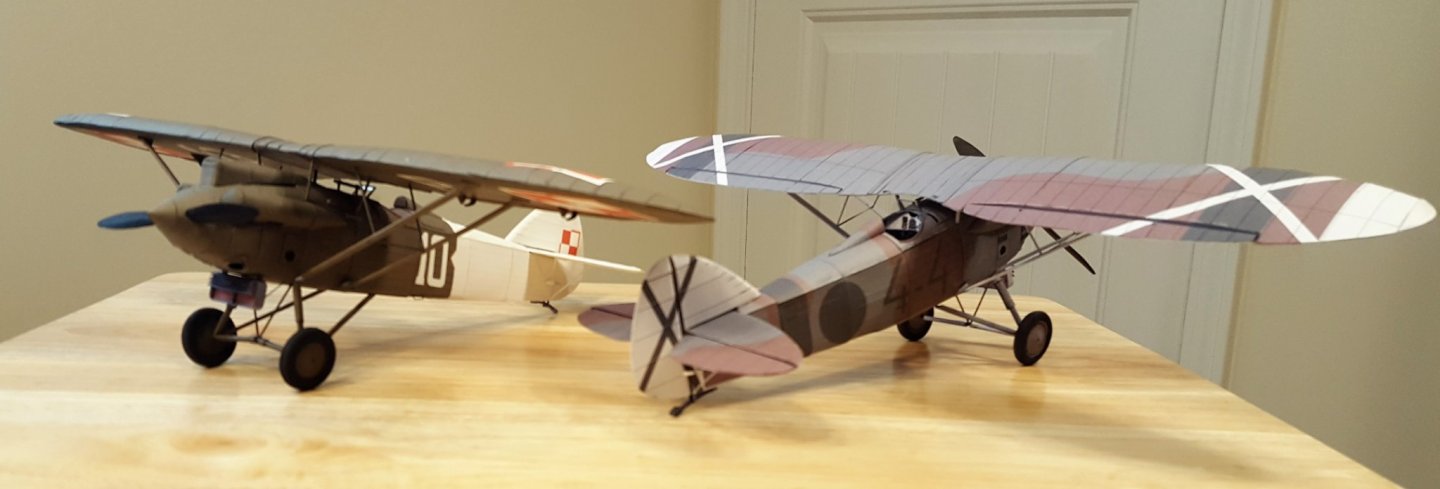
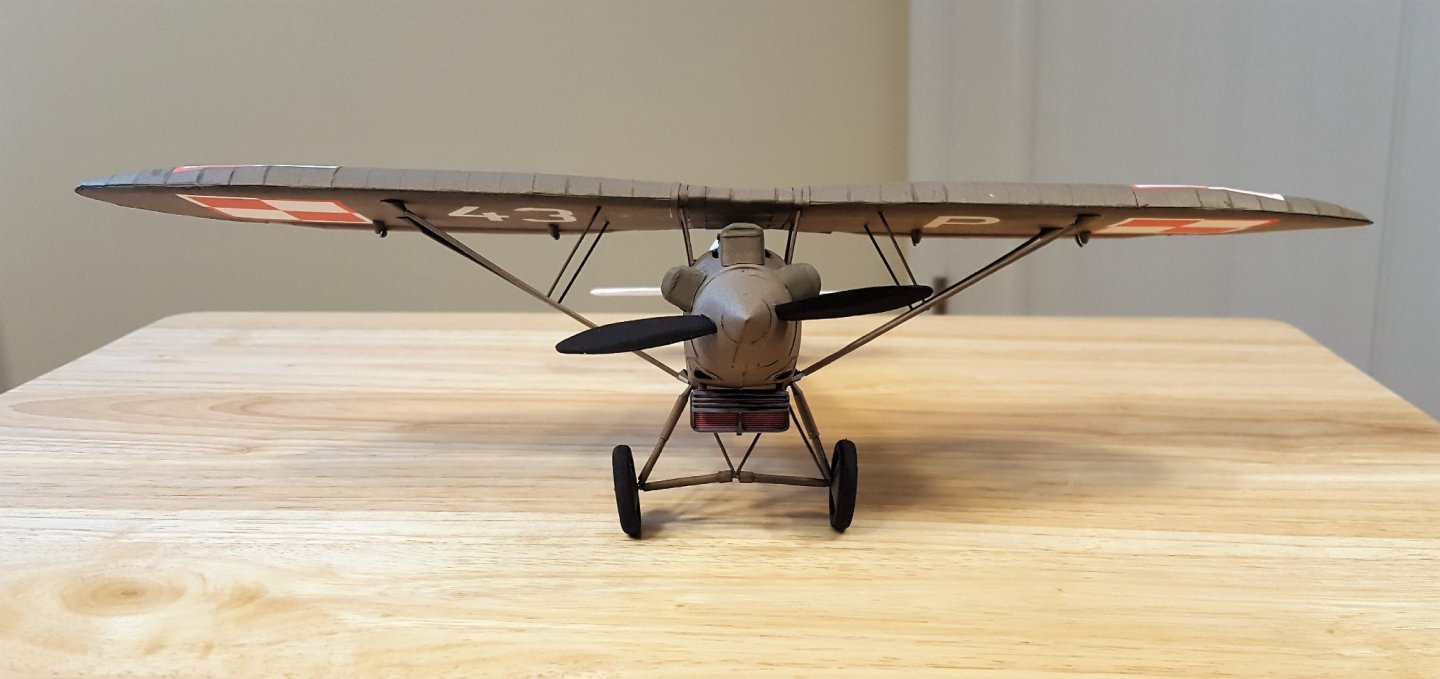
All done! I added control horns and/or actuators for ailerons and rudders. Of course, I also found sources that showed such devices for the elevators as well, but with no parts in the kit and no clear illustrations, I opted to go without. Good thing I'm done, too, because I had just barely enough of a couple of edge colors to finish the job. Enjoy the pictures! Now, remind me not to do any more 2-for-1 builds in the near future! 🤪


- 136 replies
-
- 26
-
-

-
I edited the email addy out of the post.
-
Absolutely mind-boggling retail price differences are not unheard of in our hobby. It really does pay to shop around!
-
I have to take back an earlier observation. While I was working on the planes this evening, I did find where the fuselage is marked for the rudder control rod fairings. Bother! 🙄 But no parts for these were included.
-
I forgot to add my congratulations for finishing your degree. That's an important milestone for a young person.
-
Look for build logs with "first build" either in the title or in a tag -- these will show you what other beginners have tackled.
-
Yep, I noticed that. There is no provision for that in the kit. I think I will skip that bit, otherwise I may lose my sanity by looking for additional super-detailing opportunities! 😬
-
Small boats make excellent first models. A company called Midwest Products used to manufacture a great line of such kits, though they have since dropped them from their offerings; they still turn up on eBay regularly. Model Shipways and BlueJacket Shipcrafters have both been working to fill the gap -- check with Cornwall Model Boats to see what they have in stock on your side of the pond.
-
That makes sense and appears to match what can sorta be made out in the photos. Of course, the kit makes no provision for either the rod or the fairing, but it does look a little weird with just the horn and no connector. I'll have to see what I can drum up. Some good pics there, Egilman! Our Polish friends publish some pretty good walk-around volumes.
-
Ya lost me -- I can't picture what that looks like.