HOLIDAY DONATION DRIVE - SUPPORT MSW - DO YOUR PART TO KEEP THIS GREAT FORUM GOING! (Only 24 donations so far out of 49,000 members - C'mon guys!)
×


toms10
-
Posts
929 -
Joined
-
Last visited
Content Type
Profiles
Forums
Gallery
Events
Everything posted by toms10
-
 Walrusguy You did a fantastic job on the quarter galleries. The whole build is very neat and clean. I like the white on the inside of the great cabin. I am enjoying following this build. Keep up the great work. Tom
 -
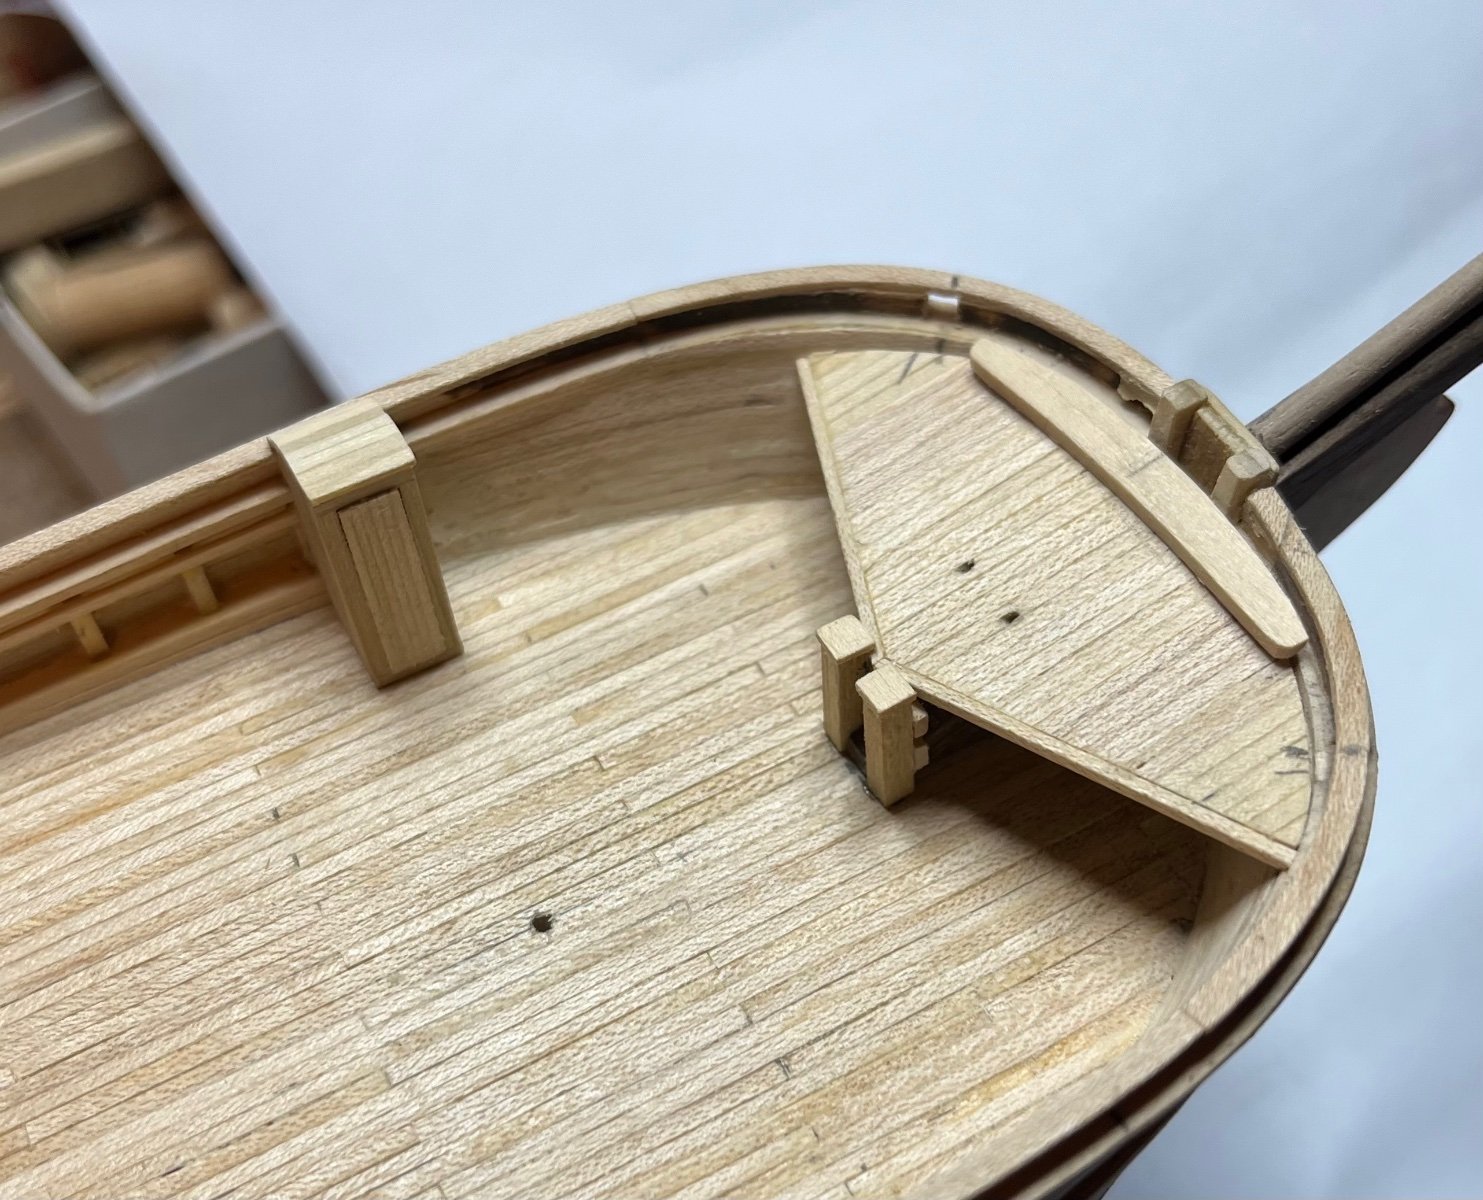
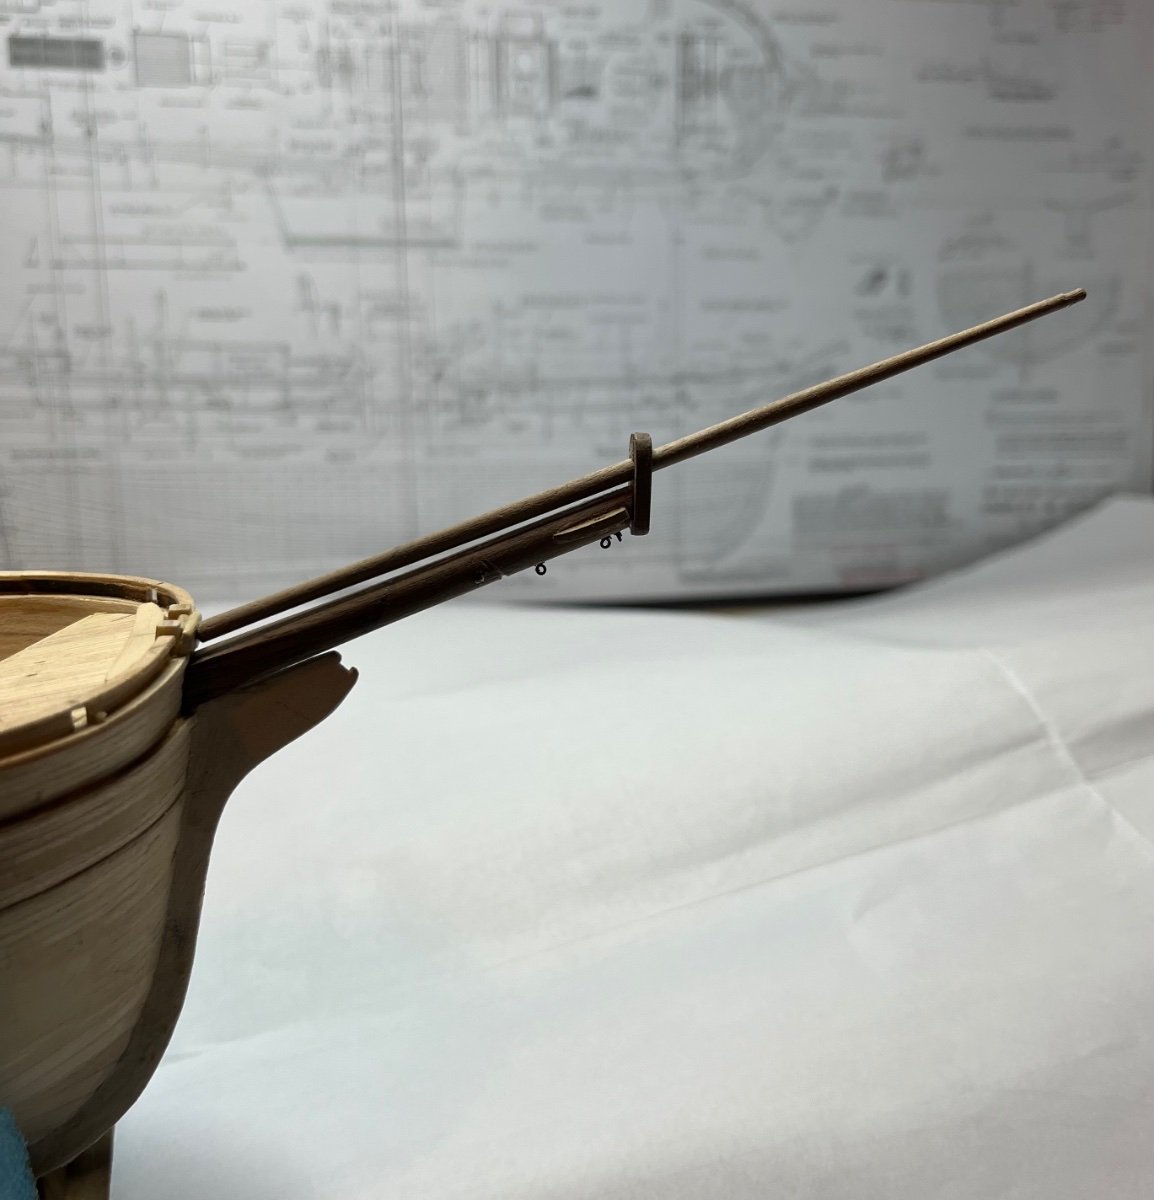
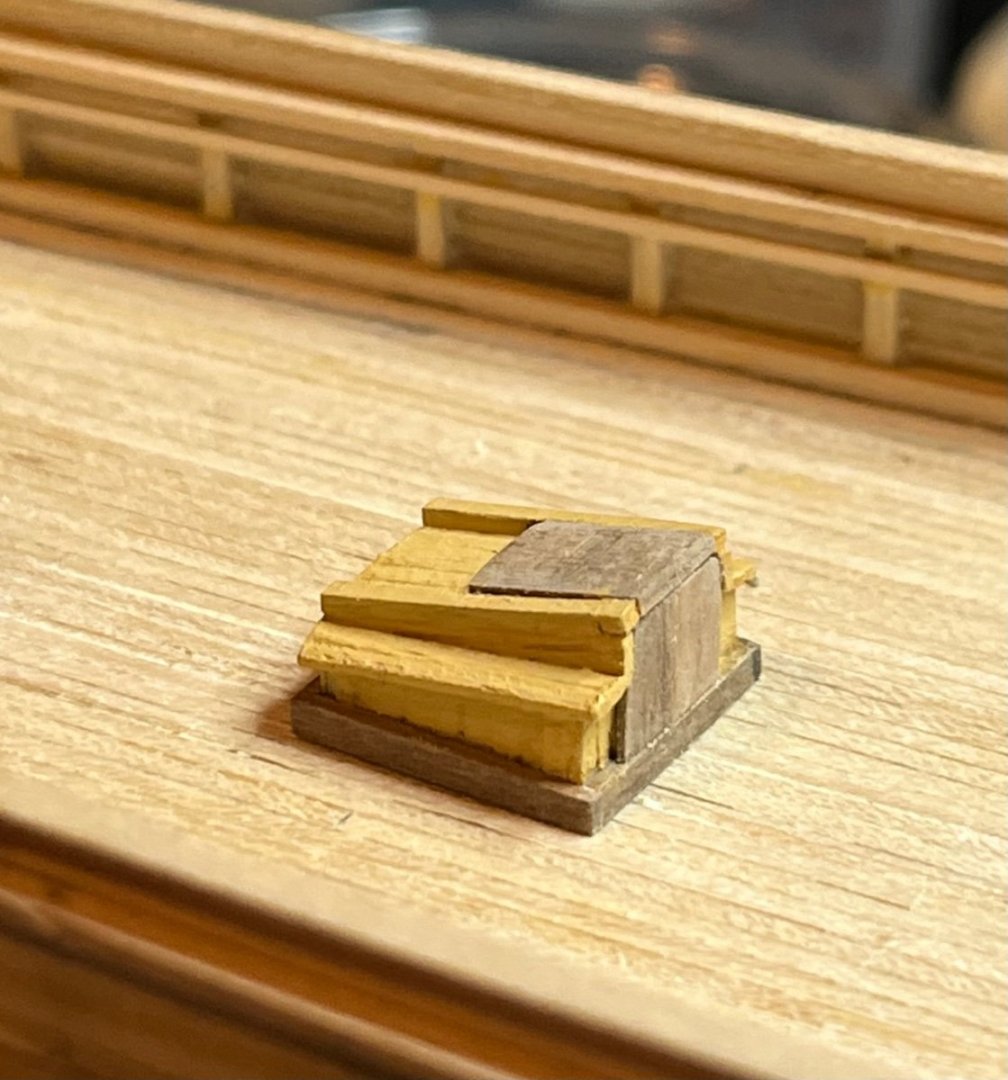
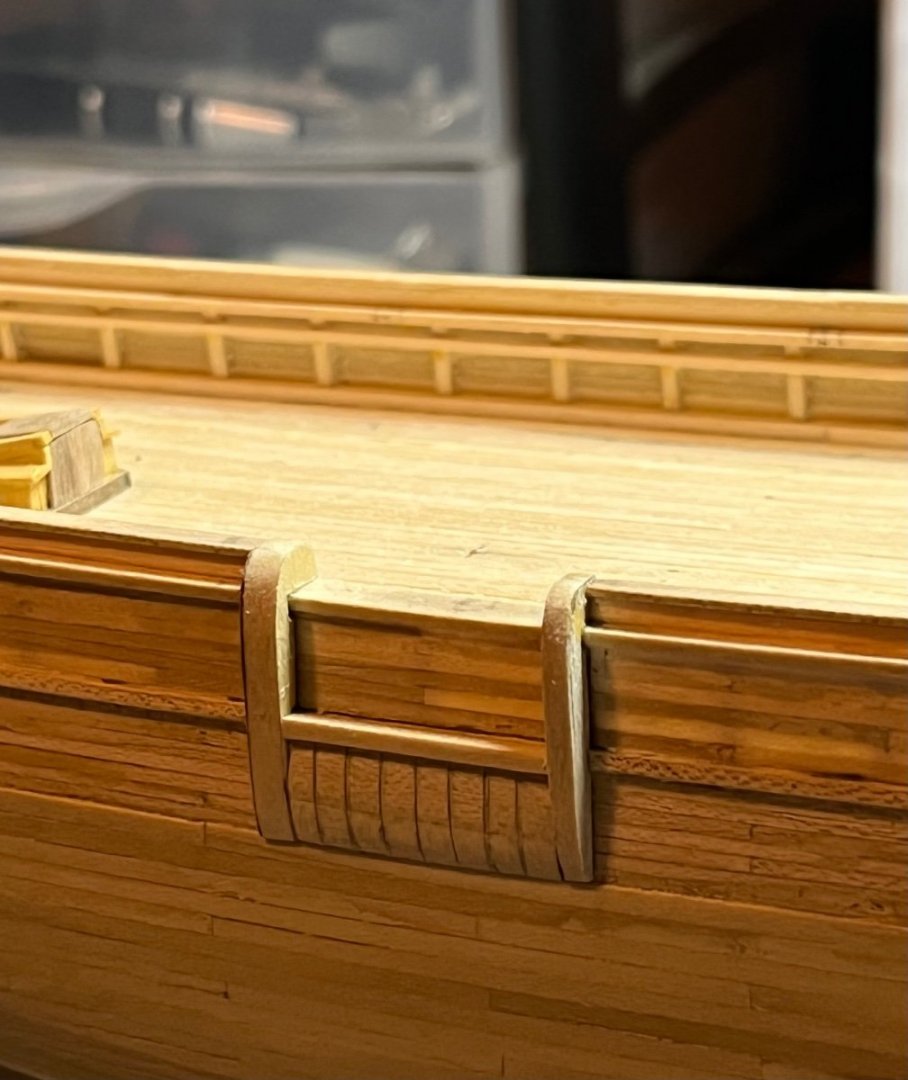
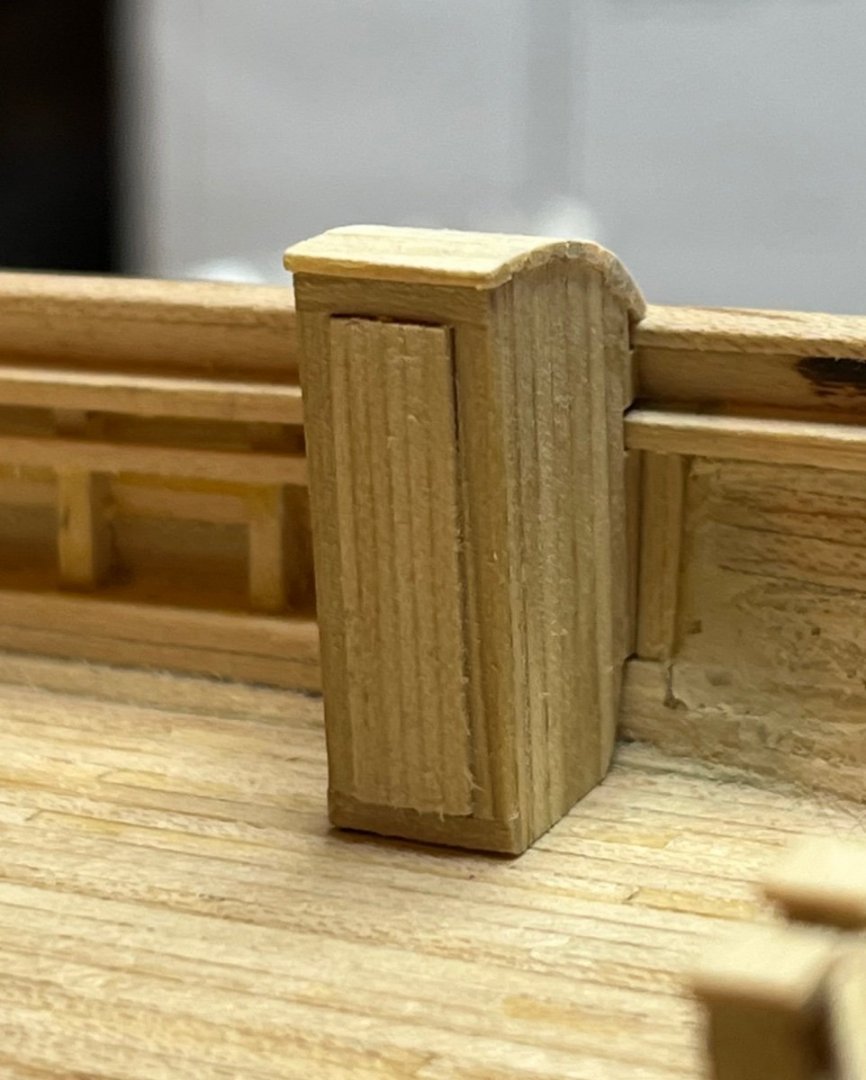
Haven’t post in a while or been able to put much time towards modeling but I have been picking away at some of the deck items for a change of pace. Worked on the anchor deck. Still need to clear out some slots for the catheads. I made some rope for the mainstays that go through the holes. Everything is just dry fit right now. Still need to do a lot here before anything gets glued. Finished the removable bulwark to access the cutting stage. I also made the bow sprit and jib boom so I could properly fit before putting in the anchor deck. here is the steerage companion way. Still need to add some urethane finish to the walnut pieces. I used walnut to add some contrast in hopes of getting the detail work to stand out a bit instead of painting everything a light yellow ochre. And finally the crew’s head. I need to figure out how I want to mount the hull to the base then I will get back to the hull and paint and copper. Tom


- 200 replies
-
- 12
-

-
- Whaling Bark
- Charles W Morgan
- (and 1 more)
-
Yes, kind of like tying thousands of clove hitches for ratlines. But they certainly do enhance the detail work and bring out the "wow" factor. This is the kind of stuff that separates many models from toys. John, your model is definitely not looking like a toy. Fantastic job, I love the little split wood pile. Tom
- 238 replies
-
- 3
-
-
- Robert E Lee
- steamboat
- (and 3 more)
-
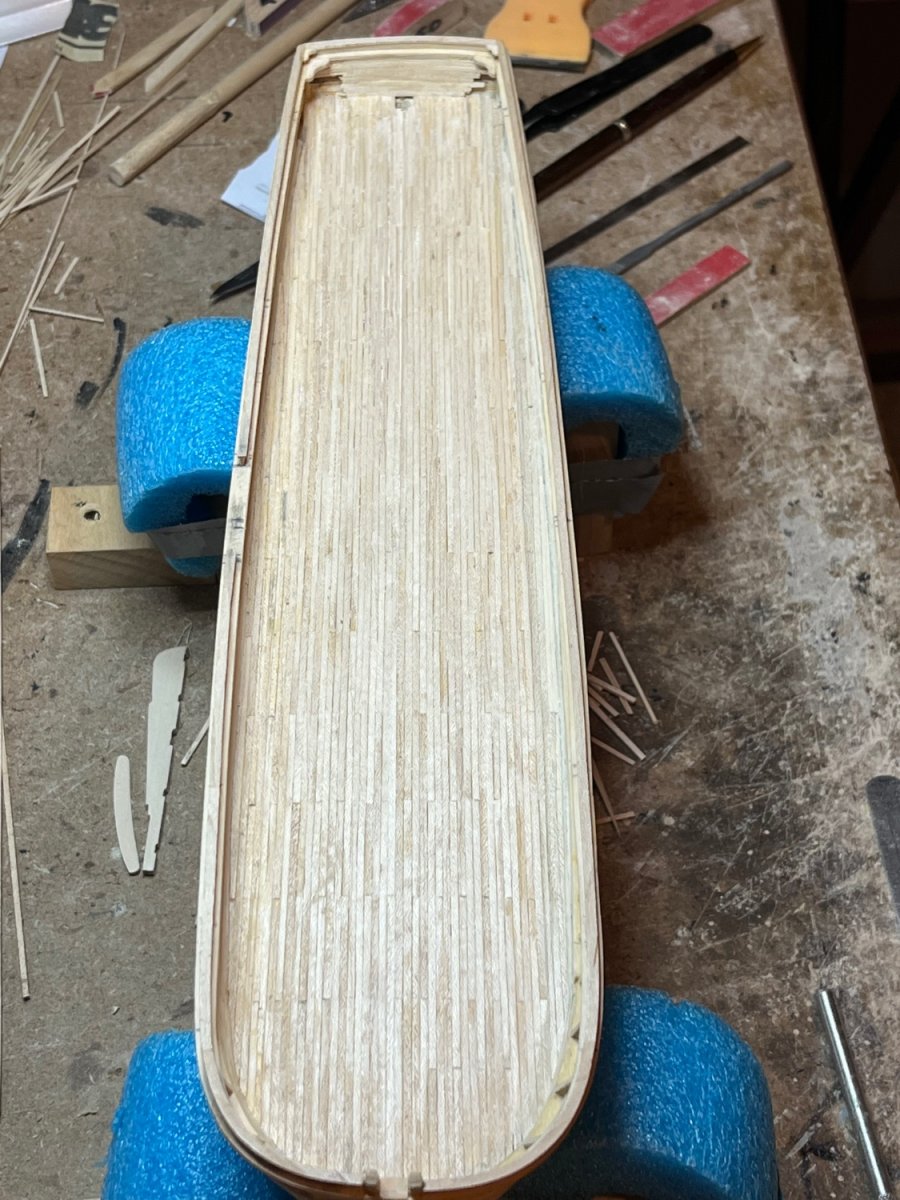
Got the main deck planked. Now I just have to find someone to swab it. 😜. I think the ceiling planks on the bow are next. I think I decided to have the cutting stage in a raised position. This will allow me the option of a billows sail or two as if she is scouting the seas. If I was going to make a diorama of a successful whale hunt then definitely it would need to be down. Tom

- 200 replies
-
- 10
-
-
- Whaling Bark
- Charles W Morgan
- (and 1 more)
-
Jon, I am far from an expert but ask all the questions you like. If I can’t answer them I am sure someone else will jump in with a suggestion. That is what MSW is all about. 🙂 Tom
- 200 replies
-
- 2
-
-
- Whaling Bark
- Charles W Morgan
- (and 1 more)
-
Thanks dogface. Still a few more steps before painting anything. I need to finish the decking and install the ceiling planks. Looking back I should have put the deck planks down before the waterways. Now I have to fit the deck planks to the edge of the waterways which is harder than just putting the ways on top of the planks. Oh well, next time. Also have to figure out how I am going to approach the removable section of the bulwark. If I leave it “in place” I don’t really have to cut it out. I can just put the frame around it and make it look like it is removable. Problem with that is then it doesn’t really make sense to have the cutting stage shown in the down position. I am not sure if I want it down or up🤨🤔. almost there with the deck planks. Tom
- 200 replies
-
- 7
-
-
- Whaling Bark
- Charles W Morgan
- (and 1 more)
-
Syren is one of the best. A link to Chuck’s website can be found on our list of sponsors. Tom
-
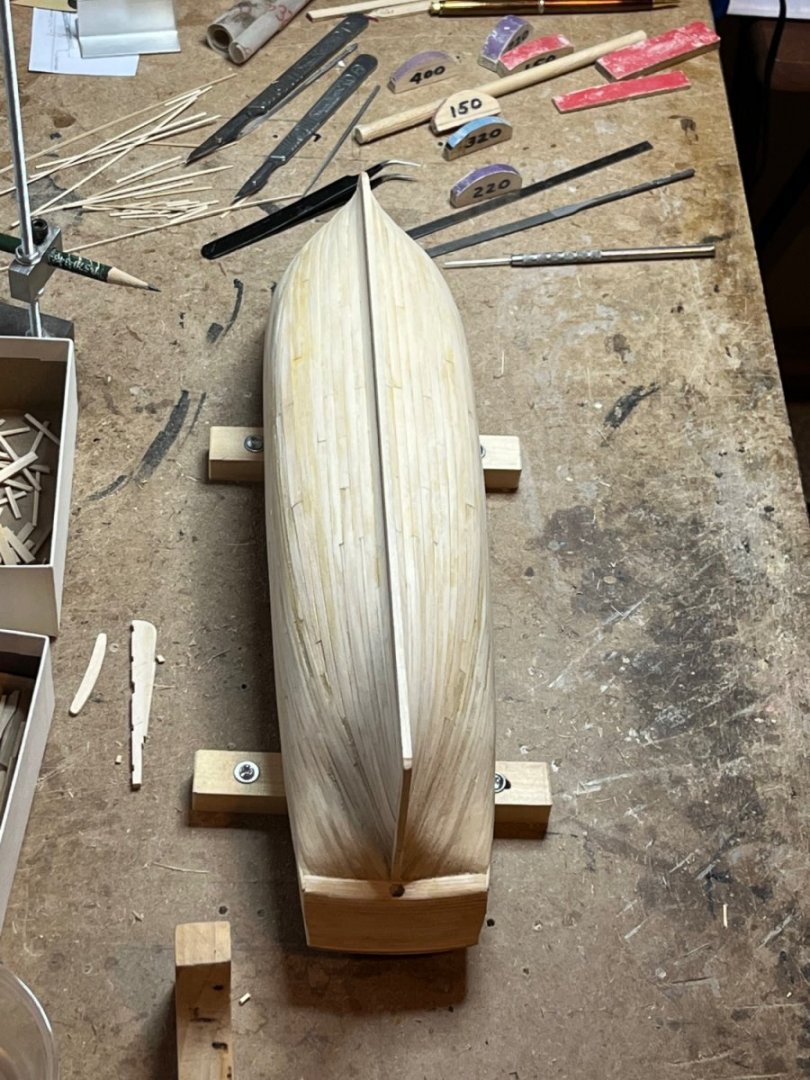
After life getting in the way a bit this past week and spending the weekend in Philly with my wife and daughter, I finally got the hull closed up. Still have to sand it all smooth. When I was in Philly we went to Penn’s Landing on the Delaware River. Toured the Olympia and saw quite a few models in the Seaport Museum. Also ran into Joe J. From the Philly club demonstrating model building techniques. Thanks to Joe for showing me the boat yard in the museum where they actually build real boats such as the whale boats that are on the C W Morgan. Very cool. it was a bit cold by the river so we will need to go back in warmer weather. 😁 Tom
- 200 replies
-
- 9
-
-
- Whaling Bark
- Charles W Morgan
- (and 1 more)
-
She is looking good Jack. I remember when I built mine. Had to do all the hidden cannon work prior to installing the deck above. I believe it was Mark Taylor here on MSW that warned me about that pitfall. It really paid dividends to read ahead in the instructions for what they are worth. 🤔😕🤨 Tom
-
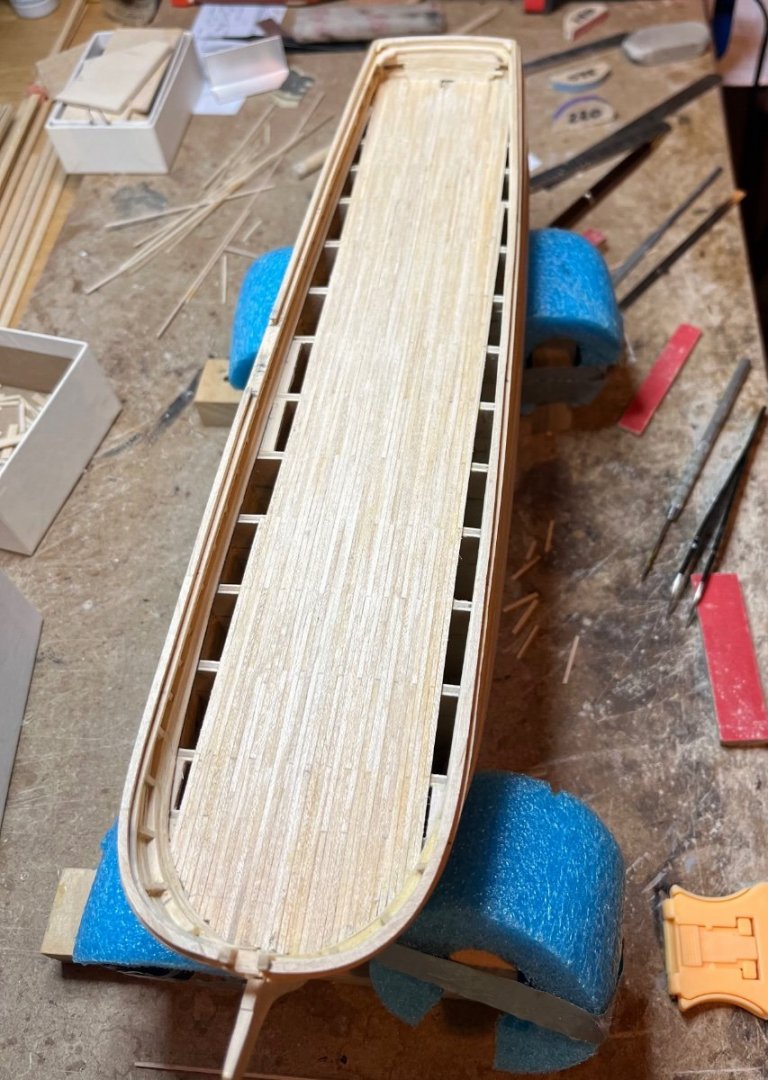
Chugging away at the planking. I have reached the copper line with the planking. Everything below to the garboard can be planked with double width planks to help speed up the process a bit. They will be covered with plates so the actual planking pattern is not all that critical as long as it is smooth and follows the right contours. Good thing sandpaper was invented. I left my planking a bit heavy in the thickness to allow for heavy sanding if needed without sanding my way through. 😜 Tom

- 200 replies
-
- 13
-
-
- Whaling Bark
- Charles W Morgan
- (and 1 more)
-
Hi Walrusguy just looking at your build and it is really nice. The planking and joinery is top notch. As for doing a scratch POF… are you kidding? I am no expert but from what I see you should definitely take the leap to scratch building. It would just be a small hop for you! Tom
-
John absolutely fantastic job on the wheels. I would someday like to build a paddle wheel boat but the wheels are a bit scary. You seemed to have tamed the beast! Great step by step explanation. That will hopefully come in handy for me someday. 😁 Tom
- 238 replies
-
- 2
-
-
- Robert E Lee
- steamboat
- (and 3 more)
-
Managed to get the planking from the planksheer down to the wale done on both the port and starboard sides. Also got the upper part of the transom planked. Still have some finish sanding to do but I will wait until everything is planked. Tom
- 200 replies
-
- 15
-
-
- Whaling Bark
- Charles W Morgan
- (and 1 more)
-
Finished planking the bulwarks. I pleased with how they came out. here is a couple of pics of the inboard and outboard sides. At 1:96, these are some pretty small planks. Good thing this isn’t a race 😜😂. Tom
- 200 replies
-
- 13
-
-
- Whaling Bark
- Charles W Morgan
- (and 1 more)
-
Hi everyone i managed to get the main rail installed. Next I will work on the top gallant rail and then start planking the bulwarks. it is starting to resemble a boat hull! 😁 Tom
- 200 replies
-
- 13
-
-
- Whaling Bark
- Charles W Morgan
- (and 1 more)
-
Hi all i now have the plank rails and stanchions and knight heads installed as I work on the bulwarks. The main rails are made but I still need to fabricate the log and top gallant rails. Once those are made I think I will assemble those off the model and install them onto the stanchions as a subassembly. Tom

- 200 replies
-
- 11
-
-
- Whaling Bark
- Charles W Morgan
- (and 1 more)
-
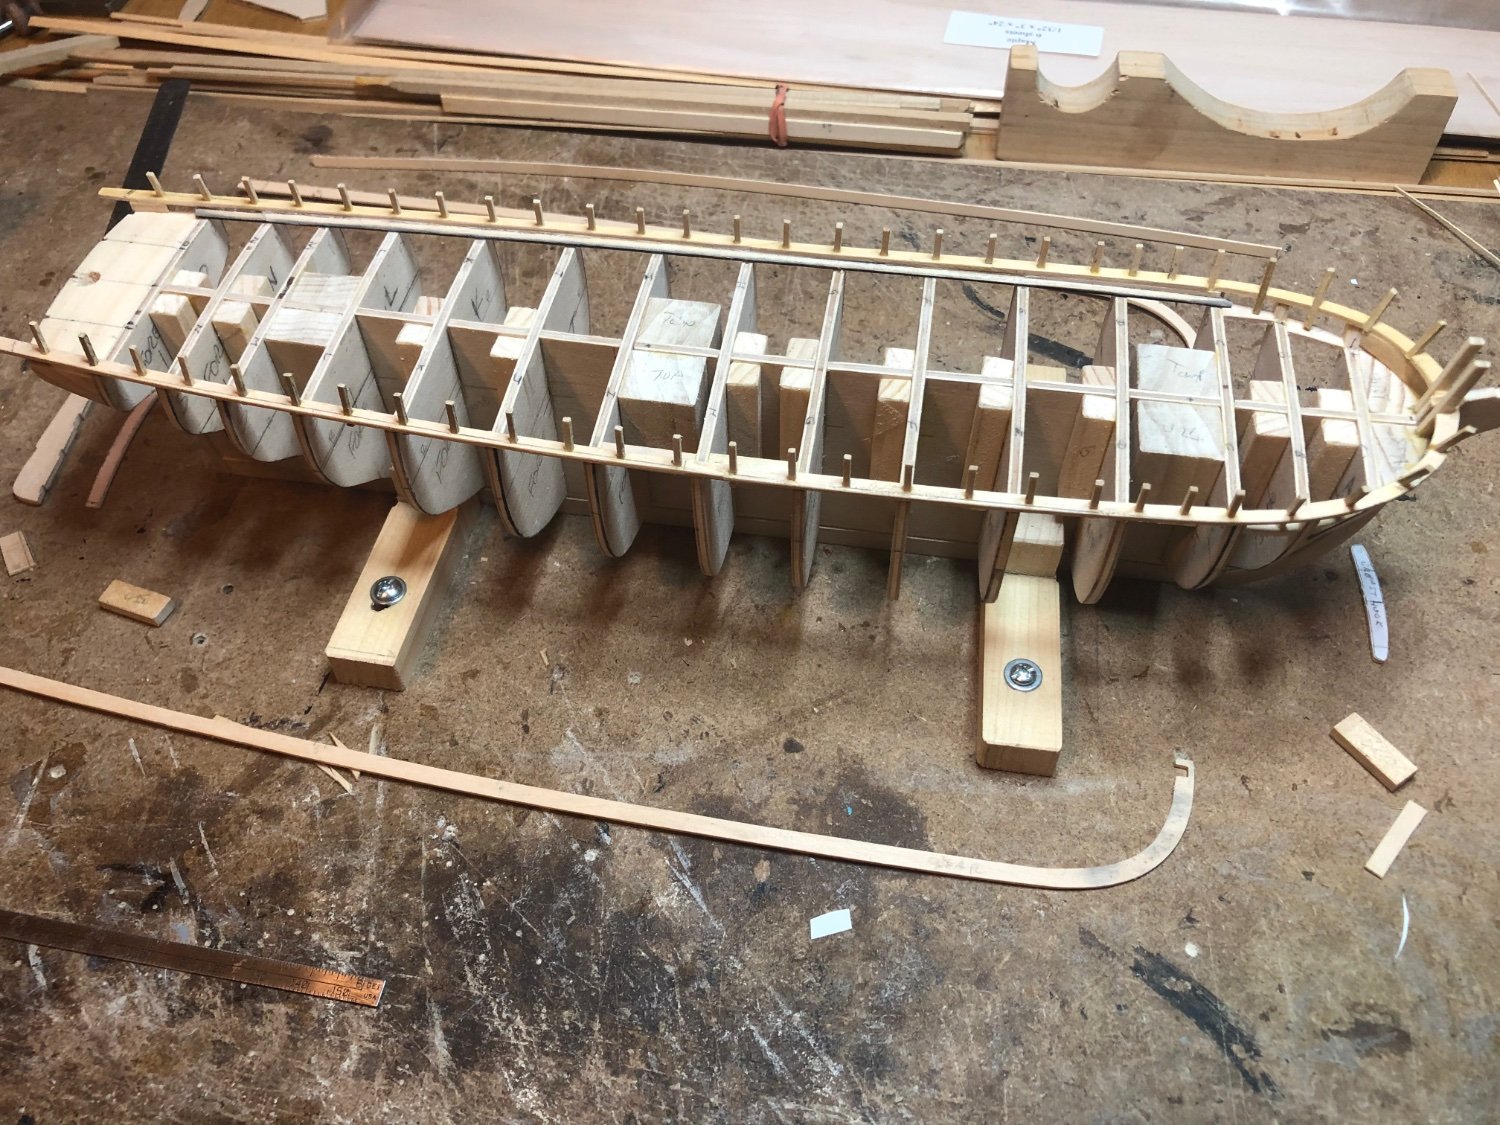
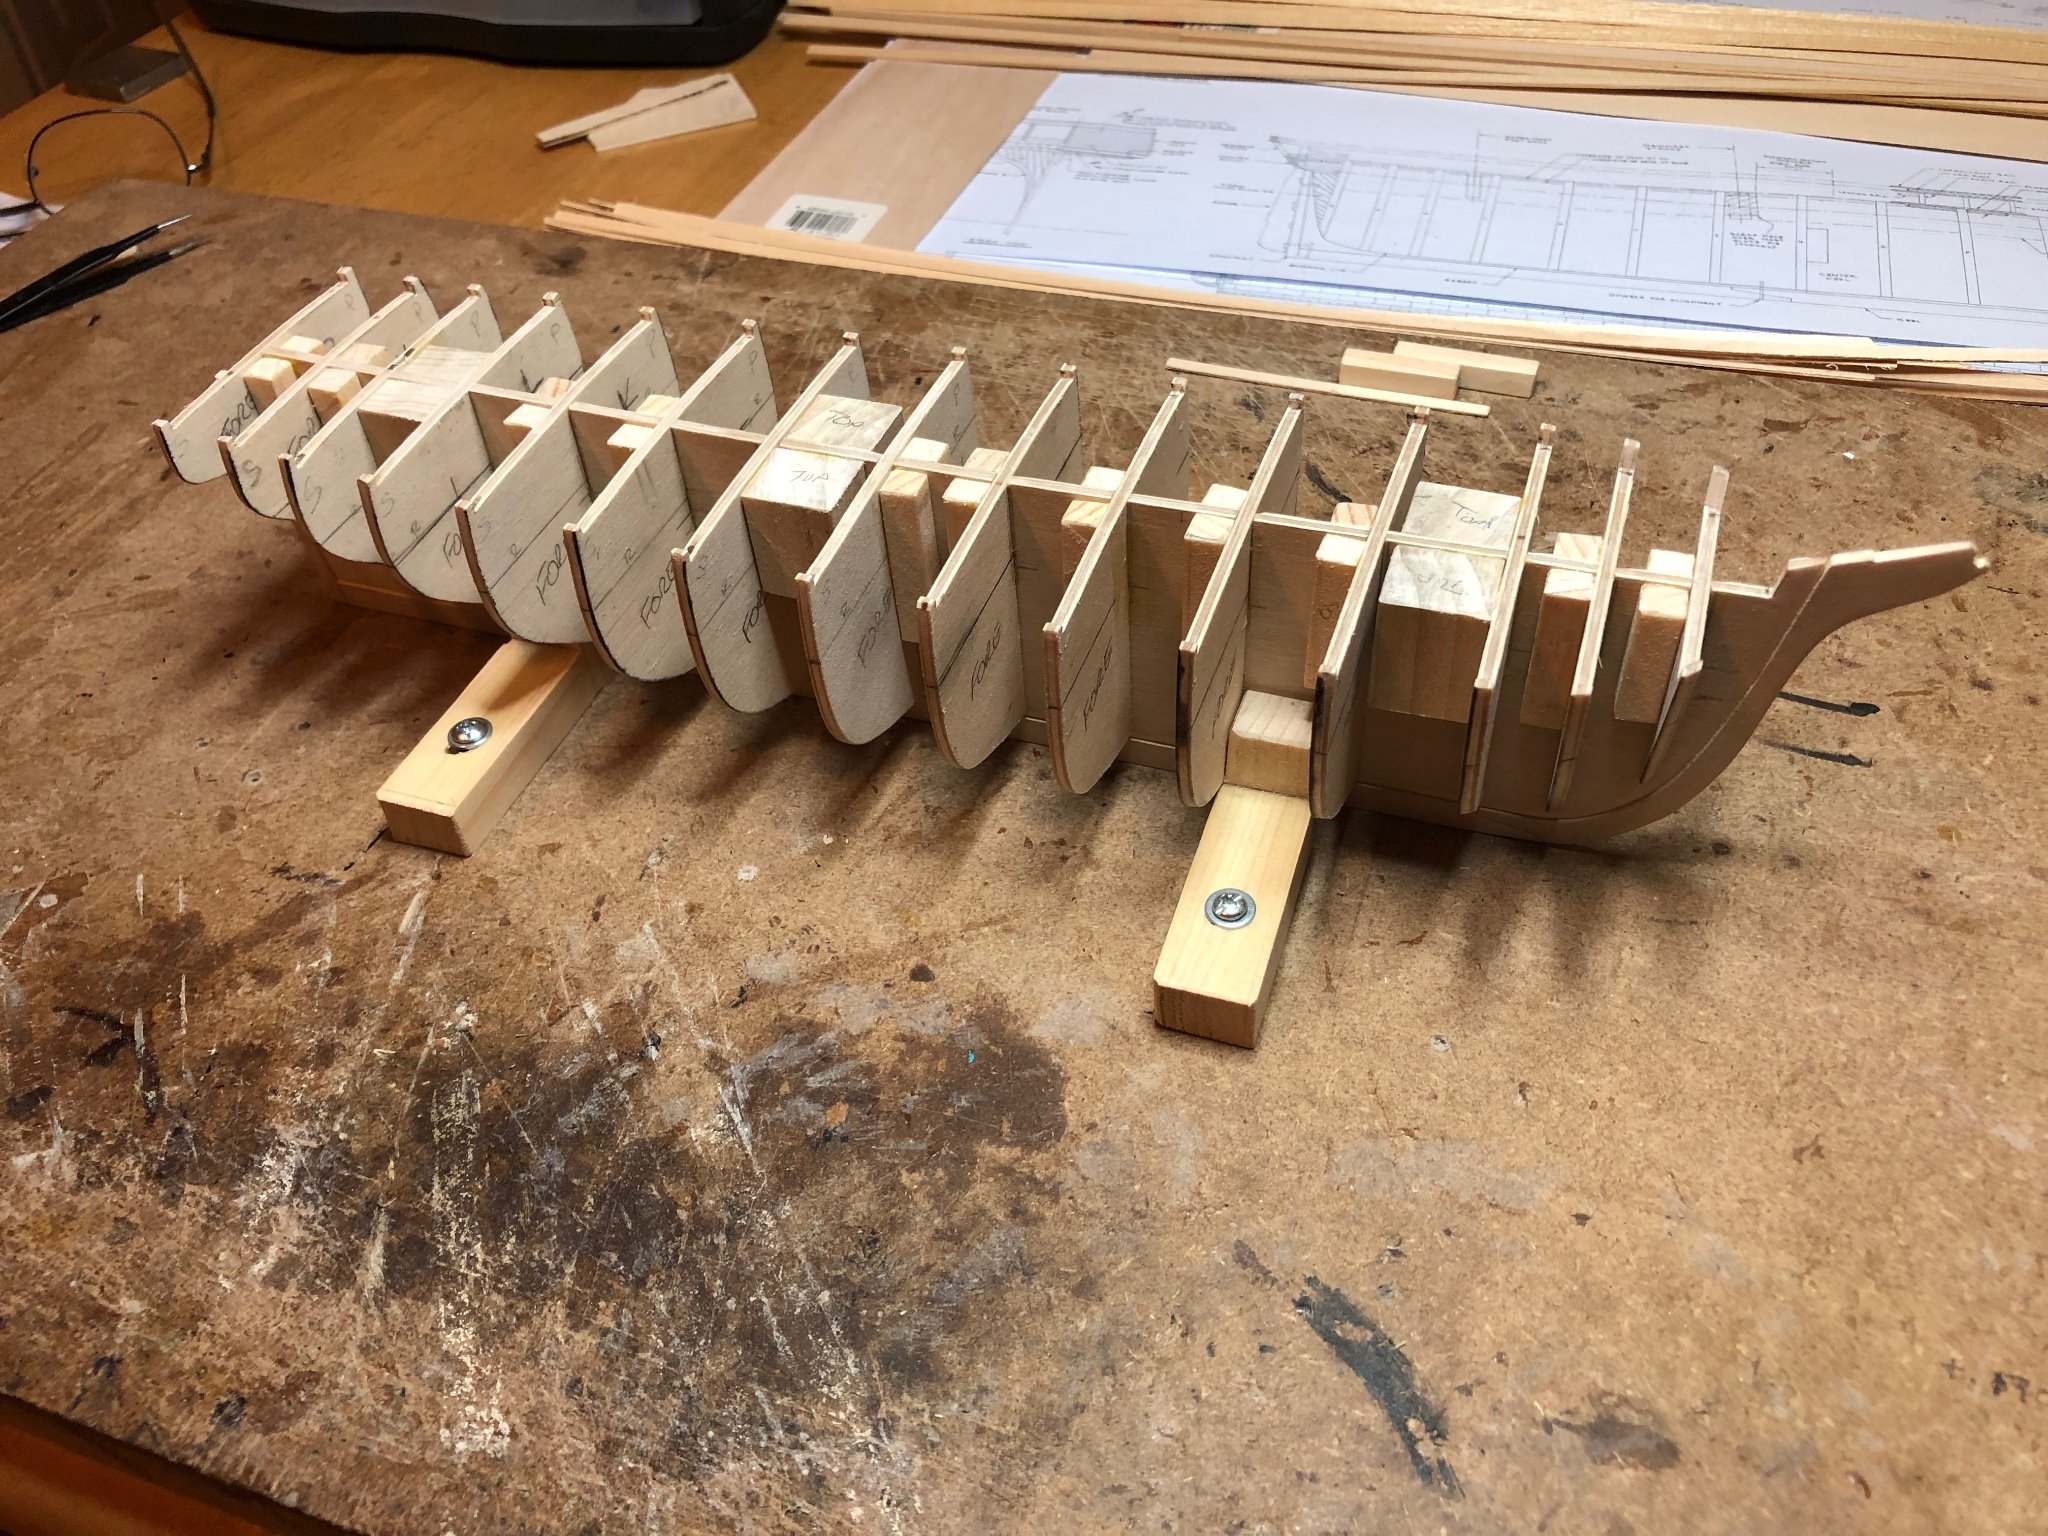
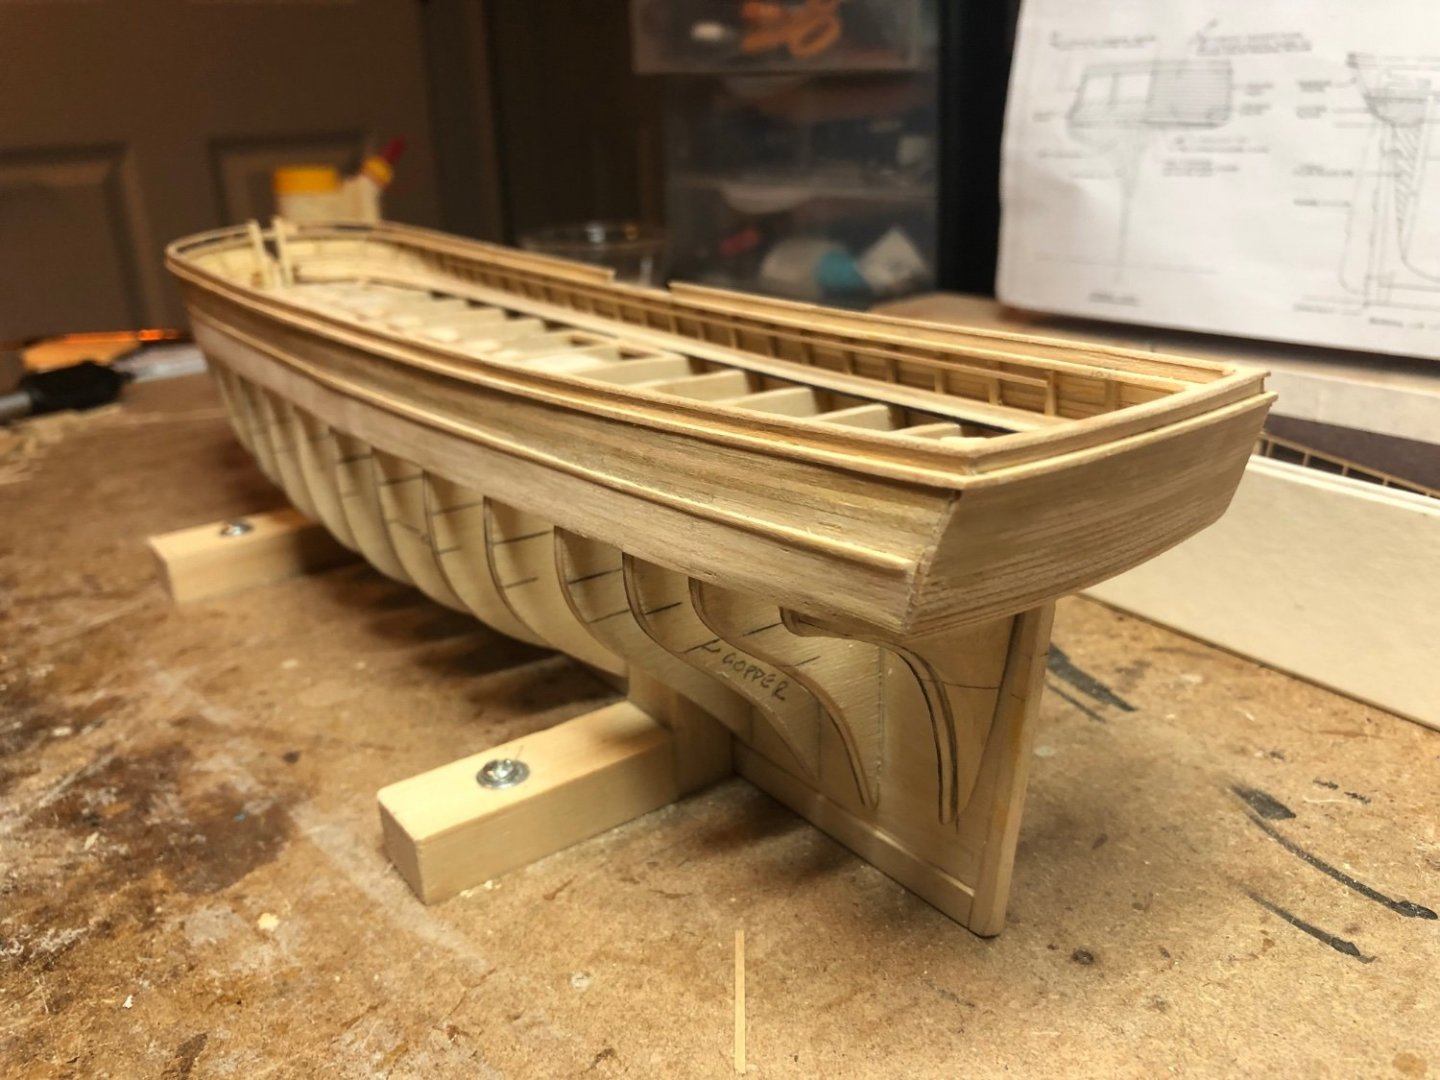
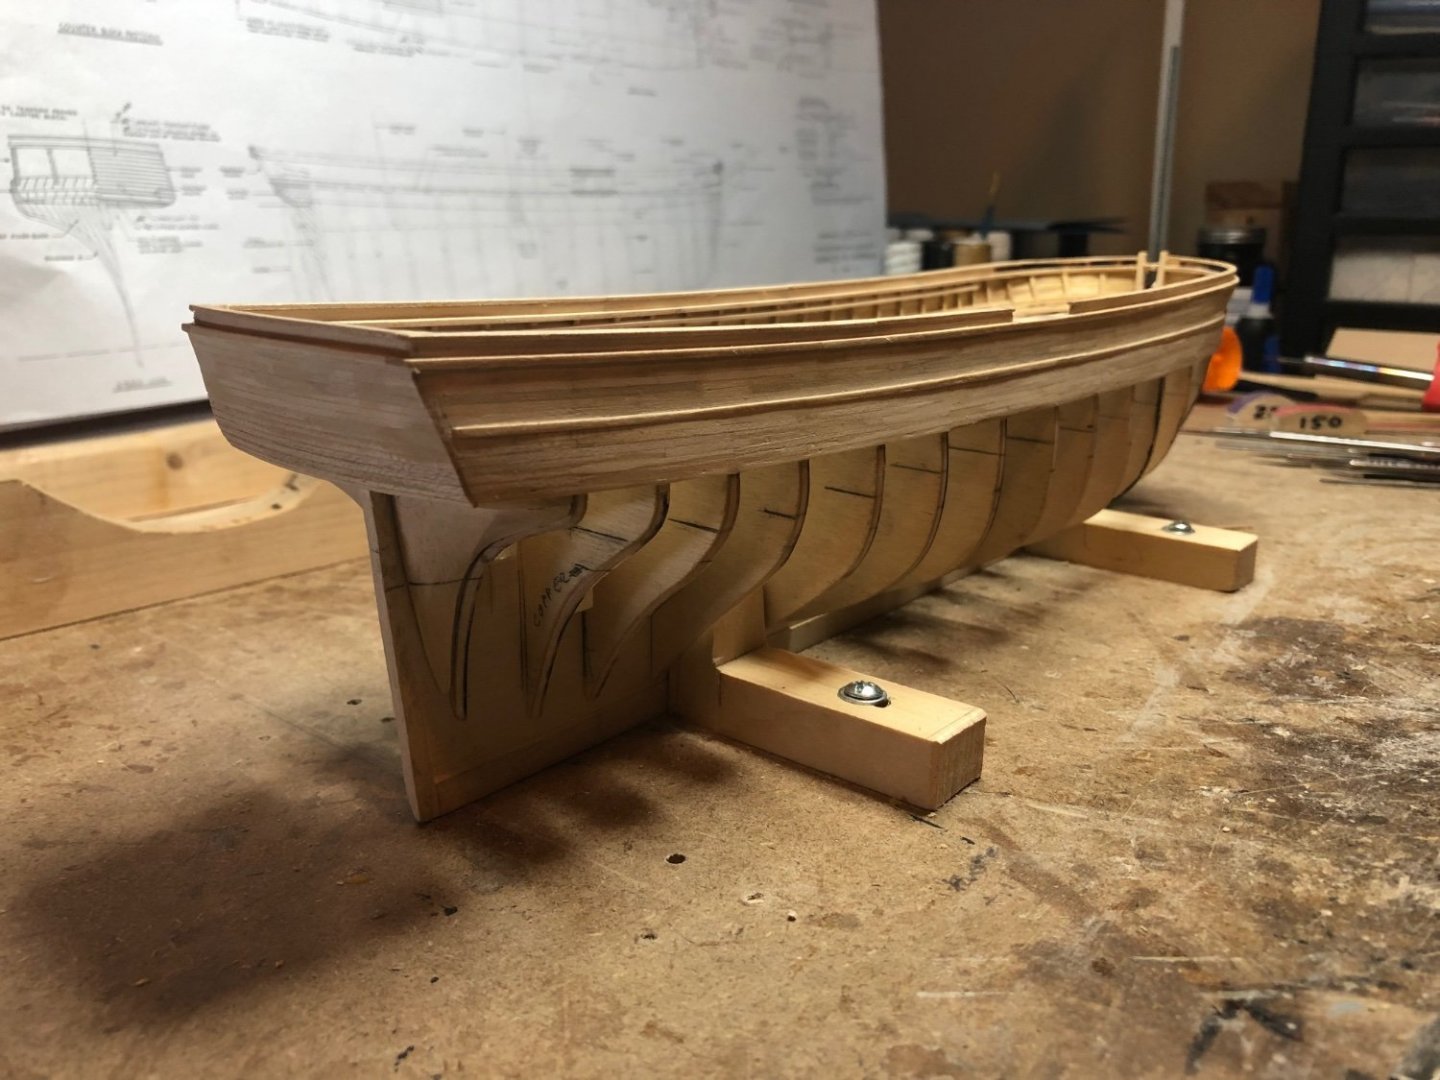
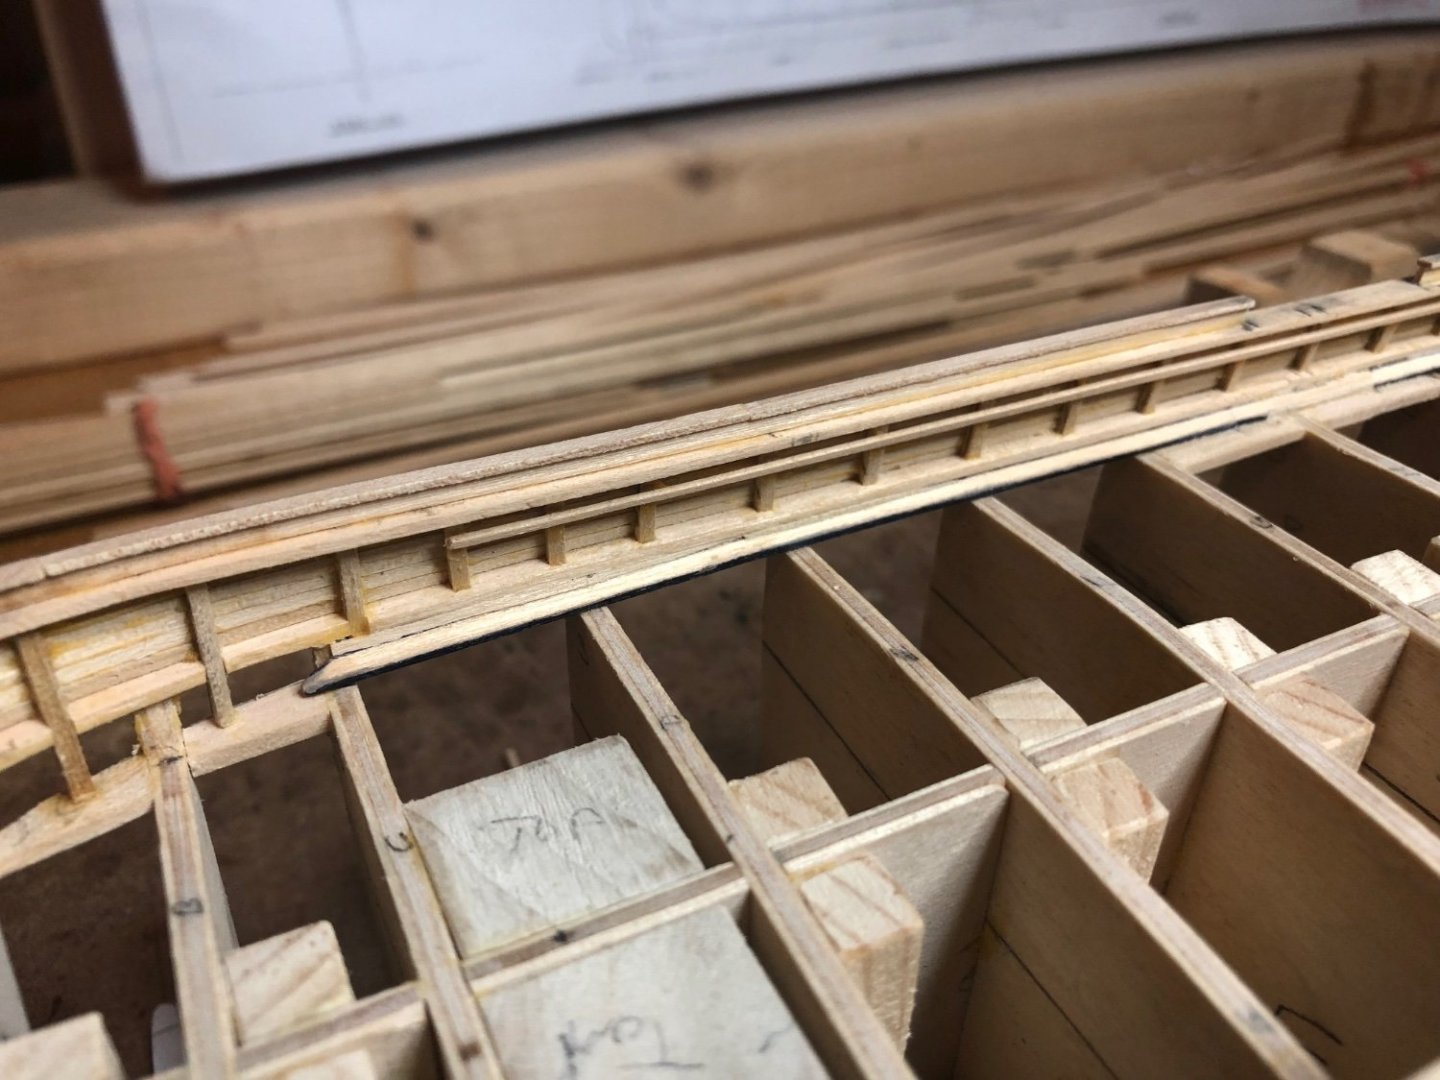
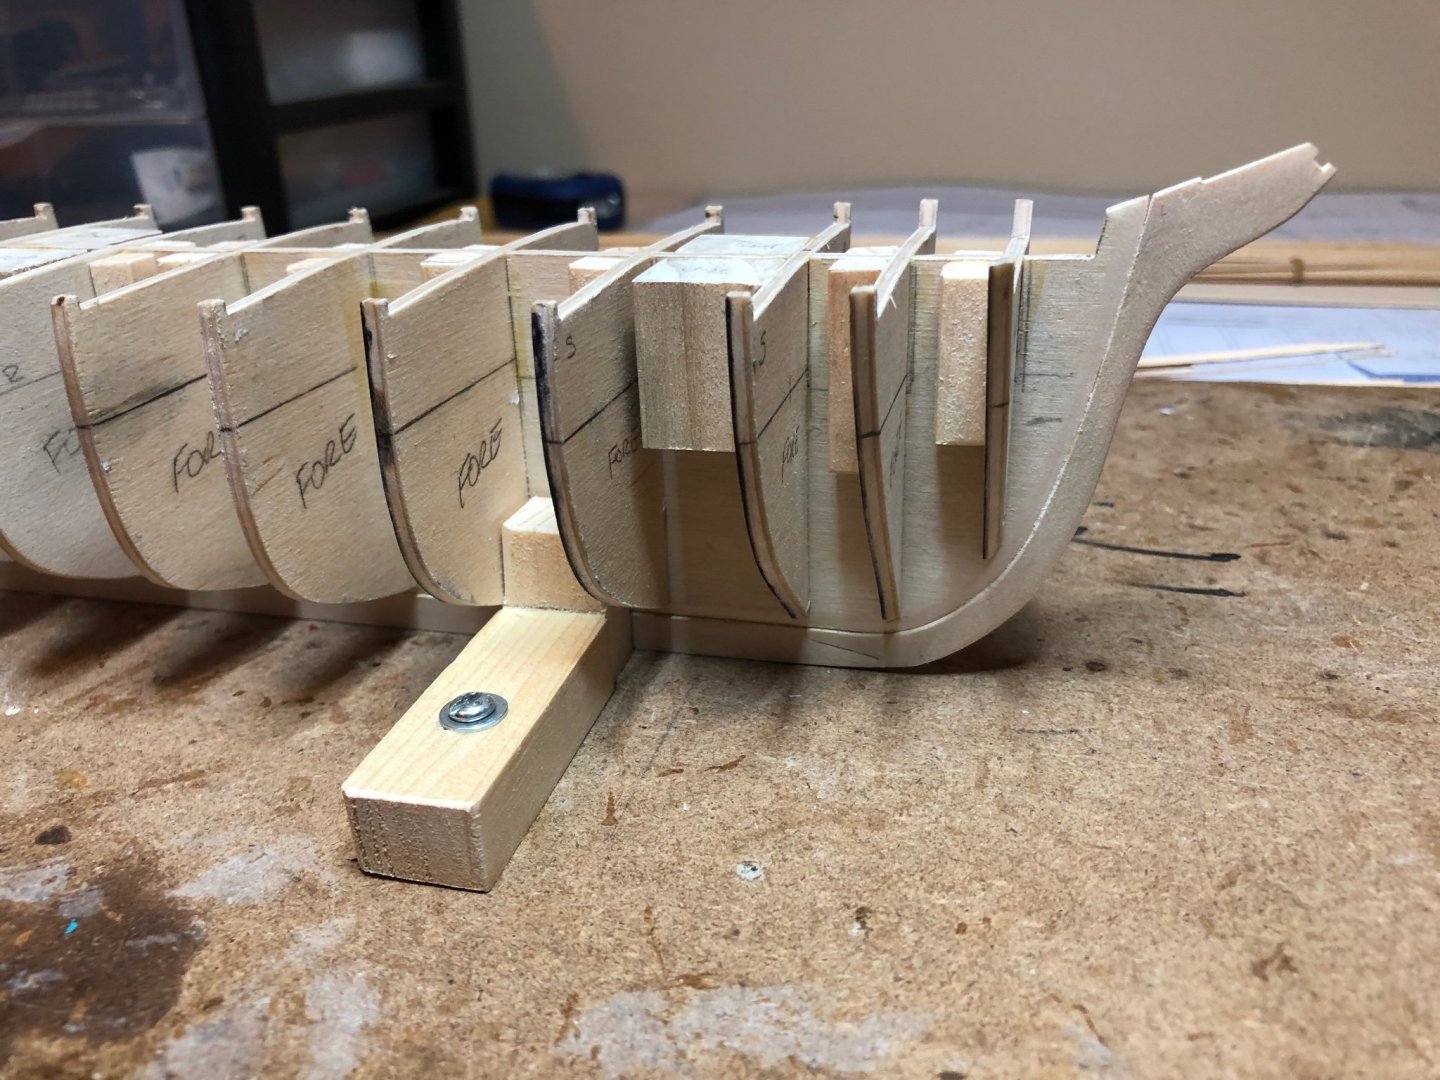
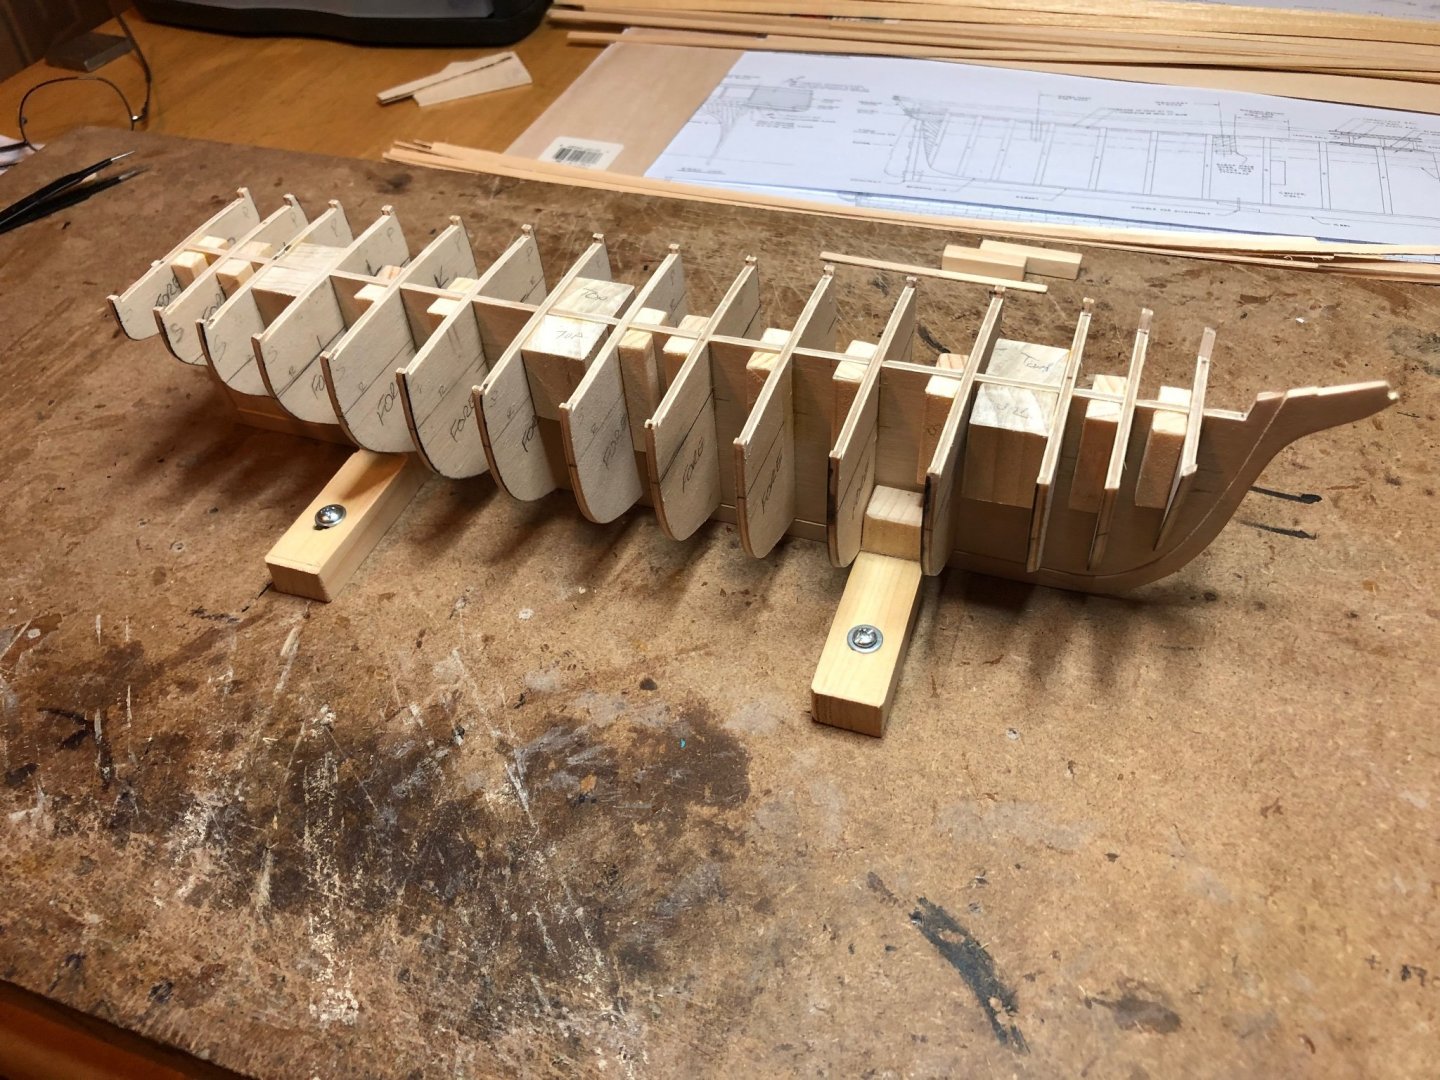
Finished the rabbet along the center keel and attached the keel, stem and stern post. Made a little build slip to hold the keel square while I glued up the bulkheads. I ran a very thin planking strip at various heights along the outside edges of the bulkheads to see if the edges were rough fared correctly. They seemed to be okay. I can fine tune them during the planking process. Probably not necessary but I also glued in 3/8” square “keys” along the center keel and bulkhead faces to help keep things square and give more surface area for the glue to hold. The pieces are only 1/8 thick which is a bit smaller than I am used to working with in terms of bulkheads. The masts will be drilled into the heavier filler pieces later on. Next I will start on the fore and aft filler blocks. Tom
- 200 replies
-
- 7
-
-
- Whaling Bark
- Charles W Morgan
- (and 1 more)
-
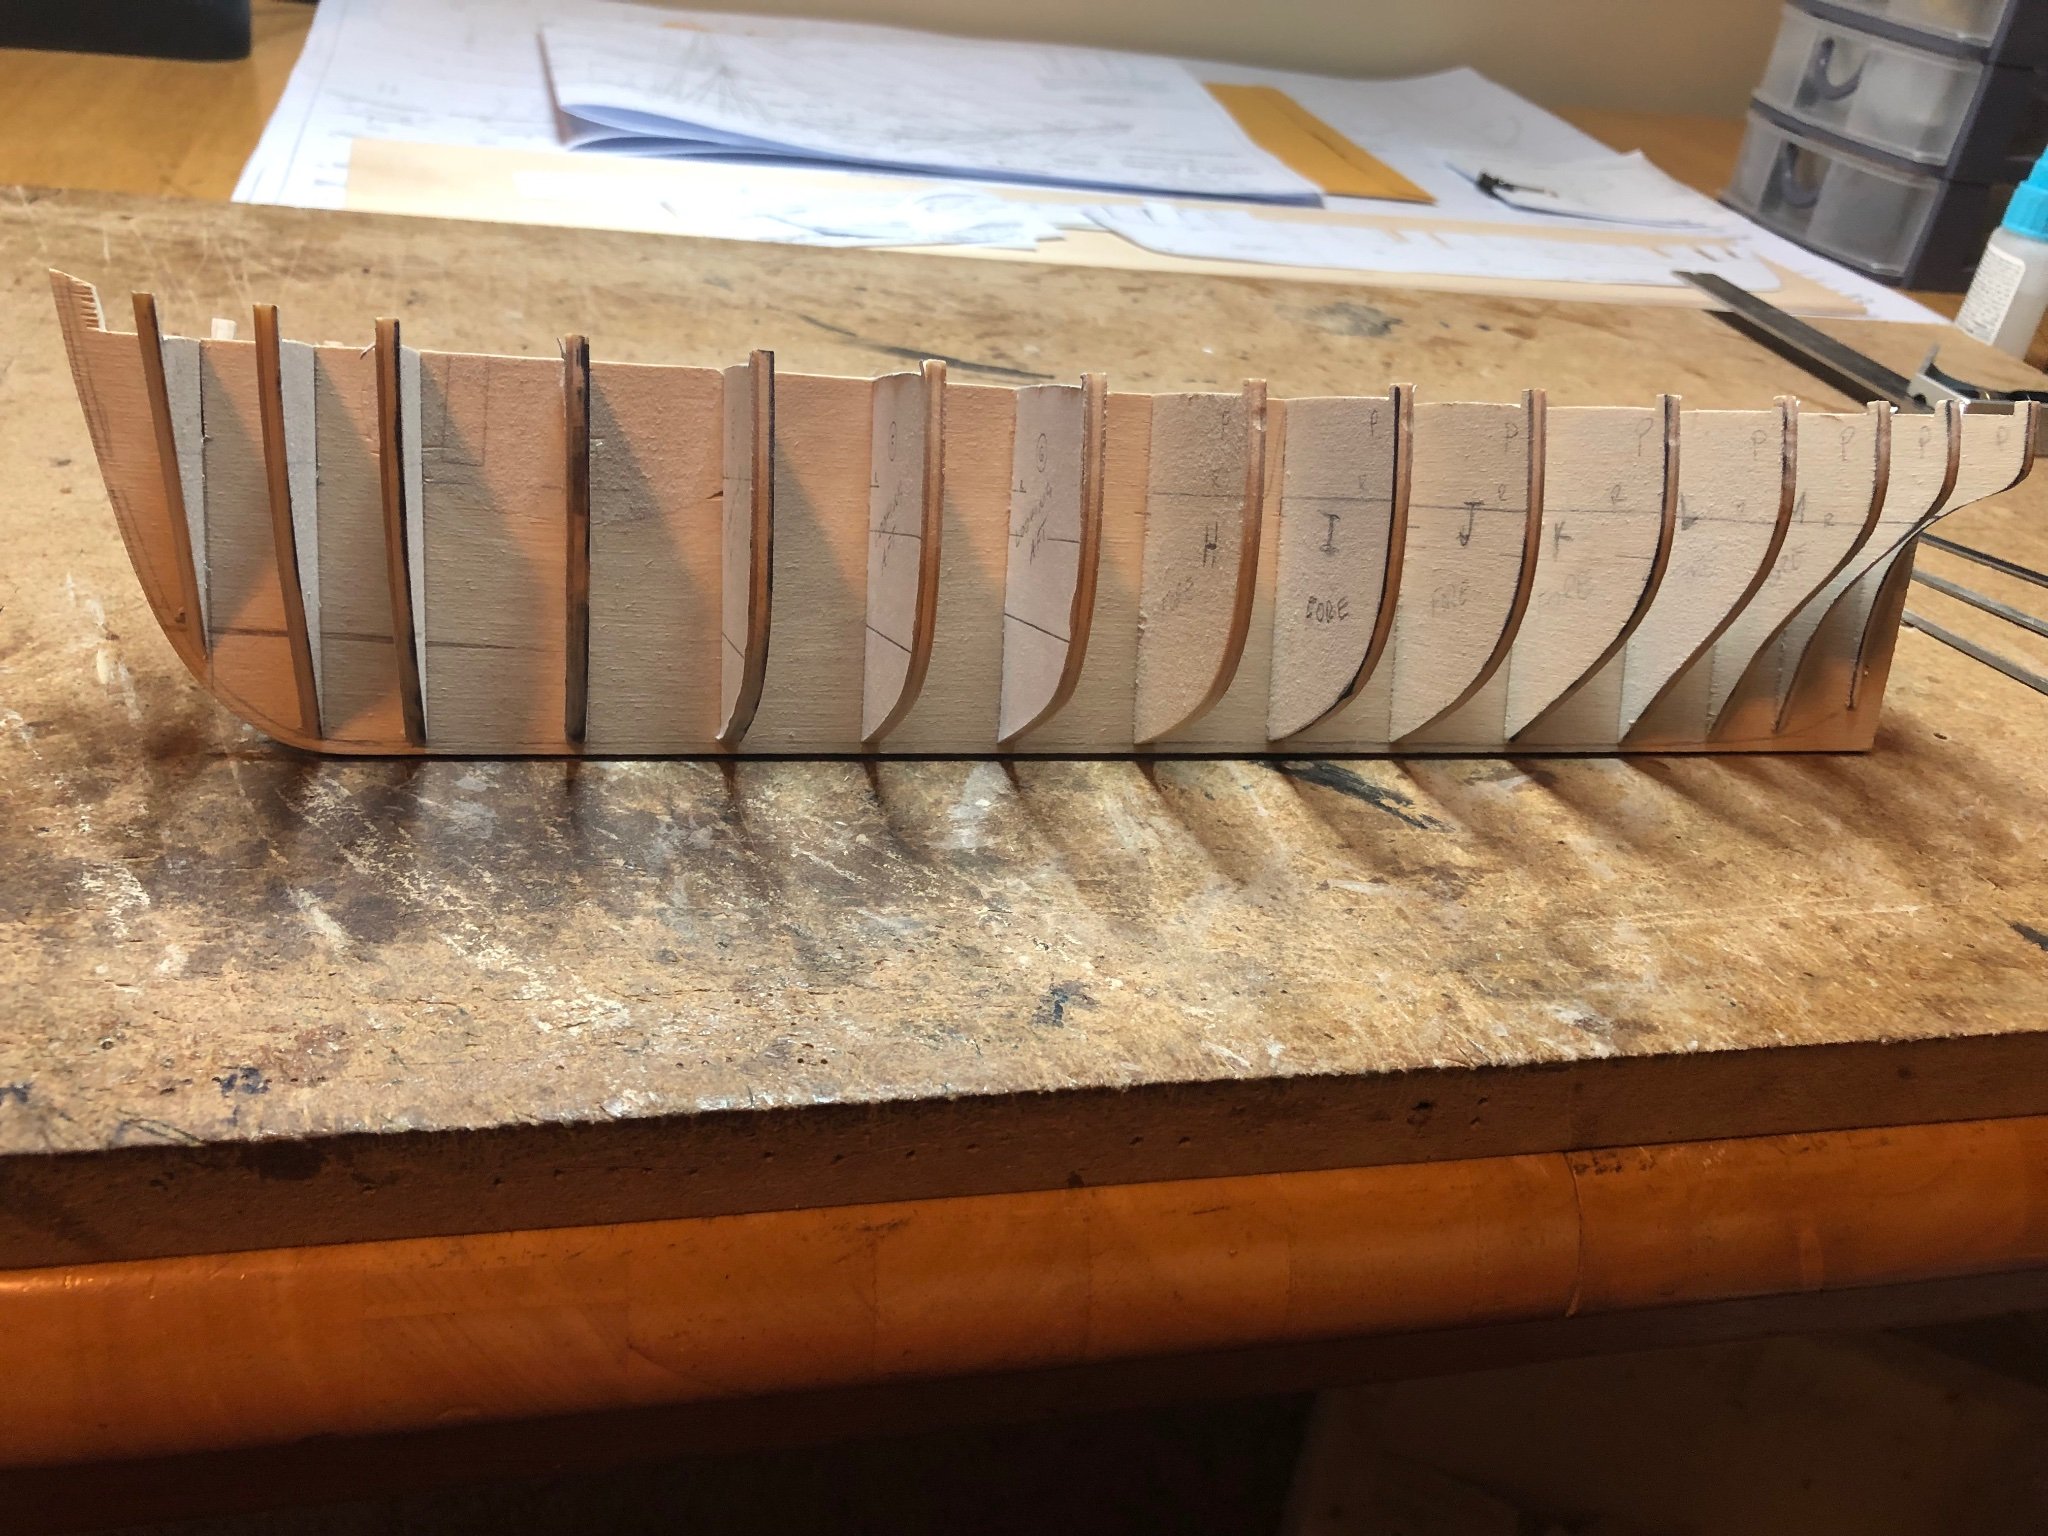
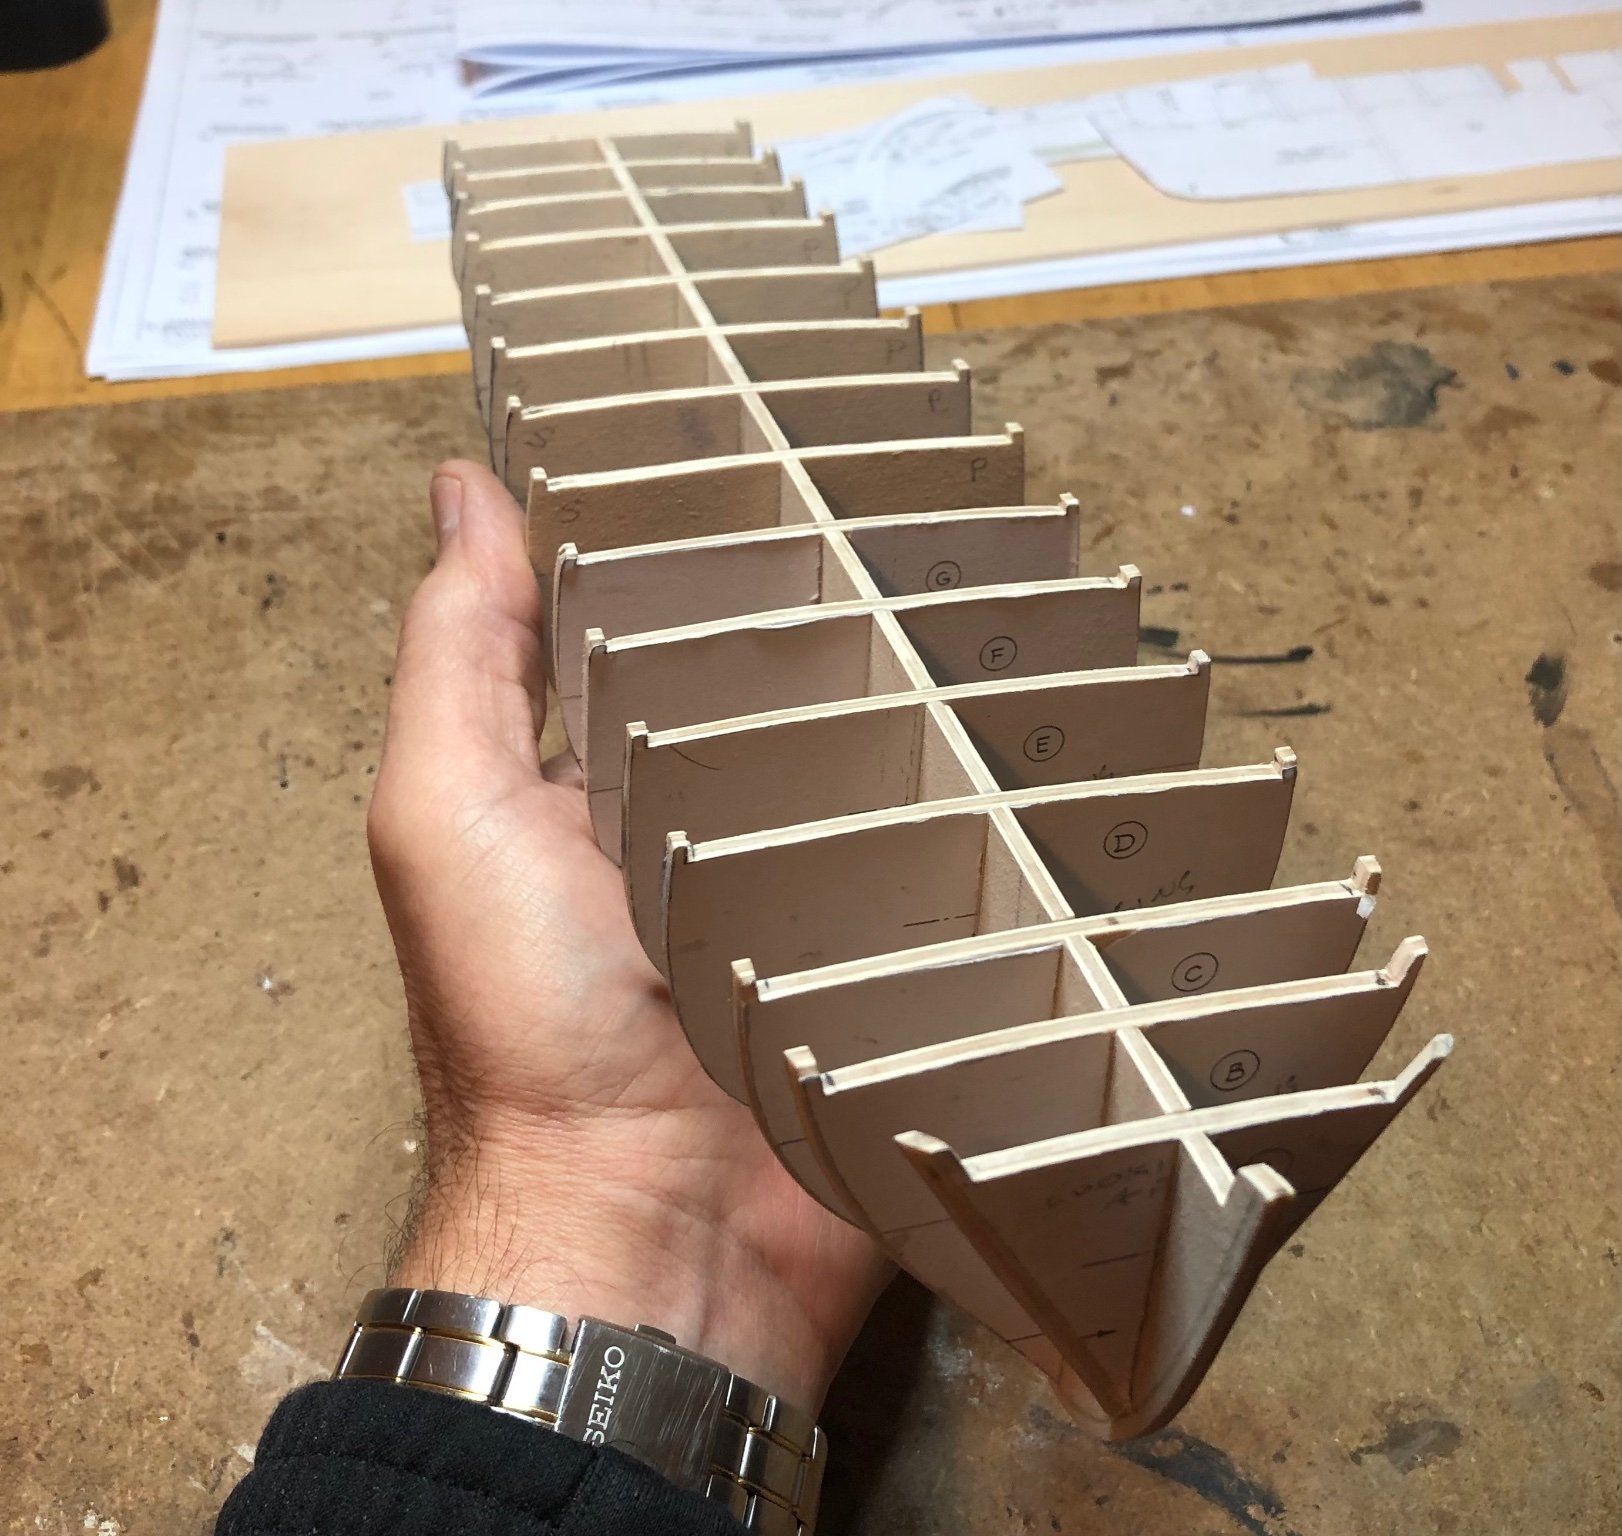
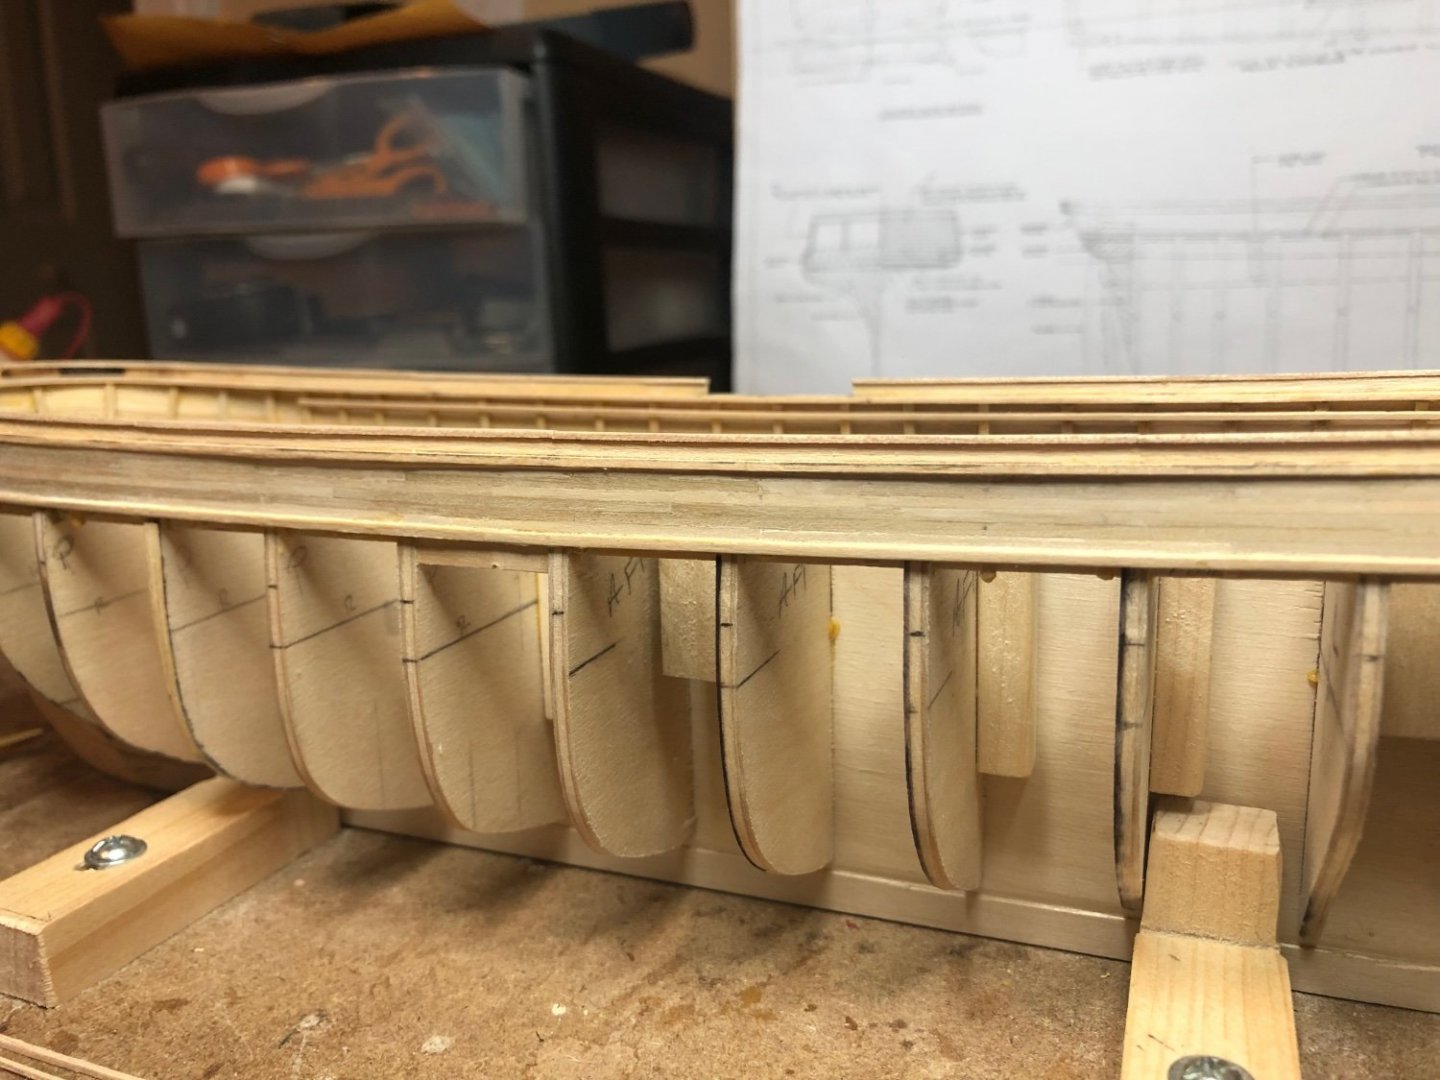
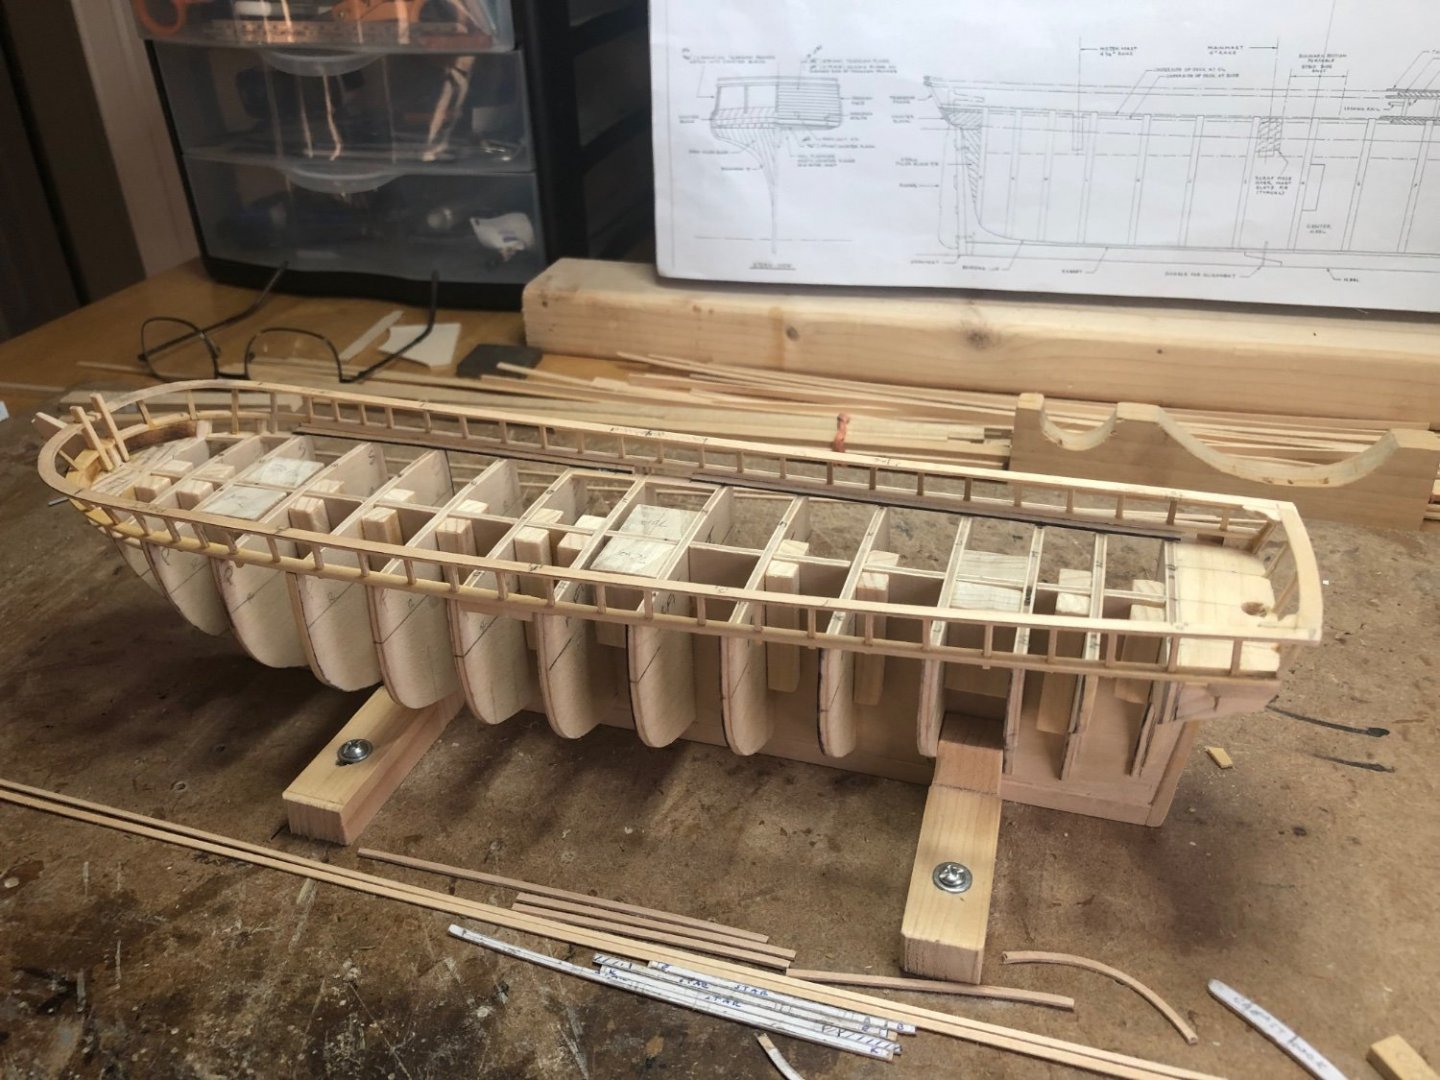
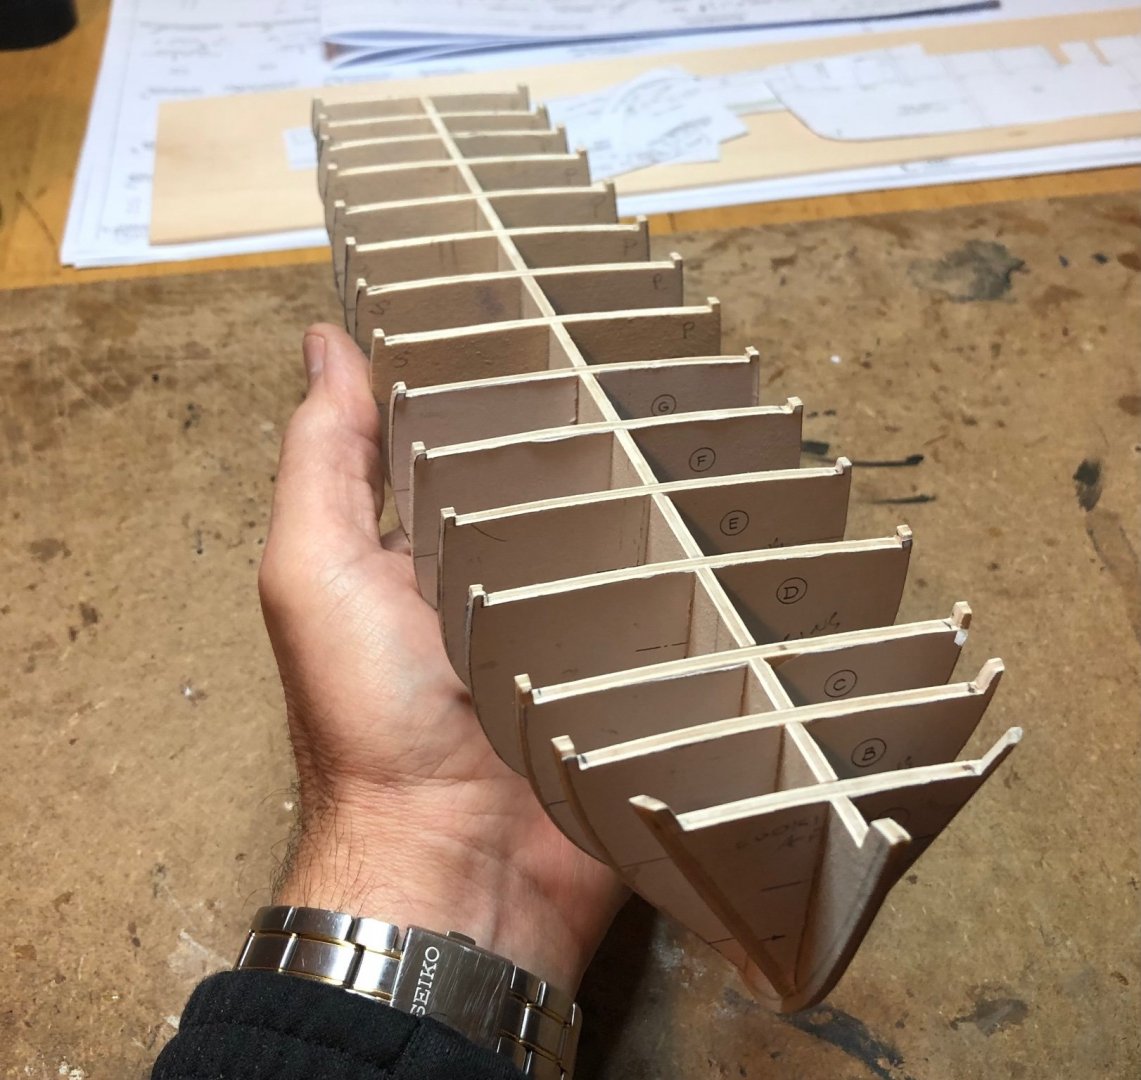
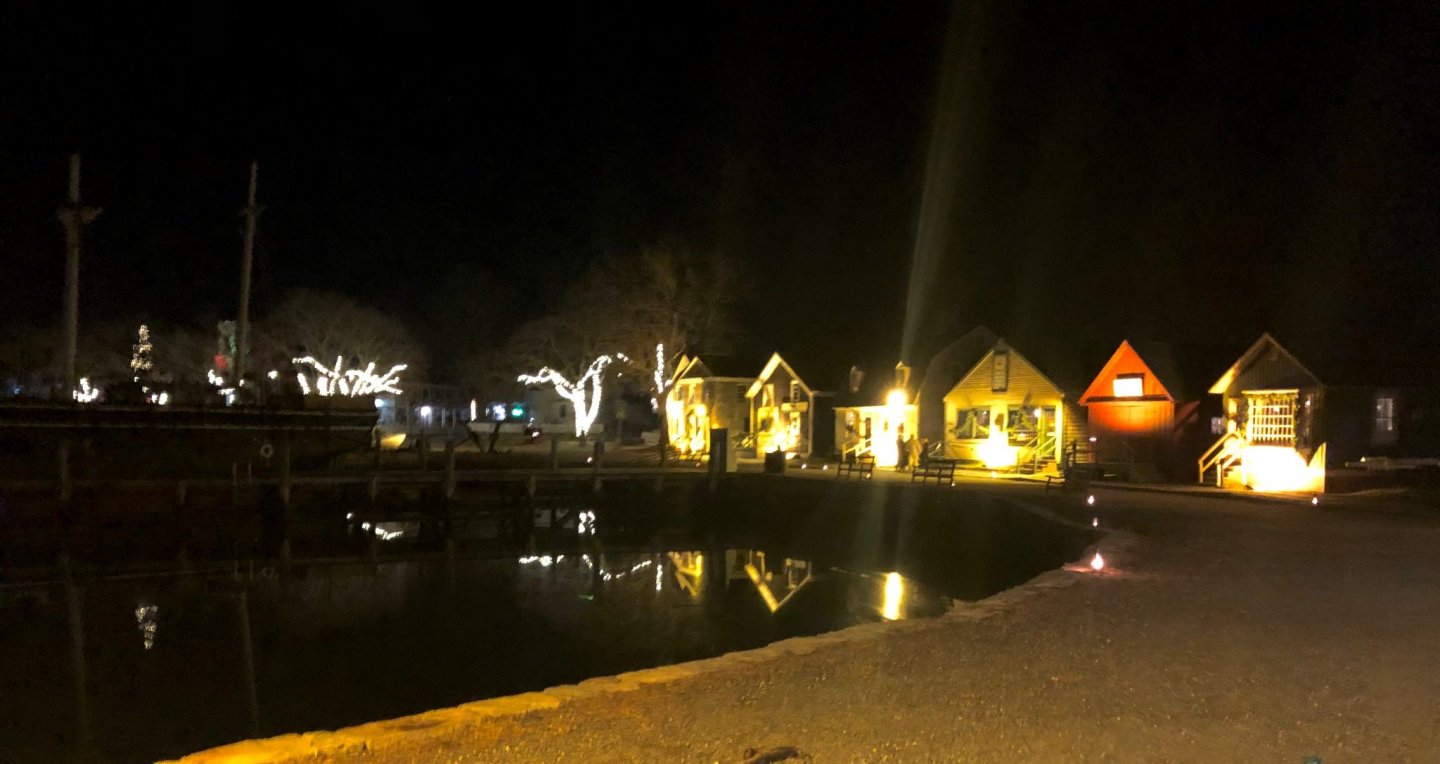
Made a little more progress today. I have all the bulkheads shaped, fit and pretty much fared. They are just dry fit now. I will true them up and glue them in place after I shape the rabbet grooves. Also managed to get in a evening last night at the Mystic Seaport during their “Lantern Light Village” exhibit. The village center was set up as it would have been in 1876 around Christmas. It was basically lit only by kerosene lanterns with small barrel fires here and there. They even had horse drawn carriage rides. People were dressed in period costumes and playing various roles. Amazingly they never broke character when talking with you about current events…. of 1876. 😁 The Morgan although only partially rigged due to the on going restoration, was a bit “spooky” looking in the to walk around in by lantern light. Here is part of the the village as it was lit up. The Morgan is on the left if you look closely in the dark. Tom

- 200 replies
-
- 9
-
-
- Whaling Bark
- Charles W Morgan
- (and 1 more)
-
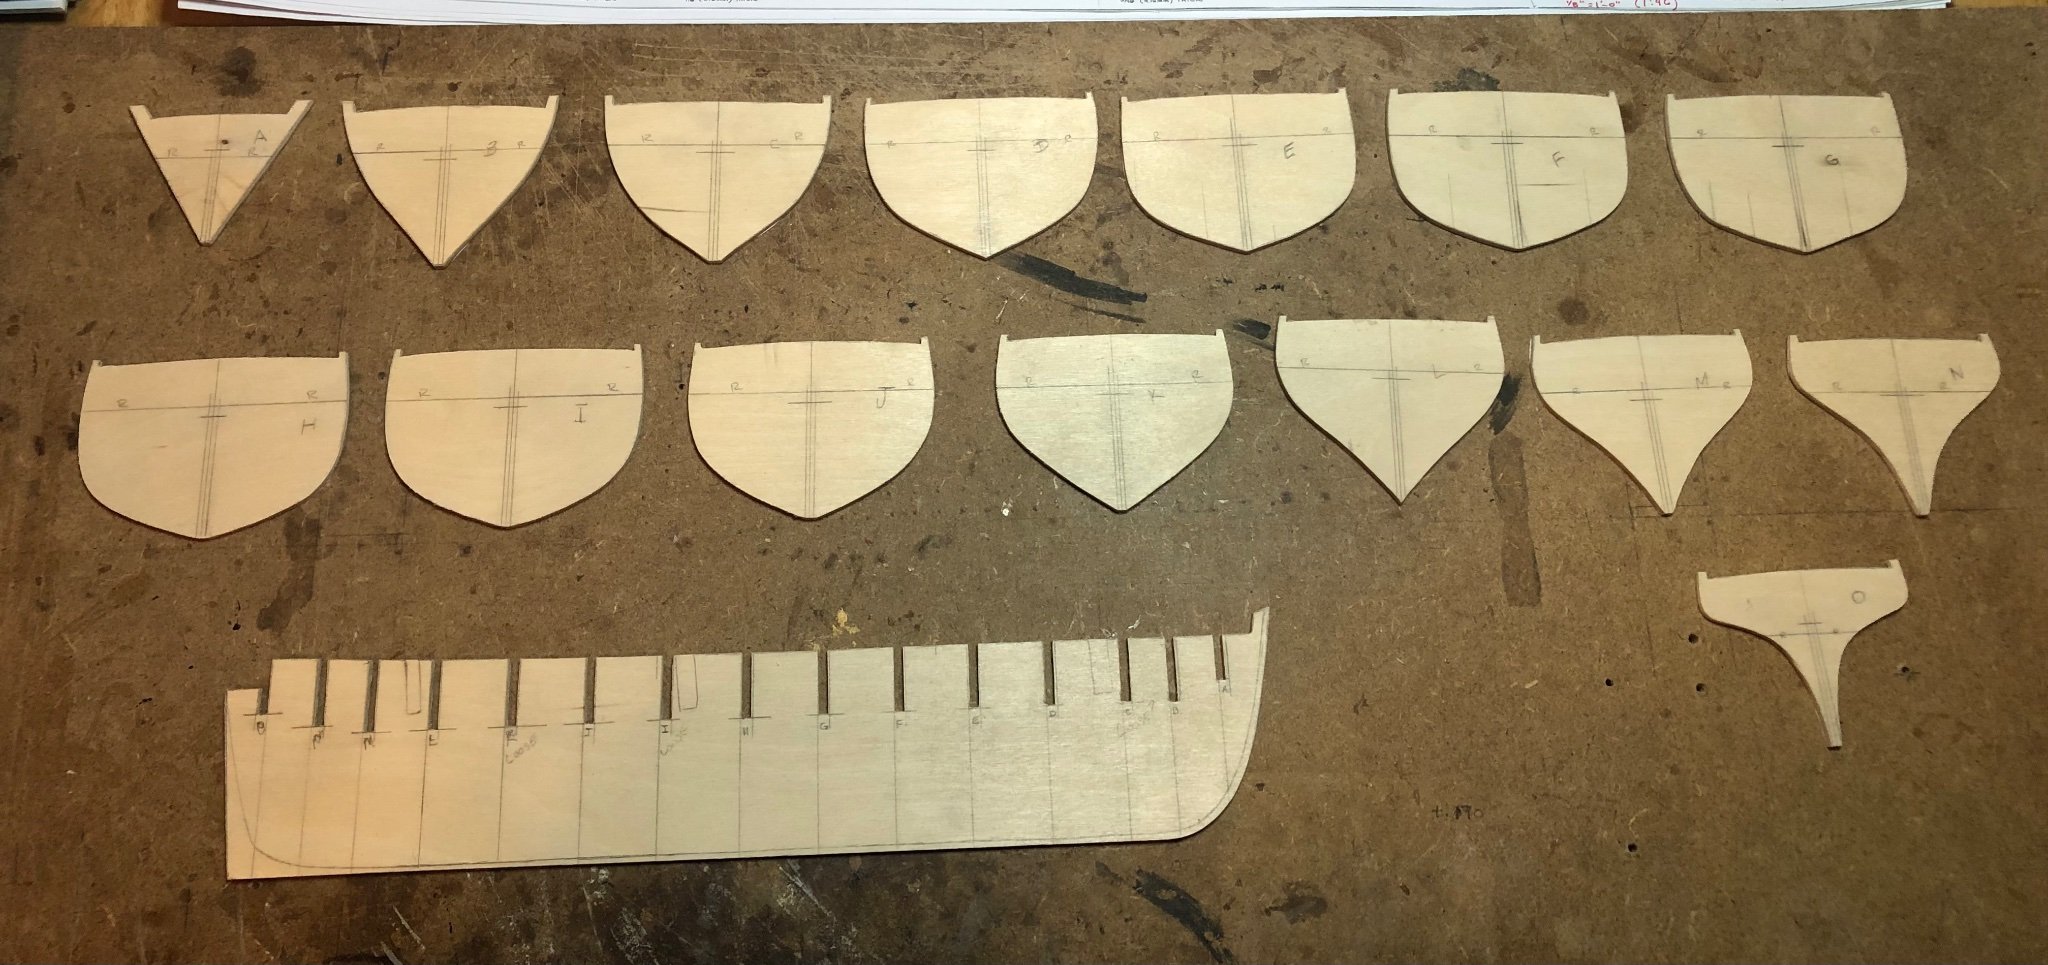
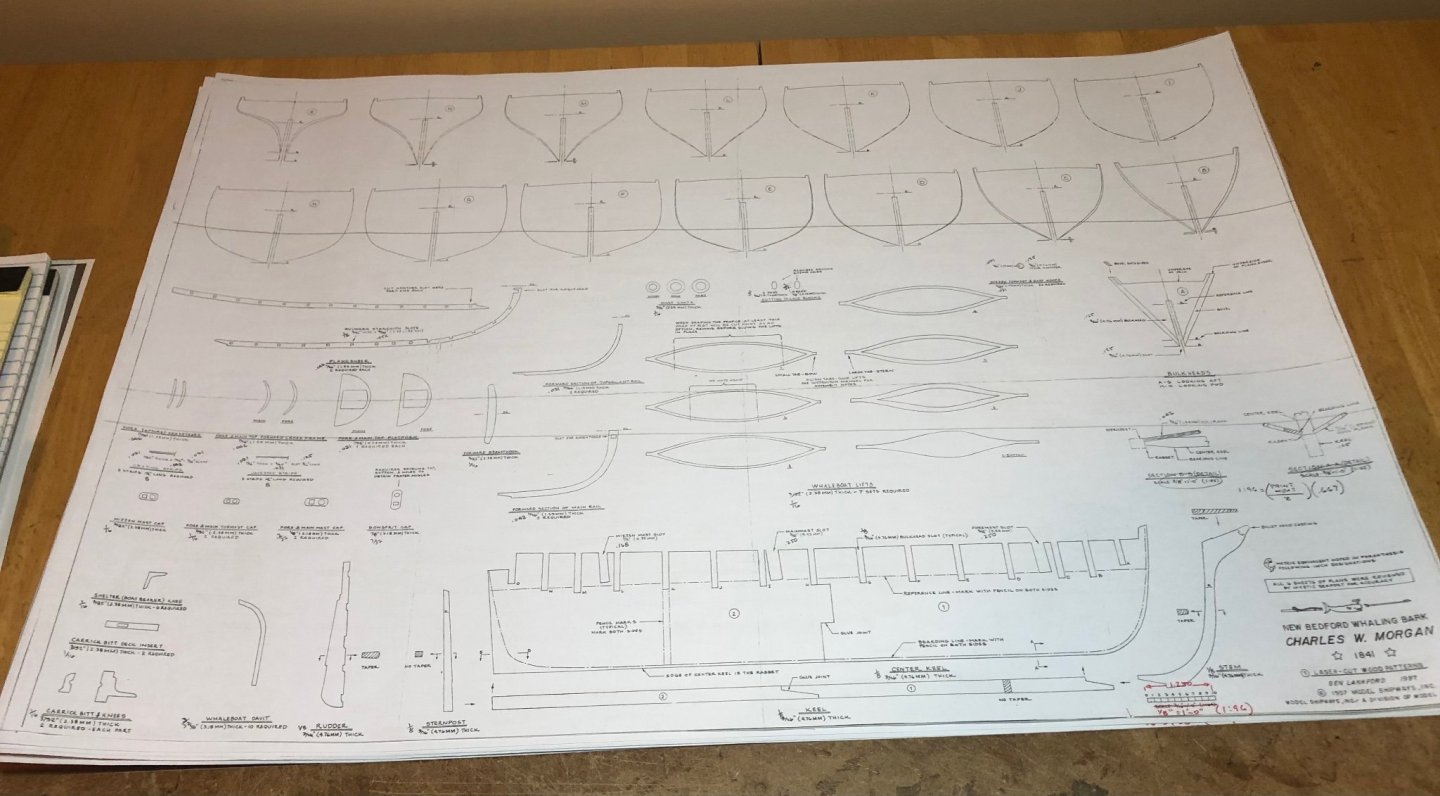
Hi everyone out there. I have finally begun my new project, the whaler Charles W. Morgan based right here in Mystic CT about a hour away from me which is a big reason I chose this ship. I am a member of Mystic Seaport and have been on her many times. The last few taking many pictures of things most tourists don’t even look at. 😁. I was able to see her dry docked as well this summer while some restoration was being done to the hull. These ships are MUCH bigger out of the water. Sometimes you just don’t realize how much is going on below the surface. I bought a set of plans from Model Shipways (1:64 scale) that has 6 pages of very details drawings of everything I should need to get through the basic build. Of course there will be hours of supplemental reading and research to finish it off I am sure. This being my second scratch build I am quite sure I have plenty to learn about. In between painting rooms other house projects I have snuck in an hour here and there to review the plans and get started on the center keel and bulkheads. Time to sit back and enjoy the ride. Tom

- 200 replies
-
- 11
-
-
- Whaling Bark
- Charles W Morgan
- (and 1 more)
-
Hi John I have been busy catching up on neglected house chores but manage to sneak in some “lurking” on the forum. I just came across your build. As you mentioned earlier, this one is a bit different from Age of Sail ships. This will definitely add to your already adept skill set. Solid hull carving is not something I am ready for but you seem to have mastered it. Looking forward to following along. Tom
- 238 replies
-
- 2
-
-
- Robert E Lee
- steamboat
- (and 3 more)
-
Hi Rick, Welcome from another Connecticut member. Tom
-
Hi Roger You are absolutely right about old tool quality. I thought I was the only one on the planet to still own a worrying Toolkraft machine! I have a 10” table saw that I use all the time to make furniture and the like. It was my father’s and like your drill press is 50+ years old. I can’t kill it ( not that I want to). Cast iron table and sturdy as heck. Probably last another 50 years!😁 Tom
-
I have the same set. Top quality. I don’t mind paying a bit more for something that is top quality if you are going to use them a lot such as pin vises. Sometimes you can get a set from retired toolmakers for a great price on EBay. Every toolmaker I have ever worked with in my 40+ year career have only used Starrett tools. Tom
-
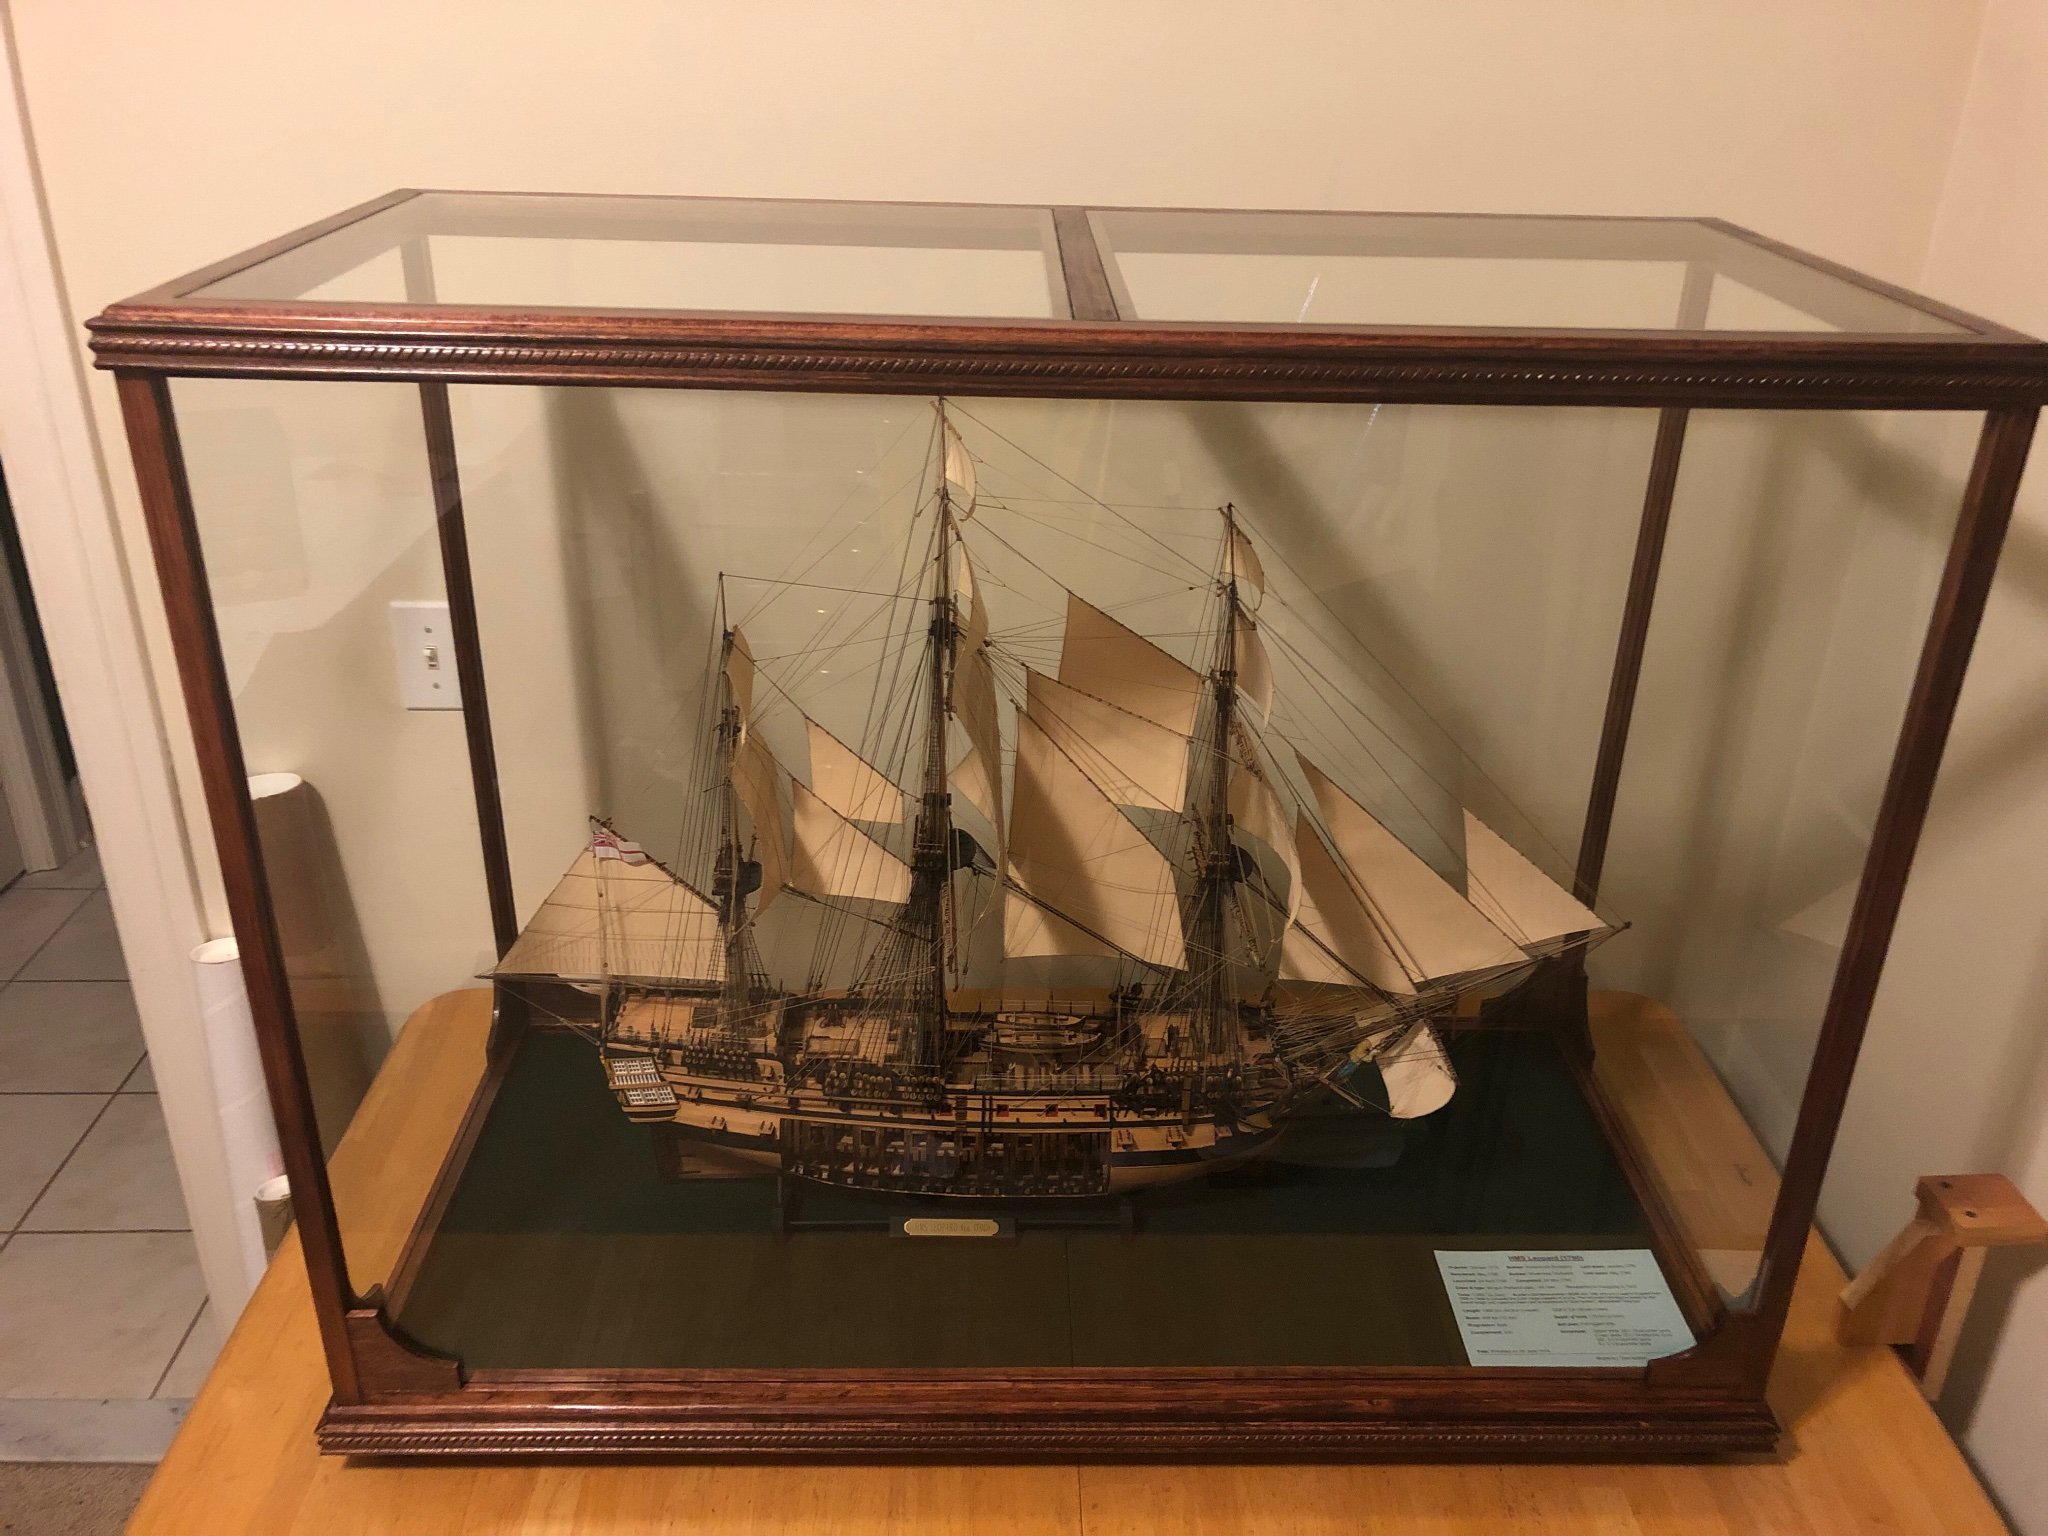
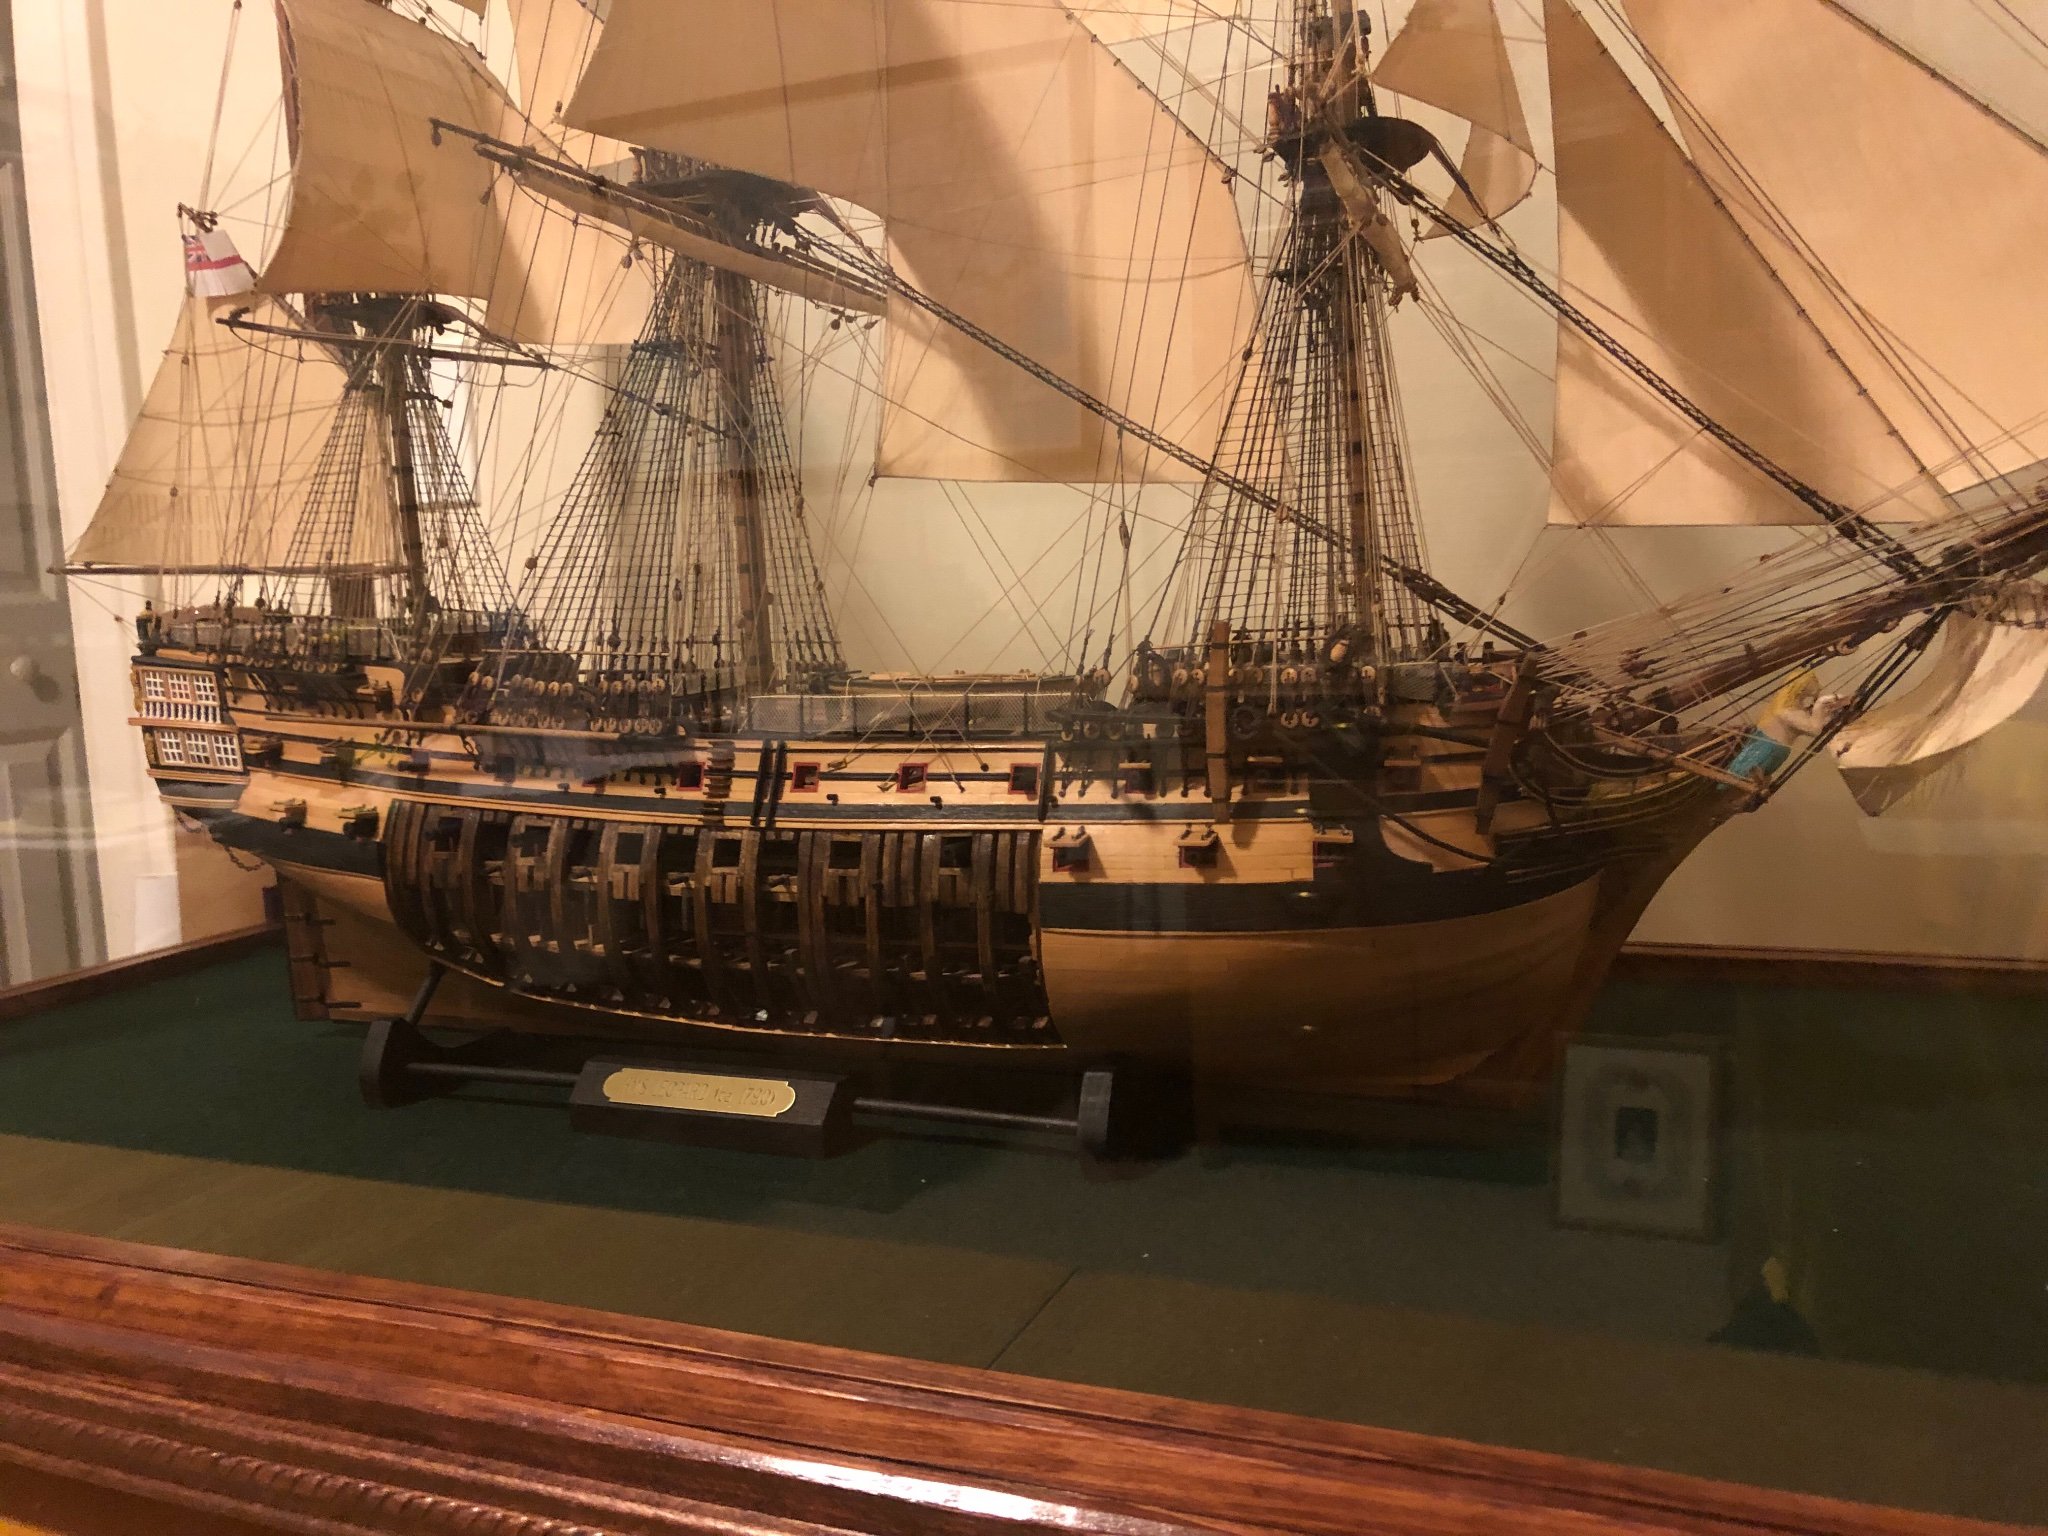
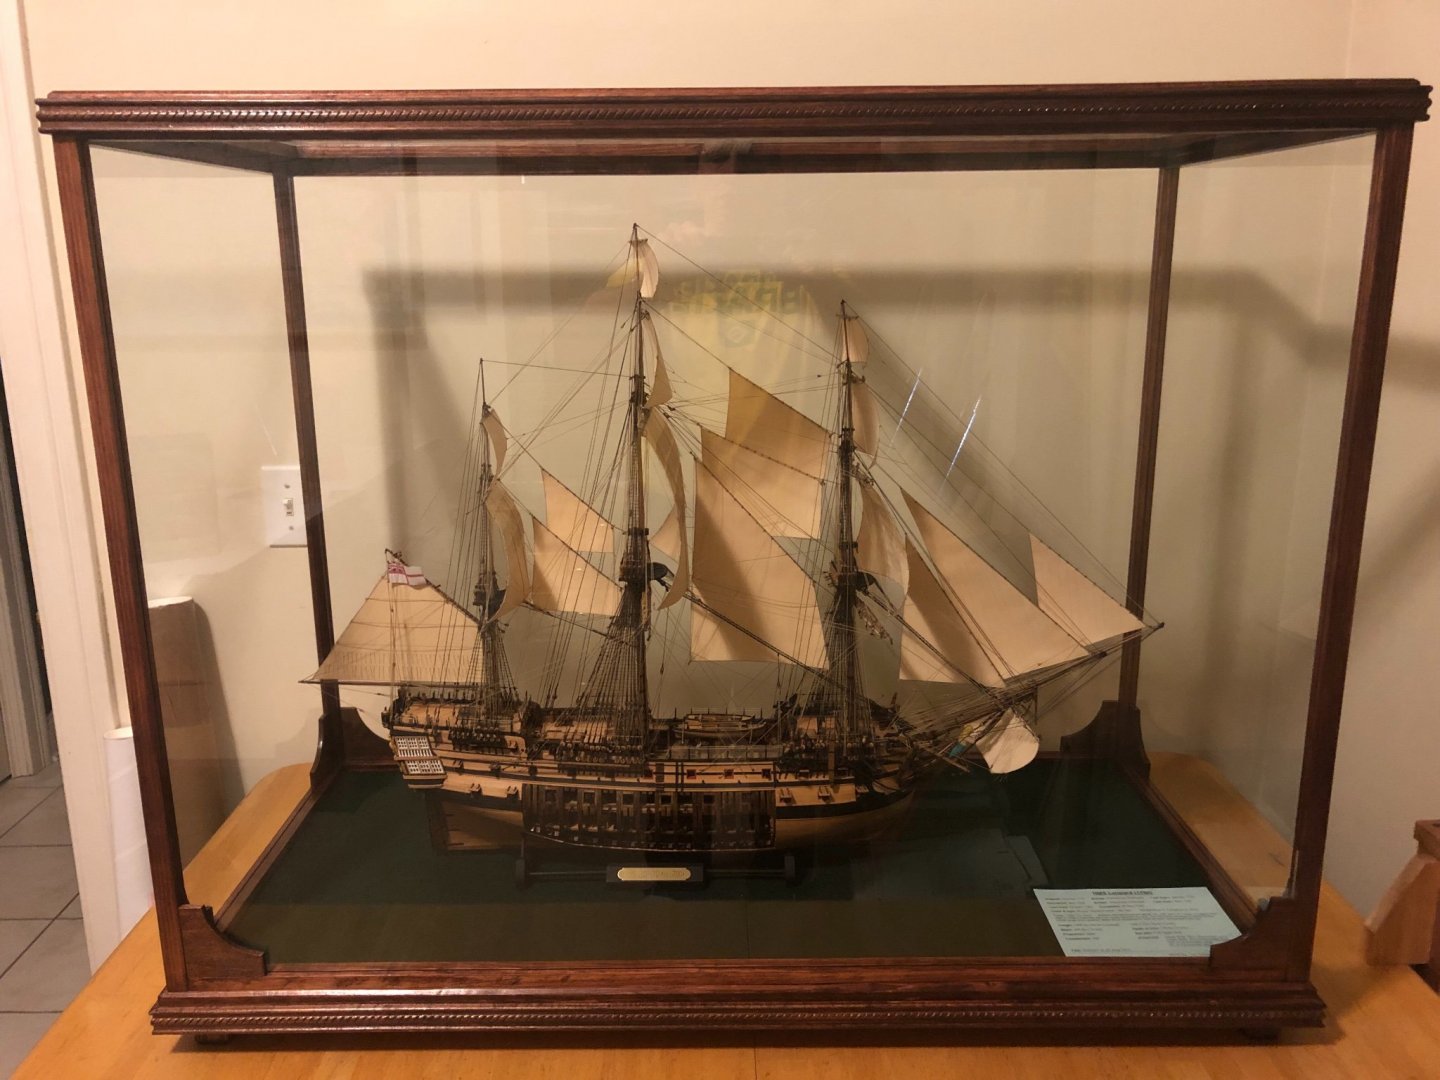
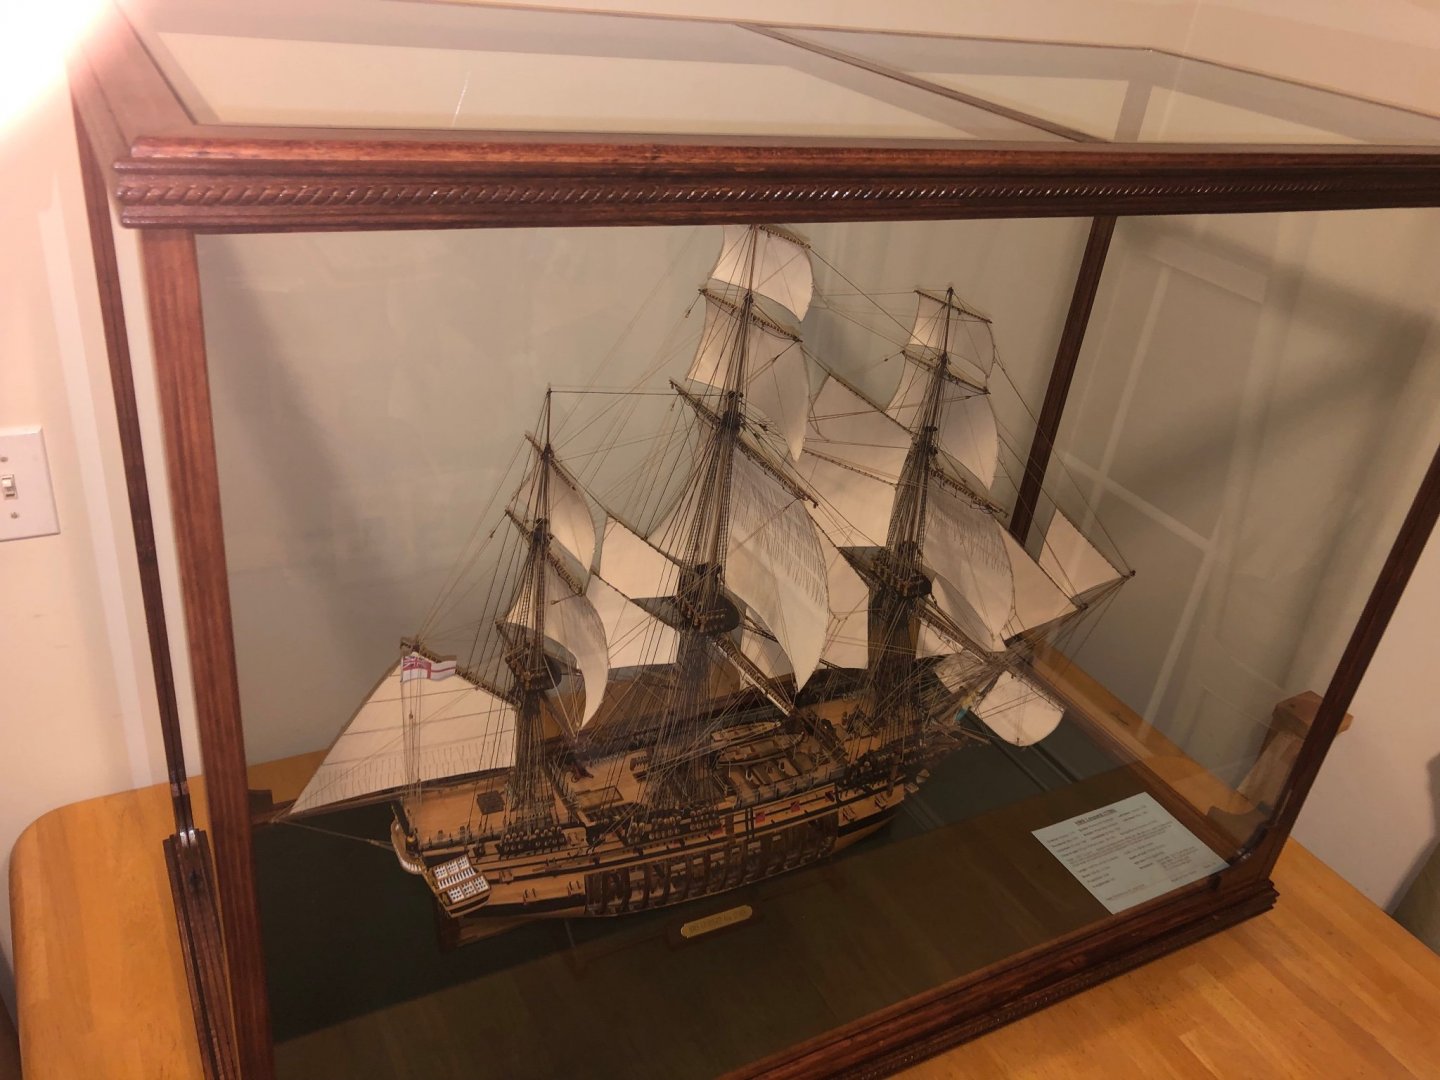
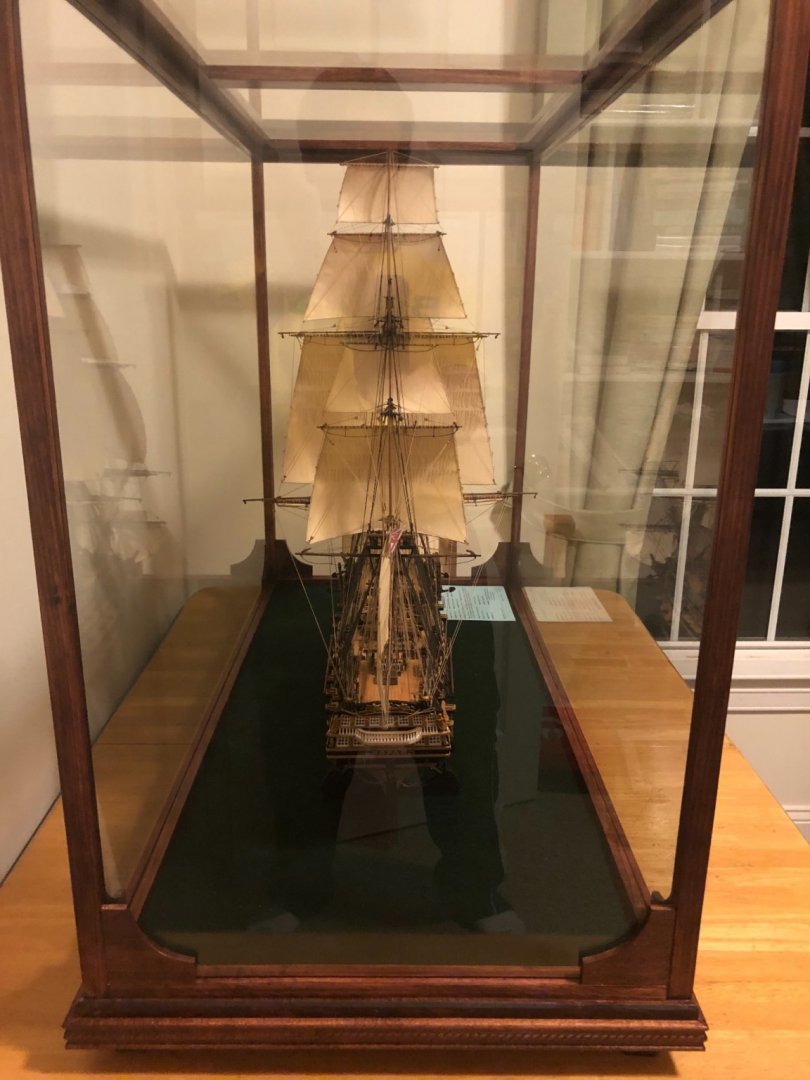
Hi everyone I finally was able to finish the display case. Right now it is just sitting on an old table in my modeling room. We are about to start refurnishing some of the rooms in our house i.e. rugs, couches, bedrooms and what ever else pops up. These projects tend to morph into much more than you originally plan. 🤔Once everything is back in order I can put the case in it’s final home. Here are some pics although the lighting was not to great. I plan on putting a couple of wireless light bars on the top glass plates to help with illumination. Now I am going to attack a birthday present from 3 years ago, a 9000 piece puzzle of the battle at Algiers. I think it measures approximately 5ft by 7ft if I remember correctly. It will make a nice wall hanging in my modeling room. Hopefully with a little help from my friends I can get the puzzle done by Christmas and then get started on a scratch build of the Charles W. Morgan. Thanks again to everyone for the support during my Leopard build. Tom


- 385 replies
-
- 17
-
-

-

-
Thanks Tom and to all those at the conference. The USS Constitution Model Shipwrights Guild did a wonderful job putting together this year’s show. The enjoyment this hobby brings is reward enough and to be acknowledged by your peers just adds to the journey. Thanks again to all those who helped me along the way with this build. It was nice to see everyone and the models in person. Tom