HOLIDAY DONATION DRIVE - SUPPORT MSW - DO YOUR PART TO KEEP THIS GREAT FORUM GOING! (Only 24 donations so far out of 49,000 members - C'mon guys!)
×


toms10
-
Posts
929 -
Joined
-
Last visited
Content Type
Profiles
Forums
Gallery
Events
Everything posted by toms10
-
 Hi JIm, As far as sails they do change the way everything looks. I think they are necessary if you are doing a diorama. Not so much if just displaying a model. They added a few months to the build and added to the complexity of the rigging lines. I may just do furled sails on the Morgan I will be doing just for something different. We will see when the time comes. 😄 Thanks for the support and kind words over the course of my build. Tom
 -
Hi Jack & Tom, Looking forward to seeing you on a few weeks at the New London conference. I will be bringing her there to show. I hope she looks as good in person. Tom
-
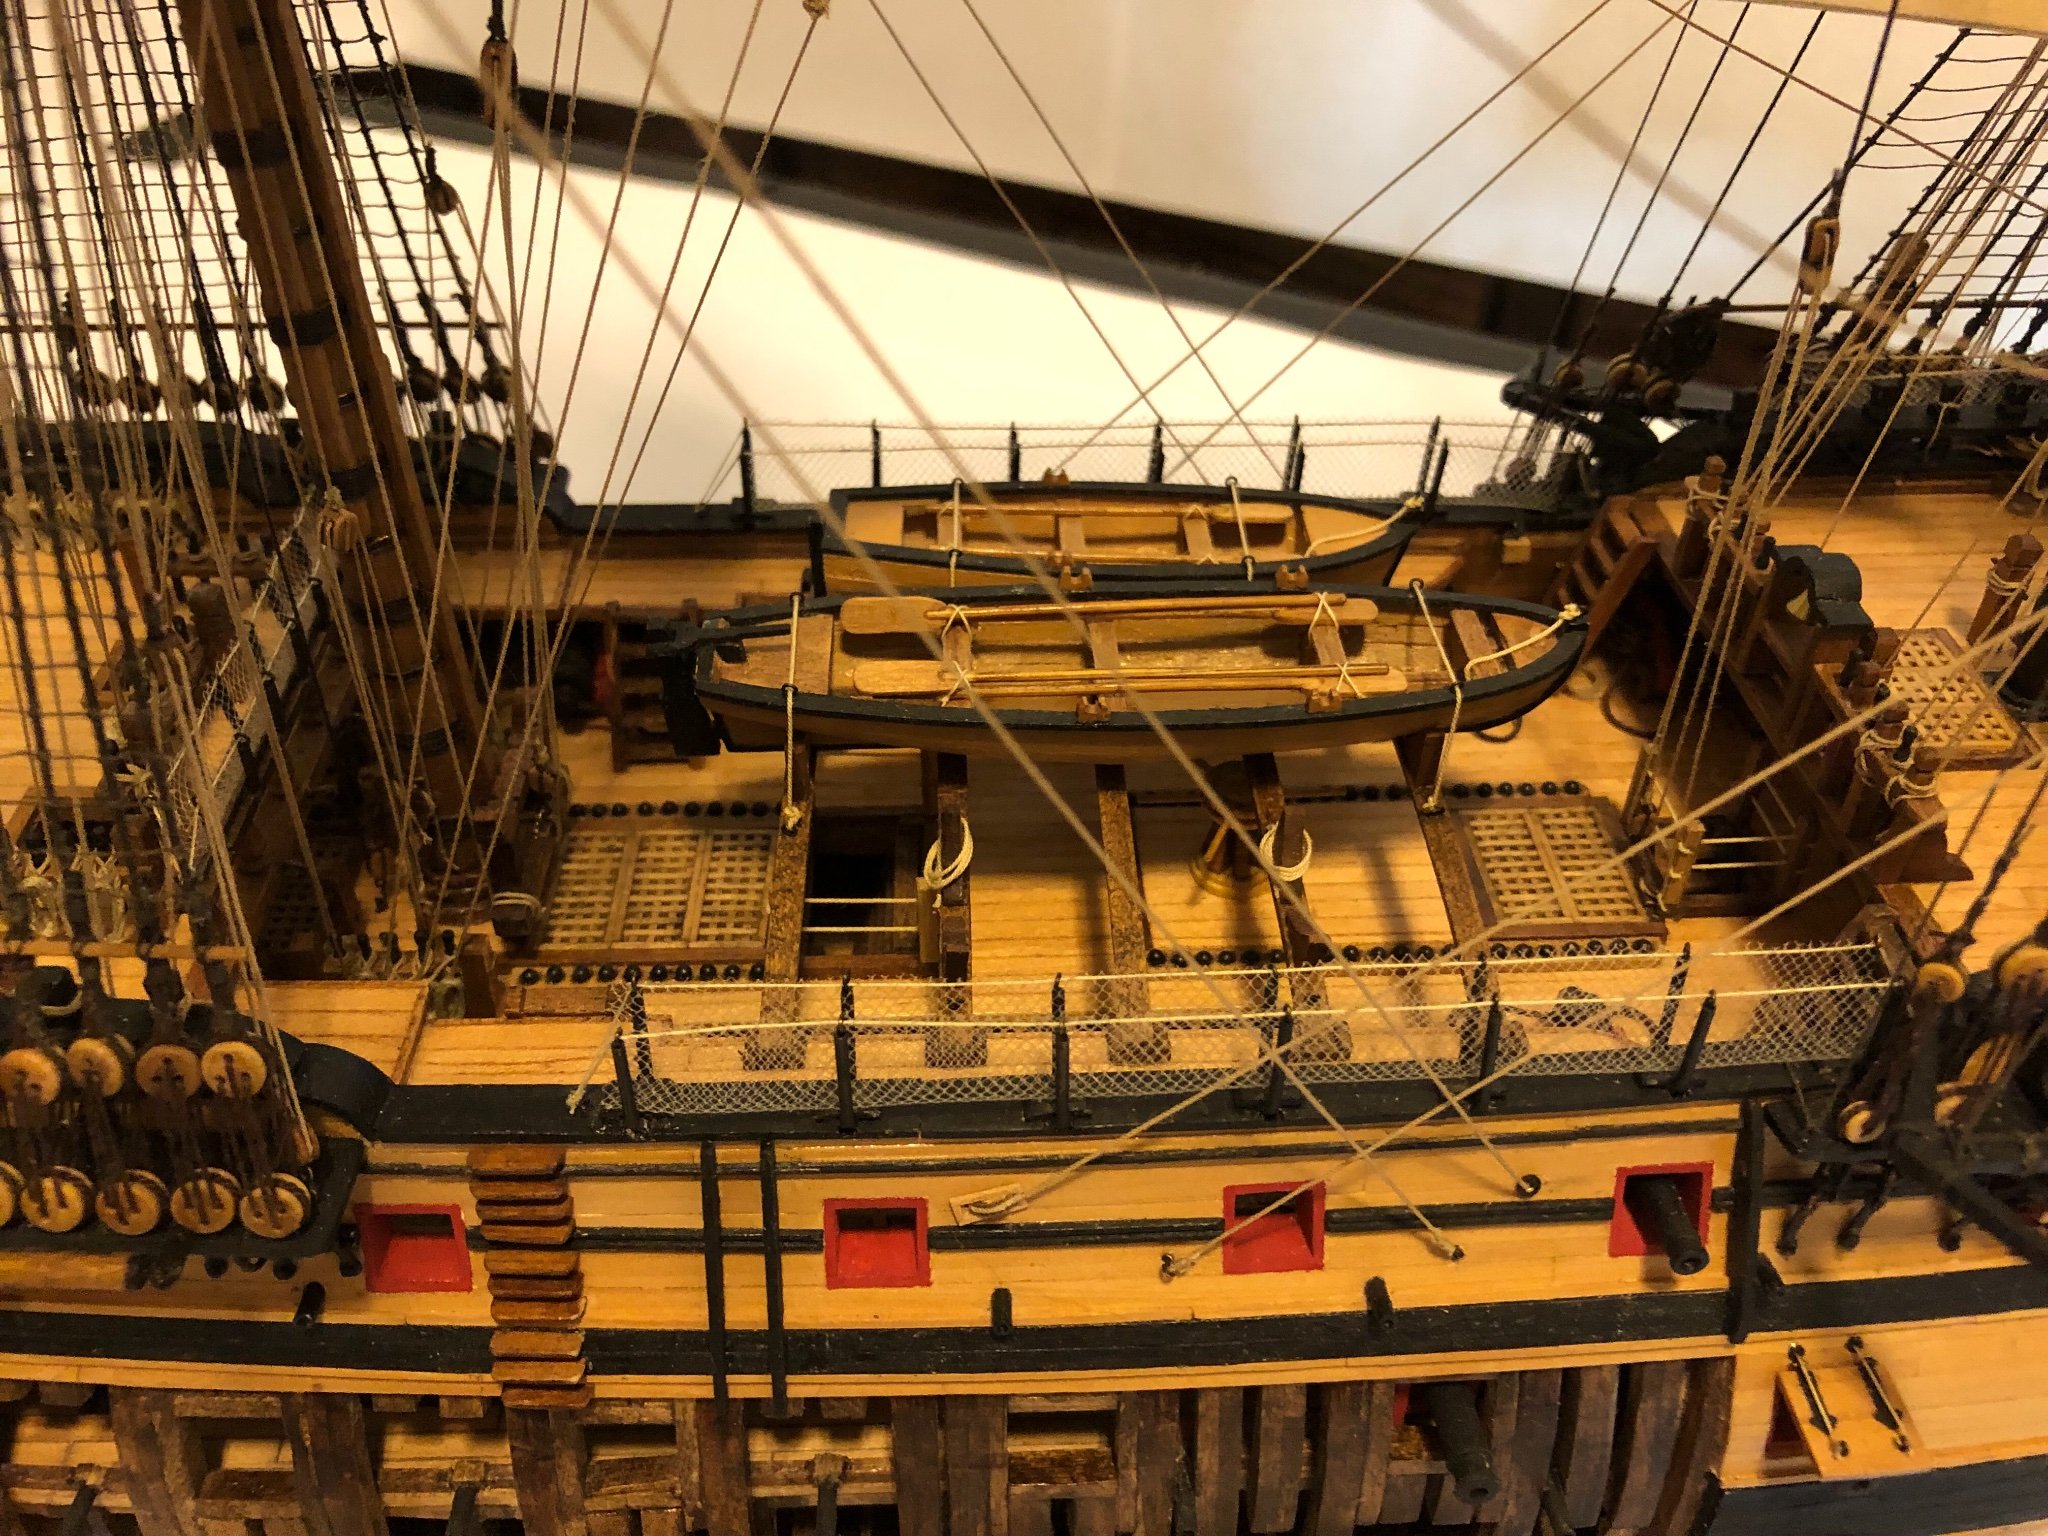
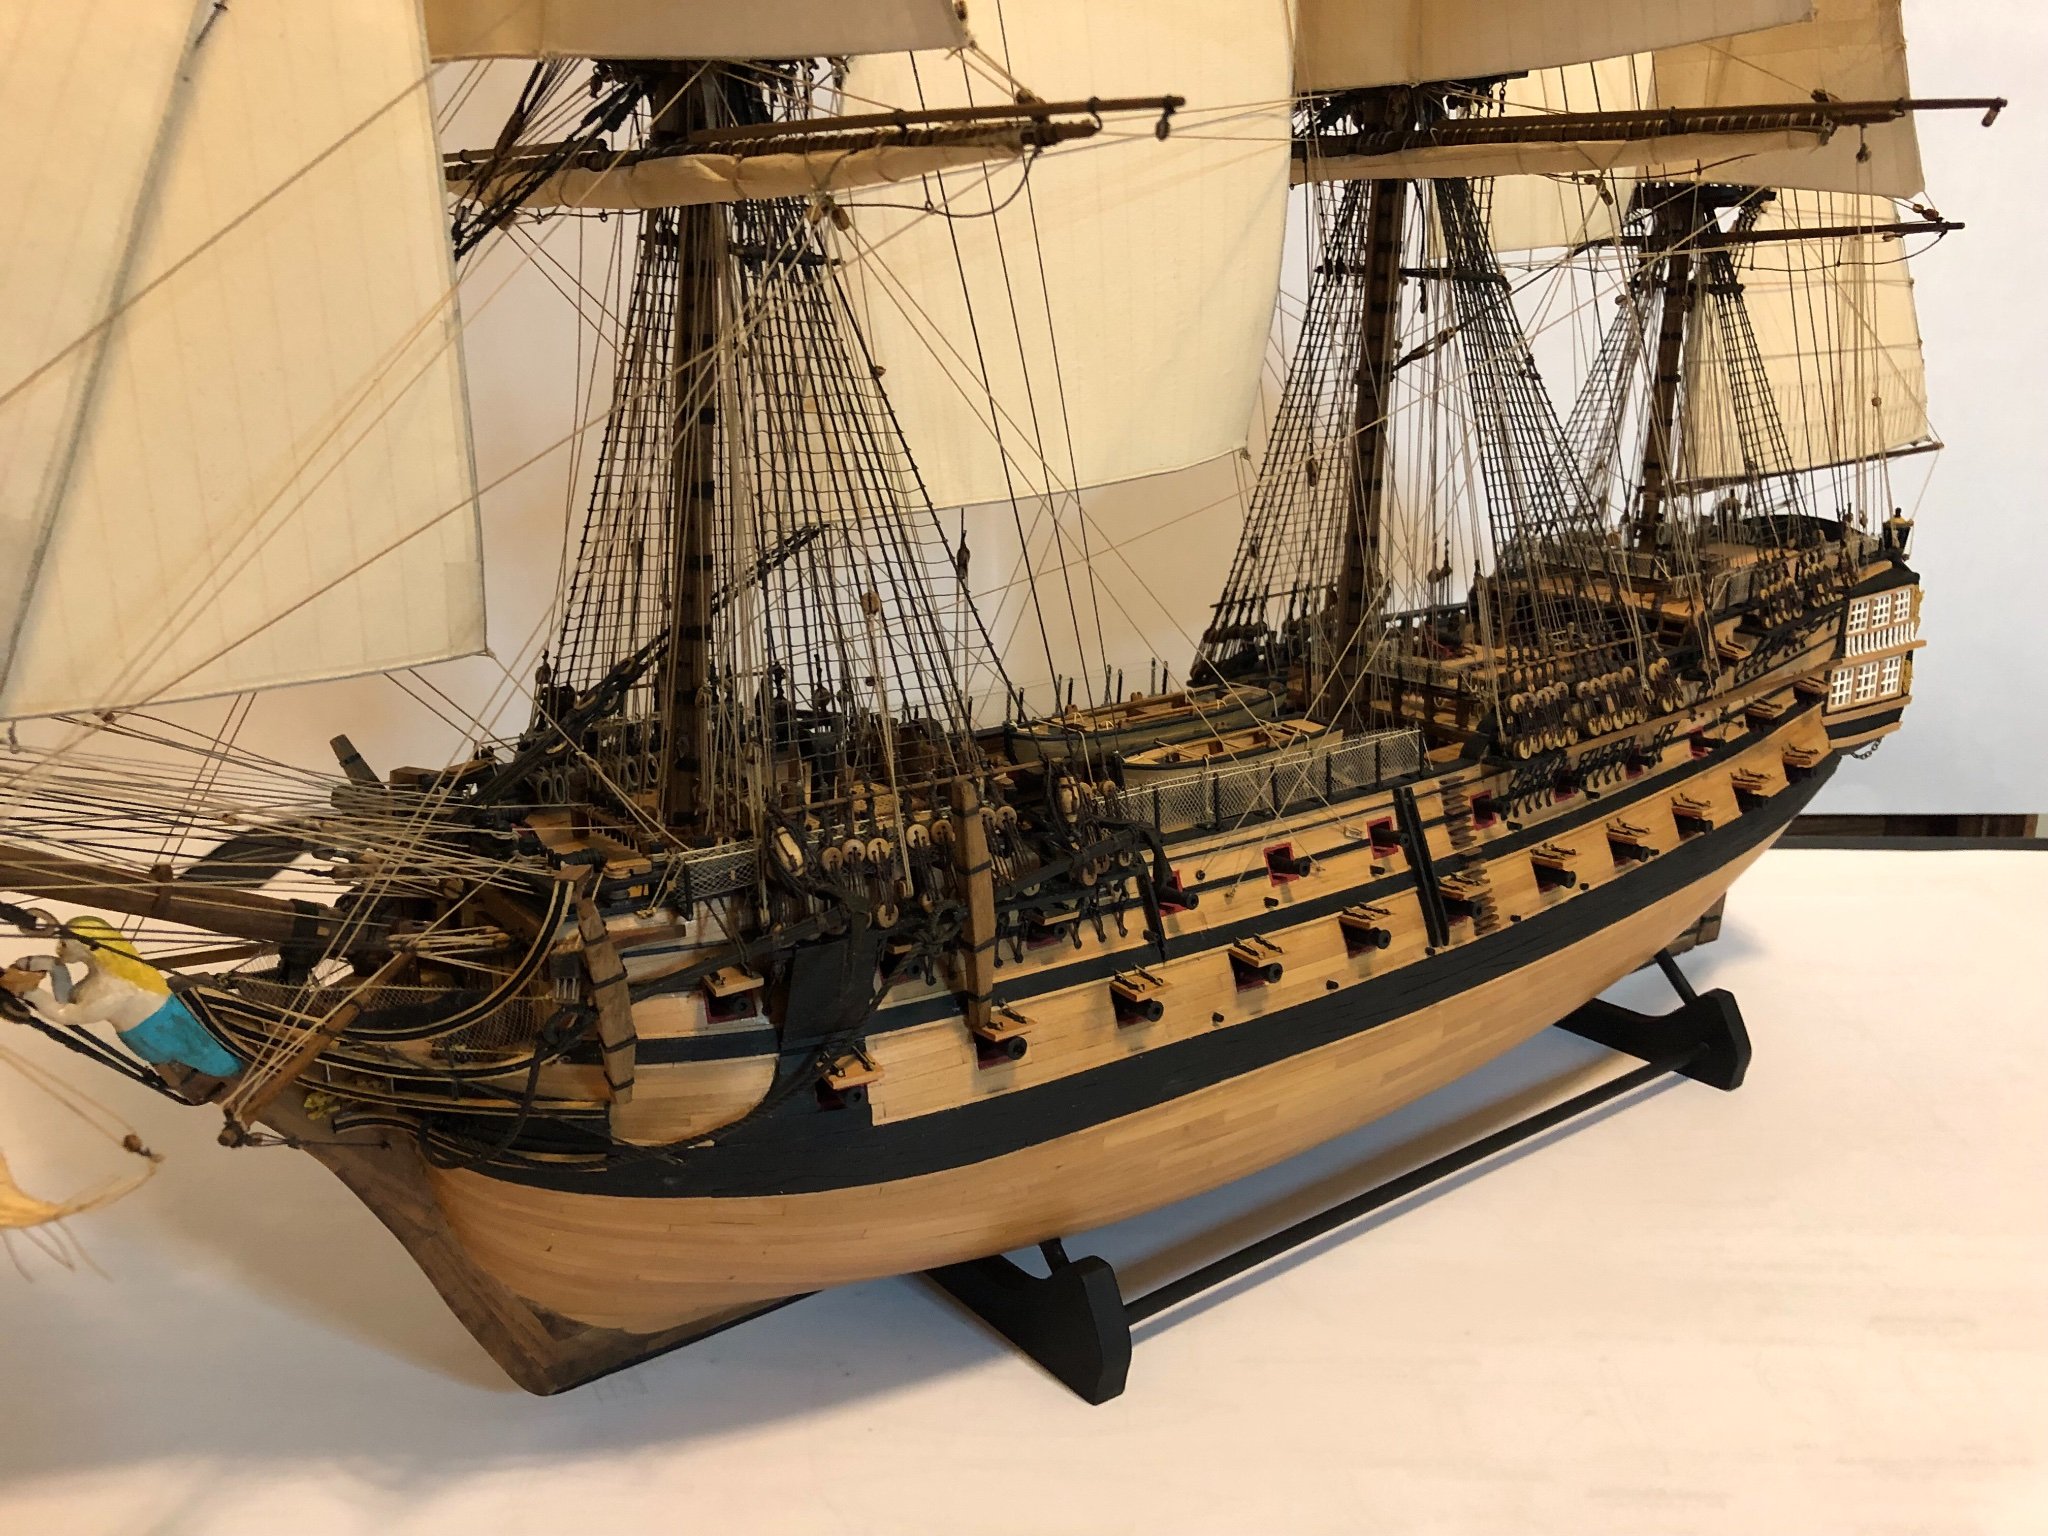
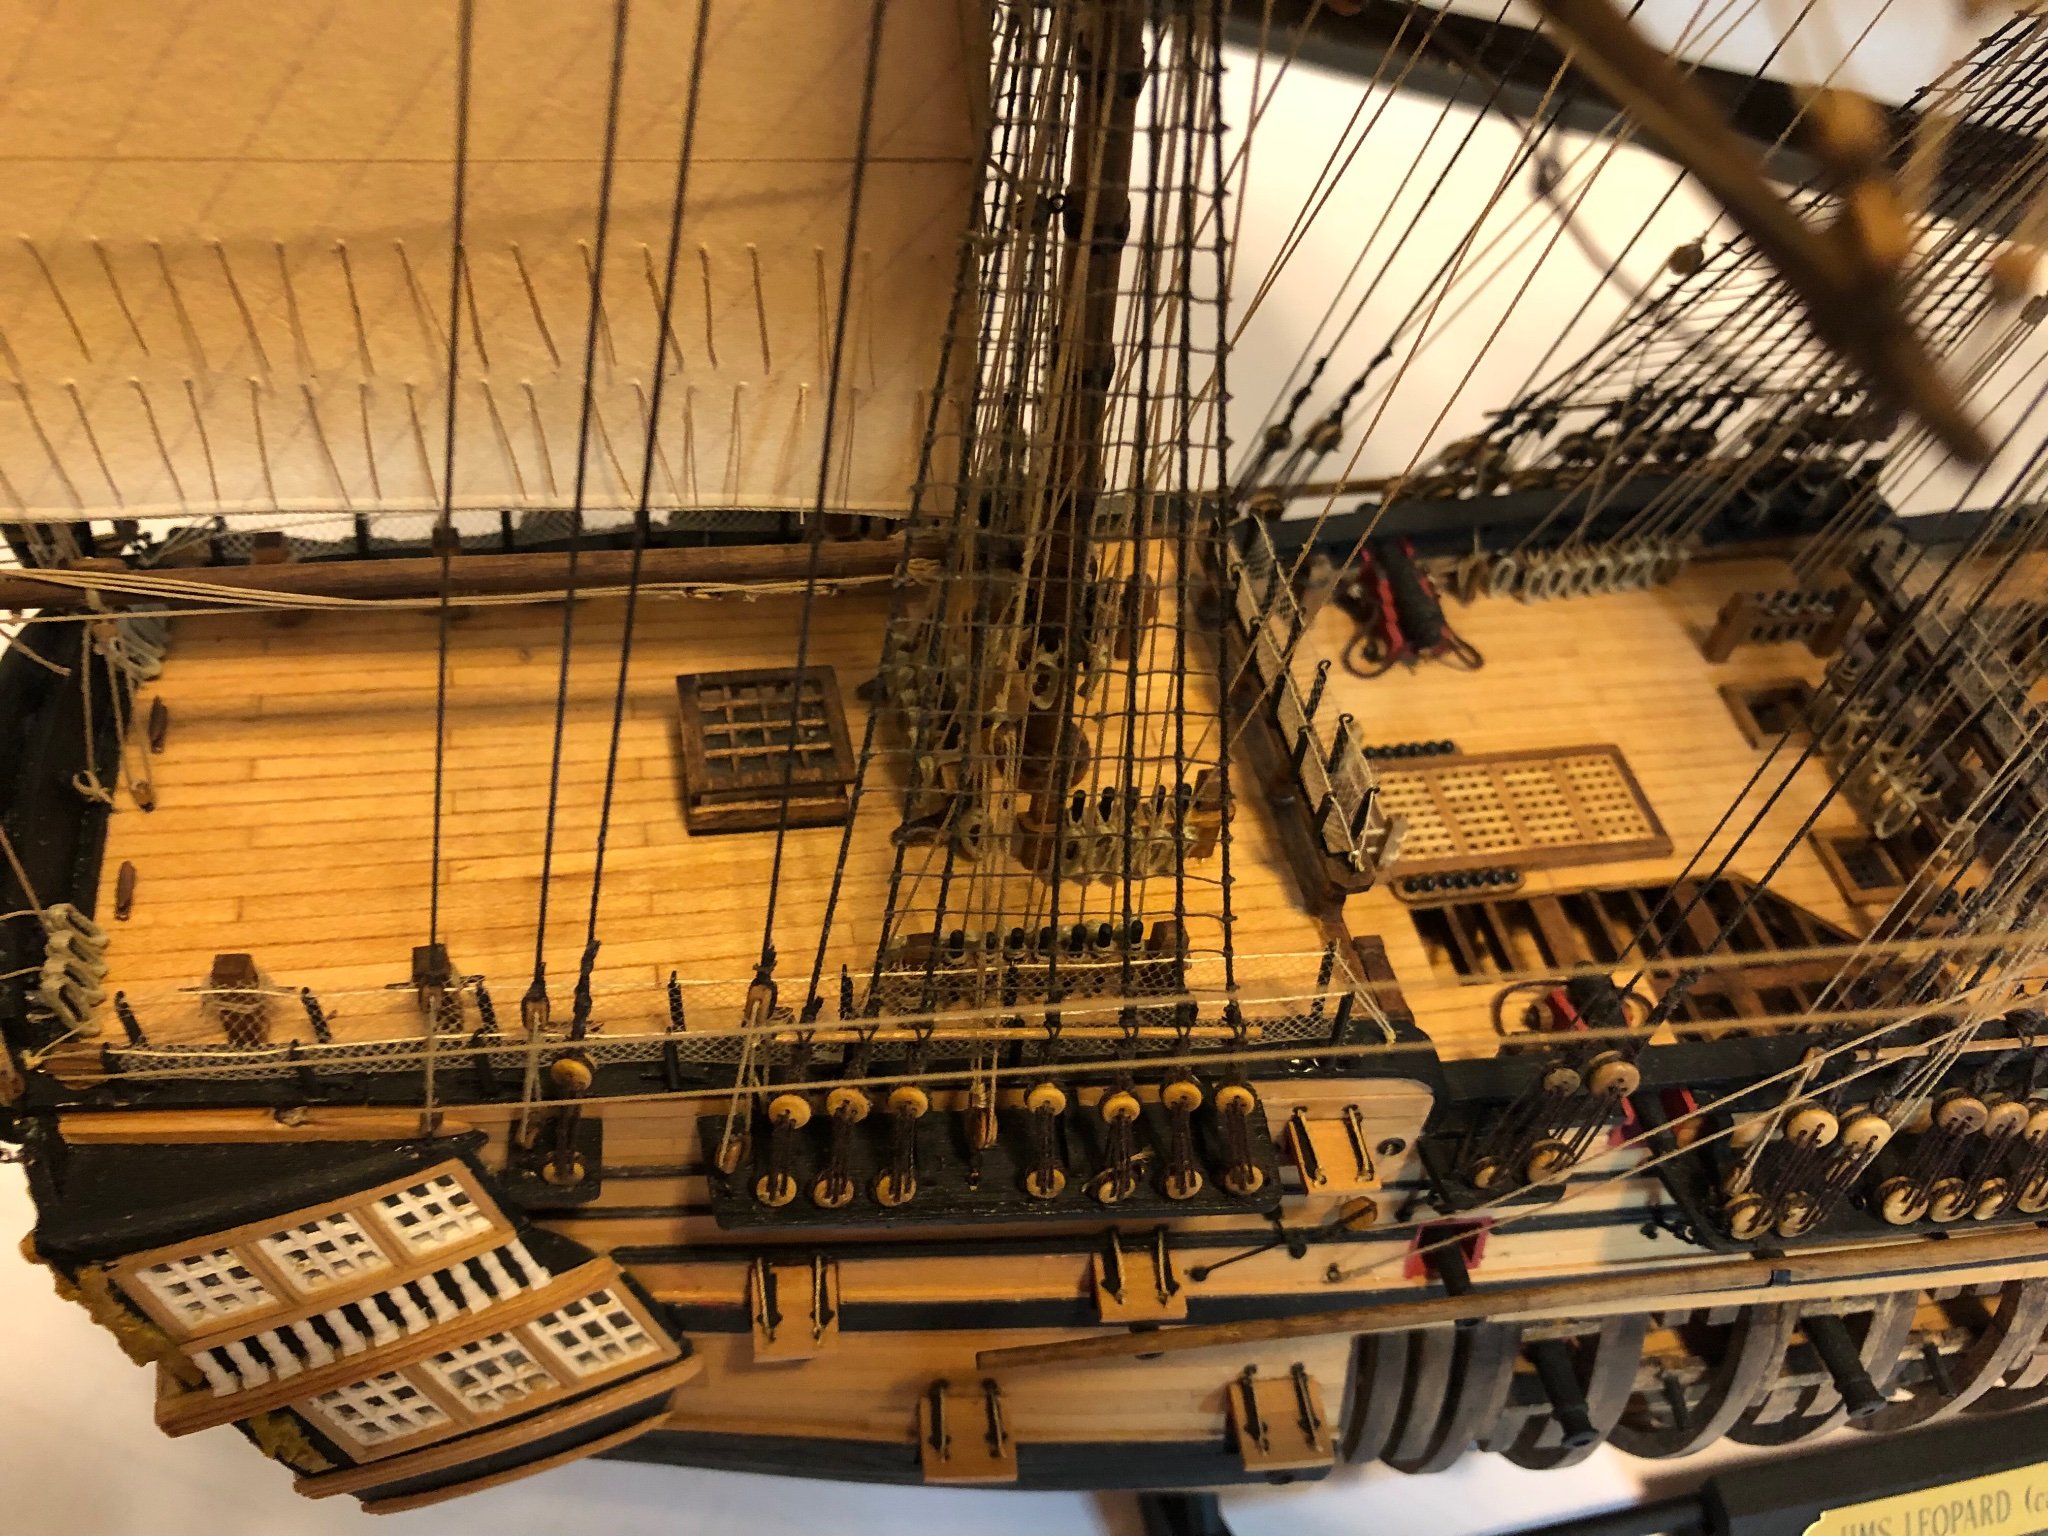
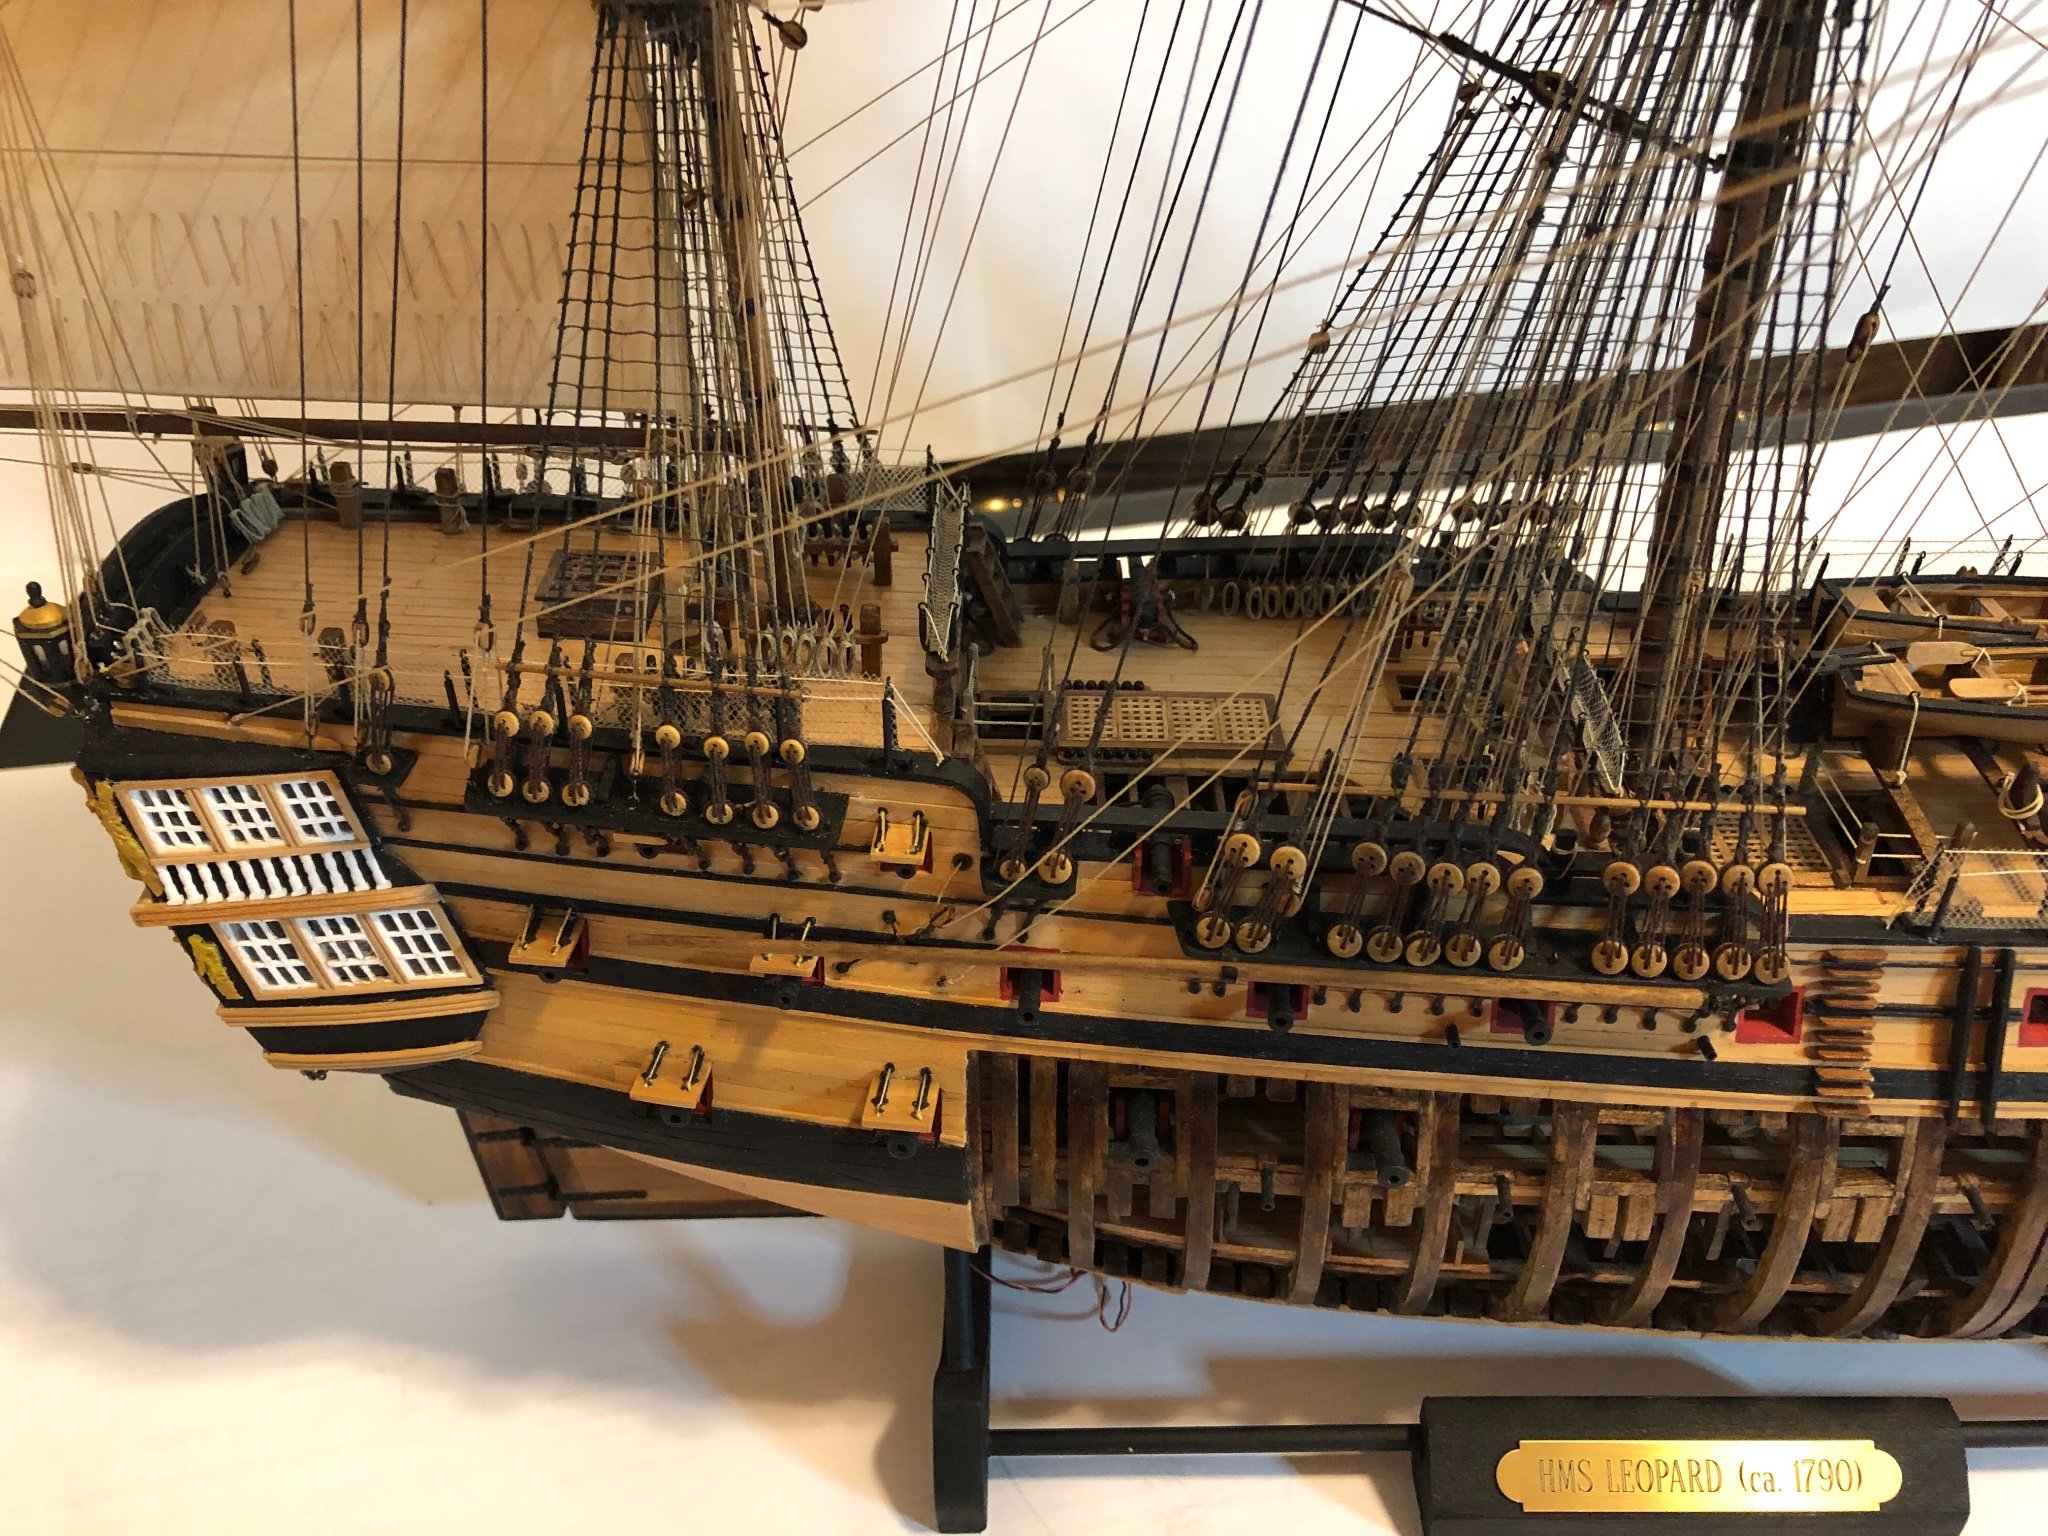
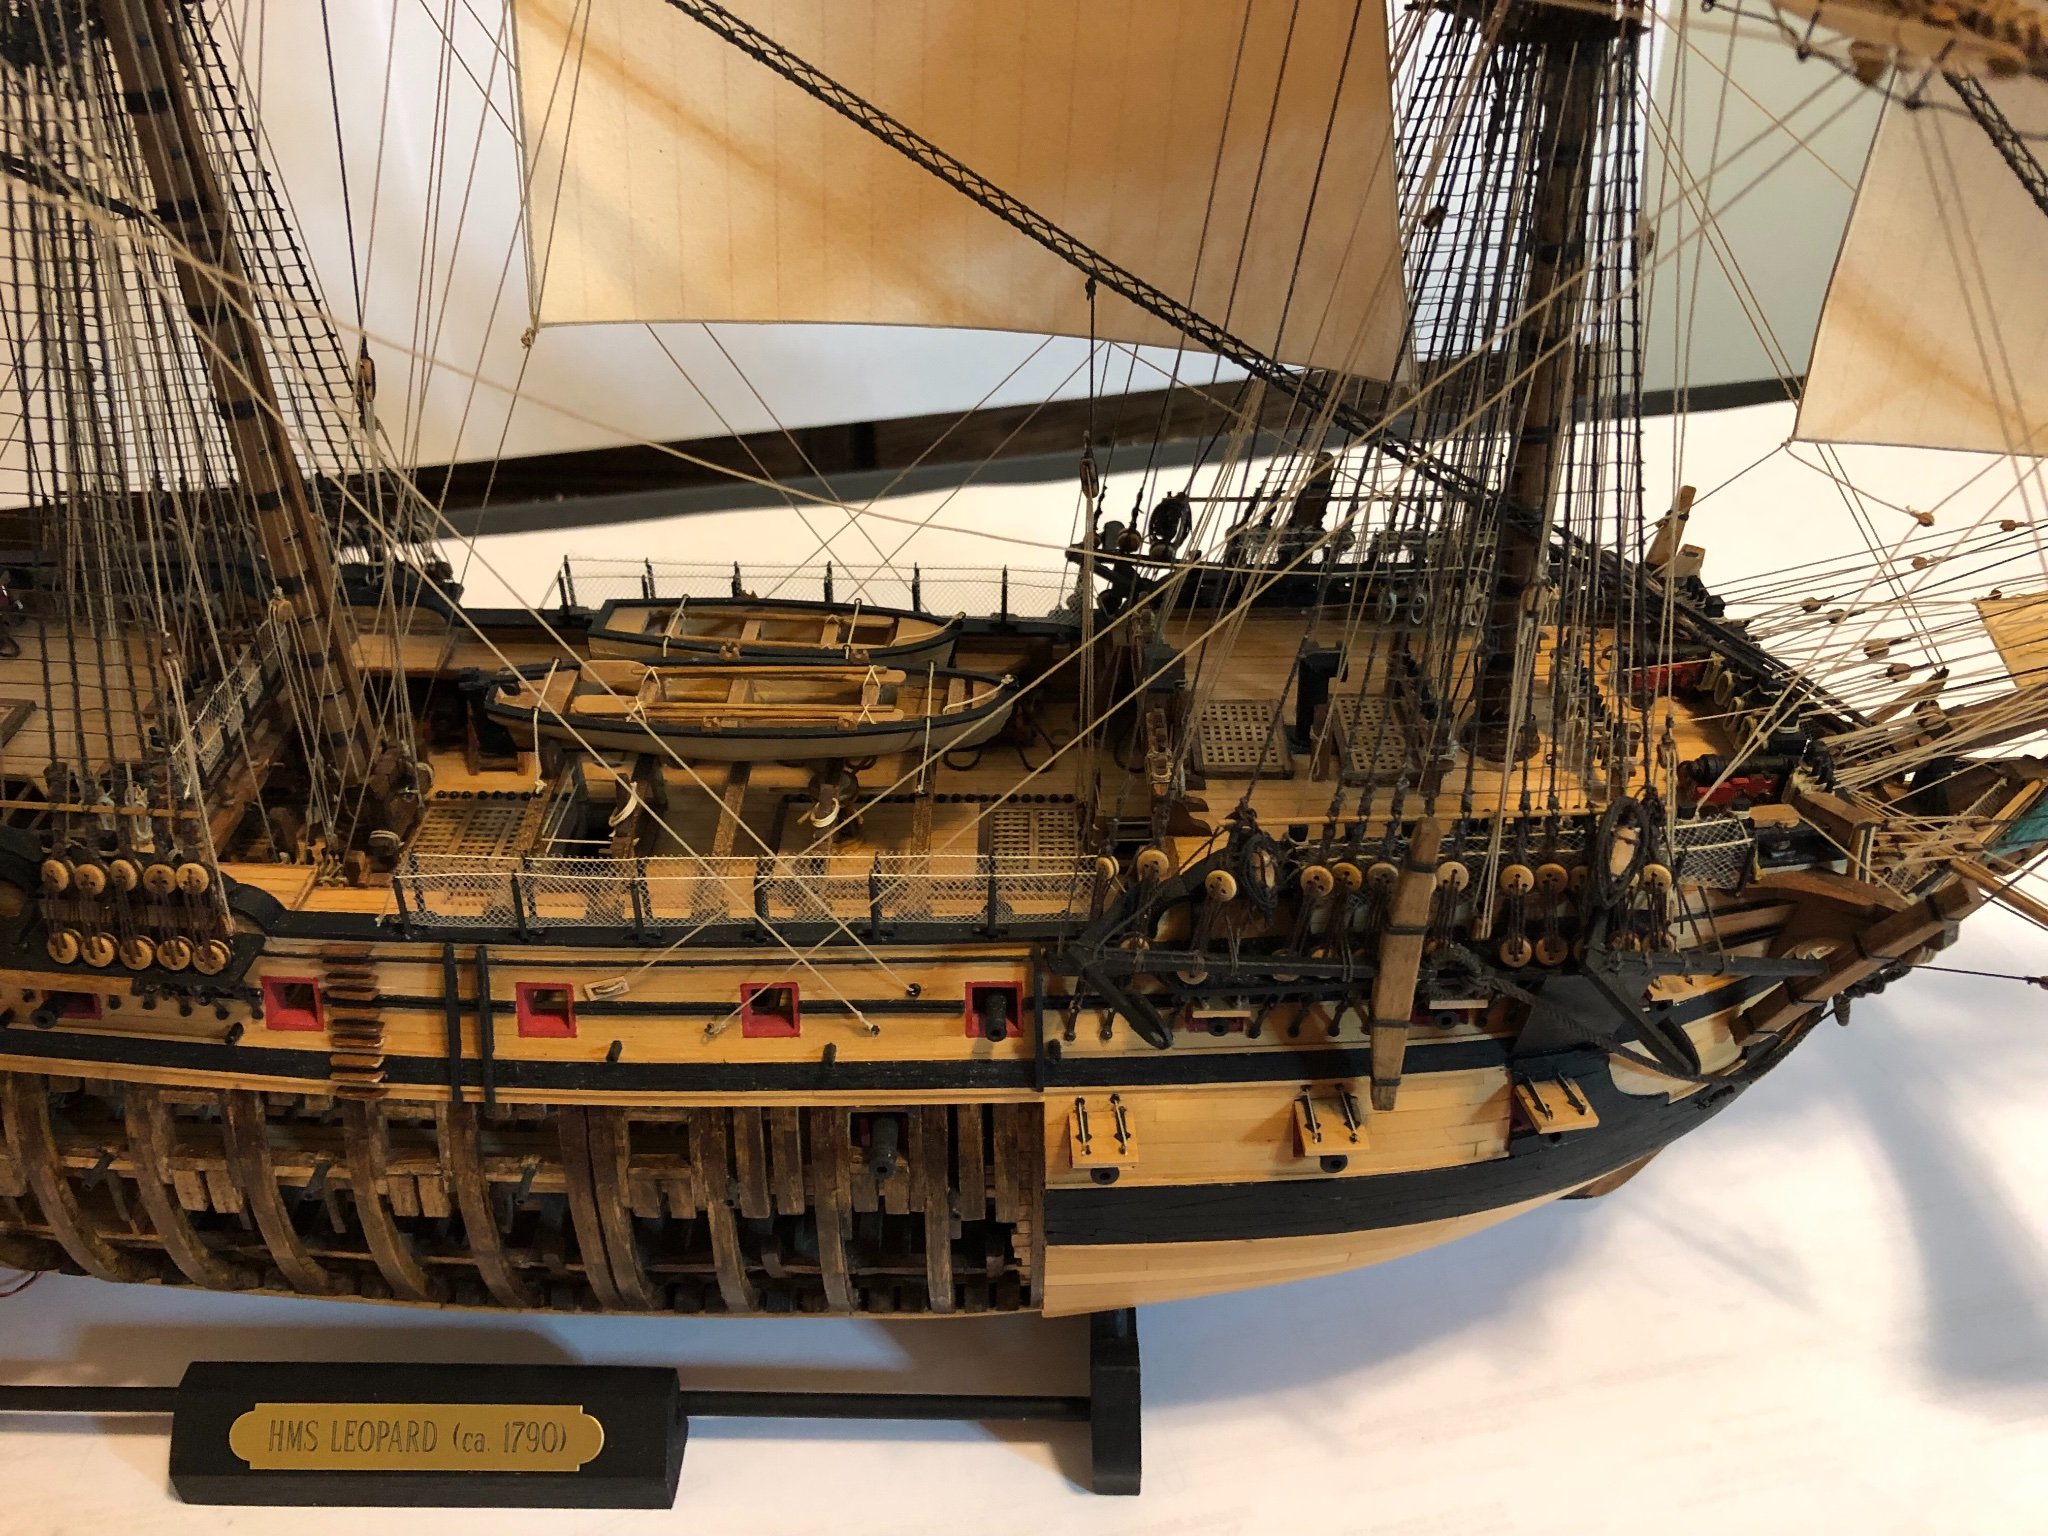
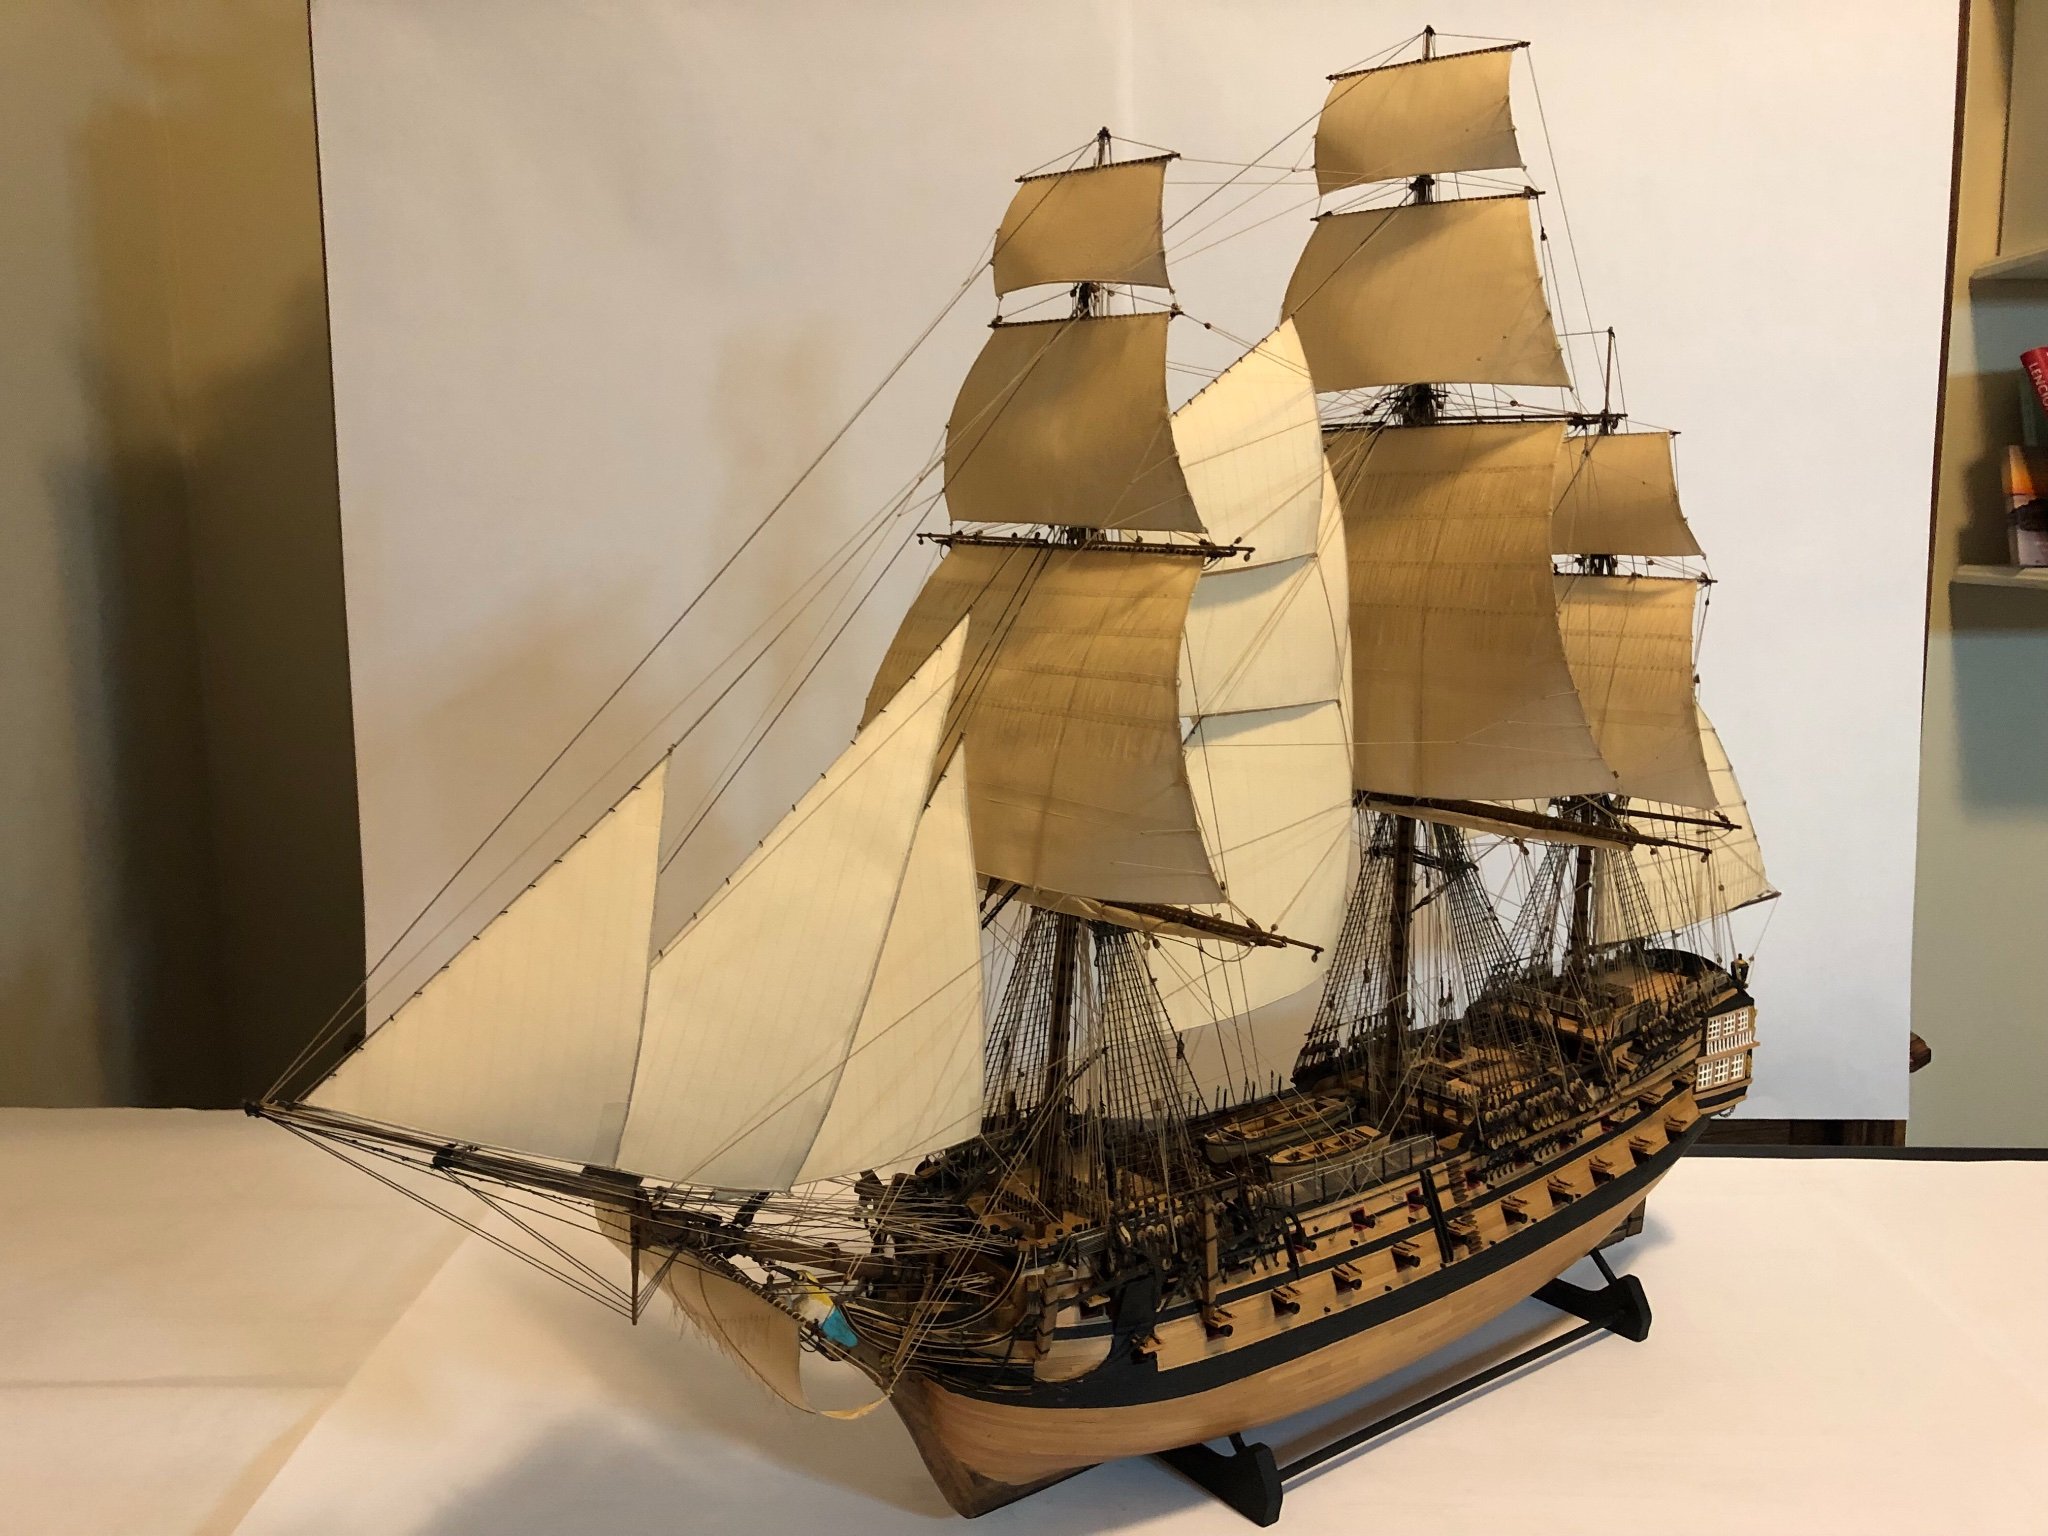
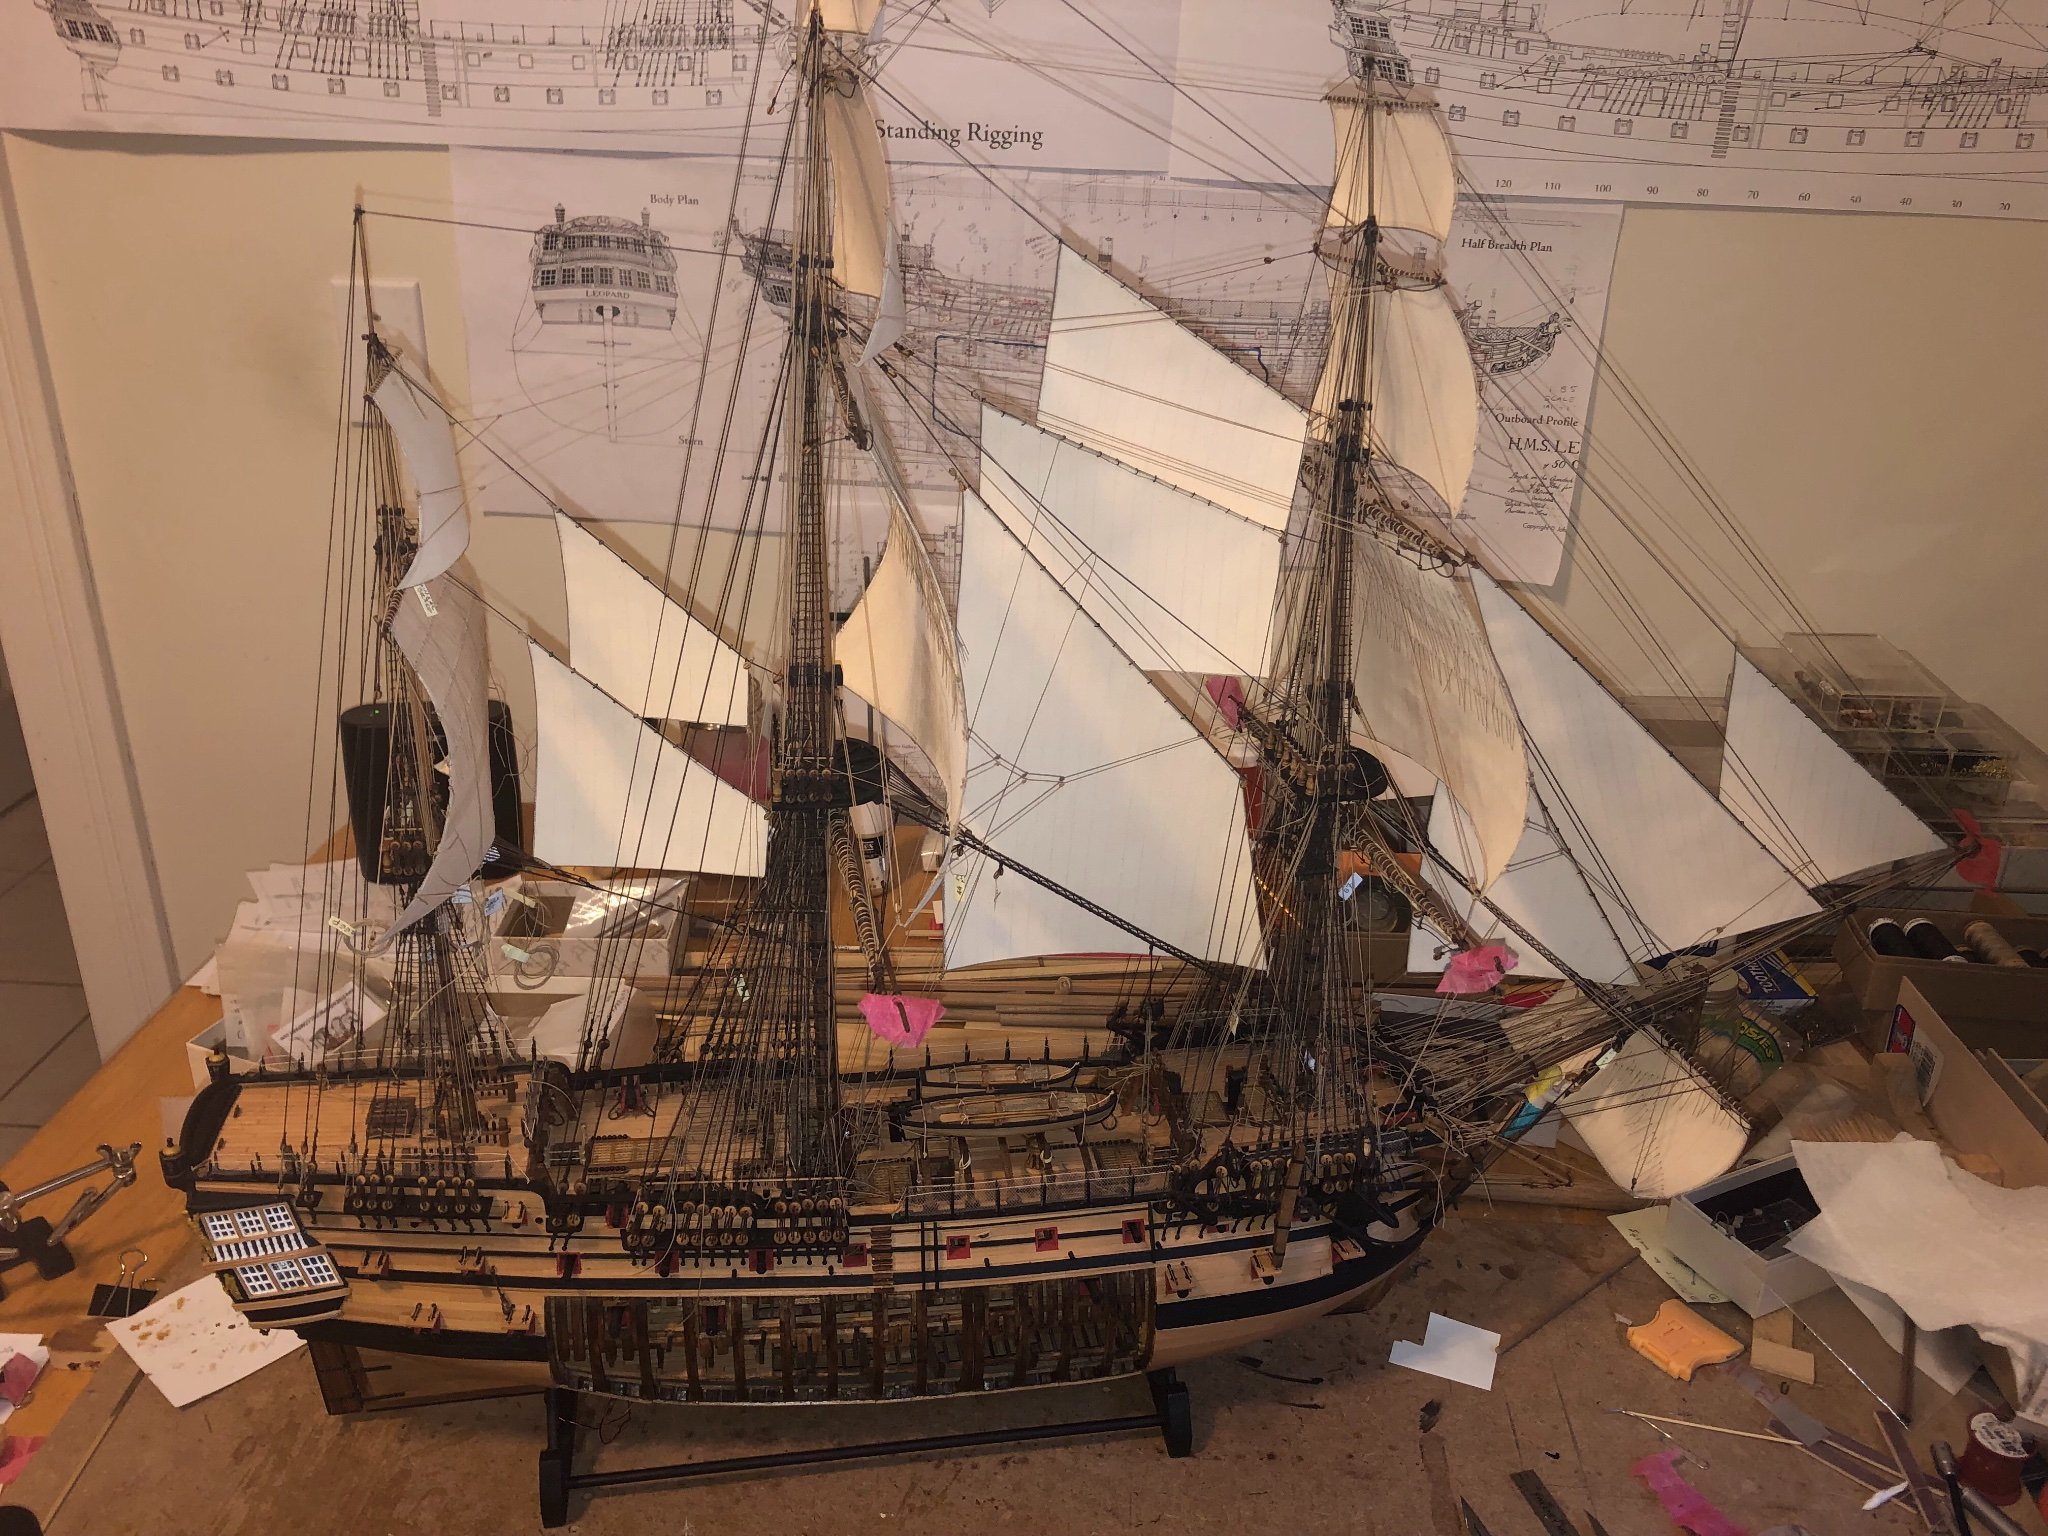
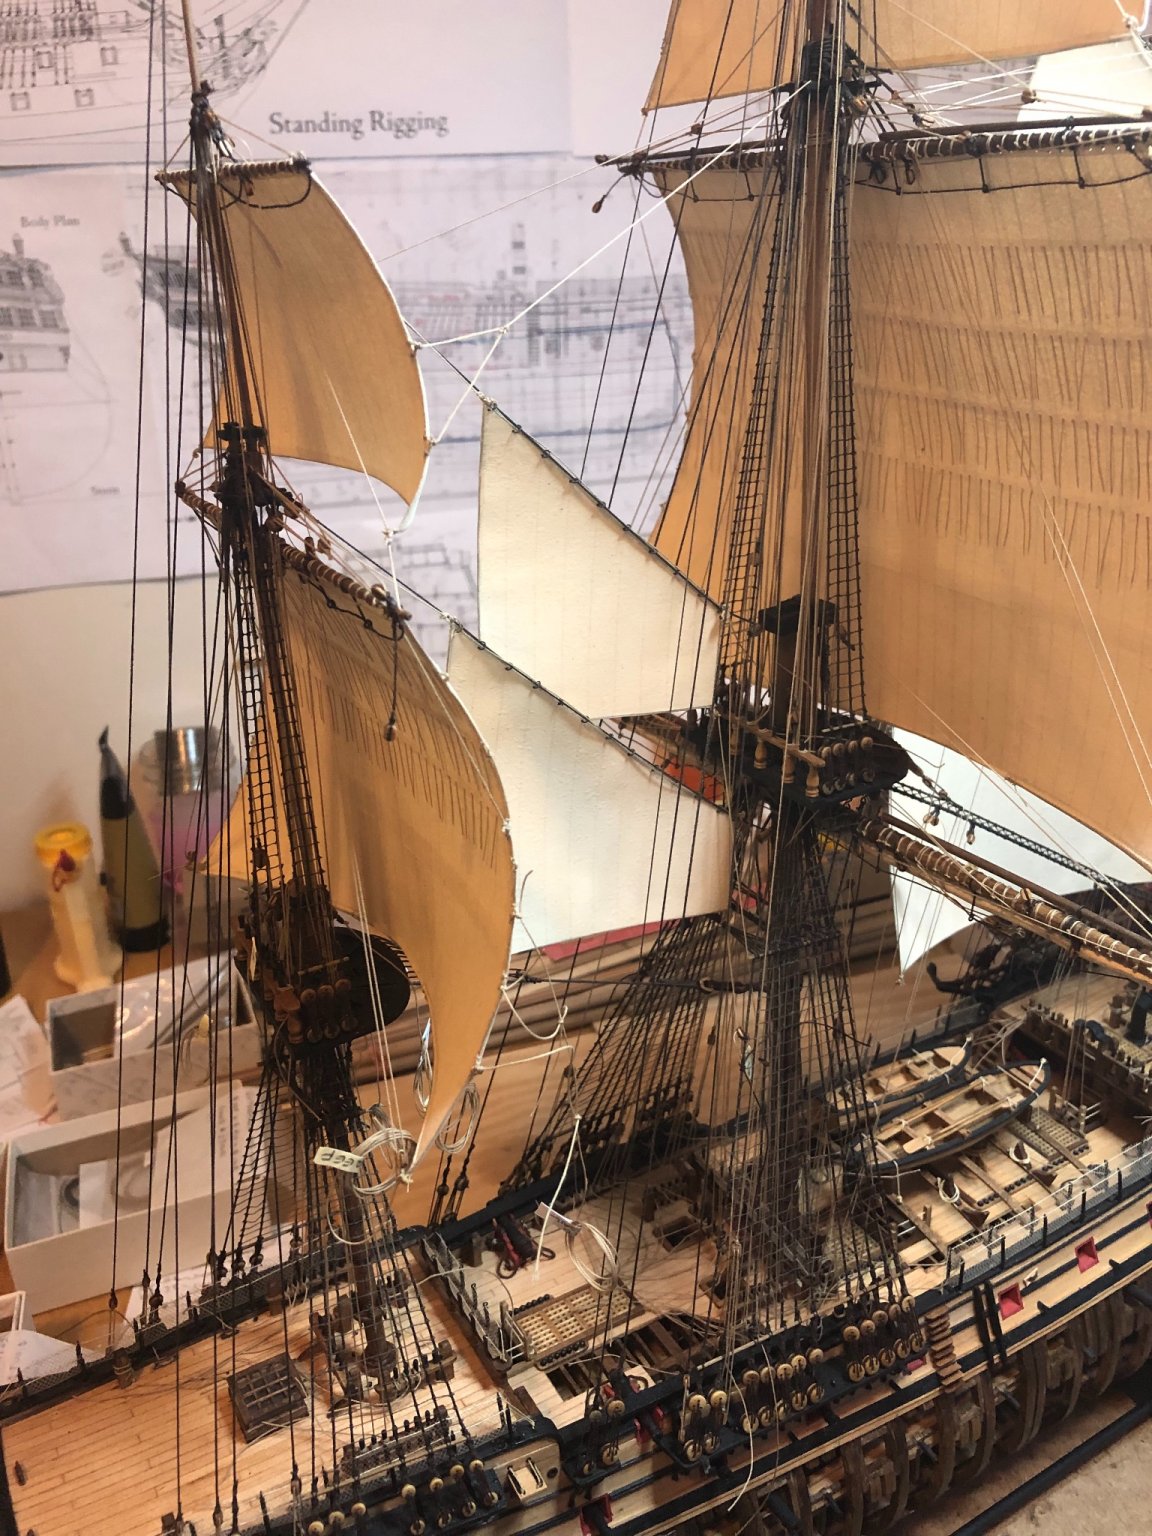
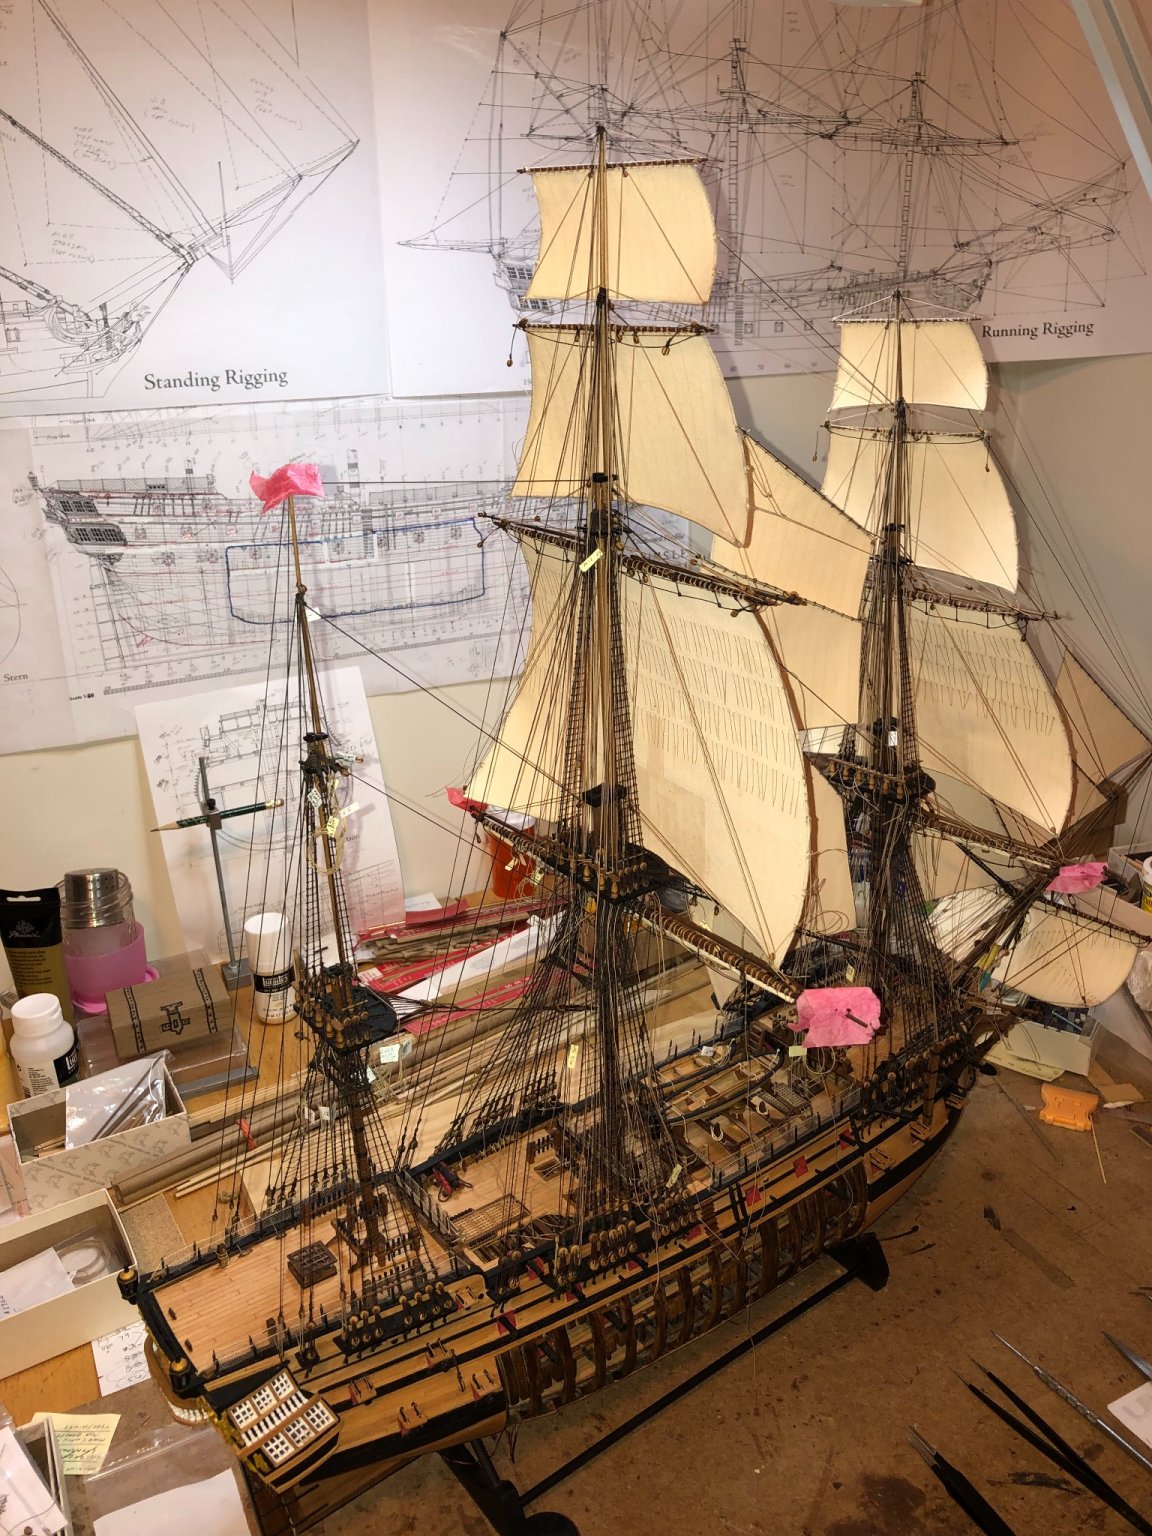
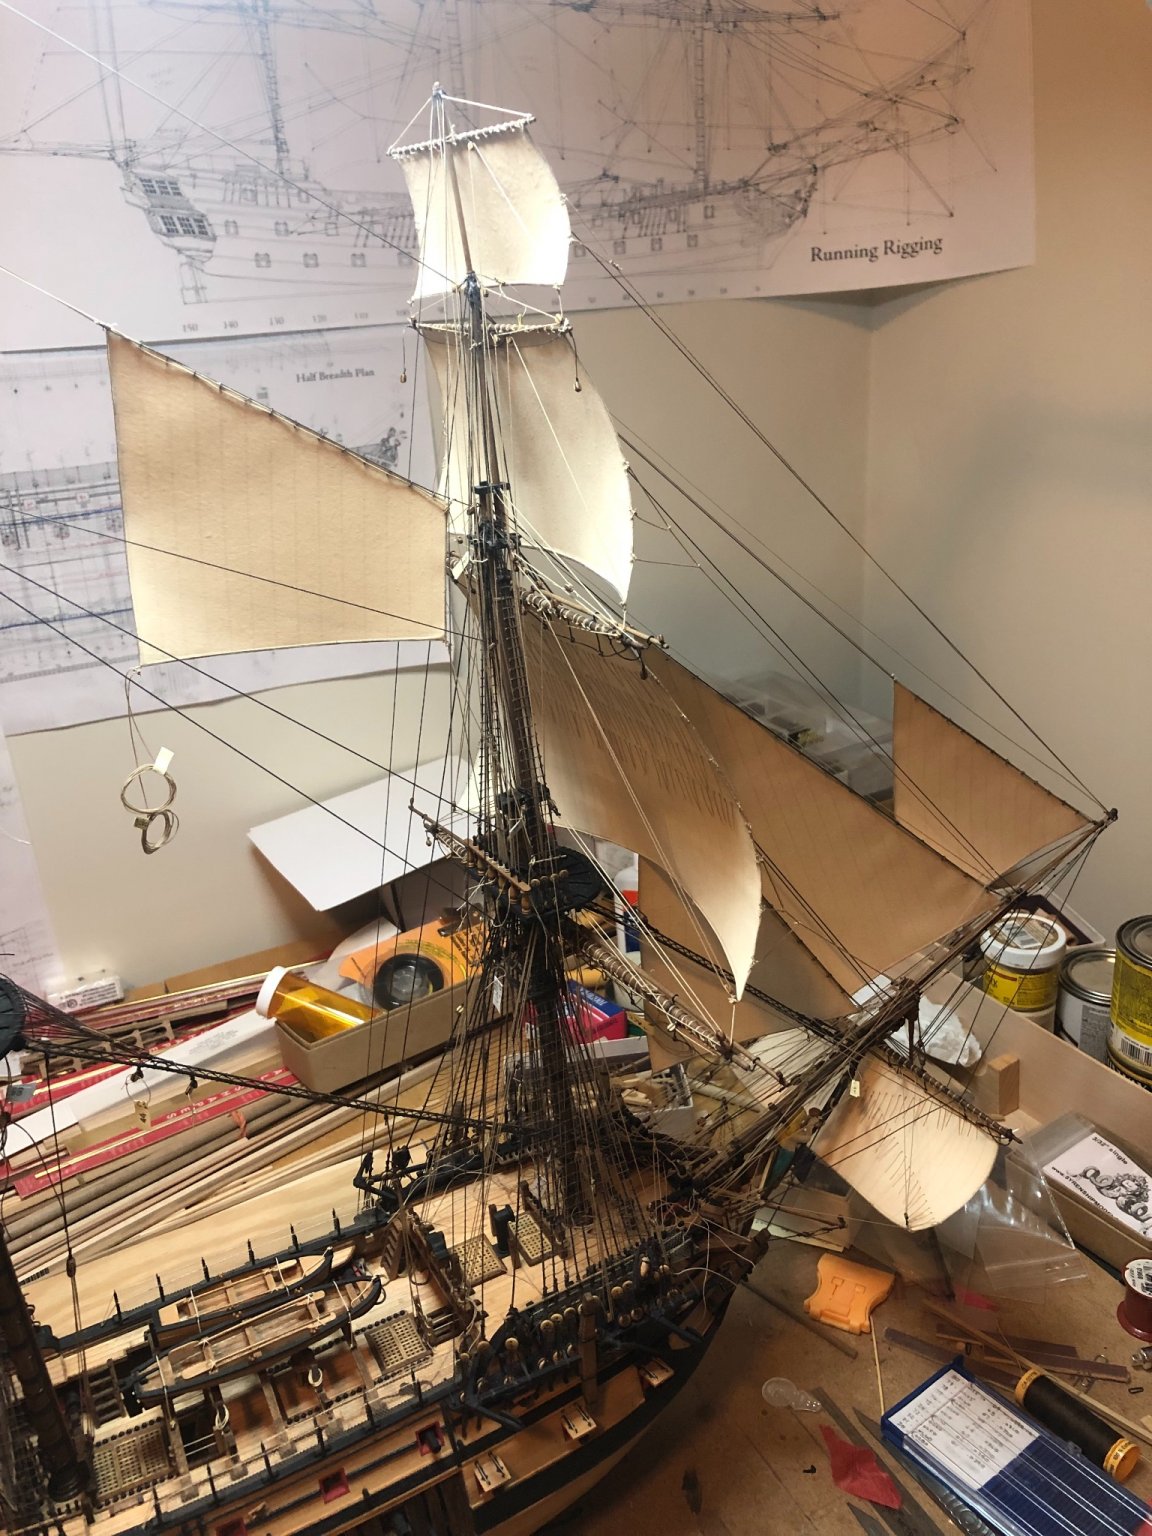
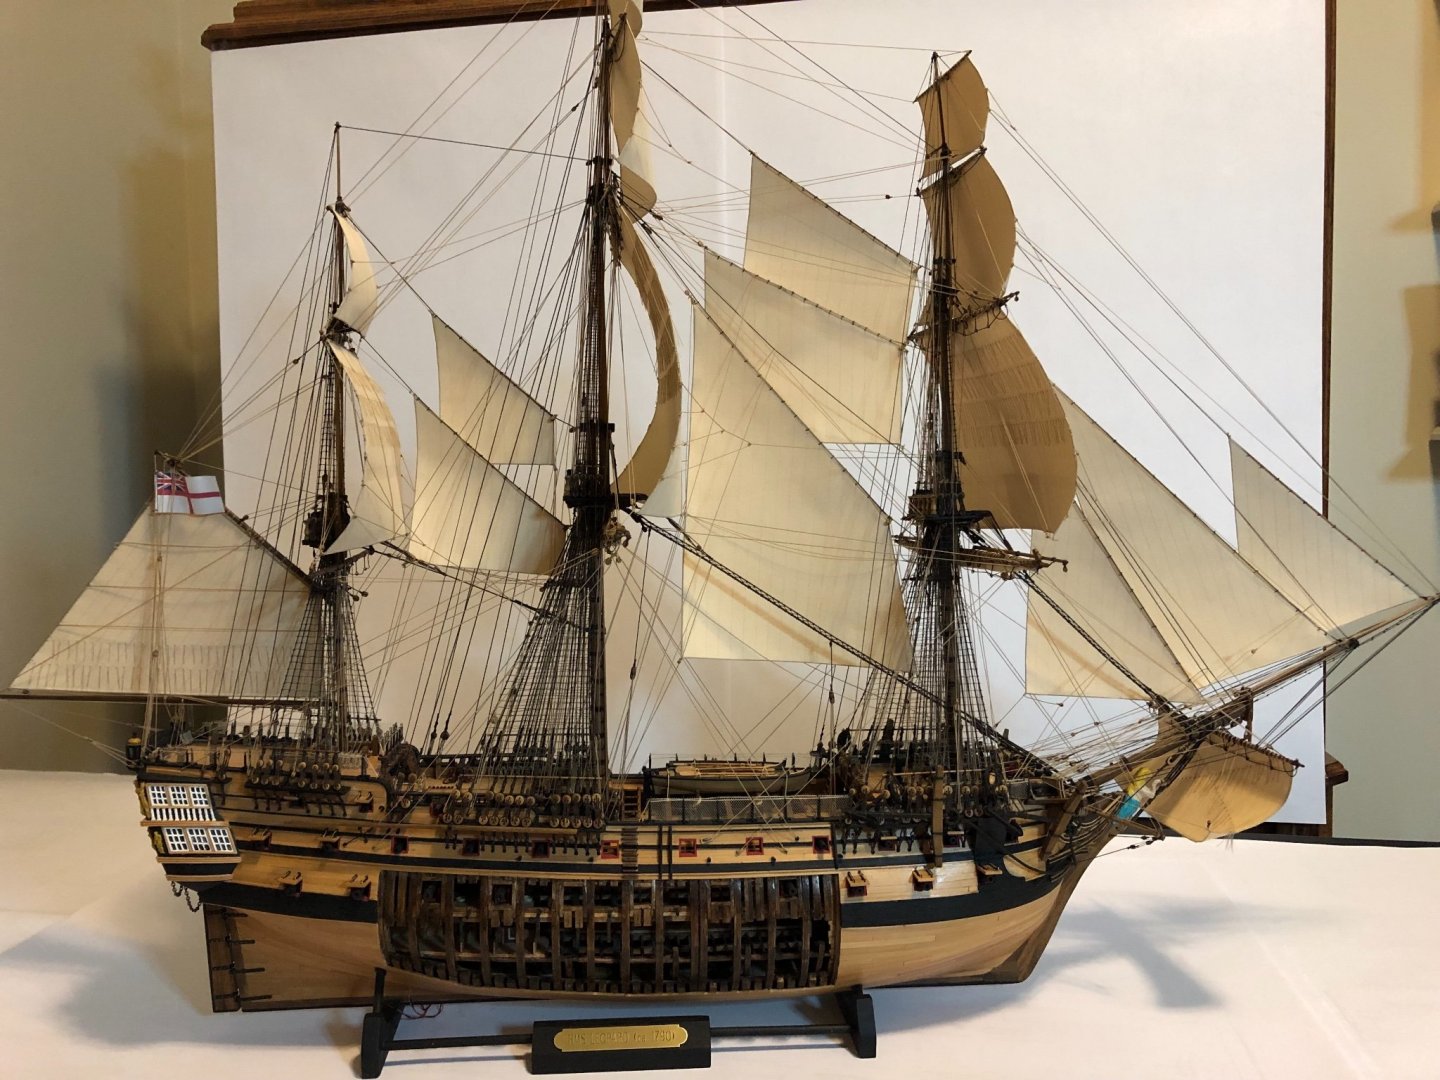
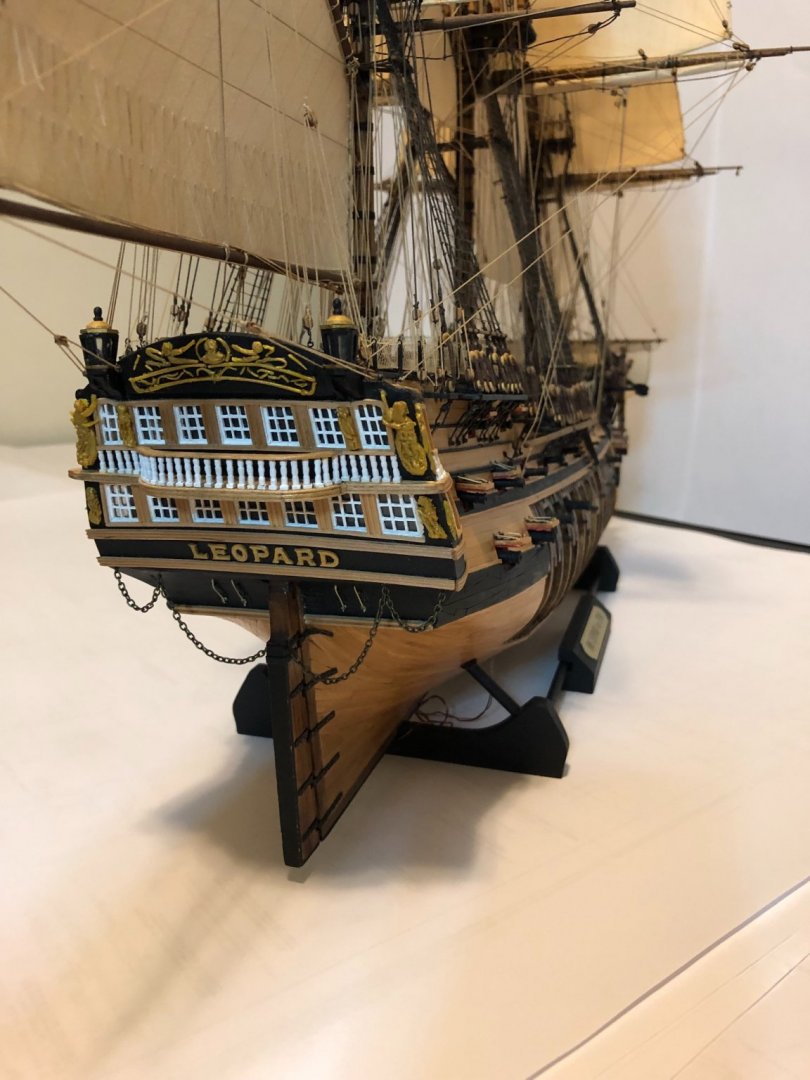
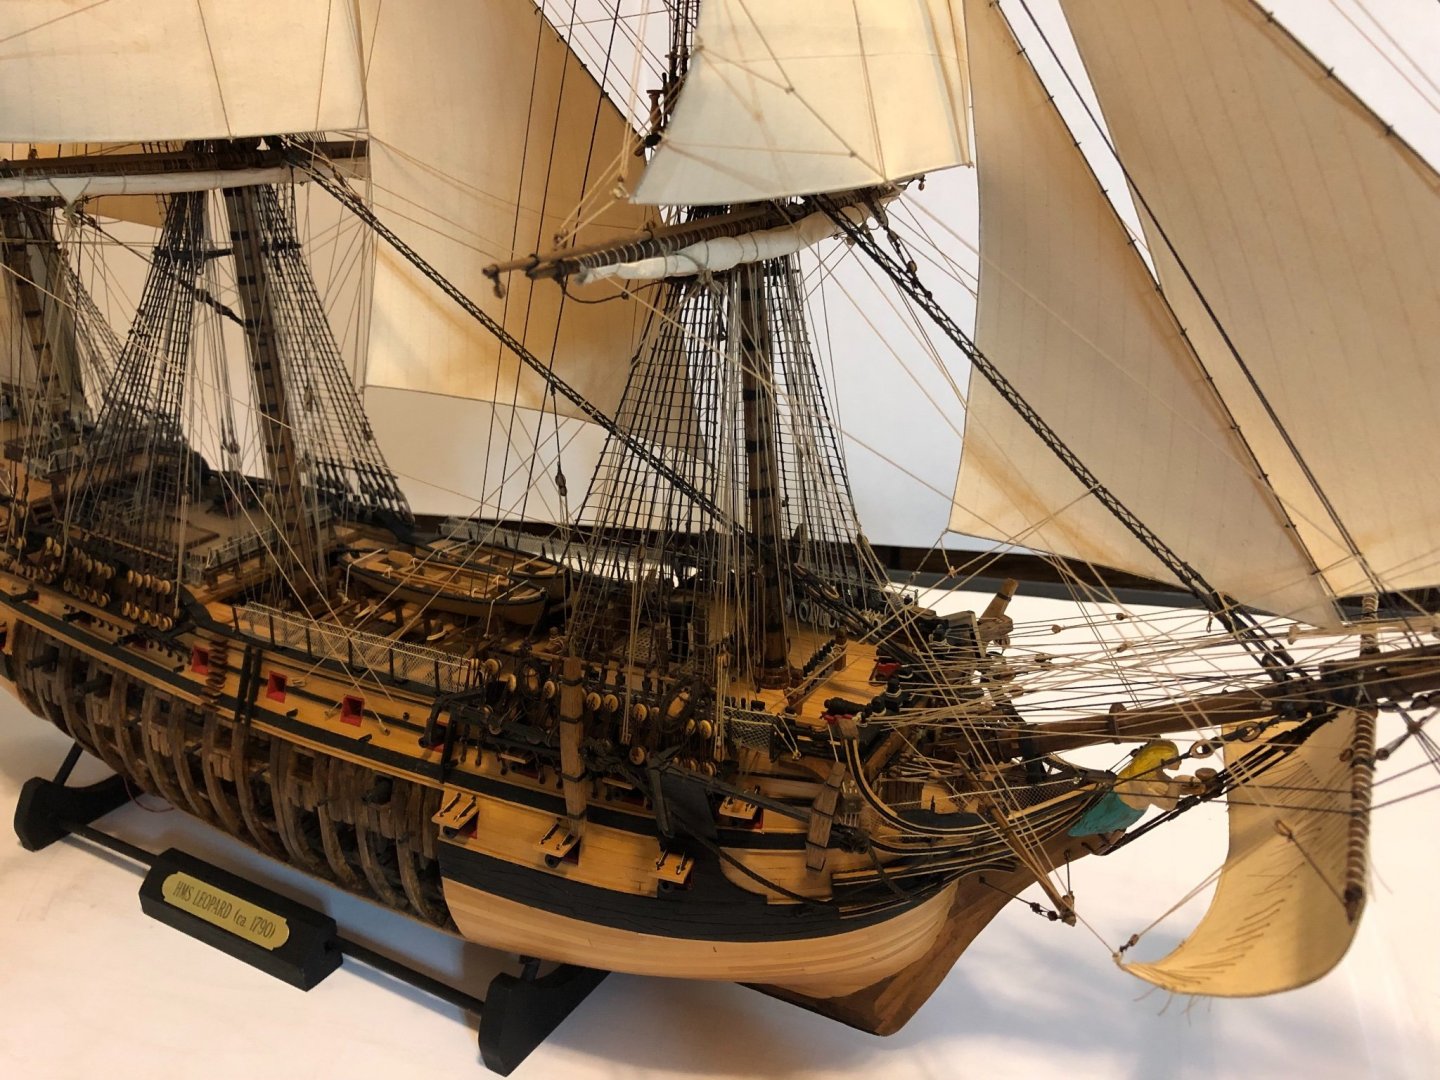
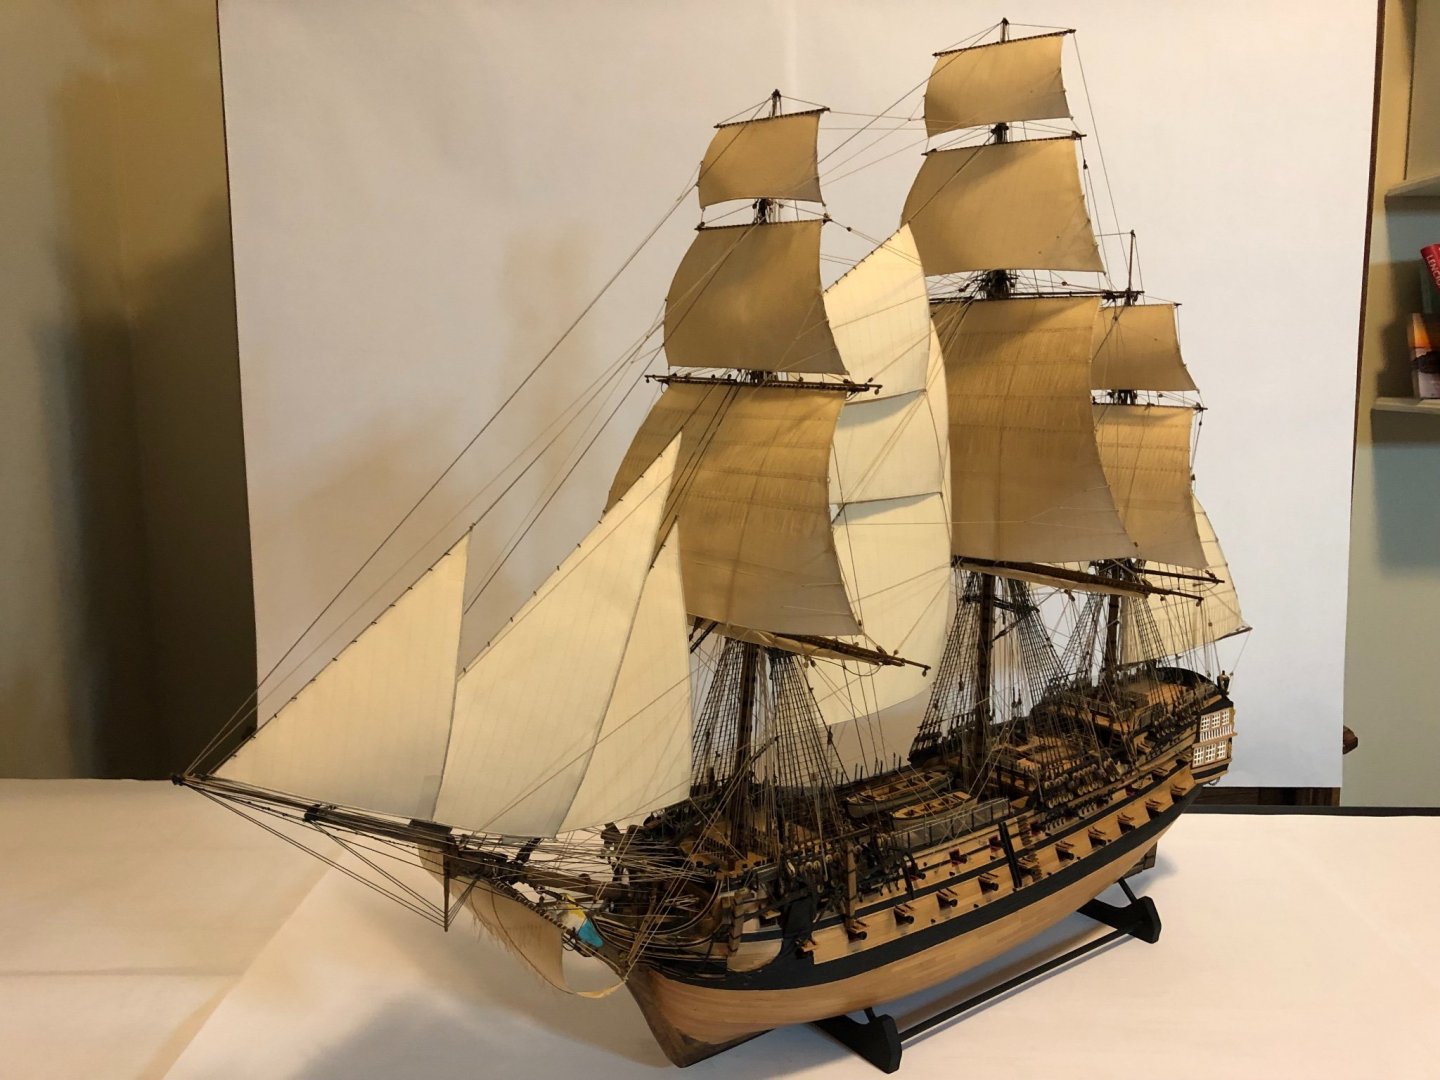
Well the light at the end of the tunnel is shining brightly. After putting a lot of hours in the past couple of weeks I am ready to call my Leopard complete. 🍾. The journey was a bit long but was worth it in the end. Being my 2nd model and first scratch I expected it to be long but 4 1/2 years? I would say a third of that was spent thumbing through reference books and a few breaks for weeks at a time. Thanks again to all my MSW friends and my fellow club members at Connecticut Marine Modelers Society for all the help and advice. Here are a few pics of her all completed. Now I just have to build a base and case for her. After that I plan on taking some time to complete the 9000 piece puzzle I started but stored away a year ago. My next modeling adventure will be the Charles W Morgan whaler which is docked only about an hour away from me at Mystic. I hope to start that when the cold weather sets in. Thanks again to all, Tom


- 385 replies
-
- 20
-

-

-

-
Thanks for checking on it Allan. I will probably end up taking a bit of everybody's info. I am thinking that since the Leopard is a 50 gun and a bit larger than the one Petersson's book uses, it might make sense to follow that as a guide and belay the lines where it makes sense. Thanks again, Tom
-
I didn’t see that in my Lee book. That tells me though that they do go on both sides and down to 2 pins. Thanks Jim, that is the direction I was going. Tom
-
Hi all I am second guessing myself and someone to set me straight. I am getting ready to set the spanker sail on my 1790 Leopard and am questioning whether: 1) the brail lines go on both sides of the sail unlike a bunt line which is only on the front of the sail. 2) if they do go on both sides, are they 2 separate lines tied to the cringle and then to blocks tied to the gaff on both sides? Or one line that is tied to the gaff then passed through the cringle to a block that is tied to the gaff on the other side of the sail and then makes its way to a belaying pin. I have read through Harland’s book “Seamanship in the Age of Sail” and the sketches don’t really show what is going on but on page 131 it mentions under general remarks that when taking in the slack of the weather side was taken and the leeward side was tightened. That leads me to believe there are two separate lines, one on each side. This would require 2 belaying pins. Also the picture shown in Peterson’s “Rigging o”Period Ship Models” pg 81, it shows lines on both sides of the sail but I can’t tell if it is one or two lines. I would assume the answer would be the same for any fore/aft sail with a brail such as the main top mast staysail. Any clarification would be greatly appreciated. Thanks, Tom
-
Hi Tom, I will be bringing it regardless since it is getting really close to finished... which is the reason I need to finish it. Kind of puts me in a catch 22 situation as I would much rather show something completed to someone than explain what is missing. It is just a whole lot easier. Tom
-
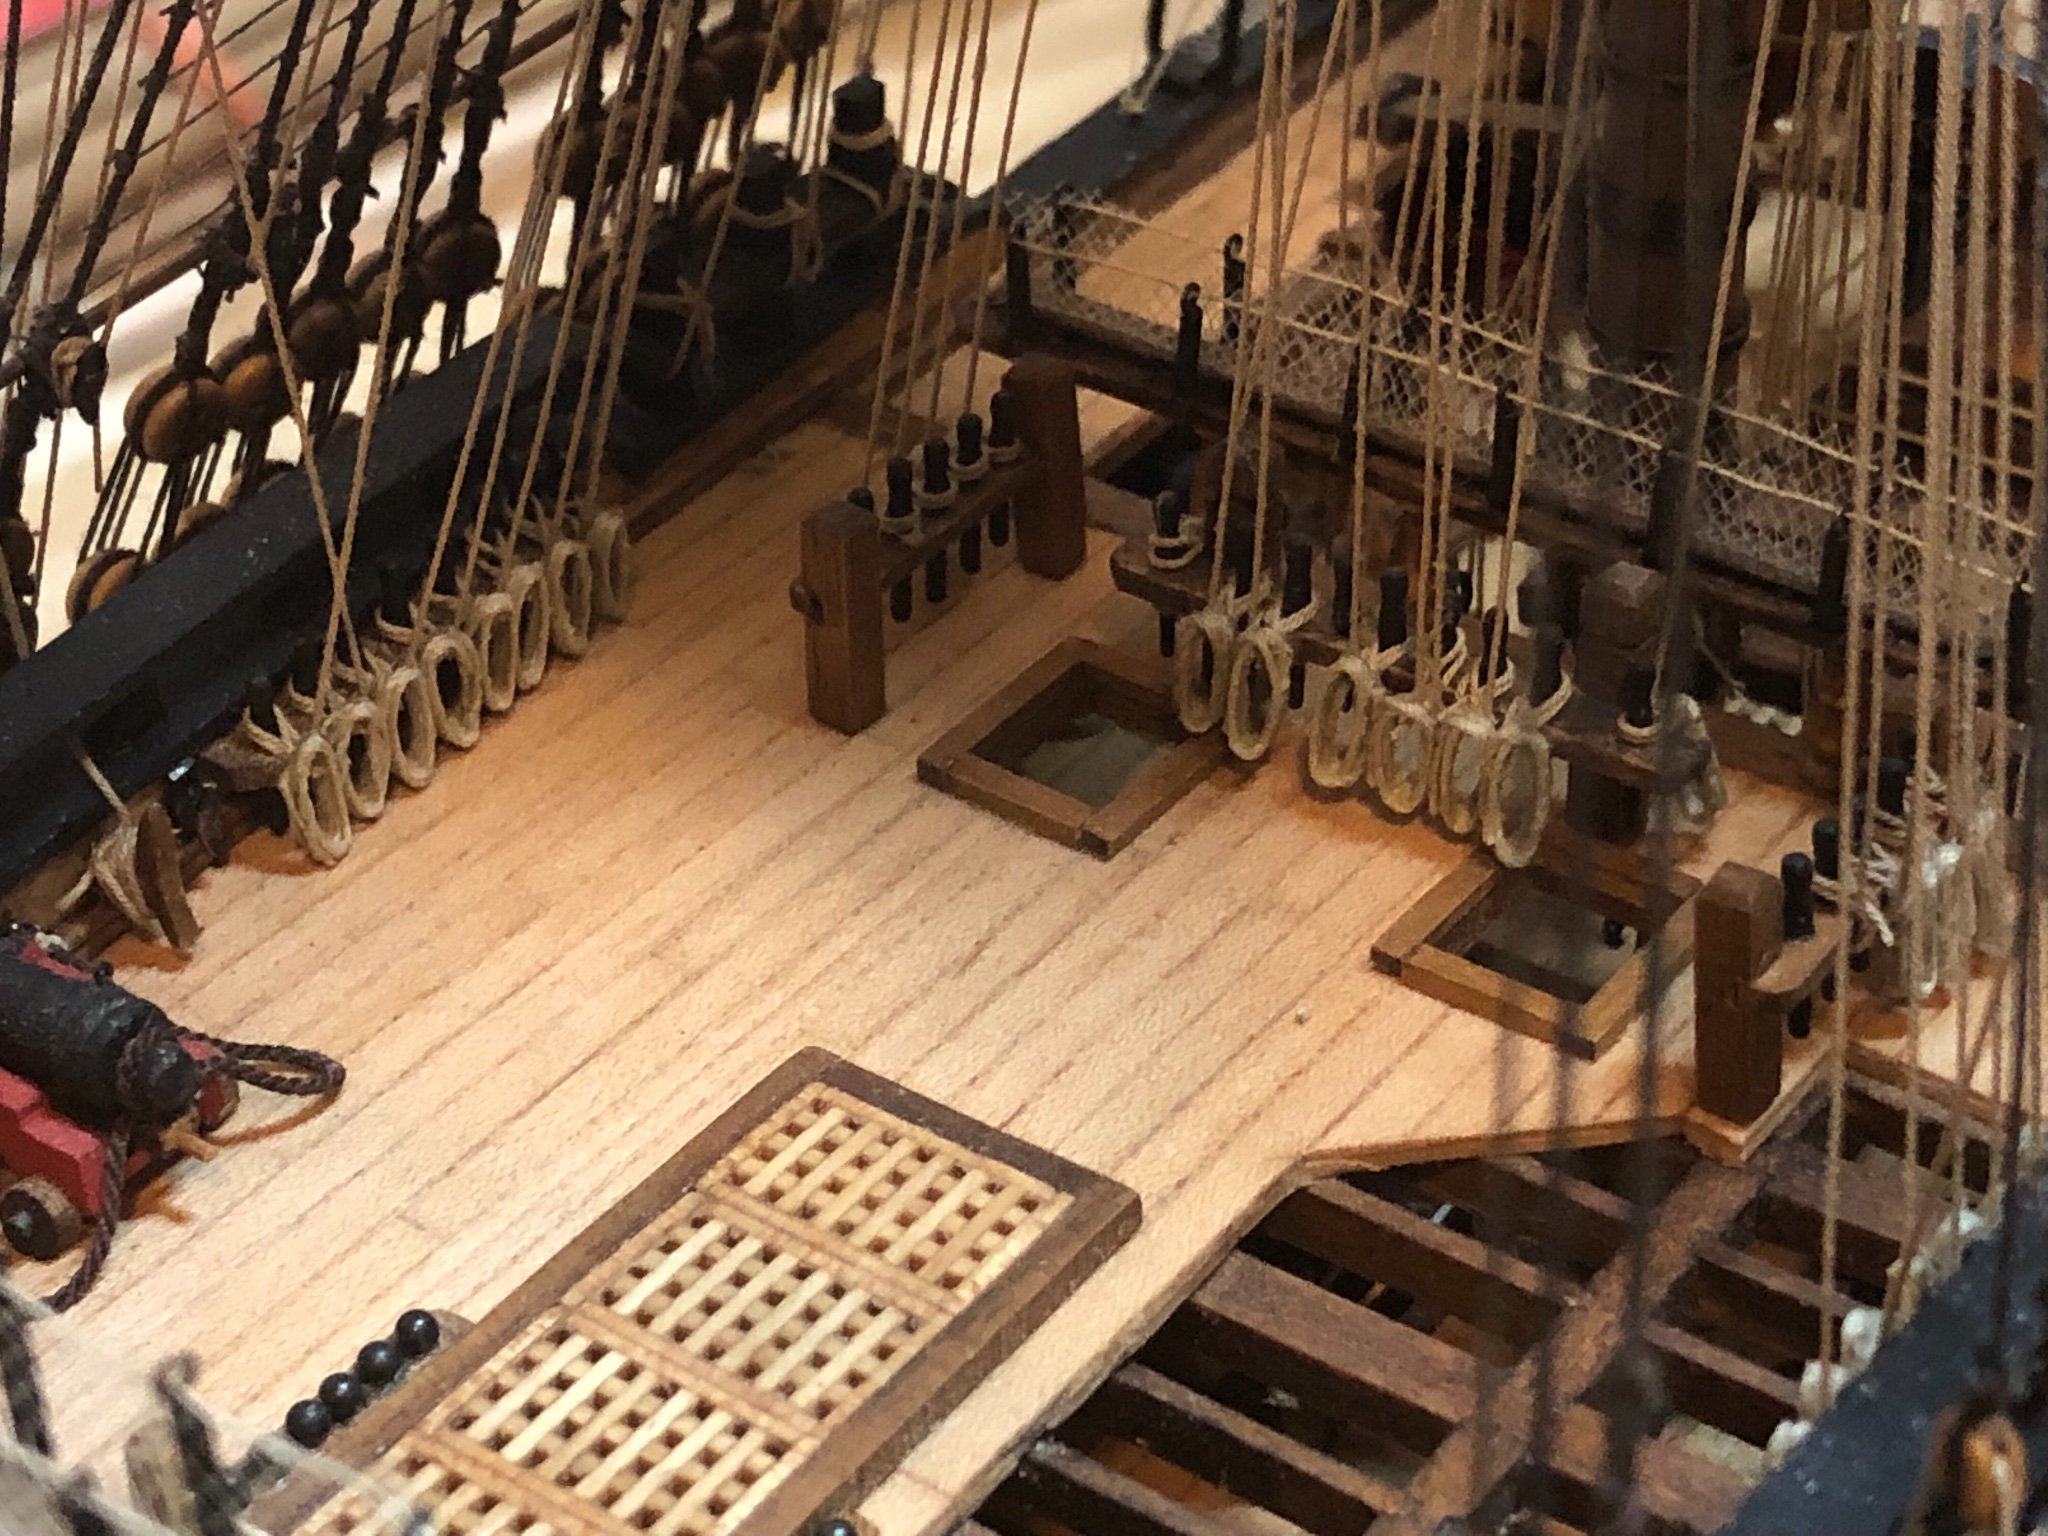
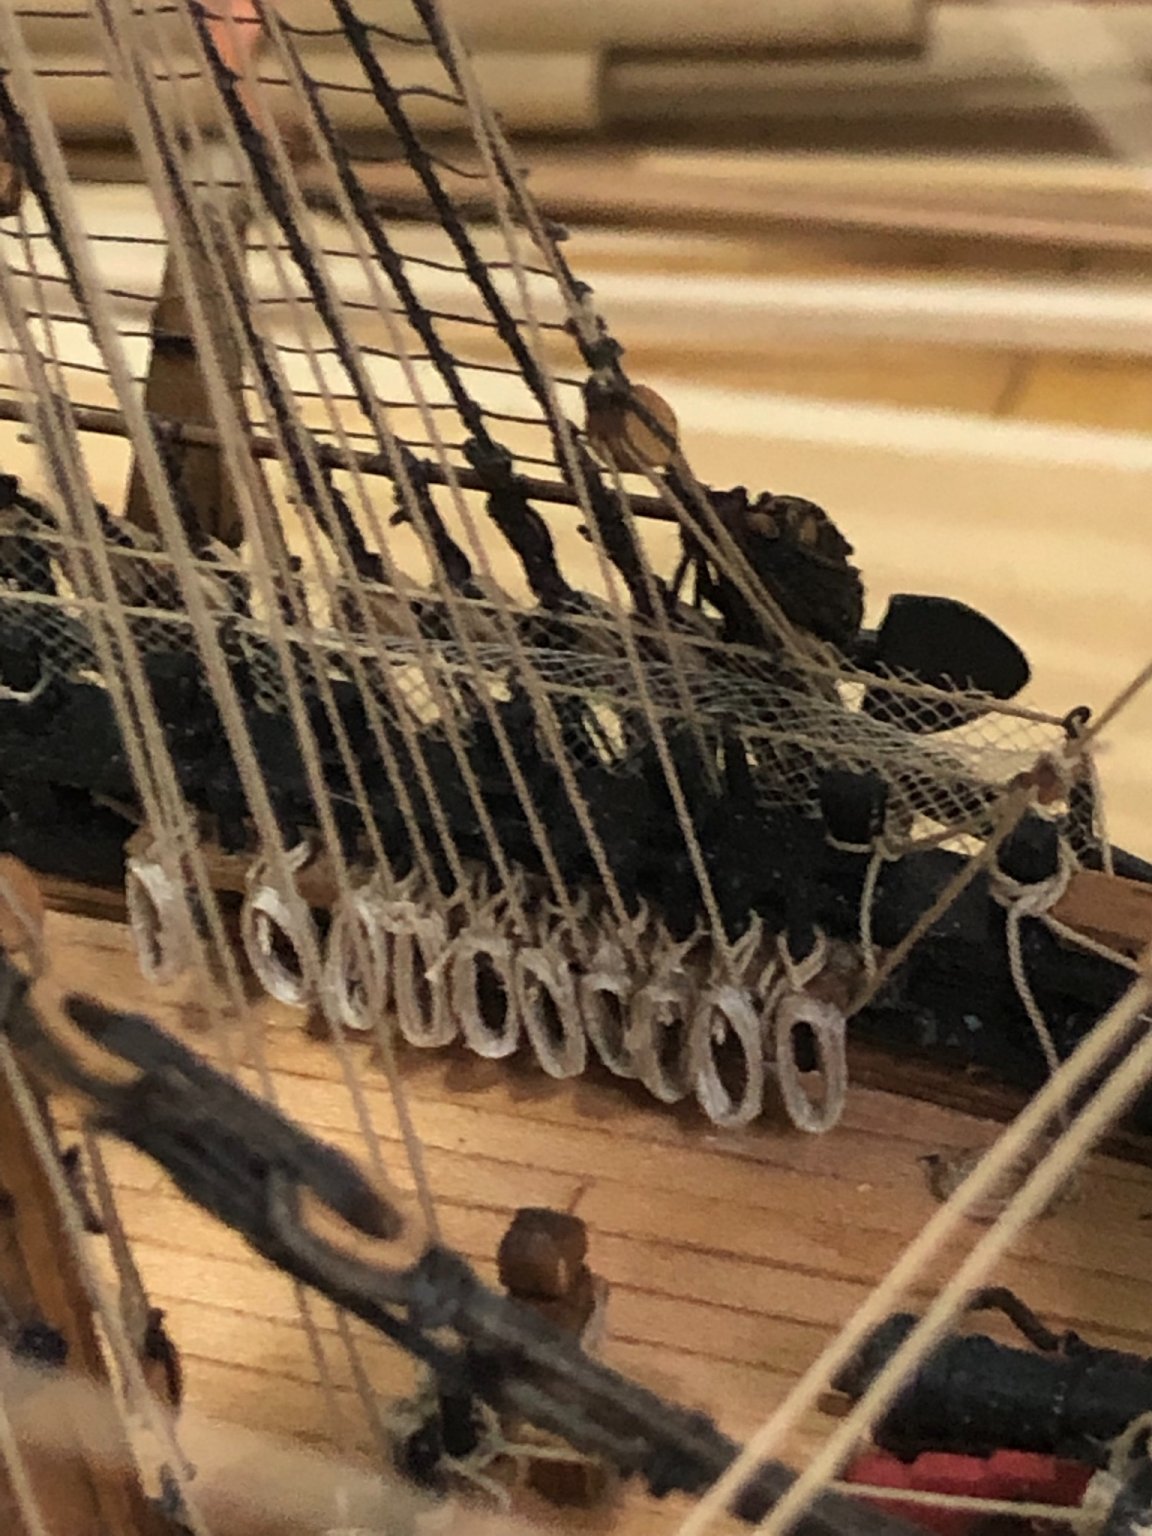
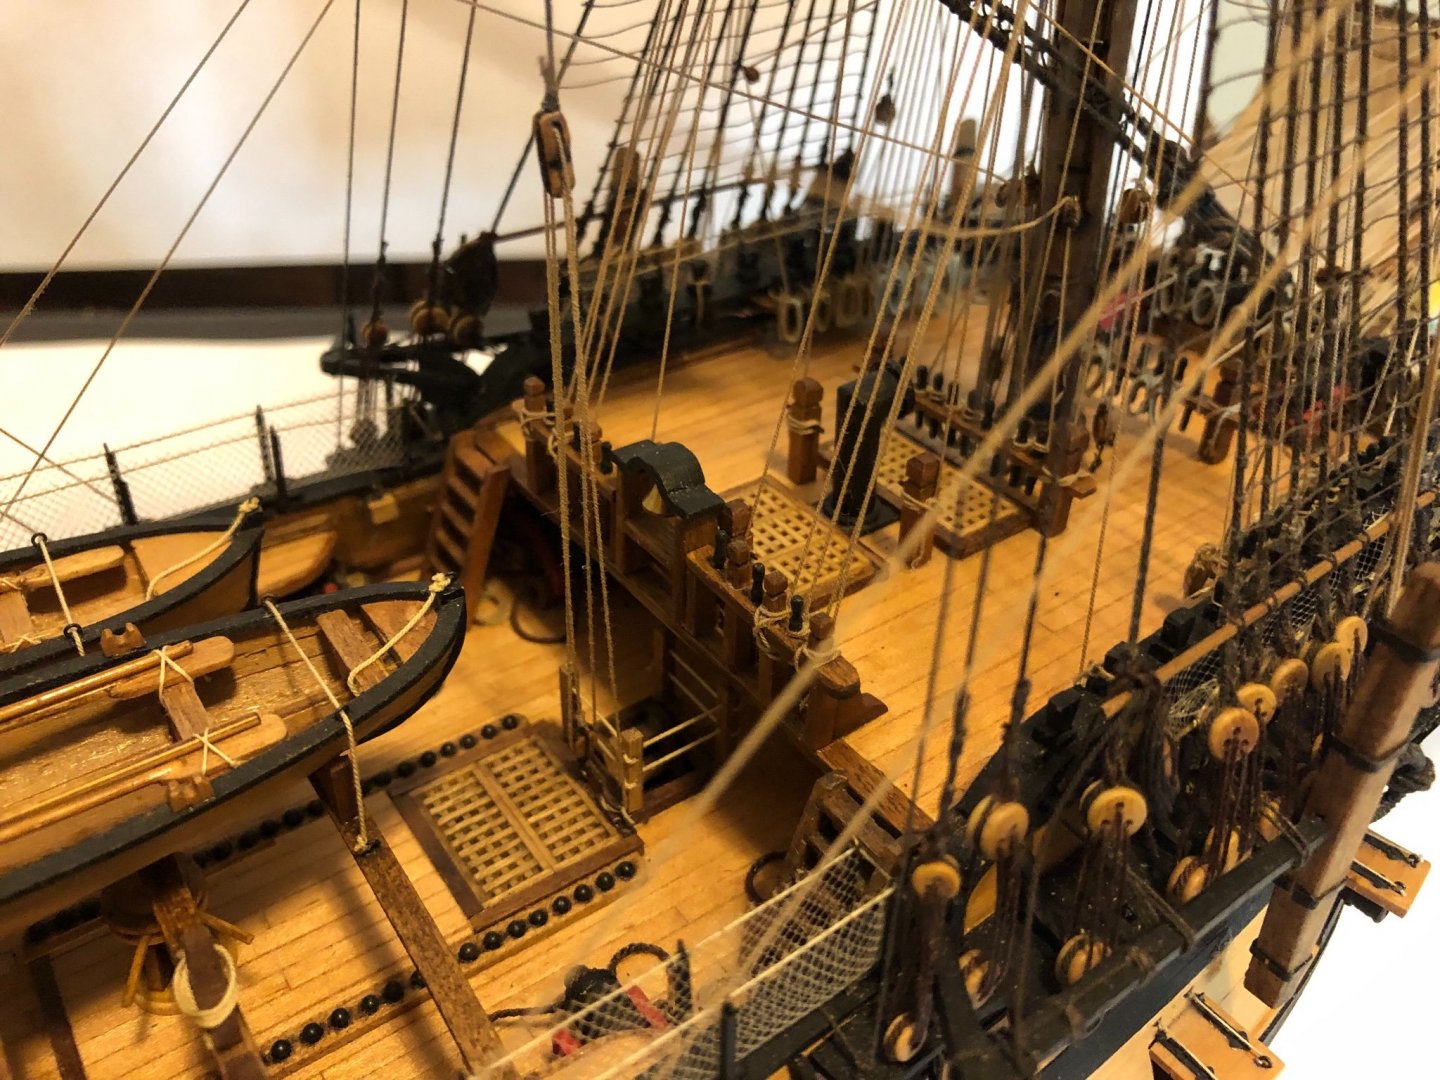
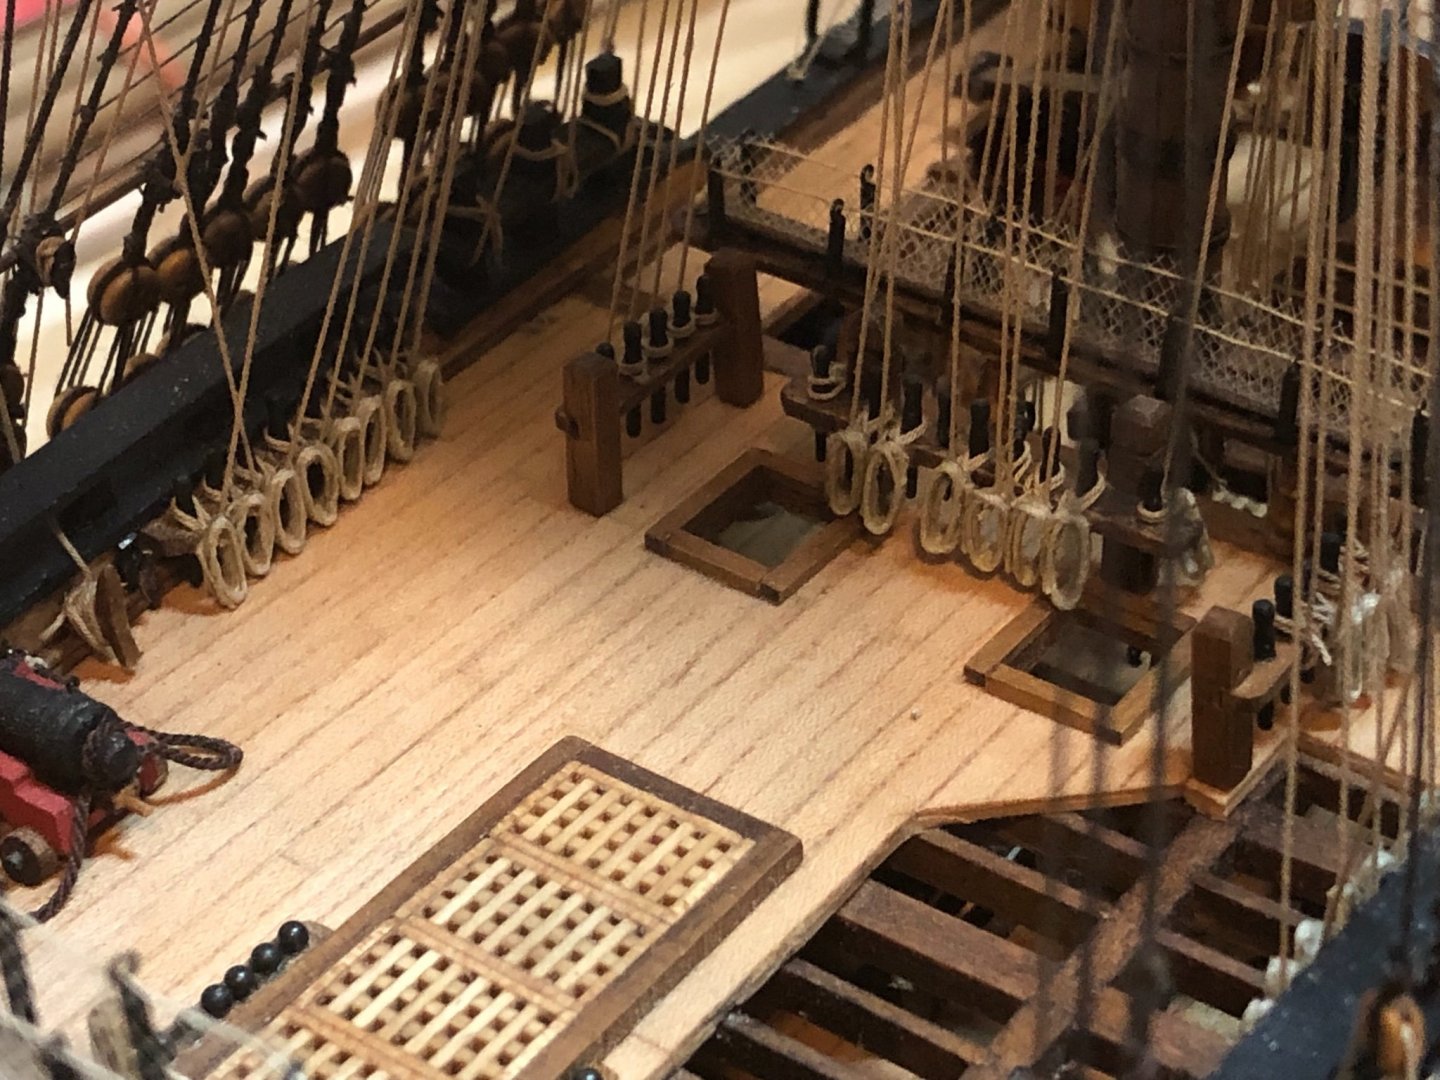
Starting to put the rope coils on the belaying pins. Seems like this phase will take a while between making about 150+ coils and then placing them. These are on the port bulwark on the forecastle. This pic is just aft the main mast Really trying to put some time towards finishing in time for the show. The last big hurdle is mounting the mizzen sail, gaff and boom. Also still need to figure out the belaying of those lines. Tick tock goes the clock 😜. Shouldn’t be a problem but I need to stress about something. 🤣😜 Tom

- 385 replies
-
- 12
-
-
-
Thanks Eurus. I am not to sure about museum worthy but being my second model and first scratch build I am pleased. It has taken quite a long time but half of it was spent learning and reading. The MSW family has been invaluable in my education. Tom
-
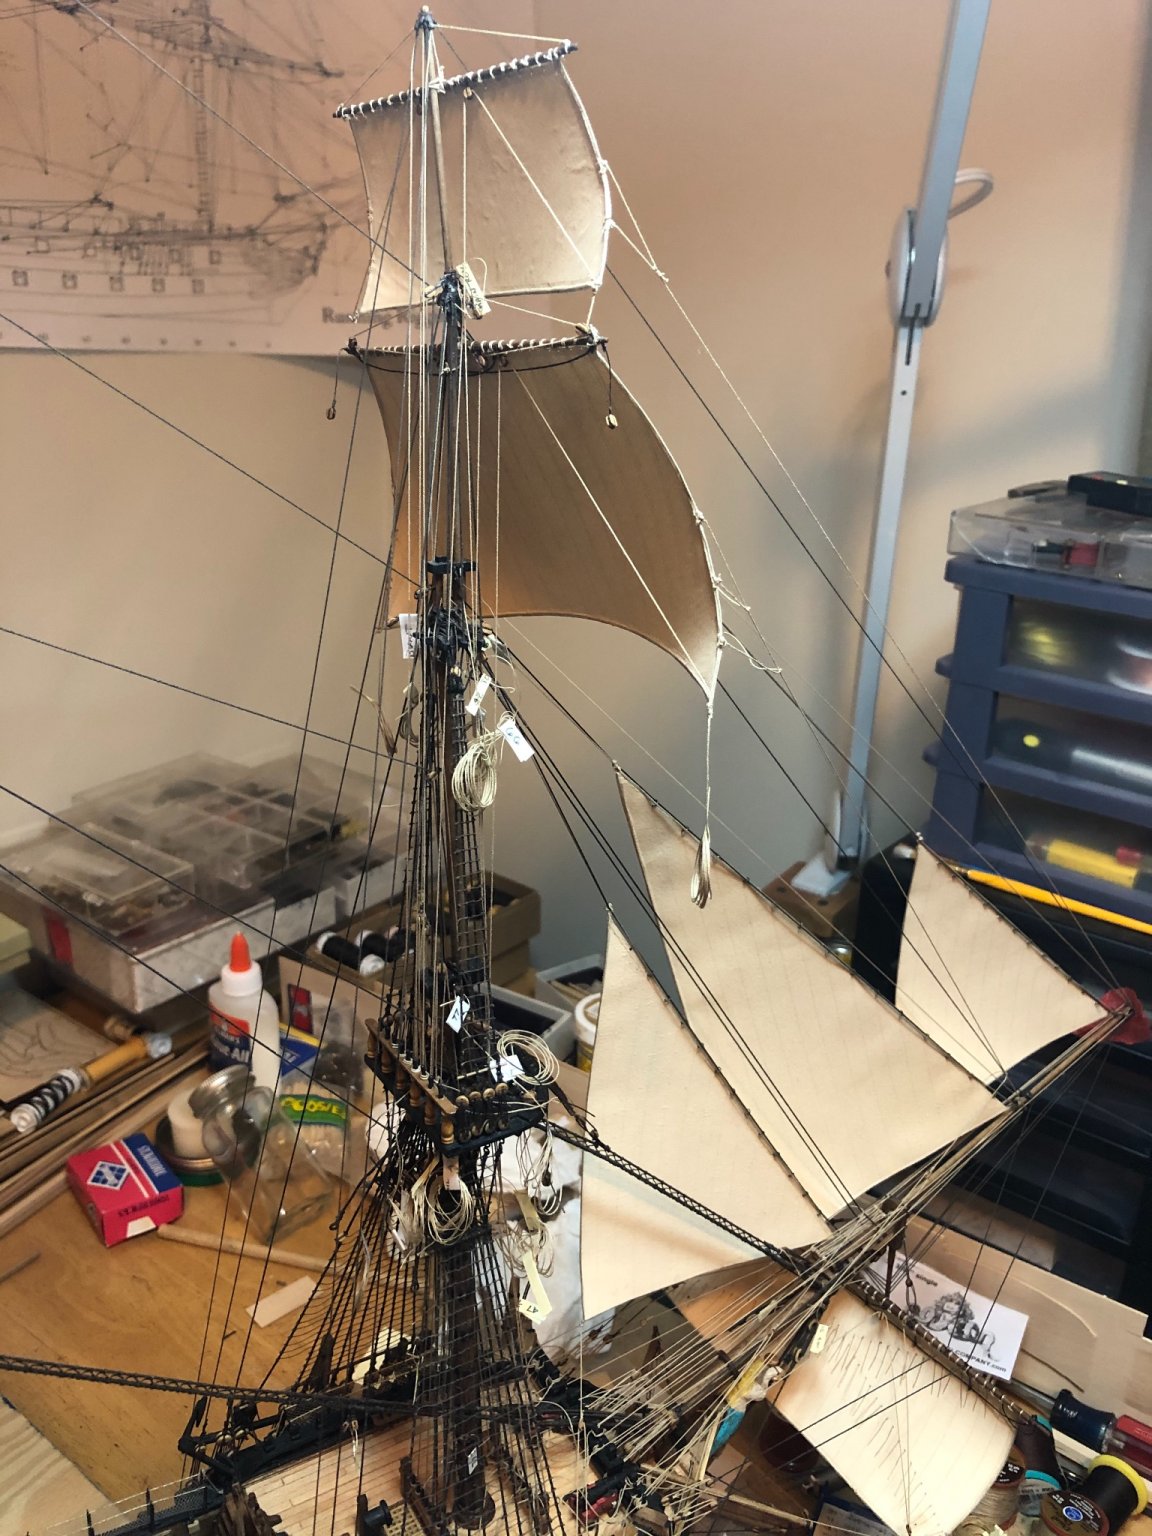
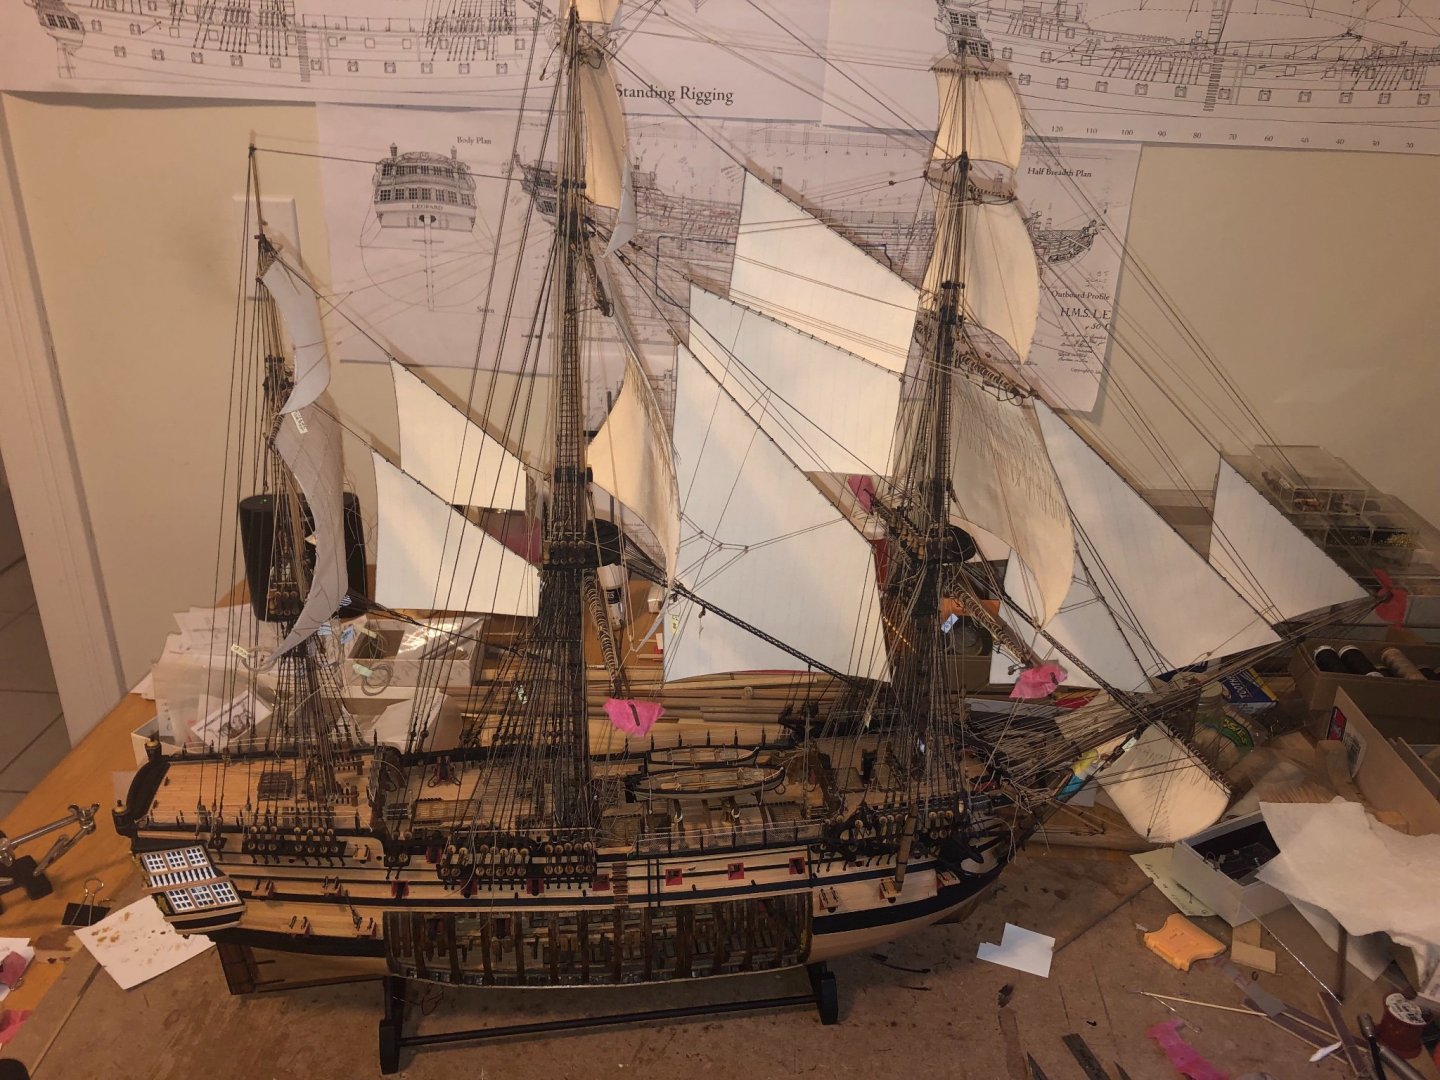
Made a little more progress this weekend with the mizzenmast staysails, top gallant and top sails. I need to mount the crossjack then finally the mizzen sail. Currently debating whether I will put up the mizzen staysail or not. I left off the lowest staysails at the main and foremast so as not to cover up the deck detail. The gap from the deck to the bottom mizzen top mast staysail is higher than the other masts so it kind of seems out of balance. Maybe it will even out when the crossjack is put up. Problem is it will be very difficult to get in there to install all the necessary blocks for the rigging now. Finally I need to go back and tie up the braces and make what seems like a thousand rope coils for the belaying pins and various odds and ends… all by mid September so it is ready for the Northeast conference Tom

- 385 replies
-
- 14
-
-
-
Lining Off your hull for planking is this what you are looking for? I copied this link from a pinned post in the planking section in the forums screen. Tom
-
Hi Ed i also went the Starrett route after playing around with the lesser “hobby” grades for a couple years. You pretty much get what you pay for when it comes to tools. I shopped around eBay and found a Starrett set of four for $50. Tom
-
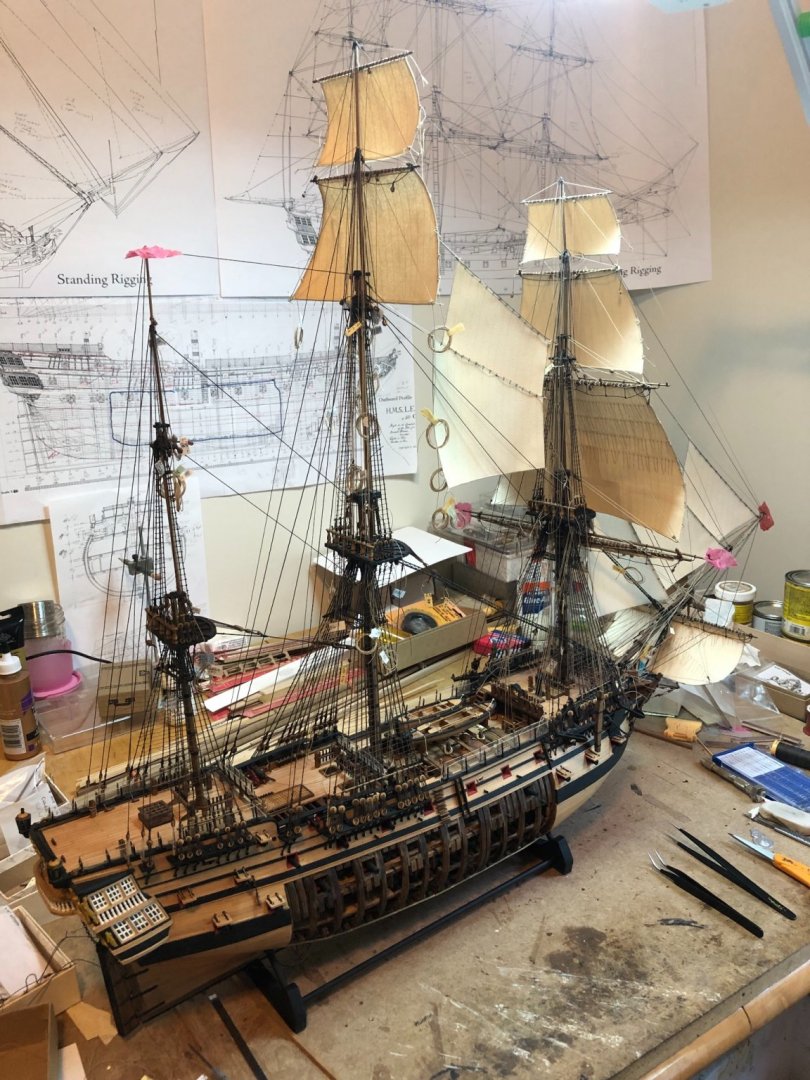
Hi all, It has been a while since I posted but I am still picking away it when I can. Still have lines hanging all over the place but making progress. All the main staysails and mast sails are up with most of the lines rigged. Getting ready to move on to the mizzenmast area next. i need to pick up the pace if I am to get it finished for the Northeast conference at the beginning of October! Funny thing though, the more things I knock off my “chores around the house” list the longer it gets!😜 That “work for a living” thing seems to be getting in the way a lot too!🤣😜 Tom

- 385 replies
-
- 11
-
-
How did I get by up till now without the machine that limbs and cuts to length? I am sure Jim Byrnes has one the drawing board. 😜😁😂 Tom
-
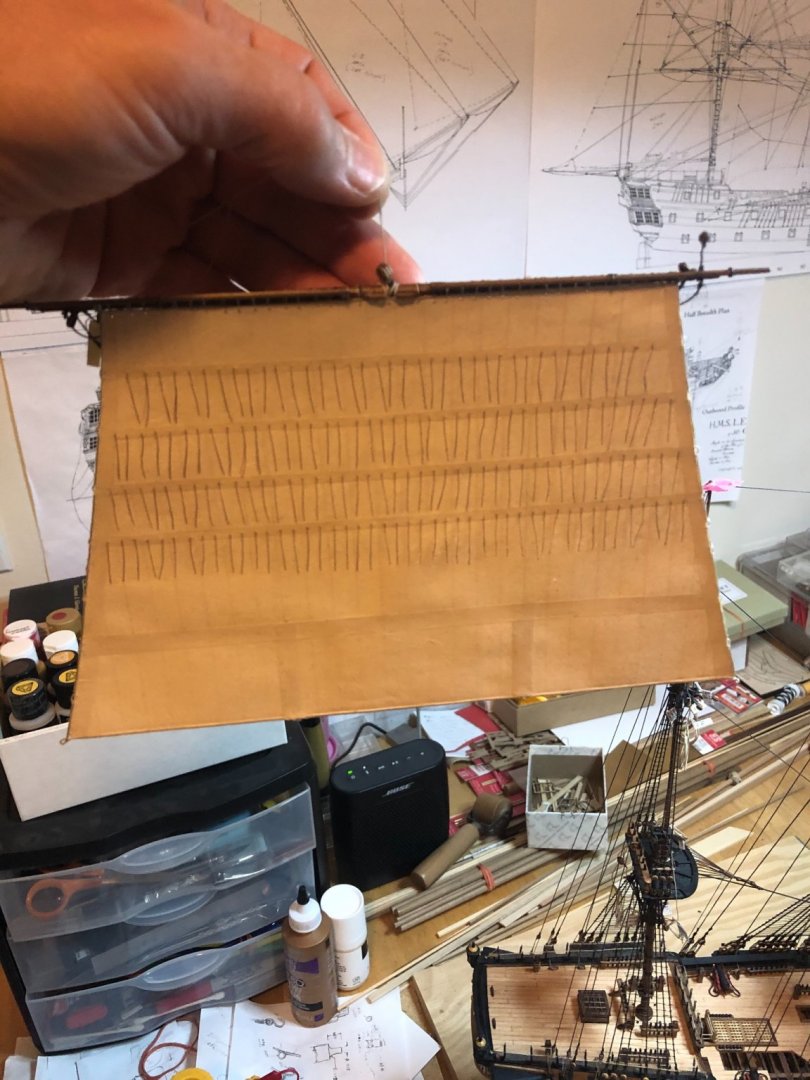
Markus look at my Leopard build log page 11. I used spray paint on both sides of the silk span. Then I used a piece of regular copier paper and drew the seam lines on it and then sprayed it with adhesive. Then I put the painted silk span on it and rolled it with a small wall paper roller to get the bobbles out. Then repeat on the other side. The paper ply in the center will eliminate the “see through” effect when held up to the light. Don’t forget to cut one side of the silk span larger all around the leech and foot sides of the sail. Then lay a piece of annealed wire on the edge and fold the silkspan over the wire and glue down. The the wire can be bent to form the sail like it is full of wind. hope this helps. Tom
-
Hi Markus16, I am making sails using silkspan with a piece of paper in between. I was following the technique showed to me by another member. In hind sight, I think next time I might try either a another piece of silkspan instead of paper or just omit the middle ply all together. I will figure it out on the next model since all my sails are made and came out pretty good... especially for the first time. Check the link to my Leopard build. Page 11 has some general instruction on how it made them. I bought my silkspan here in the US from one of our sponsors, Bluejacket. Tom
-
Hi Jim, Your killing me.!!! 🤣 I need to go back and see if I can find out where I got my info. I tend to believe your info more than mine. I just went through16 feet just for the main royal and top gallant! Maybe the 7 miles was just for the standing rigging? Allan, My ropewalk definitely is getting put through its paces. 😄 Tom
-
Hi everyone. I managed to get some time to add a few more sails this past week. I read somewhere, I believe it was in Winfield’s book about 50 gun ships that this boat has over 7 miles of rope. At first I thought “wow”. Now I am beginning to appreciate what 7+ miles of rope really means. I hope the establishment over estimated! 😂😜 it is getting pretty tight in some areas getting the lines tied to their respective belaying pins. In hind sight I should have waited to put on the mast backstays. Tom
- 385 replies
-
- 10
-
-
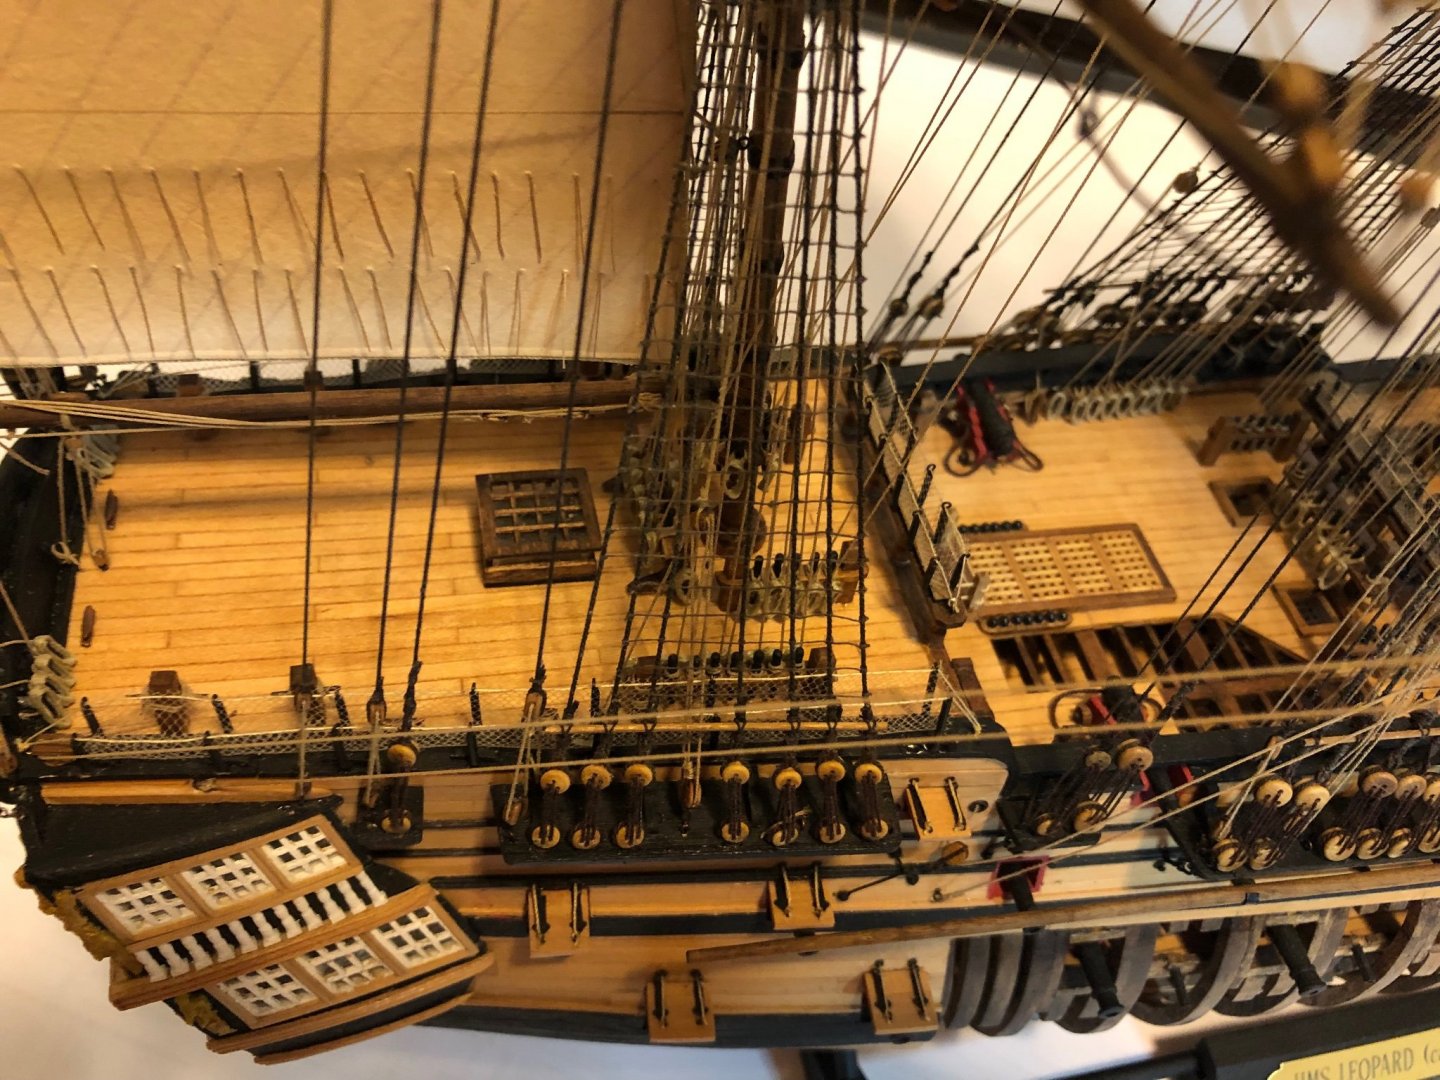
Making some progress. All the yards and sails on the fore mast are in and rigged except for the braces and the course sheet and tack lines. As I mentioned earlier, those would seem to get in the way as I continue on. On the fore mast I started with the royal yard and worked my way down. I think this time with the main yards I will put the furled course in before the main top staysail. It was a bit tight rigging up the truss lines on the fore course yard assembly with the jib sail installed. I am getting better at working with a pair of tweezers in each hand to tie off lines on belaying pins. I am currently putting up the main top gallant and middle staysails. Then I will furl a sail onto the main course and mount that assembly…. I think. 😜 I also need to clean up all the excess lines on the belaying pins on the forecastle and then make rope coils to hang on the pins. Somebody mentioned a while ago when I finished the hull, decking and fittings that I was 50% the way to the finish line. Boy they weren’t kidding. With sails and all I am starting to think 50% was generous. 😀. Here is a pic of where I am now. It’s not the best pic as there is a lot of background clutter and it’s a bit difficult to see the model details but hey, it was 10PM. 😀 Hopefully my spring chores have quieted down to a dull roar so I can make some serious progress. Tom

- 385 replies
-
- 10
-
-
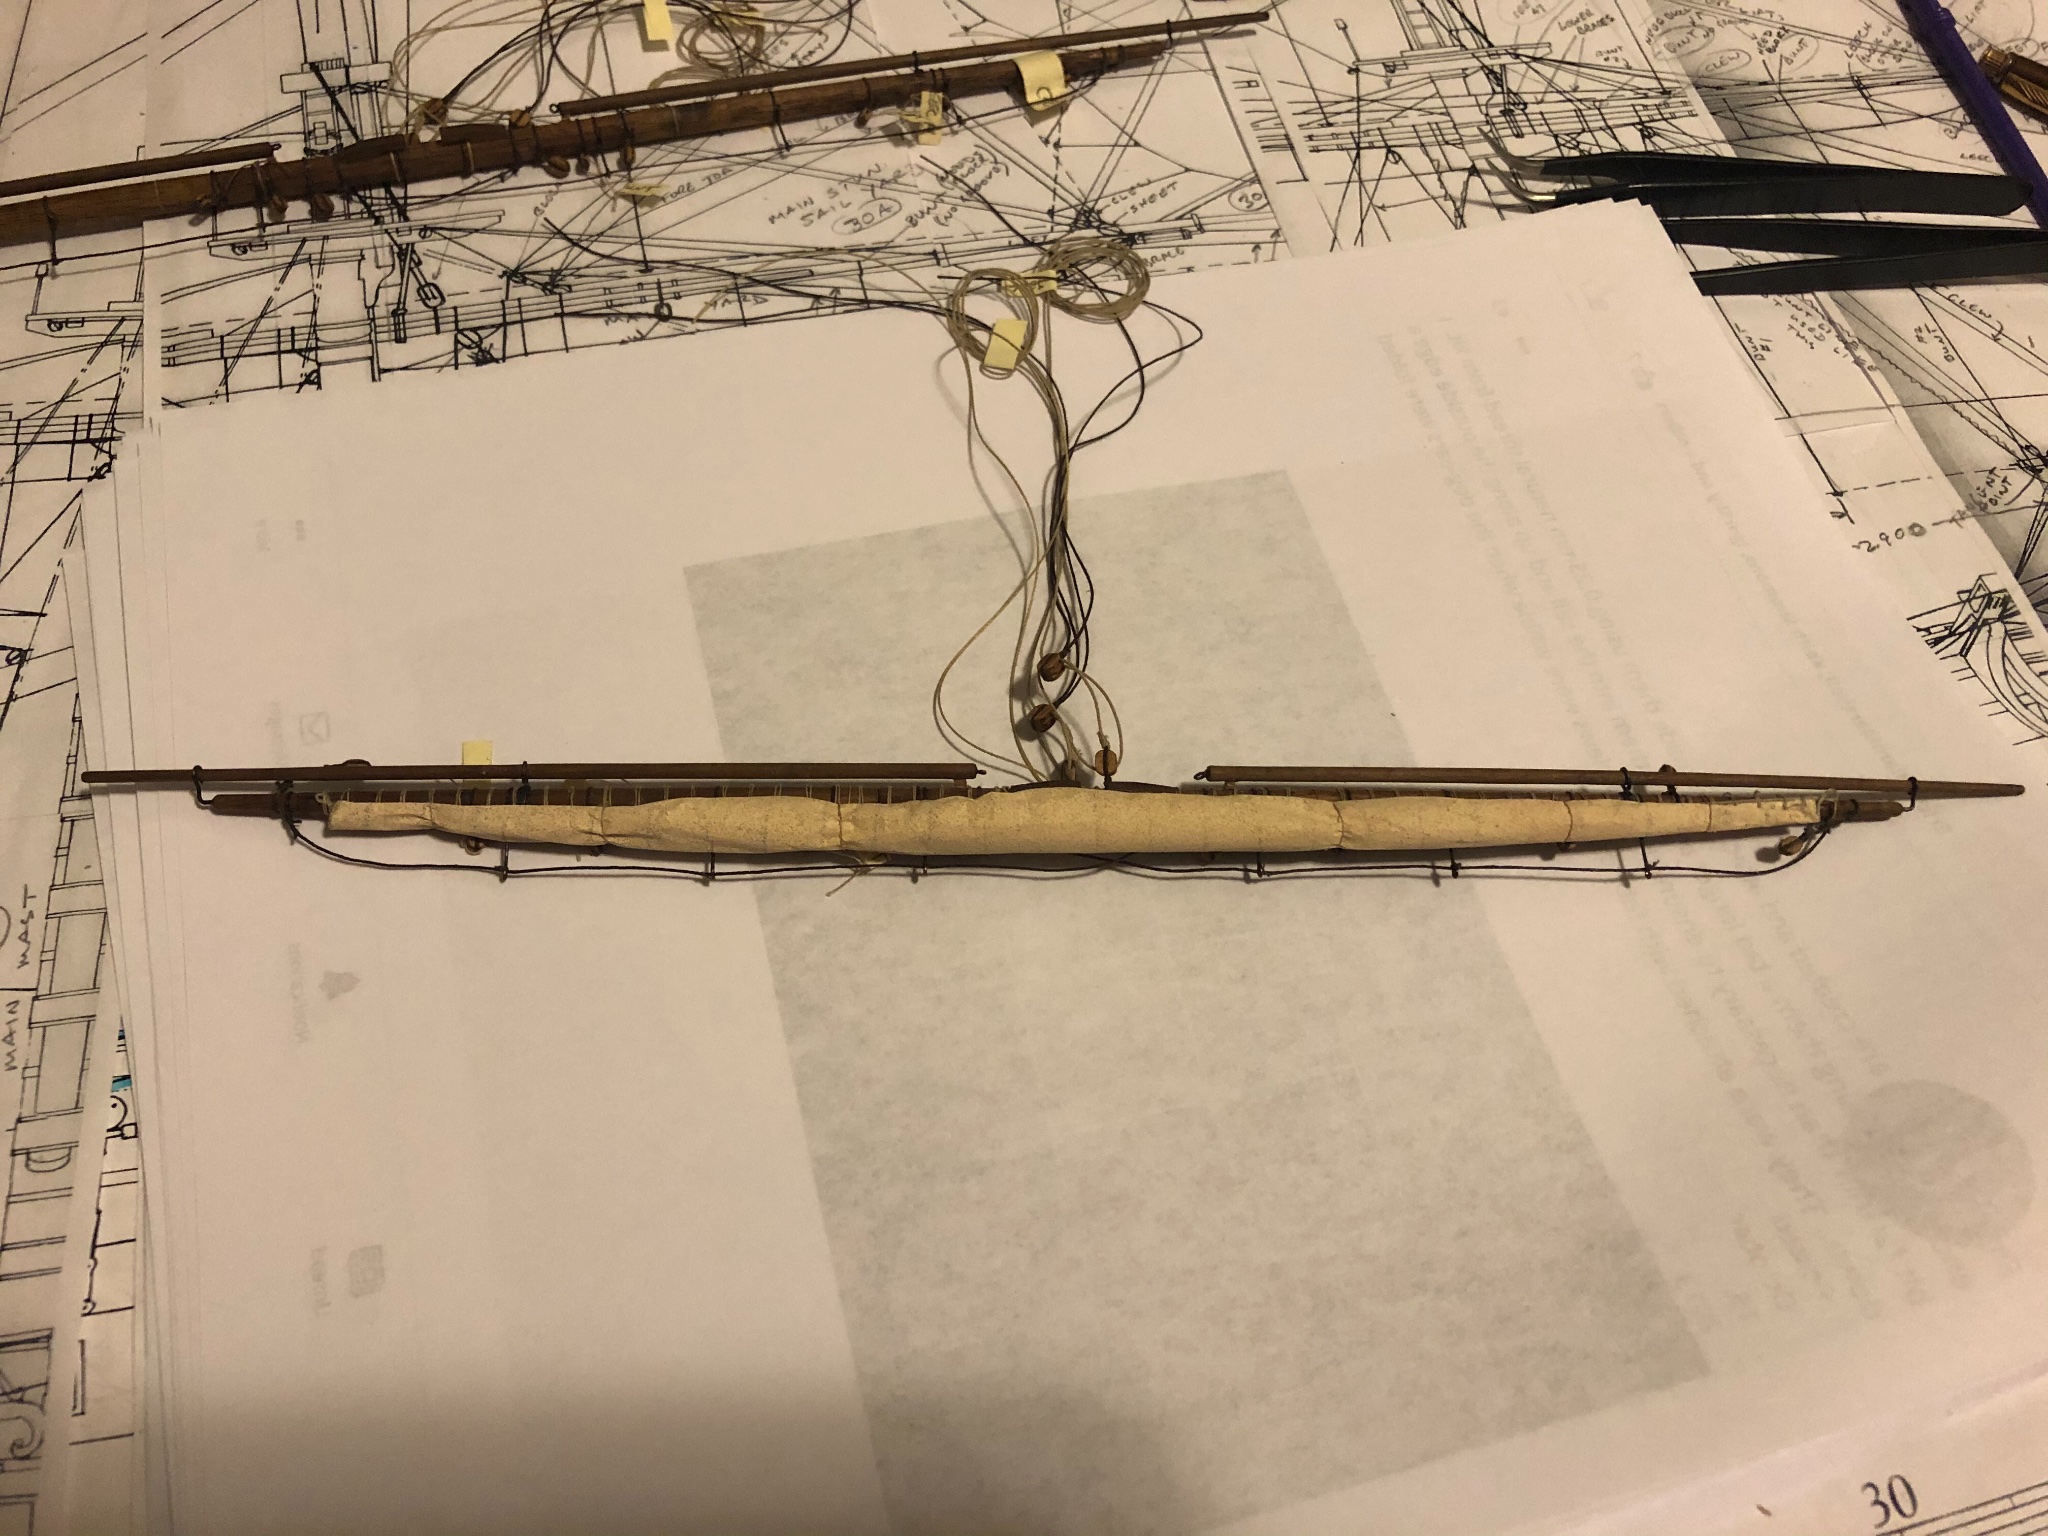
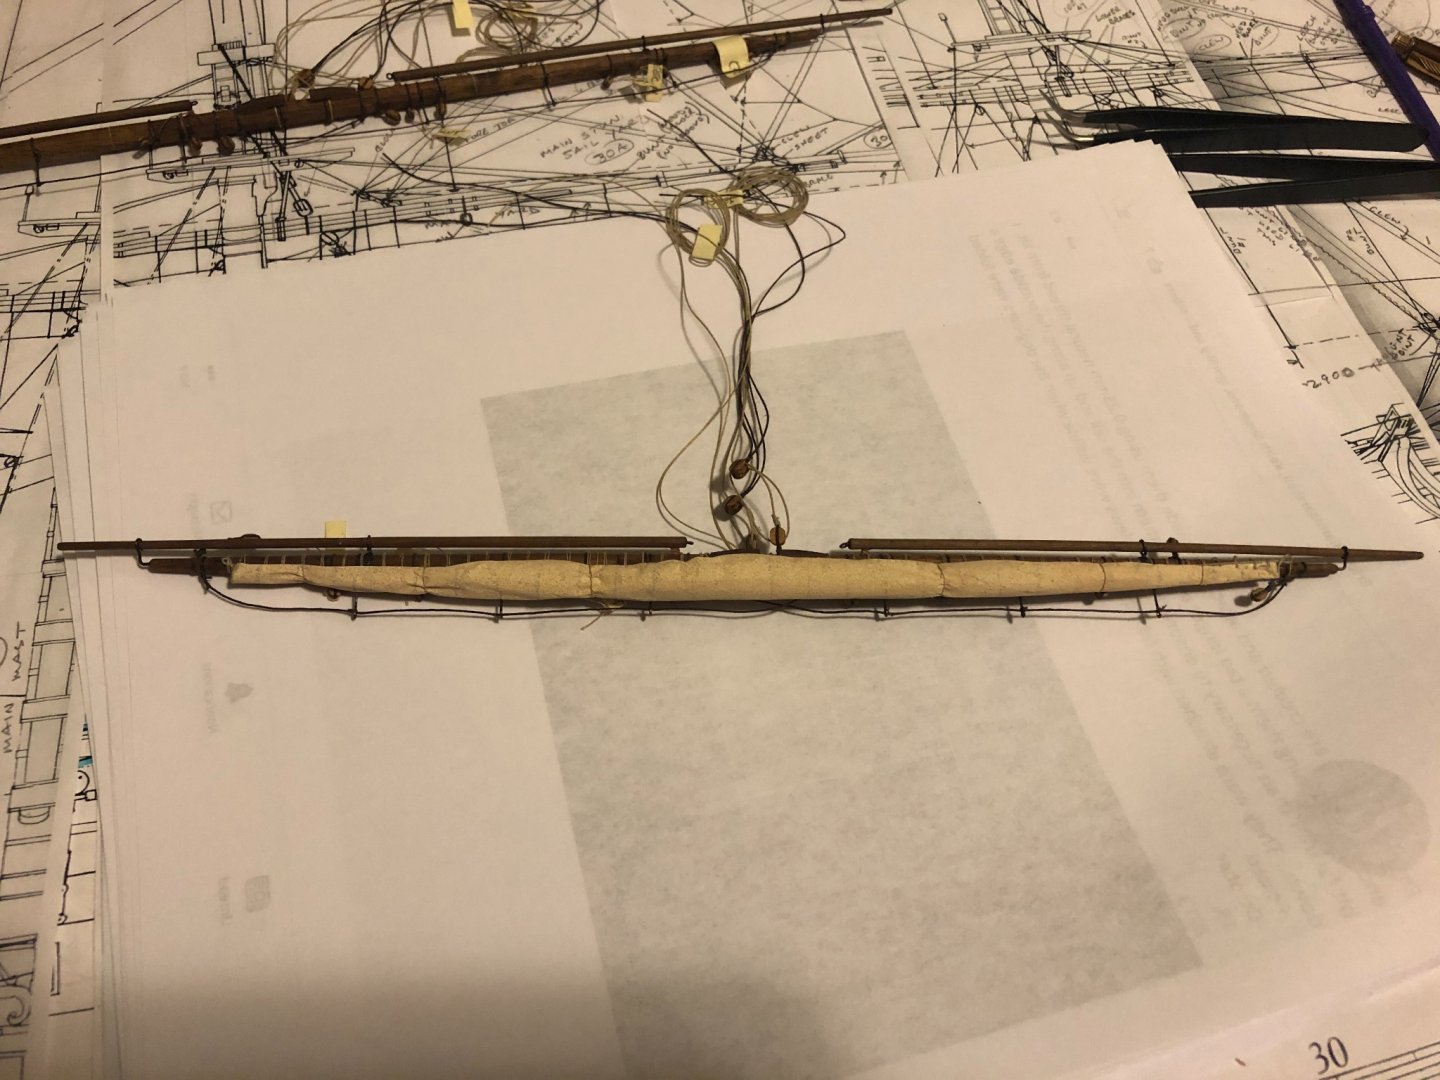
Hi John, The furled sail is actually only one layer of painted silk span folded and rolled. I am going to add the lower corners of the sail where the clew cringles are separately. I will cut out triangles of the full 3 ply thickness so I have an edge to glue the bolt rope to. I can then tie the clew block to the cringle then take the whole “assembly” and tuck the upper end into the furled sail with some glue. At least that is plan A. 😜😁 Tom
-
Have not spent a lot of time actually working on the model the last couple of weeks. Did manage to rig most of the fore topsail and get the fore course sail bent and furled to the yard. Took a couple of shots to get the furl looking somewhat correct but I think it is passable. My original thought and attempt was to “drape” the sail about a third of the way down but I could not get it to look like it was loosely draped. It just looked too stiff. Now I can mount the fore course yard and continue on to the main mast yards.... after I finish laying the 100 feet of pavers for my front side walk, cut the grass, plant the shrubs and the beat goes on. 😜 Just looking at the top sail pic, the color or the upper sails look white. They are actually unbleached titanium which is more a hemp color. Next time I will try for a more realistic picture with my phone. Tom

-
Congratulations a very nice job John, As you said, there is no room for the crew! You went through that relatively quickly. You skills must be approaching expert level! Tom
- 104 replies
-
- 3
-
-
-
- model shipways
- new bedford whaleboat
- (and 1 more)
-
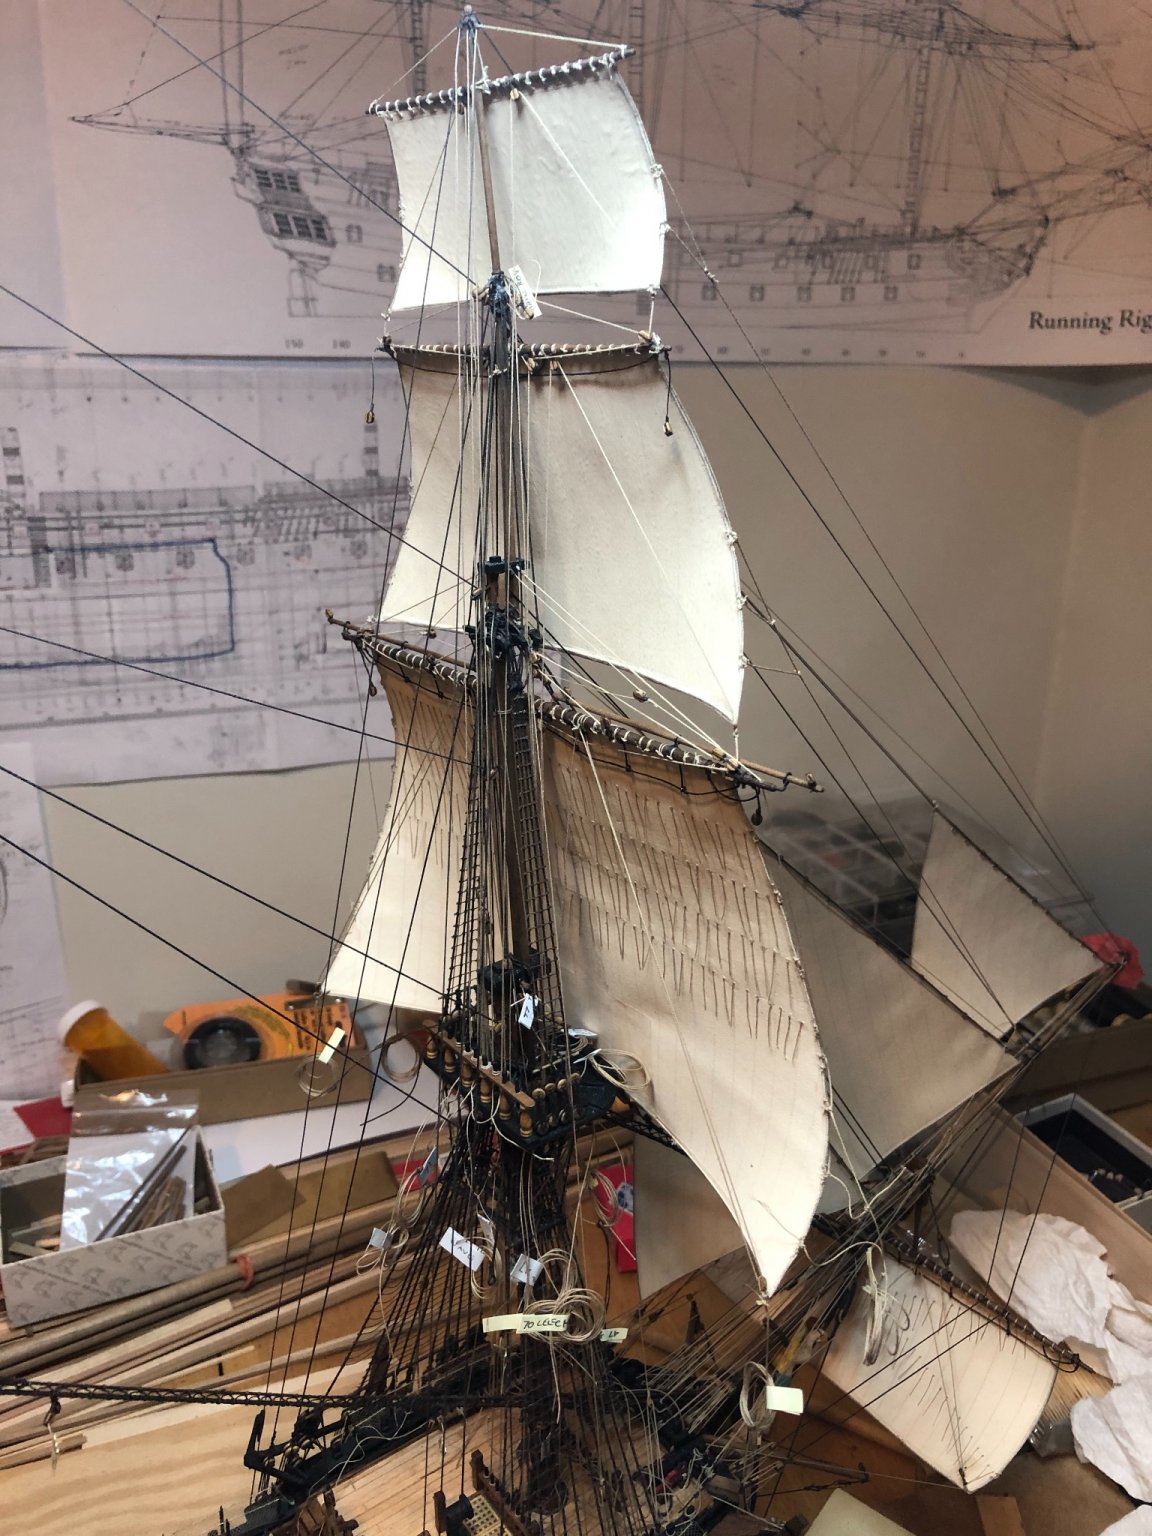
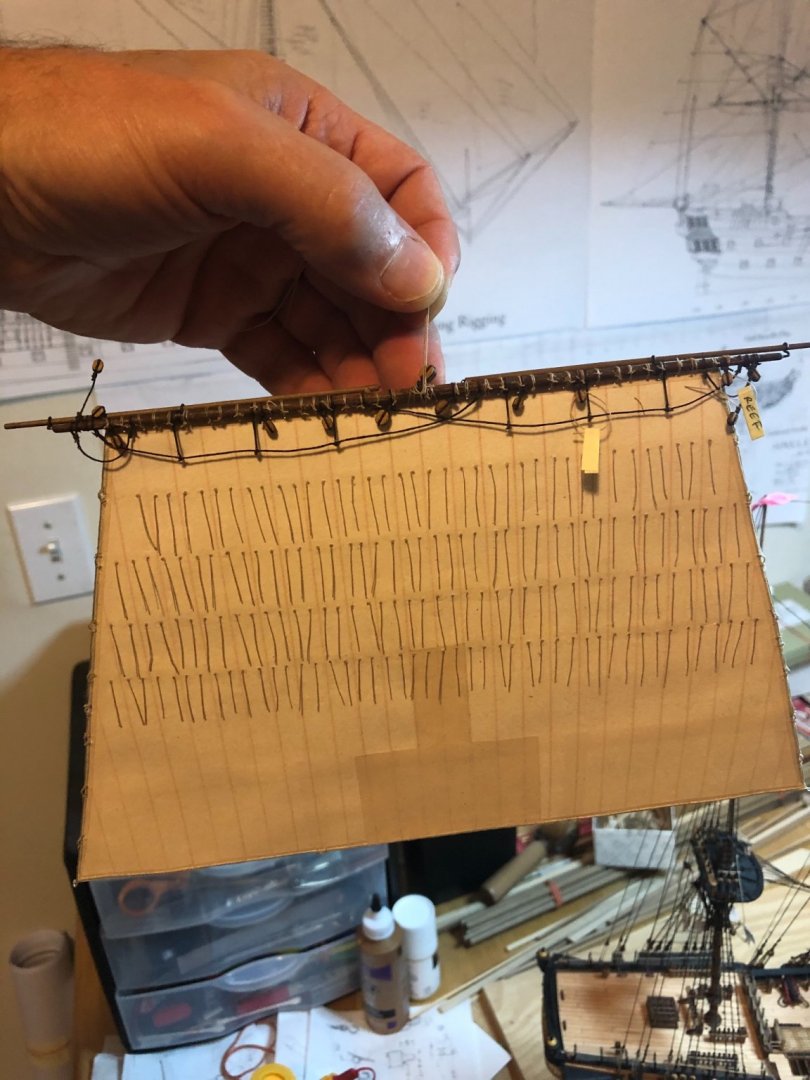
Little more progress the past few days. Fore royal and top gallant sails are rigged except the braces. Also got the fore top sail bent to the yard and put in 170 reef points but who’s counting? 😜😁 hopefully this will be mounted in a couple of days. Then I plan to work on the main stay sails then the main royal and top gallant and top sails. I am going to furl the fore and main courses so I am thinking those can be made and installed afterward. At least that is the plan now. Tom

- 385 replies
-
- 11
-
-
Nice job John, Sloth mode! That is the only mode I know when it comes to modeling. If I count all the “do overs” I probably rigged my model 3 times already and I am only 25% done 🤣. Tom
- 104 replies
-
- 2
-
-
-
- model shipways
- new bedford whaleboat
- (and 1 more)
-
Slooow is synonymous with modeling... at least in my world. I would be very malnourished if I did this for a living!😁 Tom