


bdgiantman2
-
Posts
359 -
Joined
-
Last visited
Reputation Activity
-

 bdgiantman2 got a reaction from thibaultron in Ship in trouble by Ab Hoving - FINISHED
I recall several years ago someone on here was making a diorama of a pirate 5th rate ship that had wrecked on a beach, I think it was before the recent crash of the site. I was looking for it and can't find it on here.
Brian D
-

.jpg.d84ec4dad1d7791e855dca06210ab6f3.thumb.jpg.f45209242e851d4409eca1a09293165b.jpg) bdgiantman2 got a reaction from hollowneck in Ship in trouble by Ab Hoving - FINISHED
bdgiantman2 got a reaction from hollowneck in Ship in trouble by Ab Hoving - FINISHED
I recall several years ago someone on here was making a diorama of a pirate 5th rate ship that had wrecked on a beach, I think it was before the recent crash of the site. I was looking for it and can't find it on here.
Brian D
-
 bdgiantman2 got a reaction from Canute in Ship in trouble by Ab Hoving - FINISHED
I recall several years ago someone on here was making a diorama of a pirate 5th rate ship that had wrecked on a beach, I think it was before the recent crash of the site. I was looking for it and can't find it on here.
Brian D
-
 bdgiantman2 got a reaction from mtaylor in Ship in trouble by Ab Hoving - FINISHED
I recall several years ago someone on here was making a diorama of a pirate 5th rate ship that had wrecked on a beach, I think it was before the recent crash of the site. I was looking for it and can't find it on here.
Brian D
-
 bdgiantman2 got a reaction from GrandpaPhil in Ship in trouble by Ab Hoving - FINISHED
I recall several years ago someone on here was making a diorama of a pirate 5th rate ship that had wrecked on a beach, I think it was before the recent crash of the site. I was looking for it and can't find it on here.
Brian D
-
 bdgiantman2 got a reaction from Glen McGuire in Ship in trouble by Ab Hoving - FINISHED
I recall several years ago someone on here was making a diorama of a pirate 5th rate ship that had wrecked on a beach, I think it was before the recent crash of the site. I was looking for it and can't find it on here.
Brian D
-
bdgiantman2 got a reaction from mtaylor in Brig Eagle 1814 by bdgiantman2 - 1/48
Hello friends. Merry Christmas to all and hope everyone is in good health and making progress on models.
While I haven't made any physical progress on my ship model, there is plenty of other stuff going on to be telling about. Like I mentioned in previous post, I was give a mini table saw for my birthday. Haven't had a chance to use it yet, but I anticipate stuff soon. When I am able to get my USB drive issues fixed (the disk had the audacity to just stop working on me with no warning at all and many important pictures and CAD files on there) as well as lingering tool problems I plan to make sawdust again. Lots of research going on in the mean time. This past year, I acquired two books, The Anatomy of the Ship HMS Blandford (British 20 gun 6th rate) by Peter Goodwin and Le Cygne by Jean Boudriot. Both of these books have been very helpful and interesting. Blandford was the same length and number of guns as Eagle, but was ship-rigged (3 masts) and had a whole additional deck than Eagle making her taller out of the water as well as being a century prior. Cygne is smaller than Eagle but the same time period and also a brig configuration plus she also has the additional deck that Eagle didn't have, there are features about her decking and rigging that are very helpful. However, Brig Eagle has a wider beam than both of the European ships - about 7 feet wider than Blandford and a solid 10 feet wider than Le Cygne. Also been dusting off my very rusty CAD skills attempting to make drawings similar to some of you modelers - stalled for now again because of the USB issues. I know more CAD people are using SOLIDWORKS which I never learned about during early college years, but still plugging along.
So anyways, that is what is going on for now and probably will be waiting for better outdoor conditions.
Brian D.
-
 bdgiantman2 got a reaction from scrubbyj427 in Brig Eagle 1814 by bdgiantman2 - 1/48
Hello friends. Merry Christmas to all and hope everyone is in good health and making progress on models.
While I haven't made any physical progress on my ship model, there is plenty of other stuff going on to be telling about. Like I mentioned in previous post, I was give a mini table saw for my birthday. Haven't had a chance to use it yet, but I anticipate stuff soon. When I am able to get my USB drive issues fixed (the disk had the audacity to just stop working on me with no warning at all and many important pictures and CAD files on there) as well as lingering tool problems I plan to make sawdust again. Lots of research going on in the mean time. This past year, I acquired two books, The Anatomy of the Ship HMS Blandford (British 20 gun 6th rate) by Peter Goodwin and Le Cygne by Jean Boudriot. Both of these books have been very helpful and interesting. Blandford was the same length and number of guns as Eagle, but was ship-rigged (3 masts) and had a whole additional deck than Eagle making her taller out of the water as well as being a century prior. Cygne is smaller than Eagle but the same time period and also a brig configuration plus she also has the additional deck that Eagle didn't have, there are features about her decking and rigging that are very helpful. However, Brig Eagle has a wider beam than both of the European ships - about 7 feet wider than Blandford and a solid 10 feet wider than Le Cygne. Also been dusting off my very rusty CAD skills attempting to make drawings similar to some of you modelers - stalled for now again because of the USB issues. I know more CAD people are using SOLIDWORKS which I never learned about during early college years, but still plugging along.
So anyways, that is what is going on for now and probably will be waiting for better outdoor conditions.
Brian D.
-
 bdgiantman2 reacted to archjofo in La Créole 1827 by archjofo - Scale 1/48 - French corvette
Hello,
wish everyone here in the forum a .
Completion: Equipping the fore topsail yard - footropes and stirrups / Marchepieds et étriers etc.
By pulling in and tensioning the lanyard, the two halves of the jackstay were tensioned. The loose end of the ropge was carefully wrapped around the lanyard and tightened, as shown in various historical drawings.
The footropes and stirrups for this yard were then made in the same way as for the main topsail yard, but with slightly reduced rope diameters.
The following picture shows the already prepared stirrups. Thimbles are spliced into one end of them, through which the rope of the footrope will later be pulled. The other ends were formed with served eye splices, which are then lashed to the jackstay.
The next picture shows the finished footropes with details.
I continued with the lower blocks for clewlines l = 3.5 mm and the toggles to connect them to the topgallant sheets. As already mentioned, I made these from dogwood, a very hard and fine-grained wood, which is ideal for these small parts.
The following picture shows the stropped blocks for the clewlines, one is connected to a sheet. Next to it is a block for the main braces for comparison.
Here you can see the stropped blocks for the braces before they are placed on the yardarms.
Here you can see how the studding sail booms are attached.
The next pictures show the fore topsail yard equipped with the necessary elements for rigging.
Last but not least, a picture of the yards fitted out so far.
Quite a jumble... 😊
We continue with the cross yard.
To be continued ...
-
 bdgiantman2 got a reaction from CiscoH in Brig Eagle 1814 by bdgiantman2 - 1/48
Hello friends. I know it's been a long time since I last posted on this project. Yes, I am still alive and following different projects on this site. Been primarily working, and I am hoping to purchase some wood soon and get back on this project. For my birthday just over a month ago, I was given a new mini table saw by a Chinese company that I am really hoping will help making some of the cuts wanting to make. Likely will still need to get the larger Byrnes saw at some point but right now that is beyond what I am able to afford.
I would like to take dedicate the rest of this build to an influential mentor, Ed Quam, who passed away on August 19th. He was a very skilled builder and was an encouragement to me. I just hope that my progress will do him proud.
Peace ✌️, and hope everyone had a great Thanksgiving 🦃and wishing everyone an early Merry Christmas 🎄
Brian D.
-
bdgiantman2 reacted to jfhealey in La Créole 1827 by archjofo - Scale 1/48 - French corvette
And you do that in 1/48 scale!!! You must have extraordinary eyesight / patience and,of course, boundless ability. What a model you are creating.
Fred
-
bdgiantman2 reacted to dvm27 in La Créole 1827 by archjofo - Scale 1/48 - French corvette
Looking at your work reminds me of the Christmas train gardens I visited in my youth. They inspired me with their complexity and attention to detail. Yet, at the same time, they discouraged me as they set a bar so high I knew I could never match it. I have seen a few videos you posted on your website. You would be doing a great service to the ship model making community if you could find a way to video your splicing technique. Your photos are helpful but a video would fill in the gaps.
-
bdgiantman2 got a reaction from mtaylor in Brig Eagle 1814 by bdgiantman2 - 1/48
Hello friends. I know it's been a long time since I last posted on this project. Yes, I am still alive and following different projects on this site. Been primarily working, and I am hoping to purchase some wood soon and get back on this project. For my birthday just over a month ago, I was given a new mini table saw by a Chinese company that I am really hoping will help making some of the cuts wanting to make. Likely will still need to get the larger Byrnes saw at some point but right now that is beyond what I am able to afford.
I would like to take dedicate the rest of this build to an influential mentor, Ed Quam, who passed away on August 19th. He was a very skilled builder and was an encouragement to me. I just hope that my progress will do him proud.
Peace ✌️, and hope everyone had a great Thanksgiving 🦃and wishing everyone an early Merry Christmas 🎄
Brian D.
-
bdgiantman2 reacted to Stuntflyer in Sloop Speedwell 1752 by Stuntflyer (Mike) - Ketch Rigged Sloop - POF
Wing transom and quarter panels
The wing transom is made from 5/16" sheet. Using the template from the plan sheet, I cut out the basic shape and then milled the four angled notches. The templates for the remaining curve shape (forming that parallelogram shape) are on the plan sheet as well. I just copied what Chuck has described in his build log on page 8, post #228. The wing transom was pinned with 24 gauge wire and glued to the deadwood. The pinning was done to make it easier to set the height of each end and fore/aft positioning without having to worry about it sliding back and forth at the same time.
After the wing transom was installed I started work on the two quarter panels which attach to the wing transom. What is important to note is that the cant frames should be fully faired prior to installing the quarter panels. I worked on this until I got a smooth transition between the last aft cant and the quarter panel. Once that was done, I glued the panels in place.
Mike
-
 bdgiantman2 got a reaction from JacquesCousteau in Brig Eagle 1814 by bdgiantman2 - 1/48
Hello friends. I know it's been a long time since I last posted on this project. Yes, I am still alive and following different projects on this site. Been primarily working, and I am hoping to purchase some wood soon and get back on this project. For my birthday just over a month ago, I was given a new mini table saw by a Chinese company that I am really hoping will help making some of the cuts wanting to make. Likely will still need to get the larger Byrnes saw at some point but right now that is beyond what I am able to afford.
I would like to take dedicate the rest of this build to an influential mentor, Ed Quam, who passed away on August 19th. He was a very skilled builder and was an encouragement to me. I just hope that my progress will do him proud.
Peace ✌️, and hope everyone had a great Thanksgiving 🦃and wishing everyone an early Merry Christmas 🎄
Brian D.
-
 bdgiantman2 reacted to knightyo in Sloop Speedwell 1752 by Chuck - Ketch Rigged Sloop - POF - prototype build
Yes! With a flashlight whilst also swearing. Now THAT would be an authentic scene.
-
bdgiantman2 reacted to Keith_W in Sloop Speedwell 1752 by Chuck - Ketch Rigged Sloop - POF - prototype build
Darn, these Hollywood product placement deals are going to a whole new level! First it was fast food, soft drinks, and cars ... and now ship models! I'll bet Artesania is green with envy that they chose Syren and not Artesania as a subject. To make it extra realistic, you should tell Ed Harris to crawl around looking for a tiny part he dropped on the floor ...
-
bdgiantman2 reacted to Chuck in Sloop Speedwell 1752 by Chuck - Ketch Rigged Sloop - POF - prototype build
Finally finished up the stern details today. At least up to the point I would like to do them for this chapter.
First up was to paint the top of the transom before adding the actual carvings. I didnt have to paint all the way to the upper edge. I didnt want a painted seam to show afterwards. I also marked the lower areas so I knew where to stop the painting as well. You cant tell in the photos but its not black at all. Its a very muted brown black and even gray. I didnt want it to be too stark a black. I also dusted some blue on there as well. So much for my photo skills, LOL.
The two figures (port and starboard) were removed as they wont be added till last in this series of steps. Then the actual carved transom was glued into position. Once again this was after some initial cleanup and staining to make it match the wood color. Old masters gel stain (fruitwood) was used once again.
With the transom carving secure it was time to focus on the forward side of the carving. Basically the thickness of the carved transom is thicker port and starboard. Where it hangs over on both sides. There is a little carved detail in the center of this as well which can be seen on the contemporary model. My solution was to build up this area with two layers. The first middle layer is laser cut in boxwood. This layer was cleaned up of it laser char and then shaped a bit with some sandpaper and files. The edges were rounded off and I just had some fun with it. You can see my example being held in the clamp. You guys can do as much as you like with this piece. Photo is below. Then the most forward layer will be glued on as well. This is a resin casting.
When gluing them on you must finesse them a bit. Meaning you may have to trim some of the hull molding etc. You can fill any cracks or seams with wood filler and generally speaking try to blend them all together. The photo below shows these two layers on the model. They were glued to the forward side of the transom.
Next up was to add the columns. This is pretty straight forward. All of these pieces are laser cut for you. The tops and bottoms of the columns are 1/16" thick. They were cleaned of laser char and filed to suit. Then glued on the transom. The long fluted columns are thinner but laser cut as well. The laser char sanded from these and the each column was sanded to length for a tight fit between the tops and bottoms we just added. This takes a while to do but isnt difficult. You may also notice some molding at the base of each window. They are between the columns bases. These are laser cut too. Just remove the char and round off the top edge like a quarter round. Then glue them in.
Lastly we can put those two standing figures back where they belong. But before you do...there are tiny laser cut bases made for them. These bases or the floor...rock...the ground...whatever you would like to call them need to be shaped. They are shaped like a little step. I did this rather than incorporate them into the casting. Everybody's model is slightly different. You can customize this base so your figure fits perfect on your model. See the photo...
Just sand it free of char and file some bumps and grooves into it. Mine are hardly noticeable in the photo but they are there. Make it look like a stone or rock base. Using this keeps the nice run of the molding that wraps around the stern while covering the seams between all those layers we created. It covers up where the figures will stand while creating the correct angle for the figure to match the transom. It will be hardly visible. Shape yours to suit.
Here the figure is glued in place but not until after the tiny base was glued in position first. You can see the figure stepping on the small rock carved base. This pretty much finishes up the stern to the point where I want to be in this chapter. Its for the most part complete except for some very small features we add much much later. I think it came out rather nice considering this is a kit. But my goal was of course not to make it look kit-like at all.
The contemporary model...
-
 bdgiantman2 got a reaction from catopower in Mary of Norfolk 1790 by KenW - Pilot Boat
Stores like JoAnn's and Michael's sale dollhouse accessories, some in 1:48 scale. I have seen online ability to purchase kettles that scale.
-
bdgiantman2 got a reaction from mtaylor in Mary of Norfolk 1790 by KenW - Pilot Boat
Stores like JoAnn's and Michael's sale dollhouse accessories, some in 1:48 scale. I have seen online ability to purchase kettles that scale.
-
bdgiantman2 got a reaction from mtaylor in LE ROCHEFORT 1787 by Tobias - 1:36 - Harbor Yacht from ANCRE monograph
Very realistic blocks you have made for adjusting the tilt of the mast, a detail rarely seen on many models. Great progress, sir!
Brian D
-
 bdgiantman2 got a reaction from bruce d in LE ROCHEFORT 1787 by Tobias - 1:36 - Harbor Yacht from ANCRE monograph
Very realistic blocks you have made for adjusting the tilt of the mast, a detail rarely seen on many models. Great progress, sir!
Brian D
-

 bdgiantman2 got a reaction from Tobias in LE ROCHEFORT 1787 by Tobias - 1:36 - Harbor Yacht from ANCRE monograph
Very realistic blocks you have made for adjusting the tilt of the mast, a detail rarely seen on many models. Great progress, sir!
Brian D
-
 bdgiantman2 got a reaction from FriedClams in Mary of Norfolk 1790 by KenW - Pilot Boat
If by "shaded" you mean colored and looking older, I have heard of modelers using tea or coffee to color the fabric. I think it was short submerges and let dry until you get a color desired.
Brian D
-
bdgiantman2 reacted to Stuntflyer in Sloop Speedwell 1752 by Stuntflyer (Mike) - Ketch Rigged Sloop - POF
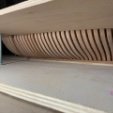
I've been moving right along on the aft cant frames. Just like the fore cants, there is a long span between the upper and lower attachments which results in some flexing. To stiffen things up I placed chocks between the frames. This will help greatly to keep the frames from breaking loose while fairing. The chocks were placed in the area between upper wale and the lower planking strake. They will be completely hidden.
Mike