KeithAug
-
Posts
3,985 -
Joined
-
Last visited
Content Type
Profiles
Forums
Gallery
Events
Everything posted by KeithAug
-
 Hmmmm! A river cruise is suddenly off the bucket list.
- 238 replies
-
- 4
-

-
- leviathan
- troop ship
- (and 2 more)
-
Well done Patrick - it is testament to you skills that you have made such a good looking silk purse out of a sows ear.
-
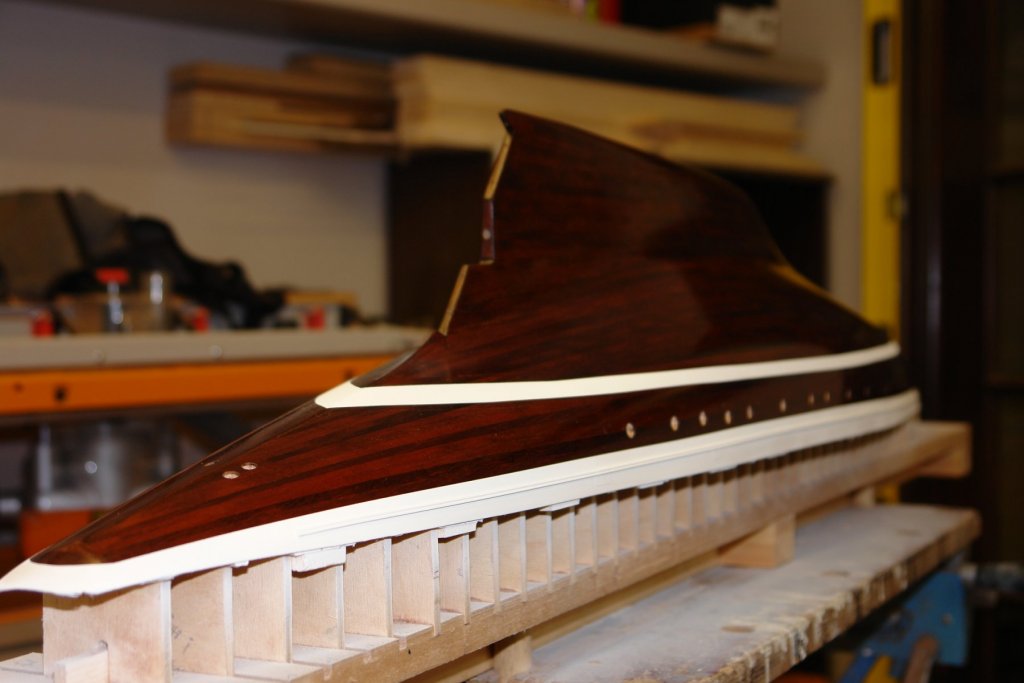
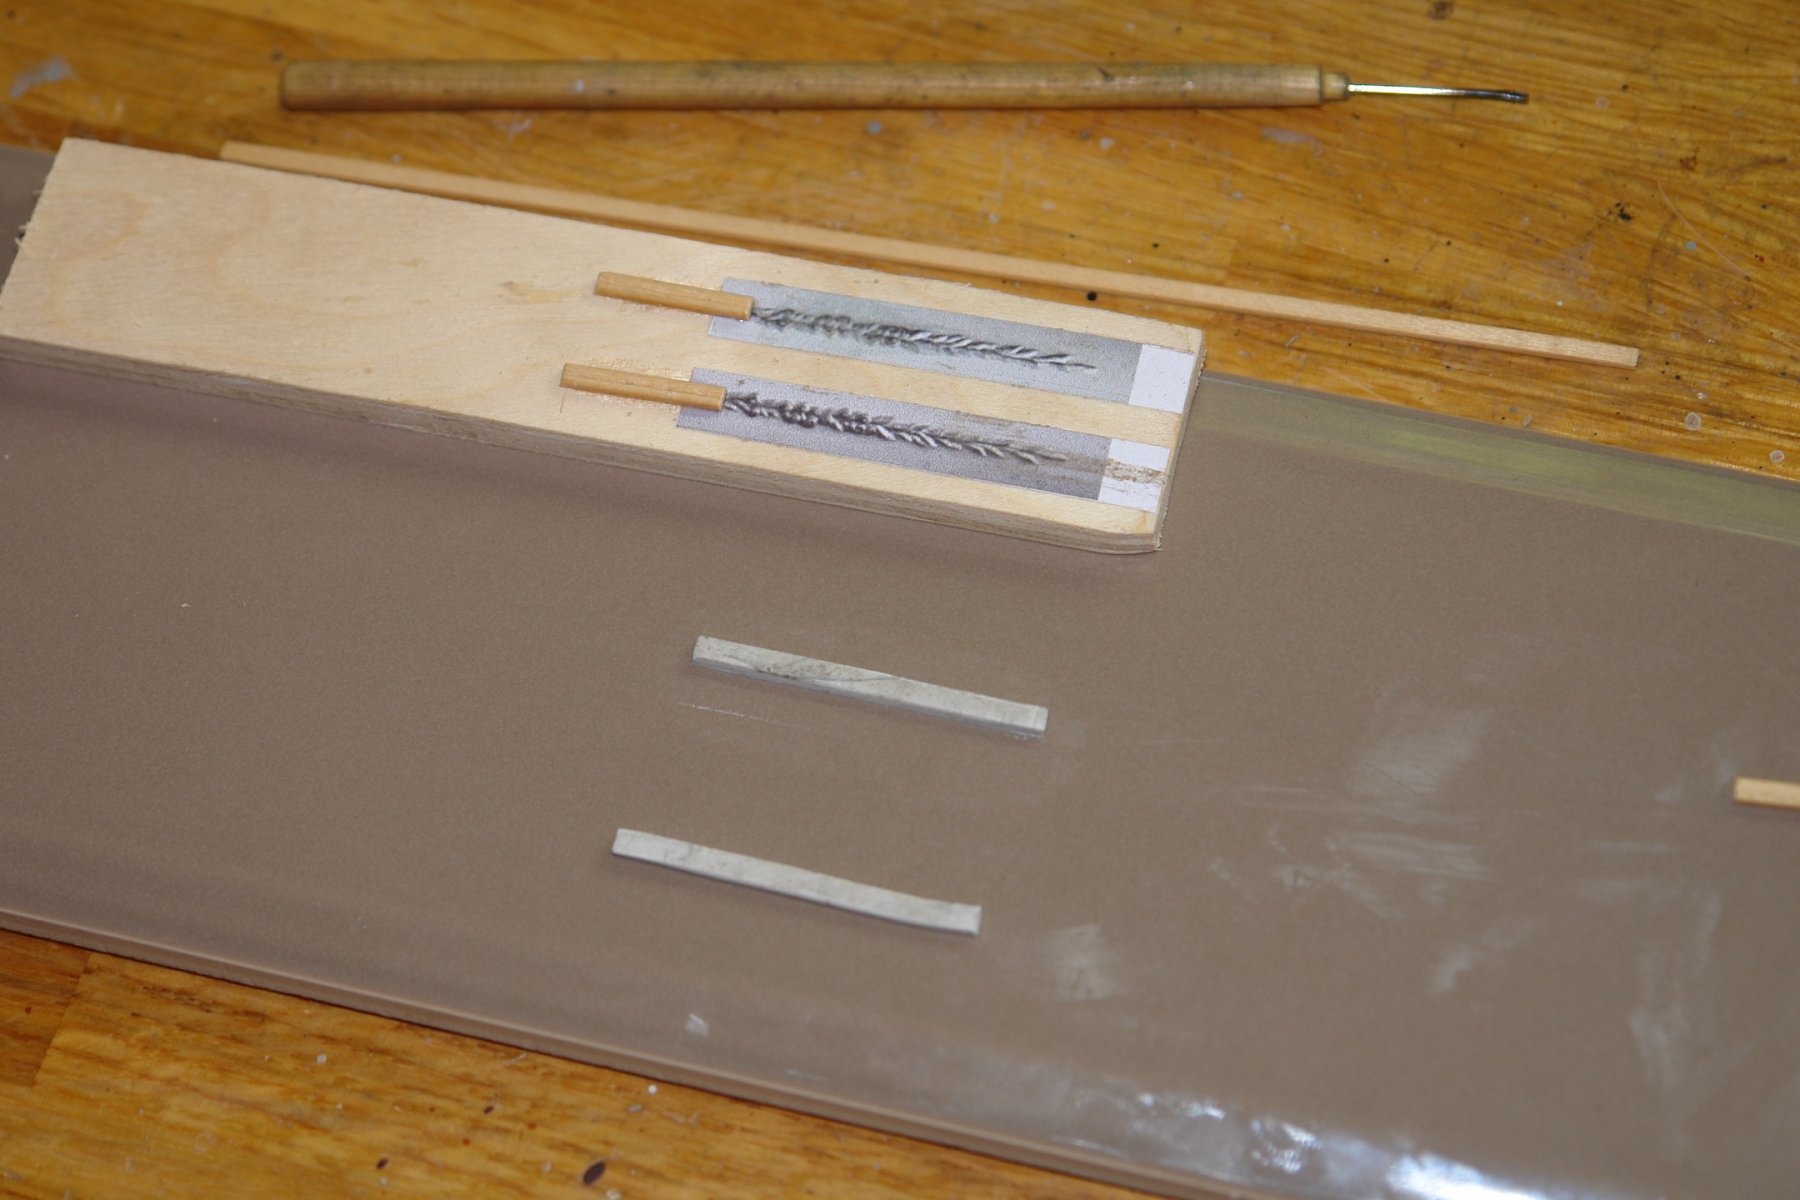
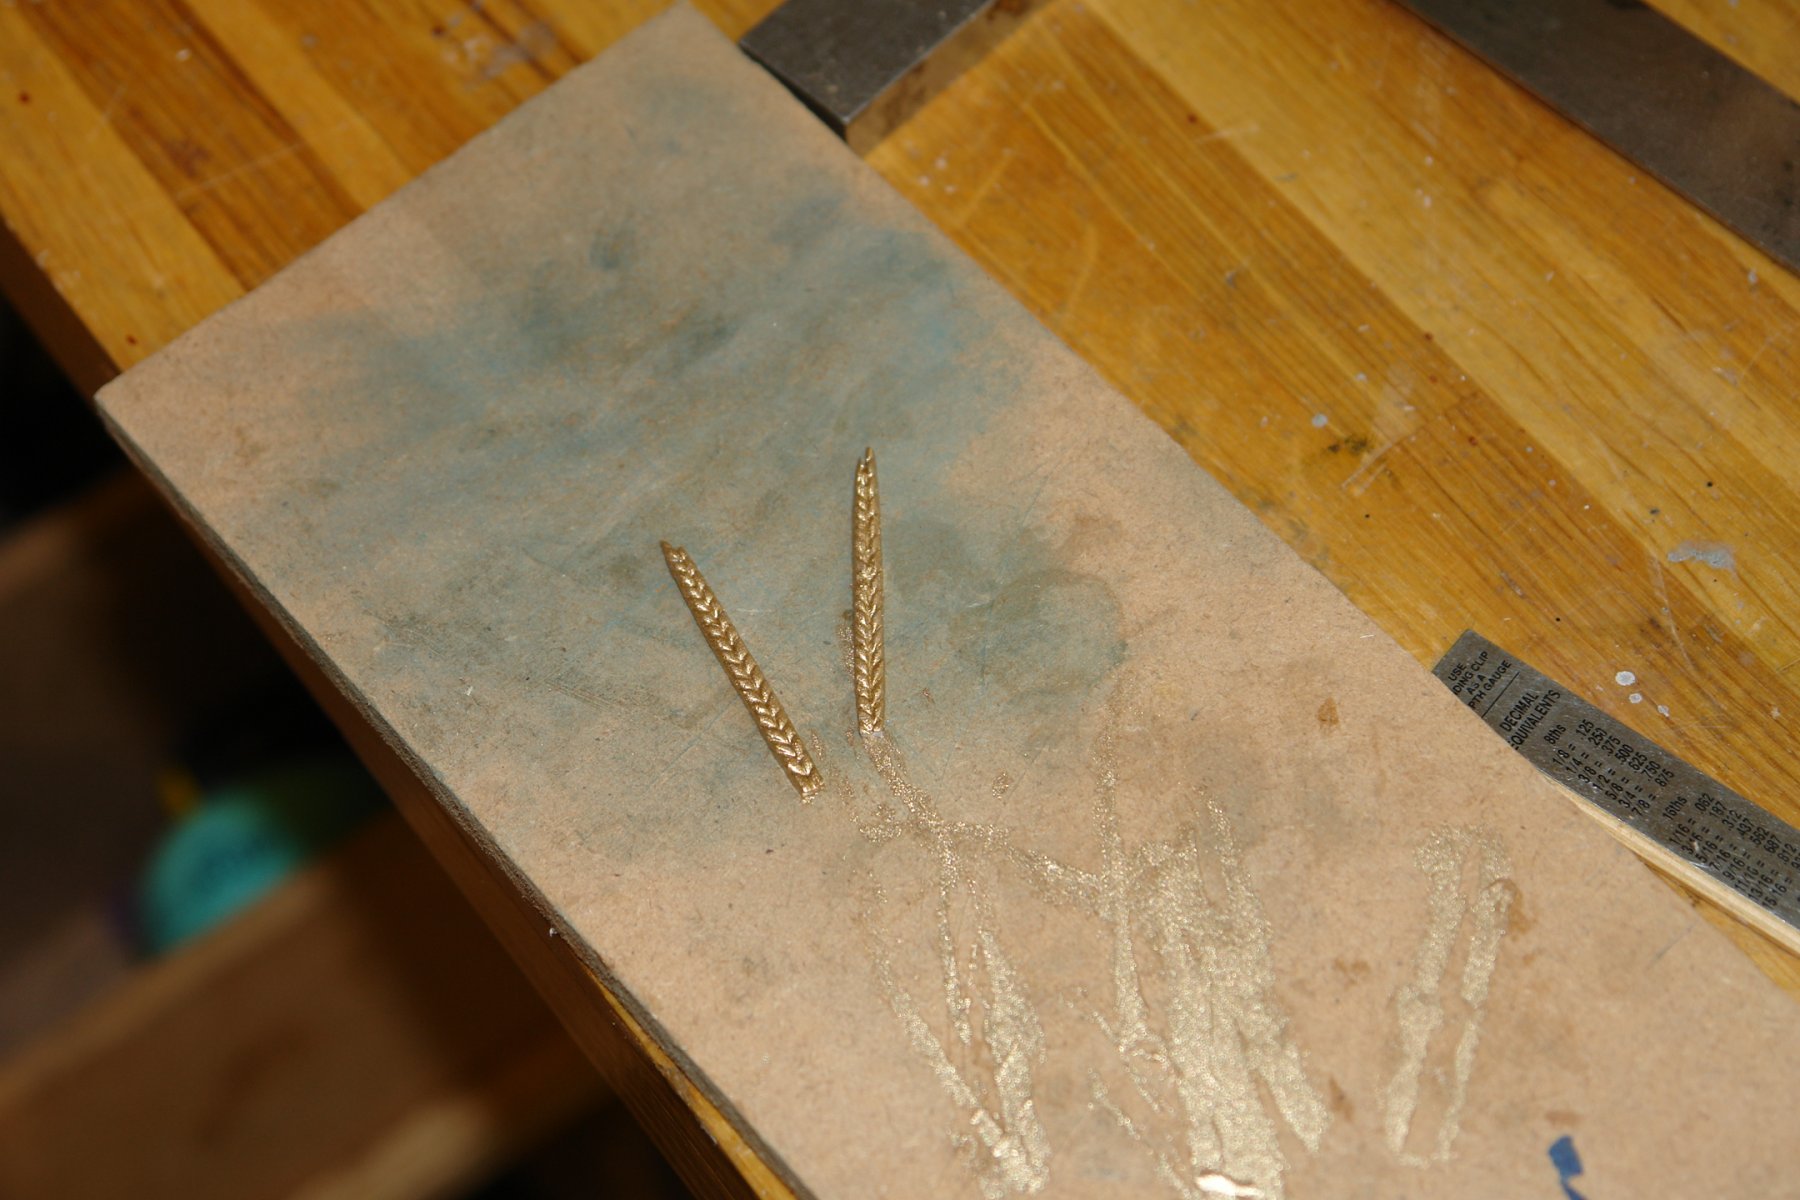
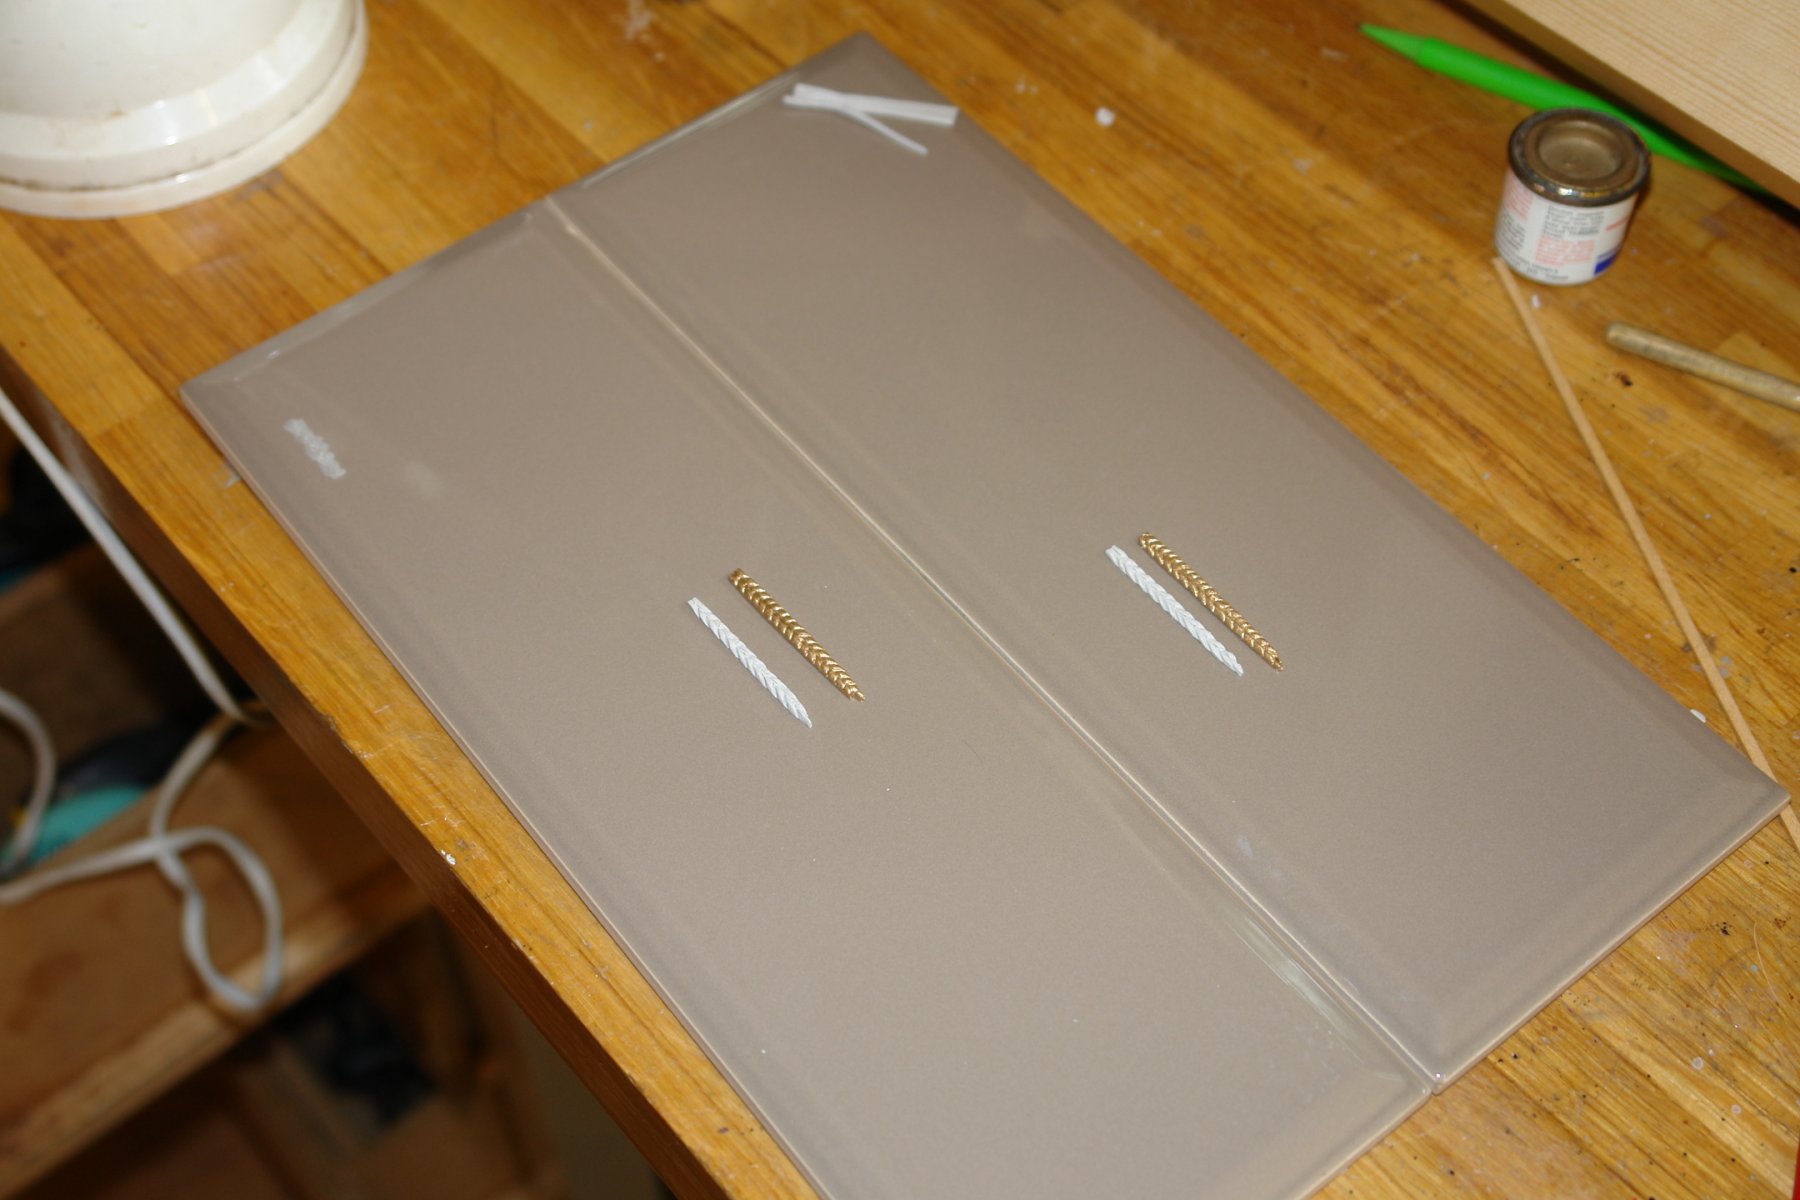
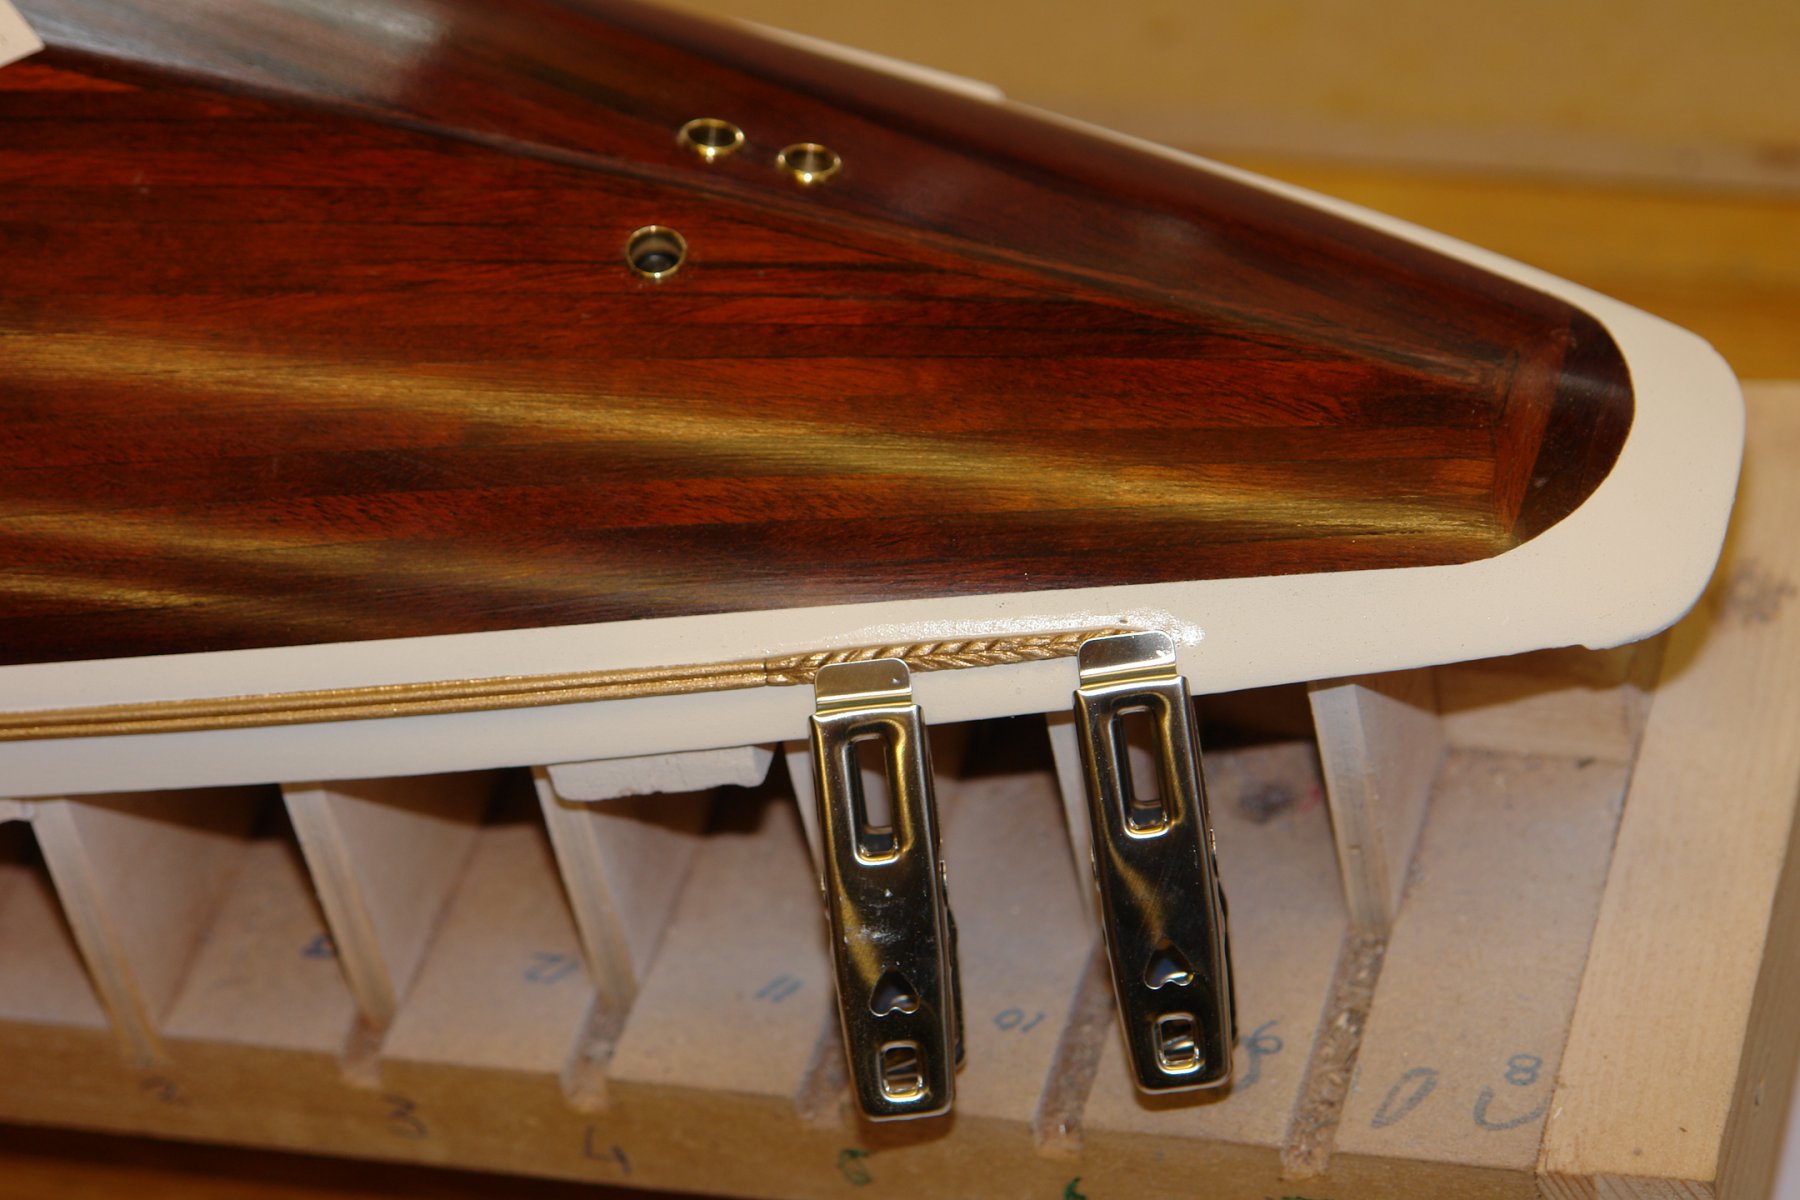
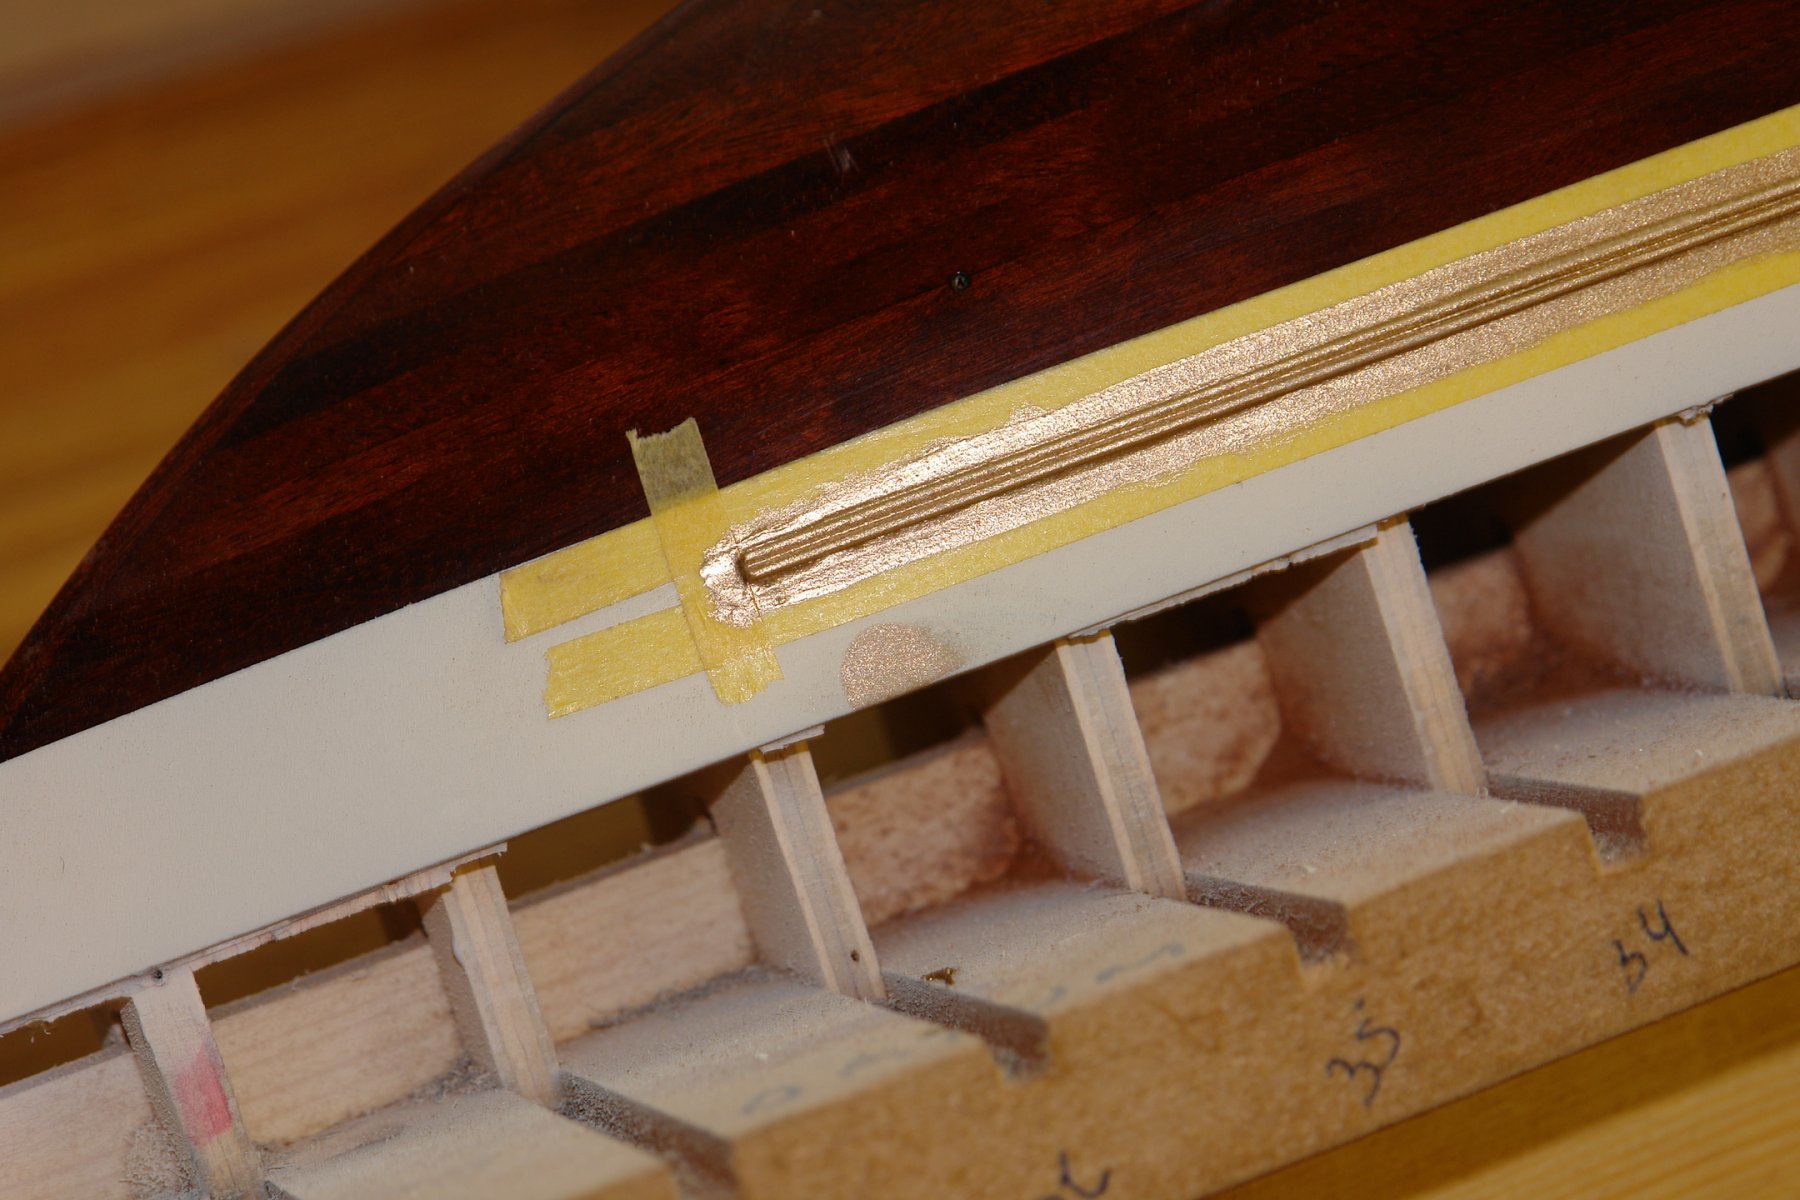
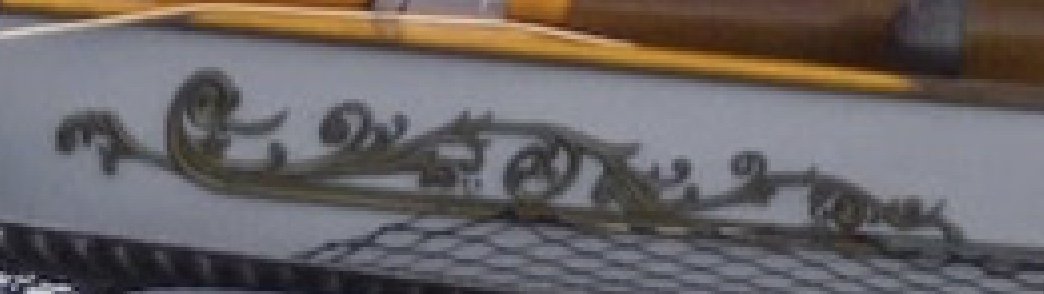
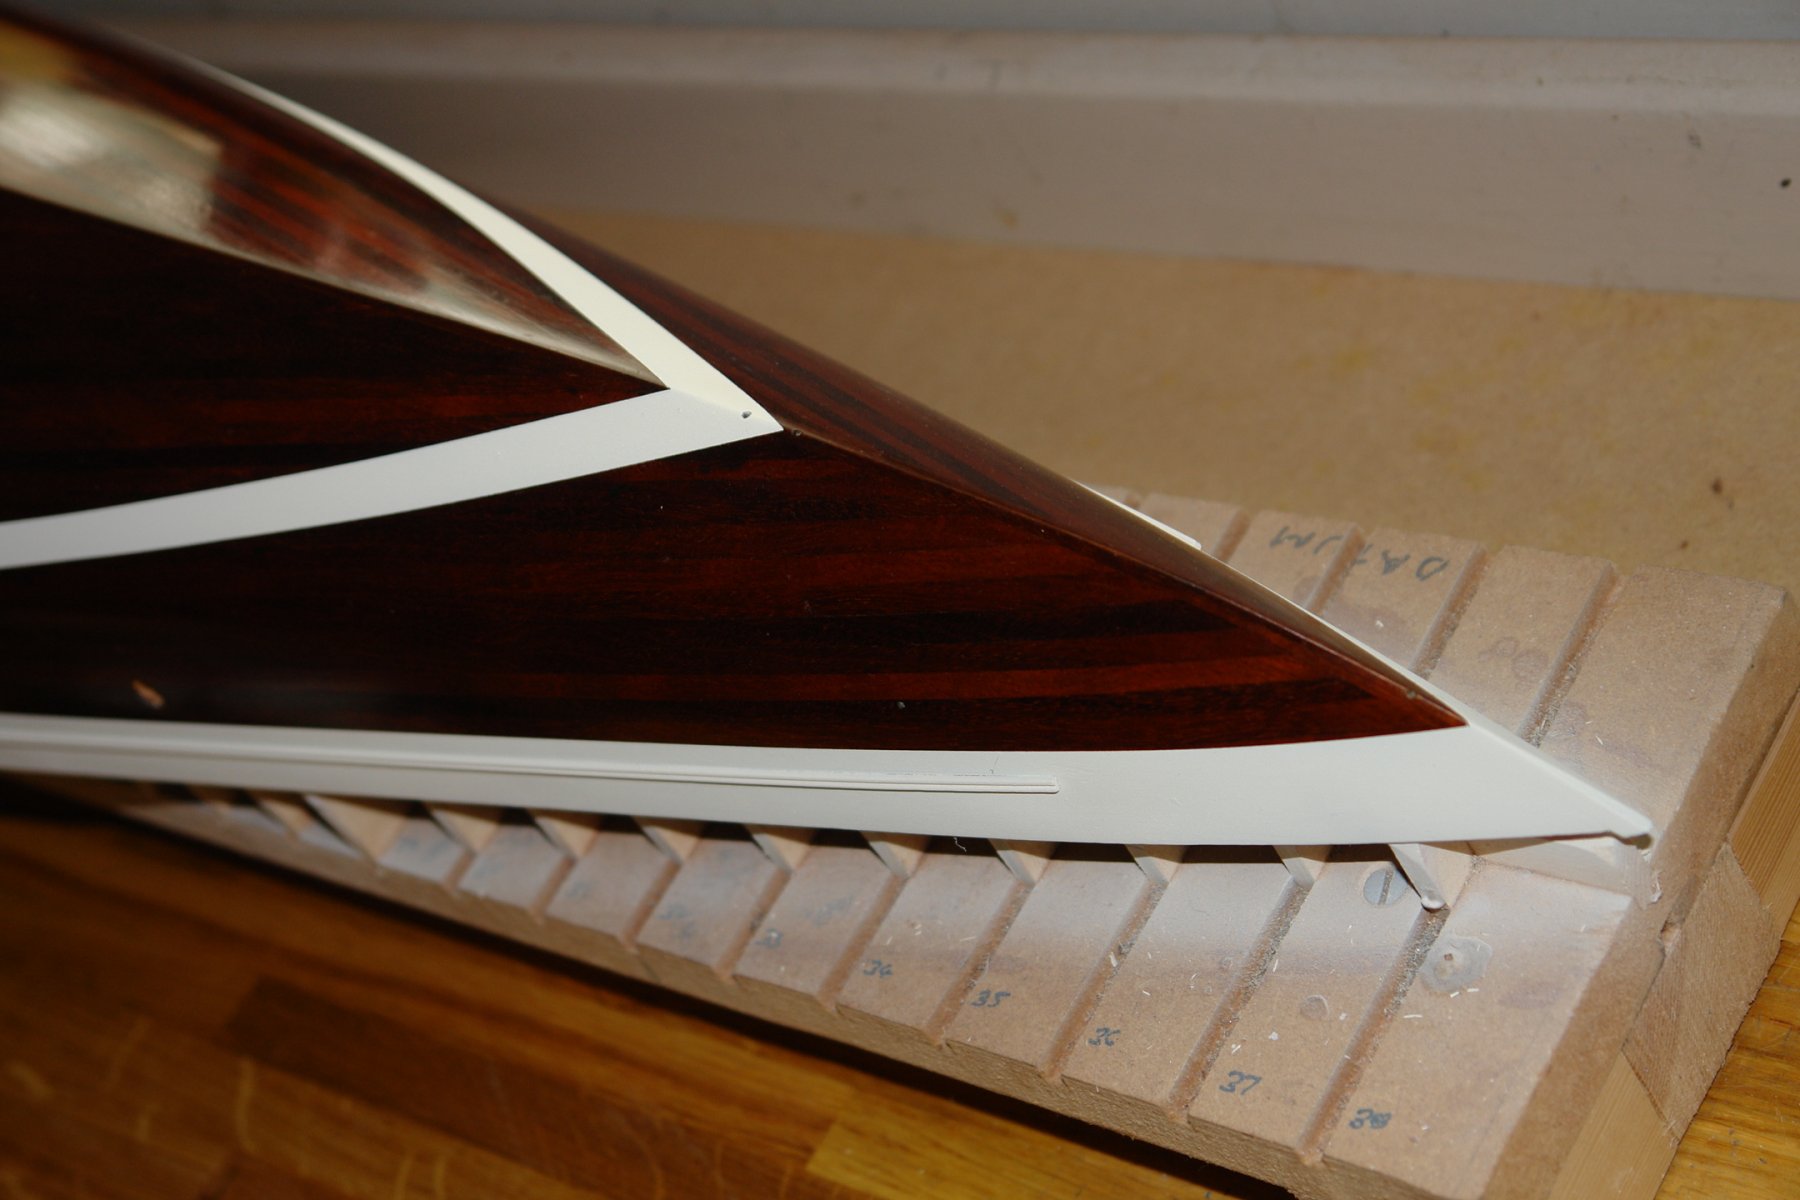
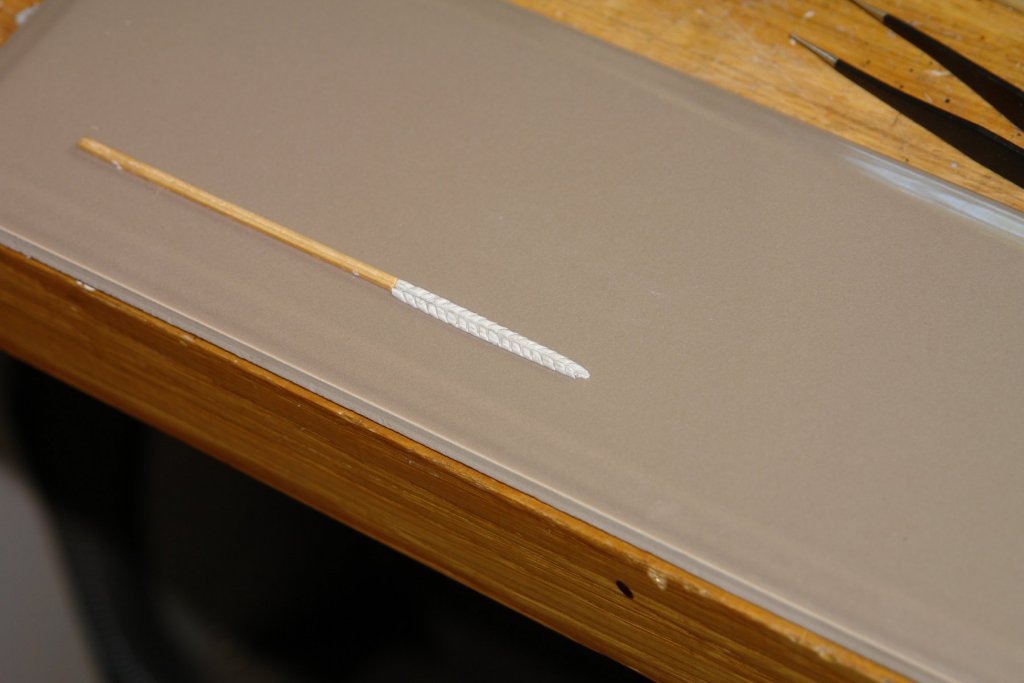
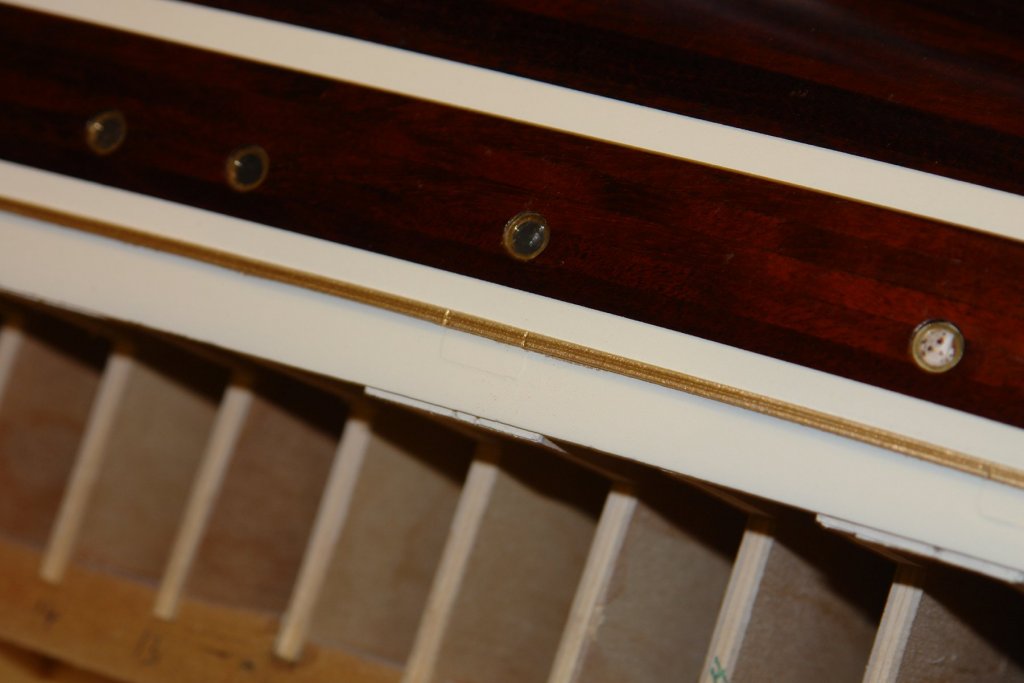
Roger - sounds interesting. I have not tried photo etch yet but may revert to this idea if other ideas fail me. Druxey. I was thinking of a variation on this - using wire to make the scrolls and adding the Fimo to show some of the detail. Eberhard - Yes, another interesting option. I will be very interested to see how it goes. Patrick - I cant remember that far back!!!!!!!!!!!!!!!!!!!! But I think the hull is much less interesting. I am still finding that the weather is keeping me out of the workshop. Whatever happened to the traditional British summer gone? Over course of a few hours I had a go at the decoration at the stern end of the rubbing strip. this was always going to be the easiest bit (despite my non existent Fimo skills). After trying a bit of unsuccessful freehand modelling I realised that I needed to start off with identical starting points, I rolled a piece of Fimo to the desired thickness and cut 2 strips of equal width and length. I found a spare ceramic tile was a good surface to work on and this had the added advantage that I could put it in the oven to cure. I pressed a longitudinal line into the Fimo and then created the leaf shapes by pressing in chevron lines with the end of a scriber. After baking in the oven I gave the decoration a couple of coats of gold enamel. At this stage I decided that the decoration was a bit too wide which made it look heavy when offered up to the hull. I therefore repeated the exercise using thinner strips of Fimo. I think with more practice I can do better, but for a first attempt I was satisfied and therefore mounted the decoration on the hull by clamping it in place and then running a bead of CA glue around the edge. I also started the experiment on the forward decoration, thus far without much success.


-
Poor thing - but I bet he had a good life.
-
Eberhard - yes, I am well aware of the skills of Doris. I think the best bet is to employ a Doris. Bruce - its new to me - Thank you I will add it to my birthday list. Roger - yes that's an option - not sure how it will cope with the thicknessI need - about .040" Phil - the craving would be a bit too fine for my level of skill. Mark / Vaddock - thank you.
-
Kortes The only negative comment that I can direct at this build is that it is almost too perfect. I'm sure some idiot would have walked the deck in hob nailed boots but I cant see any signs of it??????
- 306 replies
-
- 6
-
-
- schooner
- la jacinthe
- (and 1 more)
-
Vaddock - Thank you. Their uniformity made me think you might have done something more complex. As ever on this site just a case of care attention and craftsmanship.
-
Nicely done Eberhard. I may copy your method of making / flaring the outboard end of the hawse pipes.
-
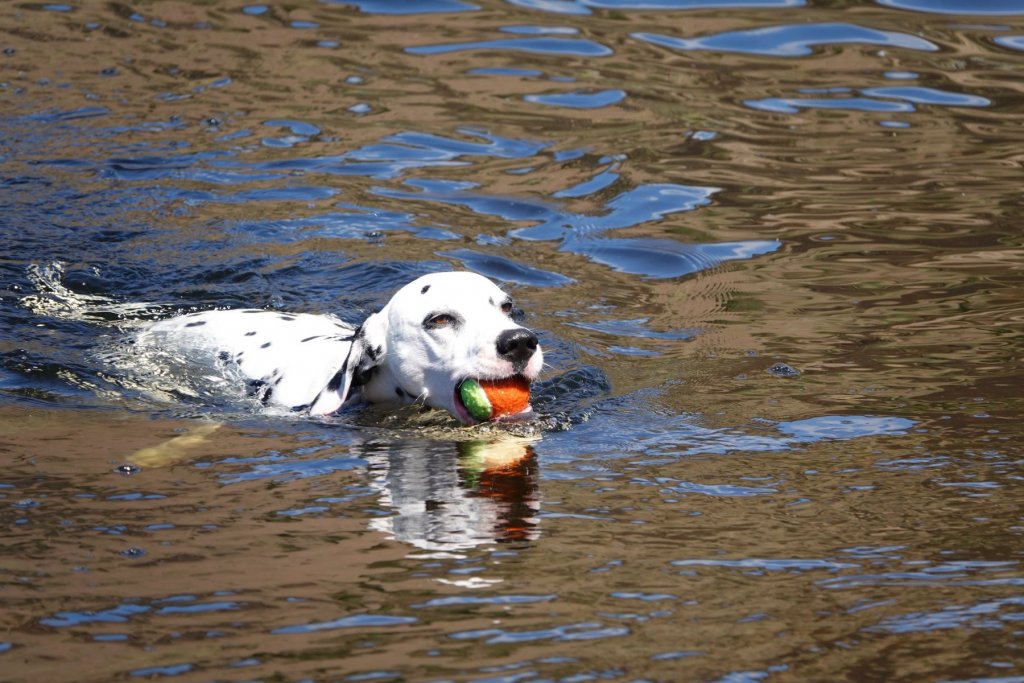
Beautifully neat work as usual Vossie. Nothing in life is certain - I bought a white dog and ended up with a spotty Dalmatian that thinks it's a seal.
- 714 replies
-
- 4
-
-
- lady nelson
- victory models
- (and 1 more)
-
Very neatly done Mark. Given your machine tool limitations you achieve remarkable results.
-
Paul I am tempted to say that I like the look of your knees - but I am fearful that this may be misconstrued!
-
Gary, It used to be like this when I started my sailing career, we went everywhere with a compass and a trailing log and never failed to reach our destination. In latter years we had more electronics than I knew what to do with and on one notable occasion found ourselves in fog sailing across a headland (on land) or at least that is what the GPS told us. Your wheelhouses is beautifully fashioned and elegantly simple. thank you for the heads up on Gallery Glass - i will store that away for future reference.
-
Patrick, That's more like it - plastic plants - just what I would expect from the owner. I enjoyed catching up and share your misery that the build is coming to an end - never mind every end is just a new beginning.
-
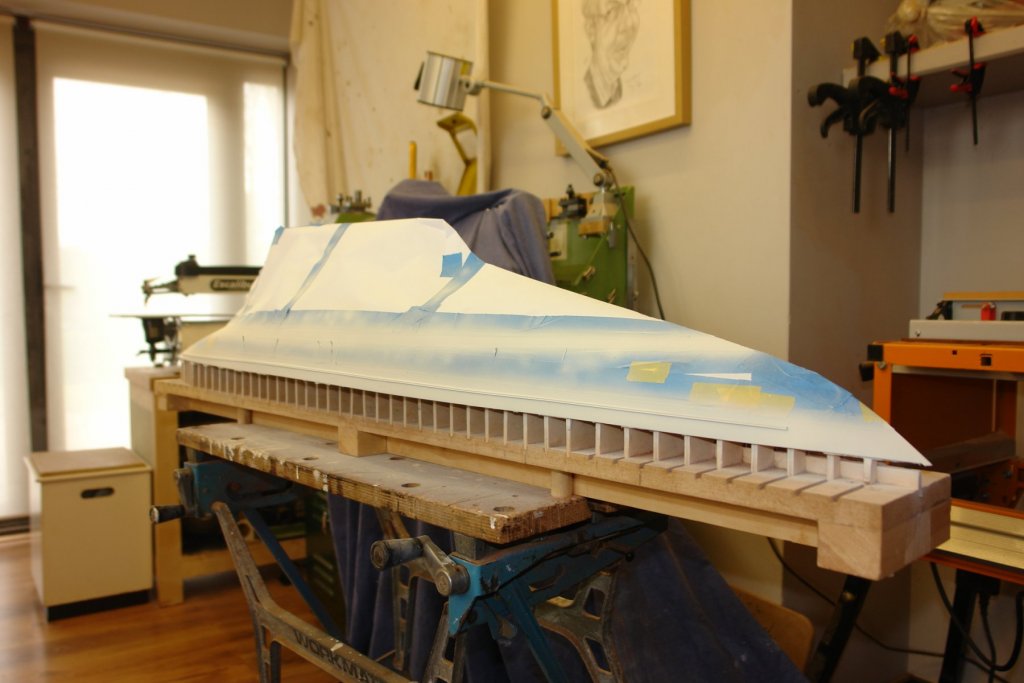
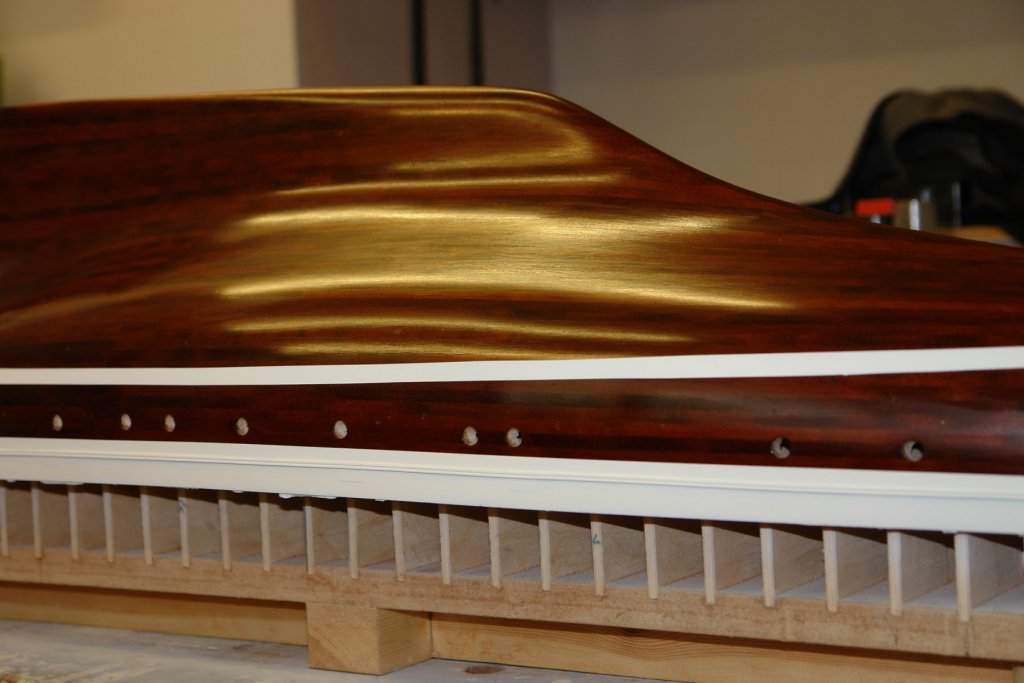
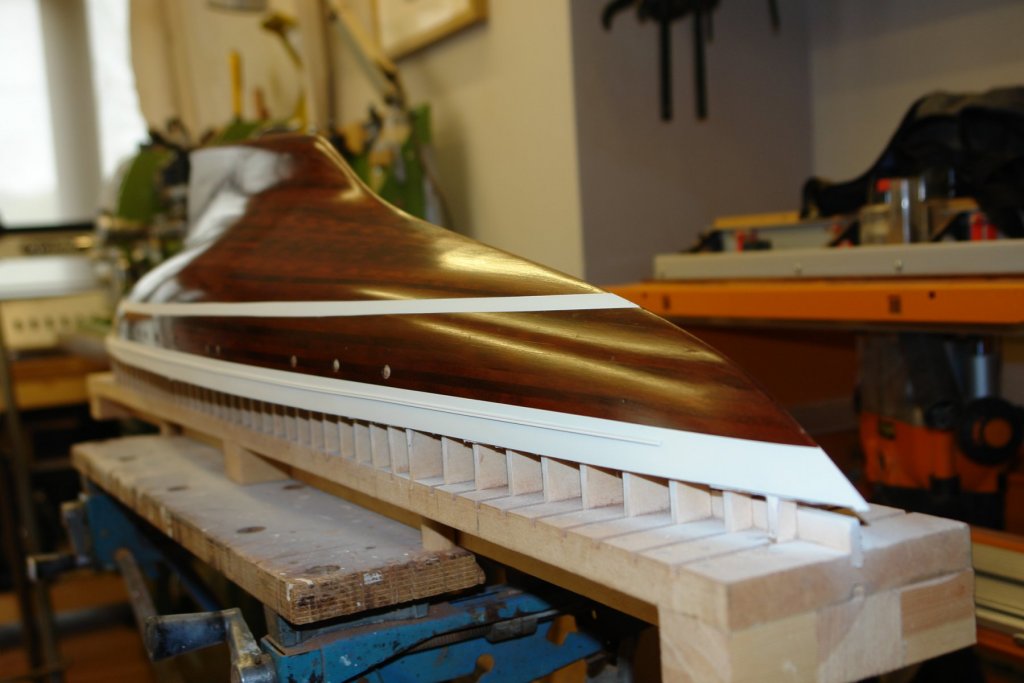
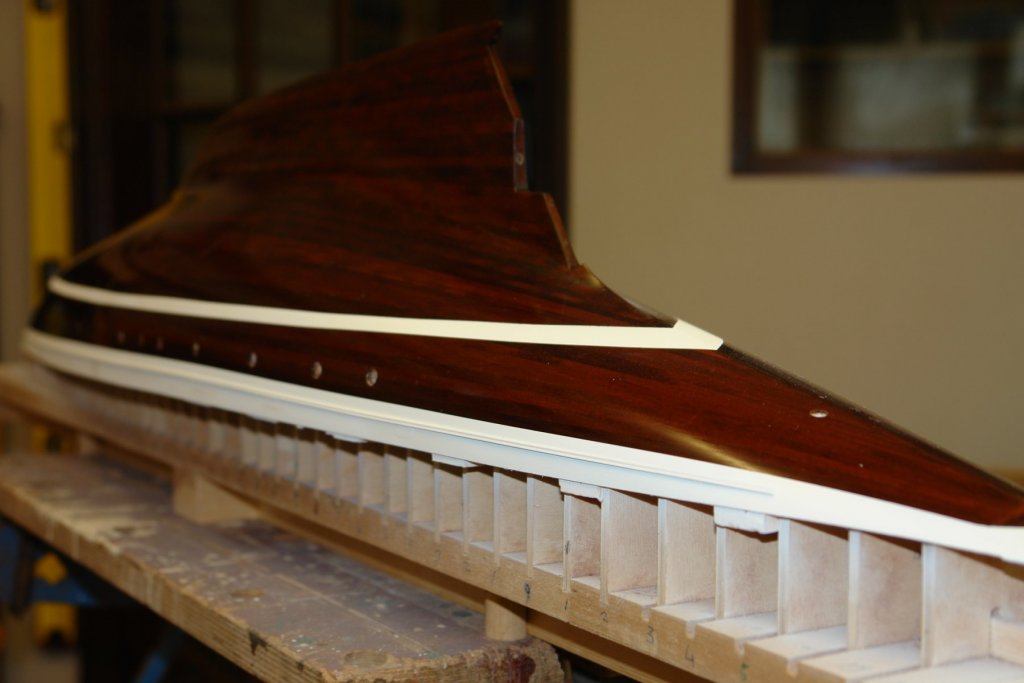
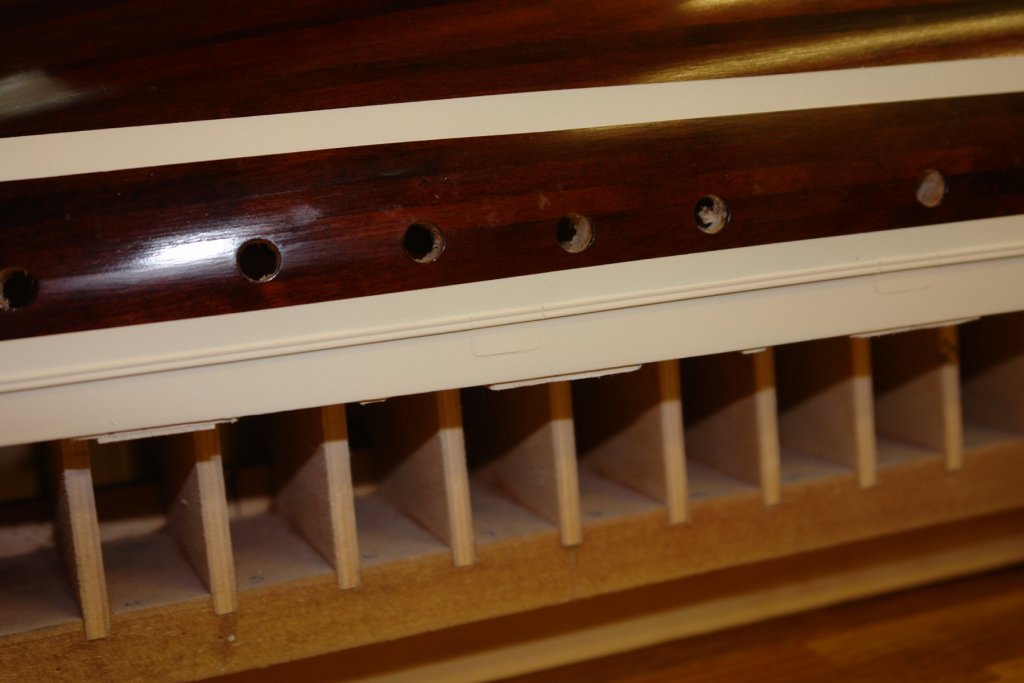
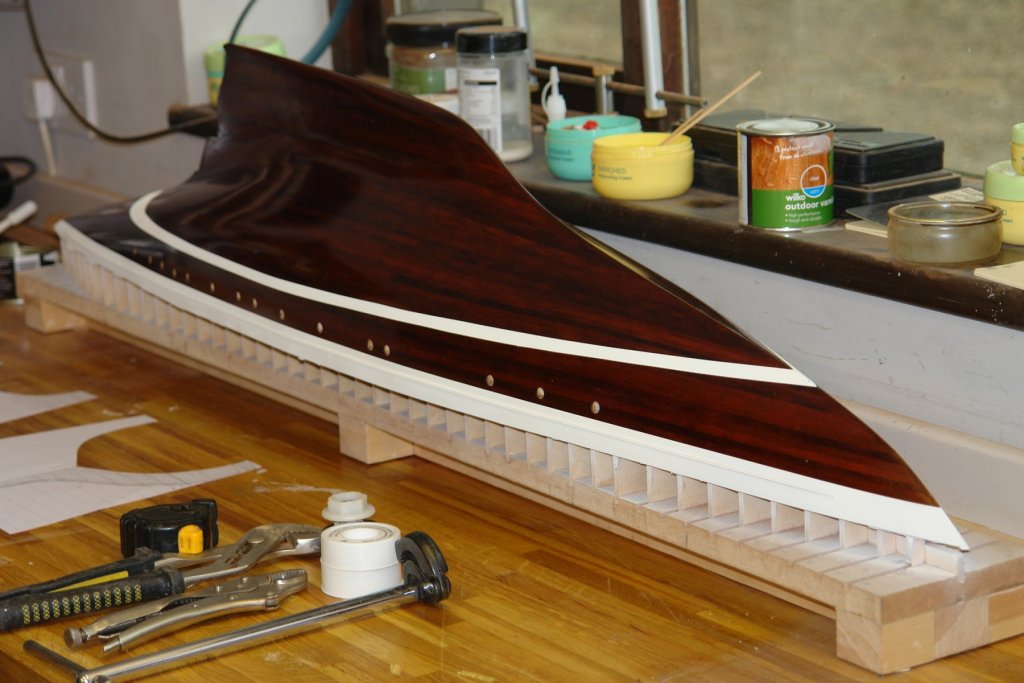
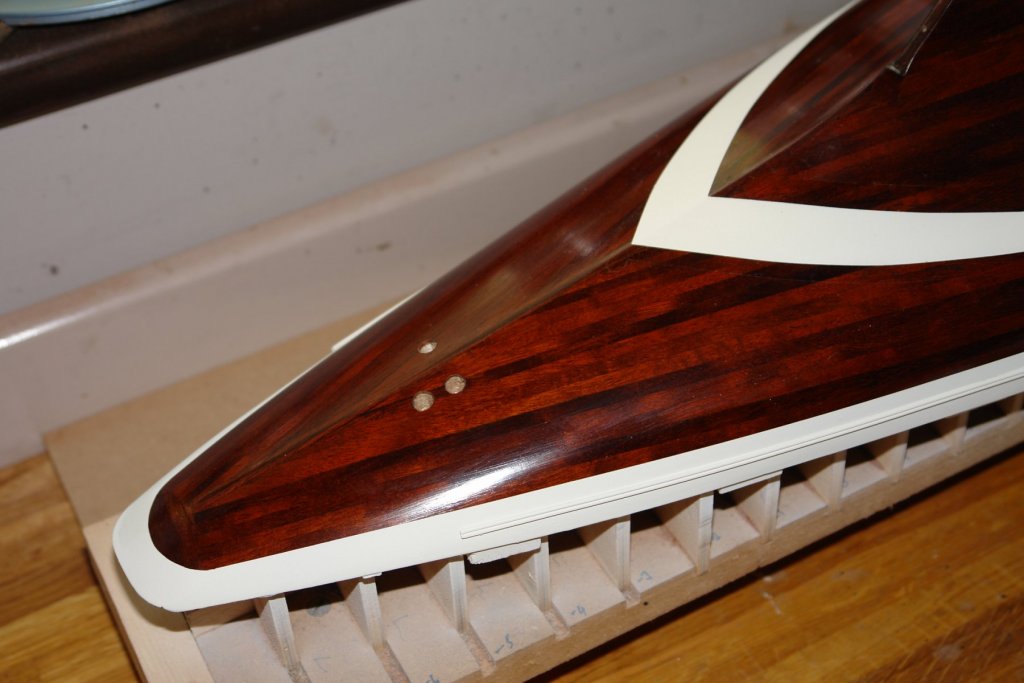
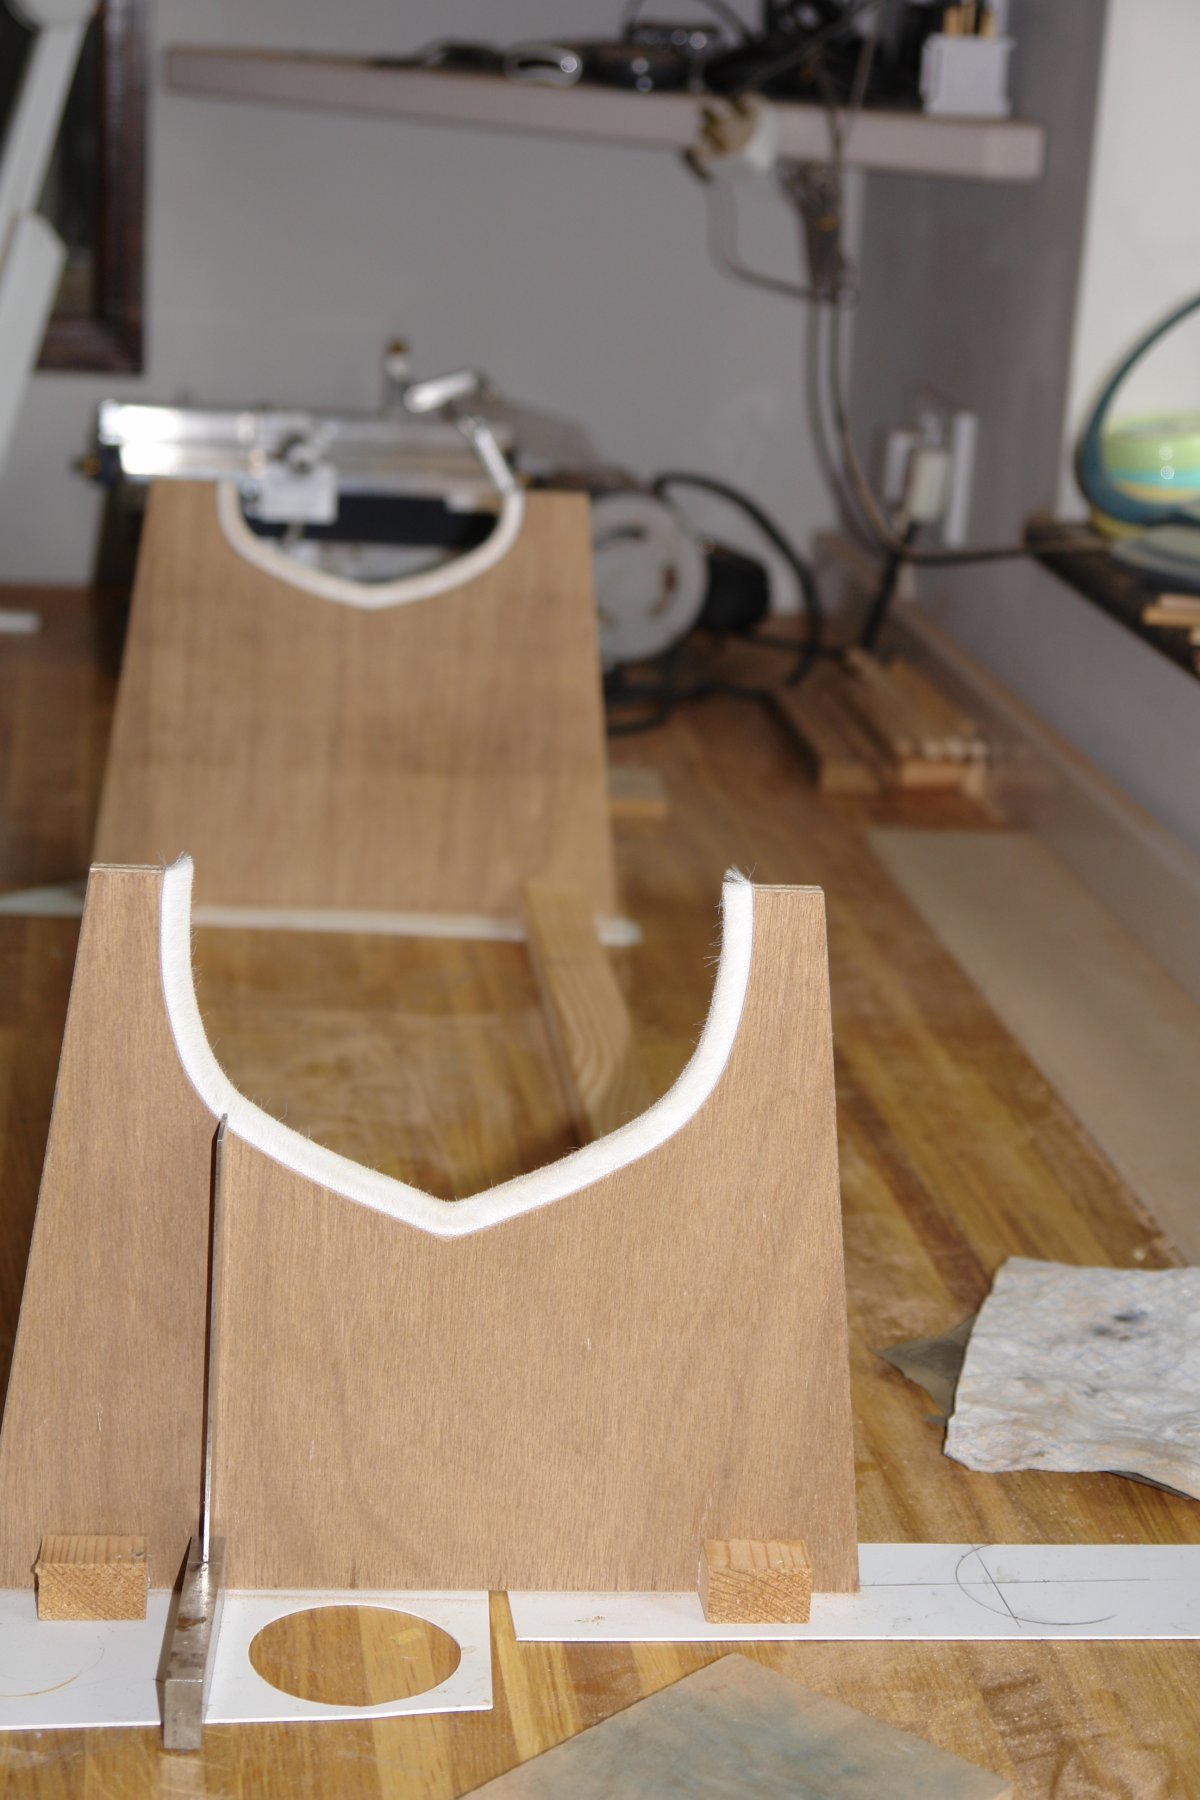
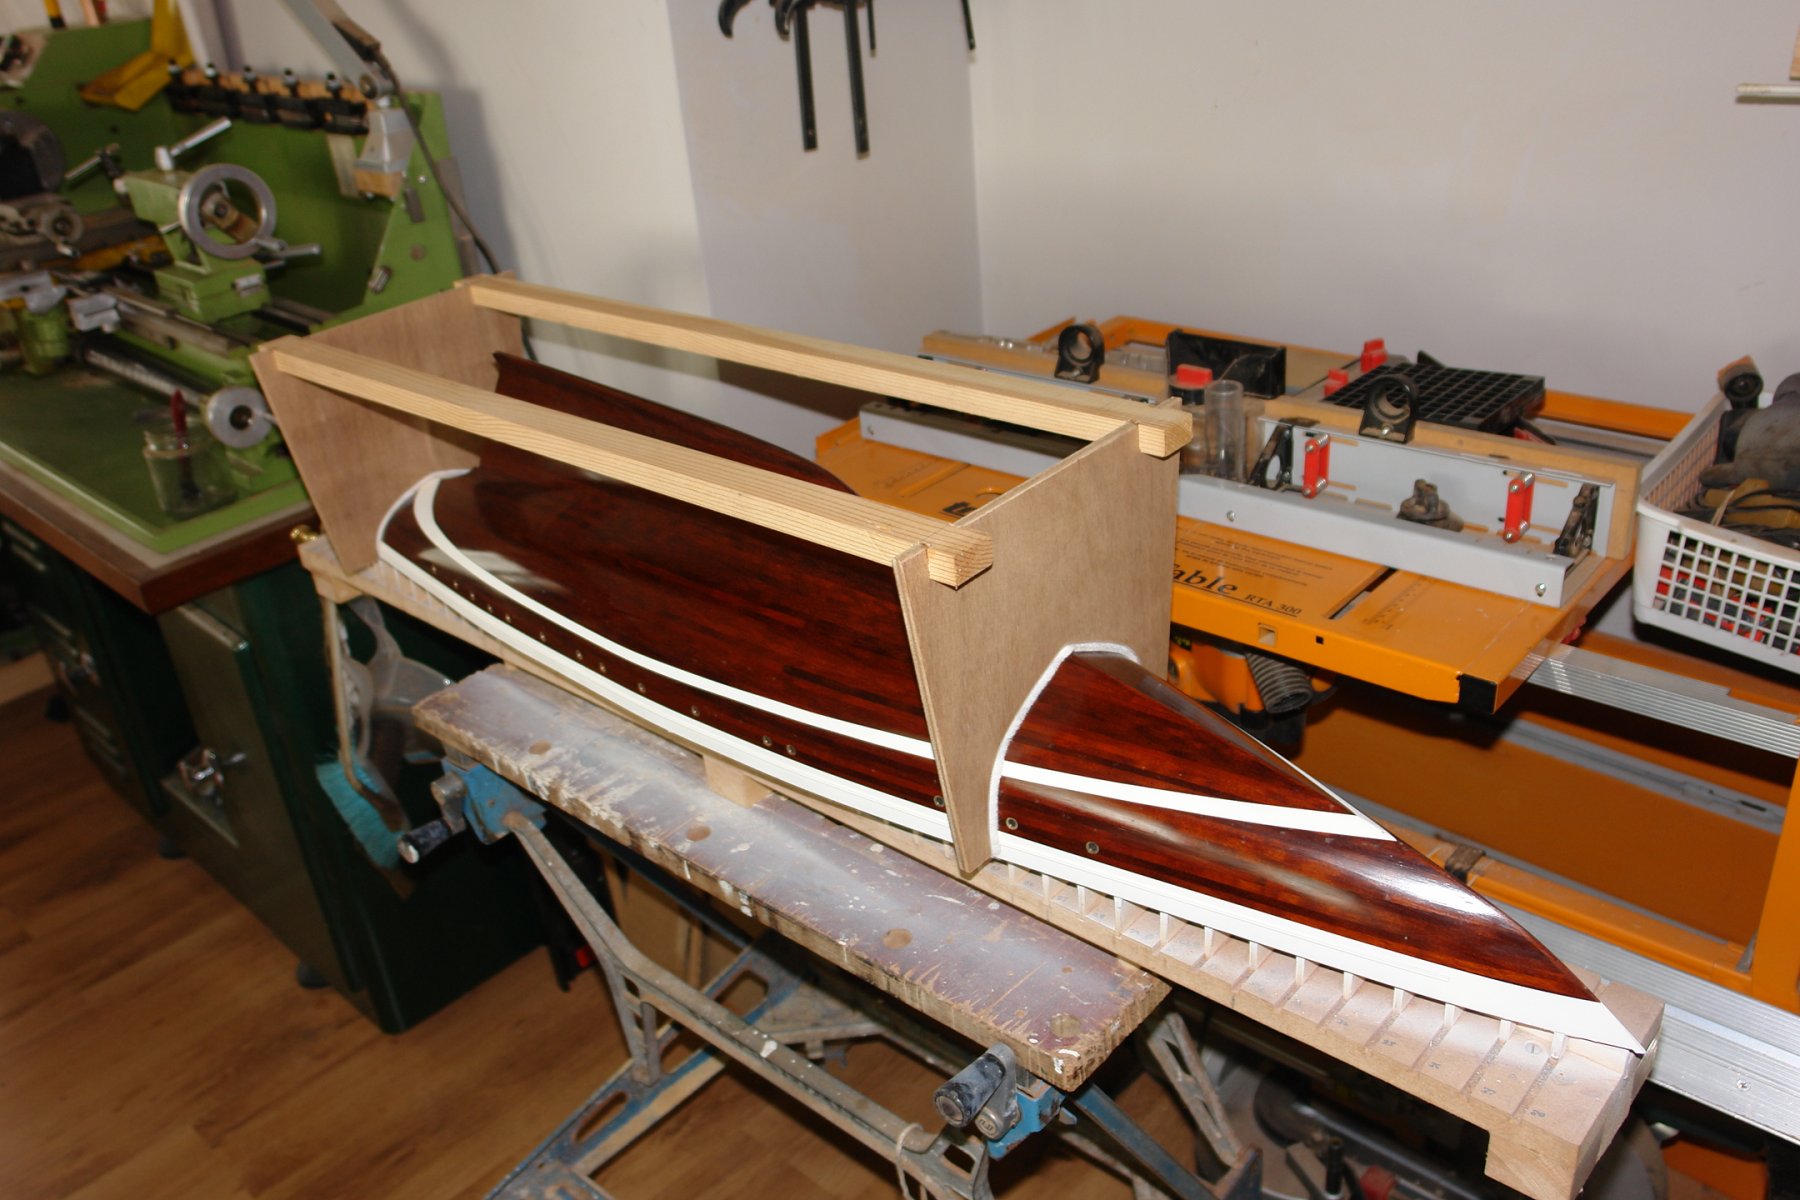
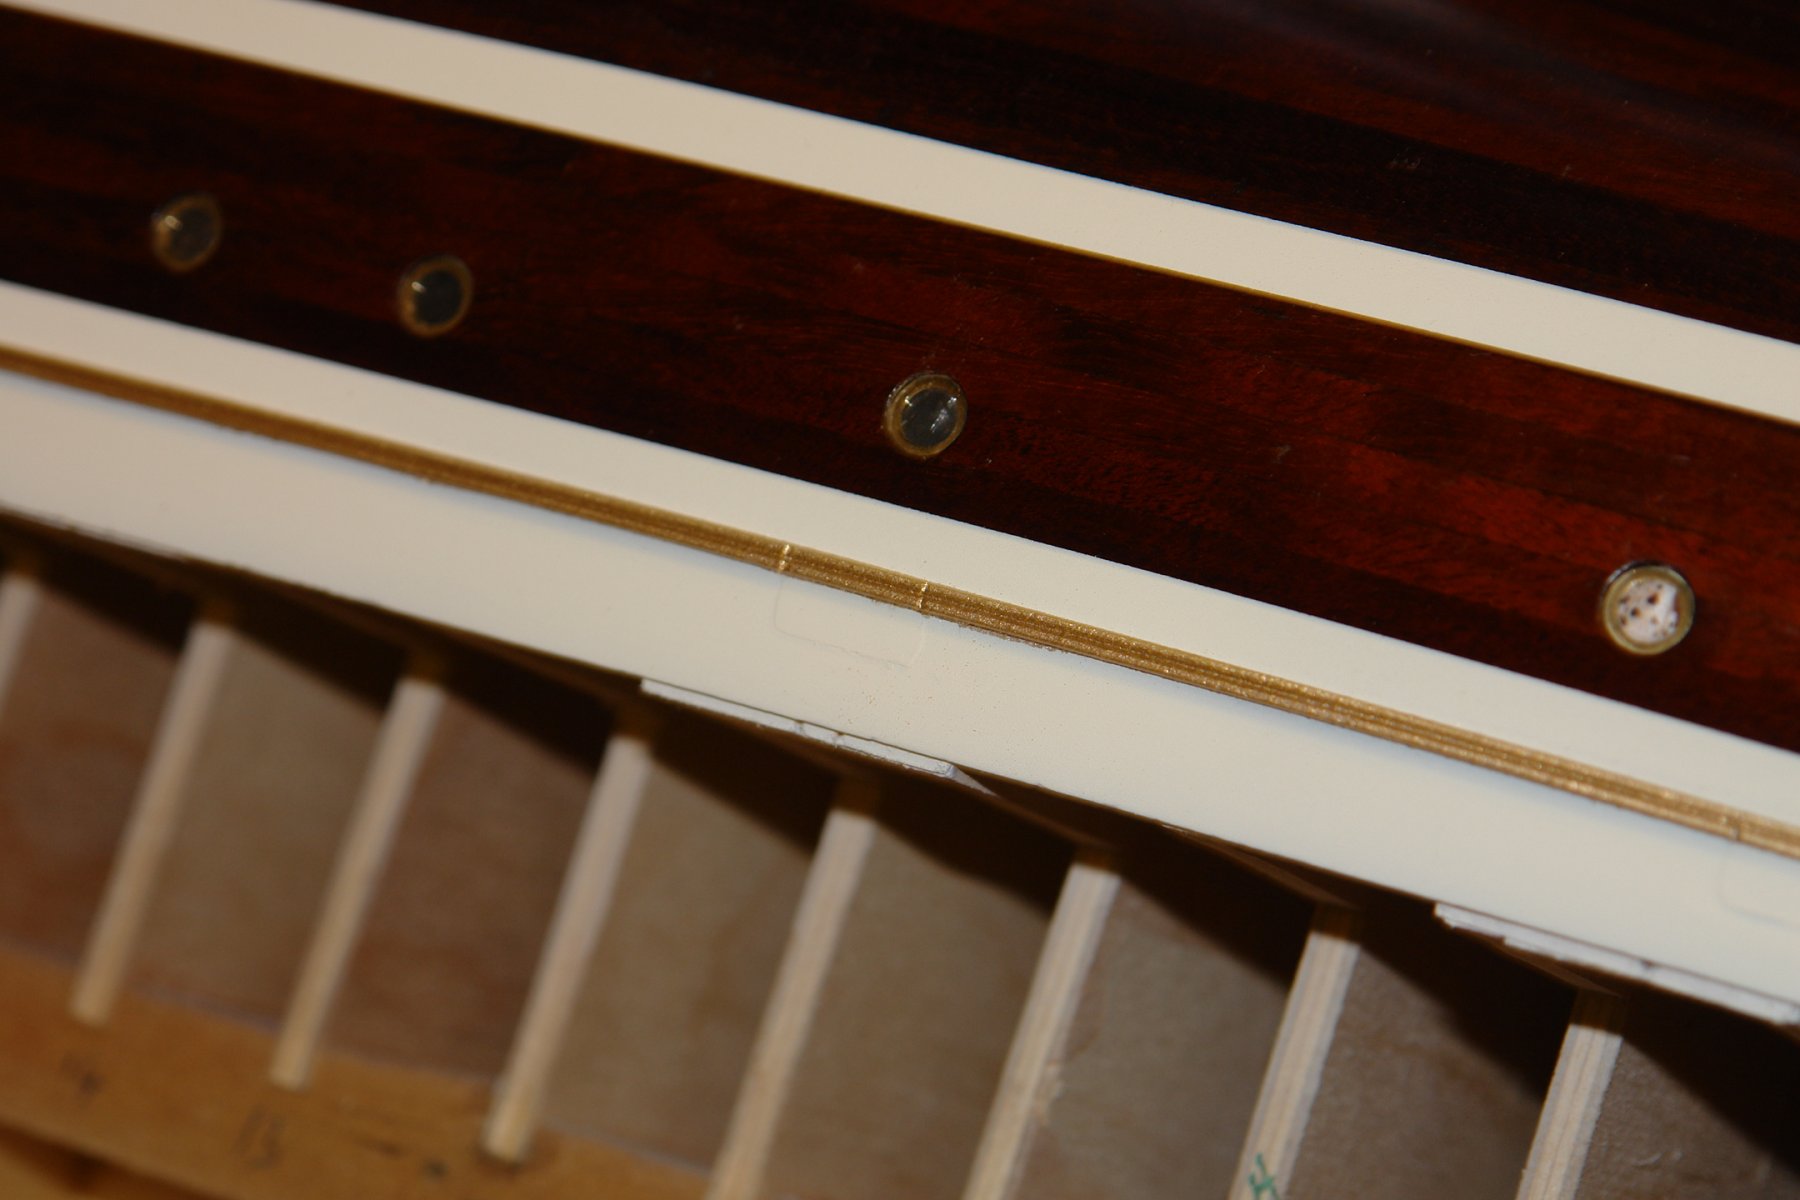
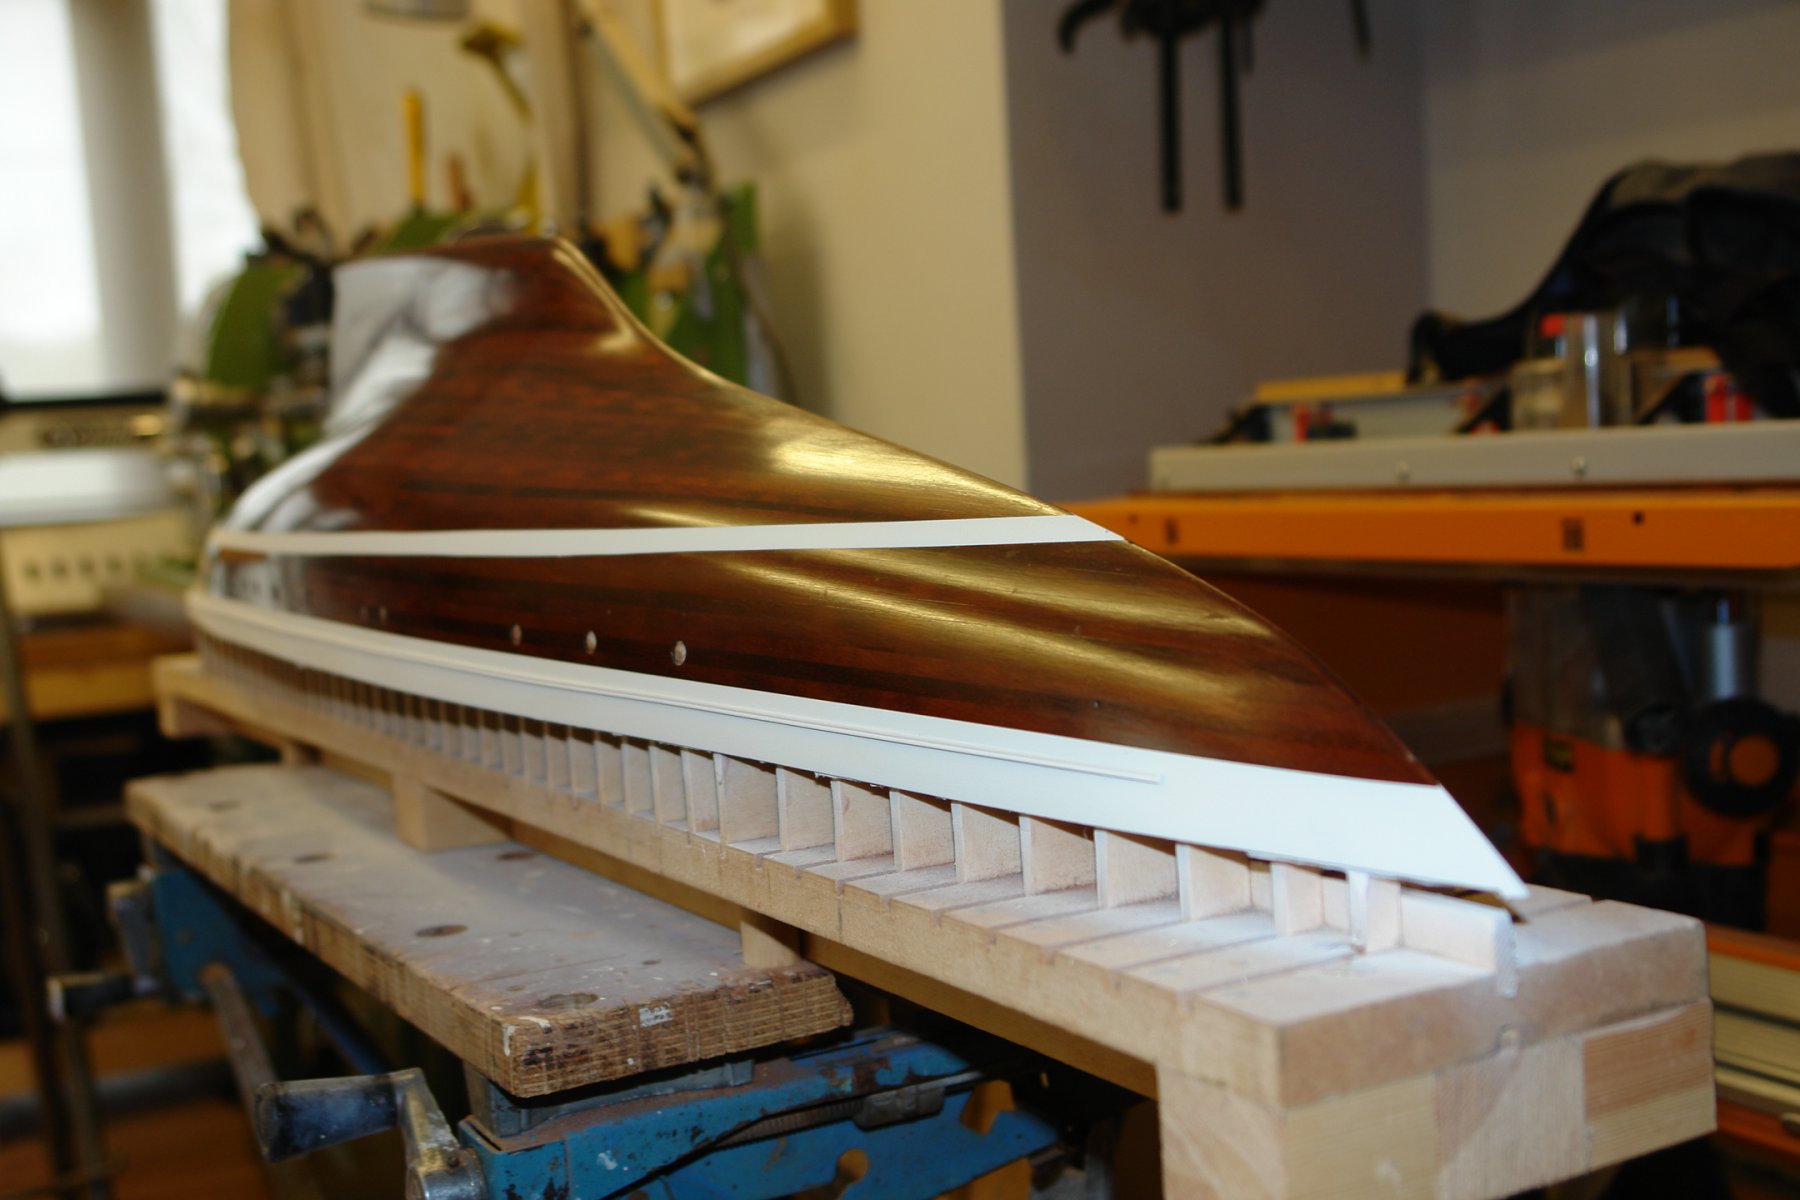
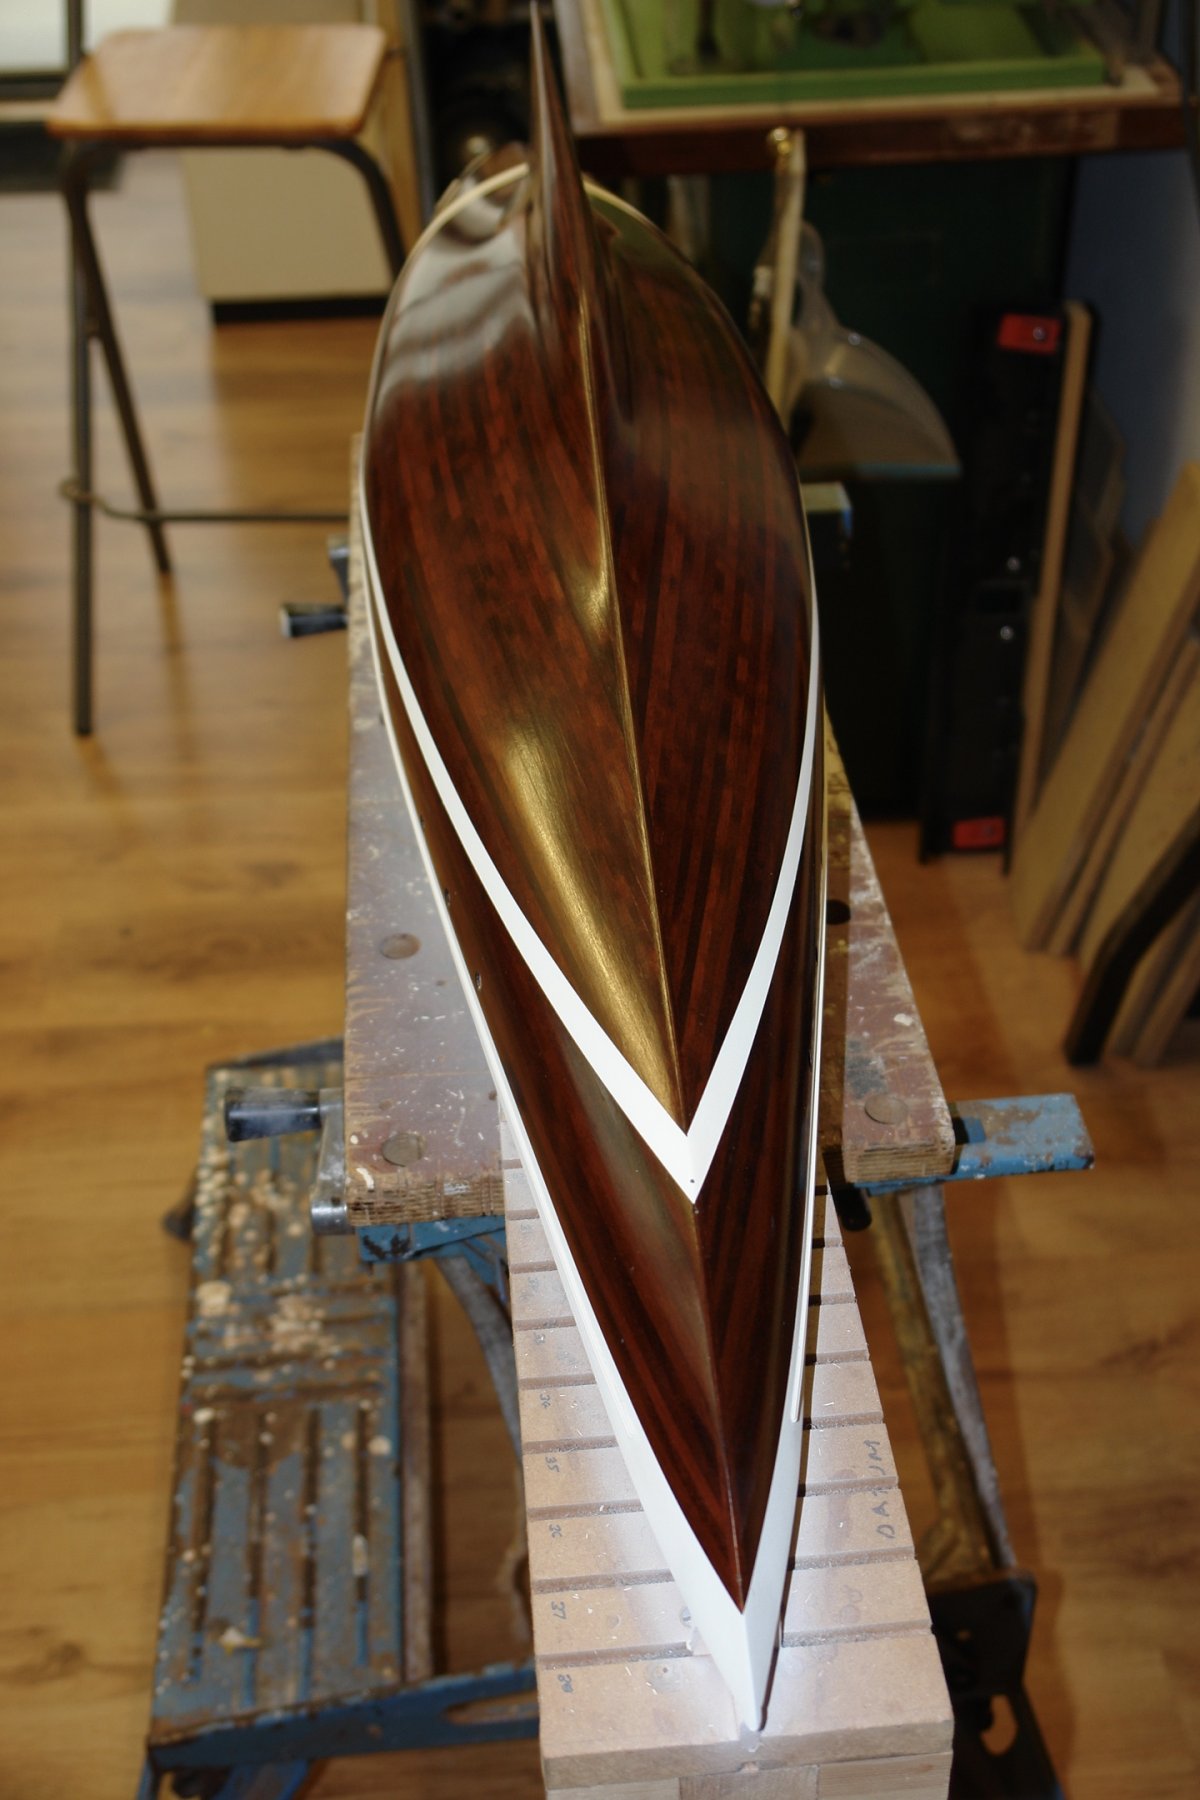
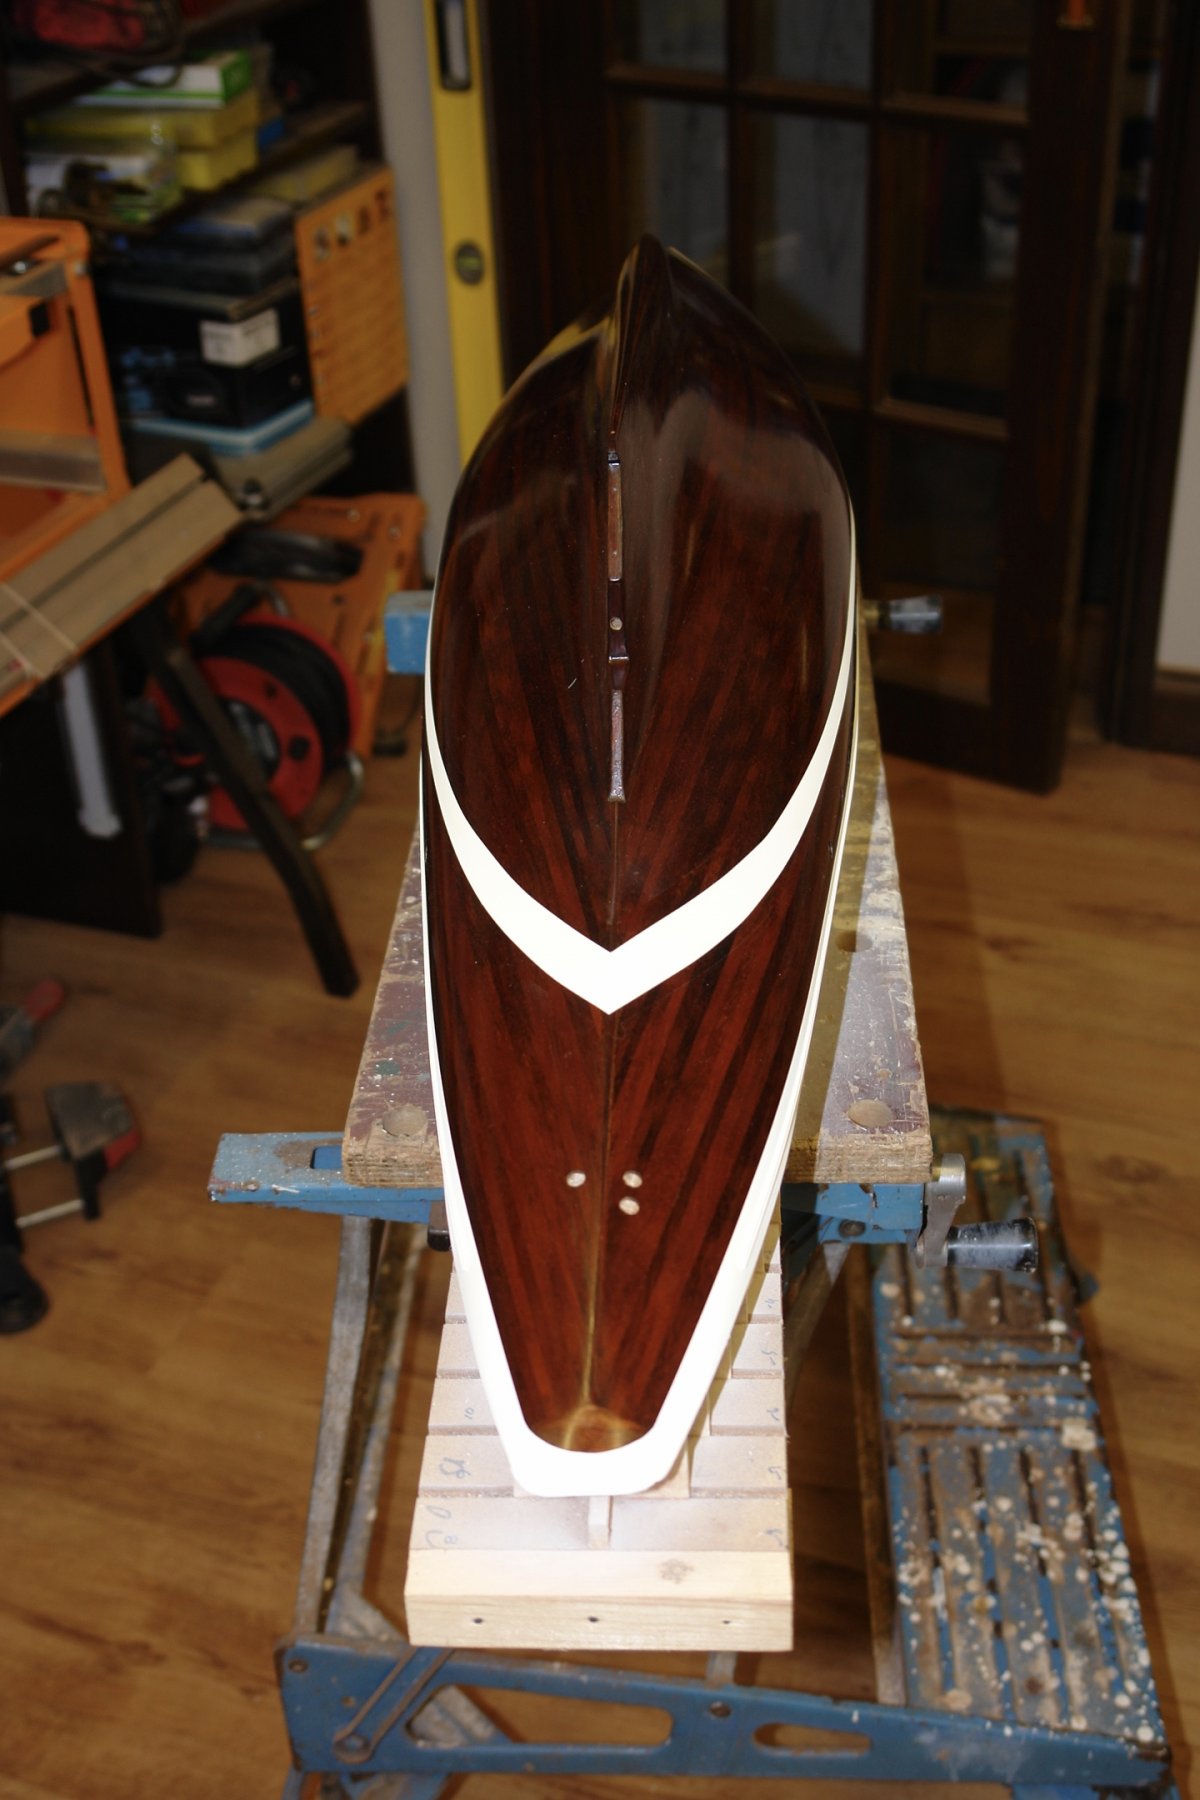
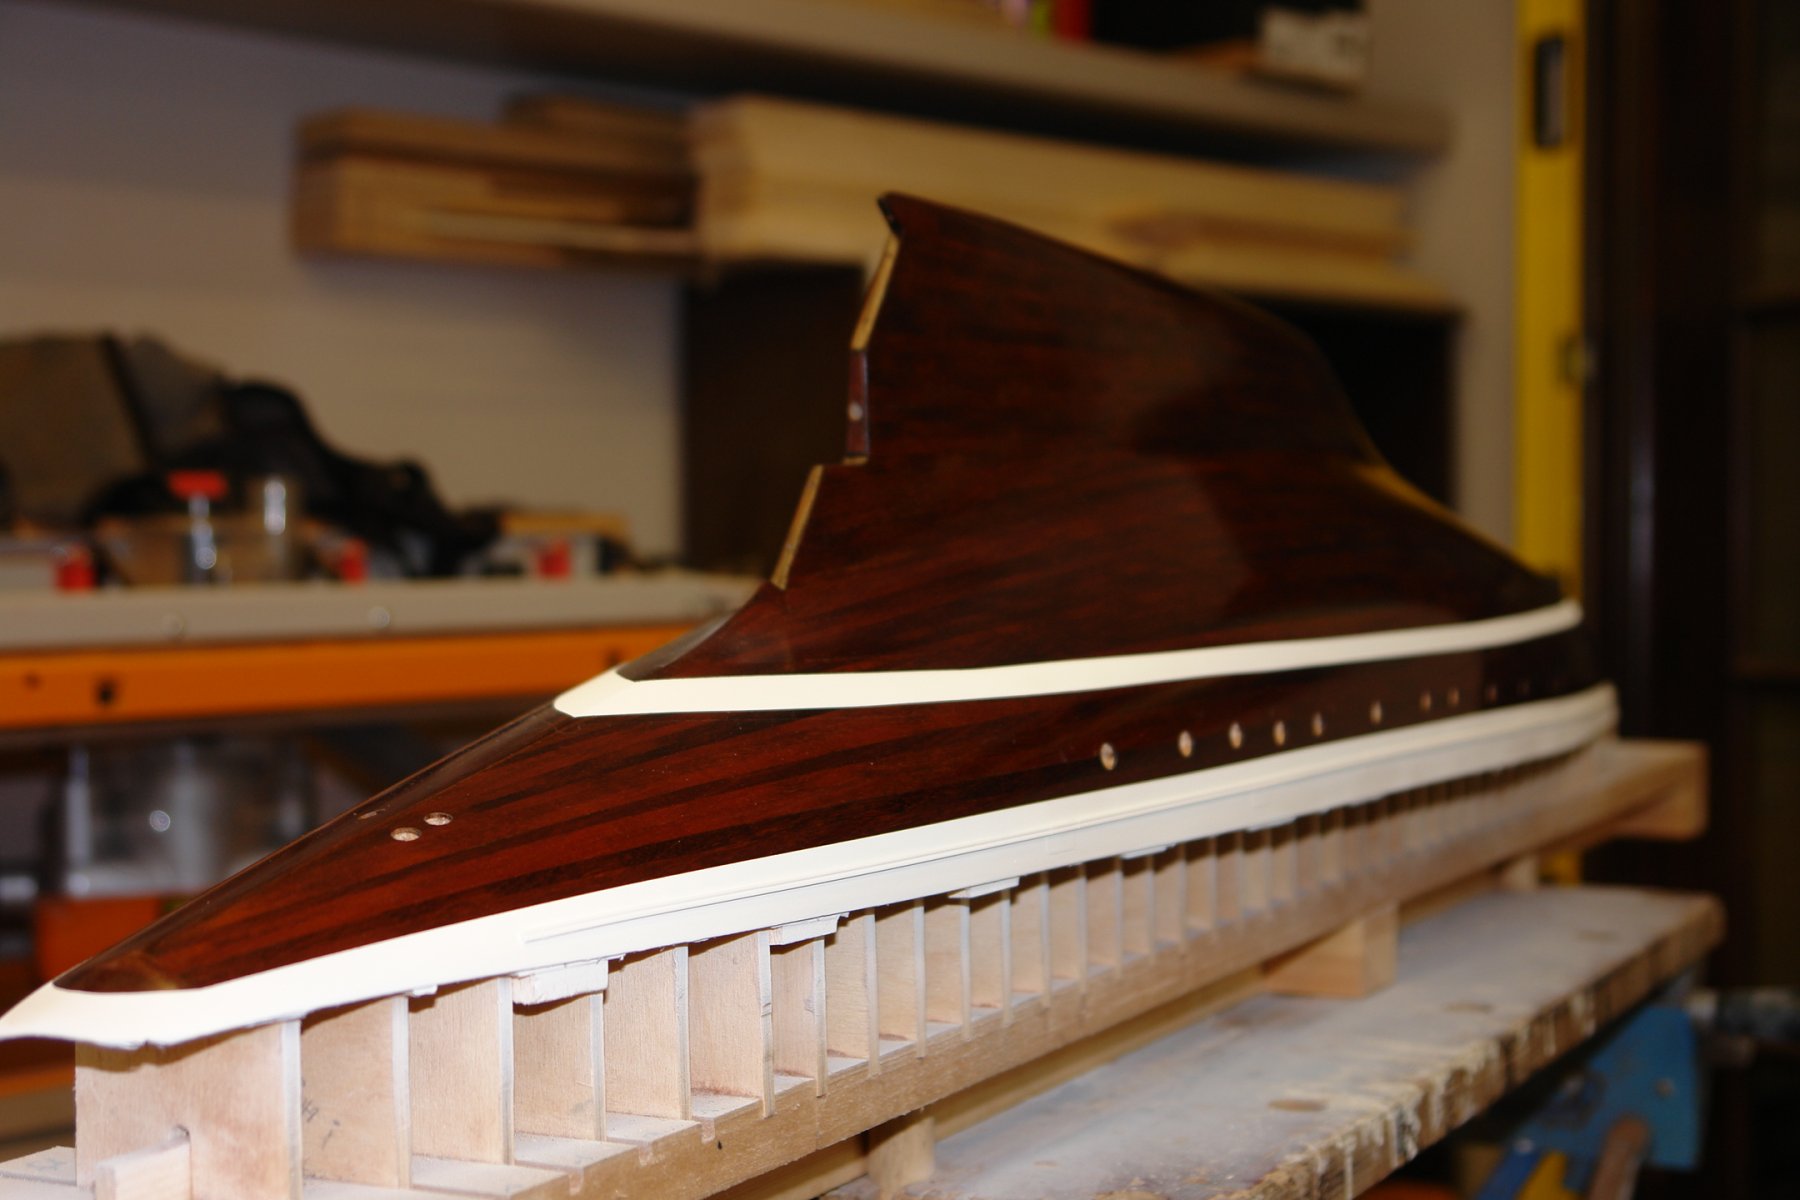
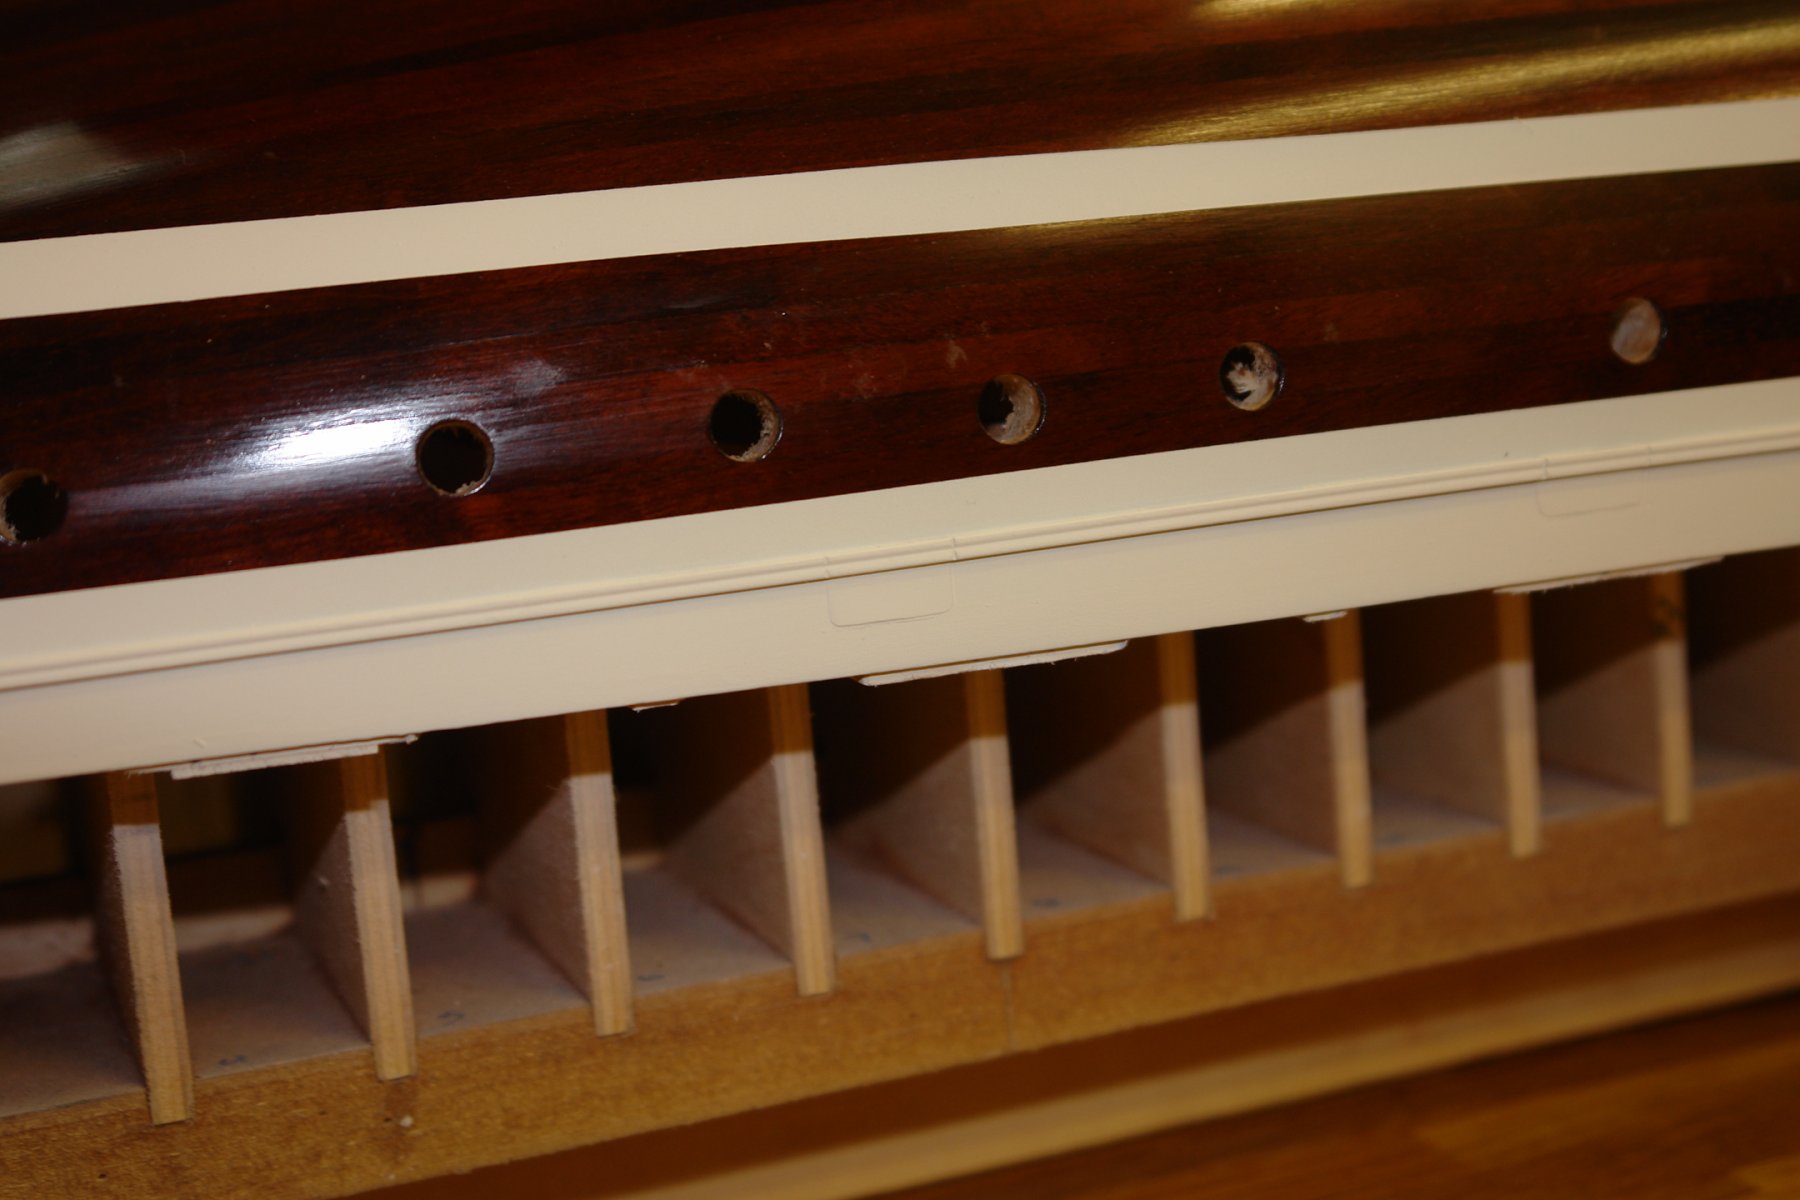
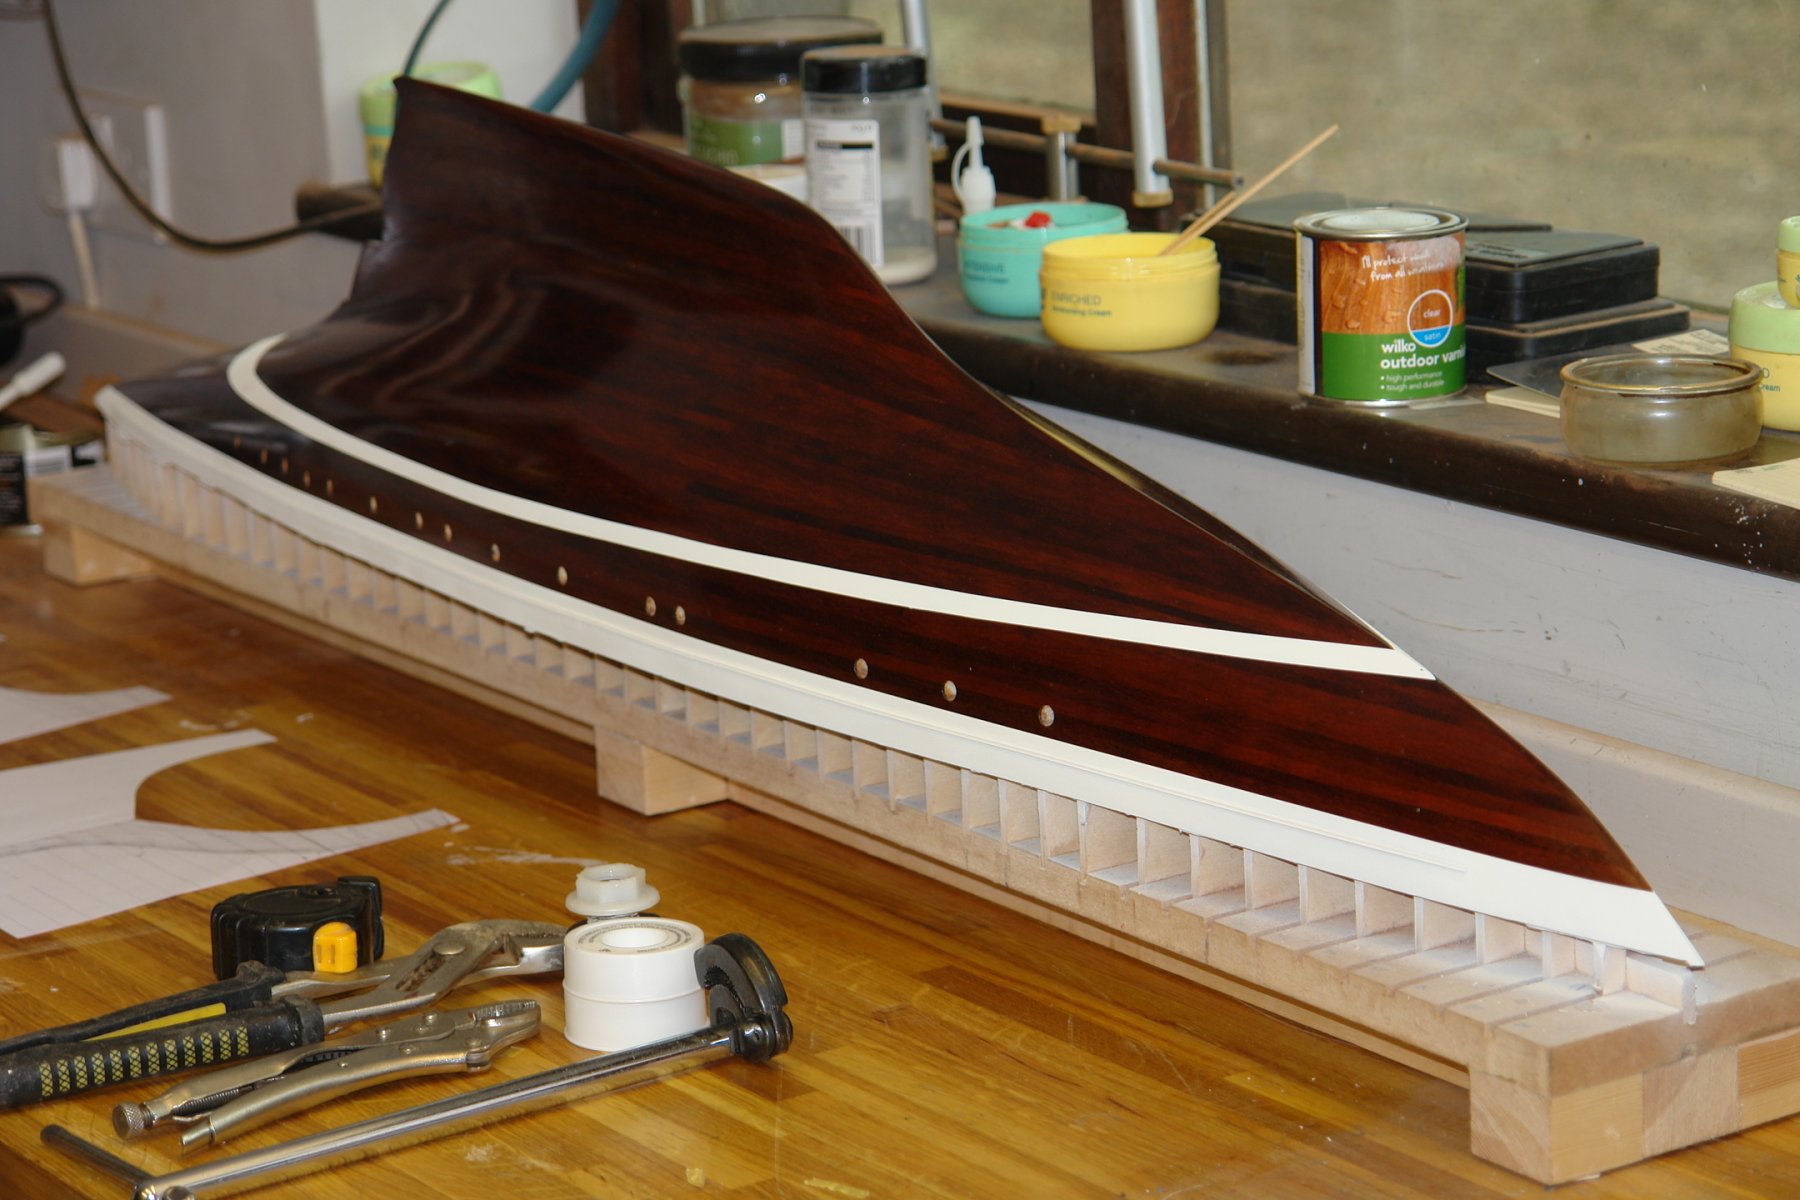
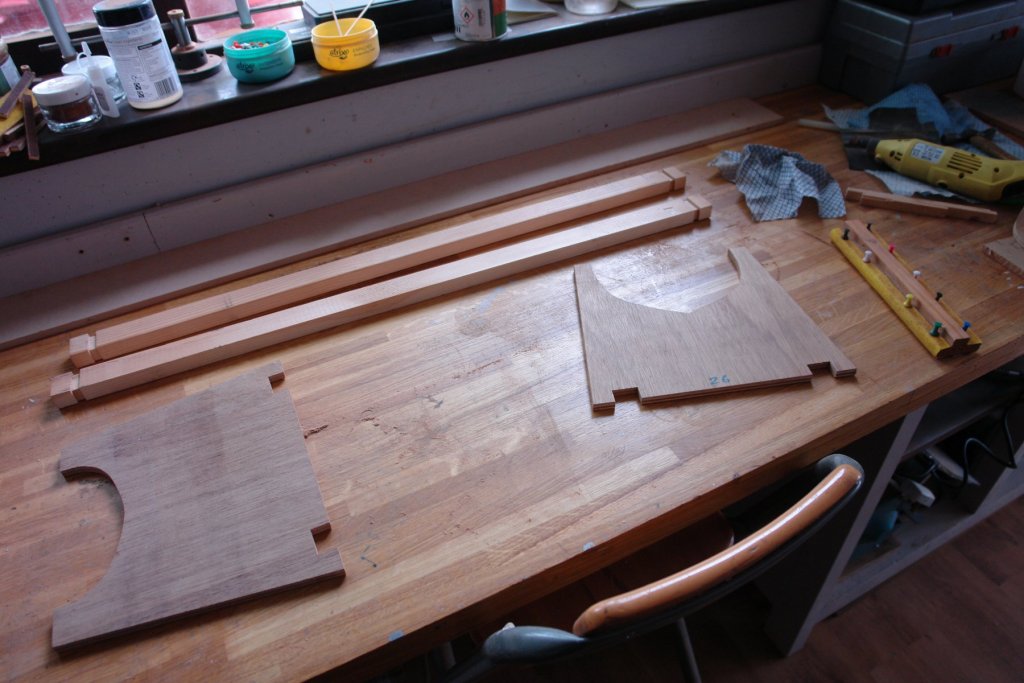
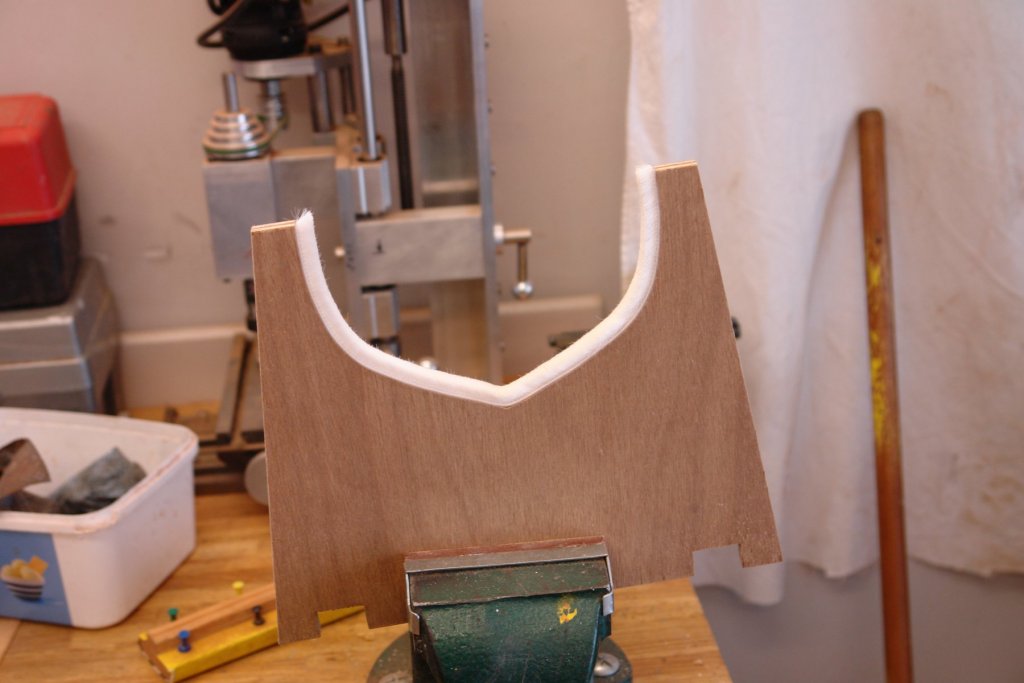
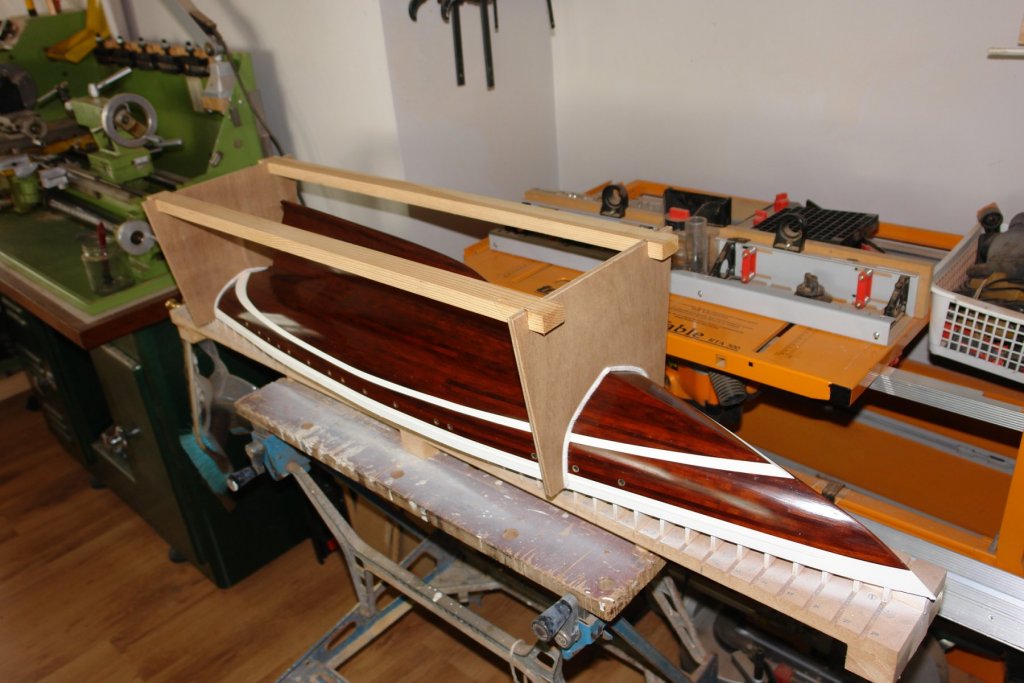
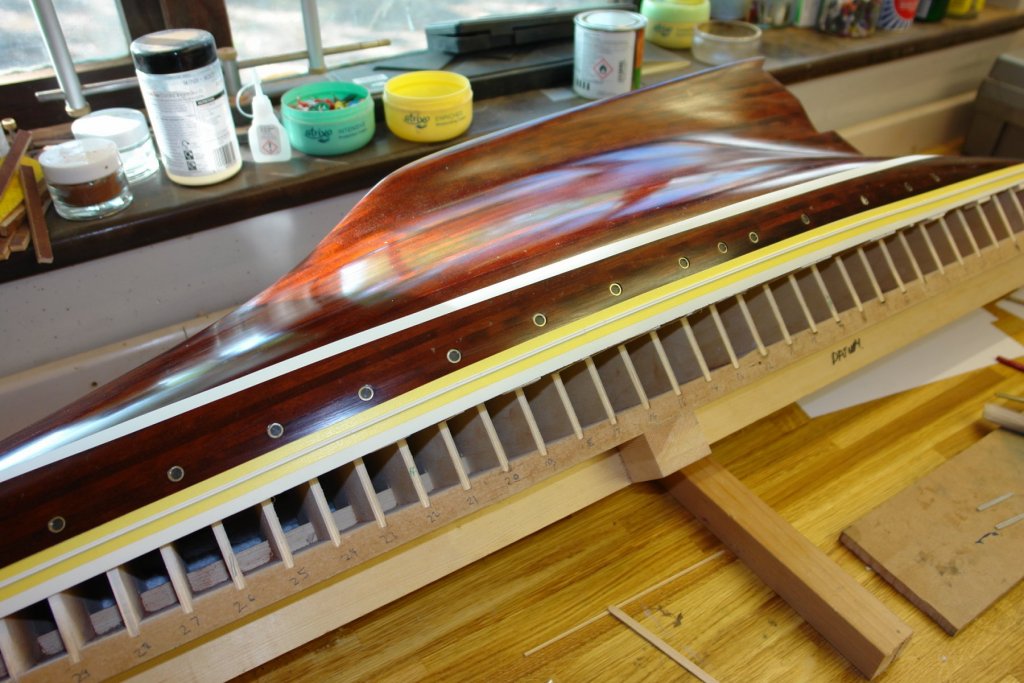
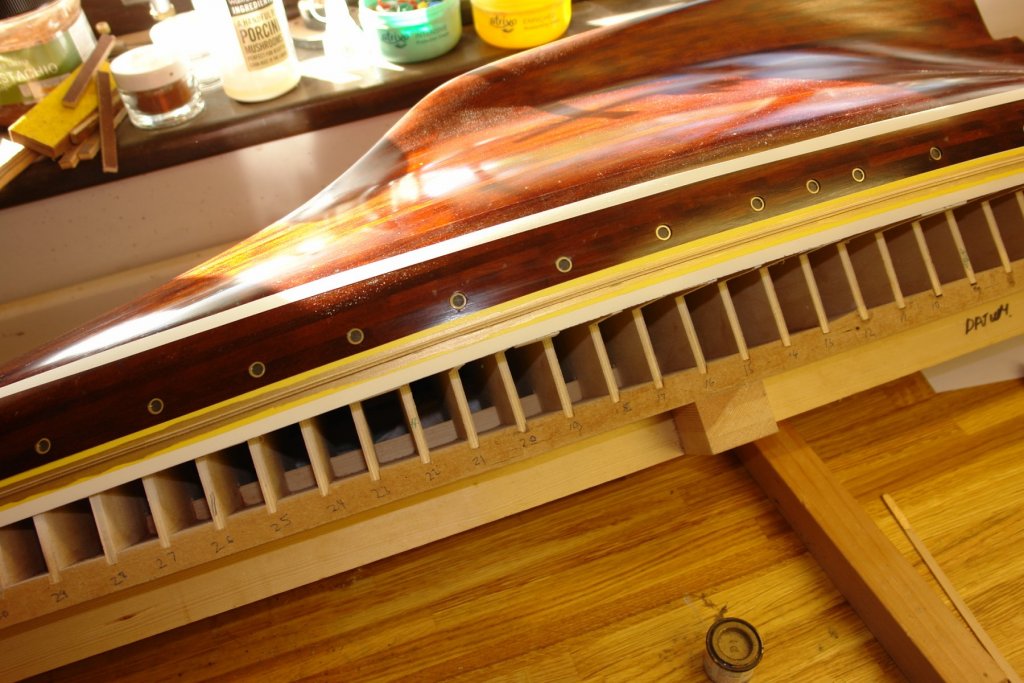
Thank you all for your comments they are much appreciated. I continue to make very little progress. The weather has been generally good for almost a month and this means the garden drags me away from shipwright duties. I pray for rain and an enforced period of "shed" work. Here is the little progress I have made in the week since my last post. I am looking forward to getting the hull off the building frame - but first I need a cradle. I decided where I wanted the support to be and used the frame sections at these positions to make a template for the "saddle". The frames were cut from scrap 3/8" ply with the cutouts being 1/8 bigger all round. Notches were cut for the stringers and the stringers were notched to take the cutouts. I had a piece of 3M extra deep door draft excluder with which I lined the hull cut outs. I tested the fit and then glued the assembly together. I then glued in all the previously made portholes. To make sure that they all sat at the same depth below the surface of the hull I turned a .02" deep step in the end of a dowel and used this to push them into place. The rubbing strips need to be gold so I masked off the sides and ends of each strip. I then hand painted the gold with Humbrol enamel. I only needed to mask either side of the strip as over spray wasn't a problem---------------but the same couldn't be said for drips!!!!!! Fortunately the drip on to the white was easily corrected. The finished result looks fine. I now have to decide how to do the decoration at each end of the rubbing strips. The scale size of these features isn't terribly large the former will be about 2" long and the latter about 1". I'm not sure how I am going to do this but my current thoughts are to try making the latter from Fimo. The fineness of the swirls on the former make me think Fimo isn't a good option for this. All suggestions are welcome.


-
Mark - very nicely done ------- but should you be using that base as a work surface???? or is it just a convenient photo stand?
-
Gary - I continue to be impressed your staining techniques. Maybe you should write a guide some day.
-
Nicely done Dan. Enjoy the Danube and the fine local wine and beer.
- 238 replies
-
- 4
-
-
- leviathan
- troop ship
- (and 2 more)
-
I think you must be mistaken Patrick. Anyone with the lack of taste required to own Genesis (or much modern art for that matter) would find it hard to appreciate a gaff rigged yacht. I think it must belong to the apprentice engine room technician - he would appreciate it. By the way you forgot to put the dinghy on the yacht.
-
Vaddoc - just a cautionary note. I use beading wire but invariably find I end up redoing some shrouds when they go slack. I think the slackening is associated with the wood of the hull and masts contracting a little when exposed to the dry environment of the lounge. You may want to aclimatise the model before embarking on rigging. Very nice job on the cleats. Your process for making them would be interesting to know if you have time.
-
Keith - they both looked and seemed satisfied. I didn't like to press them in case they changed their minds.
-
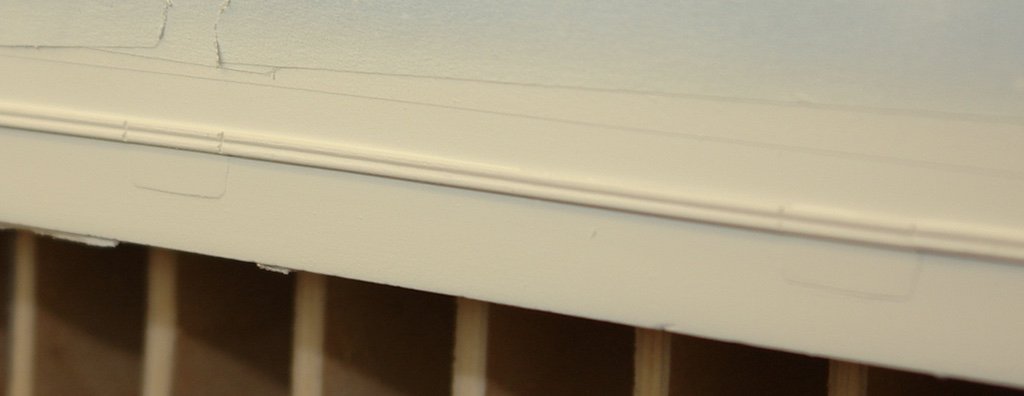
I had an internet access problem for most of the week but finally it seems to be in the past. It was 8 days ago that I last posted and the new airbrush arrived a week ago today. Over Sunday trough Tuesday I applied 7 coats of white matt Humbrol enamel paint, - oil based and diluted to the consistency of skimmed milk. The barely visible effect that I was trying to achieve on the scupper doors turned out how I wanted. I took a lot of care to press down the edges of the masking tape. Fortunately this paid off as I got no bleed at all. The tape came off cleanly and fortunately didn't pull of any of the poly layers. Given the interest previously shown in the paint scheme i have included a number of photos.