KeithAug
-
Posts
3,980 -
Joined
-
Last visited
Content Type
Profiles
Forums
Gallery
Events
Everything posted by KeithAug
-
 Yes Eberhard I will slot the binnacle on the mill. I agree that making accurate narrow slots is much easier using machinery. Welcome back Michael. I too am about to enter the silly season for excursions.
 -
An interesting subject Phil - and so full of character.
- 355 replies
-
- 2
-

-
- prince de neufchatel
- schooner
- (and 3 more)
-
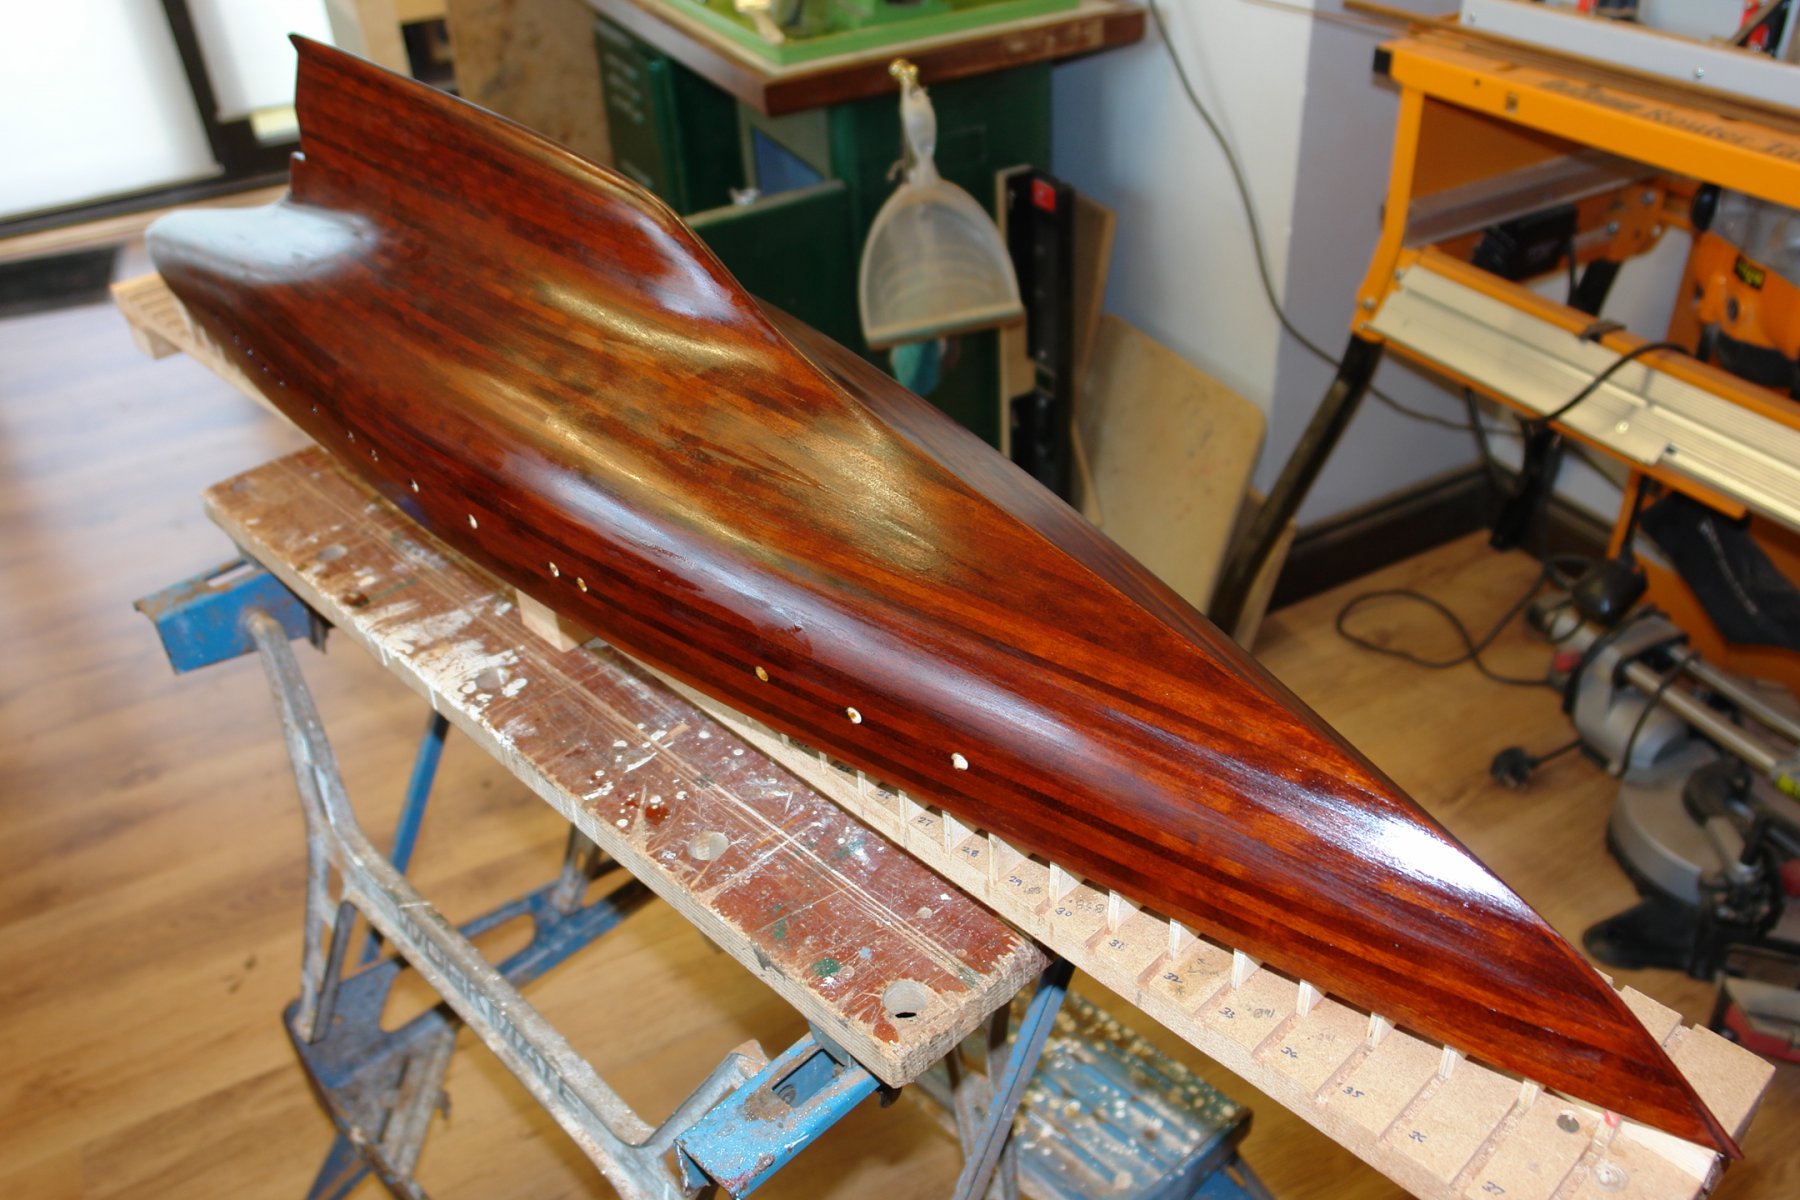
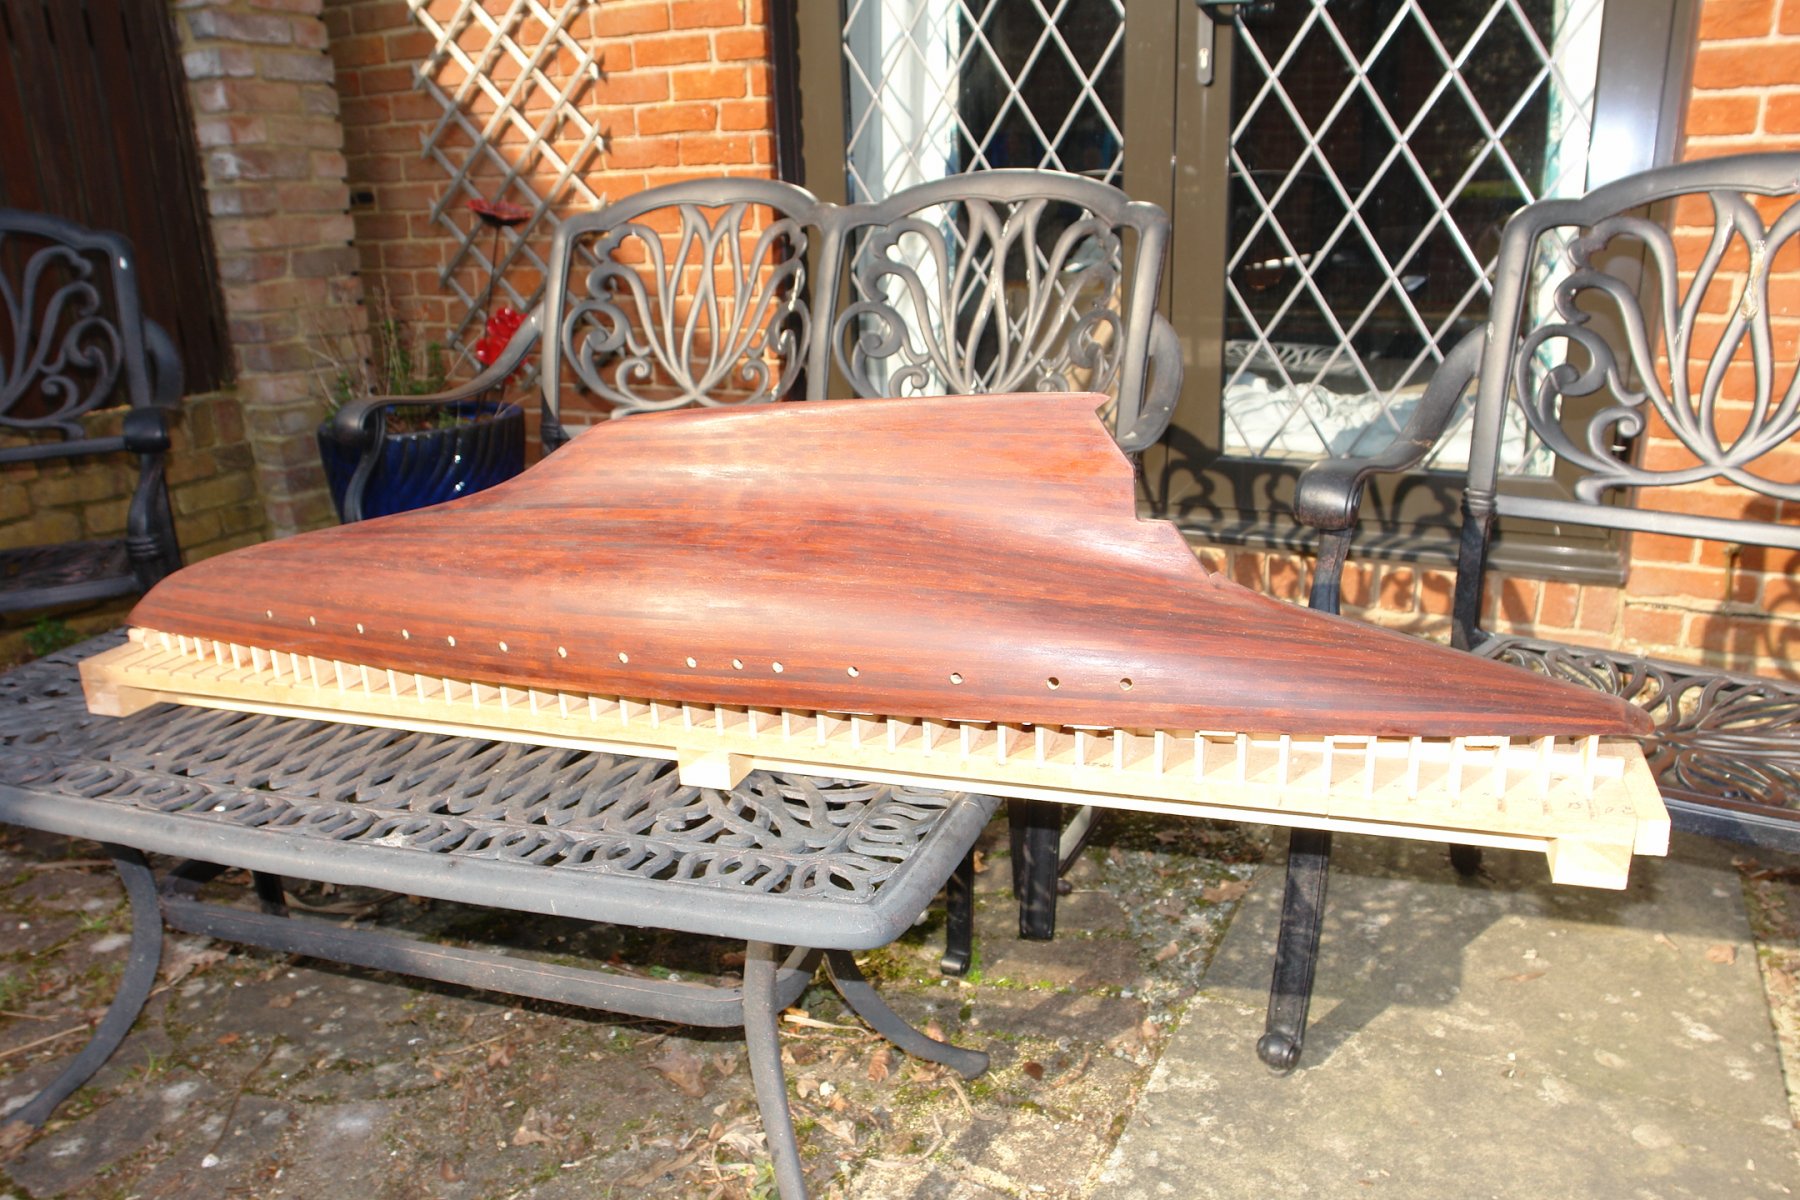
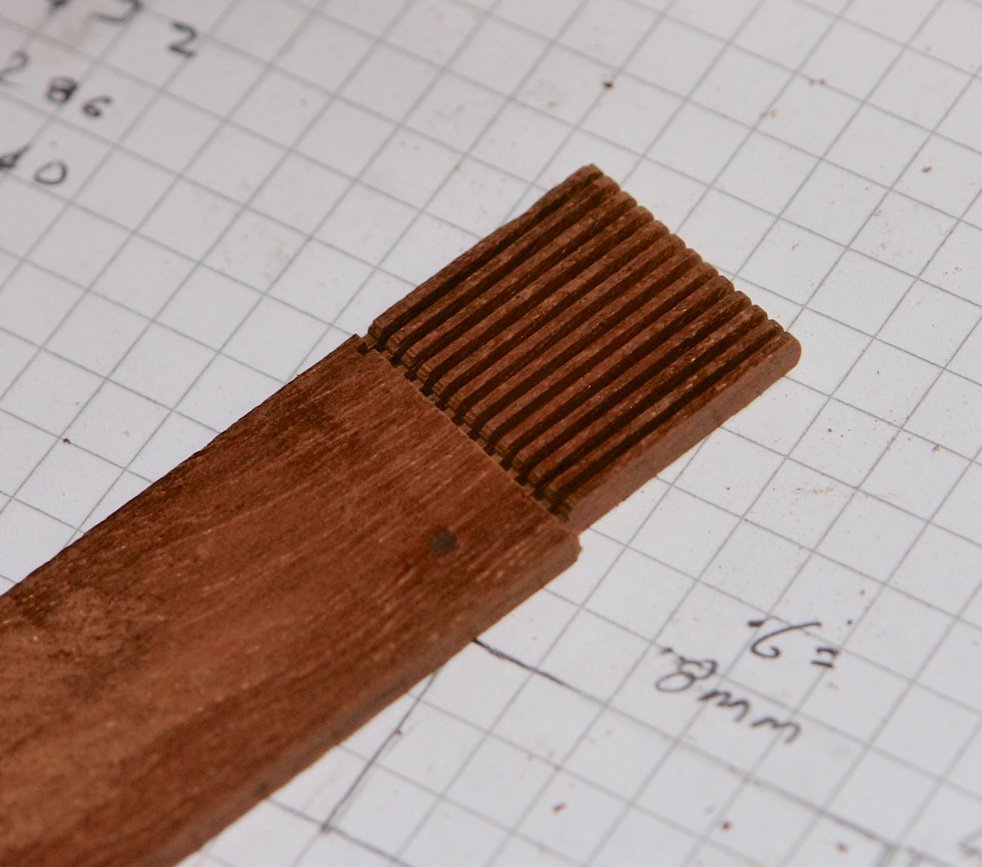
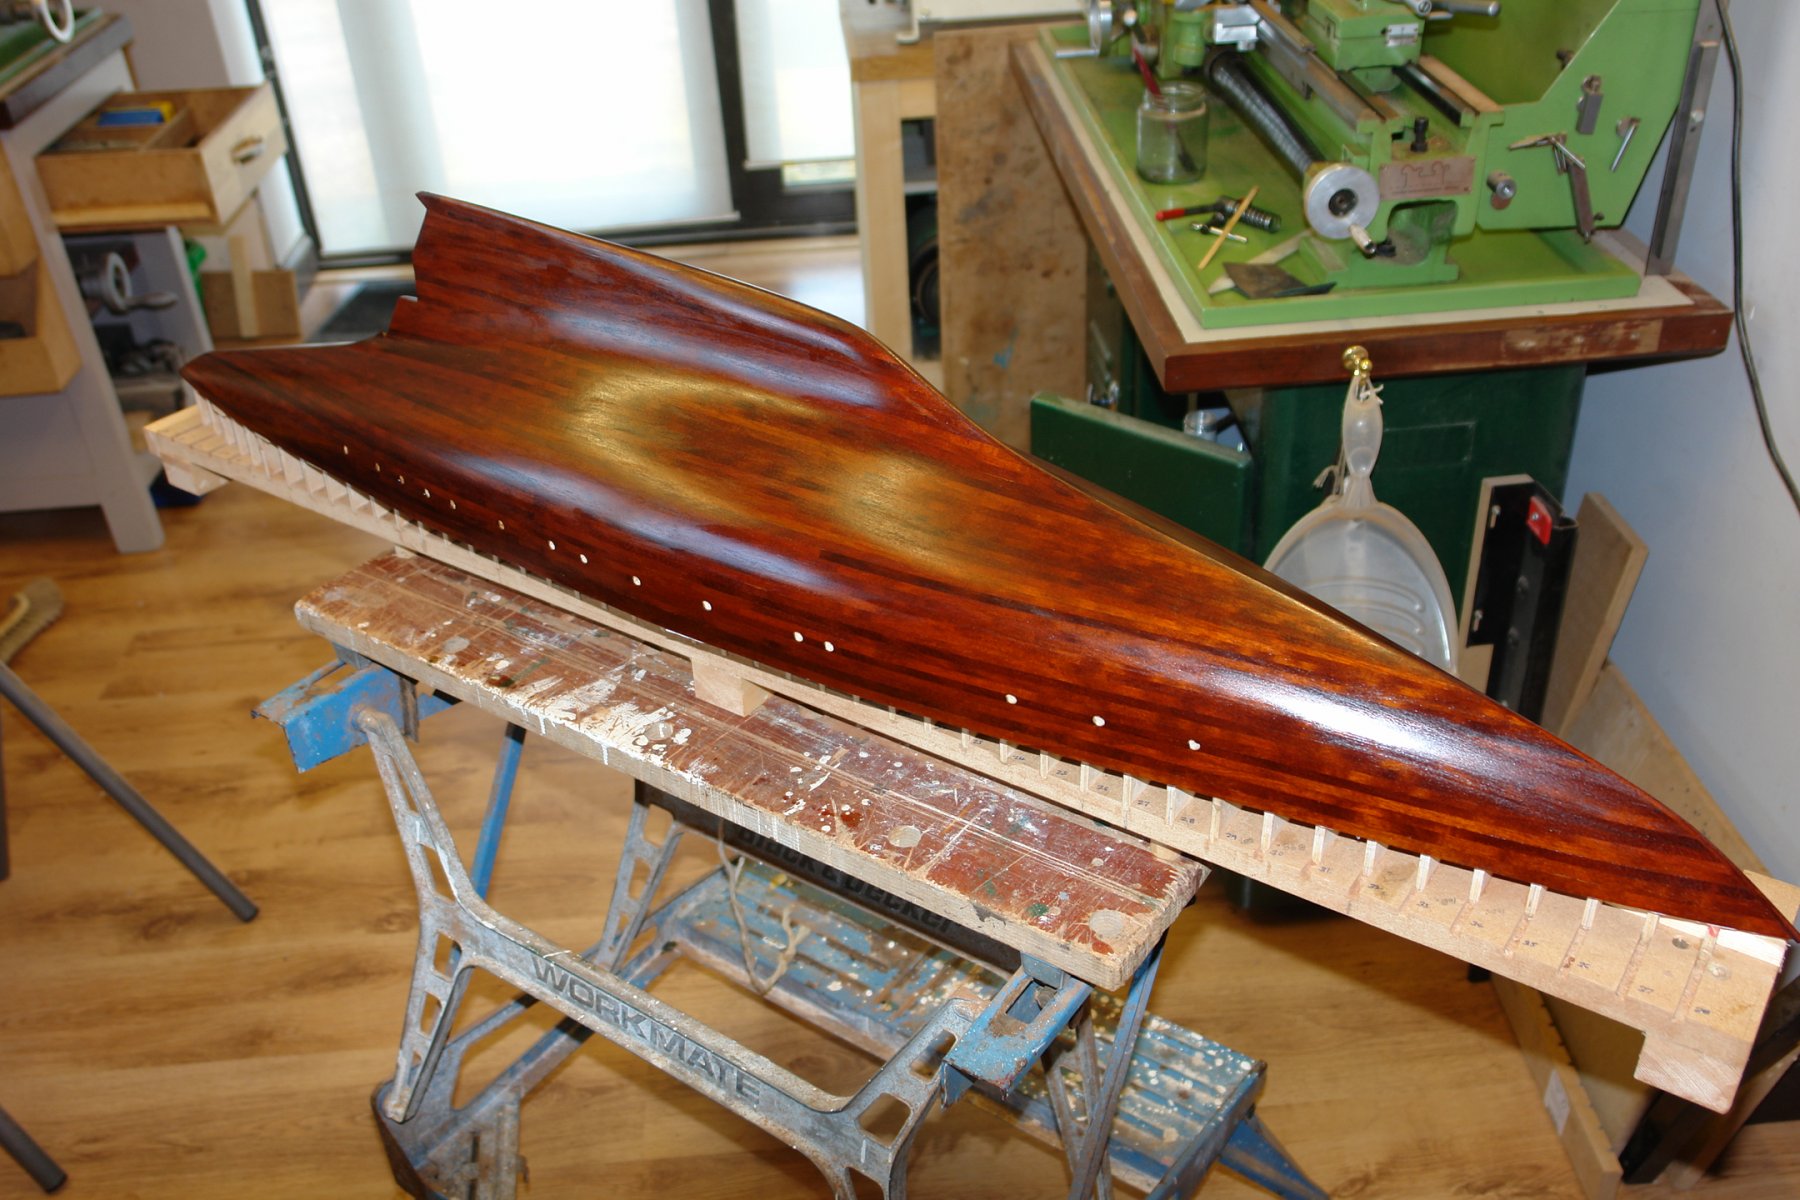
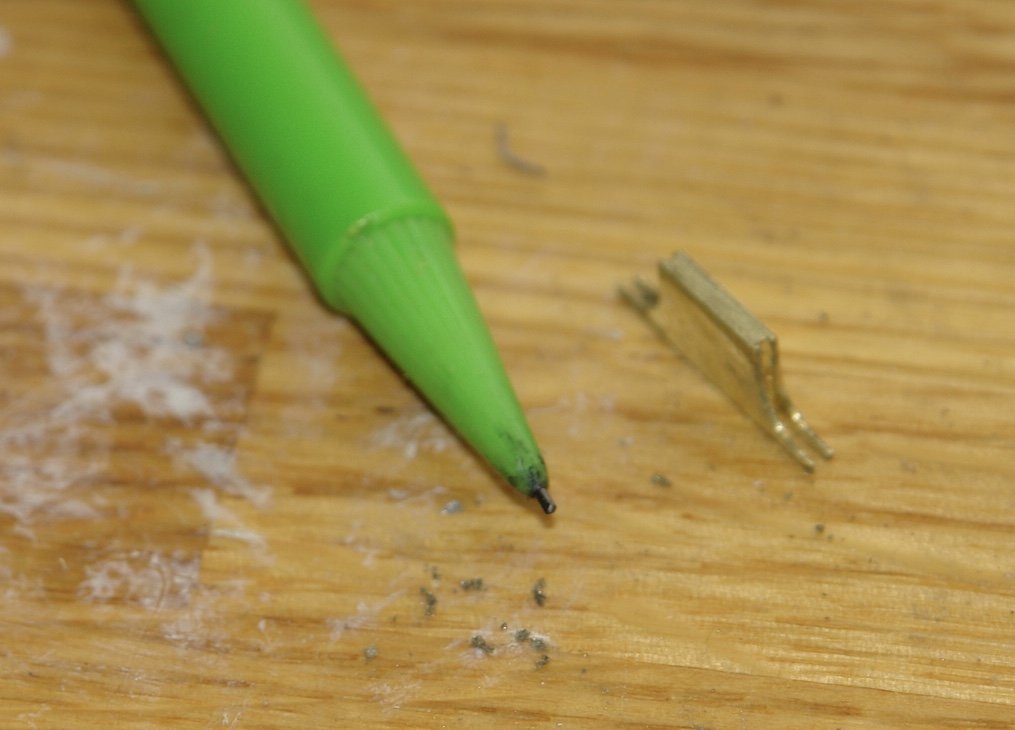
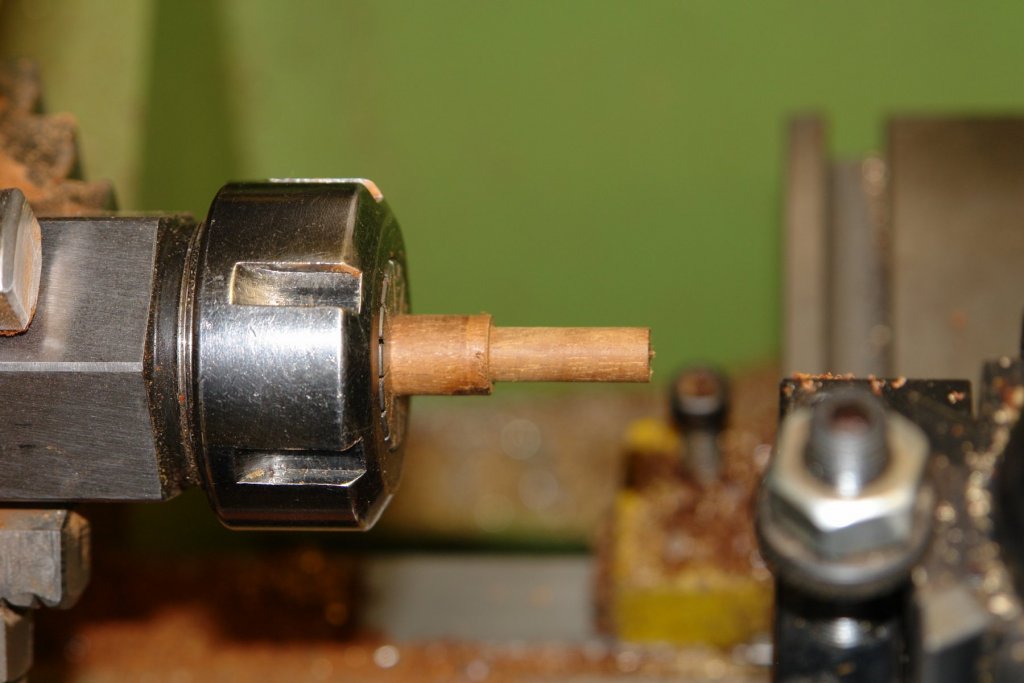
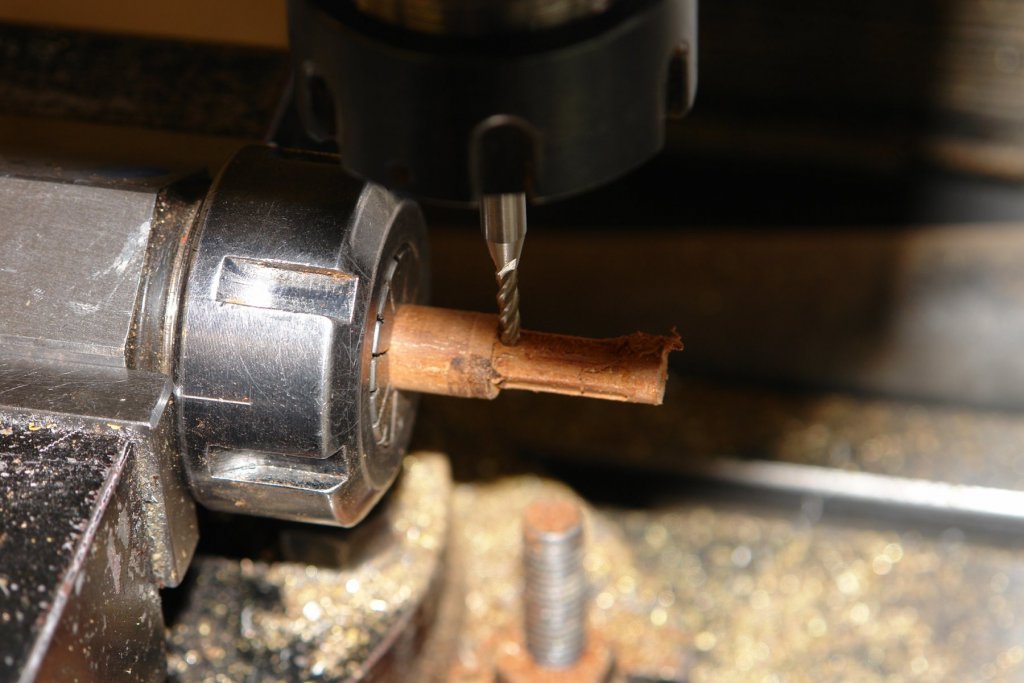
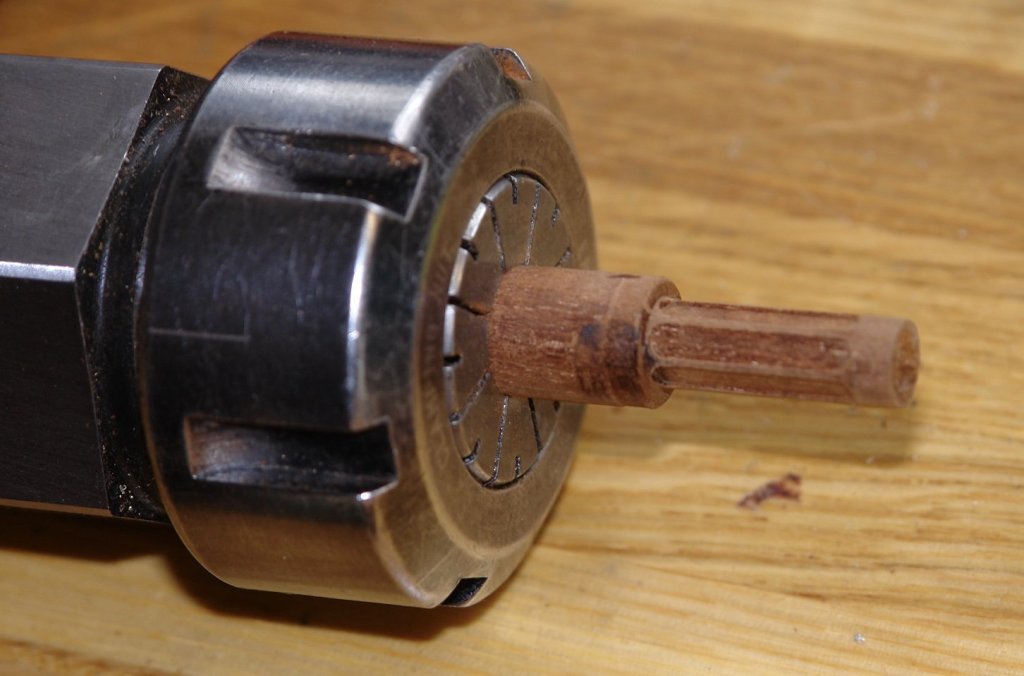
Thank you all for your continue interest and comments. I quite enjoy the discussions on finishes so don't feel inhibited. I have lost count of the number of coats but I think its about 6. The previous coat refused to dry in the workshop or in the boiler room. After 36 hours it was still tacky and unfit for further treatment. In desperation I stuck it on a table in the garden and a few hours later it was bone dry. I'm not sure wether it was the breeze or the sun (UV?) but what ever it was it did the trick. I took the opportunity of giving it a good rub down with wire wool before returning to the workshop for the next coat. Here is coat 6 (or something like that). Still some way to go! Otherwise I continued to busy myself with the binnacle - making the support bracket for Mr Kelvin's spheres. I didn't think I could make and mount individual brackets so I made both in one piece - this will pass through the pedestal. The bracket is .075" thick and was cut from .025 wide brass strip - shaped on the mill. It is currently too deep at .025" and will be reduced to .150" later. To create the bracket webs I cut a slot at each end with a 0.6mm (.024") slitting saw. The top of the bracket will be soldered on later. I tried 2 versions of the pedestal - the first was a more accurate interpretation of the original and had inserted panels (although 6 rather than the 10 the original seems to have). I turned the pedestal and then milled out 3mm (.118') wide slots to take the panel inserts. A strip of wood was cut to 3mm thickness to form the basis of the infill panels. This was then shaped to semicircles on the ends before being slit down to .025" thick on the table saw (using a 0.6mm (.024") blade). To be continued-----------


-
I have to say I don't find steel wool to be a problem, nor is the damp cloth for that matter. By the time I am using wire wool it is basically just buffing the dried poly surface. The first couple of sealing coats are sanded with fine sandpaper so any raised fibres area removed at this stage. I have a huge roll of wire wool and I rip off a handful before I start and discard it at the finish. As for the damp cloth, I wipe the surface with paper kitchen towel and then leave it for half an hour or so before I do the following coat. The biggest watch out with wire wool is that it sits on the workbench and other flat surfaces and if left will pick up on clothing and drop on the hull during the painting process.To avoid this I find it beneficial to vacuum up any residue after using the steel wool.
-
Paul - I must try making moulds some time - it looks like a useful technique. We seem to be going downhill in terms of temperature, it was very chilly in the workshop today and I was glad to leave it.
-
Dan A few months ago I watched a very interesting programme on the Spanish flue epidemic at the end of the 1st world war. News of the epidemic was suppressed among the combative nations and was only called Spanish flue because as a non-combatant Spain did not have such restrictions. The source of the flu was ultimately traced to a USA farm worker who joined the US army. It travelled to Europe by troop transport and clearly Leviathan was part of this transmission path. It is not often that a ship has been a key player in the death of over 40 million souls.
- 238 replies
-
- 5
-
-
- leviathan
- troop ship
- (and 2 more)
-
Lovely job Dan. The ventilation modification for troop transportation are really interesting - it is surprising that they went to so much trouble - I cant believe they were just to increase comfort, I guess they must have had some concerns about health.
- 238 replies
-
- 8
-
-
- leviathan
- troop ship
- (and 2 more)
-
Eberhard - yes I use that method as well. Also I thought it might be a light - but I couldn't work out how the light got from the appendage into the body of the housing - I guess the connecting bracket is actually a square tube. Nice job on your binnacle.
-
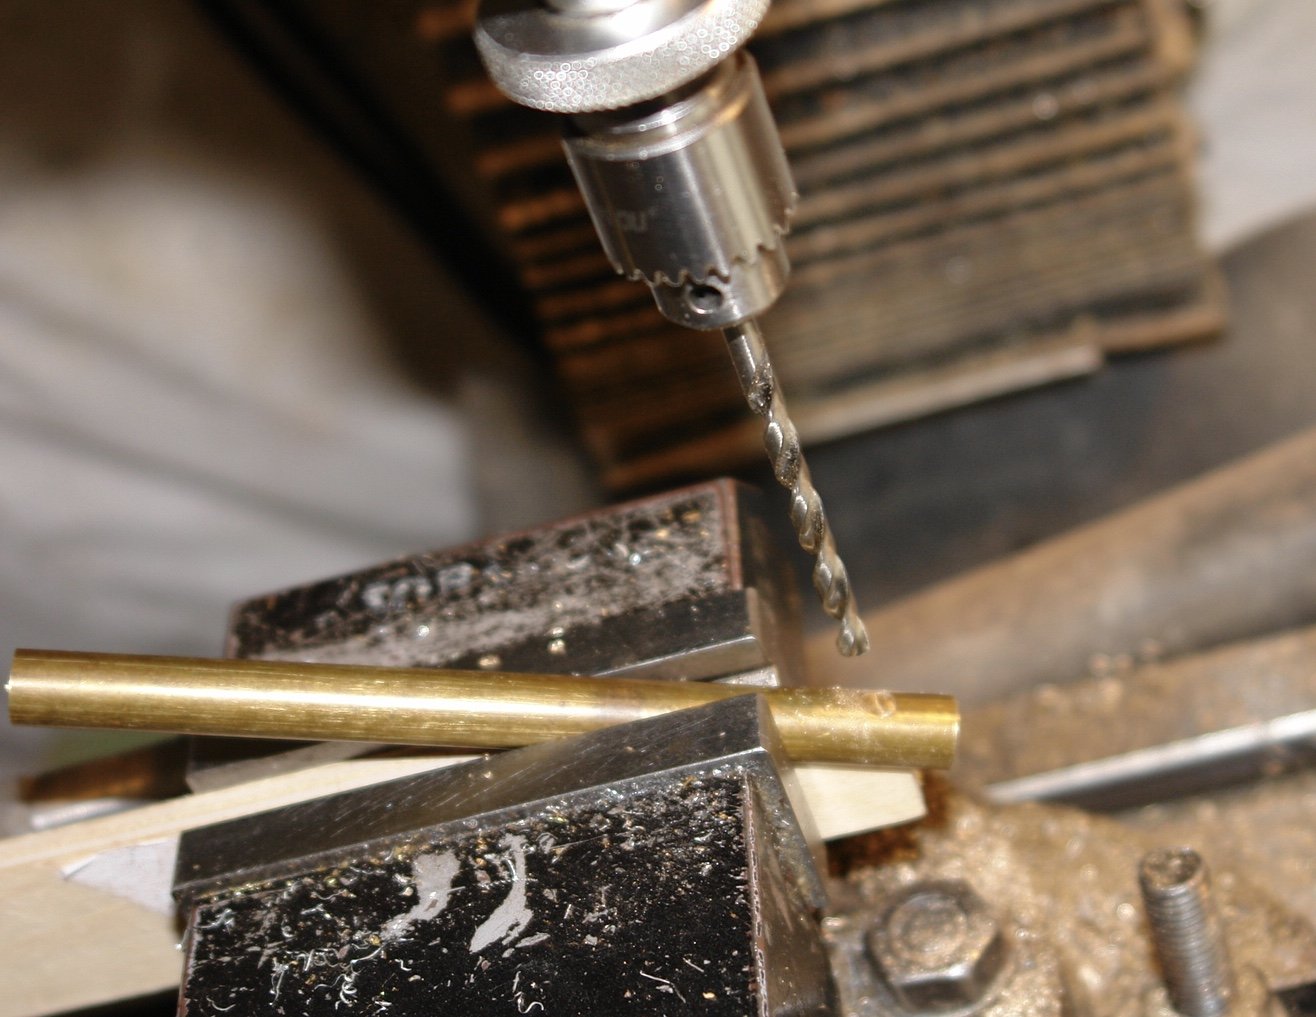
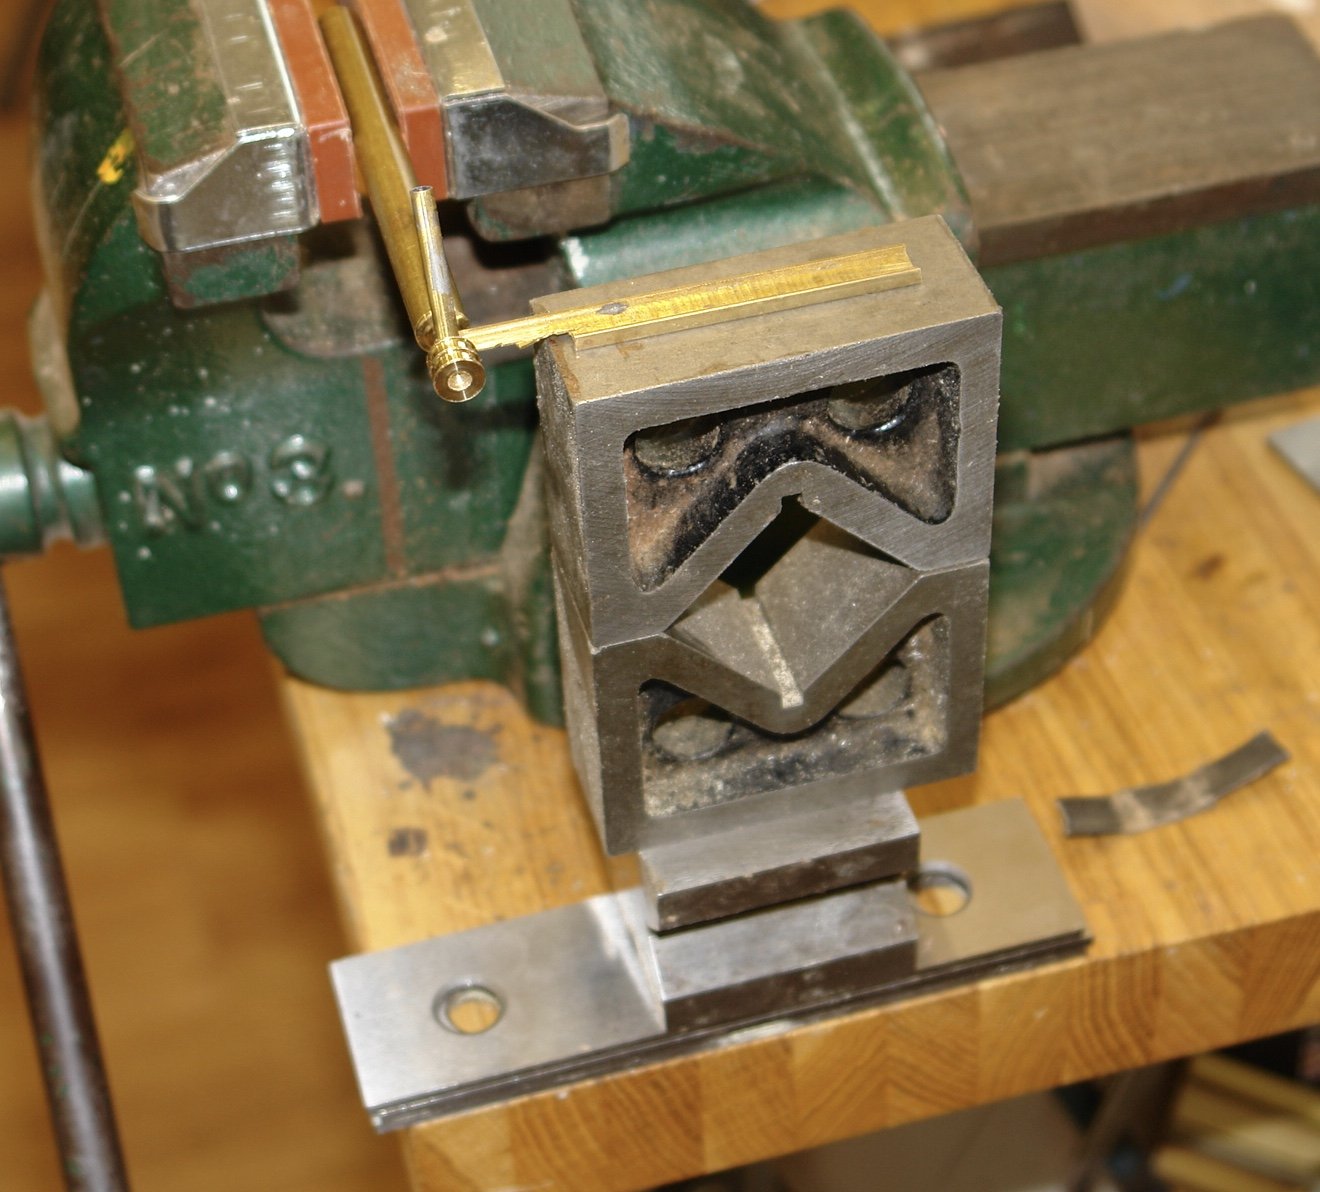
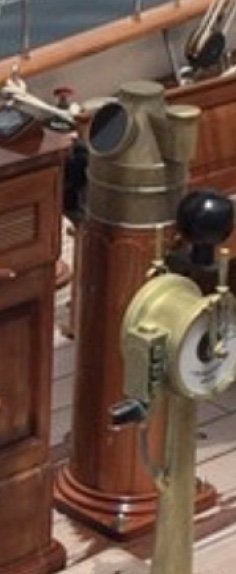
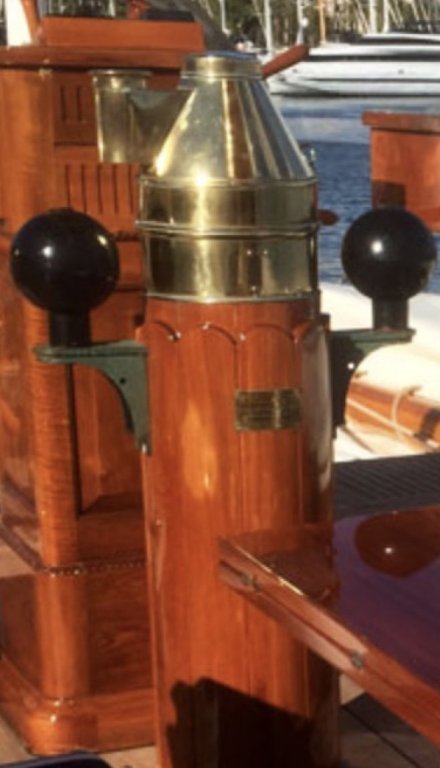
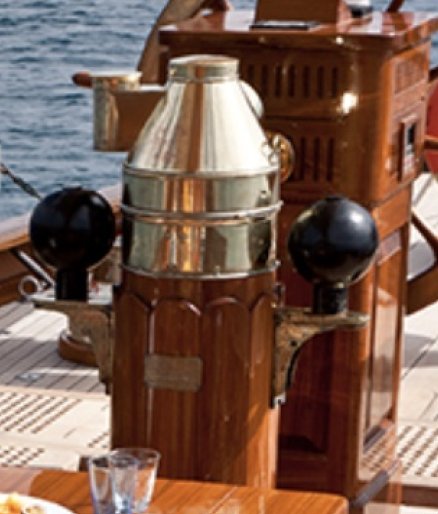
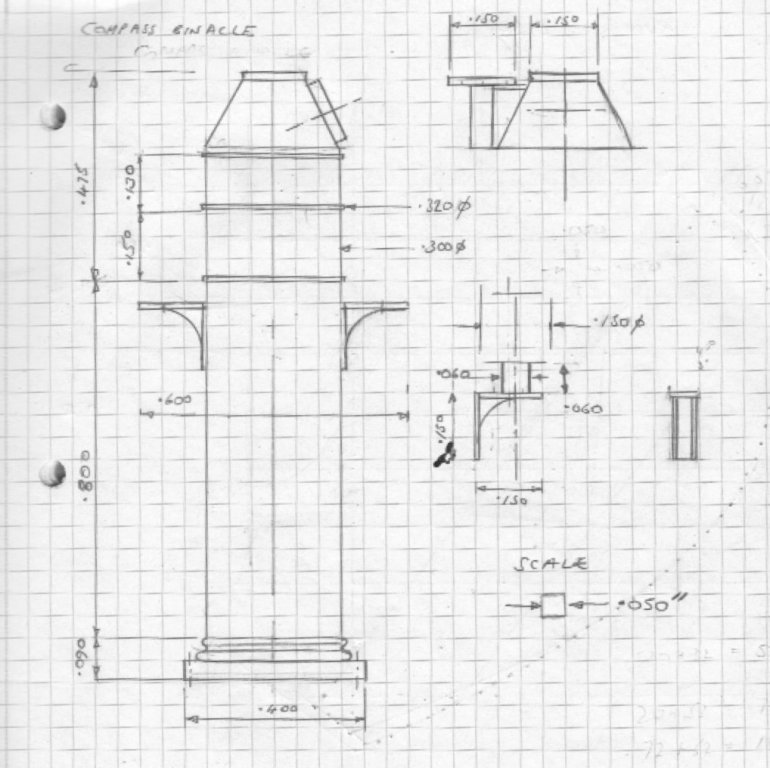
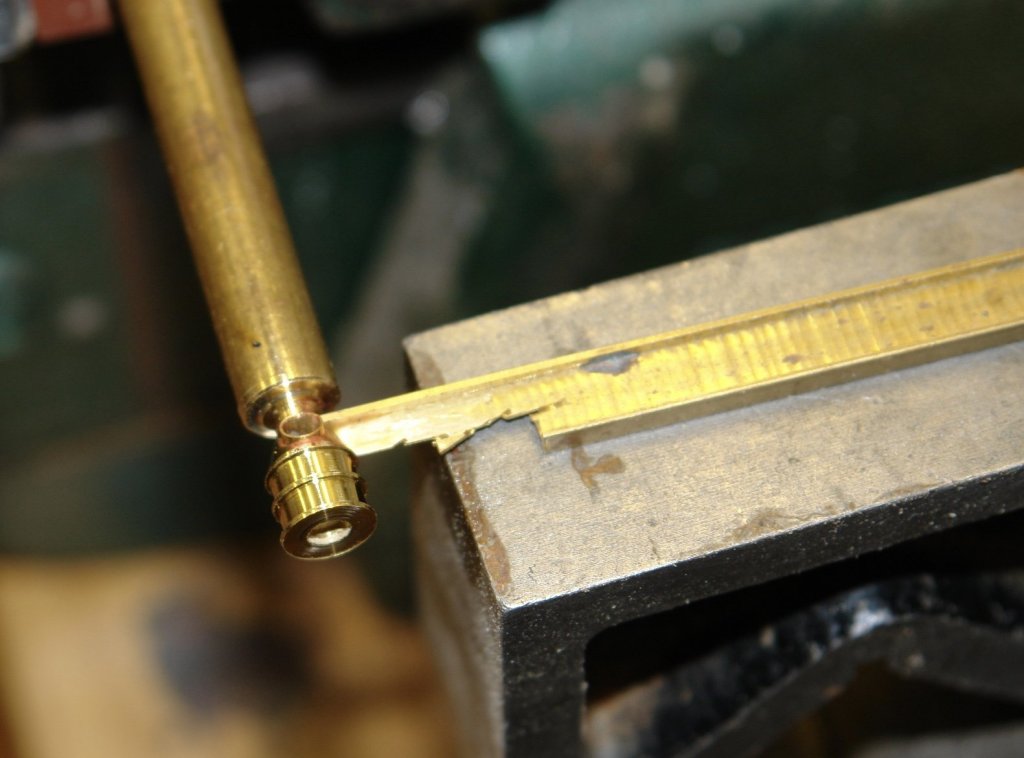
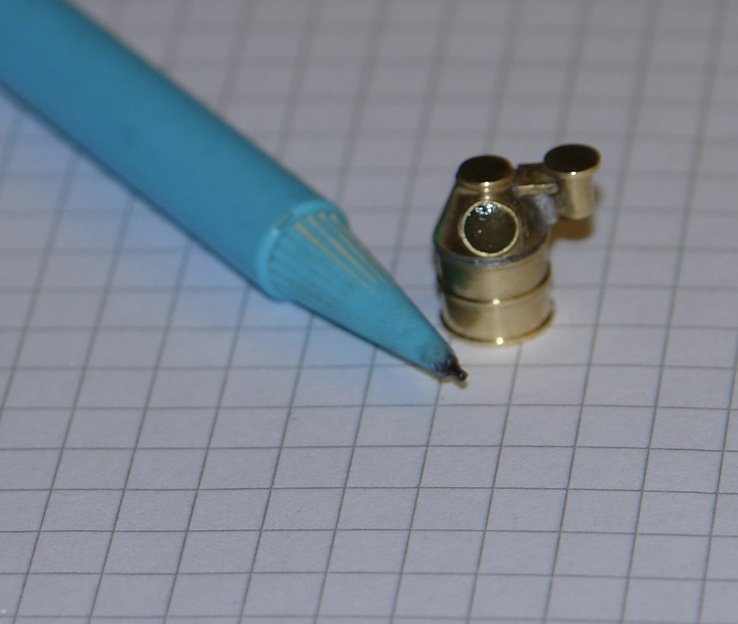
Eberhard, Phil - thank you. Pat / Jon - thank you - It feels like the late voting is starting to swing towards natural. Keith - and so to the binnacle. As usual I started with a search of my web photographs. I find it is quite easy to overestimate the scale size of these items and grand ideas often meet the reality of my capability. My admiration of watchmakers grows daily. The photographs were printed measured and converted to as good an interpretation of the binnacle as I could produce. Today I started on the brass housing for the compass. This I made out of 8mm (.315") rod. I usually drill angled holes before turning. In this case this meant drilling the hole for the viewing window skirt. I didn't take any photos of the turning operation as it was fairly straightforward - I did however leave the housing attached to the rod to ease handling during the next operation which was soldering. You can see from the photos that the housing has an appendage on the starboard side. Not sure what this is but it is attached by a "T" shaped bracket. I shaped the end of a piece of "I" section brass to locate against the housing and I also cut a piece of brass tube to form the skirt for the viewing port. These were then soldered in place. I thought that my sophisticated soldering set up was worthy of an image. The appendage was turned from a small piece of 1/4 inch brass rod, reduced to the desired dimensions. The excess of the "I" section girder was cut off and the end was shaped to take the appendage. This was then glued in place with CA. Finally the viewing window was formed with a glob of 2 part epoxy. And that was another day gone.


-
Hi Dan - hope you know it is Sunday????? Your updates are so good.
- 238 replies
-
- 5
-
-
- leviathan
- troop ship
- (and 2 more)
-
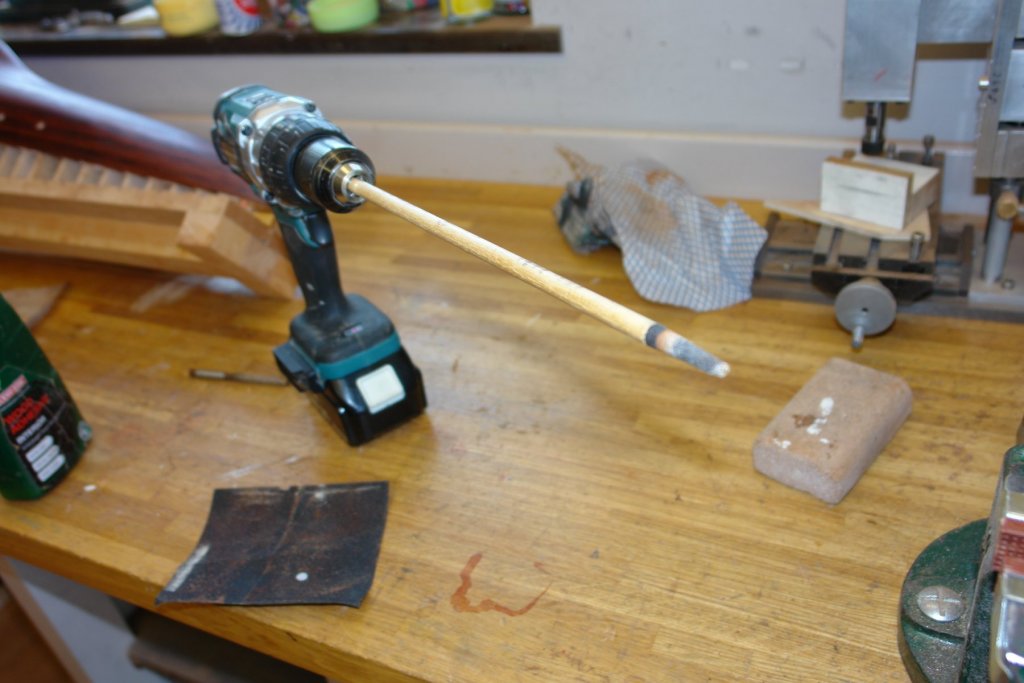
Wood finishes seems to have prompted a degree of debate - I thought I would update on progress with my unsophisticated approach. I am now on coat 3, coat two having dried eventually. Before applying coat 3 I sanded out the portholes to 8mm with my improvised cone sander (basically a dowel with cone turned on the end and a piece of 240 grit sandpaper stuck on) The holes sanded out quite nicely. And then it was on with coat 3. In parallel I started making the compass binnacle which I will start to cover in the next post
-
Valeriy - I use black card / paper between deck planks to simulate caulking. I have found that the paper needs to be good quality and not fibrous. If it is fibrous the sanding dust tends to bed itself in the planks leaving them looking quite dirty - this is OK if you want a weathered look but otherwise much better to use top quality paper.
-
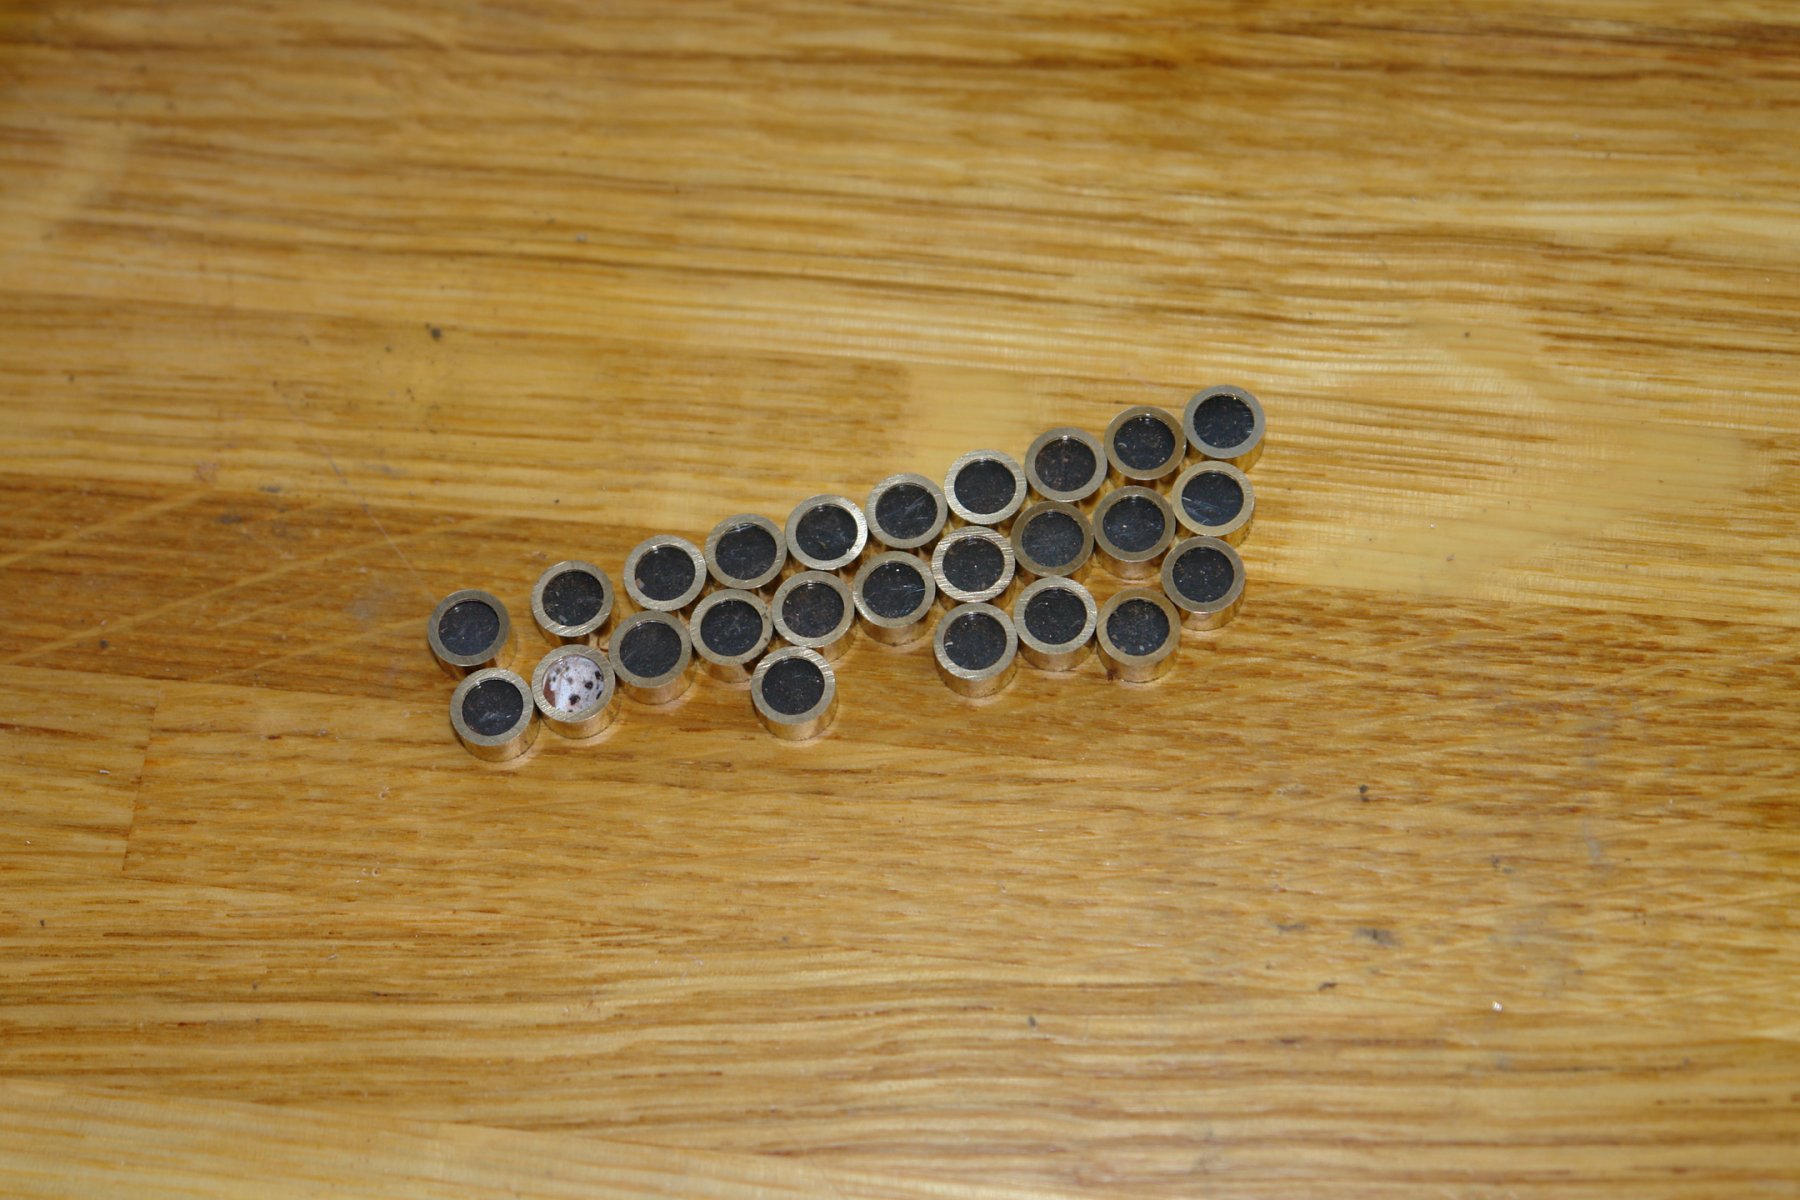
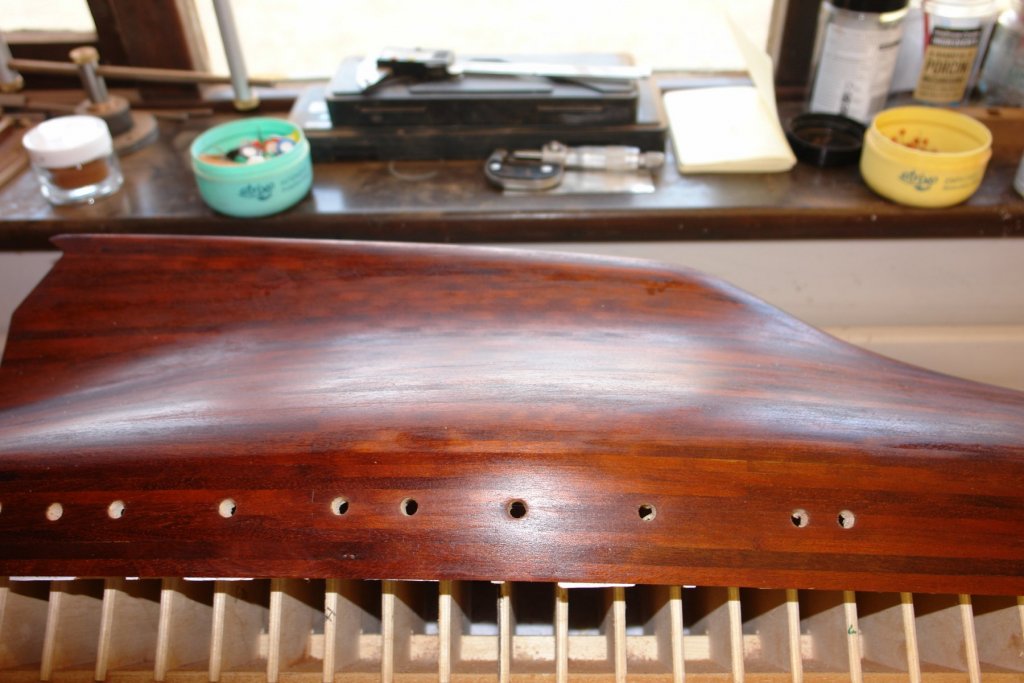
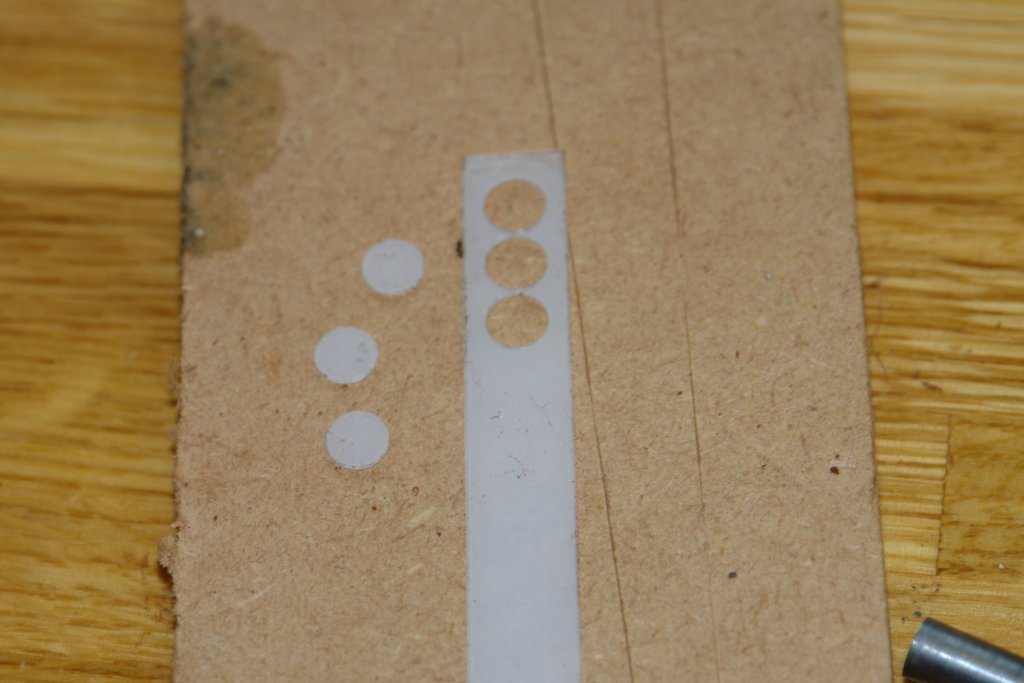
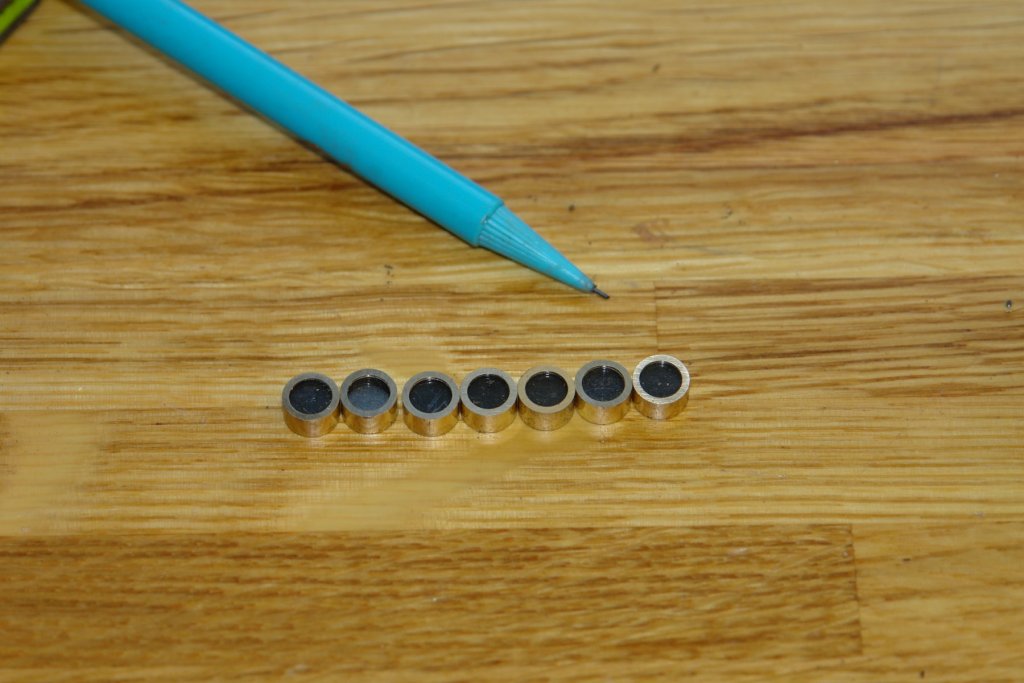
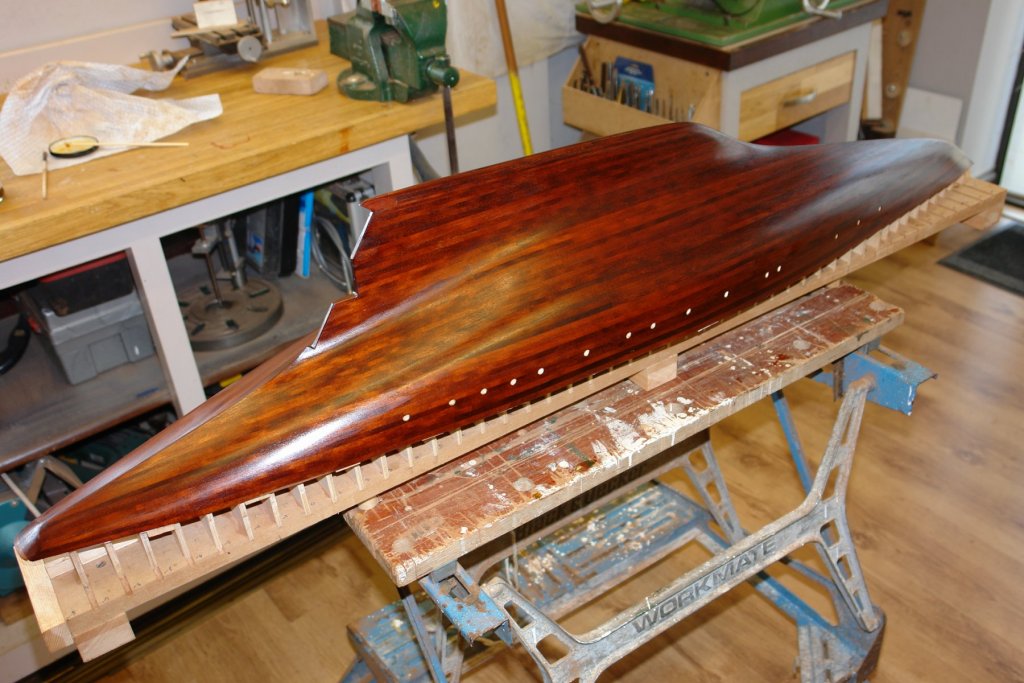
Vossie - Thank you for the clarification. Jeff - An interesting video - don't you hate it when they make it look that easy. Bedford - I guess have both learnt something today. After 36 hours the hull was dry enough to take the wire wool and it now has a second coat. I'm hoping that the next coat dries more quickly. Apart from the lawn and the dog walk I made progress on the port holes - 30 required. As I said previously they are pretty simple. I turned them on the lathe with the inboard end facing the tail stock. 8mm brass bar was drilled out to 5.5mm and then counterbored with a 6mm milling cutter to give a decent finish to the bore. I then did a further counterbore with a 7mm end mill to a depth of 5mm. this produced a shoulder against which to push the "glass" made form acetate sheet. I then parted off the resulting "stepped tube" at 5.5m length. I needed to cut accurate 7mm diameter acetate circles so I made myself a punch out of a couple of pieces of mild steel from the scrap box. The hole bore was reamed 7mm. In the next photo the acetate still has its protective film on both sides. I have backed the acetate with off-black card circles as I found leaving the acetate without a backing somehow looked wrong. I have to admit however that the photographs don't give a good representation of what the eye sees. I was pleased to see that one of the commissioning team turned up early and took up residence in preparation for sea trials.


-
Hello Kortes - nice utilisation of tools and the end result looks great. Very well done.
- 306 replies
-
- 5
-
-
- schooner
- la jacinthe
- (and 1 more)
-
Hi Jon. The copper treatment turned out much better than I had expected. You refer to the use of "putty" for smoothing the hull - what is the product you are using?
-
Vossie - Pretty amazing - and how long did it take you?
- 714 replies
-
- 2
-
-
- lady nelson
- victory models
- (and 1 more)
-
Thank you all for your continued interest and comments and if I make you laugh that is a bonus. I would struggle to make paint drying very interesting so my posts may be a bit less frequent. As expected the first coat didn't dry and was still much too tacky to do anything with this morning. The hull is now in the boiler room - hopefully a little heat will help. Jeff, it is easy to forget that I sometimes do things not everyone is familiar with. I think I should explain myself a bit more. I picked up the technique of wipe on poly some time ago from another build on MSW. I use clear polyurethane either matt or silk finish. I avoid the gloss stuff because to me it looks quite unrealistic at small scale. You can buy wipe on poly but it is basically only normal poly diluted so I just buy the normal stuff and dilute it myself, usually 1 part poly 1 part white spirit. I apply it by taking some wadding and wrapping it in a lint free cloth and then wrapping an elastic band round the neck to hold the wading in place. I always wipe the poly on in thin coats to avoid the potential for runs and always finish the wiping process in the direction of the grain. After each coat I buff back the surface with wire wool. It usually takes 4 or 5 coats before the wood is sealed and an even sheen begins to appear. If I do mess up and get a run I sand this back locally with wet and dry paper. By 10 or so coats I am finding it difficult to see any improvement with each coat so I stop.
-
Eberhard - the paint can does not quote a temperature and to be fair it says dry to the touch in 4 hours - repaint 16 to 24 hours. If it does not dry overnight I will move it into the boiler room. I start getting reluctant to go into the workshop when the thermometer reaches about 8 deg and below that I take a fan heater with me, by 12 deg I am comfortable enough not to notice the temperature. I suppose we are all comfortable in what you are used to, a certain Canadian gentleman tells me he only thinks about changing out of his T shirt and shorts once the temperature gets down to a couple of degrees.
-
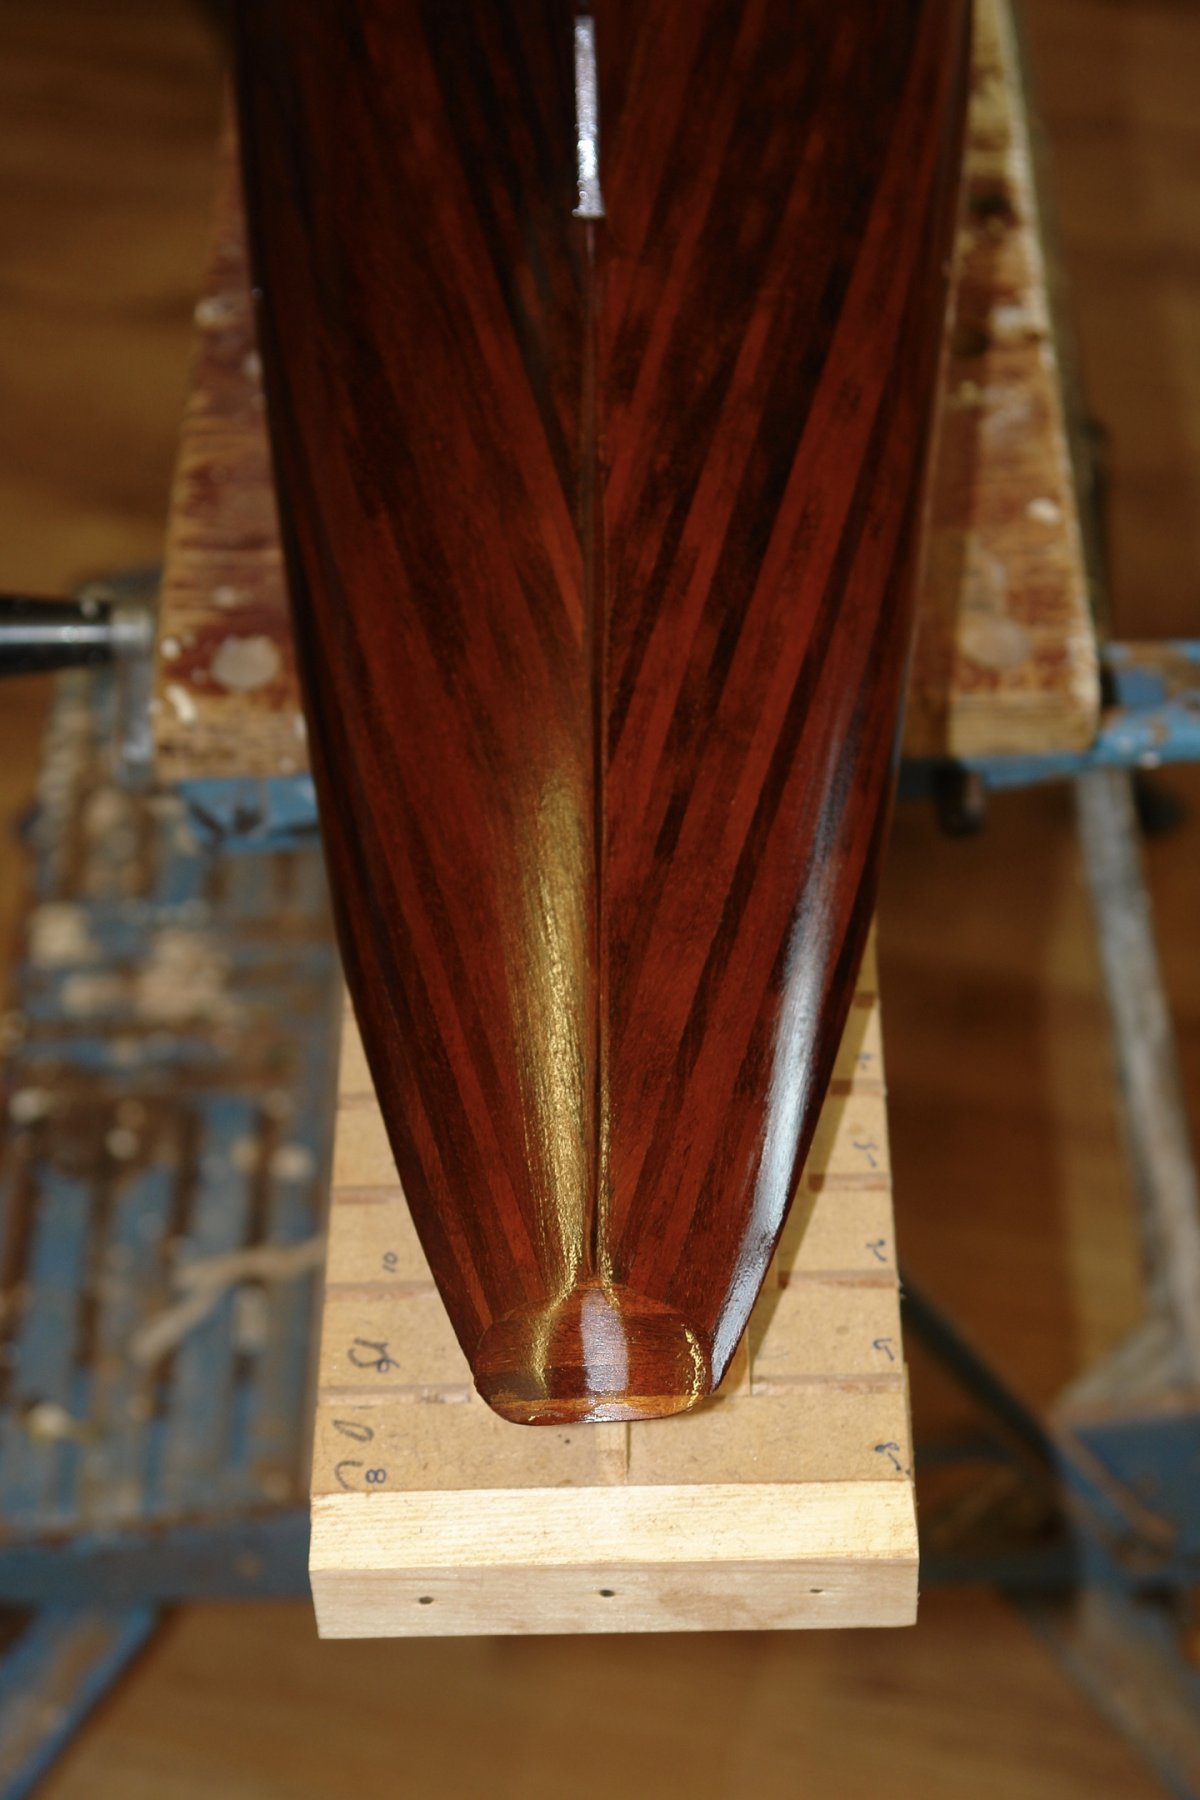
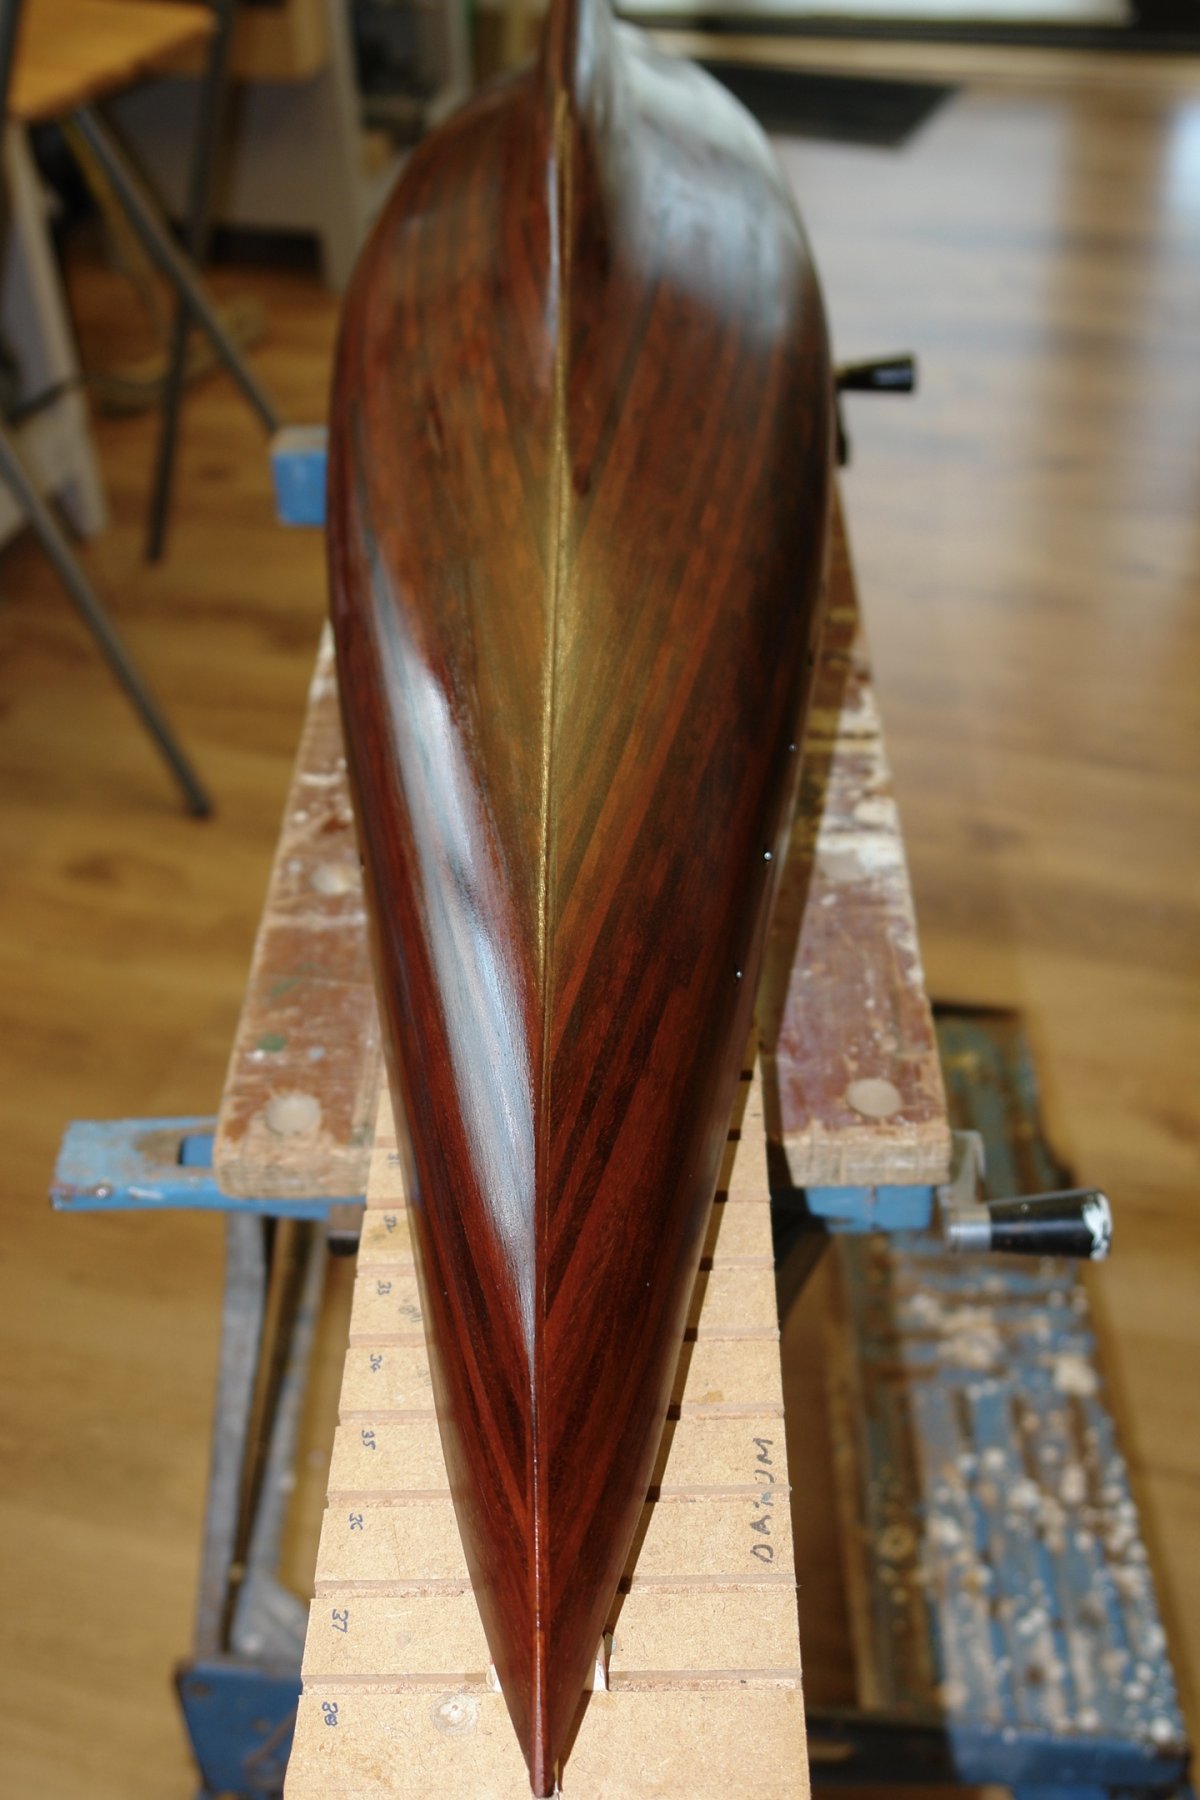
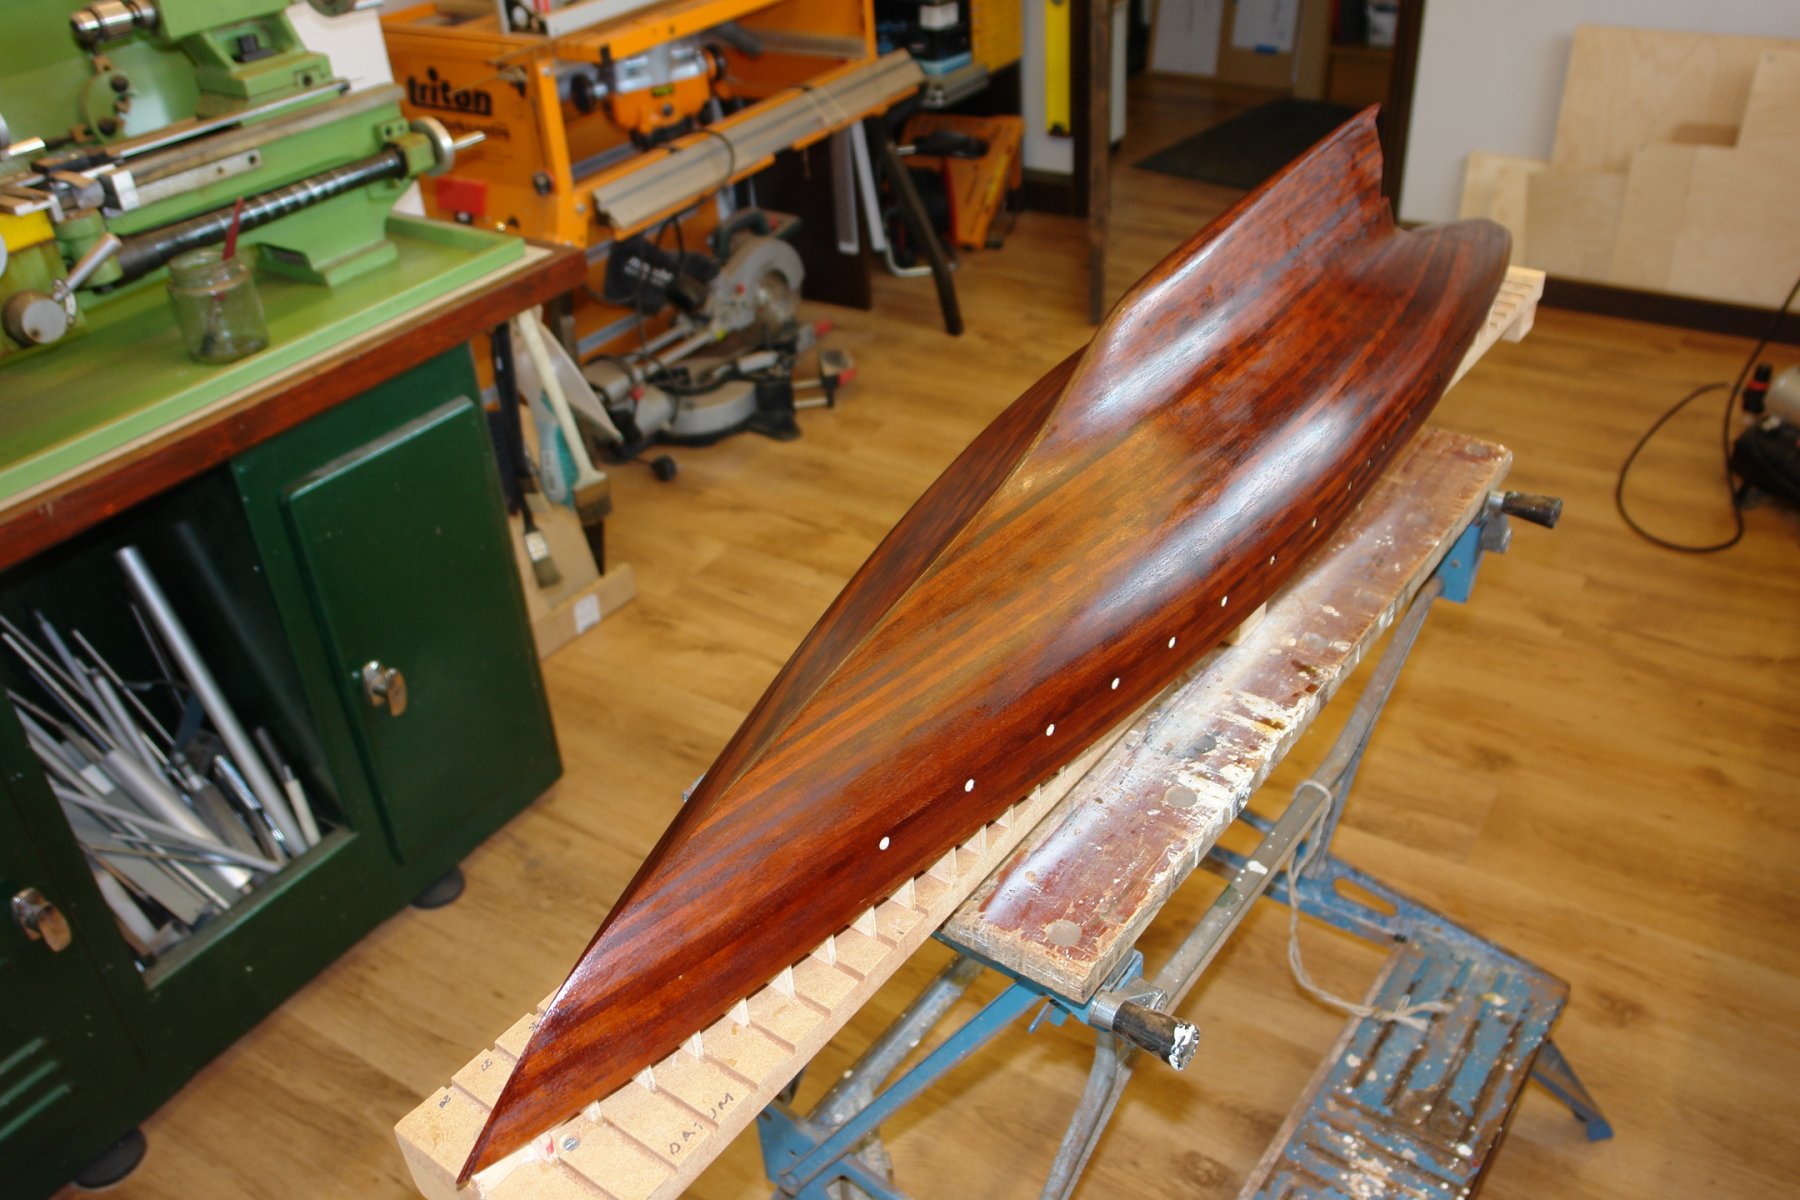
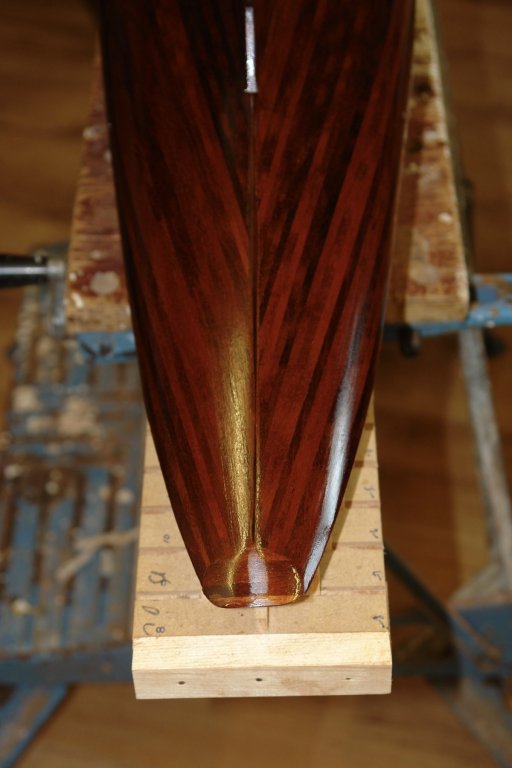
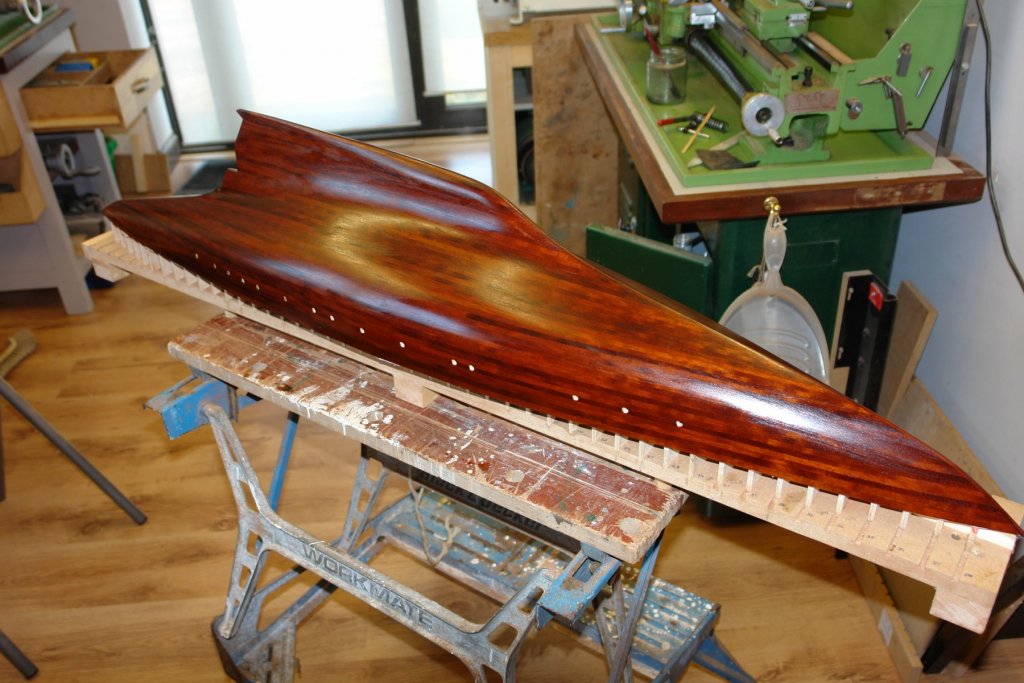
Today I applied the first coat of wipe on polyurethane and took a couple of shots while still wet. In the past I have had trouble with the first few coats drying. Not sure why but I find the poly is tacky to the touch well beyond its stated 4 hours drying time. The workshop toady was sitting comfortably at 12 centigrade and humidity was low, never the less 8 hours after application and the hull is still much too tacky to contemplate another coat. I'll leave it overnight and see how it is in the morning. I am expecting to have to apply upward of 10 coats so progress on the hull is going to slow and I am going to have to find something else to do - either deck fittings or sorting out the garden. I am hoping for rain!!!! I am reading with interest the postings on painting recommendations but I think I had better narrow down the debate. Below the water line Germainia is painted a rather unattractive black. Above the waterline is white with the exception of decoration which is in gold. Some time ago I made the decision to finish the hull below the waterline with clear polyurethane. I know this won't be consistent with the steel hull but its the penalty I have to pay to get it on display in the inhabited area of the house. My original plan was to paint above the waterline white with the decoration in gold - as per the original. However a number of comments posted here and from daughter have raised doubts. I have to remember that my daughter plans to house my efforts when she consigns me to a care home. Apparently doing what she wants earns me points which I can trade in for a better quality home when the time comes. I feel I have to paint a waterline band in white whatever happens so this decision is made. The only question really outstanding is whether I repeat the same paintwork scheme I used on Altair or stick with my original plan to paint above the waterline white. Thank you Keith, Pat and John for your comments and thank you to everyone else who has visited.

-
Wonderful work, really exceptional - and i do like the radiator in the workshop, must get one soon.
- 589 replies
-
- 2
-
-
- le gros ventre
- cargo
- (and 1 more)
-
As always it is a pleasure to find your updates Dan. I just get a bit depressed when I see how much you have achieved. She continues to look very smart. Looking forward to the next update.
- 238 replies
-
- 4
-
-
- leviathan
- troop ship
- (and 2 more)