KeithAug
-
Posts
3,985 -
Joined
-
Last visited
Content Type
Profiles
Forums
Gallery
Events
Everything posted by KeithAug
-
 I am just being precise with my description and not being presumptious about what the future might hold.
 -
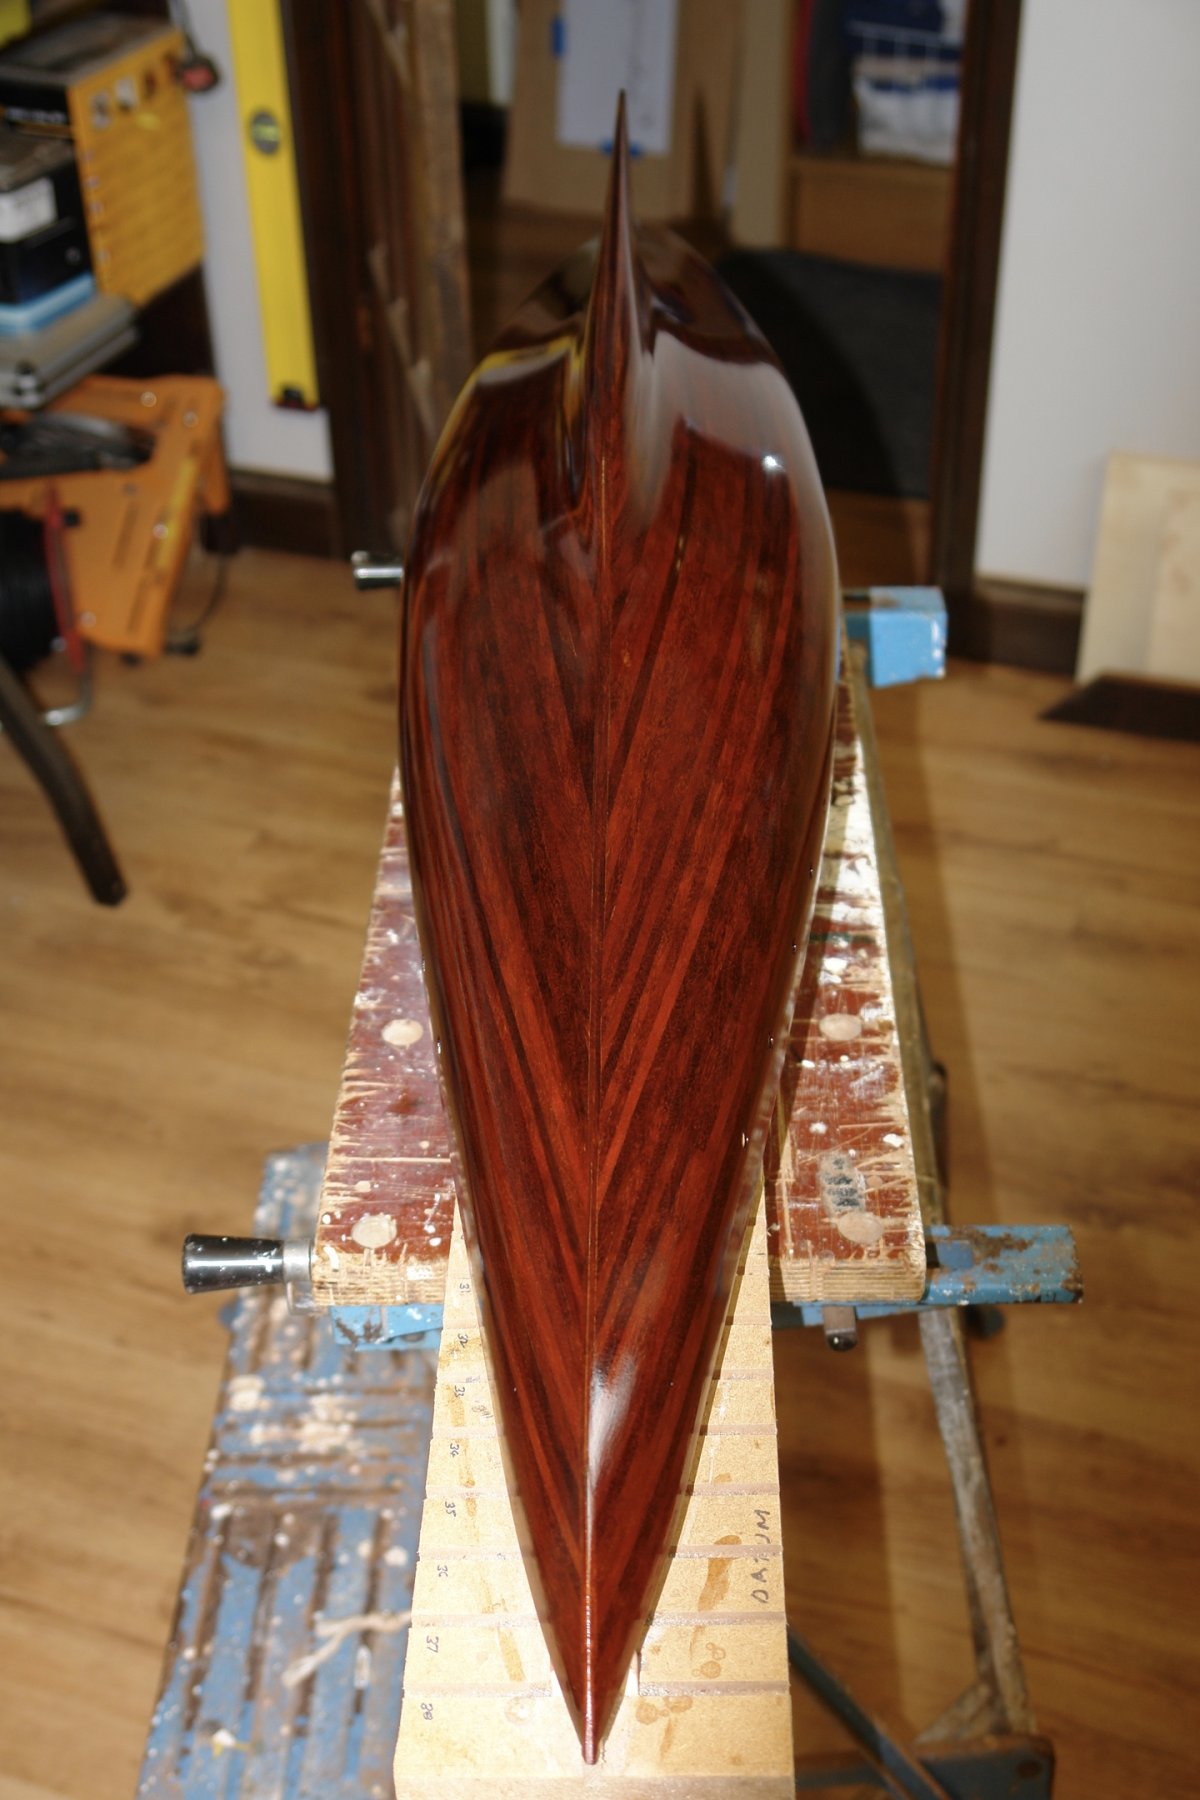
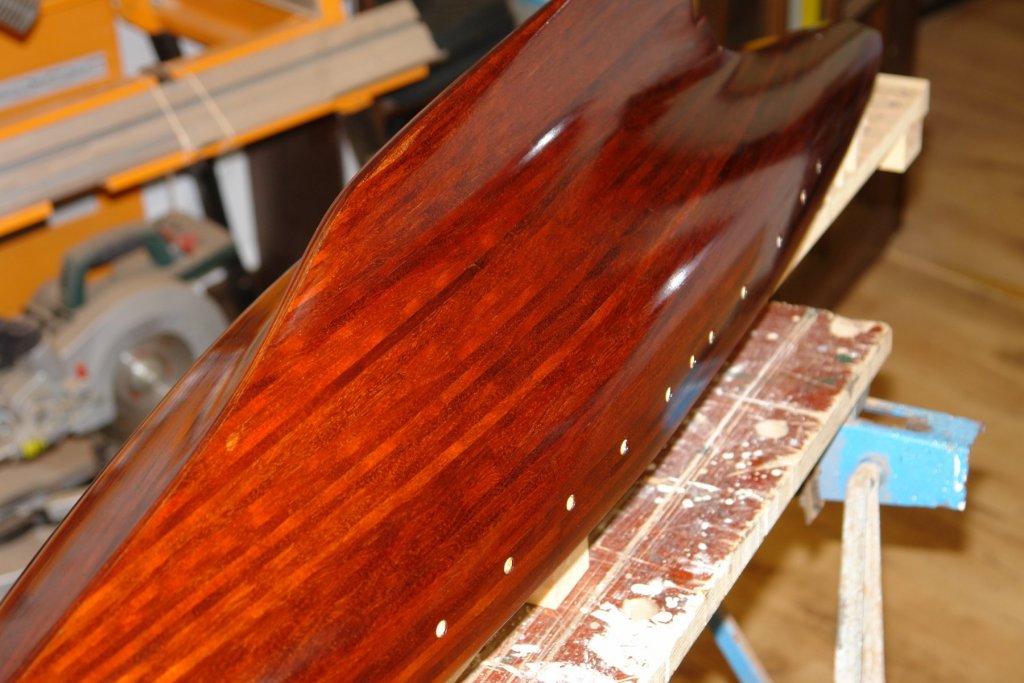
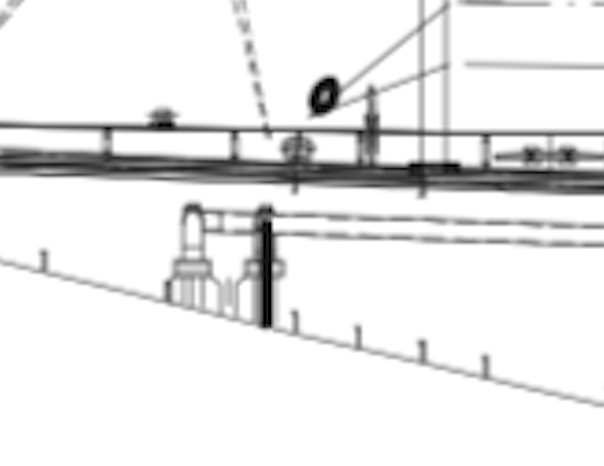
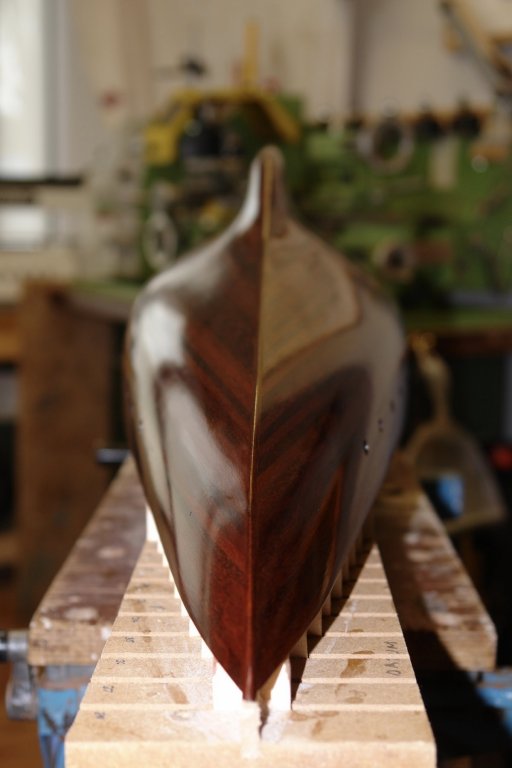
For now I have finished with the poly coats. The law of diminishing returns finally won the day. I think in the end it was somewhere between 12 and 15 coats. Under the stern are three outlets - one is clearly the exhaust and the purpose of the other two is unclear - at least to me? I placed masking tape in the position of the nearest frame and then transferred the position of the holes on to the hull. The diameters were scaled from the plan. I forgot that the positions were reversed on the upturned hull and marked the holes as a mirror image of what they should have been. Fortunately I caught the error before I drilled the holes. I also drilled the holes for the dolphin striker eye bolt and the stay bracket. Blind ended brass inserts were turned for the holes under the stern and a drop of black paint was placed at the bottom of the hole to hide the end. The various brass hull attachments were safely collected in jar lid for future use. The next step was to finally decide on the hull paint scheme. Over the course of 2 hours I made four separate decisions all of which were different. Rather than make a decision I started sorting trough my stock of paint pots. At this point my current wife walked into the workshop, observed what I was doing and commented:- "You aren't going to paint it, ARE YOU!" I think I could interpret this as a question - what do you all think?


-
Patrick - this is the traditional definition:- Bodging (full name Chair-Bodgering) is a traditional woodturning craft, using green (unseasoned) wood to make chair legs and other cylindrical parts of chairs. The work was done close to where a tree was felled. The itinerant craftsman who made the chair legs was known as a bodger or chair-bodger. However its more modern meaning is as follows:- A person who makes or repairs something badly or clumsily.
-
Yes - I have never had any success with water based stuff - like you I have always found bonding between layers is a problem. I hope someone knows how to do It well as i am eager to learn. The soldering does look ambitious, I'd be tempted to fold up 2 U sections from strip and then to join them with a single solder joint.
-
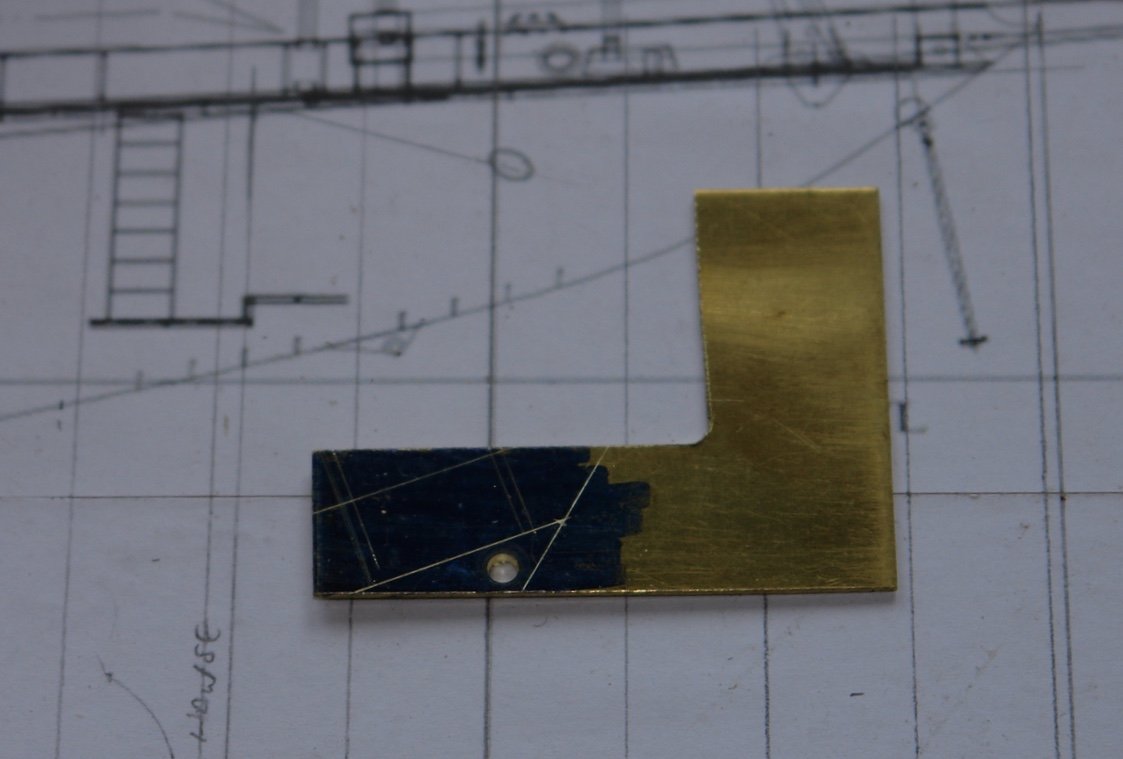
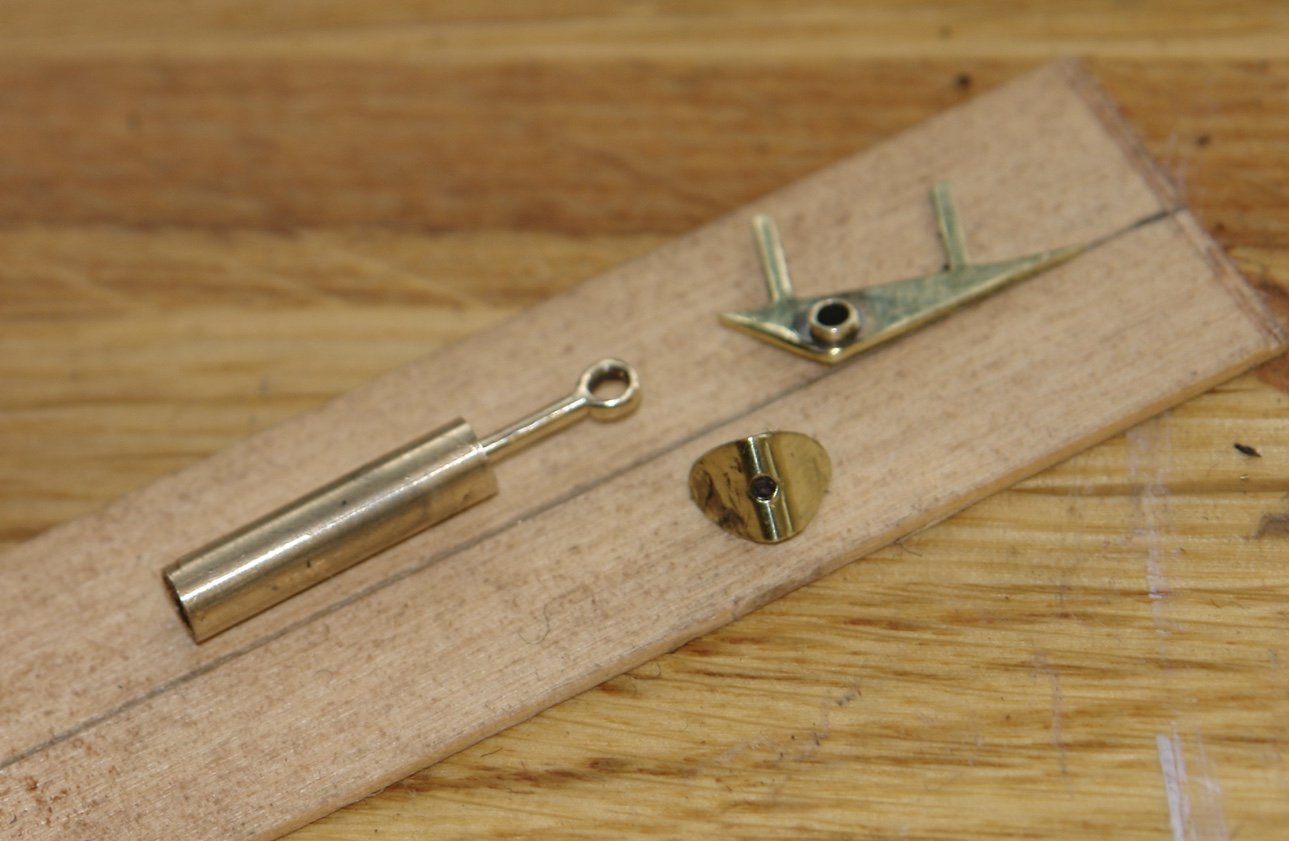
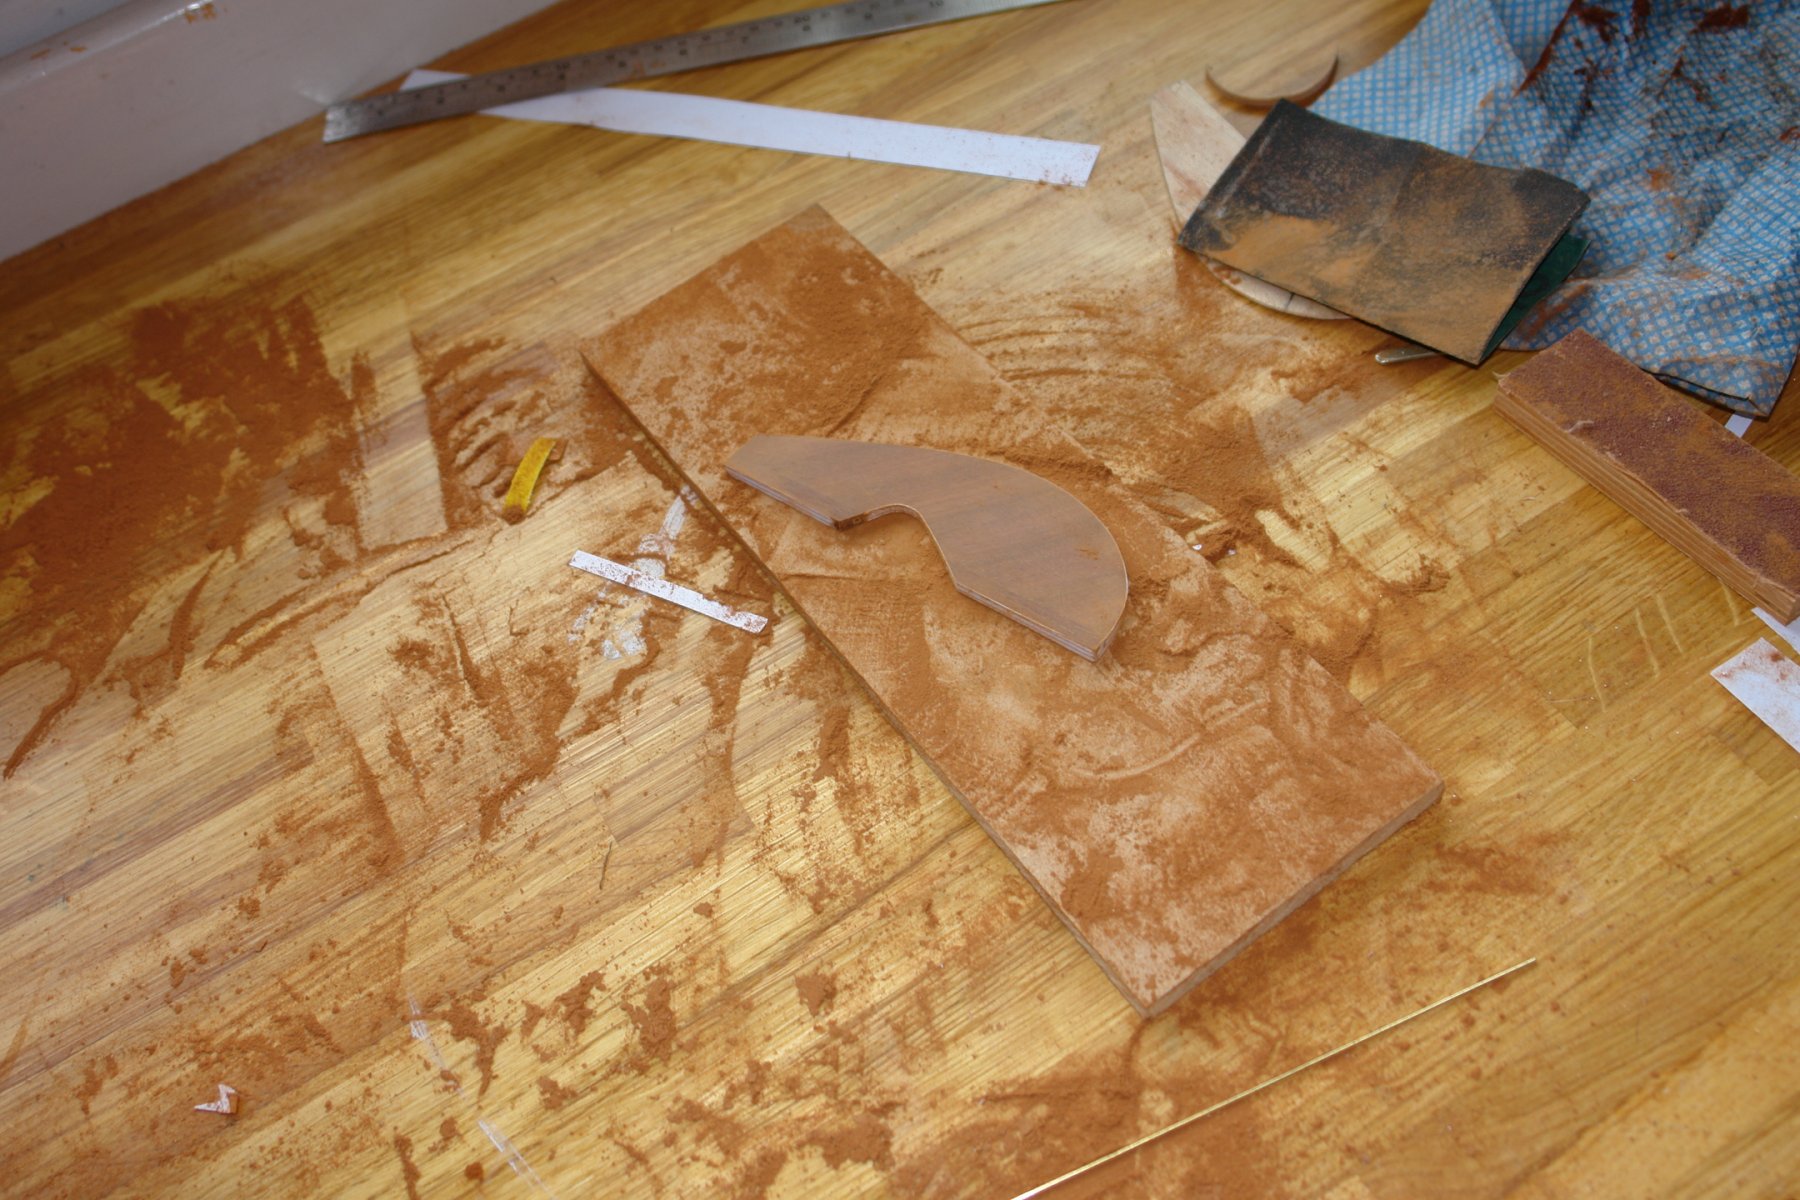
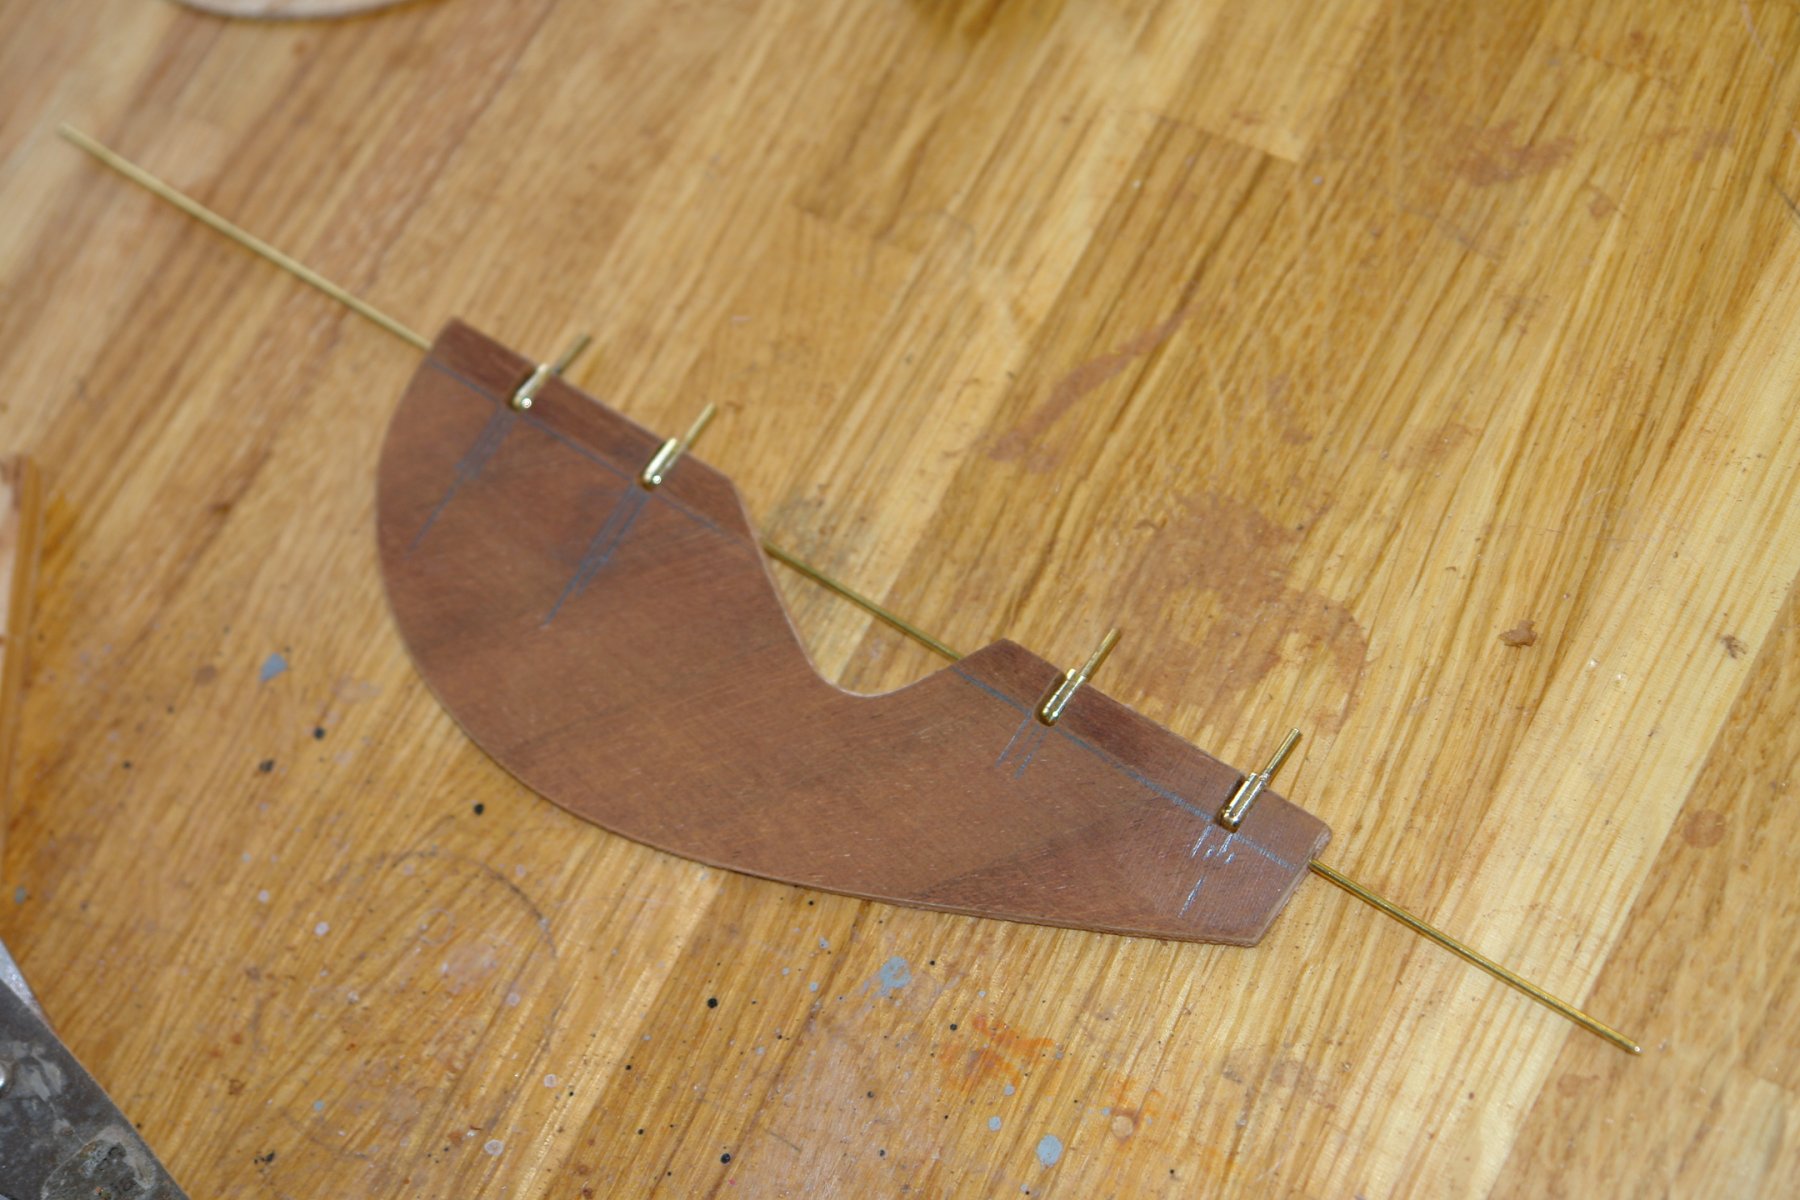
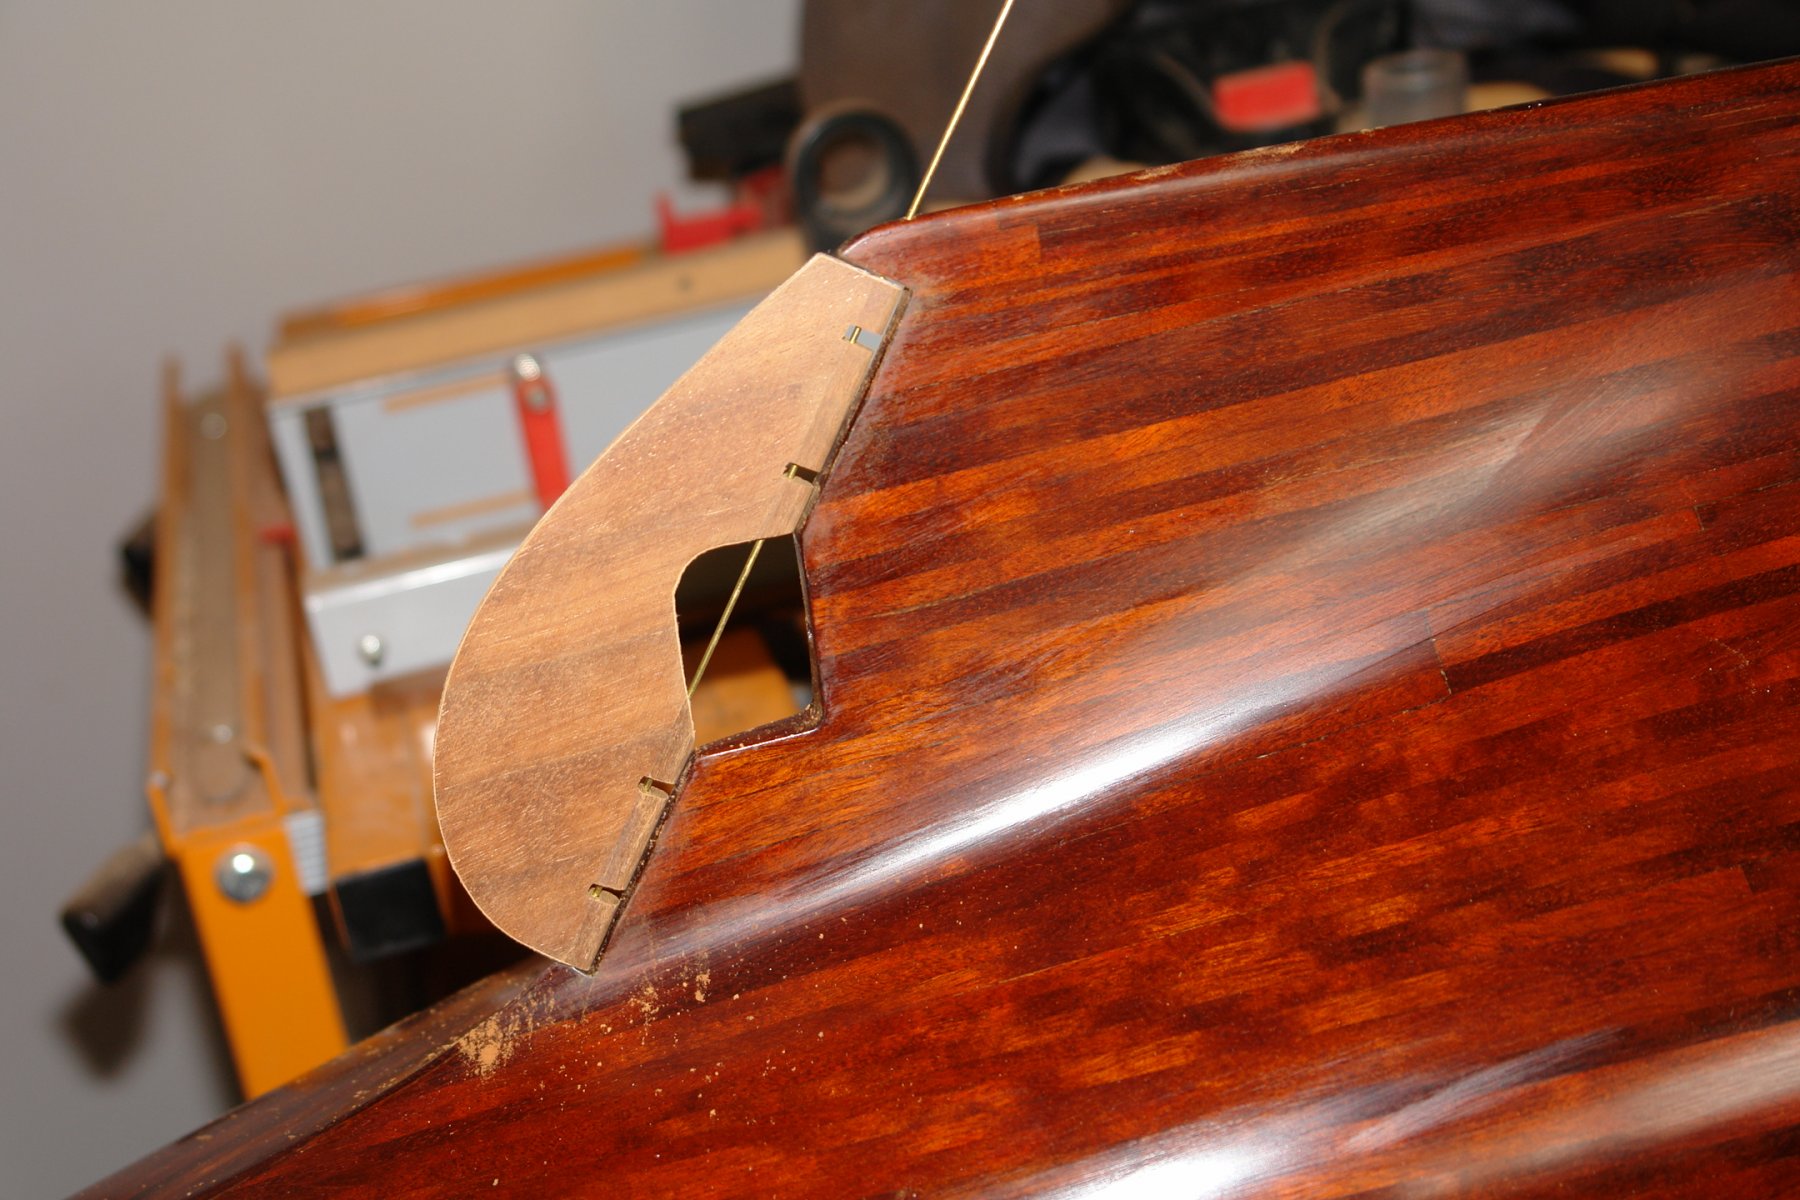
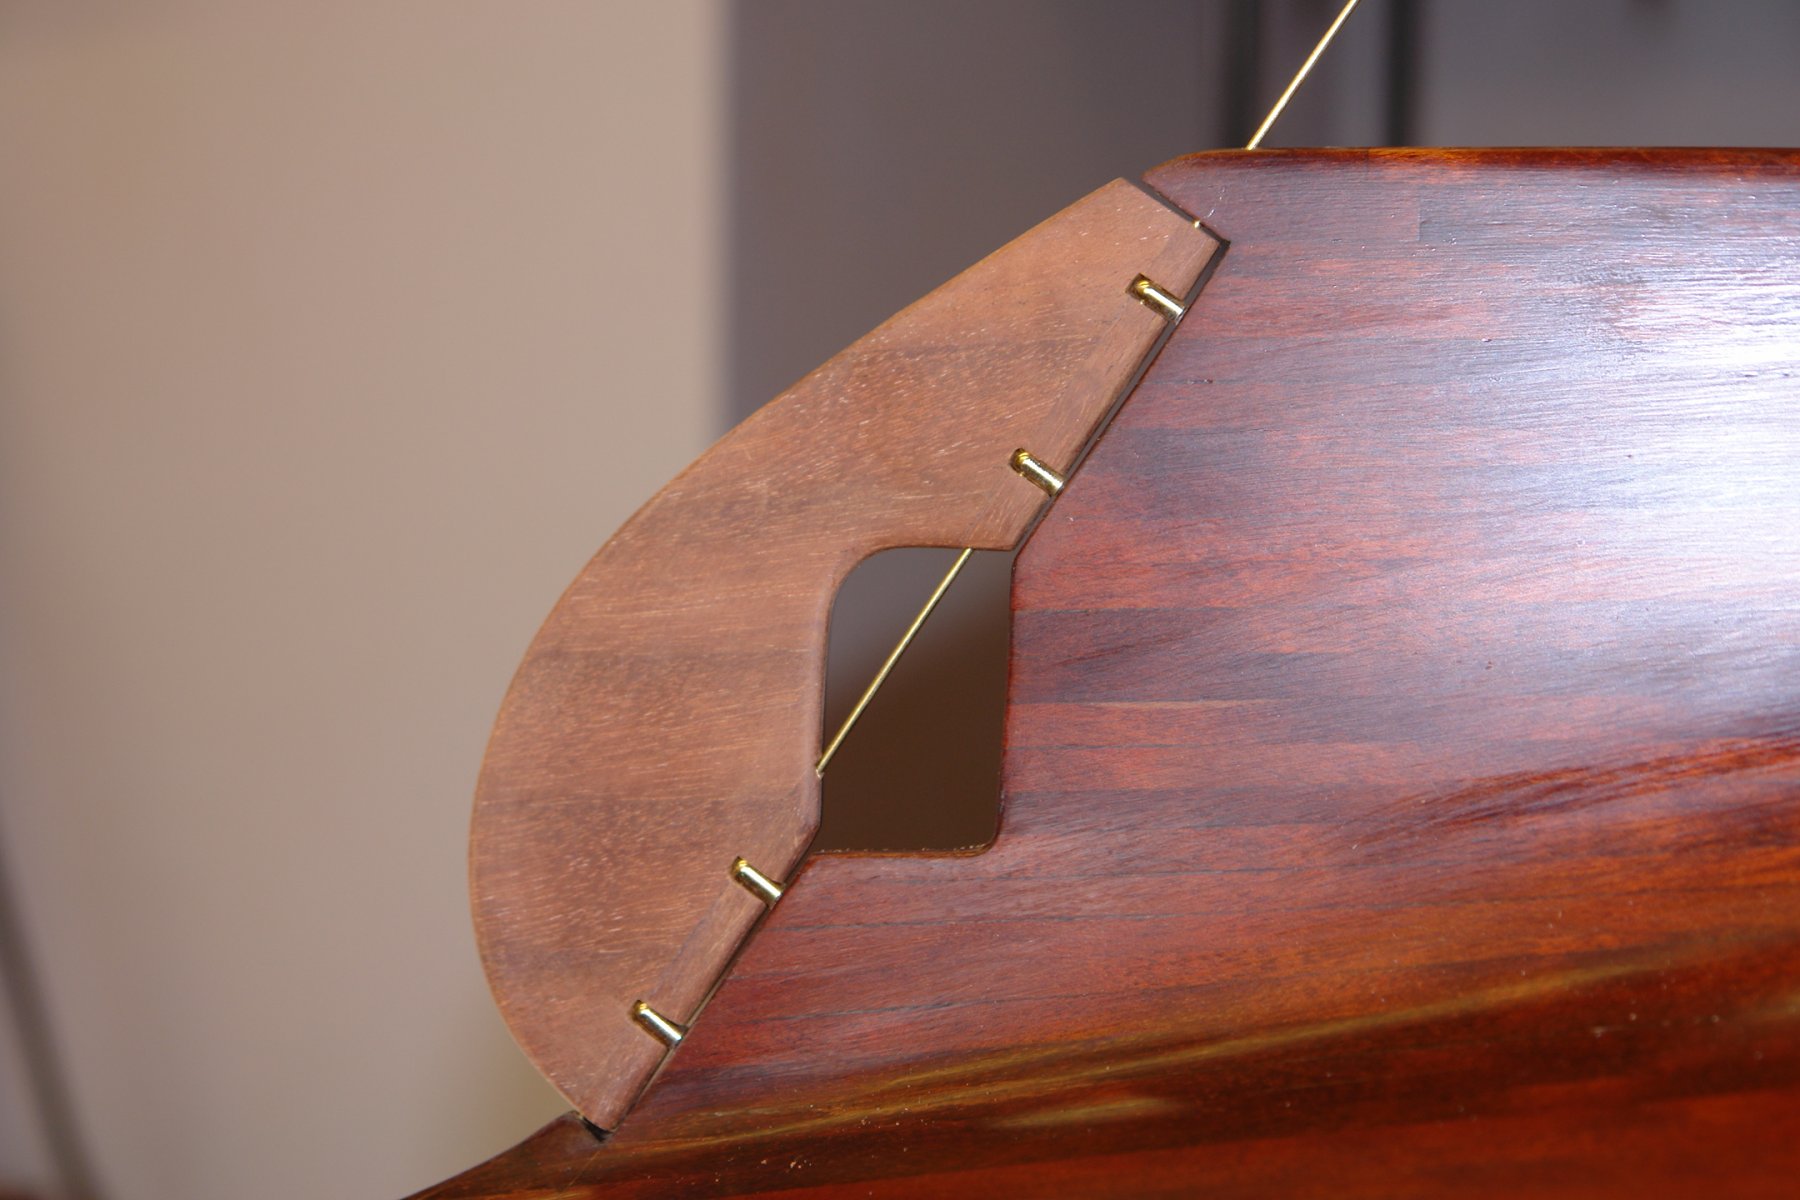
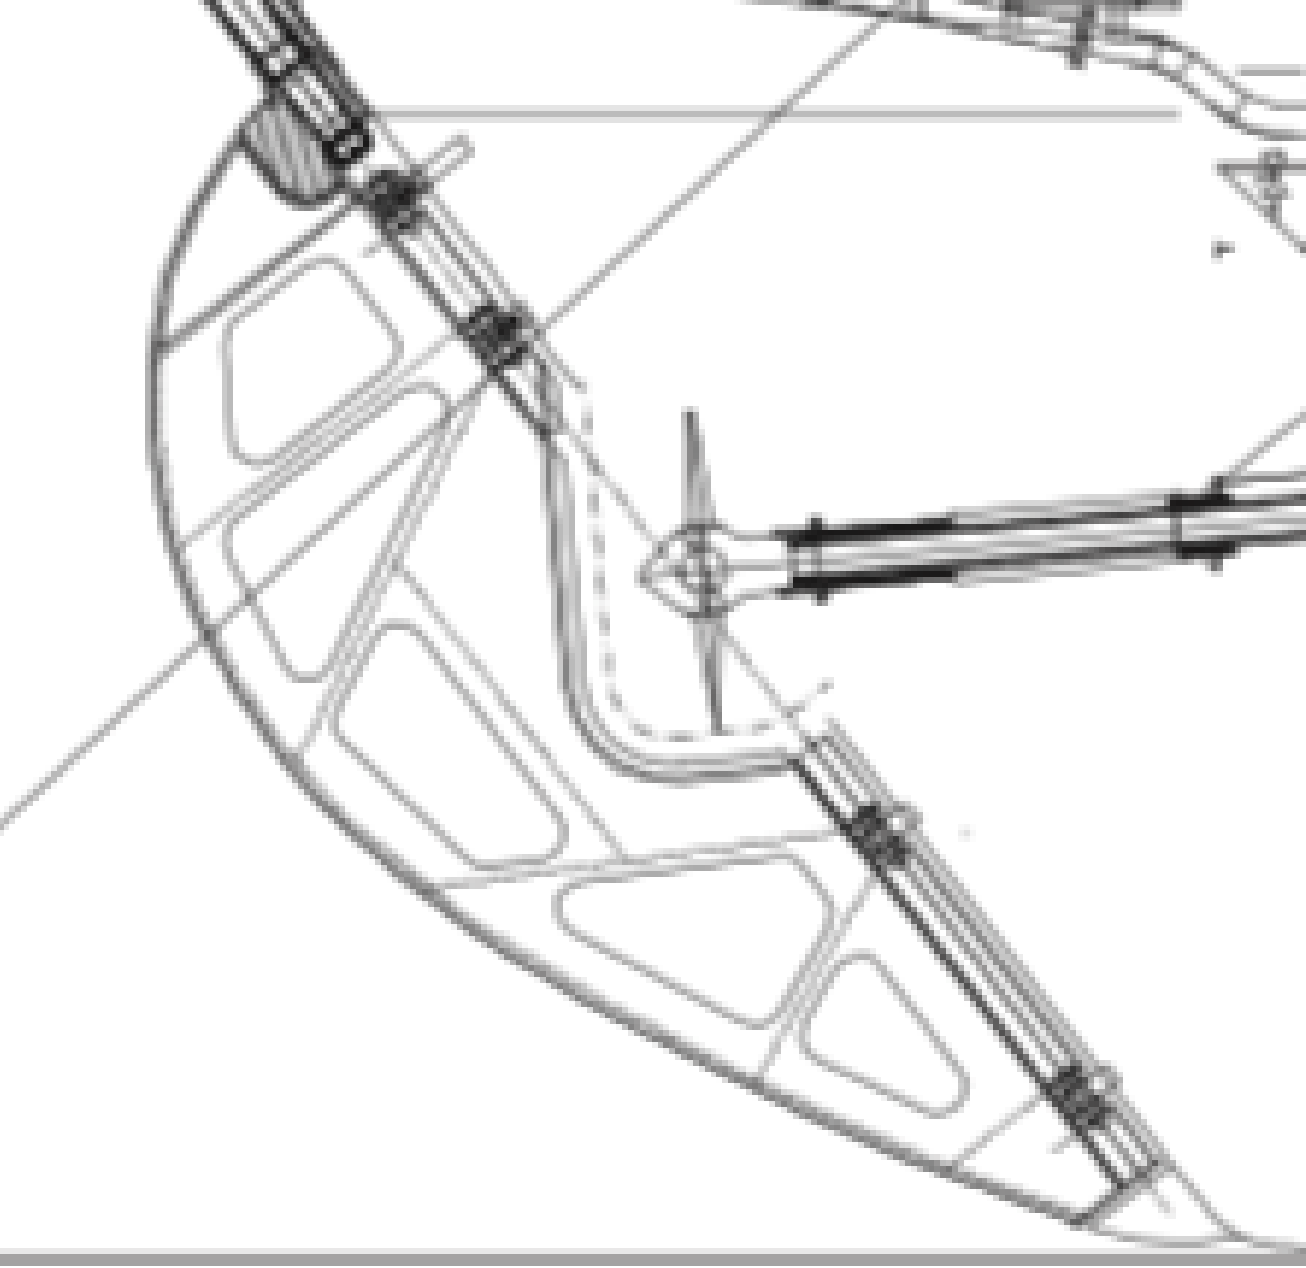
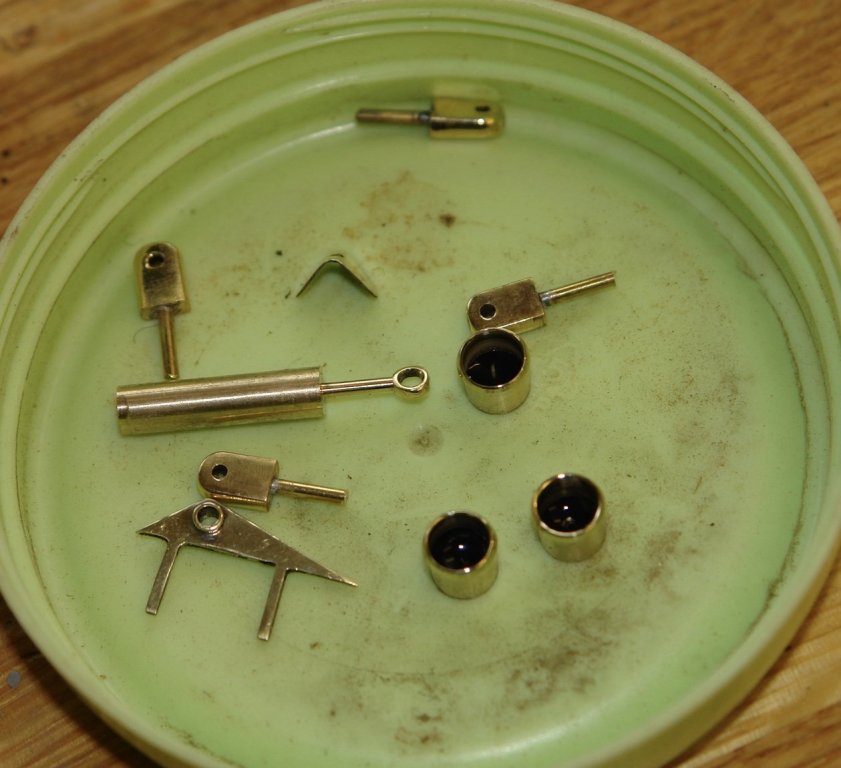
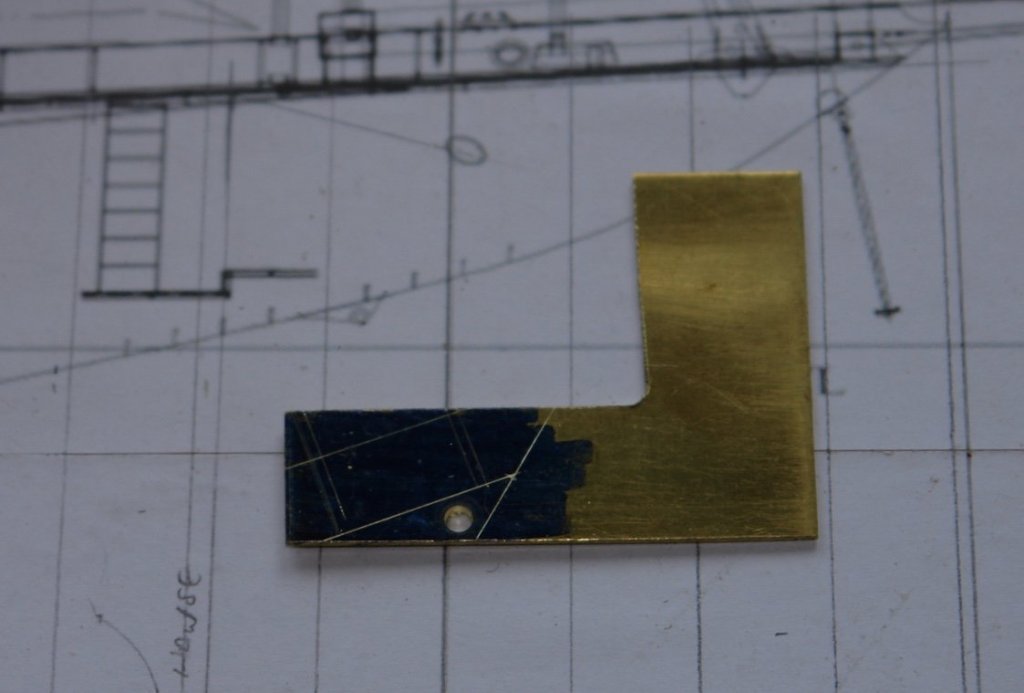
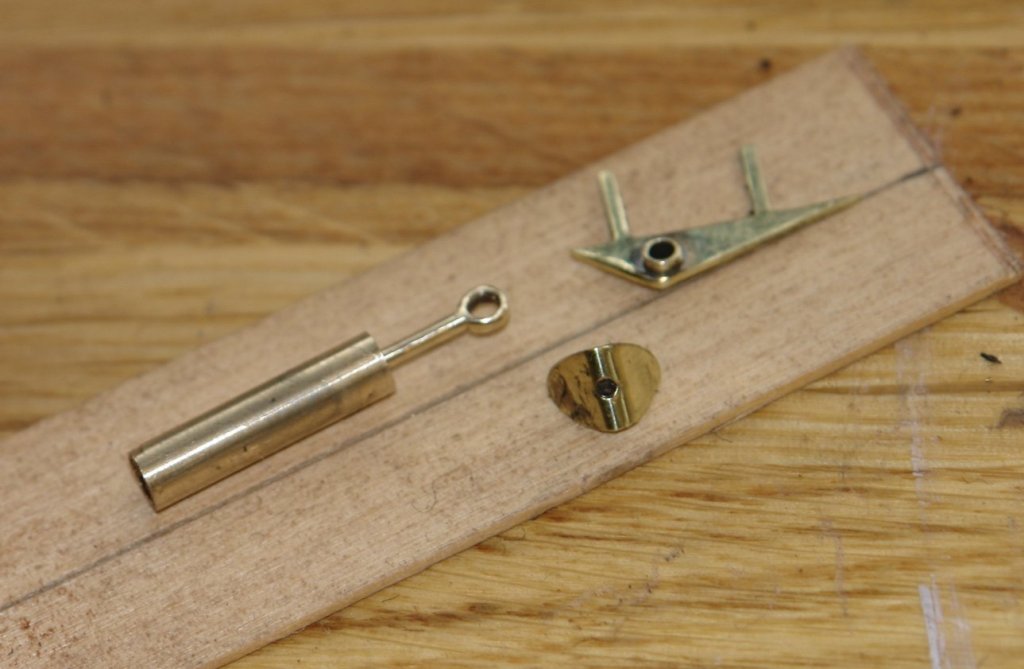
Kortes, Pat, John, Michael - thank you. Not sure that this would work as well as you might think Pat. The unlikely places are all full of junk previously saved for a rainy day. I hear what you say Michael, however I think my current wife is working herself up to providing some ground rules. She has been my current wife for 43 years and so expects to be listened to. I spent a few hours today hacking at a few small bits of brass. The eyebolt and mounting plate for the top of the dolphin striker needed to be made. As well as the bracket that fastens the jib boom stay to the hull. Both were scaled from the plans. The stay bracket was marked out on .040 thick brass sheet. it included pegs for inserting into the hull to provide strength and remove reliance on glue. The bracket was drilled to take the reinforcing boss before being cut out with a combination of the mill mounted slitting saw and a freehand jewellers saw. A tube was used to form the boss and this was soldered in. The eyebolt for the dolphin striker boss was turned from 3/16 inch rod. A ball was first turned with a profile tool before being flattened on both sides on the mill and then drilled to form the eye. Then it was back to the lathe to form the neck. In the following photo the eyebolt remains attached to the rod from which it was formed. Finally the eyebolt mounting plate was made fro a bit of 1/64 inch brass sheet. Not much to show for the effort!


-
Keith - that was a reference to my last build where I actually lost the rudder. I was recently reminded in an earlier post of this event. As advised, I plan to take a photo of its location and post it here as a reminder, i'll do this as soon as I find my camera.
-
Hello Phil, Just found your build. I have always been a fan of Warrior ever since I first visited her about 20 years or so ago. I have visited many times since. I will be pleased to follow as you complete your build.
-
I agree they are so elegant - I'm looking forward to see how your build develops.
- 26 replies
-
- 2
-

-
- gigino
- brigantine
- (and 1 more)
-
Sorry Keith - they are not the correct brand and I can't reveal what is in case you are accused of insider trading. I finished the rudder - which involved a lot of heavy hand sanding. The trailing edge needed to be sanded down to just under 1/3 of the original thickness at mid height - thickening slightly towards the upper and lower edges. The notches for the gudgeons were slotted out using my jewellers saw and a diamond file. The position of the cut outs was then transferred to the keel and holes were drilled to take the gudgeon pins. The whole lot was then test assembled and the free swing of the rudder was checked. I won't actually mount the rudder until towards the end of the build. This will give me ample time to misplace it.


-
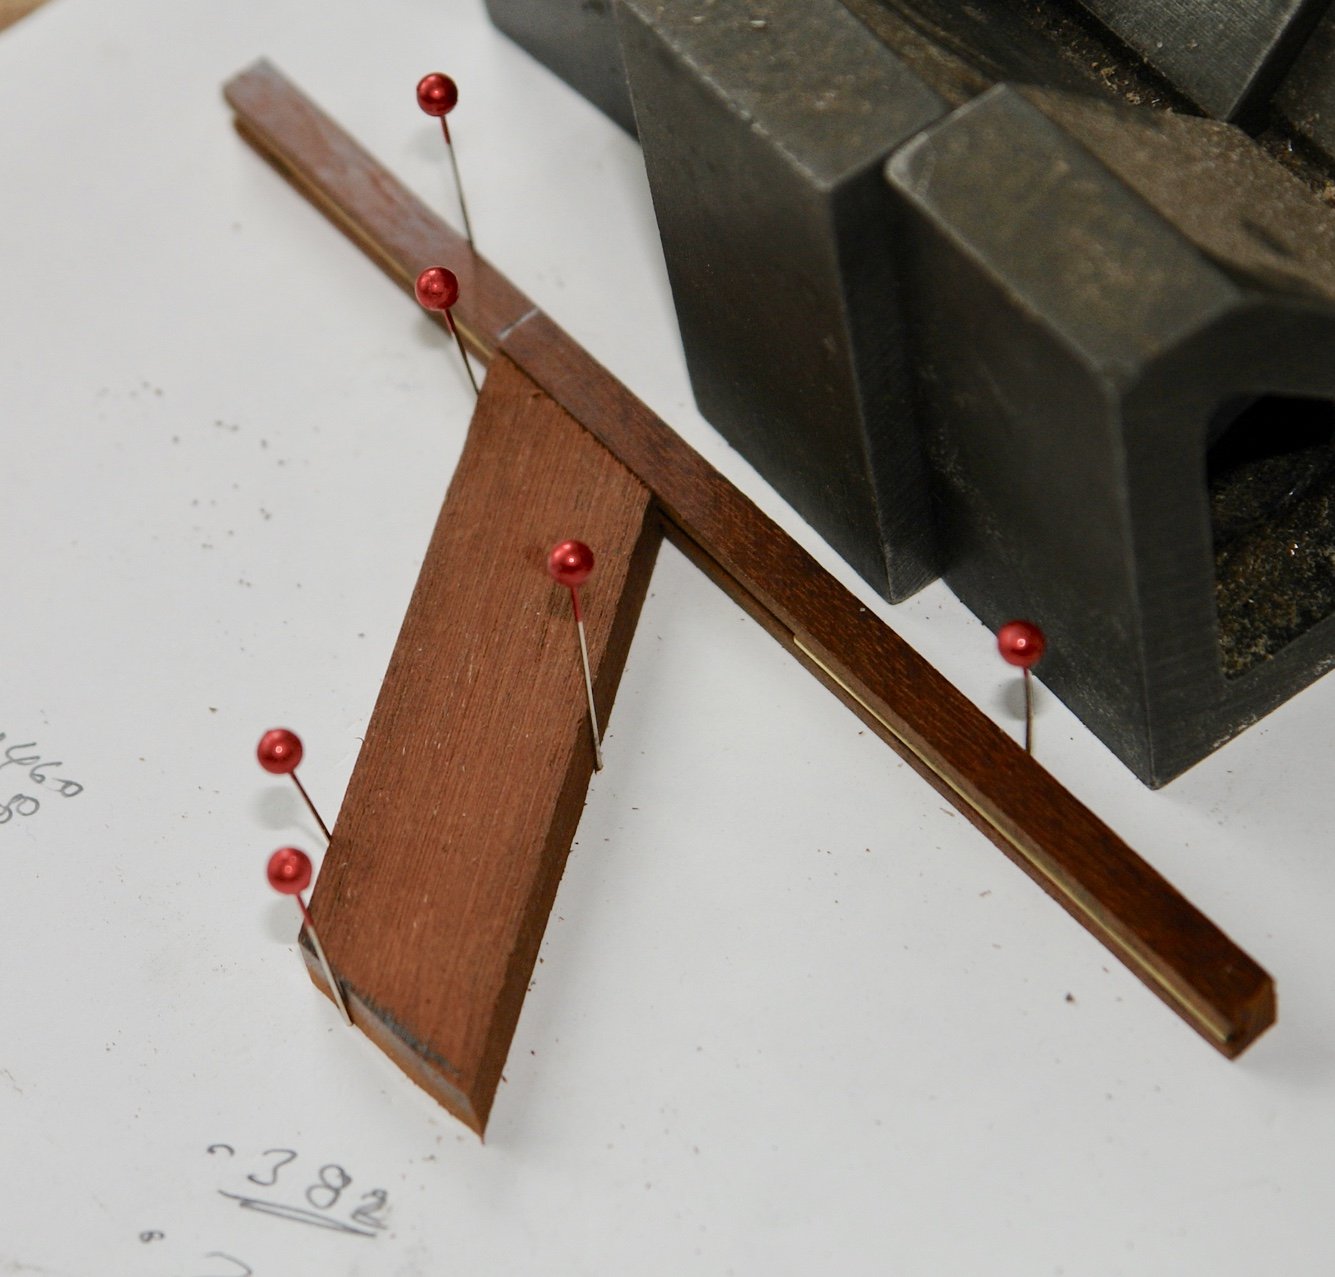
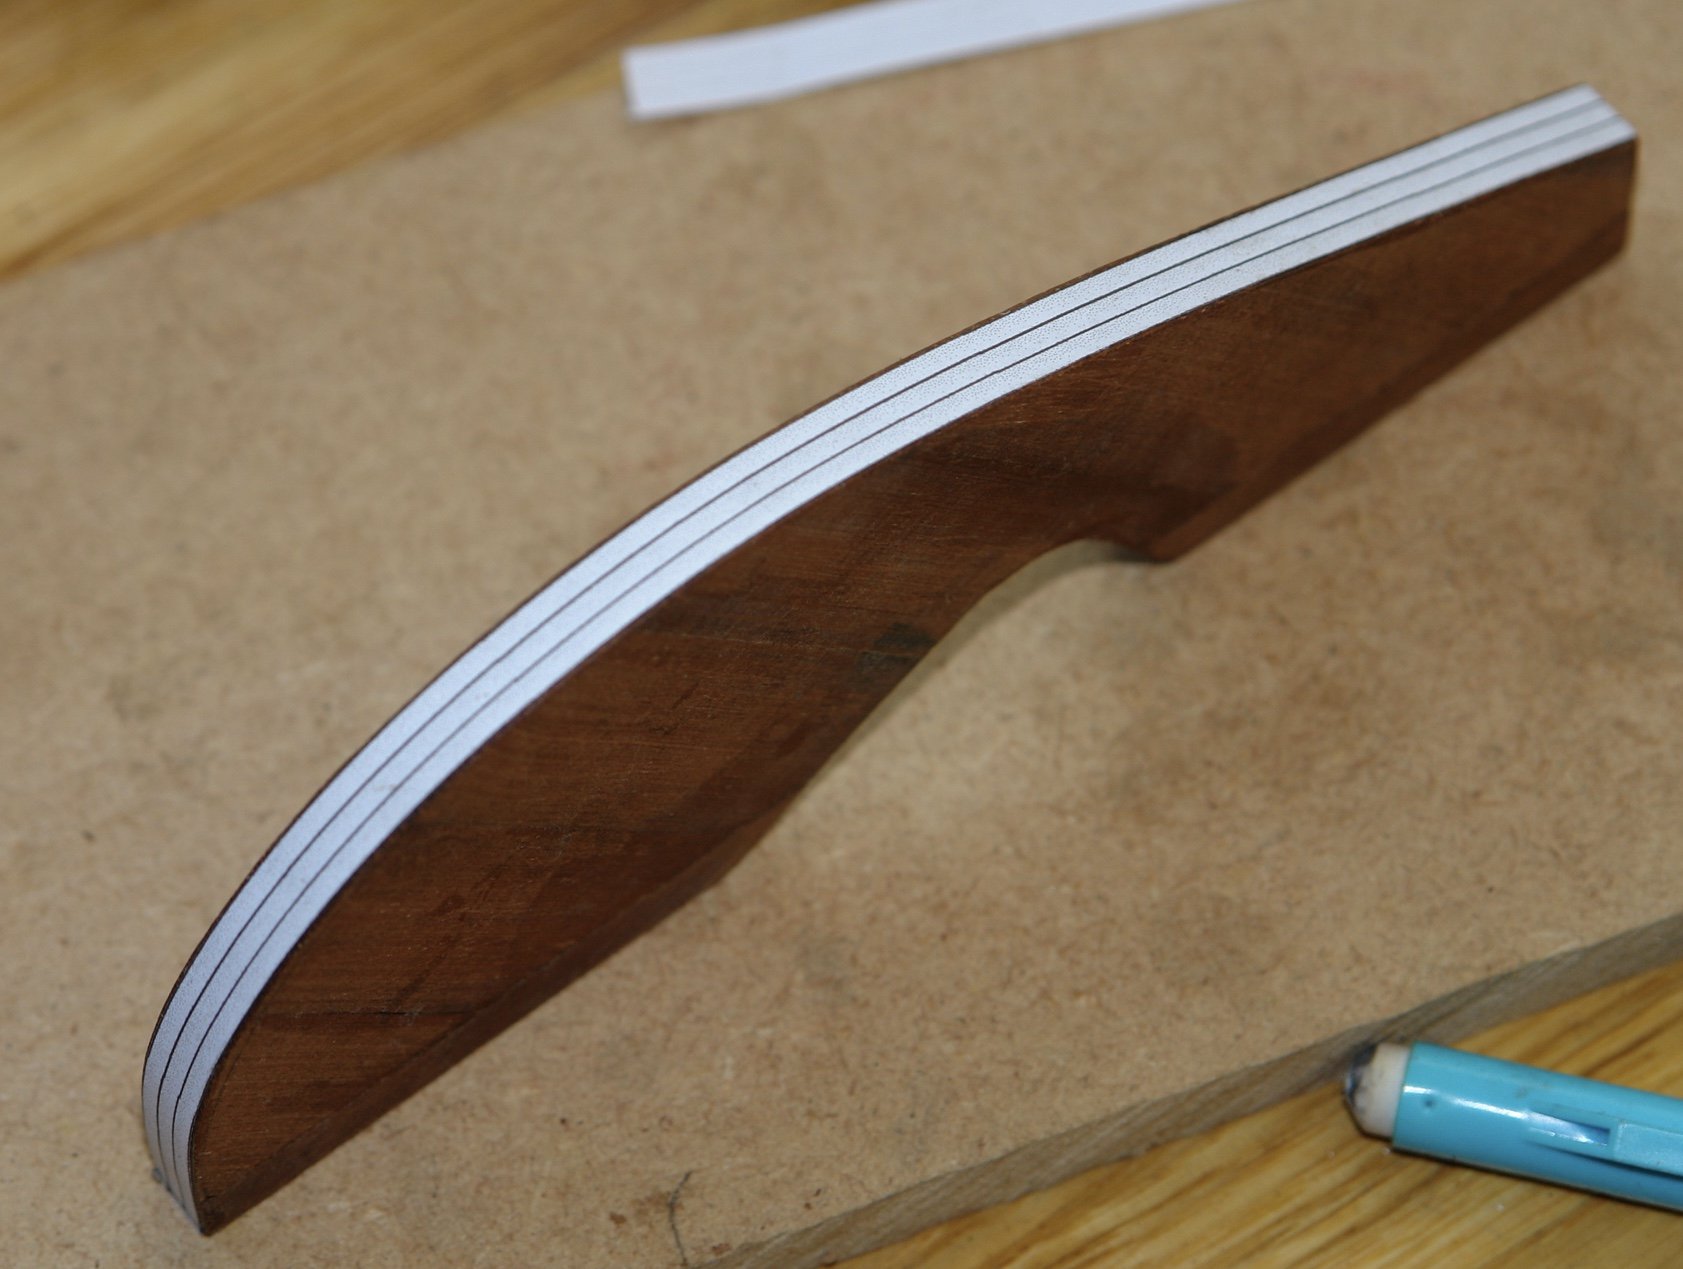
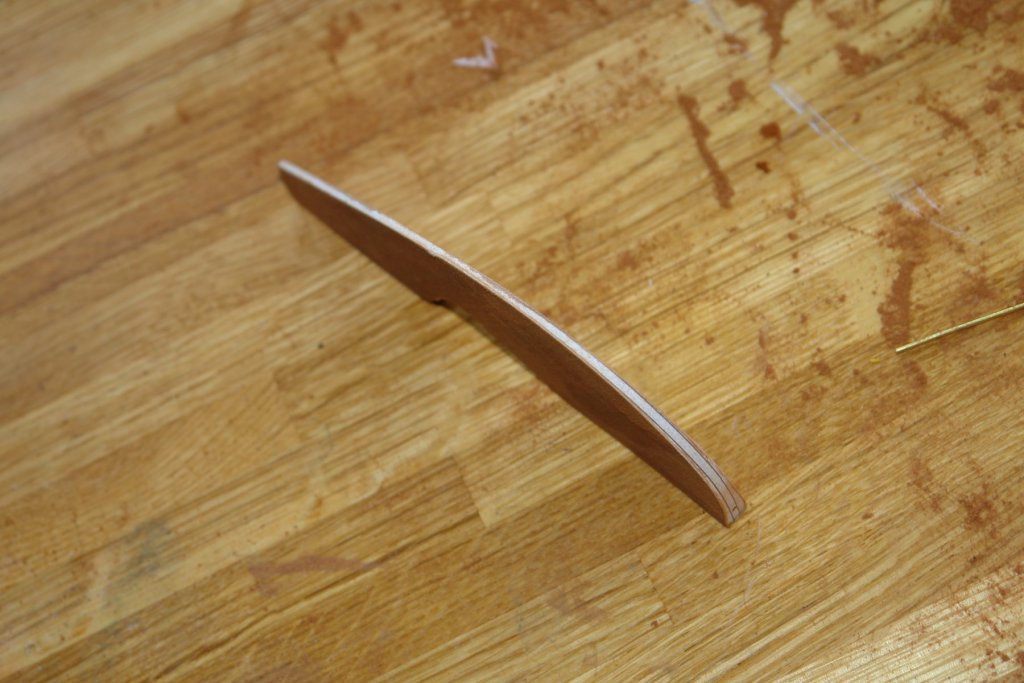
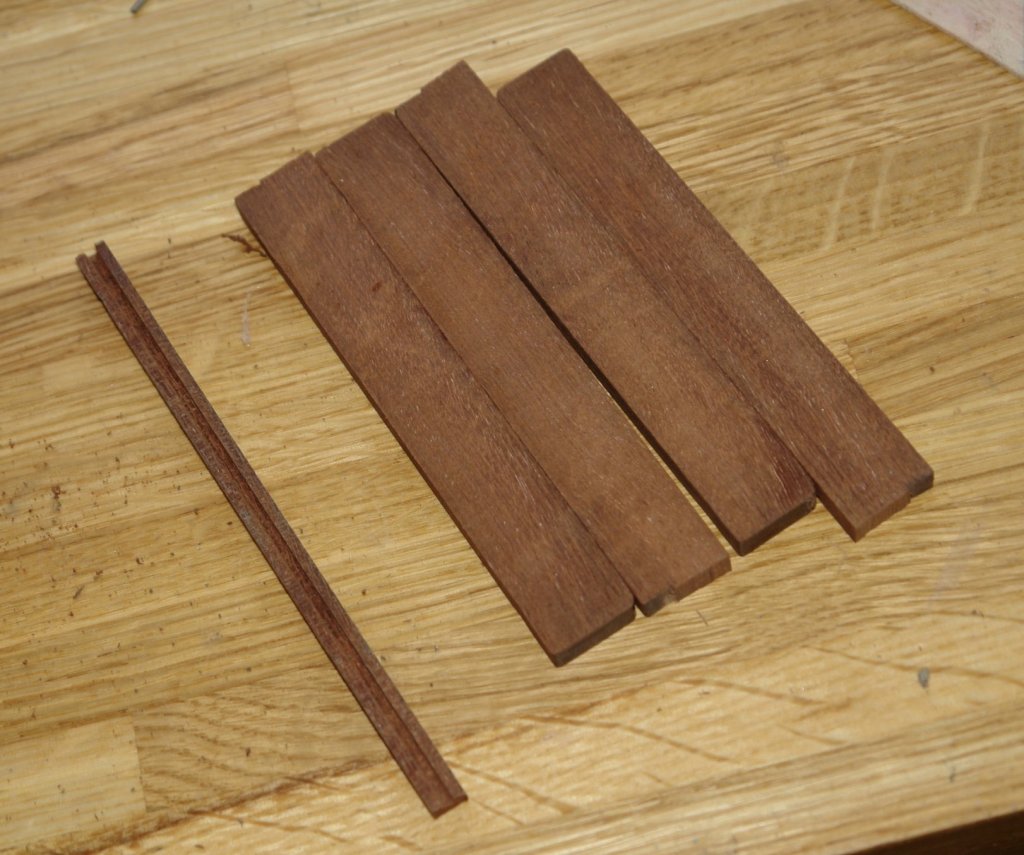
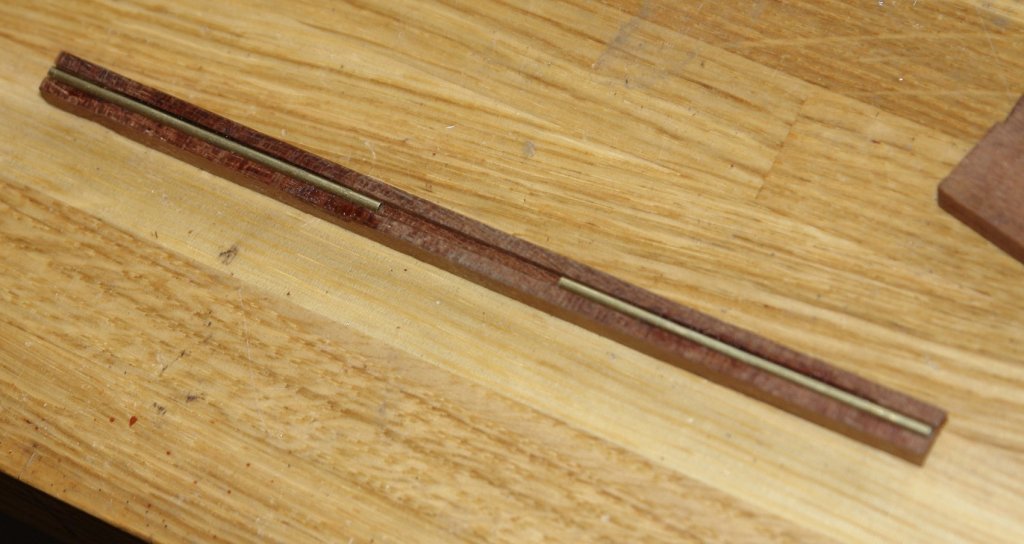
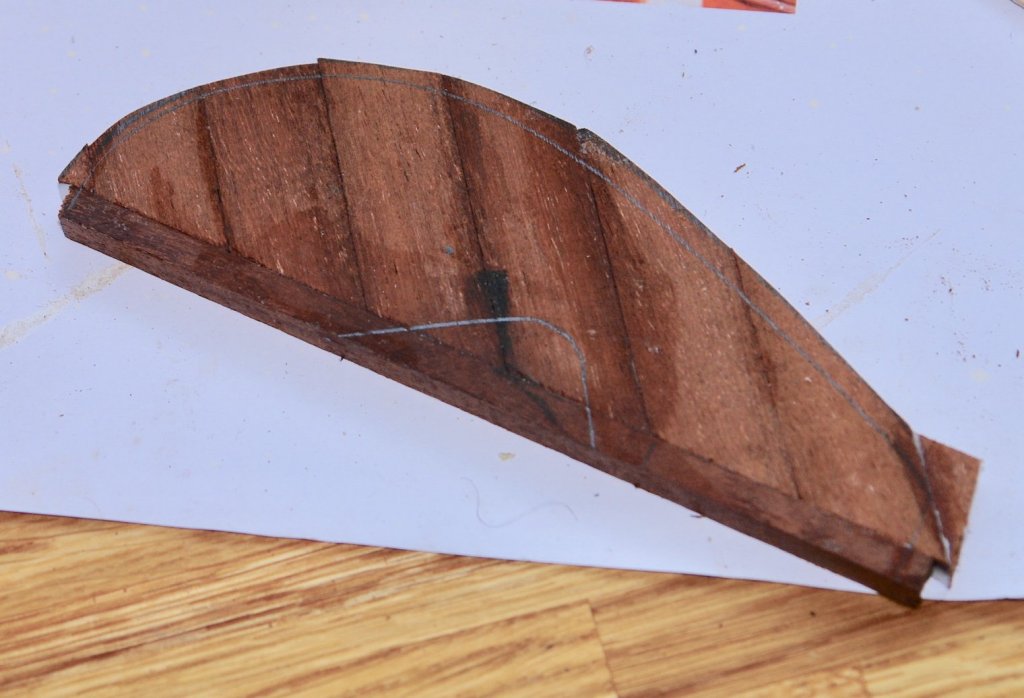
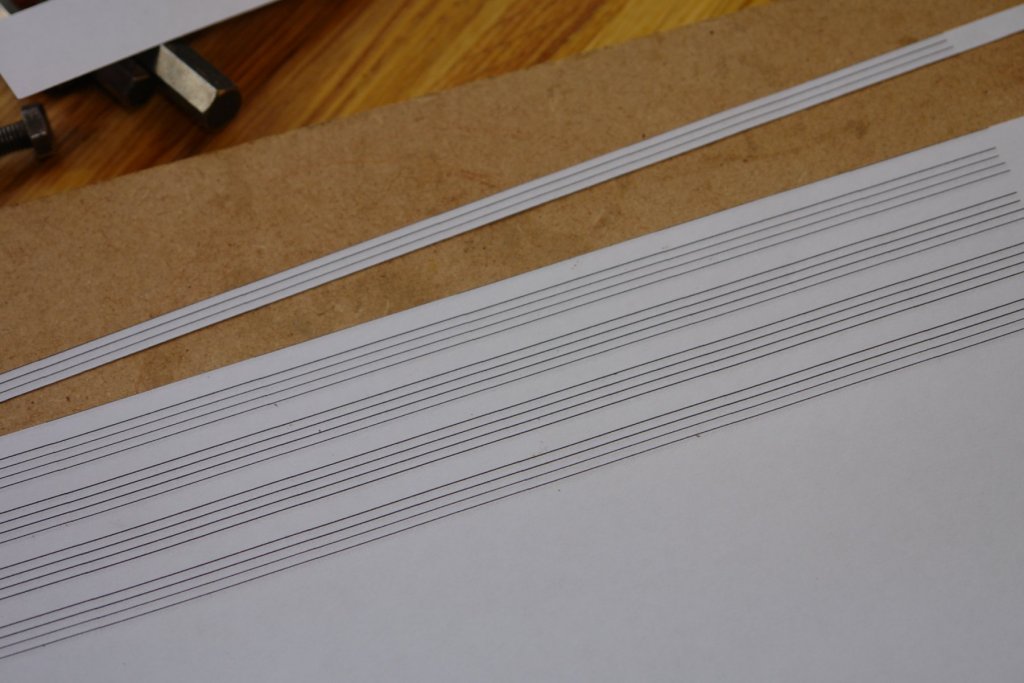
Pat, Patrick, Bedford, John, Gary - thank you for your comments. the finish isn't quite there yet but with a few more coats I should be happy. Also thanks to everyone who has visited / liked. Anyway here is the result of the next two coats - it feel like I am on diminishing returns. I started on the rudder. It is made out of 0.250" wide mahogany. I cut a number of planks and slotted one on the mill. I cut a template out of 1/8" ply and shaped this to the plan before offering it up to the hull and then making final adjustments to fit. The slot is to take the brass tubes down with the pintle will slide. These tubes were glued with CA. I want the grain on the rudder to run in the same direction of the hull planks which means gluing the planks from which the rudder blade is made at an angle to the slotted plank. Not easy to hold this while glueing with PVA. It may have been better to use CA glue. Anyway one at a time the "blade" planks were attached. The template was then used to transfer the rudder shape to the assembly. The scroll saw was then used to cut the rudder to shape before the edges were brought to size on the disc sander. The rudder needs to be shaped and I wanted to crate guide lines to ensure both sides would be the same. I drew and printed guide lines on the computer. And then used PVA to glue these to the front and back edges of the rudder.


-
UK - wipe-on-poly brand?
KeithAug replied to bruce d's topic in Painting, finishing and weathering products and techniques
I don't see why not Keith. Or should I say "I don't see why knot". -
Good to see you back Pat - Amazing engine room - however I think you have mistakenly omitted the warp drive.
-
Kortes - Lovely little stove. I like the chimney fitted.
- 306 replies
-
- 4
-
-
- schooner
- la jacinthe
- (and 1 more)
-
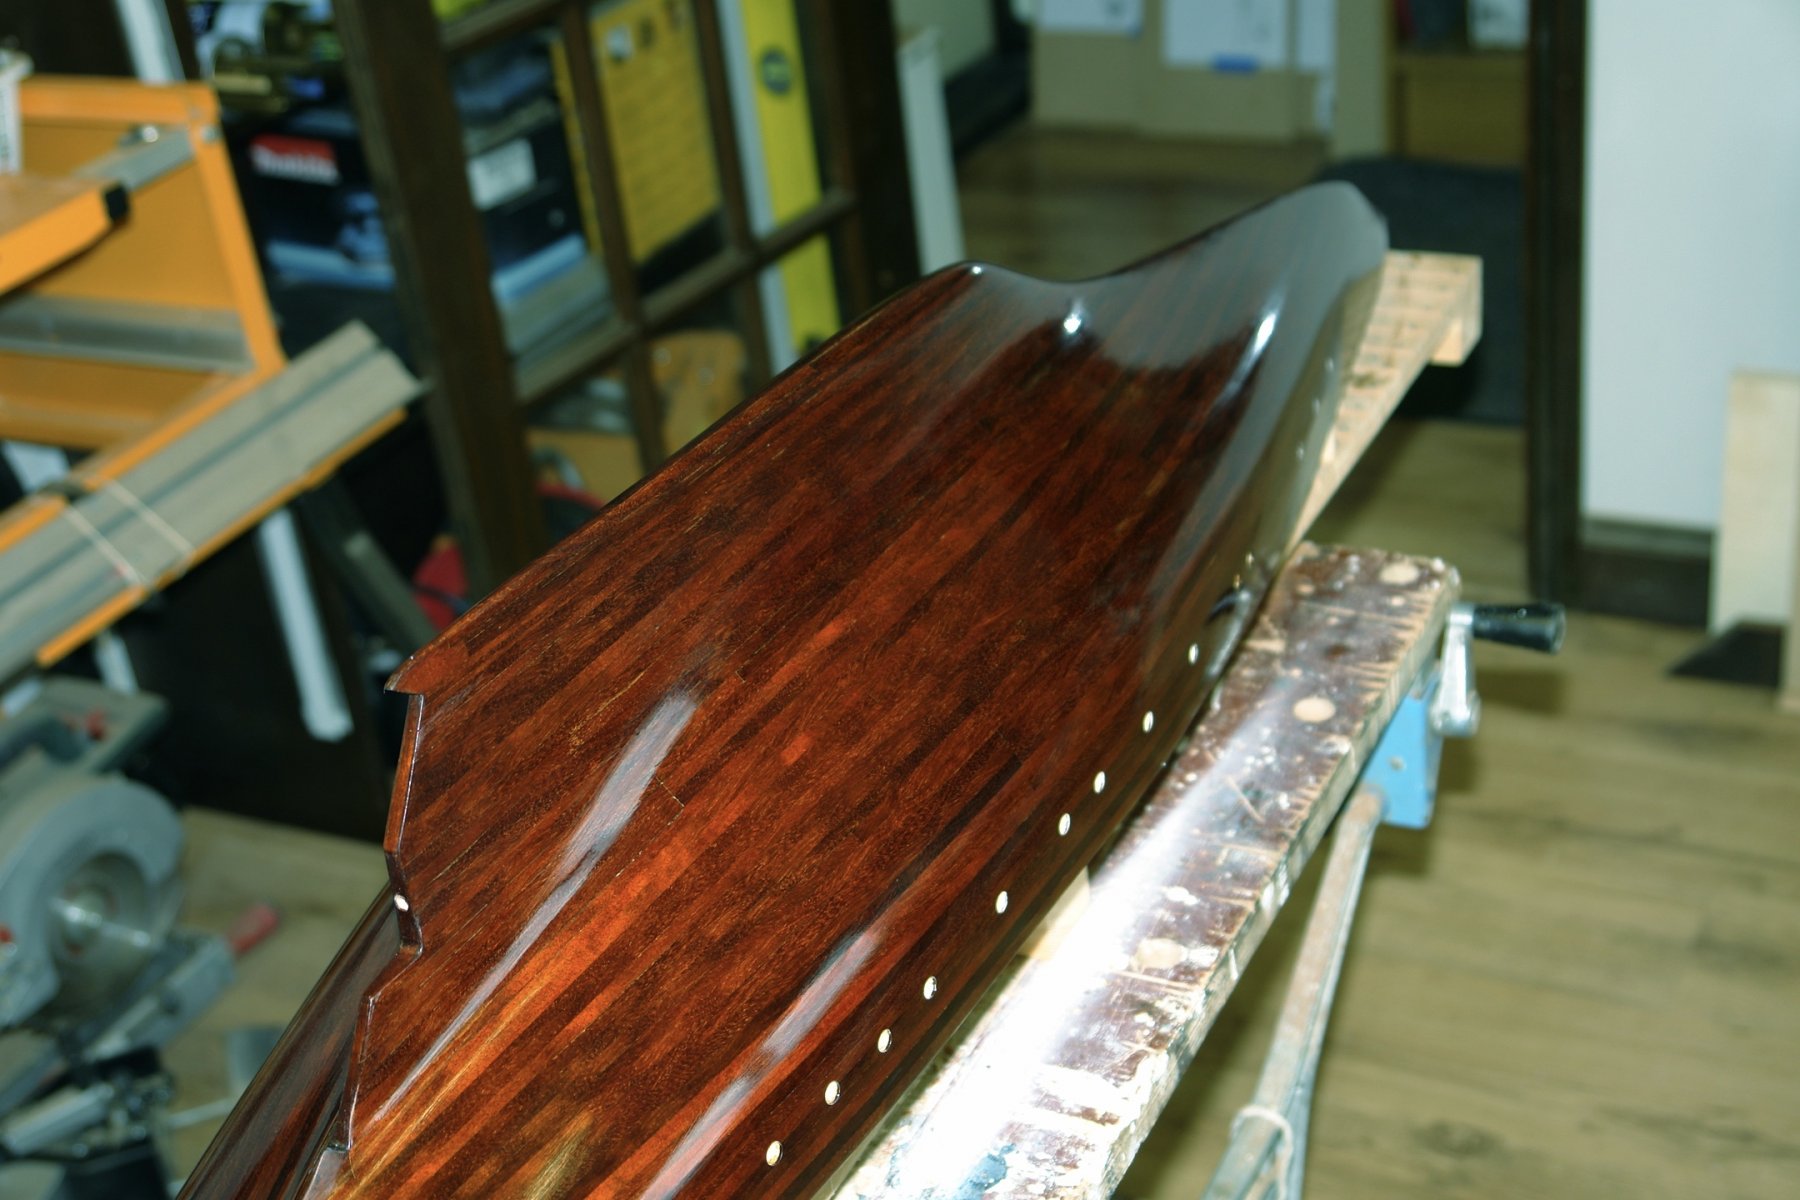
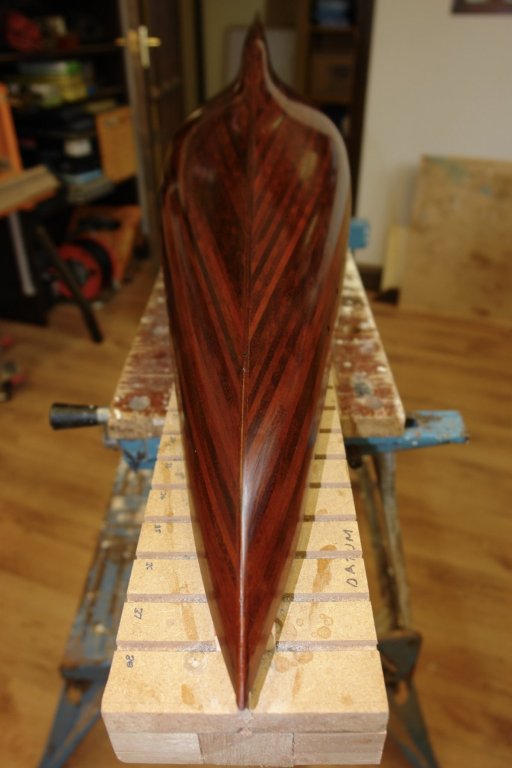
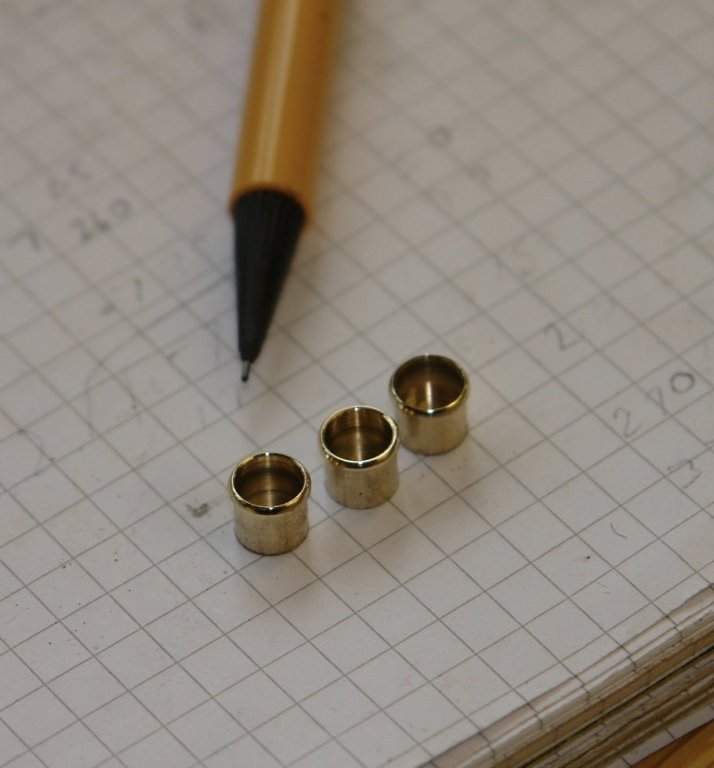
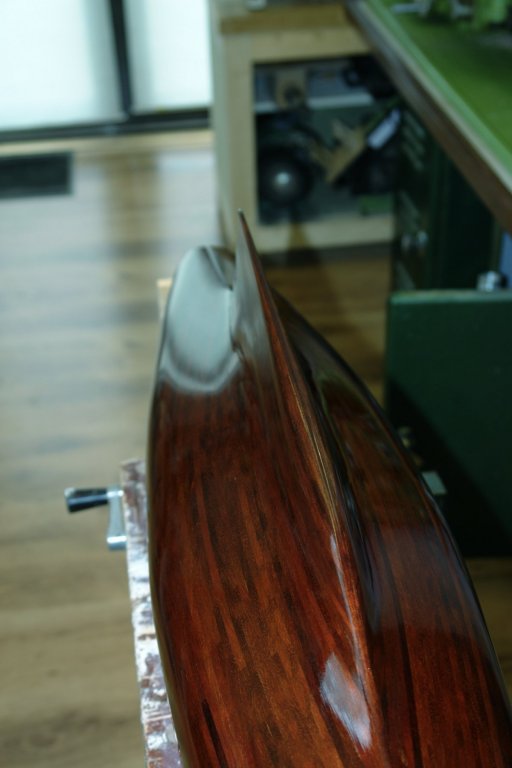
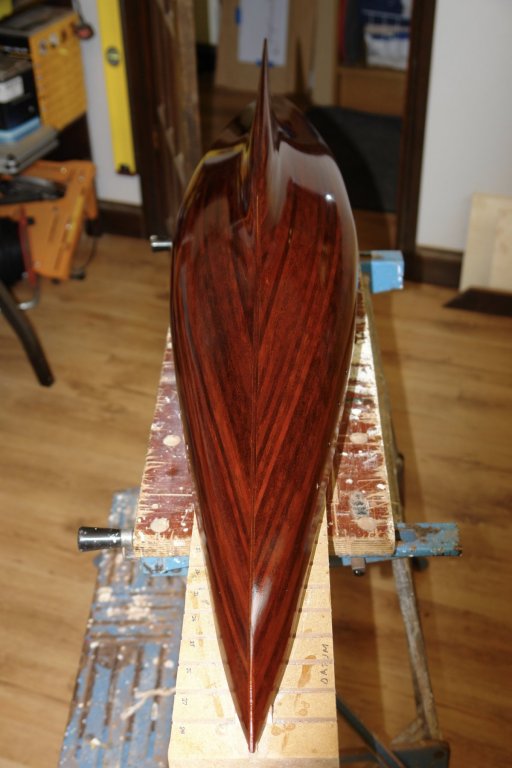
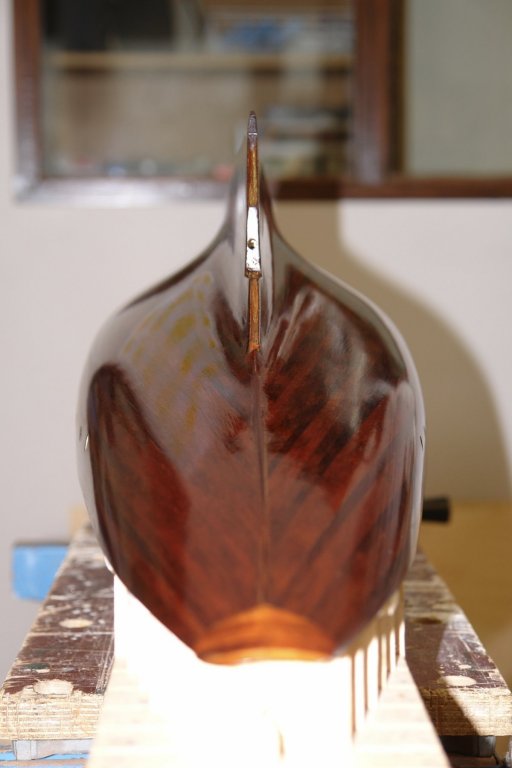
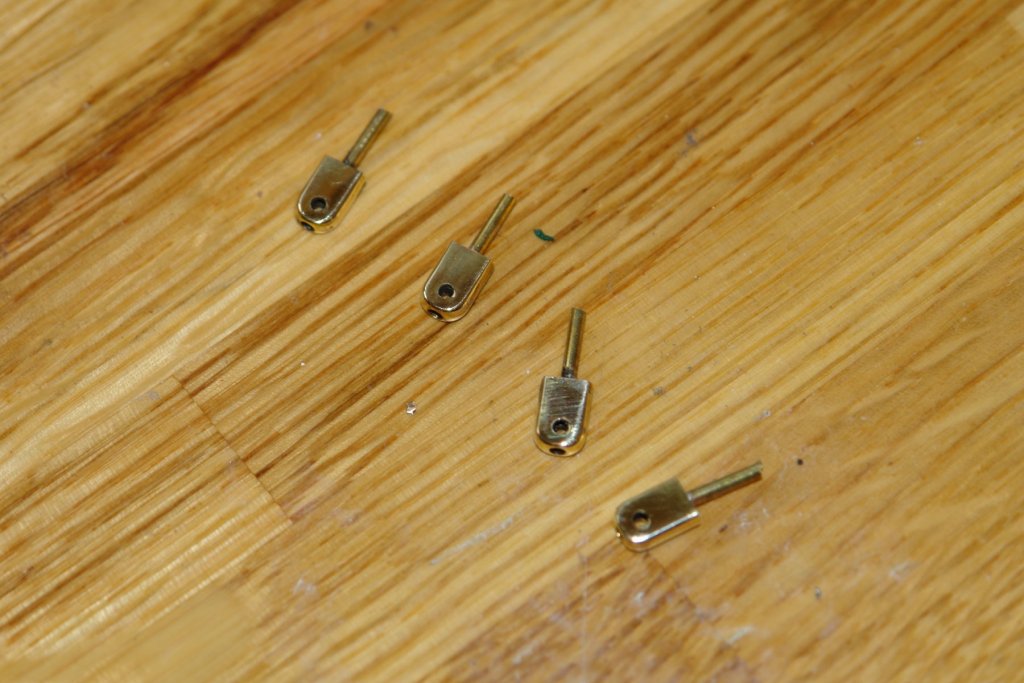
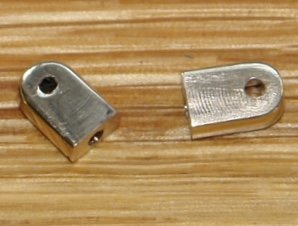
Eberhard - I had a quick trawl of the internet but didn't turn up anything relevant. I will keep a look out. I think I am now on coat 9 and I'm starting to get happy with the finish. I'm pretty pleased with the surface which has none of the dints and dimples that sometimes occur with a natural wood finish. The coat is still wet in the following pictures. The transom isn't right because the top line needs sanding back. I will do this when it is removed from the building board. I needed to sort out the mounting of the rudder. The plans I have are not very clear in this respect. However I am pretty sure there are 4 mounting points plus the top and bottom bearing. Anyway I scaled the gudgeons as best I could - 0.275" long x 0.200" wide x 0.100" thick. I made them from 0.250" round bar - turned down to 0.200" diameter with a hemisphere turned on the end with a profile tool. The last operation on the lathe was to drill 0.060" hole along the axis. I then moved to the mill and milled off 0.050" from each side to give a thickness of 0.100". Finally I drilled another 0.060 hole at right angles to the axis for the pintle. I then did a bit of polishing. I then soldered on the pegs which will attach the gudgeons to the keel.

-
UK - wipe-on-poly brand?
KeithAug replied to bruce d's topic in Painting, finishing and weathering products and techniques
Ah another Sussex member - we are probably neighbours and don't know it. Very hot here today - but at least the workshop is a comfortable 18 degrees. -
UK - wipe-on-poly brand?
KeithAug replied to bruce d's topic in Painting, finishing and weathering products and techniques
Bruce, Wipe on poly is just normal oil based polyurethane diluted with white spirit. I just buy Wilko own brand poly and dilute it 1:1 with white spirit. I am using it at the moment on my Germania build if you want to see what it looks like. You can buy it at Amazon - but don't - silly price.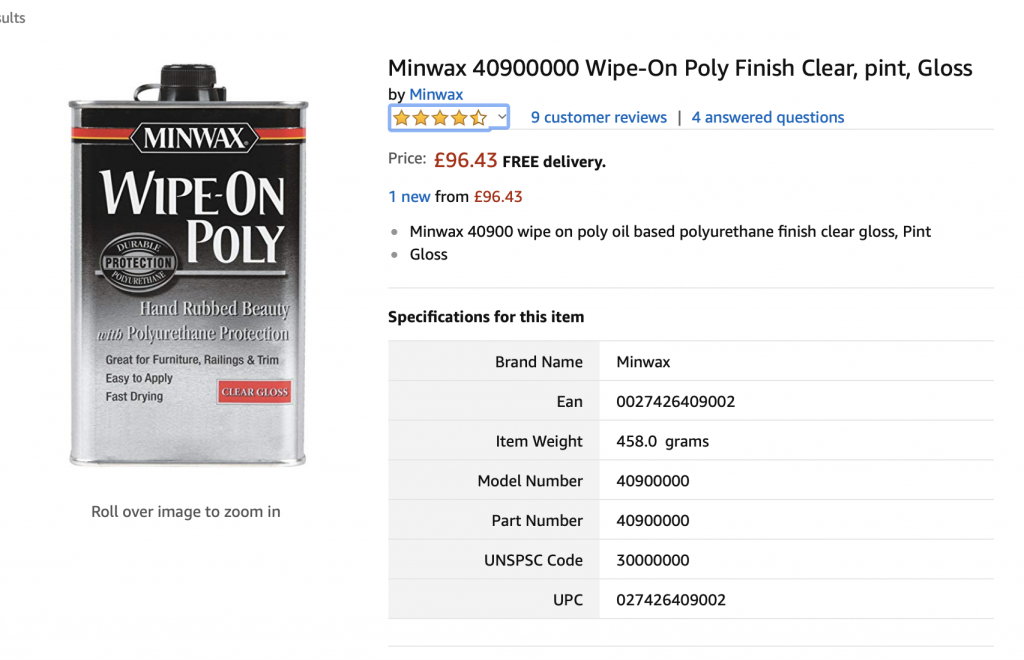
-
Eberhard - that would make sense. The skylight is over the "owners" cabin and it is going to be quite claustrophobic with only a couple of small port holes. On the other hand if you look at the recent deck in this area it isn't exactly obvious where it would fit - the hatch that replaces it seems to be quite small in comparison.


-
Eberhard - here are another 2 views. If you look at the first of the 2 previous photos you can see the Flinder's bar in profile. In the profile view below it does not appear. Probably more conclusive however is the next photo. The brass plate seems to be over where the top bracket of the Flinder's bar would have been.