KeithAug
-
Posts
3,985 -
Joined
-
Last visited
Content Type
Profiles
Forums
Gallery
Events
Everything posted by KeithAug
-
 After a stormy passage this little Jolly successfully berthed ahead of schedule yesterday. Her Grandad is well pleased. The shipyard will be closed for a week due to enthusiastic splicing of the mainbrace.
-
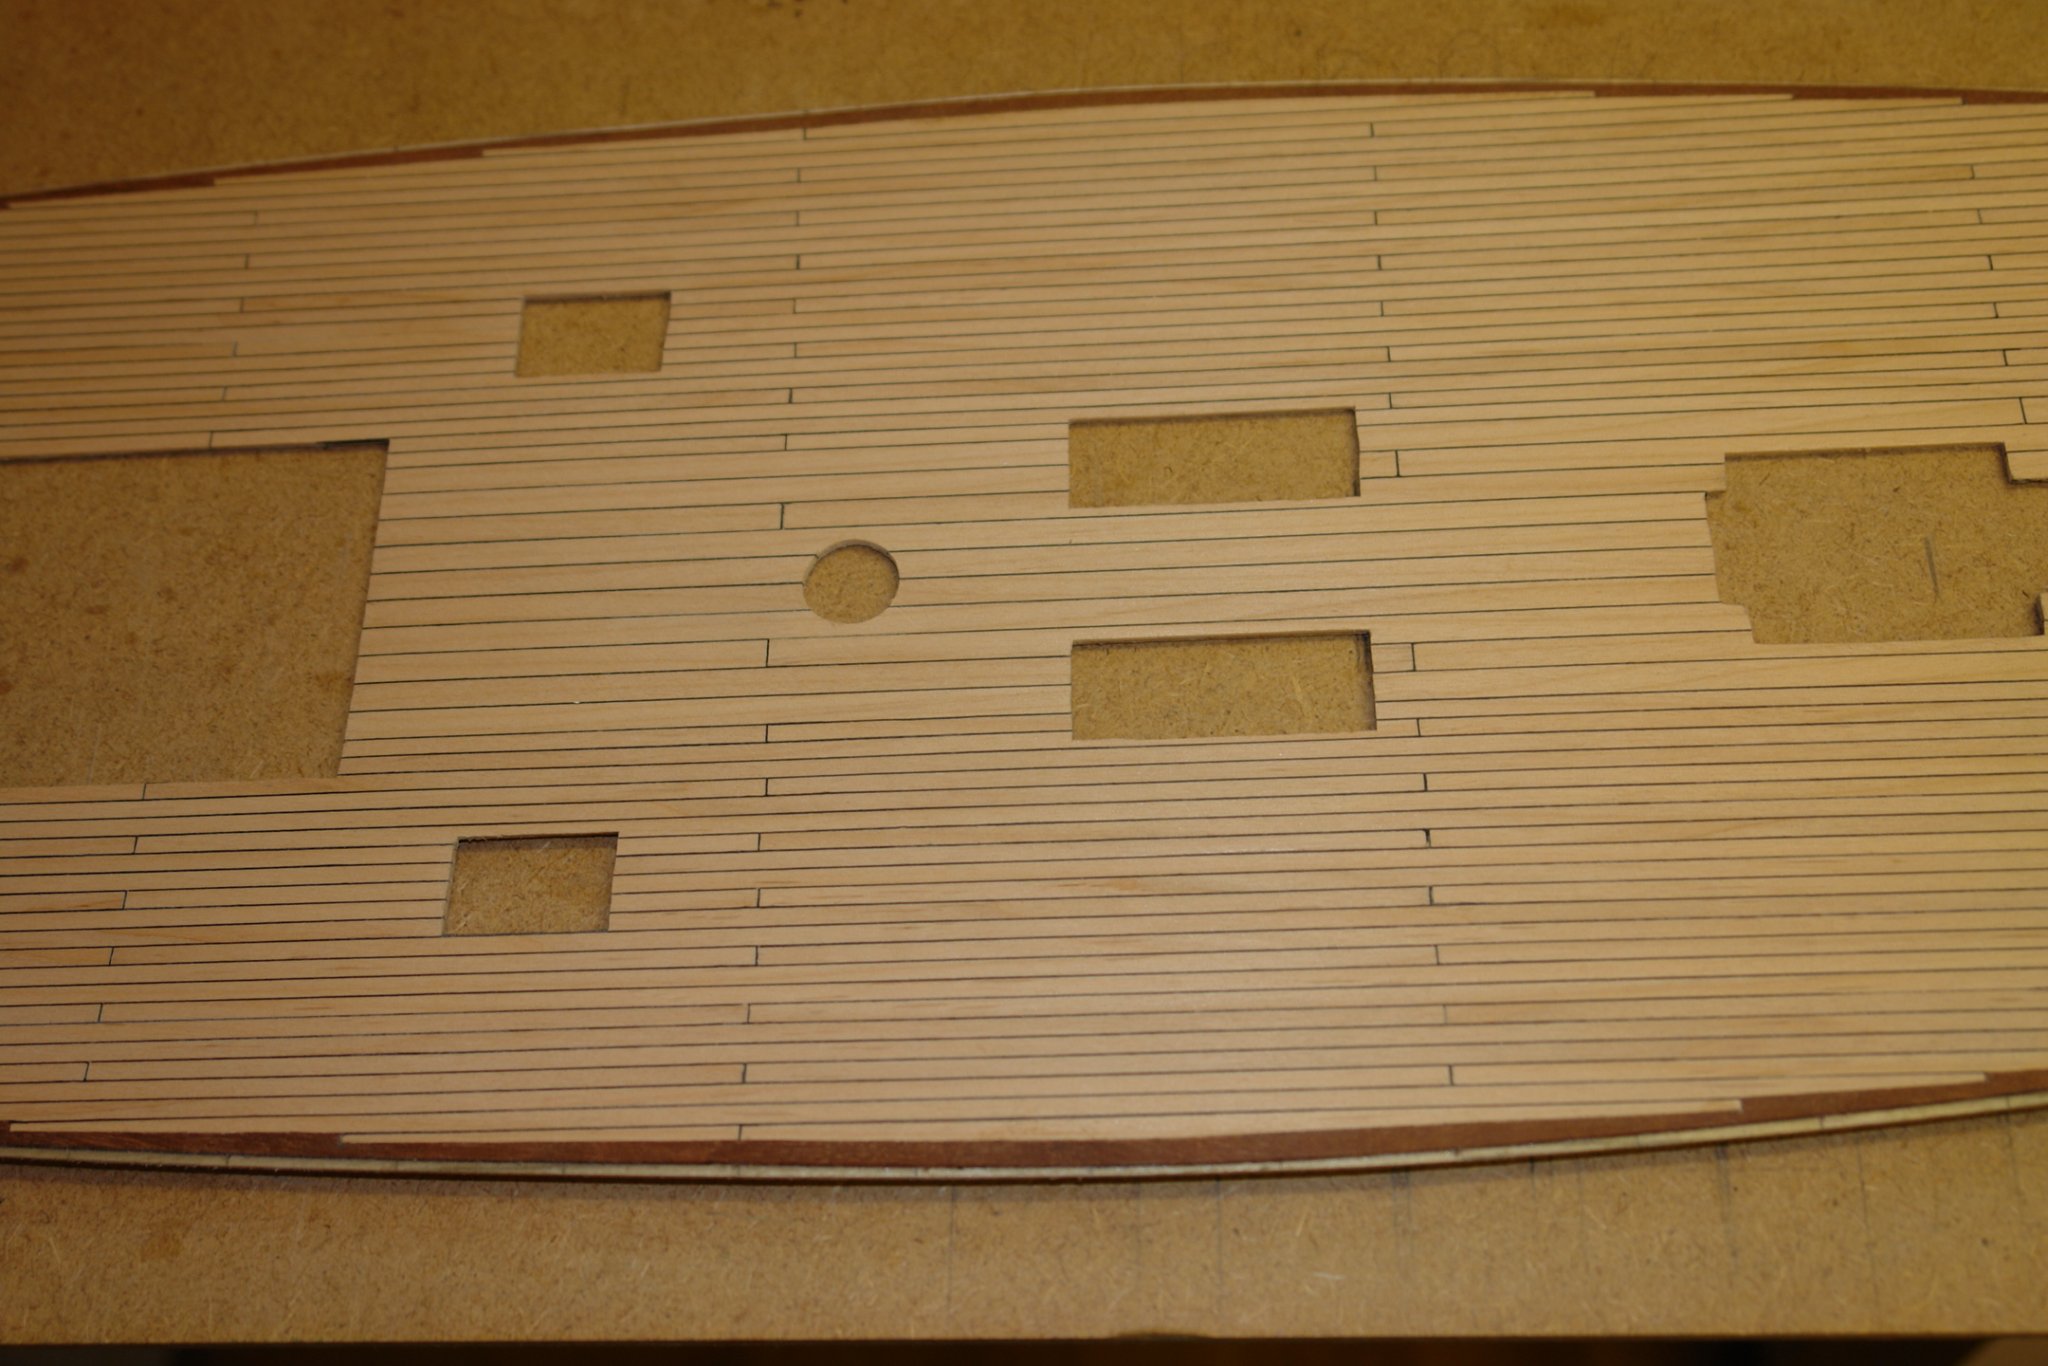
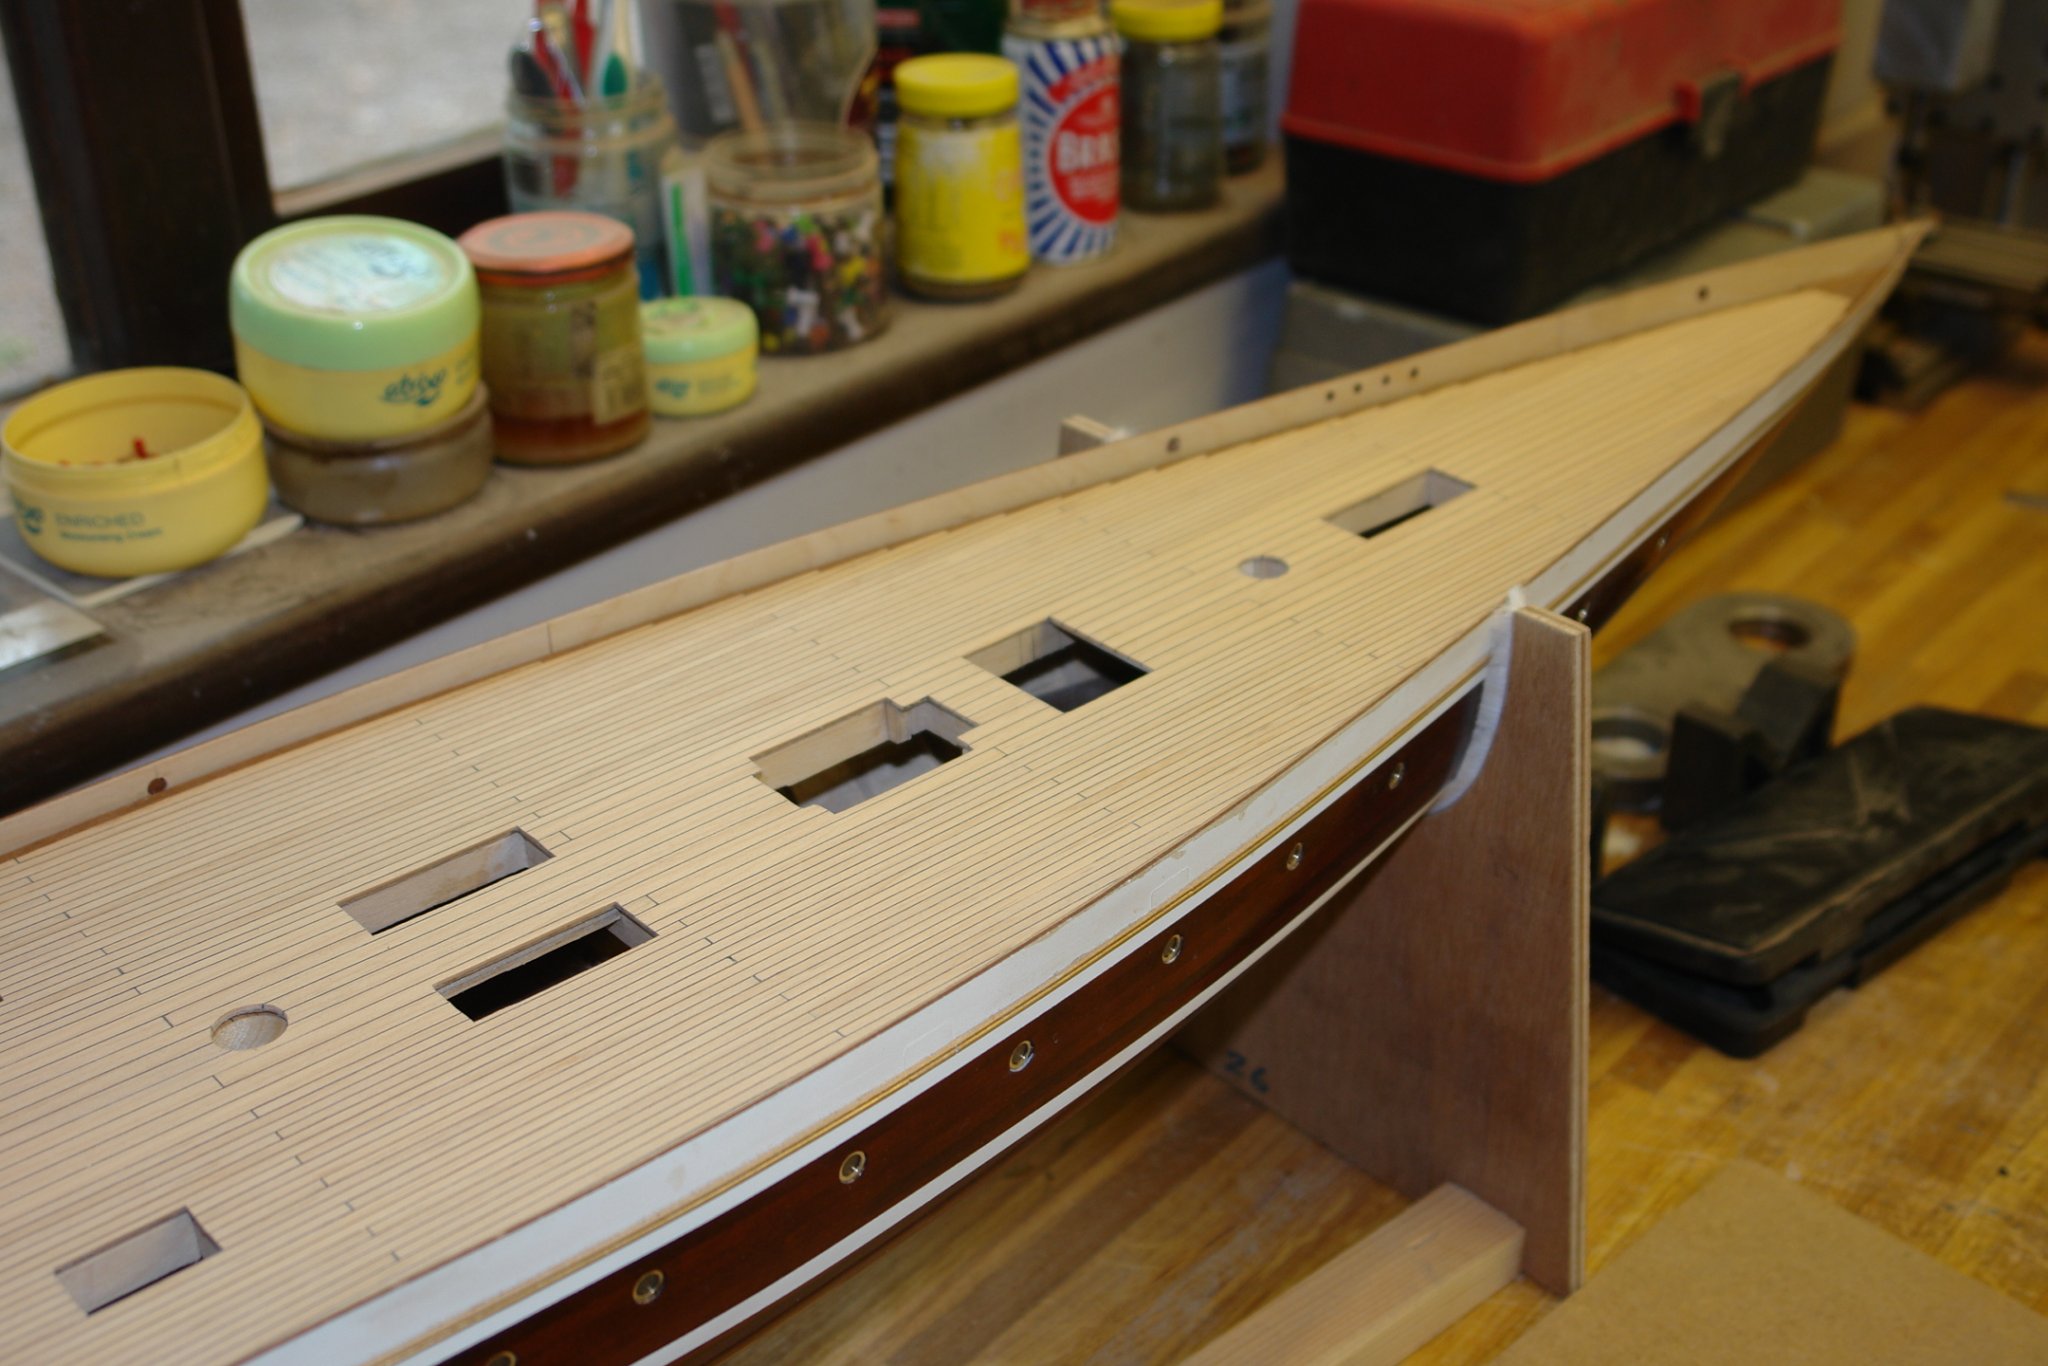
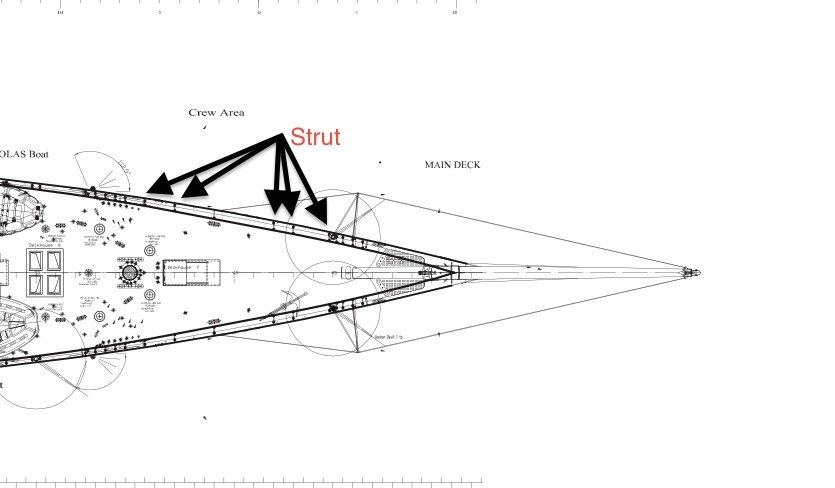
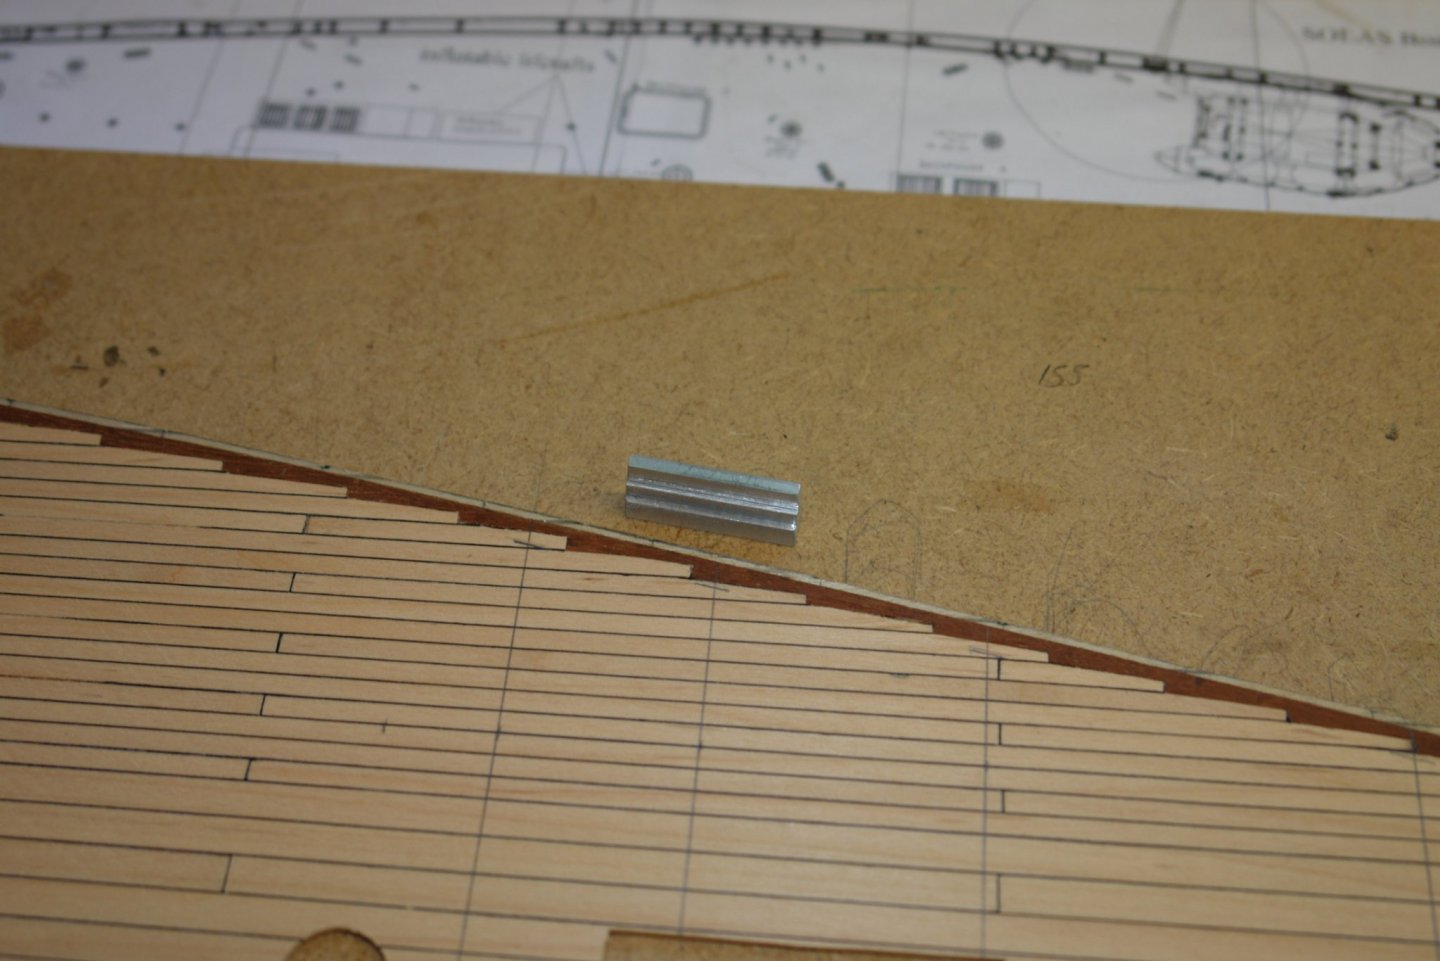
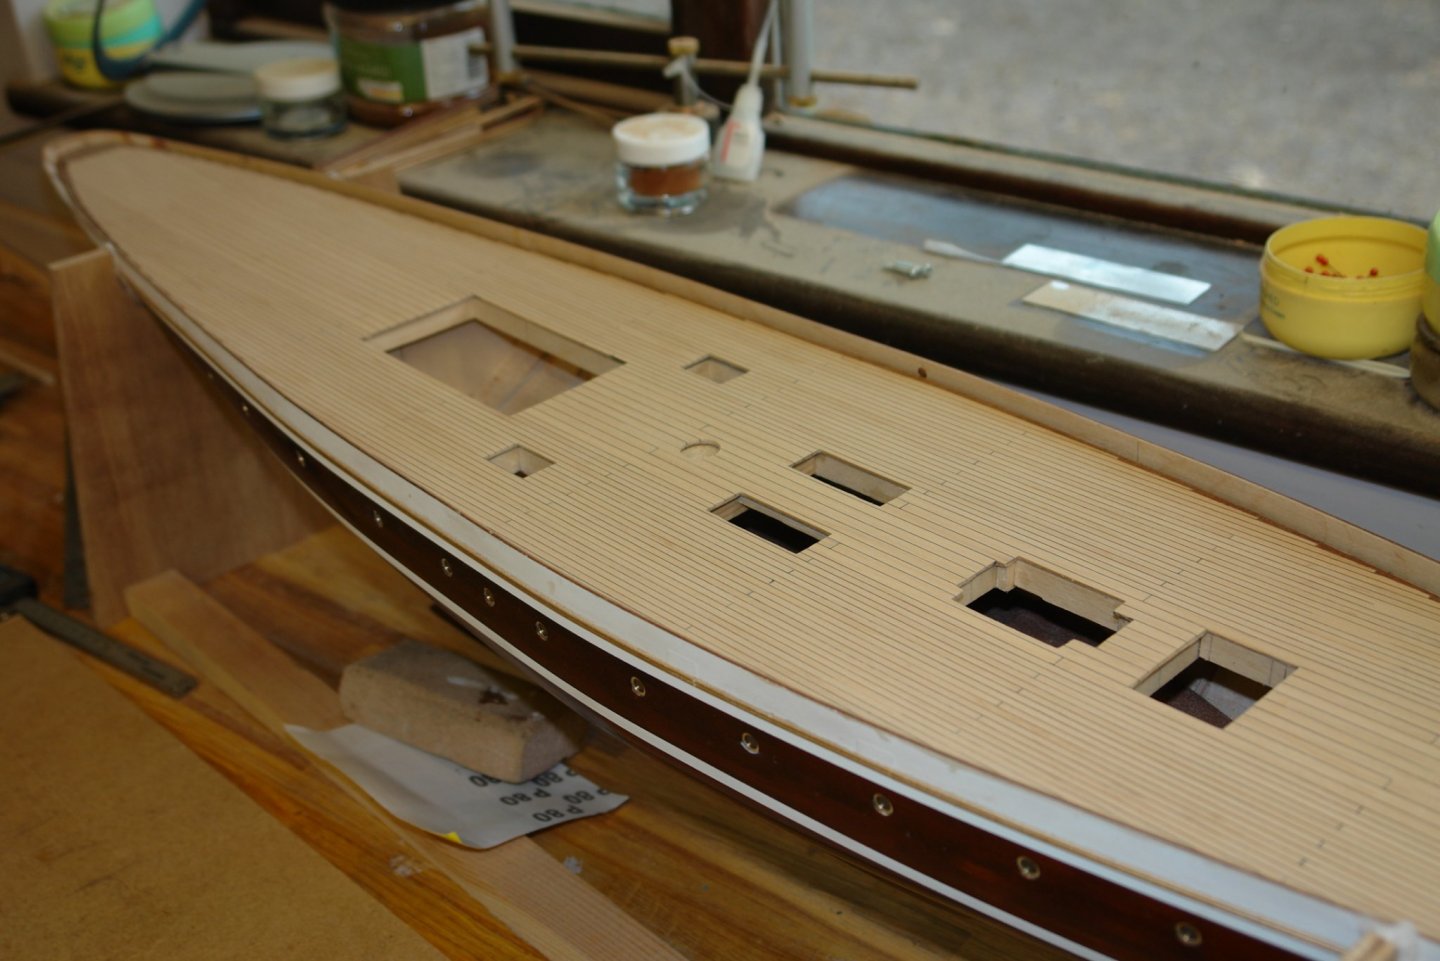
Having finished the deck planking I have now commenced making it look like it has a bad case of woodworm. The deck is covered in a multitude of fittings all of which require holes of various small diameters. I am making a start on the holes which take the lower ends of the bulwark struts. There are about 50 struts per side. The positions of the struts are indicated on the plans but careful checking against photographs revealed a couple of discrepancies. Noting the discrepancies I attempted to validate all the positions from photographs. This proved to be quite a forensic task - enjoyable but very time consuming. The holes to take the struts are all equidistant from the deck edge. I made a small gauge with a stepped profile to mark them out. Then I drilled them out using 3 drills of increasing size. The final size was 3/32 inch.


-
Thank you Nils. Keith, Pat, Roger, - I think Roger is correct - planking bonded to a steel deck is also what I am assuming.
-
Greg, Druxey, Paul, Phil - thank you for your comments. Pat ---- It is a good question. I have had a good look round all of the photos and they don't appear on any of the planks.
-
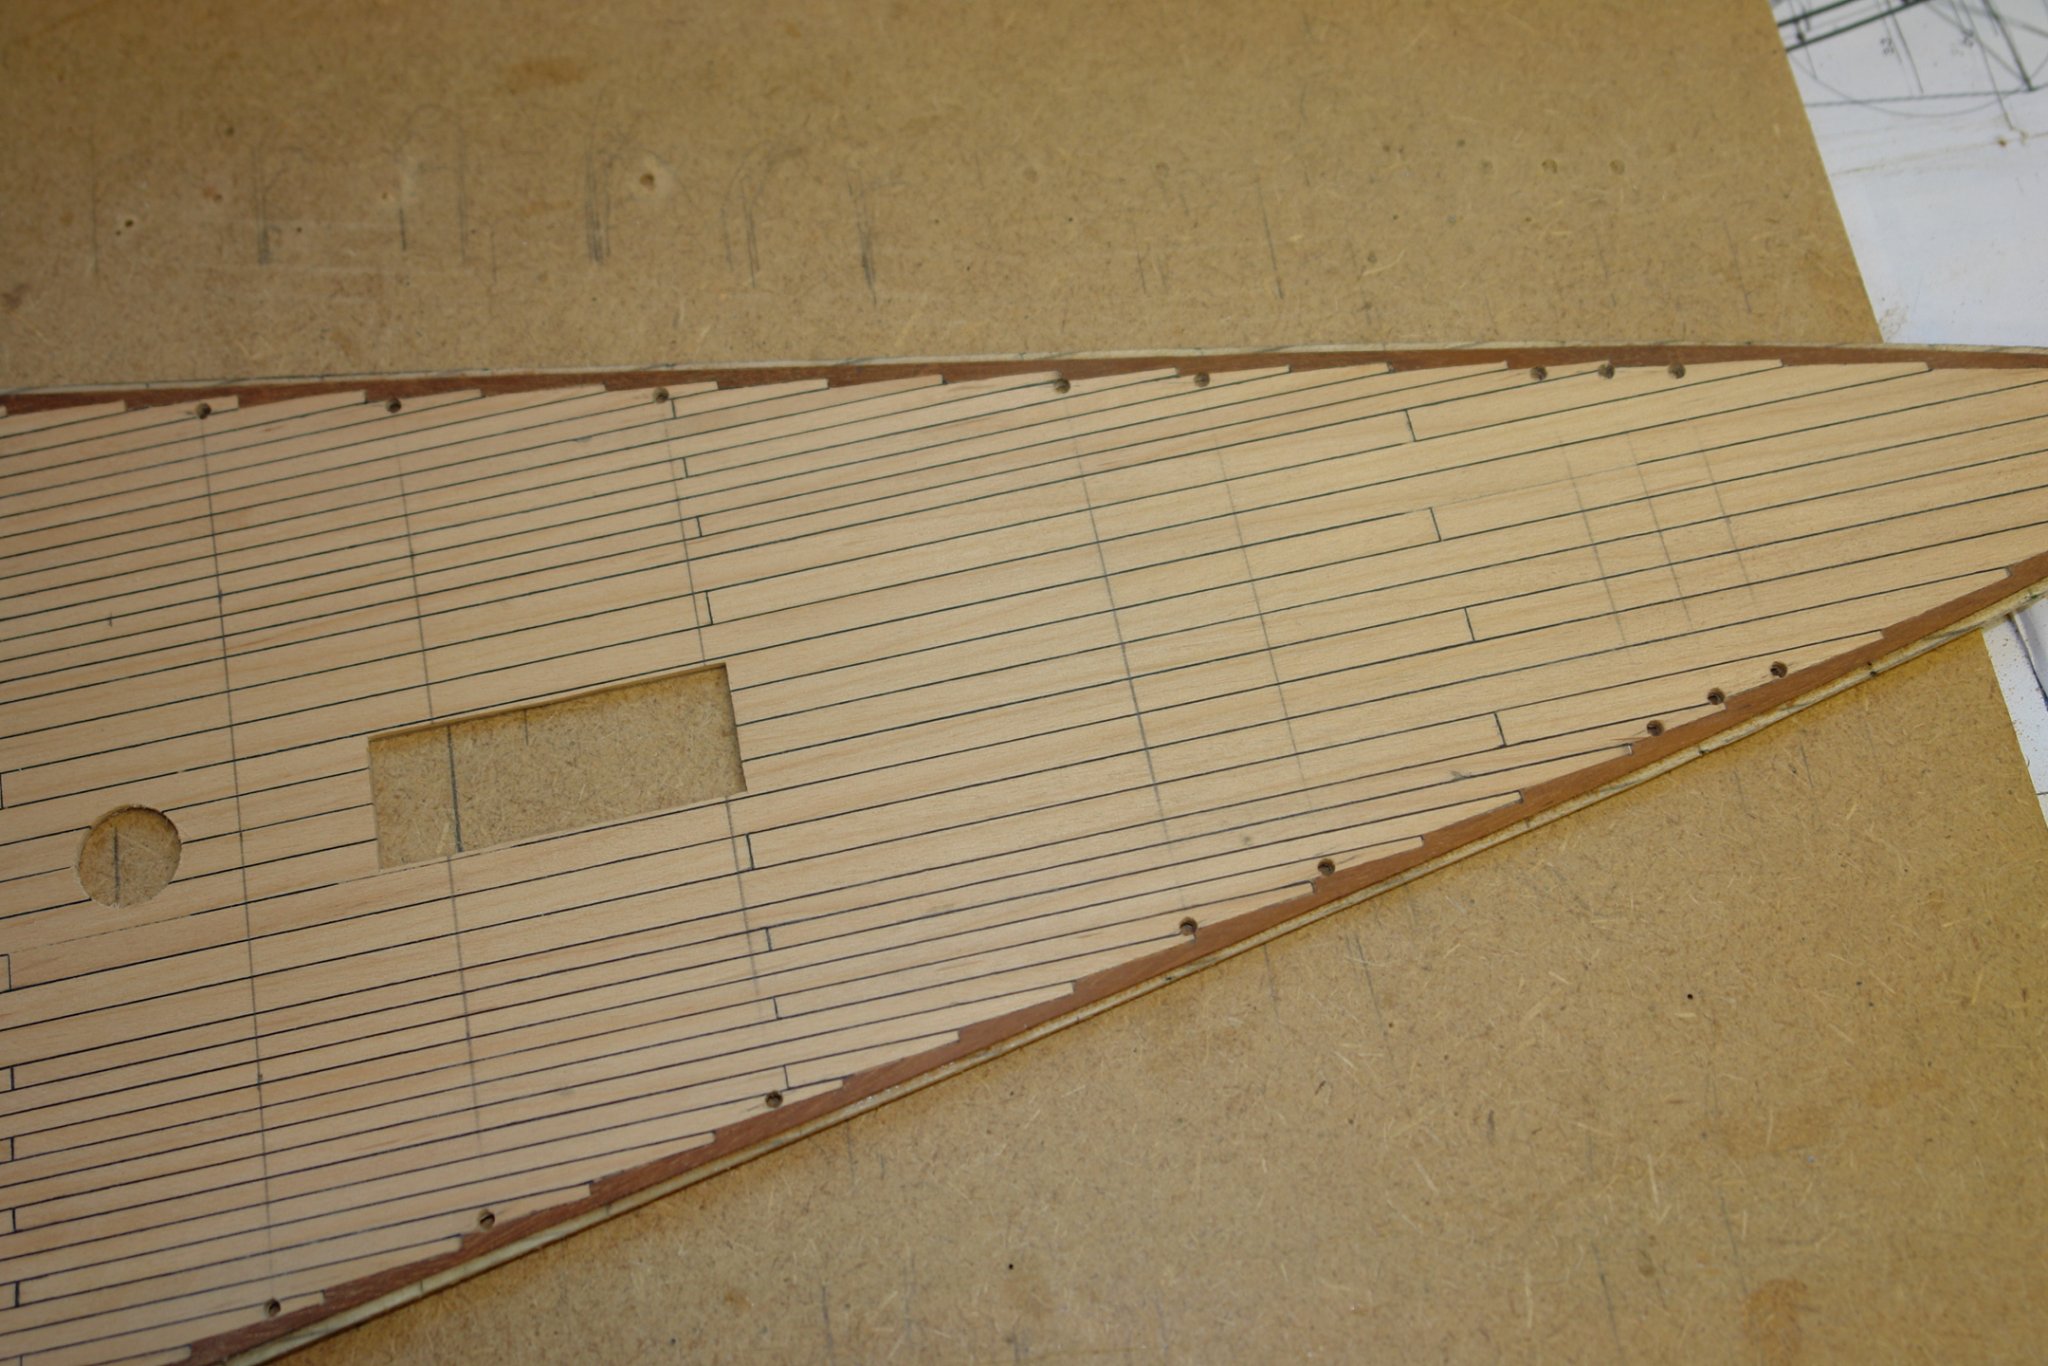
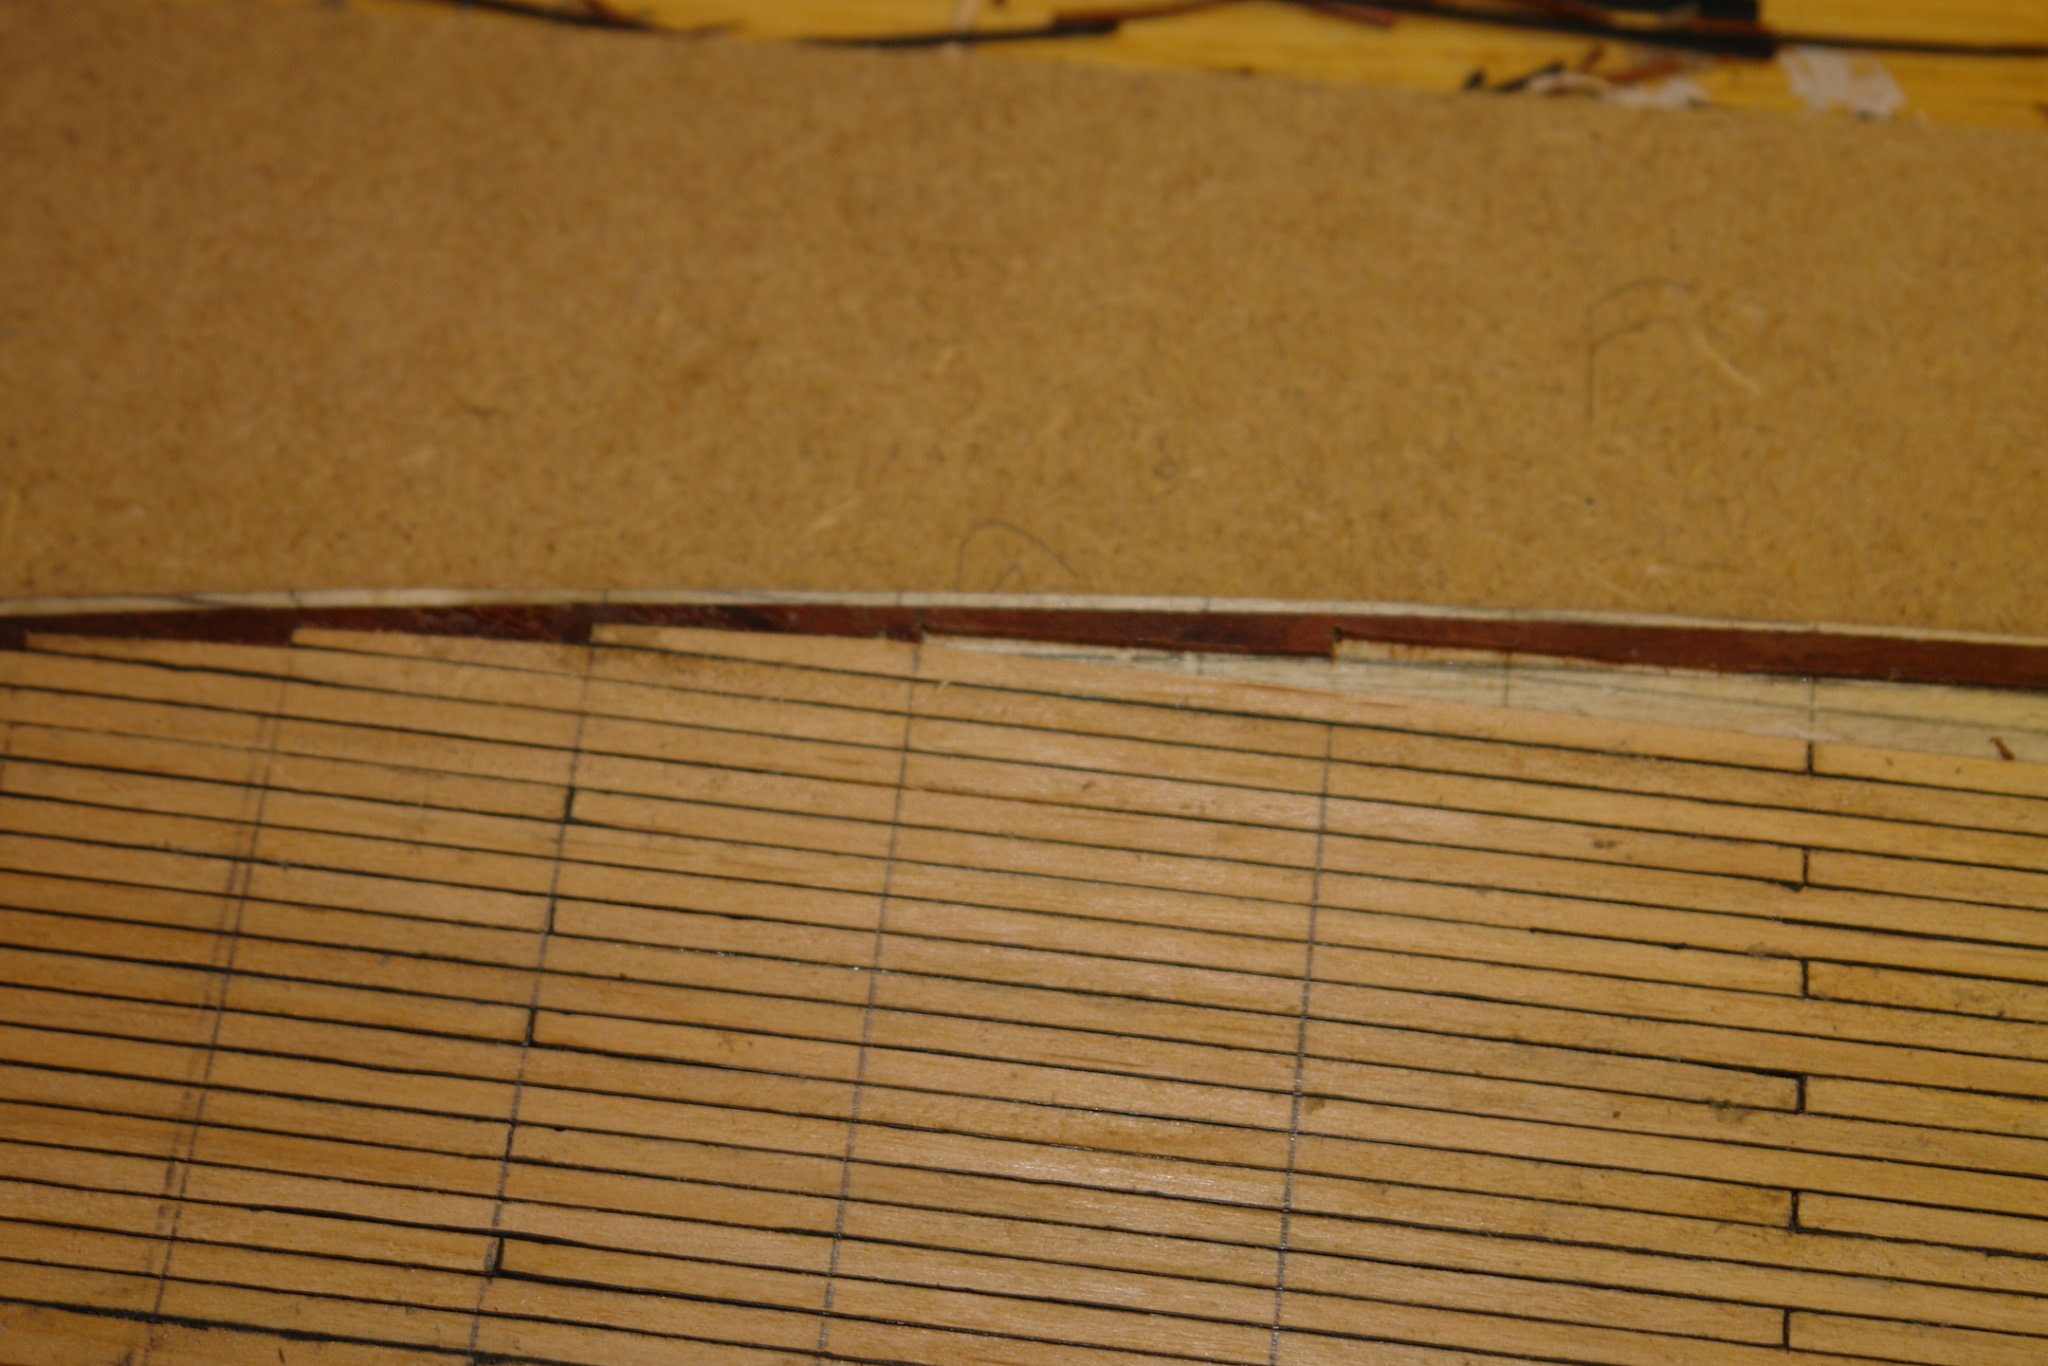
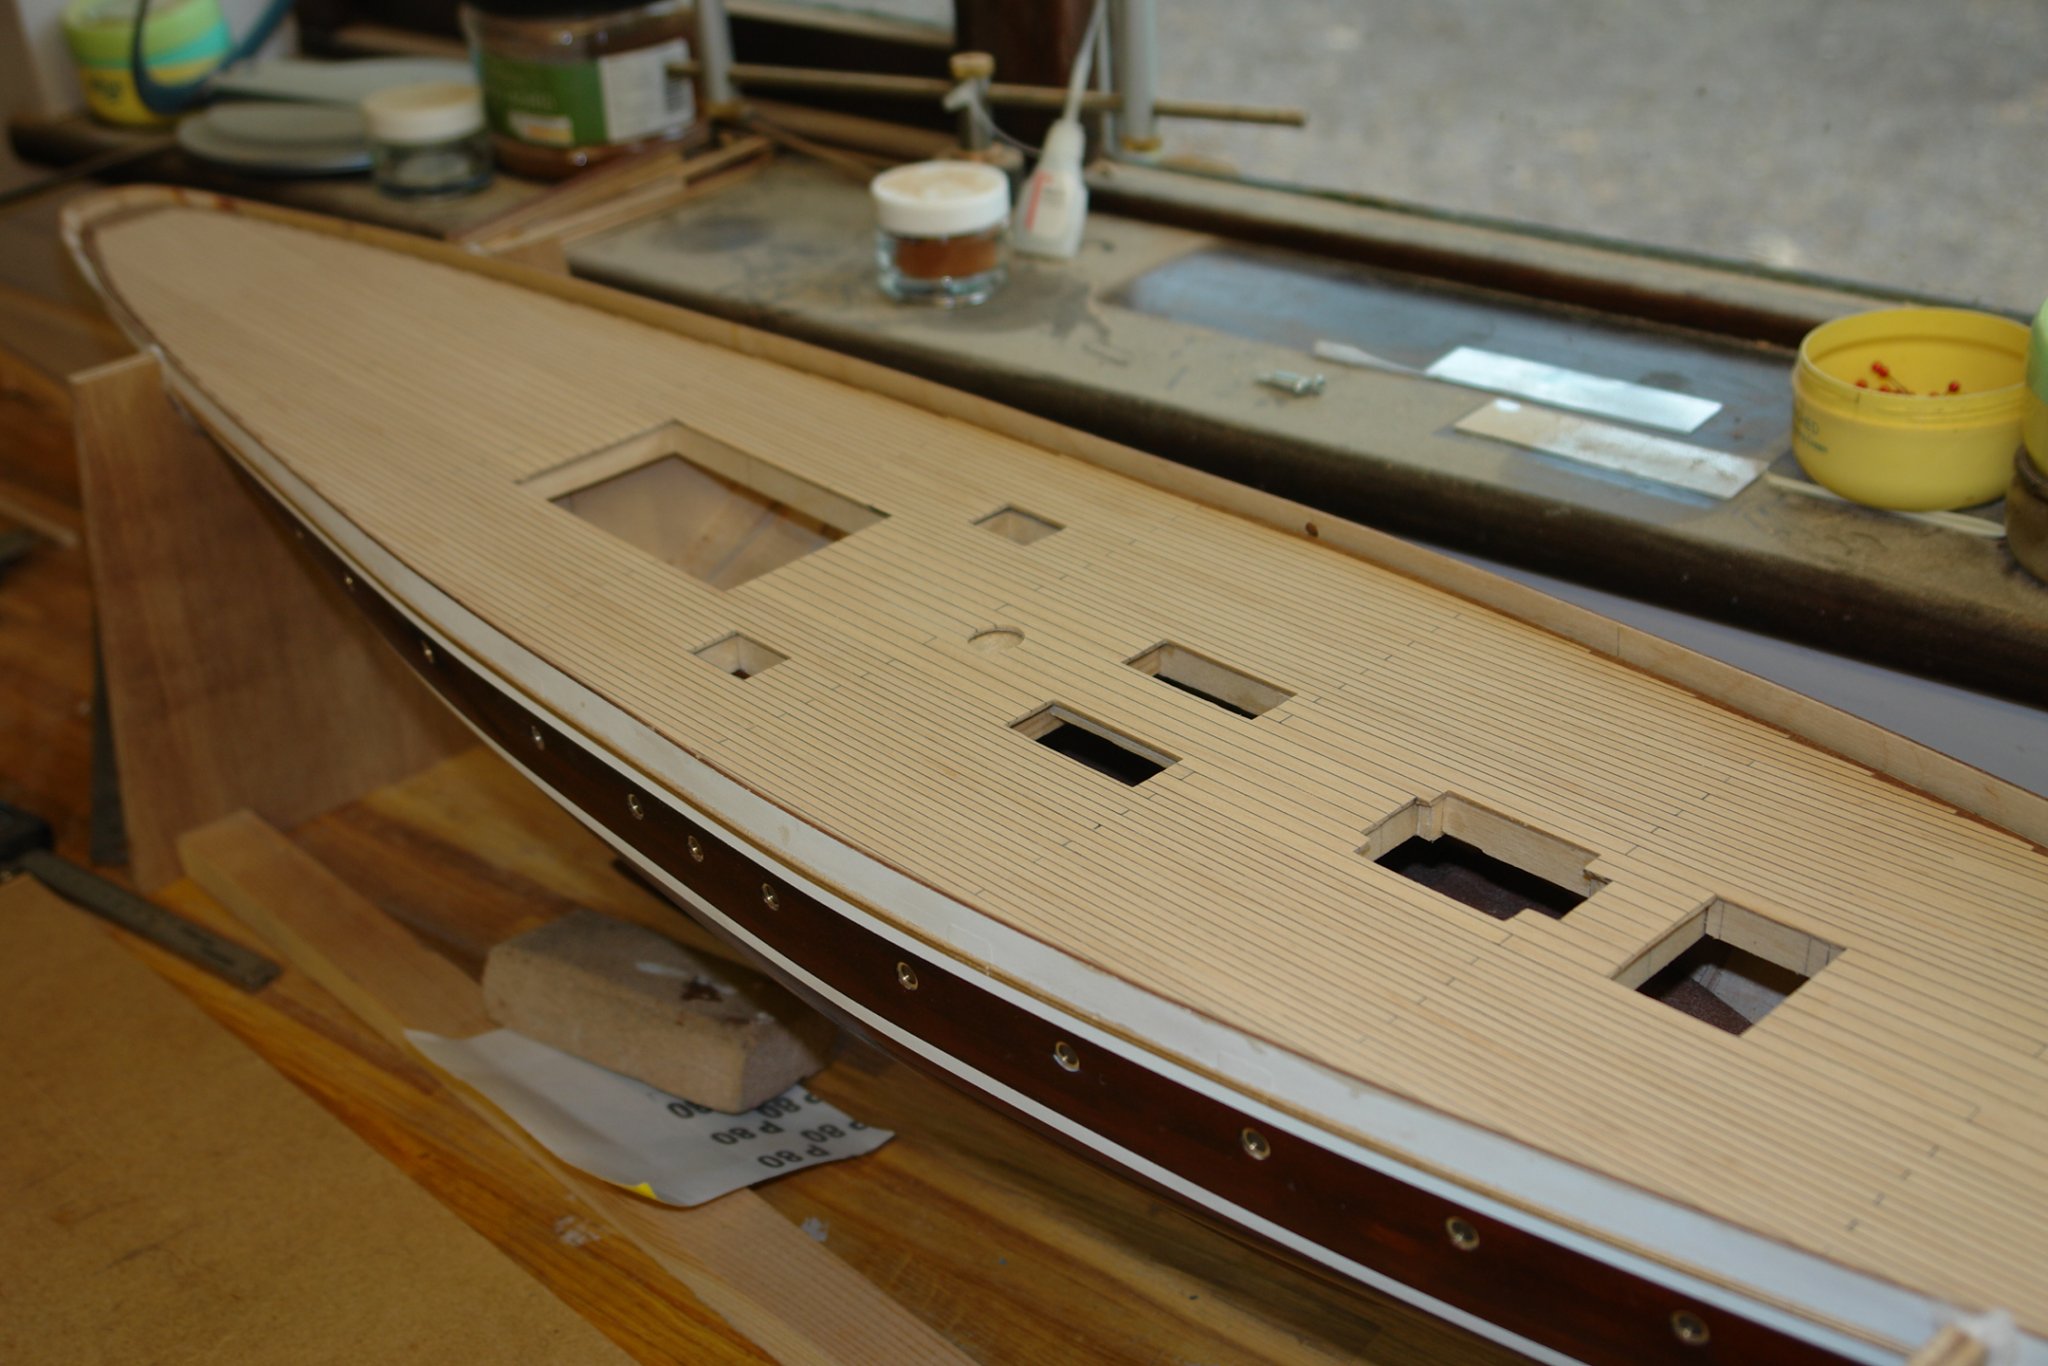
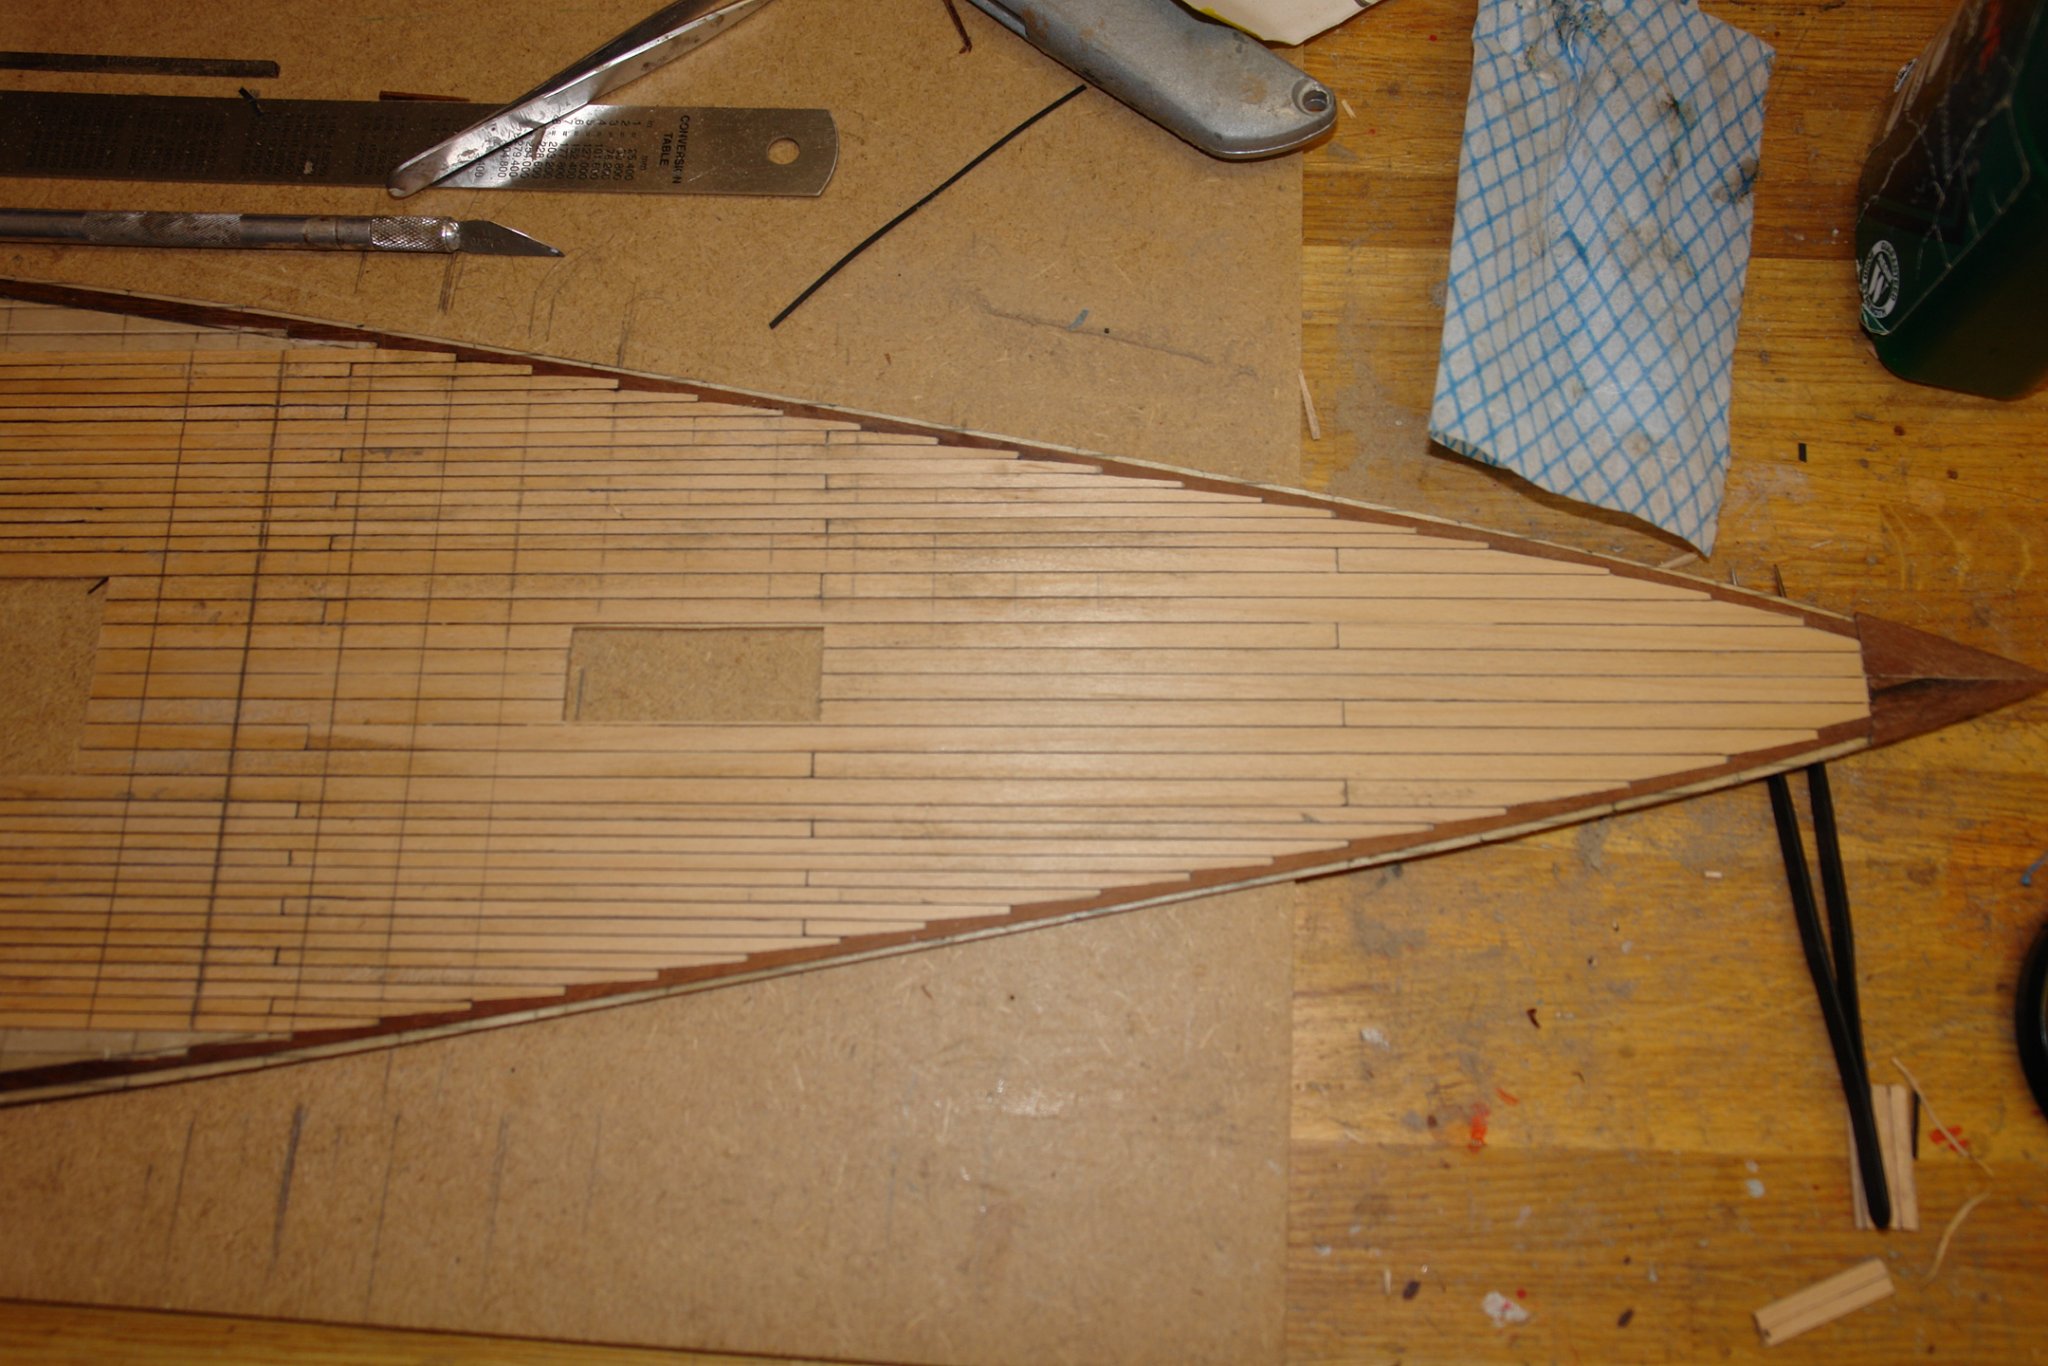
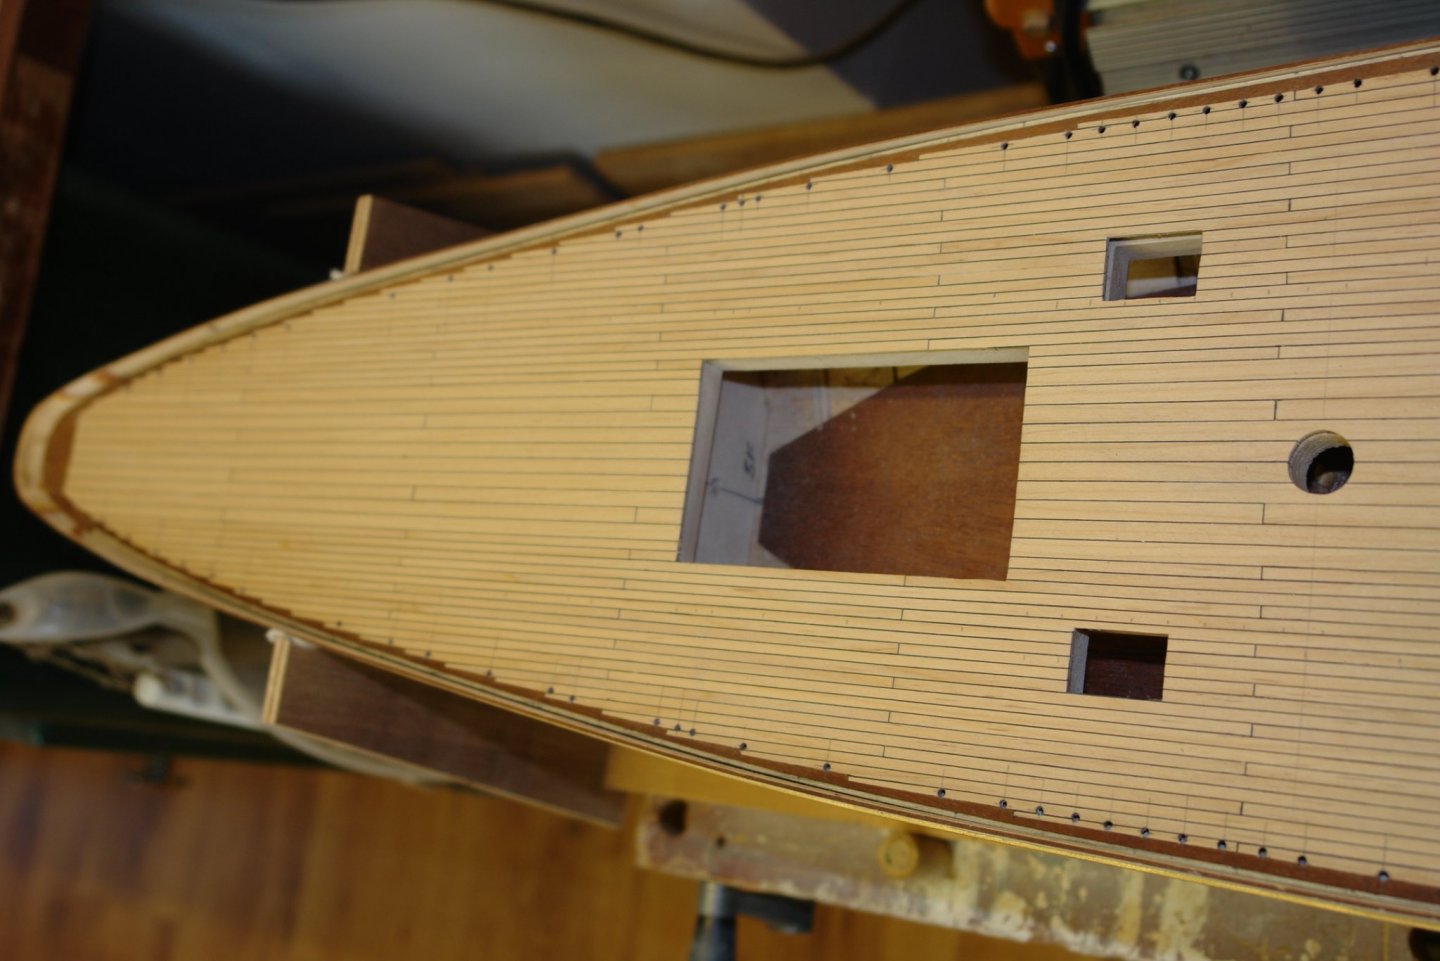
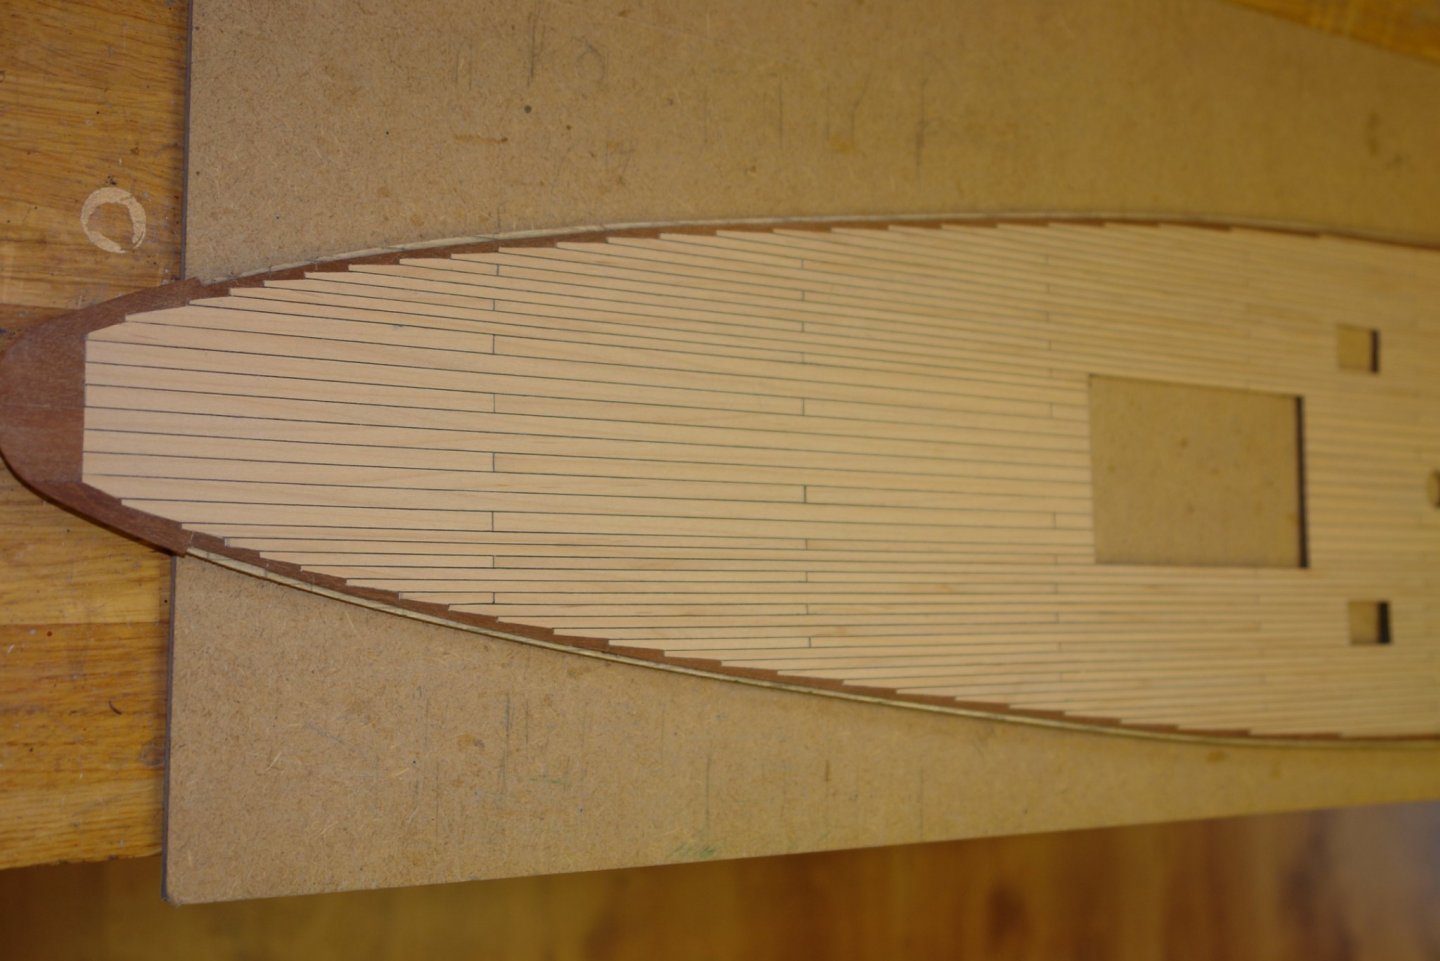
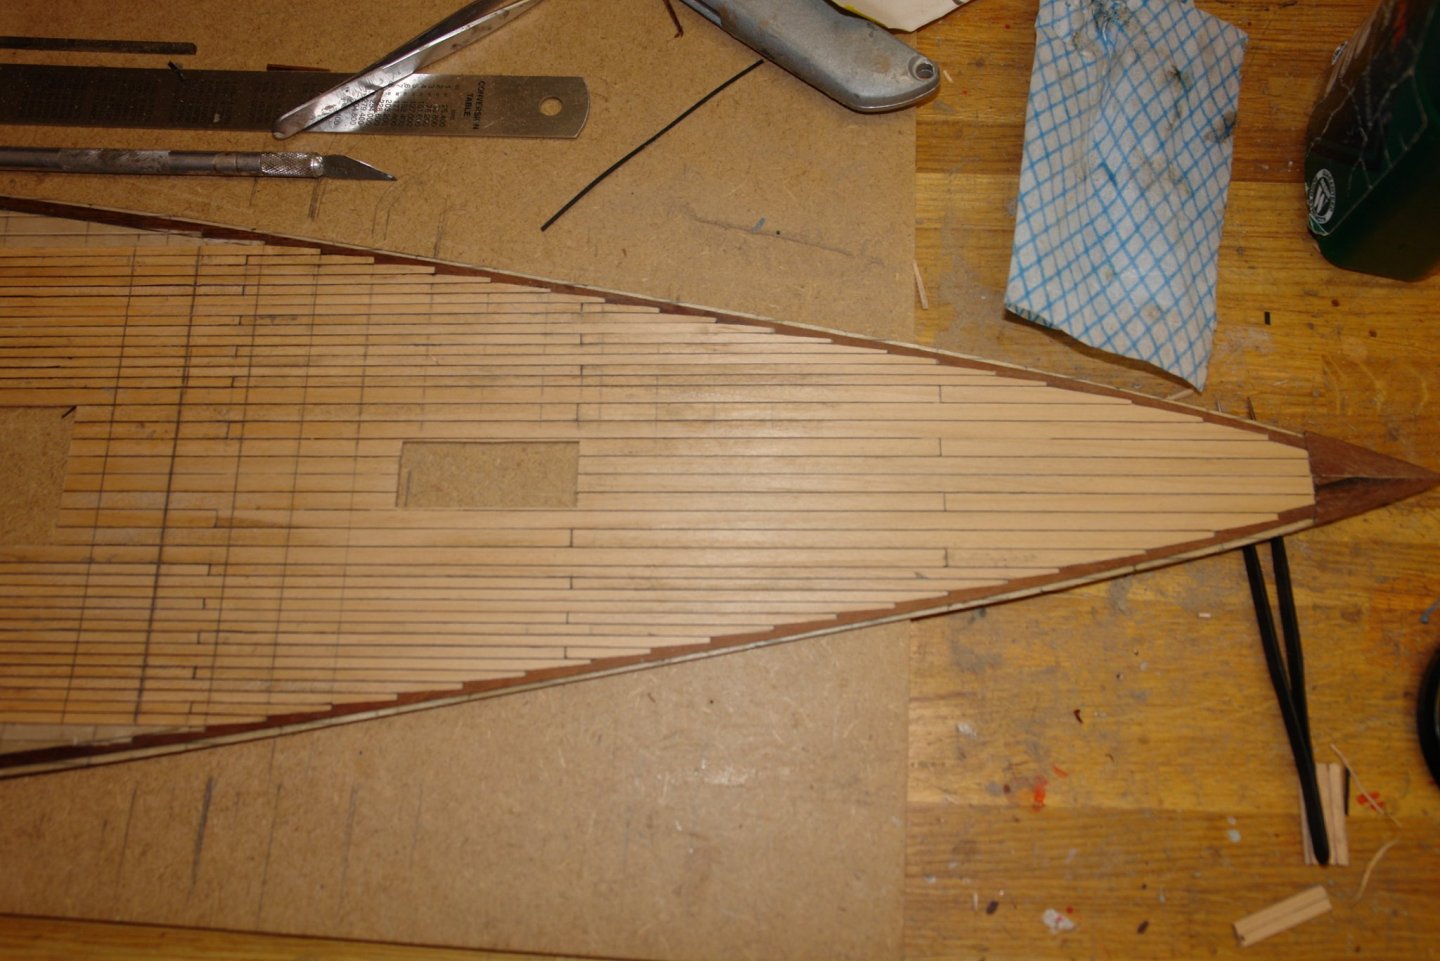
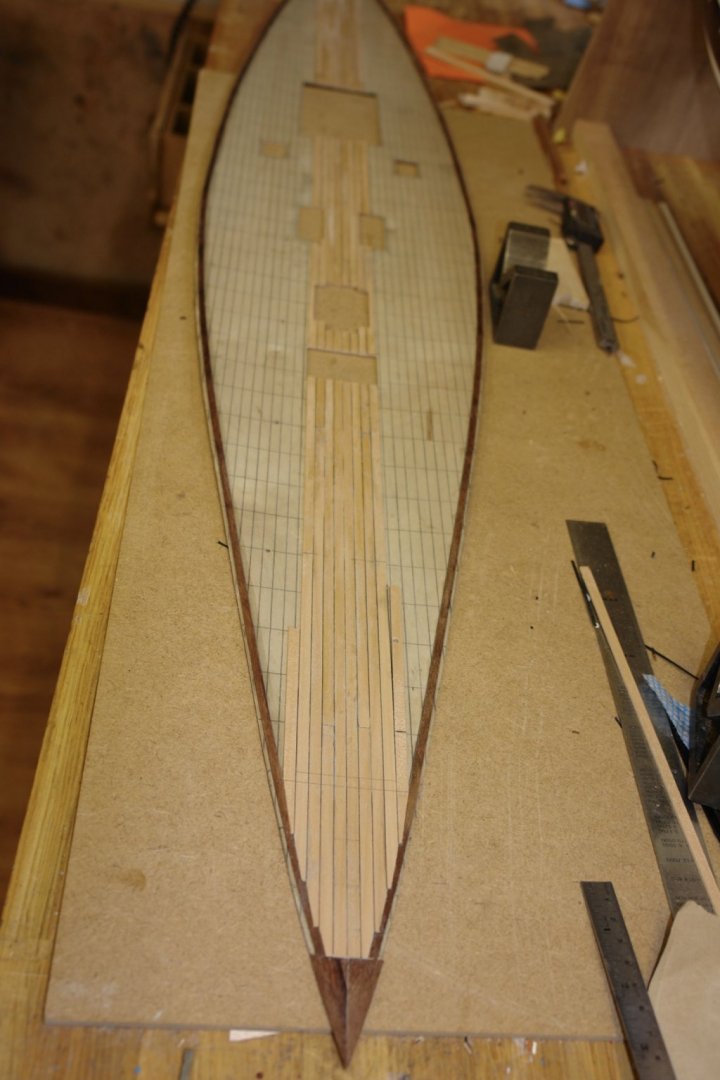
I managed to finish the deck planking. By the time I had got to the final planks on each beam the joggles were much longer than the maximum width of my chisels and I had to revert to the craft knife for cutting purposes. At maximum beam the deck edge becomes parallel with the deck planks and joggling becomes unnecessary. I have done some rough sanding (80 and 120 grit) to clean up the surface. I laid the deck on the hull to check what it would look like. Much more work to do before it is attached. I was pleased with the symmetry - by luck or judgement it was pretty well spot on.


-
Nice work Paul - Lets hope kitty does not get too interested in Sirius - claws can be very sharp.
-
Bedford Well done so far. I will be following along.
-
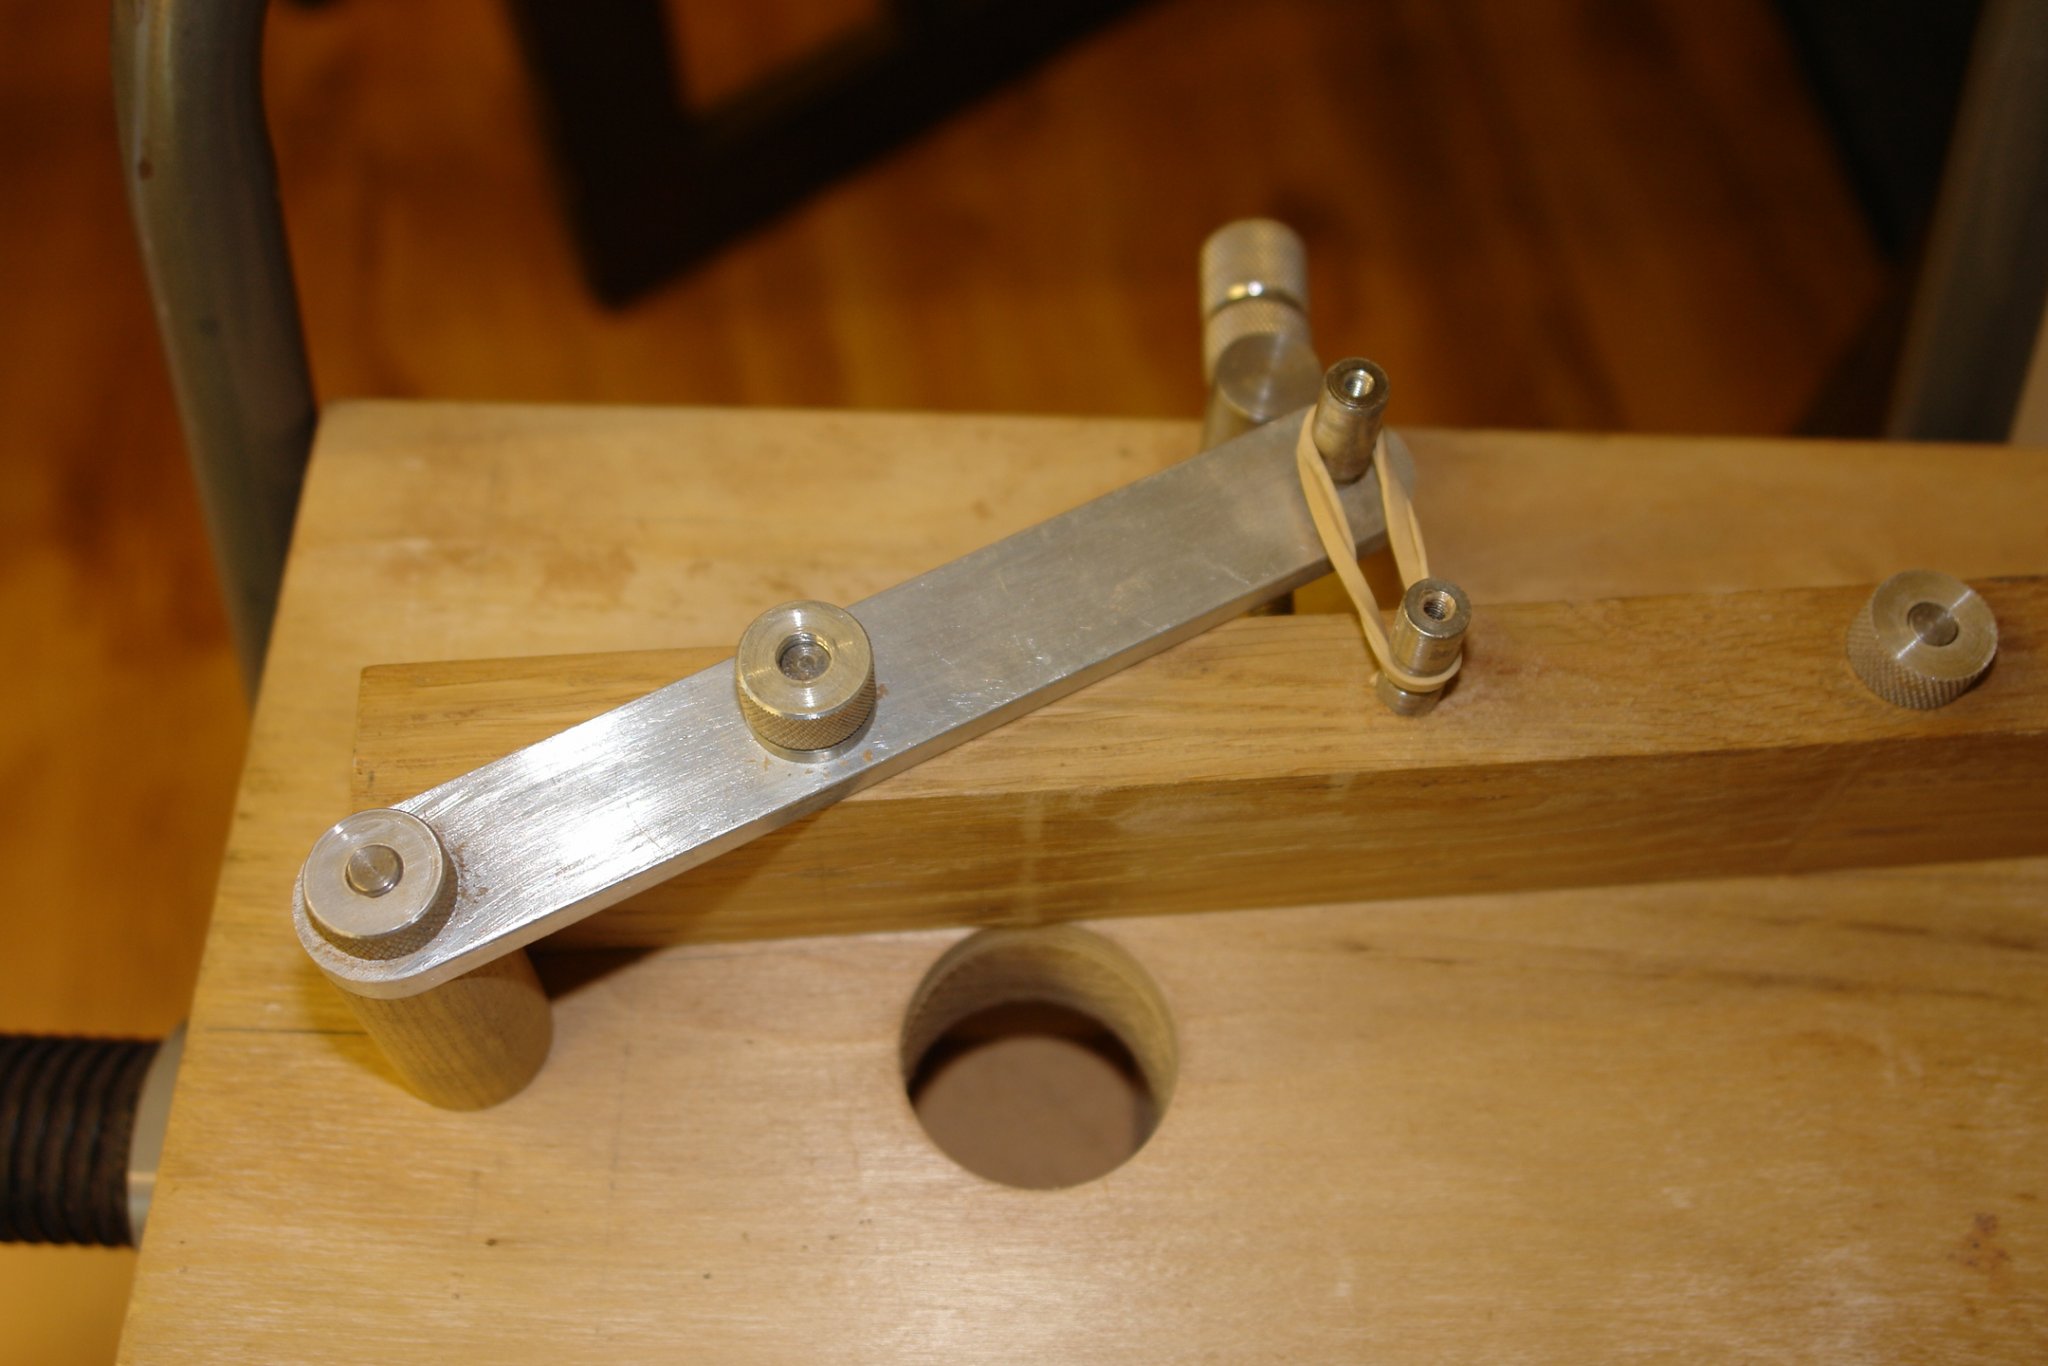
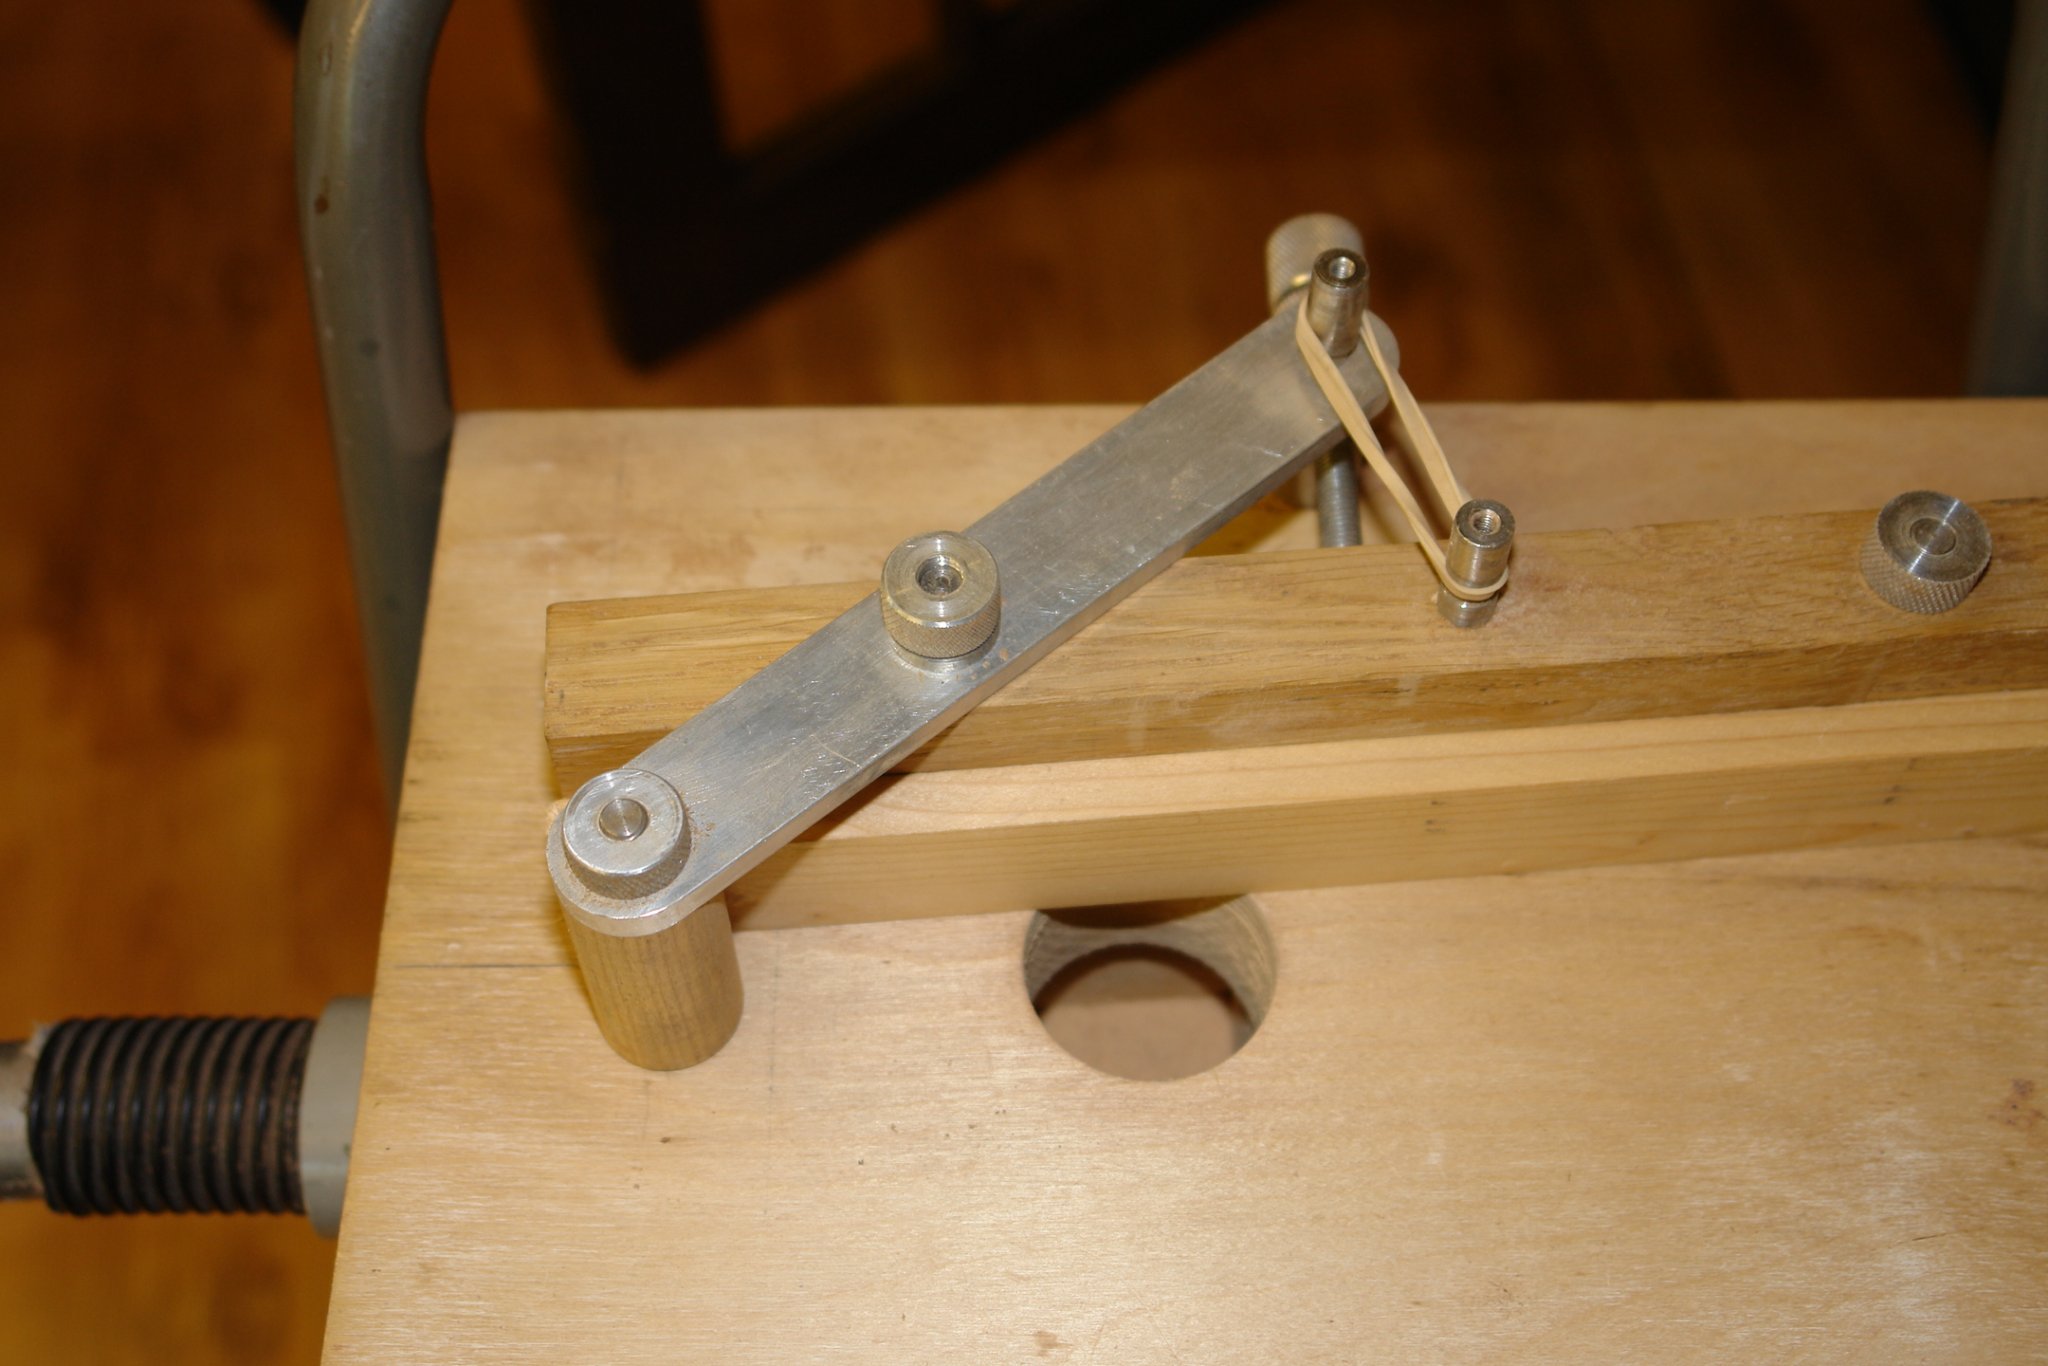
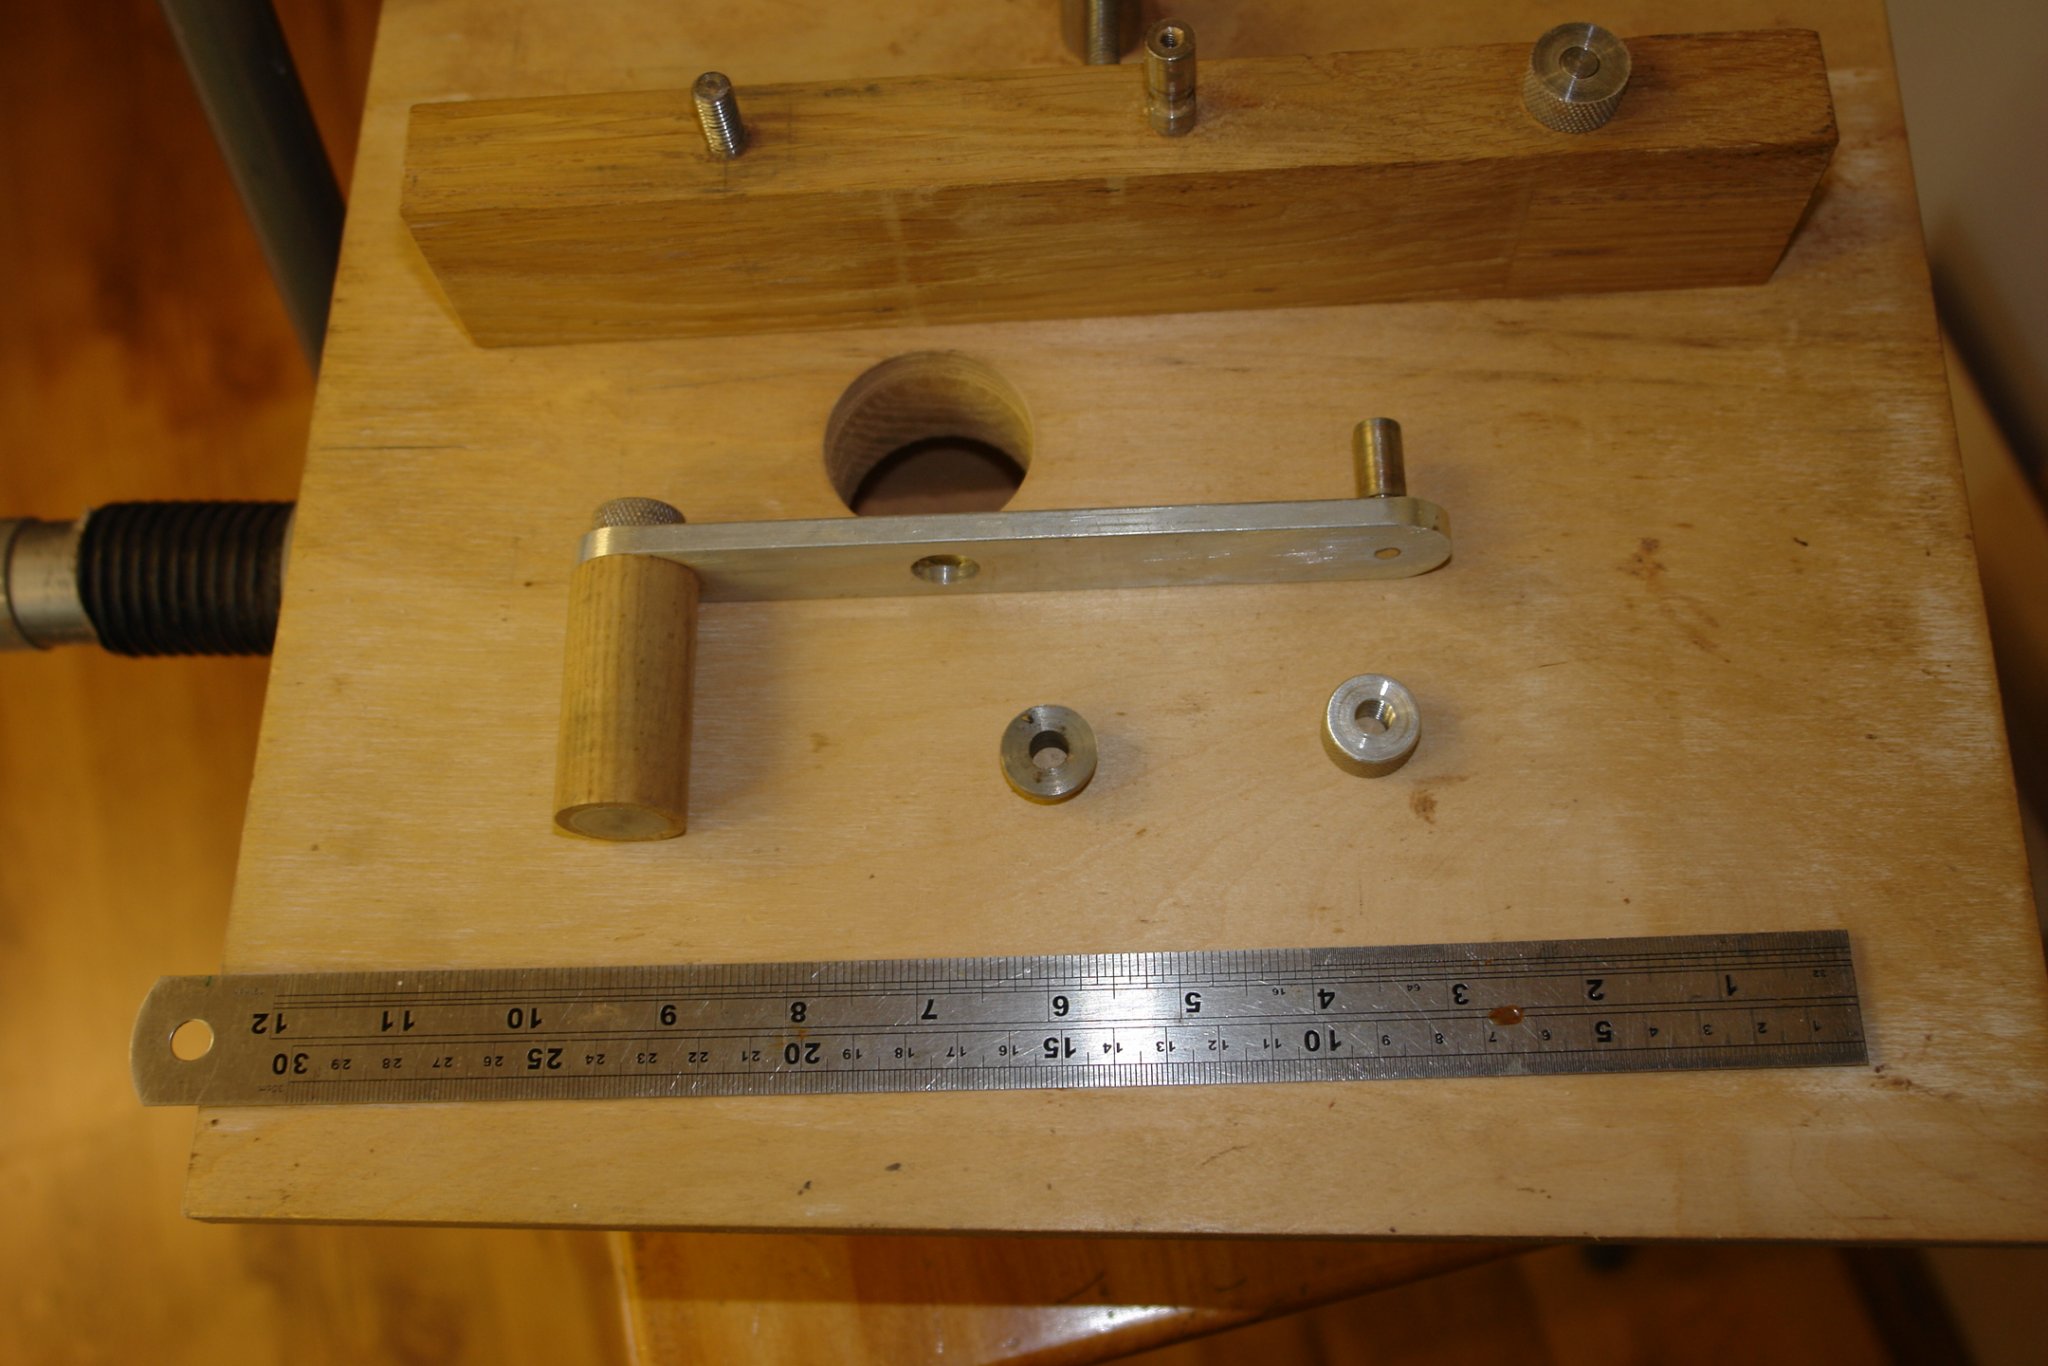
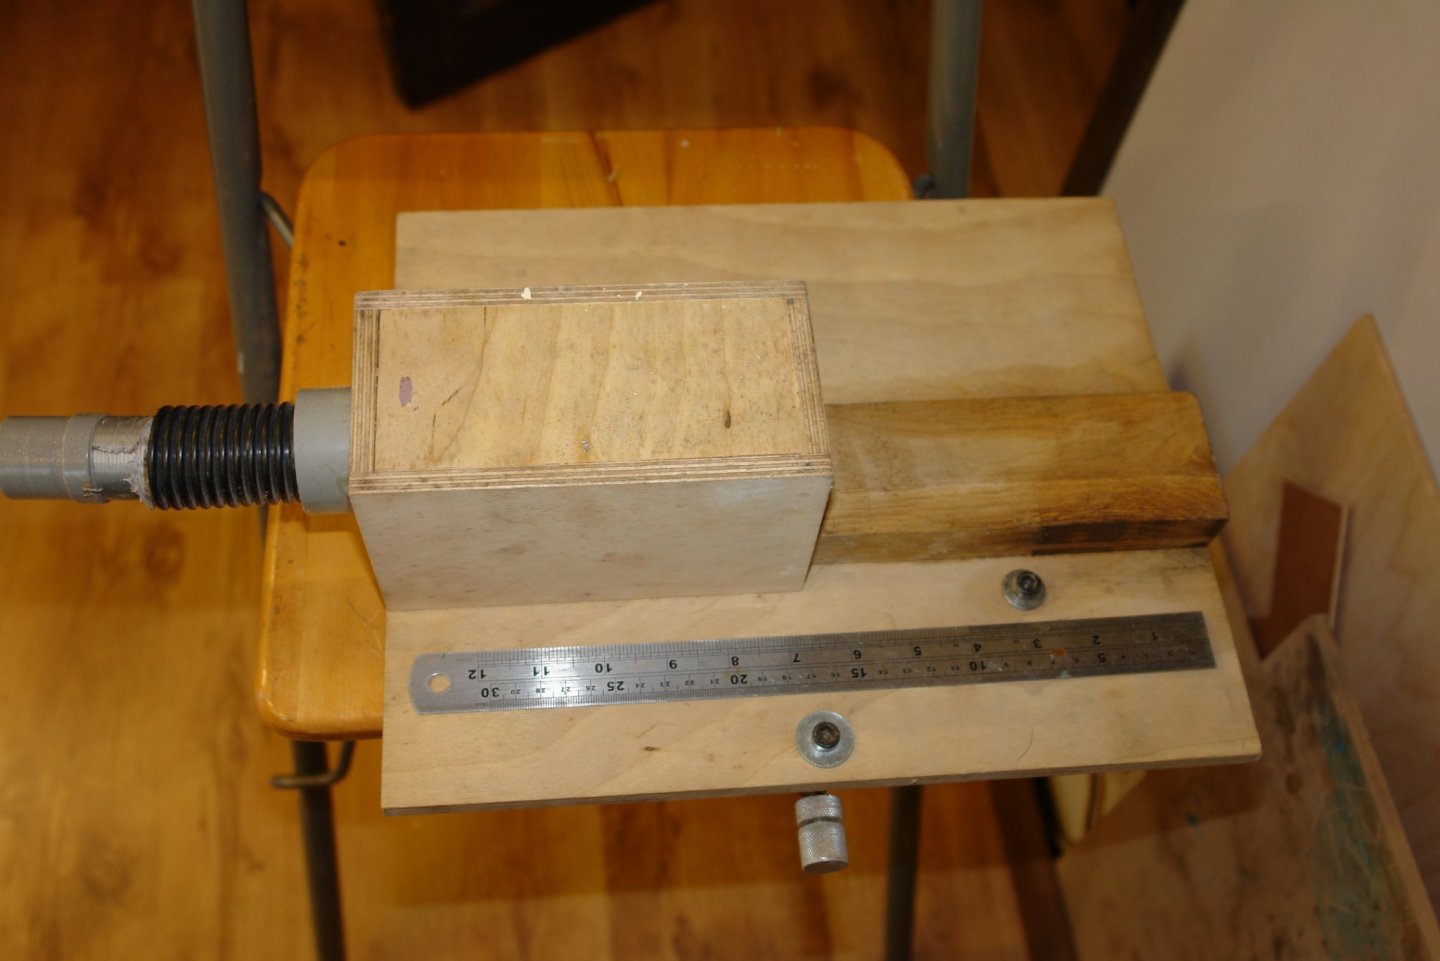
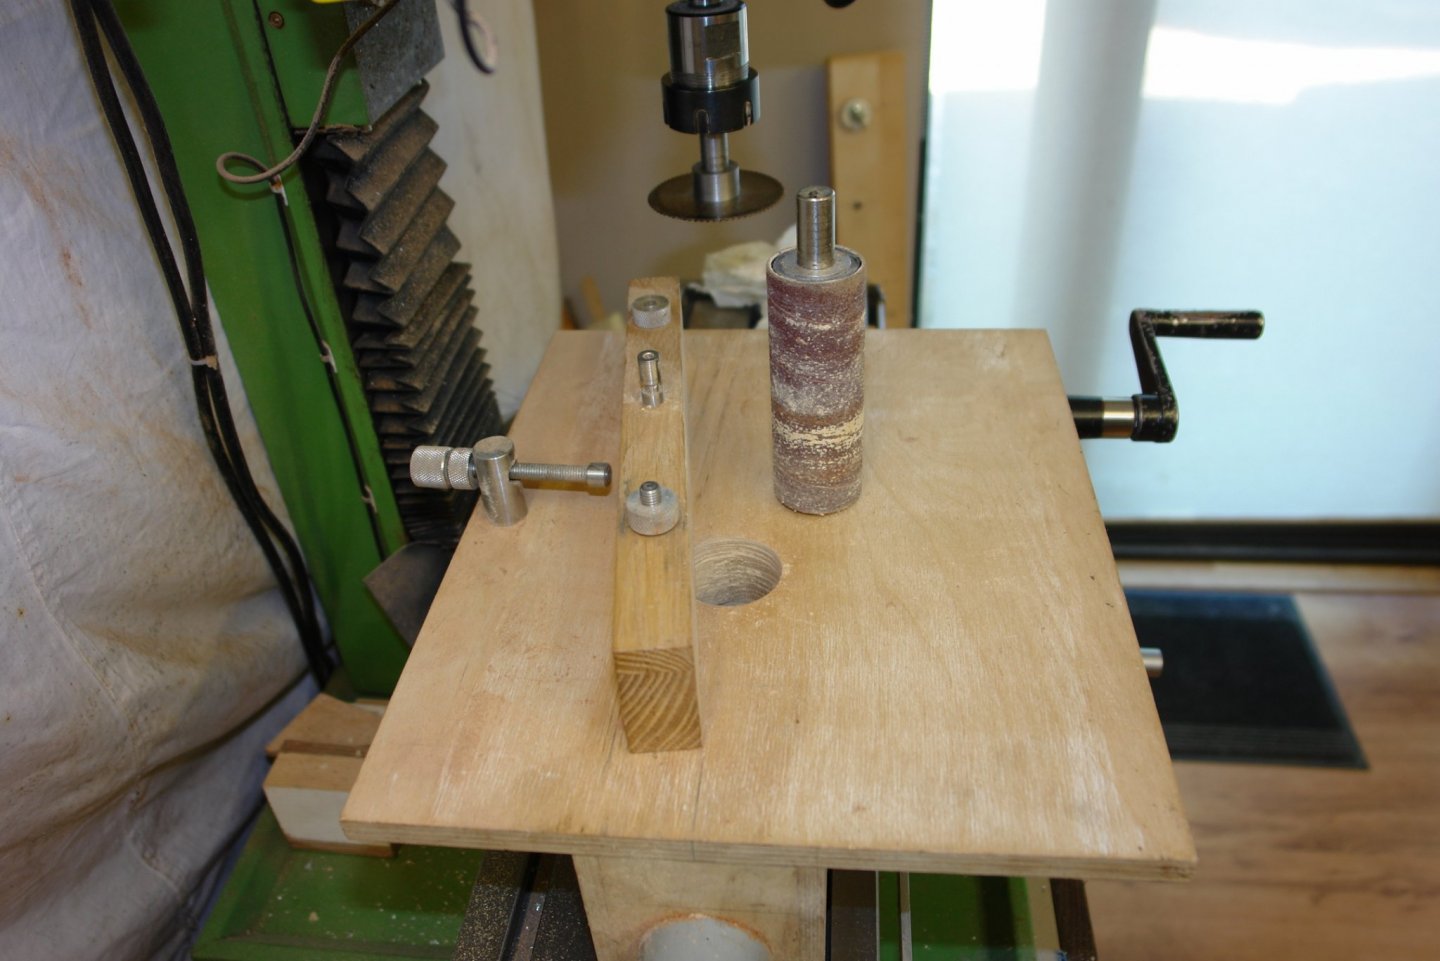
John / Druxey - thank you - and thank you to others who have visited and or liked. Tom Here are some more photos which may help. The next component is a clamp which holds down the plank after it has passed through the sanding drum. I don't use it a lot but it is helpful when sanding thin planks as it stops them lifting.


-
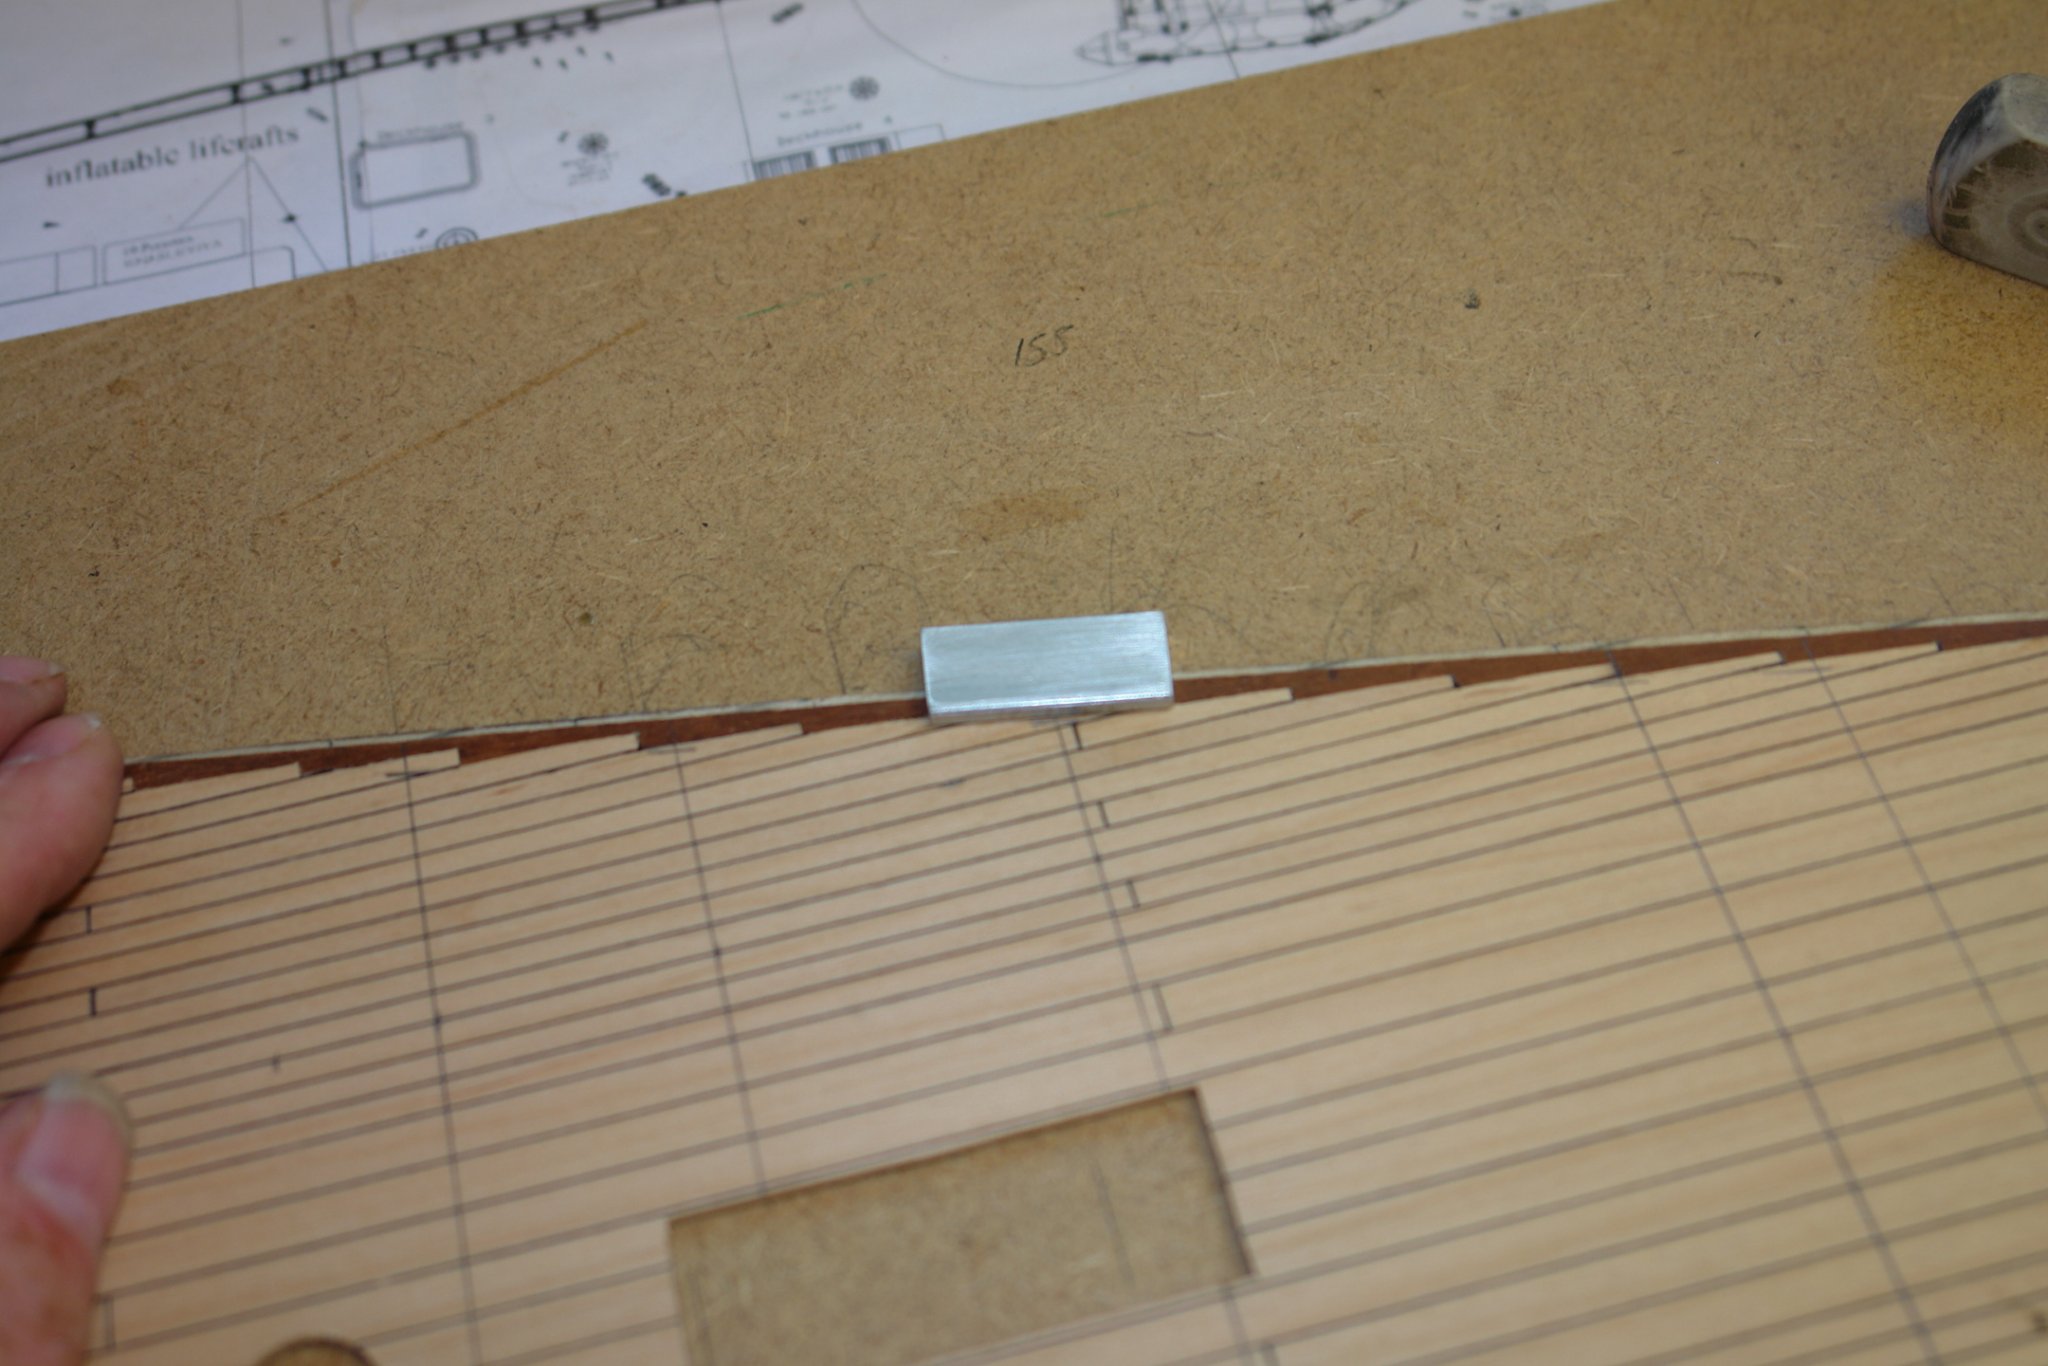
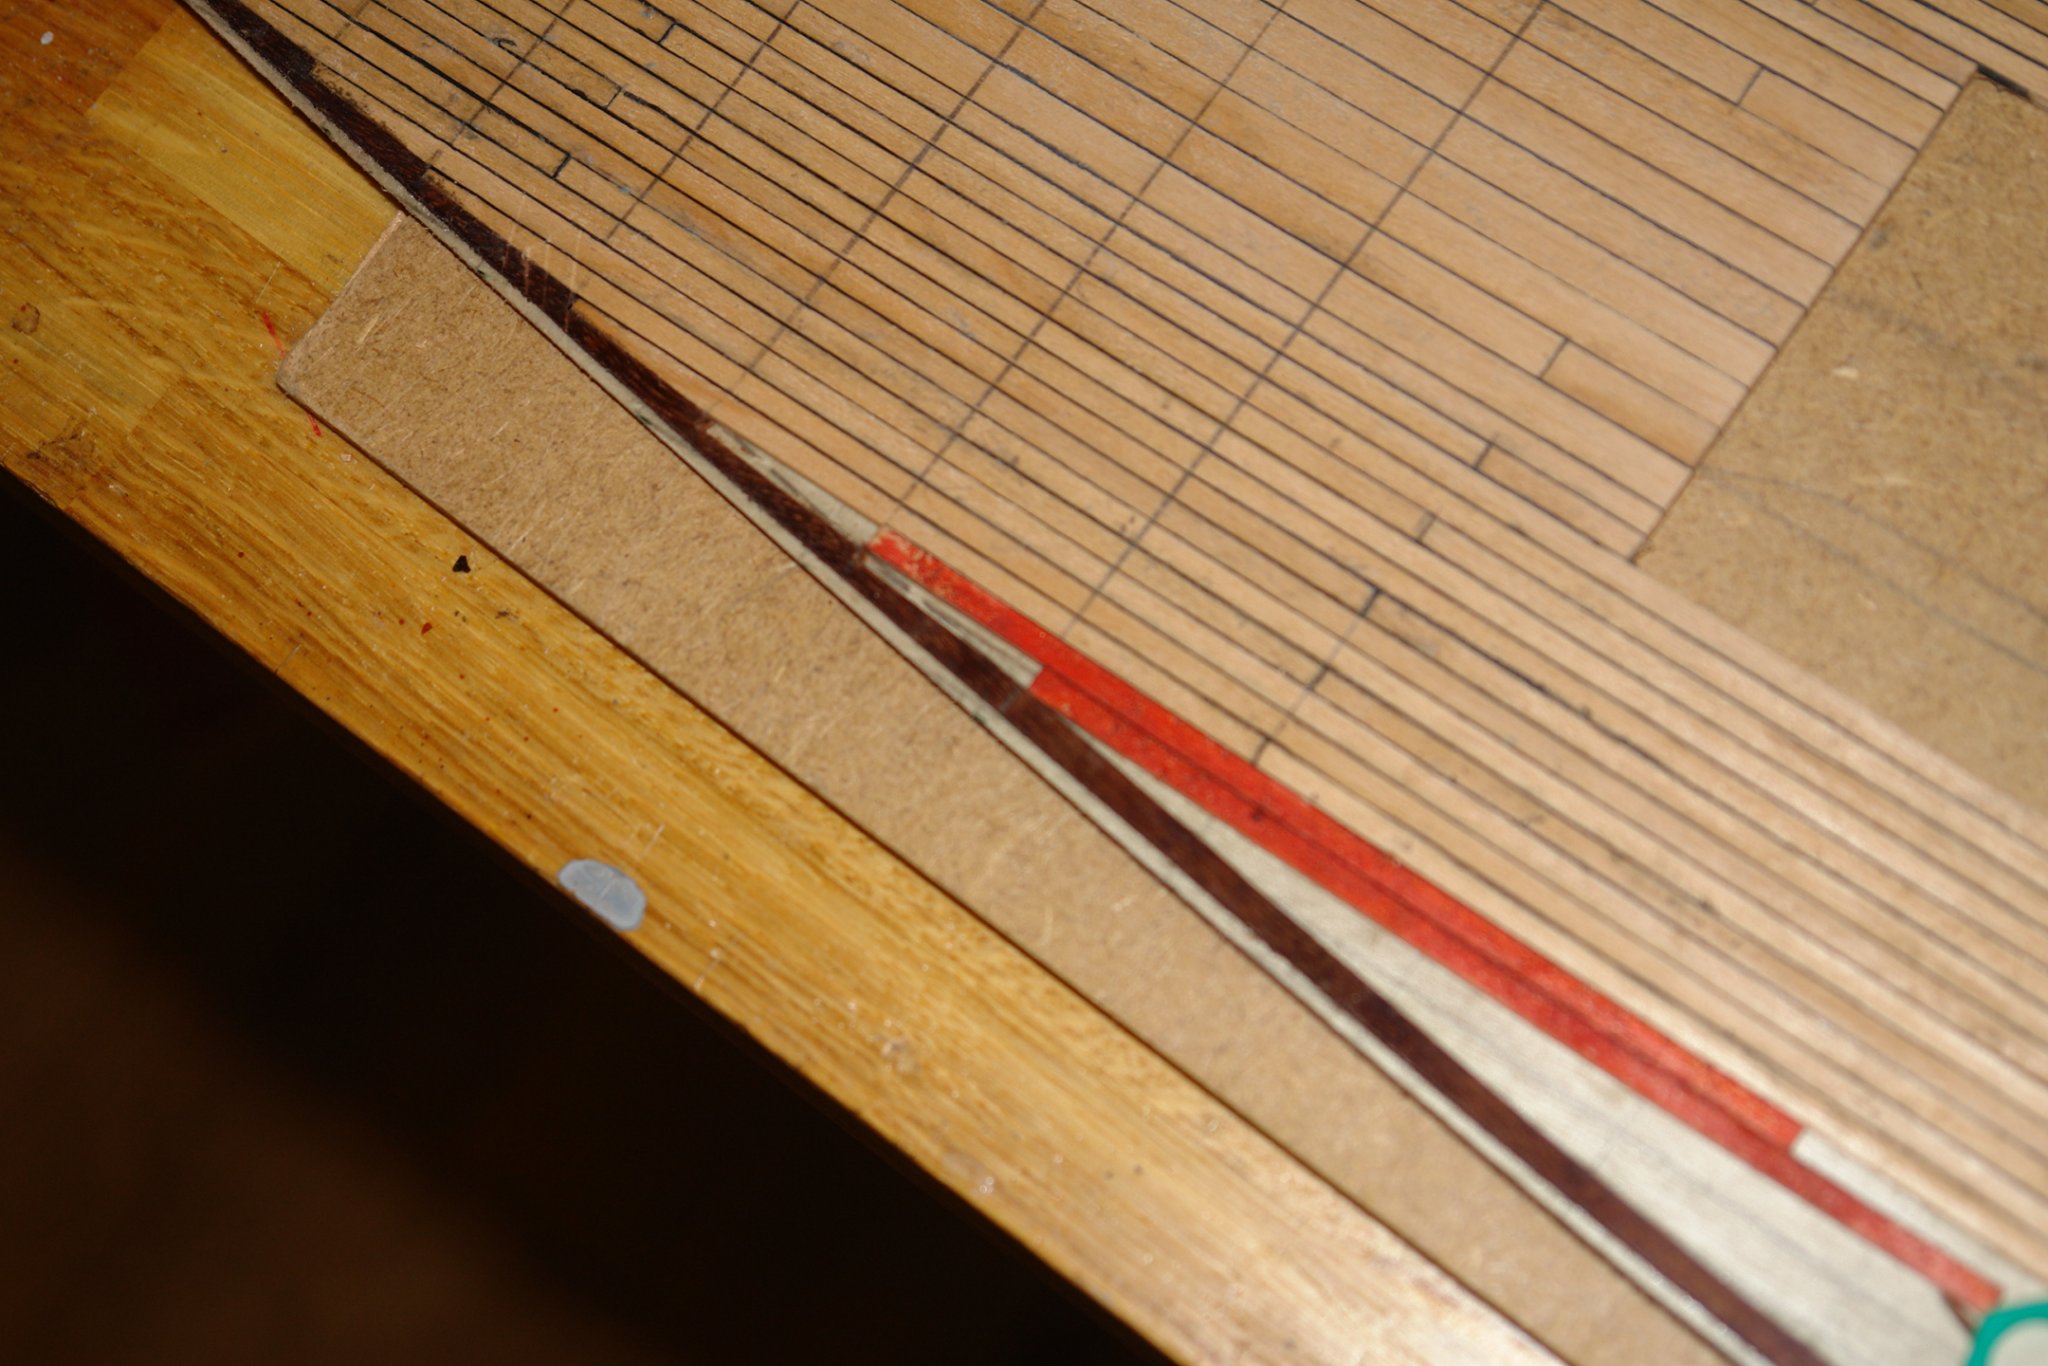
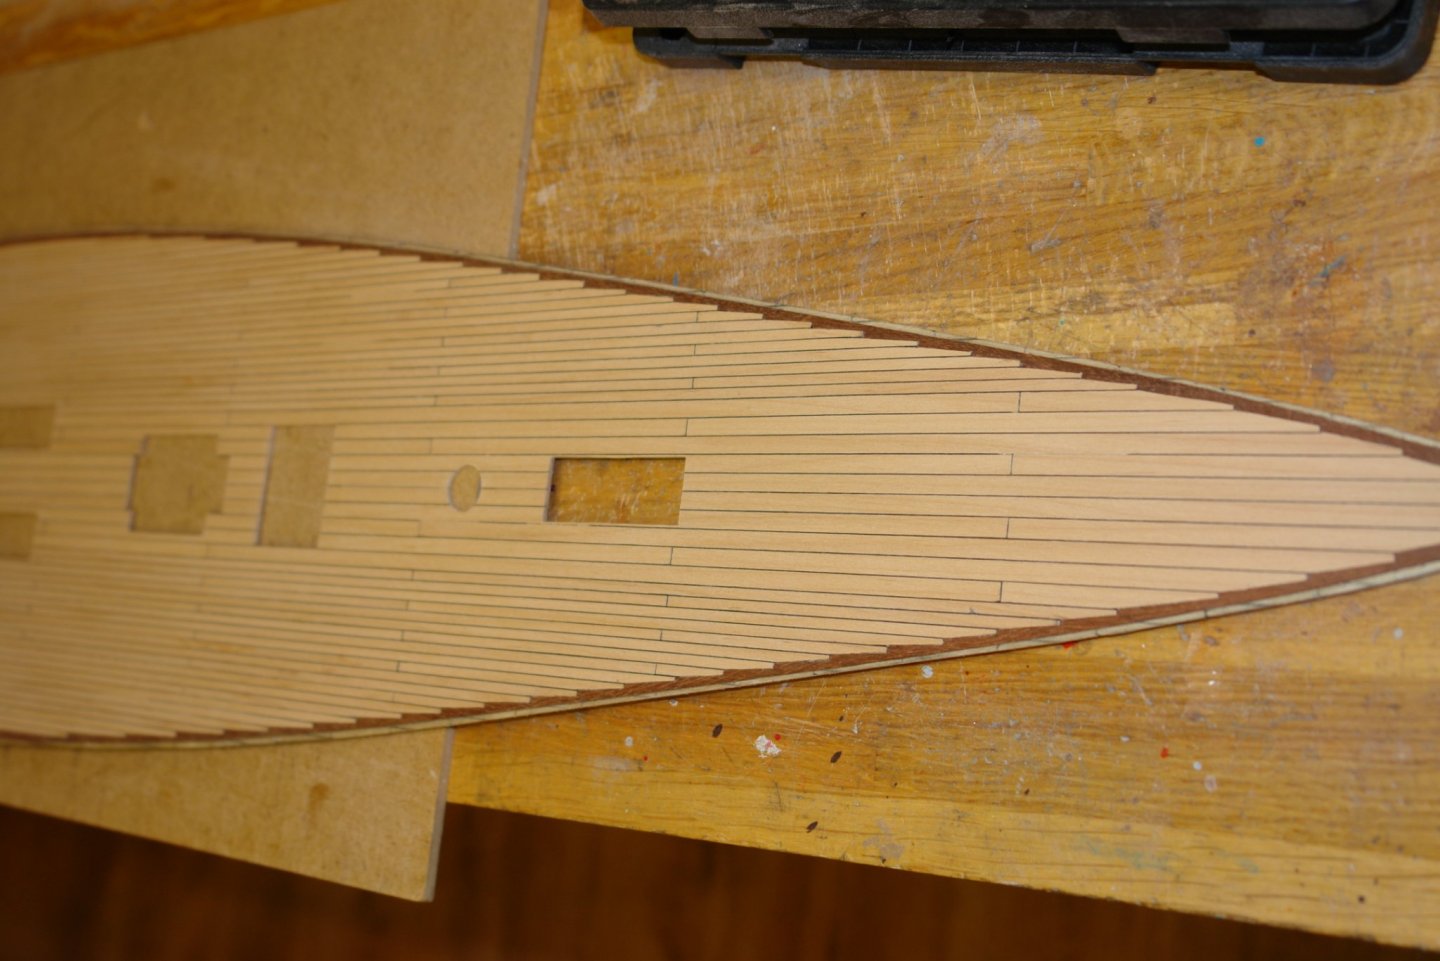
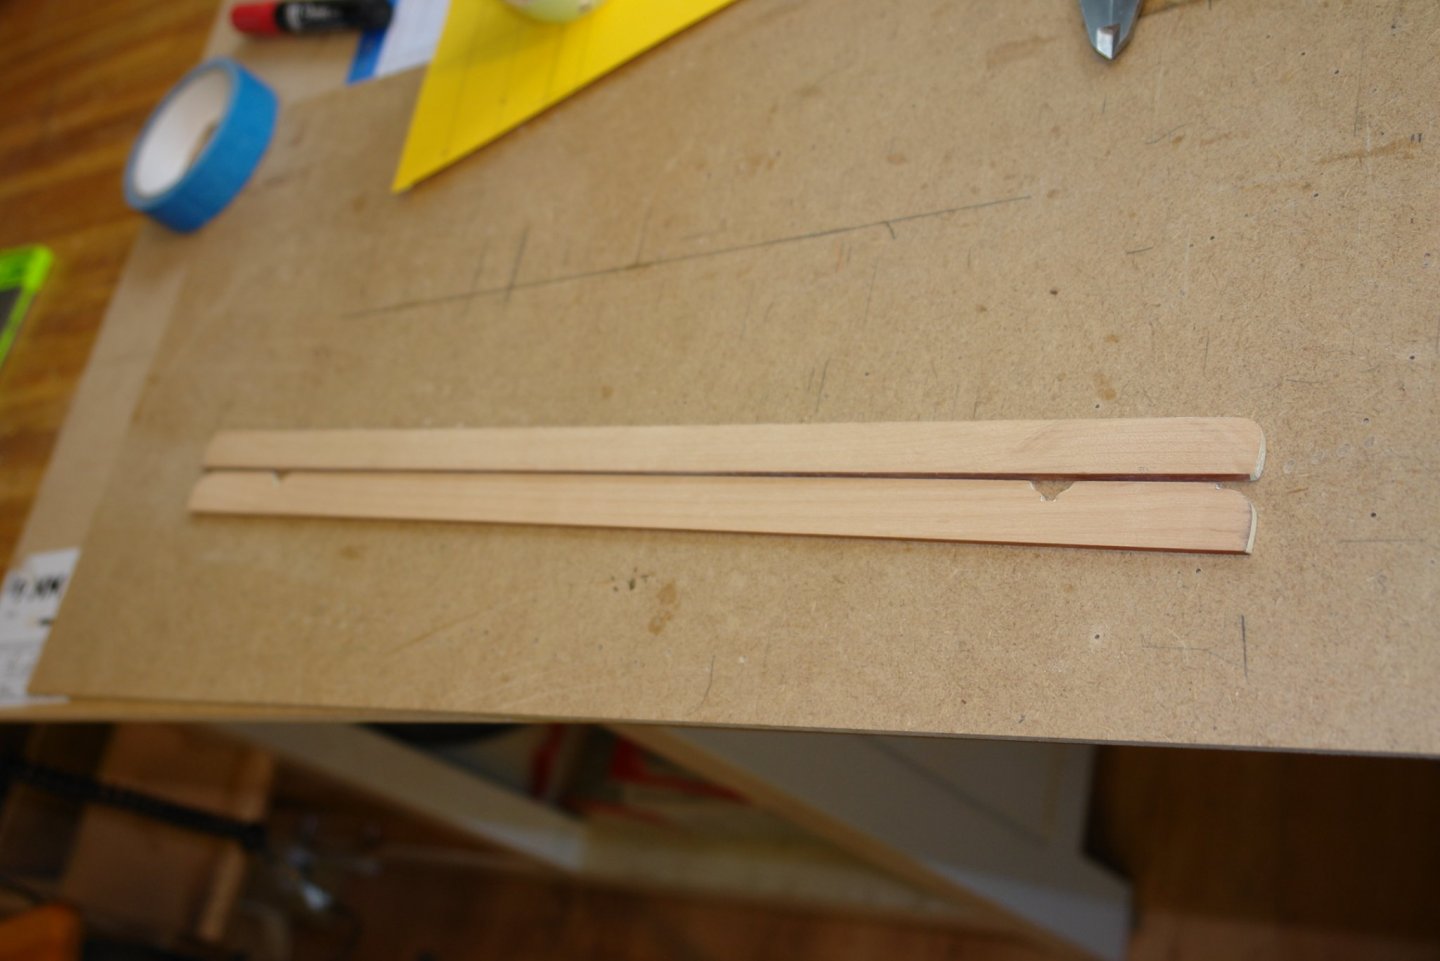
I have had a few good days progressing the deck planking. The following photos show a lot of the narrower planks now in place. I have been drawing pencil lines across the planks as I go as an aid to checking the joggling is symmetrical, fortunately it is. My joggling tool consists of 2 offcuts of deck planking each with a caulking strip glued to one edge. They are coloured red to stop them getting lost among the other offcuts. By using the red planks as a gauge I am able to accurately mark the position of the joggles in preparation for cutting out. I did a bit of sanding to confirm the deck was going to look OK. I hope to finish the deck planking in the next 2 days.


-
Hull looking pretty good Gary. Well done.
-
Well Patrick you have been busy while I have been away enjoying my summer break. I must say that the owner is sowing better taste than the last one, although I think the pot plants are a bit decadent, they wont last well in the salt spray. Maybe you should replace them with plastic simulants. Excellent work as usual.
-
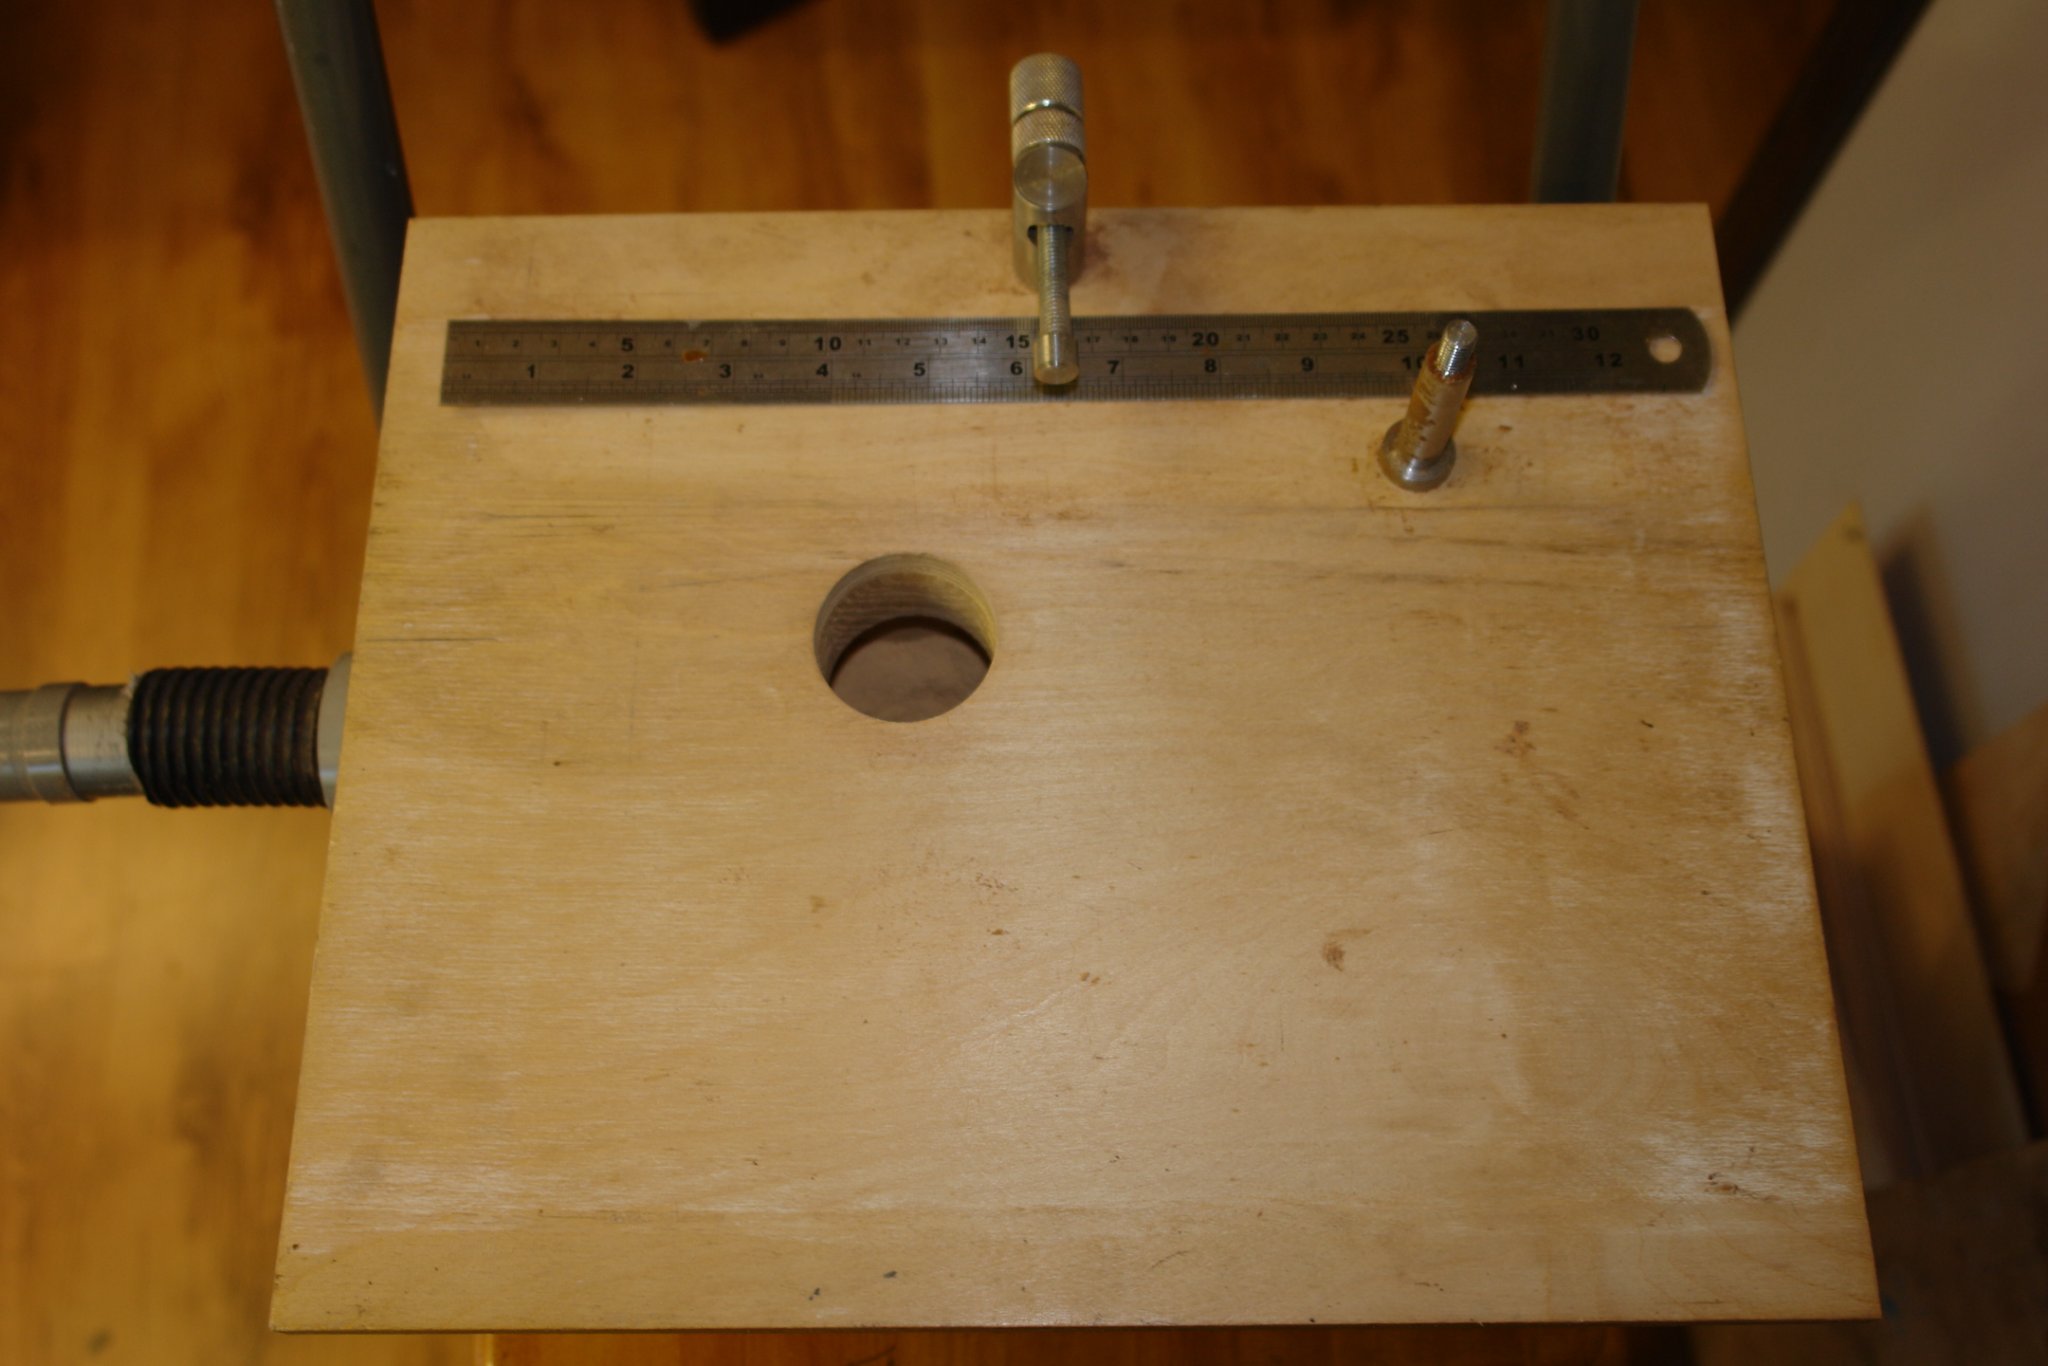
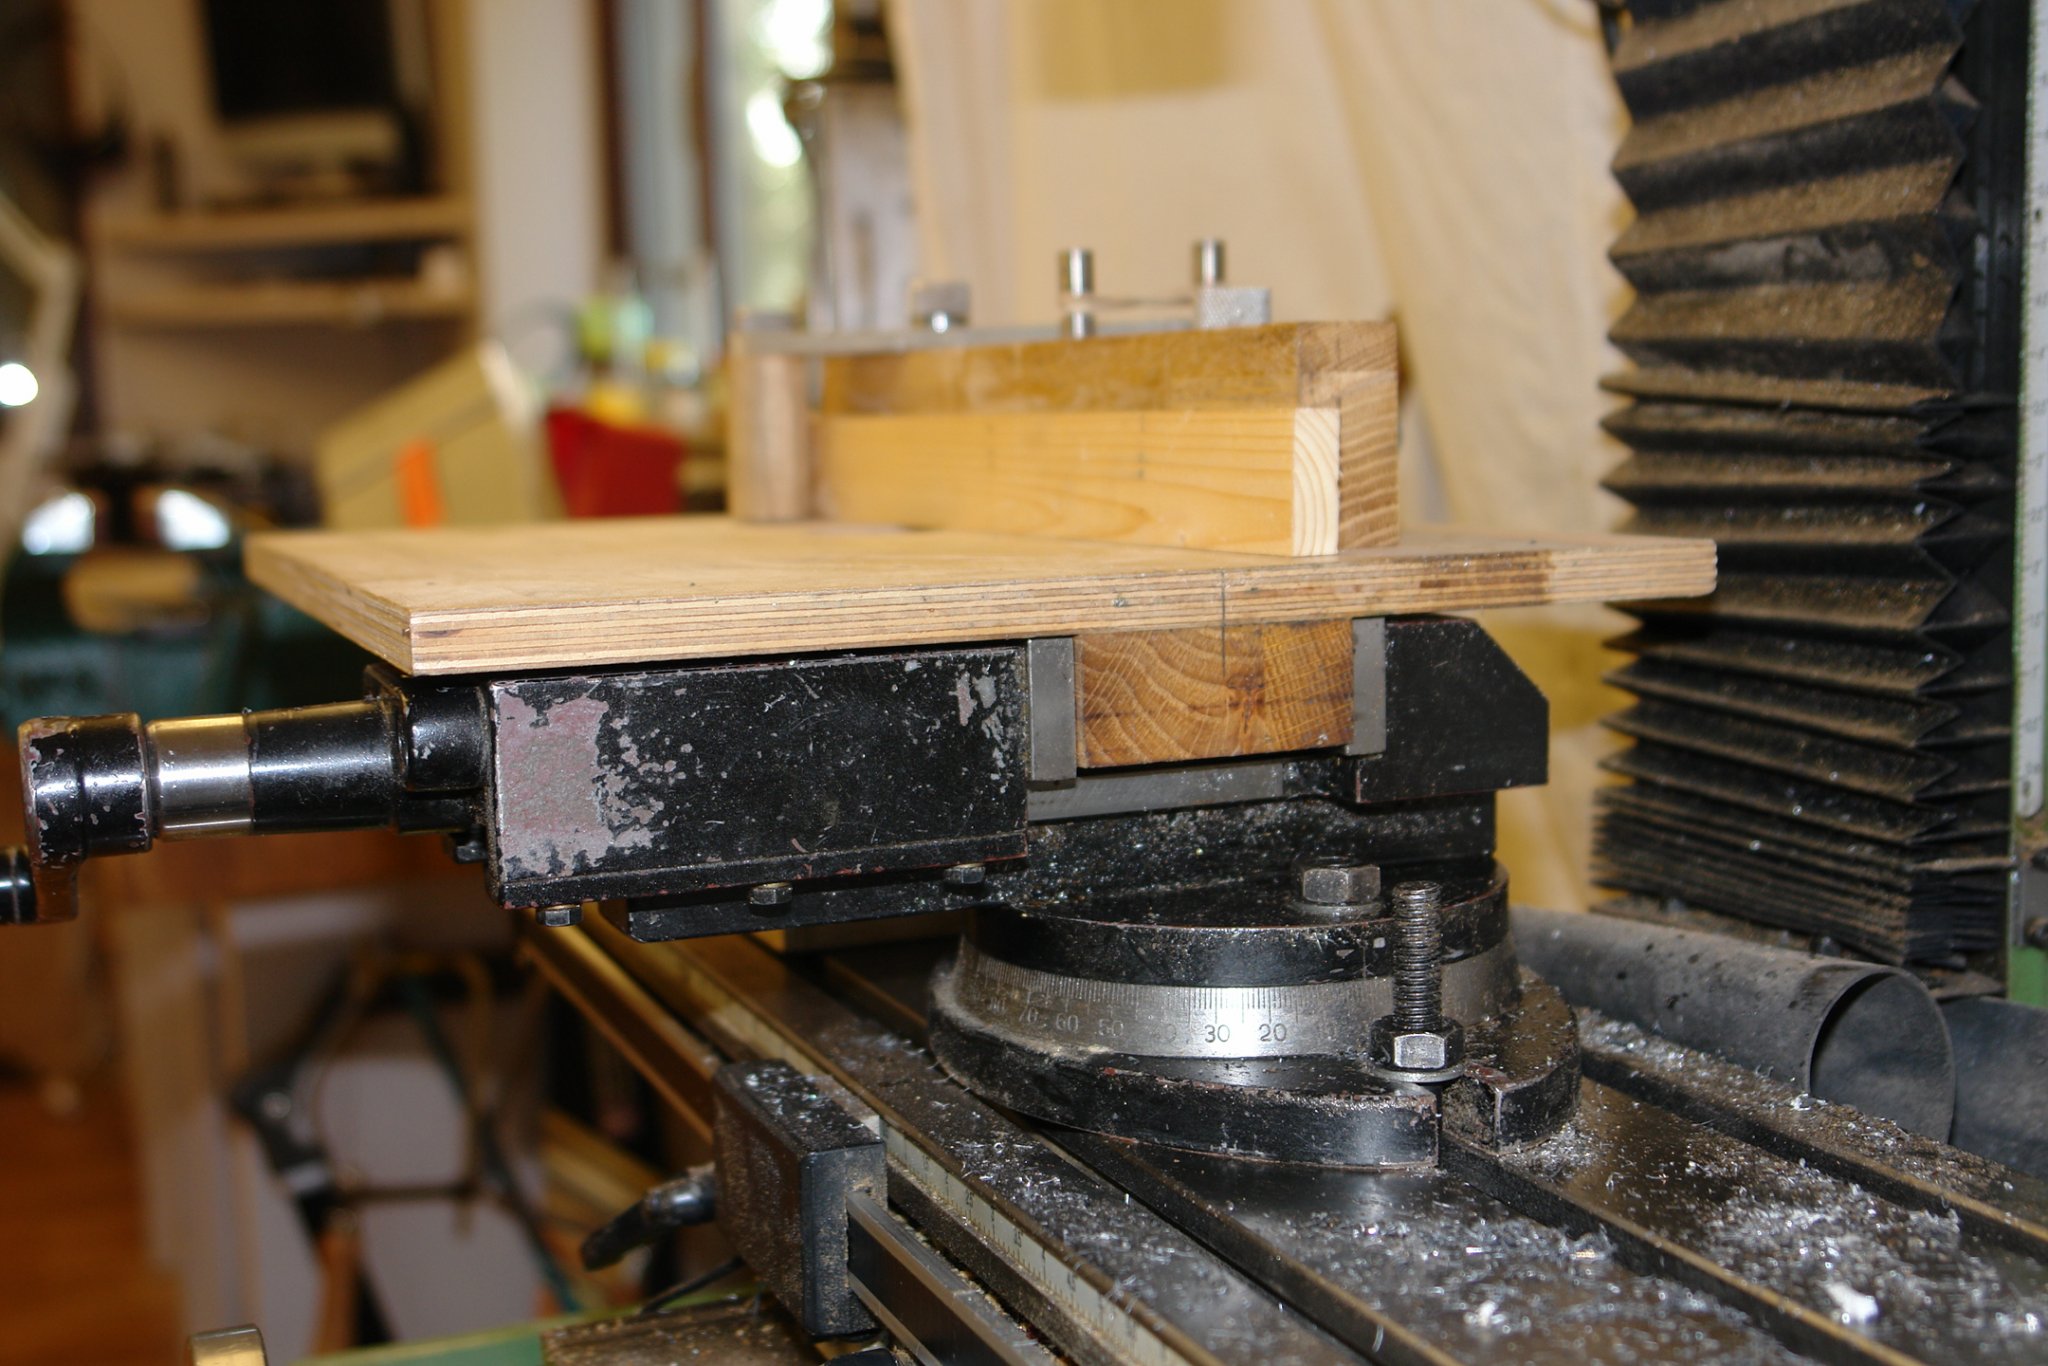
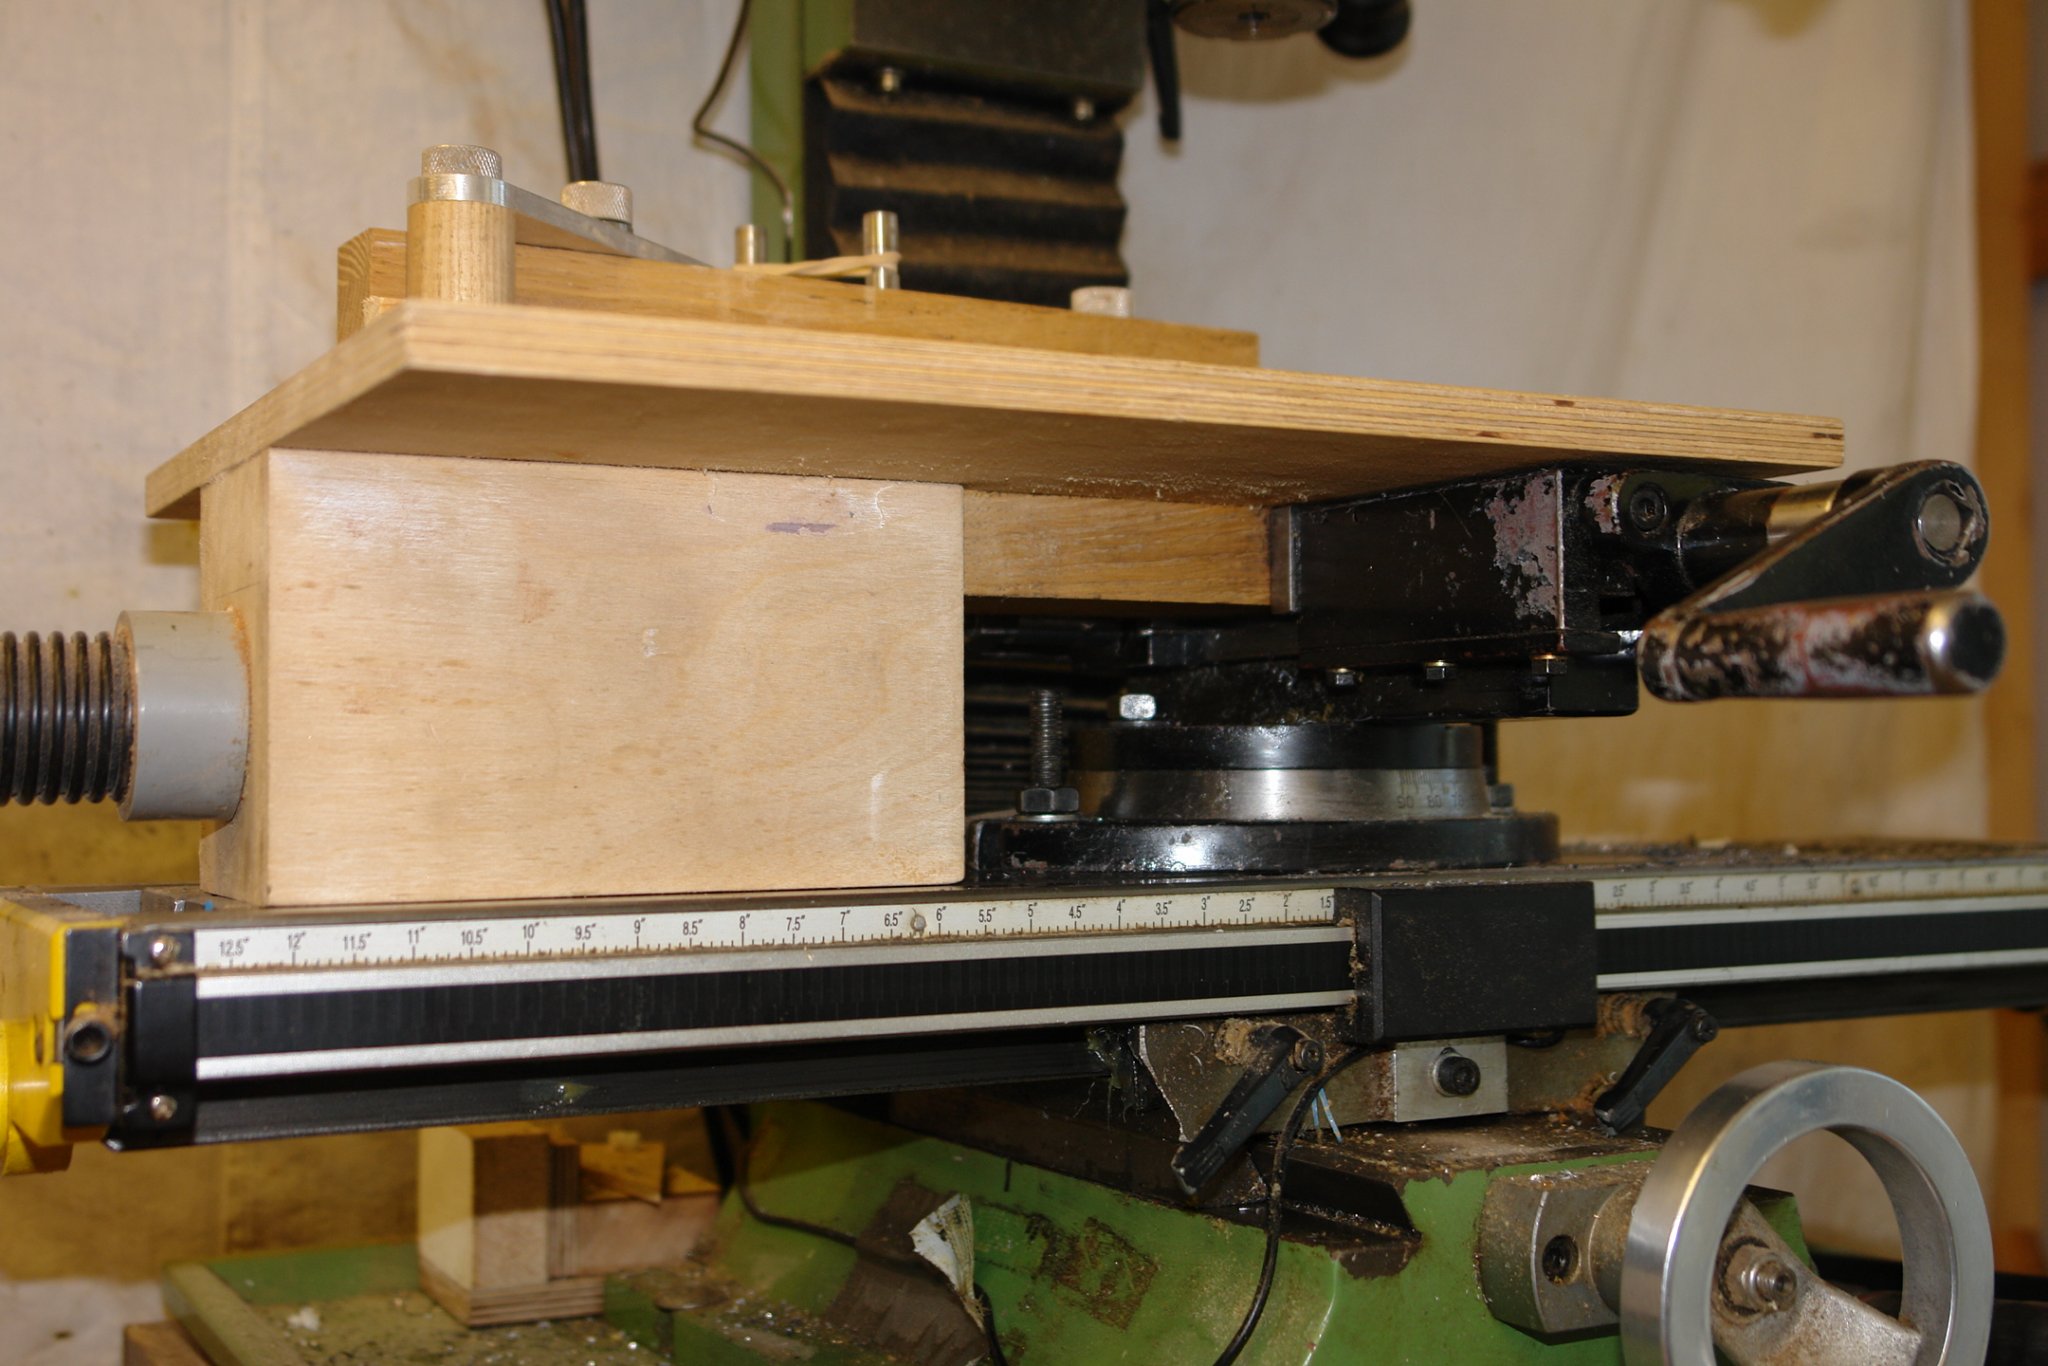
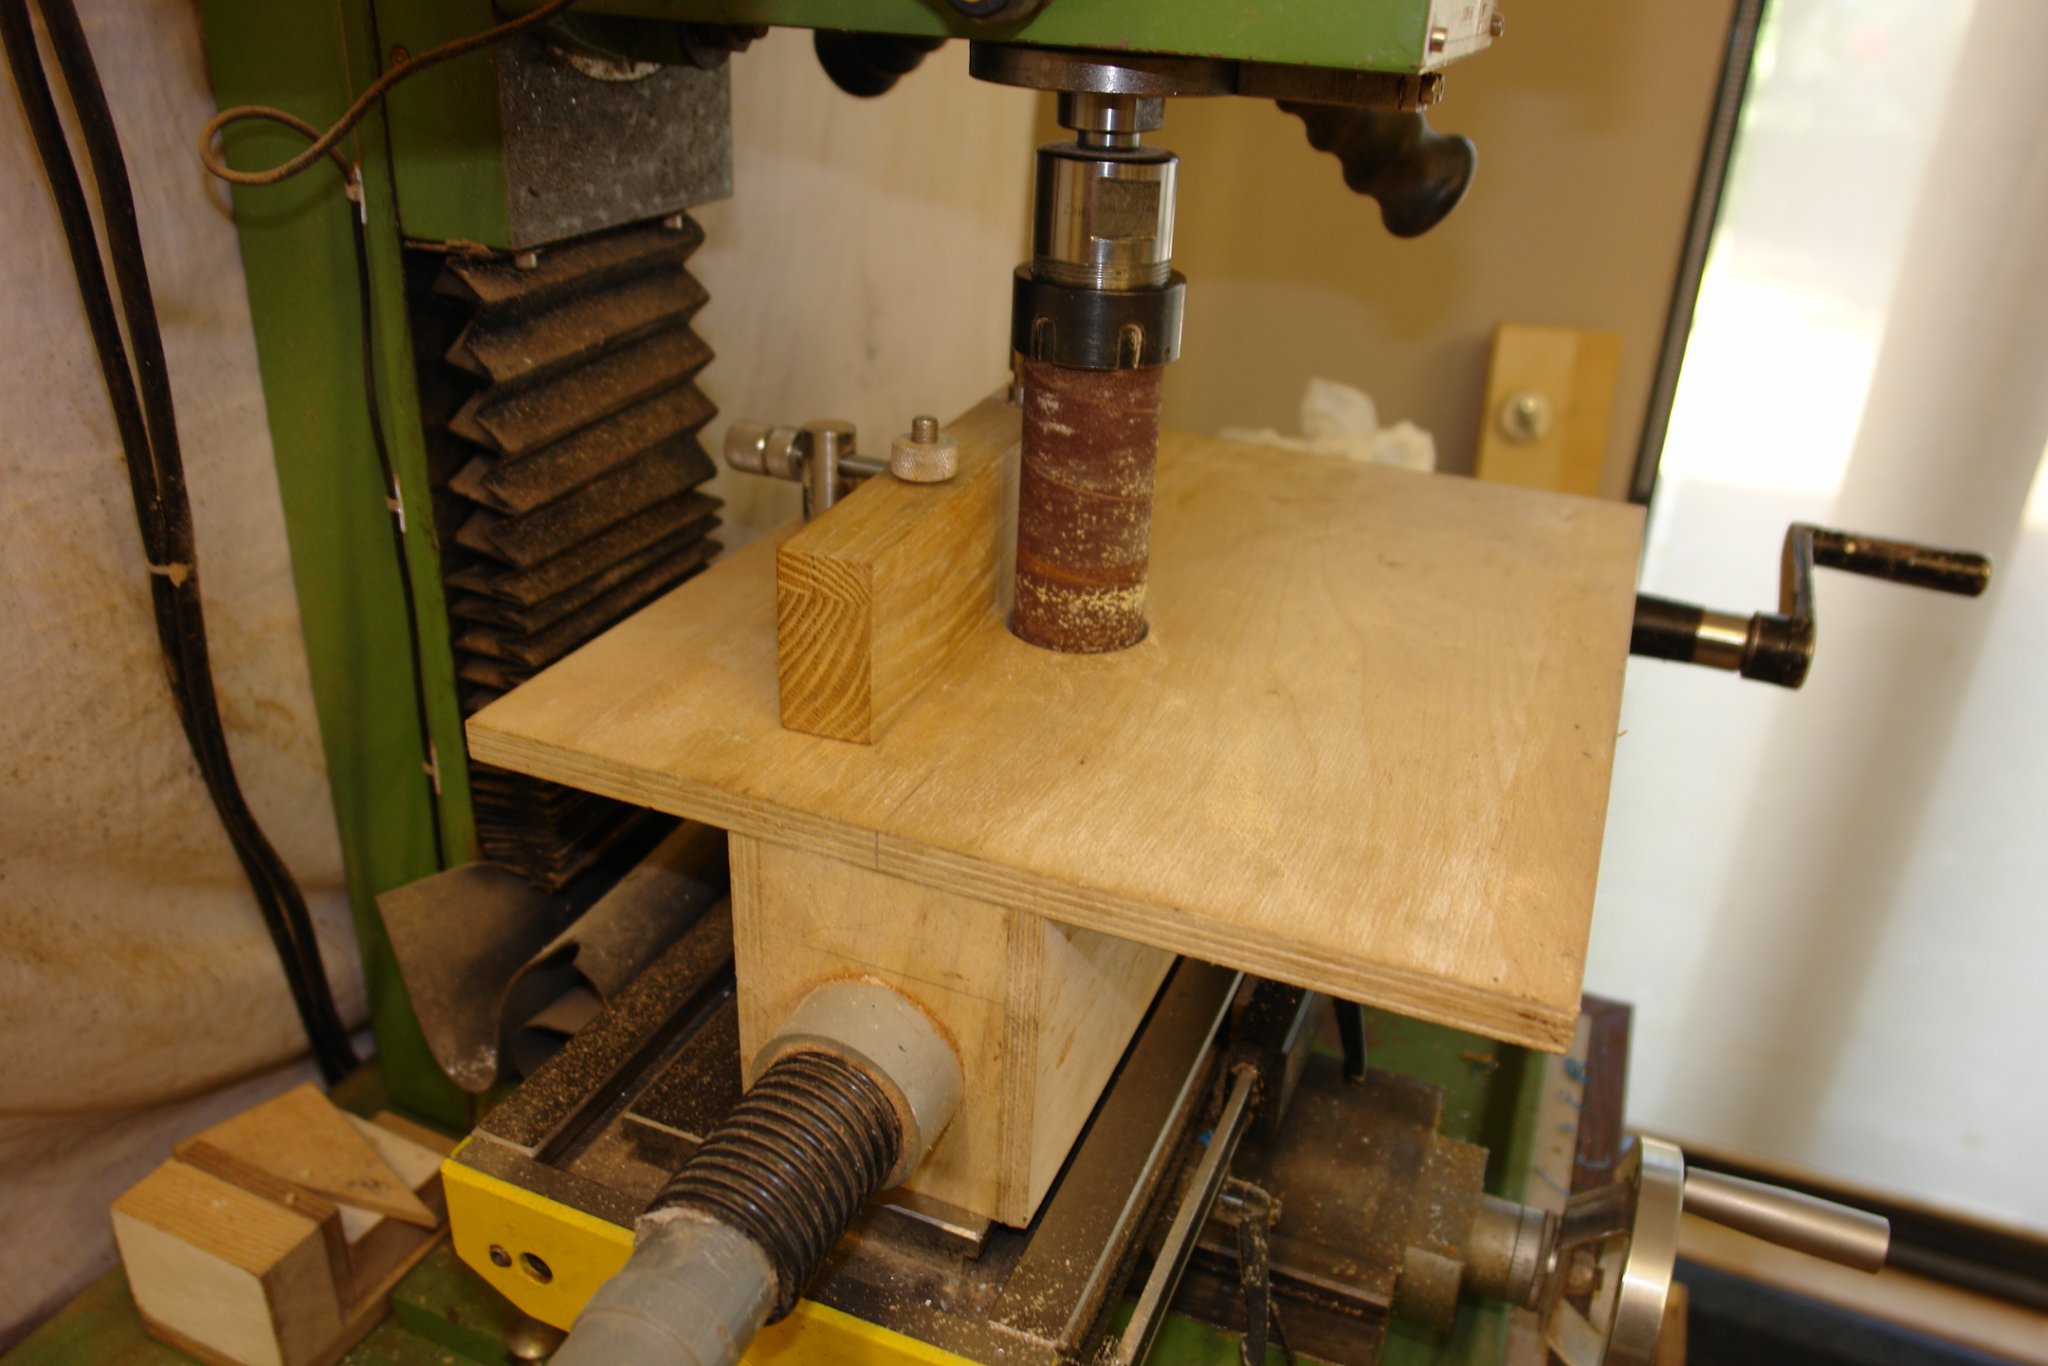
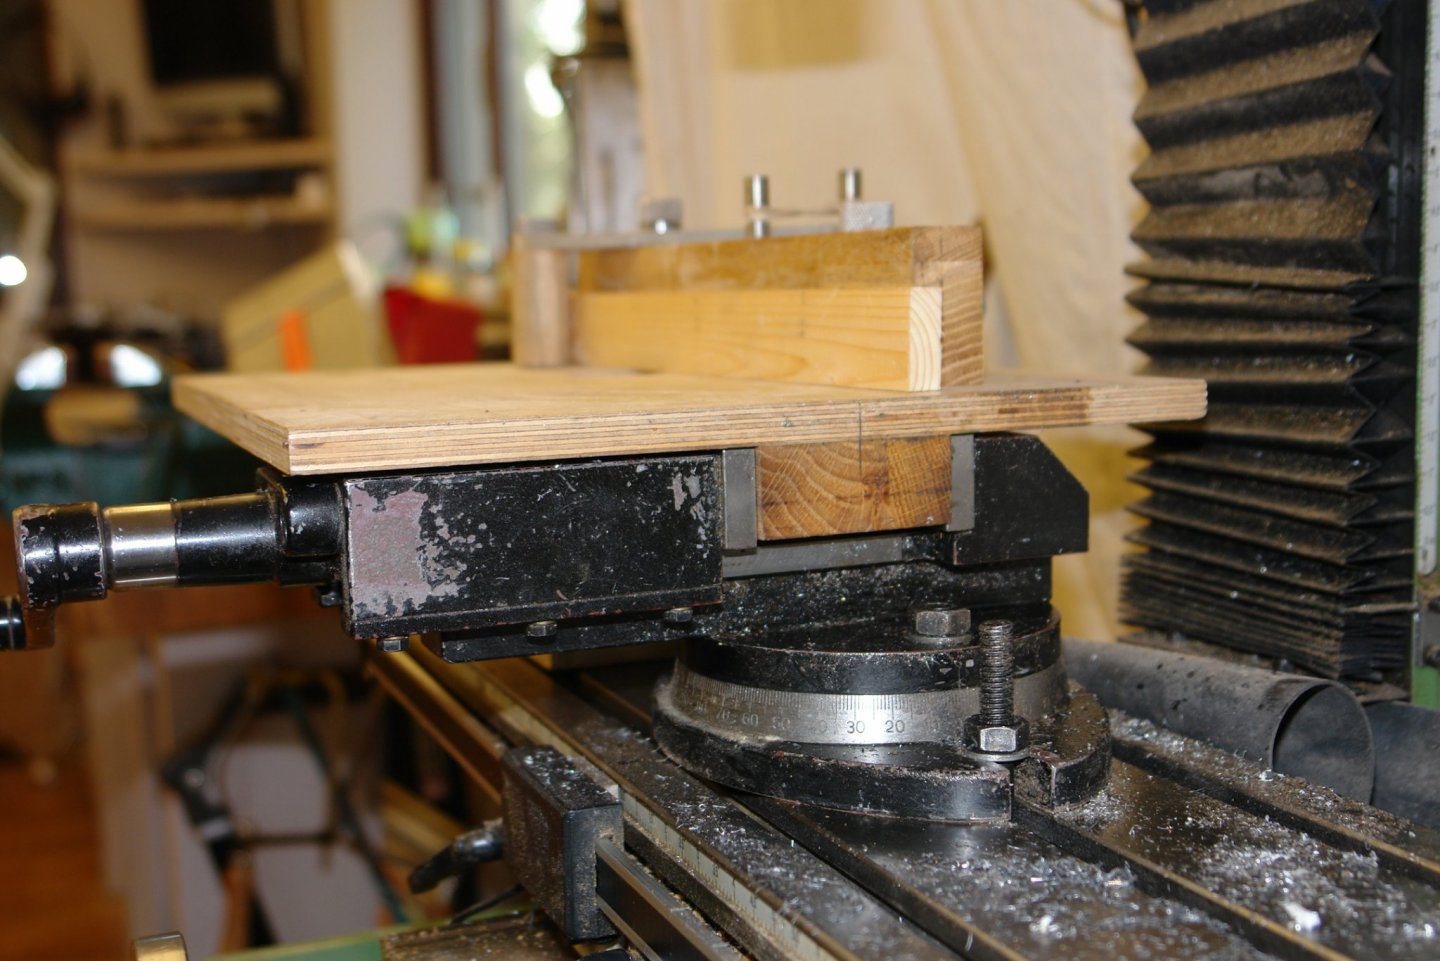
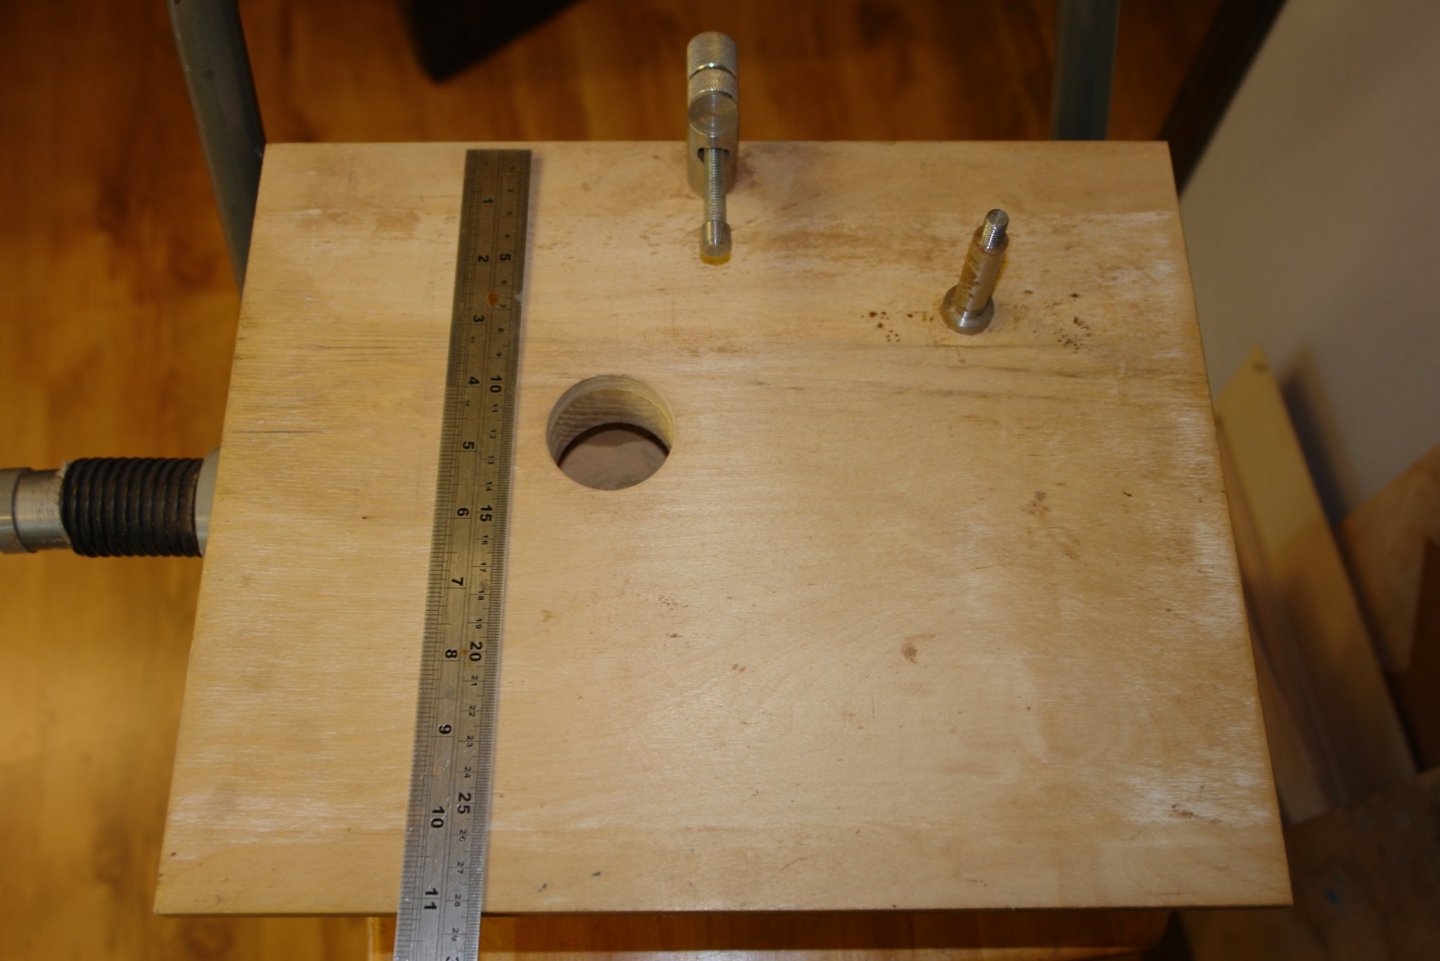
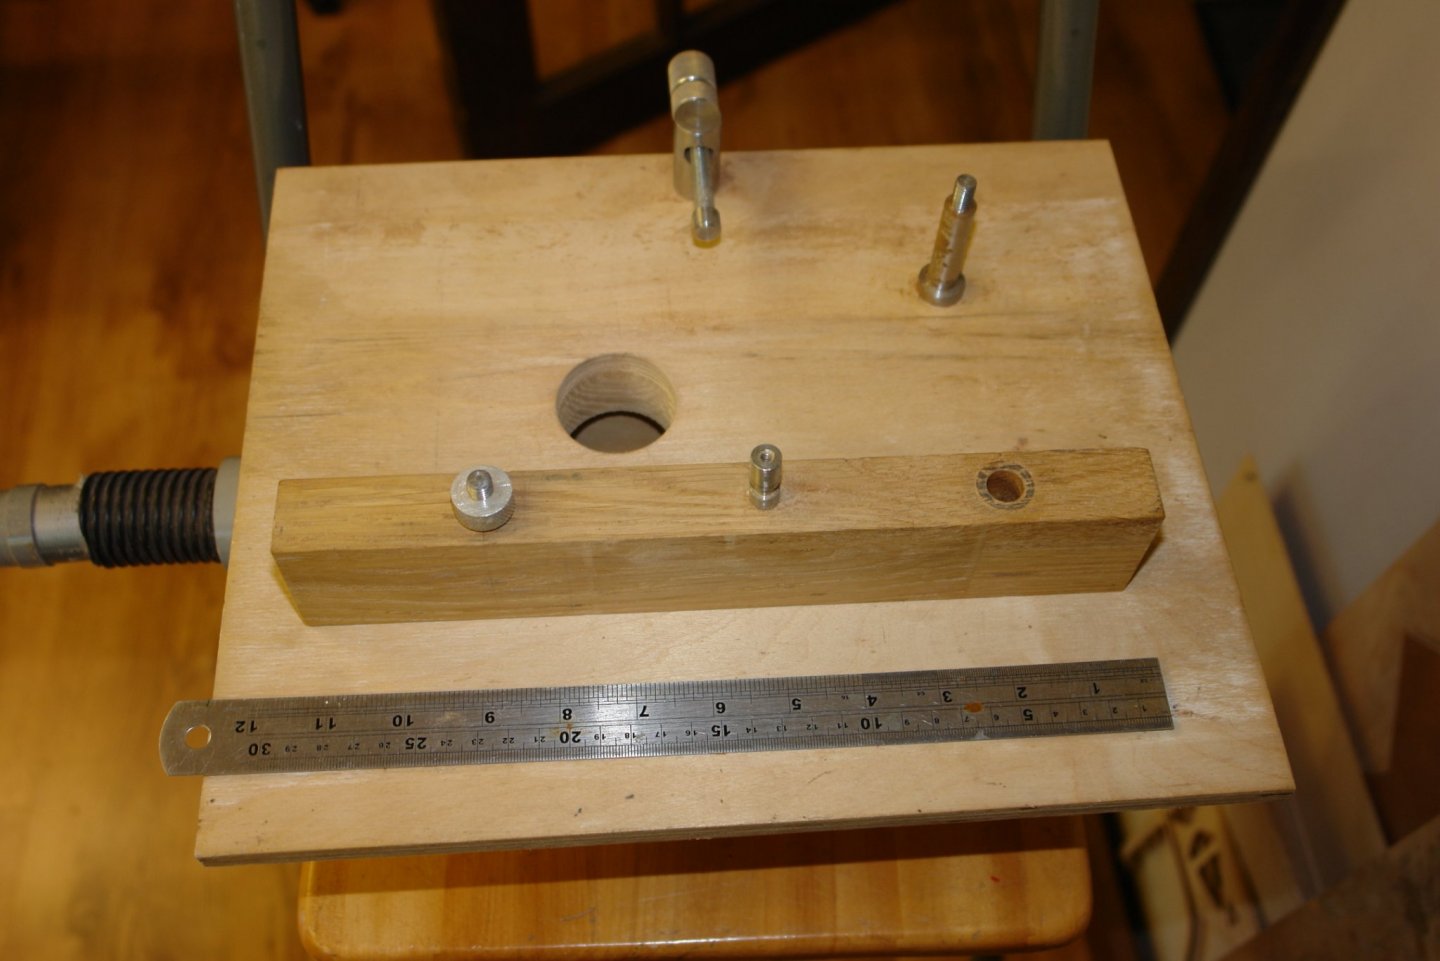
Hello Tom - my drum sander lacks sophistication I'm afraid. I use the drum and sanding tubes from an oscillating sander. The sanding table is made from 3/8 inch ply below which is a dust collection box connected to a vacuum port. Sanding is done between the upstanding wooden plank and the sanding drum. The plank pivots on the pin at the far end and coarse adjustment is made by the screw on the left hand side. The hole in the table is about 1/4 inch bigger in diameter than the sanding drum which means that I can fine tune the thickness of the sanded components by adjusting the table relative to the drum axis using the Y axis of the mill table. This works very well and allows me to achieve very accurate results.. The table clamps in the jaws of the milling vice and hence is quickly removed and replaced. Peter thank you for visiting, my methods are probably a result of my antiquity. Pat - thank you - pity about the Ashes!!!!!!!!!!! Eberhard - thank you .

-
You are right - it is plastic coated. The plastic however is clear and all you see is the braided wire beneath. Its big advantage is that it is very flexible and does not retain any pre set shape.
-
Well done Gary. I like your wood store and you remind me that I need to make a rack for my needle files - I have to go through the lot every time I need one - its always the last.
-
Gary Try this https://www.ebay.co.uk/i/331888339497?chn=ps&var=542249273716&norover=1&mkevt=1&mkrid=710-134428-41853-0&mkcid=2&itemid=542249273716_331888339497&targetid=522577489903&device=c&mktype=pla&googleloc=9045826&campaignid=1782815748&mkgroupid=70885937642&rlsatarget=pla-522577489903&abcId=1139356&merchantid=9478344&gclid=EAIaIQobChMIs97Y6YTW5AIVAuDtCh2WIgQPEAQYAyABEgLzZ_D_BwE Much easier to use. You can get it in lots of different thicknesses.
-
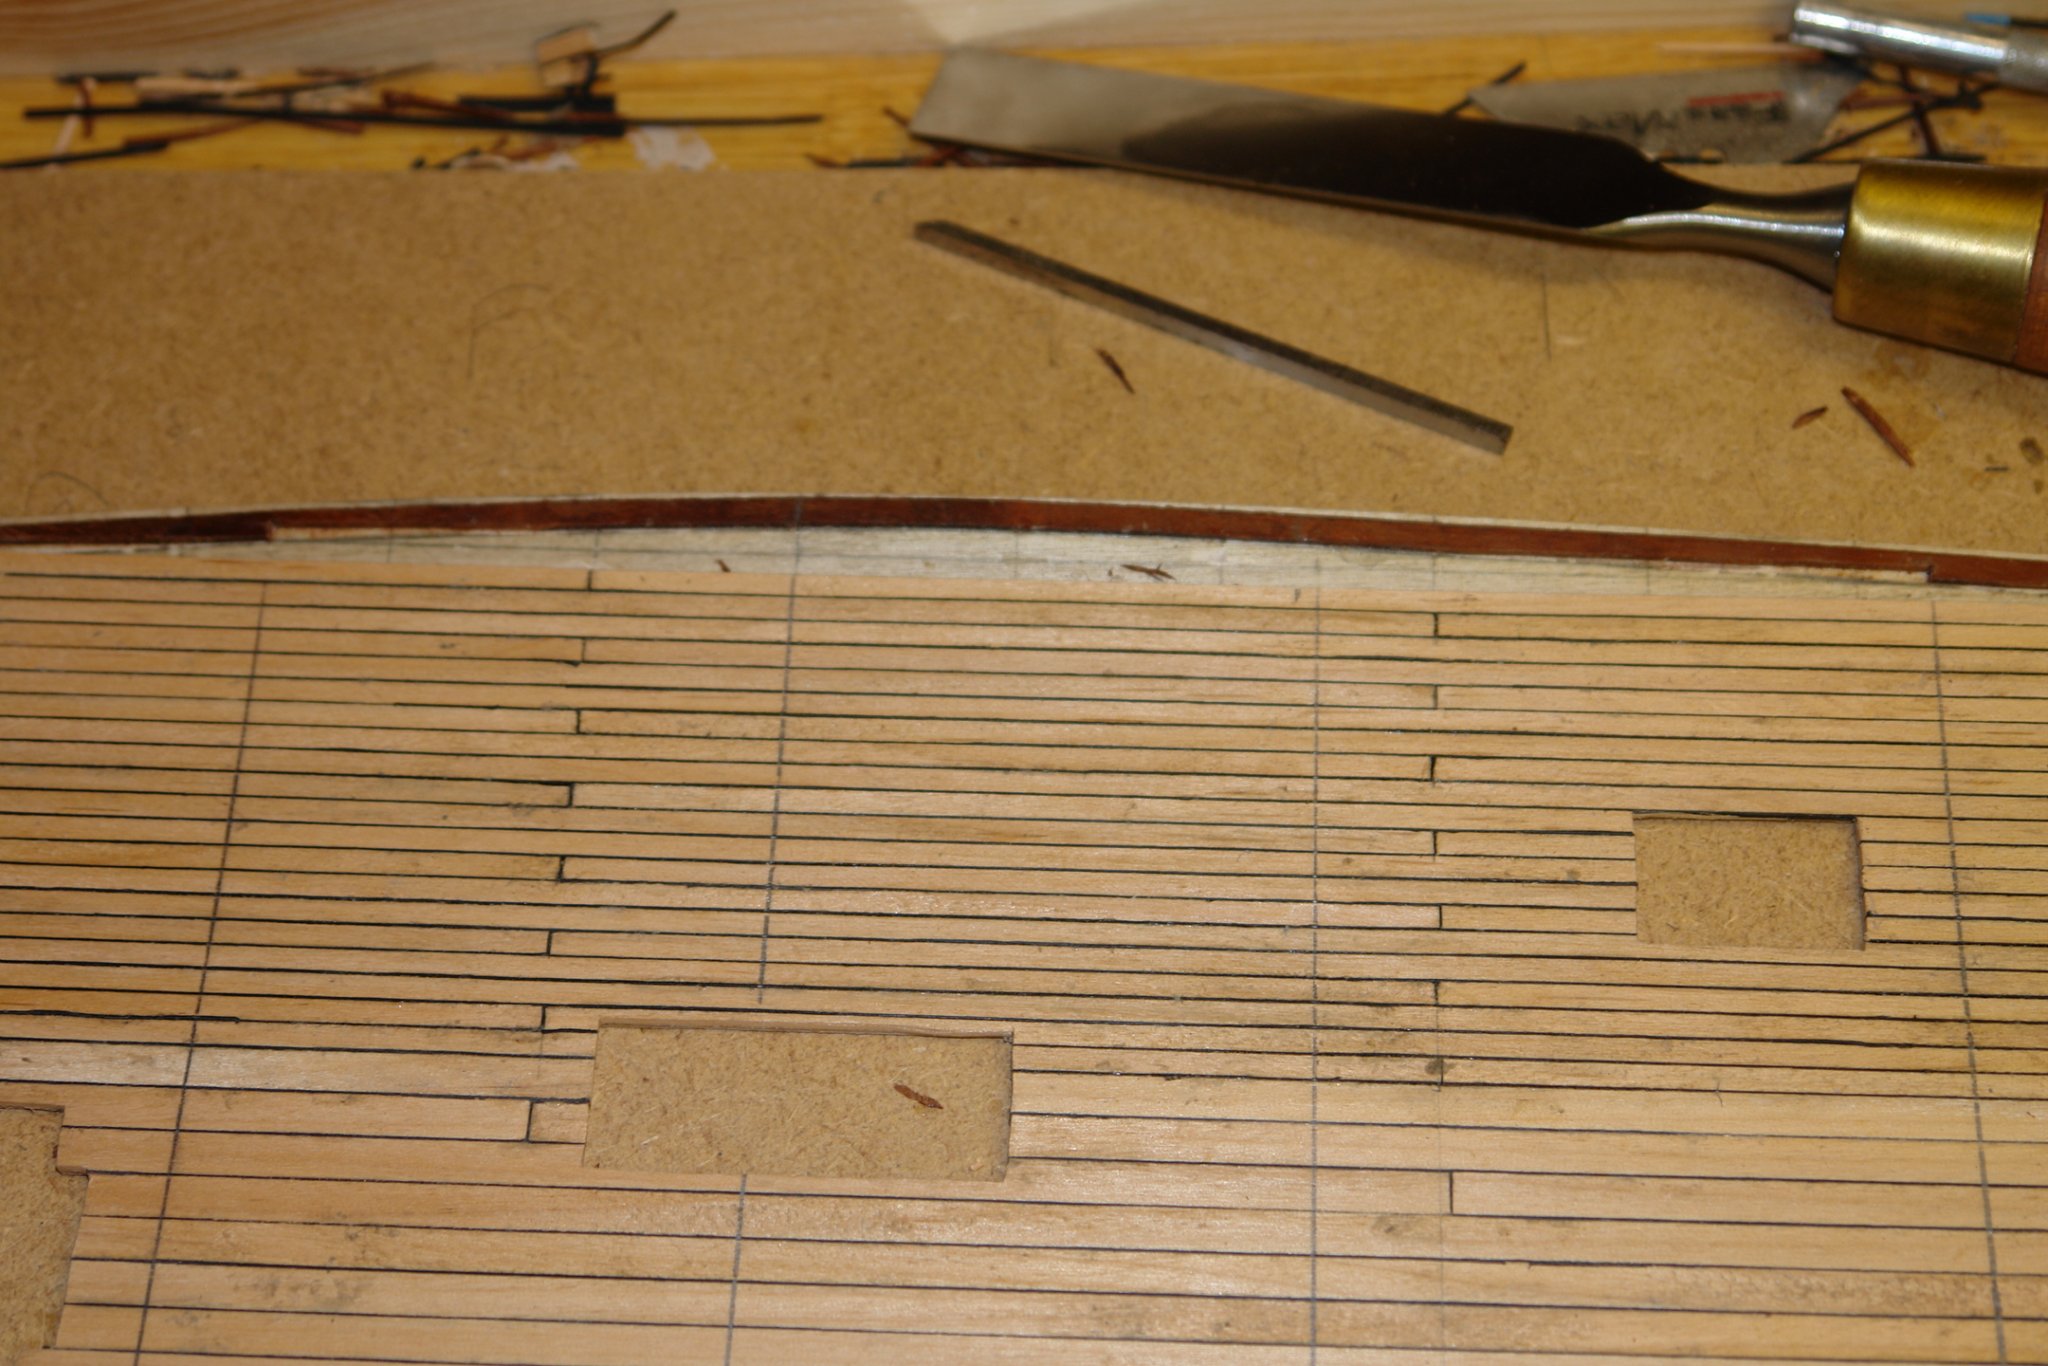
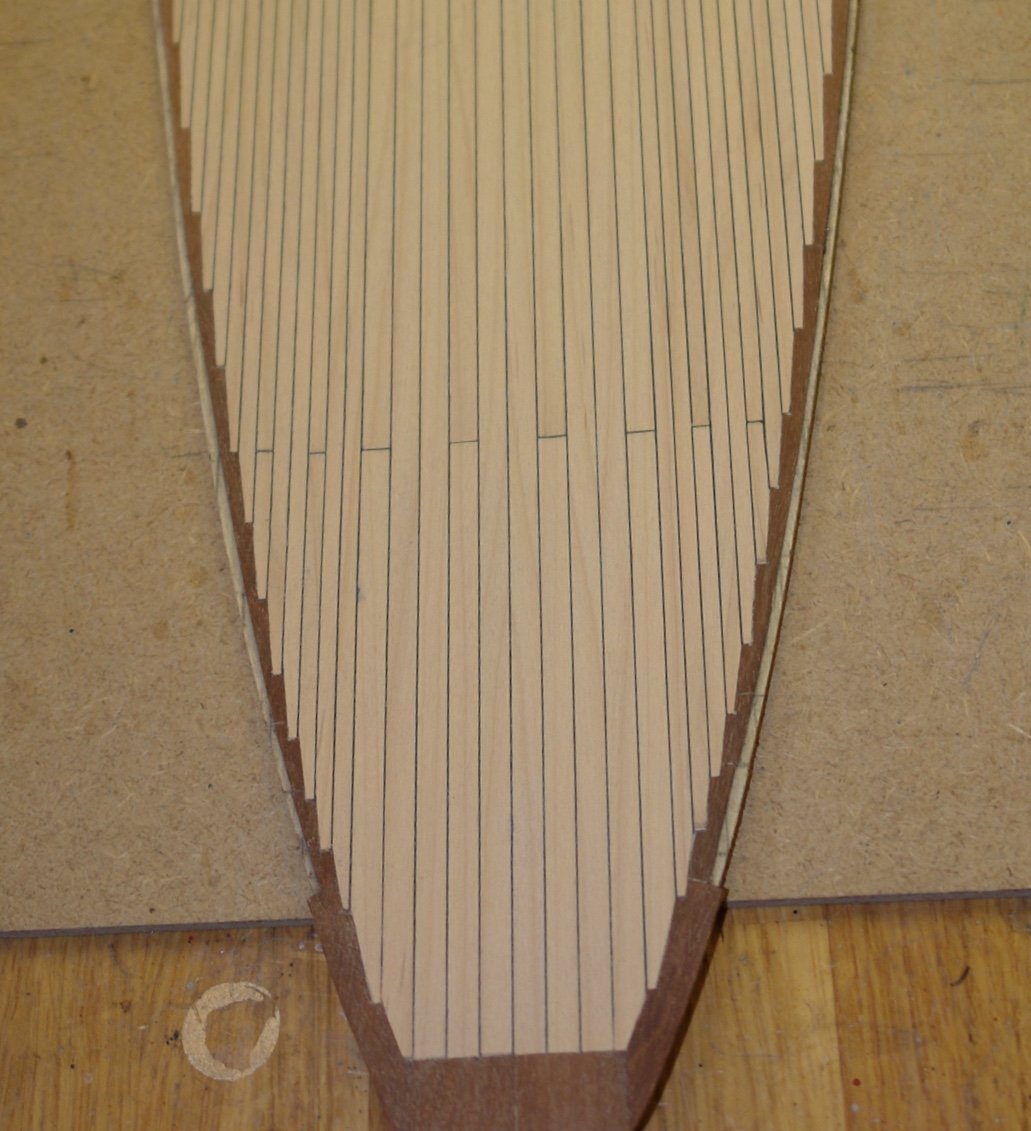
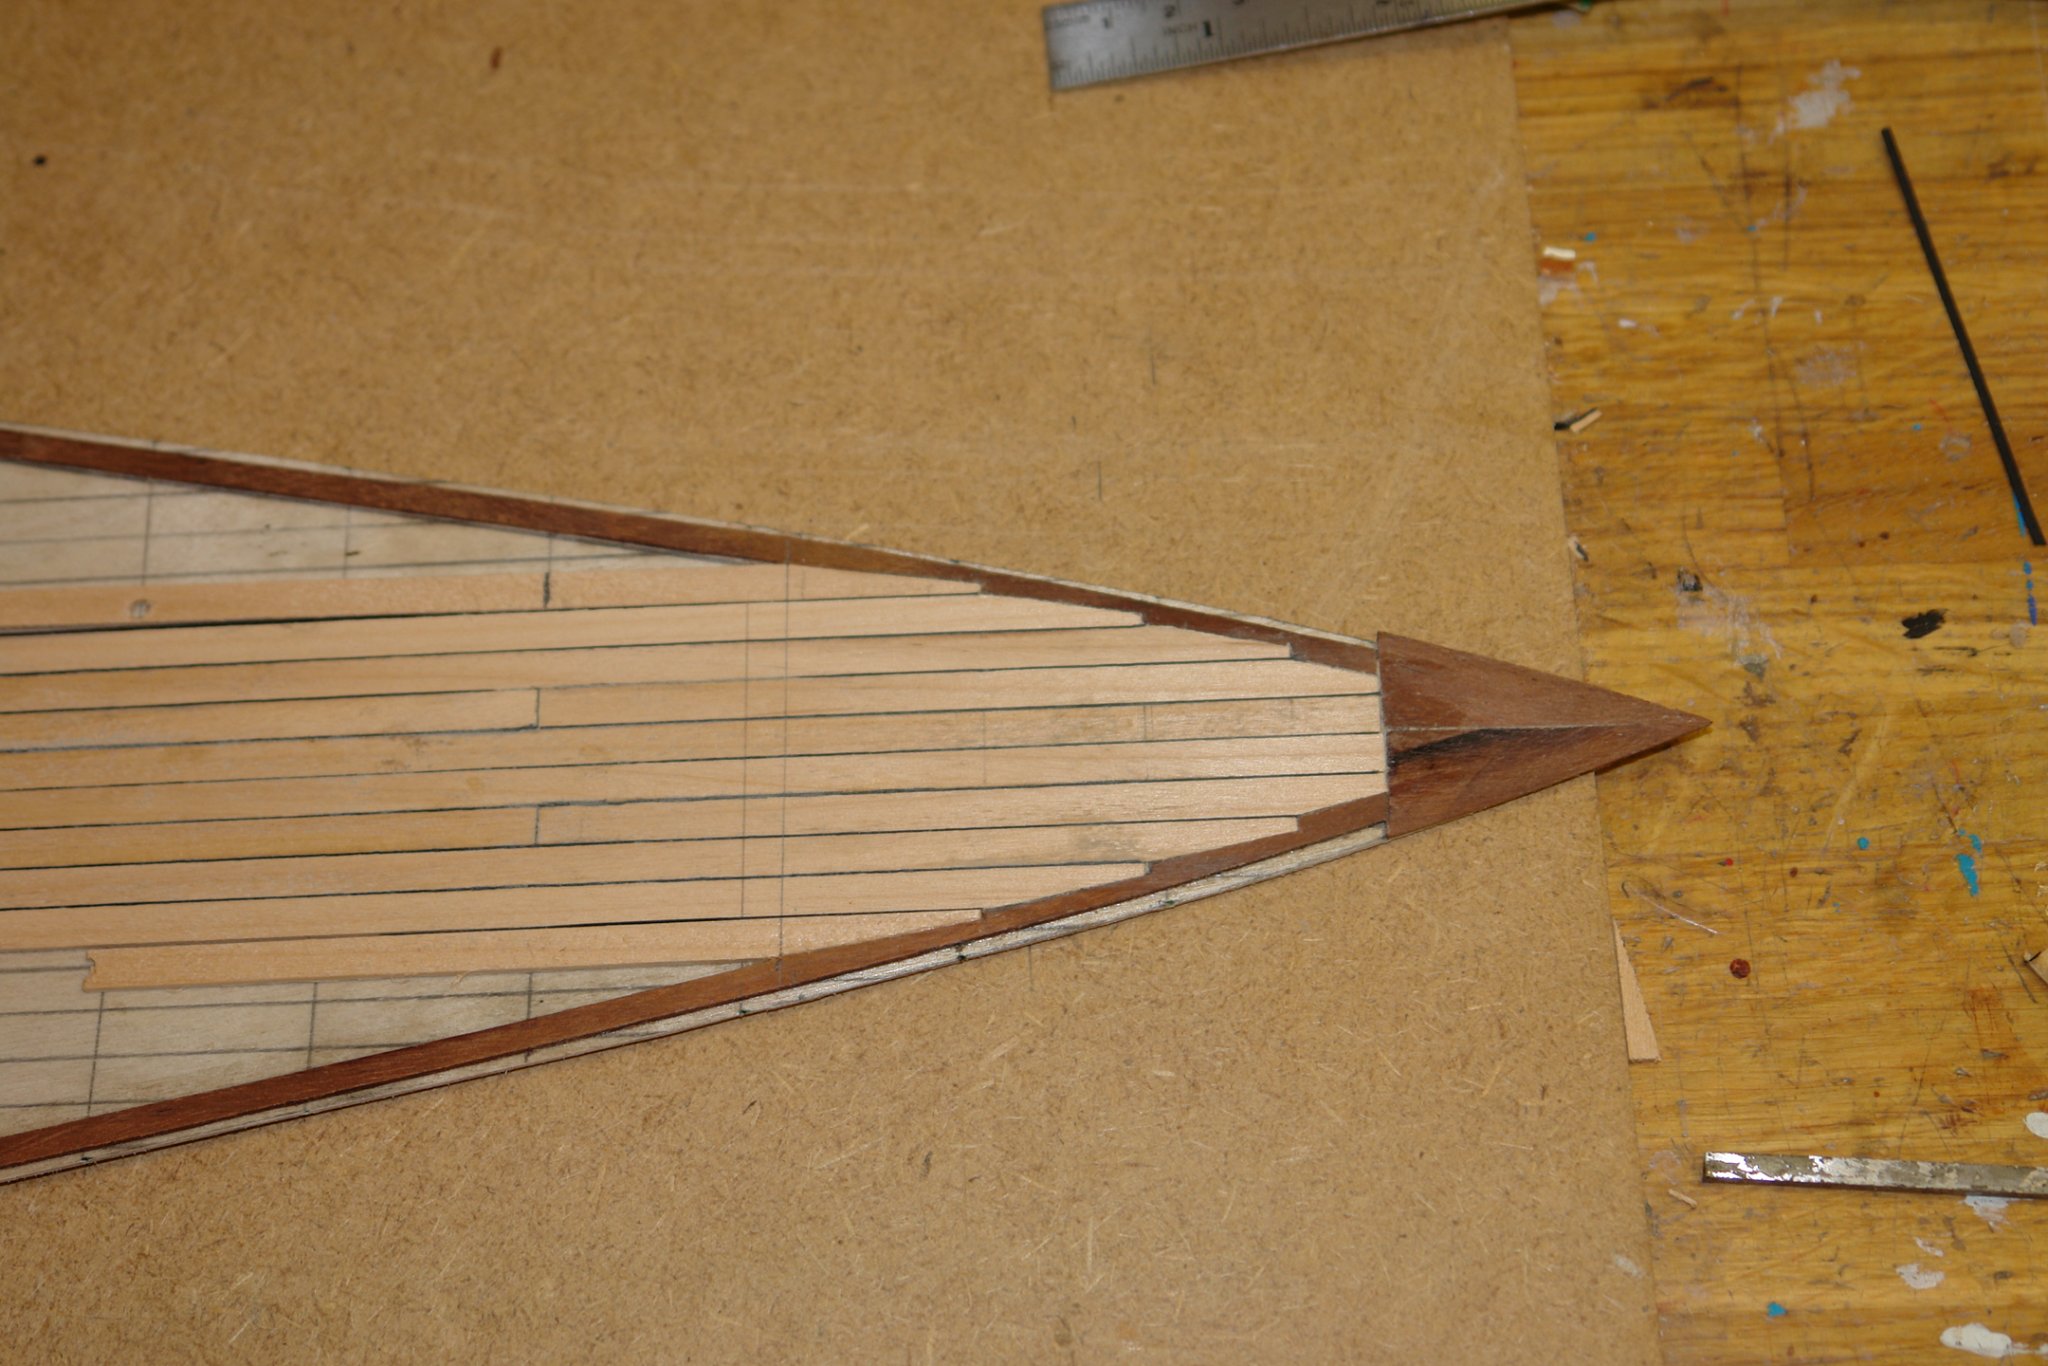
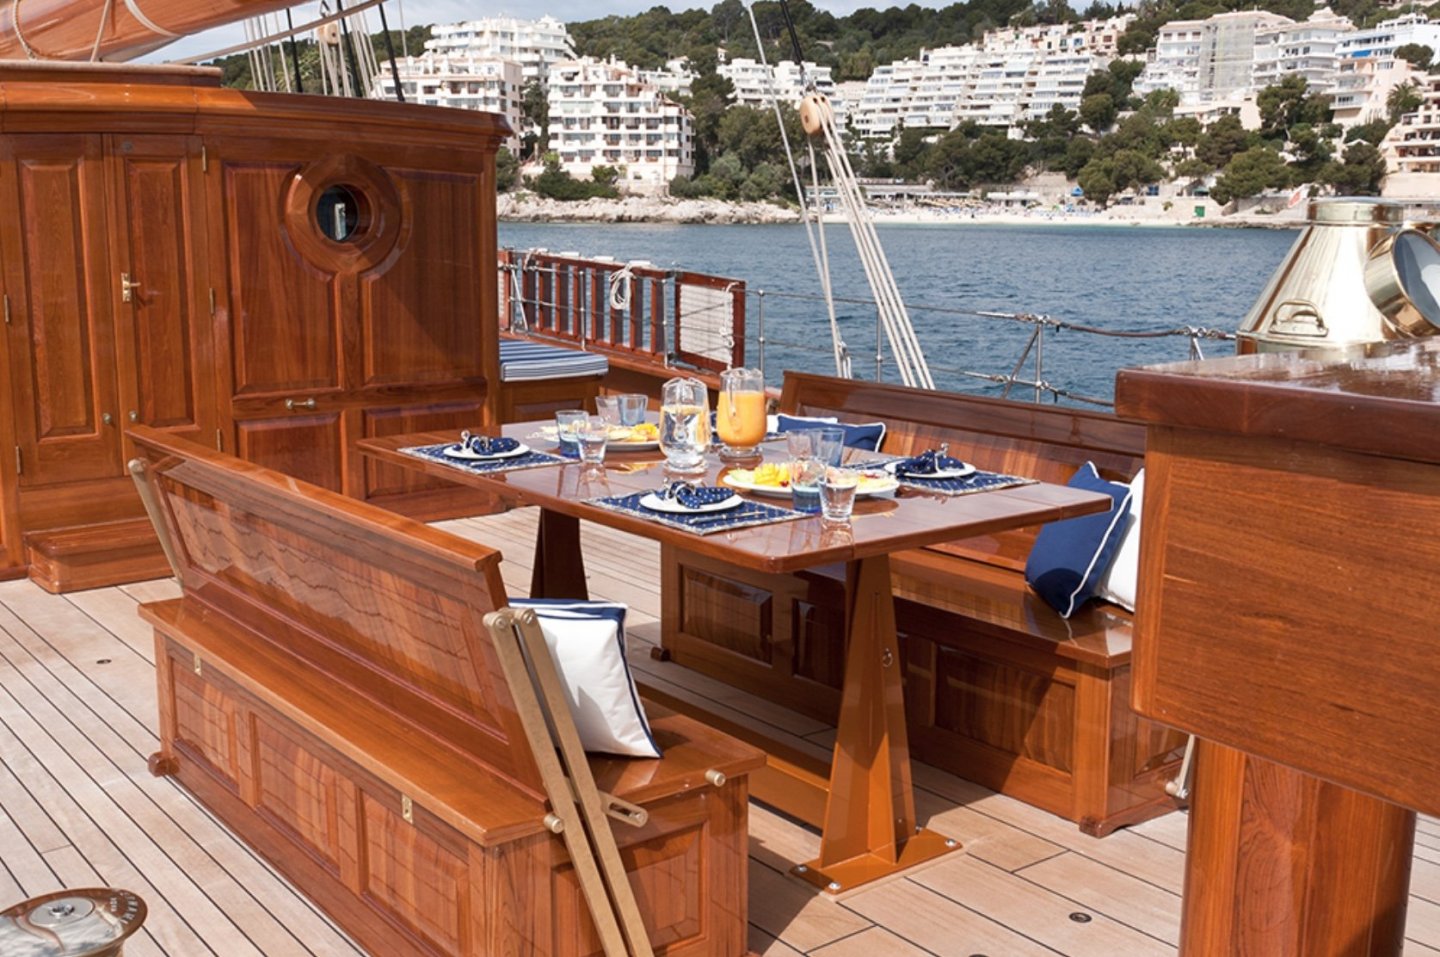
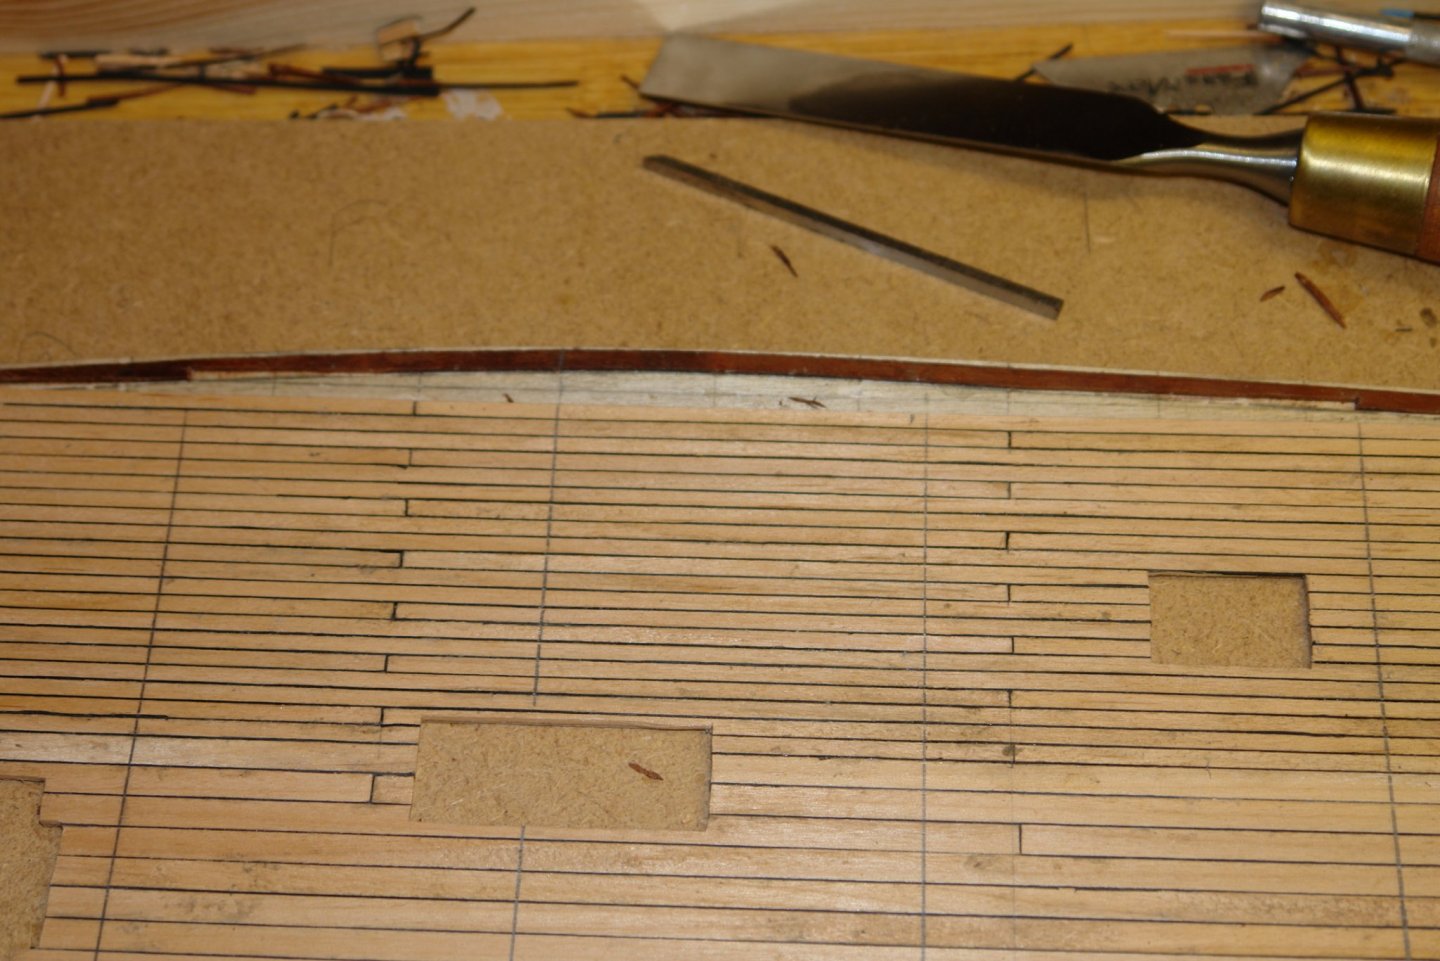
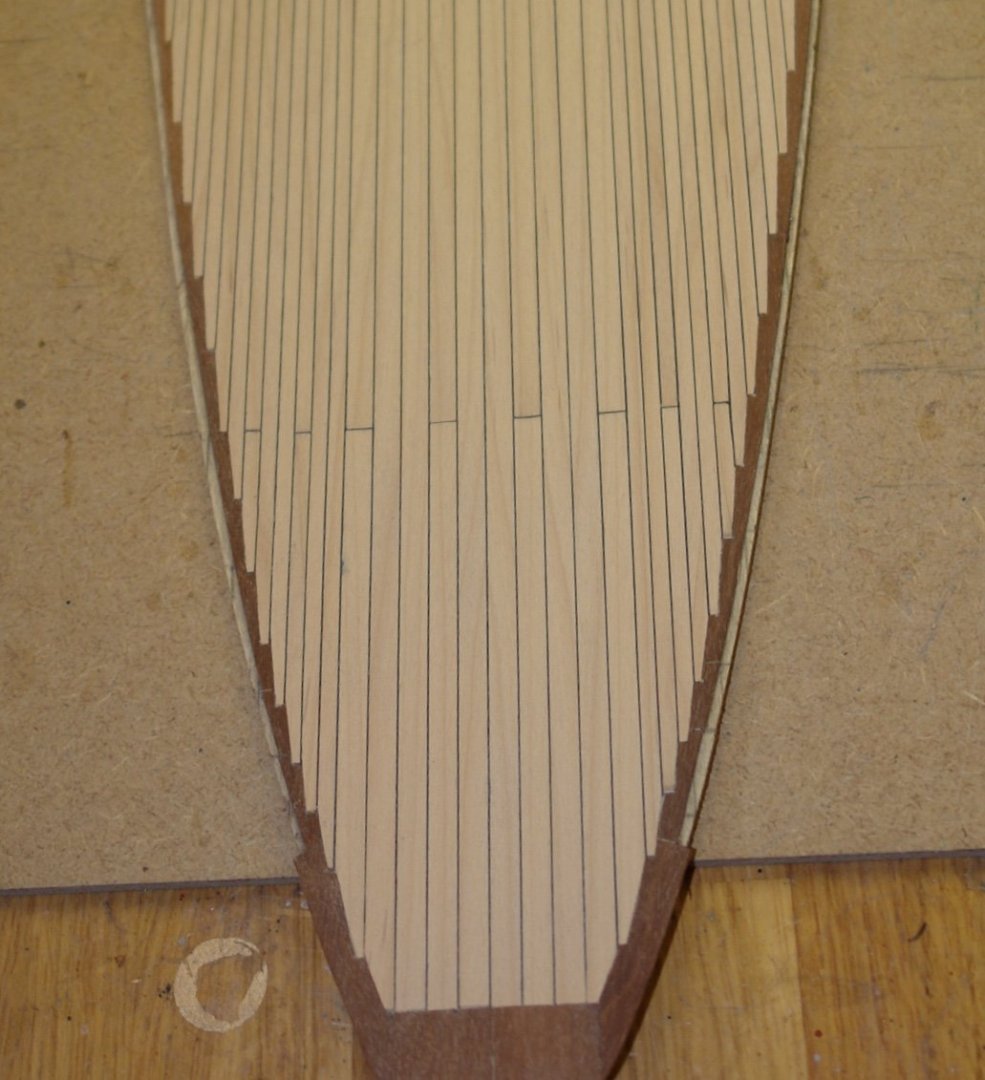
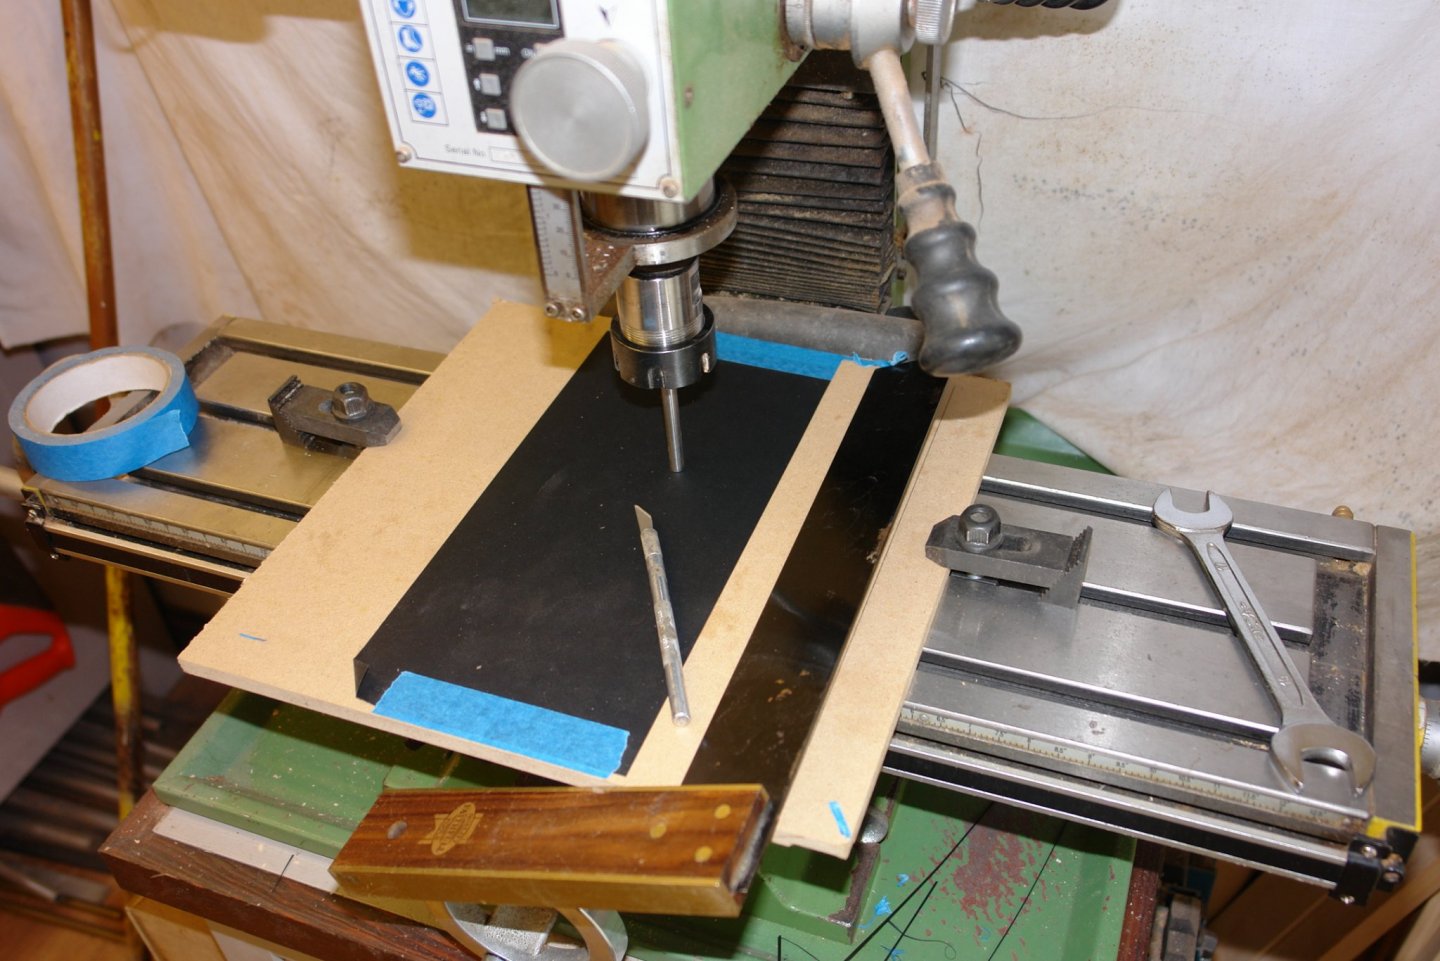
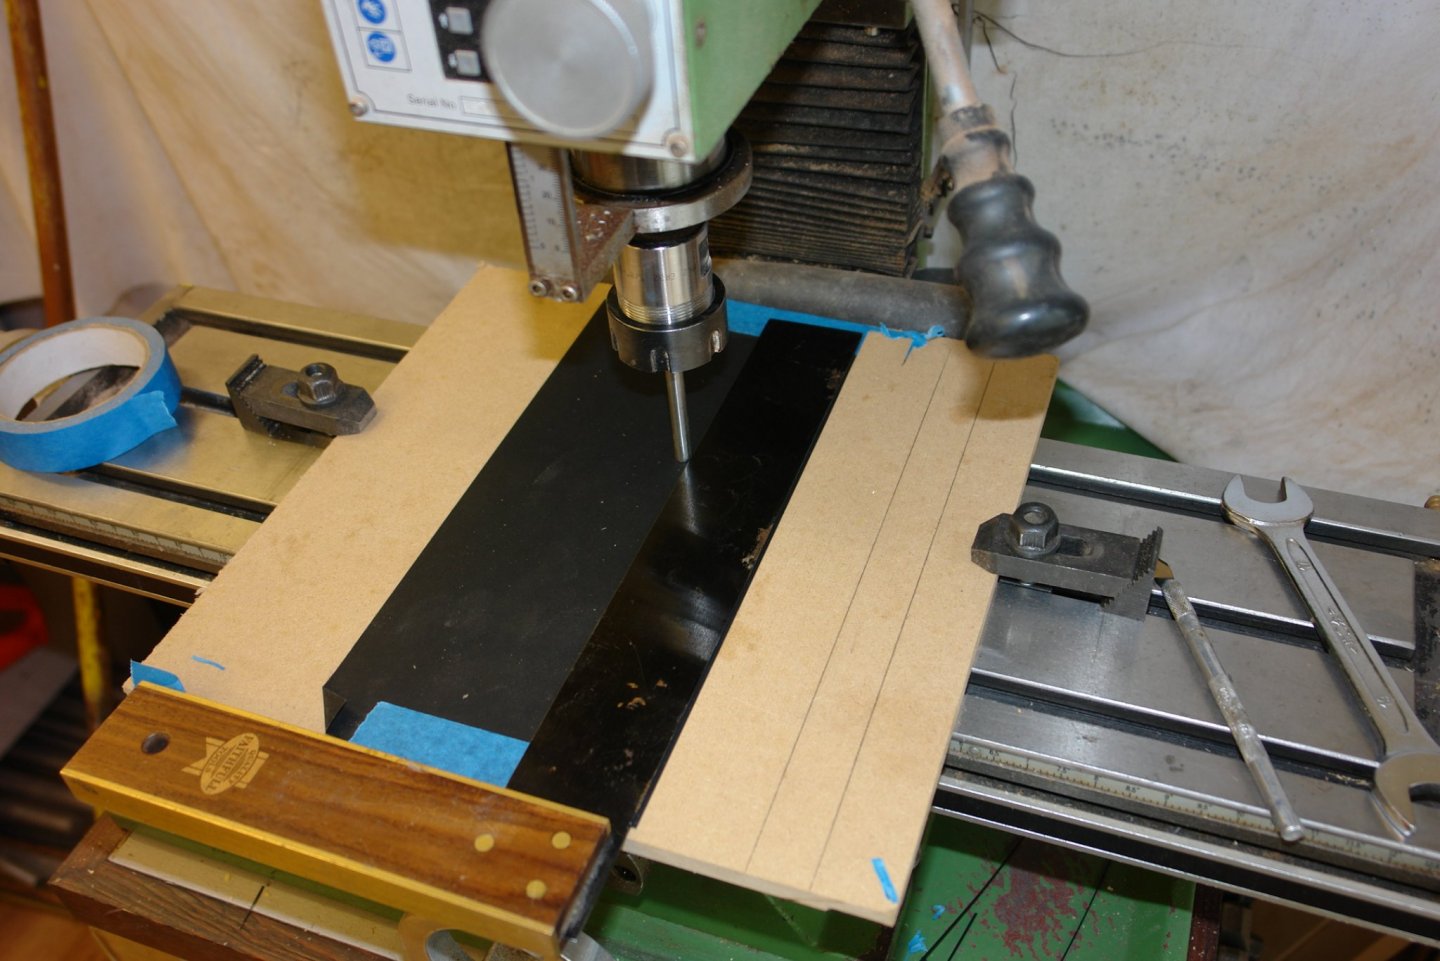
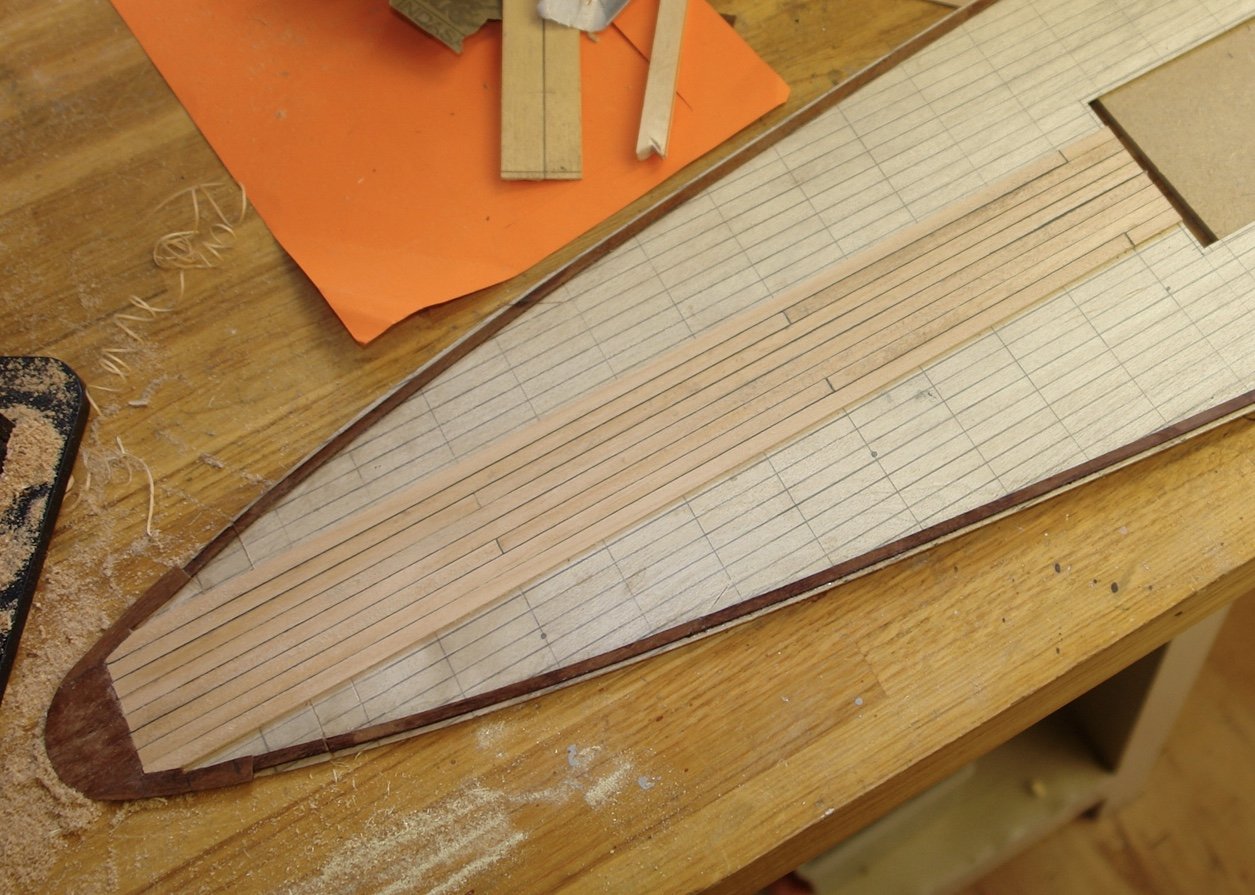
I made a start on the deck planking. As previously explained the deck has 2 widths of plank. The wider planks will be .216" x .060" x 12 inch - at full scale this equates to planks 7.75" wide by 36 foot long. The narrower planks will be .125' x .060" x 12 inch - at full scale 4.5" wide by 36 foot long. I did a hunt through the shed to find a light shade of wood to represent a faded teak deck (which I think is what Germania has - see image in previous post). I came up with some old wooden kitchen doors so I thought I would give them a try. They seem to cut reasonably well, have a close grain and uniform colouration. They do feel unpleasantly fibrous when cut but sand well. The wood is quite soft and easy to cut with hand tools and doesn't seem to splinter. I haven't a clue what the wood might be. Once I had cut the slices from the door I passed them all through my improvised milling machine drum sander. As a result the widths were all within a couple of thou of the target plank widths. Planks of the correct thickness (.060") were then cut from the slices. The margin planks are only .050" thick and the extra .010" of thickness on the deck planks is to give me ample scope for sanding. I am caulking between the planks with .006" thick black card. The card is good quality to avoid fibres impregnating the wood during sanding. I cut the caulking strips from the card on the mill. I use a metal rod in the chuck to act as the backstop for the square and advance the table in .060" increments to produce caulking strips of the correct width. Having completed the margin planks I guessed what the bow and stern finish looked like. Both are under gratings and not visible in any of the photos. I shouldn't worry really as they wont be visible on the finished model. I have completed 8 of the 10 wider planks. As yet I have not needed to start joggling the stern planks. At the bow end joggling has commenced and so far is turning out pretty uniform. I am finding that cutting the joggle in the margin plank is made much easier by first drilling with a very fine drill (.020") in the corner of the piece to be removed. I then cut the short butt end with a sharp craft knife and finally cut the long edge with a single press of a vertically held 1 inch wide chisel. This seems to avoid any splintering of the margin plank. I then mark out the deck plank to fit the joggle and cut it with a vertically held chisel. With a bit of care this seems to produce and accurate result. I have just started the final (9th and 10th) wide planks. The narrower planks should slow my progress somewhat.

-
Hello Gary, I enjoyed reading your log. Your progress is impressively quick - if you don't mind I will follow along.
-
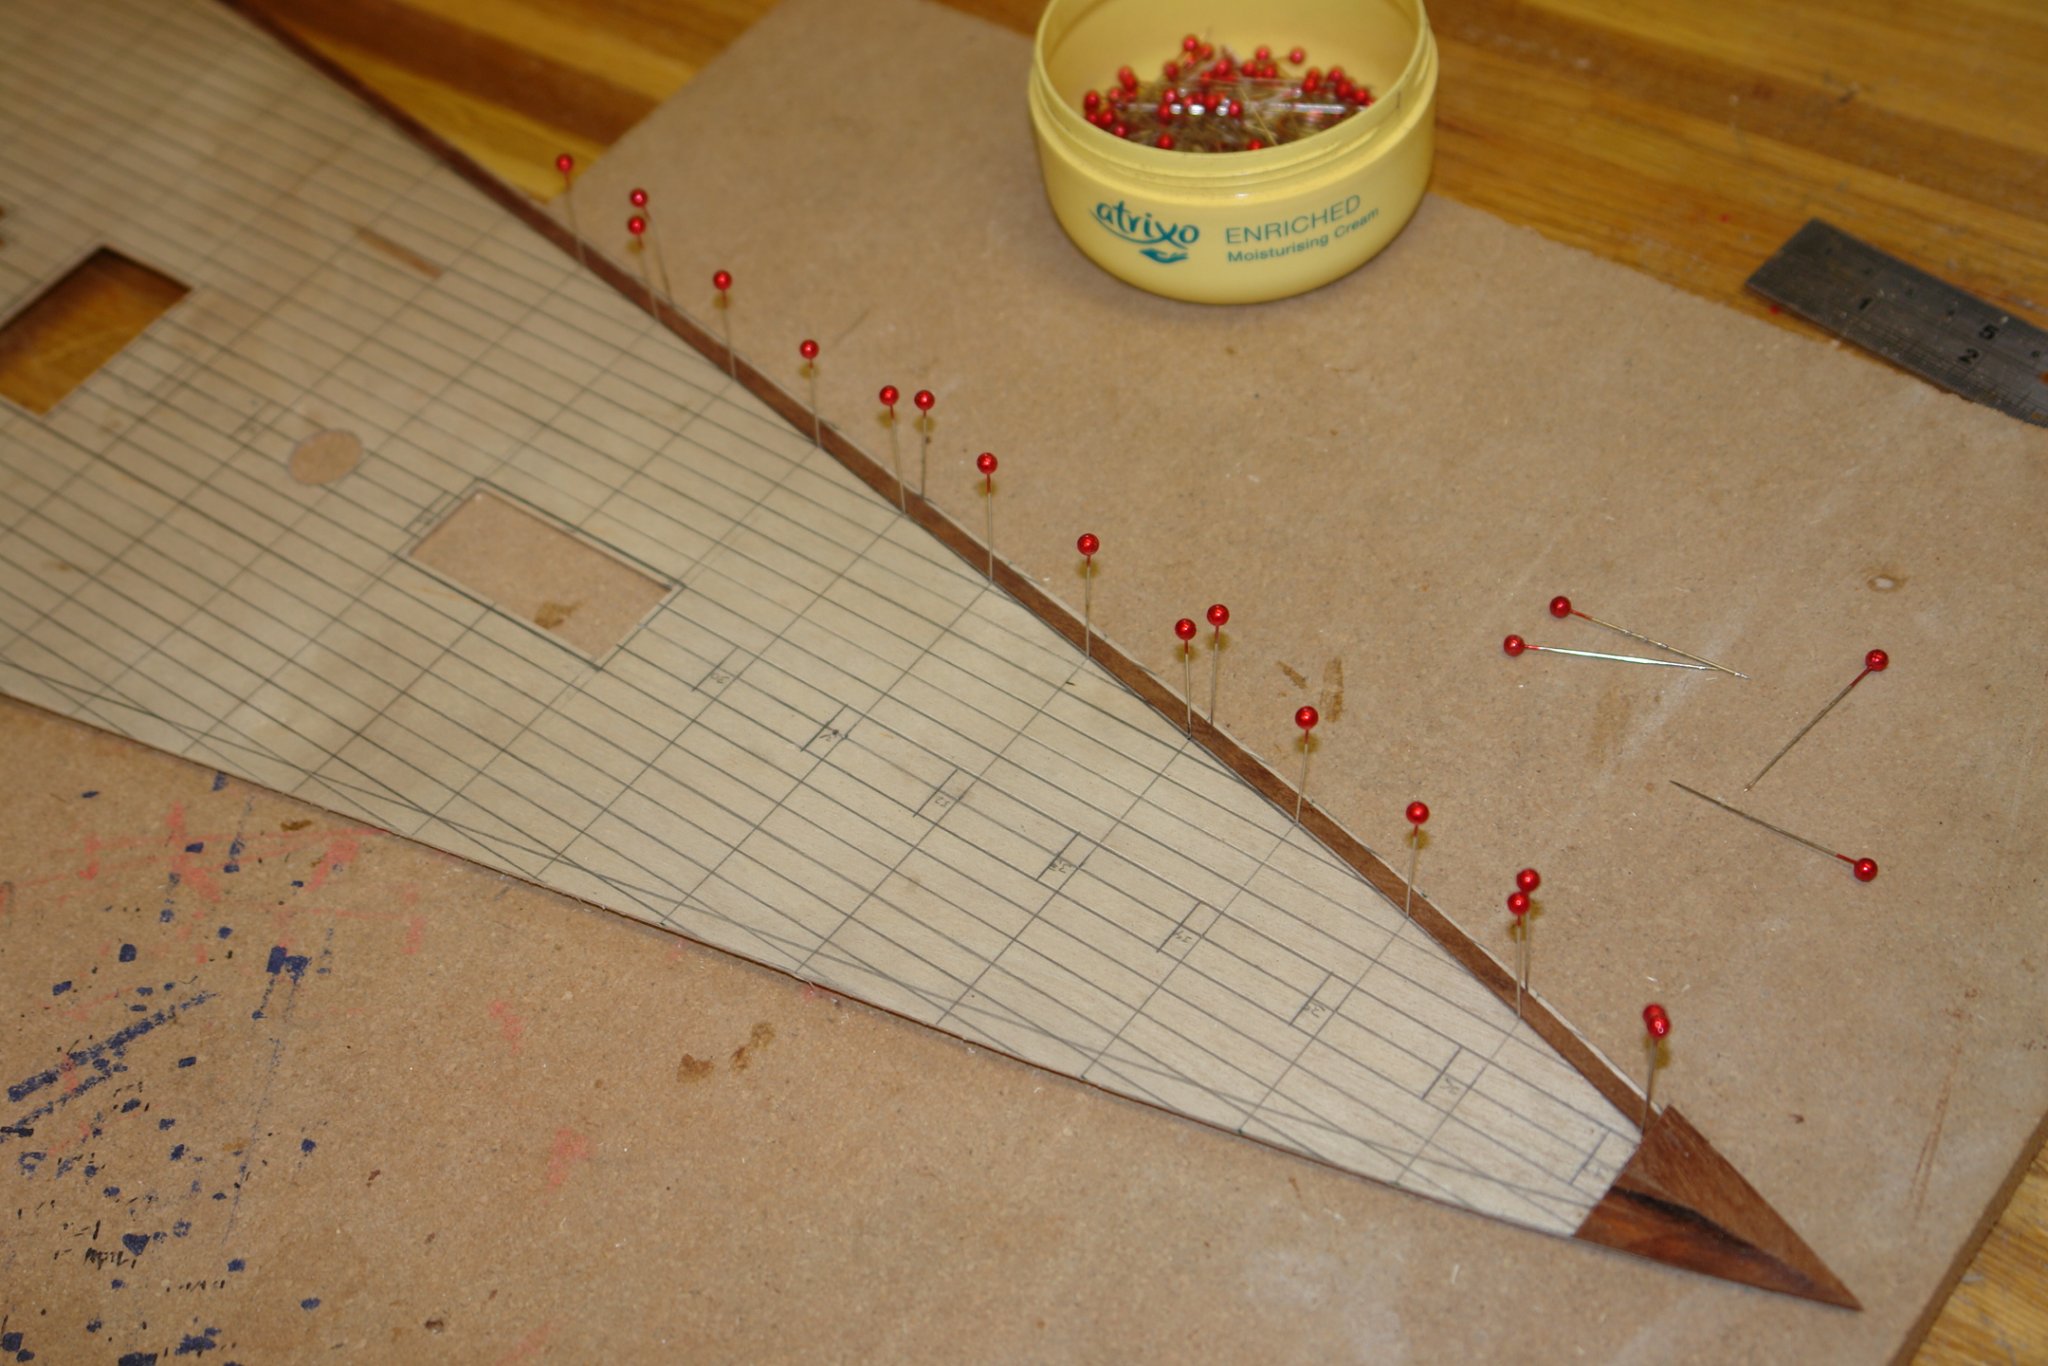
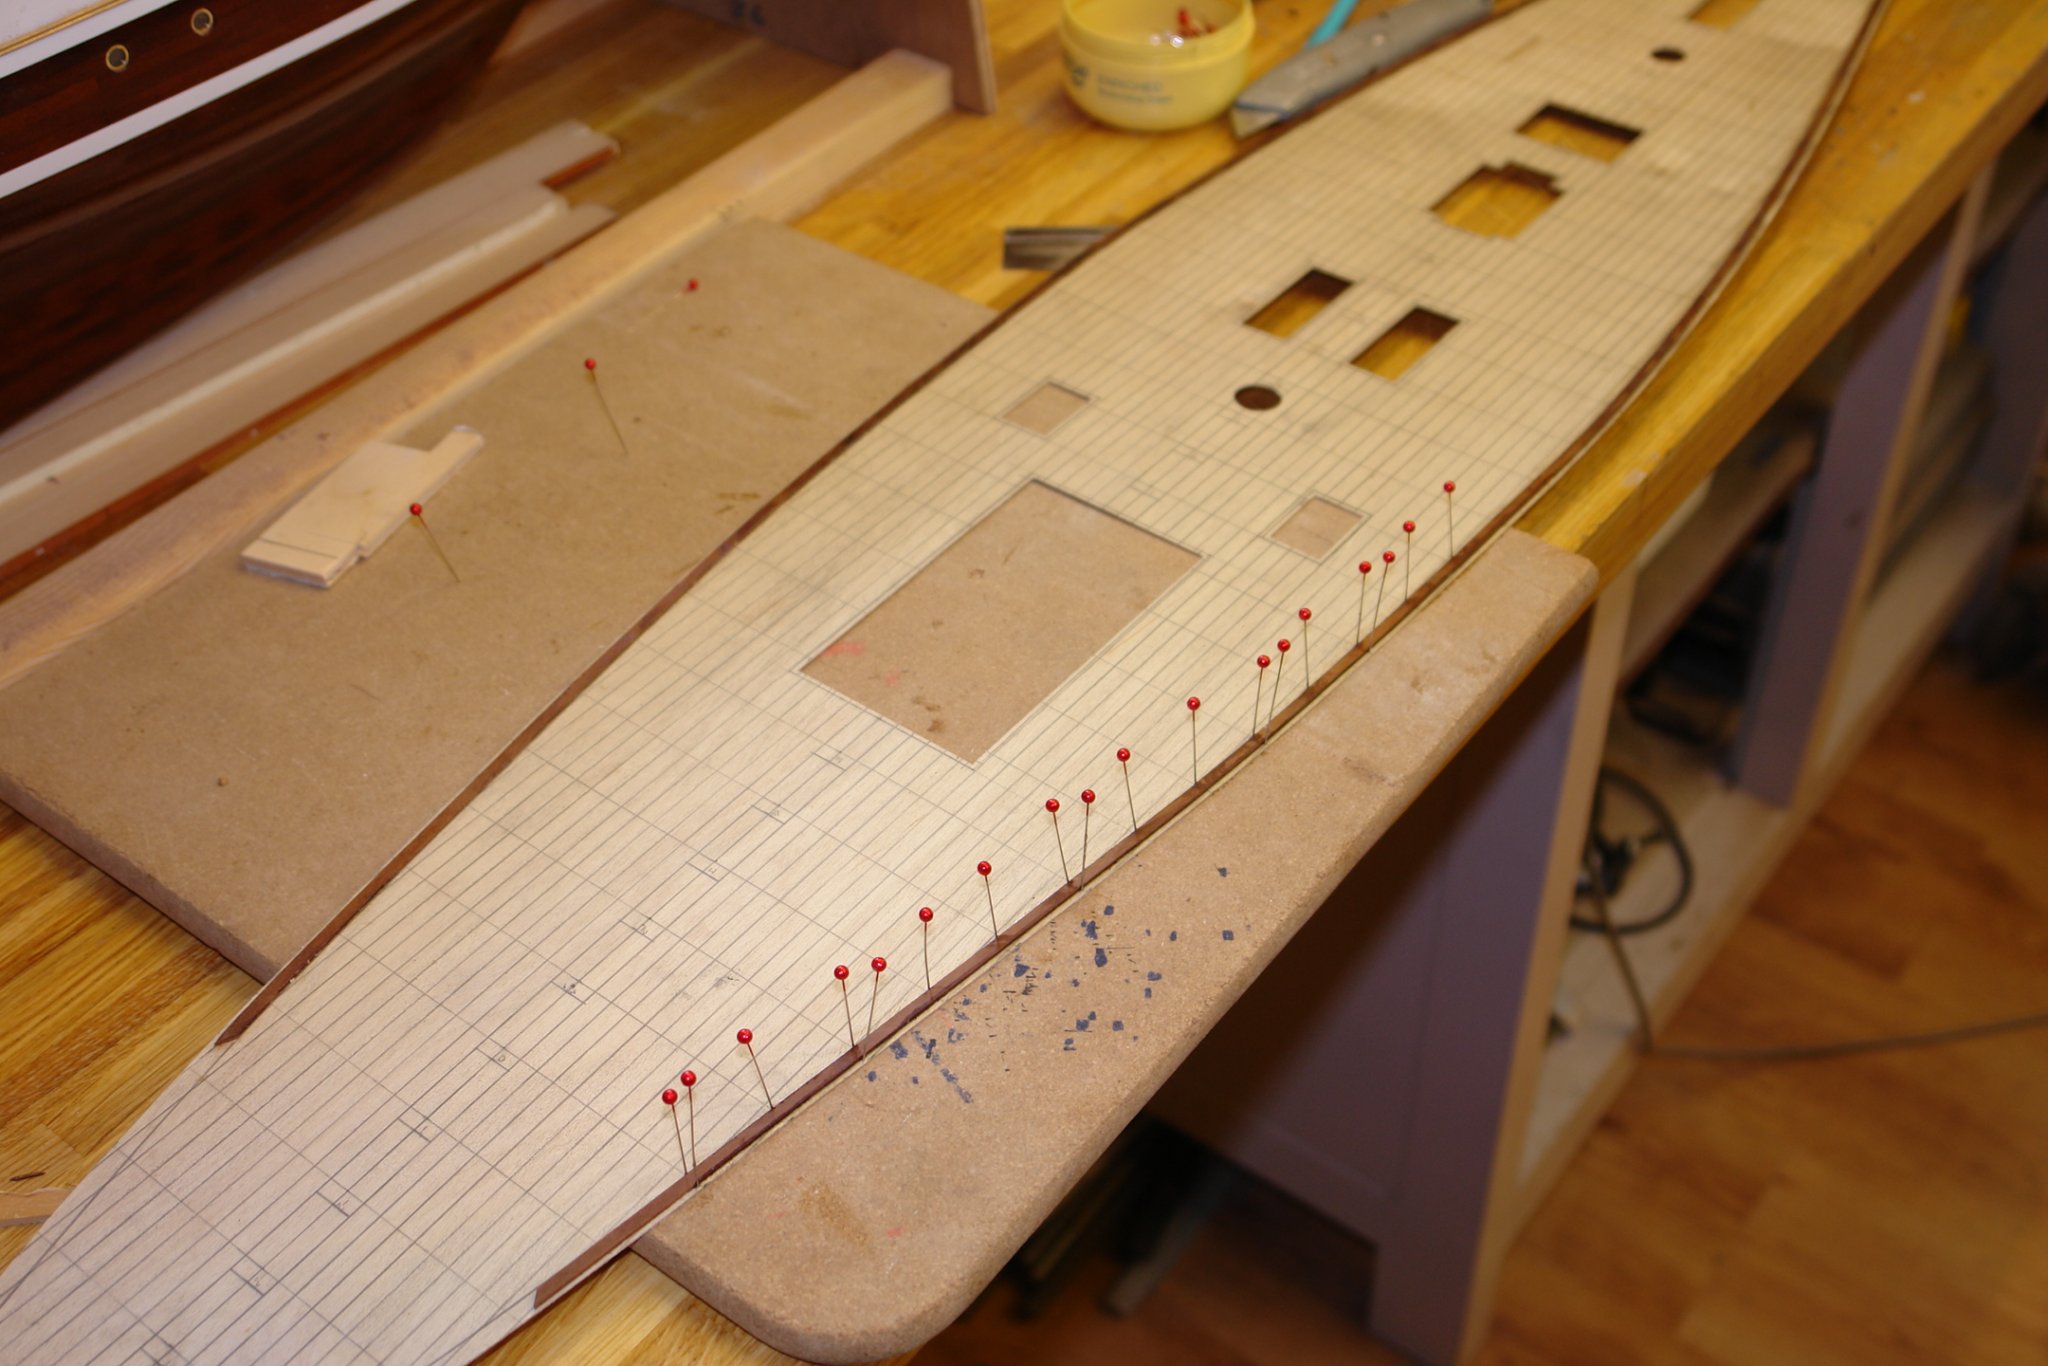
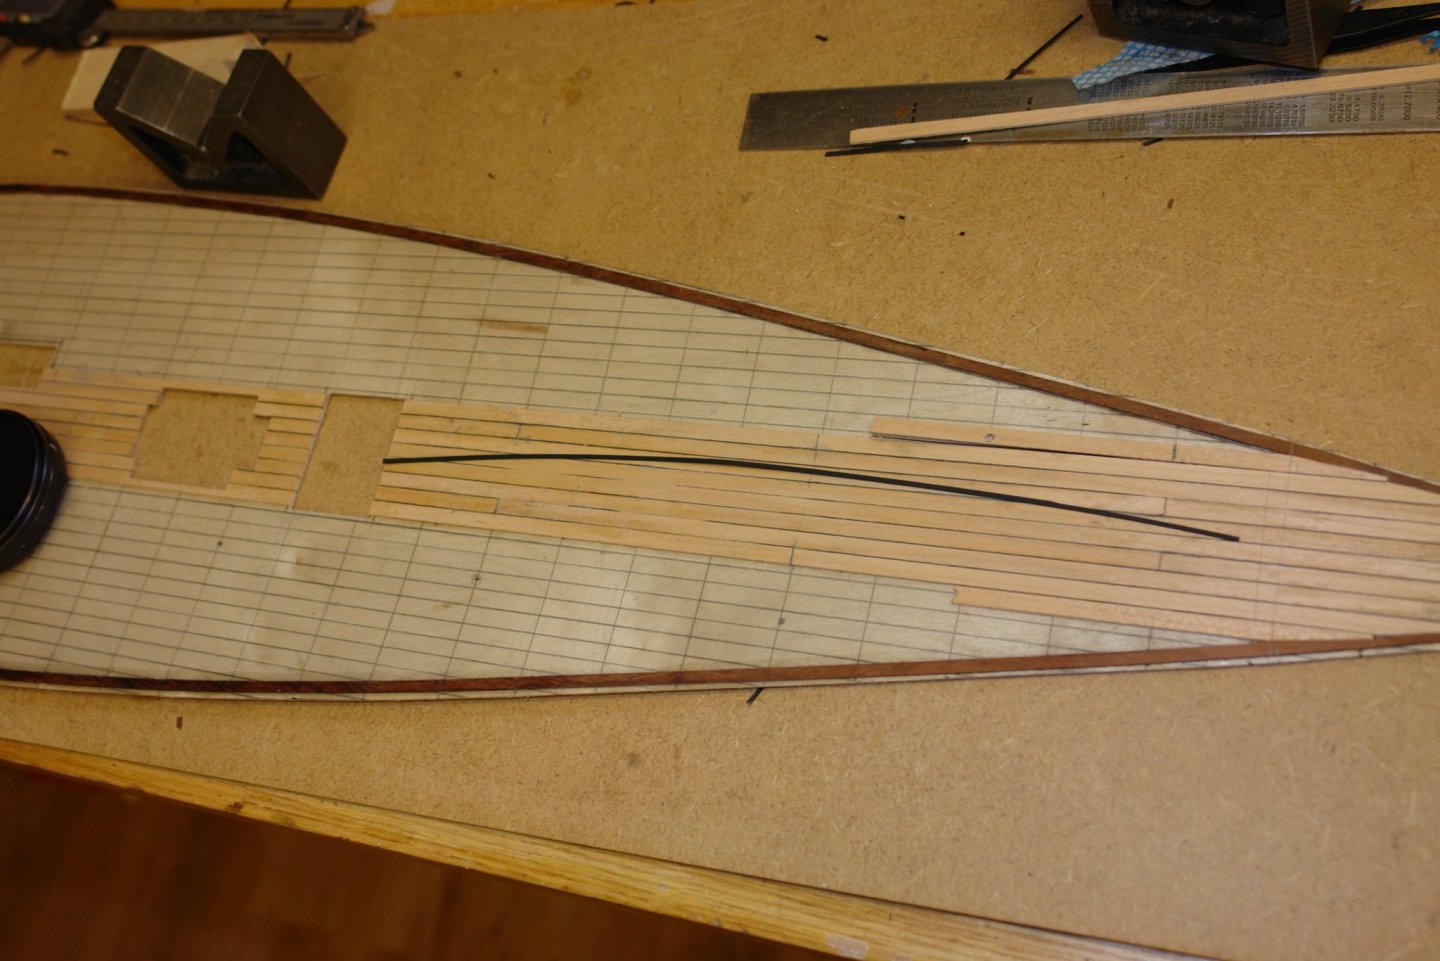
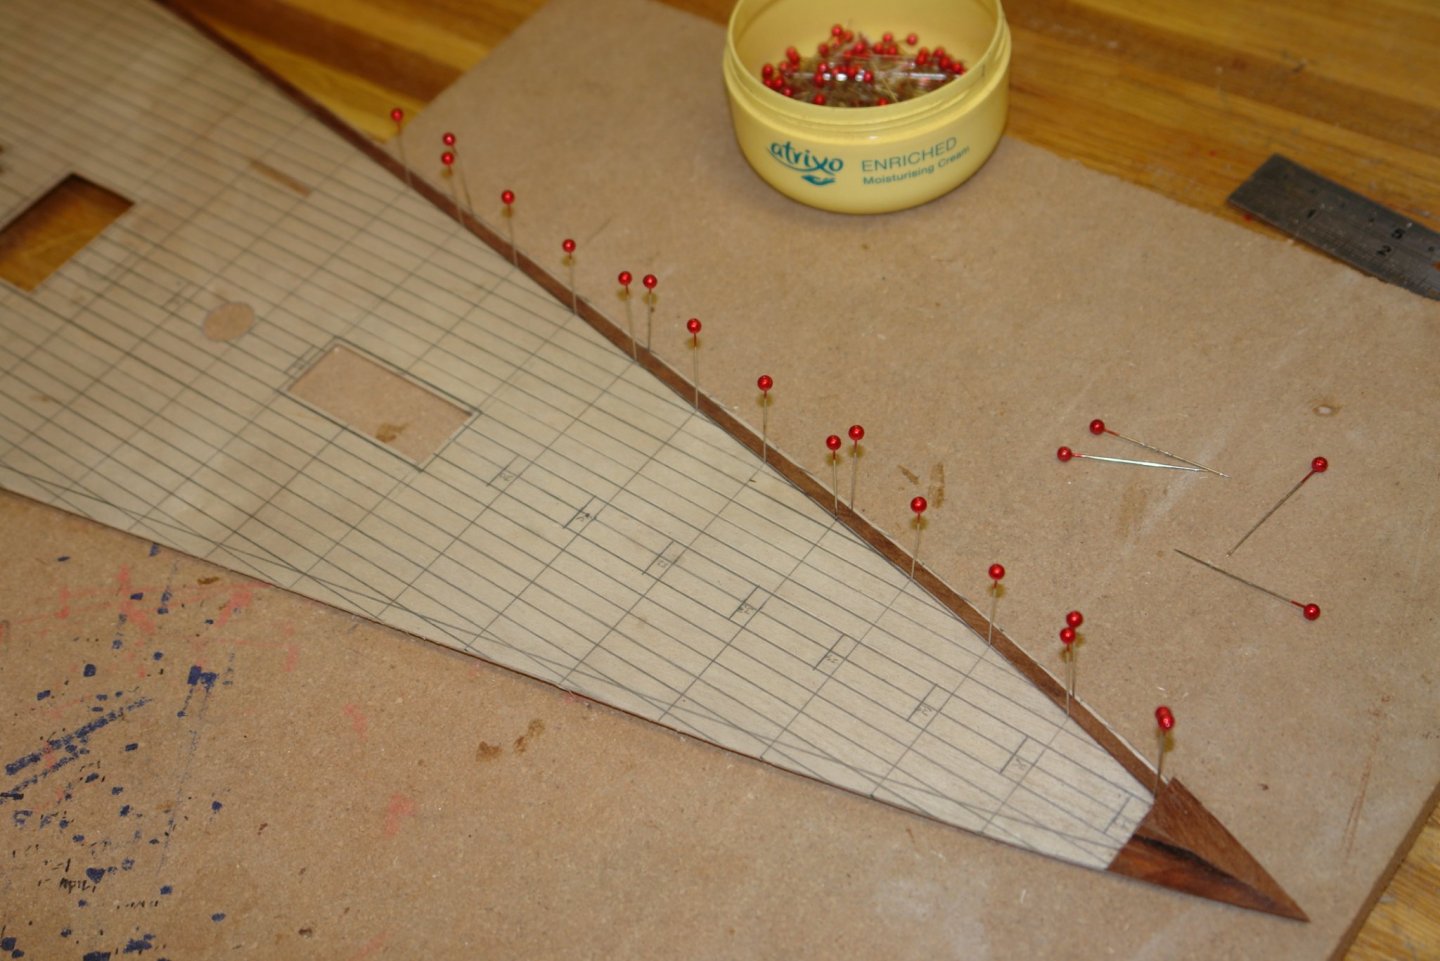
Back to the build log:- Mostly pondering rather than building, but still fun. The deck planking on Germania is different to that previously undertaken on Altair. On Altair a number of "wider" deck planks run parallel with the centre line while the remainder of the deck planks (narrower planks) run in a curve parallel to the margin plank. the narrower planks are "joggled" into the wider central planks:- On Germania 10 off wider central planks follow the centre line. Narrower planks then run parallel with the central planks and are joggled into the margin planks. I want the jogging to be absolutely symmetrical on each side and achieving this requires three things to happen as follows:- -The margin planks must be attached to the sub deck exactly symmetrical about the centre line. -The central planks must then be attached to the sub deck exactly on the centre line. -As the deck planks are built up progressively from the centre line to the deck edge the cumulative width must identical on both sides to maintain the symmetry about the centre line. Accurately sizing the plank widths is essential to achieve this. The first step was to attach the margin plank to the sub deck. The margin plank was made from mahogany and .160" wide by .050" thick. I used engineers dividers to form port and starboard holes in the sub deck at about 1" axial spacing. I then used pins through these holes to create a stop against which to press and form the margin plank. More pins were positioned on the outside of the margin plank to hold the plank in place and CA glue was run in to form the permanent joint. The margin plank is not full width as the tumbleholme on the bulwarks would prevent the deck dropping in place. I will add addition width to the margin plank once the deck is installed on the hull. I have a very useful redundant cork bath mat for tasks like this. The pins go in very easily but are very solid when resisting side load. As you can see I have not got very far with the plan:-


-
Hello Gary - just catching up - lovely job. I particularly liked the finish on the exhaust pipe. Solder for the hose pipe is a good Idea which I must use.