DONATION DRIVE - SUPPORT MSW - DO YOUR PART TO KEEP THIS GREAT FORUM GOING!
×


KeithAug
-
Posts
3,980 -
Joined
-
Last visited
Content Type
Profiles
Forums
Gallery
Events
Everything posted by KeithAug
-
 I like the lino, obviously recycled from the wife's boudoir (from the French verb bouder, which I think means to sulk).
- 732 replies
-
- 5
-

-

-
- Lula
- sternwheeler
- (and 1 more)
-
Not very expensive then. Keith - You could always try a bit of tin basing and solder. You would only need basic hand tools. 🙂🙂🙂
- 732 replies
-
- 5
-
-
- Lula
- sternwheeler
- (and 1 more)
-
Another interesting vessel Ras. I look forward to seeing how she develops.
-
I am always amazed how far Cornwall Model Boats business extends. Nearly as famous as Wall Drug. Always a tricky and stressful job Bruce, but you executed it well.
-
I presume the flower arrangement was standard naval issue Phil?🙂
- 476 replies
-
- 3
-
-
- minesweeper
- Cape
- (and 1 more)
-
Not bad progress seeing as the log was only started 3 days ago!!!! I assume you started the build before you started the log Valeriy.
-
Phil - Yes
-
Yes Steve - her bottom isn't very flat and I guess this would have had a negative impact on righting moment.
-
Quite an exposed helmsman position. I hope his hat is tied on.
- 288 replies
-
- 4
-
-
-
- Santos Dumont No. 18
- hydroplane
- (and 1 more)
-
Craig / Valeriy and all other visitors to my build - thank you for your contributions.
-
Yves, I feel compelled to resit my desire to exclude them. I am hoping that finishing them in mahogany to match the lower hull will cause them to fade into the background. 🤞 As for breakages.😬
-
Rick - that was always going to be the plan but as time goes by I am refining it. Indecision is the sincerest form of procrastination.
-
Another good way to avoid the problem Keith.
-
Great "I can't make my mind up" option Stephen.🙂
-
Very novel approach to hull building. I like it.
-
Should be an interesting turning project Keith and I could always make you one if need be.
- 732 replies
-
- 3
-

-
-
- Lula
- sternwheeler
- (and 1 more)
-
Yes John - I know the logic. Am I the only one that thinks they look incongruous on a 1901 shaped hull?
-
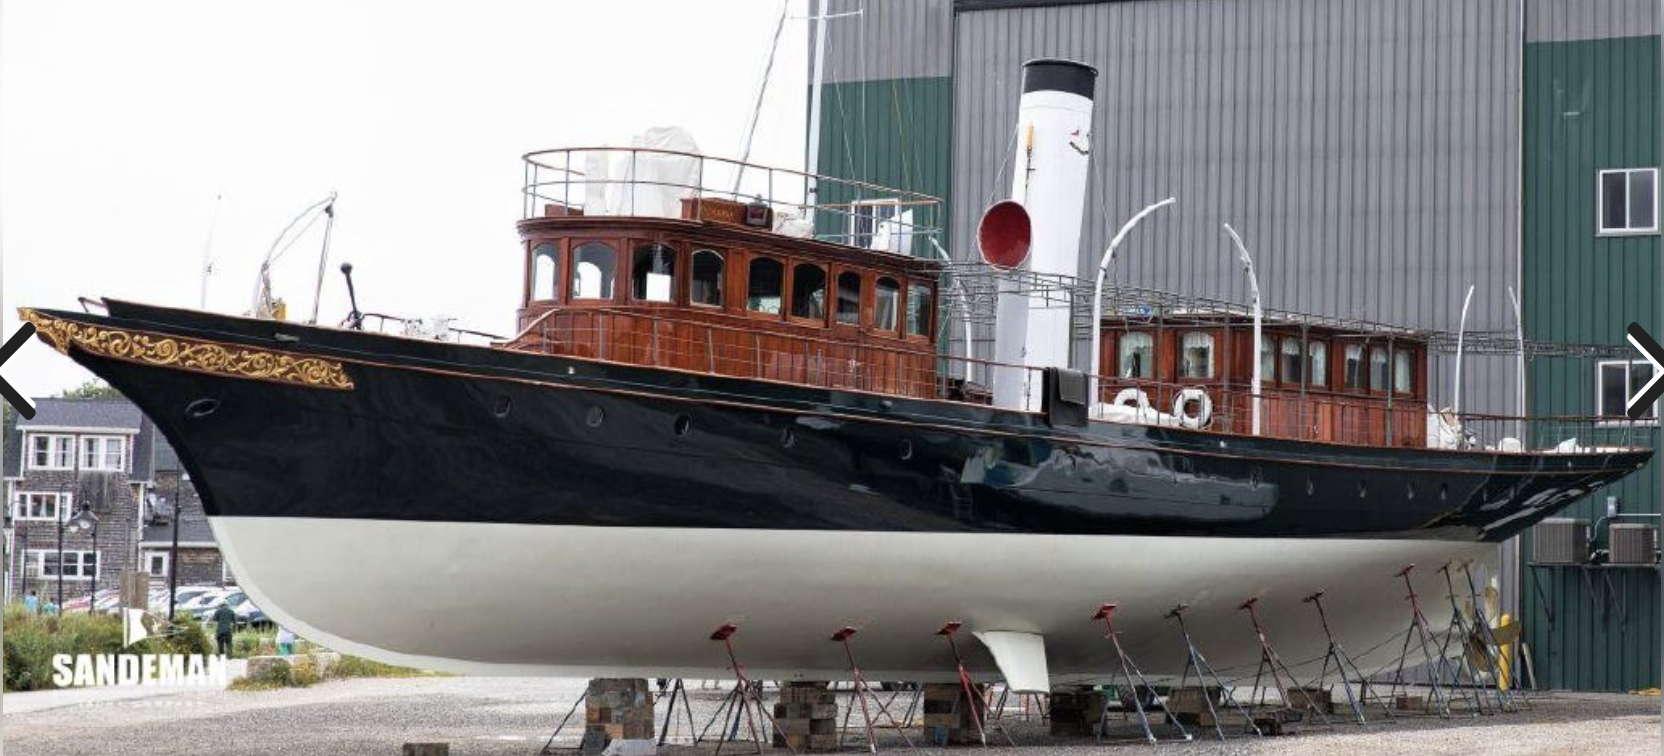
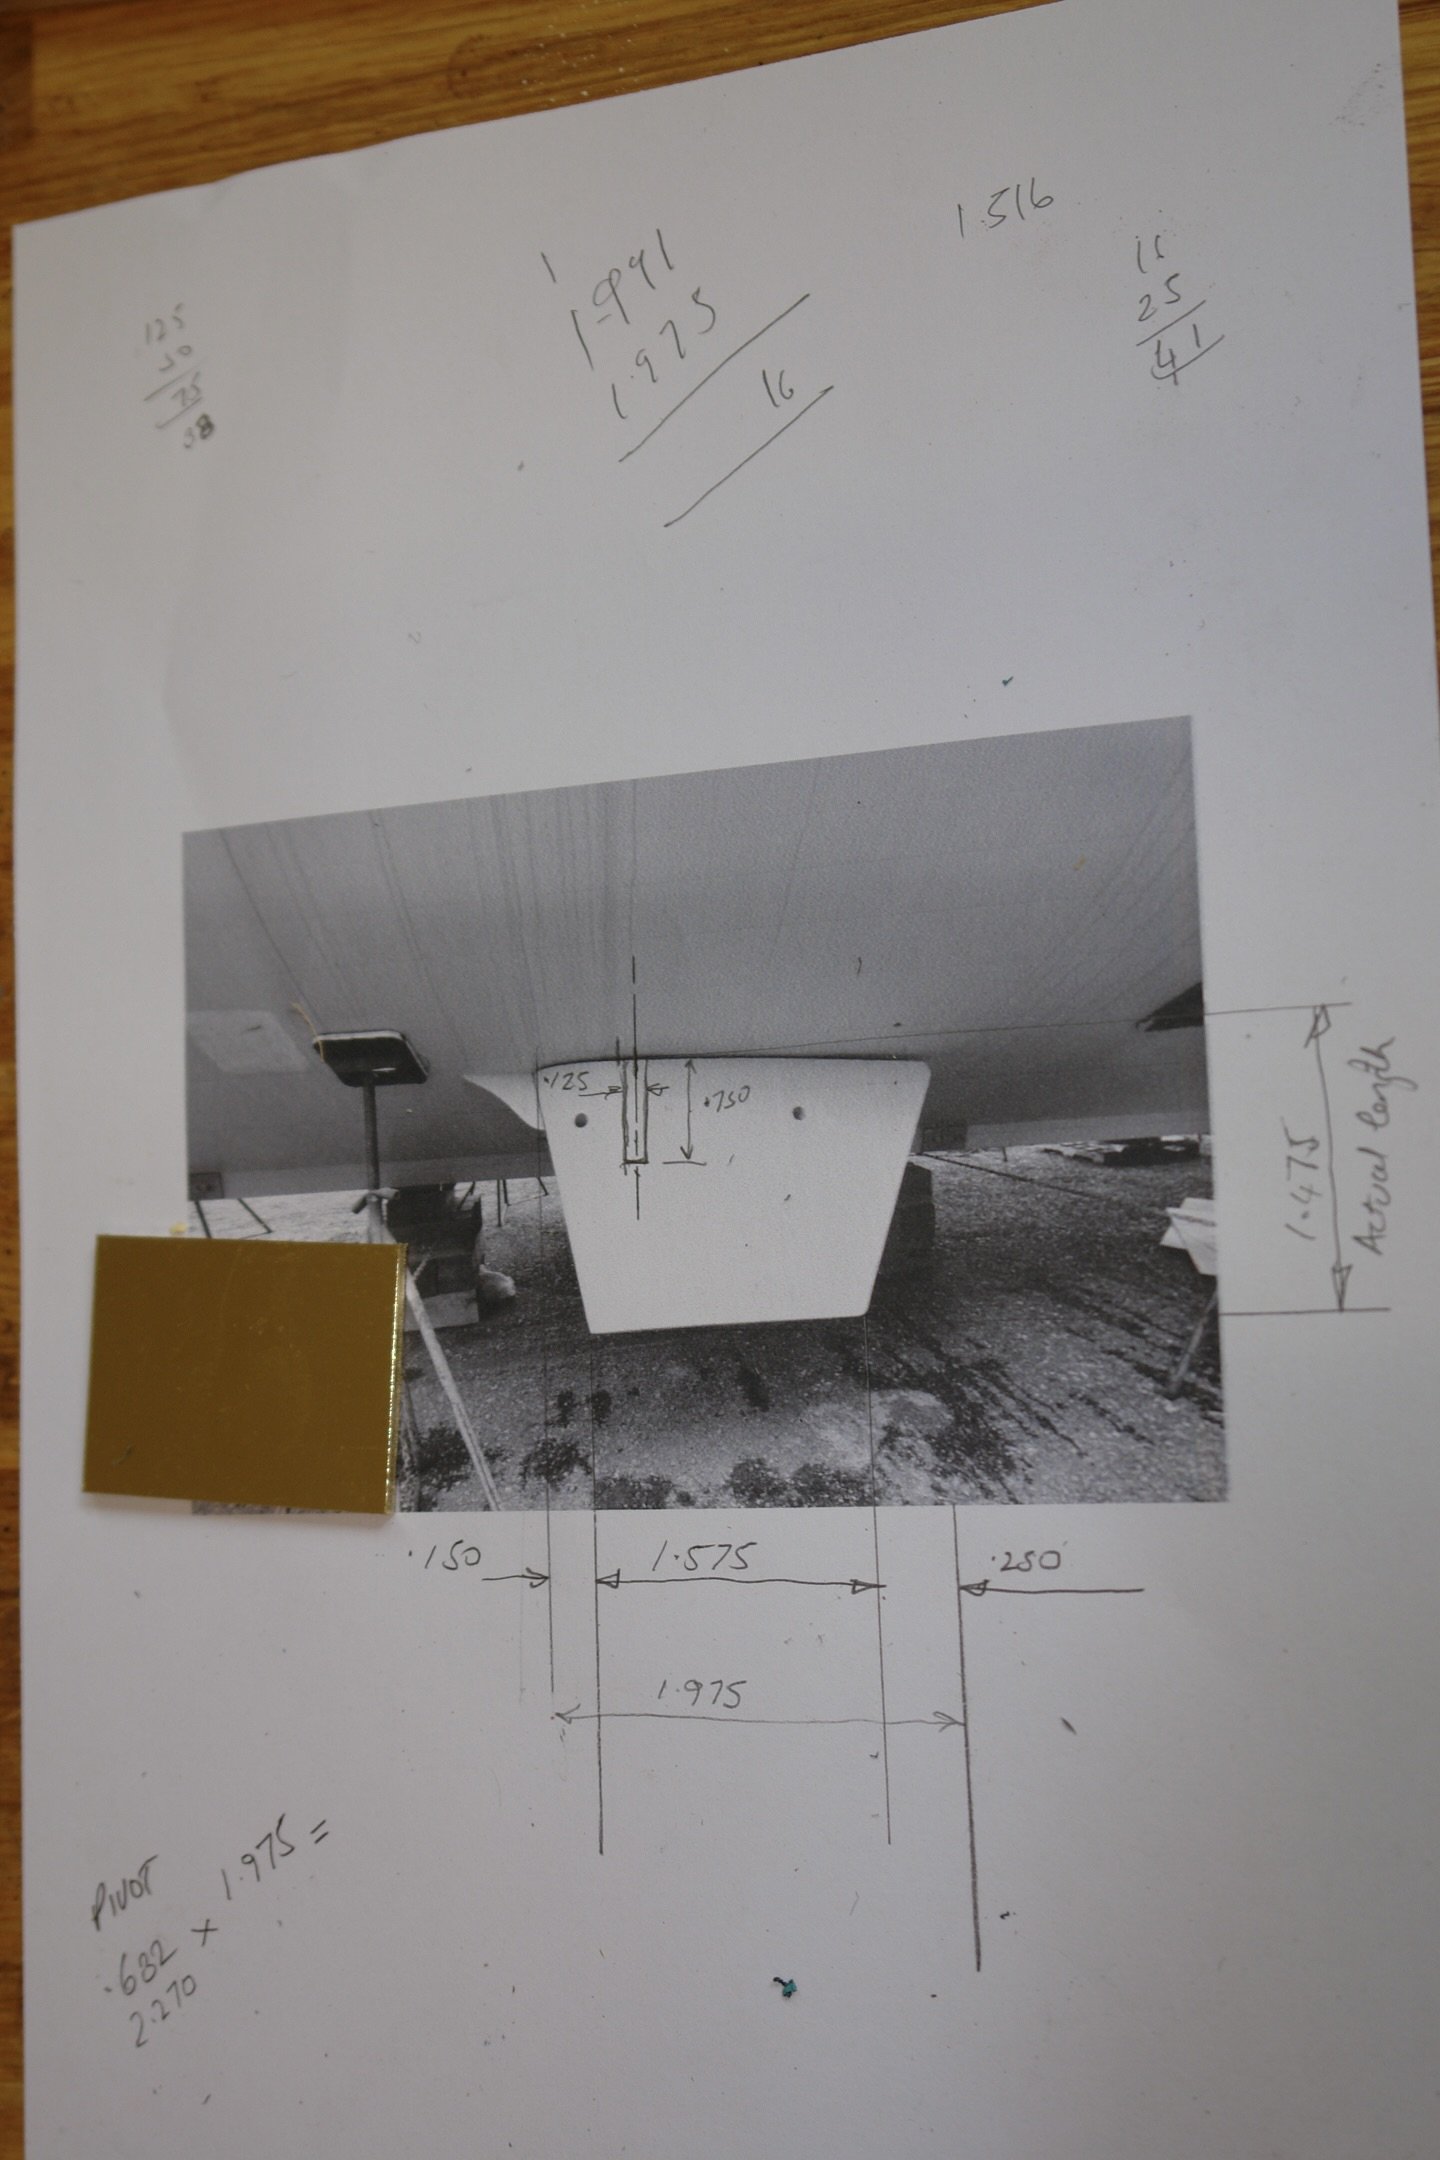
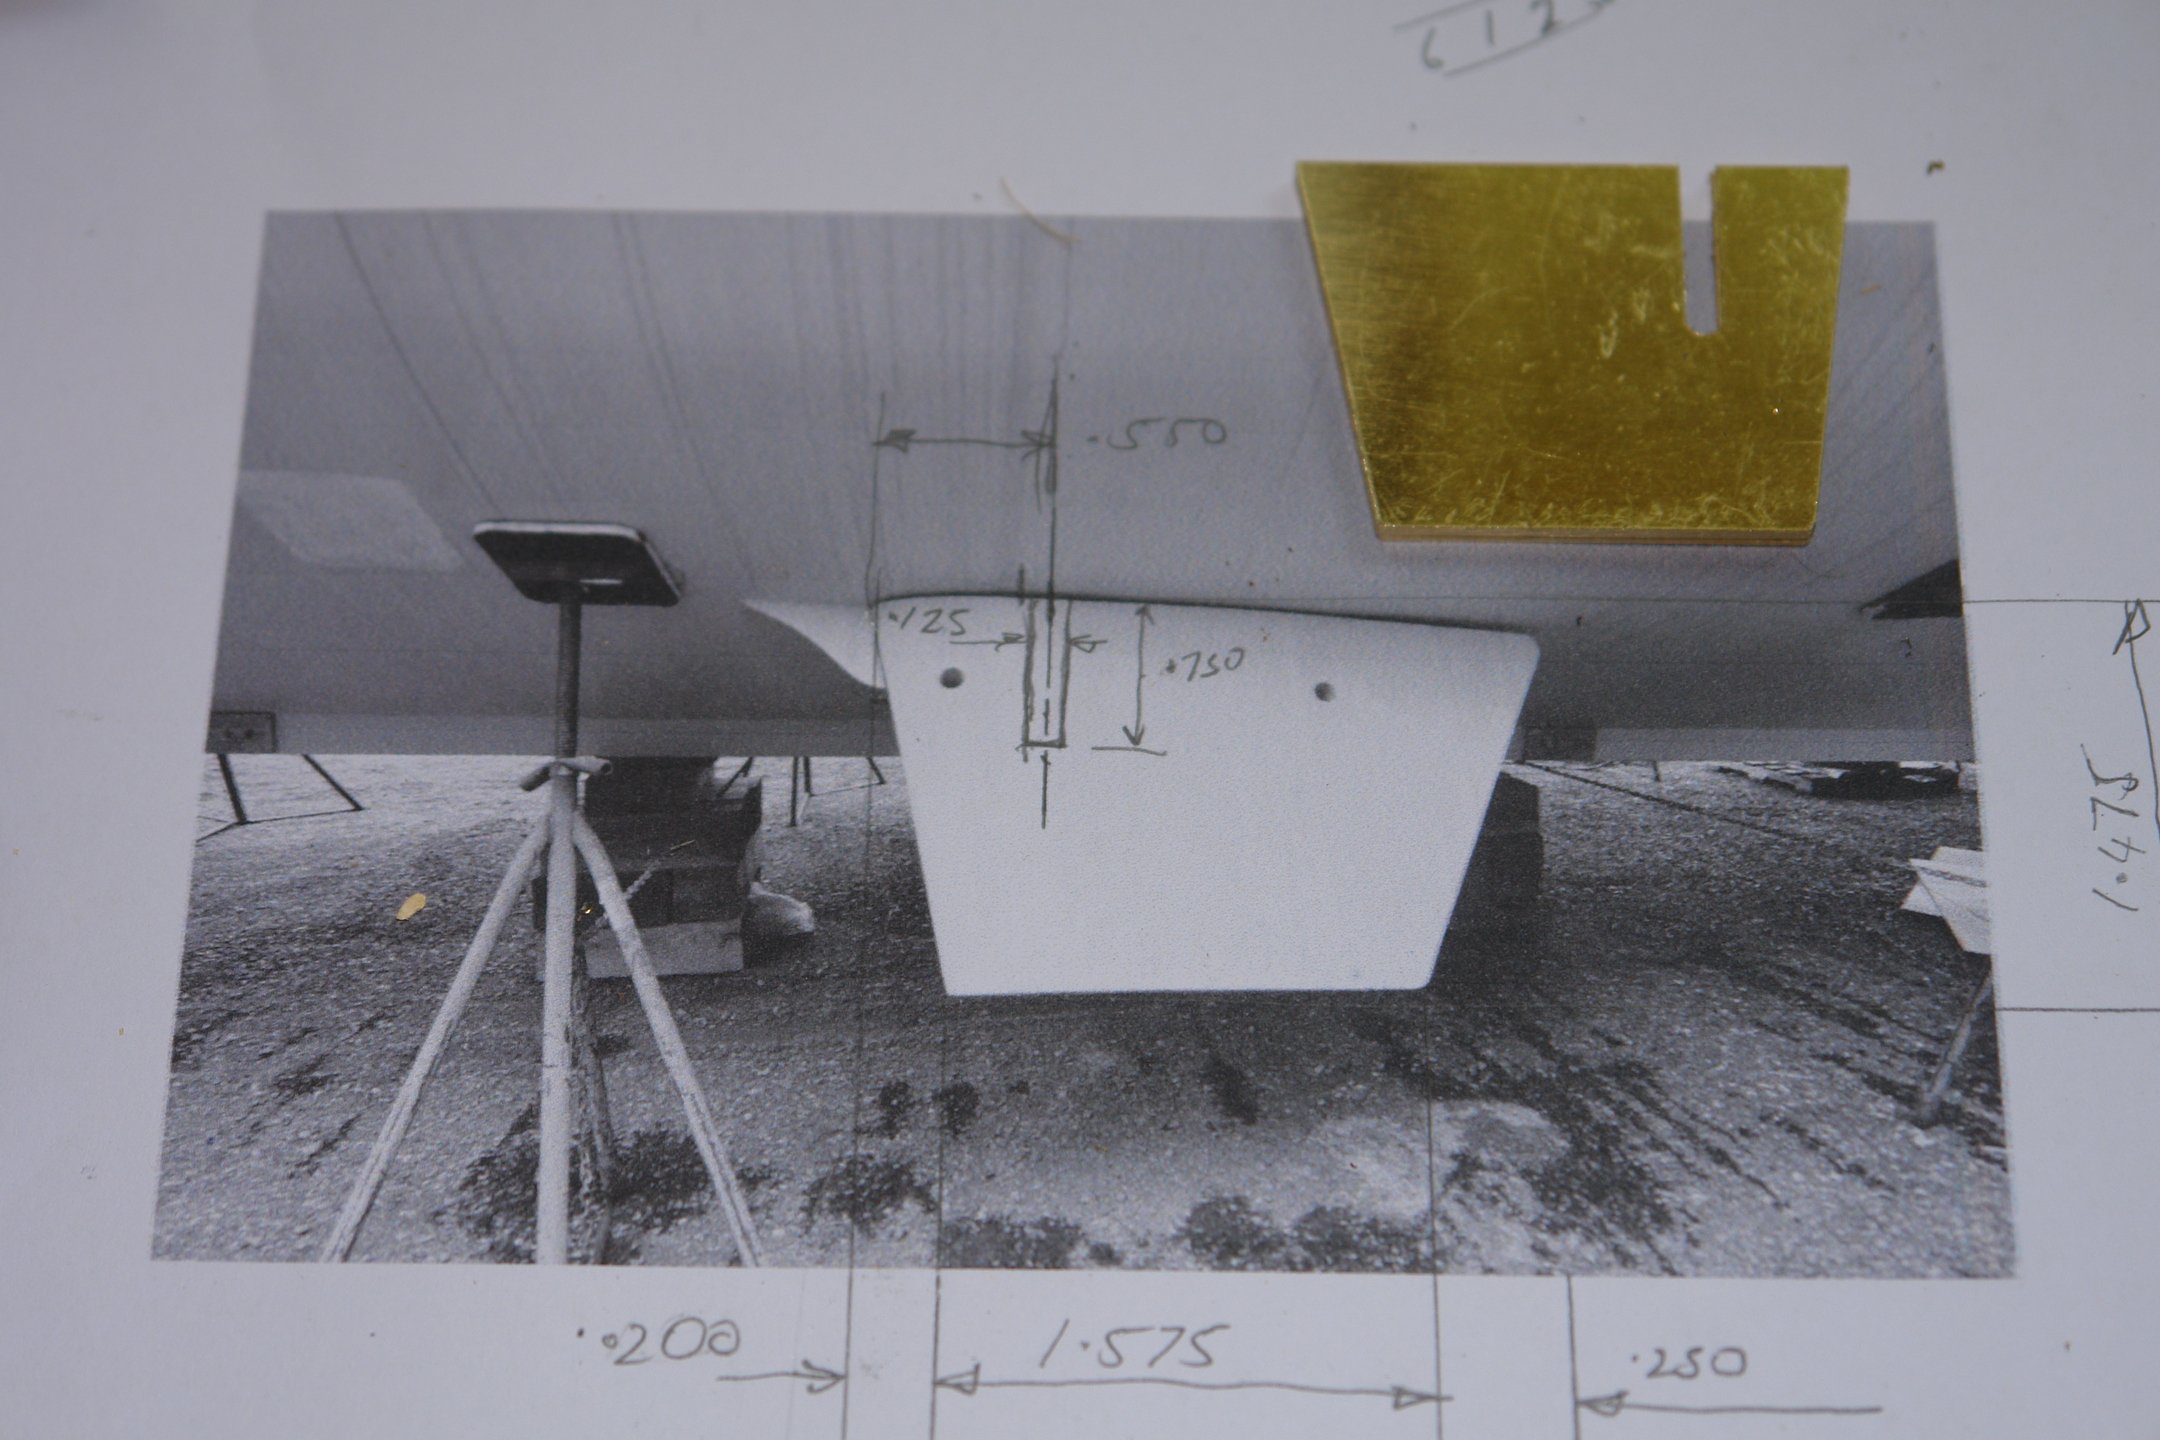
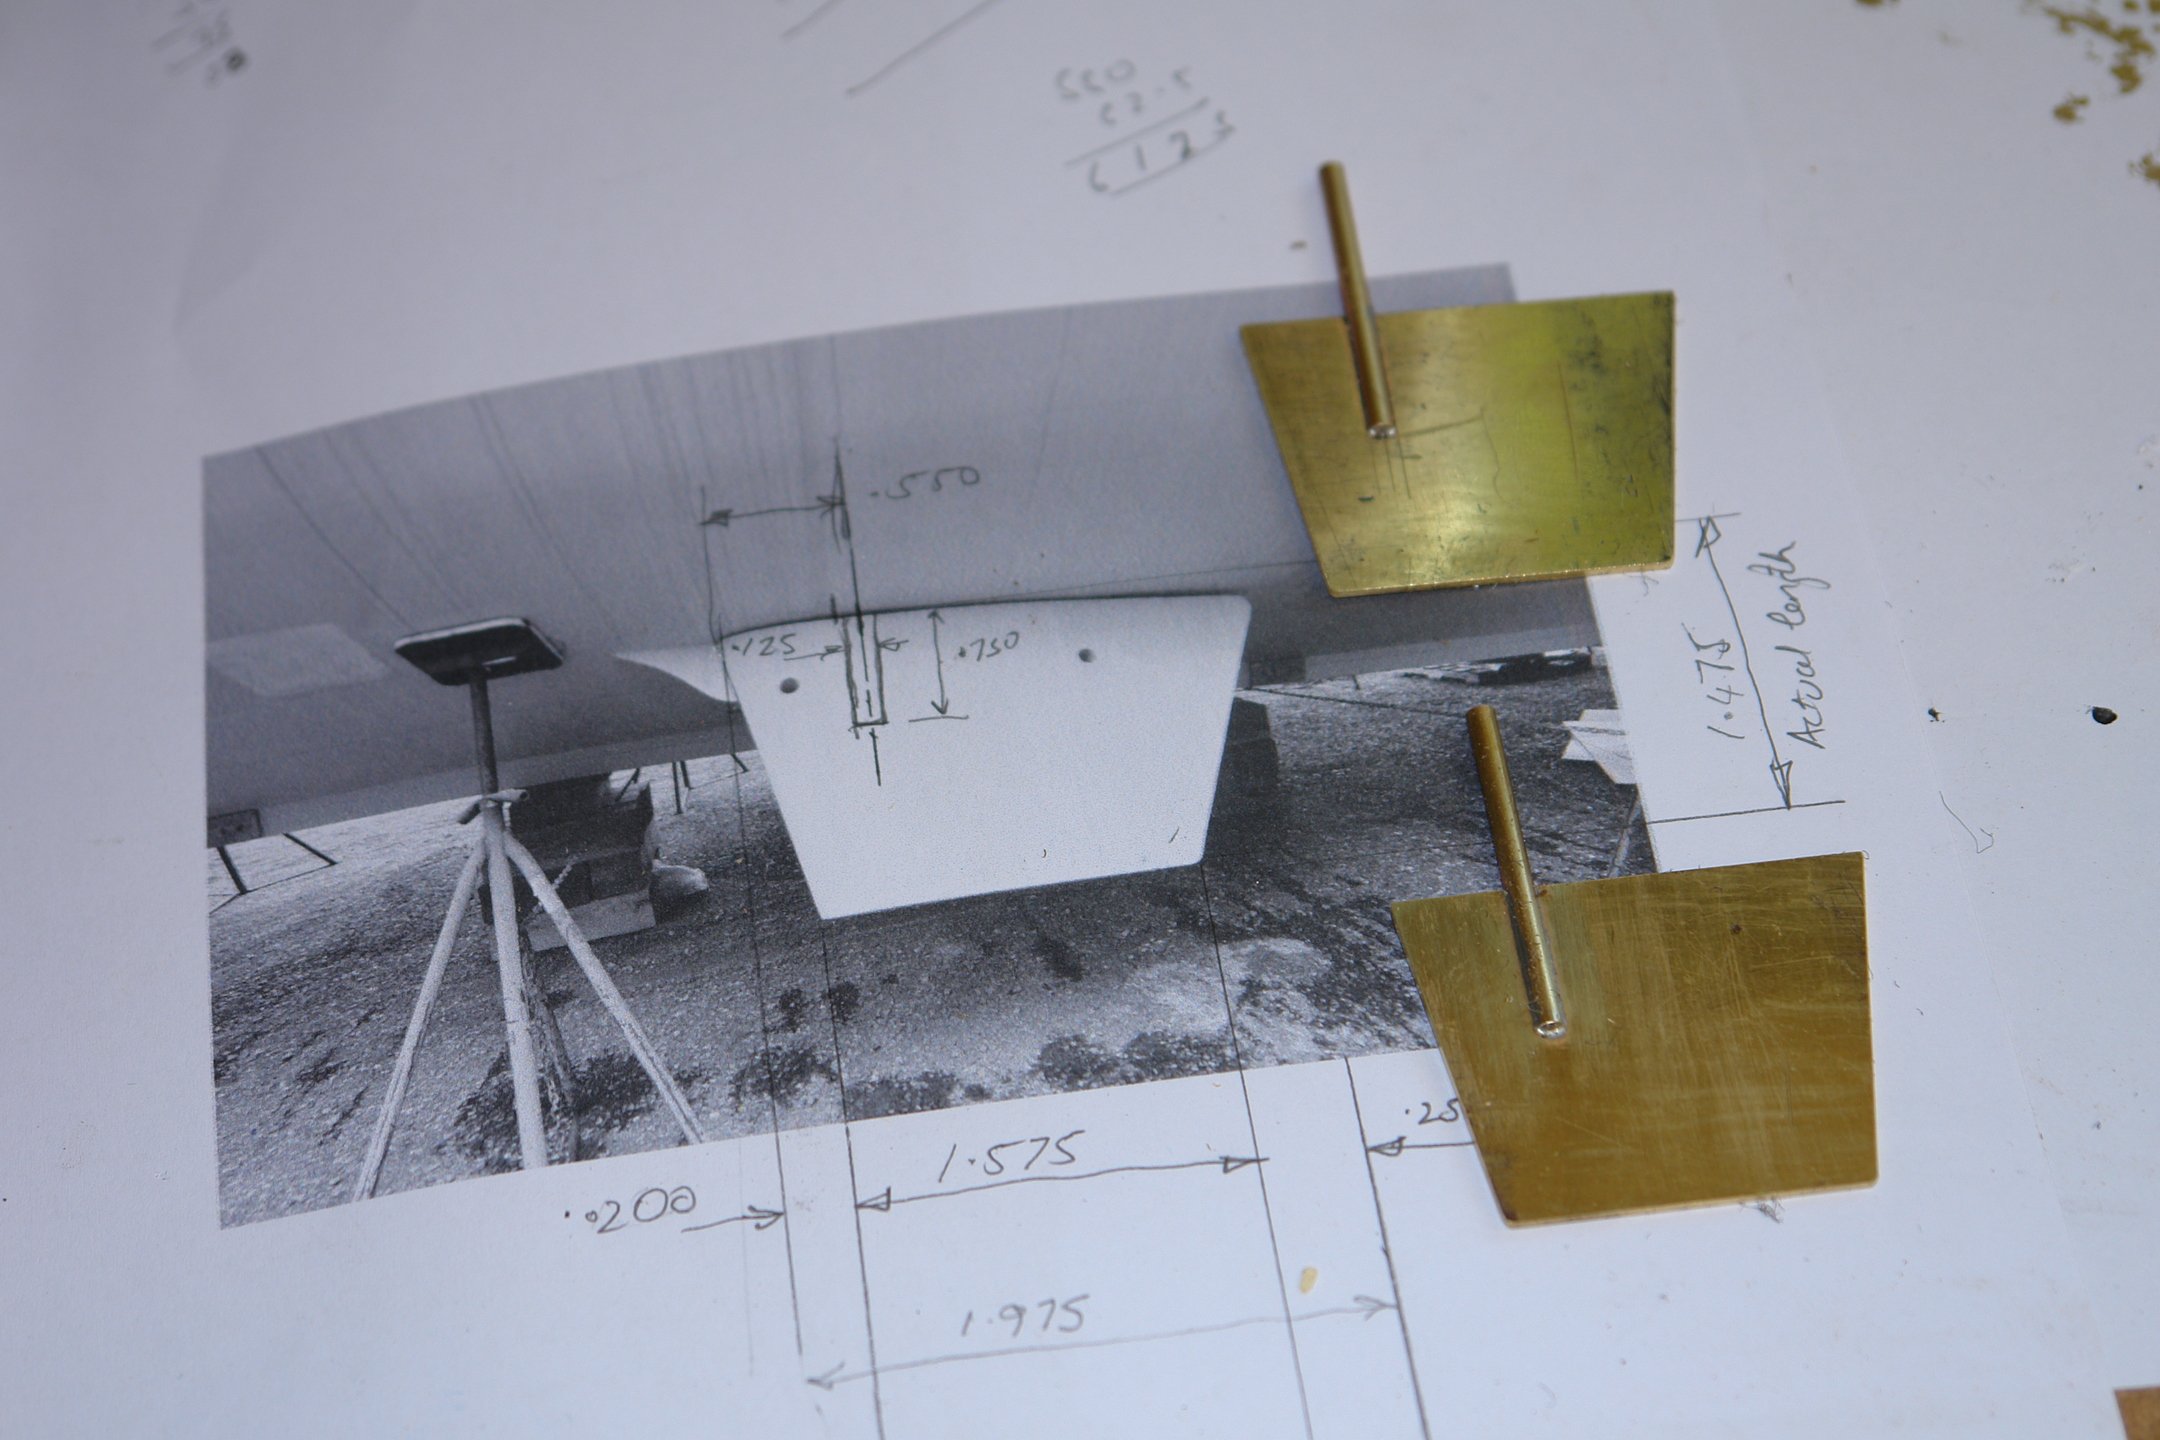
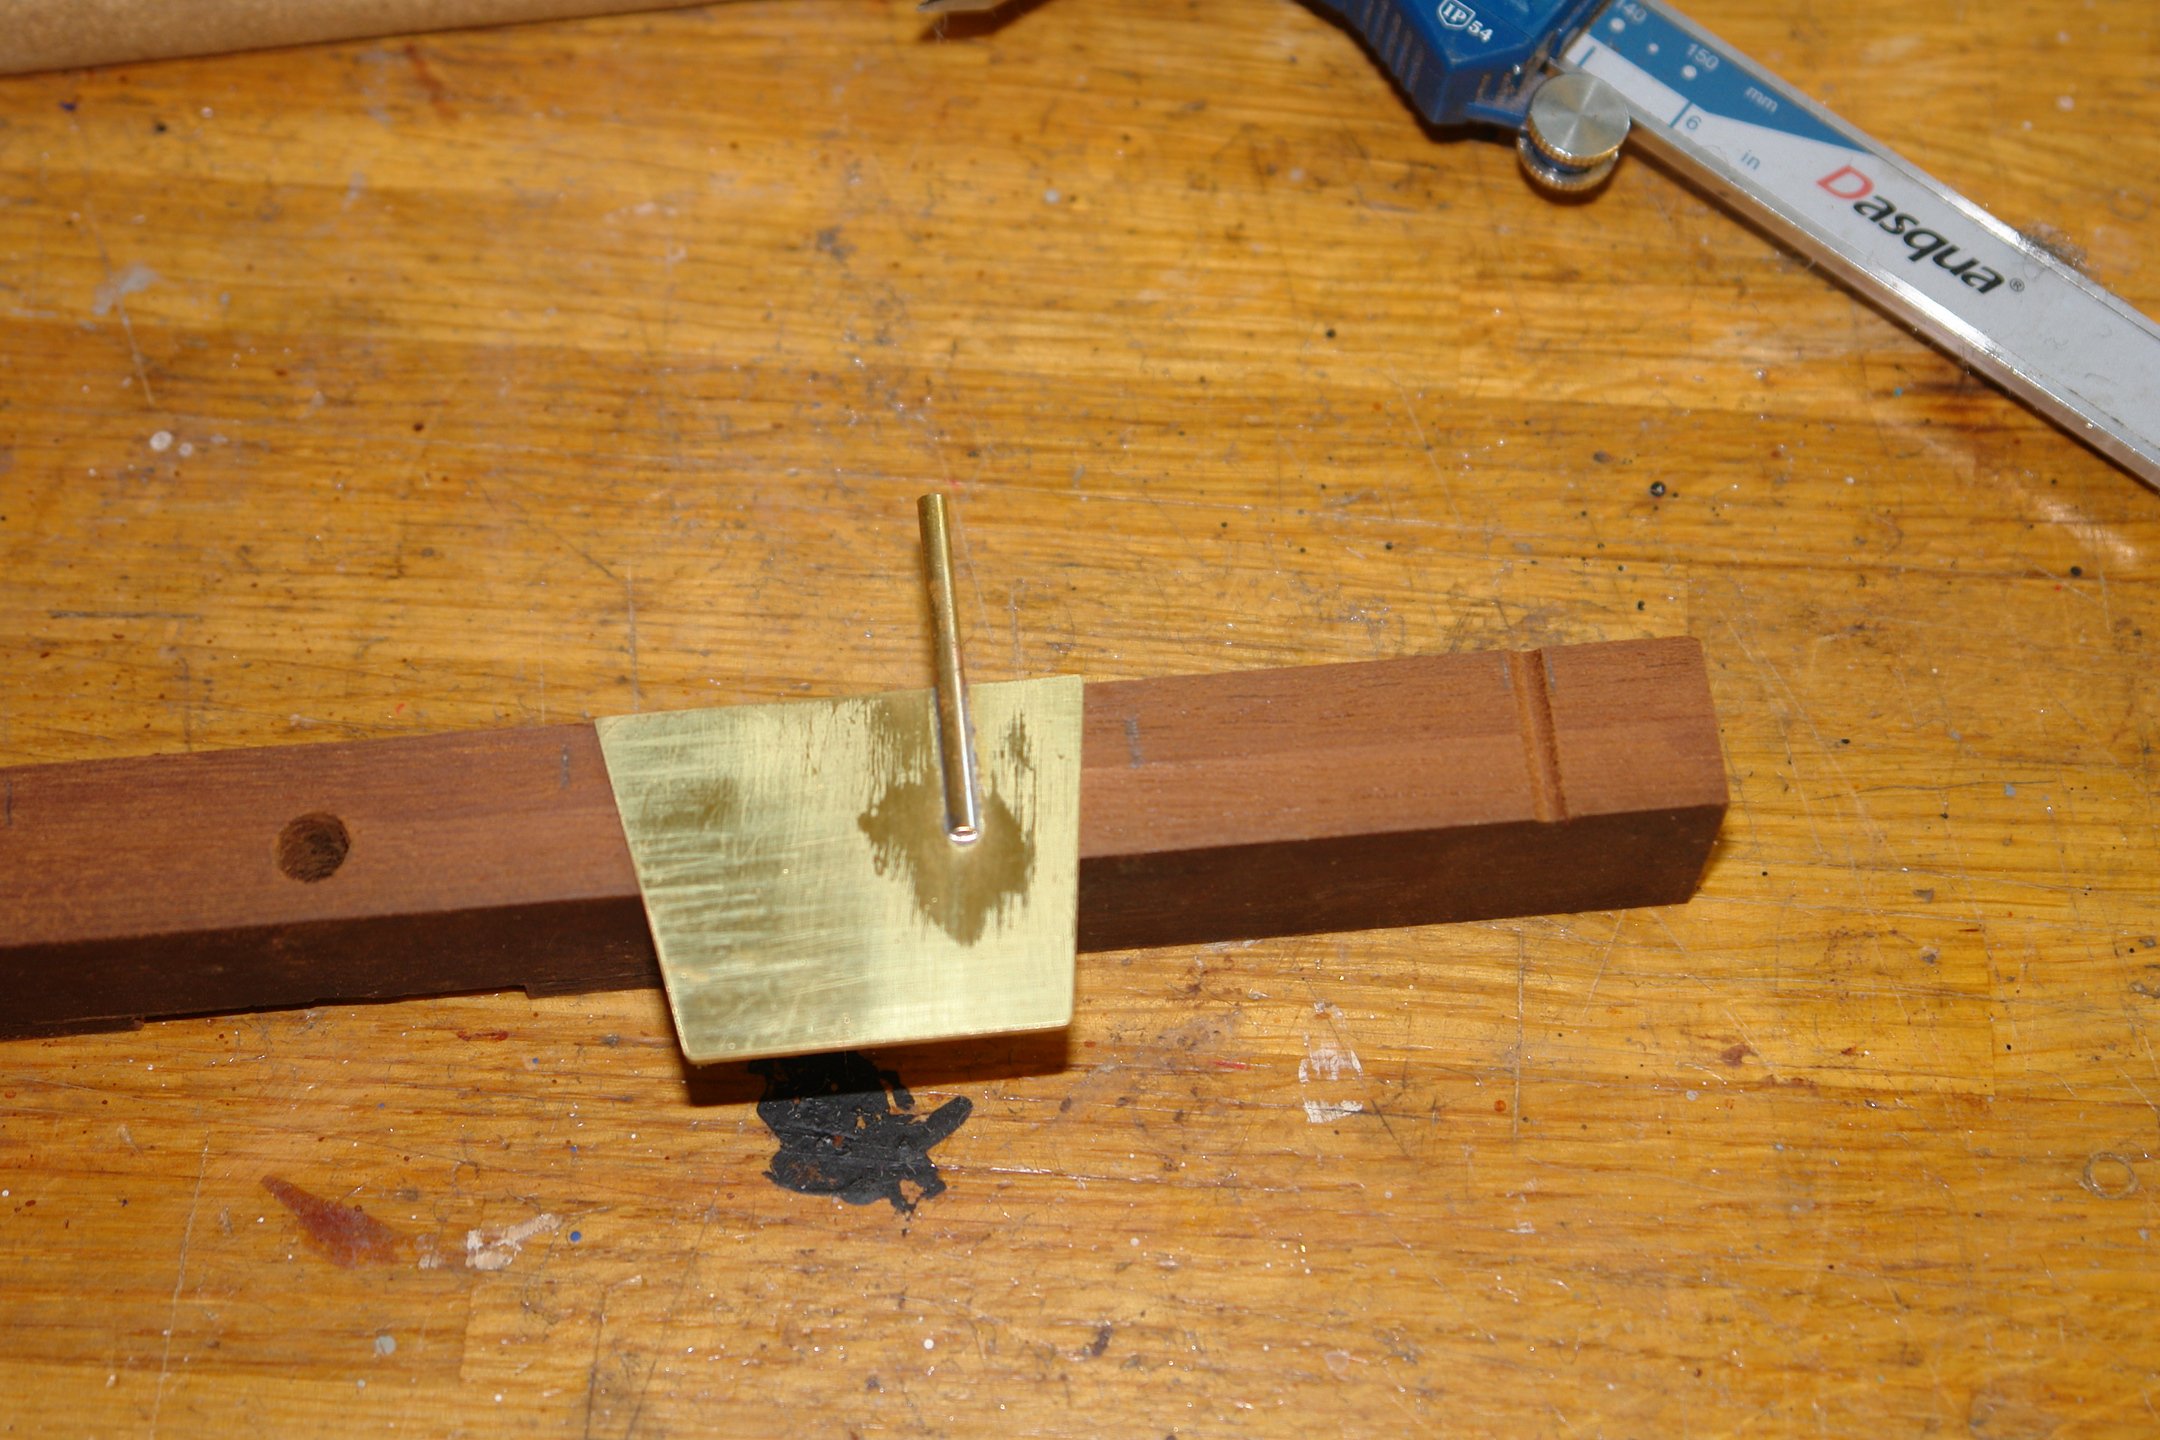
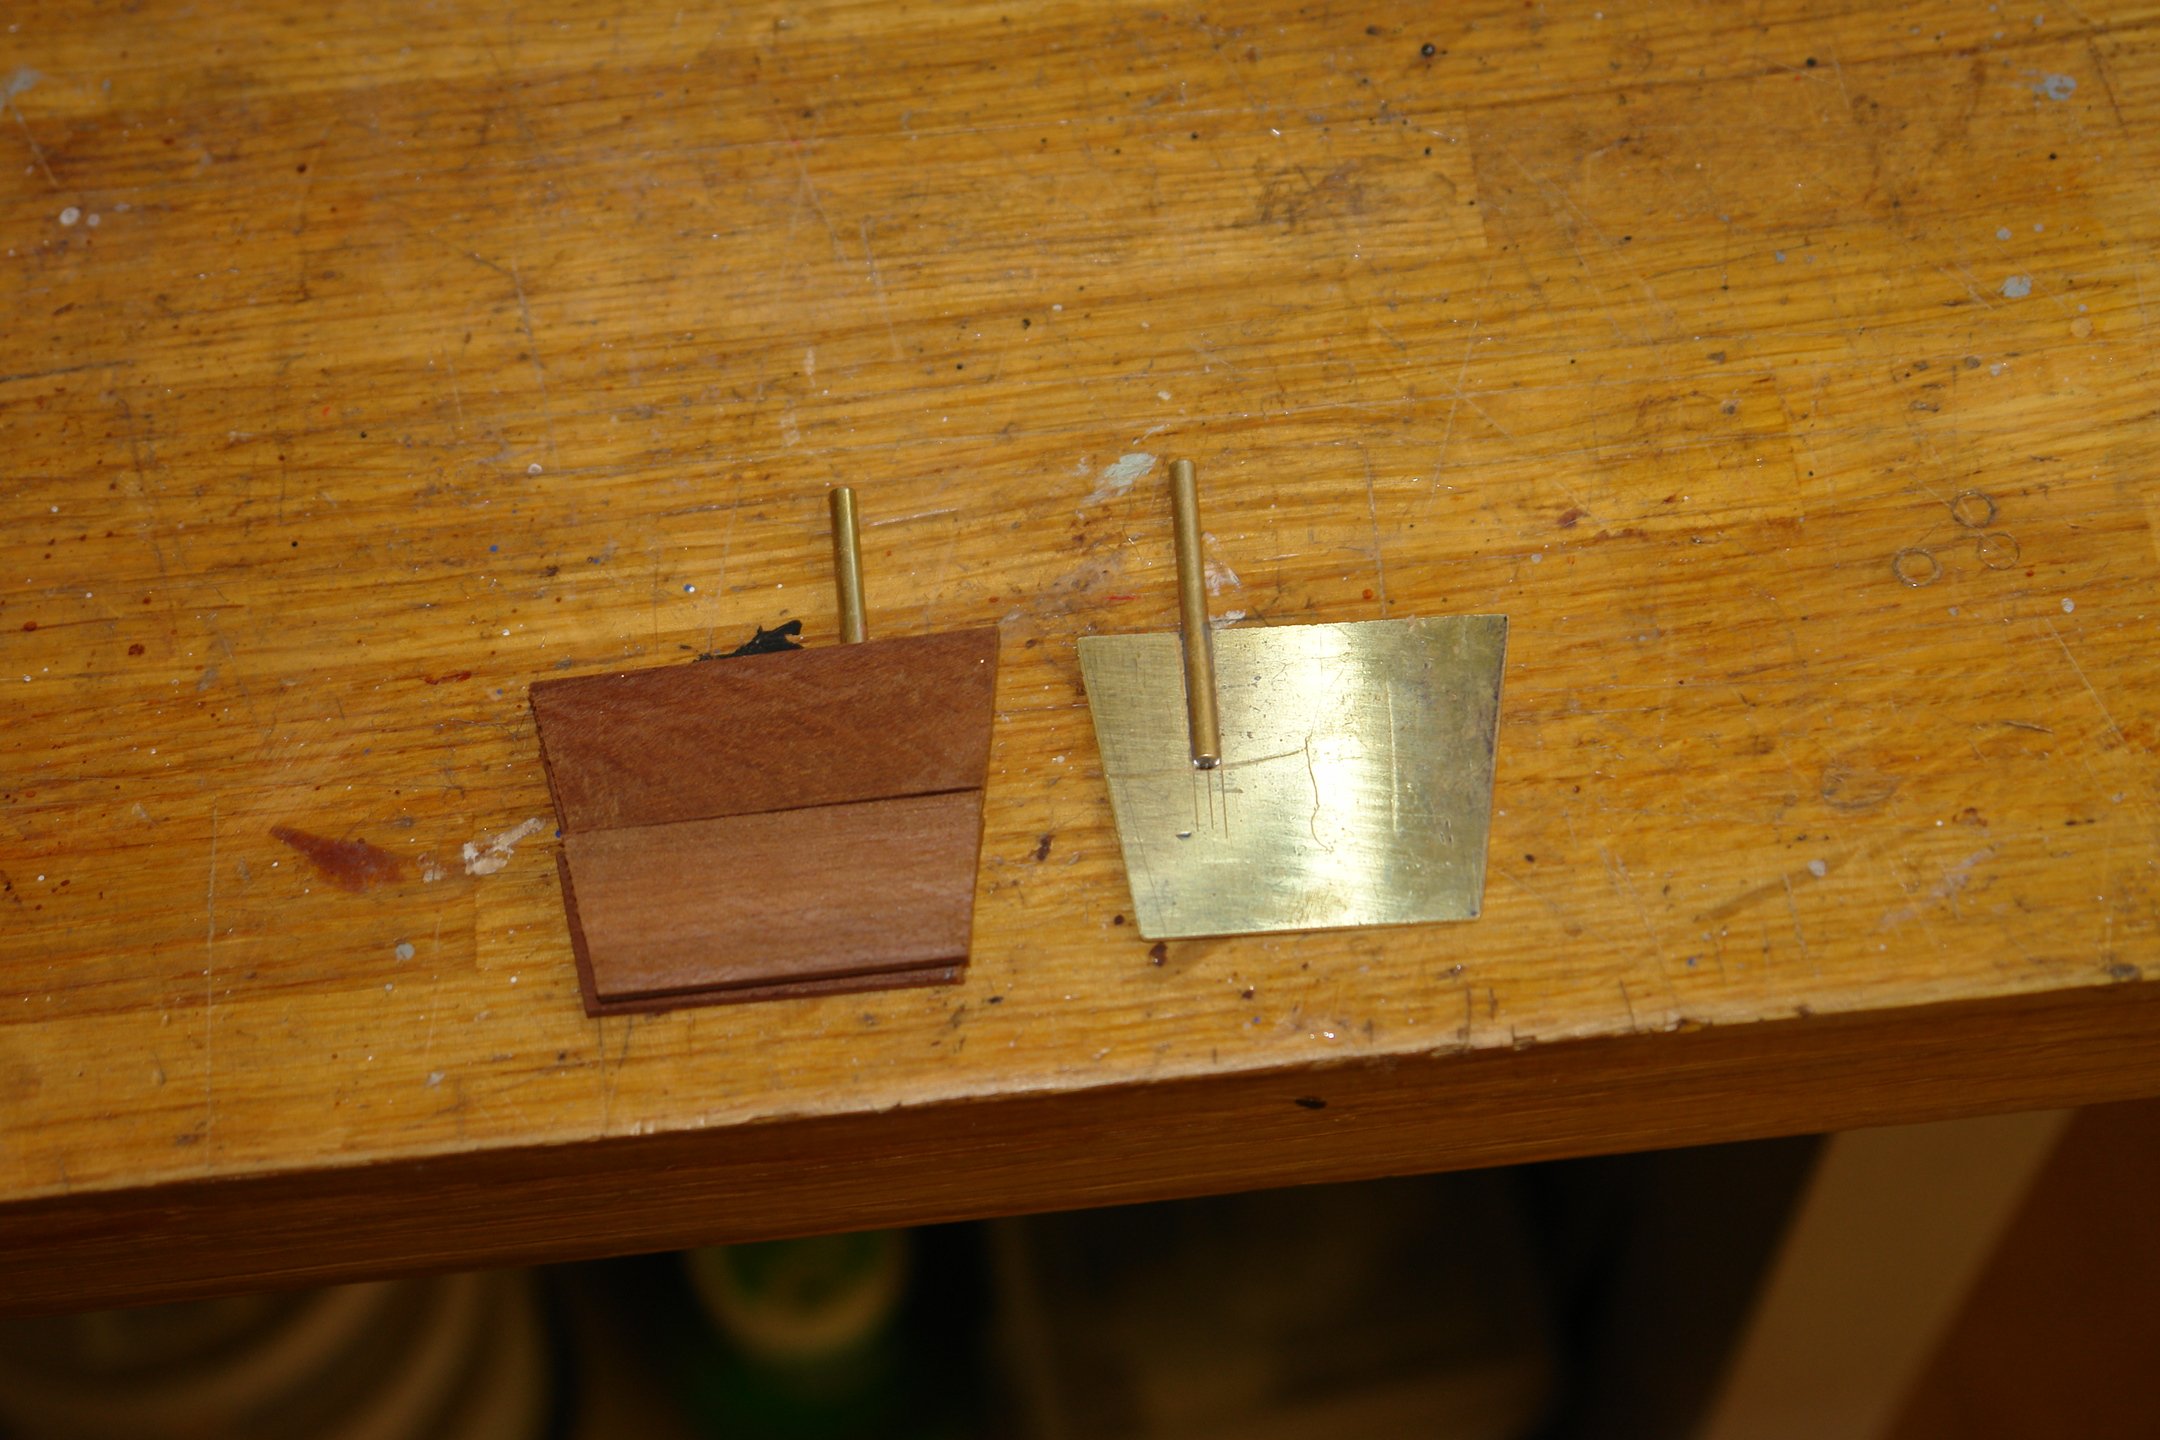
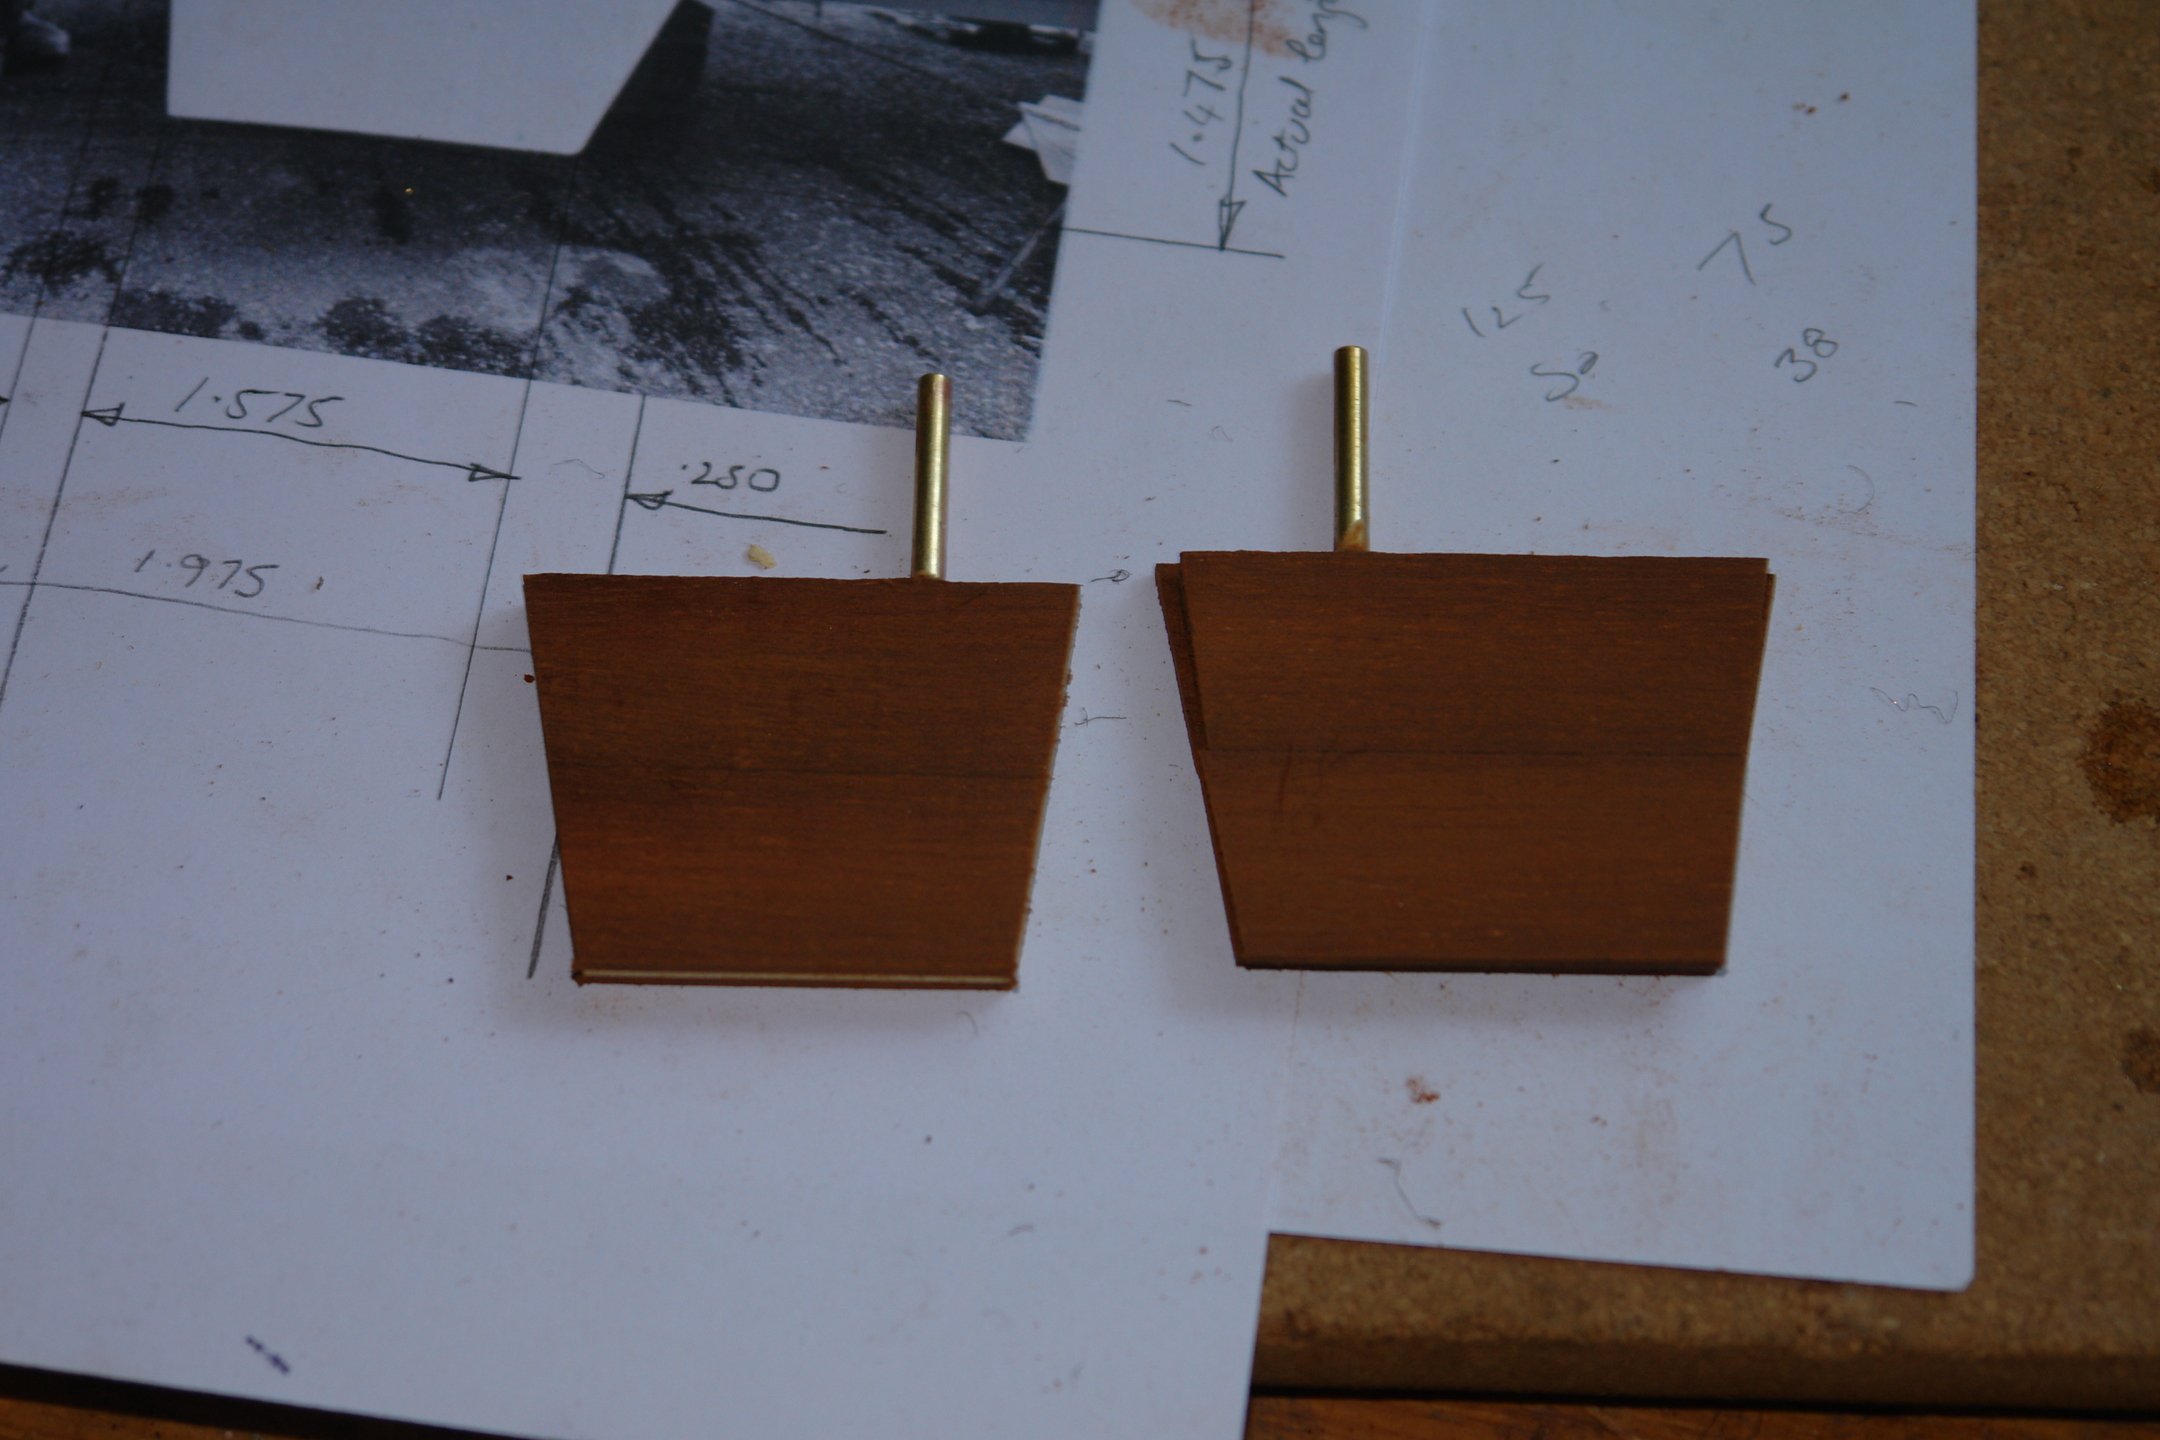
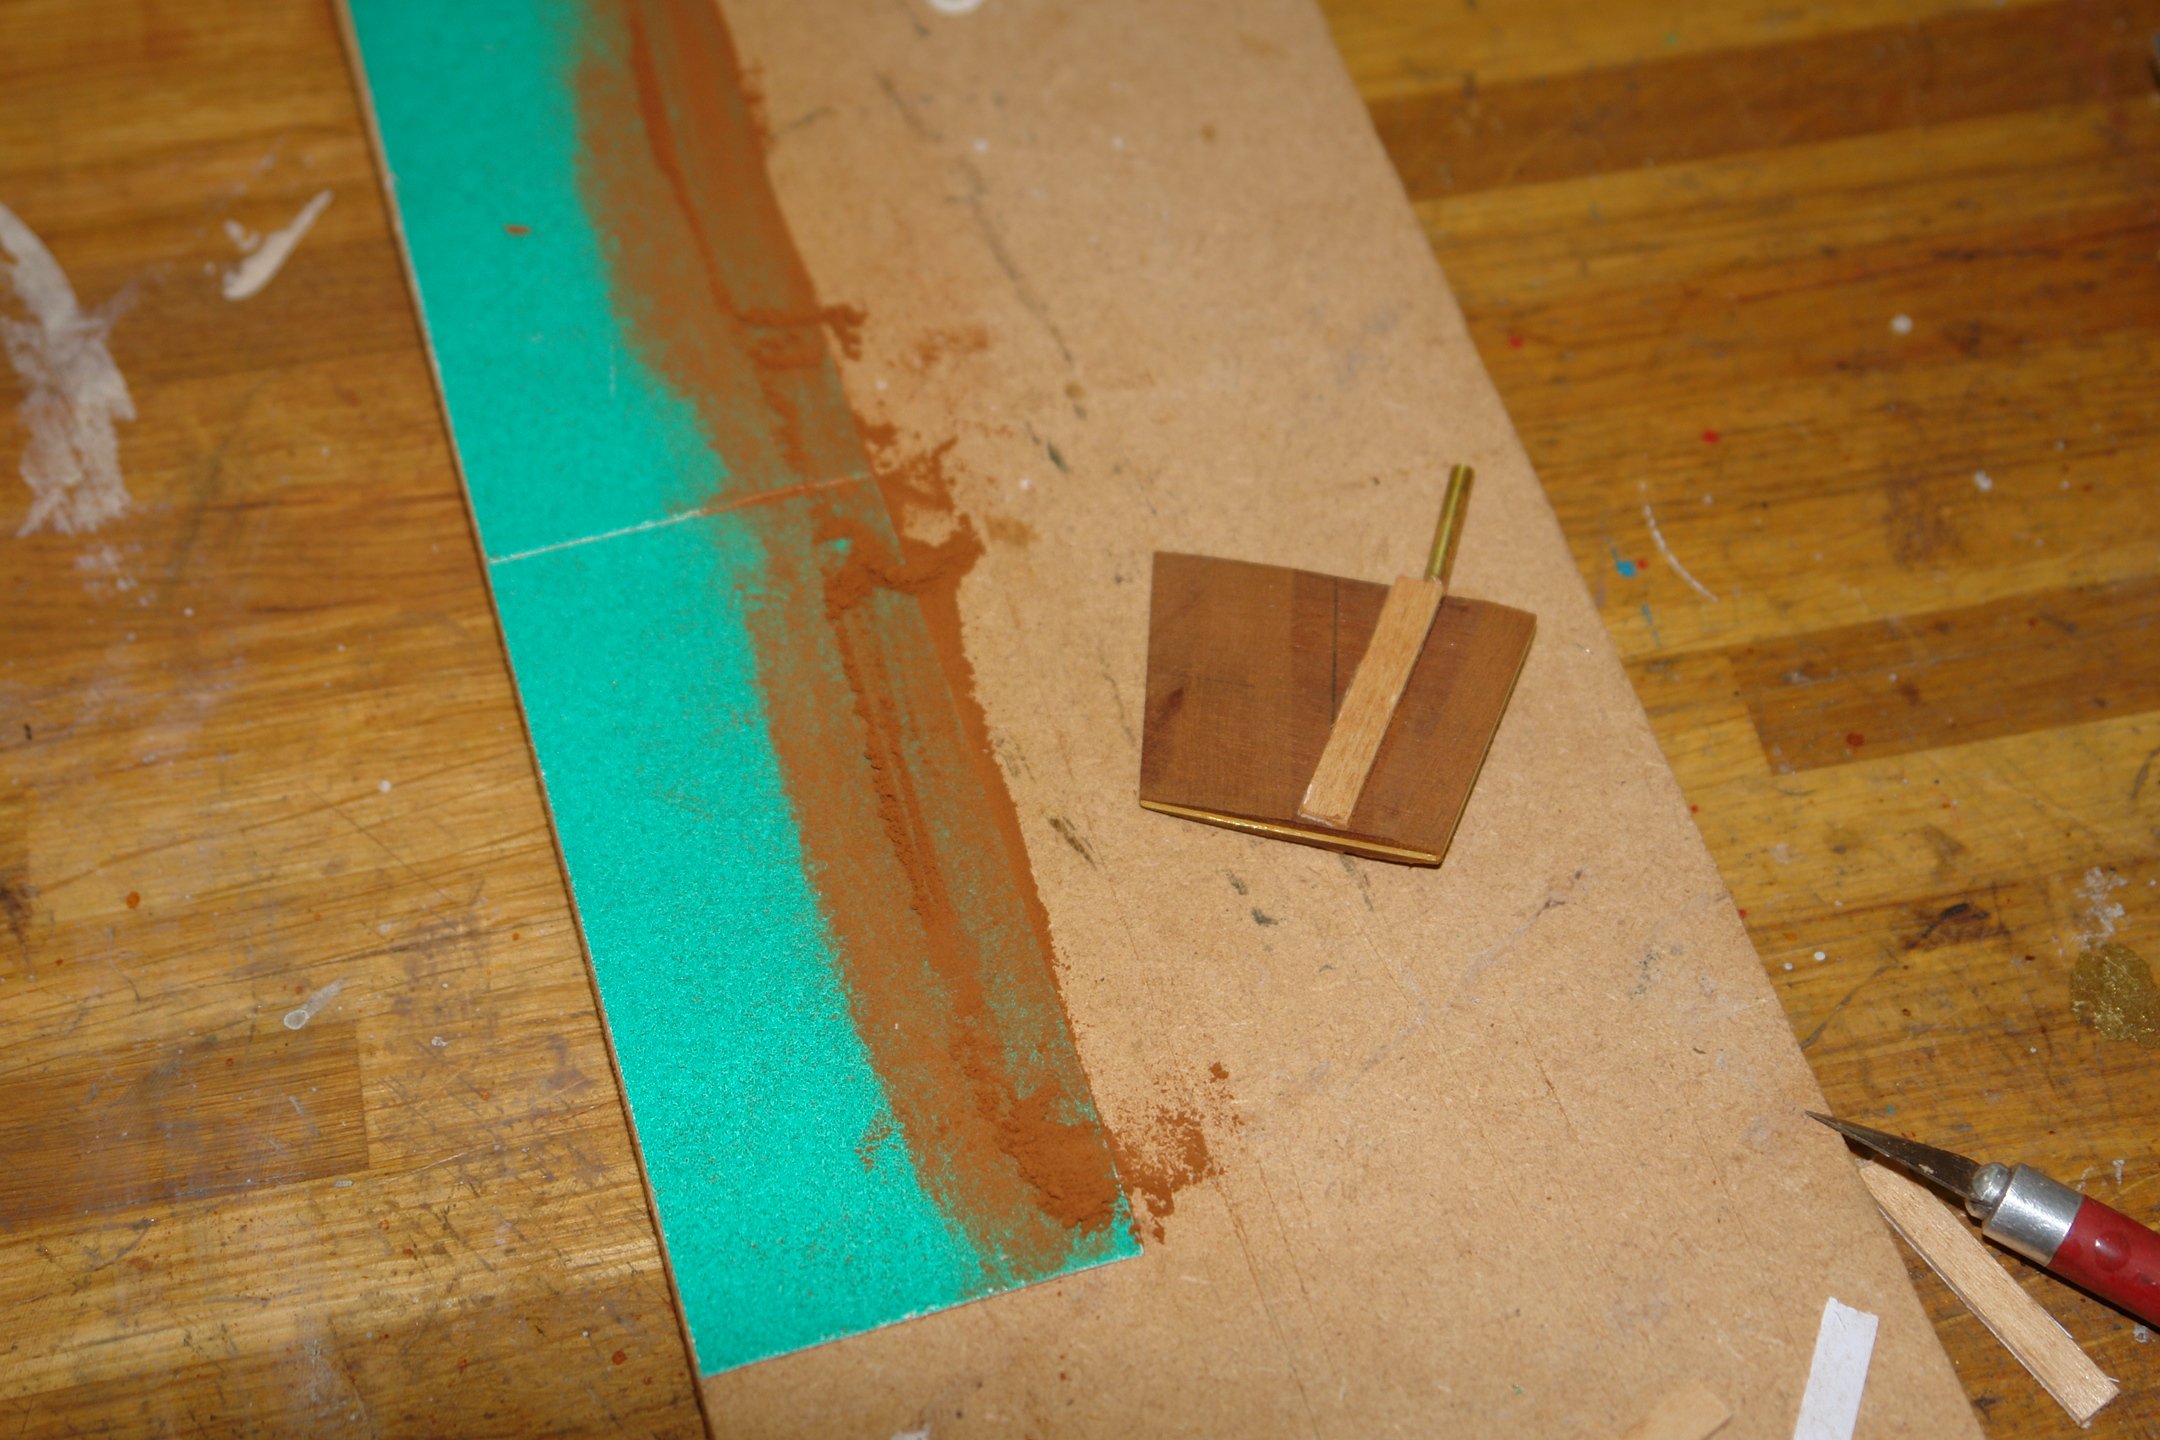
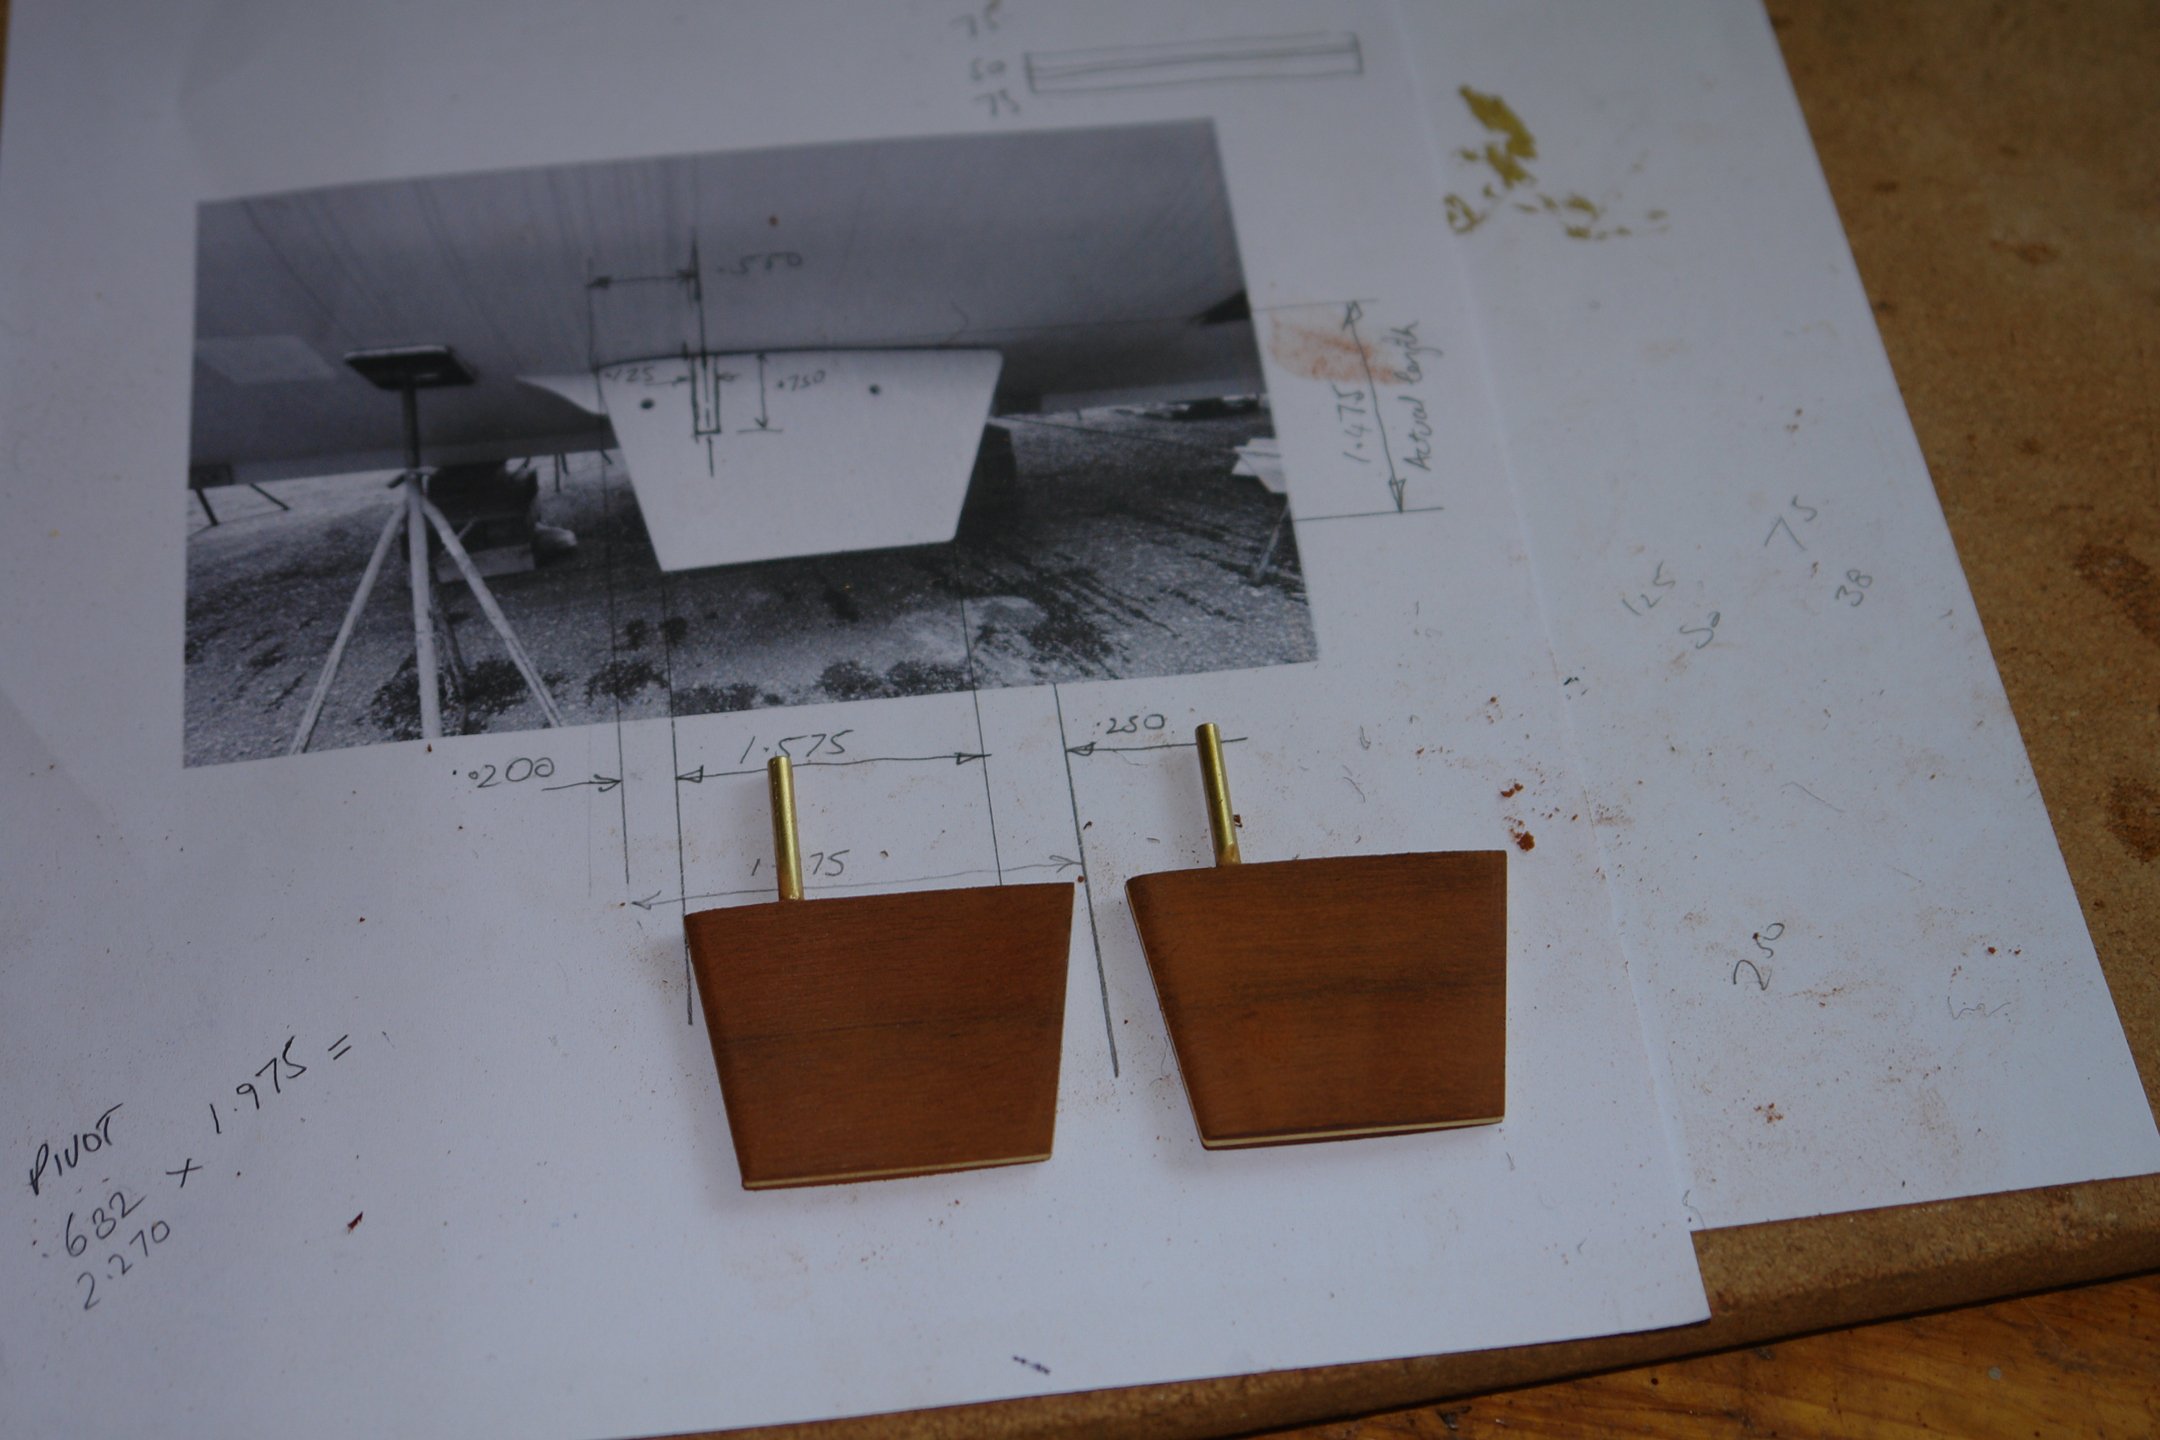
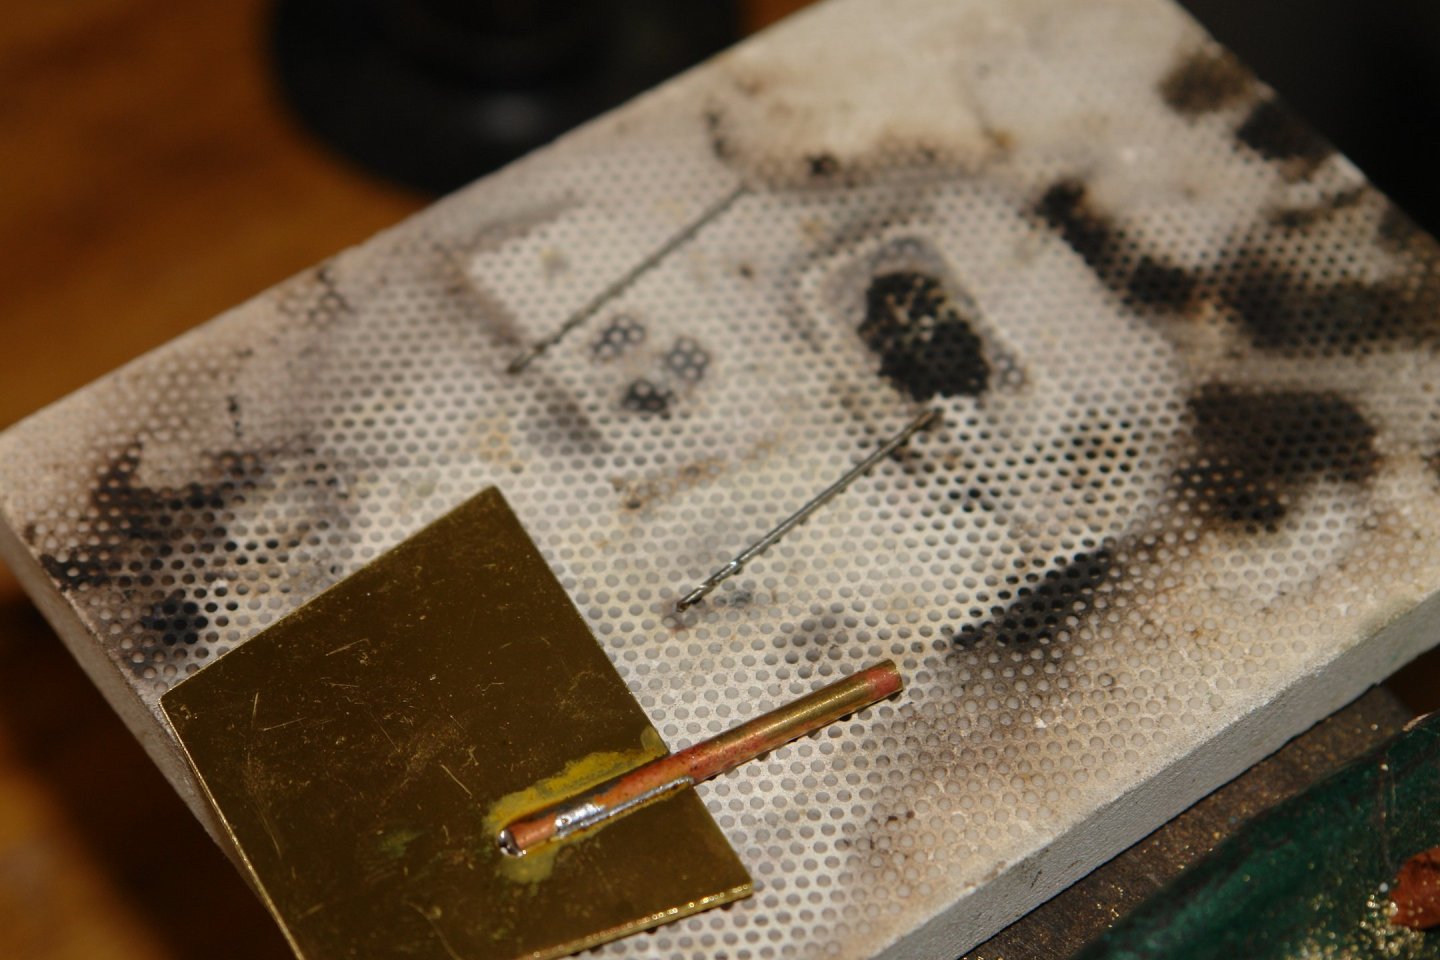
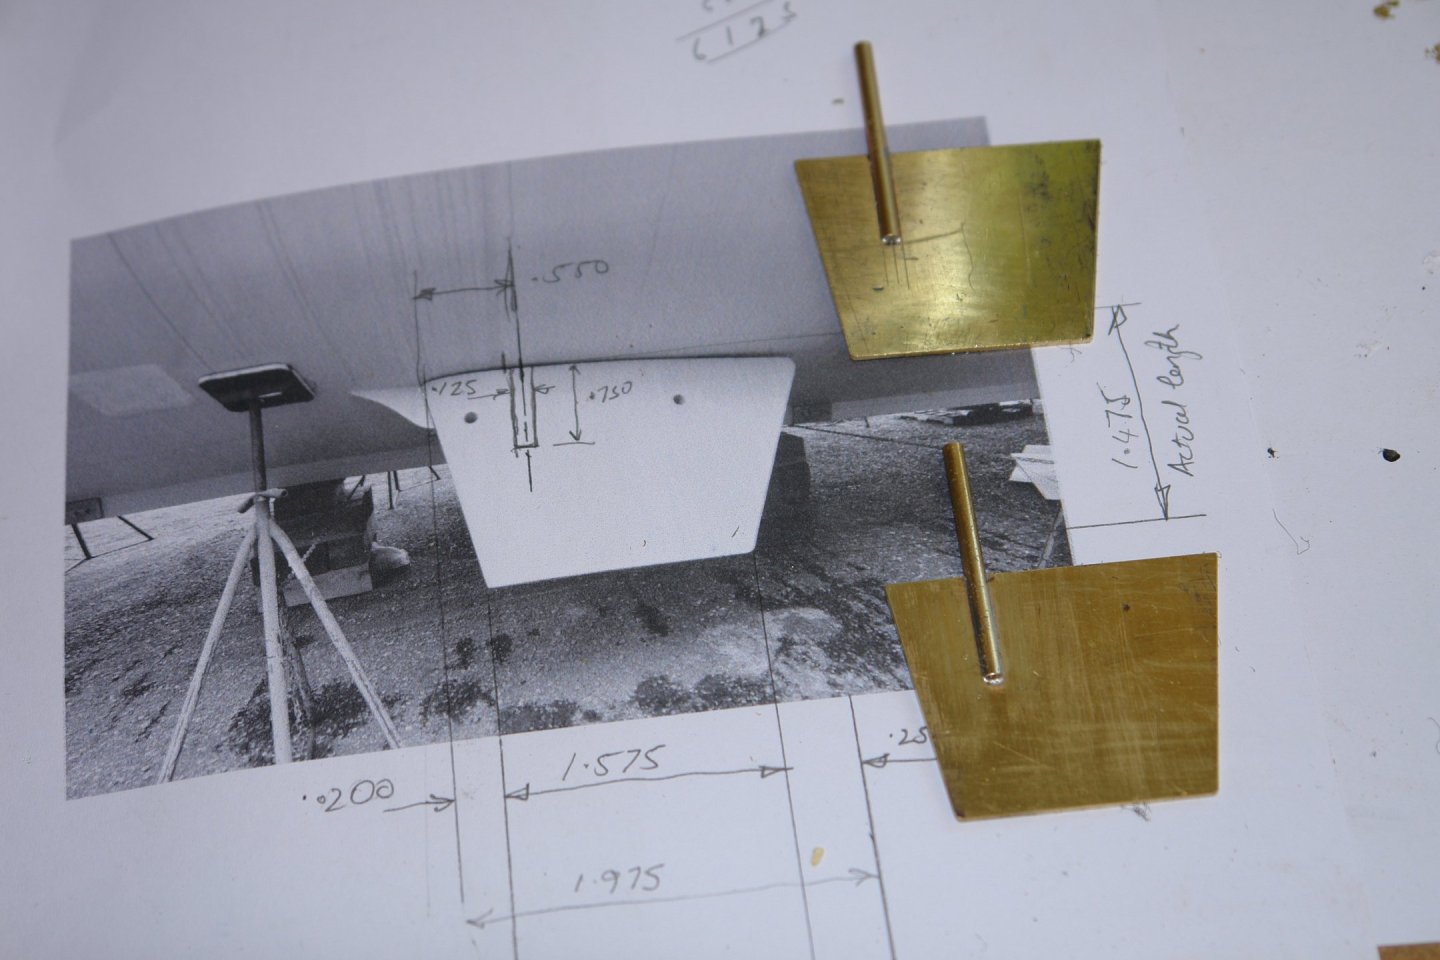
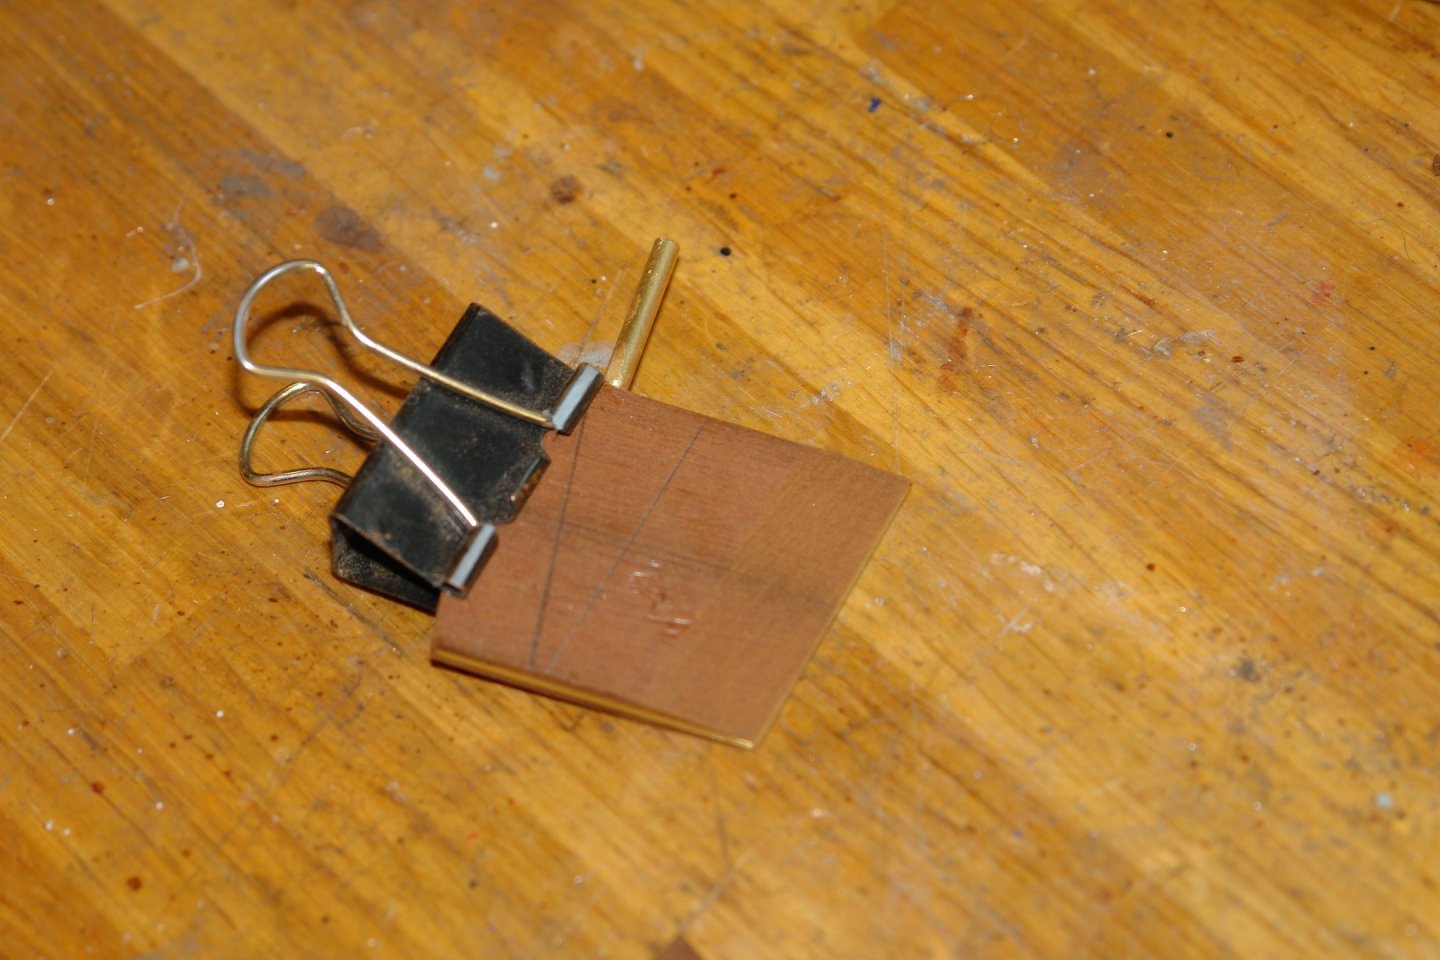
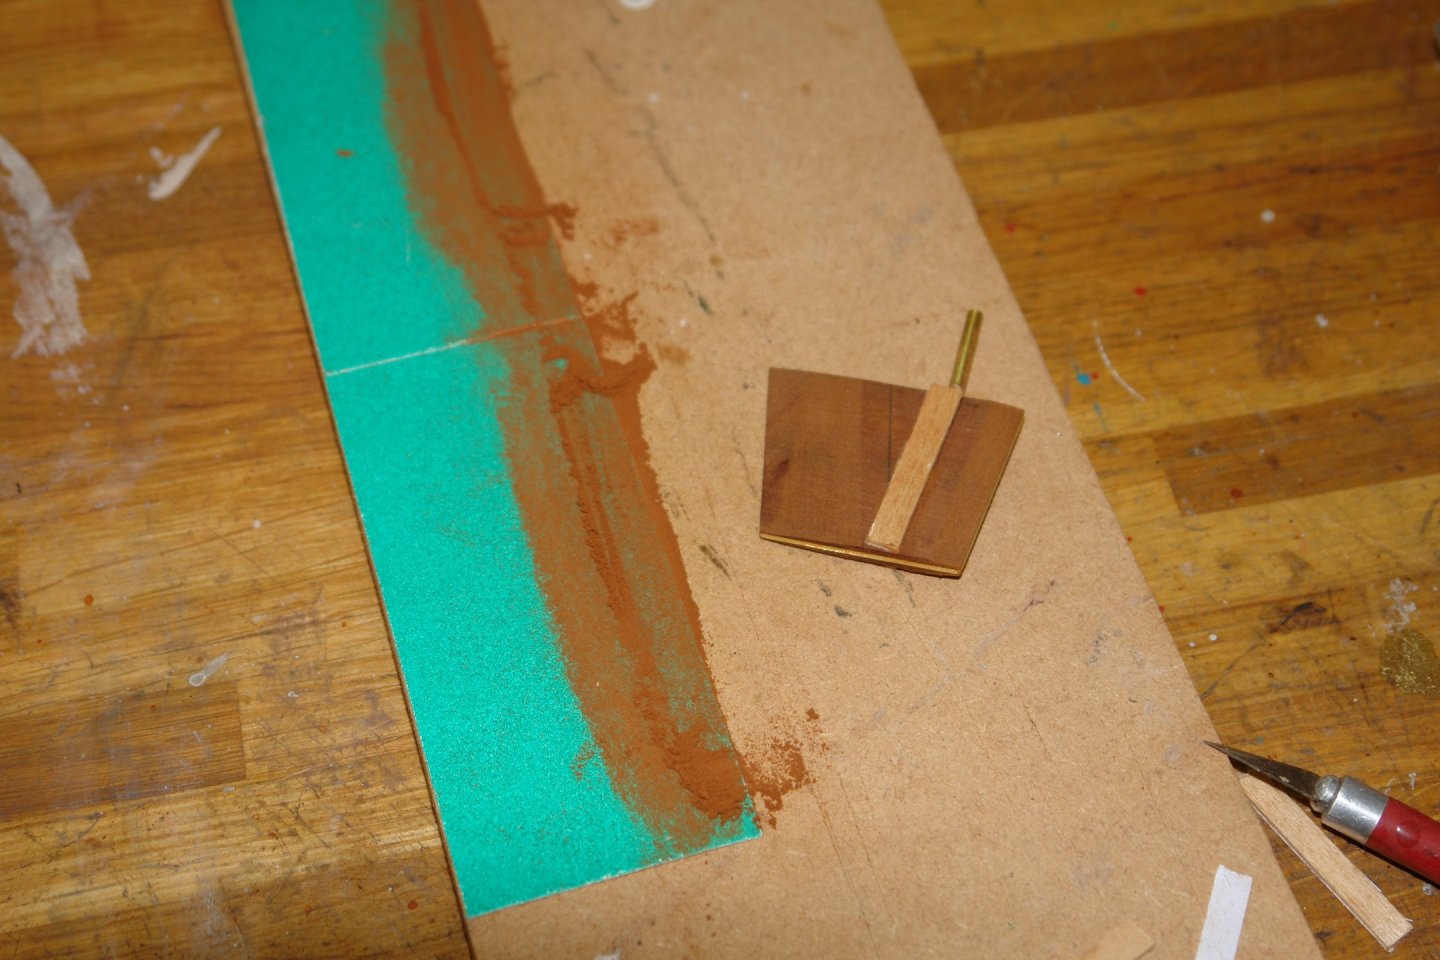
All votes will be counted Veszett. I think you may be on to something there Yves. Not wanting to jump to a snap decision on paint finish I diverted to another controversial area. I refer to the stabilisers. Clearly they were not a feature of the 1901 build and were presumably included in the 2007 rebuild to make her more comfortable for the more delicate sailors of the 21st Century. I personally think Cangarda looks quite odd with the stabilisers fitted but unfortunately I can't bring myself to omit them (departing markedly from her rebuilt form). Courtesy of Rick I have some rather good shots of the stabilisers and these plus a bit of educated scaling allowed me to do a reasonably good job of getting their size and shape correct. As with the rudder, I am making them from a brass core clad with mahogany. The next shot shows the dimensions and the already cut brass plates (1/16" thick). The 2 plates are held together with double sided tape at this stage. The plates were then cut to shape and a 1/8" slot was milled out for the shank. The 2 plates were then separated and the shanks were cut from 1/8" brass rod. The shank needed to be soldered central to the plate, so for soldering stage the plate was supported on 2 off 1/32 twist bits (as per the next photo). The solder was then cleaned up. Mahogany planks were then glued to the brass - note the slot in the mahogany to take the shank. Once the mahogany was secure I used my patent bulldog clip method to control sanding of the aft end taper. The front end needed a slightly different approach because of the trapezoidal shape. In this instance I temporarily attached a sacrificial strip with double sided tape. The two stabilisers were thus completed. I now plan to move on to sorting out the hull paint scheme.


-
There does not seem to be any chimney - a steam pipe or two would seem to be the obvious solution - probably using exhaust steam.
- 732 replies
-
- 7
-
-
-
- Lula
- sternwheeler
- (and 1 more)
-
Really smart and realistic. Excellent.
-
Greg If the copper is hard soften it by heating (to red) and then quenching - this should make it very easy to bend, then it should be possible just to bend it by hand around a piece of metal rod of appropriate diameter.
- 288 replies
-
- 5
-
-
- Santos Dumont No. 18
- hydroplane
- (and 1 more)
-
What sort of cargo would she typically carry? It would be nice to try and show it.
- 312 replies
-
- 3
-
-
- Chile
- Latin America
- (and 6 more)