Cathead
-
Posts
3,532 -
Joined
-
Last visited
Content Type
Profiles
Forums
Gallery
Events
Everything posted by Cathead
-
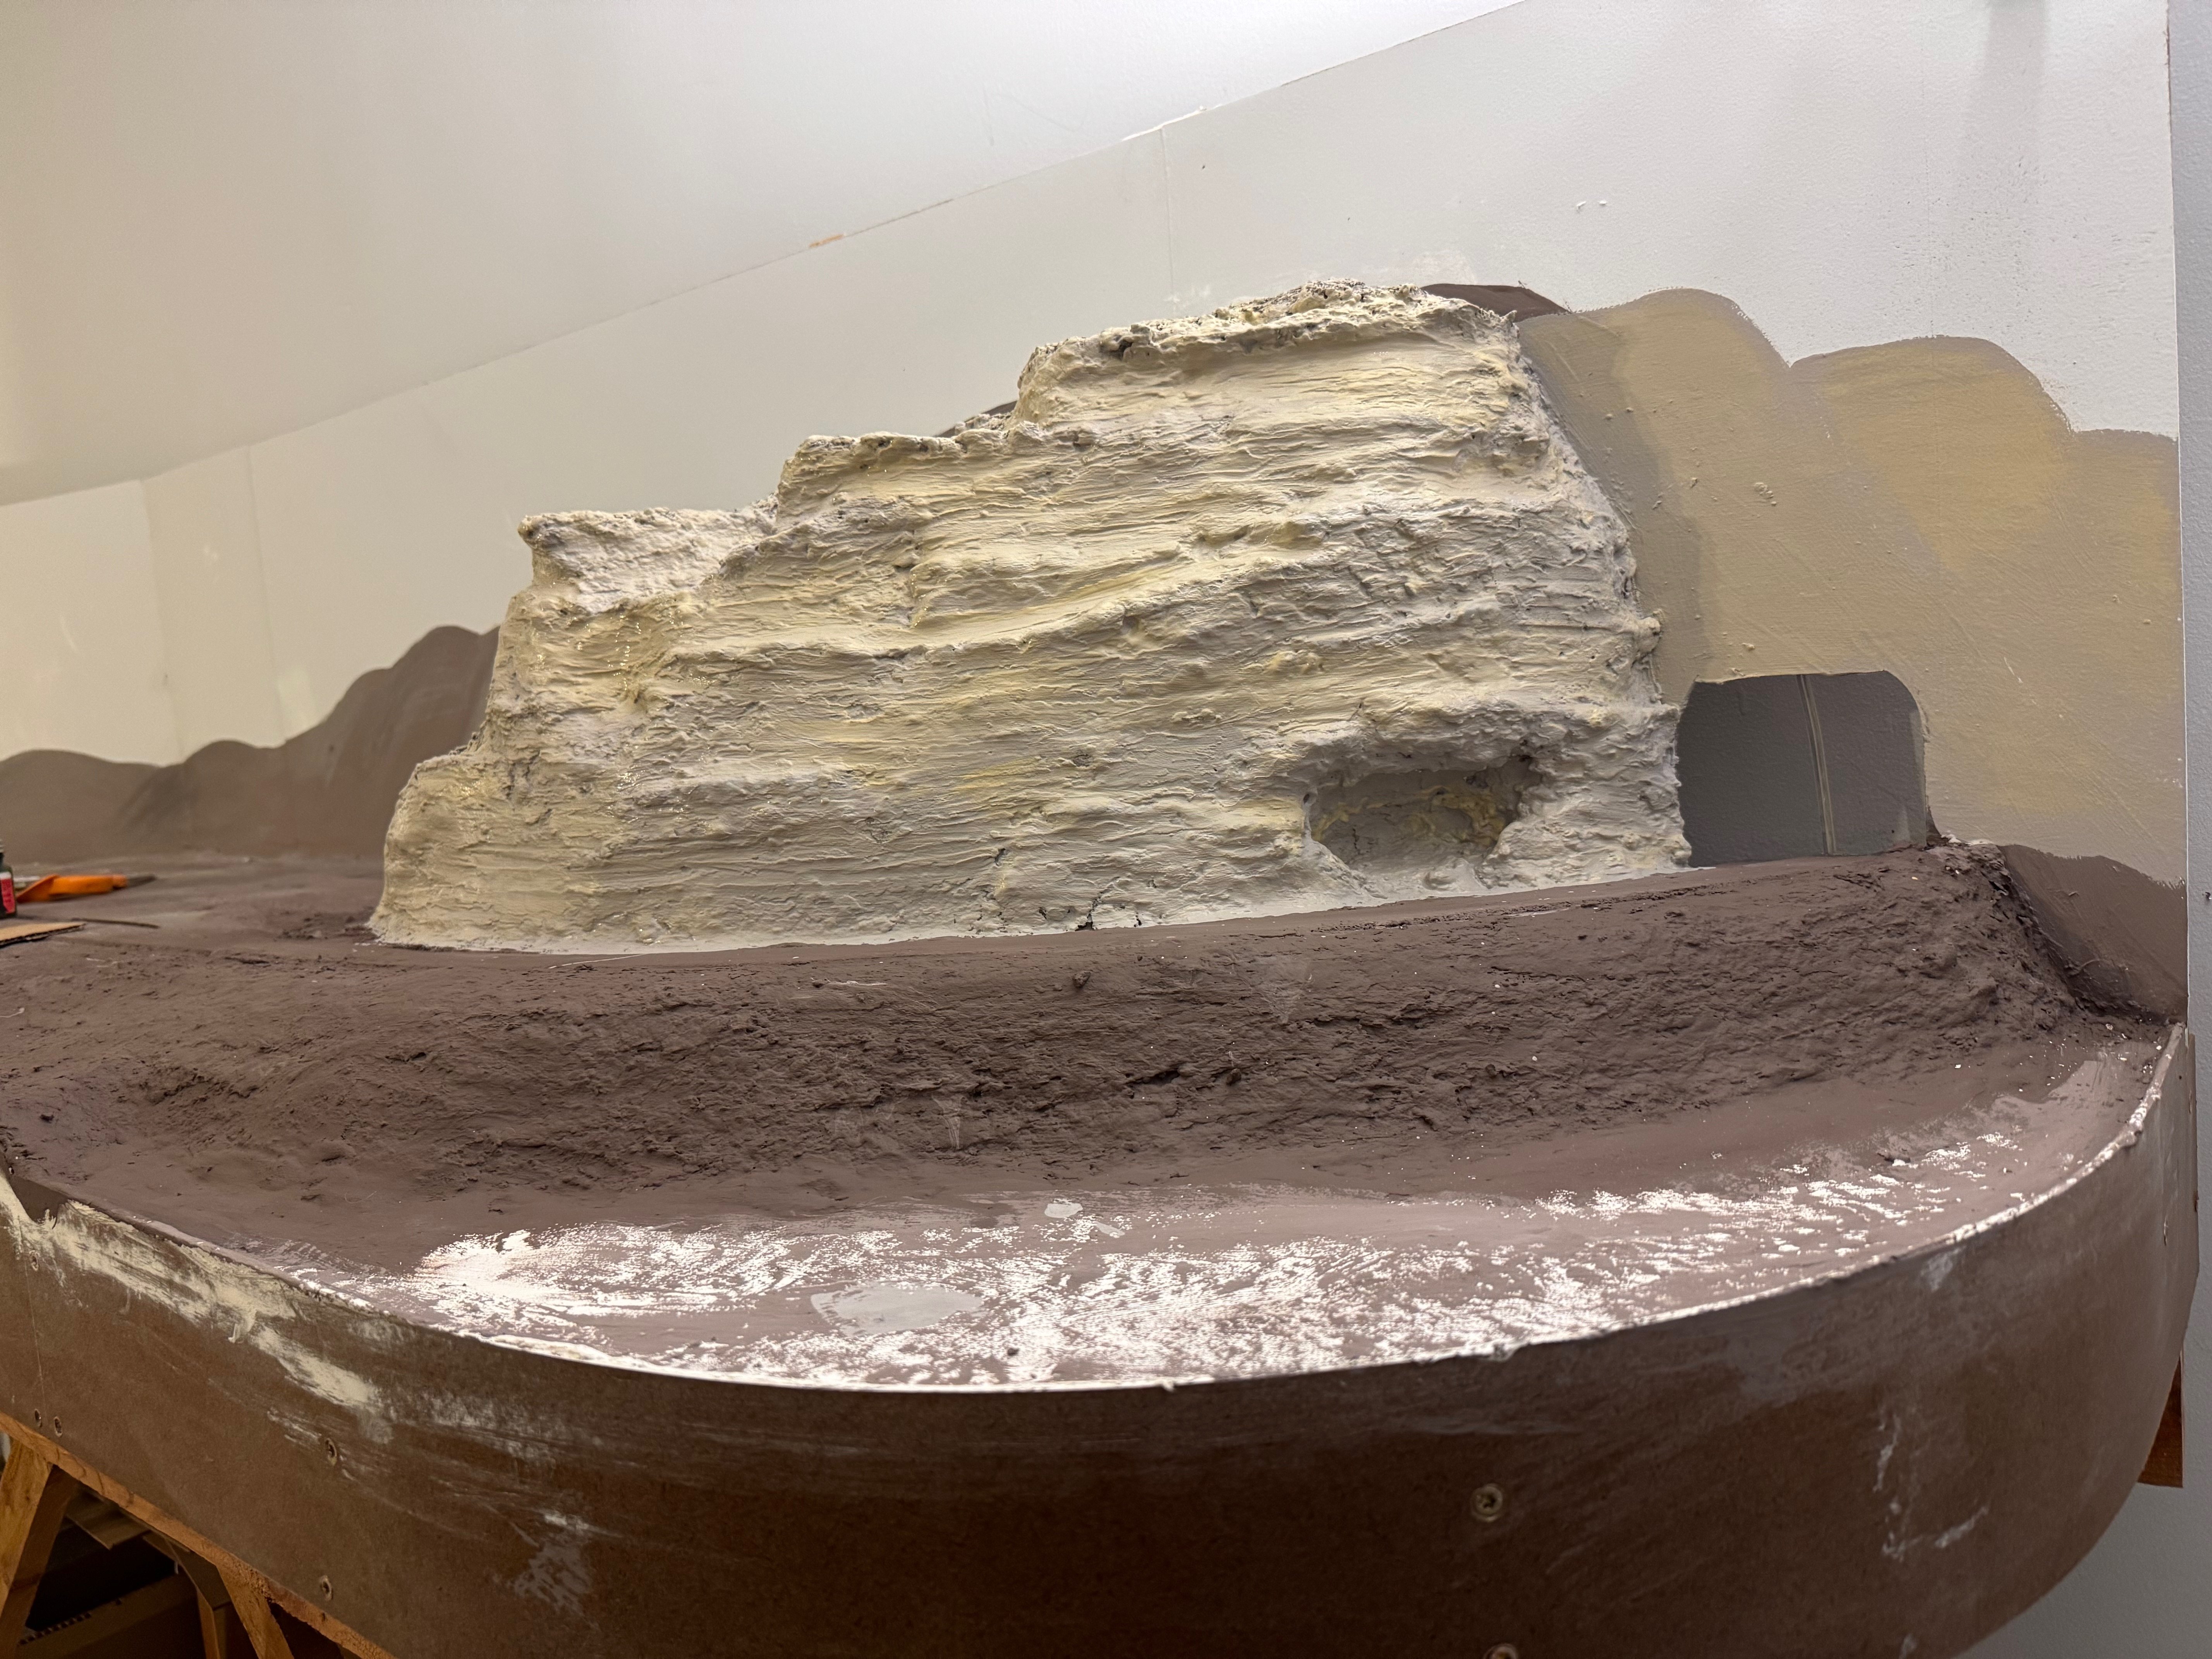
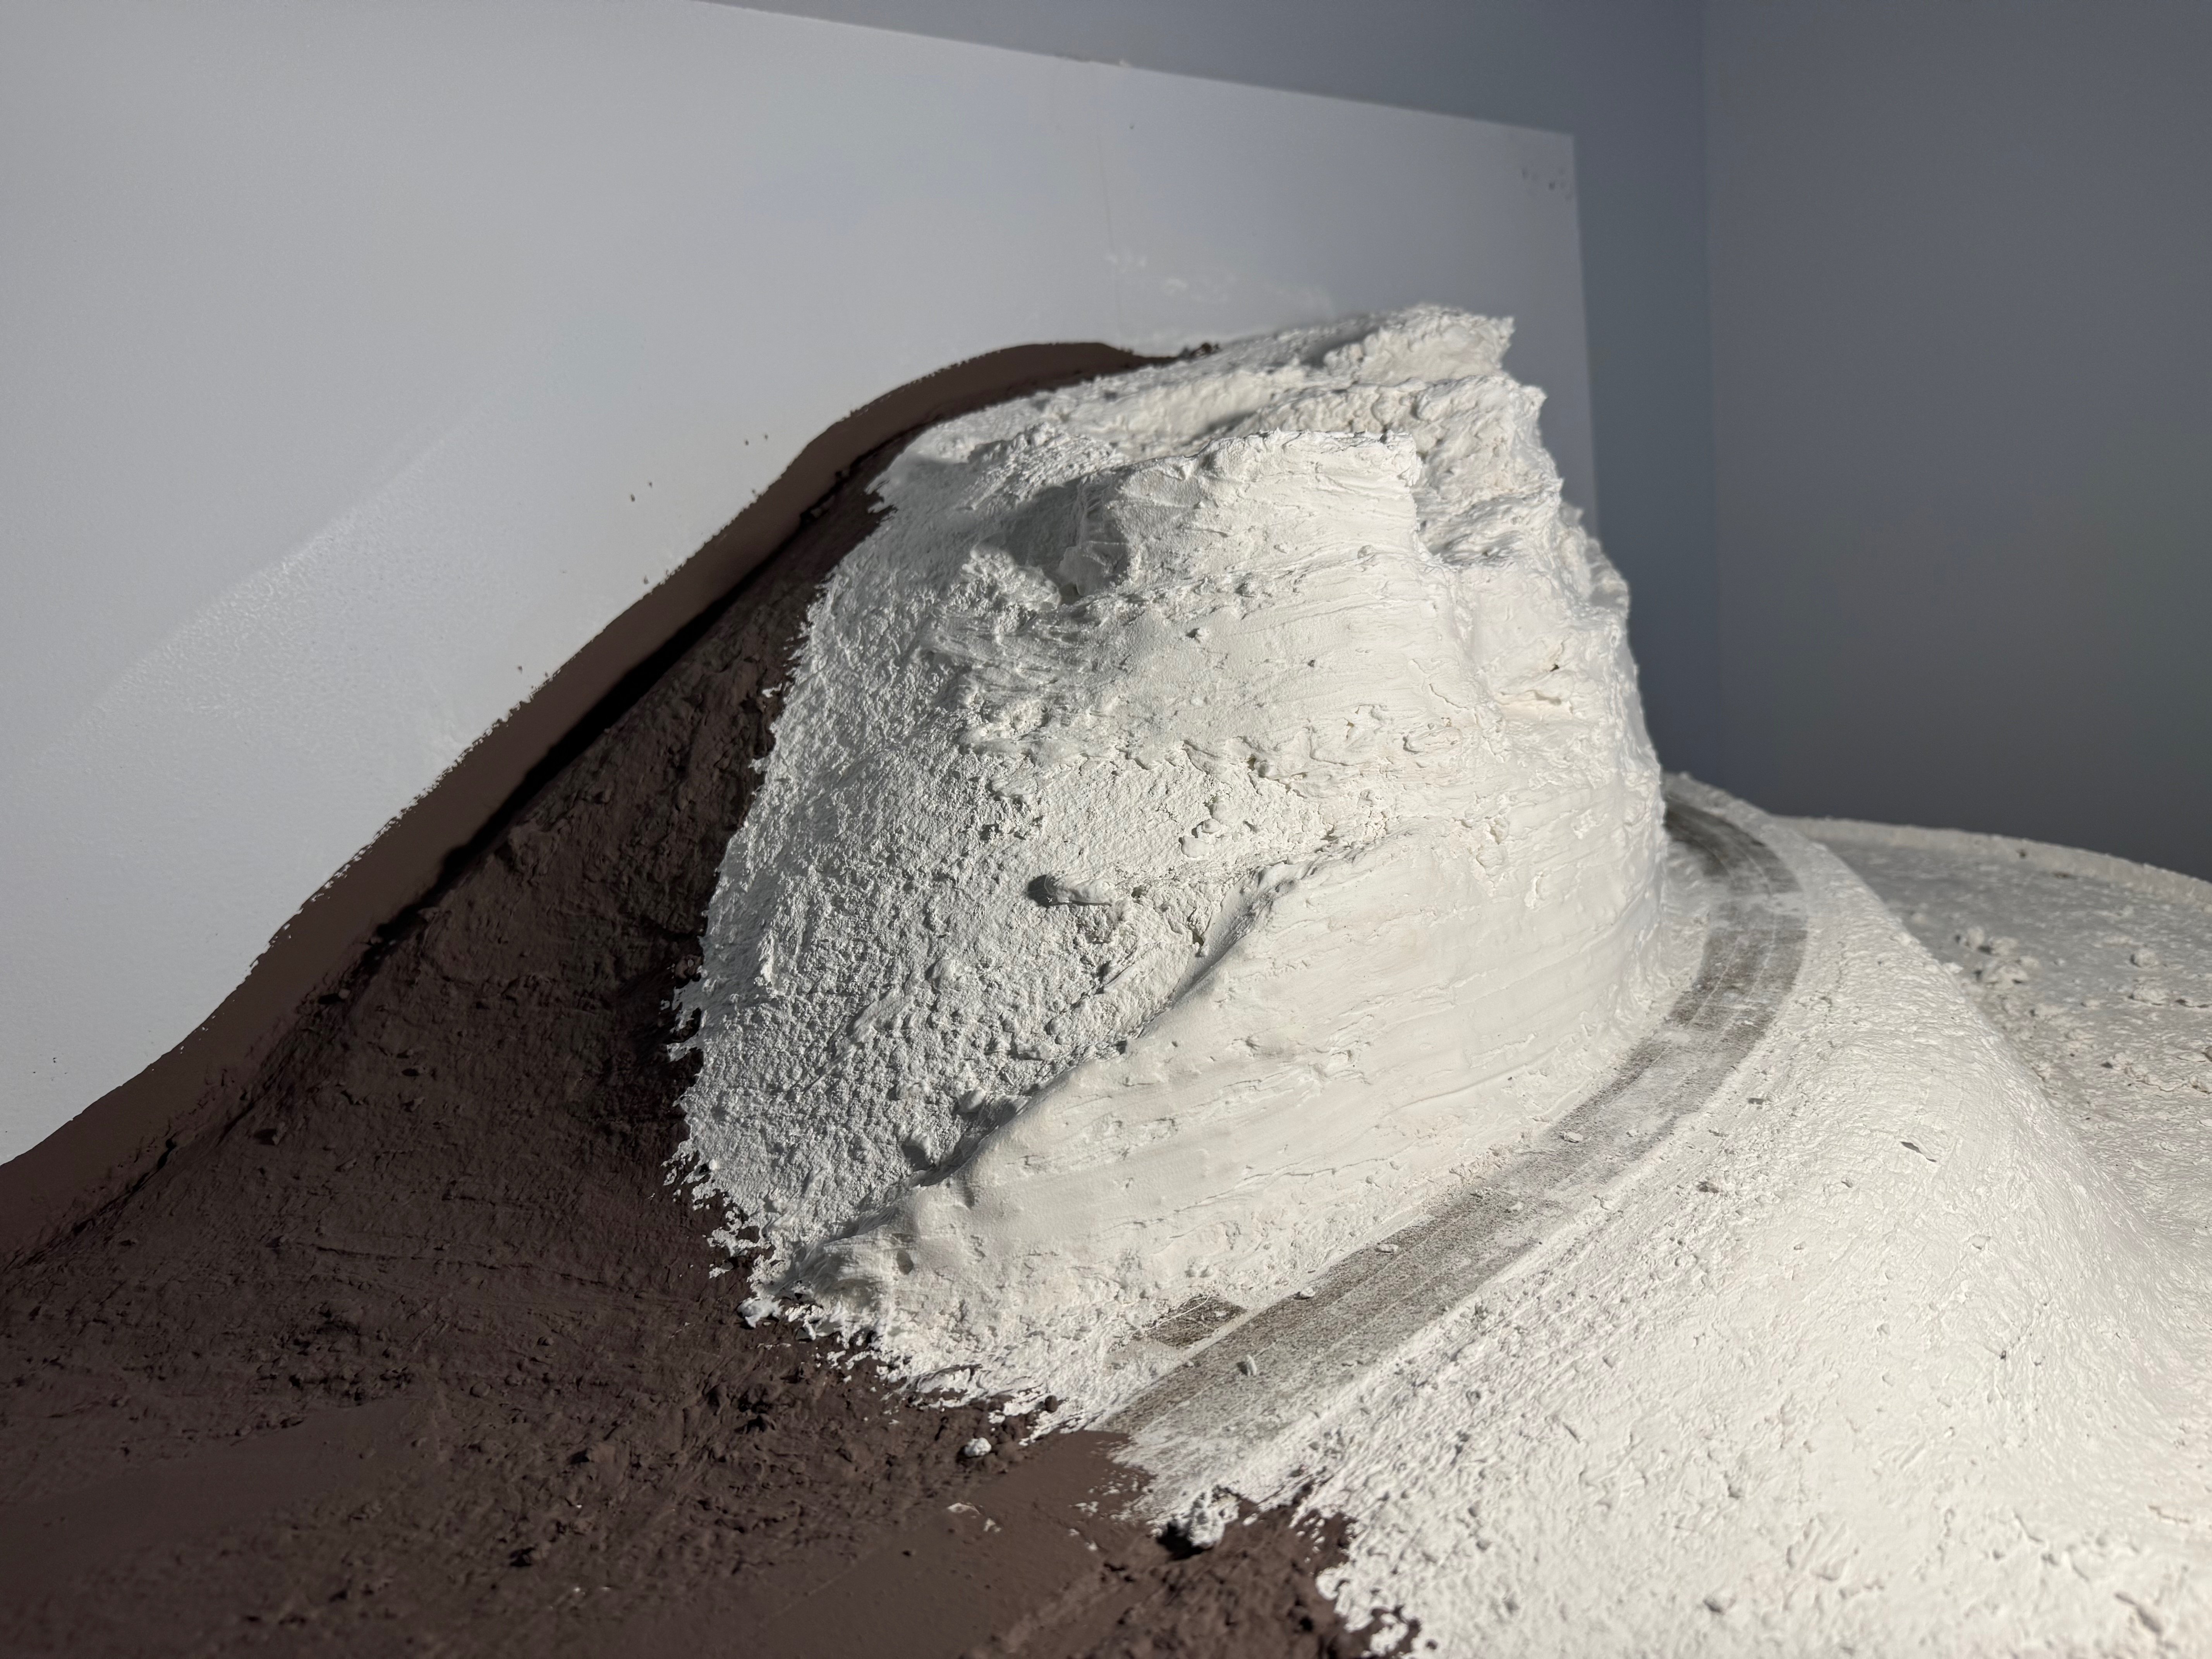
 So here's a low-angle 3D view of the landscape at Rocheport, looking north at roughly the same perspective the viewer of the layout has. This is taken from the US Geological Survey's National Map online map data server, something I use all the time in my day to day work. From left to right, you can follow the rail line through the tunnel at the nose of the left-hand ridge, across the bridge over Moniteau Creek, through the town of Rocheport on the flat riverbottoms between the two lines of hills, then back to the sheer bedrock bluffs along the Missouri River at far right. And the reason I share this, is that here is the current layout's version of that view: You can see that I've started painting the backdrop as well, giving rough shape to the line of hills framing the Moniteau Creek valley in the background and giving the scene some depth. Maybe this helps give some more geographic context to what I'm building here. If you're wondering, the bluffs on the right side are quite a bit shorter than the real thing; I simply don't have vertical space to build them to scale, and even if I did they'd probably look fake. This height uses the principle of selective compression, as does so much of model railroading, to give what I think is a proper sense of scale and proportion that "feels" right. Same for the horizontal compression of Rocheport, which has a far longer distance between the two bluffs than I can include here, but I've planned the town's layout to include enough signature features so that it'll "feel" right. Hope you enjoy these shots. I'm getting relatively close to being comfortable with the idea of actually laying tracks and being able to operate a train through here, which will be a very exciting development. Thanks, as always, for all the various expressions of interest and support!
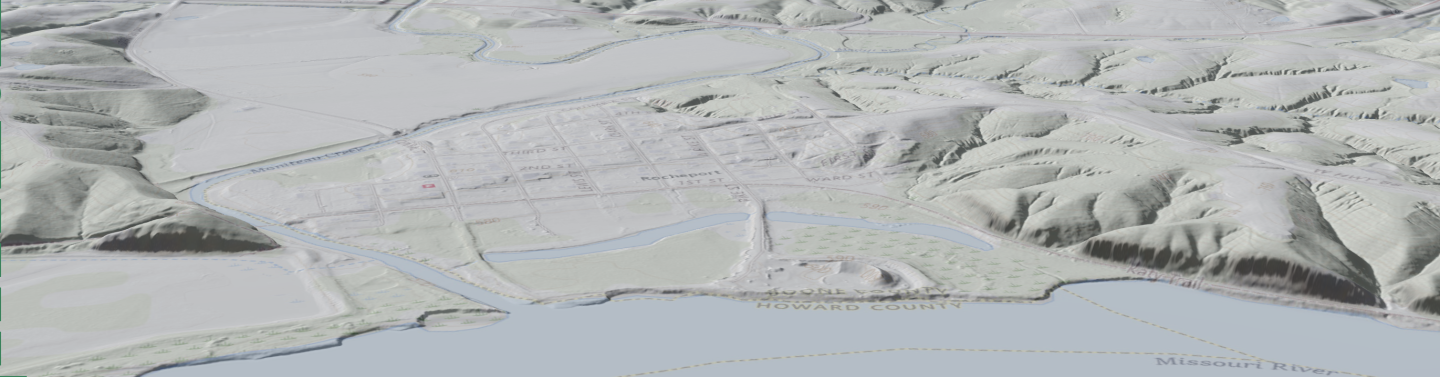

- 264 replies
-
- 12
-

-

-
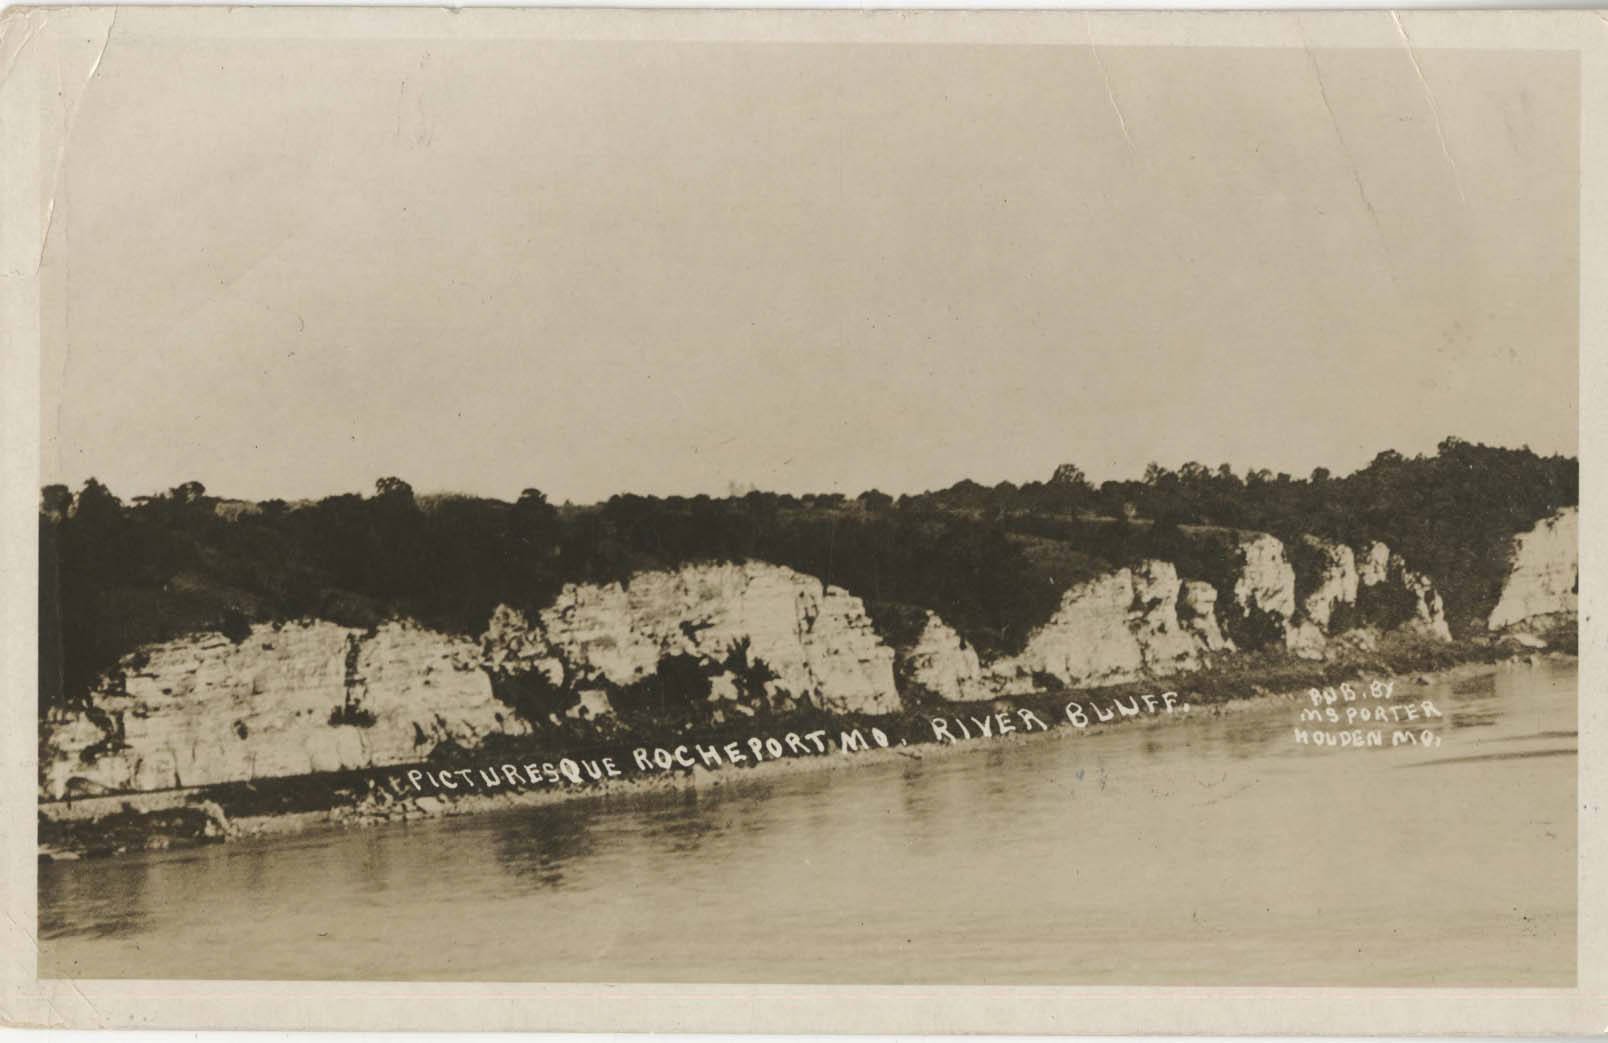
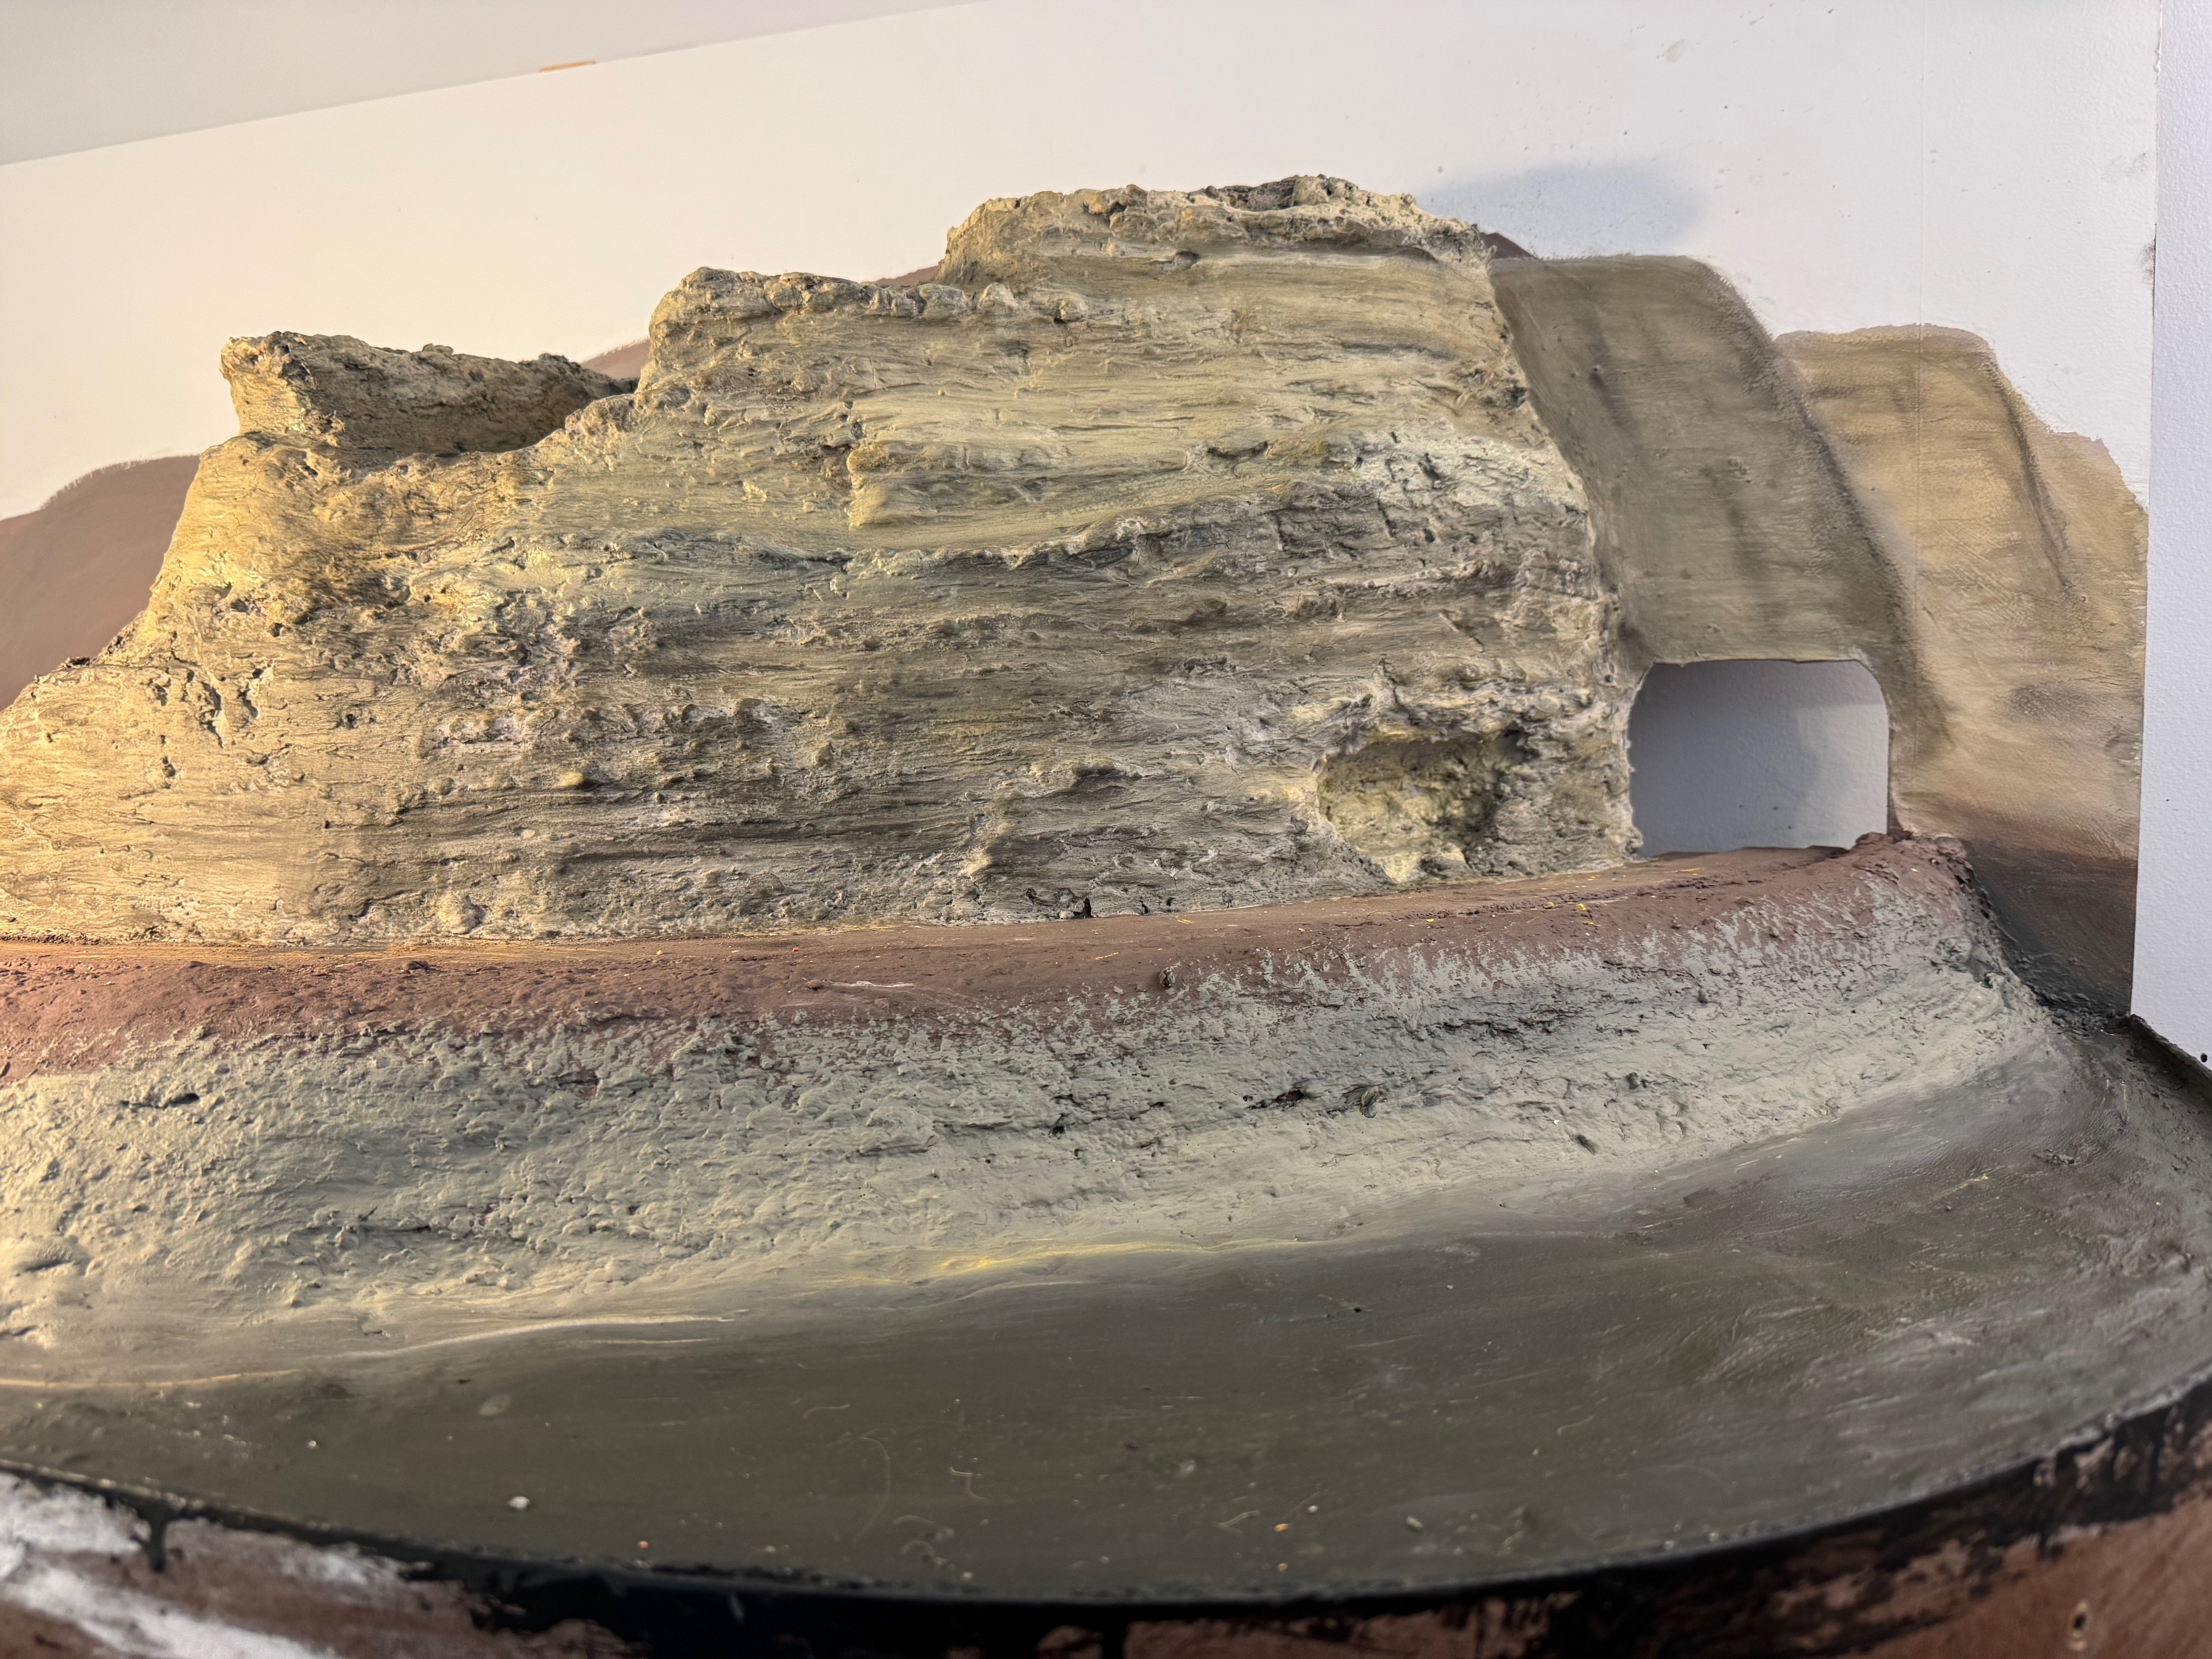
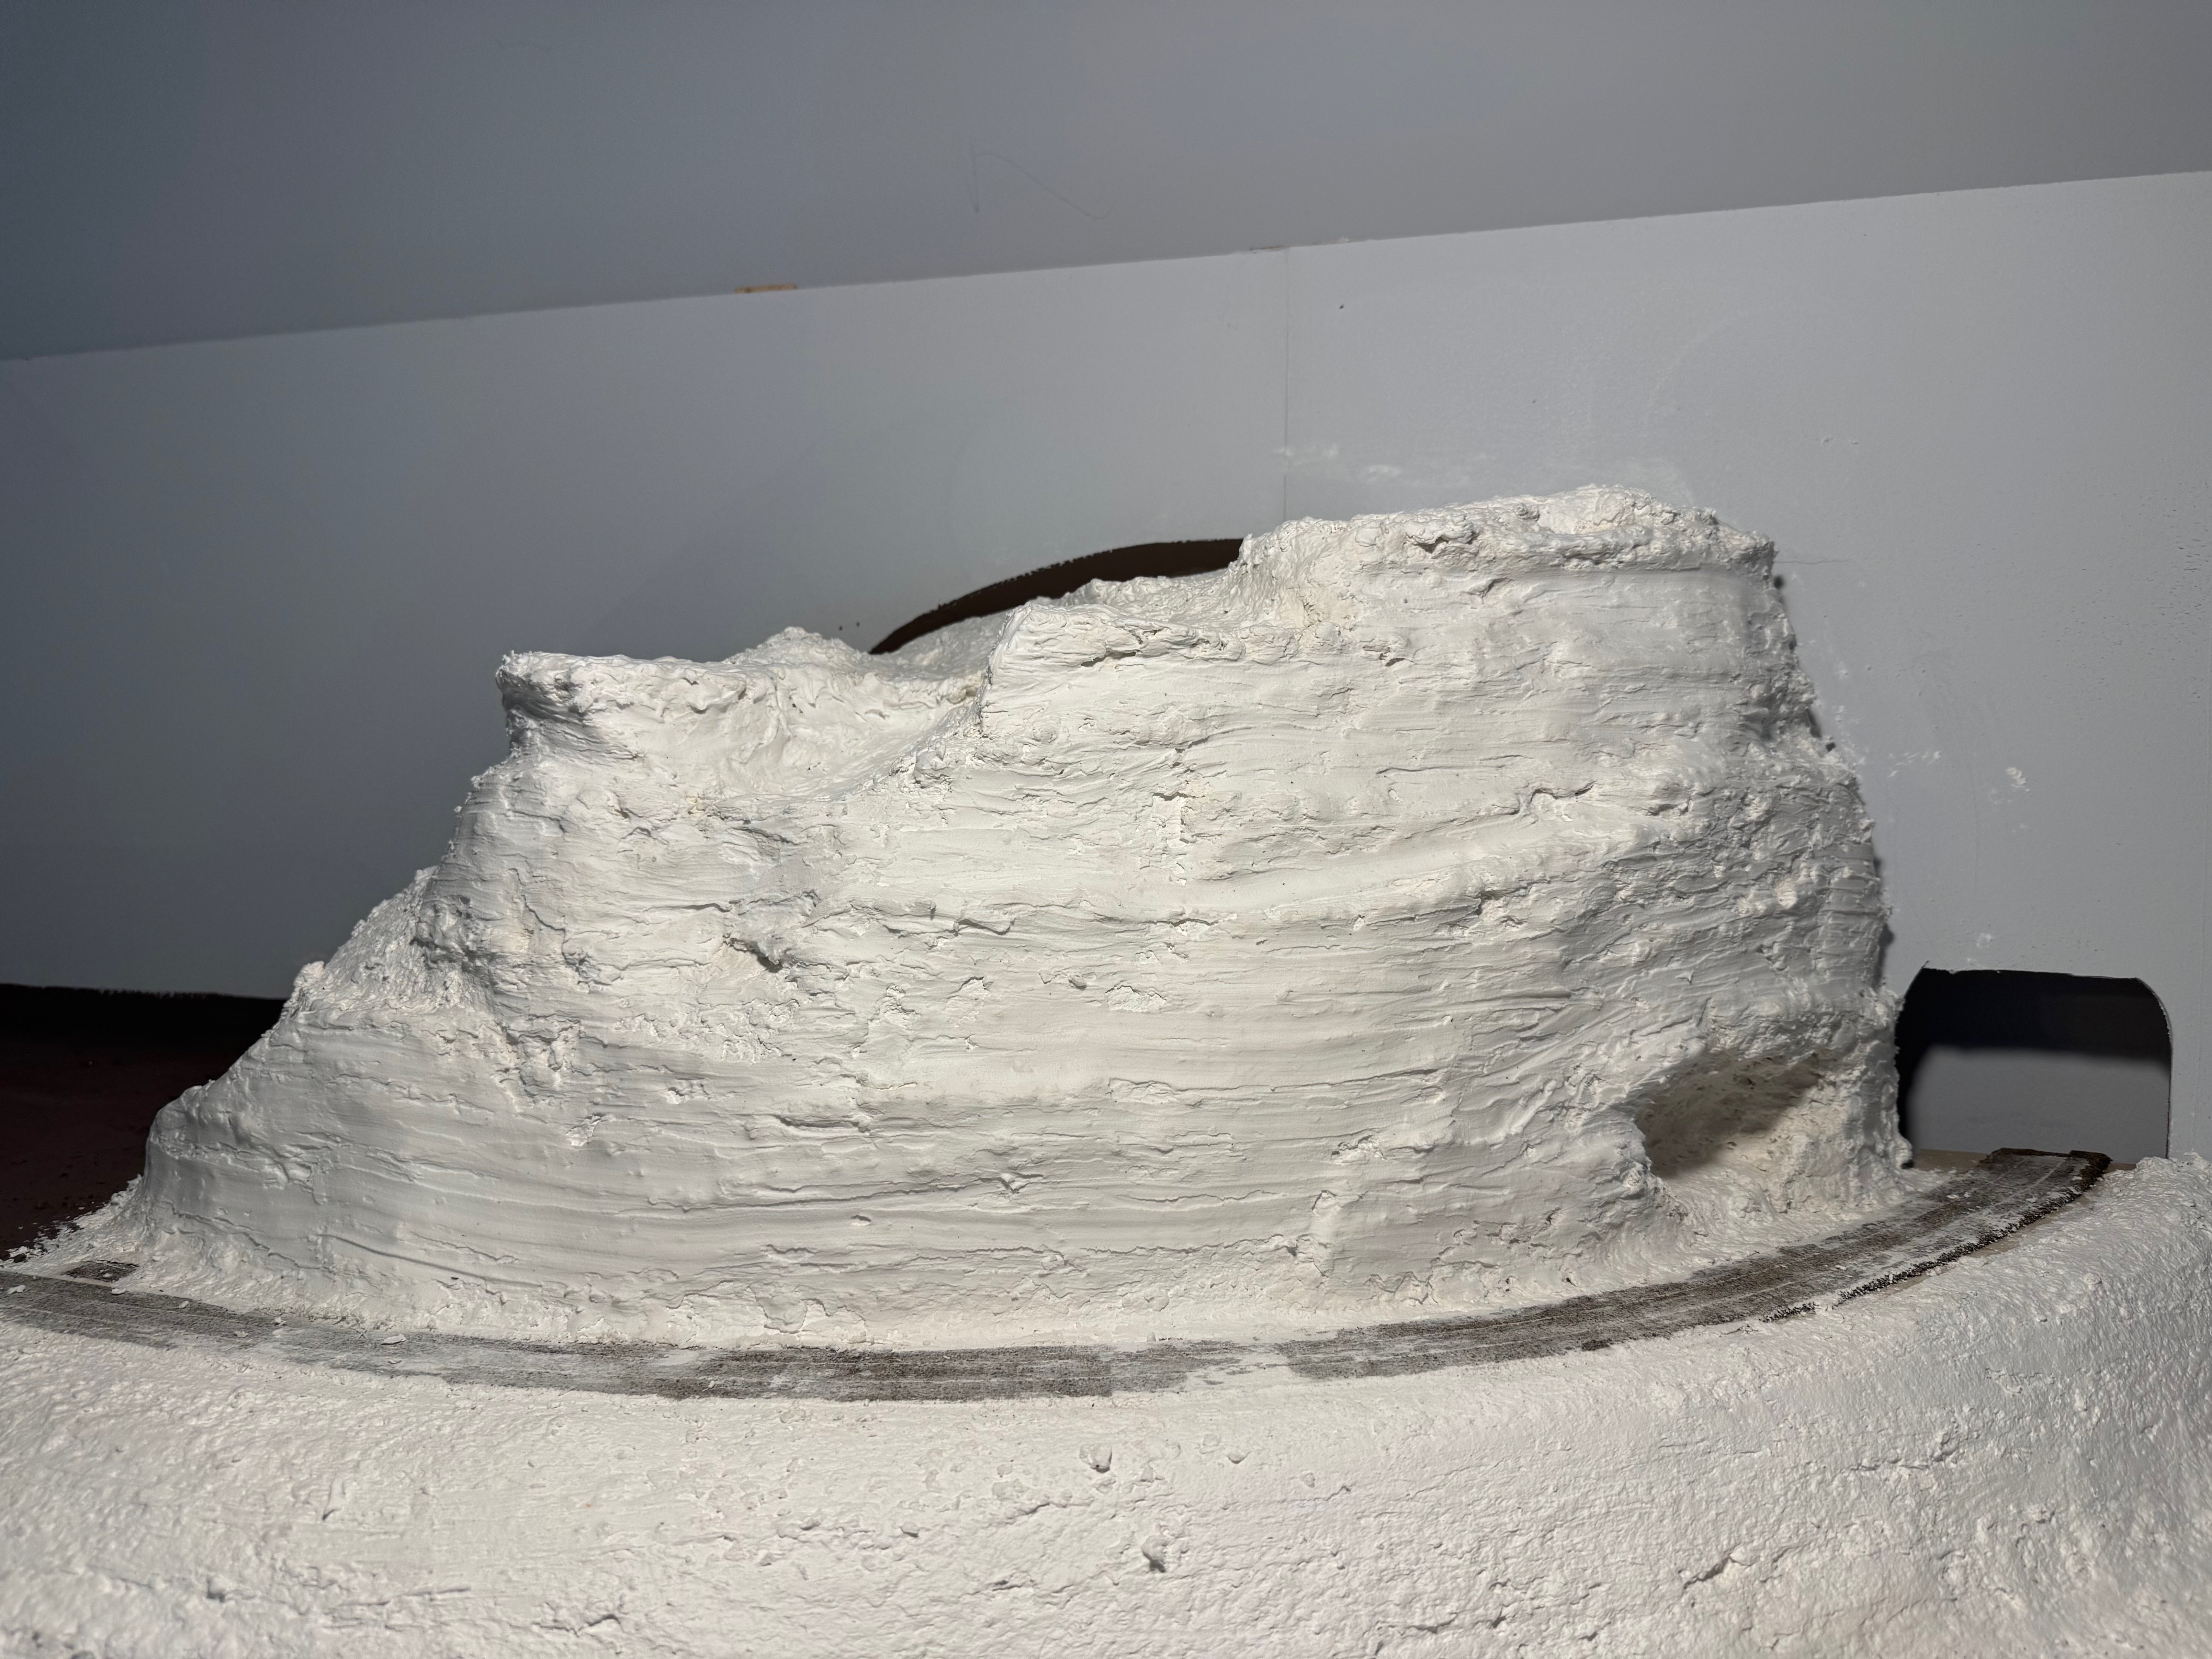
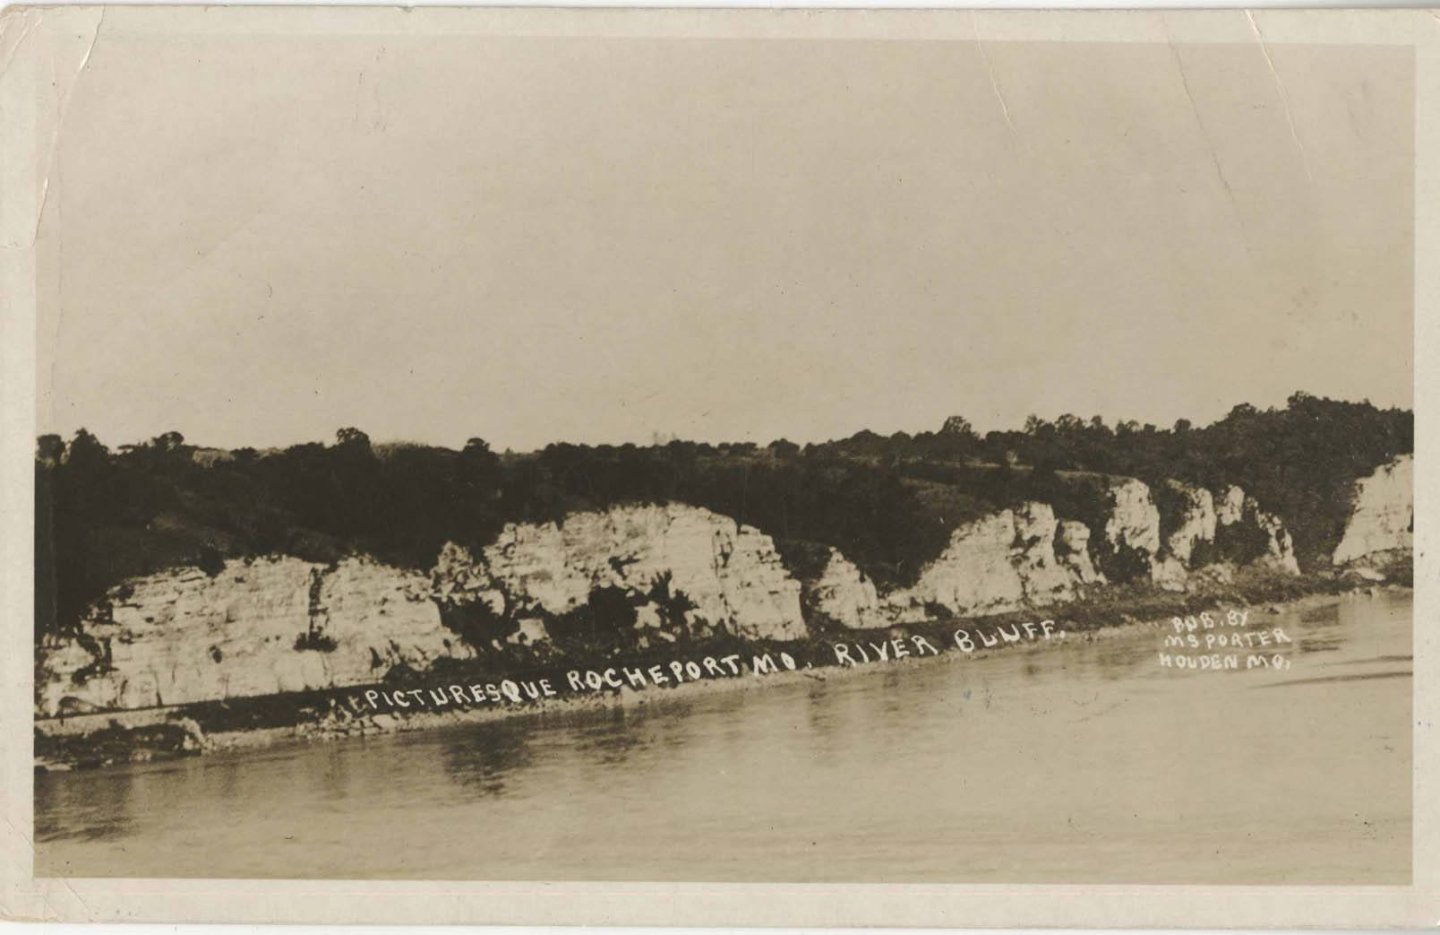
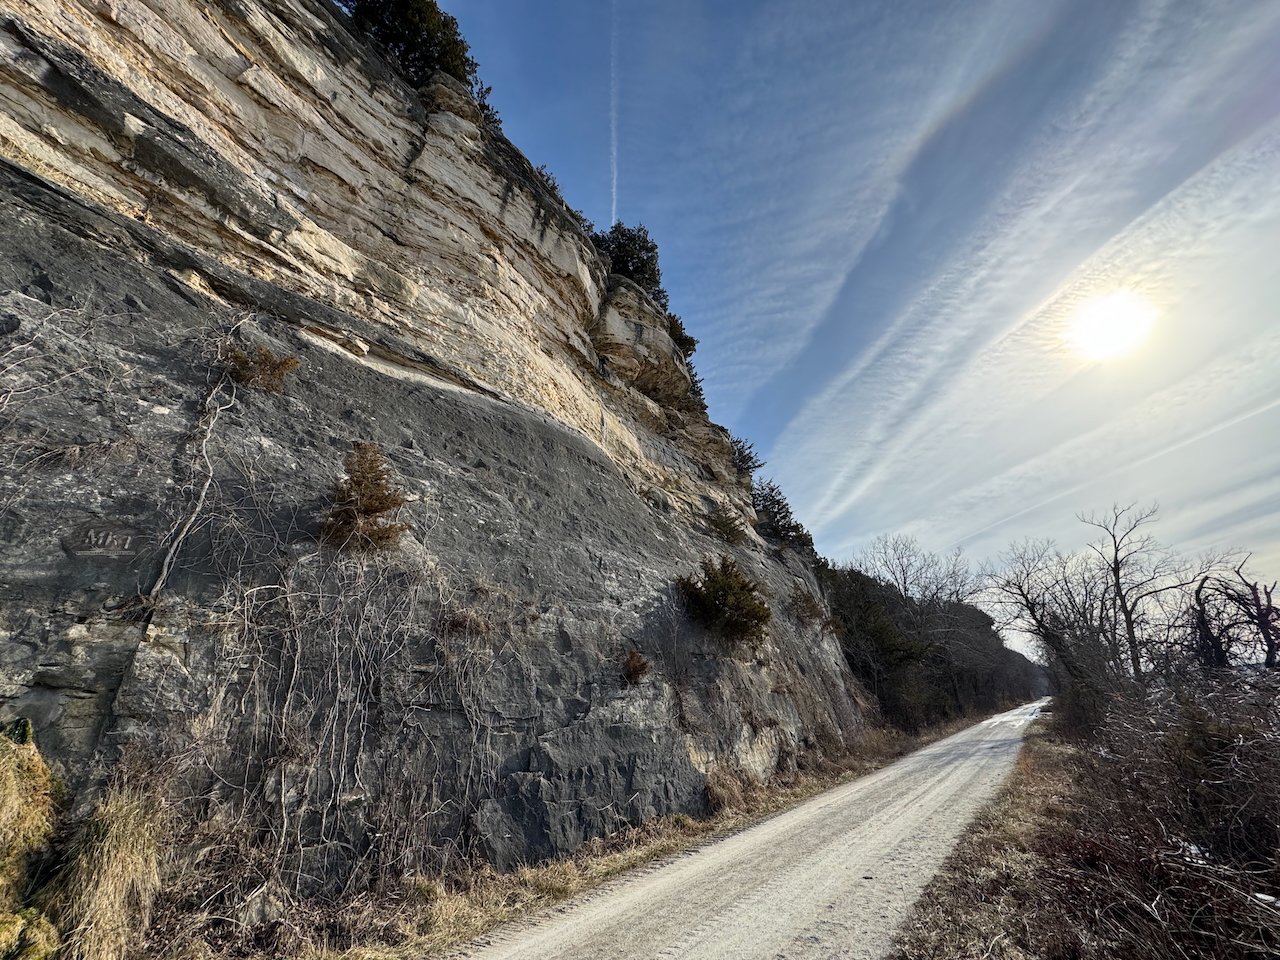
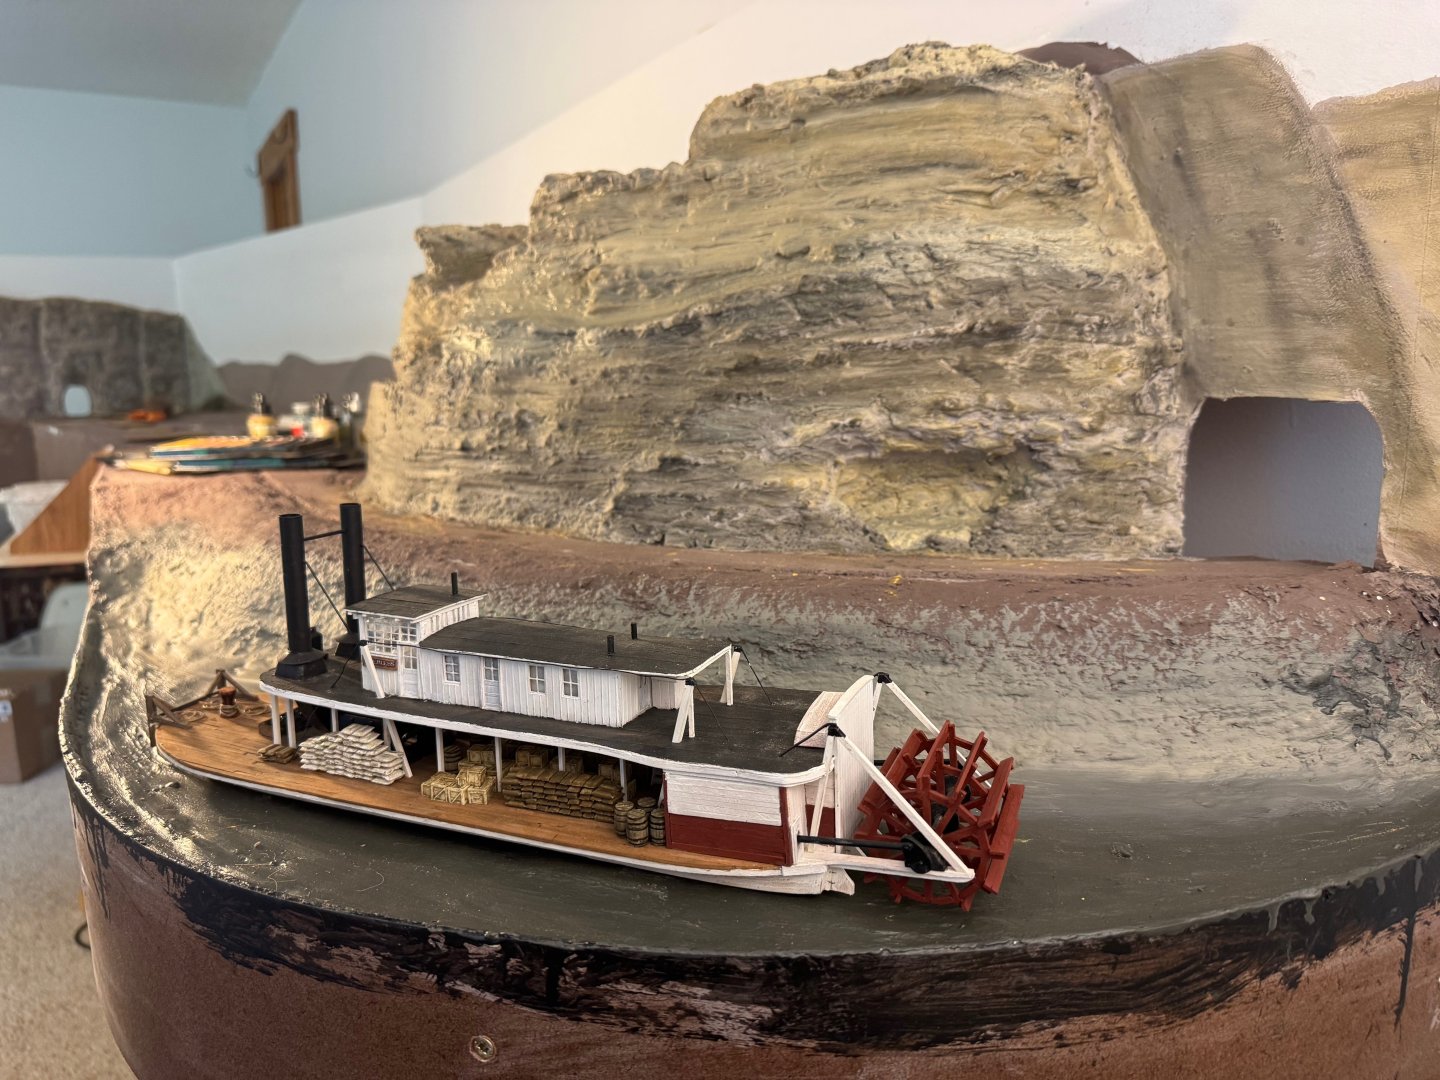
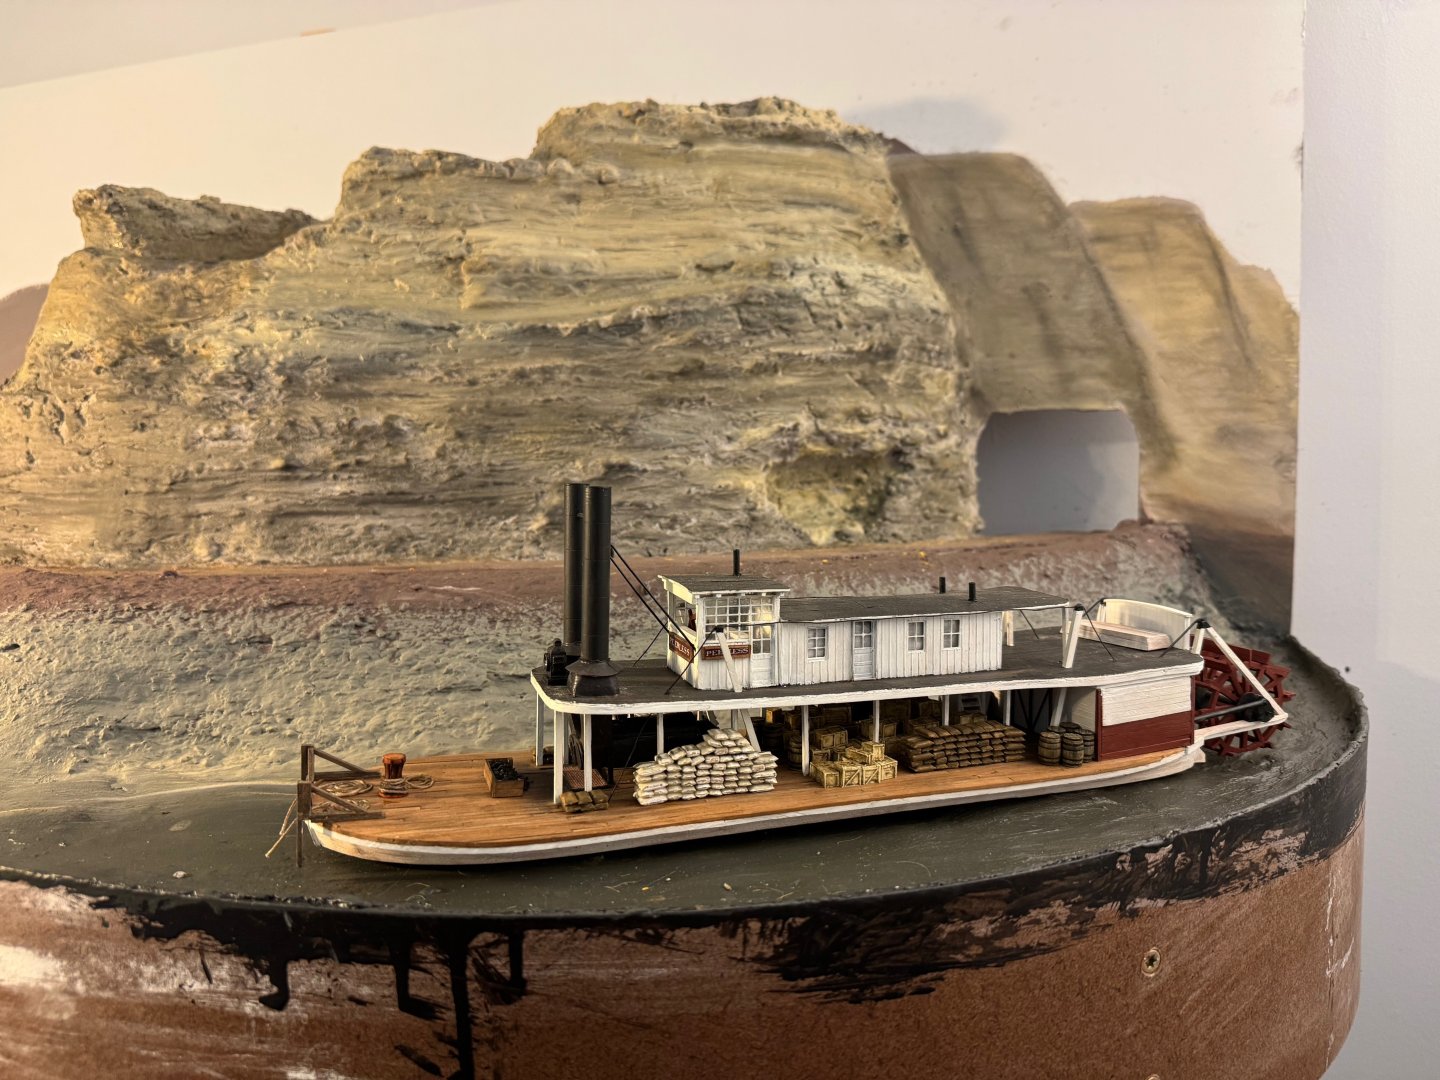
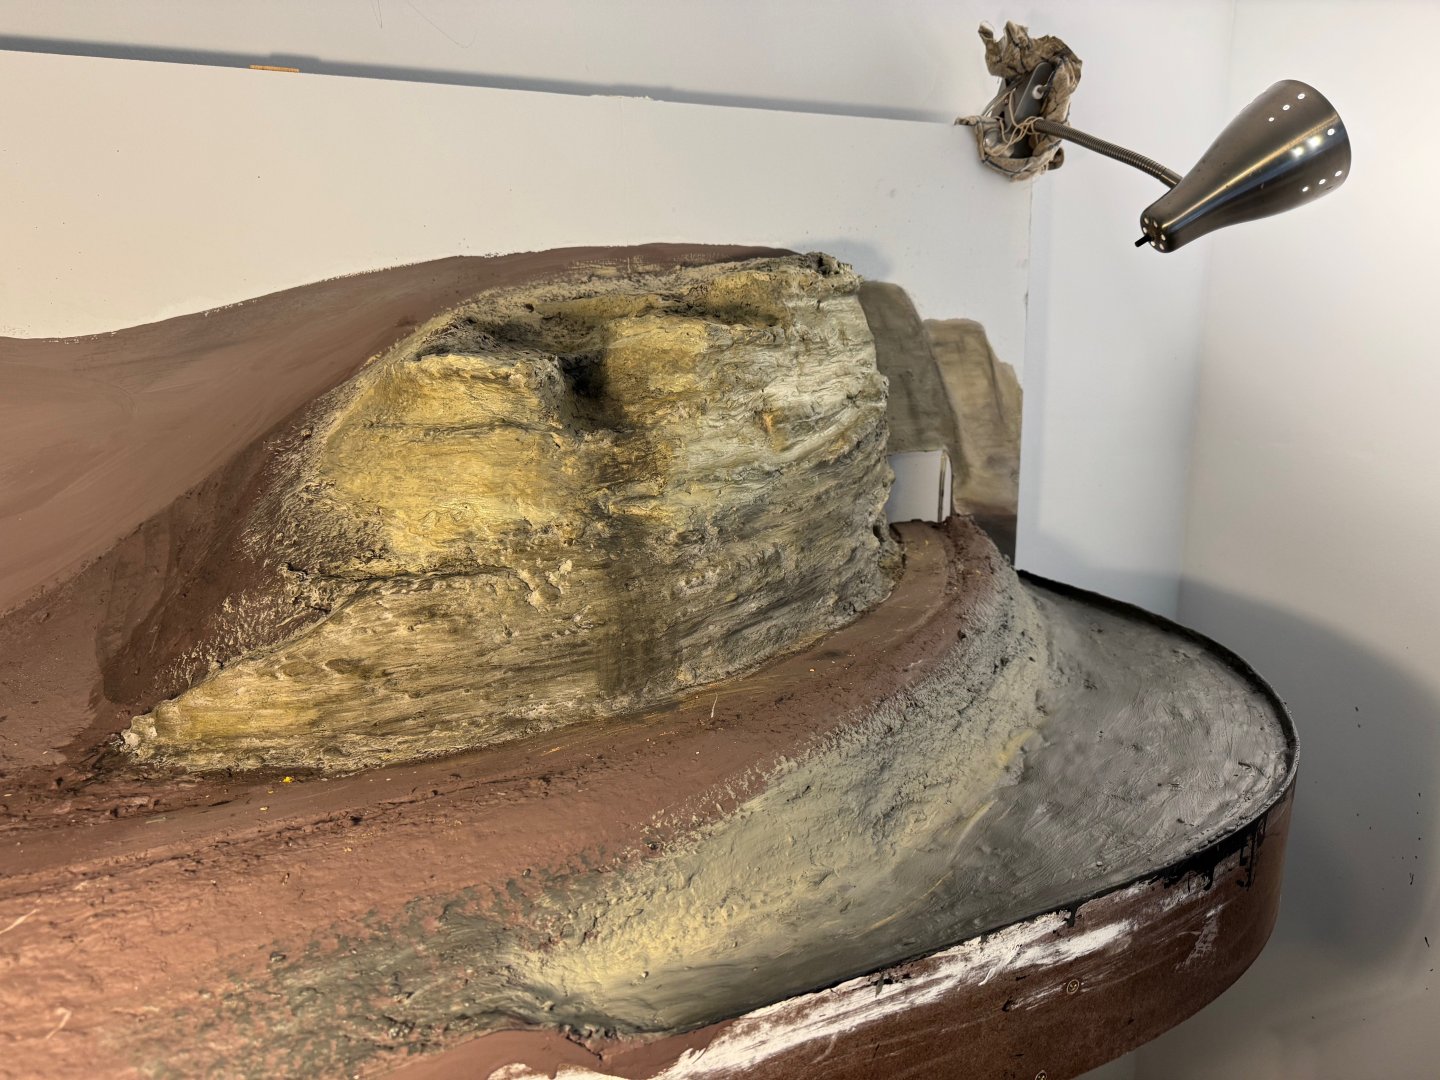
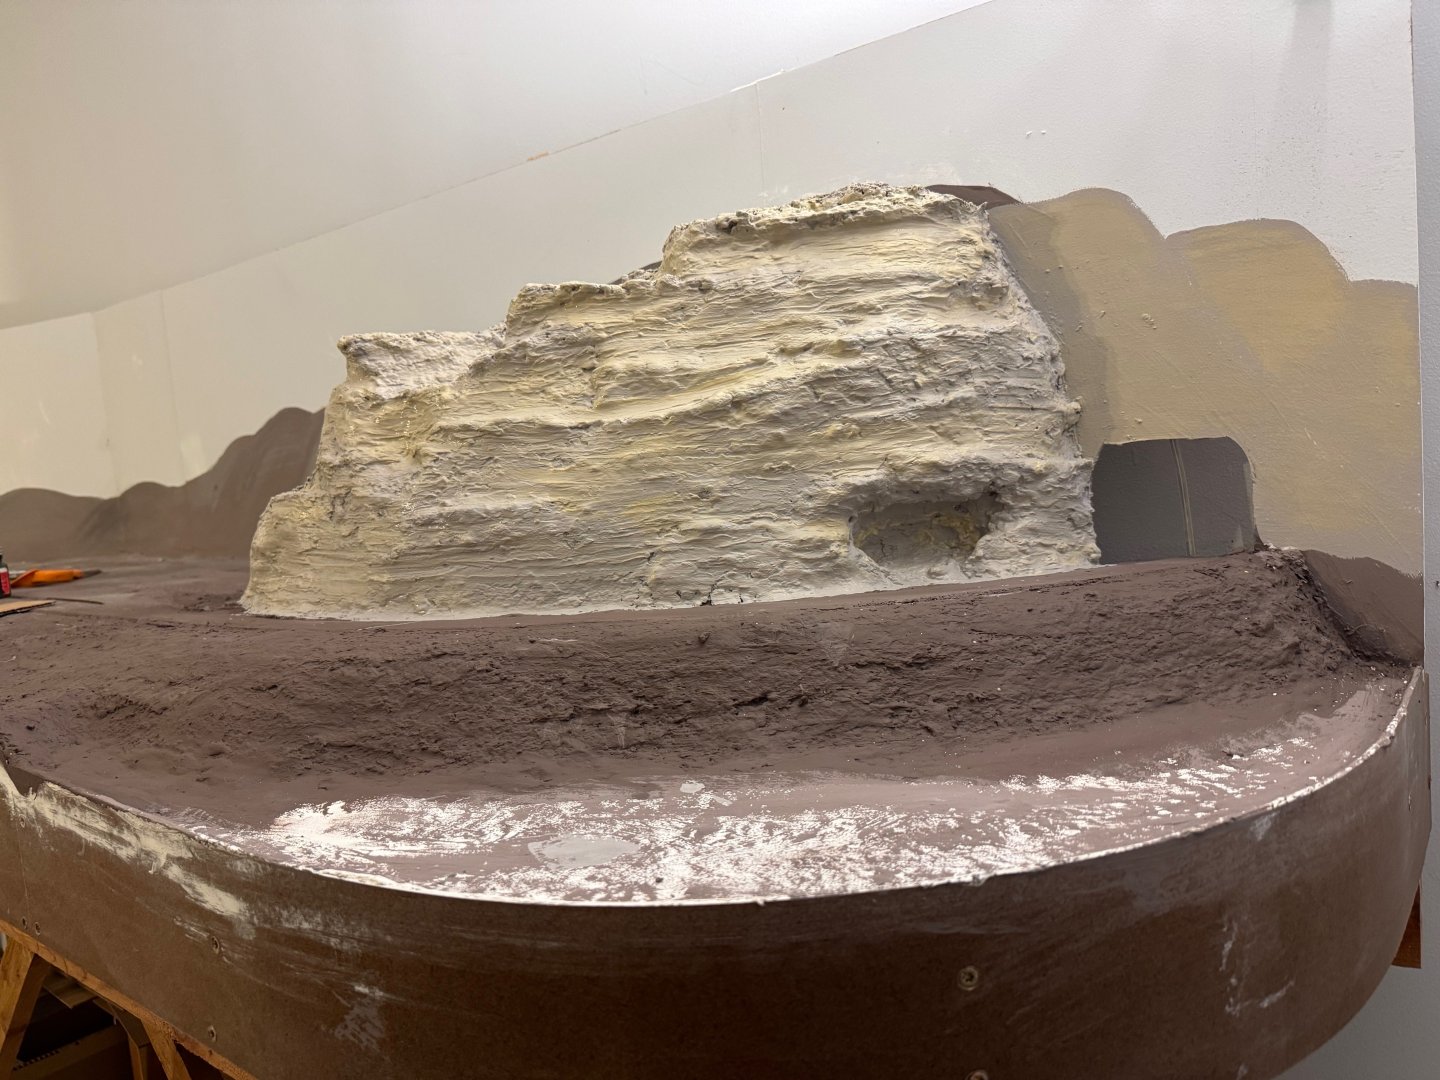
OK, here's a broader update covering the last week or so. I've been filling in the bluff line to the right with plaster and base color layers. Base plaster layer shaped into rock faces and outcrops: Early paint layers: Adding more color complexity: And since this is Model SHIP World, here's a reminder that this whole scene was inspired by Peerless operating on this stretch of the Missouri River. Right now this all still looks like Montana, not Missouri, in the absence of vegetation. But it's coming along. I'm not done with bluff coloration, I'm still planning to build up more color complexity and texture, as on the tunnel bluff. Here's a reference shot as a reminder: And a historical reminder: In the next post I'll share an interesting broader view.


- 264 replies
-
- 11
-
-
Welcome back! Those shots of crowded boats are fun.
-
It honestly looks like something a model railroad company would invent as an overly quirky layout detail.
- 457 replies
-
- 5
-

-
-
- sternwheeler
- Hard Coal Navy
- (and 1 more)
-
As we've discussed privately, I have some personal history along this part of the Susquehanna and am very excited to see this build come to life!
- 457 replies
-
- 2
-

-
-
- sternwheeler
- Hard Coal Navy
- (and 1 more)
-
I will need to dredge up more superlatives for this one. You've done such an amazing job of taking a really unique, interesting prototype and making it into something even more unique and interesting. I feel like I can review these photos over and over again, still finding new details to enjoy. This log has added a lot of joy to my life and I thank you for all of it.
- 732 replies
-
- 4
-
-
-
- Lula
- sternwheeler
- (and 1 more)
-
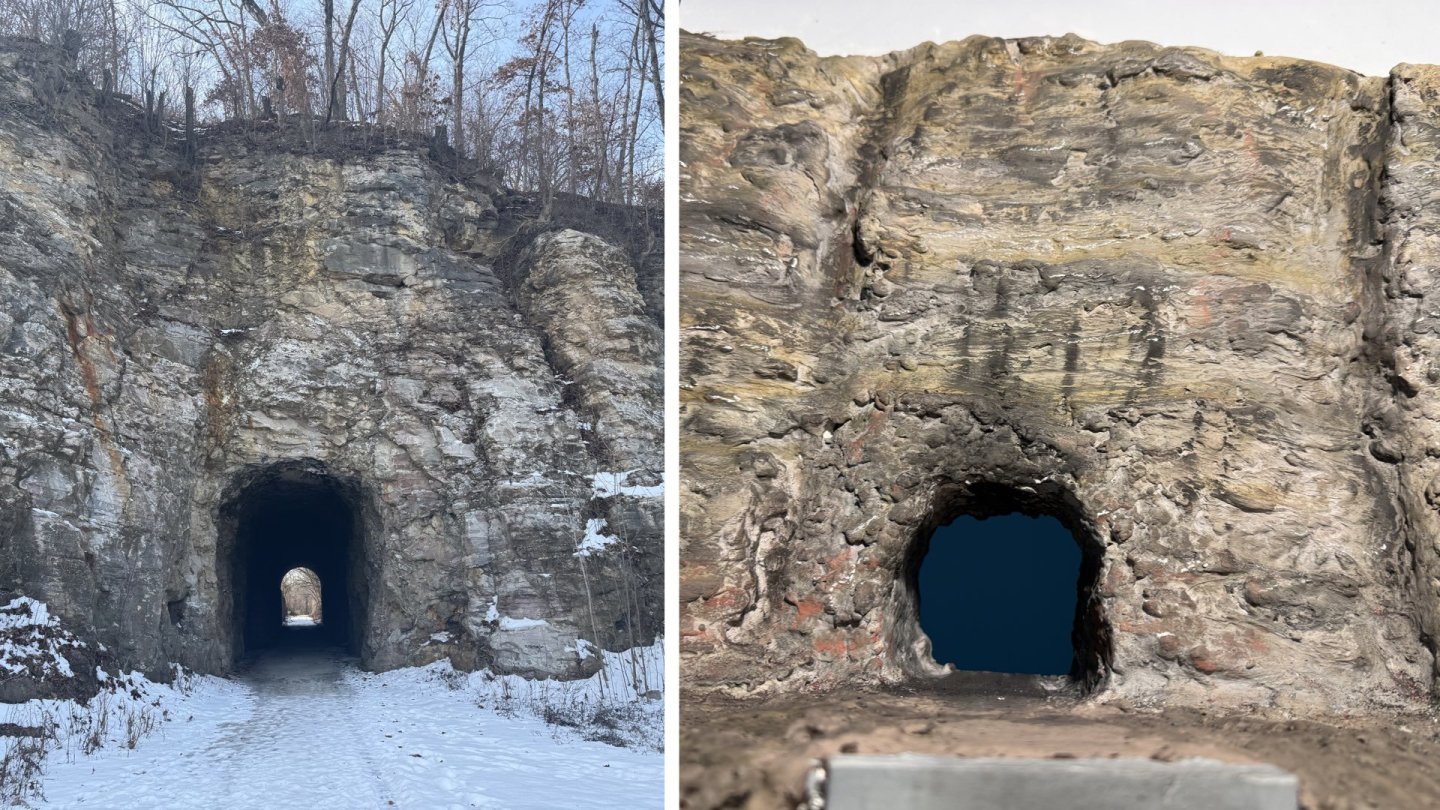
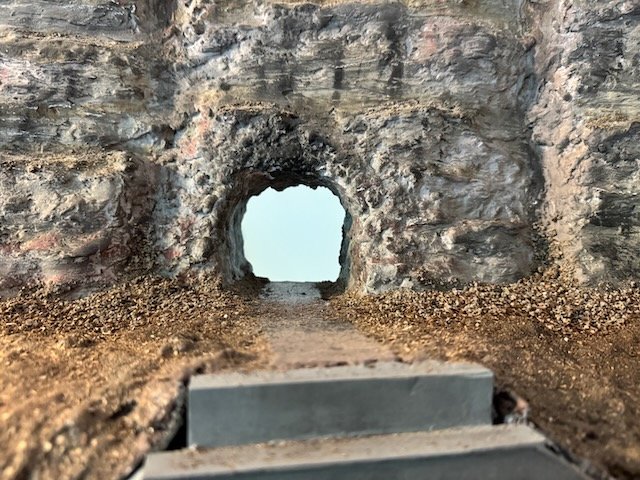
Less mineshaft, more tunnel.
-
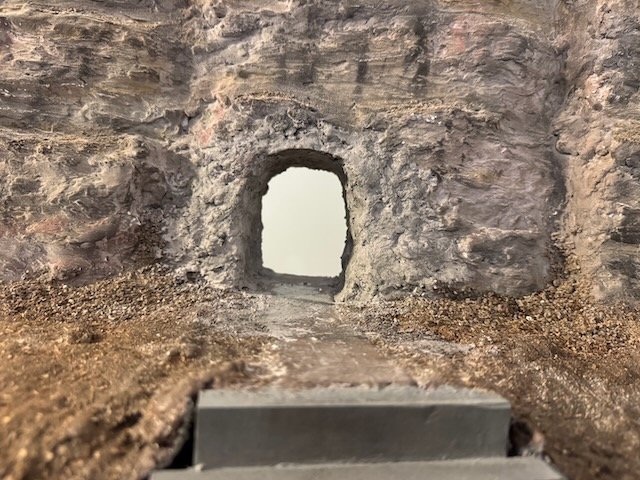
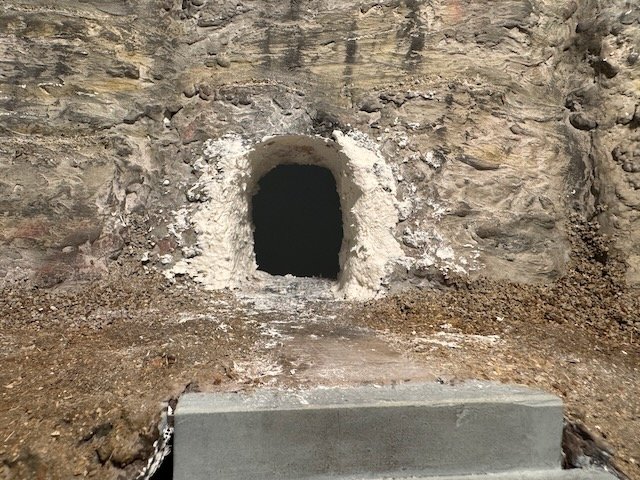
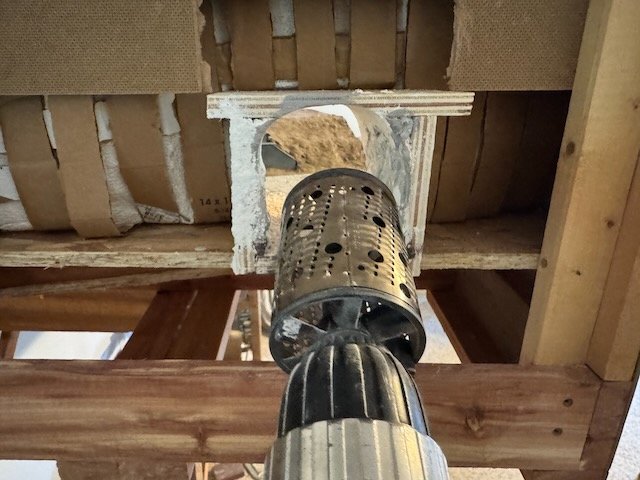
I've made broader progress that I'm not quite ready to write up yet, but here's a narrower update on a minor upgrade. The shape of the tunnel has been bugging me; it seems too squat. It wasn't really obvious to me until I'd finished the bluff, but now I can't un-see it. I think you can see what I mean in the paired photo below. The real one is significantly rectangular; mine is nearly square. Bugs me. So I decided to renovate it. This meant raising the ceiling and narrowing the sides. Starting point: I used a woodworking tool I had in a drawer, a rotary rasp that chucks into a power drill. It's meant for rough shaping of wood, but boy is it perfect for boring out a tunnel. Then I filled in the sides with some new plaster. Gave it a fresh base coat of paint: And weathered it down: That's much better. The beauty of this is that I'm modeling the period not long after this tunnel was freshly blasted. So it's actually perfect to have the area right around the portal look a little disrupted and different from the rest of the rock. I didn't weather it quite as much, leaving the color a little fresher. I'm pretty pleased with how this came out. Just shows it's worth going back and reassessing your work now and then. I've also been working on the longer bluff line on the other end of town, along the river, but am not quite ready to share that progress yet. Thanks for the fun discussions above, and for all your interest!


- 264 replies
-
- 15
-
-
-
I'm enjoying the thought and creativity you're putting into this build. Making a build your own is what makes it not "yet another Endurance"!
-
This model is simply a cat-alogue of excellent work. Littered with interesting features, and the hull has lovely fe-lines. One might even say purr-fect.
- 732 replies
-
- 7
-
-
-
-
- Lula
- sternwheeler
- (and 1 more)
-
That's looking really nice.
-
That wide rail seems like a necessary piece of infrastructure enabling the stable placement of adult beverages as needed.
- 732 replies
-
- 4
-
-
- Lula
- sternwheeler
- (and 1 more)
-
Not something I'm very experienced in, but as no one else has answered...I've seen a couple different approaches used. Some folks shape their masts from square stock, which lets them produce both rounded and other forms on the same piece (much like the real process). You could certainly build it up as well.
-
I managed to overlook this update somehow, but a belated congratulations on finishing. You've done a nice job bringing this kit to life and it's a lovely gift for your friend.
- 56 replies
-
- 2
-
-
-
- Lindberg
- sternwheeler
- (and 1 more)
-
As you can tell from my username and photo, I heartily approve of this addition to the crew.
- 732 replies
-
- 6
-
-
-
- Lula
- sternwheeler
- (and 1 more)
-
Kurt, do you agree with my assessment above? You're the true expert here, you and Roger, and I'm happy to be corrected if I misstated something.
- 732 replies
-
- 3
-
-
- Lula
- sternwheeler
- (and 1 more)
-
Thanks for sharing those great photos! You've done a nice job on your scenery. Do keep in mind that I'm modeling late fall / early winter, so a lot of the standard foliage products won't work for me. I also prefer to minimize the use of artificial stuff, though I'll certainly be using some. One of the reasons I'm focusing on this season is that it lets me use a much higher percentage of natural materials. But, for example, I intend to use some purchased static grass to help simulate the winter grasses so distinctive in this part of the world. There will be plenty of fallen limbs/timber, especially along and in the creek. But on the other hand, keep in mind that this was the era when trees were at a minimum, so to speak, given the local demands for timber and firewood. Check out the historical photos posted earlier in the thread; the landscape was a lot more open than the lush regrowth people take for granted today. One of my interesting challenges will be balancing a historically accurate level of vegetation with an easily believed/accepted look, because modeling this truly accurately would make many modern viewers think it was farther west in, say, Montana, because they associate modern Missouri with lush (almost overwhelming) vegetation rather than the sparser "frontier" look it had around 1900.
-
Keith, most of those appear to be steel-hull vessels. For one thing, the super-long hulls and short stacks imply they're late-era vessels that are more likely to overlap with early metal hulls. #1 is, as you suggest, a harbor vessel and not representative. #2 is the Monongehela, a steel-hull built in 1927 (https://www.waterwaysjournal.net/2021/01/24/the-towboat-monongahela/) #3 I can't identify but looks like a lake steamer design, and a post-1900 one at that given the more modern davits and lifeboats as well as the thin metal paddlewheel, so very well may be a steel hull. Even if not, if she's a lake steamer, she can have a heavier, more rigid hull than a riverboat so may have more muted support structures above deck. Or if she does have a full set of hog chains, they may well be hidden within the superstructure and since we can't see a bow view we can't tell for sure. #4 is the George Verity, another 1927 steel-hull vessel (https://en.wikipedia.org/wiki/George_M._Verity_(towboat)). And though your view is from astern, the photo from Wikipedia is forward and shows the same long hull, short stack design of that era. #5 is the Orco, built in 1936 according to the UW LaCross library (https://search.library.wisc.edu/digital/ACNQC2XXRJ4USX8G), so again very likely a steel-hull vessel. #6 is definitely a steel hull, and the 1935 date of the photo helps confirm this. These are all fun photos to look at, and thank you for sharing, but I'll maintain that any wooden-hulled riverboat had to have hog chains for structural integrity, until the development of steel hulls or unless it was designed to operate in deeper water (e.g. the Hudson) where shallow draft and/or light weight wasn't a consideration. If I recall correctly, the original Lula was up in Montana, so absolutely fit those constraints. Your version is meant to be a Hudson River / port boat, right? So you can get away with fudging it a bit.
- 732 replies
-
- 4
-
-
-
- Lula
- sternwheeler
- (and 1 more)
-
Can you show an example? To the best of my knowledge, and as wefalck implies, this was an integral part of steamboat structure (stern or side wheel) and not easily dispensed with. They're sometimes not easy to see, but until the development of metals hulls were pretty essential. They keep the lightweight hull structure from essentially folding up like an origami construction and so have to run most of the length of the hull. I've never seen a traditional stern or sidewheeler that didn't have longitudinal hog chains and often latitudinal ones as well. Now, to be more specific, that's true of RIVERboats, because they needed shallow, lightweight hulls to navigate shallow river conditions, and so couldn't afford the hull bracing typical of marine vessels. Your original Lula was indeed a riverboat with hog chain bracing, but your modeled Lula is a harbor vessel with less concern about draft, so you could also assume that it has a stronger hull than the typical riverboat.
- 732 replies
-
- 5
-
-
-
- Lula
- sternwheeler
- (and 1 more)
-
Honestly there's an even better pretend option; just assume that the angled hog chain post within the engine room doesn't extend up through the boiler deck floor as on the real thing, but is a bit shorter and set further back, such that the chains you have meet it right at the stern wall. In other words, it's there but hidden from sight. Yeah, this doesn't fully transfer the weight forward, but that's a detail only the most technical observer will notice. Your current way deals with the more obvious visual question "what's holding up the wheel?".
- 732 replies
-
- 6
-
-
-
- Lula
- sternwheeler
- (and 1 more)
-
There's a difference between regular Google and Google's AI-generated results. When you search something in Google, often the top result will now be labelled "AI Overview". THAT'S what you should take with a mine's worth of salt. It's AI attempting to synthesize internet-wide results into a coherent answer and it's routinely full of crap. The problem is that AI is a black box and doesn't share where it's getting its information from or how it's analyzing it, so you have no way to assess the accuracy of its sources or results. For just one example, AI tends to assume that quantity equals quality, so it'll spit back whatever it thinks is the most-common answer. But that doesn't make that answer correct. Below that, usually below a blue line, you go back to "traditional" Google results, which is just serving up websites that appear to have information relevant to your search. It's not that these are inherently reliable, but you can actually look at the source. For a theoretical example, if you search "how many birds are there in the world", and a regular result comes from something like the Audubon Society, it's probably reasonably accurate. If it comes from some rando non-bird-related website, you know to be cautious. Regular Google results still give you the option to make your own decision about the reliability of the source. AI results do not. And as ccoyle points out, it's becoming cyclically worse, because now more and more "regular" web results are reposting AI-generated drivel without fact-checking or critical thinking, so even regular web results slowly become less reliable, which in turns means that direct AI results are ever less reliable because it's regurgitating mistakes it generated in the first place. It's always been necessary to use critical thinking when doing internet research, but it's especially so now when the "results" being given are ever-more unreliable. But the most immediate thing you can do is recognize that "AI Overview" section at the top of Google results and scroll right past that little devil, or at least give it some serious scrutiny before taking it as gospel. Think of it like the "sponsored" results you get when you Google a product; just because they come up first doesn't mean they're the best results for you; just because AI Overview comes up first doesn't mean it's the best result. In both cases it means it's what Google wants you to see, and you're better off scrolling past that crap and using real results for your answers. Google should be thought of as a tool for locating resources that will answer your question, NOT as the actual provider of those answers. That means you have to go beyond Google to click on and read the actual answers those links provide, not just trust the AI attempt to summarize those answers. Think of it this way: you can ask a librarian how to find a book on a specialist topic like "how to rig a sailing ship model", but you should NOT just ask the librarian themselves how to rig a ship model and expect to trust the answer. And you should still take the time to assess which of the books on the shelf seem most reliable, not just blindly take the first book off the shelf and assume it's right.
- 732 replies
-
- 8
-
-
-
- Lula
- sternwheeler
- (and 1 more)
-
In my experience one should trust nothing that AI generates. In every case that I search a subject in which I have any specialist or even reasonable knowledge, the top-level Google AI summary is either outright wrong or highly misleading.
- 732 replies
-
- 6
-
-
-
- Lula
- sternwheeler
- (and 1 more)
-
Wefalck, Keith and I had a brief private conversation about that protoype a little while back. I'm quite familiar with that area, having been involved in two different graduate geologic research projects on the Susquehanna (one in particular right in that setting). Though I was somehow unaware of the coal dredging operations this represents. There's no doubt these operations were dirty, but keep in mind they're dredging not a free-flowing river bed, but a reservoir bed behind an impoundment (hence why the coal dust built up there in the first place). But yes, it's been both the curse and blessing of the US to have such abundant resources that efficiency/waste were not really a concern for generations, at least not in the way modern Europeans think about it. All these "freelance" infrastructure elements are part of the vaunted freedom that brought so many people to the US over generations. There's a reason so many things were invented and/or developed rapidly here (think the evolution of riverboats). Creativity flourishes when there are no rules (as does abuse).
- 732 replies
-
- 7
-
-
-
- Lula
- sternwheeler
- (and 1 more)
-
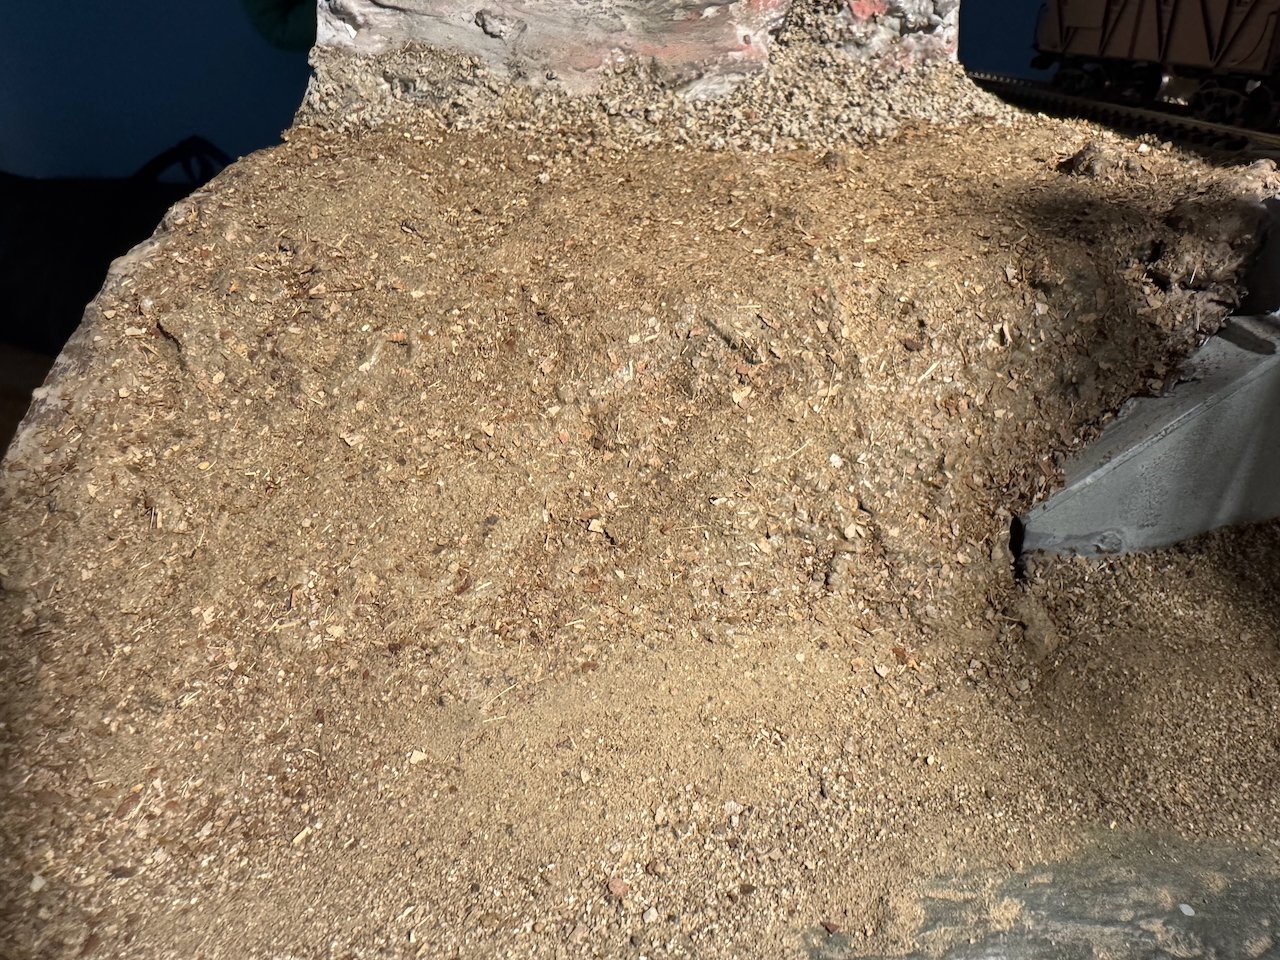
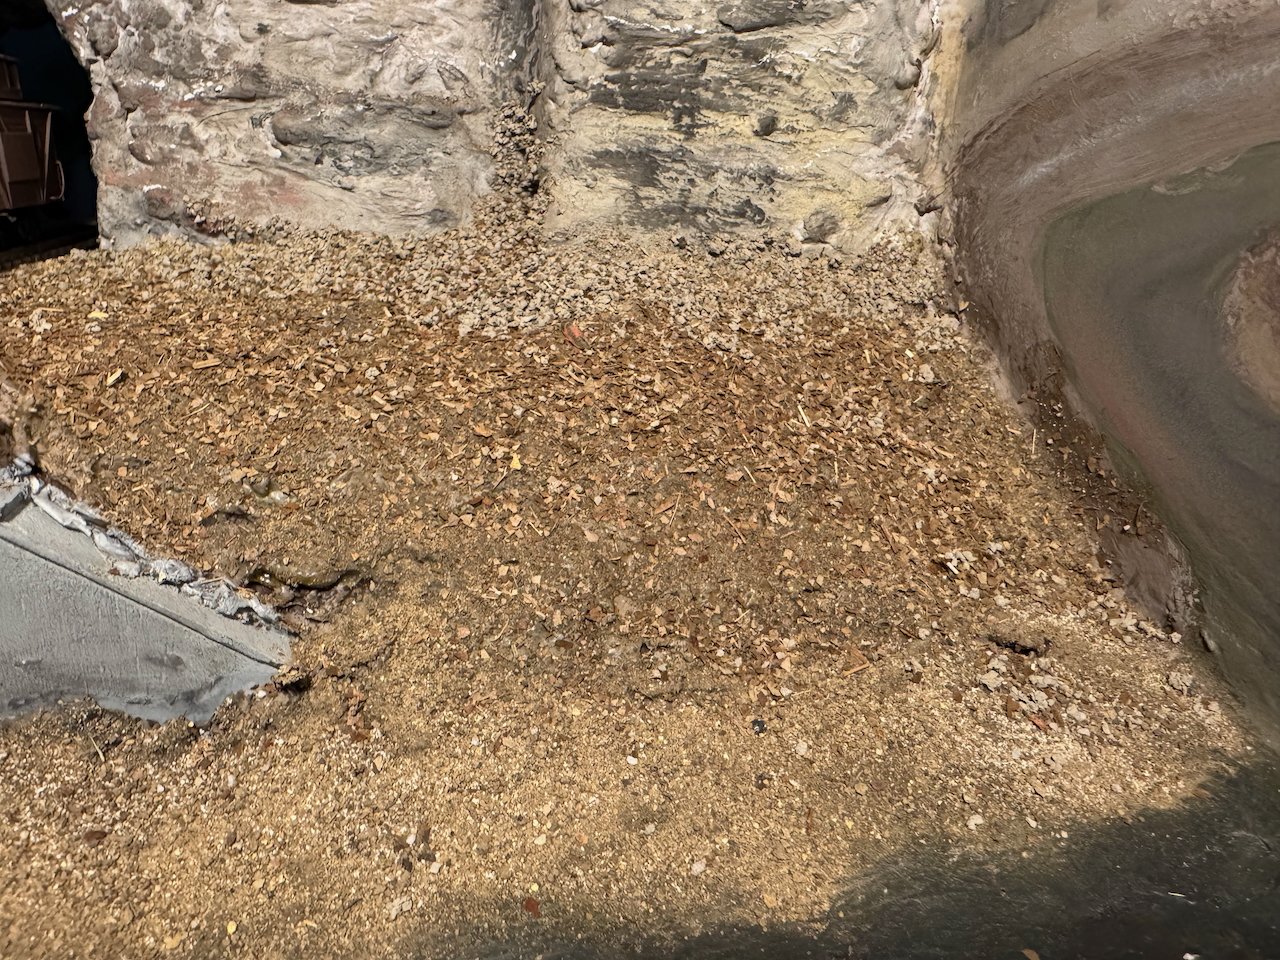
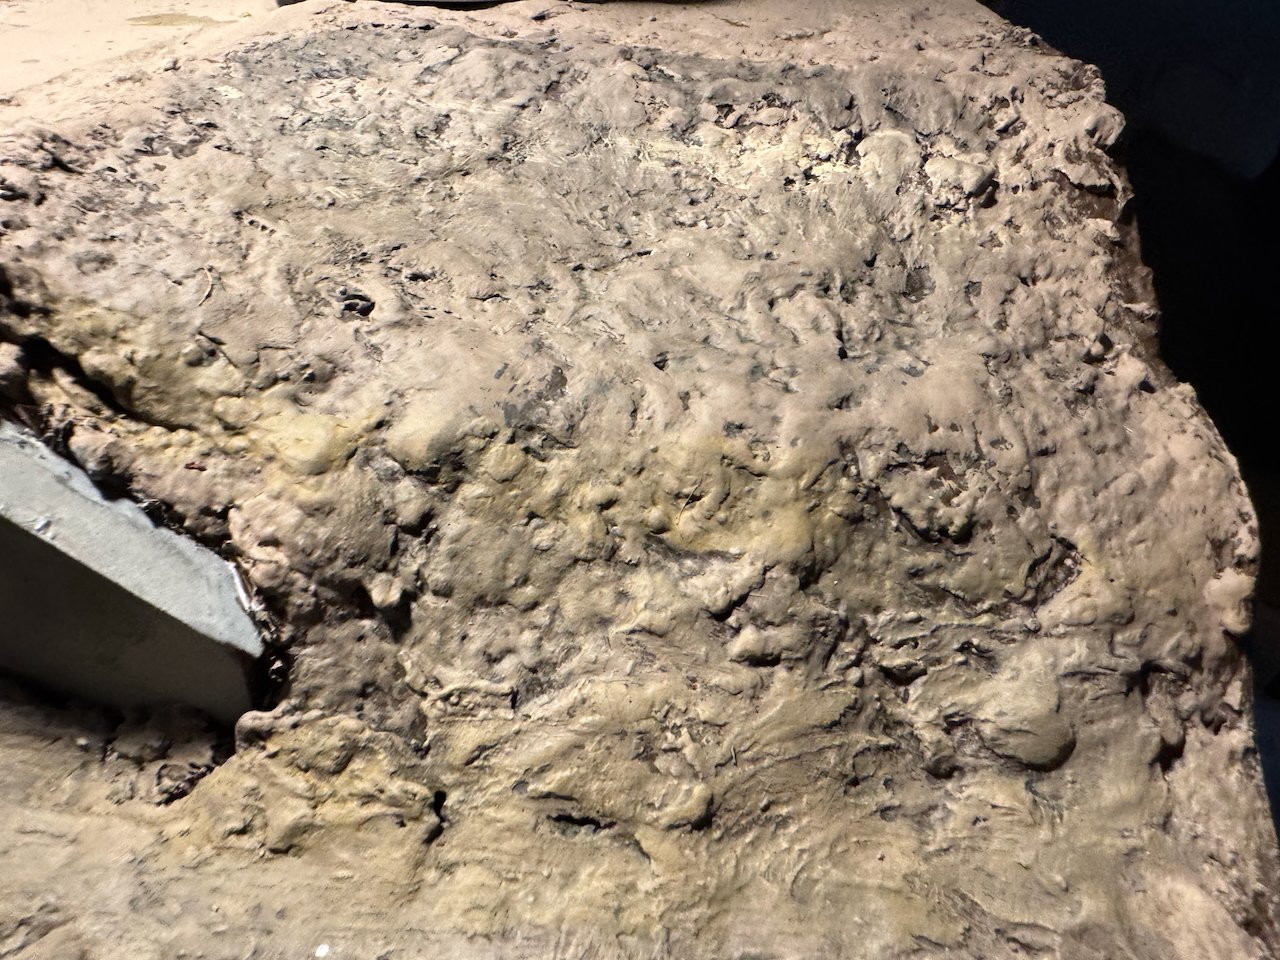
Interesting question; absolutely not. (a) I don't want to personally work with anything like that, (b) they're all set with glue and not sitting around like a light flammable powder, (c) any broader fire risk comes from the extensive wooden benchwork, not a thin skim of glue-fixed natural material. Thanks! It's definitely a challenge thinking through the real setting and trying to figure out how to translate it into a version that's simultaneously scaled down but also true to eye. Having said that, I should have waited to post the results above. Shortly after I did, Mrs. Scenic Consultant came in from the garden and had a look. She agreed that the material was coarser than scale, but also had a very good idea how to adjust it. She suggested rubbing off some of the coarsest outer layer, which I tried, and it worked brilliantly. What happened was that the material that had truly embedded in the glue stayed, dulling the painted plaster surface and giving a sense of texture, but some of the material that was sticking up more and really looking coarse went away, making the grain/particle size less obvious. It's a bit hard to explain this change, but I tried a series of photos this morning to see if I could get the comparison across. (1) Original painted plaster creek bank. Too smooth, uniform, and shiny, though the color and base shape are good: (2) Sifted leaf and sand application. Improves the texture and complexity, kills the "shine", but a bit coarse (I started to realize that the flatter surfaces looked a bit like a power company wood chipper had been through). And the area along the creek bank is a bit too gravely for an area that in real life is mostly muddy rather than rocky: (3) Same texture after the upper layer has been rubbed away. Now there's a more subtle blend of "powder" and coarser material dulling the surface, maintaining that complex natural non-plaster look, but less of the "wood-chipper and gravel" effect: I thought (2) was fine until I saw what (3) accomplished, and that's now the new approach. The material that gets rubbed off can be collected and re-used elsewhere, so it's not a waste. It's less fun if you're not learning!
- 264 replies
-
- 13
-