HOLIDAY DONATION DRIVE - SUPPORT MSW - DO YOUR PART TO KEEP THIS GREAT FORUM GOING!
×


vossy
-
Posts
600 -
Joined
-
Last visited
Content Type
Profiles
Forums
Gallery
Events
Everything posted by vossy
-
 Really glad you are going to plank her David. I hate these printed on decks. I have them on my Chaperon, and although that model doesn't call for them to be planked over, I will certainly do so. The printed stuff just looks too fake and perfect for me. Btw, do you end up putting your models in display cases? If so, can you shed any light on affordable sources? Cheers Chris
- 133 replies
-
- 1
-

-
- cutty sark
- mantua
- (and 3 more)
-
Hi David, great progress. As for edge gluing, I have always done this on every model I have built. I think it makes for a more solid build, and indeed some kits do call for the removal of the ribs later in the build stage. Glad you read ahead and sorted this out. Cheers Chris
- 133 replies
-
- 1
-
-
- cutty sark
- mantua
- (and 3 more)
-
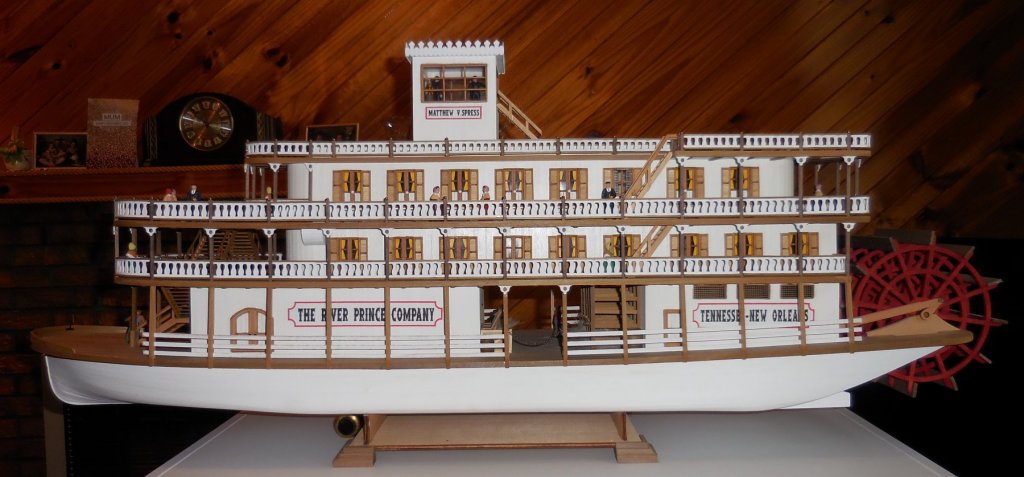
Looking forward to this one David. What are the overall dimensions of the build? My riverboat is Sergal/Mantua. I can only vouch for my kit, but it had way more than enough wood. In fact I reckon they may have made a mistake because I could easily plank mine 3 times over! My plans are also double sided. Personally I don't find this a problem, and I like the fact that they are large and easy to read. Based on my 1 and only experience with this manufacturer, I wouldn't hesitate to get another of their kits. Hope you find the same. Chris
- 133 replies
-
- 1
-
-
- cutty sark
- mantua
- (and 3 more)
-
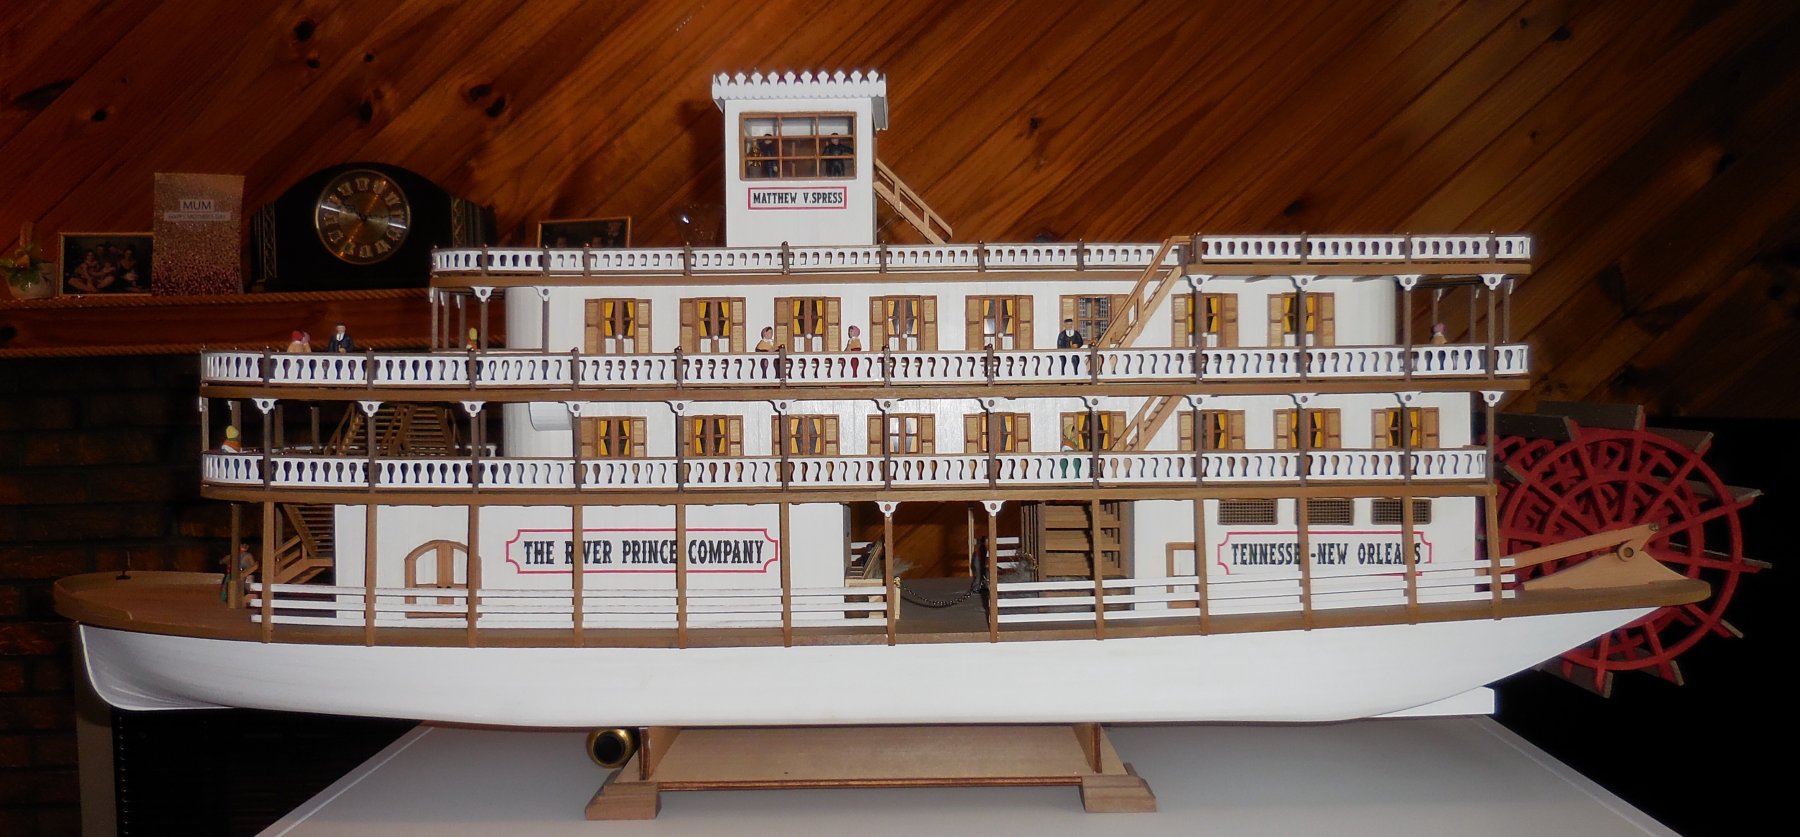
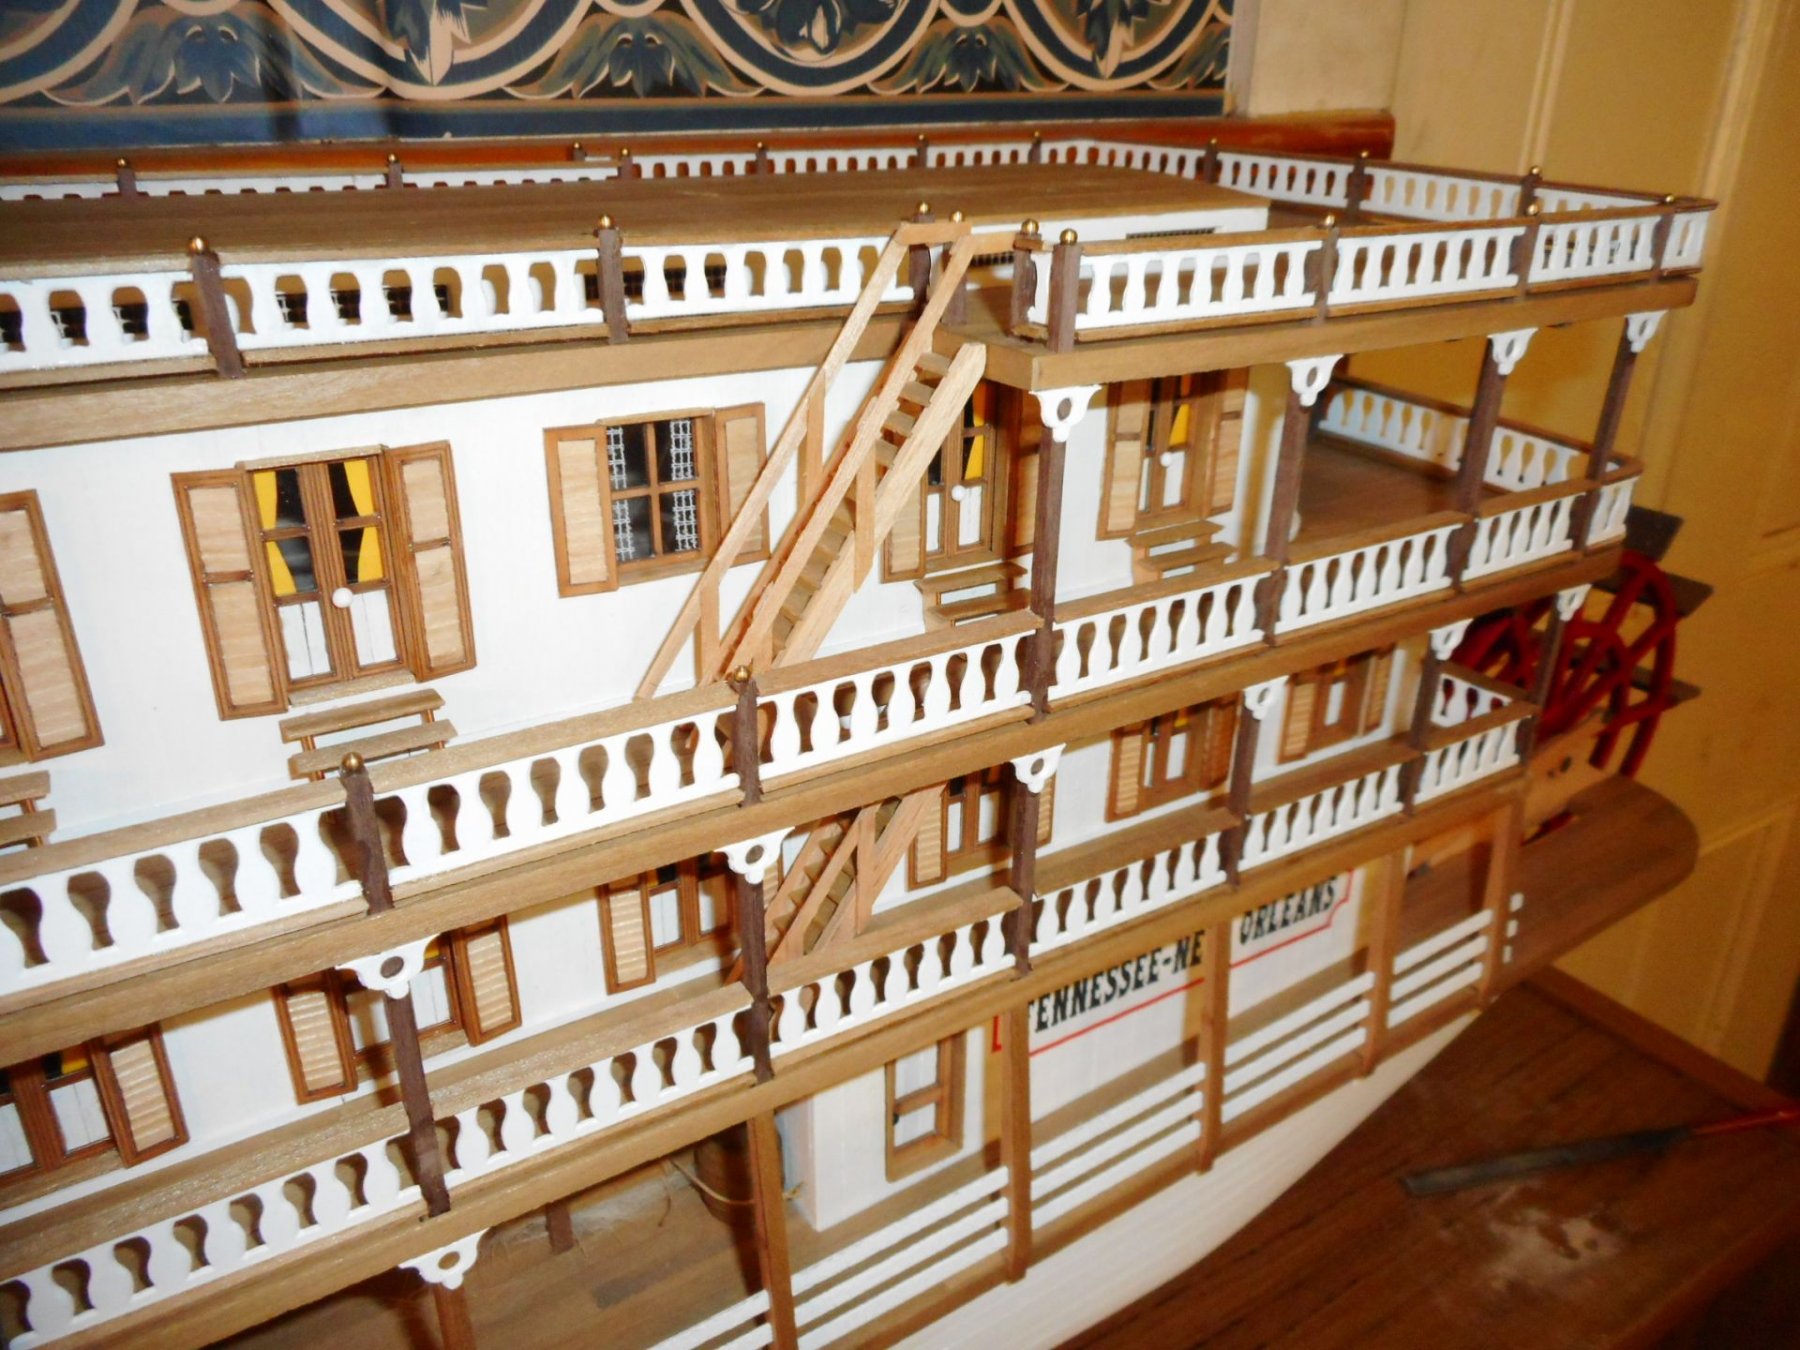
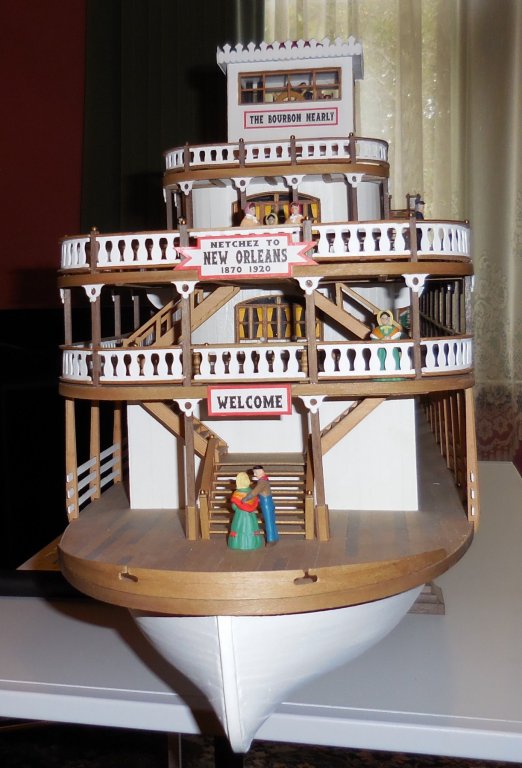
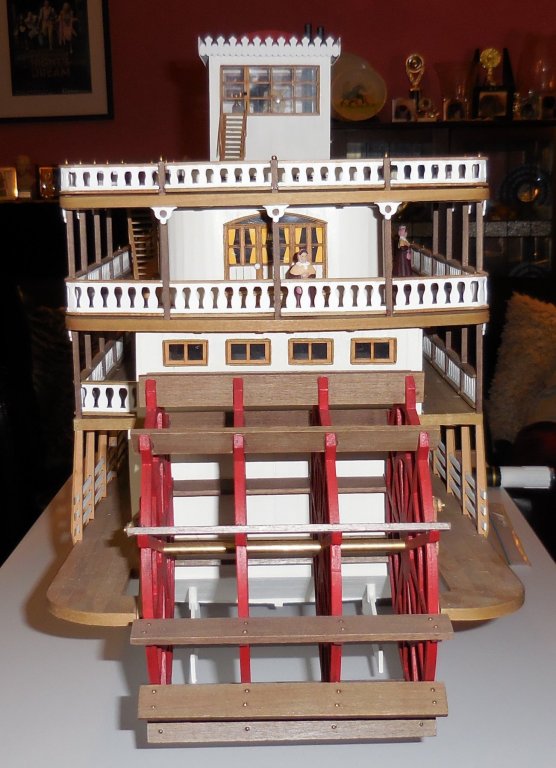
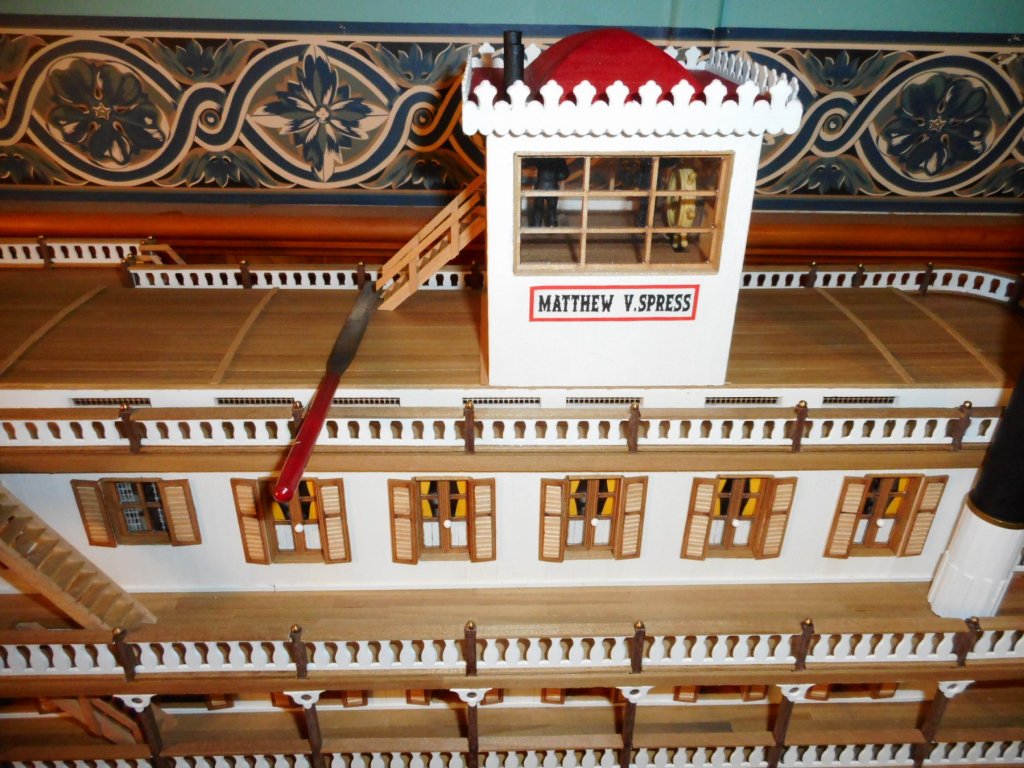
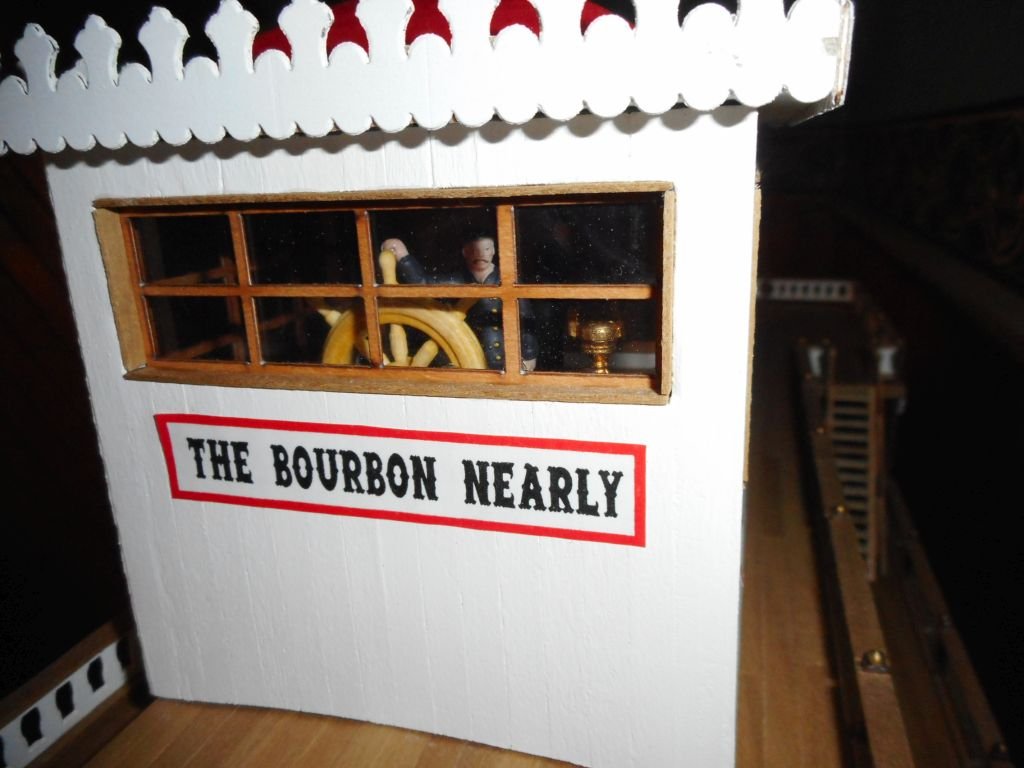
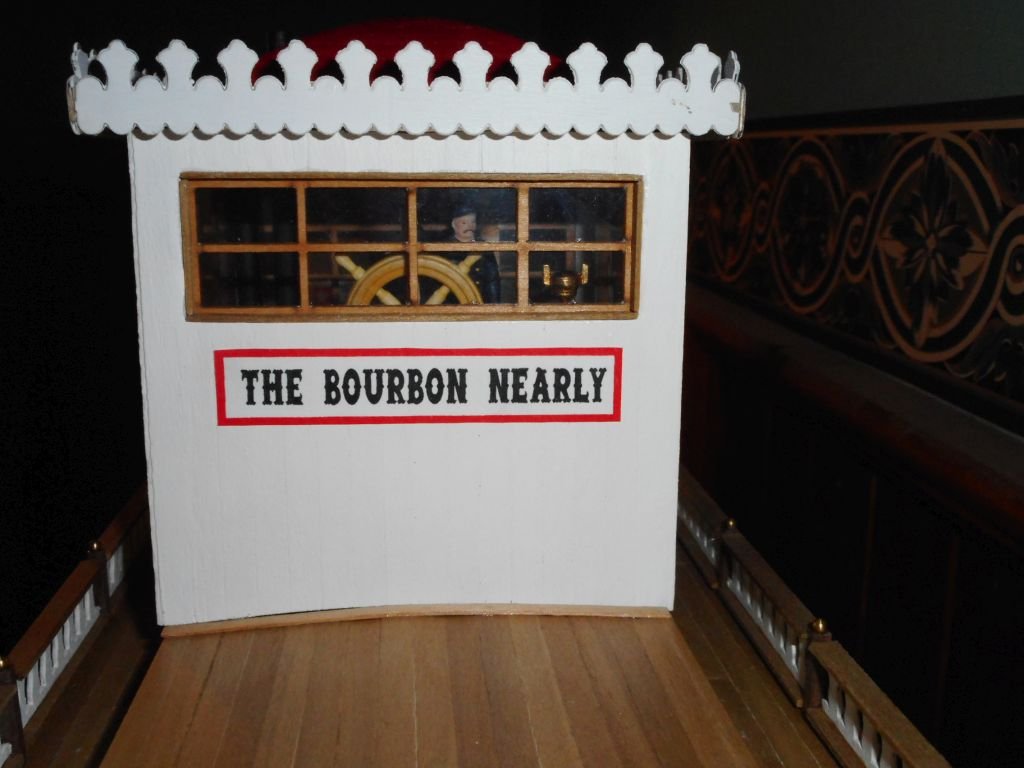
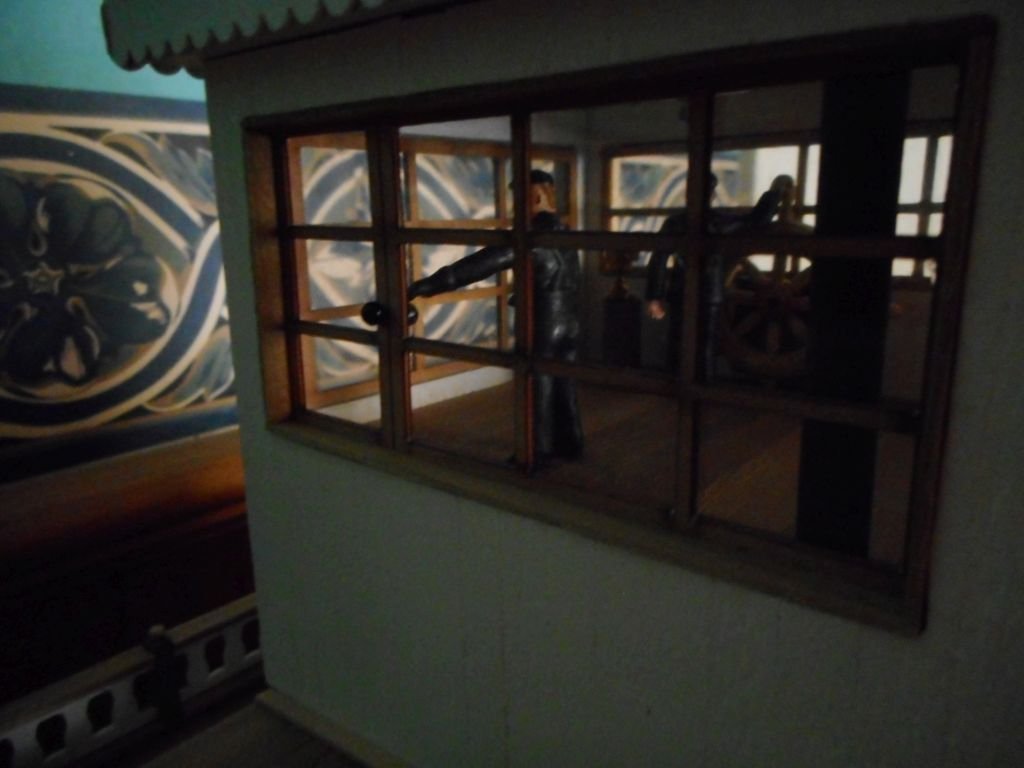
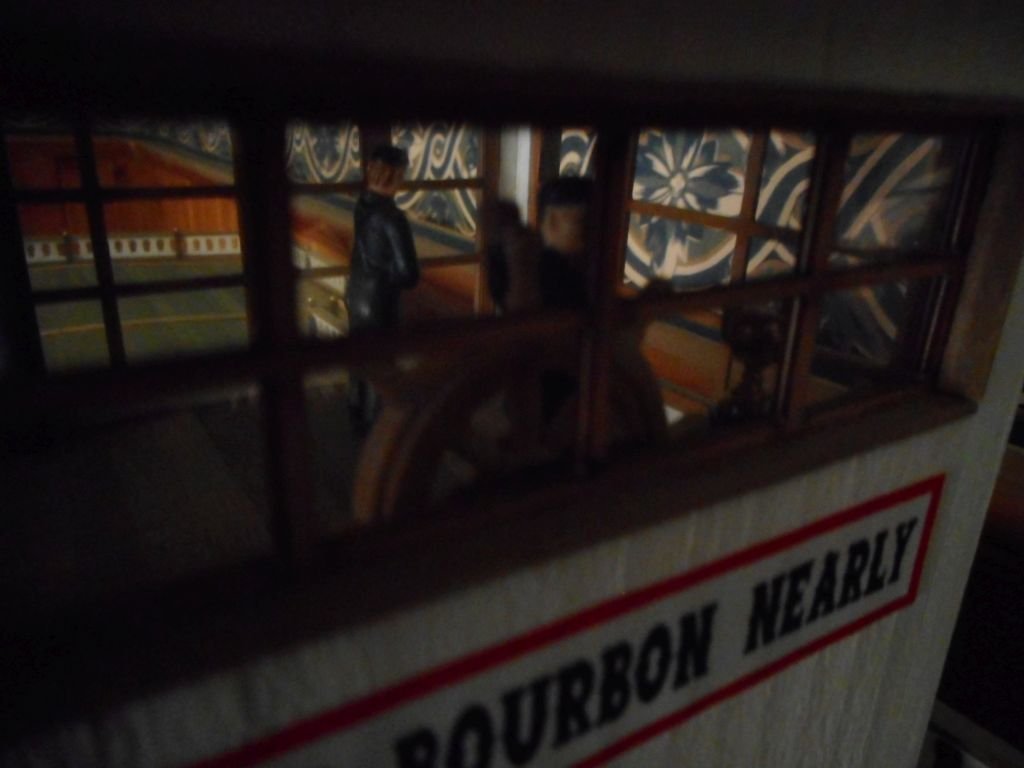
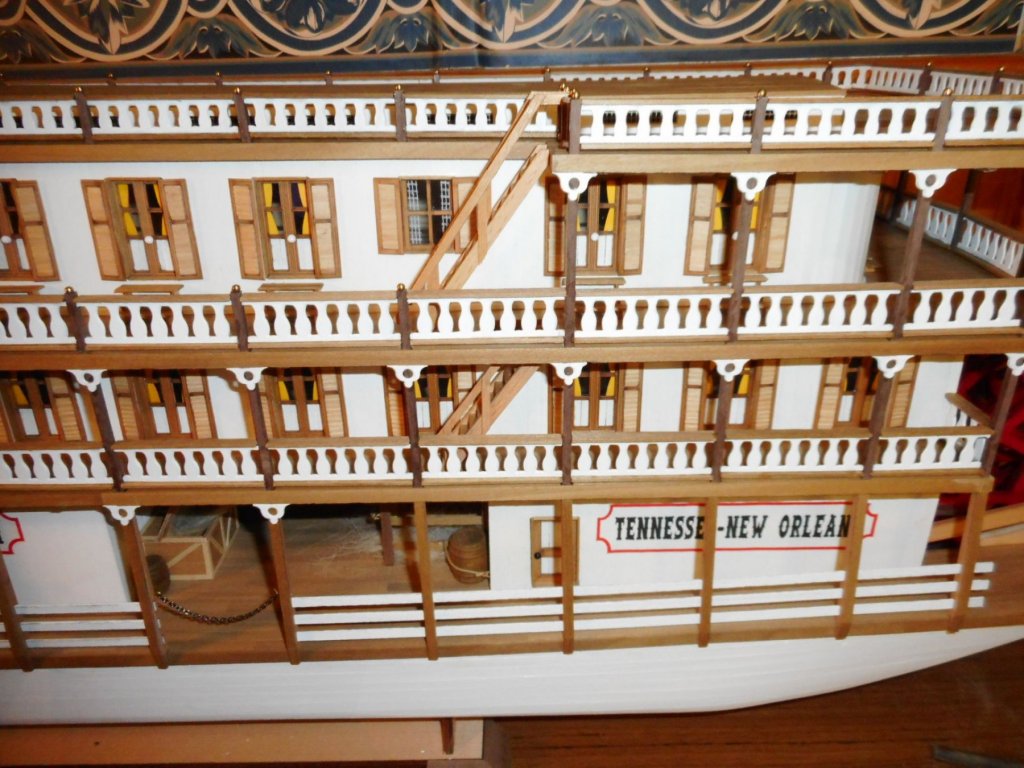
Thanks mate, she is coming along slowly. Most of the people are just sitting on there, courtesy of my sister. I intend to paint them all different colors and put them around the boat so to the casual observer they appear to be different people. Already I have a few of the same figures on permanently, but because they are painted and in such different area's of the boat I doubt many will realize they are in fact the same figures. The Captain at the helm is the same figure as the guy with the lantern in the horse bay area, and the guy leaving the wheelhouse is the same figure as the guy opening the forward starboard door on the main deck. I just painted the wheel house guy's clothes black to make him out as a bit more important crew member. All up I have about 36 people, but only 6 of them are unique, so the trick is to try to make each look a bit different by painting and positioning I guess. Chris
-
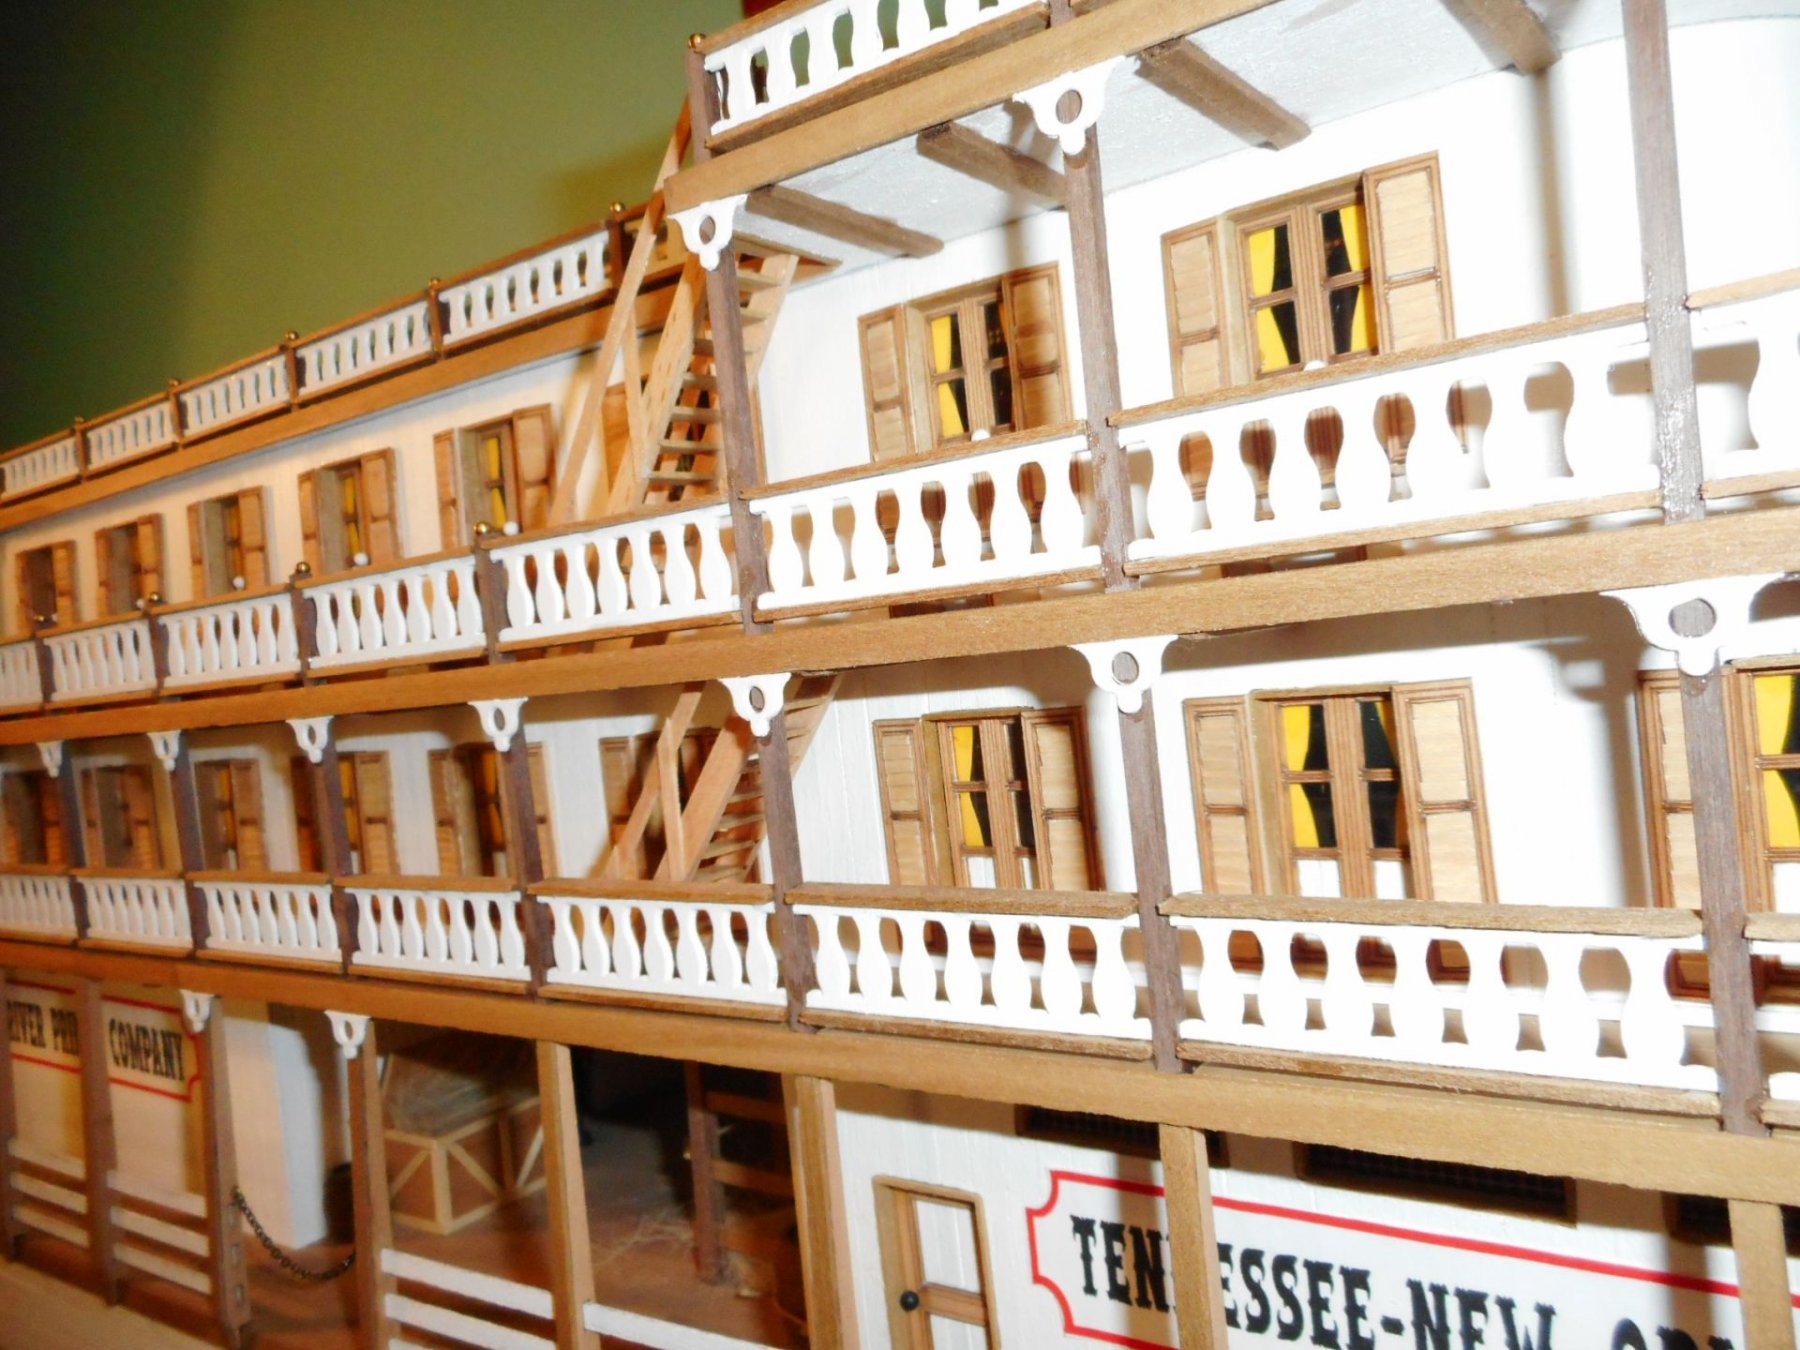
A few high res pics my sister took when I had the boat around at her house. Much better than my efforts. Chris
-
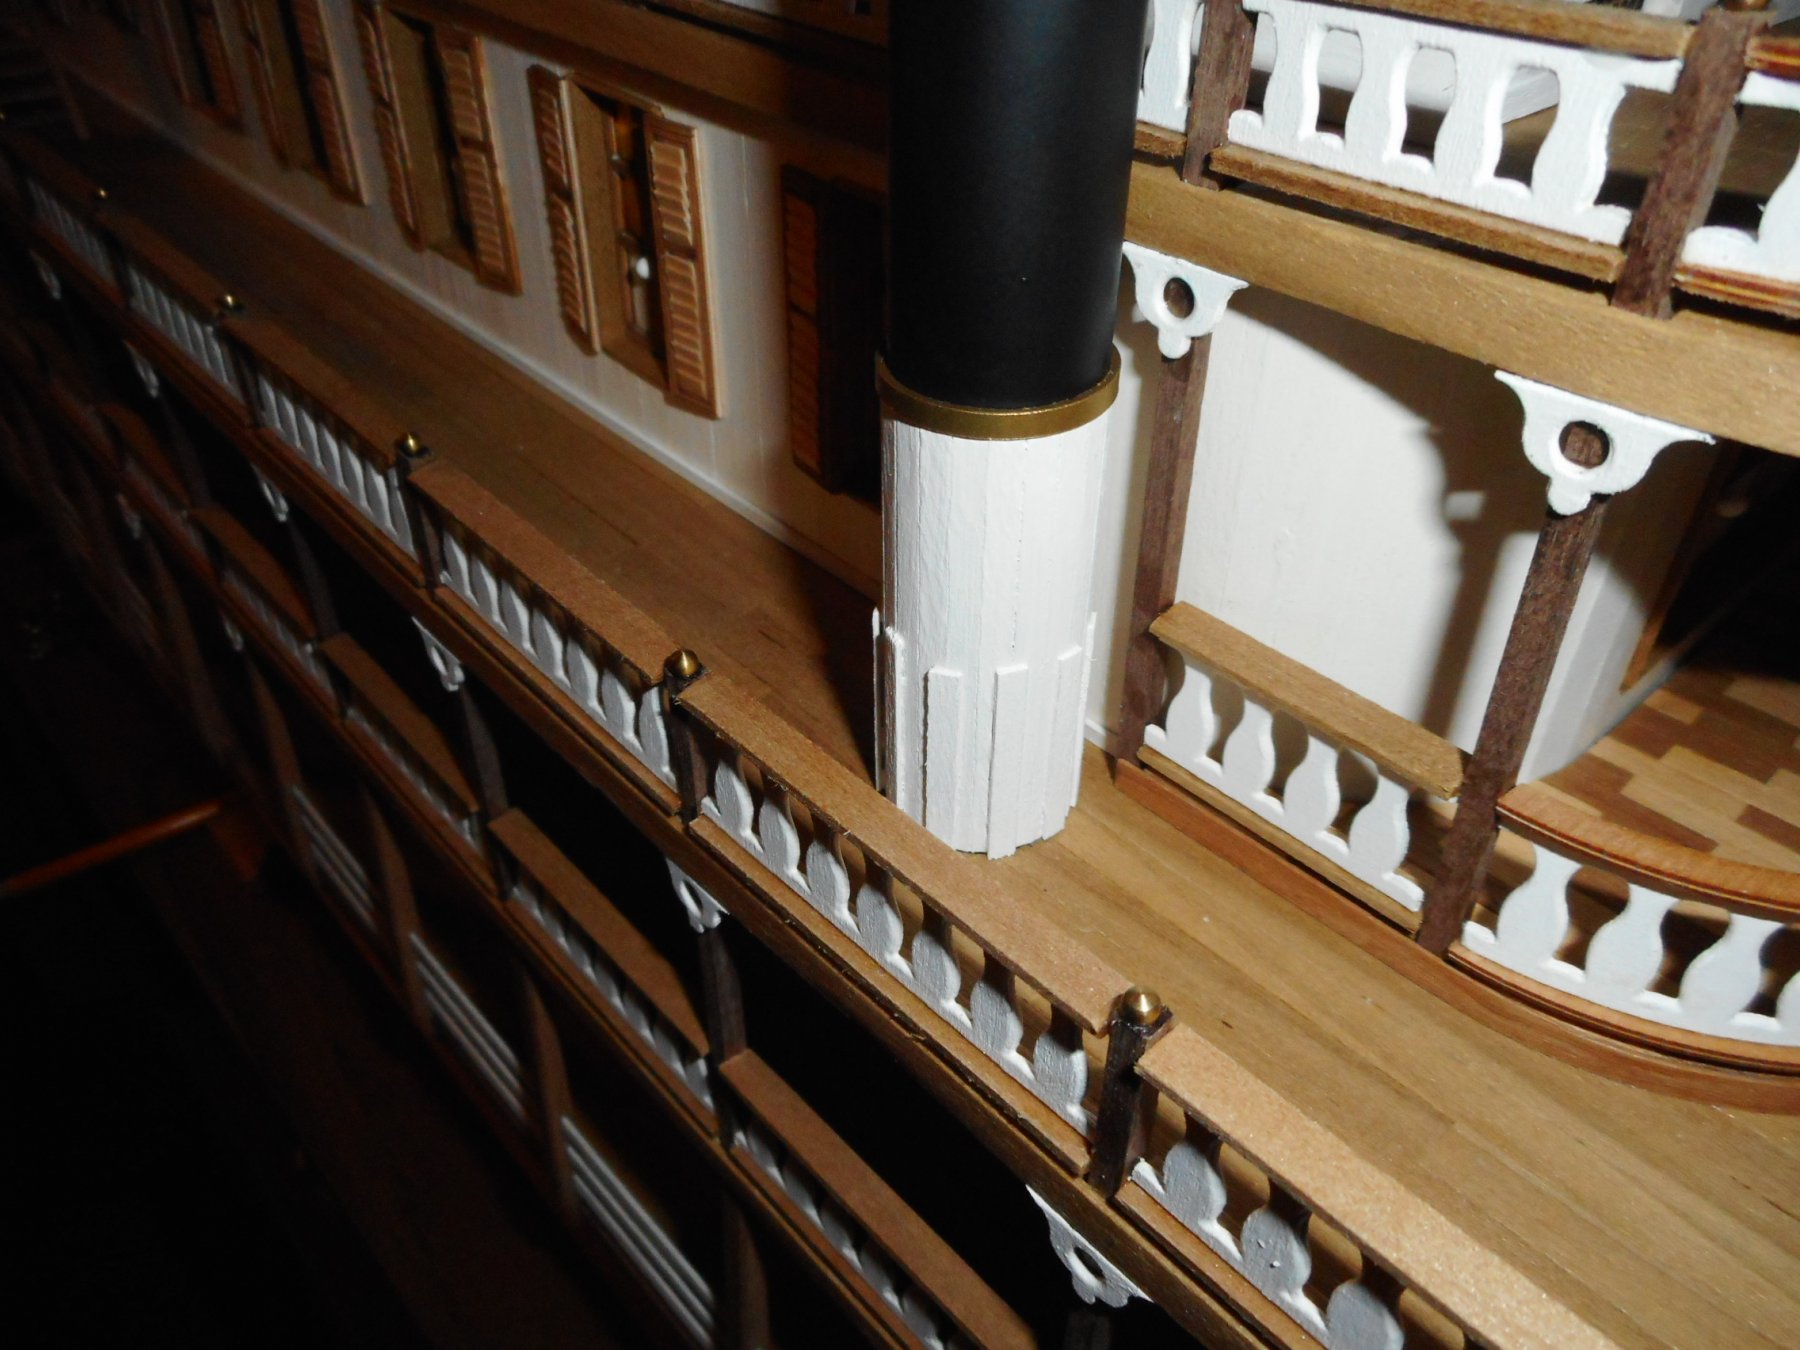
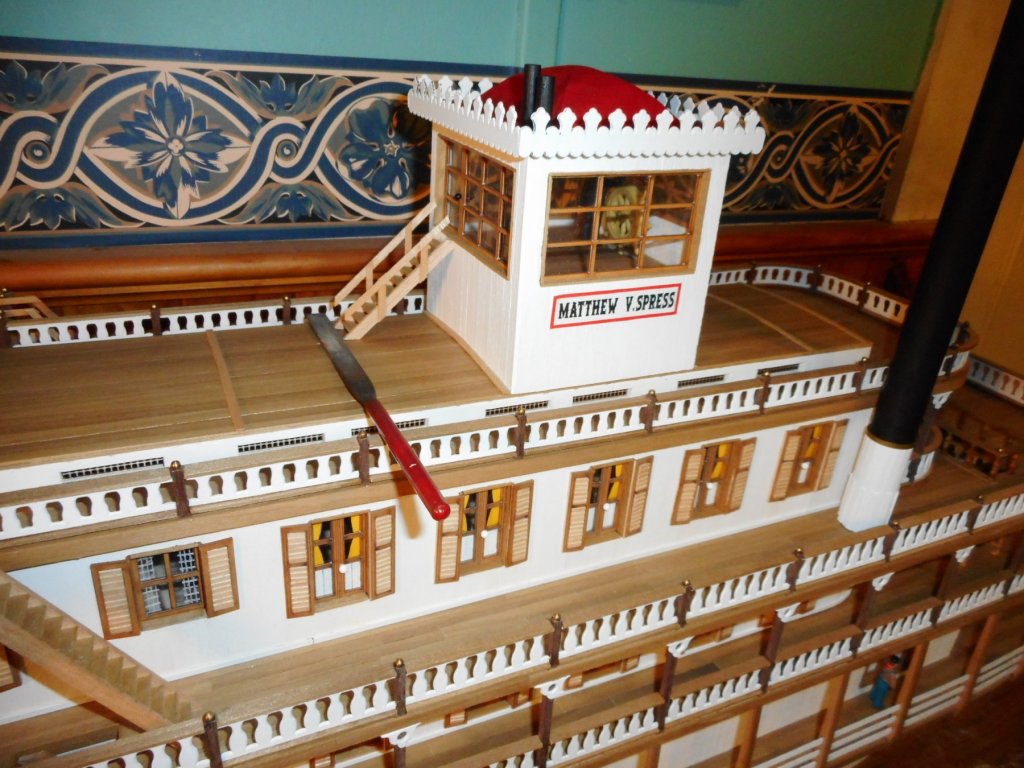
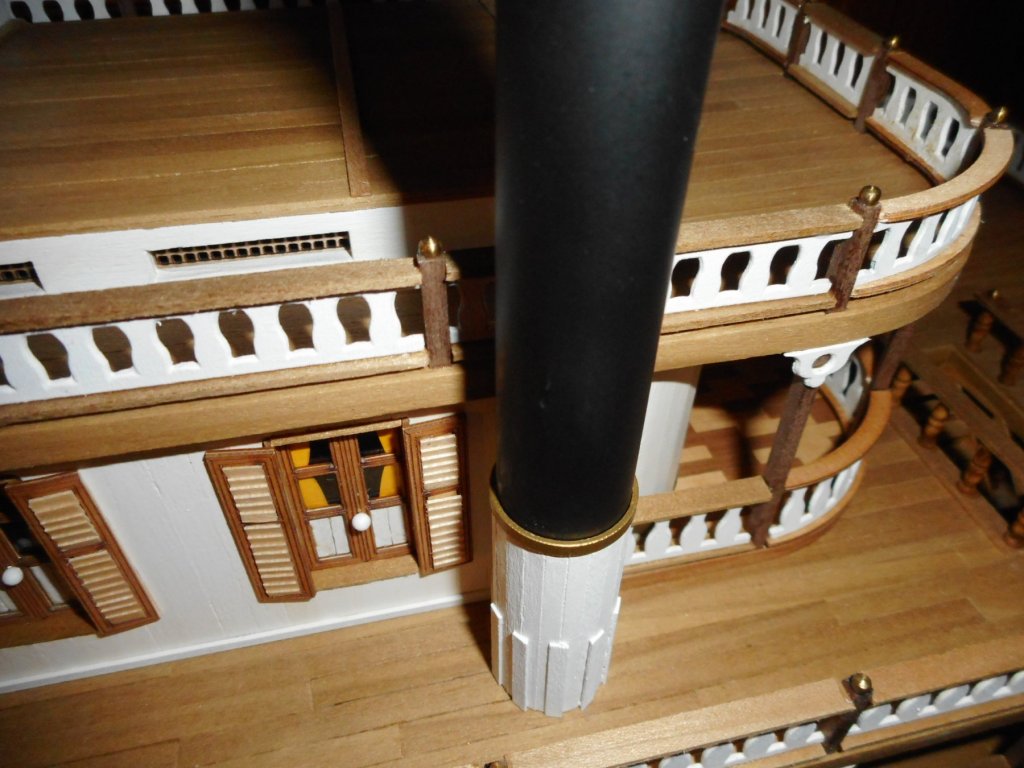
Hey Eric, yeah there are bracing ropes etc. You may be able to see a couple of eyelets near the top of the stack? Also there are 2 brass rods that connect both stacks together, so this will also help. I have jammed some wood into the end of the stack that will meet with some timber inside the stack hole, so that combined with a thin bead of glue around the bottom of the white part of the stack should make the whole thing pretty solid. Well that's the plan anyway! Chris
-
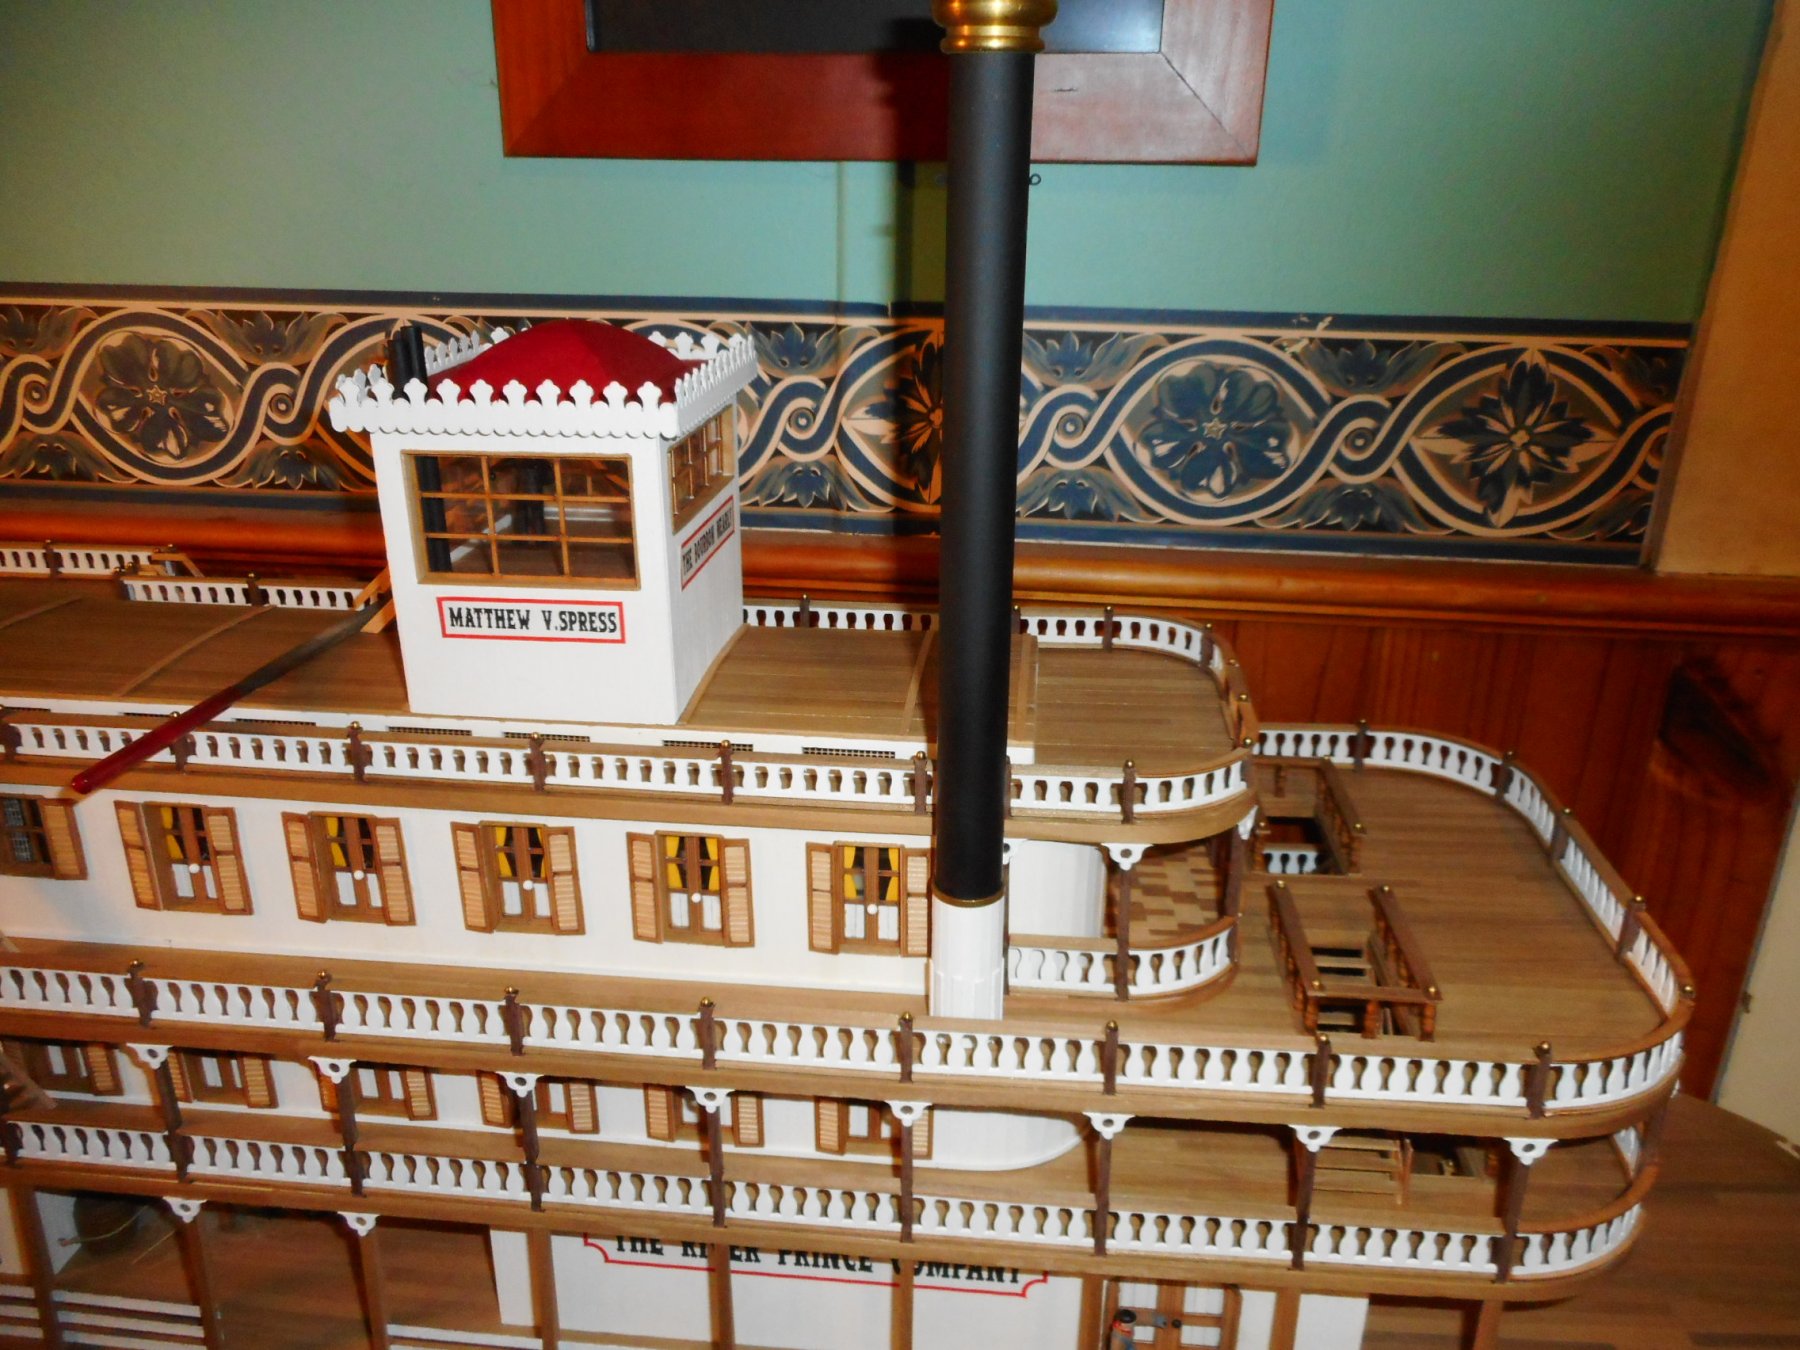
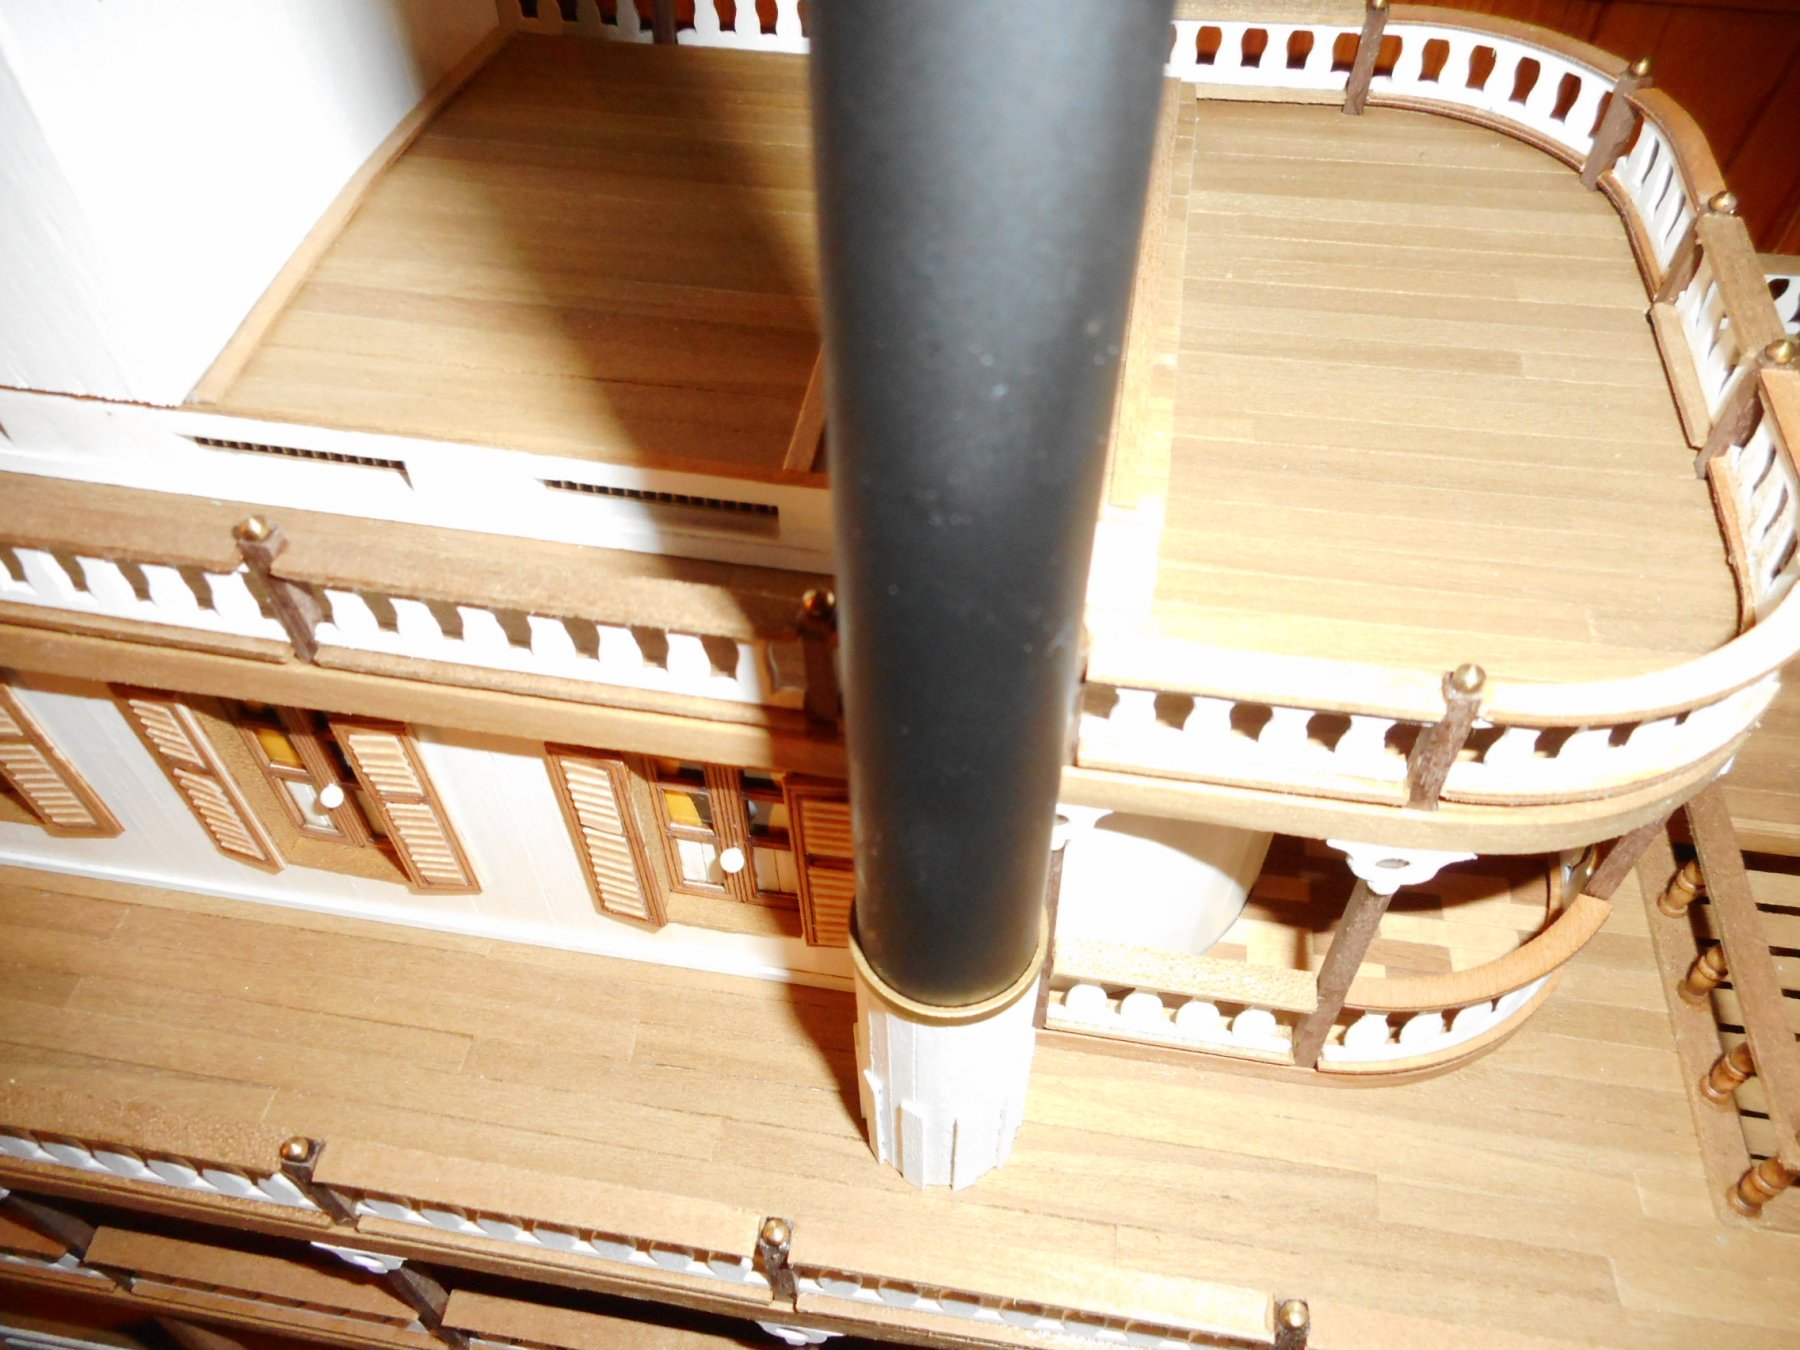
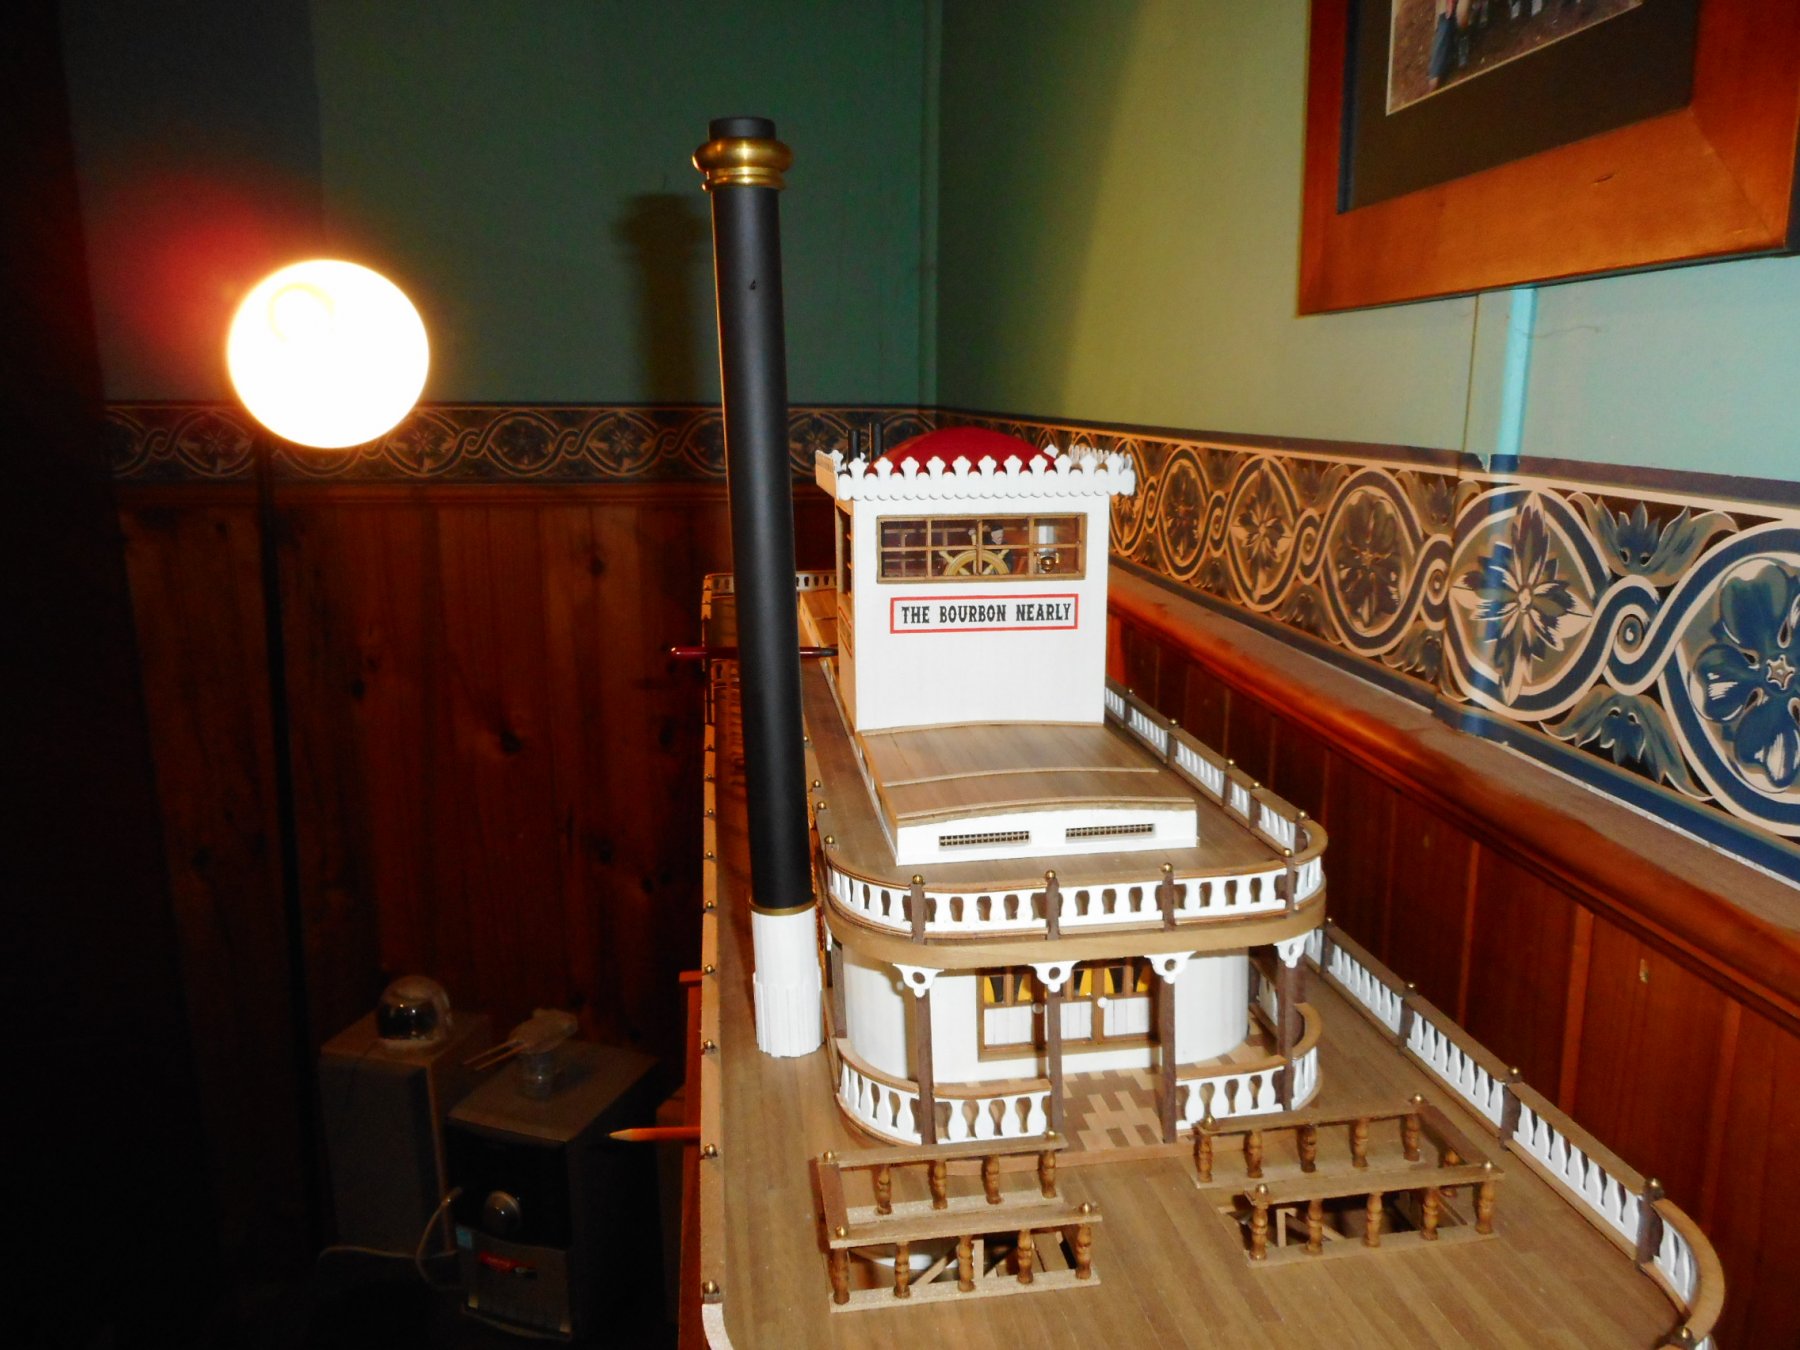
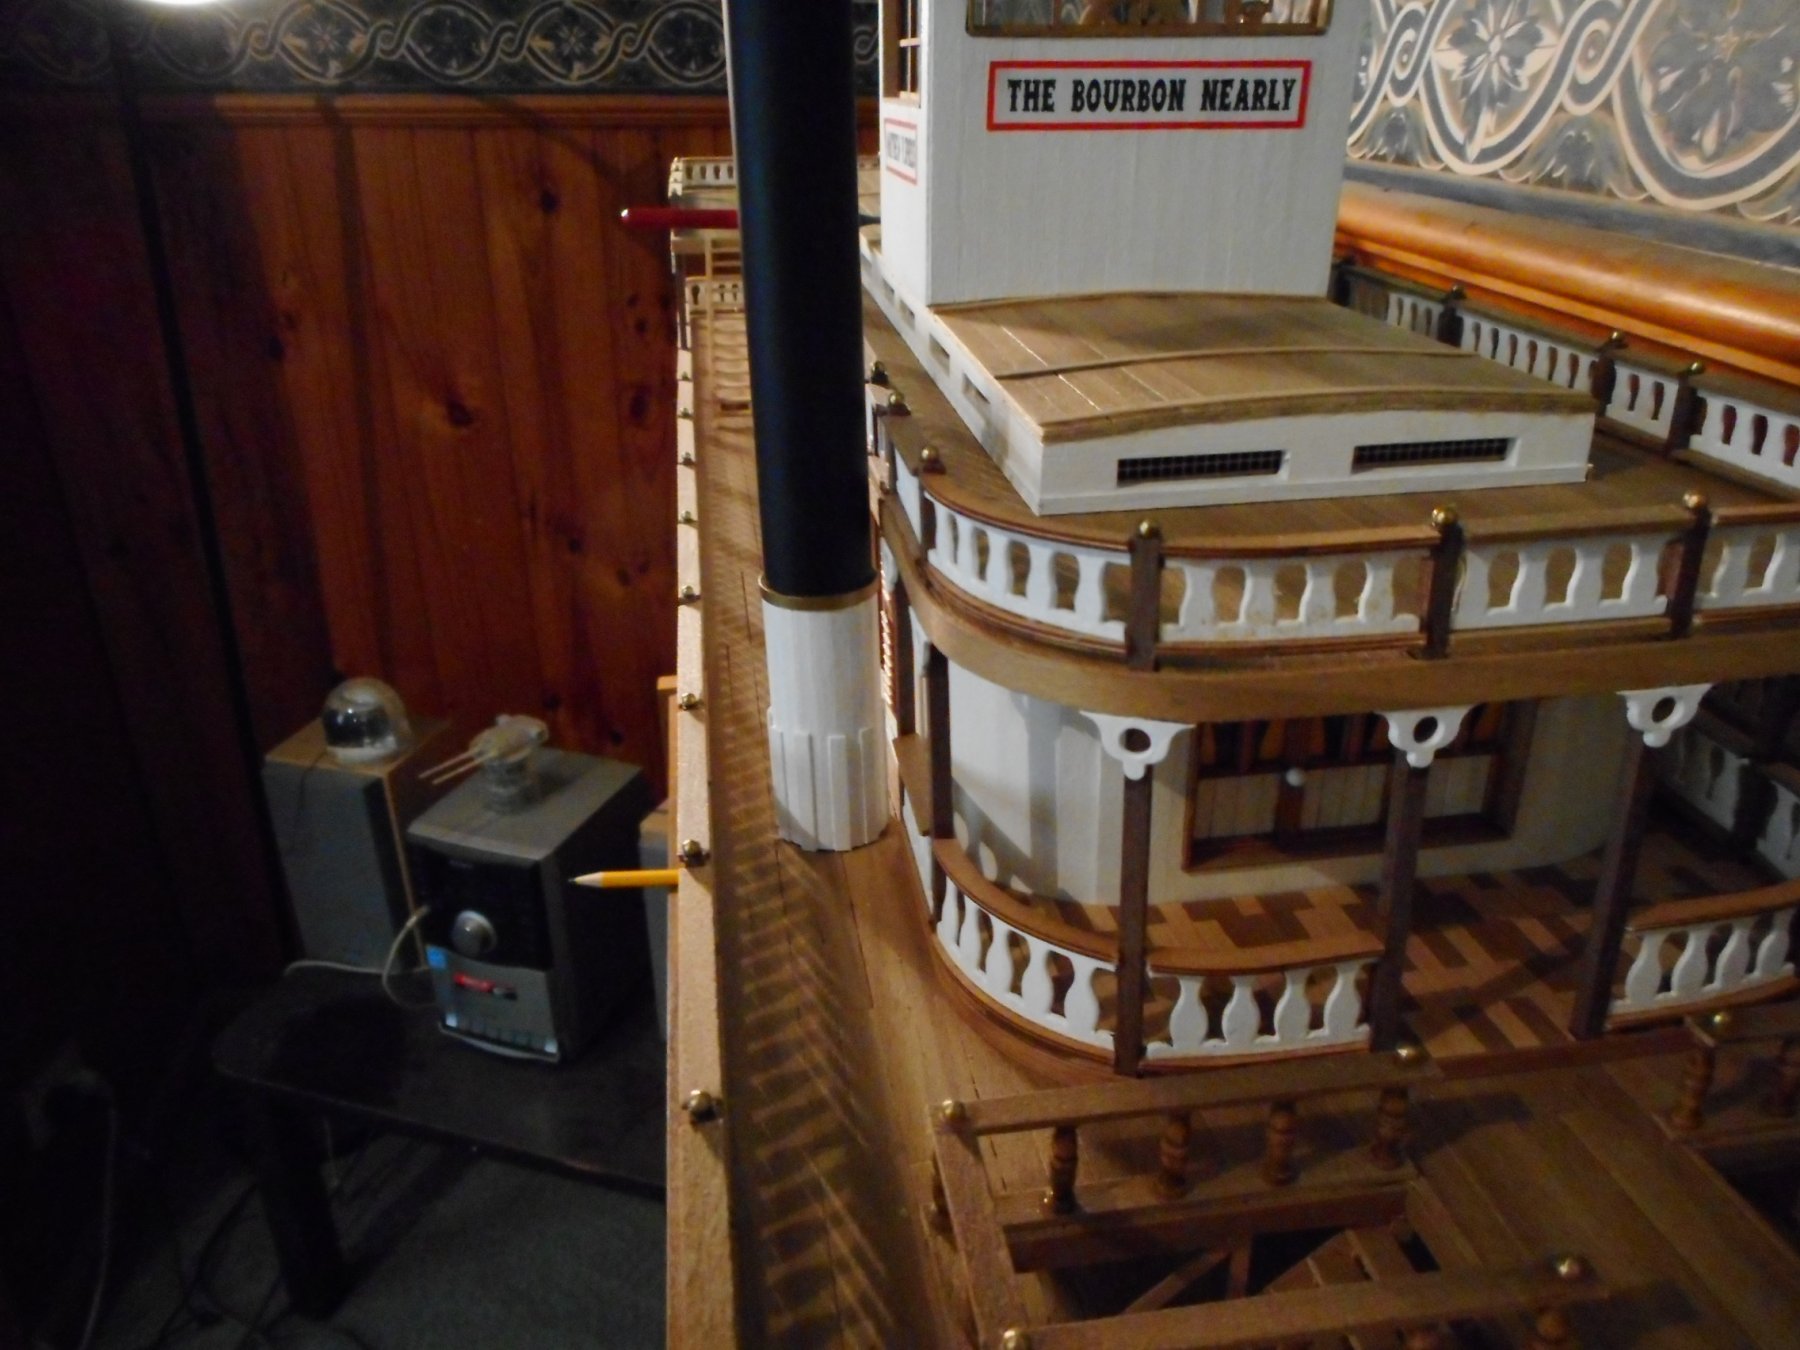
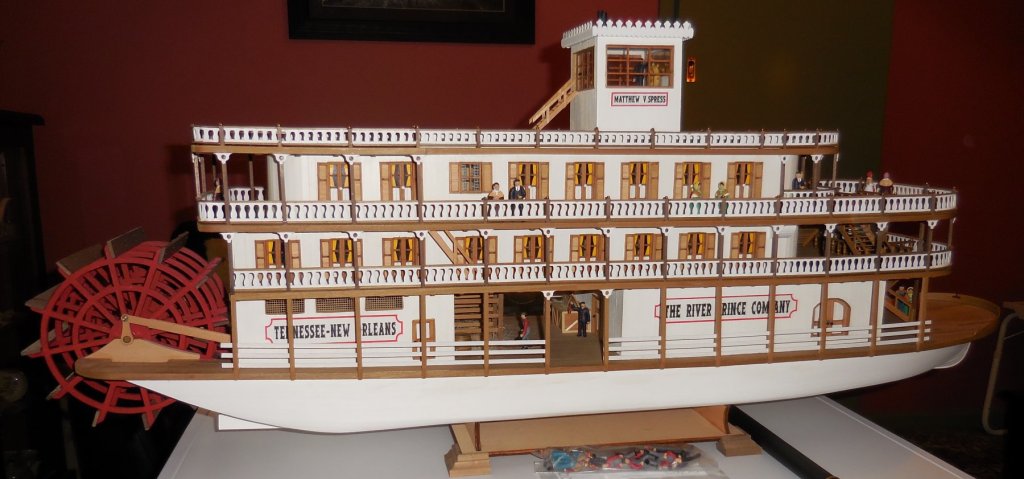
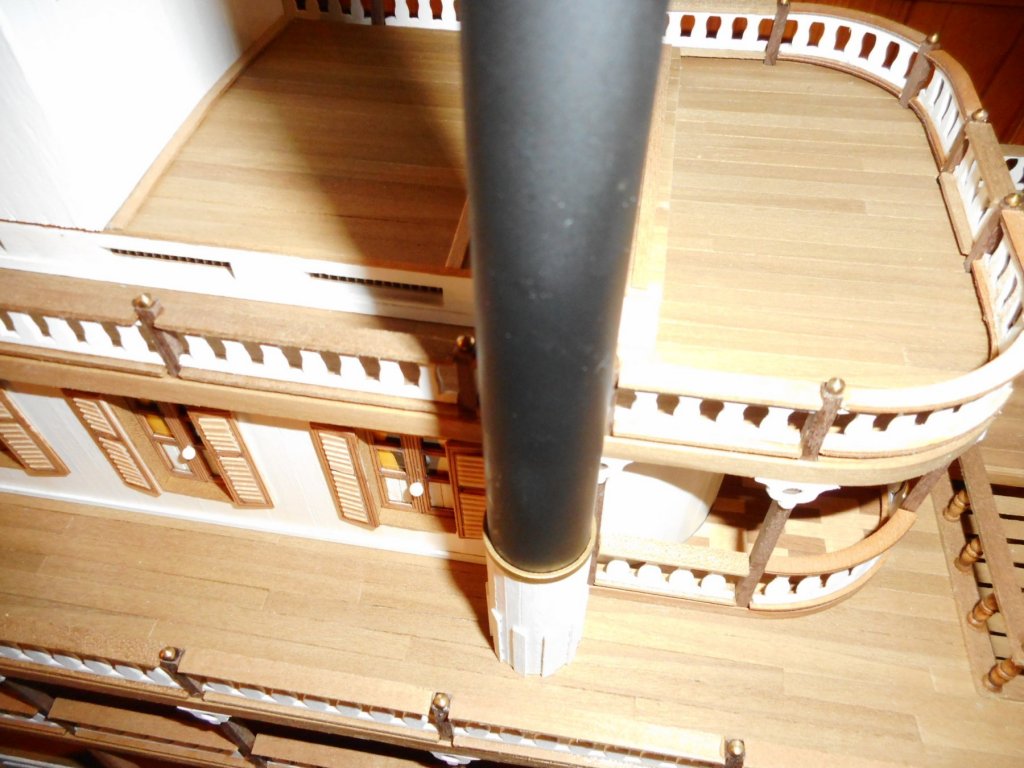
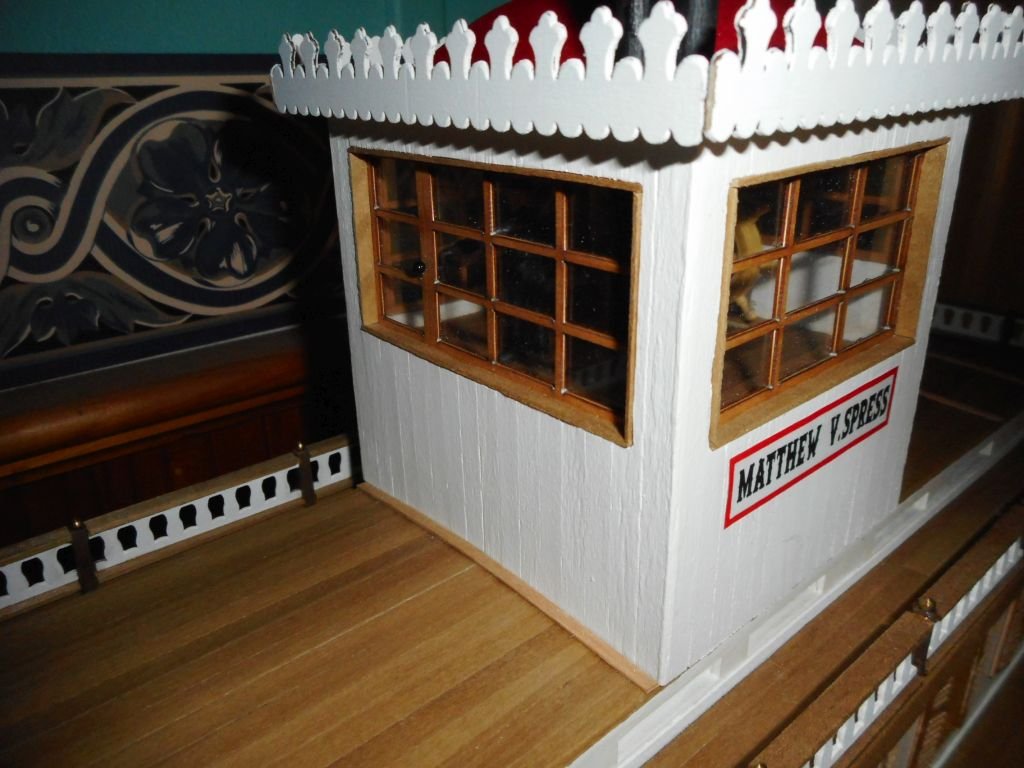
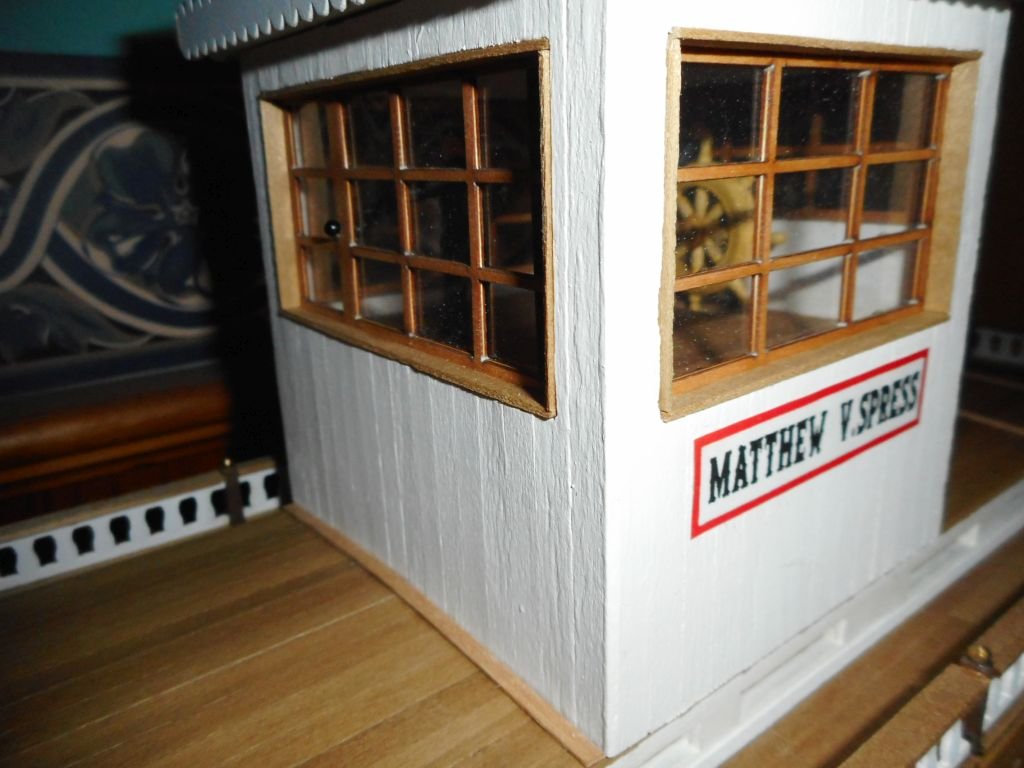
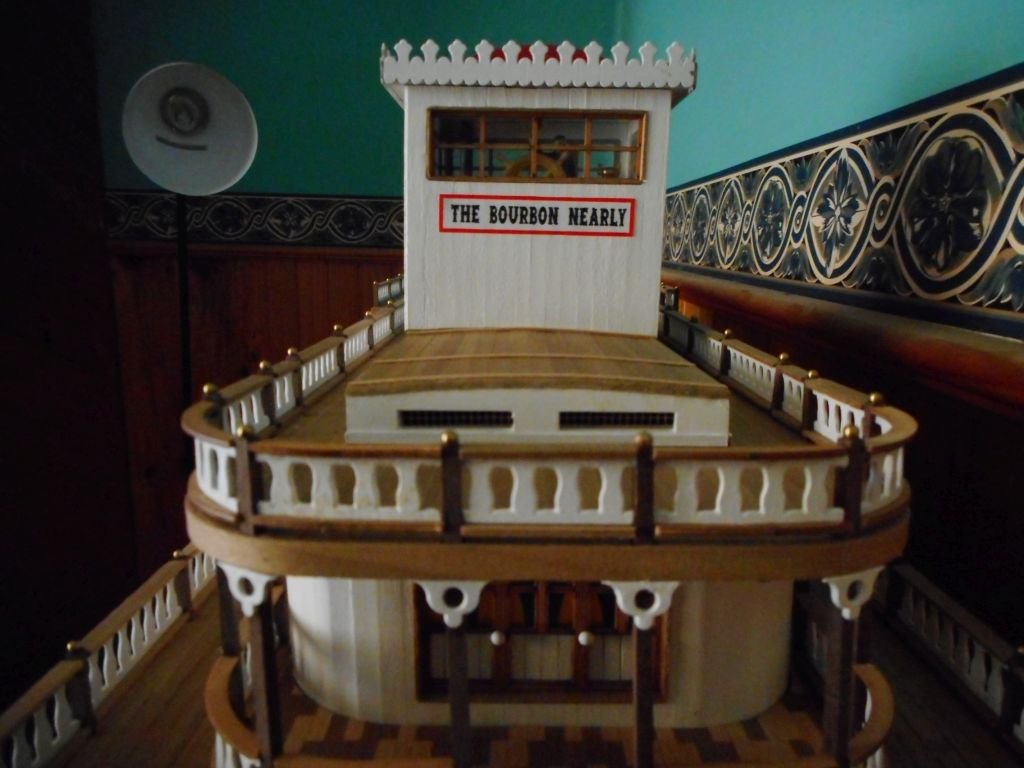
Work on main smoke stack and access ladders. I slightly changed the smoke stack from the box art. All parts, including the pilot house are just sitting there and not glued yet. Smoke stack also needs another coat of black to hide a few glue stains. The smoke stack only goes through the deck 5mm so I am hoping it will be sturdy enough when glued. Cheers Chris


-
Bit of a long overdue update. Sorry about the poor photography and lighting. Main smoke stacks nearly finished and ready to be installed. Have to touch up painting on bridge (well that's what i called it in the Navy). Now have about 30 passengers and crew that will be added later. Cheers Chris
-
Fantastic model of the most beautiful building on the planet! Everyone should aspire to visit the real thing at least once in their lives. Great job. Congratulations. Cheers Chris
-
Good job. I too am working on this model. One thing though; gloss paint shows more imperfections than flat/matt paint because it is shiny, and thus highlights any imperfections. This edict is true on both small model projects and large houses. Most houses, at least here in Australia, will be painted with a semi-gloss/low sheen exterior as opposed to a ultra shiny gloss level which will only highlight the imperfections. Cheers Chris
- 133 replies
-
- 3
-
-
- chaperon
- model shipways
- (and 2 more)
-
This looks like a fabulous new model. Do you have any idea of the dimensions? I am extremely tempted to get this one myself. Cheers Chris
- 63 replies
-
- 3
-
-
- revell
- harbor tug
- (and 2 more)
-
Hi Eric, all building has slowed to a trickle as I have just started a new job which requires a lot of technical training, so by the time I get home I am pretty much zonked out. I have another 2 weeks training left after which I go on shift. So probably in a few weeks I hope to be right back into it. I will more than likely finish the Mississippi first though. Up to the smoke stack stage with her so she shouldn't take too long once i'm back to it, then Chaperon will kick off fully. Thanks for the interest. Cheers Chris
-
Hey James, welcome. Number 1 thing I advise is build something you are interested in. No matter what your level of experience etc. we all run into problems at some point. By having a genuine interest in the subject of the build you will be far more likely to overcome the problems and complete the build. My very first wooden model ship was the Amati Santa Maria. Scale 1:50 (from memory), and recommended for intermediate modellers. The instructions were total garbage, as many European kits are, but because I was/am a Columbus fanatic I ploughed on through the problem area's and ended up with a very fine double plank on bulkhead model that I am very proud to say I built. So I reckon being invested in the subject of your build should constitute an extremely large percentage of the decision making process as to which kit to tackle first. And don't forget, no matter what problems you run into, you can bet your house that someone else here has experienced the exact same problem previously and can help you out with answers. Cheers Chris
-
Straightening thin brass wire
vossy replied to vossy's topic in Metal Work, Soldering and Metal Fittings
Thanks Pat. We have a local hobby shop here which I reckon I have seen the rods in question. Cheers Chris -
The Mastini book is gold! If you can get it do so. Cheers Chris
-
Straightening thin brass wire
vossy replied to vossy's topic in Metal Work, Soldering and Metal Fittings
Thanks for the response everyone. Unfortunately nothing I have tried works to my satisfaction. This brass wire is way too thick and non-pliable to stretch or roll etc. Once the temperature drops below 40c here, if it ever does, I think I will take Mark's tip and go to the local hobby shop to source some straight rods. My other thought was maybe a very thin chain through the stanchions instead? The constant heat here will doubtless give me plenty of time to mull over the choice. Cheers Chris -
Hi Anna, I would start by using 80 grit sandpaper to give the hull a good sand by hand. Don't use power sanders unless you are very skilled with them as they can, and will, remove more than you want to. Once the hull has been sanded you need to fill in any large gaps and attain the correct flowing hull shape for the final planking to cover. To do this you may need to fill and sand a few times to form the correct shape. During this process I would suggest you use 120 grit sandpaper. Everyone will have their own method of sanding, whether using blocks etc. I tend to just fold the paper and hand sand it. This way I can sort of feel the curve as well as see it. When you are happy with the hull shape, give it a final sand with 240 grit paper. Note how we have progressively gone from quite course to very fine paper. Finally, depending upon the type of filler you applied you may need/want to brush a clear coat on it so the subsequent glue on the covering planks has a good surface to bond to. I don't tend to do this as the filler I use doesn't require me too, but I know of some very good builders on this site that do. So as with many things in this hobby there are many ways to skin a cat. Or plank a boat. Cheers Chris
-
Straightening thin brass wire
vossy replied to vossy's topic in Metal Work, Soldering and Metal Fittings
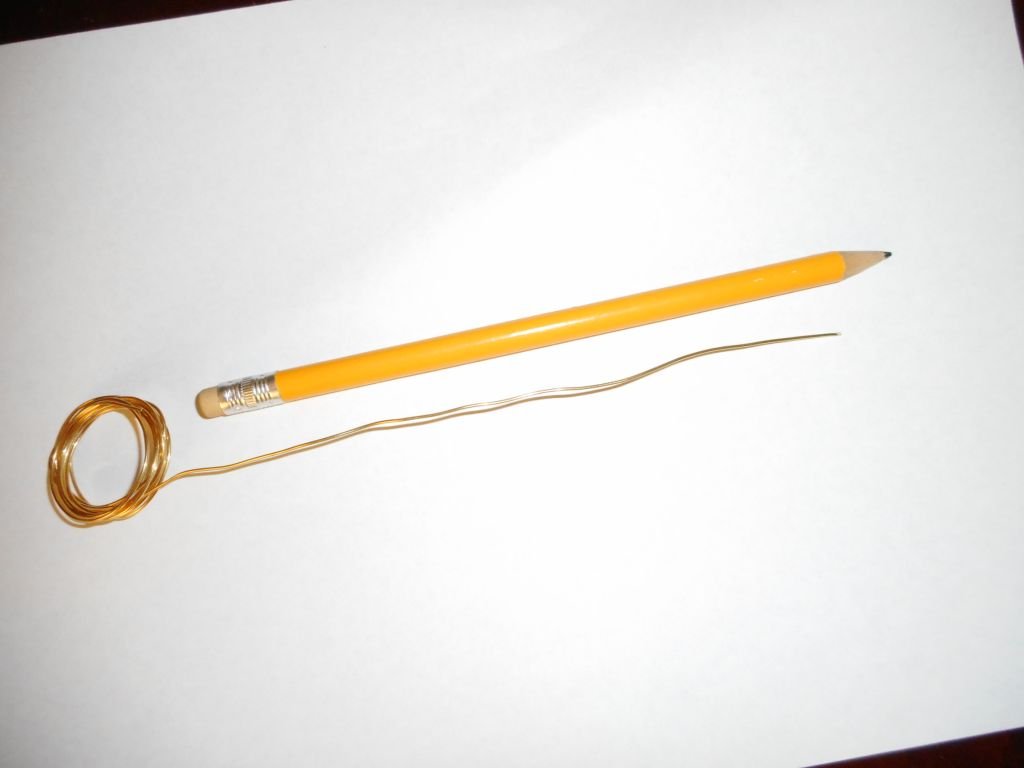
Thanks Ken, Steve. Here are a few pics to further show my problem. No way can I pull the wire straight using a vice and pliers, and the 2 metal ruler method does zip as well. Reckon I may need some sort of heat source perhaps? So what I am trying to do is make the horizontal brass rails as shown in the last picture. What I currently have is this. I have tried pulling, clamping, rolling, stretching etc. to no avail. The wire remains warped and frankly unusable. The picture here is the offending item under a stock standard grey lead pencil for some sort of scale. Nice straight rails.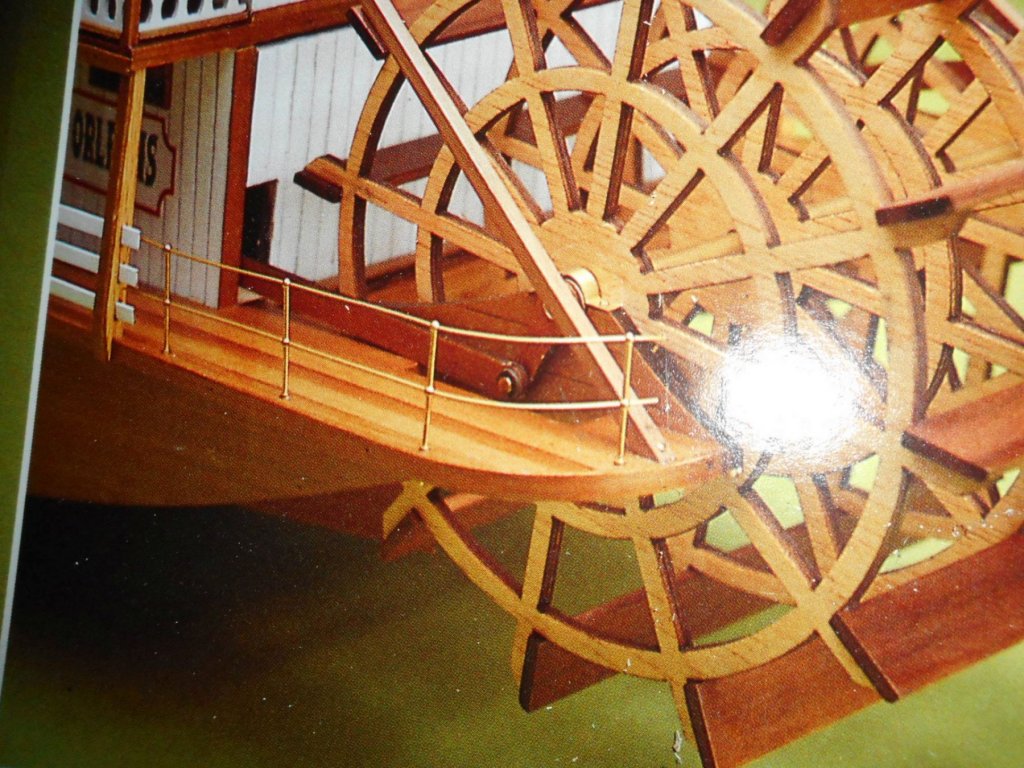
-
Hi, I have a length of very thin brass wire I need to straighten out. It came in the kit in a round form and needs to be nice a straight when cut into lengths to use as railings. Problem is, when I unwind the wire it bends and kinks and hence looks terrible. Any tips on straightening bent or kinked fine brass wire? Cheers Chris
-
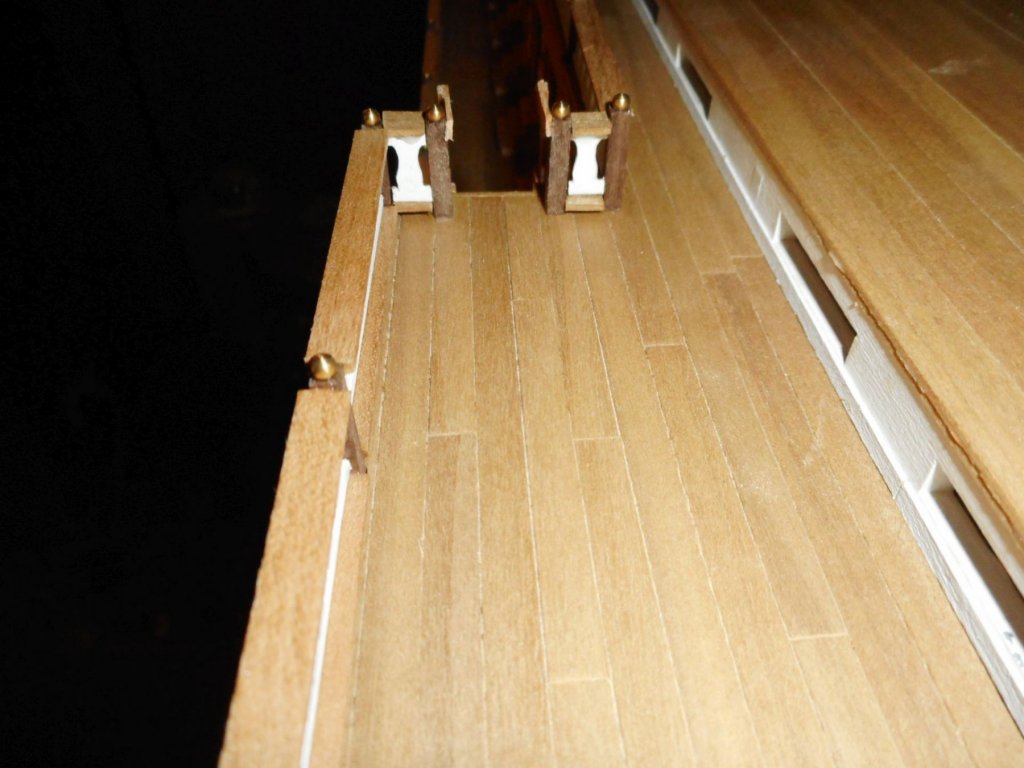
G'day Anna, elastic bands (rubber bands), make great temporary holding clamps. They conform to pretty much every shape and are cheap as chips. As Eric has said, once the wood has dried it will hold its shape enough to allow gluing. Again, I usually use elastic bands to further hold the piece whilst the glue sets. As for you bow section on your hull; it wont be too expensive to buy some more thin strips to put another layer of planking over what you have done. If you choose to do so, firstly sand and fill the entire hull to achieve a nice flowing curvature toward the bow and stern (front and back). Give it a nice sand, and you will find you now have a really nice surface to apply a final planking layer which will look first class. Also, try not to use nails unless you want them to be seen. On my current build you can see where I have deliberately put exposed nail heads on the blades of the paddle to simulate large bolts. I will do this to a few more larger structural pieces to further simulate what I think may have been seen on the real vessel. Overall, your vessel is coming along very nicely and you should be very proud. I will continue to follow along with interest. Good luck. Cheers Chris
-
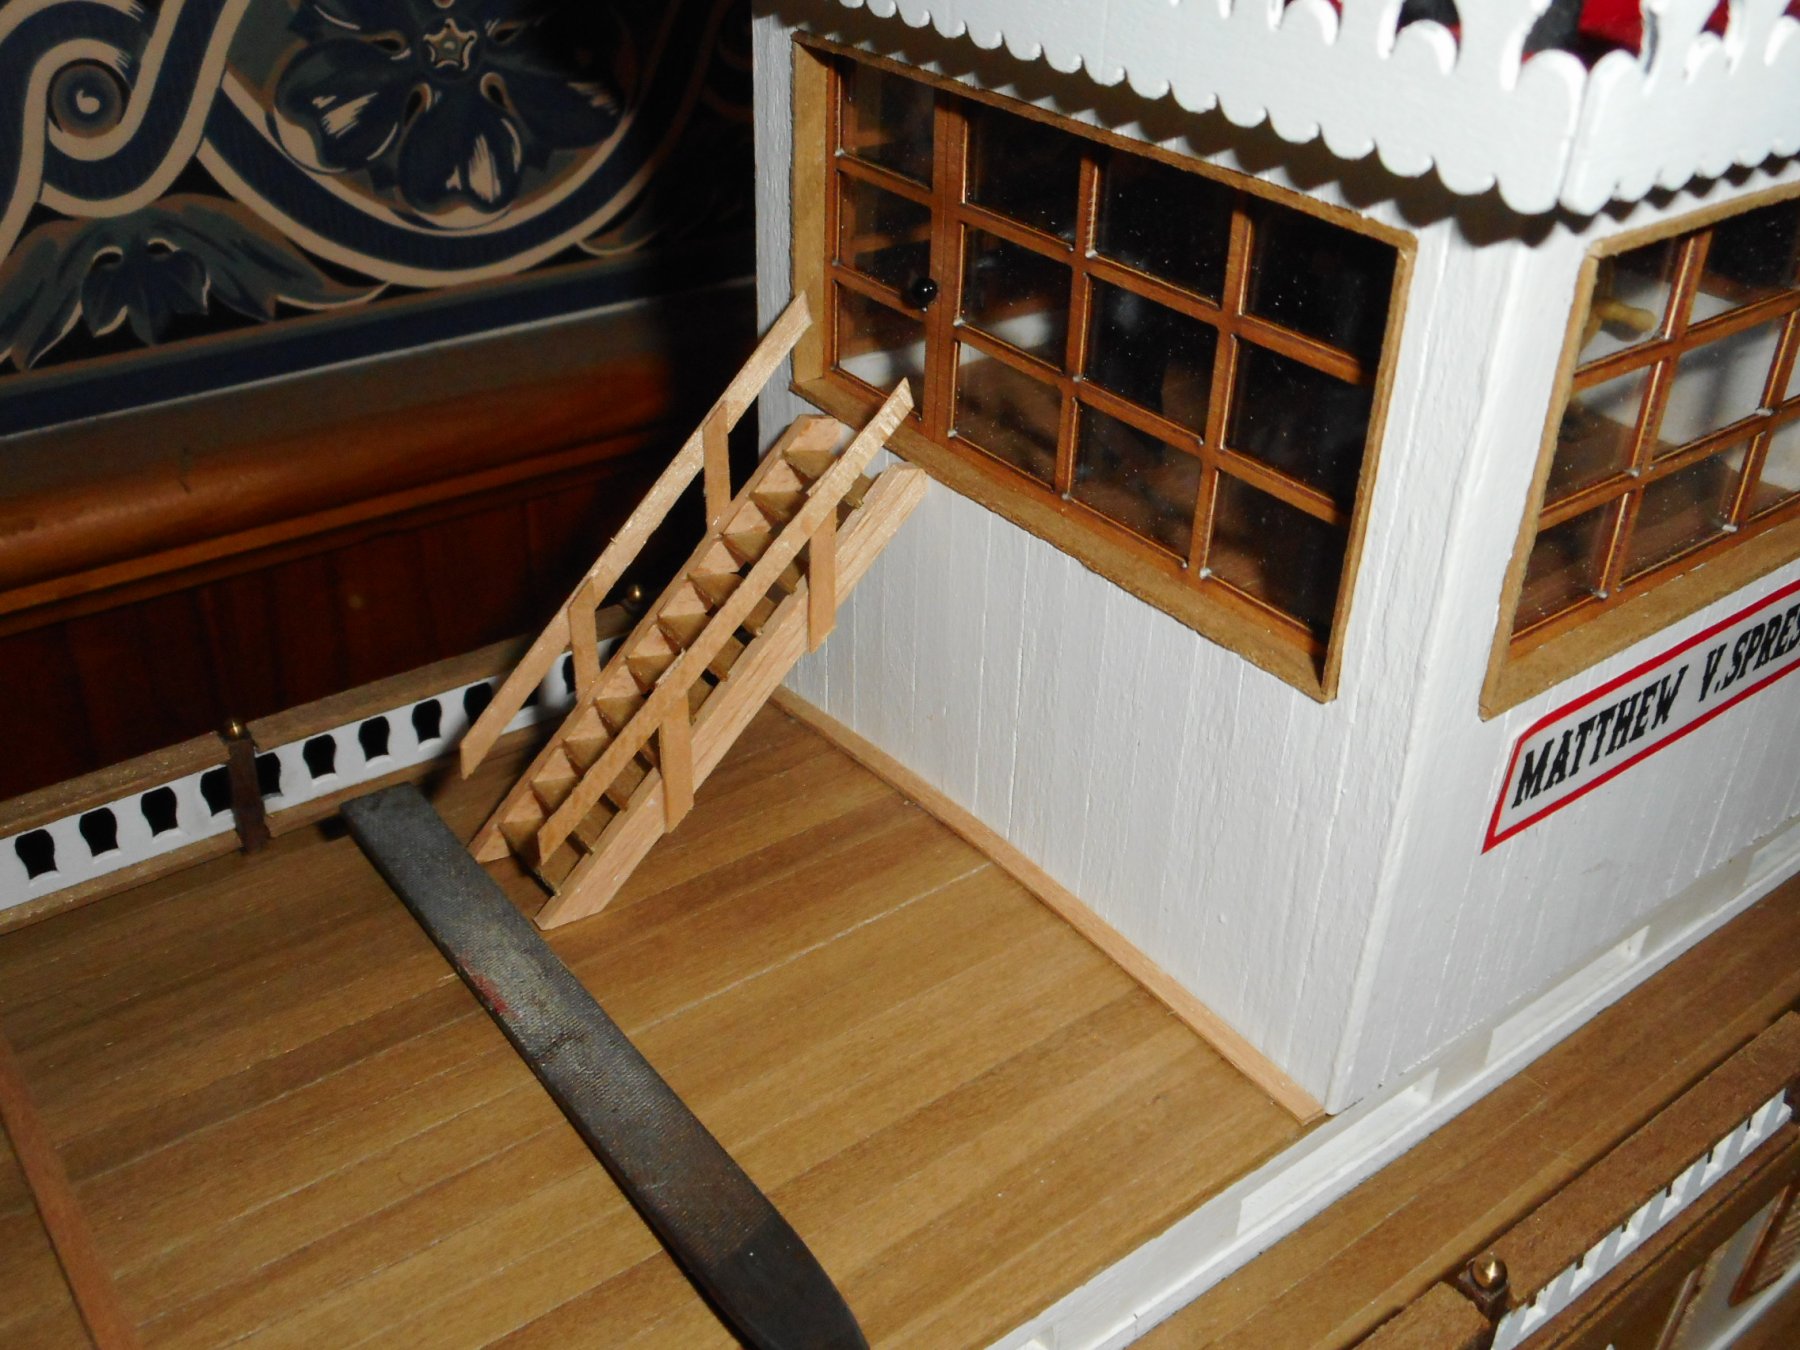
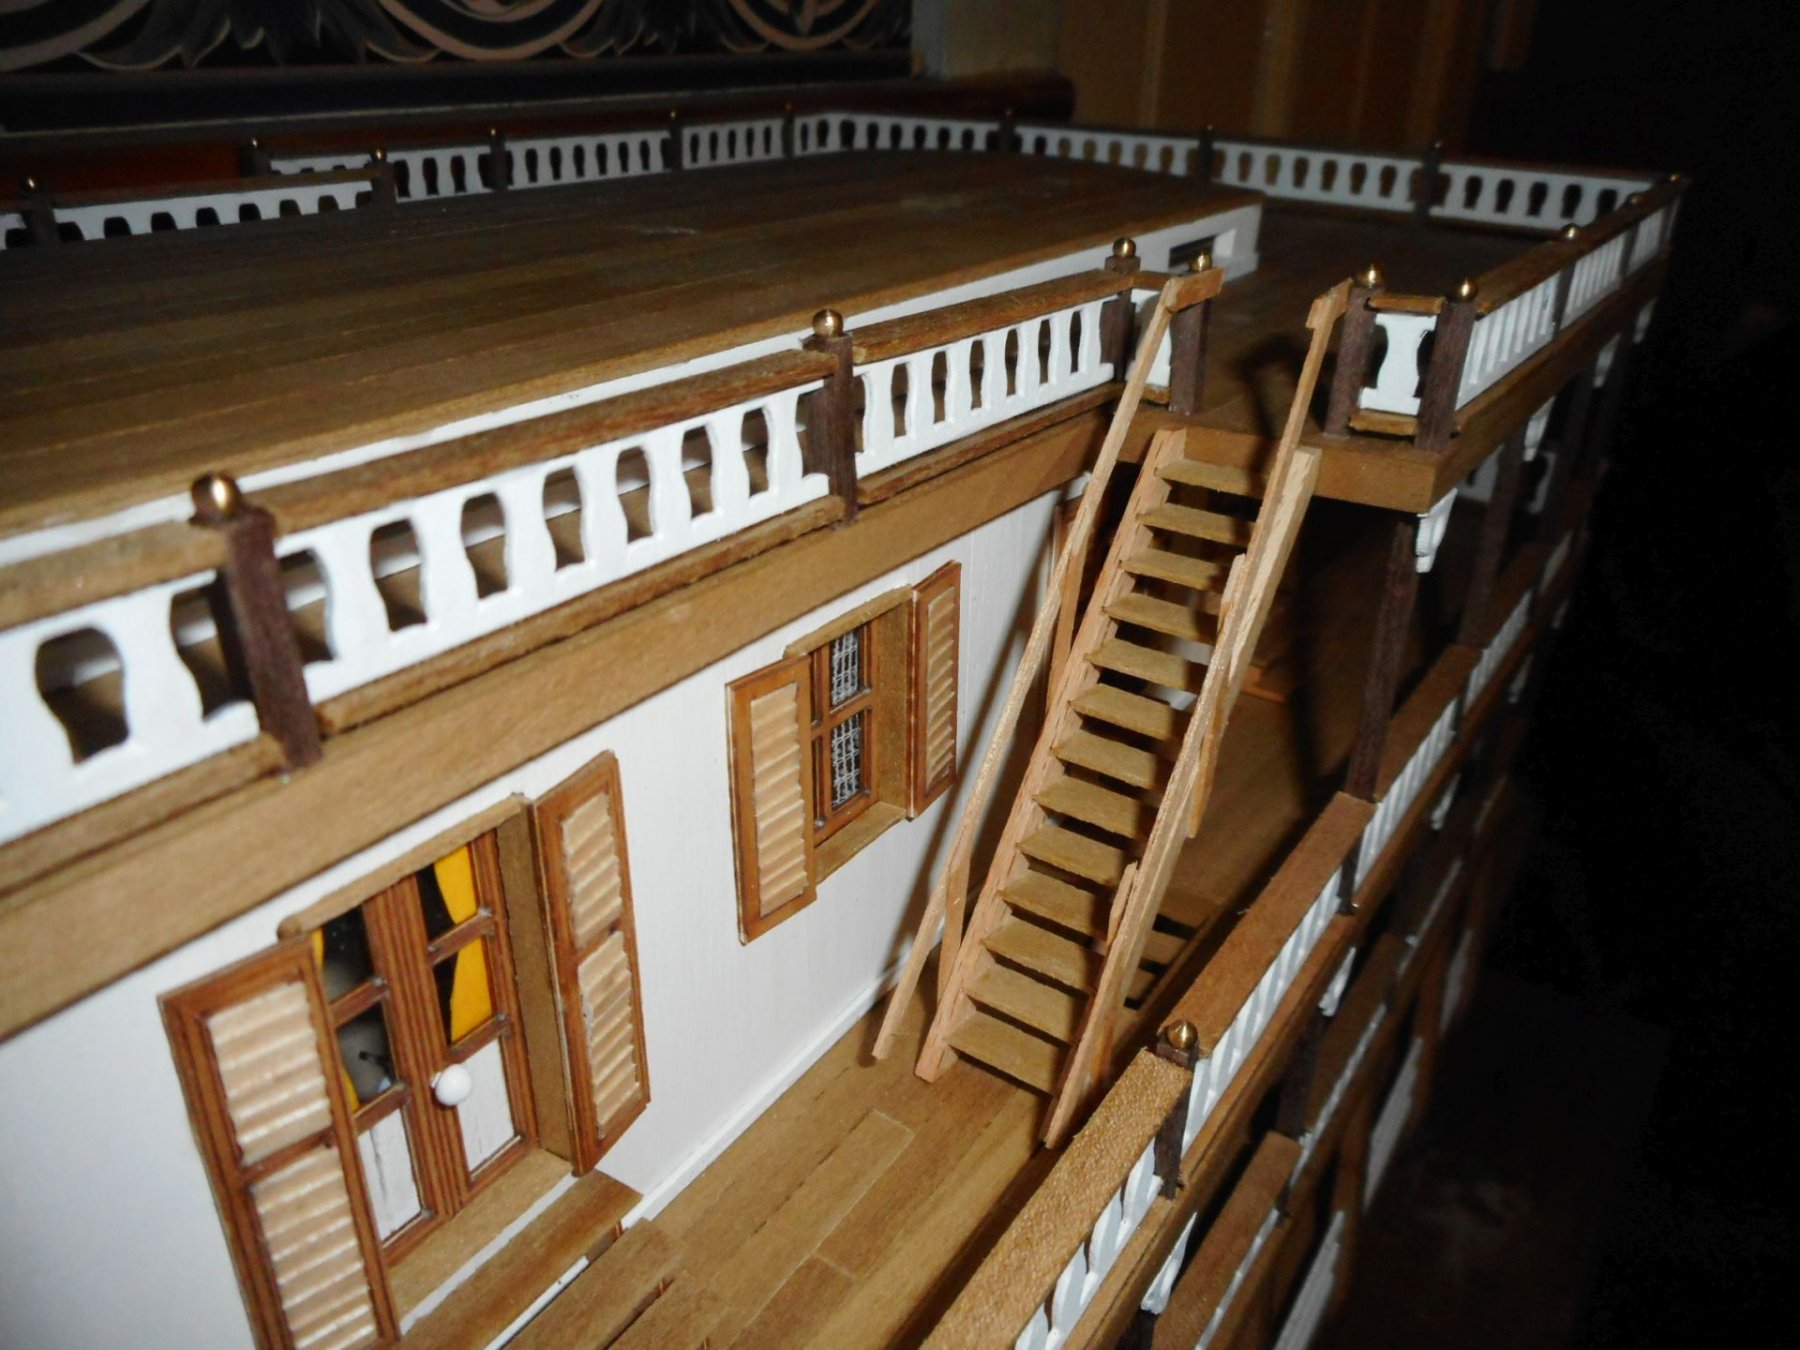
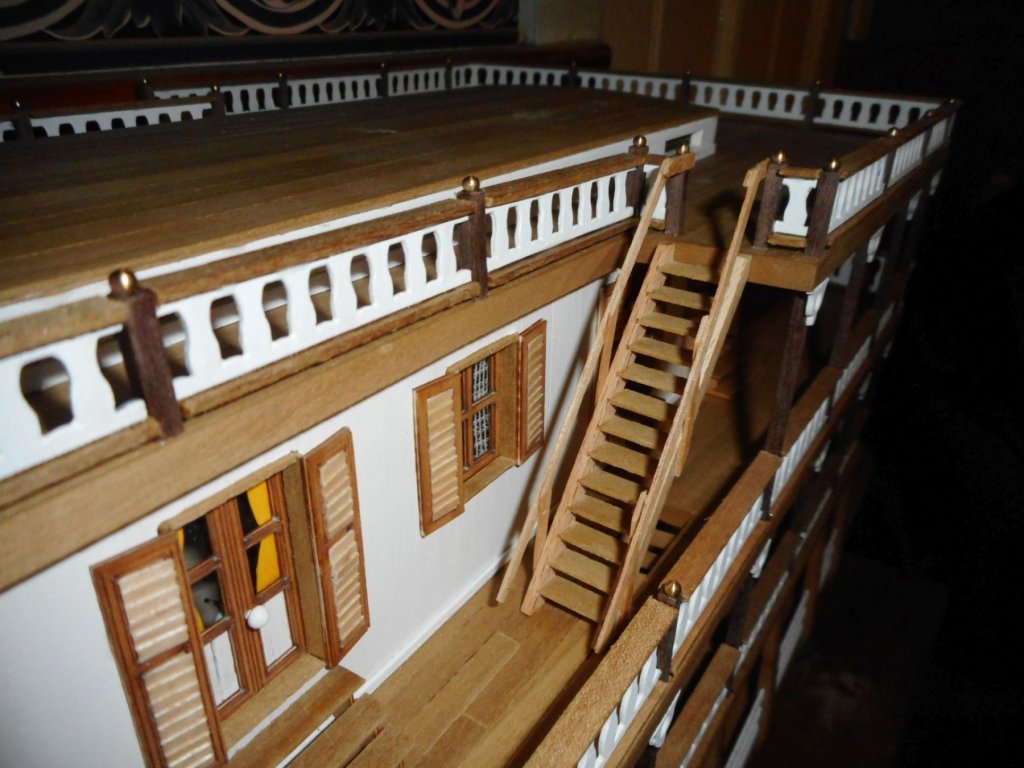
Upper Port side staircase. Not 100% happy with this, but it is what it is. I maybe able to deflect eyes from it via cunning methods elsewhere. Anyway, the Port side is always my "test" side so I hope to do better on the Starboard. All mistakes are my own and not the kits or manufacturer. Cheers Chris


-
if you say, and are correct, I would say scratch built. cheers chris
-
hey mate. welcome. post pics! cheers chris