HOLIDAY DONATION DRIVE - SUPPORT MSW - DO YOUR PART TO KEEP THIS GREAT FORUM GOING! (Only 13 donations so far - C'mon guys!)
×


UpstateNY
-
Posts
466 -
Joined
-
Last visited
Content Type
Profiles
Forums
Gallery
Events
Everything posted by UpstateNY
-
 Hi Simon, Glad to see you posting again Looks like you made great progress and looking forward to seeing her painted! Cheers, Nigel.
 -
Hi Darrell, Looks like you and I went in different directions given your location note! I am a transplanted Londoner! Deck planking looks good and will be even better after sanding. On the color, I'd do some test pieces and see what I liked after giving them a couple of coats of wipe on poly. Deck in your picture has a nice sheen so perhaps a satin finish would work. Good luck and enjoy your build. Cheers, Nigel.
-
Simply spectacular! Congratulations on your beautiful model. Cheers, Nigel.
-
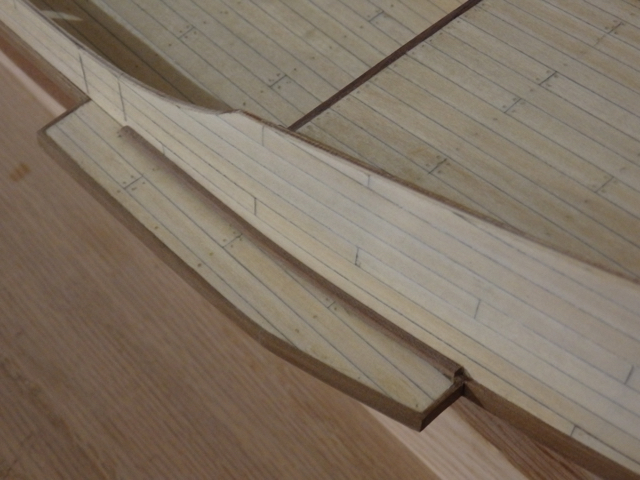
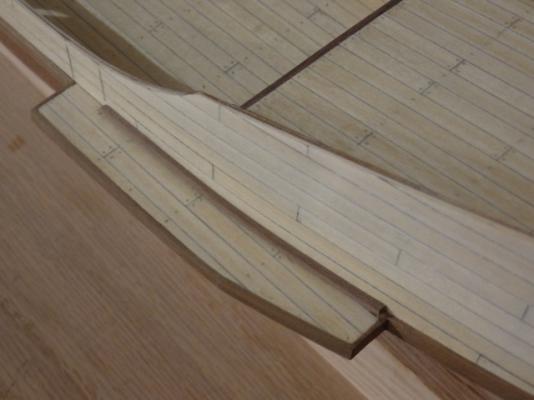
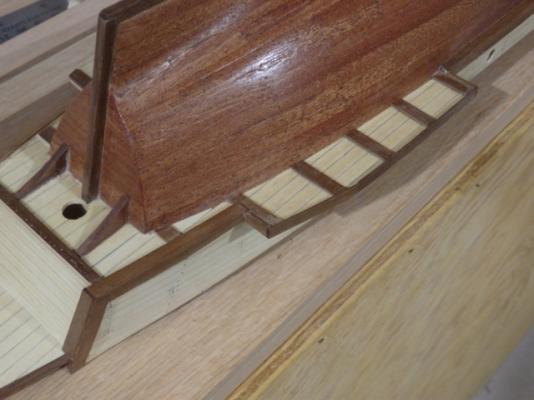
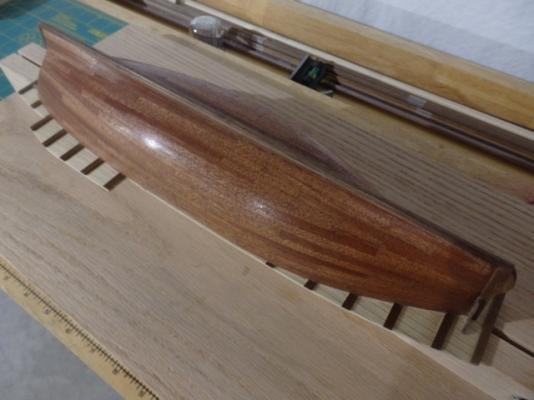
Hi All, A little more progress has been made to finally complete the port bulkwark. Outer basswood planks were first treenailed using the drill and fill method in the same way as the decking. The inside of the bulwark was then also planked with basswood to help hide all the treenail holes! 3x3mm walnut strips were then cut, sanded to match the waterway thickness and finally glued to the planking to make some dummy frames. The dummy frames were aligned to the joints in the decking. Making these frames took me a long time as each frame had to be individually fitted to match the hull and deck shape correctly. I usually needed several attempts at sanding the angles correctly before each dummy frame fitted at least reasonably well. Walnut strips were as usual heat formed to shape the fore and aft gunwales. The bow curves especially took repeated heating before I could match the hull shape. Some edge bending was also needed to get the strip to lay correctly on the frame tops. Aft gunwale was made in pieces in the end as even with heat, I kept breaking the strip at the sharp transition to the poop deck. As usual a few thumbnails are below. After some final cleanup, the starboard bulwark is up next. Cheers, Nigel.


- 270 replies
-
- 6
-

-
- red dragon
- artesania latina
- (and 1 more)
-
Hi Captain Steve, I am very late to your build, but been really enjoying seeing all these great details coming together. Wonderful stuff! Looking forward to seeing your launch loaded up and ready to set sail! Cheers, Nigel.
- 625 replies
-
- 3
-
-
- bounty launch
- model shipways
- (and 1 more)
-
Tilting Table on Byrnes Saw
UpstateNY replied to jhearl's topic in Modeling tools and Workshop Equipment
Thanks George. Didn't see before that the tilt table was actually attached to the fence. Makes perfect sense now. Cheers, Nigel. -
Glad it all worked out. Looking forward to seeing how your San Francisco is coming along! Cheers, Nigel.
-
Tilting Table on Byrnes Saw
UpstateNY replied to jhearl's topic in Modeling tools and Workshop Equipment
Interesting discussion as this saw is on my ever increasing wish list of tools! So I just looked at the actual image of the angled table on the Byrnes website and my 2c from the way the table appears is you would have to do sequential cuts, dropping the table after you did the miter cut to cut the stock to the final length before then applying the finishing angle cut to the other end of the piece if this was needed Probably doable for most cases but certainly more work than on a table with the capability to angle the blade. Hopefully someone actually with the angled table option can comment how it works in practice and what I am missing perhaps. I believe the Proxxon saw does allow the blade to be angled. George... from the Byrnes image, the tilting table does indeed show a slot on the tiling part of the table. I do not see how a fence could be used however, but I am probably misunderstanding the intent of your question here. Cheers, Nigel. -
Just seen your question. They are called tags and you can add them to your log to allow someone to find similarly tagged content quickly. I created them as I made my log, but I found the below link that shows you how to add them once your log is created. http://modelshipworld.com/index.php/topic/593-how-do-i-change-the-tags-after-setting-my-build-log-up/?hl=tags Hope this helps! Cheers, Nigel.
-
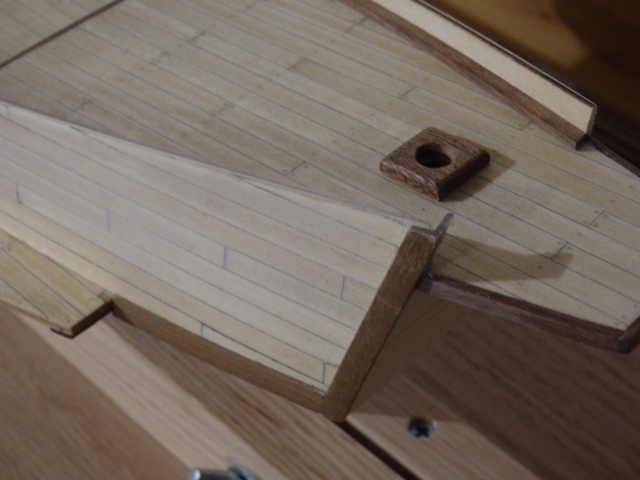
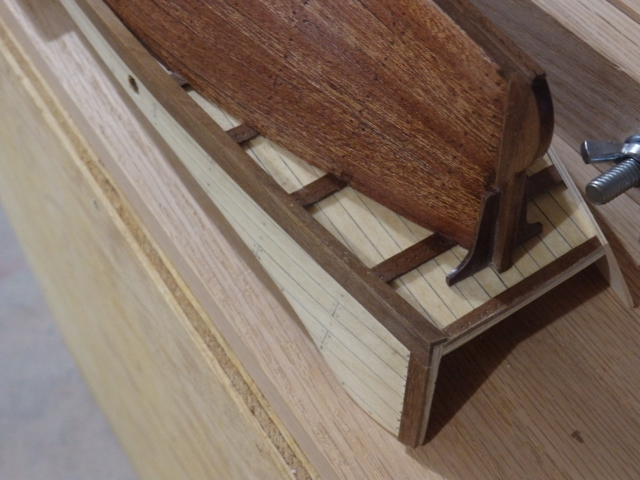
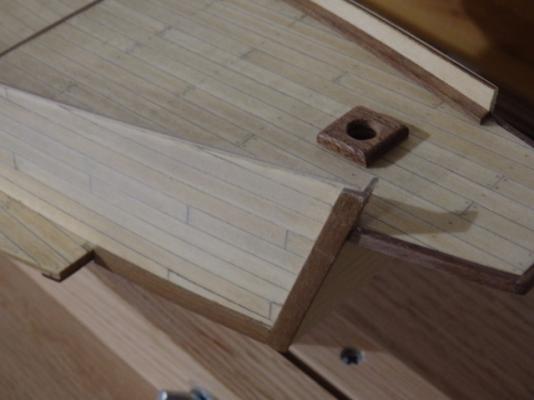
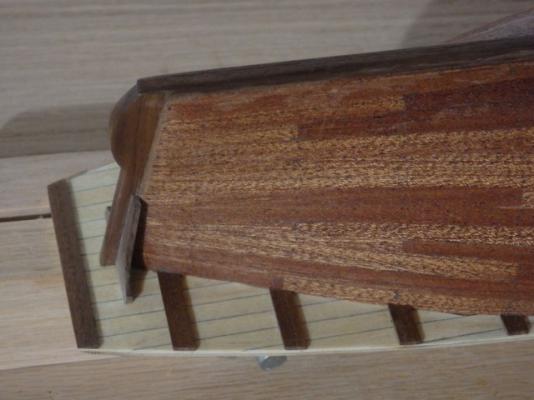
Hi All, So, continuing to add the detail to the outside of the port bulwark. I am using walnut which I hope makes a nice contrast against the basswood planking. Much this work is not actually in the plans, but it is a lot of fun adding it in. Heartstopping moments were as I cut in the entrance using a fine razor saw, but all went well with only some fine scratching of the decking I can easily finish out. I then detailed the entrance using various sizes of walnut strips. I thought I was done on the entrance, but the macro shot shows I have a lot of clean up still left to do! The underside of the port bulkwark is also completed with the last strip now glued on to finish the bottom surface of the ply bulkwark. All the strips were as usual heat formed to shape. Next steps are to treenail the bulwark outer planking (you can see my setup pencil marks in some shots) before starting to finish the inside of the port bulwark. As usual thanks for reading and for the “likes”. They are much appreciated. Cheers, Nigel.
- 270 replies
-
- 10
-
-
- red dragon
- artesania latina
- (and 1 more)
-
Carvings, windows and covers look great Max! To me, the extra height of your carvings vs the photo etched parts makes the stern look much better. I just hope my first try at carving goes half as well! Enjoy your vacation! Cheers, Nigel.
-
Hi Josh, Welcome aboard and my thanks for your more than kind words. . Certainly the standards achieved here on MSW amazes me continually as well. As a build, the Dragon is perhaps a bit different, but it is proving to be a fun kit to build. Thanks again..cheers! Nigel.
-
Simply beautiful! My thanks as well for posting all these detailed pictures. As toms10 said above, they really are a great step by step reference for new builders like me. Cheers, Nigel.
-
Lovely work and look forward to your progress. What is the product you are using to do your sculptures please? It seems to be able to hold very fine detail. In the States Sculpey is often used. Cheers, Nigel.
-
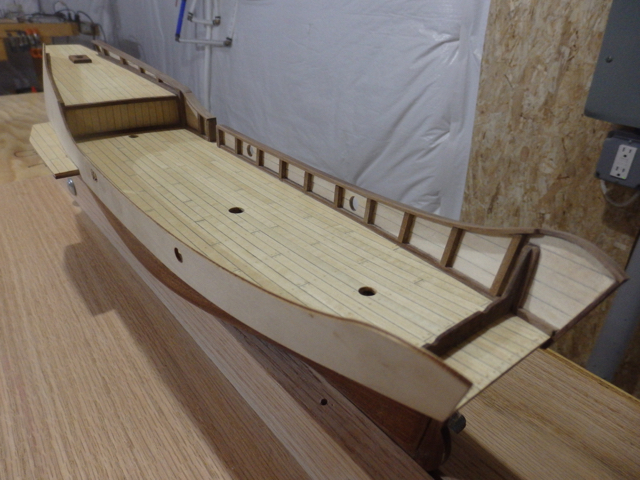
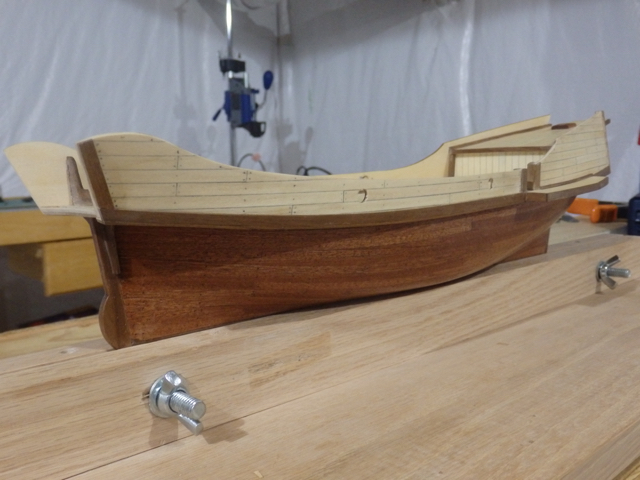
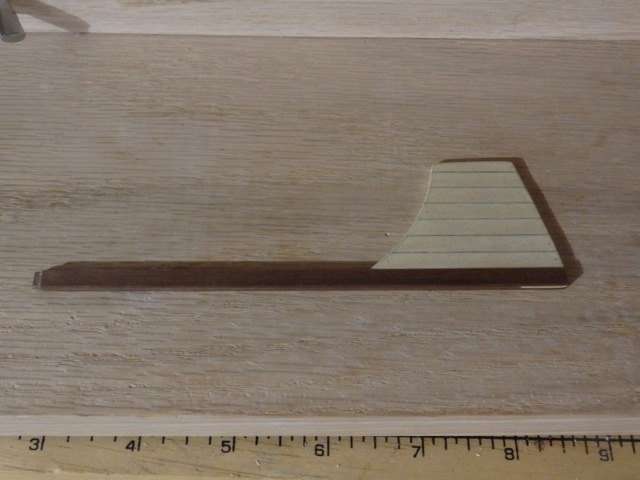
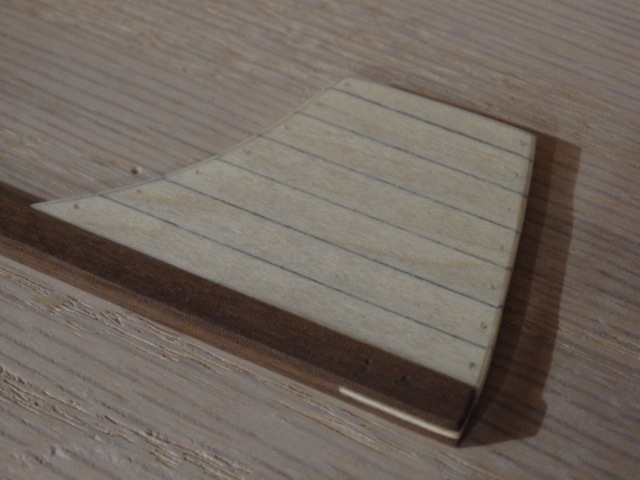
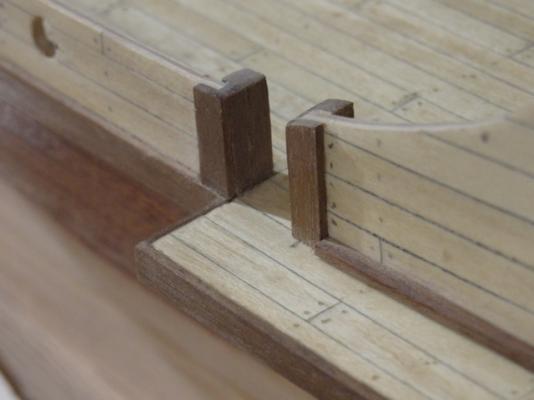
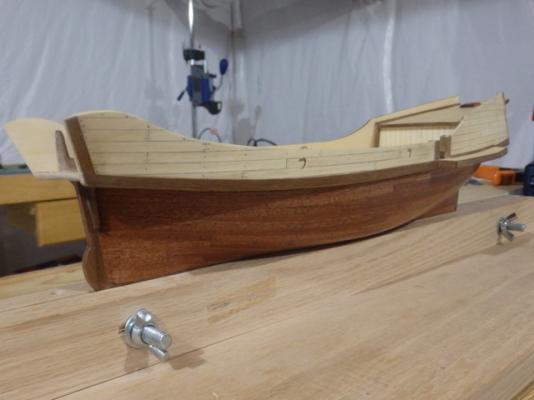
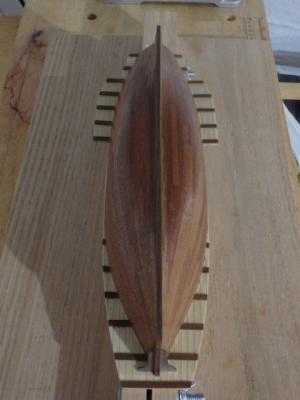
Hi All, So over the weekend, I managed to attach the bulkwarks. Once more Chuck’s heat technique helped to preform the bulwarks, but I found I needed to slightly overbend the ply to hit the needed shape as it wanted to spring back more than the solid walnut I used for the main deck waterways. Port bulwark was then planked on the outside in basswood using the same 4 shift pattern as used for the deck, trying to match up the joints to the decking lines. Finally, I added the poop deck walnut rubbing strakes and waterways again heating them to preshape. Feels good to be finally starting to add some of the deck details. Thumbnails attached below and as usual thanks for reading. Cheers, Nigel.
- 270 replies
-
- 10
-
-
- red dragon
- artesania latina
- (and 1 more)
-
Hi Bryan, Wow...fast work and she looks great! As for planking, in case you haven't already seen it, take a look at the below video by Chuck in his great Cheerful Cutter build log. Great stuff and his heat technique has already really helped me on my build to shape strips easily. http://modelshipworld.com/index.php/topic/8131-hm-cutter-cheerful-1806-148-scale-by-chuck/page-22 Cheers, Nigel.
- 75 replies
-
- 1
-
-
- Caldercraft
- Supply
- (and 1 more)
-
Hi Jörgen, Just seen your build and what a fabulous job you have done. Lines on these yachts are simply outstanding and I am looking forward to seeing her with her lighter sails. I was lucky enough to take a trip on a much later America's cup yacht when I visiting Auckland ten or so years ago. Your pictures just brought back great memories of the feeling as she cut through the water. Thanks for posting your build and I am going to add this kit onto my wish list! Cheers, Nigel.
-
Hi Bryan, This looks like a great kit of a historic ship. Will follow along if you don't mind! Enjoy! Cheers, Nigel.
- 75 replies
-
- 1
-
-
- Caldercraft
- Supply
- (and 1 more)
-
Your eyeball looks pretty well calibrated to me! She is coming on beautifully and love the stain color. Cheers, Nigel.
- 43 replies
-
- 2
-
-
- indian girl canoe
- Midwest Products
- (and 1 more)
-
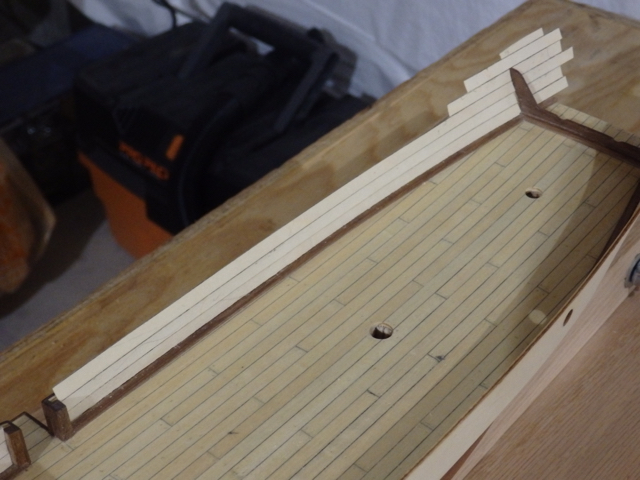
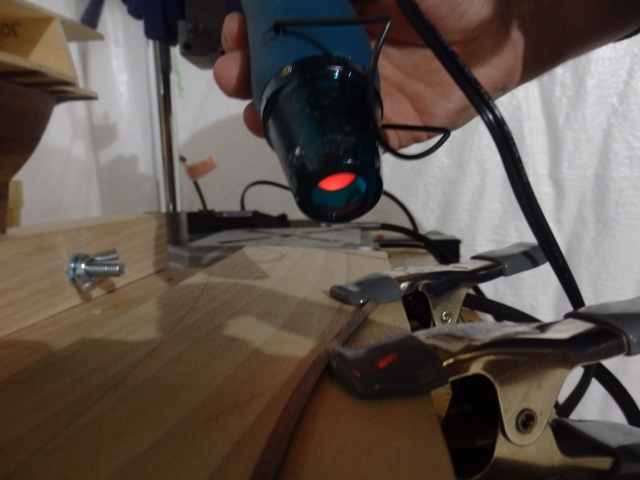
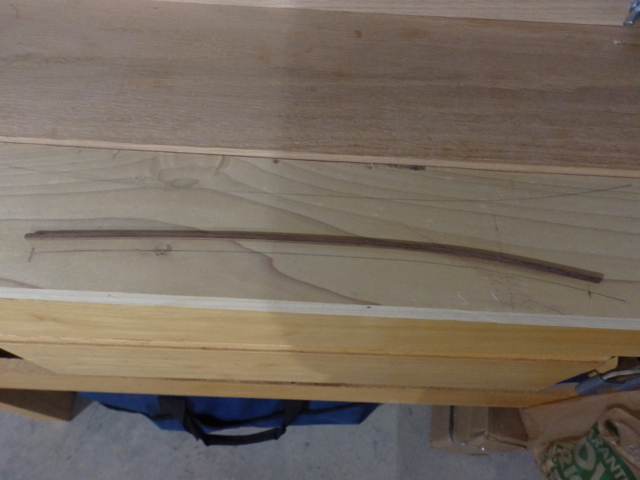
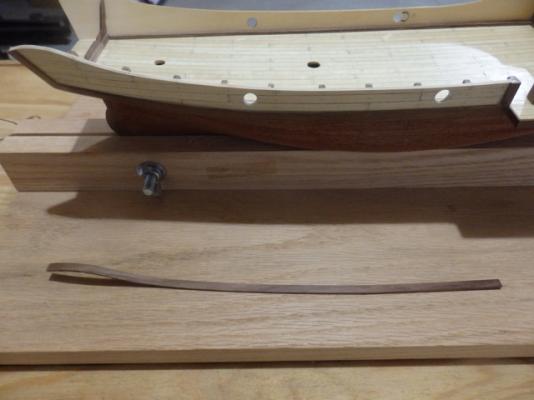
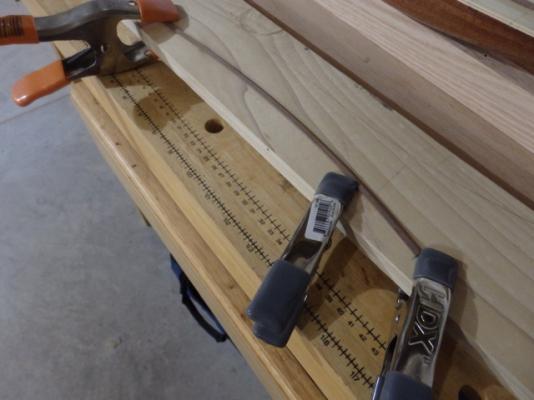
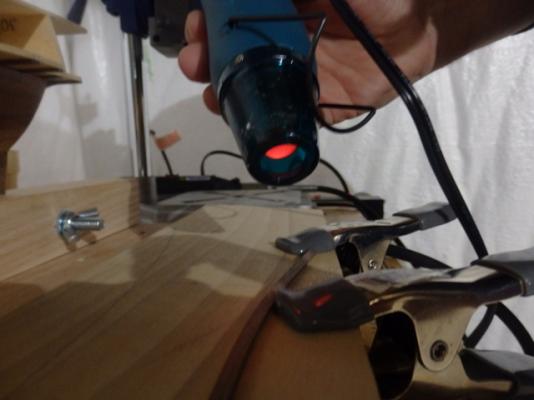
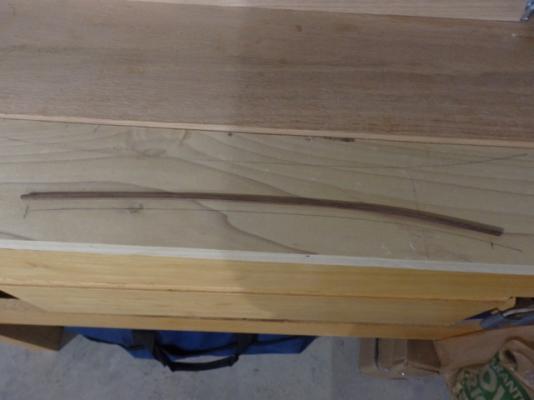
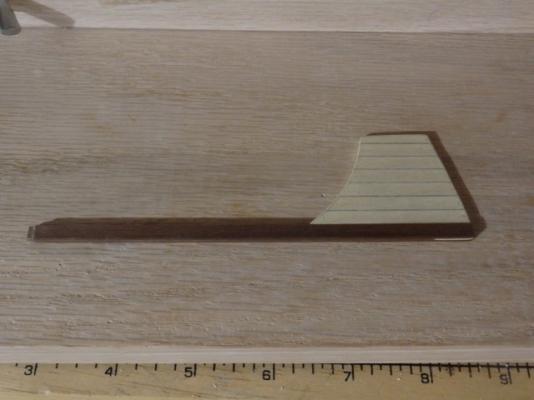
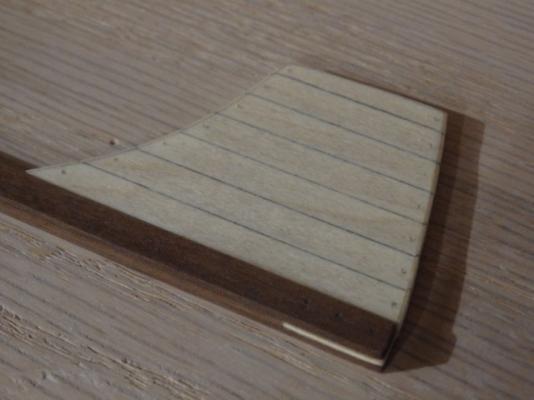
Hi All, Only a quick update, but here is my first attempt at using Chuck’s edge bending technique as demo’ed in the video in his awesome Cutter Cheerful build log. Link below. http://modelshipworld.com/index.php/topic/8131-hm-cutter-cheerful-1806-148-scale-by-chuck/page-22 The waterways (2x3mm walnut) on the Dragon need to be edge curved to match the deck shape. I used the cutoff from the laser cut deck sheet to draw out the shape of the deck and then clamped the strip to form the needed shape. As the Admiral’s hairdryer was off limits ( ), I used the Captain’s embossing heat tool to heat the walnut gently for about 5 minutes, keeping the heat tool moving all the time. After allowing the strip to cool for 30 mins, I released the clamps and the strip matched the needed shape pretty well. A minute of light pressure until the wood glue tacked up and done with no clamping needed. Wonderful tip…thank you Chuck! Thumbnails below. Apologies for the image ordering...uploads aren't working correctly for me right now. Cheers, Nigel.

- 270 replies
-
- 9
-
-
- red dragon
- artesania latina
- (and 1 more)
-
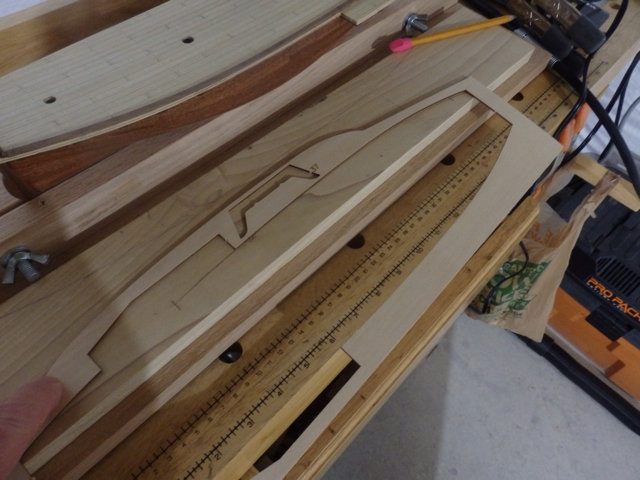
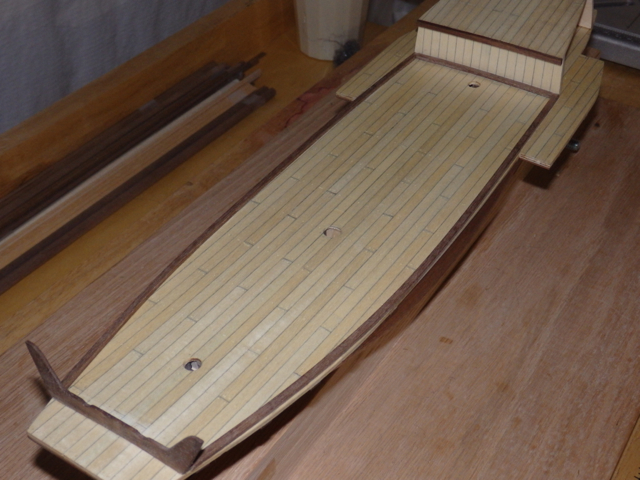
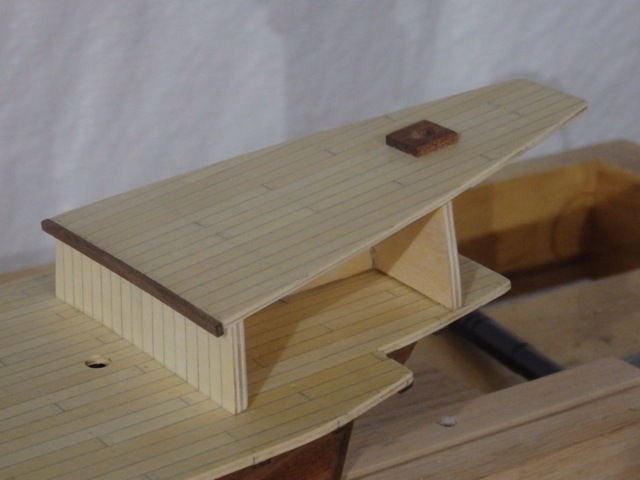
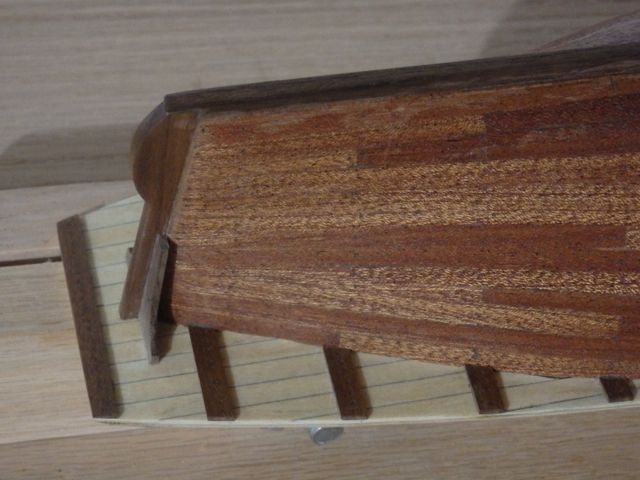
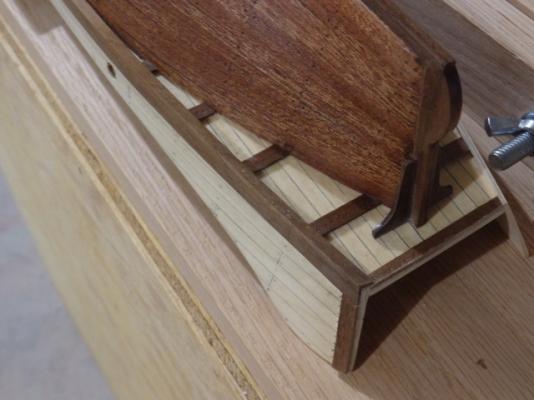
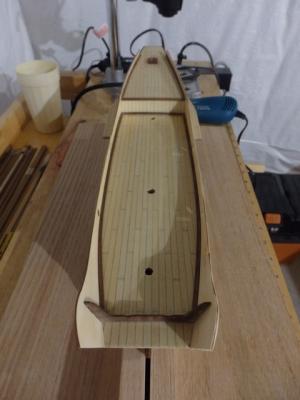
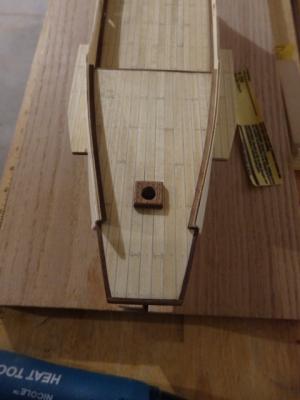
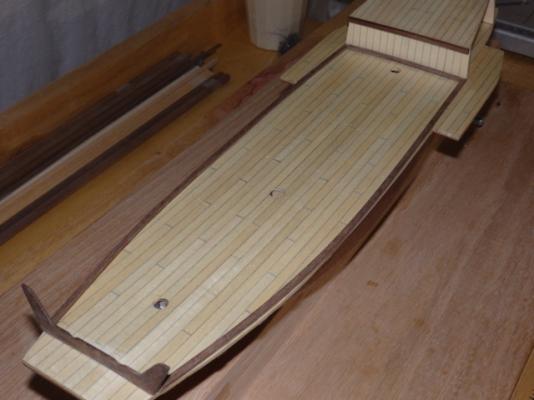
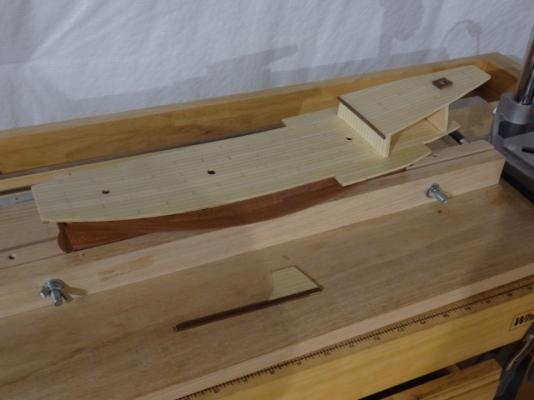
Thanks Augie! So, I made a little more progress this weekend on the Dragon. The cabin has been assembled, planked and treenailed. I then skipped ahead of the instructions to complete the rudder. This allowed me to use the rudder assembly to set the correct angle and placement of the rudder post holes through the main and cabin decks. I did this now as didn't like the idea of drilling these large holes with the model largely assembled. I also marked the gluing location of the cabin on the main deck while I had the rudder clamped in position. The cabin was then glued onto the main deck. She is slowly starting to take shape and some photos are below. Next step is now to start assembling the upper bulwarks. Cheers, Nigel.

- 270 replies
-
- 8
-
-
- red dragon
- artesania latina
- (and 1 more)
-
Really beautiful, Brian. I love the planking pattern made by the planks in the last shot especially. Cheers, Nigel.
- 43 replies
-
- 1
-
-
- indian girl canoe
- Midwest Products
- (and 1 more)
-
Great to see using the coverslips is possible...we'll see how steady my hands are in a few weeks! Cheers, Nigel.
-
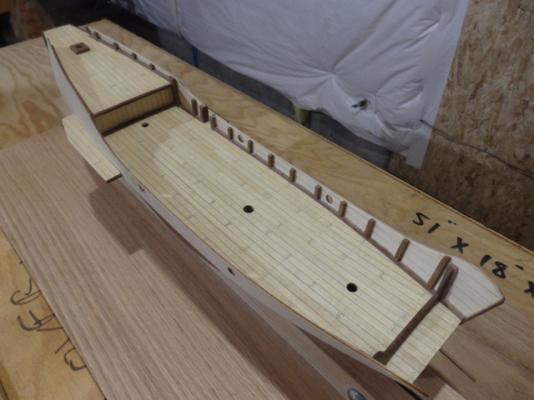
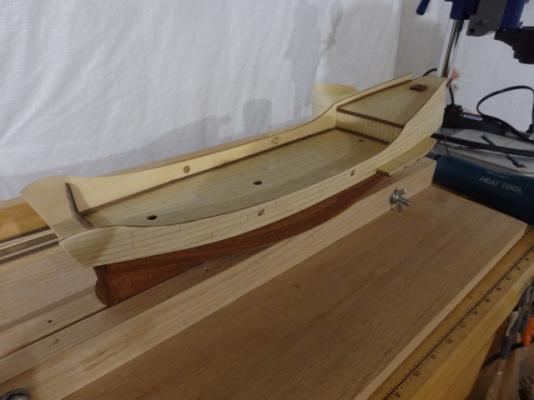
Hi All, Firstly thanks to John and Carmelo for the kind words and to all for the likes…much appreciated. Carmelo, there was no worry on my part about your picture…I am looking forward to seeing your progress on your Dragon! As for my build, I’ve managed to finish the hull tree nailing. I used a dark walnut filler to try to get the treenails to stand out against the sapelli planking. They don't show up strongly, but in the right light they are visible. I also finished planking the underside of the deck and added some walnut strips to look like support beams, lining them up with the planking joints. The plans don’t call for this and almost none of this work will be visible after the bulwarks go on. For reason I feel better knowing the underside of the deck is finished to match the top! Anyway thumbnails below and next up is attaching the cabin and the upper bulwarks. Cheers, Nigel.
- 270 replies
-
- 7
-
-
- red dragon
- artesania latina
- (and 1 more)
-
Hi Augie, Not just great work but consistently great! Post after post...I just don't know how you do it! Cheers, Nigel.
- 2,191 replies
-
- 1
-
-
- confederacy
- Model Shipways
- (and 1 more)