HOLIDAY DONATION DRIVE - SUPPORT MSW - DO YOUR PART TO KEEP THIS GREAT FORUM GOING! (Only 13 donations so far - C'mon guys!)
×


UpstateNY
-
Posts
466 -
Joined
-
Last visited
Content Type
Profiles
Forums
Gallery
Events
Everything posted by UpstateNY
-
 HI Robb, Looks awesome. Great to see all the deck details bringing her to life! I hear you on drilling the hole for the bowsprit....drilling out my cannon ports gave me fits. In case it helps, another option to add to the suggestions by George and Matt, is to use a tapered sanding stick as Augie showed in his Confederacy build. See link below to the page in Augie's log. http://modelshipworld.com/index.php/topic/3371-usf-confederacy-by-augie-ms-164/page-82 Hope you enjoyed your time up at Lake George. Cheers, Nigel.
- 389 replies
-
- 3
-

-
- scottish maid
- artesania latina
- (and 1 more)
-
How I make Clue (Clew) Blocks by Dan Vadas
UpstateNY replied to Dan Vadas's topic in Masting, rigging and sails
Wonderful step by step tutorial. Thank you Danny. Cheers, Nigel. -
Hi Nils, Lovely metalwork...seems a shame to have to paint it in some ways! Props look better every time I see them as will now the rudder! Hull is also looking wonderful and I am looking forward to seeing the next detail levels go on like all those great portholes. Cheers, Nigel.
- 2,625 replies
-
- 3
-
-
- kaiser wilhelm der grosse
- passenger steamer
- (and 1 more)
-
Cutty Sark by NenadM
UpstateNY replied to NenadM's topic in - Build logs for subjects built 1851 - 1900
Hi Nenad, Great work on your CS and very much enjoying watching all your detail work come together. Could you post a wider picture when you have time so we can see them all together? Enjoy the mountains...they are my favorite place to be no matter what the season. Cheers, Nigel.- 4,152 replies
-
- 3
-
-
- cutty sark
- tehnodidakta
- (and 1 more)
-
Hi Mobbsie, Love the sails and their color as well.Great stuff. On the mast winch, from your first post images, I think I can see a similar green winch on the other mast as well. Assuming I am right that the green color is also a winch, couldn't these winches perhaps have been used to rapidly lower the masts to enable the barge to move upriver beyond Tower Bridge? There are a lot of bridges on the navigable river above Tower Bridge, none can also be raised at least as far as I can remember. Being able to lower the masks quickly would make the barge more useful commercially I would think. Just a thought.... Cheers, Nigel.
-
Hi Nils, Seems from Mr Hollom's wonderful pictures you have a lot of rigging to plan for in your build! Number of stays and so on is amazing! Hull is looking really great...nice to see her off the board now. Looking forward to your next update! Cheers, Nigel.
- 2,625 replies
-
- 5
-
-
- kaiser wilhelm der grosse
- passenger steamer
- (and 1 more)
-
Hi Martin, Perhaps you have seen this, but in case not, here is the link to where Chris posted extensive updates as he worked on his prototype of his Victory and other builds for Amati. http://modelshipworld.com/index.php/topic/985-amati-and-chris-watton/ Enjoying watching your Revenge come to life...looks like a really fun kit to build. Cheers, Nigel.
-
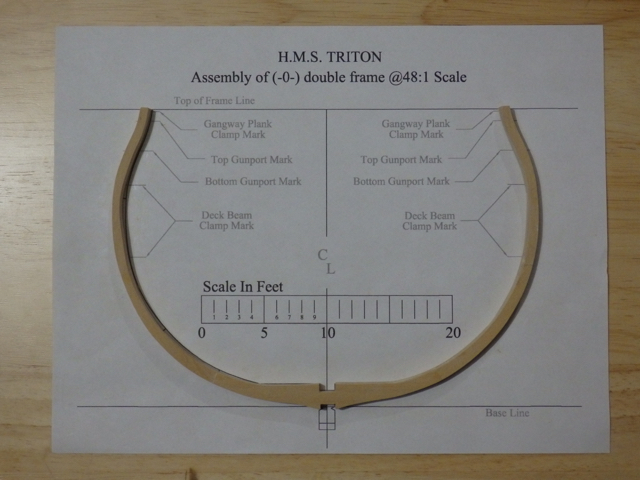
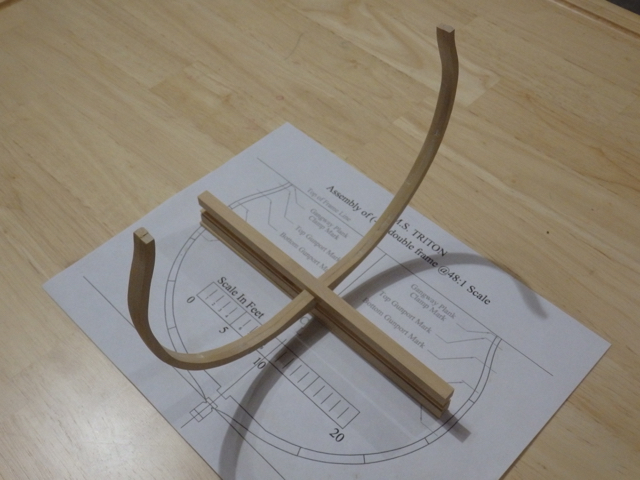
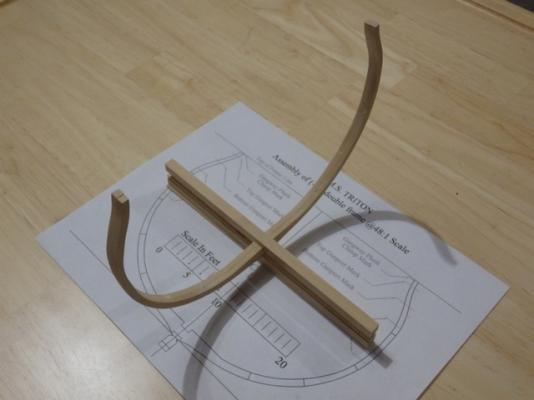
Hi All, Well, I’ve been working on my first boxwood frame. Not an entire success, but as usual I’m enjoying it and of course learning a lot, so all is good! Firstly, I tried to cut much closer to the template lines than I did for my test frame to follow Mark and Pete’s advice and so avoid excess fairing. As you can see from the images, I overdid it and ended up cutting things too close in a few places so I need to learn to be more precise using my handsaw. I also need to learn to be smoother with the saw to avoid leaving vertical saw lines on the edges. I went ahead and made up the frame using these pieces anyway in spite of their problems to practice the assembly step again. Now I can’t remember which member has the great saying to treat each piece as being its own model, but right now I guess I am starting my third model frame! Perhaps this will be a keeper!! Images below including a comparison shot with my basswood test frame. Thanks as usual for reading! Cheers, Nigel.


-
Hi Mark, Just beautiful. Really looking forward to seeing these pieces come together into a longboat. Some of them look like they are only a few mm long! All your hard work and persistence seems to have turned the tools potential into reality! Congrats! Cheers, Nigel.
-
Working Comfortably on Upper Rigging
UpstateNY replied to capnharv2's topic in Masting, rigging and sails
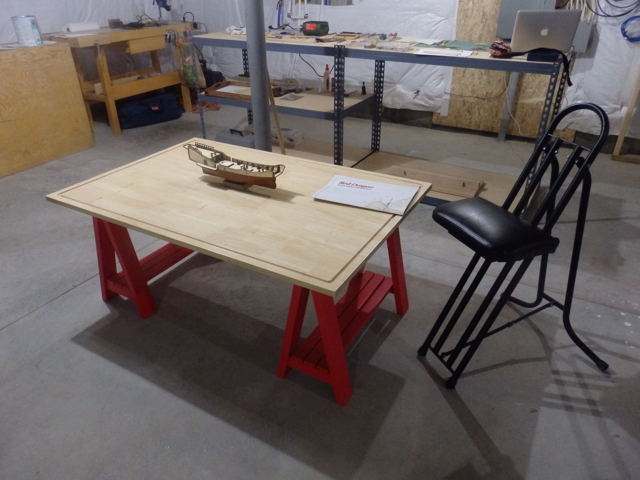
Hi All, As a compliment to a low table (reusing my captain's old play table) I am also reusing my astronomy observing chair as my build chair. I've copied the photo and some text from my Dragon log from a few weeks ago below to save you clicking through. I just checked the link and it still works. "It is infinitely adjustable for height as the seat grips the back rails using a plastic friction bar. Needs a foot rest at the highest settings (~36in so at least I do!) but again will work well for rigging w/o bending over or standing up for ever. I’ve not seen anyone mention these chairs before so figured I’d post in case it interests someone. They aren’t cheap, but I find mine sturdy and comfortable. Link below for those not into astronomy. Not done any checks for price so look around before you take the plunge if you like it." https://www.astronom...hairs_c457.aspx Hope this perhaps helps. Cheers, Nigel.
-
HI Igor, Very late to this build, but will once again follow along as you complete this little jewel. Very much like the sail detailing as well as the wood contrasts used on the deck. Cheers, Nigel.
- 154 replies
-
- 2
-
-
- colin archer
- lifeboat
- (and 2 more)
-
Hi Matt, Well you have 1c there already, but my 2c view is spectacular work by the entire Nutz team! Cheers, Nigel.
-
HI Mobbsie, Sorry to read of the accident to your lovely model and the "repairs" are certainly a bit of an eye opener! I love the stand and fact she now seems to "float" above the base. I follow along on your repair build if you don't mind as you return her to her former glory. Cheers, Nigel.
-
Hi Robb, Your build looks great and I am amazed at how fast you are moving! Enjoy your vacation! Cheers, Nigel.
- 389 replies
-
- 2
-
-
- scottish maid
- artesania latina
- (and 1 more)
-
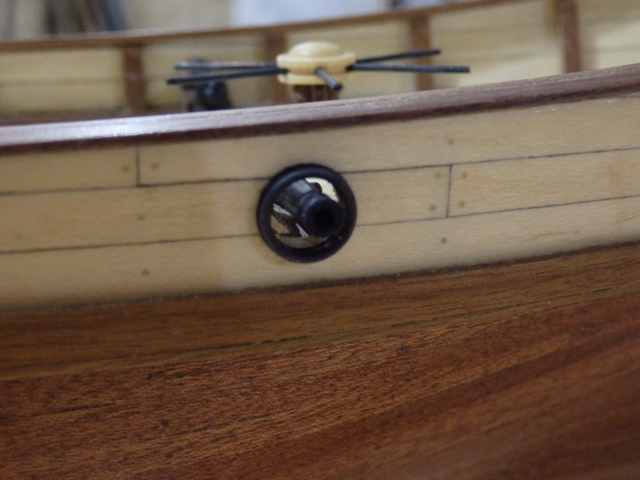
Hi Igor, Really enjoyed watching you build this lovely model. The stopper finishes things off beautifully and I love the seal as the finishing touch! Cheers, Nigel.
-
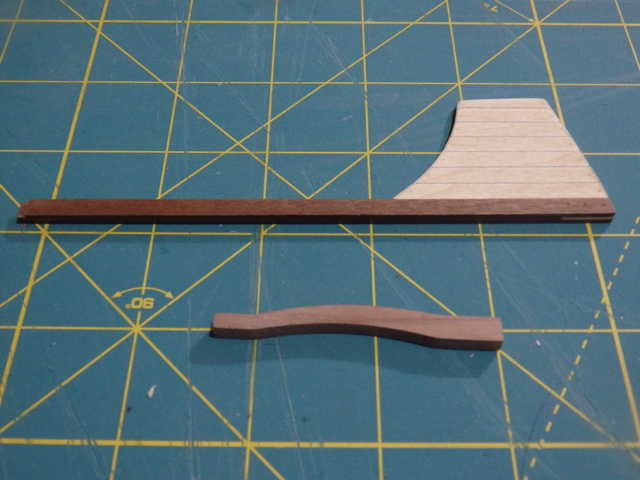
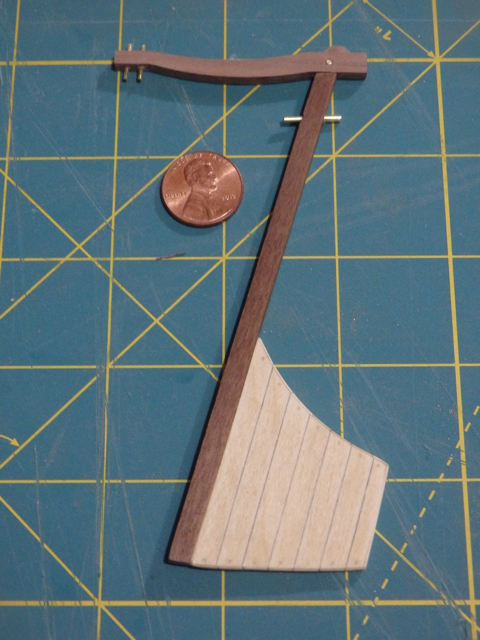
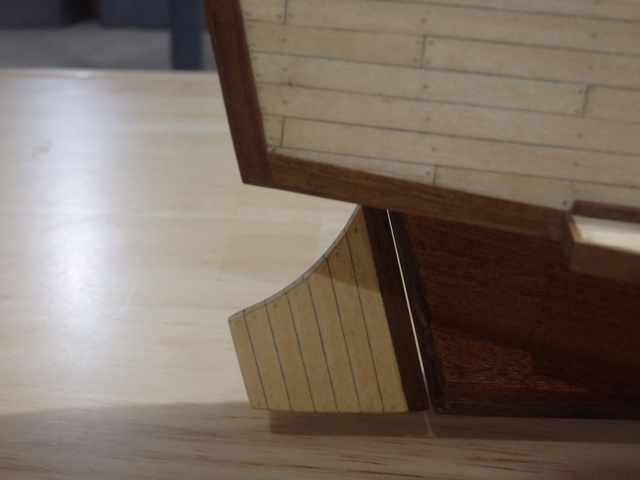
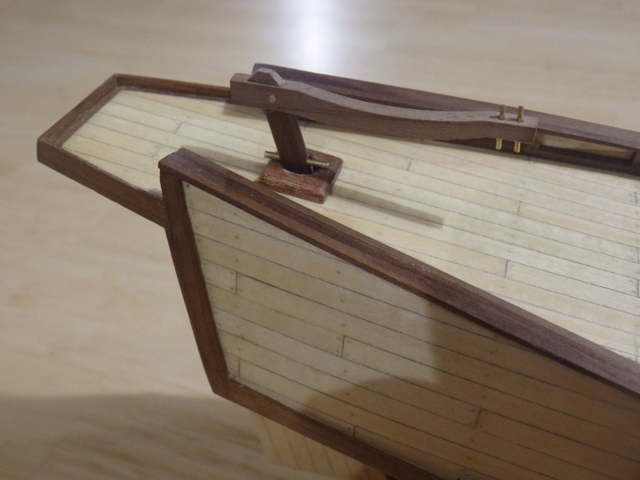
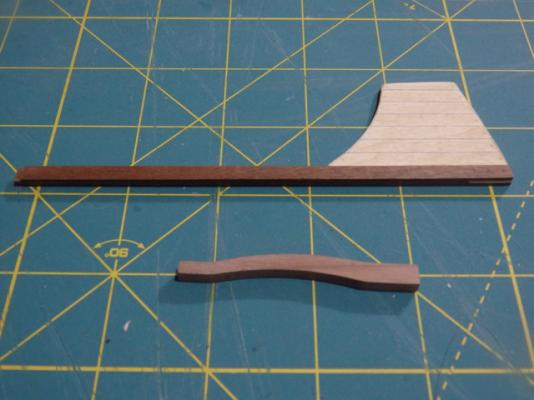
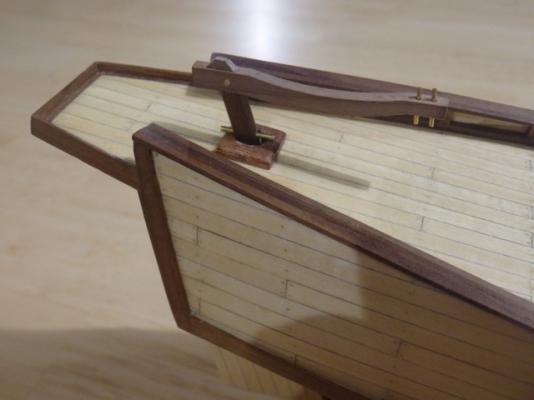
Hi All, Janet's mention in her post above that she is rigging her tiller reminded me I also needed to assemble the rudder and tiller as I am getting pretty close to no longer being able to easily invert my Dragon. I had previously made up the rudder assembly by planking and tree nailing the laser cut former and making up the post using 5mm walnut strips. The tiller was a laser cut part so after cleaning off the char, I drilled out a recess using my Dremel so I could attach the rudder assembly. I added a small walnut piece to the top of the tiller to simulate a through tenon for the rudder post. Brass was used to form the tiller posts for the rigging as well as the larger rod that supports the rudder on the deck. Just for fun, I also added a brass rod to "pin" the tenon. Test assembly showed everything seems to fit OK so I just need to blacken the brass and give the wood a coat of poly before gluing everything in place. Thumbnails below...thanks for reading. Cheers, Nigel.


- 270 replies
-
- 8
-
-
- red dragon
- artesania latina
- (and 1 more)
-
Hi Mark, Great tip and just what i needed as I've not managed to make a precise turning template yet that really lasts. I even have an old blade to hand I was about to toss so prefect timing! Thank you! Hi Nils, Thank you for stopping by. Very much appreciate your kind words. Hi Janet, Great to hear you are building again and I look forward to seeing your progress. I am sure your Dragon is looking fantastic. Cheers, Nigel.
- 270 replies
-
- 1
-
-
- red dragon
- artesania latina
- (and 1 more)
-
Thanks Augie...and yes all the work was worthwhile as I learned a lot. Chuck's smallest cannons are a bit larger, but I think will still fit. More worried about the size of the cannon's mouth as there is little room to widen the ports further really even I redid the brass port rings. I will probably have to redo the carriages again of course. During my yard work this morning, I decided to go ahead and do it...no point in not making the Dragon as good as she possibly can be. Cheers, Nigel.
- 270 replies
-
- 3
-
-
- red dragon
- artesania latina
- (and 1 more)
-
Oh goodness Nigel. I am sorry to hear about the house. . I thought when I saw you working on the Mordaunt again, things had finally worked out for you and your family. Guess I'll go and quietly cross my fingers for you again. Cheers, Nigel.
-
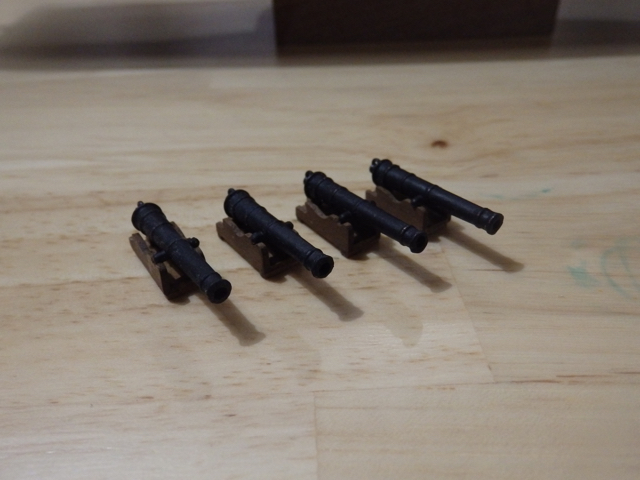
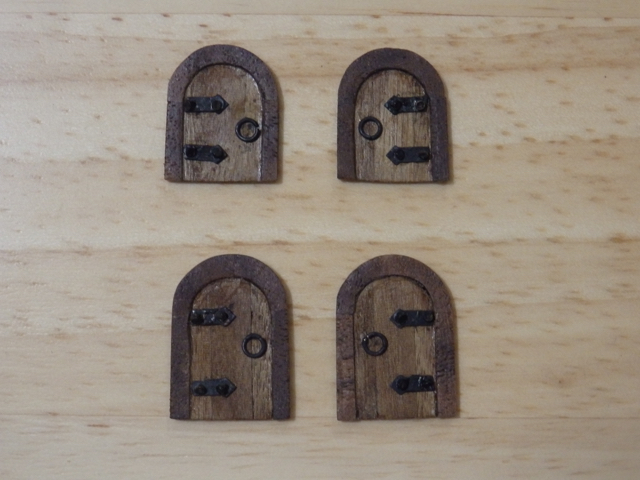
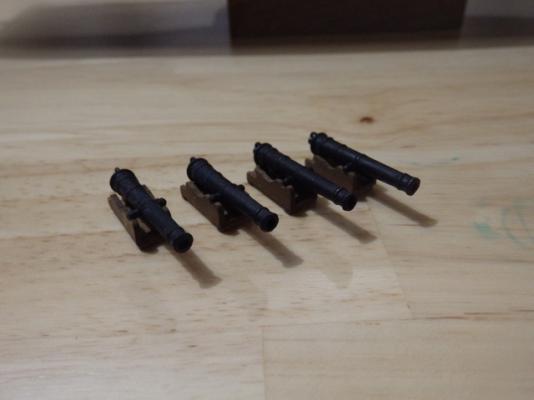
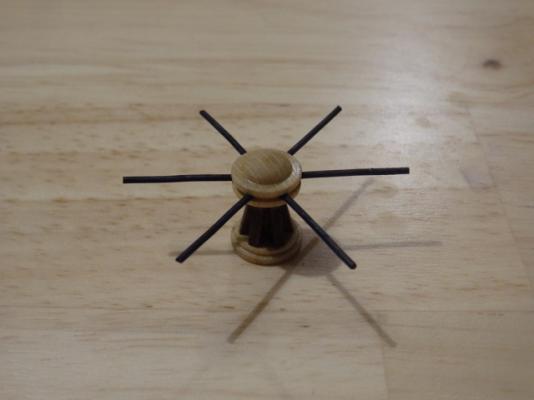
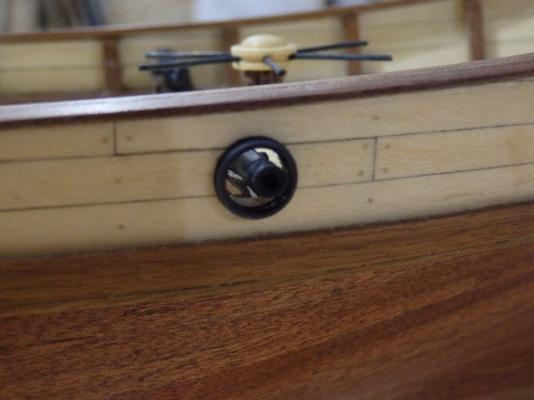
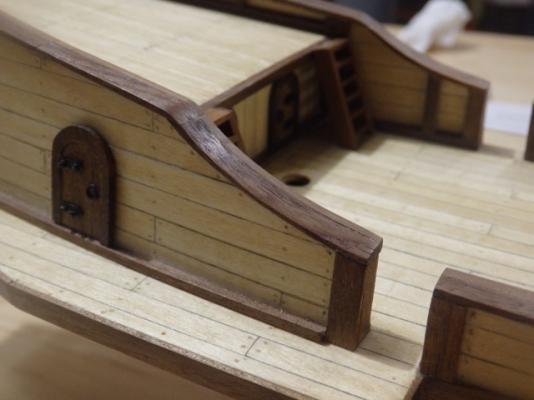
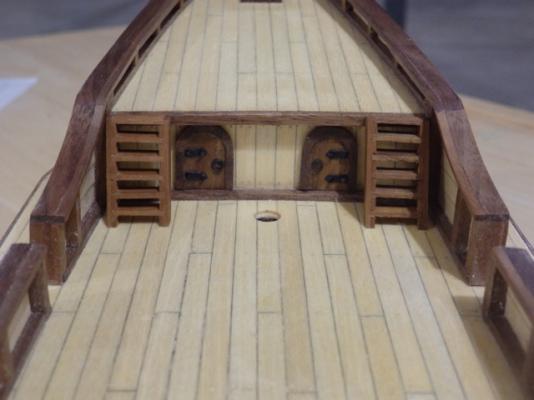
Hi All, Well, I’ve hit the 6th month mark and while I’ve not been keeping a detailed time log, I think I am at about the 250hr mark. Work continued on the cannons to file off the casting marks using Ken's (xken) tips in his Niagara log (Thanks Ken!). I also opened up the cannon mouths...well tried at least! Drilling out the mouths was a real challenge in terms of just holding them firmly and my Dremel drill bits, while saying were for metal, couldn't drill out the metal cleanly. After making rather a mess of the mouths, I then slowly filed out the mouths using the end of my round needle file. I repaired the mouths as best I could using drops of CA, allowing them to harden, filing to shape and then repeating until they looked passable before painting them. Not yet sure I am happy enough with the cannons to keep them...back up plan is to buy some from Chuck and he also has some nice swivel guns that would be fun to add. Every cloud has a silver lining I guess . Capstan was assembled using the kit parts and then the brass work was blackened using Casey’s Birchwood solution. I also completed the doors, adding the hinges and door handles. Hinge bolts were made using the head from some brass planking nails. Smallest details I've ever tried to make by far! Final item this week was I added the cannon port rings to the bulwarks. Kit only provided 4 rings for the outsides of the ports (really AL??), so now I need to figure out how to make some decent rings from some brass wire. Images below and as always thanks for reading. Hope everyone on the States enjoyed their 4th July. Cheers, Nigel.

- 270 replies
-
- 7
-
-
- red dragon
- artesania latina
- (and 1 more)
-
Hi Mark, I've been following quietly along for a while and trying to catch up on all the history of your build. Seems like today is the ideal day to say that your Licorne looks absolutely fabulous and that I especially admire your determination to do whatever it takes. Happy Birthday! Cheers, Nigel.
-
Hi Nigel, Looks beautifully symmetrical! Particularly like the shots shot showing the wonderful transom and gun deck framing details. You seem to be really moving along now...must be great to have your workshop back! Cheers, Nigel.
-
Hi Popeye, She's certainly coming to life! Great to see how all the colors are complementing each other as the decks come together. Sorry to hear about the difficulty of aligning the decks. I guess this is what you were worried about when you said right at the start of the build you were surprised how flimsy the decks were. You mentioned you wished the scale was 1/96th...now that would be something to see as she'd be over 9ft long! You may need another shelf! Cheers, Nigel.
-
Hi Igor, Love the furled sail and the rigging as well what I believe is the anchor in your last picture. Can I ask if you using a microscope do to this work? I find things hard at 1:60 scale.....can't imagine doing all this in something that fits into a bottle! Cheers, Nigel.
-
Hi Nils, The beautiful hull lines are starting to really show! Really enjoying watching your KWdG come to life! Cheers, Nigel.
- 2,625 replies
-
- 4
-
-
- kaiser wilhelm der grosse
- passenger steamer
- (and 1 more)