HOLIDAY DONATION DRIVE - SUPPORT MSW - DO YOUR PART TO KEEP THIS GREAT FORUM GOING! (Only 20 donations so far - C'mon guys!)
×

Cabbie
-
Posts
599 -
Joined
-
Last visited
Content Type
Profiles
Forums
Gallery
Events
Everything posted by Cabbie
-
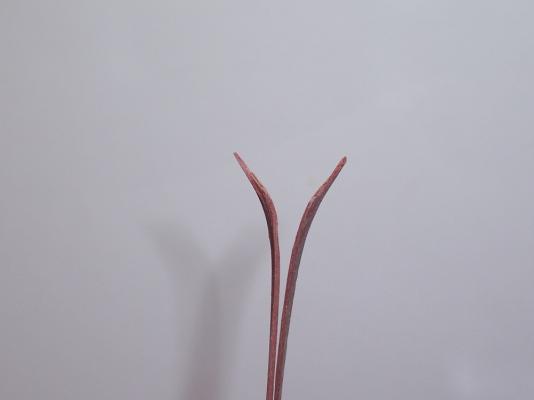
 Little update, first pair of spiled planks made. Cut with small snips, sharp knife and file. Wasn't as hard as i thought it might be. Note to self, "Have a go first before worrying about something" They were softened in hot water for an hour and then glued to ship. Now off to do more Hooroo Chris

-
To spile or not to spile...
Cabbie replied to fish's topic in Building, Framing, Planking and plating a ships hull and deck
Good Morning Mark I will have a try at those things, the Jarrah I am using is quite brittle and needs softening, I don't know if the heat will do that. They might have been ok, to use without soaking. I wasn't game to try. Thanks Druxey I have been wondering how they managed to get the wide planks to cut with. Would they have tried to plank a bow like an Endeavour doing almost right angled spiles and make all the planks go forward? Thanks Chris -
To spile or not to spile...
Cabbie replied to fish's topic in Building, Framing, Planking and plating a ships hull and deck
First pair of spiled planks, took about 1/2 an hour to make. If not less than that, maybe 20mins. Currently they are soaking in hot water, I am not game to bend around the hull and glue in one go. Without the soaking it would have been a lot quicker than normally soaking and pinning to the hull until dry. In real life they would have been made from a plank 600mm wide, and they are in real life a plank 240mm wide. Cheers Chris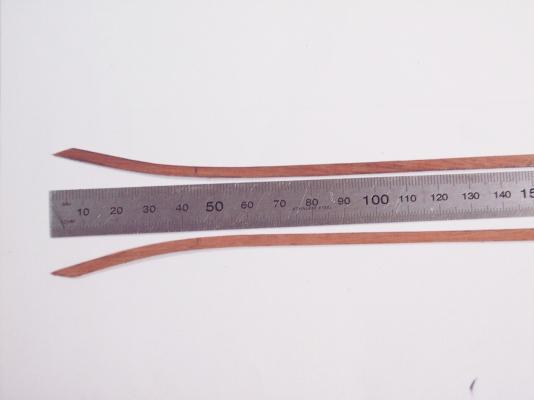
-
Hi Pat, the noodles are the greatest thing since "sliced bread"!. I have cut a "V" notch one end to help hold the ship in place and i think that it needs to be done both ends. One thing i keep meaning to do is to add a duct tape strap in the middle to keep the sides from spreading. Today's first job, I will do it. Since I am on the sick list, I will have to stay inside, stay quiet, and do ship modelling. Anyway, make sense to me Cheers Chris
-
Good Morning Dave Oh man, I have a head cold at the moment and this is making my head hurt more. I didn't realize when I started this hobby that I would need to know all about sailing ships going back hundreds of years. These ships are a lot more complicated than what I ever gave them credit for. I have seen a few other things in logs, but didn't take a note of them. When you guys are in my log again can you let me know what things have been discussed. Don't go into great detail I will research, once I know what to look at. I hope that putting this request here is ok with you, Dave Thanks Chris
-
Good Morning Pat bad luck about the chain plate. That is something that bothered me when I built my Swift. Do you rely on glue and a fake nail. I am keen to see the fix you come up with. Hooroo Chris
- 517 replies
-
- 3
-

-
- Endeavour
- Artesania Latina
- (and 1 more)
-
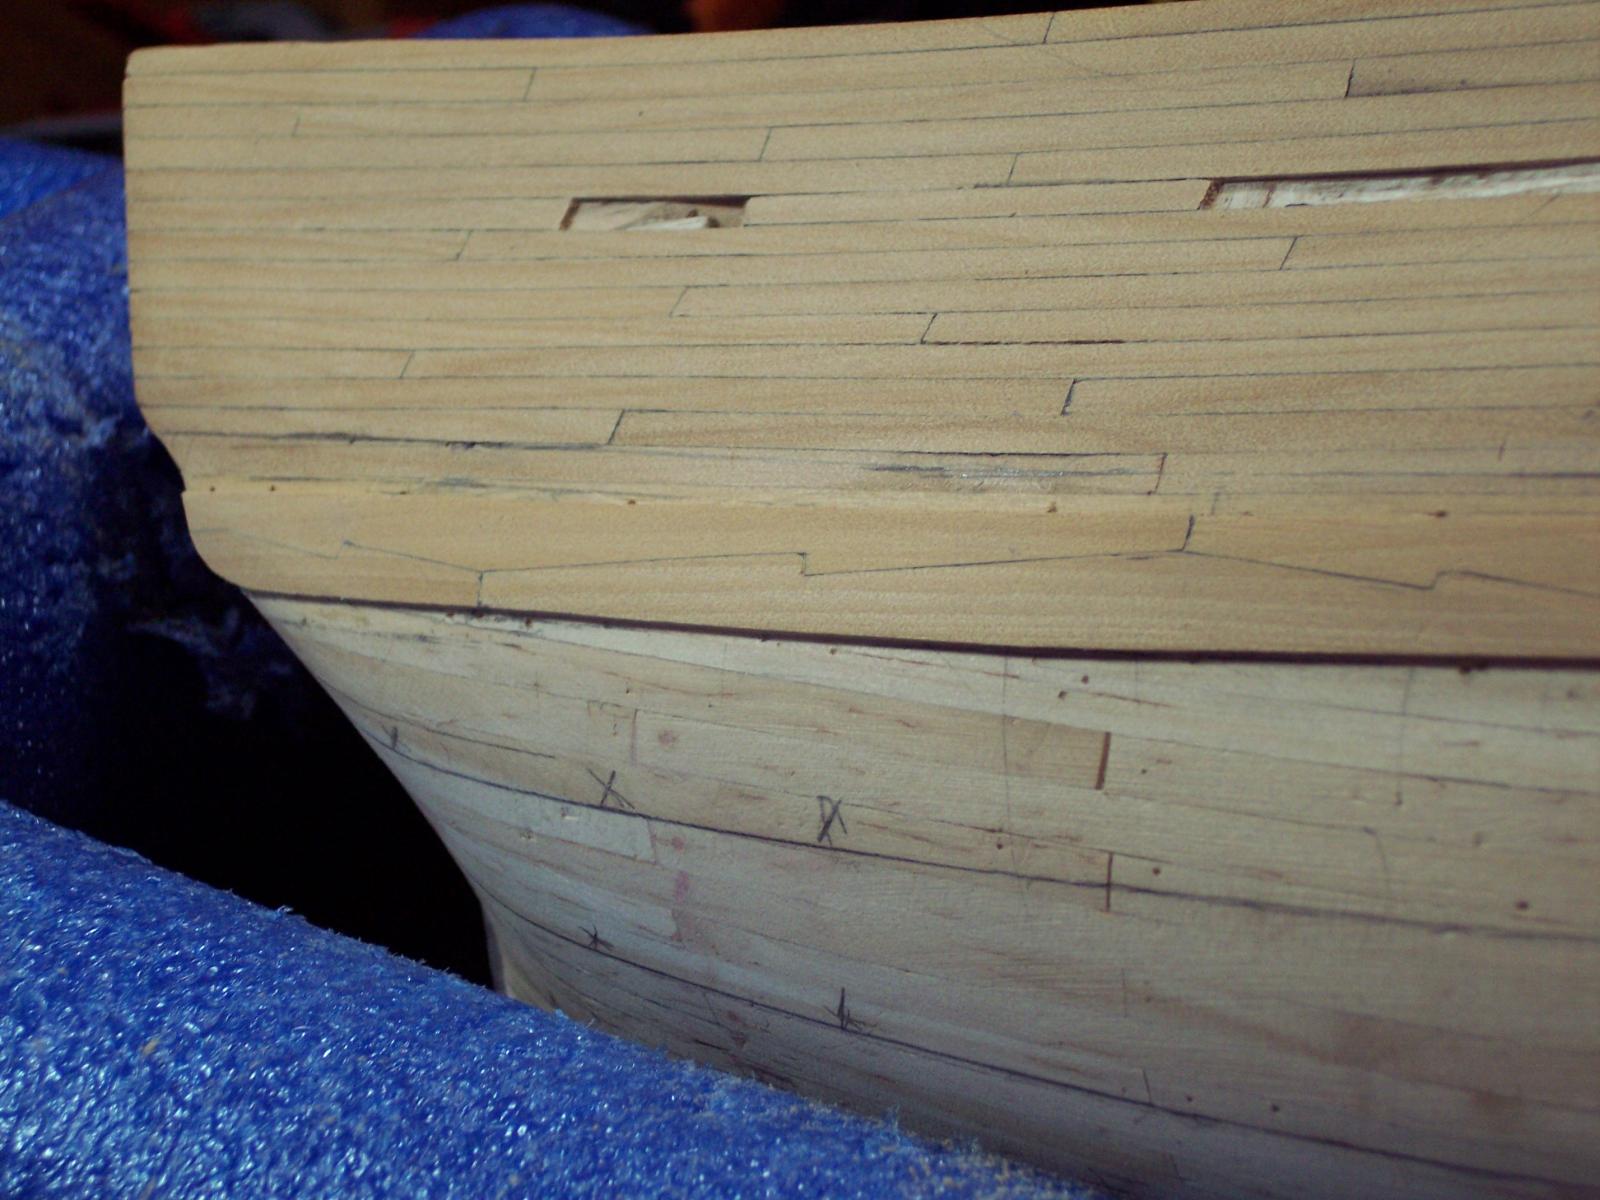
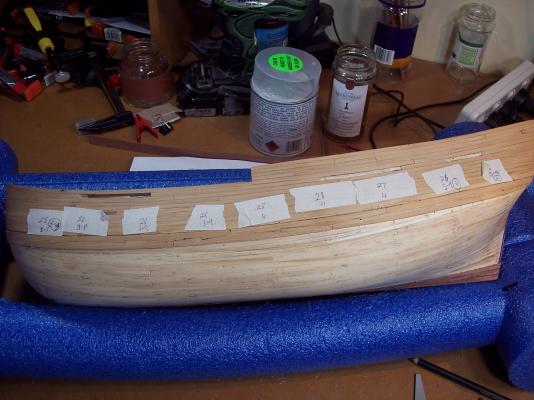
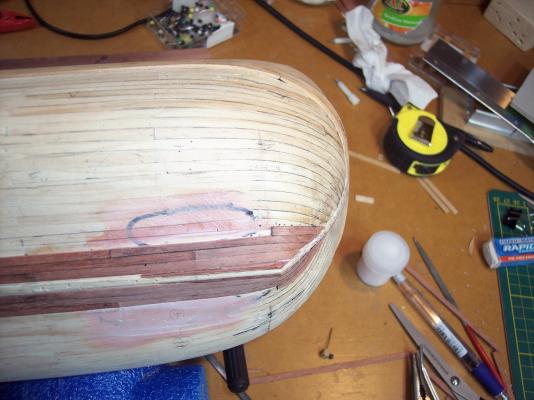
Good Morning Slog, they probably didn't need days, but that is what they got because of my slow planking at the moment. Though I had one plank that had been sitting in the jar for a day and when I cut the end off it was till dry inside it. They are .8mm thick and letting them soak doesn't seem to be doing any harm. I have been doing the bending, flexing thing mainly to break up the fibres a bit prior to pinning to the hull for drying and it does help. Hi Dave, how do you make your steam? It would seem that I would need to make continuous steam for quite a while to get through these planks, and I haven't seen a way to do it. Hello Pat, Yes I nearly gave myself a heart attack after I posted that photo, but that is the result of a bit of dodgy boat building. The planks are the right height. The ply has a bend in it going up the bow, (it appears I didn't block it right) and there has been a bit of dodgy rebate forming. There are some lines on the first planking that show the position of the bow post and that plank on the right goes too far in than what would be normal. If you square across the bow to the line the planks are abut the same height. Thanks for keeping an eye on it for me, I am largely planking the ship by measurement so I am constantly checking measurements. The photo shows the number of planks and their widths at each place. This is all new to me so I am hoping that it will work all right. Thanks gents for looking in and the likes. Cheers Chris
-
Hello Ian that is an absolutely beautiful Hull, the poly has just the right patina. And the planking is 1st class as well. Going slow is just fine, its not a job that can be done quickly Cheers Chris
- 191 replies
-
- 4
-
-
- victory
- caldercraft
- (and 1 more)
-
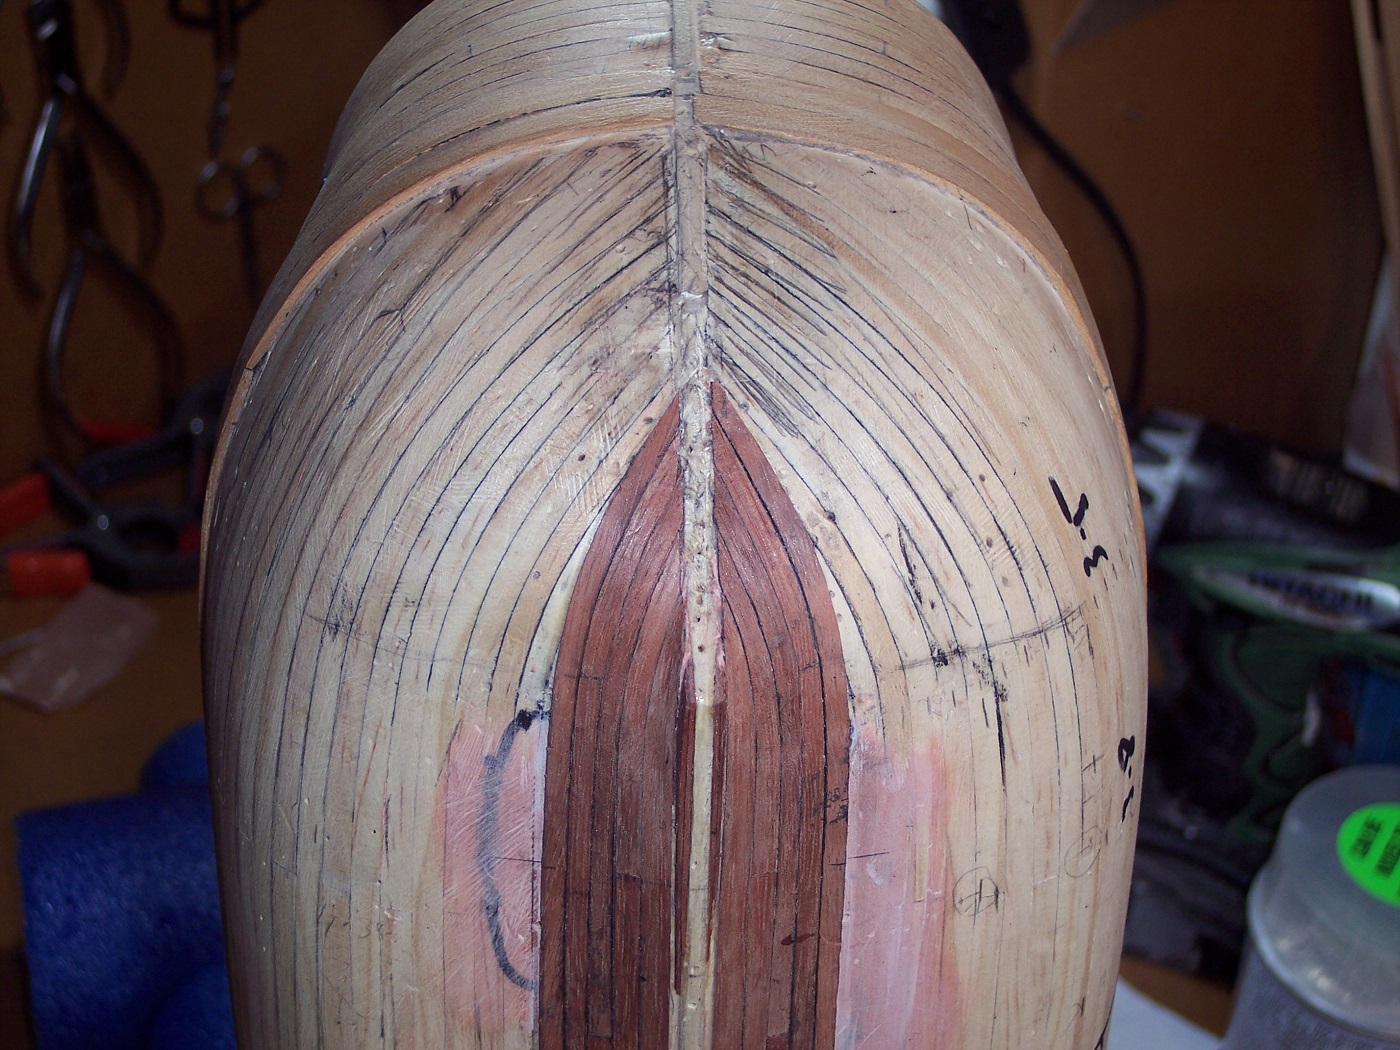
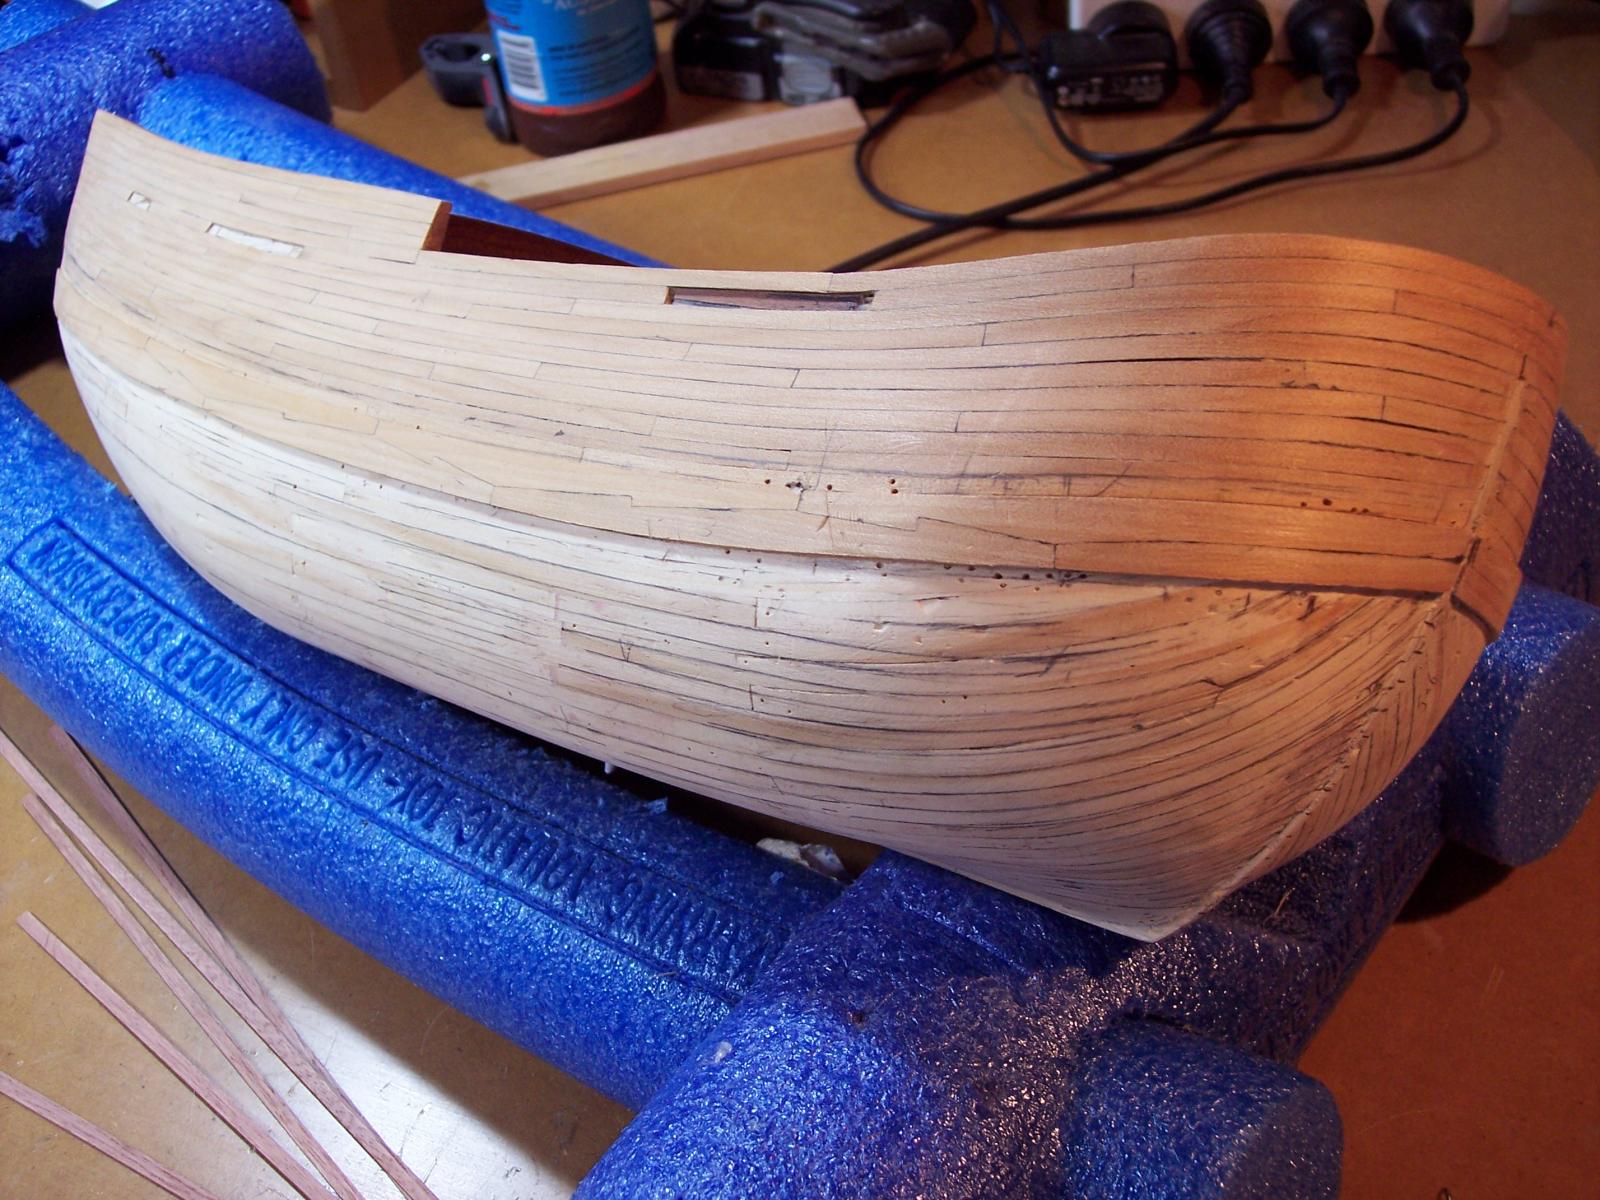
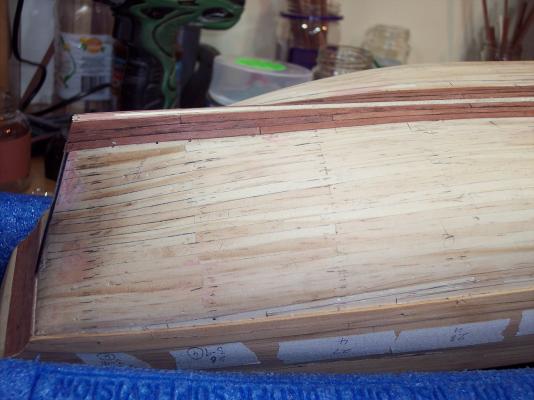
Oh Dear and i know that plenty of other members have done this, but it is going to be a lot of work, but good fun. 2nd planking is under way and I am getting a good idea of how it will go. Probably about 270 little planks to be glued on. So far up the bow they have been soaked for 3 days and then bent, including a bit of side bending. For the next few planks I will be spiling. The planks at the stern should all run through with only a little bit of soaking needed under the counter, though i might soak to get the twist needed. Cheers Chris
-
Hi LL Mike be careful with the mdf it will move as much as a real piece of wood. It is not always flat, and if it decides it wants to expand ect it will. Hooroo Chris
-
To spile or not to spile...
Cabbie replied to fish's topic in Building, Framing, Planking and plating a ships hull and deck
Hi Robin where would that be, in one of his logs? -
To spile or not to spile...
Cabbie replied to fish's topic in Building, Framing, Planking and plating a ships hull and deck
I think you are on the right track Ian, Make a plank out of more segments for which you might be able to a wider one for bigger curves. Still i think that 400mm to 500mm planks would be near the max width to get any sort of length if that. so i think that I will work out my planking based on this idea. Cheers Chris -
To spile or not to spile...
Cabbie replied to fish's topic in Building, Framing, Planking and plating a ships hull and deck
Hi Ian Stock is no problem as I am cutting planks myself. What I want to know is, what is the max width of planks that would have been used back in the past when these ships were built. On my Endeavour i would need planks that would have 900mm plus in width I don't think that would have been done. Thanks Chris -
To spile or not to spile...
Cabbie replied to fish's topic in Building, Framing, Planking and plating a ships hull and deck
Timely topic for me, thanks Fish I have just started 2nd planking my Endeavour and have been pondering the correct way to do it. What is the proper way? Do I need to make all the planks go forward? Or do it as the replica has been done. Another question, What would be the max width plank used for spiling? The Jarrah I am using will only side bend a tiny bit, but the pine I used for the 1st planking could nearly be tied in knots after soaking. Which has me thinking that if a plank will side bend then do it. If not then spile. Thanks Chris -
Hi Captain Slog that was quick, getting in while I was editing. Thanks for the likes. Chris
-
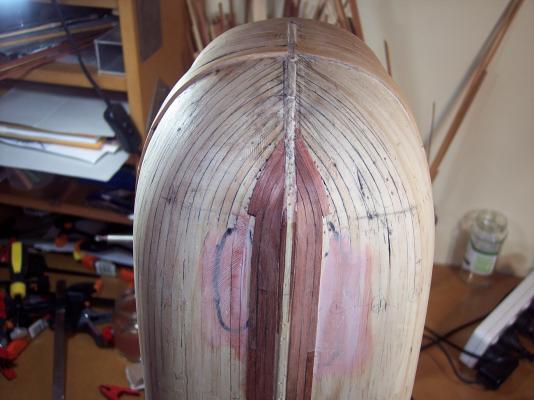
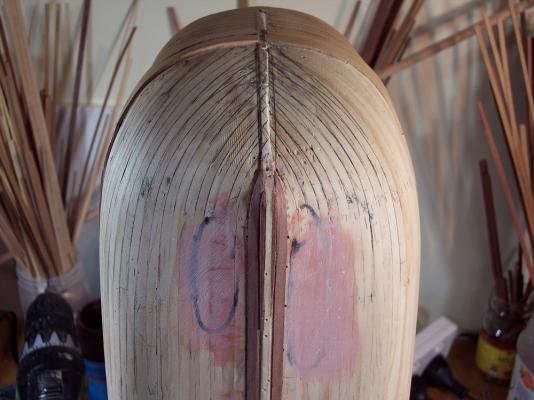
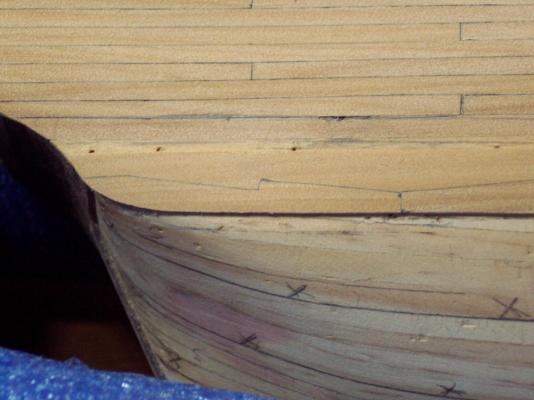
About time for me a little update. It has taken over a week to shape and glue 2 planks, after making one pair and not using them. Then making another pair and gluing them on, and later removing them, after the third try i think I am close but it is important to start the right way . And another, this is how far up they go. Looks a bit rugged but it will clean up. Now to work out how to plank the bow. How much spiling? If i follow on from this plank and do a little bit of tapering and spiling I can fit in about 14 planks up the bow post and do it similar to the replica. Or i can do spile more, and fit more planks into the bow post. One thing that I have been thinking about is, how much spiling used to be done on ships?, and how wide a plank would have been originally used to spile a plank? To fit in more planks I would need to spile from a plank that would be 15 to 20mms wide, or 900mm to 1200mm wide full size. Would that have been done? I am inclined to go with the first option and do it similar to the replica, which I like. Now off to fit a few more garboard planks. Cheers Chris
-
Good evening Don It is good to see you are still following along. In my my mind the Jarrah will look something like this https://www.flickr.com/photos/endeavourvoyages/9020700963/in/album-72157634081735926/ Except for the white caulking and that funny looking metal thing. It is going to be very interesting to see how it looks when done. Thanks Chris
-
Good evening Pat Thanks for looking in and the welcome. Its a bit hard keeping up with build logs lately, there is too many going on. I just try to do as many things as possible, I figure that there is no point in putting something off until later. Might as well have a go, as things come up, even if they don't finish up the best. There are too many different skills to learn. The Jarrah planking under the wales is going to be hard work. It is quite hard and brittle and will need a lot of soaking to help it bend. Yes the kauri is great stuff to use, straight even grain, bends well when wet. I must go and see my machinist mate and get some more, before it goes. Hi Don if your around, I have finally figured out what you were trying to tell me about the planks at the bow. I was trying to taper one side when I should have been cutting an angle on the other side. I think I have it worked out now, a bit more experimenting then I hope to be right to go. There is a little bit more to do and in a day or 2 I should be starting with the Jarrah. Cheers Chris
-
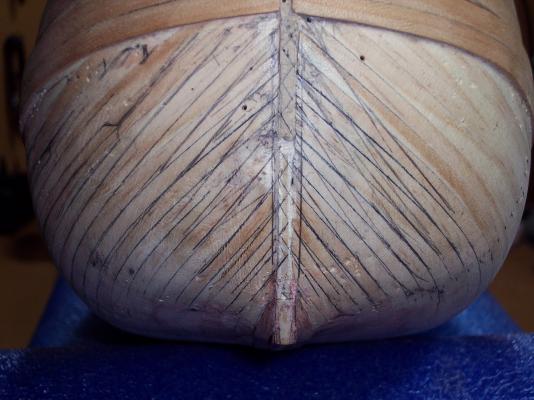
Good Evening to all A little update to report, Wales have been completed on both sides. They have not been sanded properly, so hopefully they will tidy up a bit with the sanding done. I am going to add a single line of Jarrah planks above the wales to simulate the plain plank on the replica. This is to separate the wales from the upper planks, that will be done with the Kauri planks. Below the wales will be Jarrah planks. And now off to finish working out the planking below wales which is what is going to happen next.


-
Great stuff Cristic How about designing a tumbler for the blocks etc, while your at it. Might need a bit of speed control though. Cheers Chris
-
Looking good Pat keep working out the methods and techniques for me, I will be coming back here later on to find out how to do it. Cheers Chris
- 517 replies
-
- 3
-
-
- Endeavour
- Artesania Latina
- (and 1 more)
-
"Groove" That's an ideal word for it. That's why i tried to do my 1st planks in a proper manner, to get my mind into gear and thinking the right way. It certainly helps if you can into a "groove" and get a nice bit of work done. Hooroo Chris
-
Yeh I know that stuff, use it quite a bit. That sounds as though it made for a difficult start, but can't be helped. Where we come from is part of what makes us, just go with the flow and make use of it. Not my idea to leave a groove for the channels, I think i pinched it from Kiwiron, not sure. My apologies in advance if it was from someone else. 2 wales planks attached, back to do more. Cheers Chris
-
Hi Harry This type of bog dries up nice and hard and the wood glue sticks as good as sticking to wood. I have seen that a toothpick can be used as a treenail, and i will put some in after the keel is screwed on. That is good about the 1st planks, soon you will be having fun doing the 2nd ones. As for the "terminology" thing that will come very slowly, I was not a ship person at all before I started here. You're not helping now, though, talking about "aliphatic" glues, I use white glue for wood, yellow glue for mdf, and melamine glue for melamine. And now a bigger user of CA glues Too many new words will overload the brain and cause a meltdown. Now off to work on the wales. Thanks Chris
-
Are you putting joins in the planks, I found it easier to fix in place and soak shorter lengths, which i did by standing them up in a tall jar. I was lucky with the pine i used first up, it bent easily even without soaking. The filler sounds similar to something i use which is called "Builders Bog" except that it is pink. But sticks well to almost anything. The African walnut will be a challenge, any stuff like that always seems to be stiff and brittle. Anyway back to work, Good Planking, Chris