HOLIDAY DONATION DRIVE - SUPPORT MSW - DO YOUR PART TO KEEP THIS GREAT FORUM GOING! (Only 13 donations so far - C'mon guys!)
×

Cabbie
-
Posts
599 -
Joined
-
Last visited
Content Type
Profiles
Forums
Gallery
Events
Everything posted by Cabbie
-
 Excuse my ignorance, but what is anchor stock? Sounds like something I should know about cheers Chris
 -
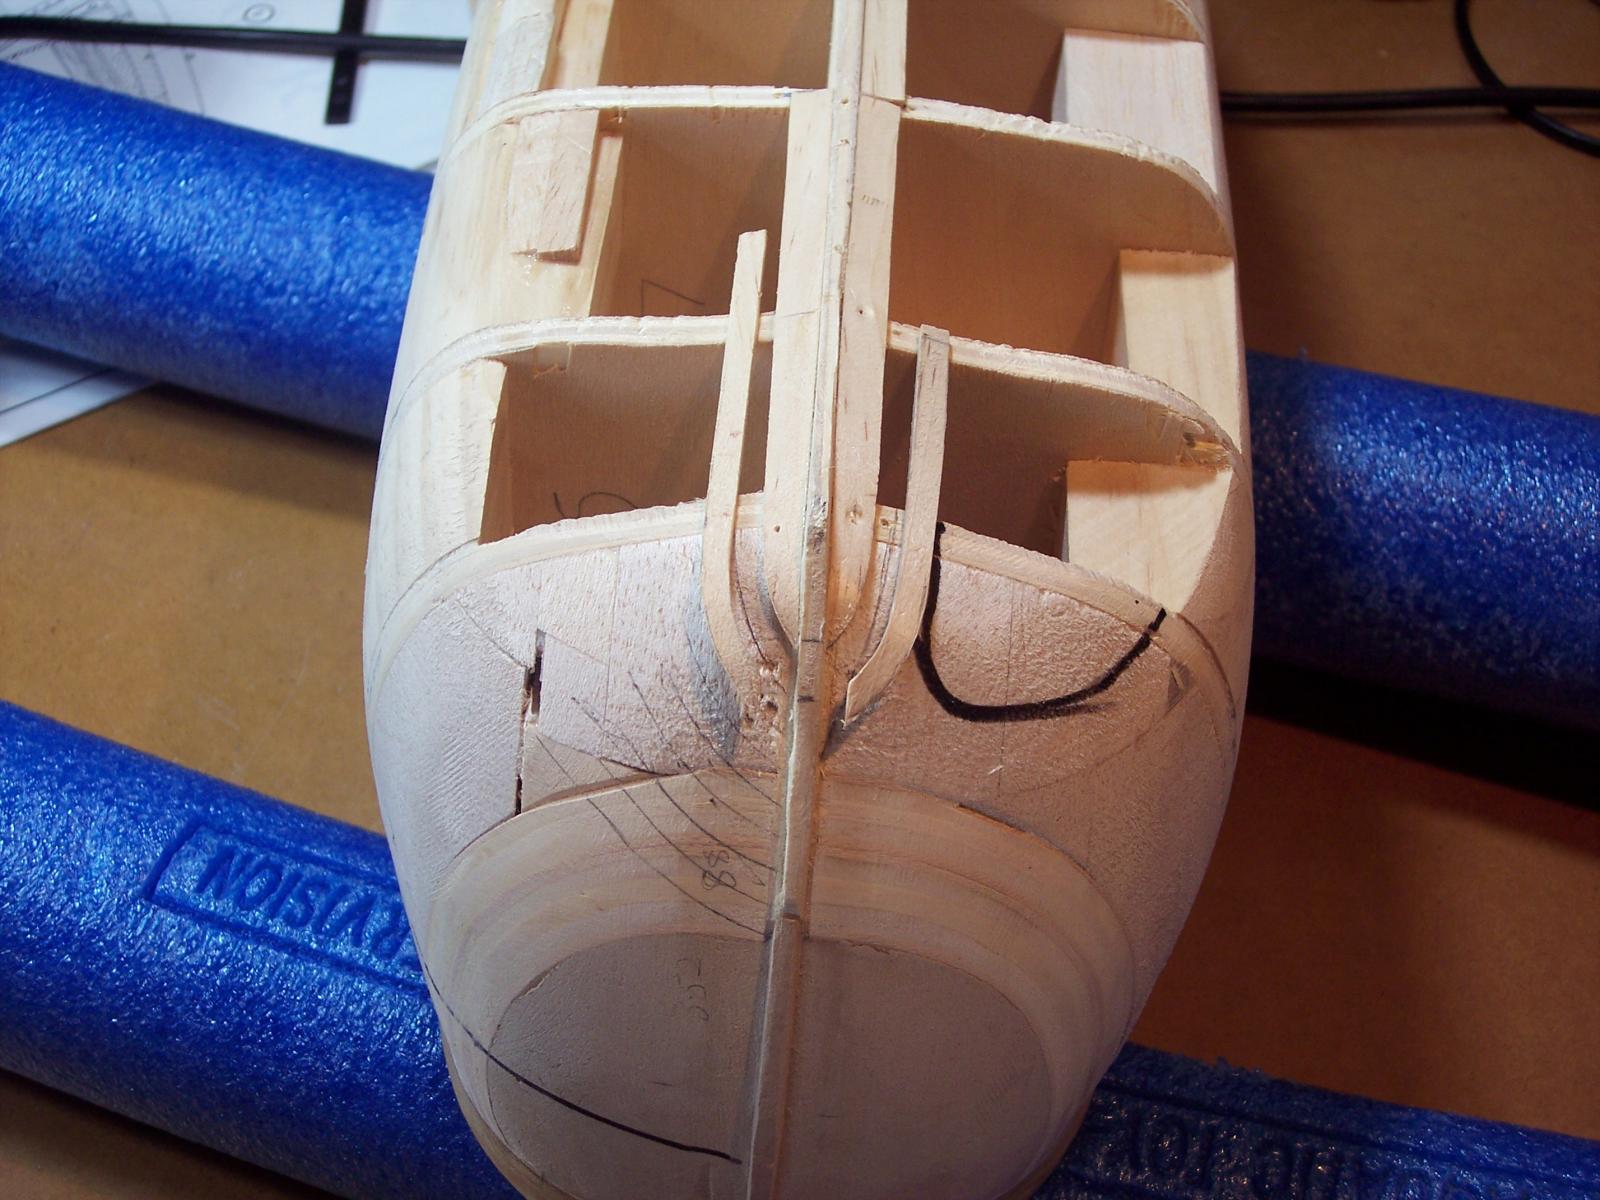
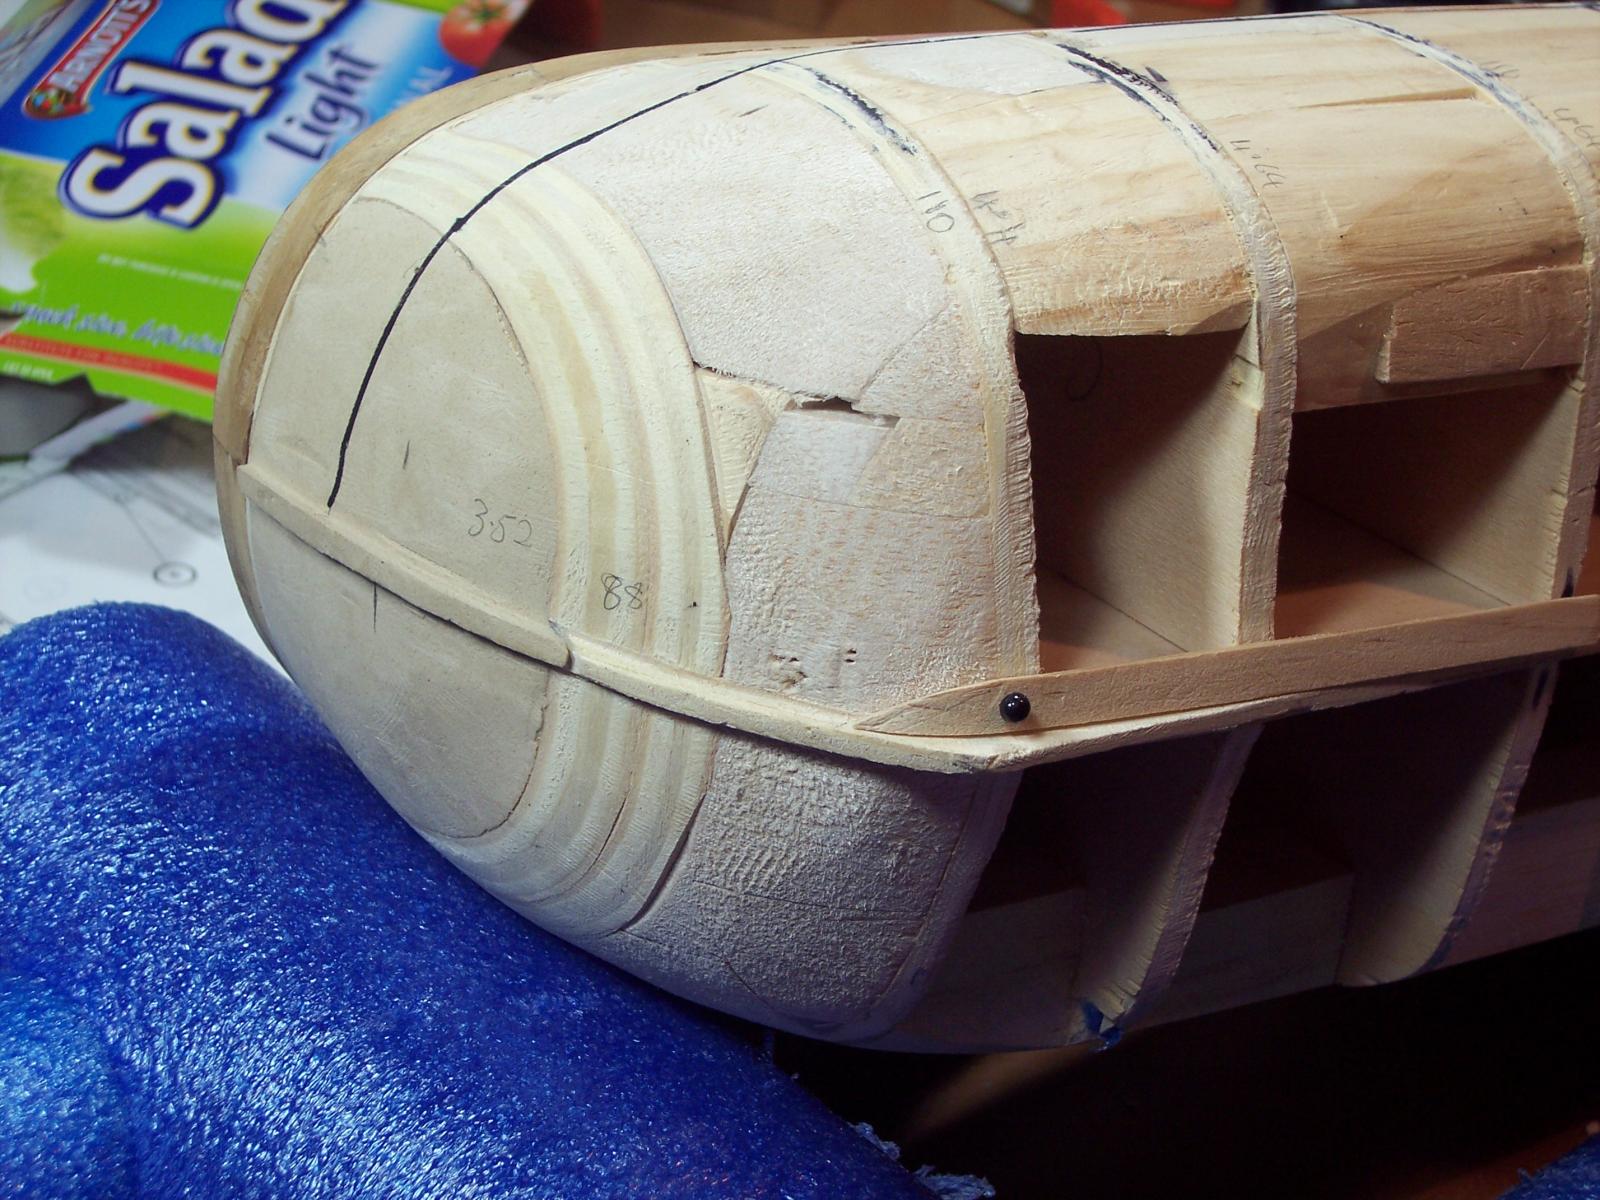
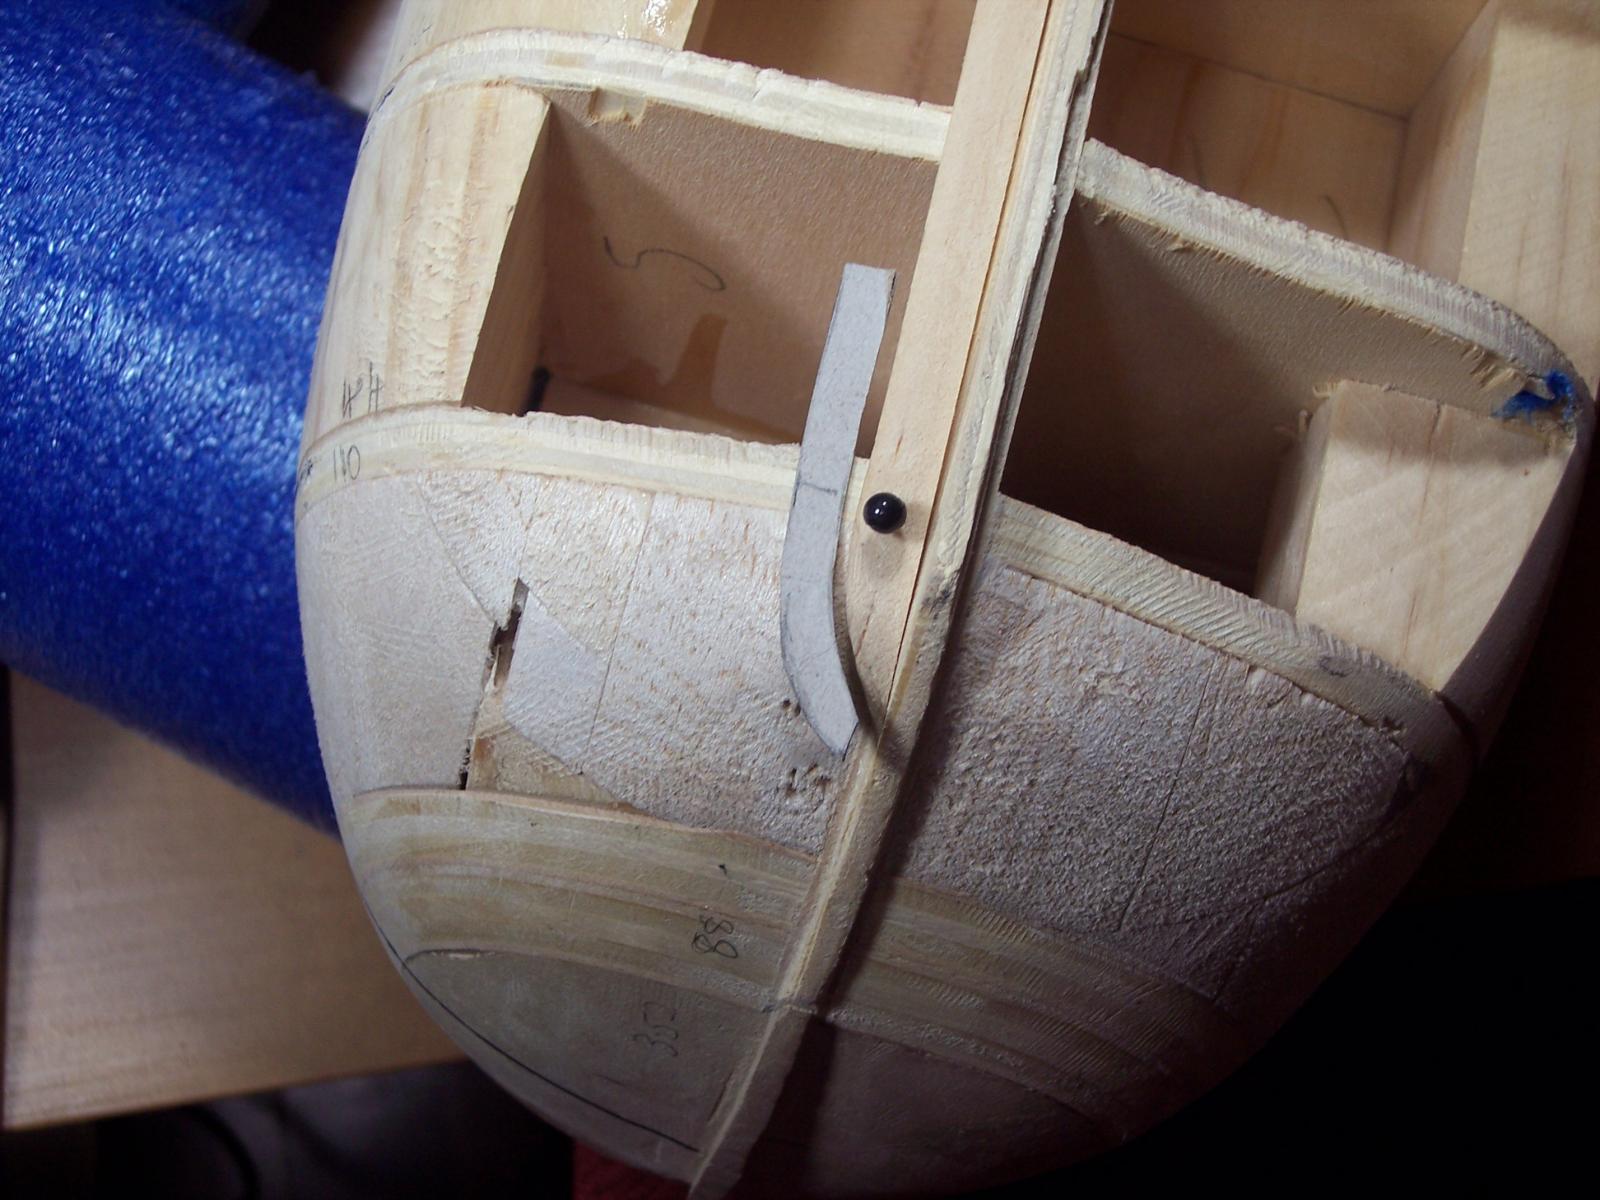
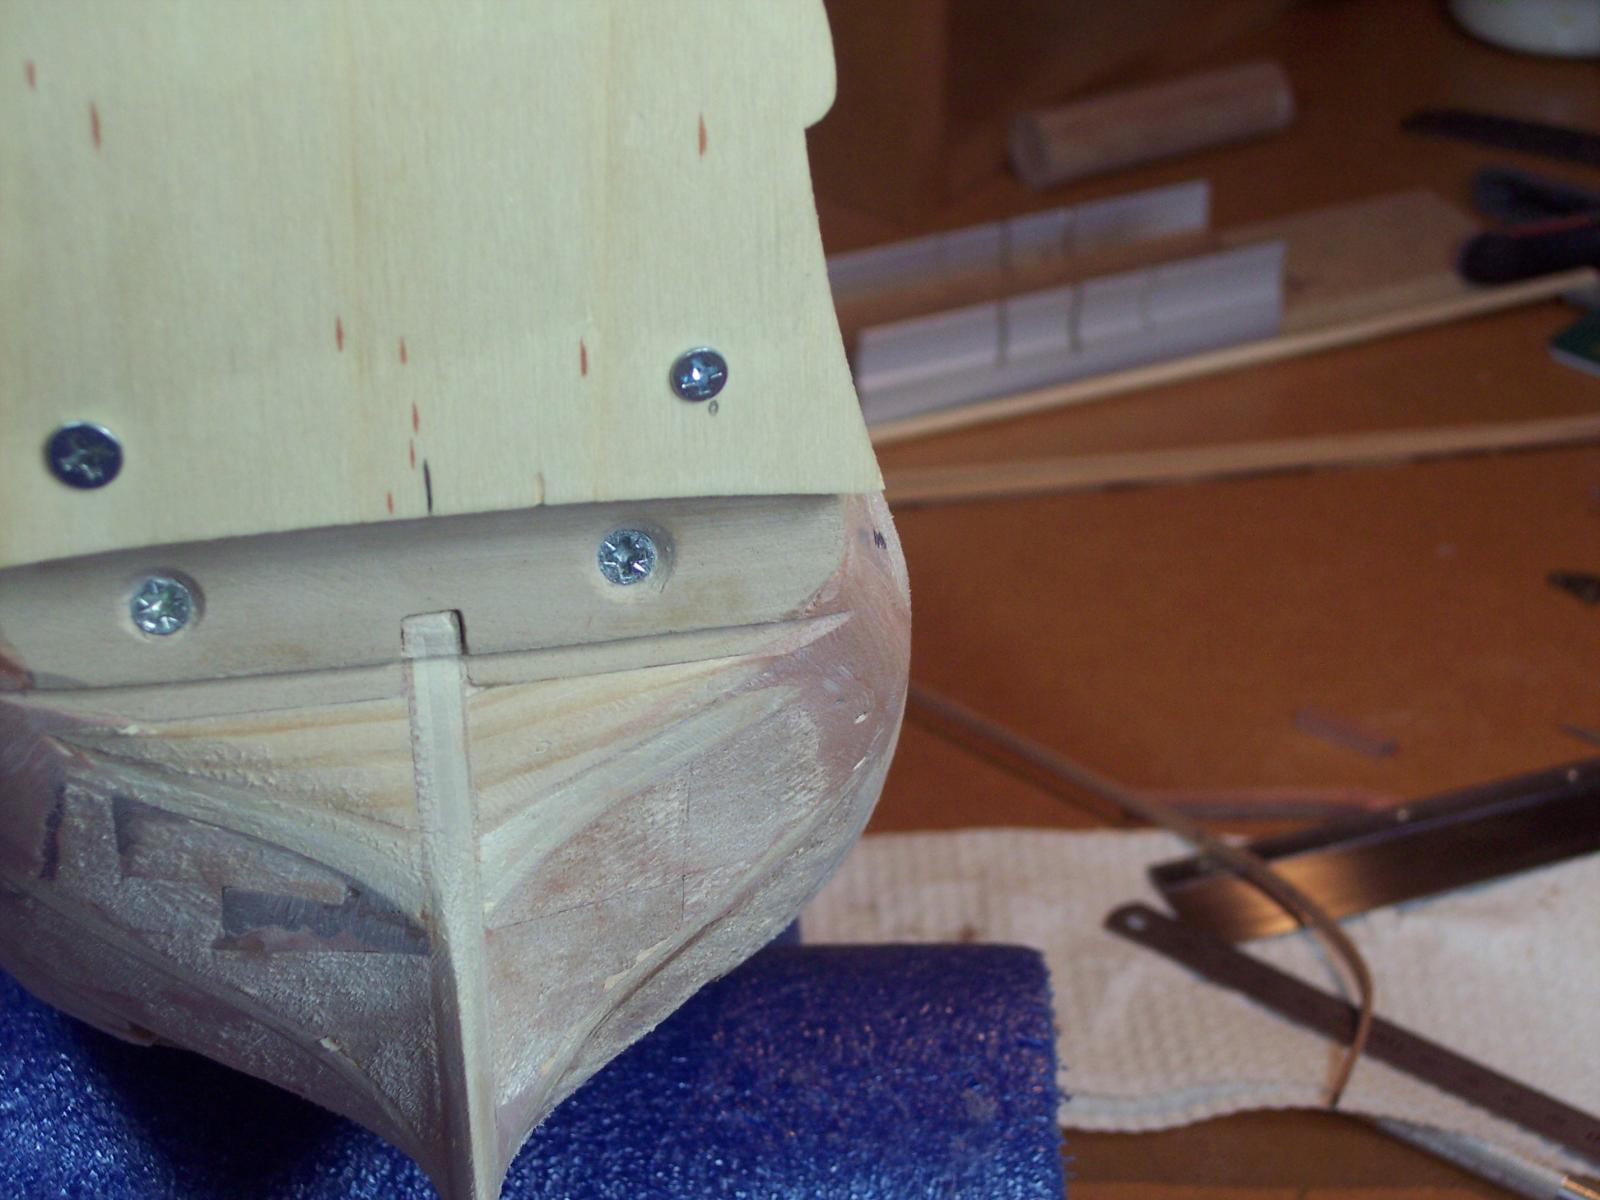
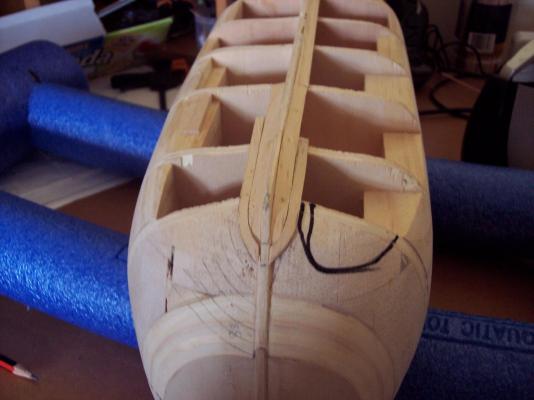
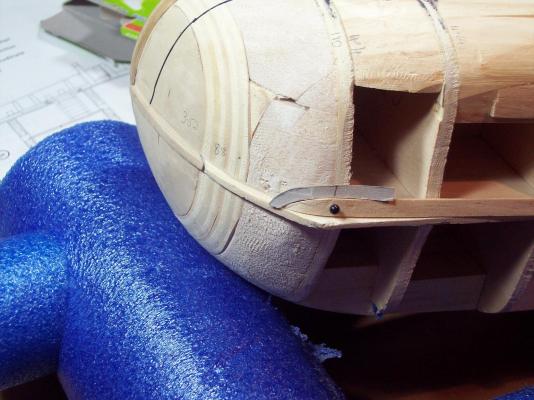
Ok Haven't got too far and the first pot hole has been hit. The garboard plank is laying way too flat, needs to be much more upright. So I have decided to take them off and add a little filler block, and reshape. I think that there was a upturn in the filler block, but i took it off because i couldn't see what it was doing. When I drew in a roughy of the planking it had that big round curve in it. That is something I do not want I might take out some of the filler inside the black line, but will do the other bit first and see what it looks like. Hooroo Chris

-
Nina by ScottRC - FINISHED - 1:75 scale - completed in 48 hours
Cabbie replied to ScottRC's topic in Plastic model kits
Ok Scott That sort of sounds Plausible. I will file it under tips and techniques. Chris -
Good Evening Mark It sounds as though you have your hands full all around. Best wishes for the Admiral, Getting winterized is something I'm glad we don't have to deal with here. I have just put 2 first layer planks on my endeavour and can now start to fully understand the effort required. Hooroo Chris
-
Nina by ScottRC - FINISHED - 1:75 scale - completed in 48 hours
Cabbie replied to ScottRC's topic in Plastic model kits
Well done Scott it looks like you had some modelling energy that was dieing to get out. Did the Jim Bean help or hinder? Cheers Chris -
Hi Paul thanks for the info, I have been looking at the pdf and it certainly looks a challenge. I just think that if i have a go with the 1st planking I will have a better idea with the second. i am hoping not to paint as i am finishing with the Jarrah planking. Cheers Chris
-
Hi Paul thank You I made a former using a perspex type material, but the trouble is that the shape keeps changing as you go down the hull. Yes, i am going to form the planks using the hull, but I will let them dry in place, and then do a final fit, and glue in place.
-
Hi Dave Thank You I am waiting until i get my copy of AOTS before i do anything up top. I want to see how, what I have done, compares to it. My first planking is actually radiata pine, and it is flexible stuff especially when wet. So I am thinking that it will bend, along with some spiling, to where I want it to go. Its a learning exercise, just to see what happens when i do something. Cheers Chris And yes Dave I faired back the whole of the bow blocking, to leave the narrow strip sticking out that will form the rabbet. I will fine tune its shape after the first planking.
-
Hi Steve Thanks for looking in. I really want to have a go at spiling and try it here, where it was going to be covered up. I have Chuck's Syren coming up next and wanted to improve my skills. I have to do a good job of the Syren or people might talk. Before i get going i just wanted to know if i was starting out right. Thanks Chris
-
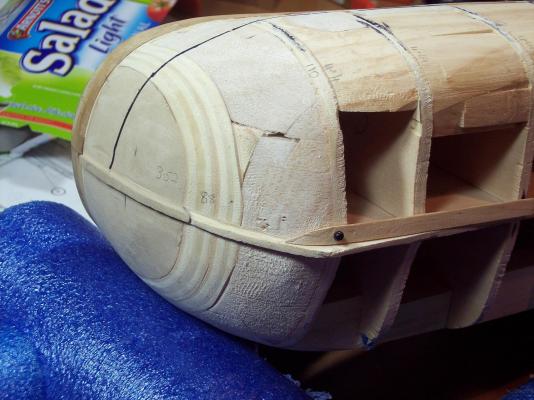
Thanks Don For the like and commenting I think that I have got it the right way, Perhaps a different view would help Would anyone else like to comment Thanks Chris
-
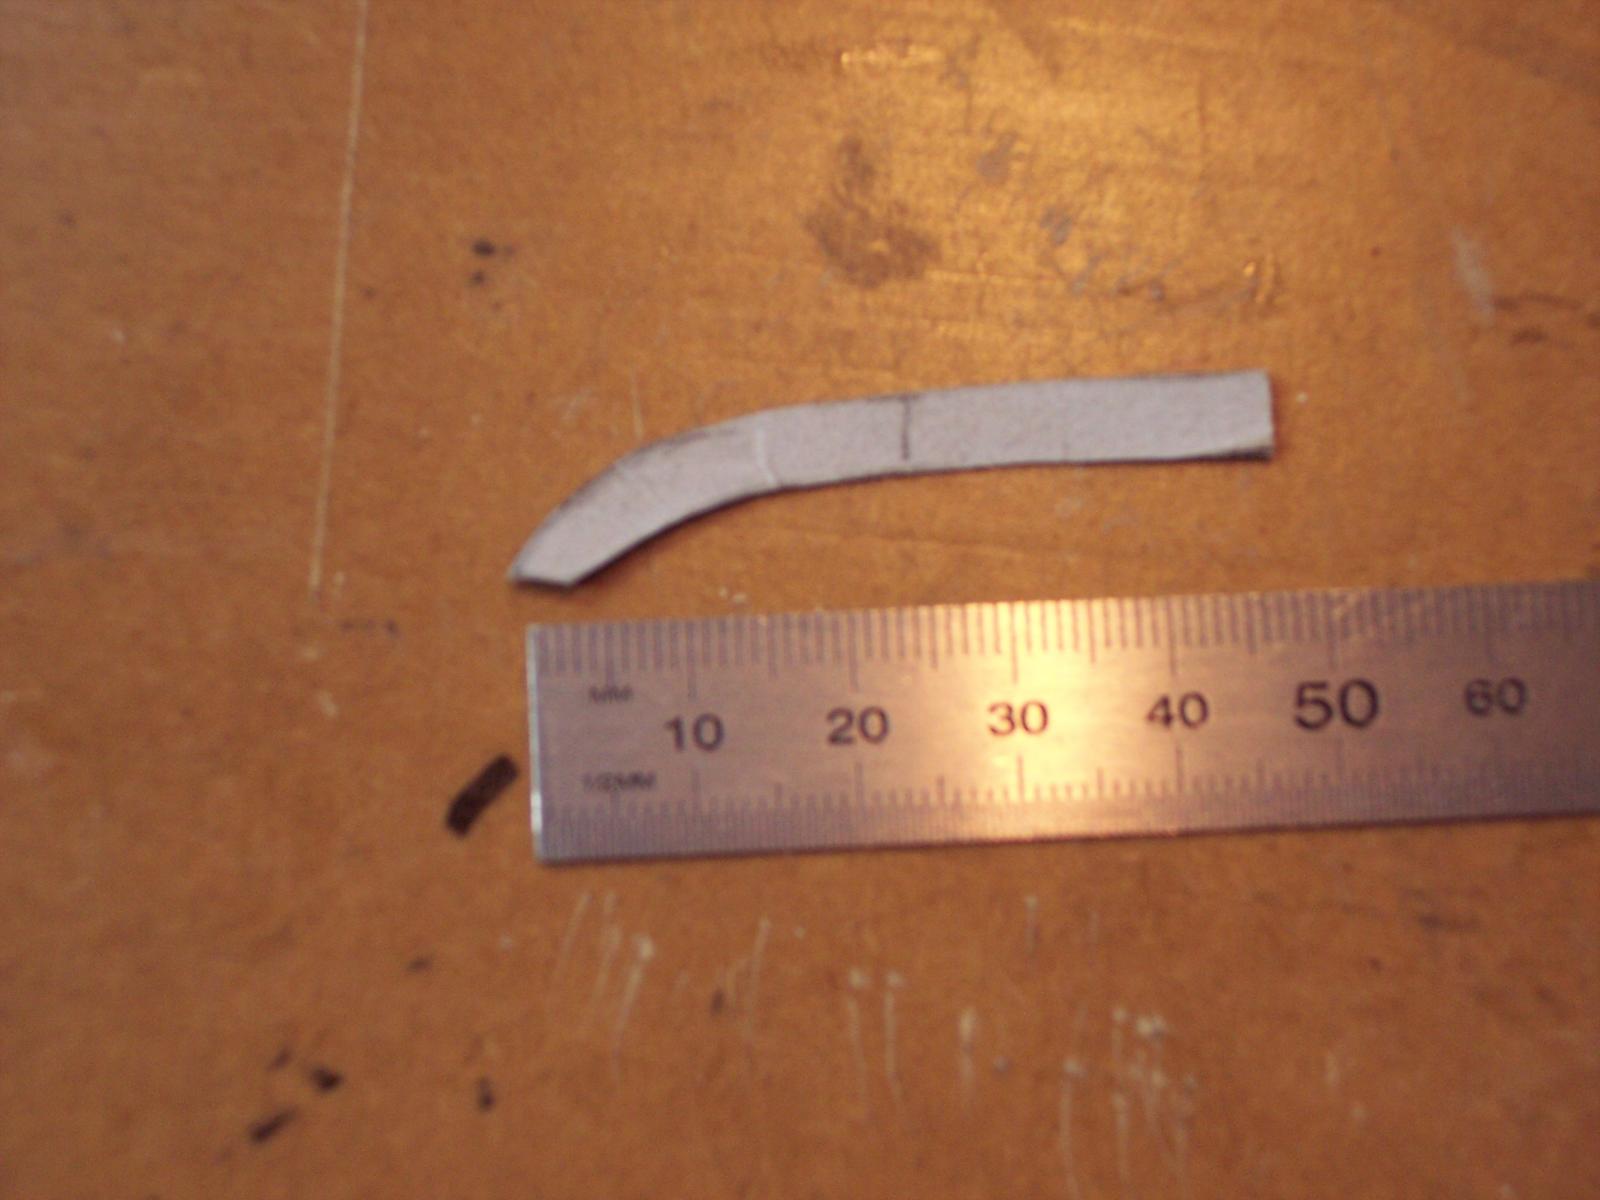
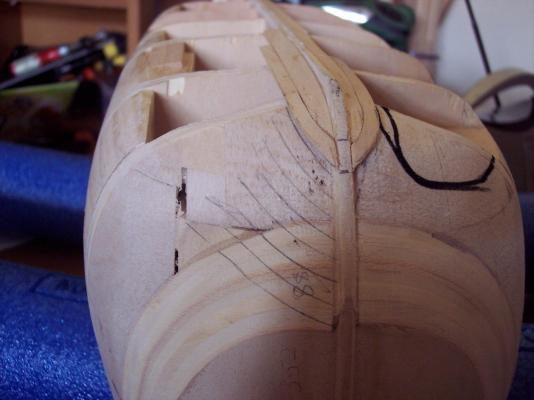
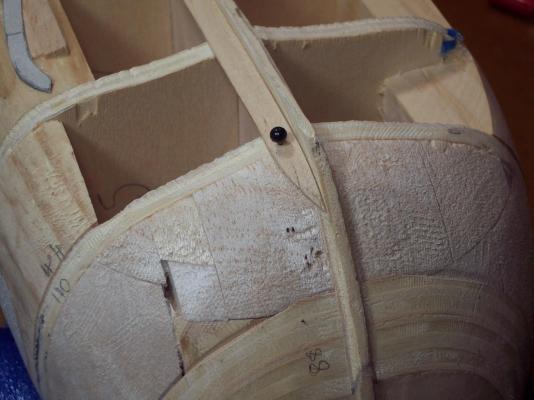
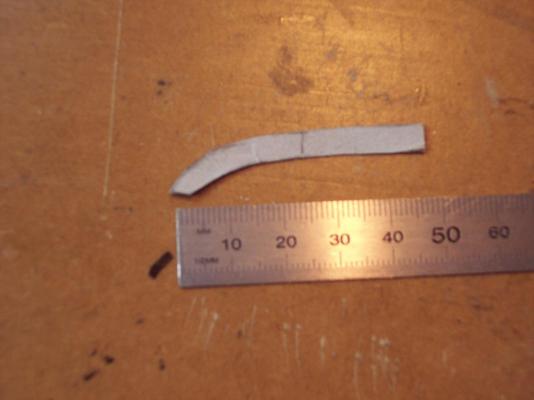
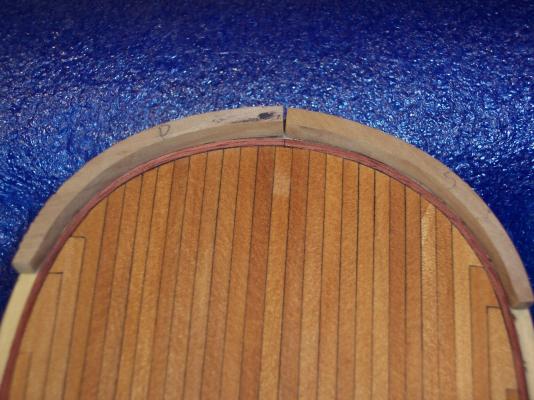
Help needed please I am just starting to sort out the first planking below the wales, which I am hoping to spile? and do as well as I can. Does the garbord plank, and the cardboard template look to be right? Or do i have the curve too sharp? All comments welcome Thanks Chris Or am I going about it the wrong way? Also what would be the normal width plank that would have been used to cut a curved one from. Thanks Again

-
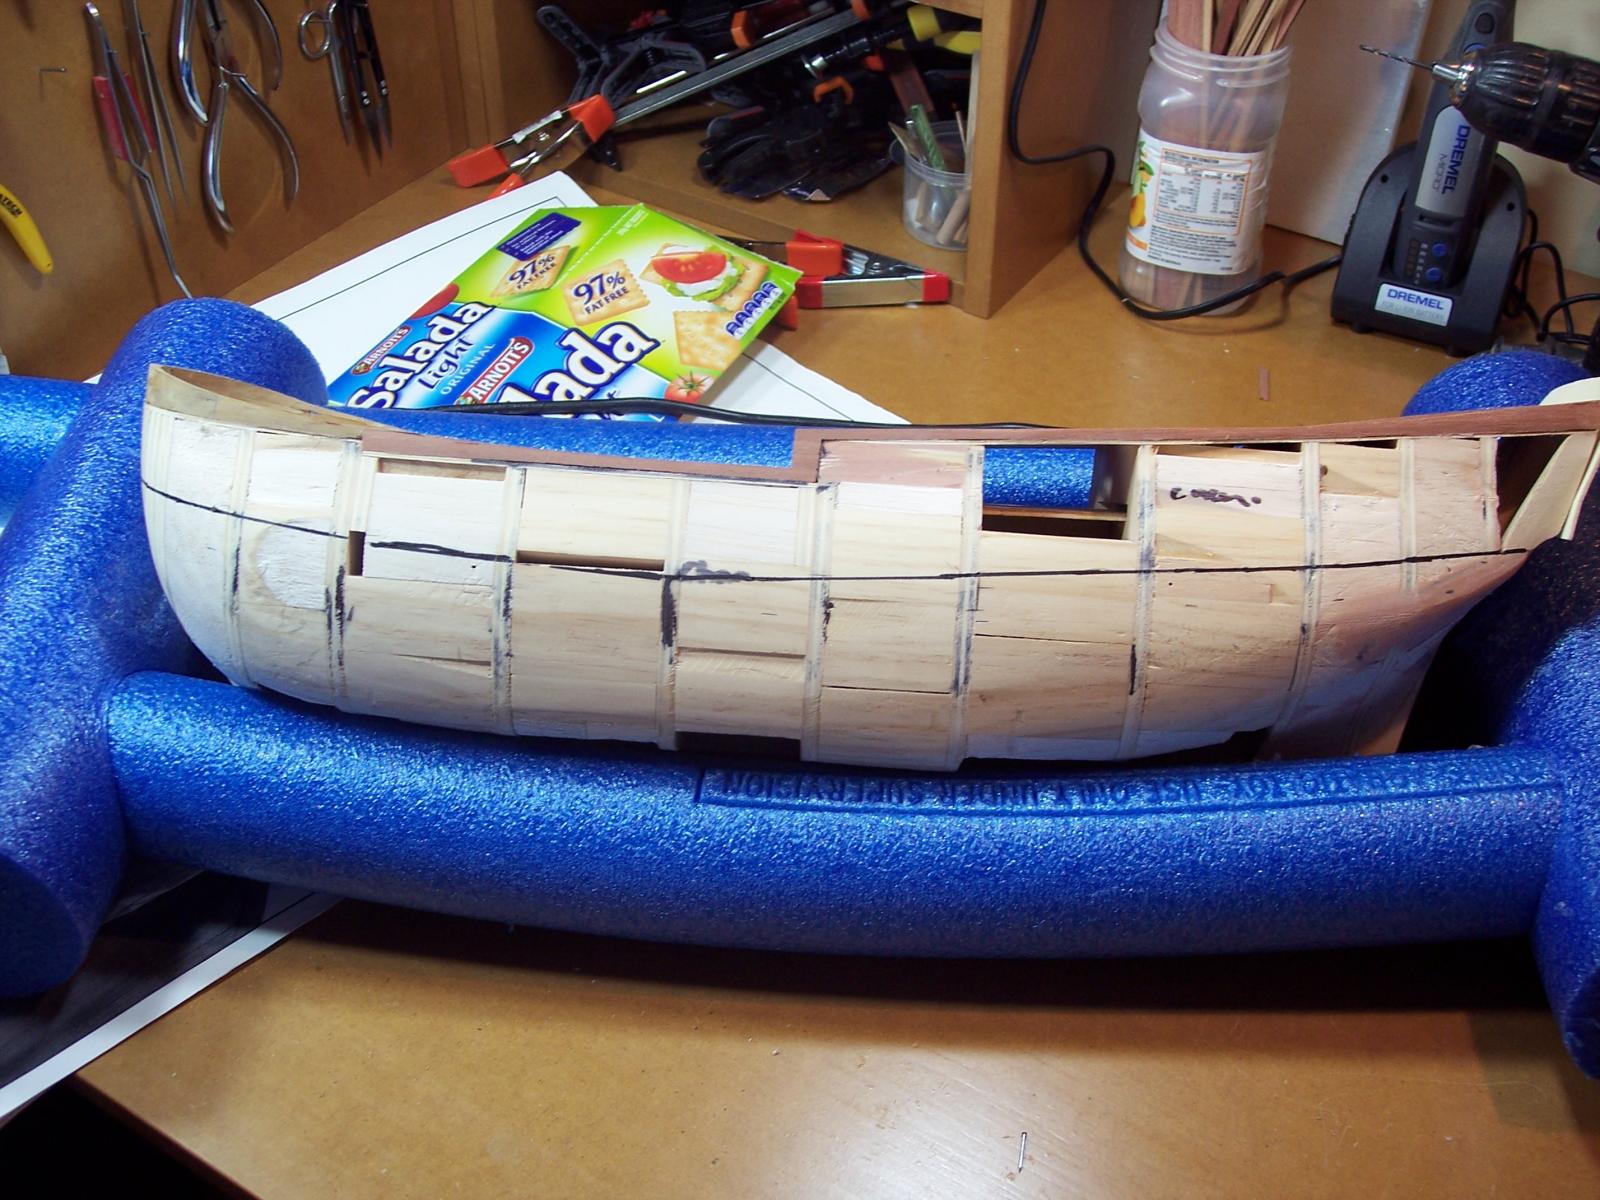
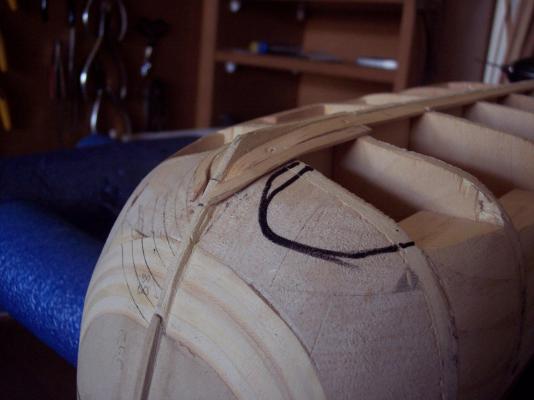
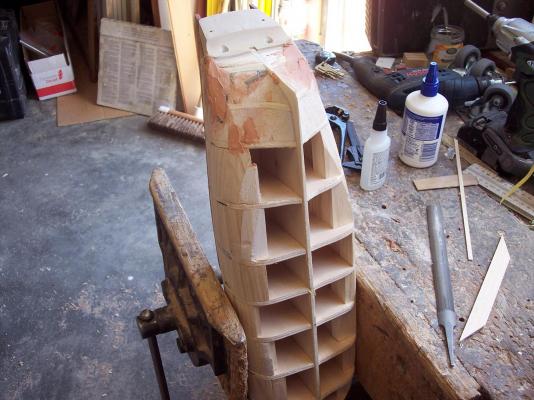
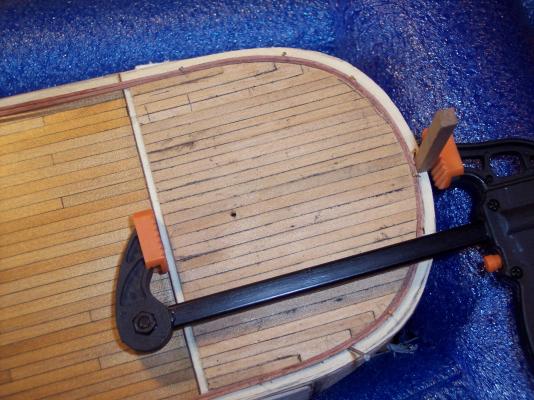
Good Evening everyone Big day today spent a few hours doing a final fairing, and trueing up the ganwales. And I marked out the top of the wales. I think that they are close to the right position. They mostly seem to be parallel to the top of the gunwales. One good thing I discovered about doing a lot of blocking was that it makes it easier to hold the ship by putting it in the bench vice. Lastly this evening I have given a few planks the hot water treatment, fitted them to the hull, and clamped in place to see what they bend like Hooroo Chris


-
I am actually in the recliner with the footrest up. Is that ok?
- 203 replies
-
- 5
-

-
- artesania latina
- marie jeanne
- (and 1 more)
-
Good looking blocks Piet Bad luck about the redo's, but you know what they say about having lots of practise. cheers Chris
-
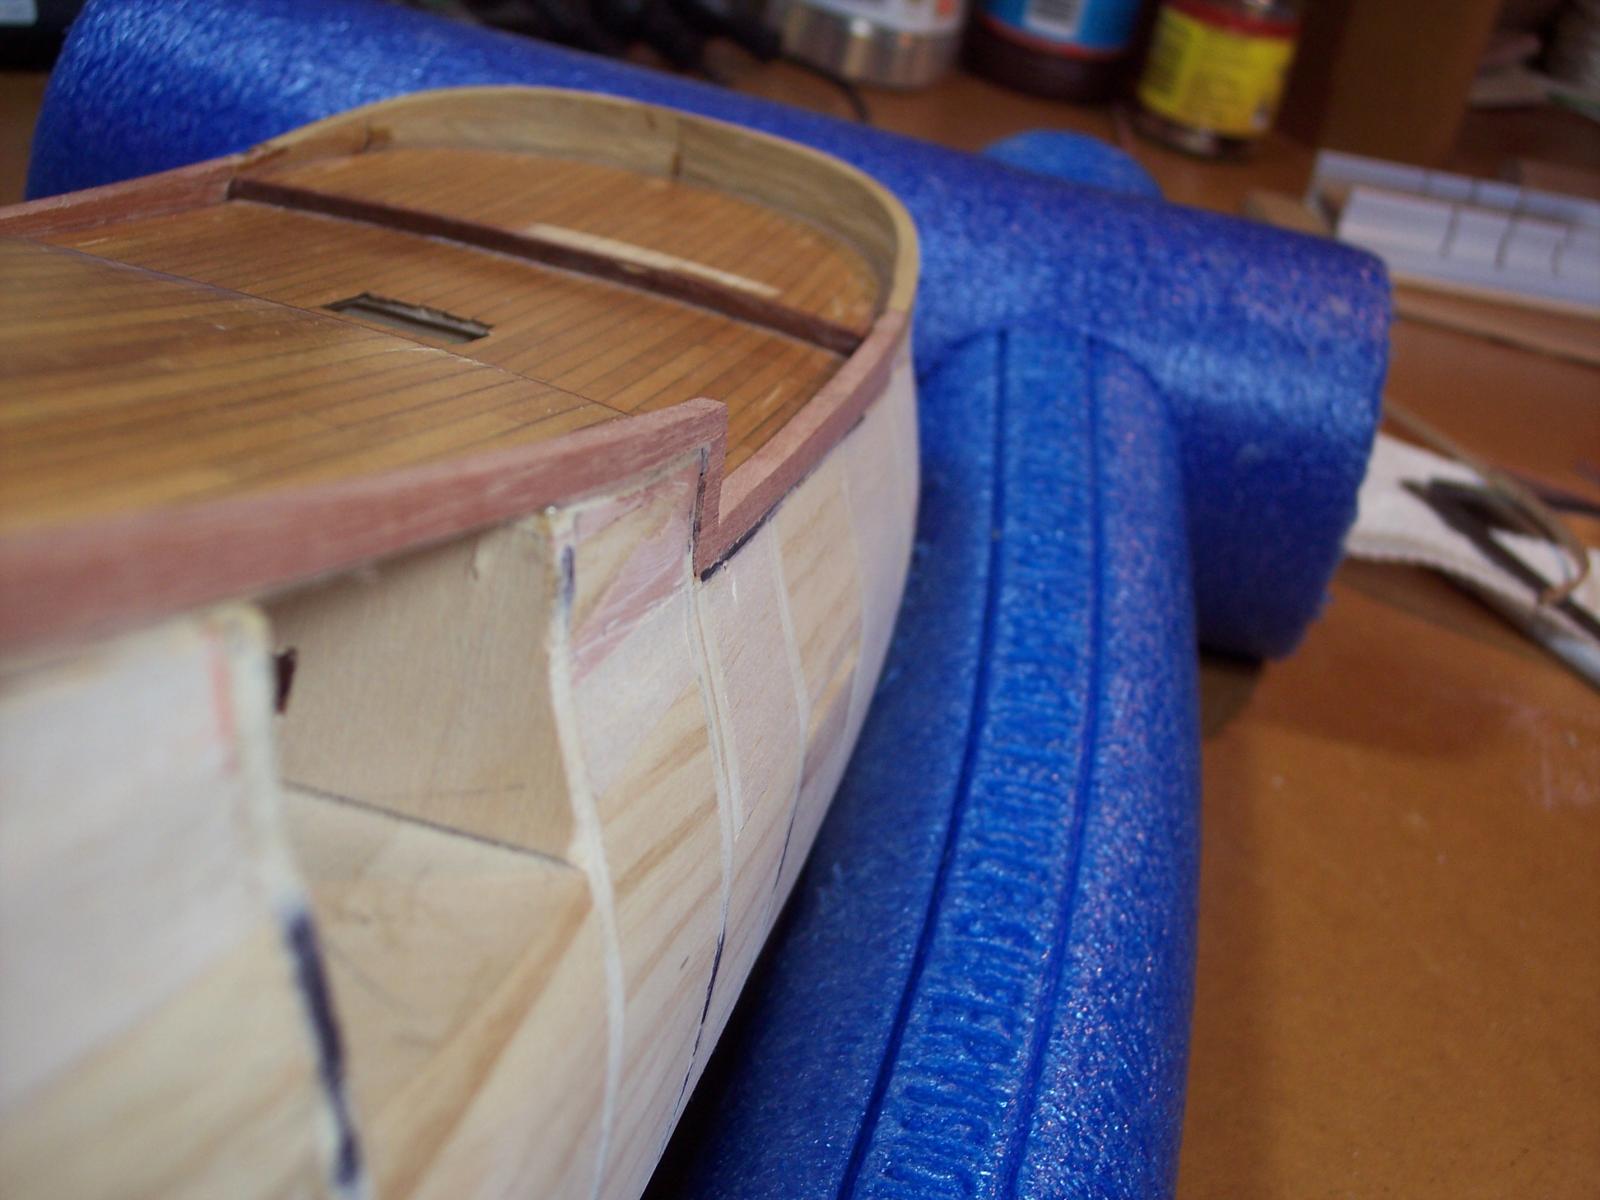
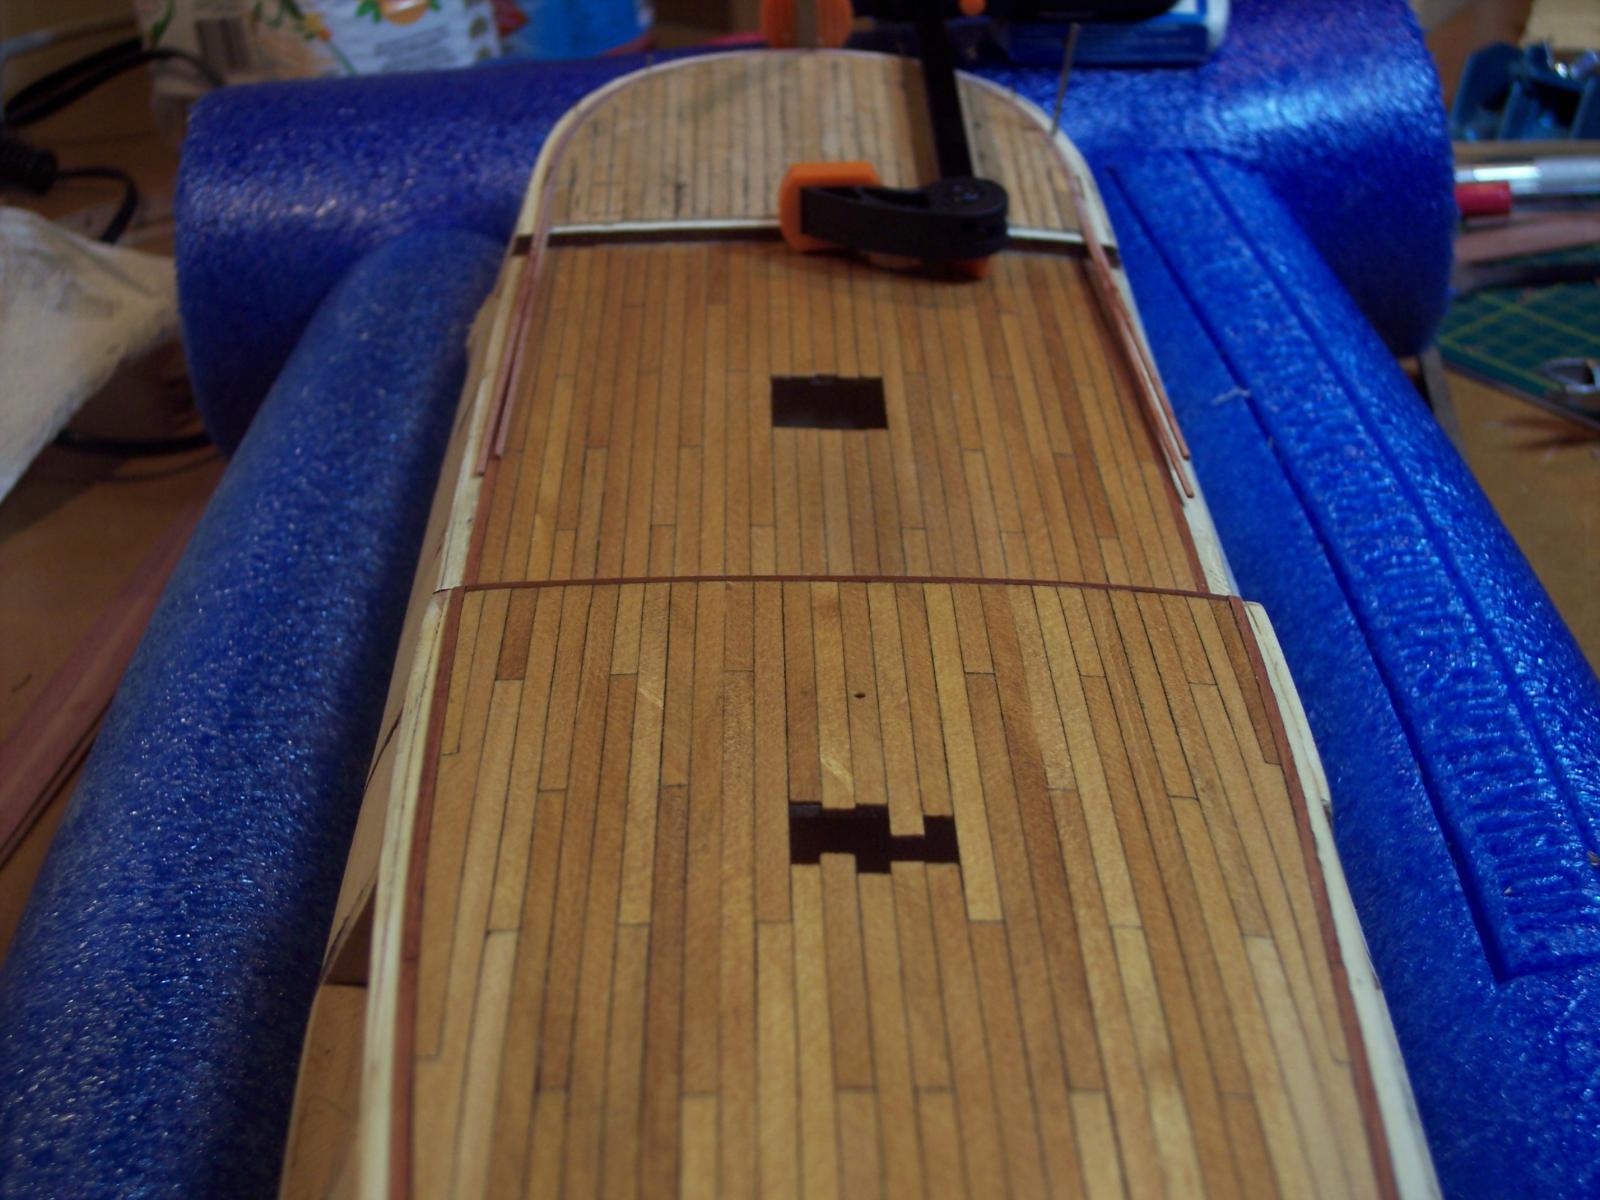
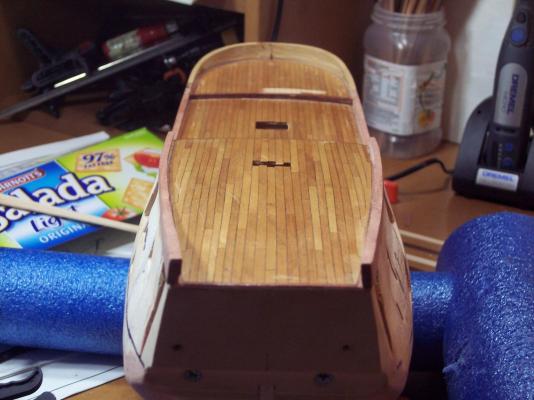
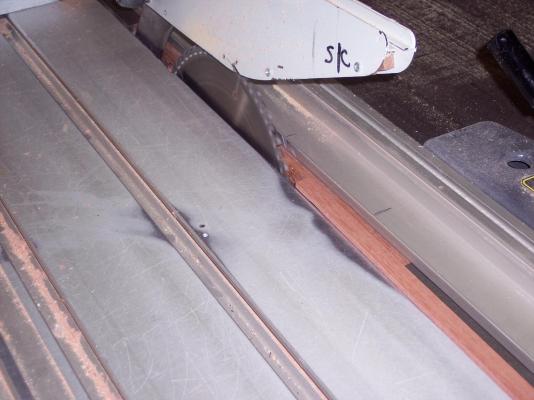
Good Evening All A little bit more progress, forecastle deck is planked, and has been given a coat of poly. It has been fudged a little bit, so don't look to close. And I have started fitting the gunwales I thought that the gunwales would have been relatively quick to do. Well ha ha ha ha ha, HA, should have known better, very fiddly little things. Getting angles machined on the bottoms, so that they lean into the ship, and fitting them around the planking. But I think that I am doing them the hard way. Oh well good fun anyway. Here is a pic of me over killing it a bit, using the panel saw to cut an angle on the bottom of the gunwales. Hooroo Chris
-
Hi Scott thanks for looking in. No heroics around here, that is 2 pieces each side being bent. I tried to cut them from wider pieces, and put a couple of joins in, but it needed a scroll saw to cut, which I don't have yet. And thanks for the like. Chris
-
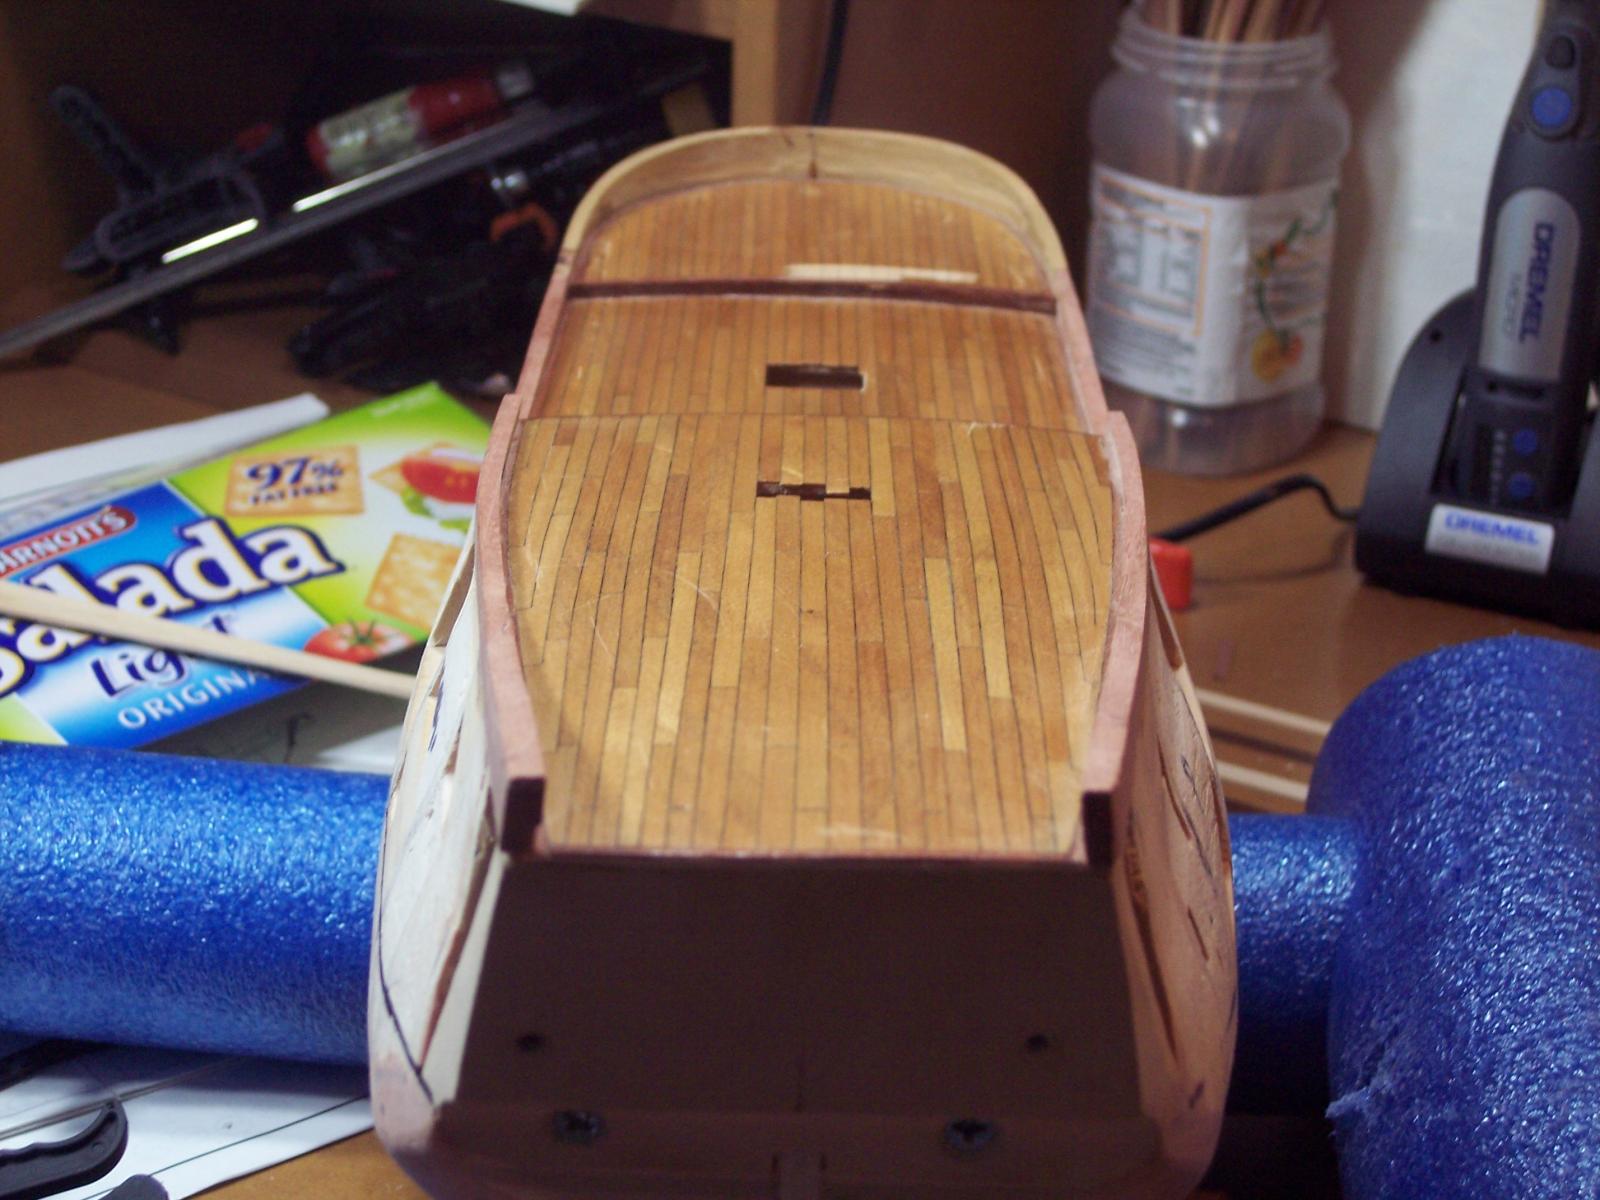
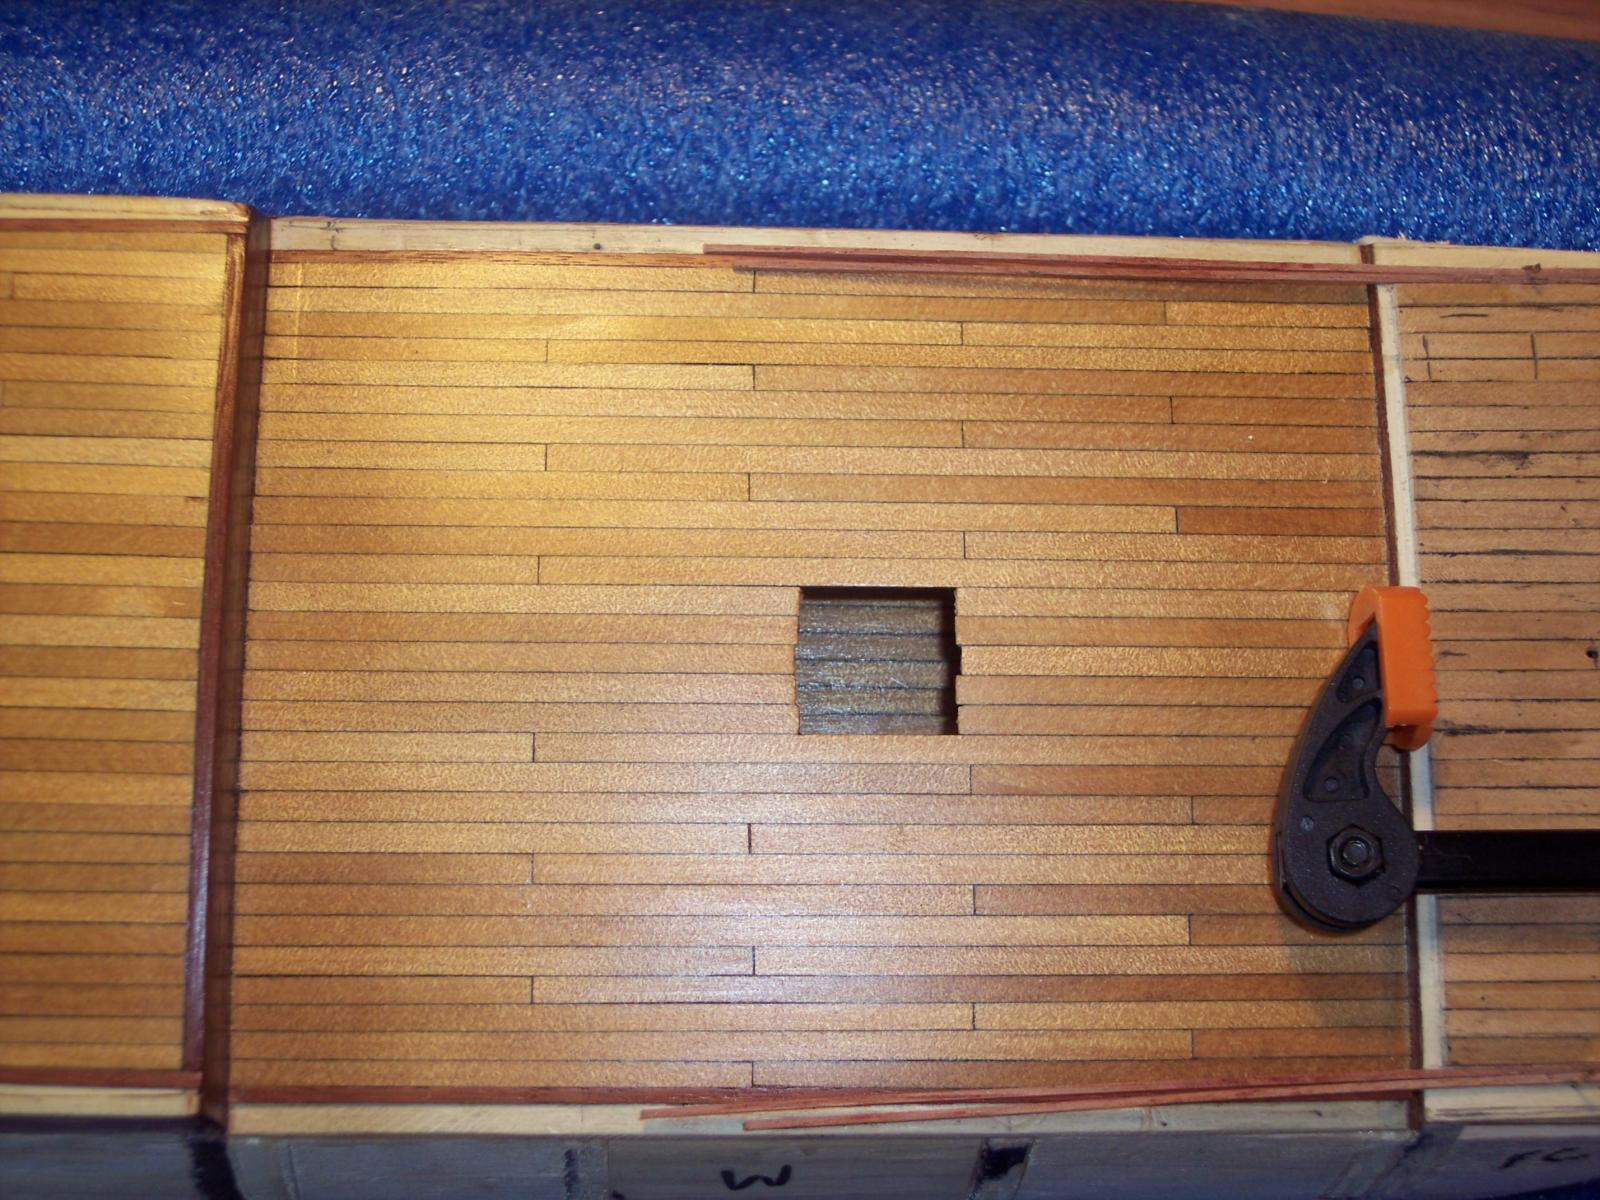
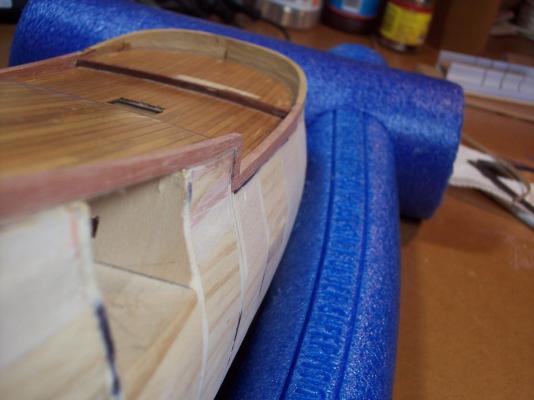
Man, it takes time doing anything on this build. It has taken a week, to take photos, to show the waist deck planked, But in the mean time the fore-castle deck has been planked, and the waterways have had the hot water treatment, and bent into place. I will glue them in tomorrow. Thanks Chris Yes Ok I will admit it the water ways are fake, they don't have any shape to them. But they look the part.


-
"Anatomy of the ship" A series of books with plans, etc about various ships. http://www.booktopia.com.au/anatomy-of-the-ship-karl-heinz-marquardt/prod9781844862306.html EDIT This one is not available for some reason, but they have others. I am still waiting for mine from this place but they are slow Cheers Chris
-
Good Morning Augie Yes I am trying to push it to another page as well. I have missed most of your build, but congratulations, Its a great achievement to produce a fine looking ship like your Syren. I have the same waiting on the shelf so I will be coming back here for help. Cheers Chris
- 1,668 replies
-
- 2
-
-
- syren
- model shipways
- (and 1 more)
-
Good Morning Biz, Yes it is a long gracious curve. Did your plans have the wales marked? Lucky you My plans don't show anything which means its up to me to work out. I will probably end up having a dozen different versions. That's partly why I blocked most of the ship, easier to mark lines on. Chris
-
Hi bigboris I am doing the AL endeavour now. Its a 20yr old kit and the instructions are pretty basic. This is only my second ship build and don't know much about other kits. But model ship building is really all about what you want it to be. You don't have to just follow the instructions, you can do your own research, look for books, info off the net, ask questions on MSW. And make the ship what you want it to be, That's why i did an Endeavour, the replica is supposed to be one of the most accurate to have been done. There are plenty of photos available. For example I have just finished planking the poop deck by copying what they did on the Endeavour, ( I think) just from what i could see on the photos. Others ditch some of the fittings supplied, and buy items, and ropes for rigging etc from suppliers and do their own thing. Whatever happens don't rush, and enjoy. Hooroo Chris
-
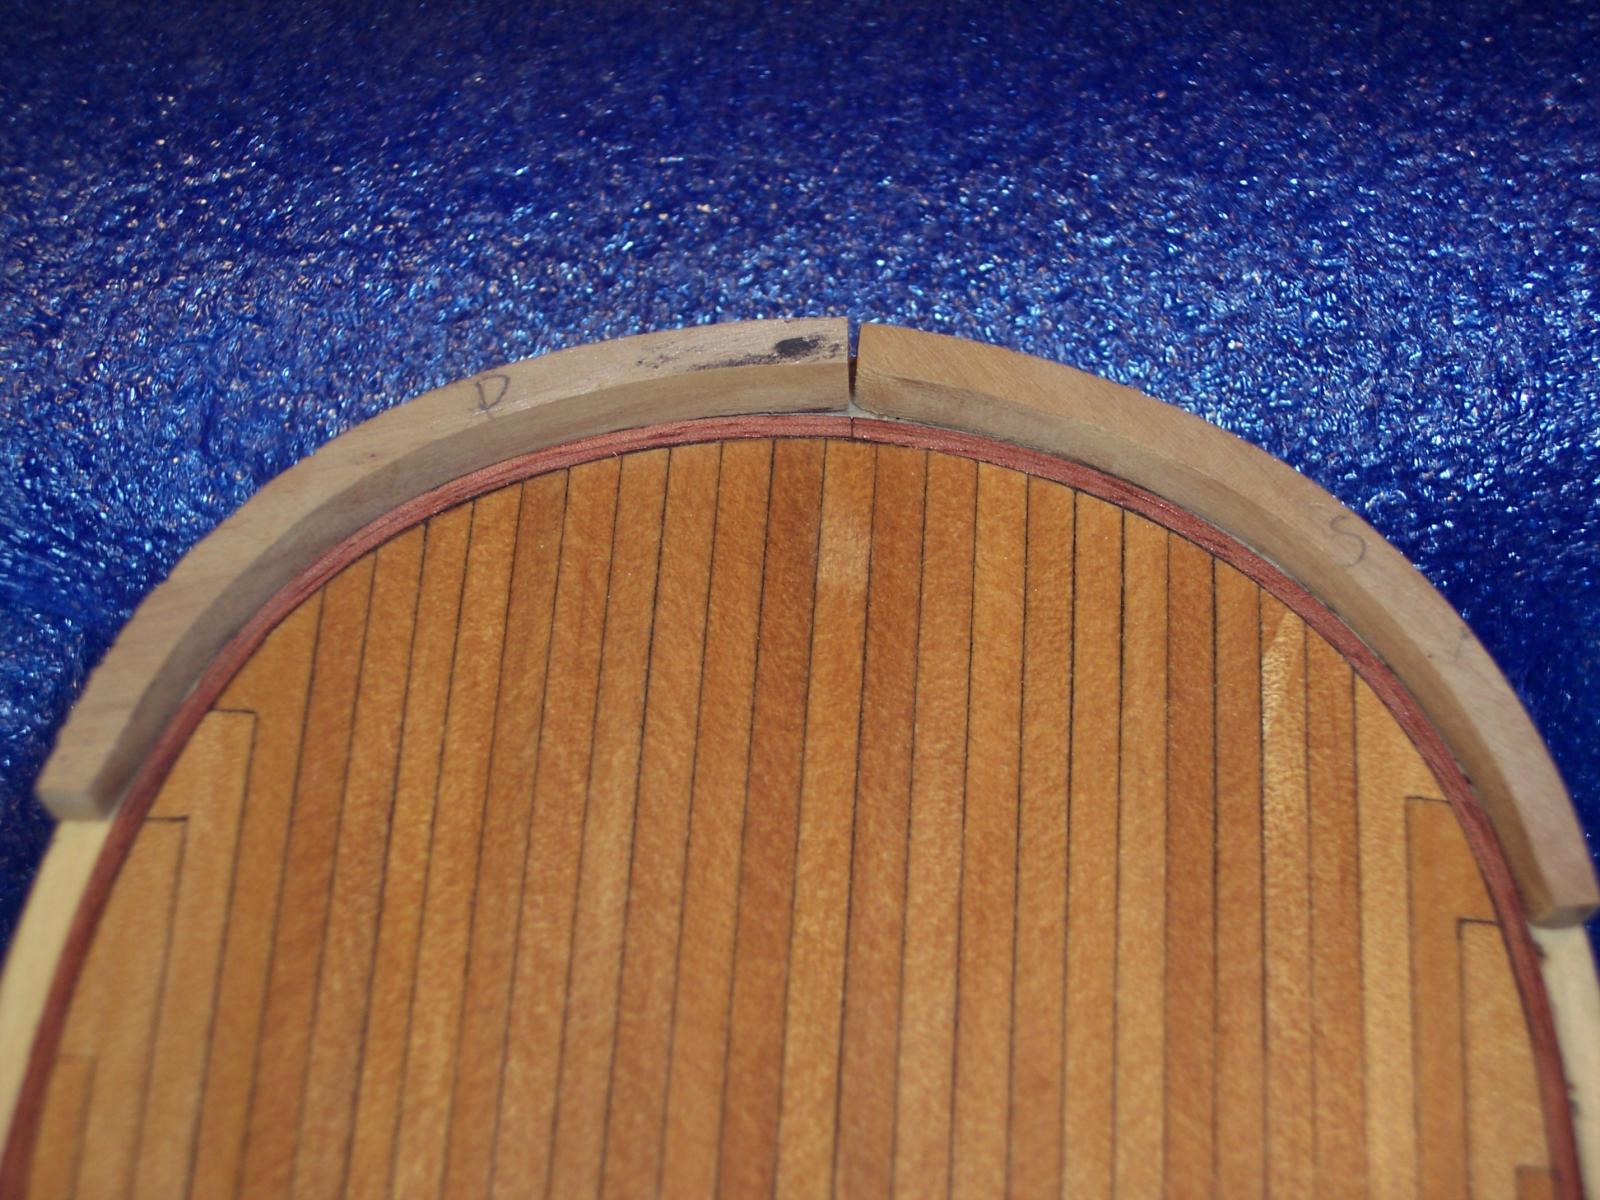
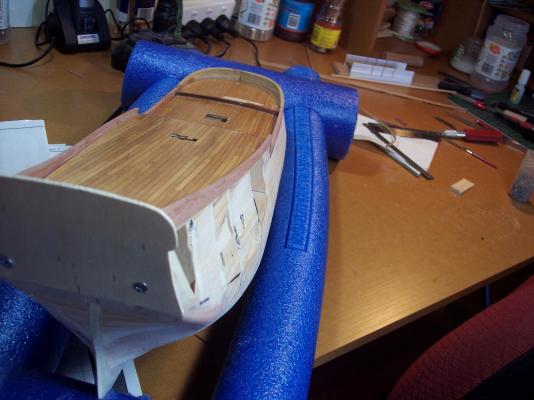
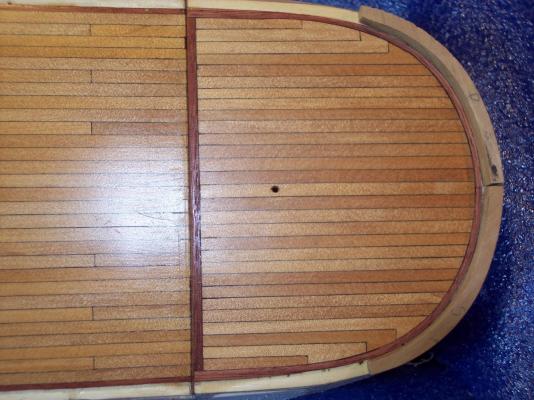
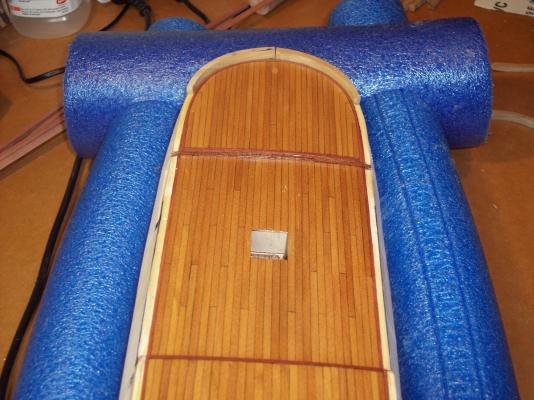
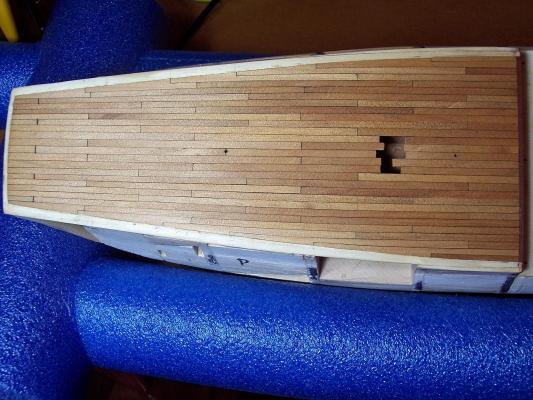
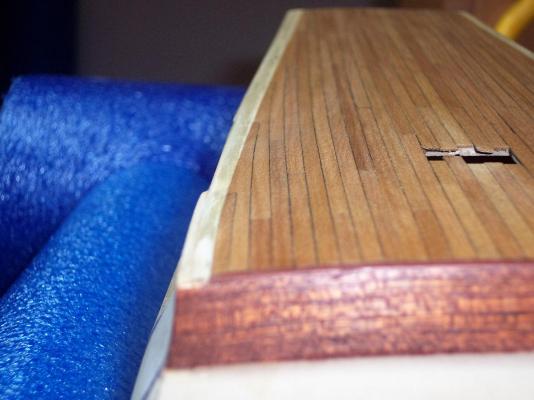
Good morning Andrew, Michael and Canute, thanks for the likes and comments. The decking is recycled Kauri, a New Zealand wood, and the waterways are to be Jarrah 2mm wide strips, a West Aussie wood. The caulking was supplied courtesy of a Neocolor ll water soluble, wax pastel, applied to one edge. Which actually looks better than it does in the photos. Thanks Chris
-
Good evening all Time for a little update, Poop deck is planked but not finished. I couldn't help myself, I had to put some poly on to get a better idea on how it was looking. I think that the colors and caulking have come up pretty good. I don't like the caulking looking too obvious. Waterways will go on next, then do the other two decks. I have tried to copy the replica deck, just going by photos. I think that it is reasonably close to it. Now to see if i can put some photos up to show.

-
Hi Micheal I think that is right about reducing the keel thickness. I haven't got to mine yet, so have not looked into it closely. But I did see somewhere. don't know where now, a discussion about the rudder posts not being the correct thickness in models, and that they can be tapered sometimes. Chris