
Supplies of the Ship Modeler's Handbook are running out. Get your copy NOW before they are gone! Click on photo to order.
×


dafi
-
Posts
2,400 -
Joined
-
Last visited
Reputation Activity
-

 dafi reacted to Blue Ensign in Pickle by Blue Ensign - FINISHED - Caldercraft - 1:64 scale
A few odds and ends
Rudder coat and pendants.
I usually make rudder coats out of micro-porus tape as it has a sort of canvas finish to it and has the added advantage of a sticky back.
Rudder coats are a sort of bell shape in plan but cutting a pattern for a particular ship is a matter of trial and error.
There should be an element of ‘bag’ in the coat to allow free movement of the rudder
This is difficult to achieve without padding out the interior, I use a little cotton wool off a cotton bud for this purpose.
After this it is just a matter of teasing it into shape around the transom and rudder.
The canvas was tarred to waterproof it as much as possible and I have represented this with a black grey finish.
The Rudder pendants
Evidence is that even smallish vessels like Pickle would have had some system for retaining the rudder after all loss of rudder was no small matter.
I could not find any detailed information exactly how the pendants and chains would have been fitted on Pickle; similar smallish vessels are shown with the pendants taken up over the transom and secured to cleats on the inside. This method would foul the stern gunports in the case of Pickle.
I fitted chains to eyebolts secured in the rudder and to eyebolts in the lower transom, and contented myself with this arrangement for the present.
Anchor buoys
These too are an essential part of a ships equipment, they need to be clearly seen on the water, and the standard size is 54”x 30” with something in excess of 100’ of line.(475mm)
Smaller vessels such as Pickle would have had a smaller version and I scaled mine down to 36” x 20”
I made an egg shaped core from the cone shaped tips of two cheap bic prop pencils and planked these with styrene strip.
With the addition of eyebolts either end and 0.25mm line to form the slings and hoops and the job’s done.
I don’t normally adhere to scale lengths of line but in this case I have measured out 18 fathoms of line (scale of course) to coil on the shrouds.
Nearly there
-
dafi reacted to Bender in Tying blocks to yards or masts.
I was asked to repost this. This is an easy way of tying blocks to yards or mast. I have also used this to tie blocks to the underside of tops.
I start out with thicker thread. A little trial and error with different threads to get the look I want. Notice I have the thread folded three times and use a clip to hold the thread tight.
I use smaller thread to wrap around the thicker thread. I start out with a slip knot tied in the thinner thread, and stick the loop and loose end of the thicker thread through the knot.
The thinner thread has two ends. The end that pulls the slip knot tight and the end the pulls the loop through the knot.
I pull the loop tight against the thicker thread and use a second clip to hold the thinner thread in place.
I start wrapping the thin thread (The end that pulls the knot tight.) around the three layer of thick thread and the loop of the thin thread.
I make 7 to 10 or more wraps. Trail and error to get the look.
While wrapping and after, you have to hold the wraps to keep them from unwinding. Remove the one clip. Take the end of the thread you've been wrapping and pass it through the loop of the thin thread.
Still while holding the wraps to keep them from unwinding, pull on the other end of the thin thread to pull the loop tight around the end of the thin thread. Pull the thin thread tight but not too tight. If is too tight, it will be hard to pull the thicker thread through. Also, as you pull on the end of the thinner thread it will pull the loop and the other end on the thin thread into the wrap.
You now have a loop and a loose end of thicker thread sticking out each end of the thinner thread. Pulling the loose end on one side pulls the loop in on the other side. Put a block in one loop and pull the loop tight.
Slip the other end over a yard or mast. You can also start out with the loop already around something.
Pull that loop tight.
Add a drop or two of CA glue, and when it is dry snip of the loose ends. This picture shows two block tie to a yard.
-
dafi reacted to Bender in Tying blocks to yards or masts.
I am not very good at drawing but . . .
The last four pictures shows different places I have used this method.
Around a yard.
Under a top. These blocks were added by passing the thicker thread around the cross tree before doing any warping.
All of these blocks are attached with this method. I used a variation of this method to attach the stay.
And one more
I lied. One more.
-
dafi reacted to archjofo in La Créole 1827 by archjofo - Scale 1/48 - French corvette
Hello,
thank you for your nice comments.
Here are some more anchor pictures.
-
dafi reacted to archjofo in La Créole 1827 by archjofo - Scale 1/48 - French corvette
The anchors are made of brass.
to be continued ...
-
dafi reacted to archjofo in La Créole 1827 by archjofo - Scale 1/48 - French corvette
Before I start my build log some information about the real La Créole and
the data from which my model will build.
The La Créole was a 24-gun corvette of the French Navy. The corvette
carried 4 x 18 pdr guns and 20 x 30 pdr carronades.
Her plans were drawn by P. M. Leroux in 1827. She was launched in Cherbourg in
May 1829. The ship took part in the French invasion of Mexico in 1838, and most
notably in the Bombardment of San Juan de Ulloa before French troops disembarked and captured the city of Veracruz.
There is a fine shipyard model on display at the Musée national de la Marine in Paris which is shown by many photos in the book of Jean Boudriot (in French).
I use the following sources for building my model of the corvette:
Jean Boudriot - Historique de la corvette 1650-1850: La
Créole, 1827
Now the images of beginning:
To be continued...
Best regards
Johann
-
dafi reacted to Blue Ensign in Le Superbe by Blue Ensign - FINISHED - Heller - PLASTIC - Built as "Le Praetorian", after Boudriot
A simple man’s guide to sail making (part two)
The sail has been cut out complete with a hem all the way round, the positions of the cringles have been marked along the edges.
The hems are folded over and a small slit where the cringles are to be placed is made with the scalpel.
0.1mm line is then placed along the hem inside the fold and fished thro with a small pointy thing, to form the cringles.
This is the position so reached.
After the first few cringles have been formed the hem is glued down using neat PVA to hold the cringles in place.
In the pic below all the cringles have now been put into place.
Down each side from the top are the three pairs of Reef cringles, followed by three Bowline cringles; the leech line is attached thro’ the top two.
At the clue is the cringle for the blocks..
Across the foot of the sail are the cringles for the buntlines.
Bands, patches and linings
Additional strengthening pieces of ‘cloth’ are now required to be added to the sail. These are all attached to the aft side of the sail as shown above (Fore side on British ships.)
They comprise:
The reef bands, three narrow strips thro’ which the reef points are fixed.
The Patches small squares of material below the reef cringles at the leech.
The Top lining, the most distinctive addition whose purpose is to protect the sail from wear by friction against the mast top.
The Lining cloths which are strengthening strips staggered down the leech of the sail.
A bit like wallpapering this part, cut it to size, slap on the paste, and stick it down.
With the light behind the full effect of the various additions can now be seen.
A series of holes were drilled thro’ the Reef bands to take the Reef points, and again on the Head lining to take the Robands.
Some 150 reef points are required on the Topsail.
Once the sails are in place they can be manipulated at any later stage by the simple expediency of wetting them down.
The Mizen sail, the Brails that control the sail furling are all in place, there are matching lines on each side of the sail.
a simple wet down of the sail and haul on the Brails and the sail is loosely furled.
Modelspan is a tough material and in my workings with I had no failures.
I would use modelspan for kitting out models certainly up to 1:96 scale.
Cheers,
B.E.
-
 dafi got a reaction from mspringer in A small rigging bench
As five hands sometimes are not enough for rigging, I build myself a small rigging bench.
An inclined plane with a pin in the middle ...
... and two hairgrips on a holder. The holder can be fixed also pointing the other direction - or being left off - ...
... and even tiny bits can be worked on with ease :-)
For serving small parts I included a hook on a thread. Turning the part in between the fingers, it is still nicely held under tension and does not wobble around :-)
These are the nice bits one can do with it ...
... and even to be repeated precisely :-)
Gruß, DAniel -
 dafi got a reaction from druxey in A serving machine that serves you well
These are the words, that Maurice used when he got his little serving machine.
So here comes my interpretation of it.
Famous for my lifetime-supply of old Fischer-Technics (luckily my son never was interested in), it can be either turned by hand ...
... or the motor can be switched down. As it is works by friction and not by the gearwheel, the drive can be stopped easily while working just by holding the axis if any correction is needed
I did not use hooks but tubes, a wire is used to get the lines through ...
... and the other side is hold by a toothpic squeezed into the tube. Like this I can shift the serving area to the left or right if longer distances are needed.
First tests on the trials of the mainstay show a nice result, still showing the structure underneath.
But it not just works for the big ones, here are the tests for the thinner ropes, this one 0,5 mm thick.
Here some serving tests. Right the 3/0 fly fishing yarn with the charm of dental floss - very uncool. On the left my usual 8/0 yarn, much better :-) After serving a touch of CA on the ends, still some diluted white glue along the sausage. And juch-huui!
Still tried the 6/0 one, the black one on the right, that is a tad thicker and goes therefore faster in serving, that it will be.
Also tried the direction of serving. Going with the cuntlines - here serving rightwards - results in the serving line getting stuck in the groove and running of, like seen on the right side of the orange one. So always against the cuntlines, that it means :-)
And the result? The modelling ropes have the bad habit to flatten if taken around sharp turns. Totally uncool. Not with Dr. dafis non-patented serving machine! Here a rope of 0,5 mm wraps itself gently around a 0,5 mm drill and nicely keeps its form.
And smaller parts? No prob, if well planned, some of these can be ...
... nicely placed on the same line like Münchhausens duck hunting :-)
So have a nice day until it will be shouted again: "Mom, he did it again!!!"
Sincereily, dafi
PS: This kind of machines can be found in many variations on the net, either to buy or DIY. But this was a great opportunity to proove dear darling wife that it was a wise decision to keep all these items in the cellar, and not to sell, swoop, give as present - or even through away - already many years ago ... XXXDAN -
 dafi got a reaction from Blue Ensign in HMS Victory by dafi - Heller - PLASTIC - To Victory and beyond ...
After that much research I needed something easy to relax ...
On the left Hellers version of the rudderwheel, right dafis version, just enjoy, no further explanations :-)
Gute Nacht, Daniel -
 dafi got a reaction from Hubac's Historian in HMS Victory by dafi - Heller - PLASTIC - To Victory and beyond ...
Act 3
Happy End
And here they are, our happy actors ...
... from the inside ...
... and with a mockup crane.
Huuuuooorrrrrraaaaaaayyyyyy!
-
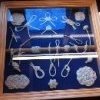
 dafi got a reaction from JayCub in Anchor making
Colored the shaft and the arms for the chamfers ... ... drilled the hole for the ring and most was done. Used my small template to cut the palms ... ...glued in place, cut ... ... cleaned up and done :-)
And here the family shot with all the needed tools that were needed for conception. All the best, Daniel -
 dafi got a reaction from ianmajor in A small rigging bench
As five hands sometimes are not enough for rigging, I build myself a small rigging bench.
An inclined plane with a pin in the middle ...
... and two hairgrips on a holder. The holder can be fixed also pointing the other direction - or being left off - ...
... and even tiny bits can be worked on with ease :-)
For serving small parts I included a hook on a thread. Turning the part in between the fingers, it is still nicely held under tension and does not wobble around :-)
These are the nice bits one can do with it ...
... and even to be repeated precisely :-)
Gruß, DAniel -
 dafi got a reaction from aviaamator in Micro Power Splice
Halleluja, praise the heavens!
Why? Because also small things can make me happy :-)
Looking back: A year ago I was already working on the improved gunport lids but had a grandious failure on the gunport tackles:
Looks like a ball of hair straight out of the shower plughole :-(
These days I broused through Gil Middletons wonderful Jotika-Victory and dicovered the splicing that he presents there:
(Edit: Later I discoverd this in use by many others too!)
We proudly present: The Powersplice
It is simple but effective:
Thread - here 0,3 mm - through the ring, neadle through the thread, it is more easy than it looks ...
... make tight, secure with a drop of glue ...
... and once more through it with feeling ...
... pull thight and ...
here we are!
Great, isn´t it???
All the best from a happy Daniel to all of those who showed it before!
-
 dafi got a reaction from spider999 in Copper Imitation
Some pictures from the finished job
And to finish with the british pattern, the batten on the top edge.
Have fun, Daniel -
 dafi got a reaction from Jdiaz in Copper Imitation
For the coppering I used self adhesive Copper foil from the Tiffany workshop. It is nice to see the difference between the new material and the old copper paint. It was good to have the paint underneath, as to make minimal gaps not too visible :-) I use masking tape to protekt the black paint from the glue, otherwise it will take out good chunks - just guess how I found out :-( BTW: The glory for bringing this ingenious material to my attention belongs to a chap in a german forum, who presented this technik on a wooden Santissima Trinidad. The copper is rather cheap Look in the internet for suppliers of Tiffany lamp builders, you need two rolls of 4 mm, self adhesive. As in my case the tiles were already in the plastic mould, I was able to use the material in straight lines. Other ones cut the material into the actual tiles. I omitted the clues in my scale, but I saw already great results on this material in imitating them by stamps or cogwheels. Also if the surface is cleand from the protectiv what-so-ever, nice verdigris can be produced on it by a spray of saltwater, lemon air and time.
Greetings Daniel -
 dafi got a reaction from GuntherMT in Micro Blocks
And it continued with an answer from Jan here in MSW: You will drive yourself insane! My guess is that your next "problem" will be to get these tiny blocks stropped according the rule book Next you will realize that blocks have sheaves, that sheaves are held into position by iron pins, that these pins have nail like heads, that.... etc. We will follow your route to insanity with ever increasing admiration! Jan OK-OK-OK, Jan´s challenge was accepted :-) The stropping we had already, so the next is ... ... put a 1 mm poly rod into the machine, drill with 0,4 mm, turning the chuck of the lathe of course by hand ... ... and cutting it off still on the drill to 0,5 mm slices ... ... and this is the result of the production. So what is missing next for some good blocks? The casing: So milling a double slot and a single slot into a 2,5 mm x 1 mm batten ... ... doing some carving ... ... colored the disks with marker for not adding to the thickness ... ... inserted the disks and the axles ... ... and cleared it up. And here the family shot with the benchmark, the wonderful 2 x 2 x 2 mm block from JB. While stropping I finally re-remembered the great power-splice, which makes things easier and cleaner, prepared a loop ... ... and slid the block into it, secured with glue and ... *drummrollandsmallfanfare* ... and the thing on place :-) Lessons learned: It is really possible to make blocks of 2,5 x 2,5 x 1 mm with turning sheaves! And by pulling on the loose end, the tackle works much easier than the other ones without :-) :-) :-) The most difficult? Checking if the sheaves are turning after securing the axles with glue. Managed to do this with the point of a needle. Confirmed positivly! ;-) Liebe Grüße Daniel -
dafi got a reaction from GuntherMT in Micro Blocks
And some more basic work. To do the side takles of my guns in 1:100 I need small blocks. The smallest commercially available are the 2 mm from JB, great stuff but still a little bit to big for my taste. So I wanted to see what there is still possible :-)
Literature shows several ways of doing blocks, most of them done in a similar way, so I am following that, just have to take out most of the machinery because of the size.
First I prepared a batten of 1,5 mm high and 1 mm thick, and marked it all 2 mm which gave the basic size of these ambitious project ...
... each of these marks got a diagonal cut in one direction and after all done, the batten was turned and the other side cut, so the grooves on one side were finished. Repeated on all four sides ...
... and this was achieved rather fast, some matt varnish to strengthen the edges ...
... and first drilling tests ...
... with the 0,5er drill. Result, difficult to get the right place, so more testing until it looked like in a swiss cheese factory ...
... and finally the enlightenment: 0,5 mm drill fixed in the stand, a stop in 0,5 mm distance is fixed. The stop has the width of 2 mm which facilitates positioning.
Now hold the batten tight and near at both sides and slide it up the stop until drilled ...
... move down and turn the batten 180° around the longitudinal axis, slide up and drill the second hole :-)
(I spared you the fingers on the picture :-)
Looks already ok, the four blocks left of my little worker are the single blocks of 1 mm x 1 mm x 2 mm - hihihihihi - ...
... a second coat of varnish, the cutter makes the groove on the side for the line - the most difficult part on the whole action - some sanding off of the edges, some more varnish and done. They stay on the batten and will be cut just prior to production for not getting lost - just in time production :-)
Just a family picture: the Krick 3 mm, the JB 2 mm and Microline from dafi, and as it looks nice a macro shot.
So I already see the crowd out there laughing in anticipation of the knots in dafis fingers, while trying to tying some rigging onto these littel bits ...
... and this was the result with a descent rope:
*jumpingofhappiness*
Not yet perfect, but the direction is right :-)
Lieber Gruß, Daniel
-
 dafi got a reaction from Sailcat in Cutty Sark by Sailcat - FINISHED - Revell - 1/96 - PLASTIC - Rescue kit bash morphed to Dame Tisane
Happy to see you back too, Kats!
As always great to see your phenix once more rising out off her own ashes :-)
XXXDAn
-
dafi reacted to wefalck in Micro Blocks
Such drills can be purchased with either 1 mm or 1.5 mm shafts from jewellers and clockmakers supply houses, or with 2.35 mm shaft from some jewellers or from modellers supply houses. The smallest drills with 2.35 mm shaft though are 0.5 mm. The others go right down to 0.1 mm. These ground drills are pricey, but their concentricity is much better than the rolled ones where the shaft diameter = drill diameter.
You may also want to look out for carbide drills with a 2.35 mm shaft on ebay, which often come cheaply from the aerospace or printed circuit board industries. They are used and replaced as part of preventive maintenance, but still good enough for our purposes. They run very well, but are rather fragile, so ou have to use them in a drill press.
wefalck
-
 dafi got a reaction from ken thomson in A small rigging bench
As five hands sometimes are not enough for rigging, I build myself a small rigging bench.
An inclined plane with a pin in the middle ...
... and two hairgrips on a holder. The holder can be fixed also pointing the other direction - or being left off - ...
... and even tiny bits can be worked on with ease :-)
For serving small parts I included a hook on a thread. Turning the part in between the fingers, it is still nicely held under tension and does not wobble around :-)
These are the nice bits one can do with it ...
... and even to be repeated precisely :-)
Gruß, DAniel -
 dafi got a reaction from muratx in Plain laid ropes from 0,2 mm up to cable laid ropes 2 mm
Oh these days I used the whole 2,5 meters of my Reeperbahn :-)
The anchor cables and messengers were due
As the small motors were to small dimensioned, I had to use the electric drill. And for long ropes or ropes with many single threads ...
... one has to knot each of the three strands on the predrilling side together for not getting small lumps. Three of the resulting cables were laid further to create the bigger ones ...
... and for an enjoyable result :-)
The anchor cable has a diameter of 2 mm which equals about 24" circumference on the original, the messenger should have about the half, this one being still too thick with 1,5 mm. This means, half of the yarn is not resulting into half the diameter.
Interesting is, that even though I used the same proportions of the colors Tan and Rusty Dun, the resulting cable have different colors. Possibly because the messenger is tighter laid, there is not as much light from the surface penetrating the outer yarn and being reflected inside.
To compensate I added one part of white to the existing two colors ...
... and the result can be seen compared to the middle messenger. On the bottom the thinner messenger of 1 mm is shown, which - using the same colors as the first one - appears lighter due to be laid less tight.
That the first messenger was laid too tight I realised, as some of the outer fibres were broken ...
... so less tension was used for the following cables. The problems on the broken one I was able to fix by cutting off the bitts and smoothening it with Uhu-Plast.
Next came parcelling and servig
That one is for you Evan ;-)
I realised, that on a lot of great models, the parcelling and serving made the cable too thick, due to the too thick diameter of the material used. But as the fishing line is like dental floss, it flattens up while beeing wrapped around ...
... and even shows the structure underneath, something I saw on the originals :-)
Still a little ink or chalk to get the plastic gloss off, and it will be ok.
And of course I could not resist, to try out a spliced eye on the messenger :-)
-
 dafi got a reaction from Archi in Plain laid ropes from 0,2 mm up to cable laid ropes 2 mm
Come on baby...don't fear the Reeper
Baby feel the thread...don't fear the Reeper
If one is stuck one should do what should have been done in the start - Listen to your inner voice and listen to the others :-)
Not: "I-wanna-have-a-ropewalk-and-do-same-nice-ropes-as-seen-on-the-modelling-exhibition" but "I-need-great-ropes-for-my-Vic" :-)
That changes a lot as I am building a completely different scale. Changes a lot towards the materials and the usage of the walk. So freshly focussed back to work:
First listen to the others: Oli/Modellbaumechaniker and Holger/Pollux from my german forums gave me the right hints for the right materials. Fil au chinois and flyfishing lines were the right hints!
http://www.neheleniapatterns.com/html/filagant.html
http://www.baker-flyfishing.com/shop/bindematerialien_faeden.php?v=n183
And this is what came:
The bigger bobbins are the fil au chinois, numbers for the colors see the picture
The smaller bobbin sare from the flyfishing, Uni-Thread green 8/0 the thin one, orange 6/0 the middle one, the thick 3/0 and the superthin 17/0
The fil au chinois is cotton with very little fussy bits, the Uni is free of fuzz :-)
The Uni has a large range of colors avaliable, unfortunately not all colors in all sizes. The 8/0 and 6/0 are great for my purpose, the 3/0 has the great appearence of colored dental floss and the 17/0 is also quite uneven and transparent.
First tests proved to be the right direction sizewise :-)
Left the fuzzy thread from the supermarket, my thinnest possibility before this date. Then comes the fil au chinois, the Uni 8/0 and the Uni17/0, always the original strand, then two, 3 and 6 stranded with blocks of 3 mm, 2 mm and 1,5 mm for comparison.
And the first test also showed that turning the axis by hand is a tad tiring and the cordless screwdriver is a little bit unhandy and also too insensitive ...
...
So ...
... reopening the Fischertechnik box from my youth, getting the motors out, glueing them with double sided tape onto the machinery, here the pretwisting side to be seen ...
... and the laying side ...
... the motor can be turned sideways to reposition the hooks ...
... and felt was put untderneath for easy gliding, and a steel ruler in the middle to control the movements of the sliding parts :-)
Both sides were clampedto the rail to be able to put the yarn properly. After chasing behind the bobbin for several times, a holder like the sewing machines ones was introduced, and from there the the yarn was brought to the hooks of the pretwisting side - I am showing a 6-stranded rope - ...
... and after 3 times twice forth and back ...
... the yarn was fixed on the laying side.
The steel ruler shows the movement of the slide - I use 10% on this rope - loosen the clamp on the laying side, the pretwisting hooks start turning and the opposite slide starts moving miraculously towards the predrilling slide :-)
If the required distance is achieved, I clamp both sides onto the rail, and the three strands are laid until the required tension is achieved ...
... some CA for fixing ...
...going with the fingernails over to release unwanted tension ...
... and you can make a clean cut :-)
Lessons learned
You can see two things:
First: I am not using any more the little guide block :-)
No difference to be seen apart from that it is much more even ;-)
Secondly: I am fixing both sides while laying the rope! In the first trials I had the trouble, that the start of the rope was coming out nicely tight and the second half was much more loose ...
I realised that at the start of laying the pretwisting slide does not move, and the shortening of the rope is only compensated by the lateral spreading of the yarn. Just later on the slide starts moving. But it was not just after I forgot once to remove the clamp of this slide and got out a great and even clean cable that I realised, that the loosness of the rope came from the missing tension on the other side.
The next tests without the guide and fixed slides prooved to be successful :-) Just if the motor is having to work too hard, I stop it and I loosen the tension a tad by carefully moving the slide and then contimue.
Come on baby...don't fear the Reeper
Baby feel the thread...don't fear the Reeper
... and the part that should be pronounced is: feel the thread :-)
XXXDAn
-
dafi reacted to Blue Ensign in Pickle by Blue Ensign - FINISHED - Caldercraft - 1:64 scale
On the old site there were a few build logs of Pickle which gave insight into this beginner level kit, but all that has been lost.
I have a build log already done for this fine little model and I will re-post it here for the benefit of those, particularly beginners, who may be interested, and as a contribution to replacing our lost content.
A little background to Pickle
She is best known for carrying to England the bitter sweet news of the crushing defeat of the French / Spanish fleet at Trafalgar coupled with the news that Nelson had died.
The Pickle was a purchased schooner originally named Sting but was renamed in 1802.
Her origin is a little obscure with opinions differing. She is often referred to as a six gun Bermudian schooner, but there are grounds for thinking that she carried eight or even ten carronades given her size, and the corresponding armament of similar sized schooners and cutters etc.
A model in the RNM shows her with 10 carronades, but details in works by Peter Goodwin and Rif Winfield list her with eight carronades.
She is pierced for 14 guns excluding the stern ports, but the forward most two are adjacent to the windlass etc which would make operating carronades more difficult.
She did have a career after Trafalgar and on 3rd January 1807, she captured a French privateer La Favourite of 14 guns off the Lizard.
Eighteen months later, on 28th July 1808, the Pickle was grounded on a shoal as she entered Cadiz harbour, and was wrecked.
The kit
Pickle represented my return to POB kits after an absence of many years, and one I can recommend particularly for those who want to put a toe into this genre of model ship building.
The kit is reasonably priced, the brass etched fittings are of good quality, and there is a good backup from Jotika. The instructions are clear and the kit builds up into an attractive model of a vessel with an interesting link to Nelson and Trafalgar.
Although I didn’t use much of the supplied timber in my particular build, there is nothing wrong with it, and an out of box build will produce a very nice model, of convenient proportions.(it can easily be accommodated in a domestic setting)
One advantage for newcomers to this type of kit is that it is not too bluff in the bows, which makes for easier planking, the rigging is much less complicated than say a ship rigged vessel, yet it provides an introduction to all aspects encountered in larger vessels including the coppering of the lower hull.
The copper adds an attractive dimension to the build, but the supplied plates are a little over-scale in terms of the number and prominence of the nail heads. Amati in their Victory models range now provide a much better style of copper plate.
In my build log I have sought to show in some detail the process of putting together this kit, my methods are my way and I don’t put them forward as the definitive approach to pob kit building, but I hope I will at least demonstrate what is involved with Pickle.
First peek at the Box
All the stuff was there, nothing outstanding about the timber, average quality I would say.
The etched stuff
These appear to be of excellent quality.
The provided boats are resin hulls with added wooden and etched fittings.
The brass turned carronades are very nicely turned out but measure only 13.36mm overall length.
Assembly of these will provide a stern test of patience.
I will cover all the aspects of assembly of this kit but in a rather more concise way than my original log.
I started the kit in February 2010 and it was completed in November of that year, so not a project that will tie anyone up for too long.
B.E.
-
dafi reacted to twintrow in Hammocks, cranes and covers
Daniel
The 1st shot is of my HMS Snake, I elected to only show a few hammocks and covered the rest as when at sea.
Hammocks are scale 2'x6', lashed 7 times, folded and stowed.
2nd is of my South Caroilina, same thing as with the Snake, this shot shows the cover lashing better.
Tom