HOLIDAY DONATION DRIVE - SUPPORT MSW - DO YOUR PART TO KEEP THIS GREAT FORUM GOING! (Only 24 donations so far out of 49,000 members - C'mon guys!)
×


rafine
-
Posts
2,932 -
Joined
-
Last visited
Content Type
Profiles
Forums
Gallery
Events
Everything posted by rafine
-
 Welcome back! Get done with that workbench so we can see some progress. Bob
 -
Wes is right on about t the problems with the drawings. I gave up early on with regard to strict historical accuracy, or even the possibility of using any one set of drawings in connection with the kit. "Creative adaptation" is exactly what you need. The problems should be more manageable if you are not going to mast and rig the model. If you intend to mast and rig, then a lot of planning will be necessary to ensure that the masts will line up with the channels, that the rigging won't cover up gun ports etc. Even with a good deal of forethought, I still wound up with situations where things weren't quite right. I'll be happy to answer any questions you have as you go along. Bob
-
Thanks so much John for the generous comment and all of your "likes". Your "ugly words" sound very much like mine. Bob
-
Thanks so much Wes. Glad to have you back and looking forward to resumption of your Essex. Bob
-
Thanks so much Don, Joe and the "likes". Joe, I'm afraid that these days some of the different ways are necessitated by physical limitations. It does keep life interesting. Bob
-
Thanks so much Popeye, Nils, Dirk and Grant for the generous comments and thanks also to the "likes". Bob
-
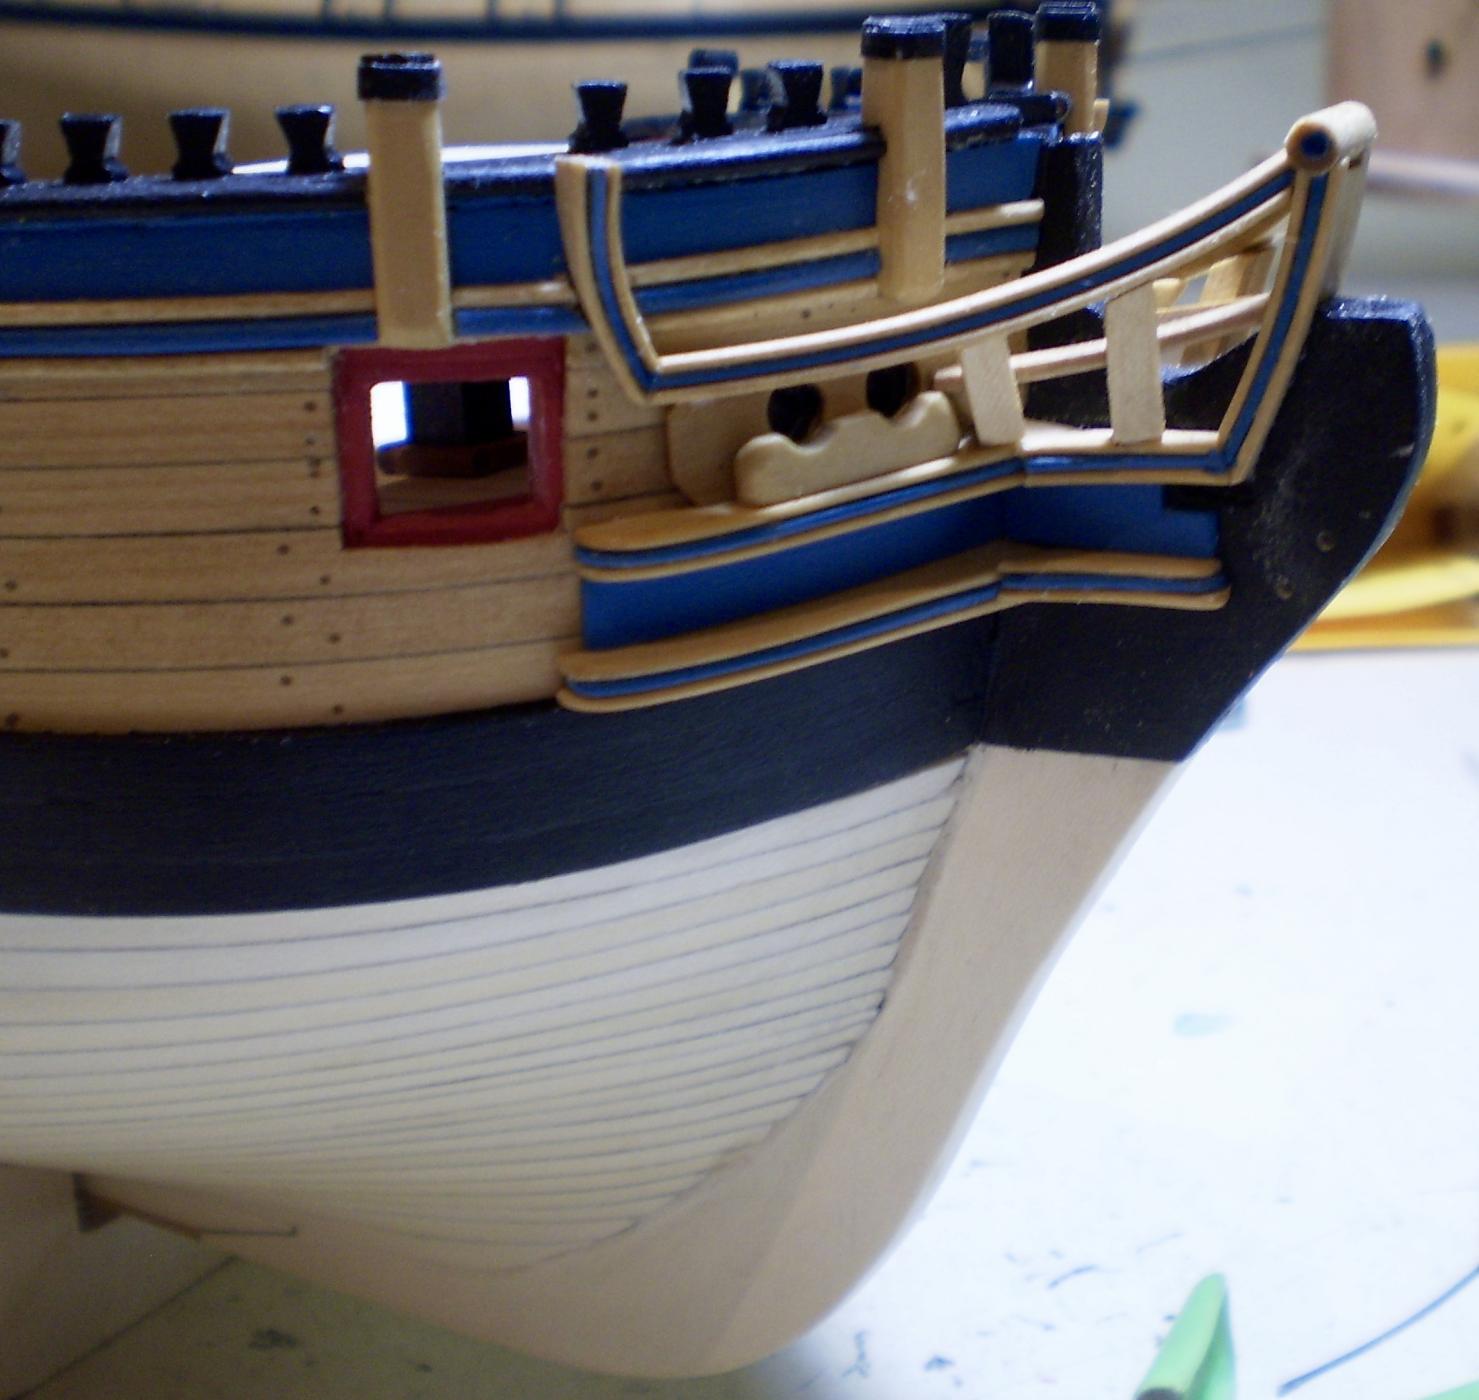
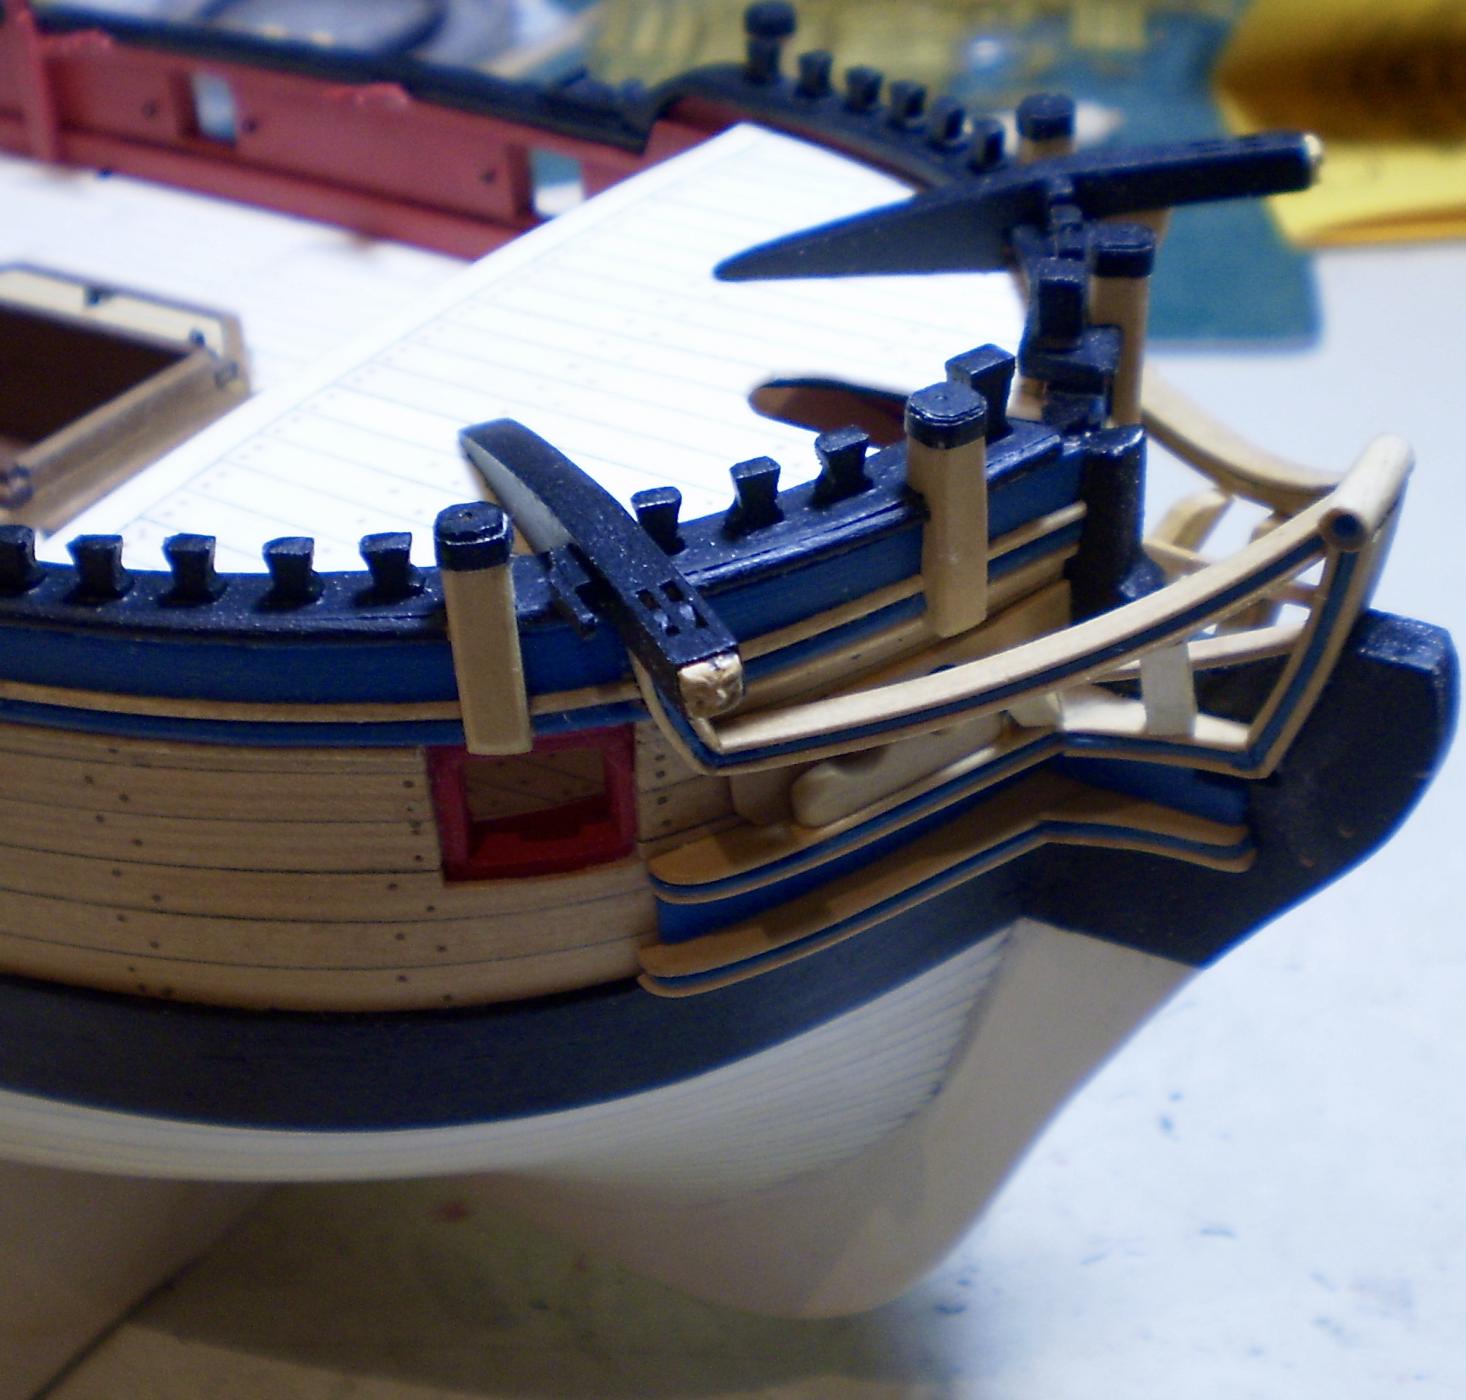
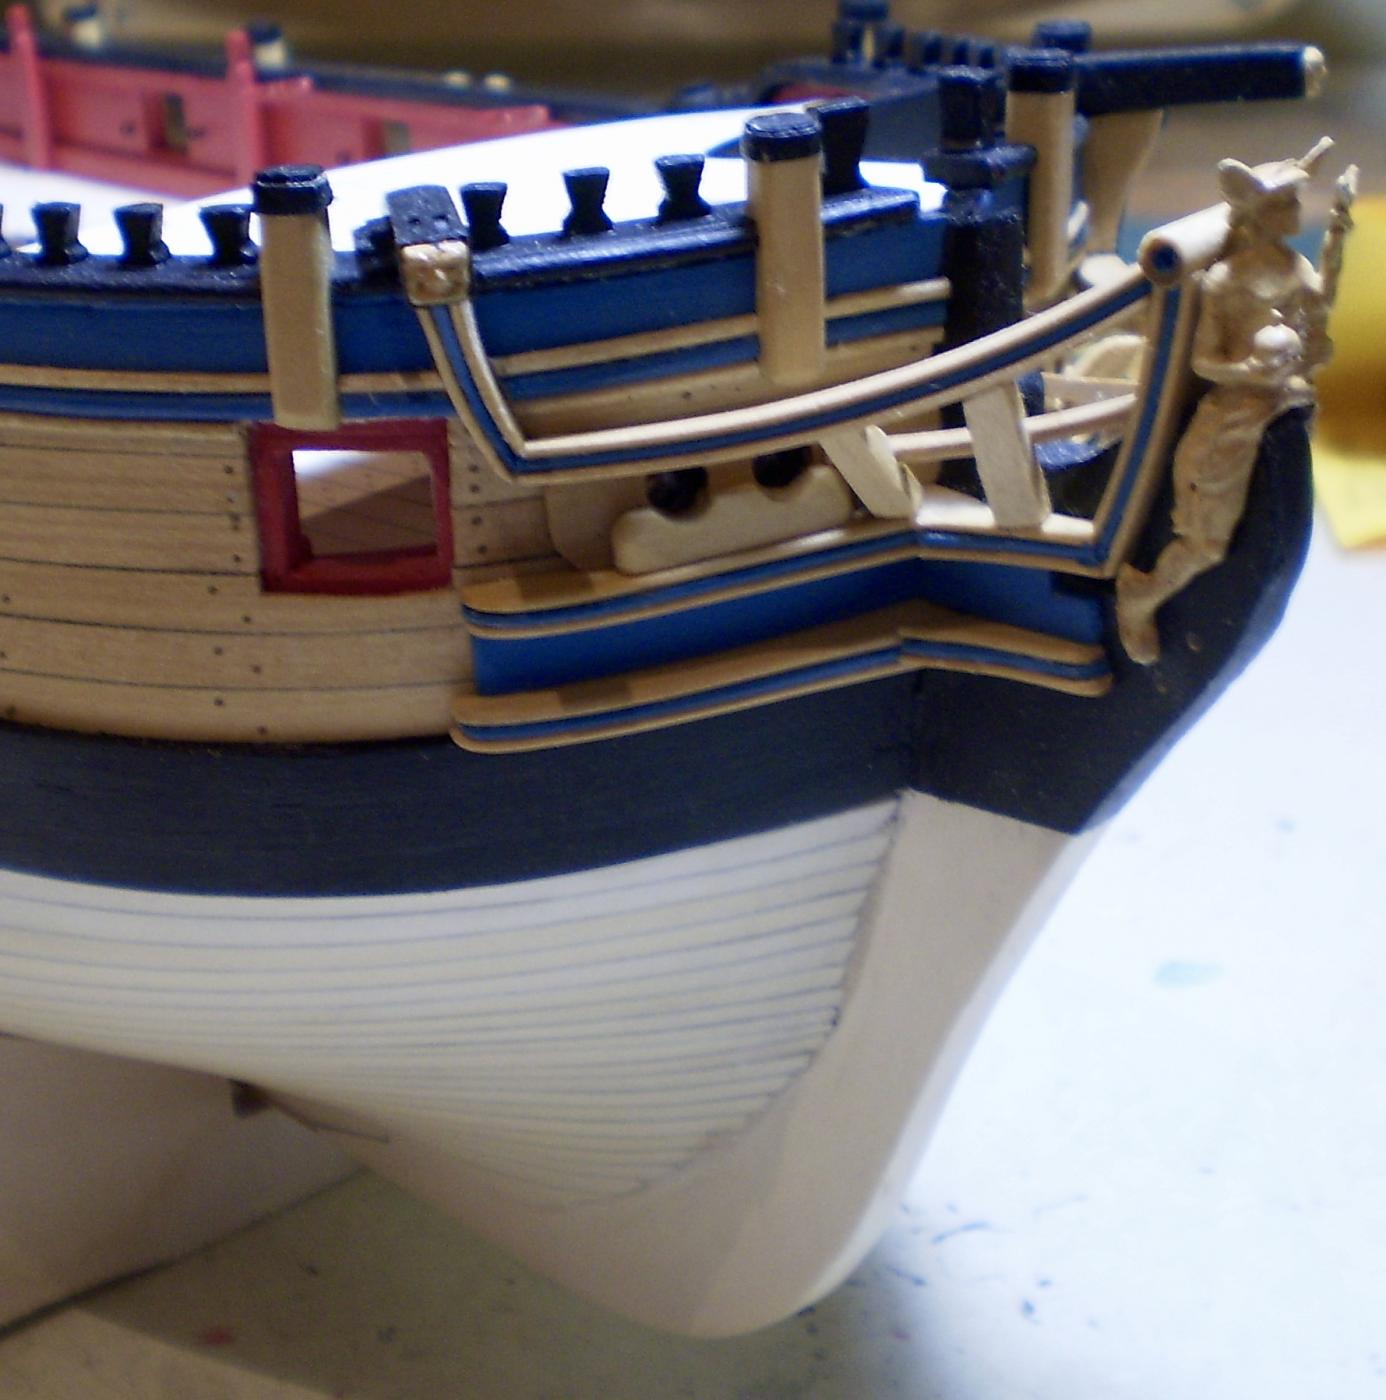
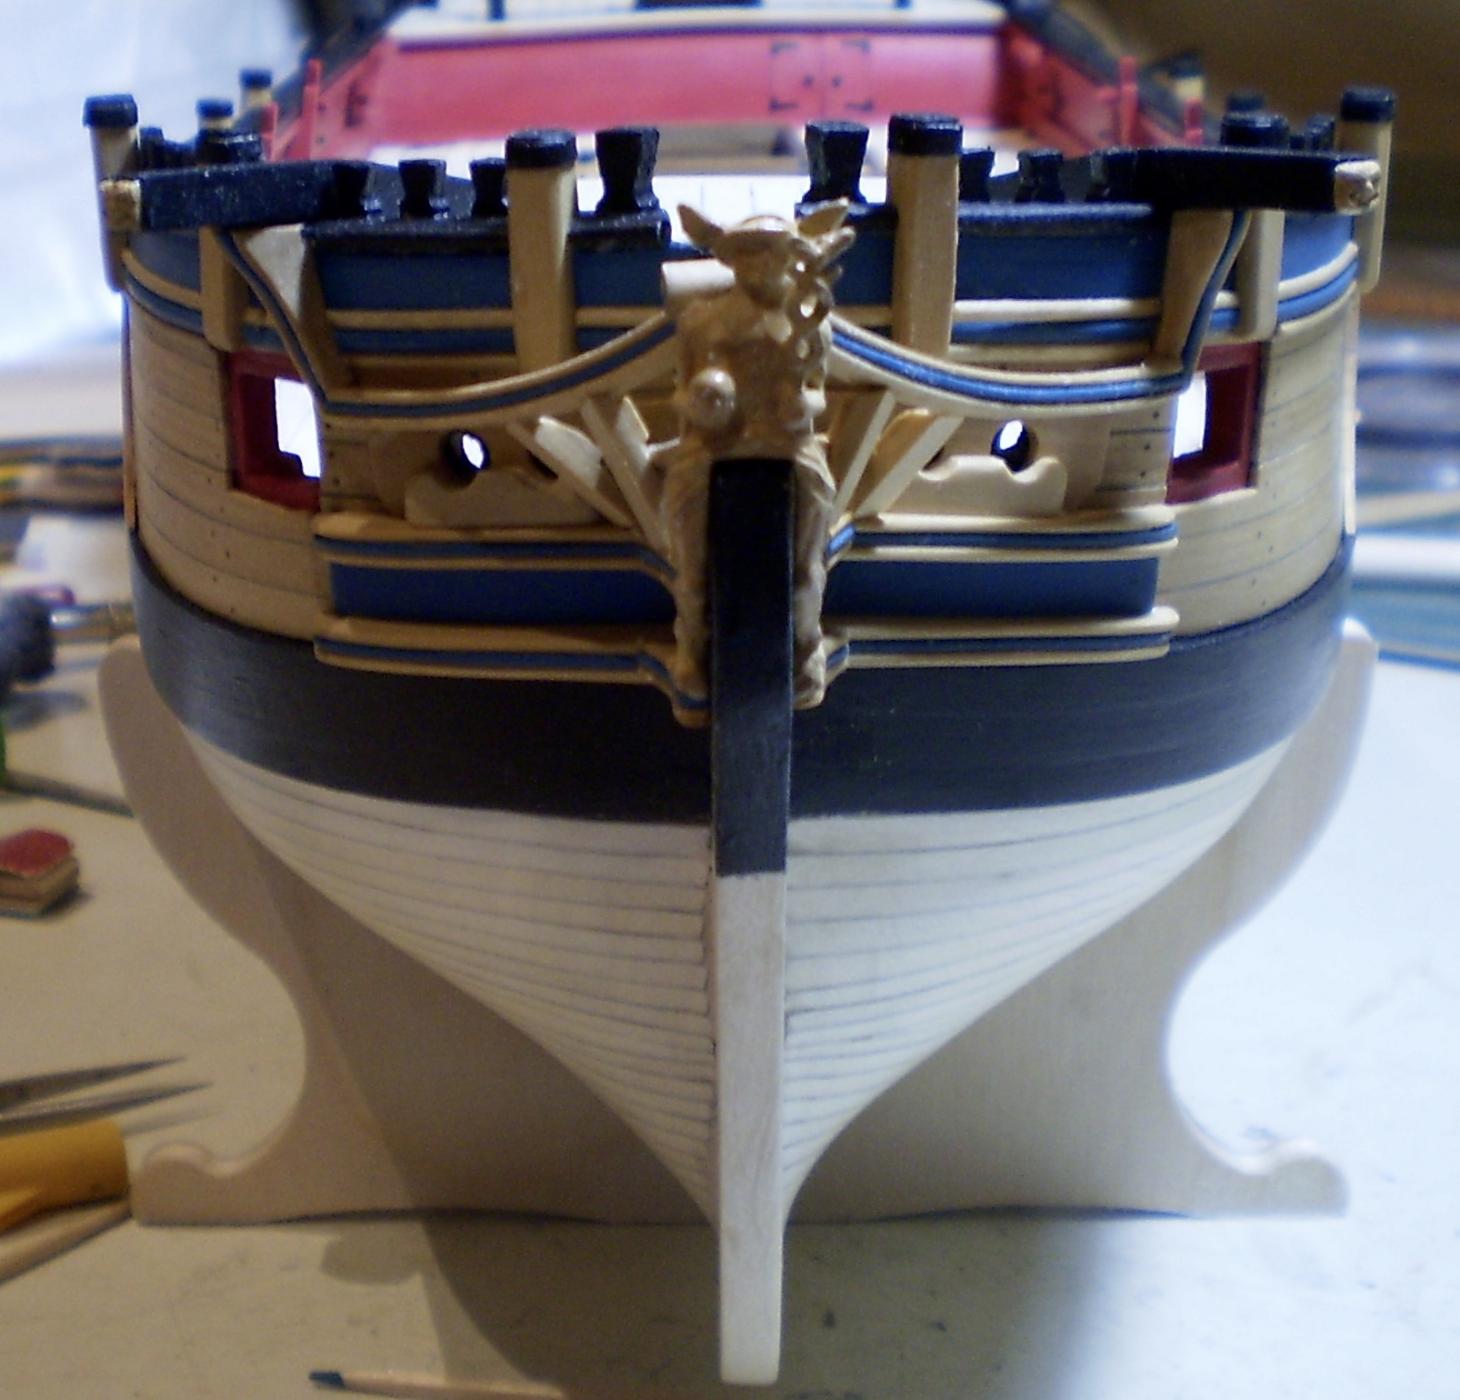
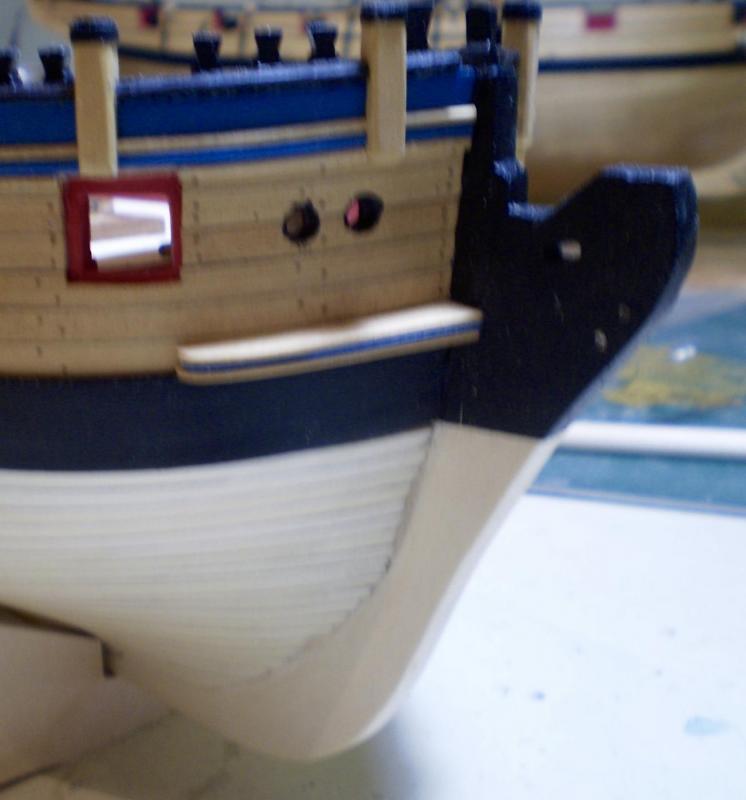
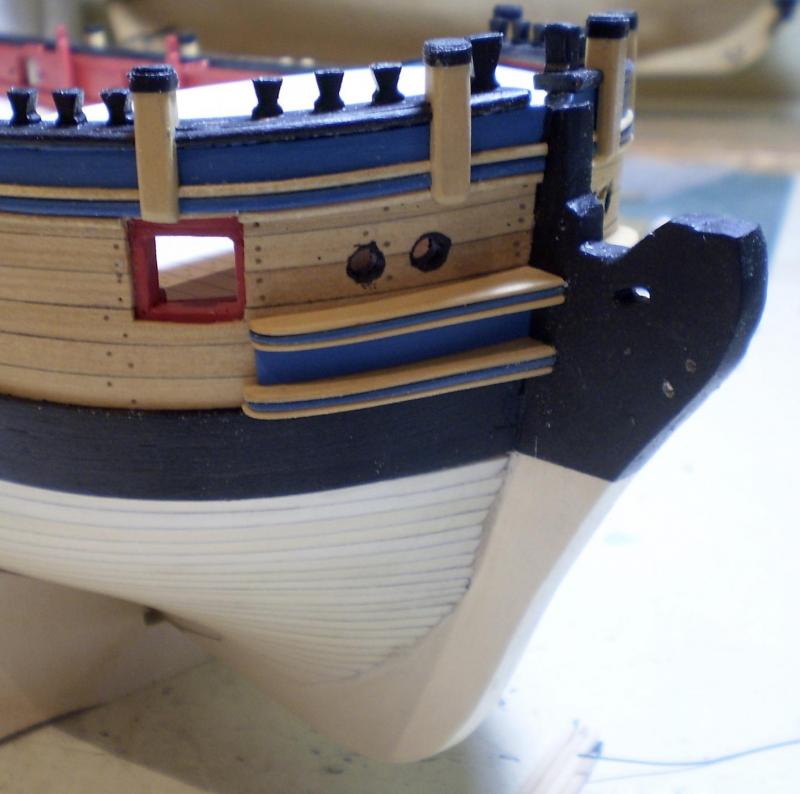
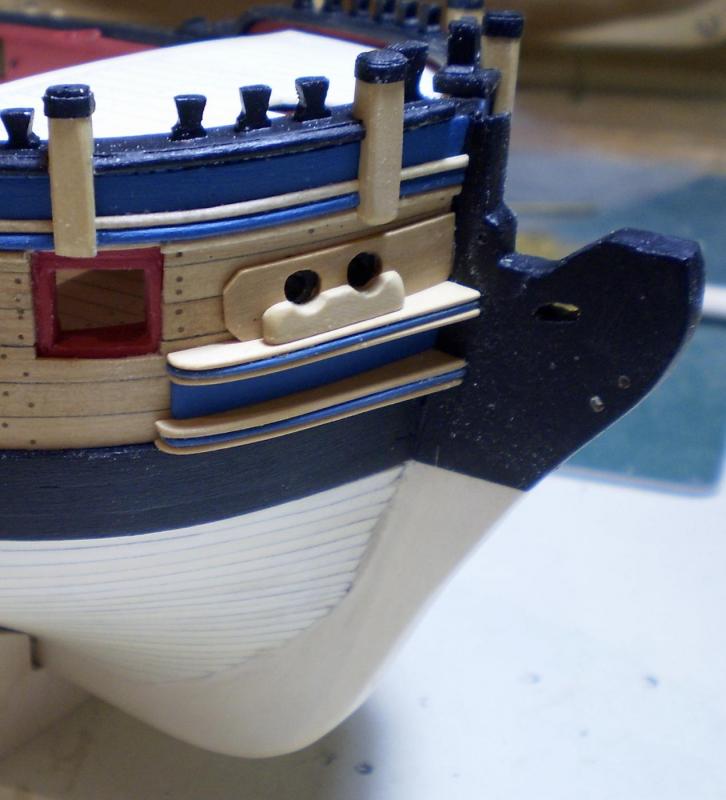
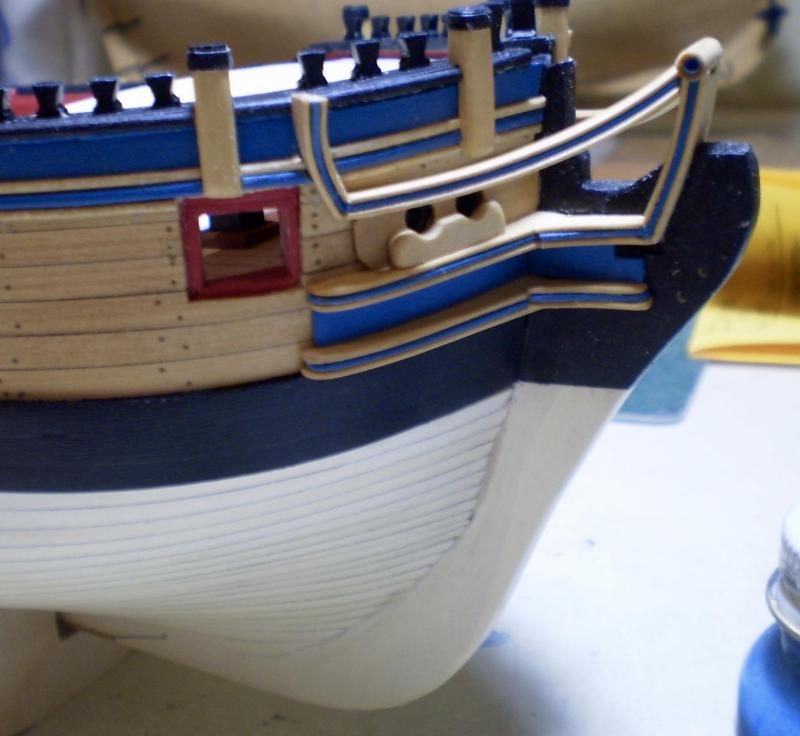
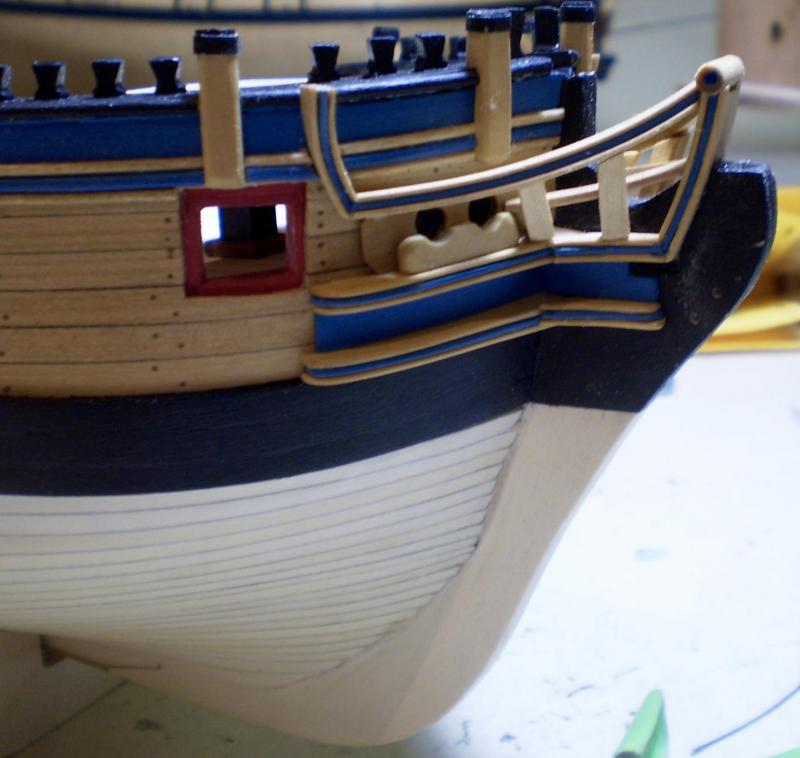
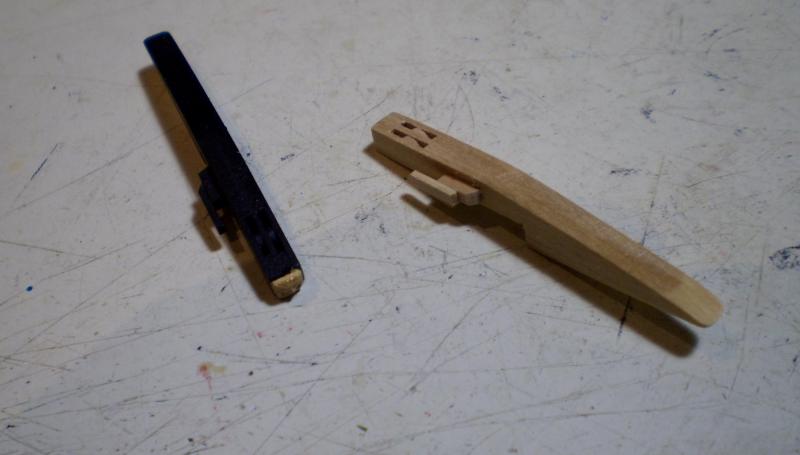
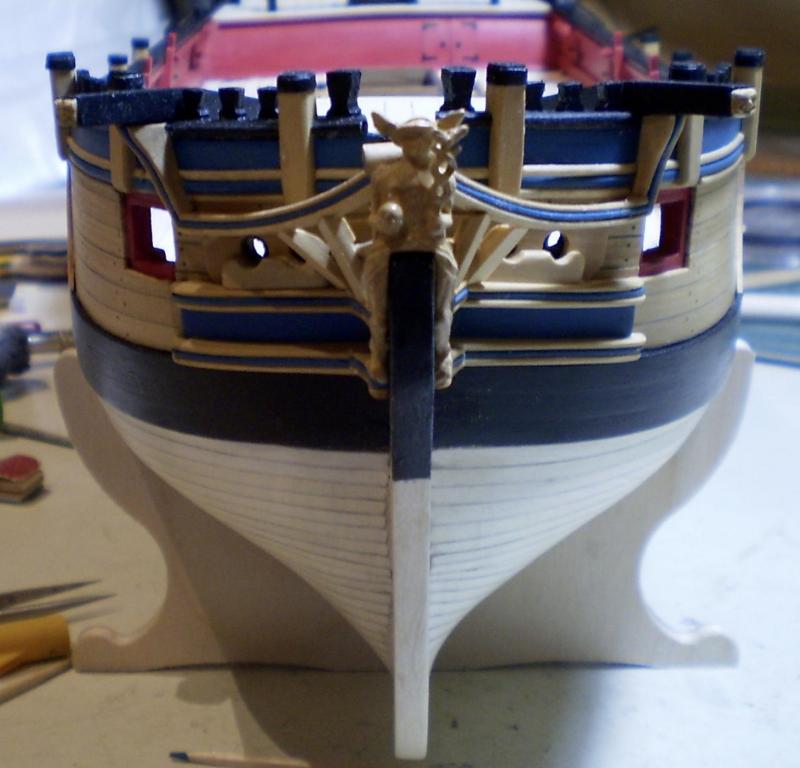
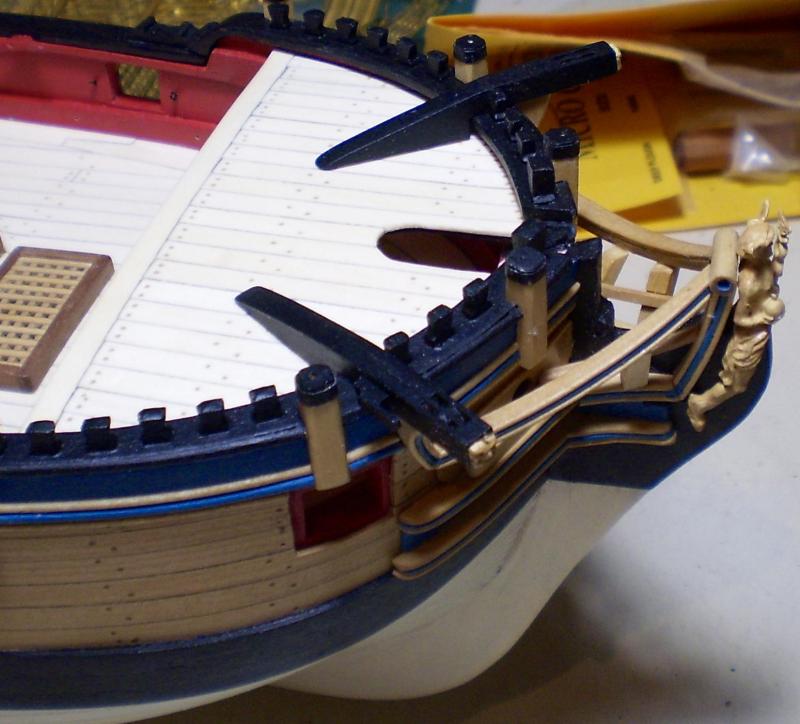
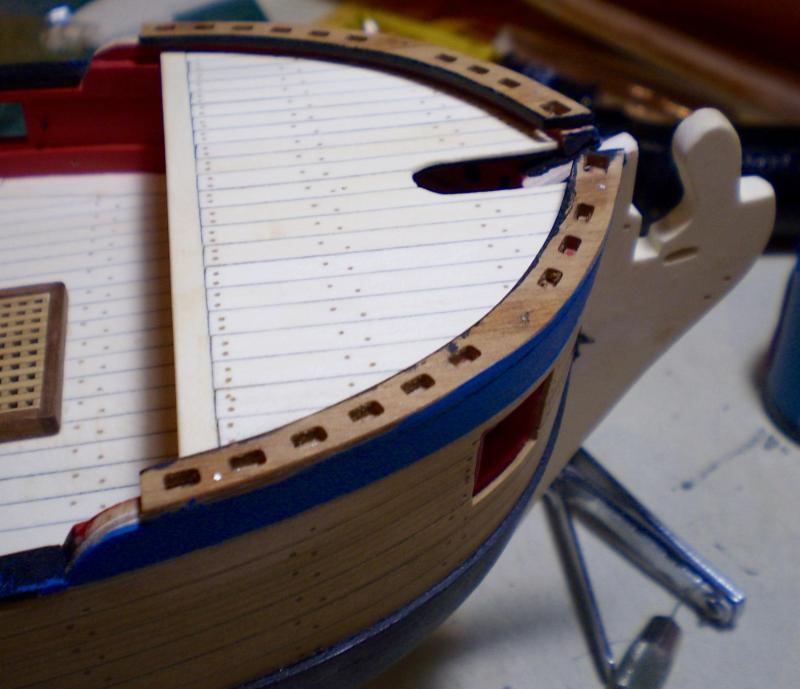
After two weeks, work on the head is now done. As I previously indicated, the kit parts were discarded (other than the figurehead casting) and everything was done scratch using boxwood strip and sheet. The intent was to recreate what is shown in AOTS. Although my version is not a precise duplication, I think that it captures the essentials of that shown in the book. While the attached photos show the construction sequence that I followed, they fail to show the large number of discards and redos that were involved, nor the amount of ugly language that accompanied the work. I began by cutting down and reshaping the stem. This also entailed recutting the gammoning slot and filling the old hole. Next, I did the cheeks and trailboards. The cheeks, including the upward extension of the upper cheek, were done using the same lamination technique I used for the hull moldings. The trailboards were cut from sheet and painted blue as shown on the AOTS cover. The hawse lining was cut from sheet, drilled for the hawse holes and bent to fit the hull. The hawse bolsters were shaped to fit from strip. The cat head supports and the upper rail were shaped using strip assembled using the same lamination method. The middle rails are single pieces of strip. The head timbers are strip pieces shaped to fit between the cheeks and upper rails and laminated to fit around the middle rails. Among all of the fiddly work on the head, this was certainly the worst and most frustrating. The catheads were made using laminated strip that allowed for easy work making real sheaves, rather than simulations. Cleats were made from strip and the kit's cat face casting was added. The catheads were painted black and the casting painted to match the natural wood. Lastly, the figurehead casting was painted to match the wood, using the same paints and method as was done with the stern castings. I'm really happy to be done with this work. It's always been one of my least favorite tasks on any build. Bob


- 563 replies
-
- 29
-

-
Looks great Sjors. Bob
-
Thanks so much guys. It's really nice to have you looking at the old logs. This was actually my first log on MSW, and was one of those lost when the original site went down and had to be redone in abbreviated form. Bob
- 81 replies
-
- 2
-
-
- kingfisher
- lauck street shipyard
- (and 1 more)
-
Nice job on the rail Elijah, and the right way to do the cleats. Bob
- 701 replies
-
- 4
-
-
- phantom
- model shipways
- (and 1 more)
-
Thanks so much Don. You should really have a go at the AVS. The LSS kits provide a unique opportunity to do a fully framed model without the necessity of cutting all of the framing. Whatever their faults (they surely have some), they are mostly enjoyable to build. Bob
-
Bruce, I used milled strips from Crown Timberyard for all of the planking. I used the holly for both the lower hull and the decking and ended up ordering a lot more than I actually needed. I'm not sure whether it was bad estimating or efficient usage, but I'm guessing that the amount used on the lower hull was 6 strips of 5mm x 1mm and 45 strips of 4mm x 1mm. I used the metric sizes (which are available from Crown) to match the kit's metric dimensions. Because the strips are very thin and the holly is quite flexible, I used tapering and edge bending rather than spiling and, thus, was able to use the milled strips. Bob
-
Joe, that's quite a bit of work you've been hiding from us. Looking very good. Bob
- 136 replies
-
- 1
-
-
- caldercraft
- Cruiser
- (and 2 more)
-
Thanks so much Sjors, Thomas, Nils and Red for the kind comments. Thanks also to the "likes". Bob
-
Thanks so much Joe and the "likes". I really like the way that you did your head and I'm referring to it for ideas on how to proceed. Bob
-
Thanks so much Nils and the "likes". Nils, I "caulked" each of the planks with a pencil on one edge and one end. Bob
-
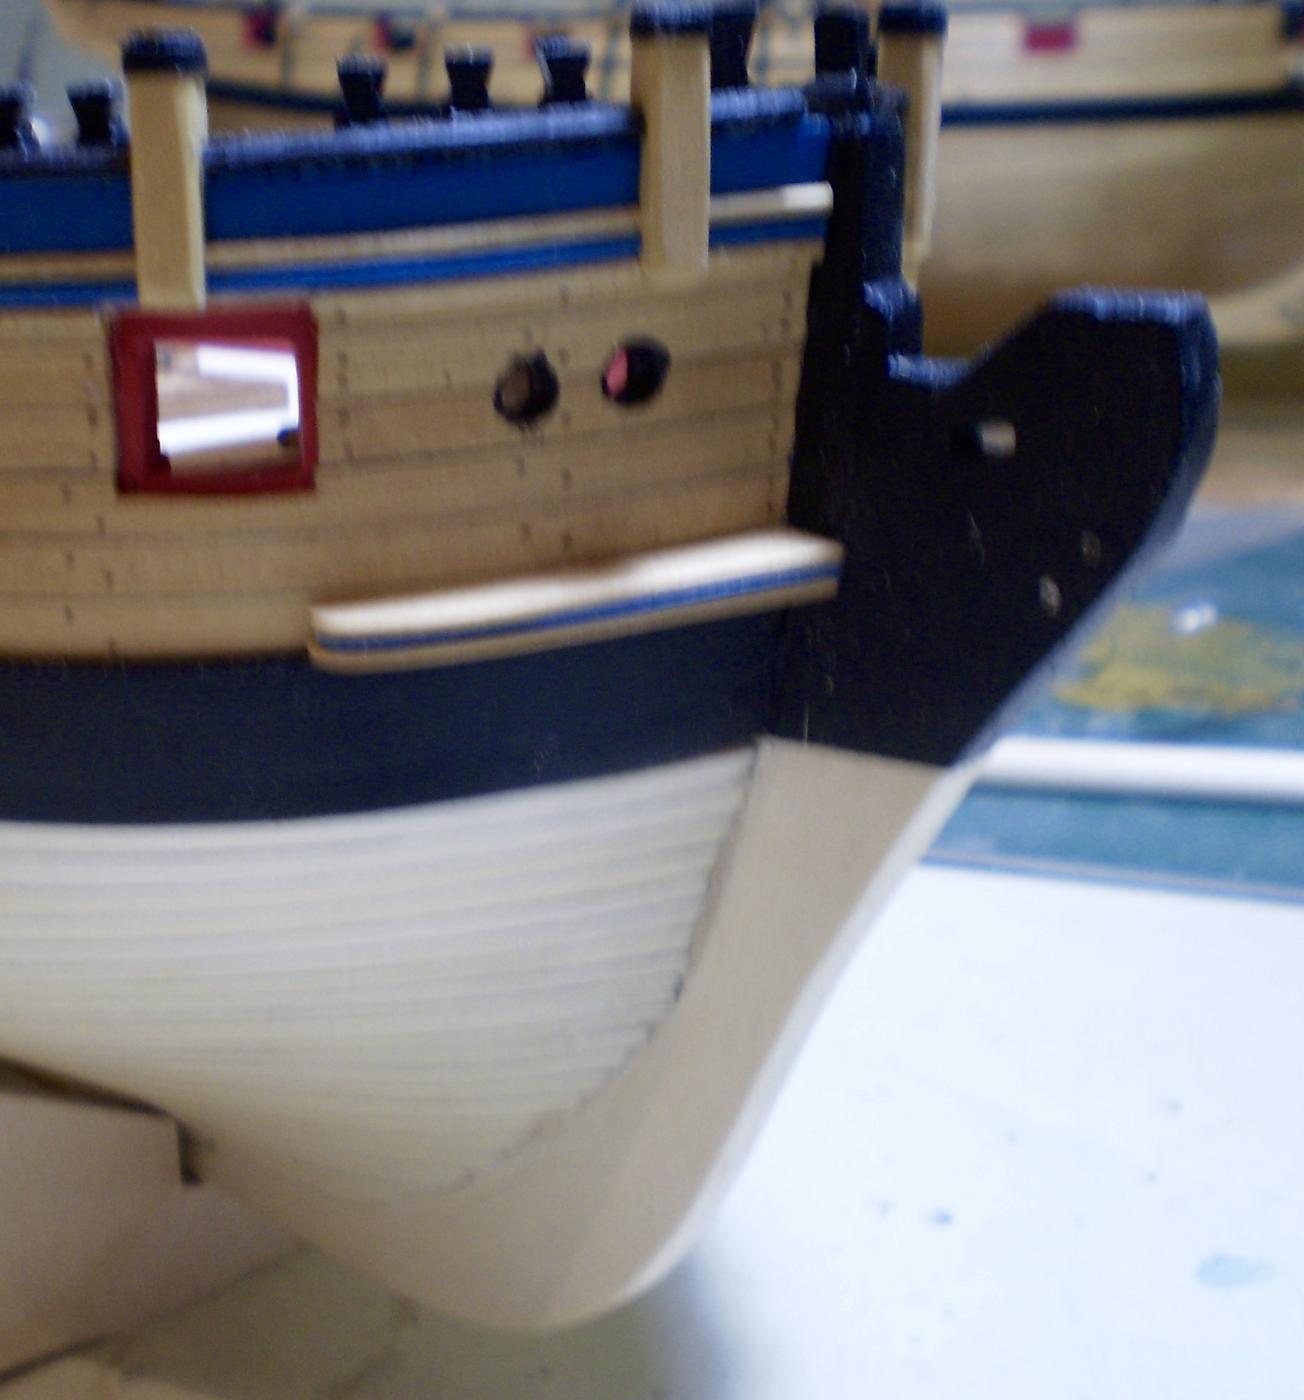
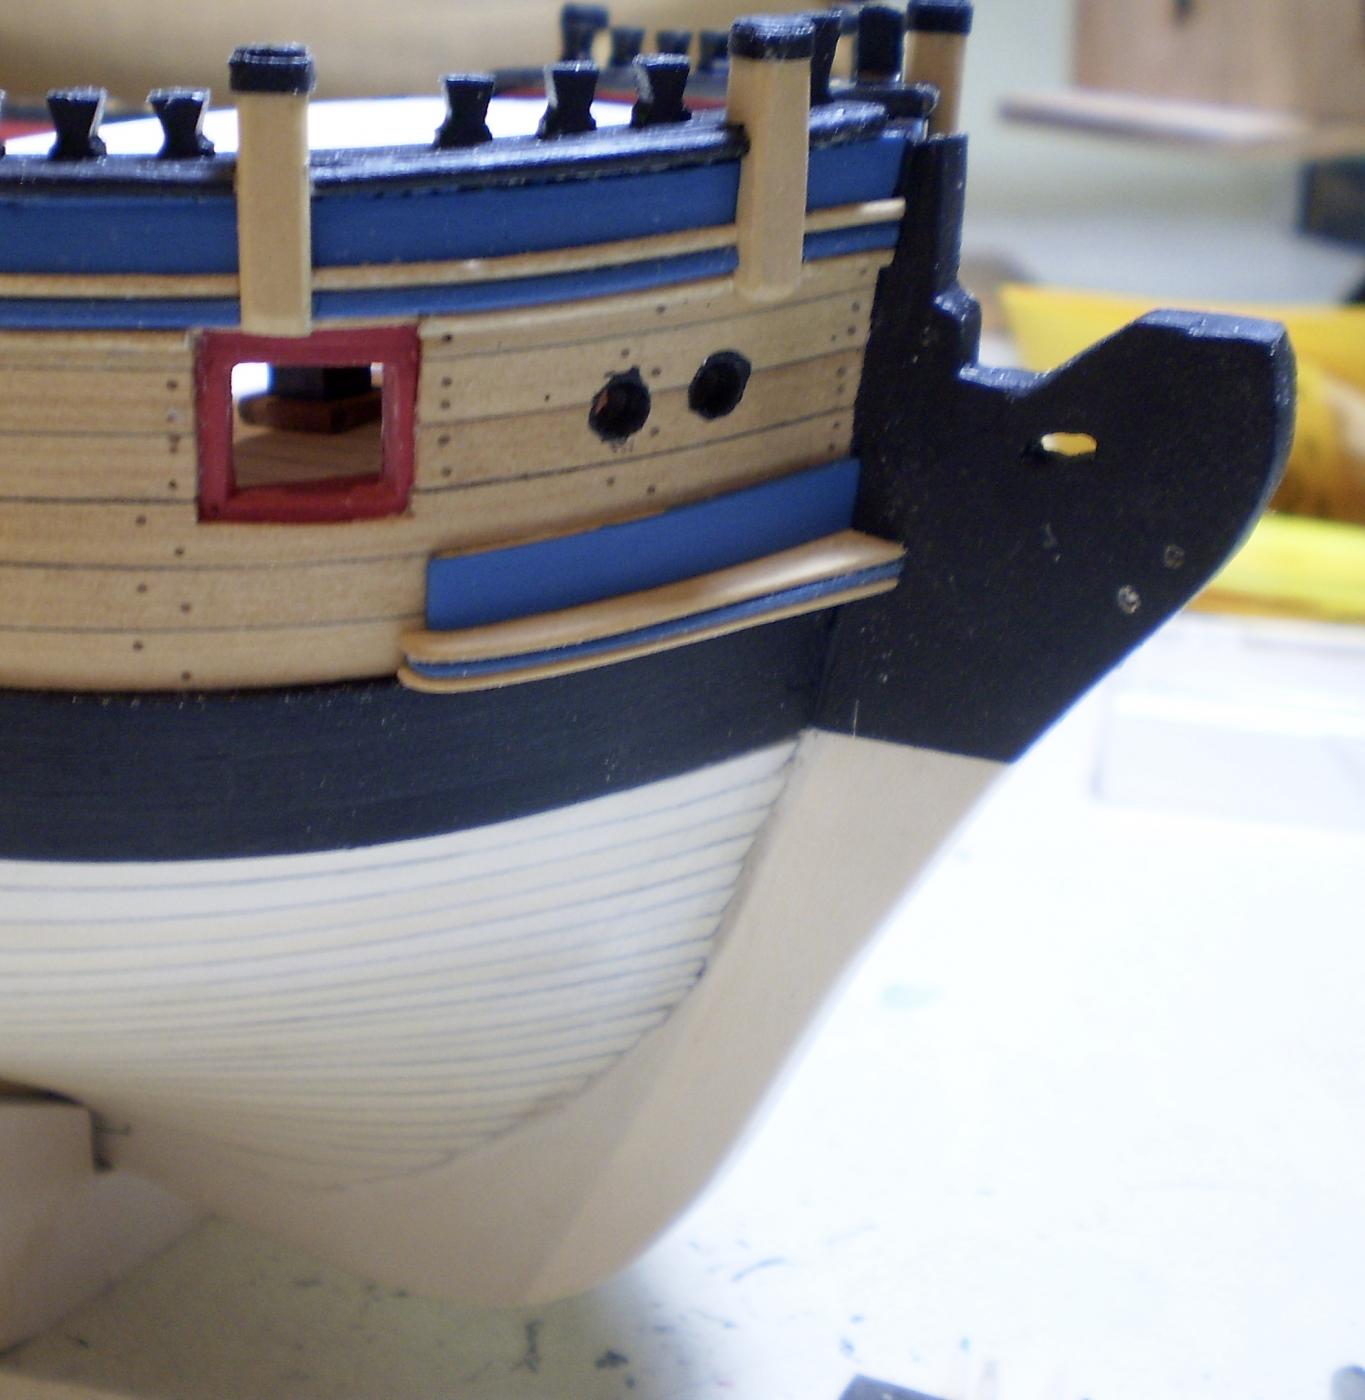
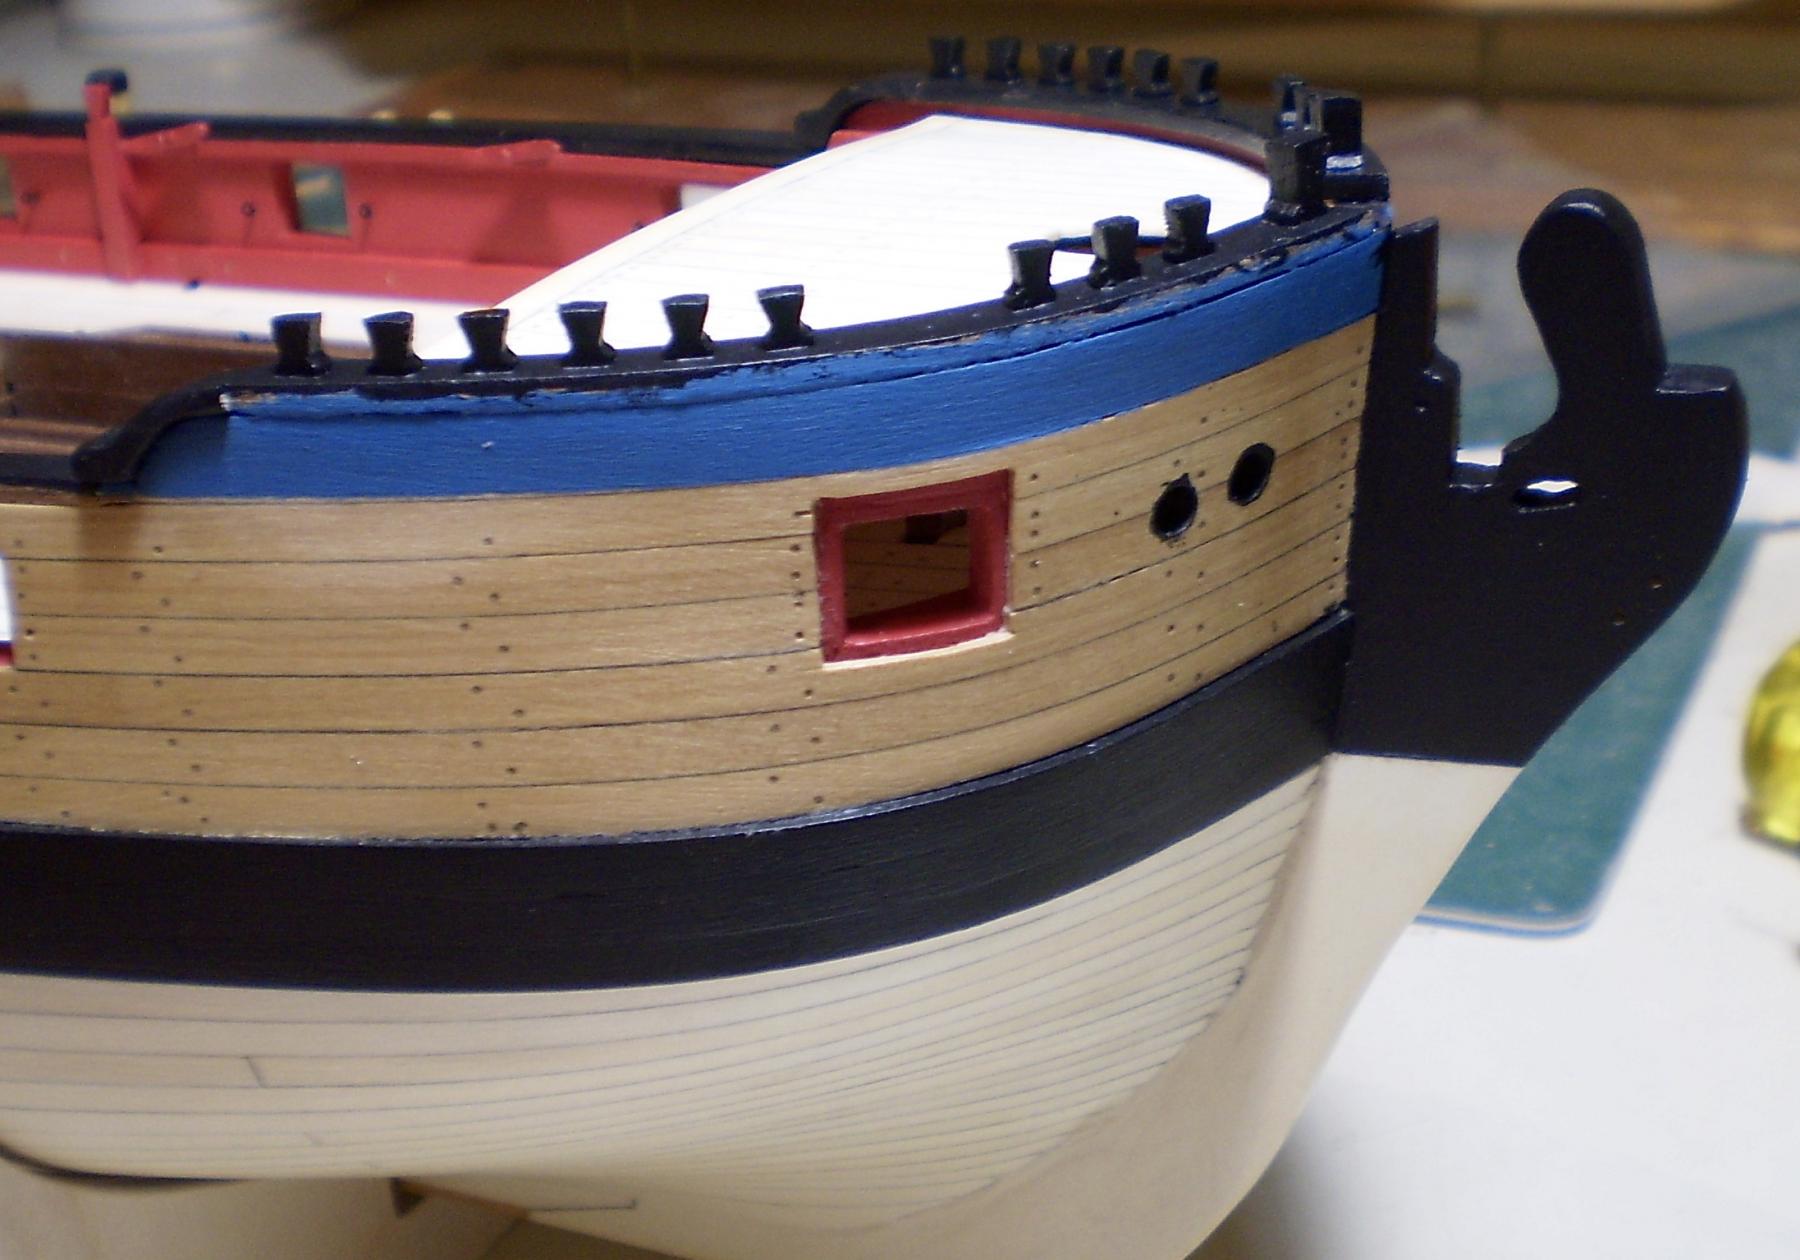
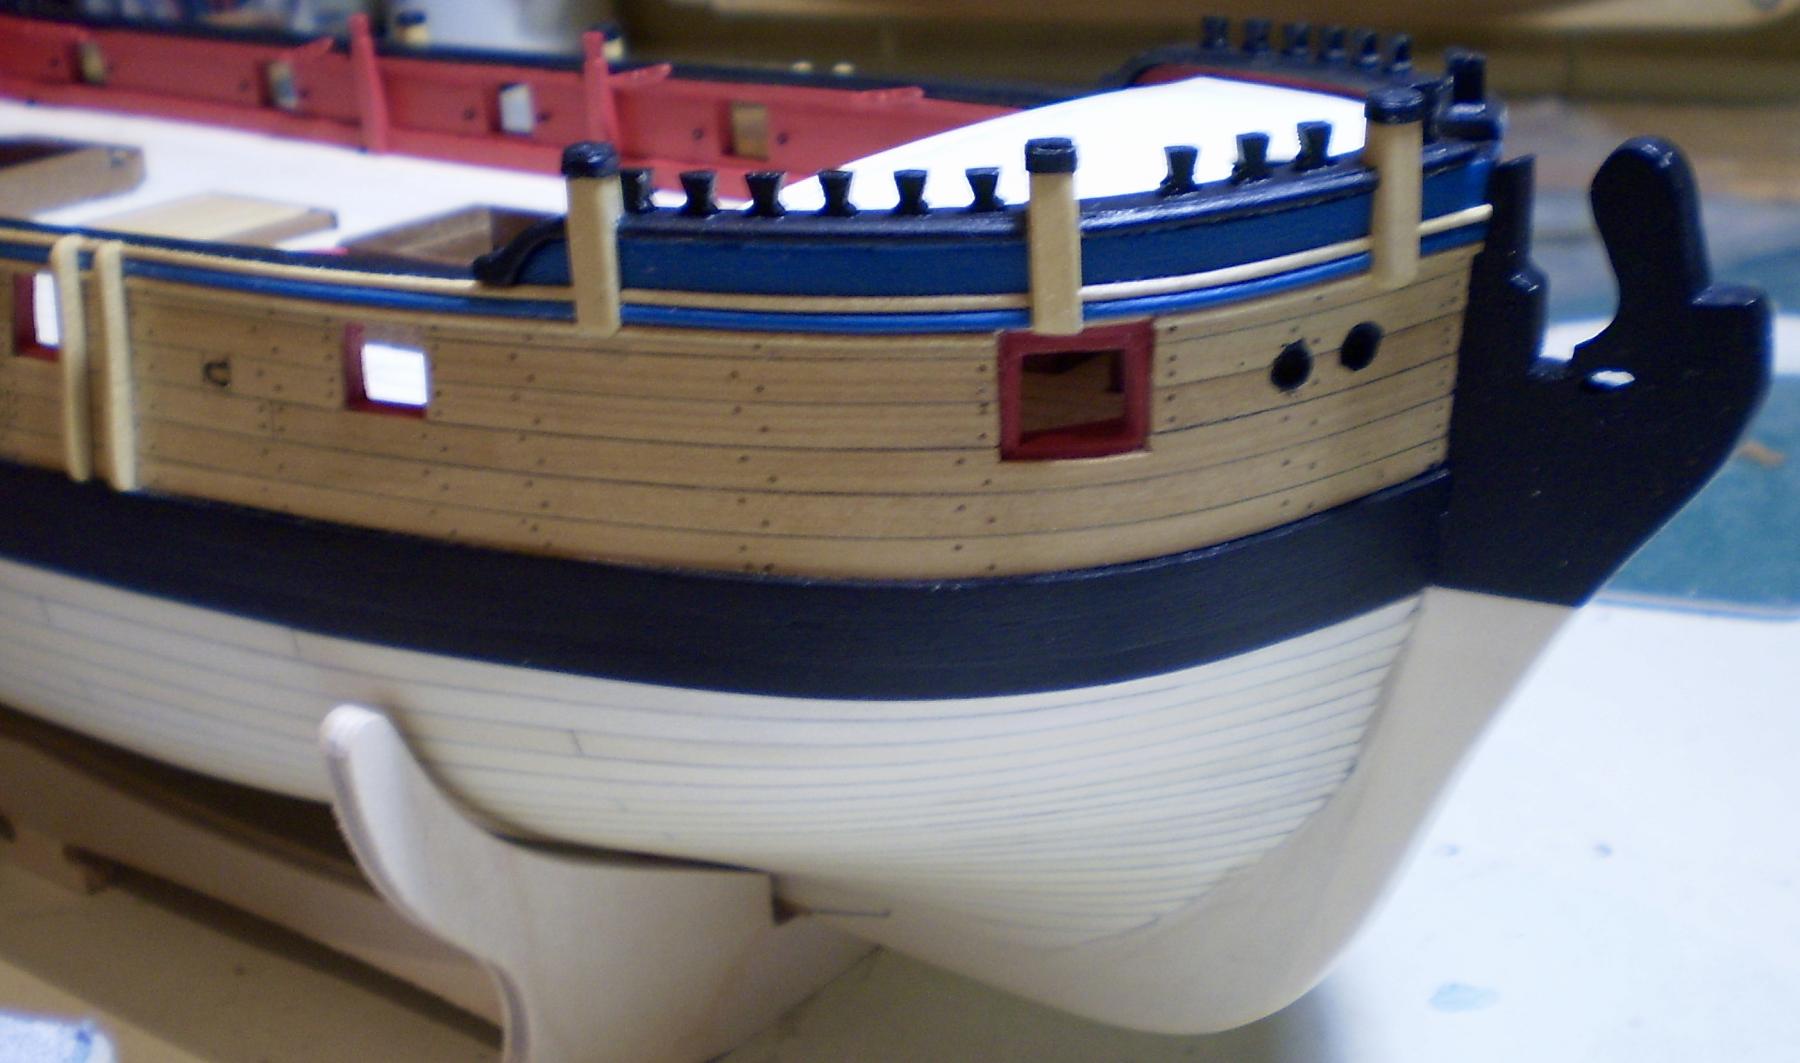
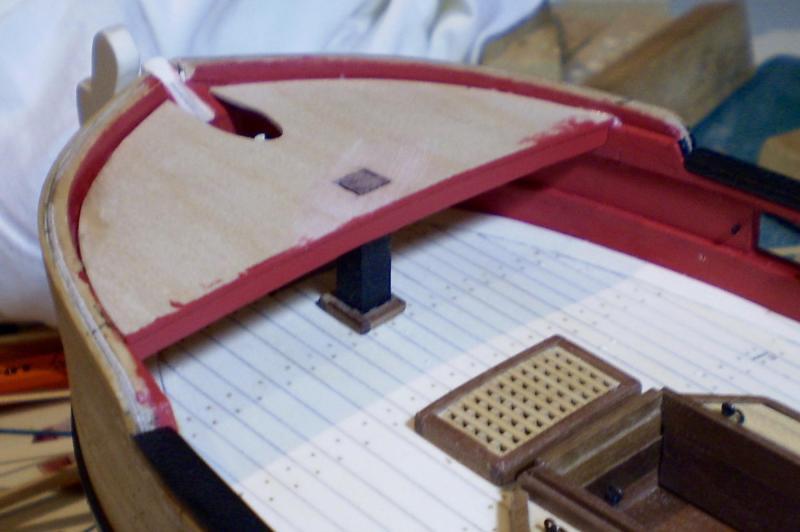
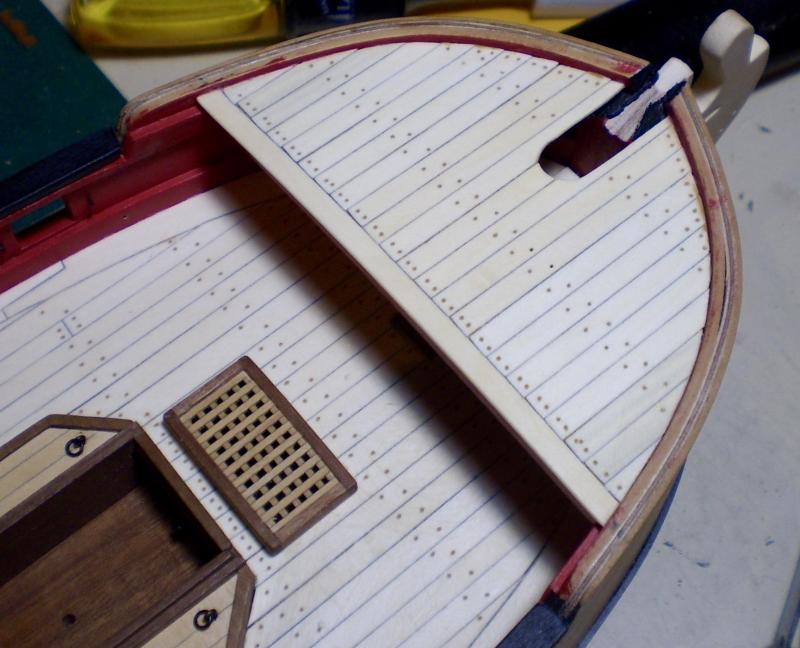
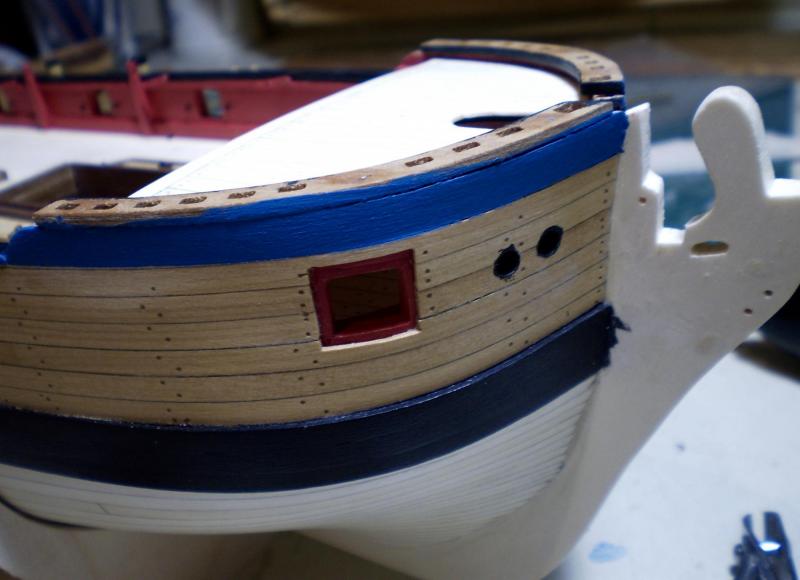
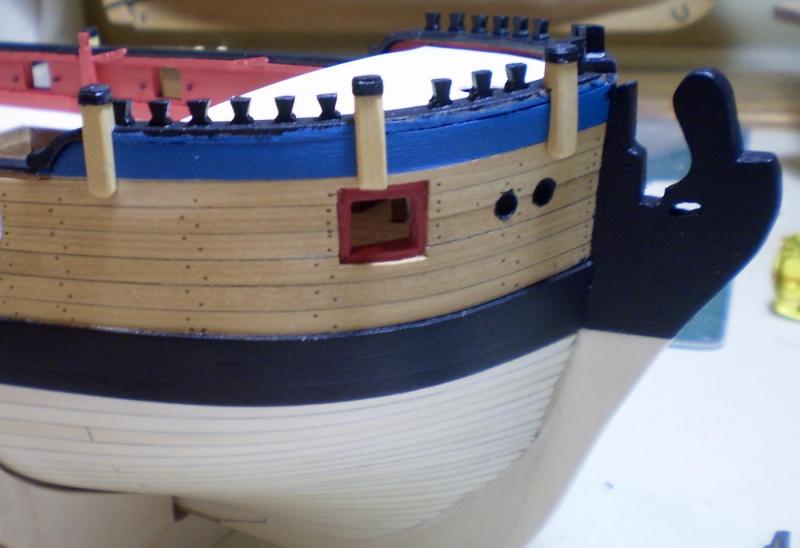
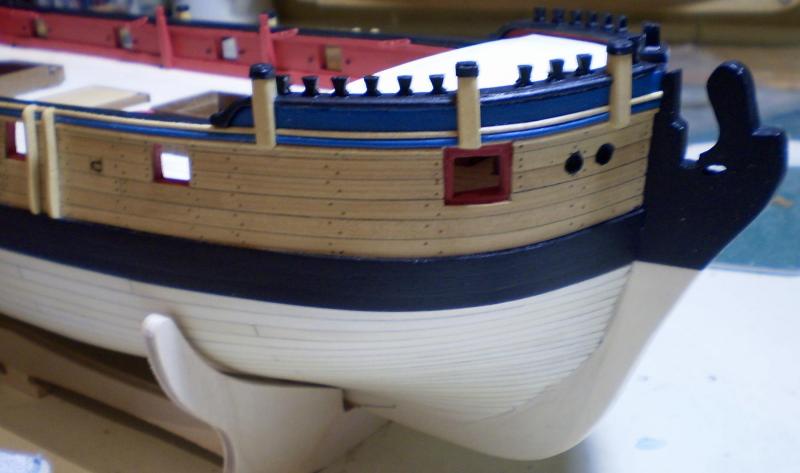
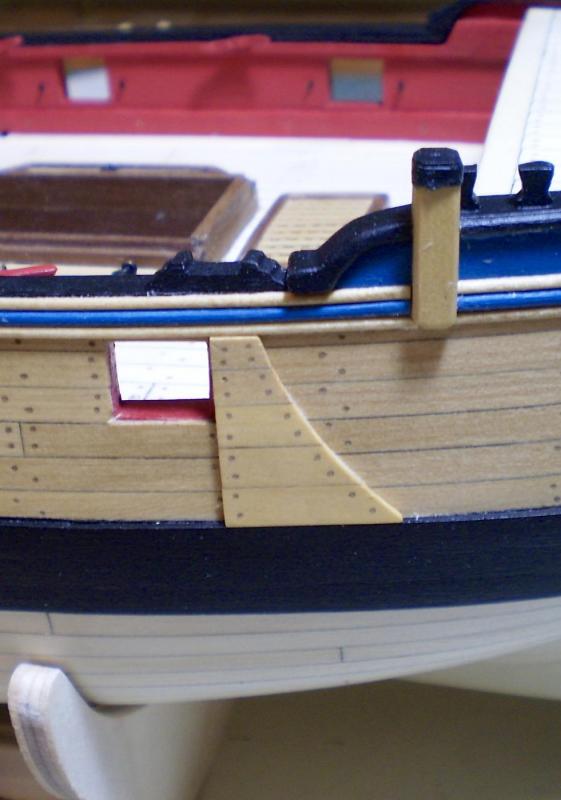
We've had some rain down here in Florida lately. As always, rain means less golf and more modeling -- so.... A great deal has been done in the bow area. To begin with, I fitted the ply subdeck for the the forecastle. This required that I make and mount the lower portion of the galley stack, which was made from boxwood strip painted black with a walnut strip coaming. I also drilled the hawse holes at this time. After the subdeck was on, I did the forecastle planking and tree nailing. This was done exactly as before for the other decking. Next, I painted the forecastle portion of the outer hull blue to match the other blue parts. I then I added the forecastle cap rails and hances using the kit parts. The knight heads and timber heads were also added, using the kit parts. All of this was painted black. I also painted the upper stem black at this time. Then, I made up the forecastle swivel gun mounts, exactly as for the quarterdeck and midship mounts, and glued them in place. With all that work completed, I continued the sheer molding forward to the stem, using the same three piece construction as before. Finally, I made up the anchor lining from boxwood strip. tree nailed it, and mounted it in place. Now, it's time to face a task that is never fun for me -- the head work. I'm still trying to figure out exactly what I'll do and how I will do it. The only thing that is clear is that I will not be using the kit parts, but will attempt to follow the AOTS, using all scratch built parts. Bob

- 563 replies
-
- 29
-
-
Thanks so much Elijah. You're right. Just thinking about drilling them all the way through creates stress. Bob
-
Thanks so much Sjors. Always delighted to hear from you. Thanks also to all of the "likes". Bob
-
Notwithstanding your misgivings Bruce, you're doing a wonderful job on her. No matter how many I build, I always find myself saying at some point, " I sure wish I had thought of that earlier". Bob
- 245 replies
-
- 2
-
-
- model shipways
- Finished
- (and 1 more)
-
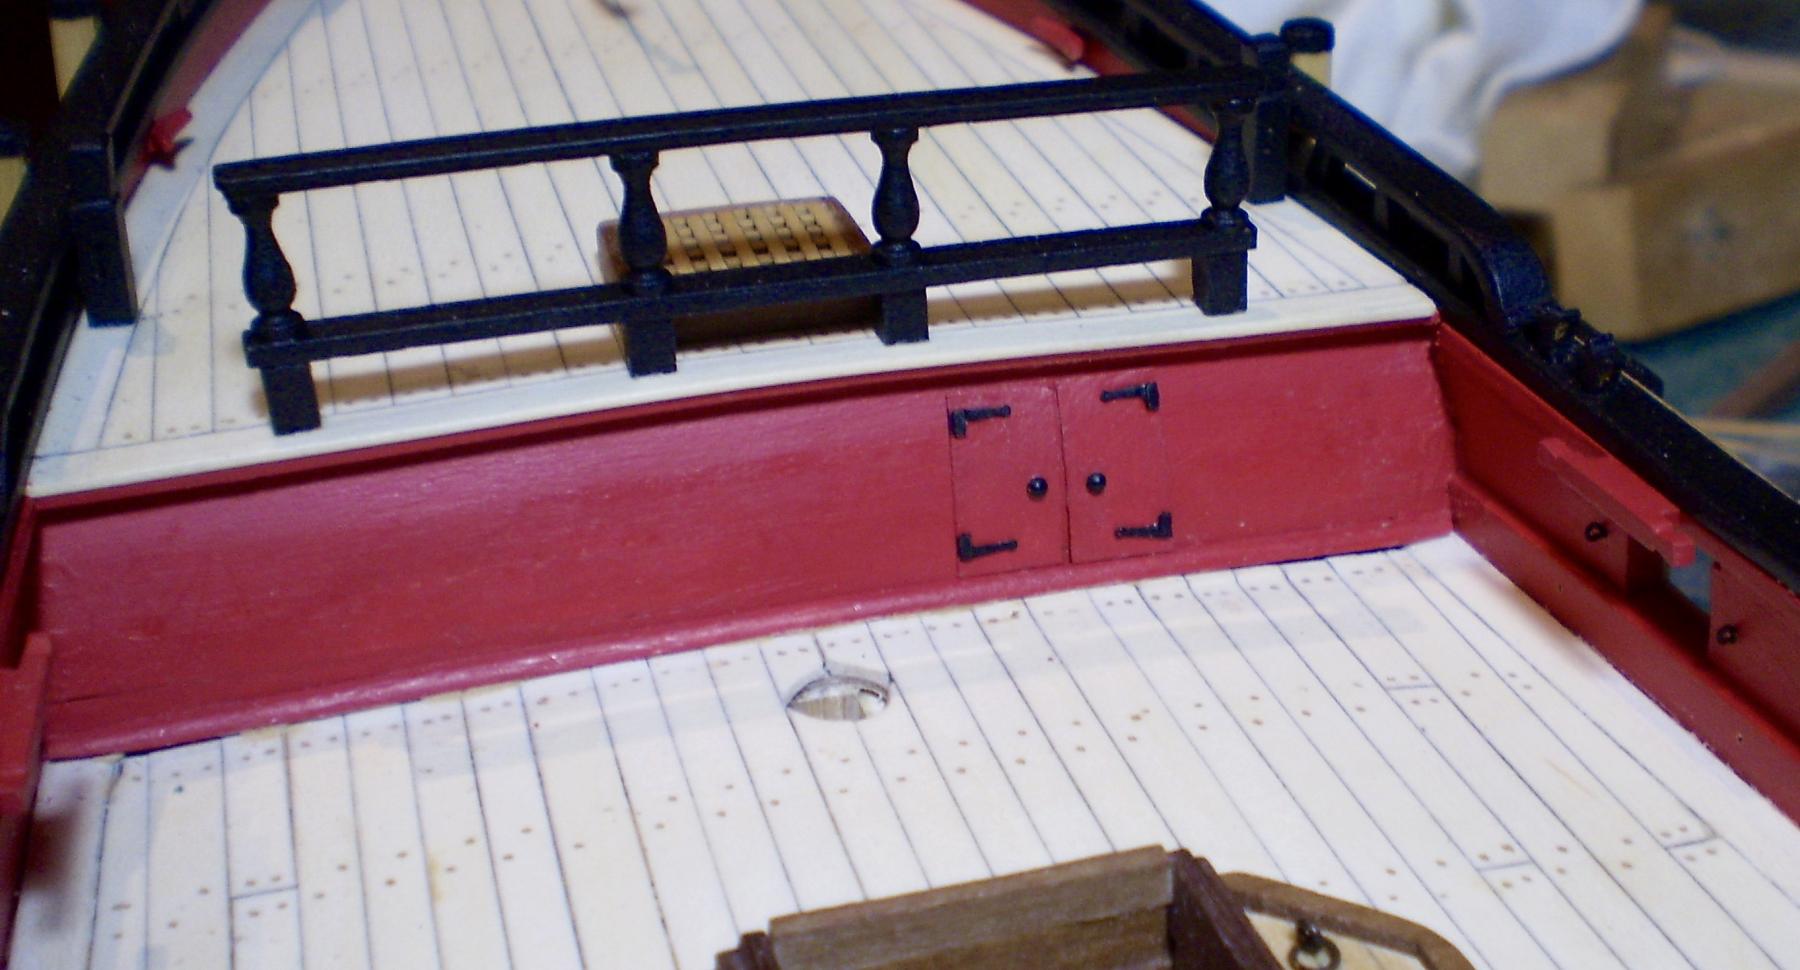
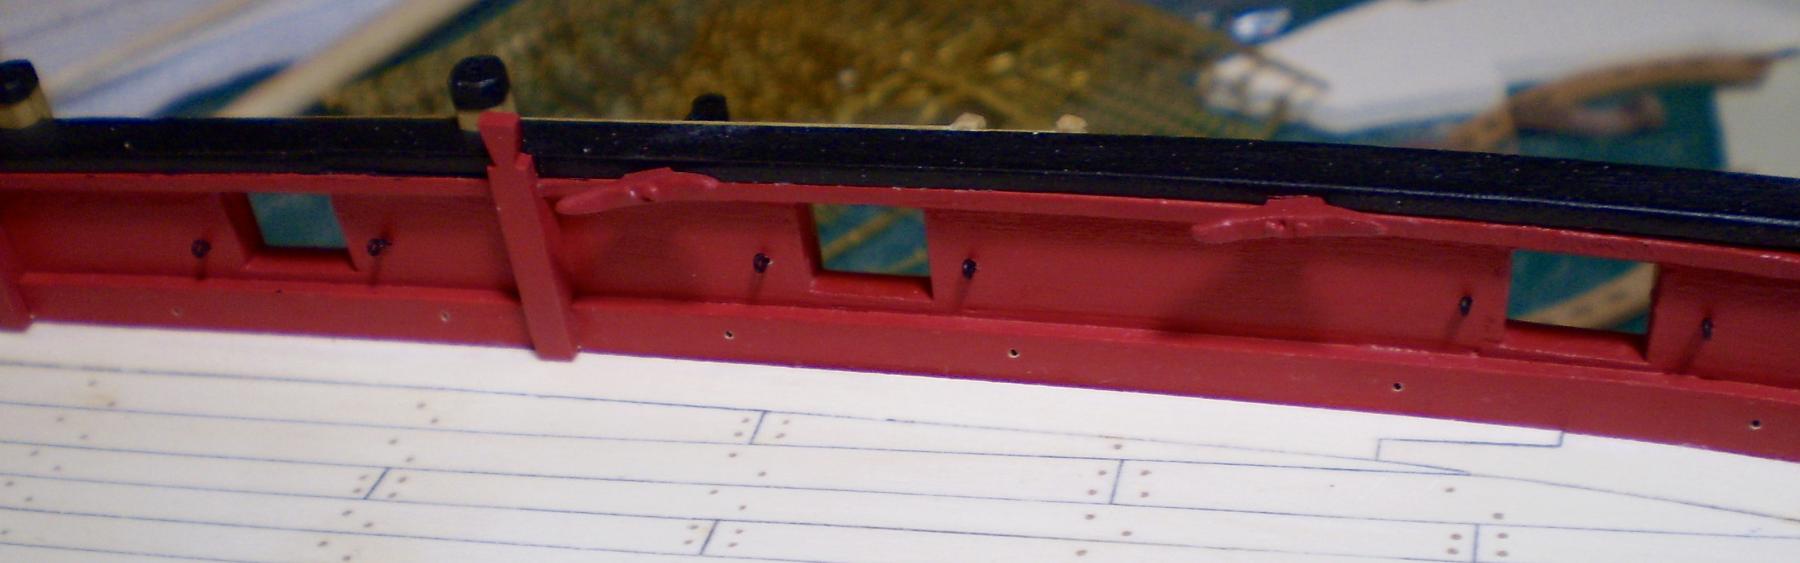
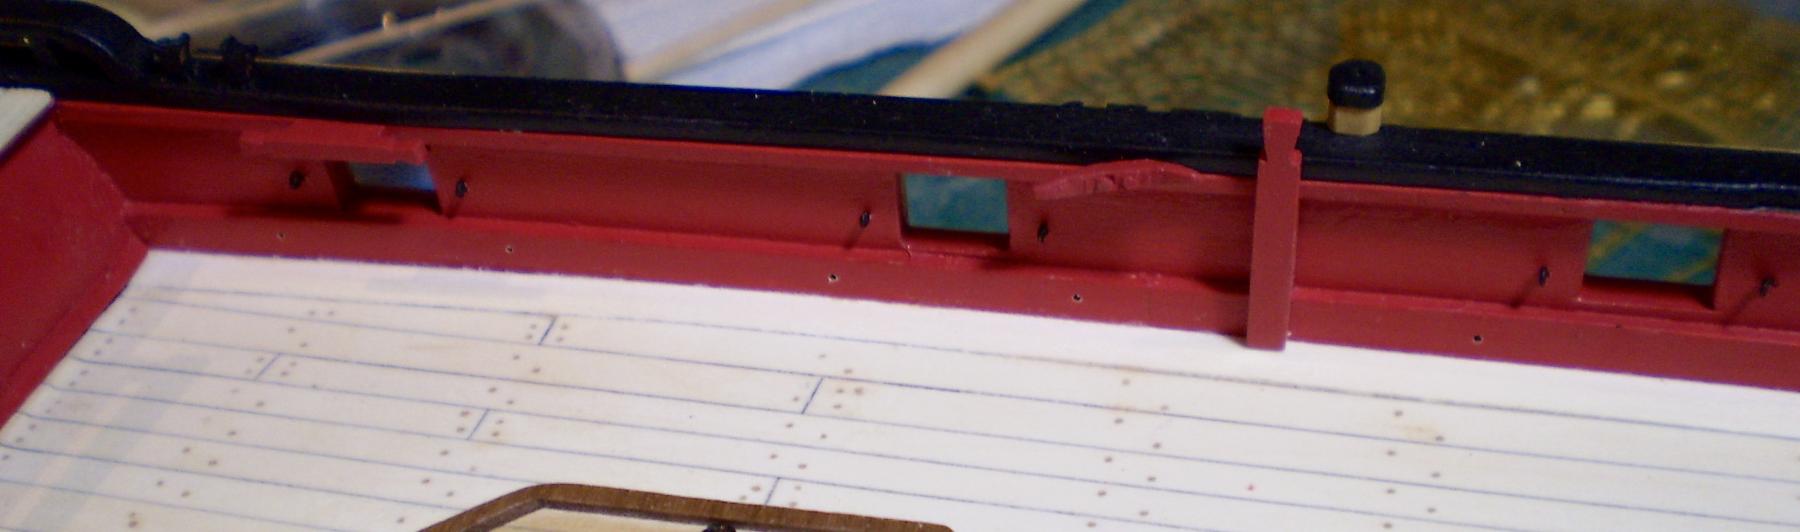
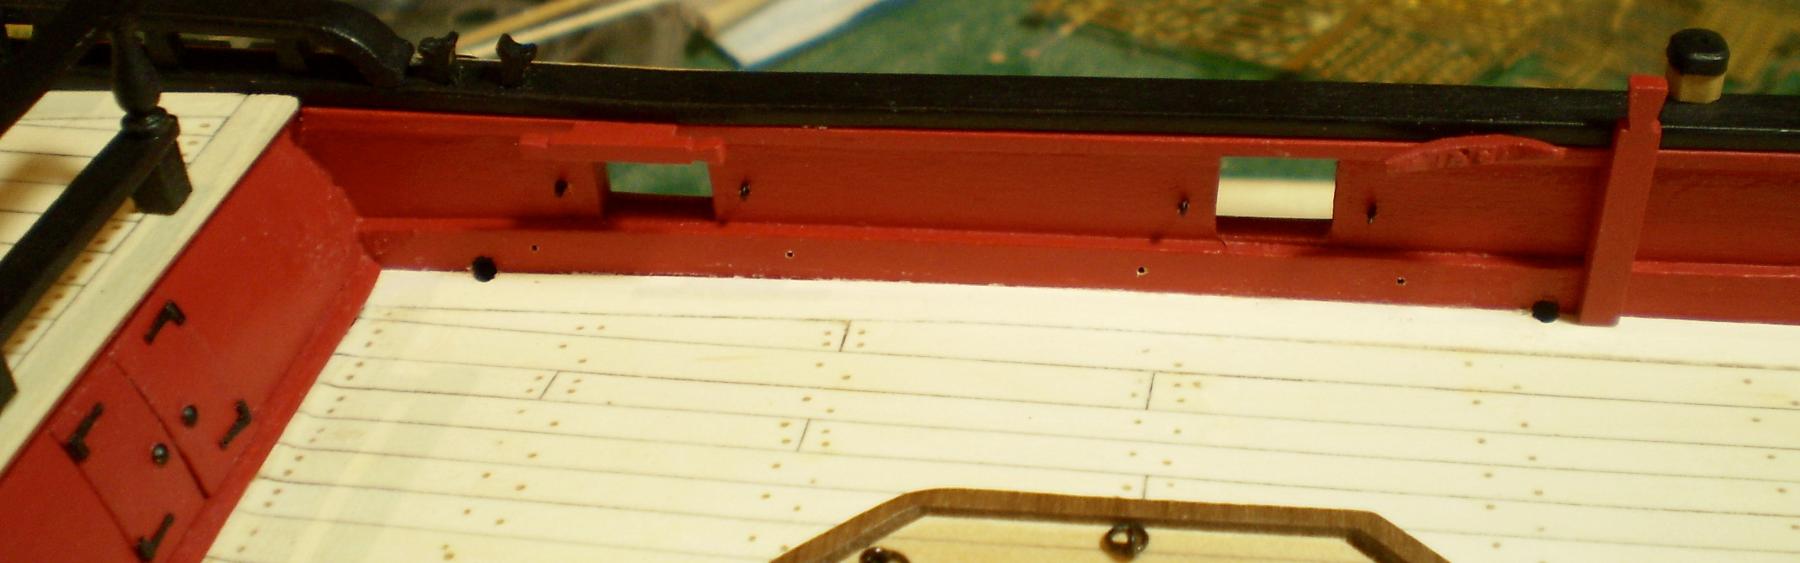
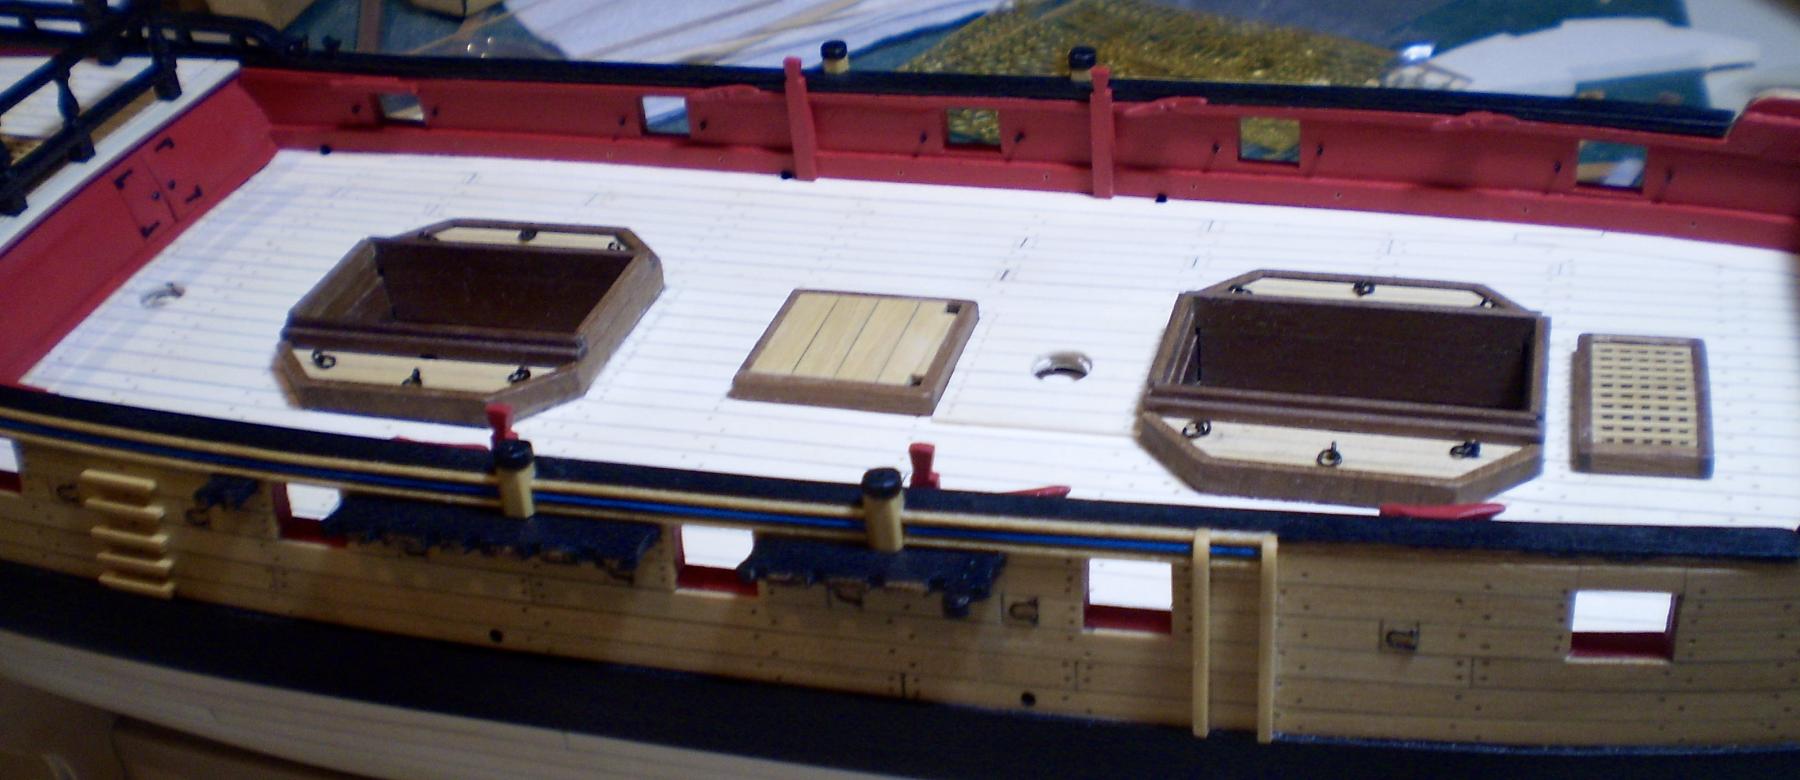
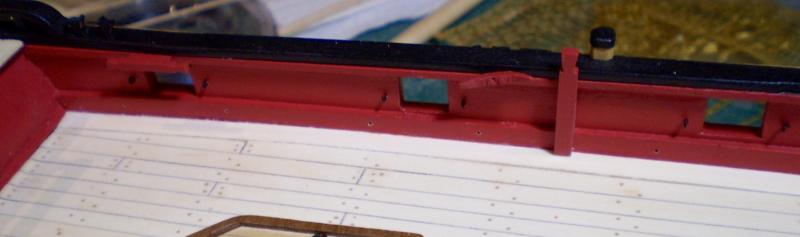
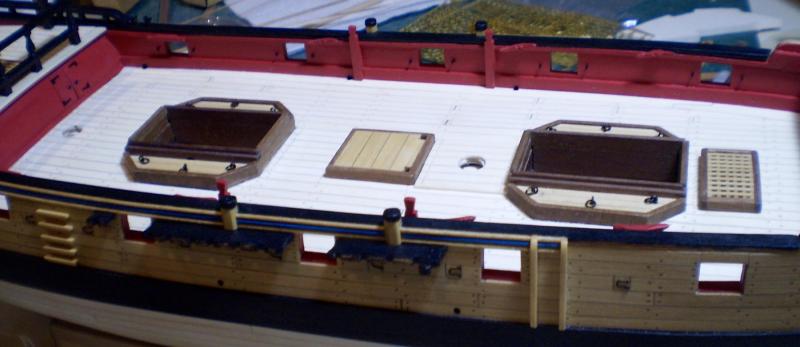
I've now completed the detailing of the midship interior bulwarks. This involved the following: adding the door to the quarterdeck bulkhead; drilling mounting holes for the bulwark eyebolts and ringbolts and adding the eyebolts; drilling the interior holes for the scuppers; adding the various cleats and kevels. The quarterdeck bulkhead door was made from thin card, painted red to match the bulkhead, with hinges from the kit PE set and knobs made from brass pins. The scupper holes were drilled at locations corresponding to those on the exterior, but not connected. Like the exterior holes, they were painted graphite with a toothpick. The kevels were made from boxwood strip and painted red. the cleats are the kit castings, also painted red. Now, it's time to move forward and do work on the bow portion of the ship. Bob


- 563 replies
-
- 30
-