HOLIDAY DONATION DRIVE - SUPPORT MSW - DO YOUR PART TO KEEP THIS GREAT FORUM GOING! (Only 20 donations so far - C'mon guys!)
×


rafine
-
Posts
2,932 -
Joined
-
Last visited
Content Type
Profiles
Forums
Gallery
Events
Everything posted by rafine
-
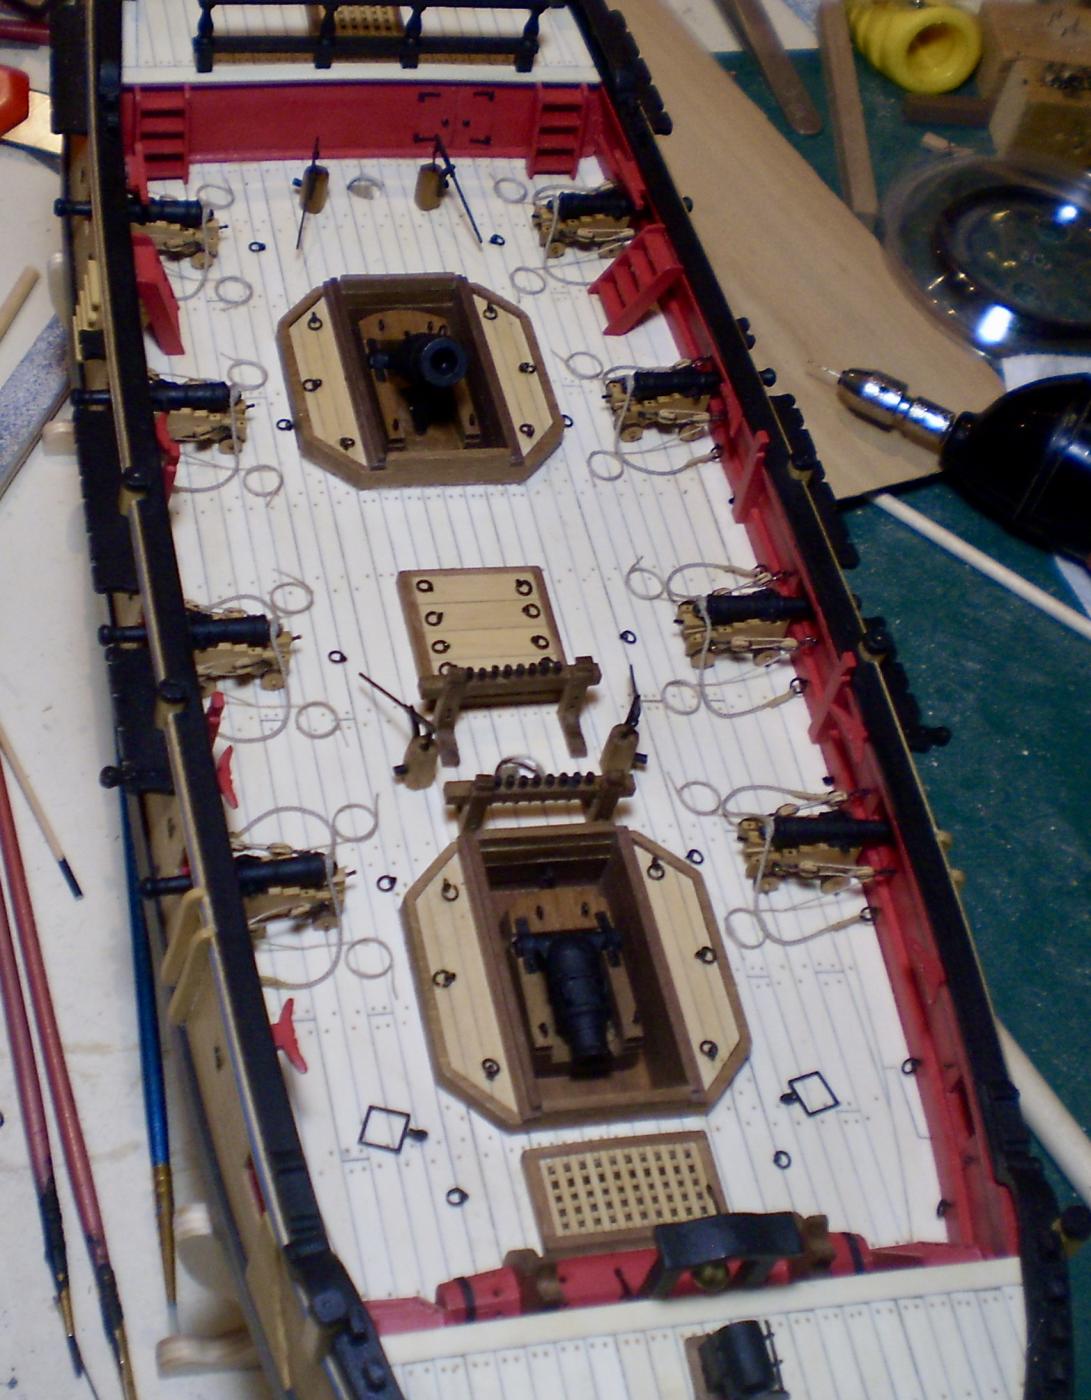
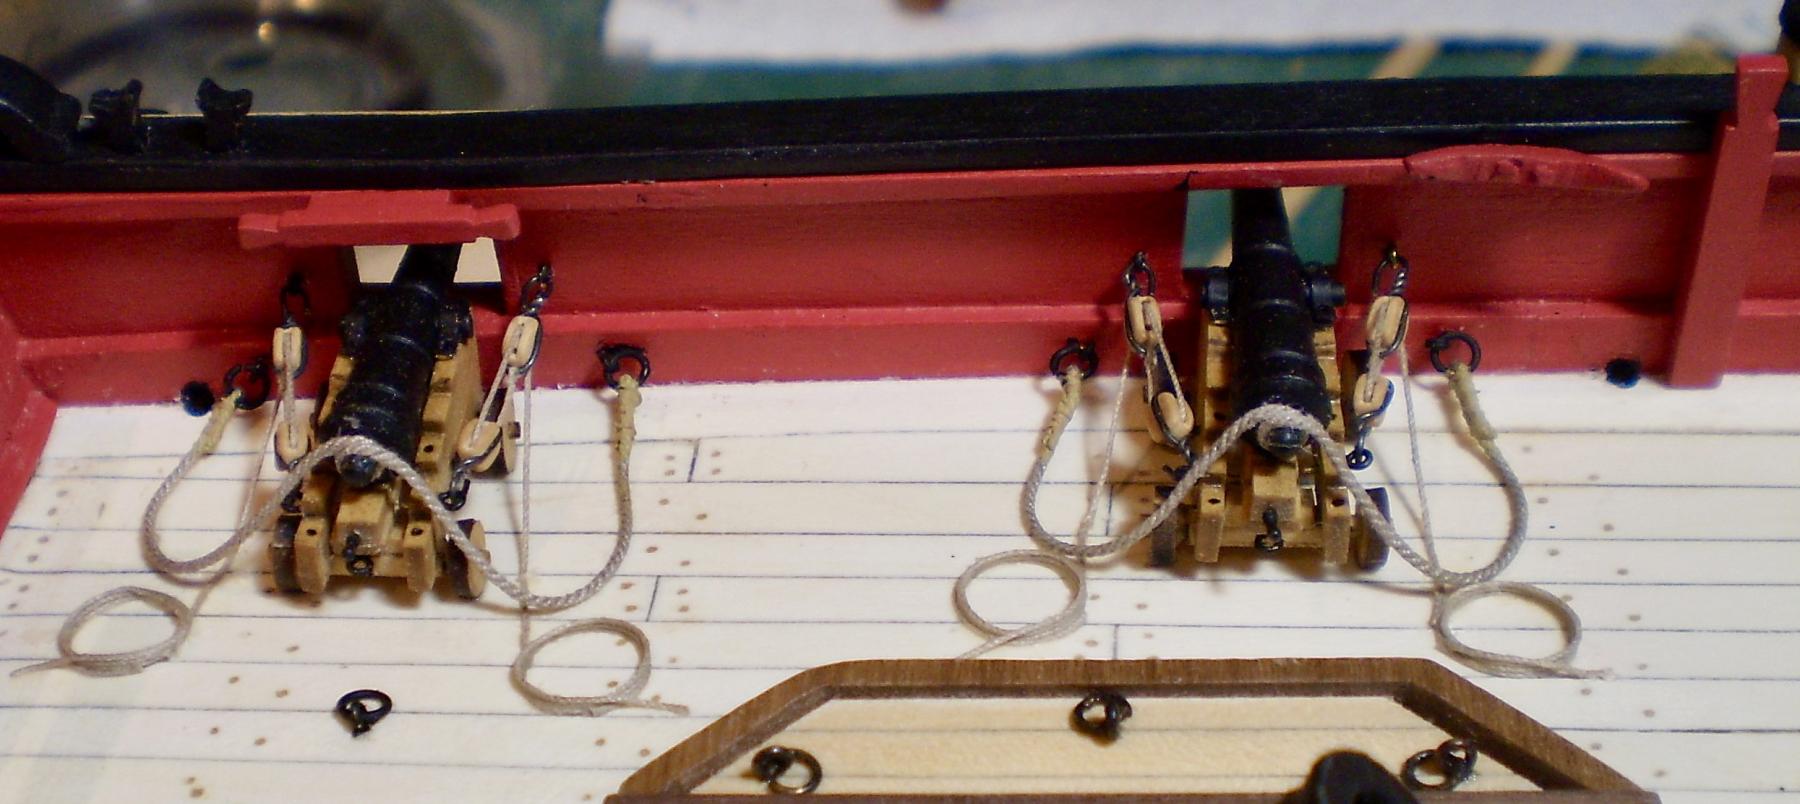
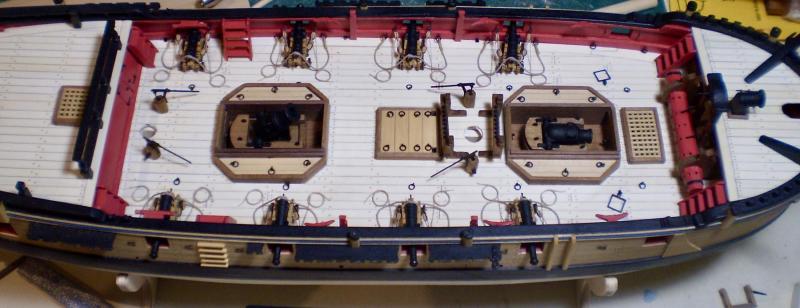
 Deck detailing has now been completed with the work on the midship area. This involved the second group of four guns, the second set of elm tree pumps, the main jeer bitts, the topsail sheet bitts and ringbolts on the main hatch and deck. The guns and pumps were done exactly as previously described with regard to the aft portion of the deck. The two sets of bitts were both made using the walnut kit pieces and were pinned and glued in place. I chose not to use the kit's wooden belaying pins. Although they look nice, they seemed to be too big, and I decided to use smaller brass pins, which I blackened. I am now returning to the exterior of the hull to complete the work there. Bob


- 563 replies
-
- 34
-

-
Good to see you back at it Sjors. The stern looks great. Bob
-
Thanks so much Wes, Brian, Lou and the "likes". Lou, my next update, covering completion of the deck detailing, will have some overall photos. Bob
-
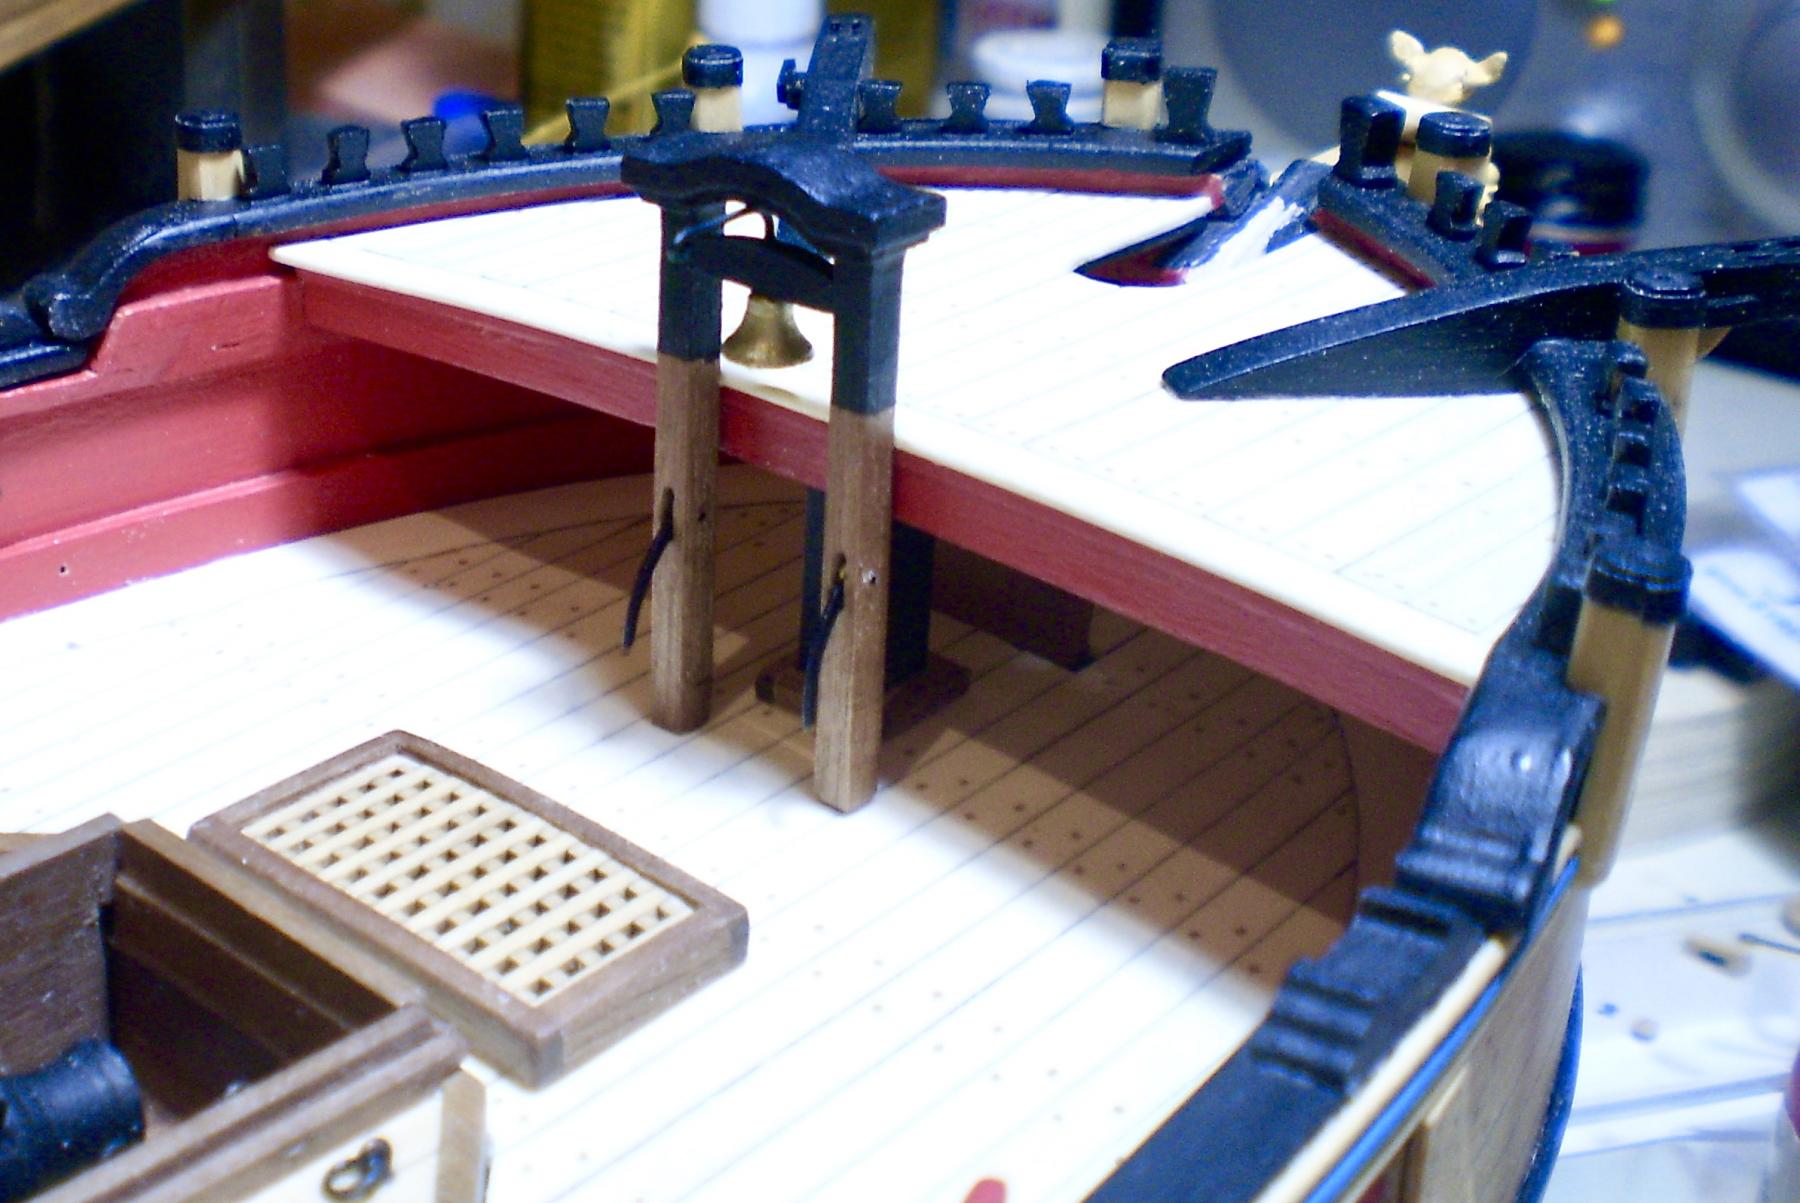
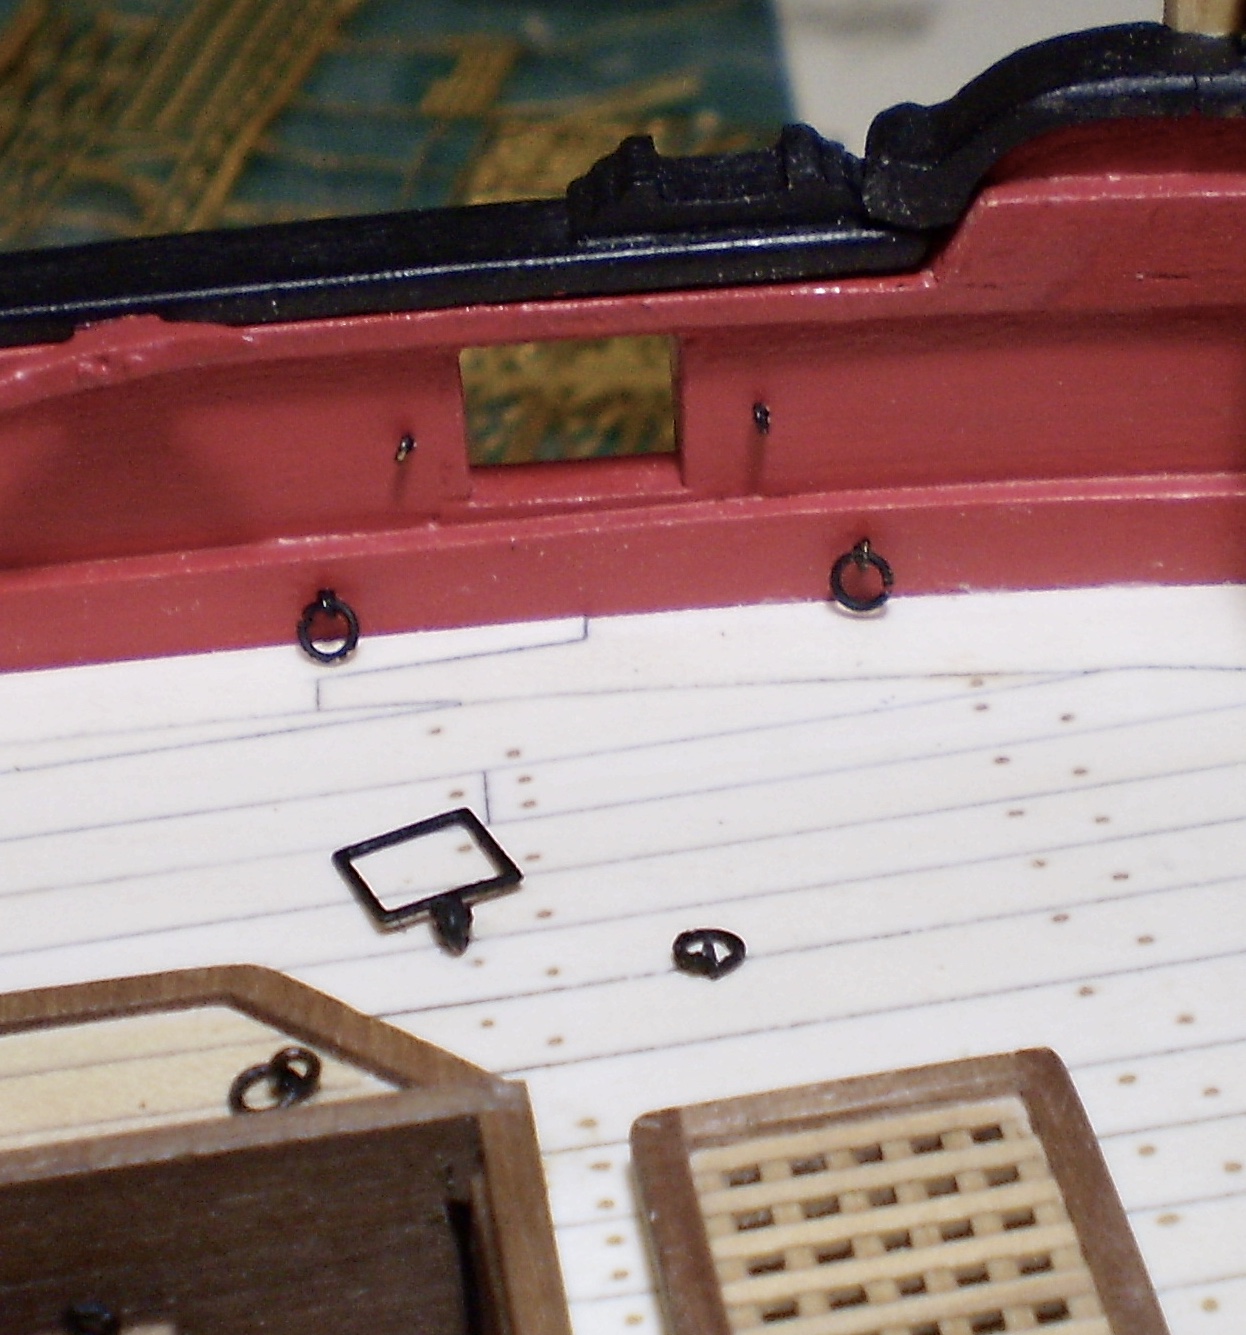
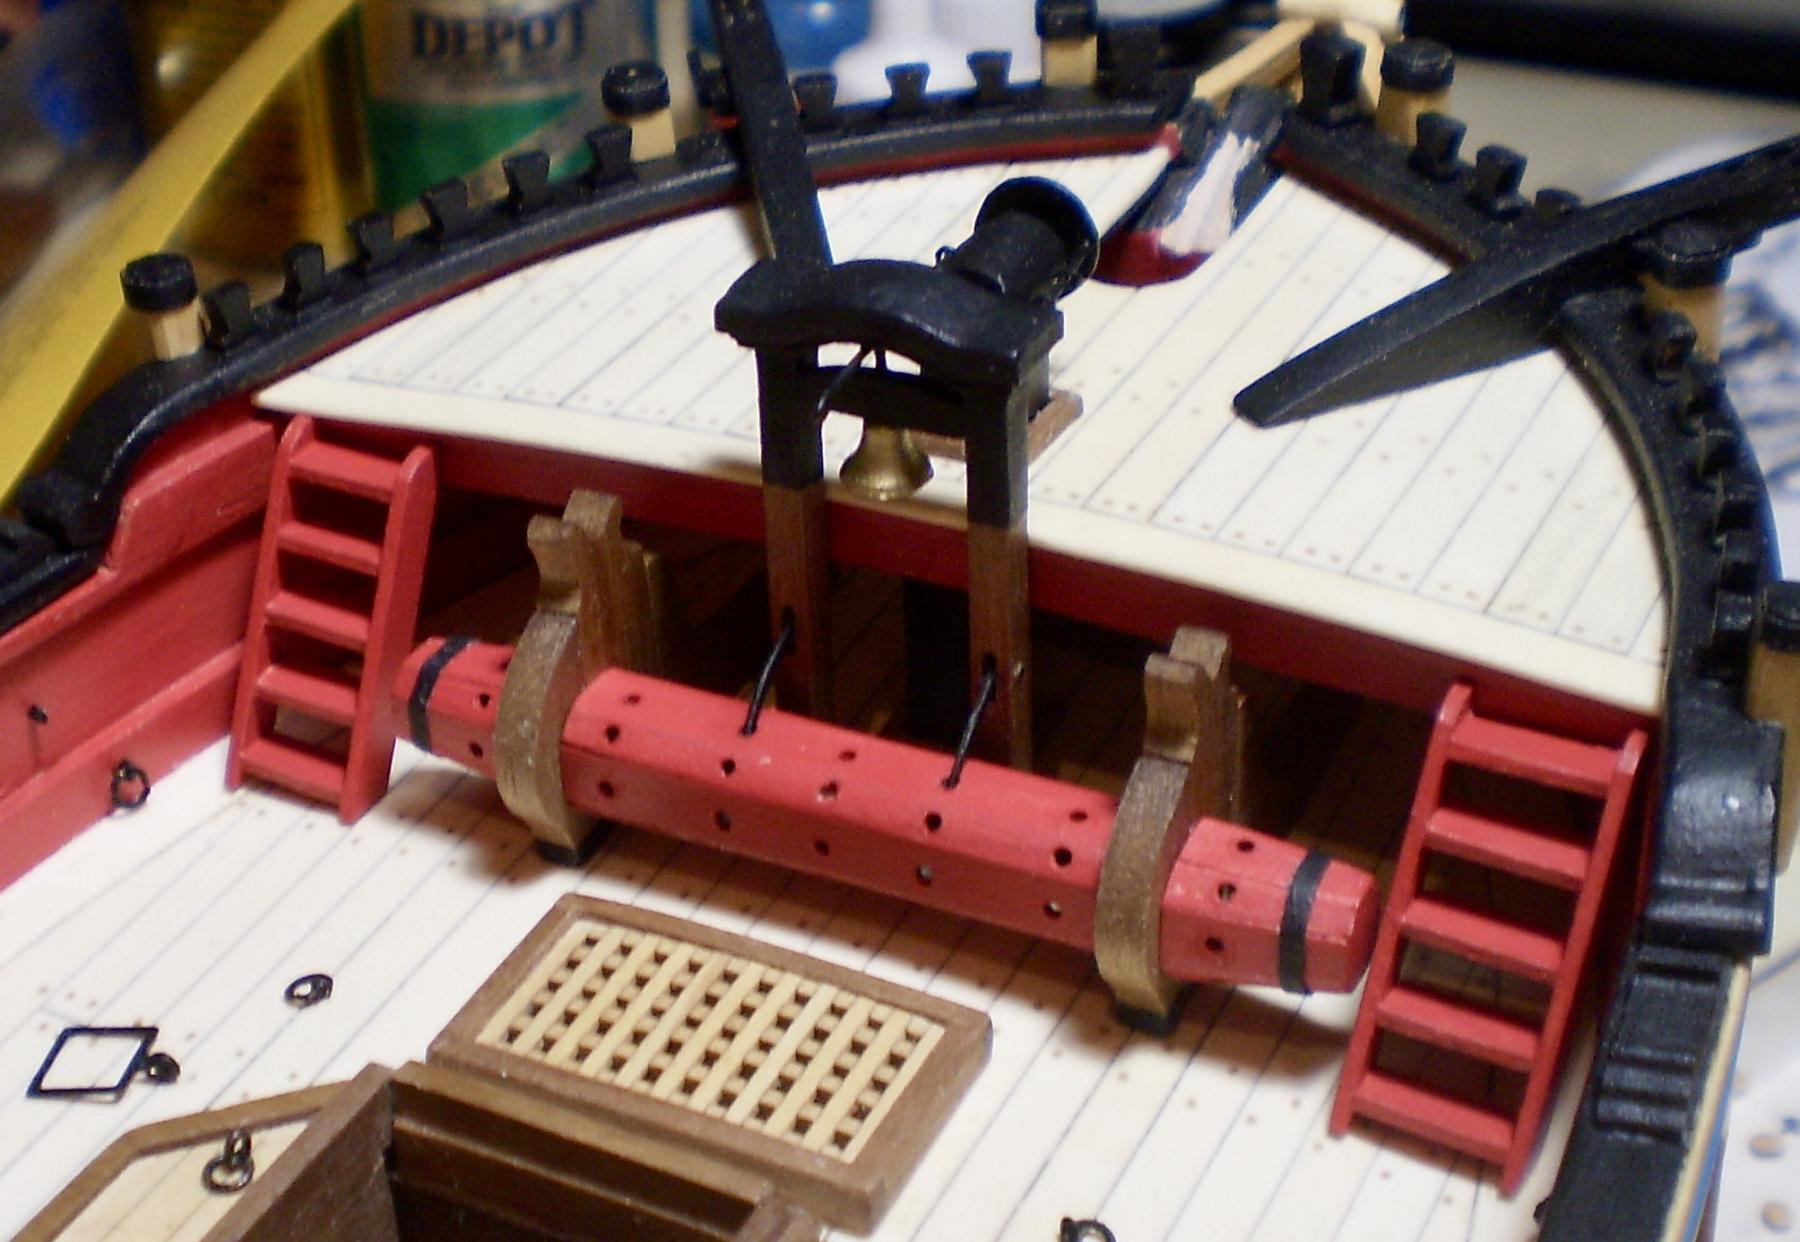
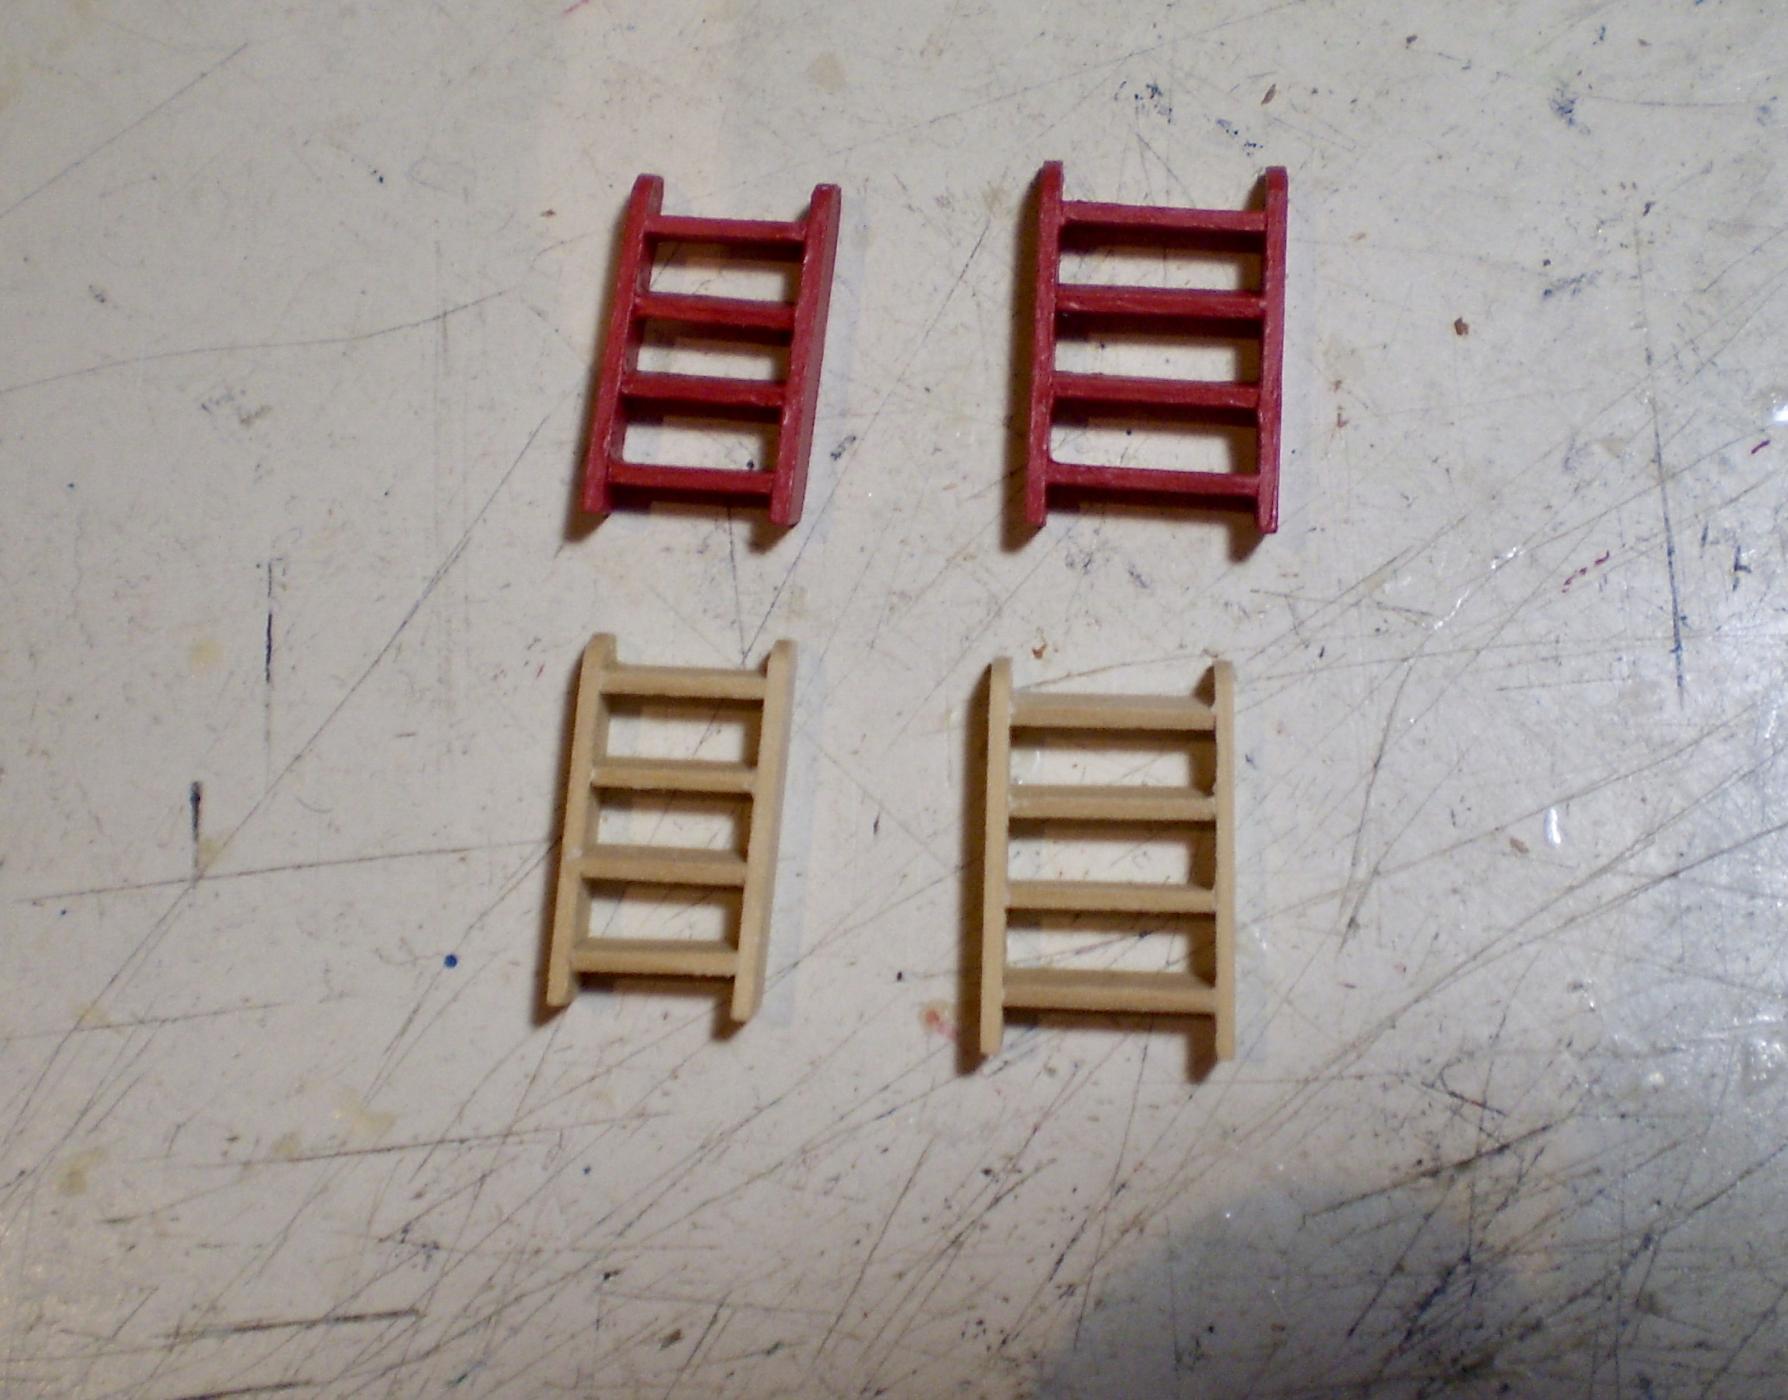
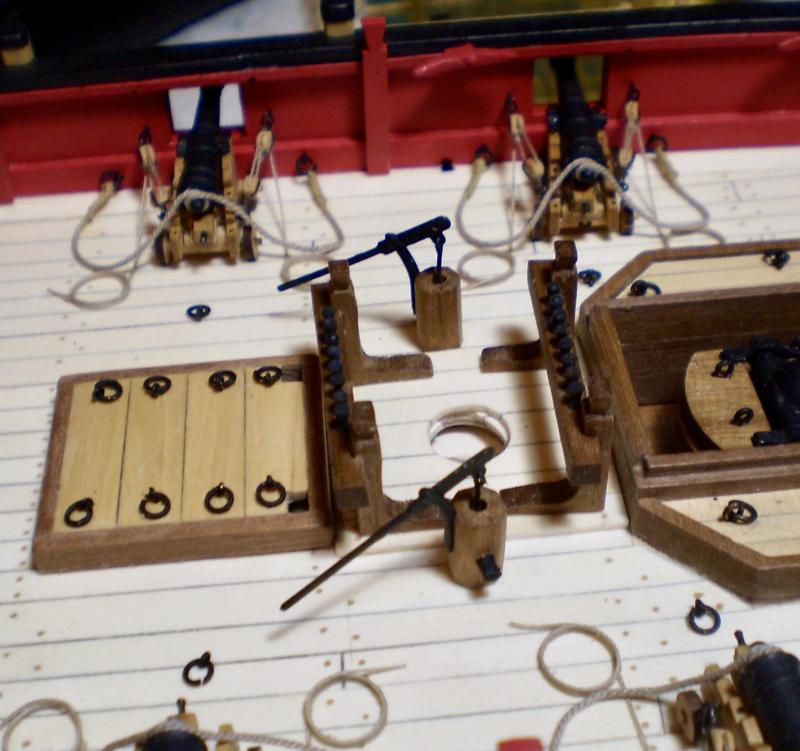
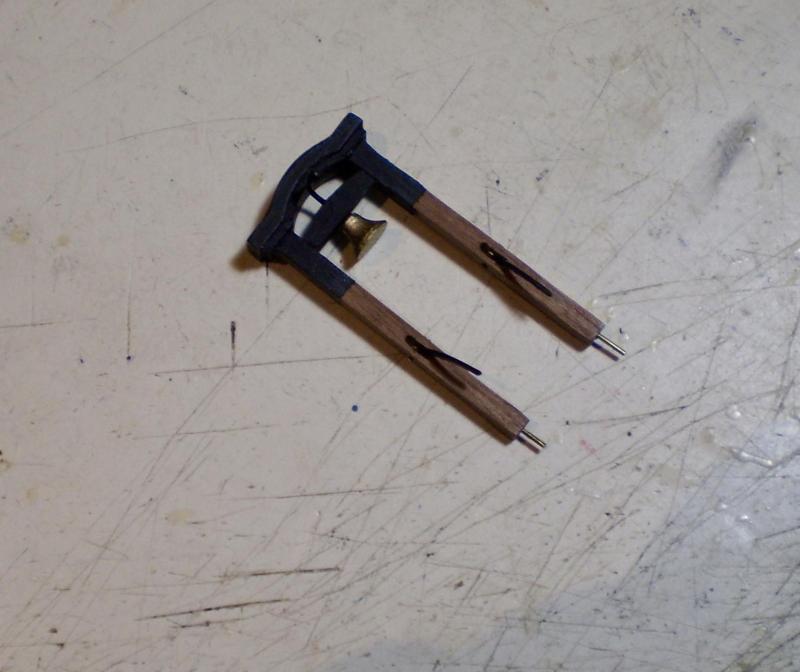
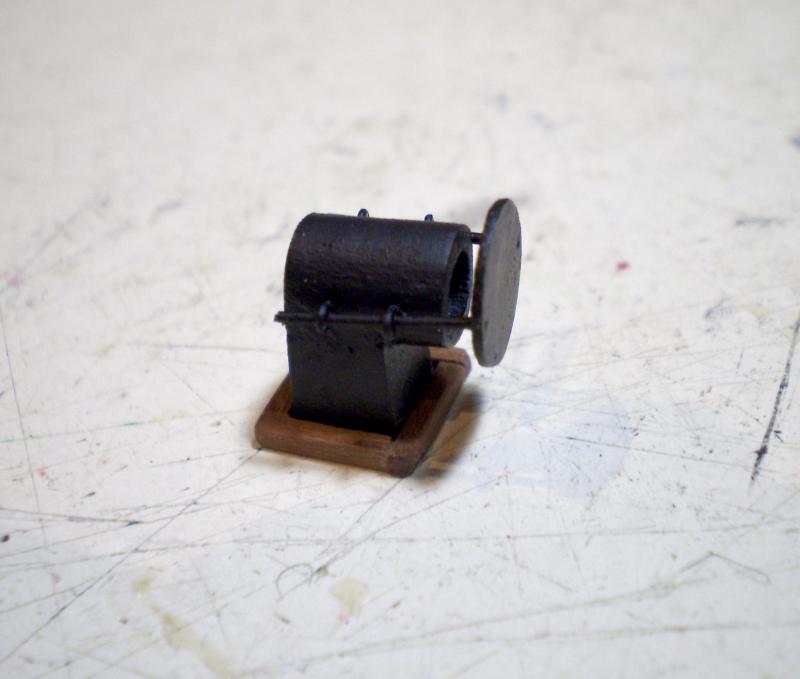
I've now completed the forward most portion of the internal detailing. This included the galley stack, the belfry, the windlass, the forecastle ladders, some ringbolts and the spanshackle for the fish davit. I decided not to use the kit casting for the galley stack, and made one up from boxwood strip with the front drilled out. I then added a flue cover made from a disc of styrene, with mounting guides from wire and eyebolts. Lastly, a coaming from walnut strip was added at the base. The belfry was made up basically using the kit parts, with minor changes. The windlass required a decision. The kit parts for the mounting brackets and cheeks are solid walnut and were fine. I did add standards (knees) to them as shown in AOTS.These were cut from the walnut sheet from which the other parts came. The decision came with regard to the barrel of the windlass. The kit parts were a very light colored ply and would not match the other parts if left as natural wood. I chose to use them ,but paint the barrel red, rather than either attempt to stain the ply parts to match or scratch build a barrel from walnut. I actually like the result. The bands at the end of the barrel and at the base are black painted paper. The ladders were made from made from boxwood strip and painted red, as I had done with the other ladders. Ringbolts made from brass rings and eyebolts were added to the forward ports and the deck. The spanshackle is the kit PE part modified to hook into an eyebolt. Bob


- 563 replies
-
- 28
-
-
Thanks so much B.E., Janos and the "likes". B.E., it does appear that there should be eyebolts on that last step, but for whatever reason, I merely simulated a bolthead instead. I'm afraid that's how they're going to stay. Bob
-
Looking very good Lou. I look forward to seeing your remaining work on the hull and the masting and rigging. Bob
-
Thanks so much Joe, Grant, Thomas, Albert, Elijah and Red for the very generous comments, and also to the "likes". As always, greatly appreciated. I find the walnut generally harder to work with than boxwood, but the walnut ply, for me, is almost impossible. Thus, the need for scratch building or after-market parts. Like many others, I like to think of a kit as merely a place to start. Red, it will stay in my house, which my wife complains looks like a museum. I'm on a "one in, one out" system, which keeps the number in the house steady. Family and friends get the overflow. Bob
-
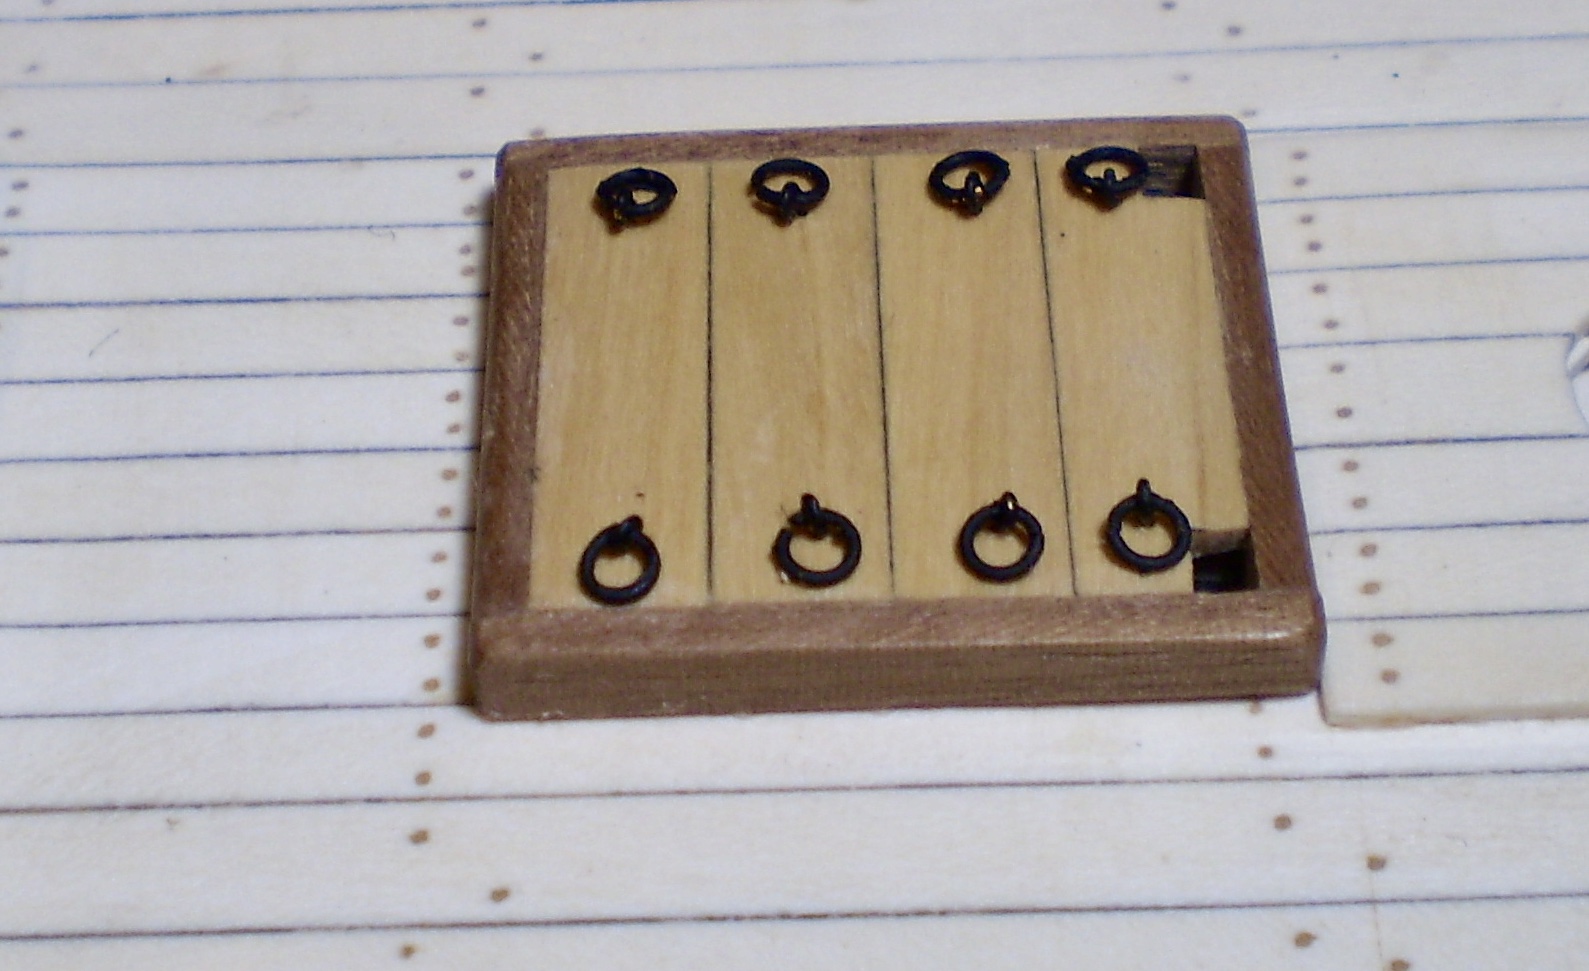
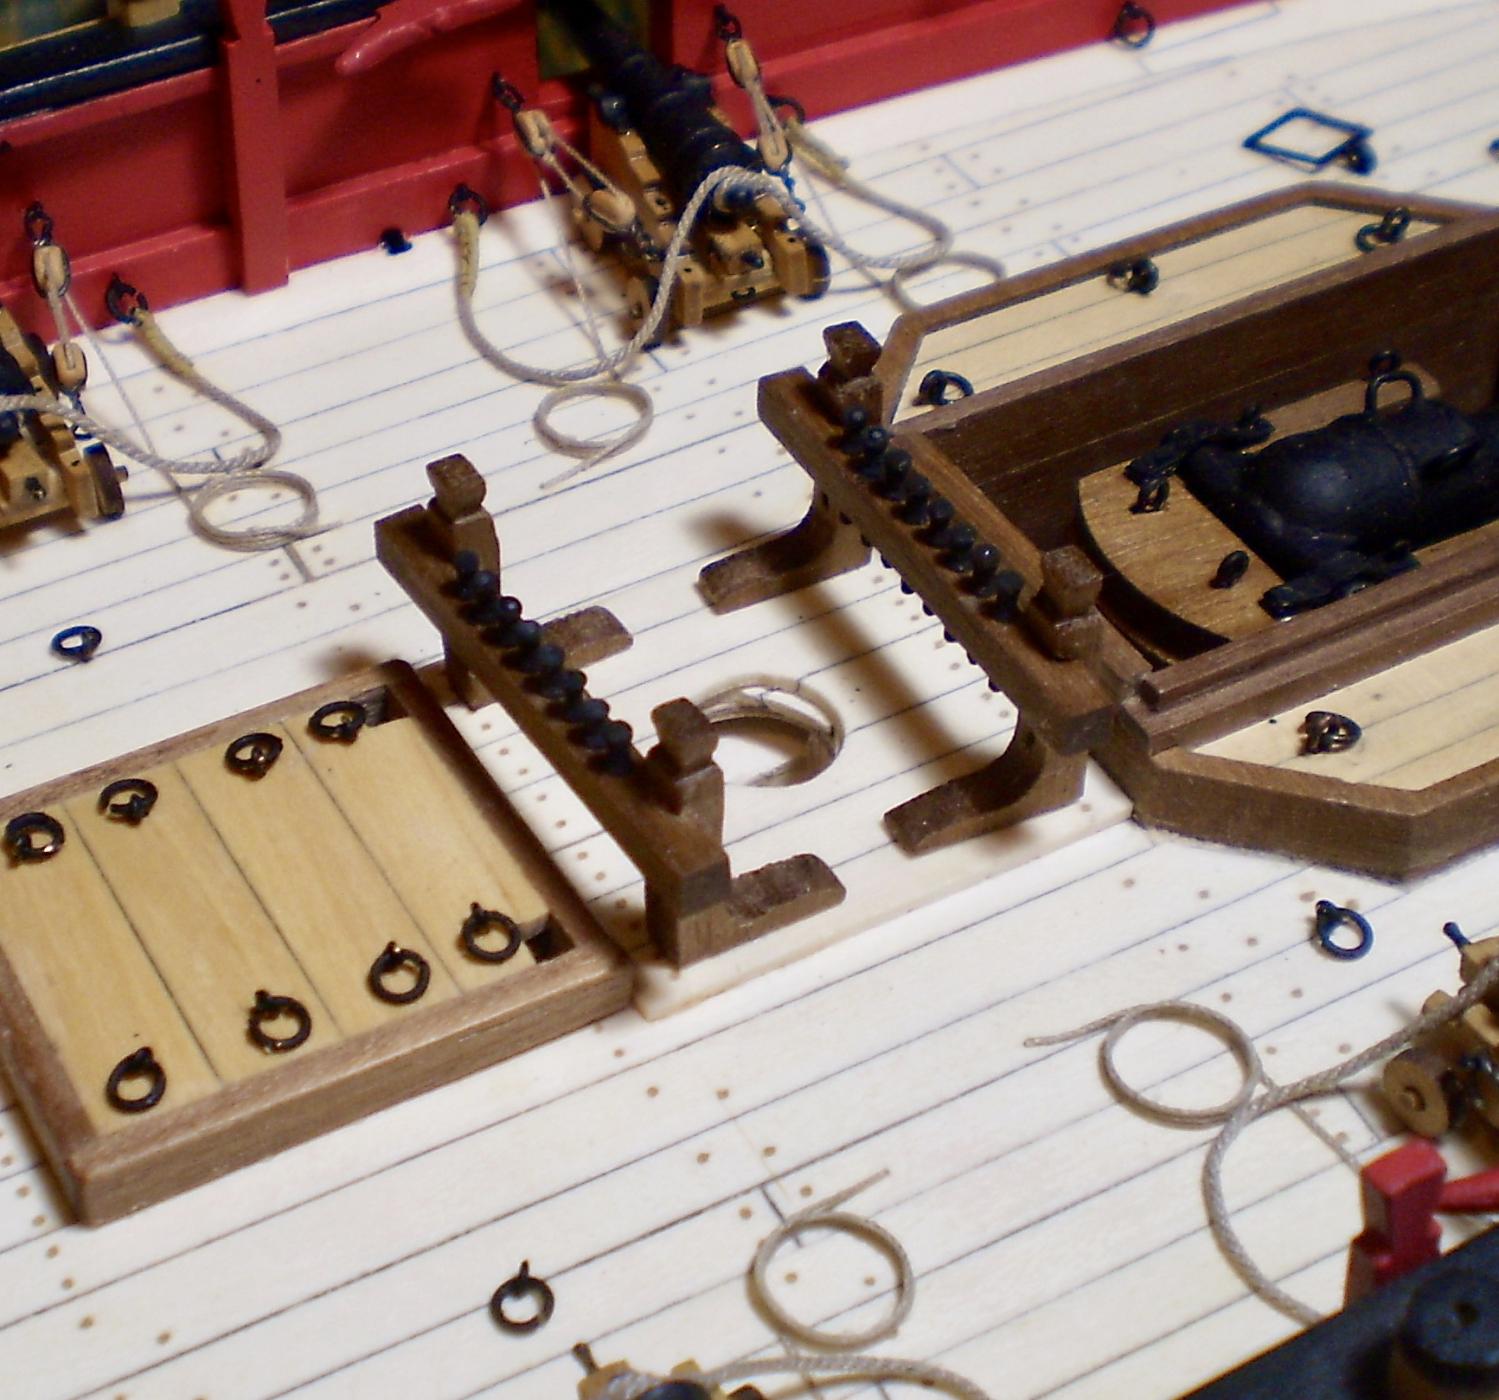
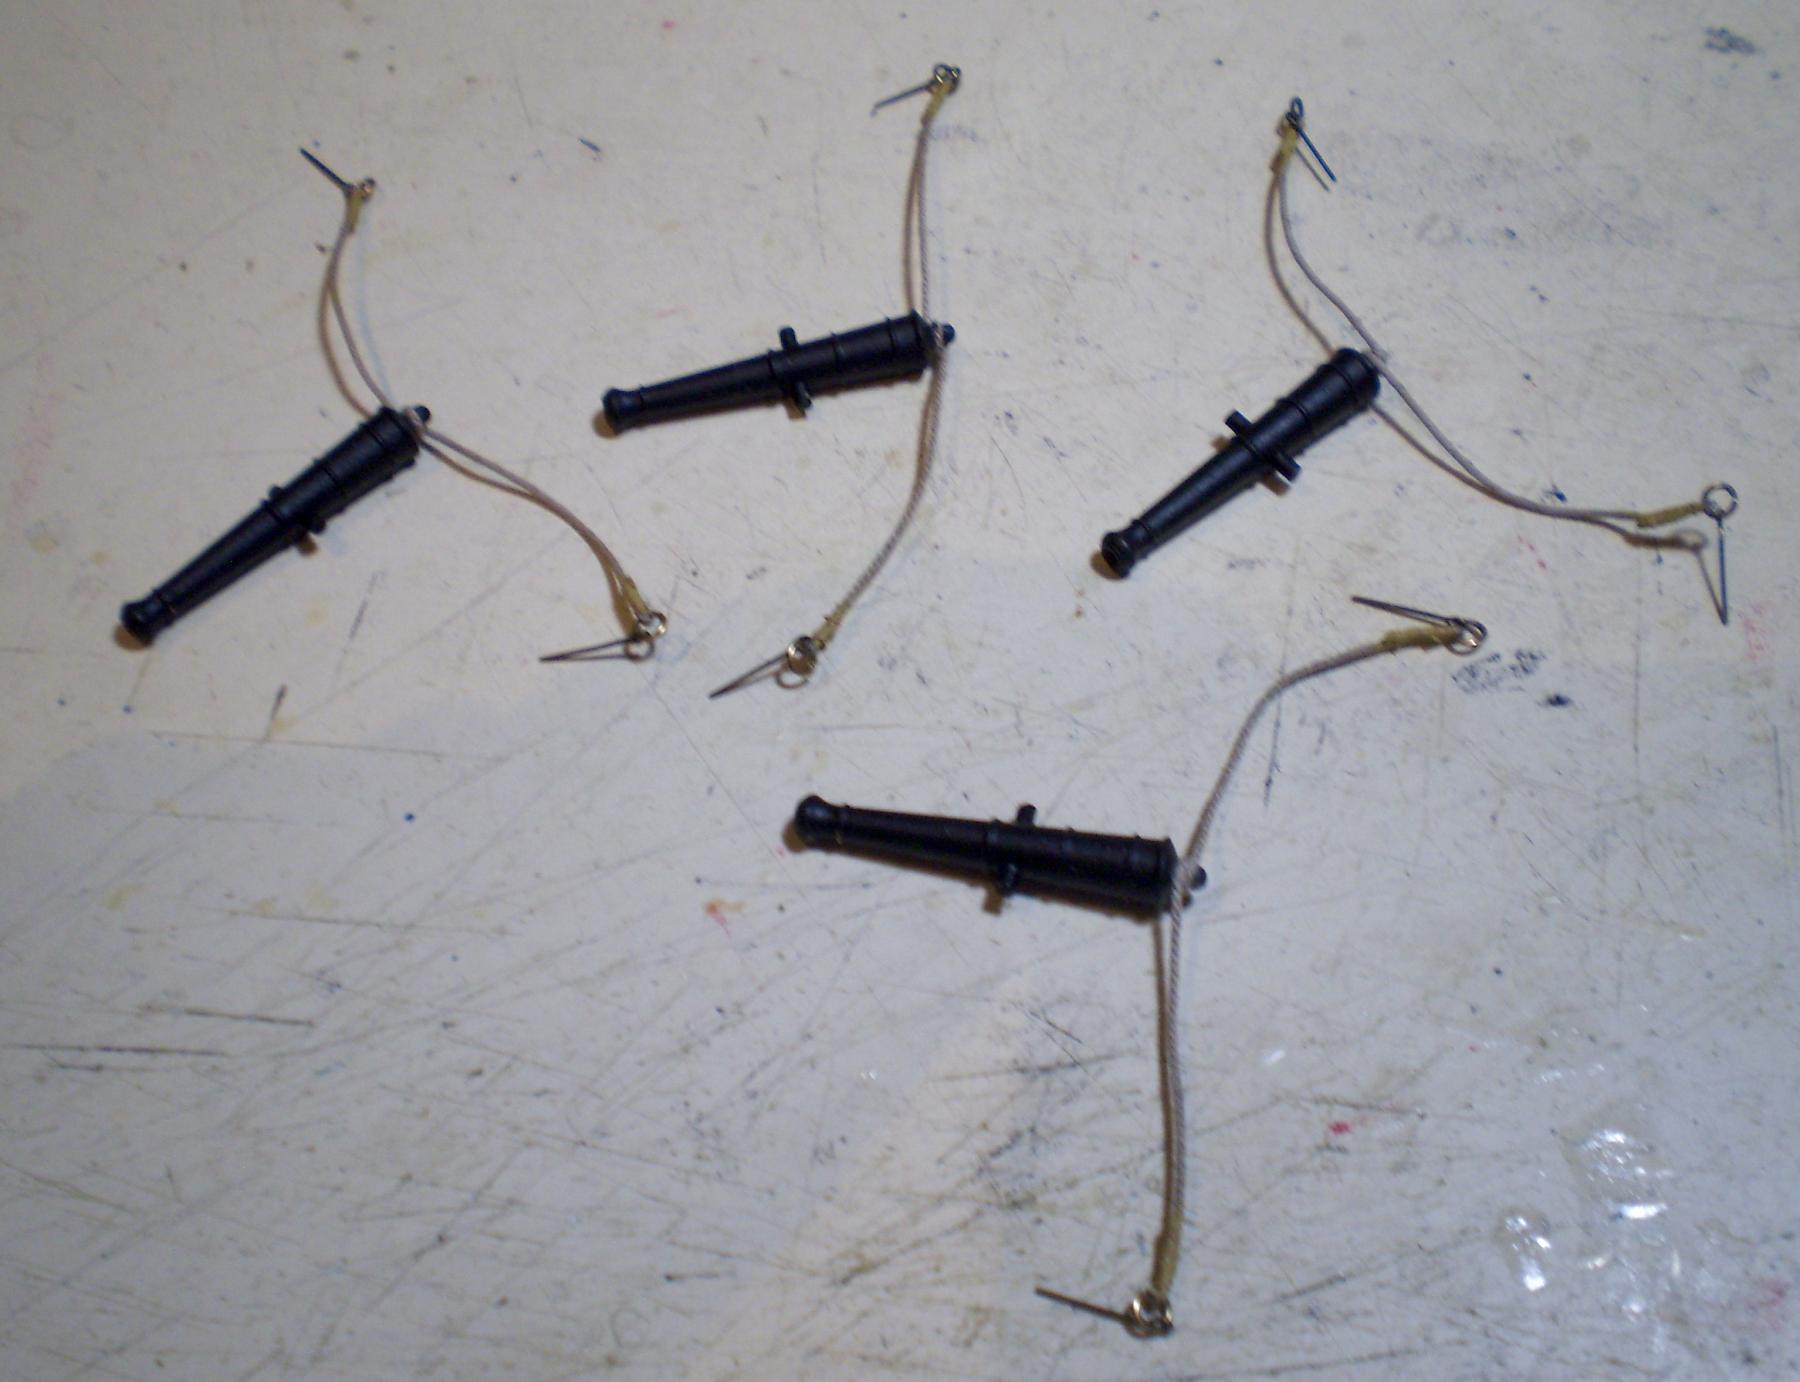
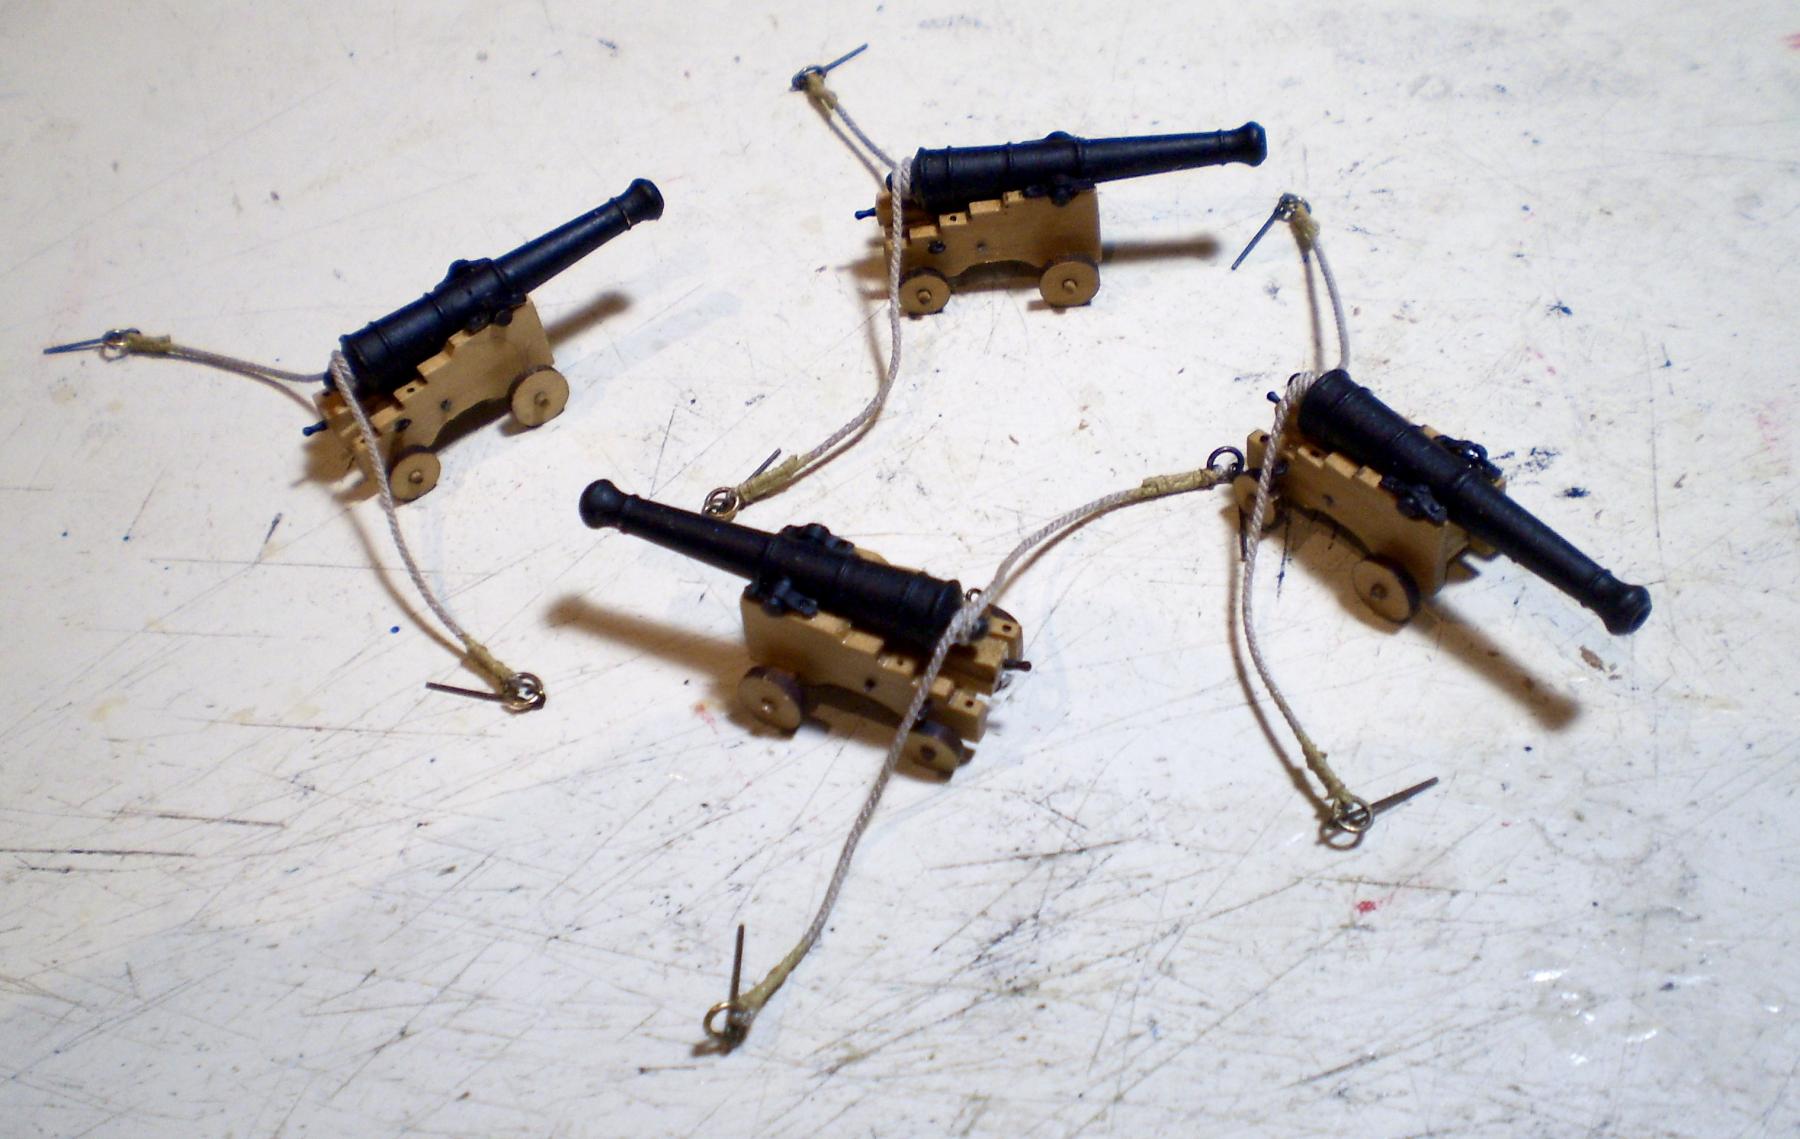
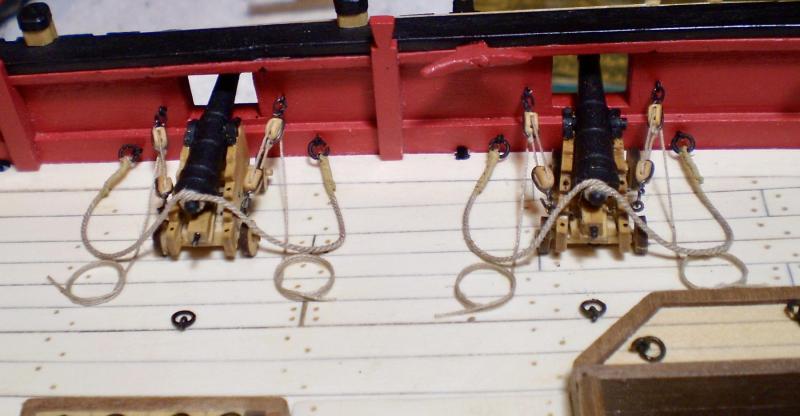
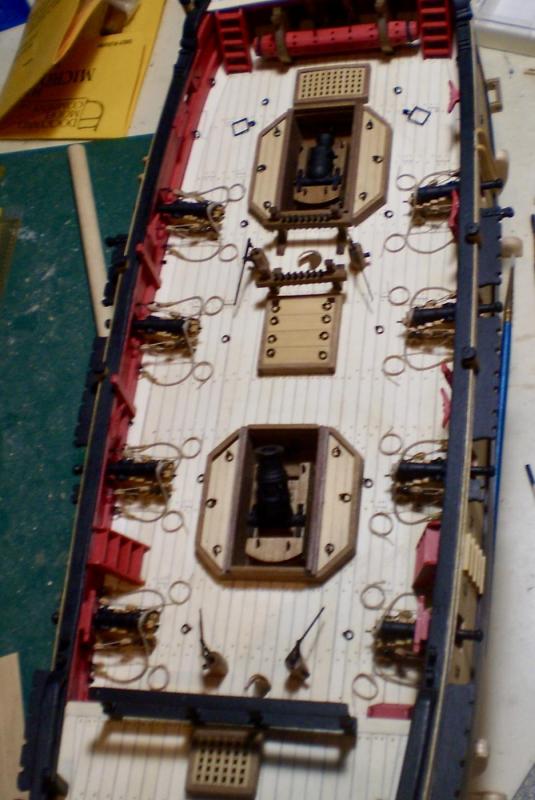
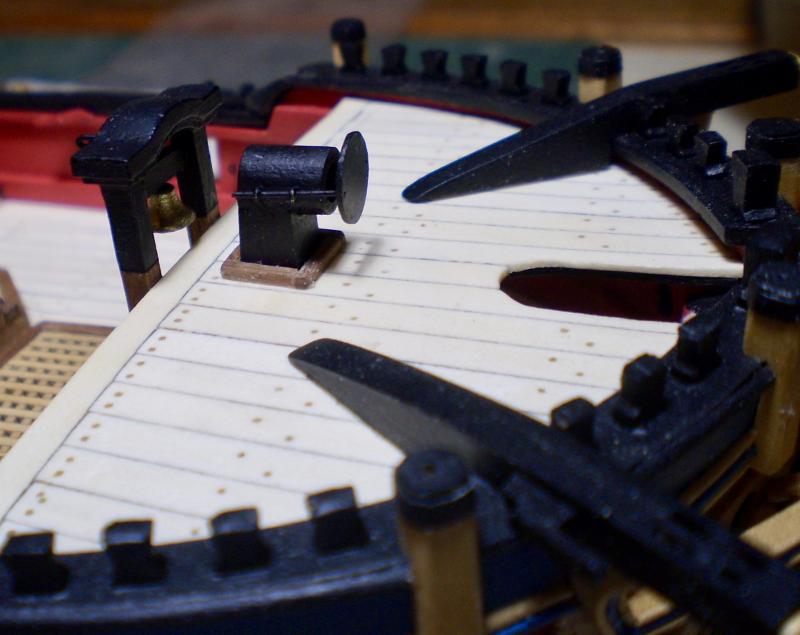
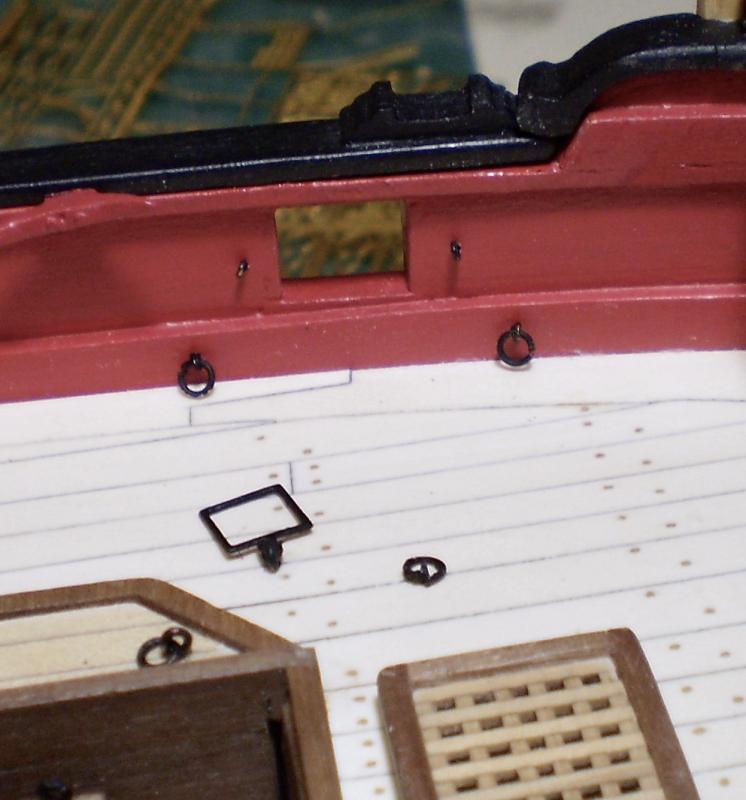
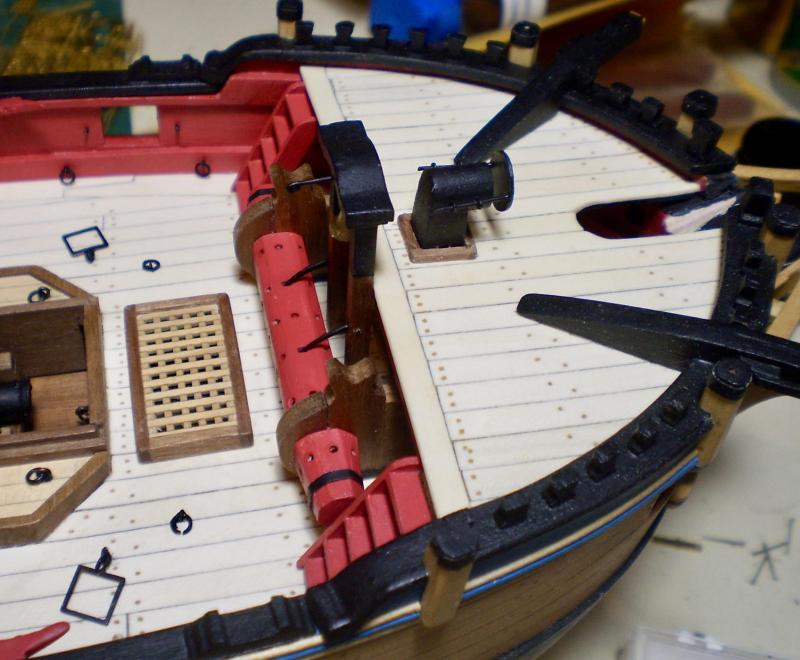
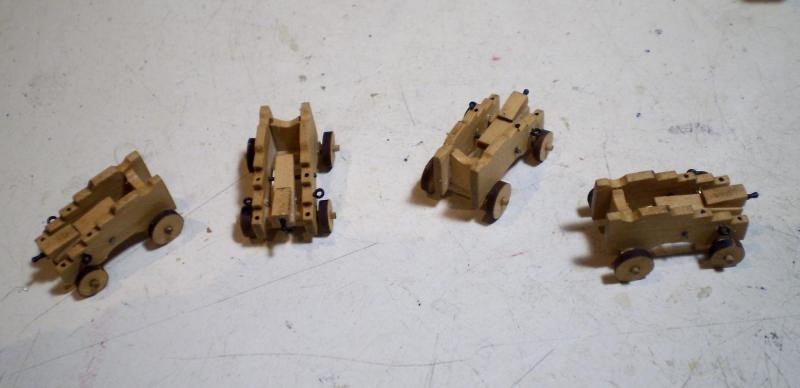
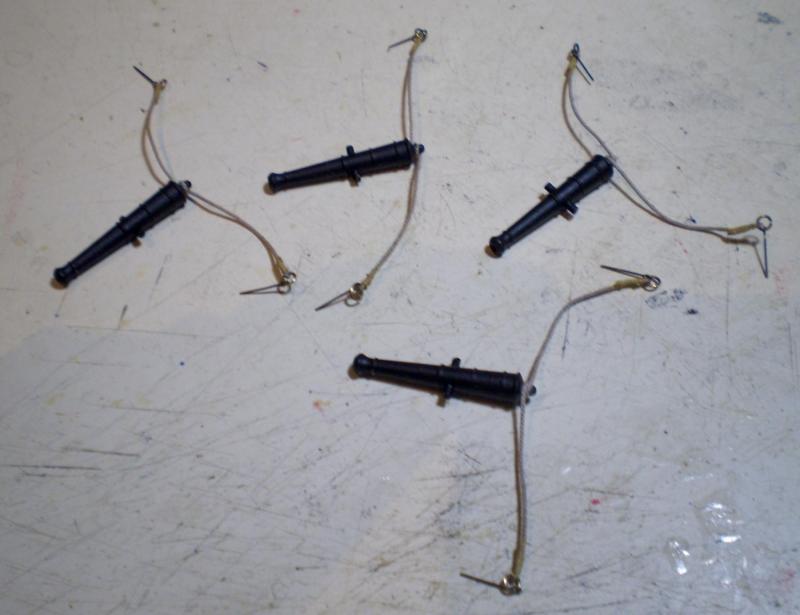
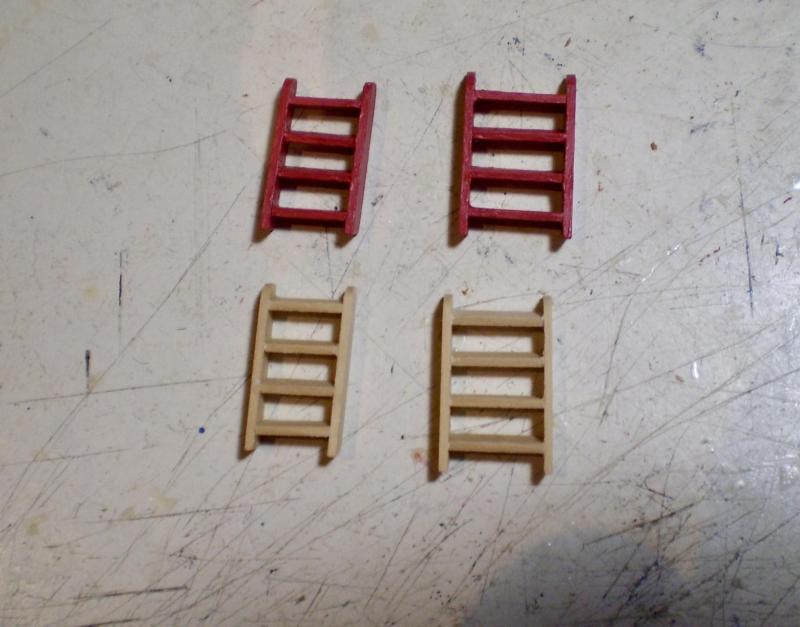
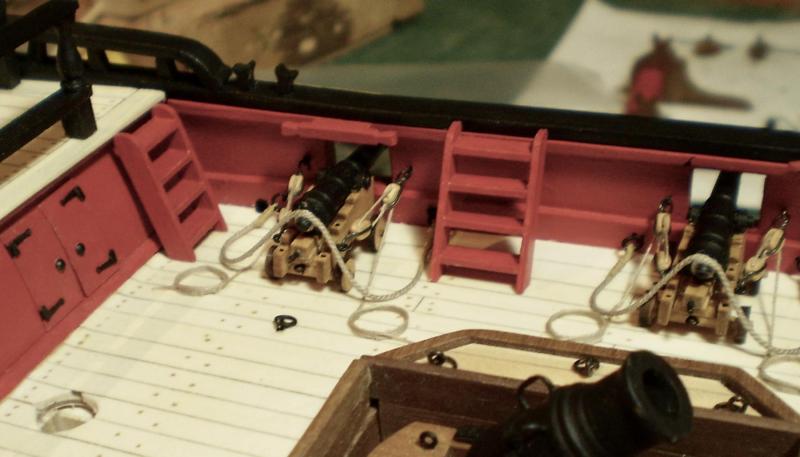
Well, we dodged a bullet down here in South Florida from Hurricane Matthew. The other good news was that the days of waiting and preparing provided a lot of unexpected modeling time. As a result, detailing of the main deck is moving along quickly. In my usual fashion, to spread out repetitive tasks, I'm doing the deck detailing in segments. The first is the aft most portion, and includes the first four of the eight 4-pounder guns, the quarterdeck and side entry ladders, the aft elm tree pumps and some deck ringbolts. For the guns, I used the kit's brass barrels and PE cap squares, but replaced the kit's splintery plywood carriages with boxwood carriages from Syren. The size was determined by using the Syren carriages intended for use with barrels closest to the kit barrels size (1:64 scale 6-pounder). The rigging was done with line and blocks from Syren. The sizes were determined from tables in AOTS (.025" for the breeching ropes, .008" for the tackles and 1/8" blocks). BTW, for anyone wondering why the breeching ropes don't run through ringbolts on the carriage sides, I did them as they are shown in AOTS (and the kit plans). The ladders were scratch built from boxwood strip and painted red. The kit ladders are walnut ply and are outsized and also splintery like the gun carriages. The pumps were made from walnut strip, shaped and drilled, and the kit PE parts. The deck ringbolts, like those for the breeching ropes, were made from brass rings and eyebolts. Bob


- 563 replies
-
- 31
-
-
HMS Naiad 1797 by albert - FINISHED - 1/48
rafine replied to albert's topic in - Build logs for subjects built 1751 - 1800
Fabulous looking model Albert. Bob -
US Brig Syren by Gahm - Model Shipways
rafine replied to Gahm's topic in - Kit build logs for subjects built from 1801 - 1850
Super job on the binnacle, Thomas. A little jewel. Bob -
Simply wonderful Nils. It's always a treat to see your work. Bob
- 2,625 replies
-
- 5
-
-
- kaiser wilhelm der grosse
- passenger steamer
- (and 1 more)
-
Really nice job on the copper Joe. The stamp with the needles worked great. Bob
- 136 replies
-
- 2
-
-
- caldercraft
- Cruiser
- (and 2 more)
-
Beautiful work on the coppering, Jason. Bob
-
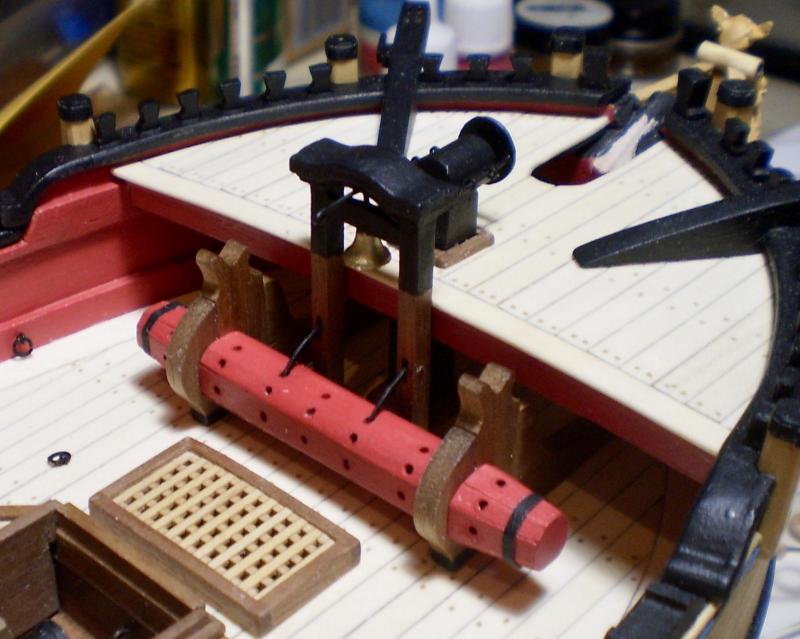
Thanks so much Thomas, Albert, Don and the "likes". Don, they are held in place, when raised, by a removable iron support. I don't know how they were raised, but I would guess by a tackle hooked to the handles. Bob
-
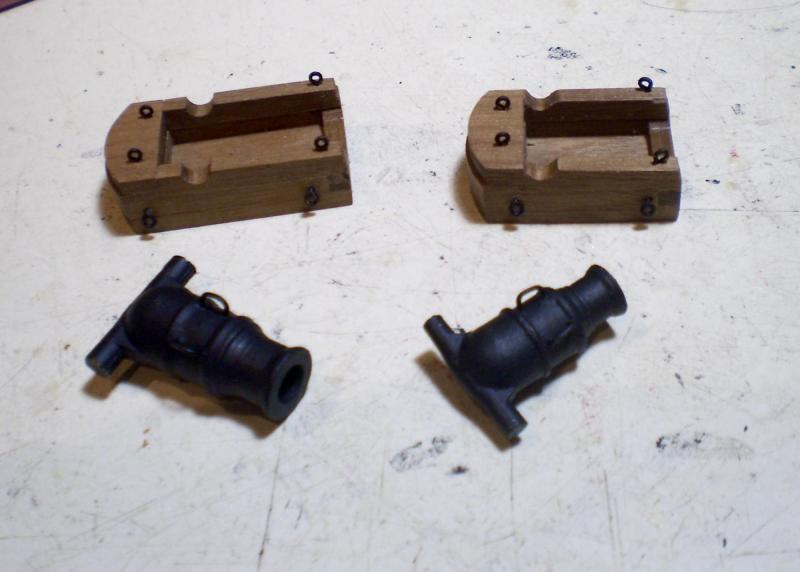
Thanks so much Nils, Dirk, Scott, Red for the generous comments and also the "likes". Those mortars do look like they could cause some damage, Dirk. Bob
-
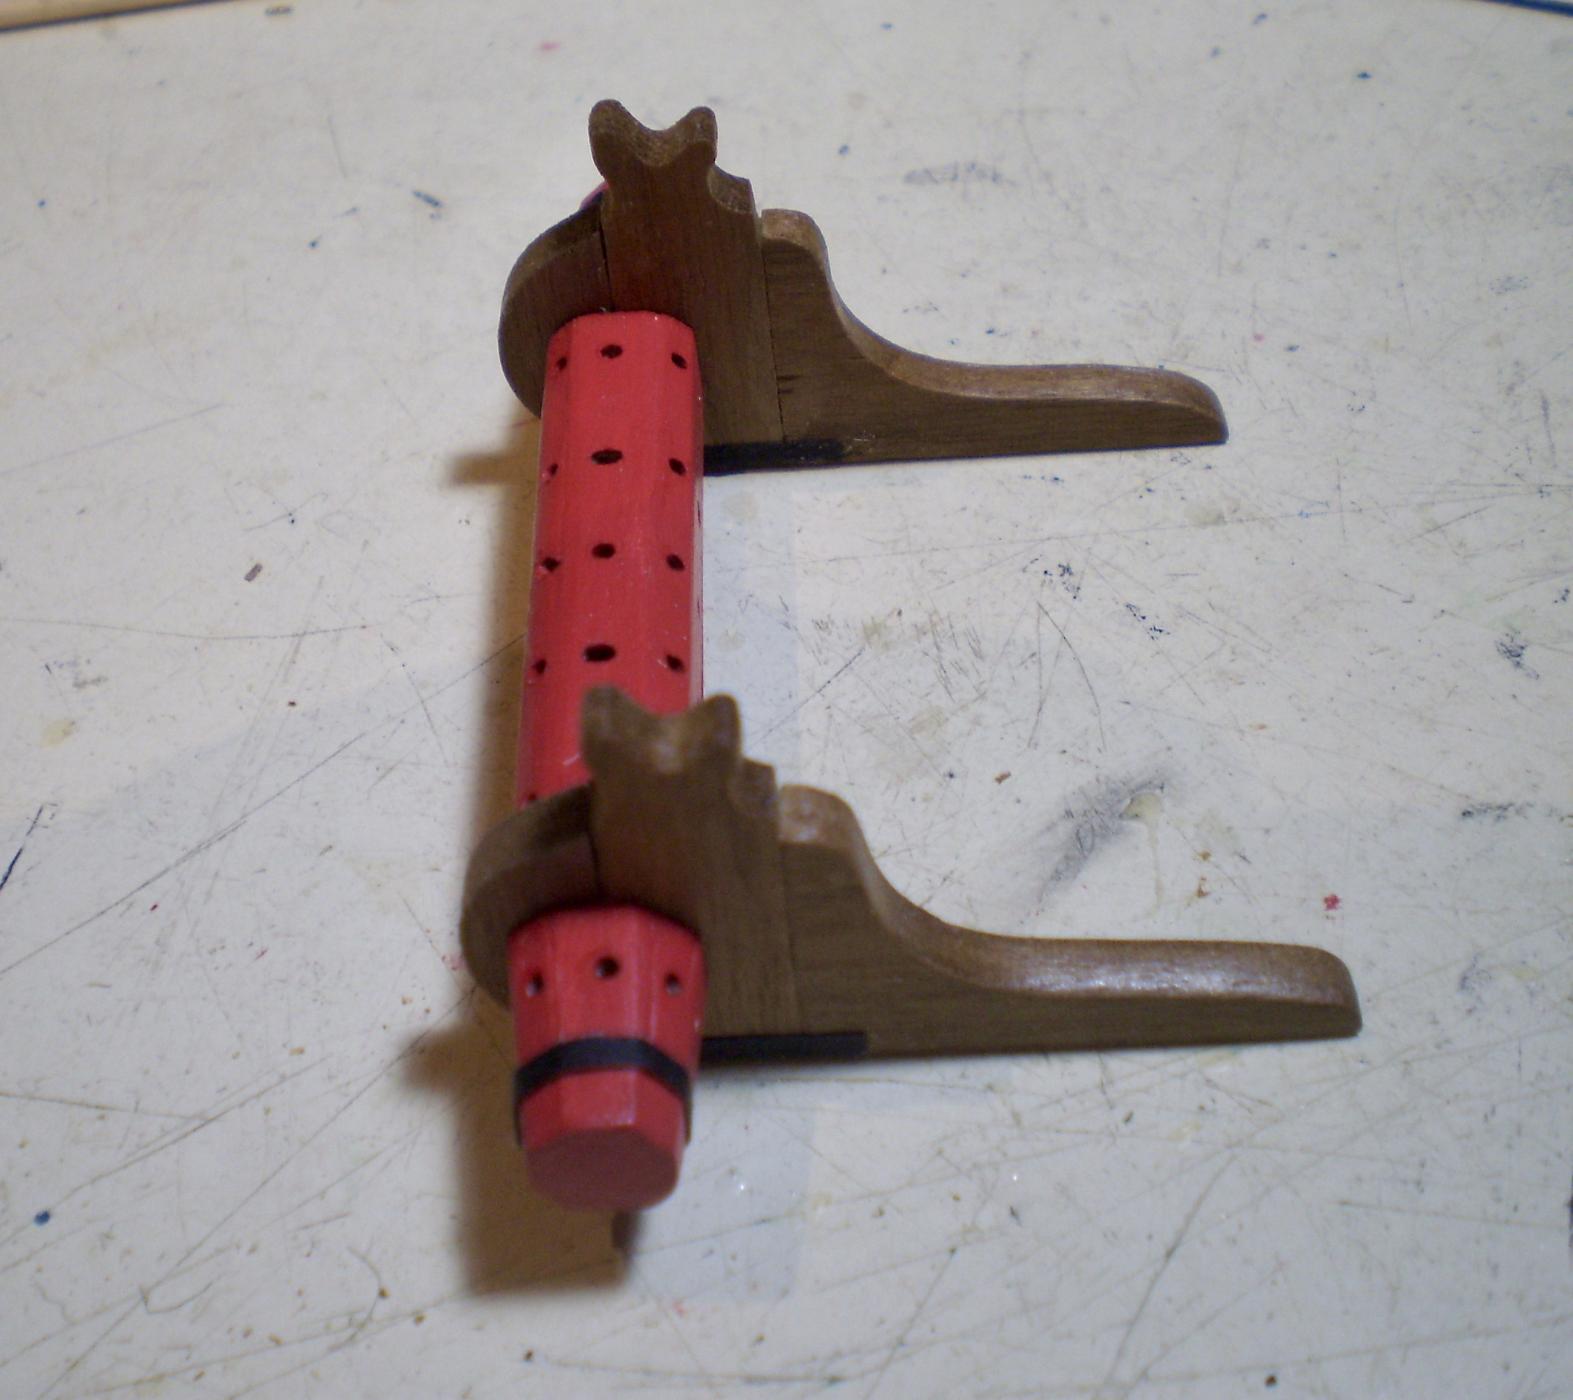
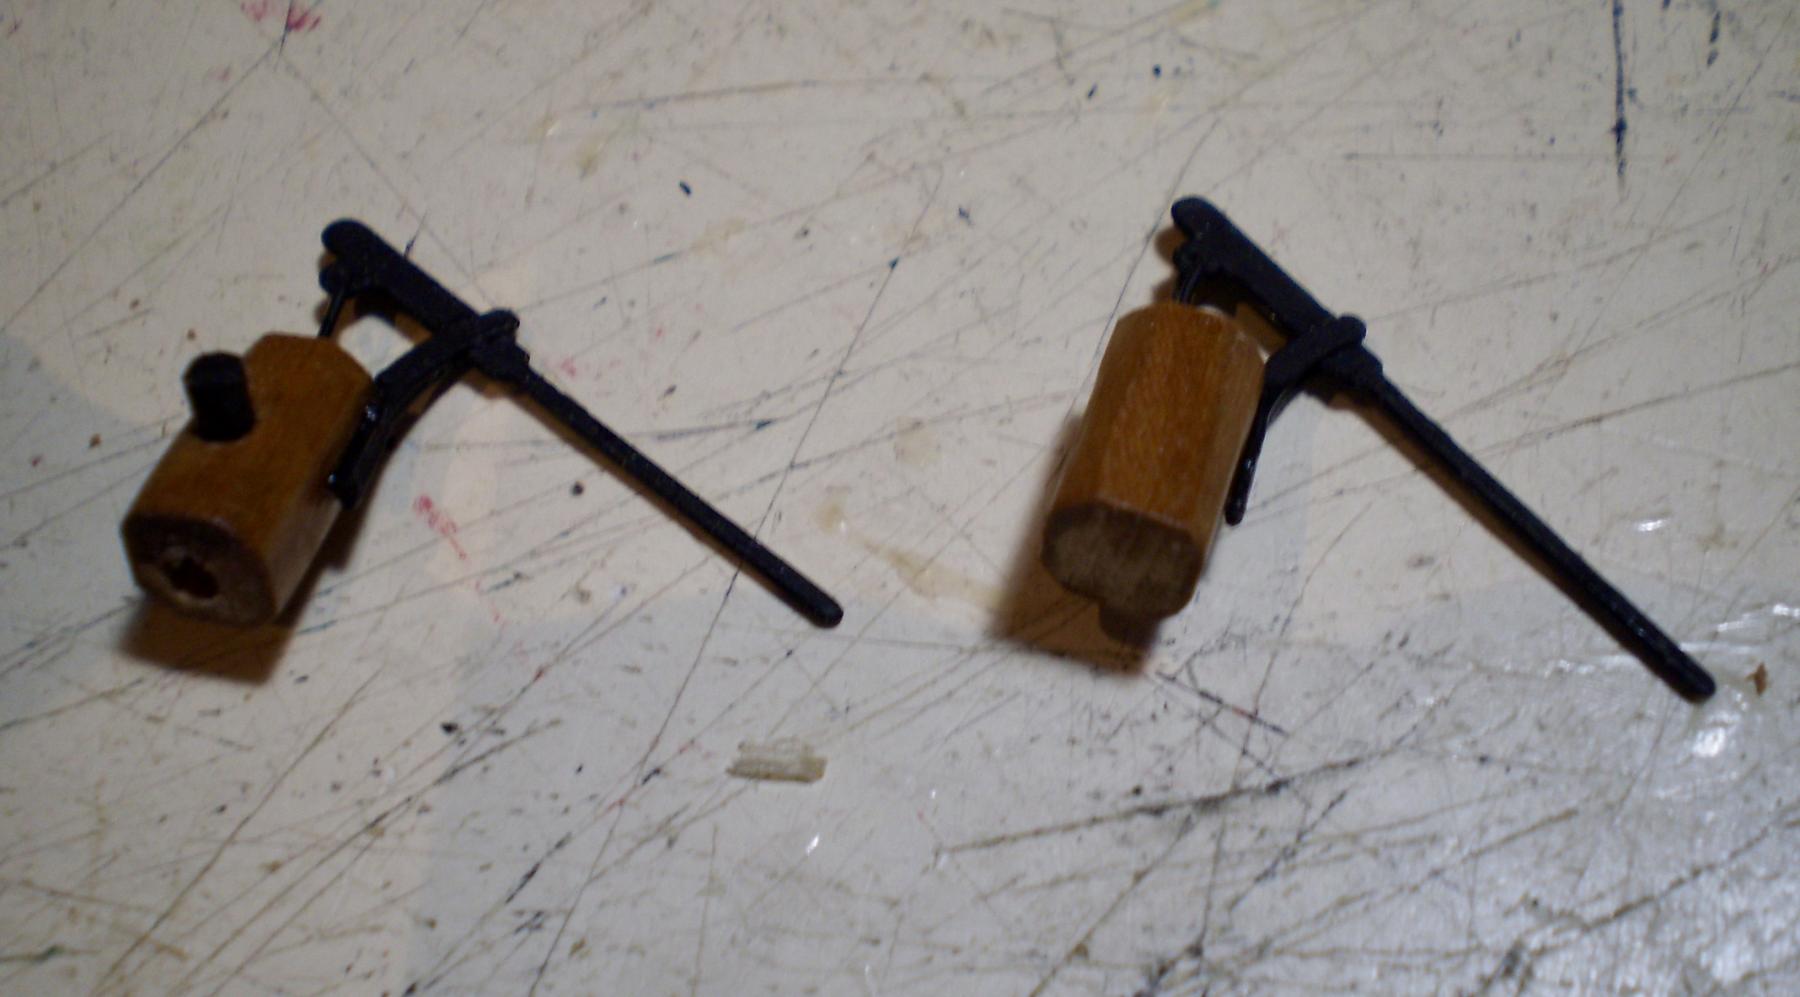
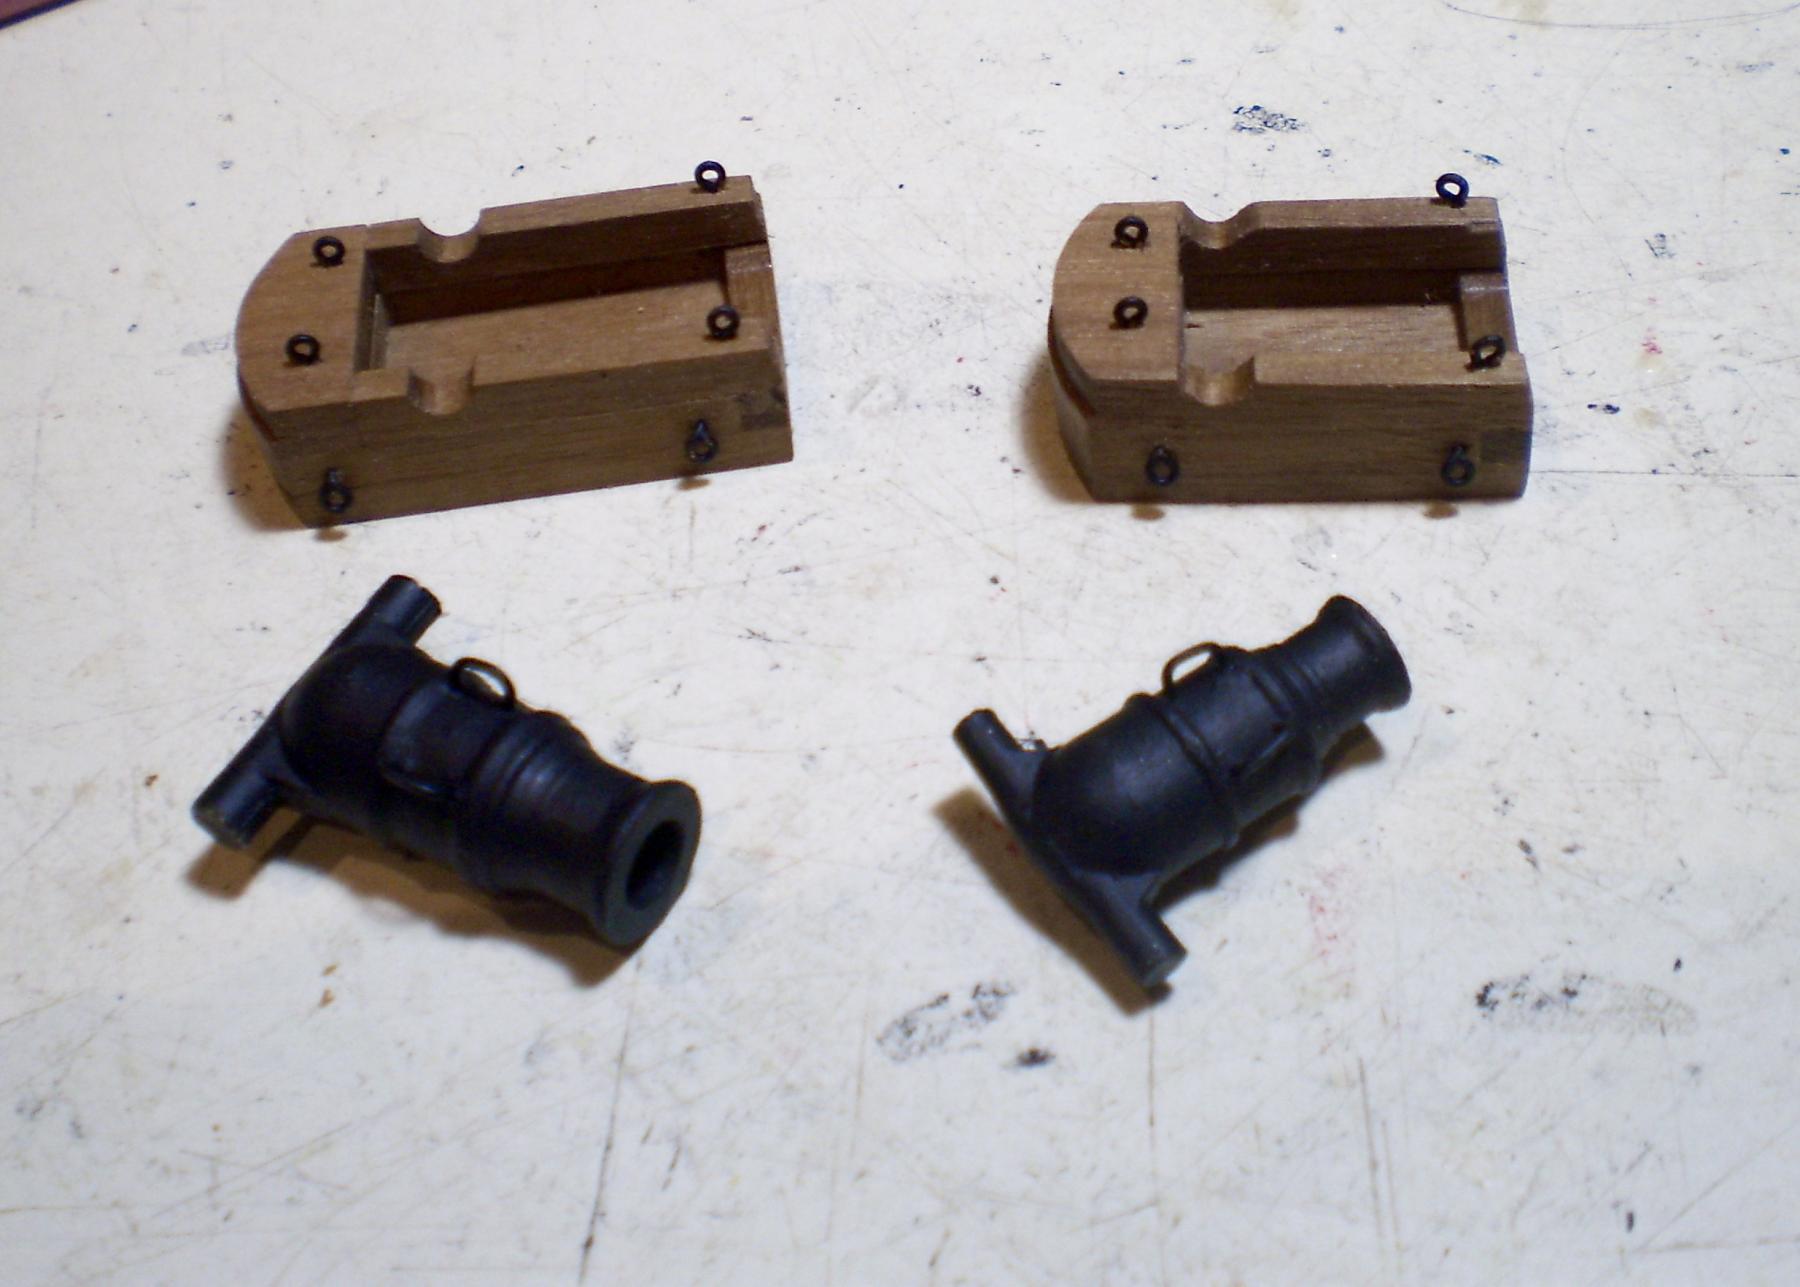
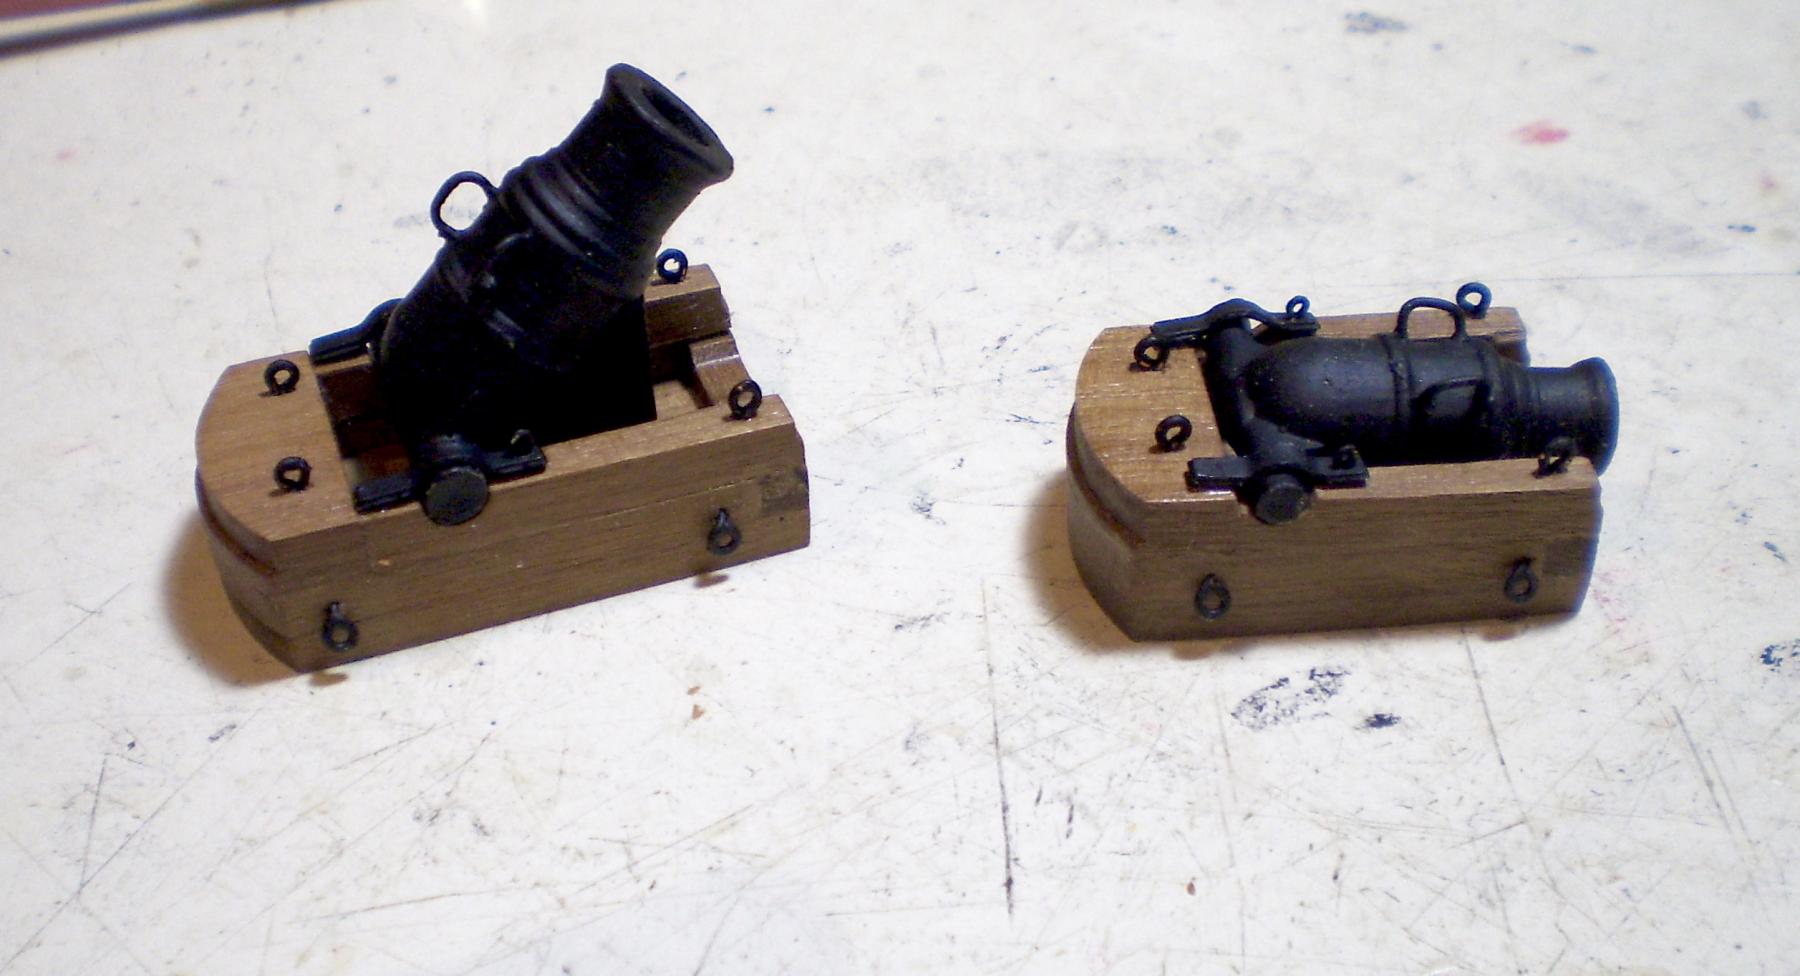
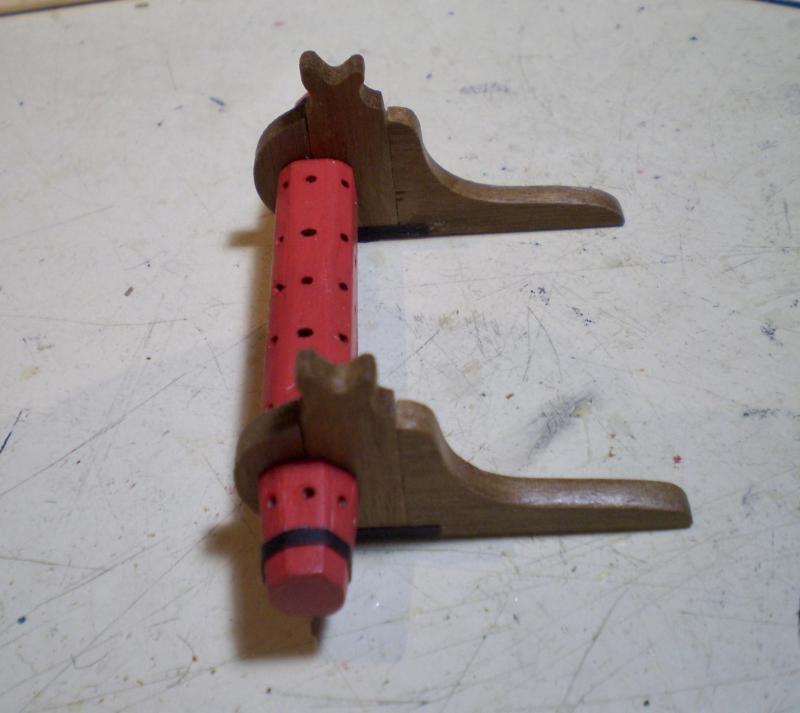
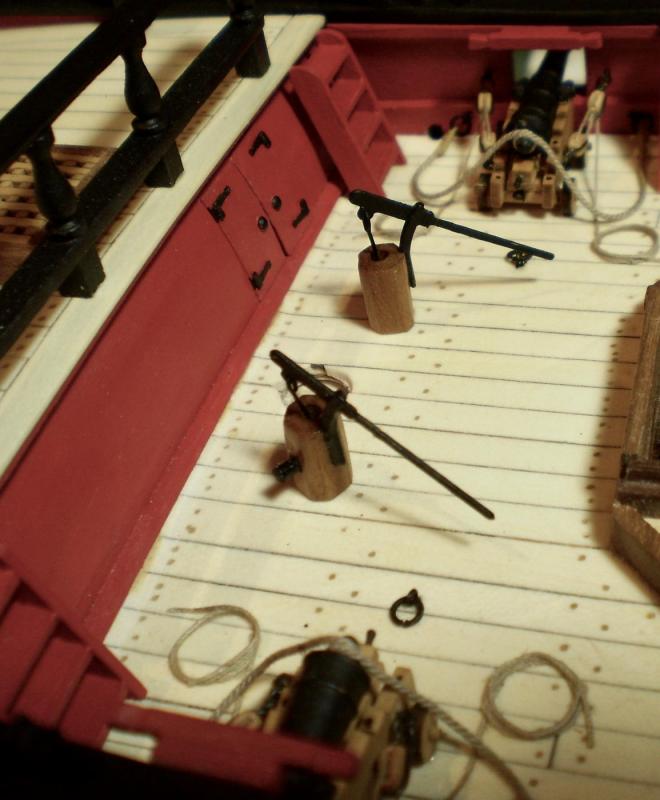
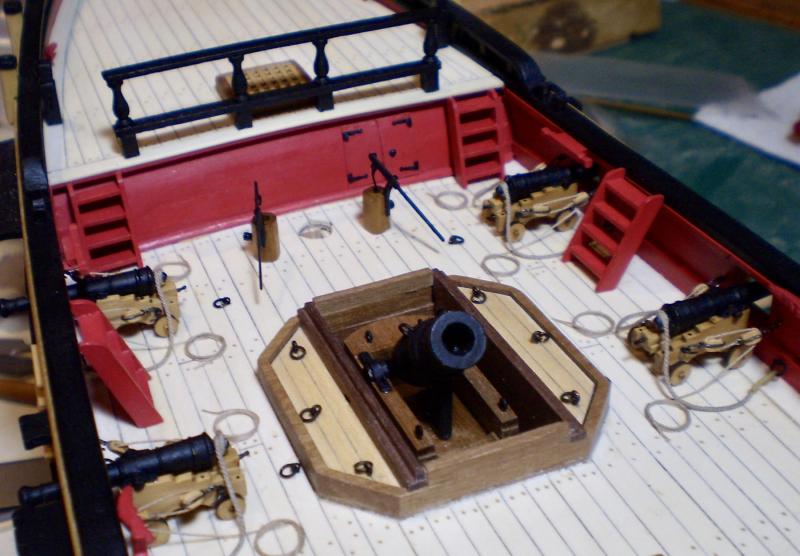
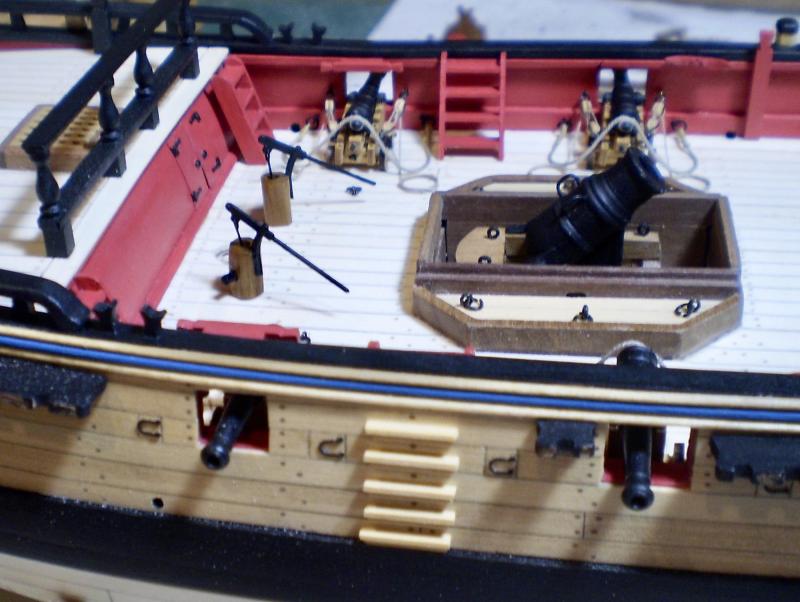
After completing work on the head, I wanted to do something less demanding (really, what wouldn't be ?}. I chose to do the two mortars. I used the kit's castings for the mortars, modified only by the addition of handles, as shown in AOTS. The handles were bent from wire. The mortar beds were also done with the kit parts, including eyebolts and the PE cap squares. I decided to show the mortars with one in a raised (firing) position and the other in a lowered (stowed) position. I'm now moving on to start the remainder of the main deck detailing. Bob


- 563 replies
-
- 28
-