rafine
-
Posts
2,932 -
Joined
-
Last visited
Content Type
Profiles
Forums
Gallery
Events
Everything posted by rafine
-
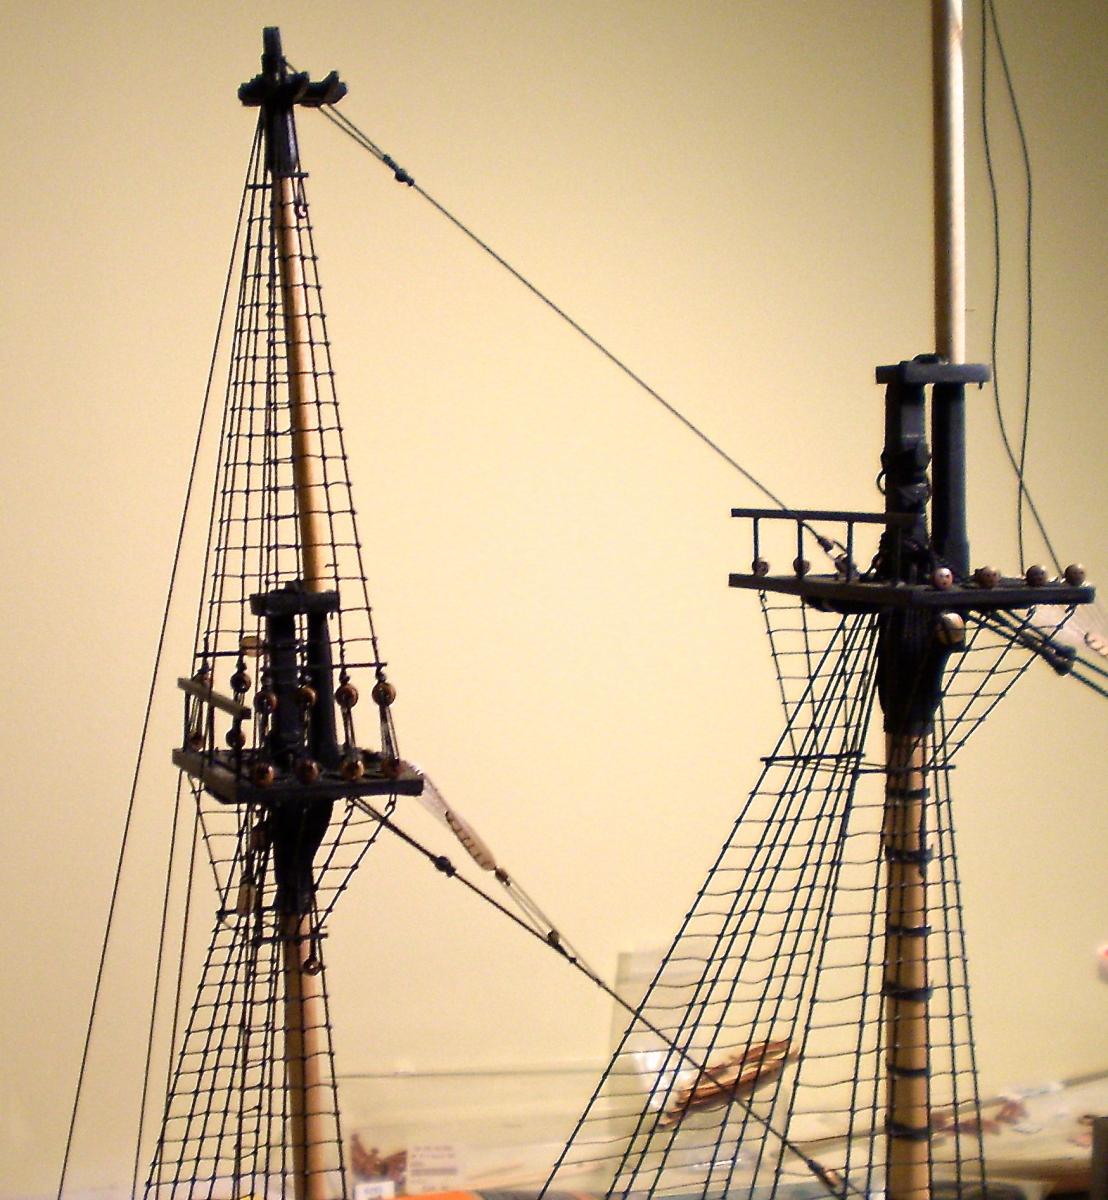
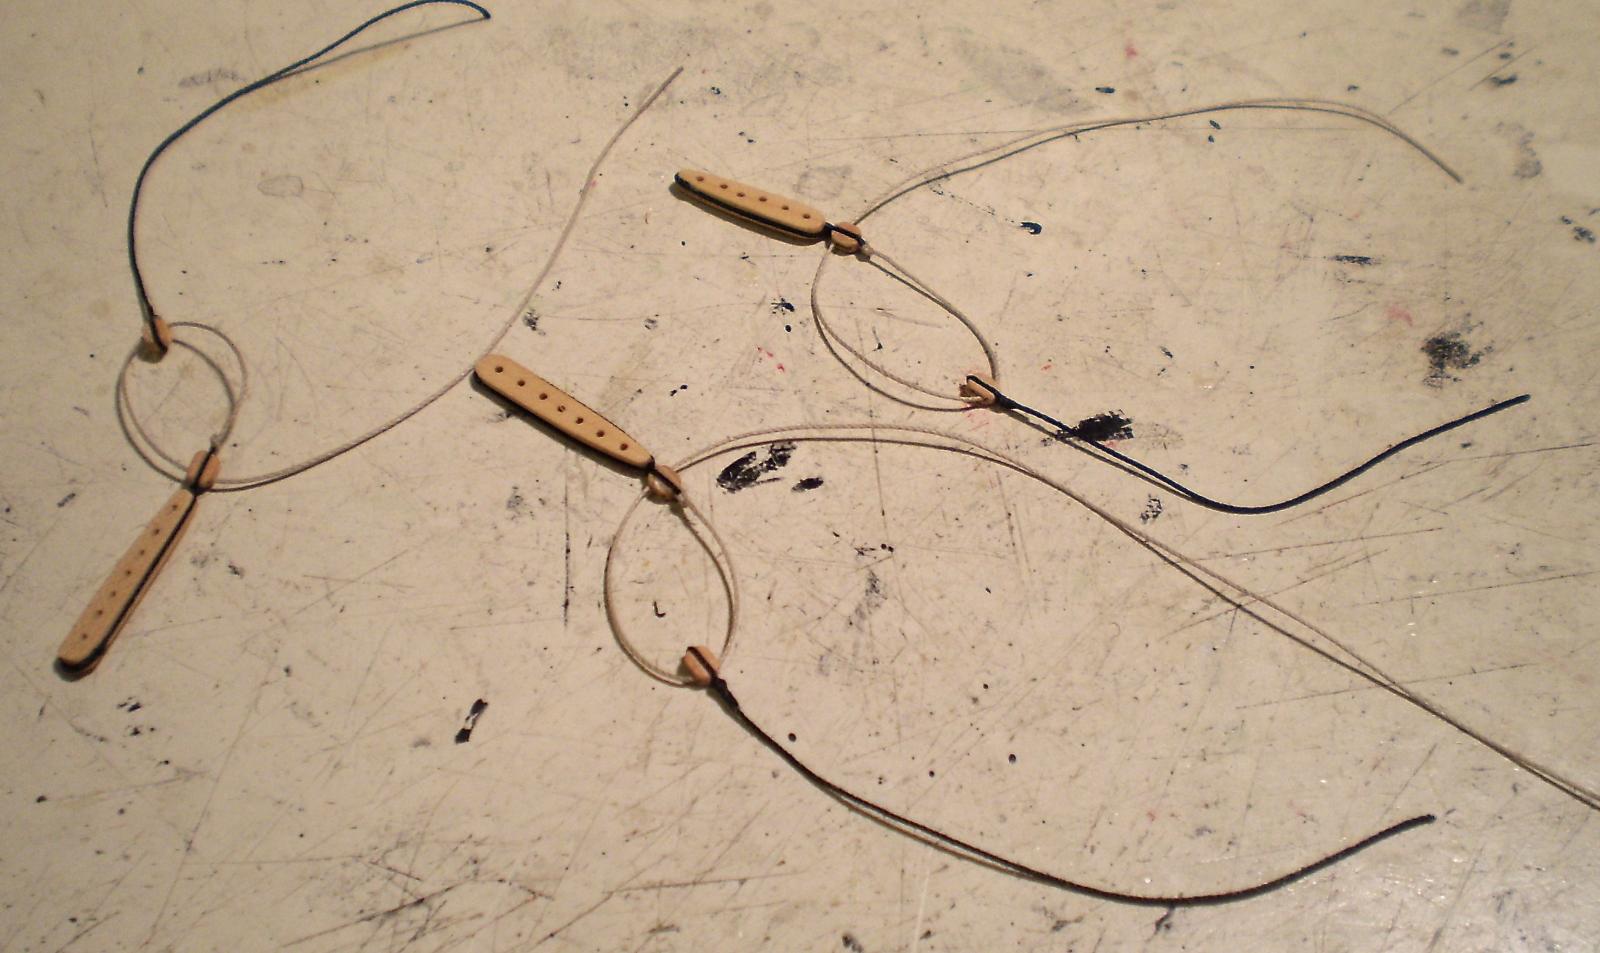
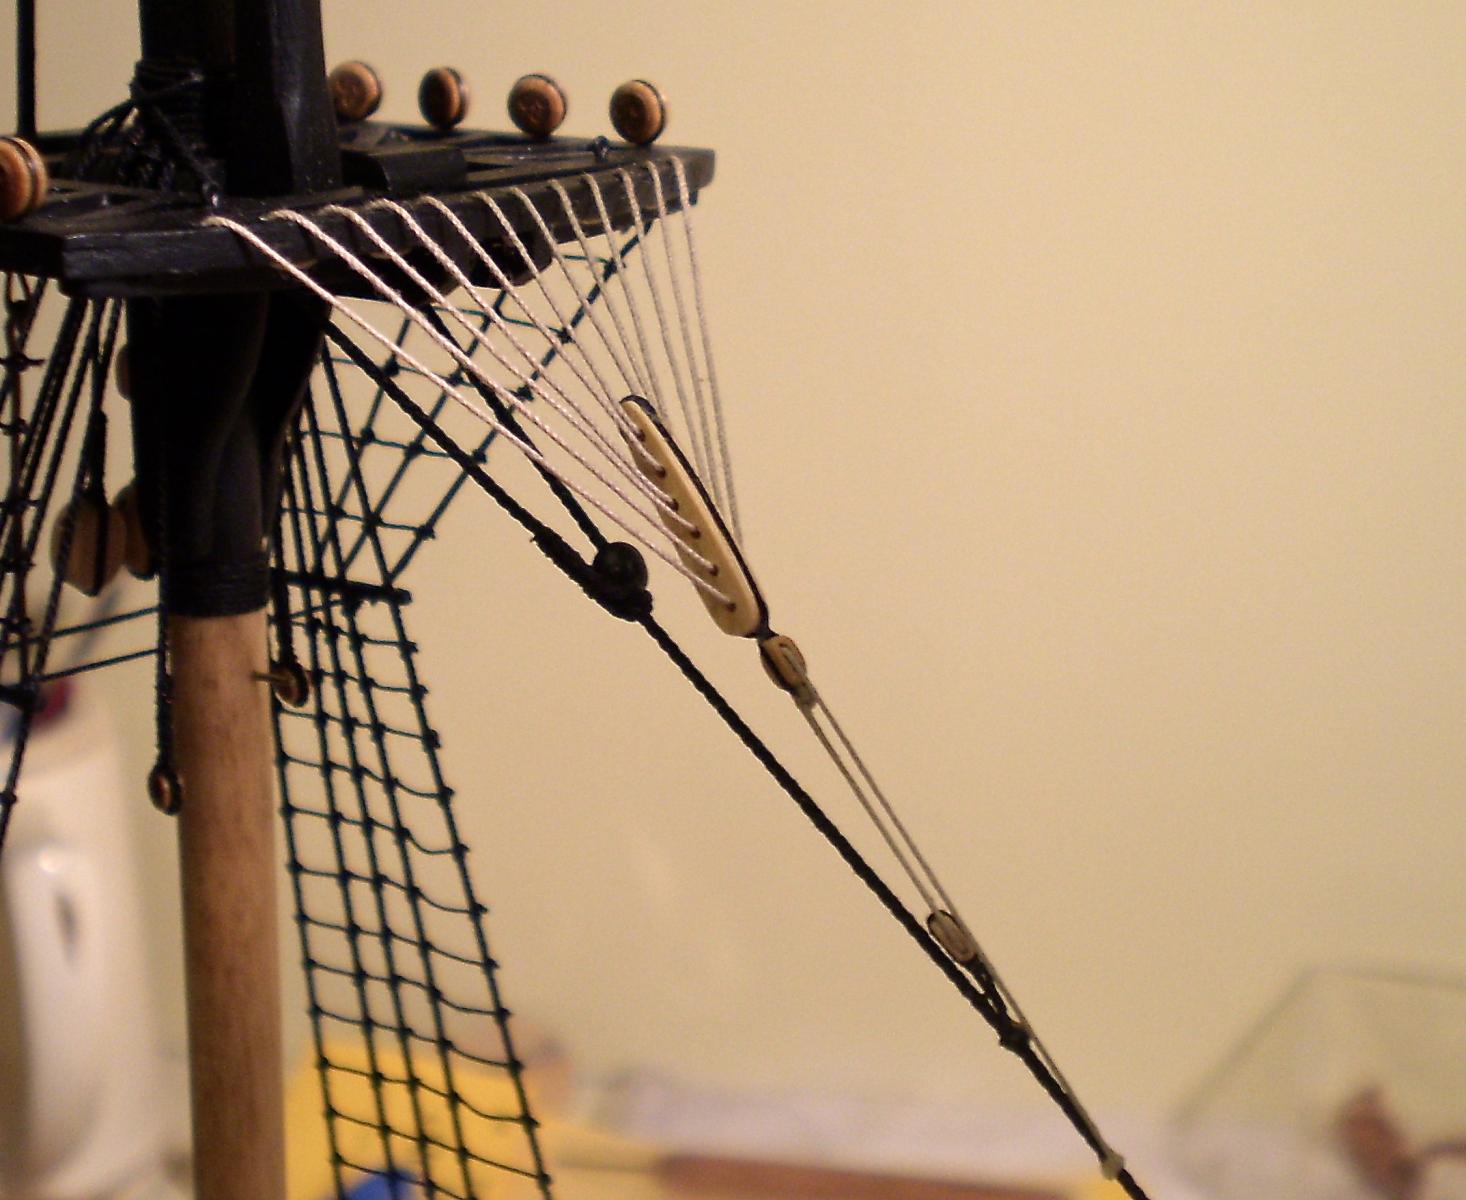
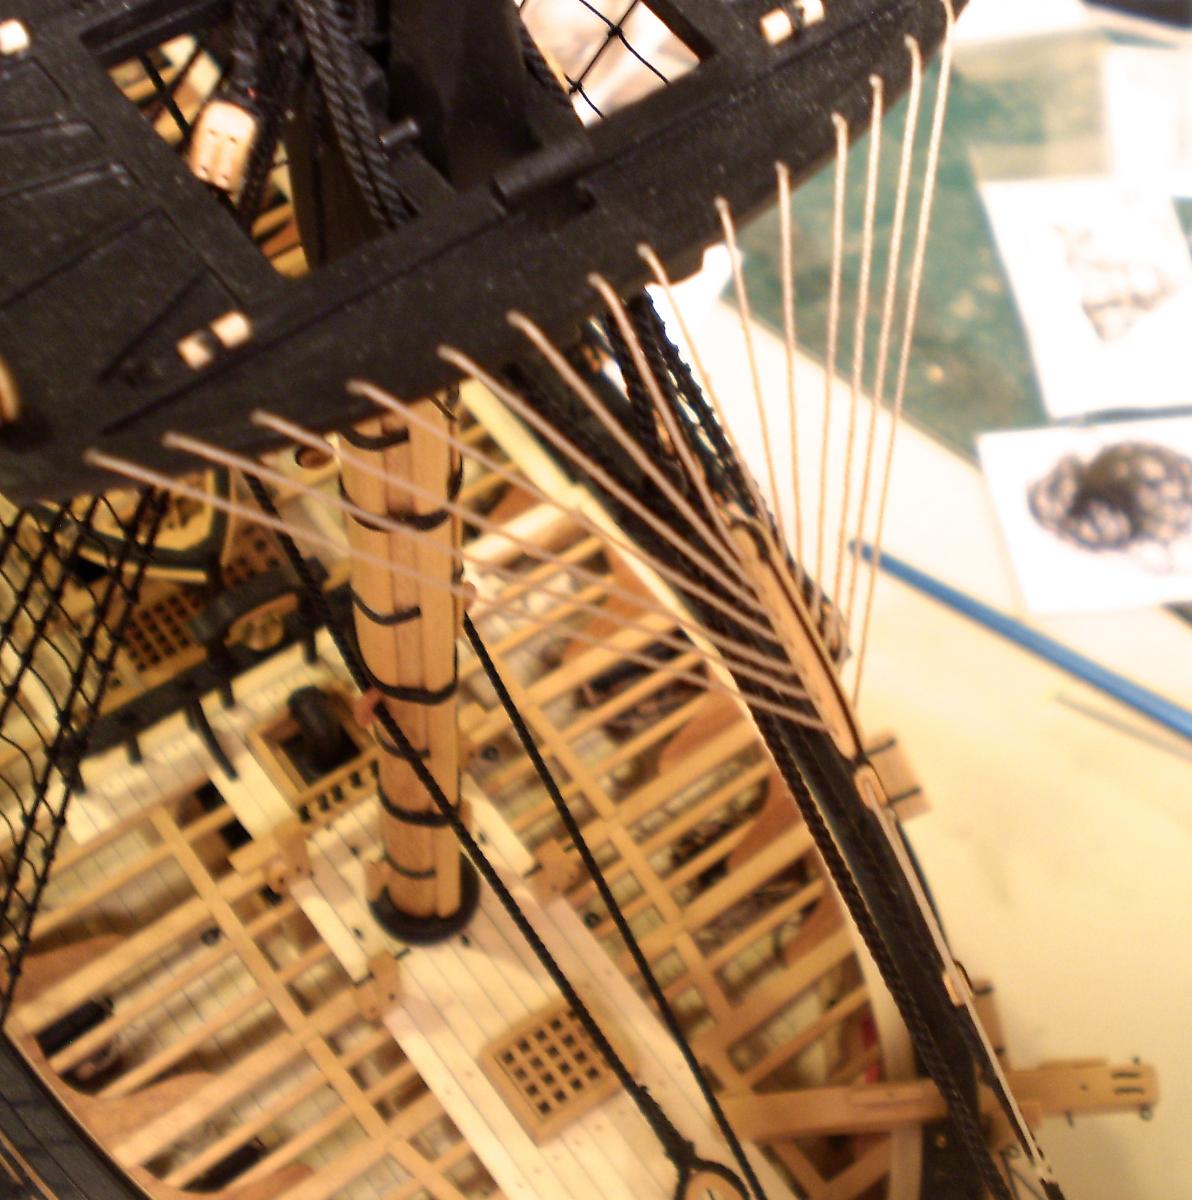
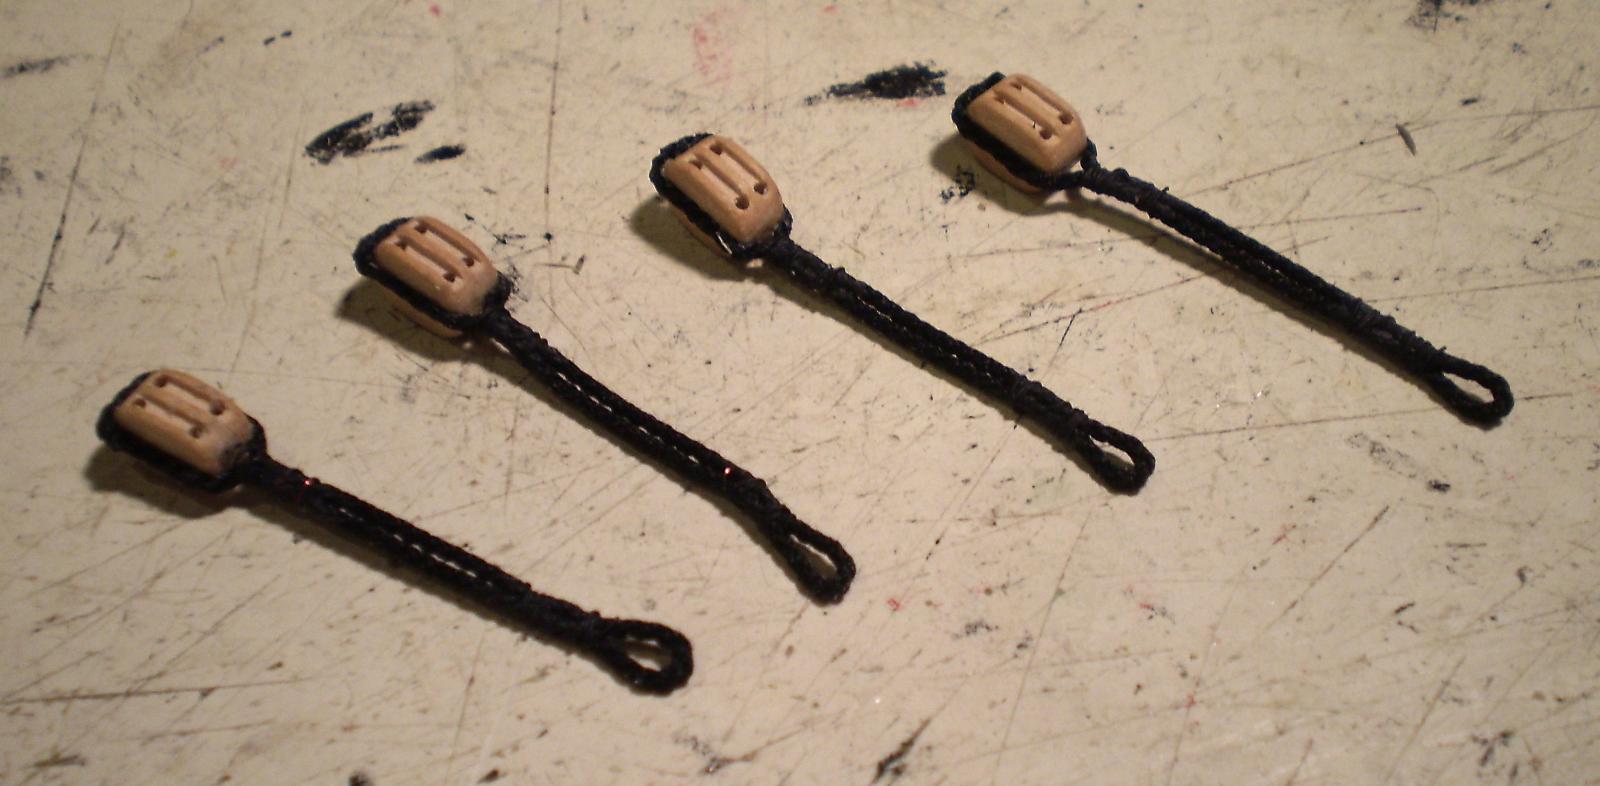
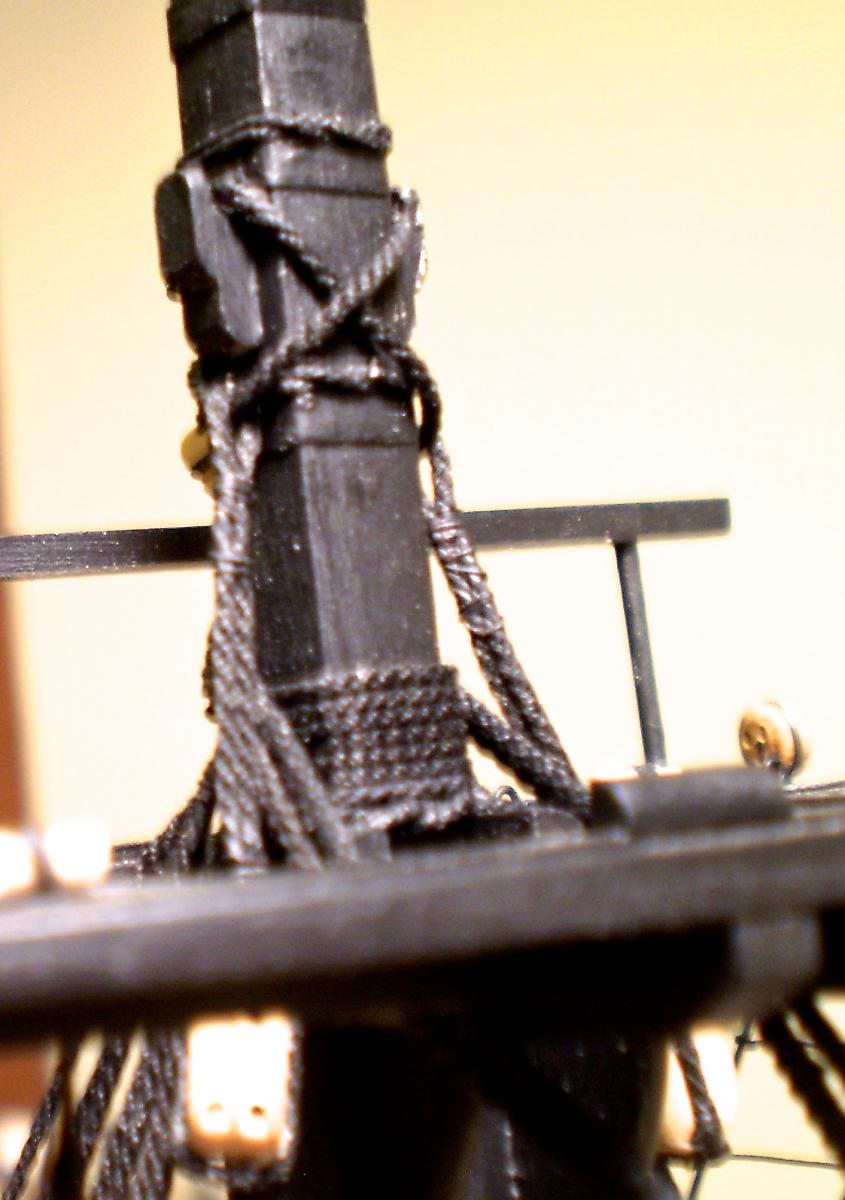
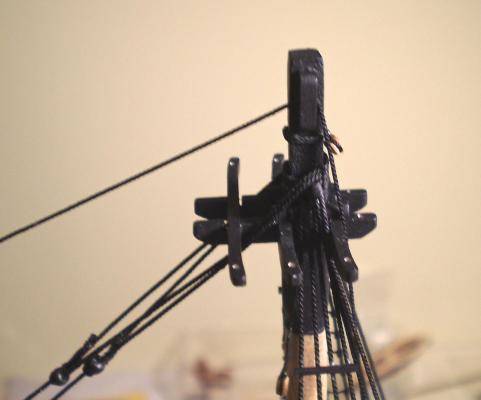
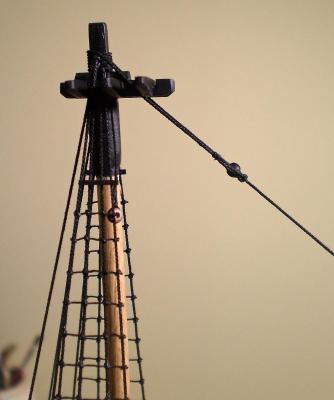
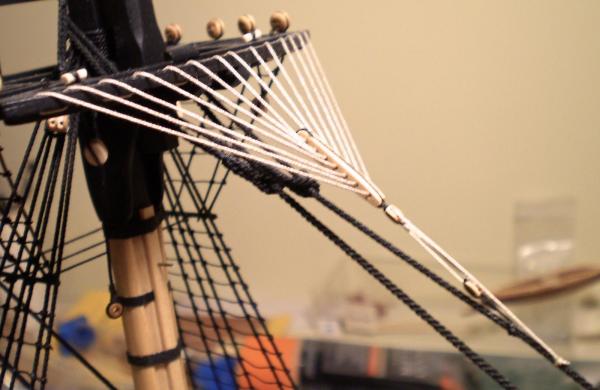
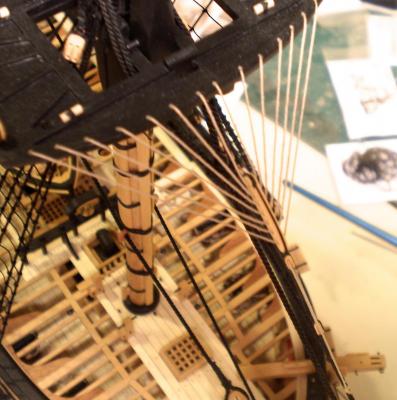
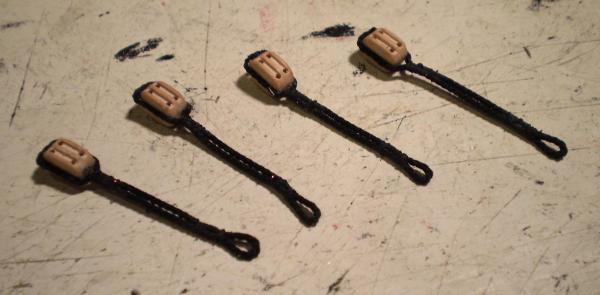
 Work on the main topmast rigging has now been completed. This included the shrouds and their sheer poles, futtock staves and ratlines, the backstays, the stay and preventer stay and the middle staysail stay. I also added a thimble seized to the masthead as a lead for the mizzen topgallant stay and cheek blocks to the masthead, one of which is used by the middle staysail stay, which then leads down to a tackle in the main top. The stay and preventer stay lead through blocks on the fore masthead and end in tackles at the base of the foremast. these tackles have long tackle blocks, for which I had obtained a fiddle block kit from Syren. After a couple of tries, I wasn't happy with the result, and ended up making my own from 2 sizes of single blocks. One other thing worthy of some note for those using Syren rigging line. Living in South Florida, most of the time we have air conditioning going, and only very rarely do we ever turn heat on. This past week or two, we had a cold spell (for us ), and turned the heat on a couple of times. The result was thet the rigging line in place on the model relaxed considerably. What was interesting, was that the actual temperature in the house was no higher than it normally would be with air conditioning on. When the heat was turned off, the rigging lines returned to their taut condition after a couple of hours. I can't explain why this happens, but I would say that the line is quite sensitive to environmental changes. I'm now working on the fore topmast rigging. Bob
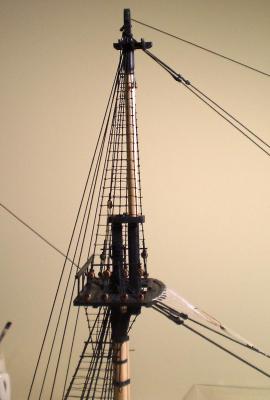

- 1,477 replies
-
- 19
-

-
- essex
- model shipways
- (and 1 more)
-
Work on the main topmast rigging has now been completed. This included the shrouds and their sheer poles, futtock staves and ratlines, the backstays, the stay and preventer stay and the middle staysail stay. I also added a thimble seized to the masthead as a lead for the mizzen topgallant stay and cheek blocks to the masthead, one of which is used by the middle staysail stay, which then leads down to a tackle in the main top. The stay and preventer stay lead through blocks on the fore masthead and end in tackles at the base of the foremast. these tackles have long tackle blocks, for which I had obtained a fiddle block kit from Syren. After a couple of tries, I wasn't happy with the result, and ended up making my own from 2 sizes of single blocks. One other thing worthy of some note for those using Syren rigging line. Living in South Florida, most of the time we have air conditioning going, and only very rarely do we ever turn heat on. This past week or two, we had a cold spell (for us ), and turned the heat on a couple of times. The result was thet the rigging line in place on the model relaxed considerably. What was interesting, was that the actual temperature in the house was no higher than it normally would be with air conditioning on. When the heat was turned off, the rigging lines returned to their taut condition after a couple of hours. I can't explain why this happens, but I would say that the line is quite sensitive to environmental changes. I'm now working on the fore topmast rigging. Bob
- 1,477 replies
-
- 2
-
-
- essex
- model shipways
- (and 1 more)
-
Thanks so much Wes for the kind words. I have no doubt, based on the precision of your work, that you will "know how to rig" when you get there. Bob
- 1,477 replies
-
- 1
-
-
- essex
- model shipways
- (and 1 more)
-
Thanks so much Jim, Thomas and the"likes". I don't know about being a master, Thomas, but I do enjoy doing the rigging. Bob
-
Thanks so much Augie, Sjors and all of the "likes". I truly appreciate your continuing interest. You're certainly right about that dust Sjors. Almost time for the soft brush and the vacuum. Bob
- 1,477 replies
-
- 1
-
-
- essex
- model shipways
- (and 1 more)
-
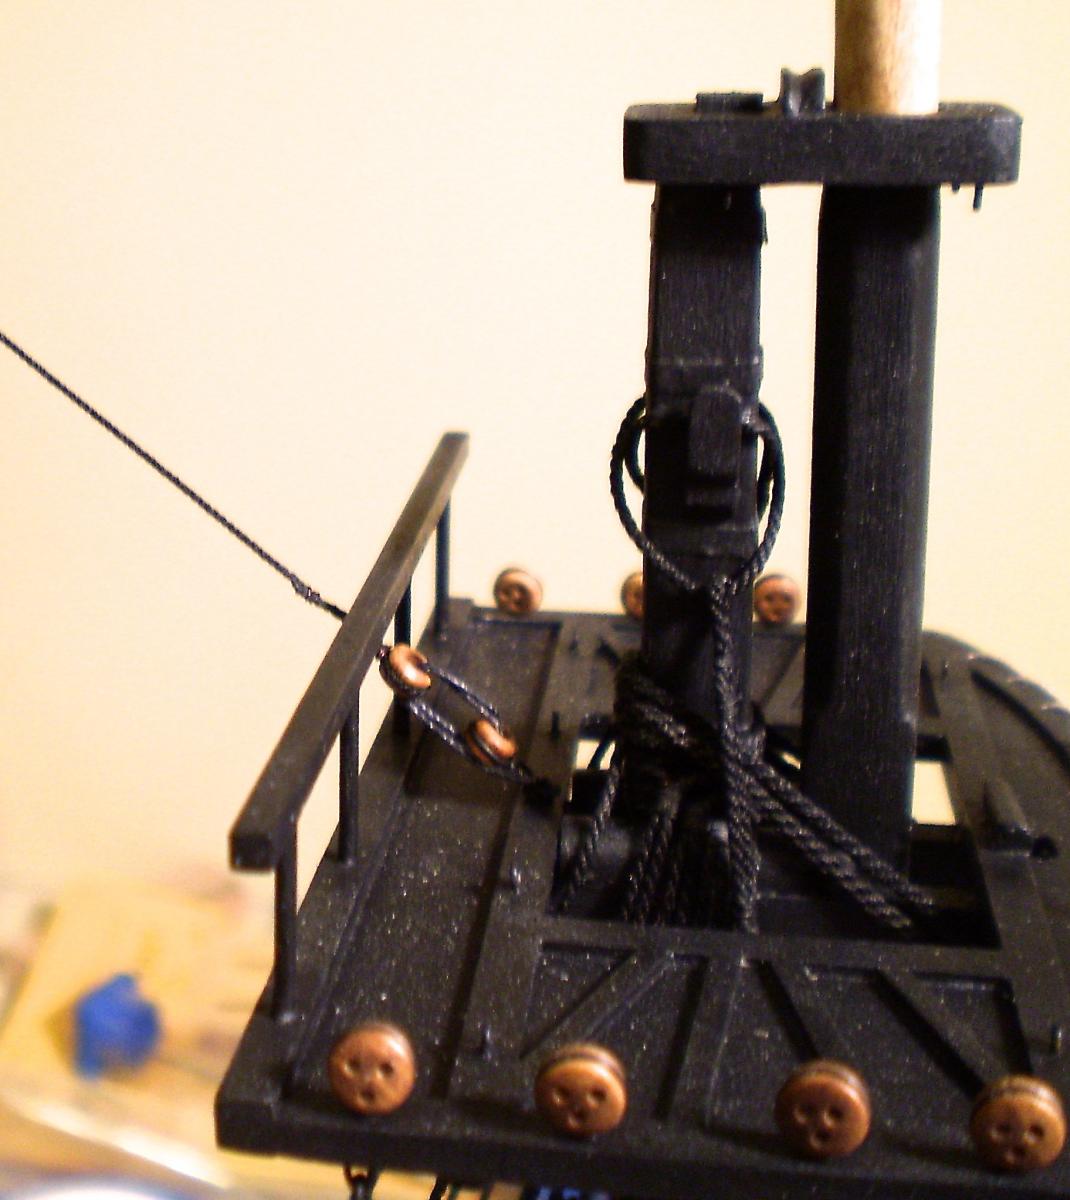
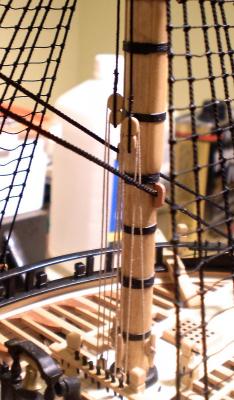
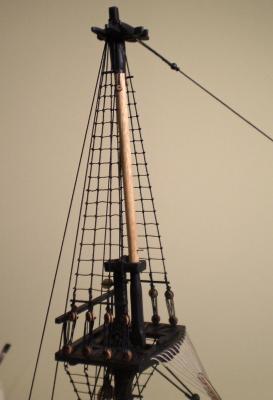
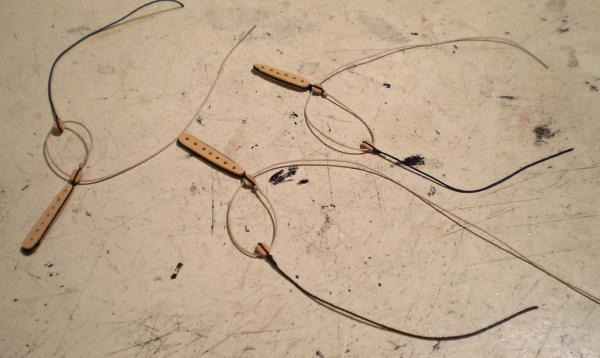
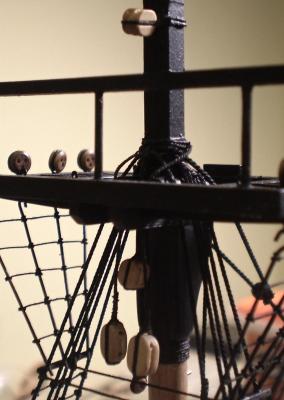
Work on the topmast rigging is underway, with the mizzen completed. This involved doing the burton pendants, the shrouds with their sheer poles, futtock staves and ratlines, the backstays and the stay. I had to do the ratlines right after the shrouds because putting the backstays in place would have made it very difficult to to do the ratlines. The mouse on the stay is simulated with a small bead. The lower end of the stay is attached to an eyebolt in the main top with thimbles and a lanyard. I'm now working on the main topmast rigging. Bob


- 1,477 replies
-
- 23
-
-
- essex
- model shipways
- (and 1 more)
-
Thanks so much Ben and the "likes". Bob
-
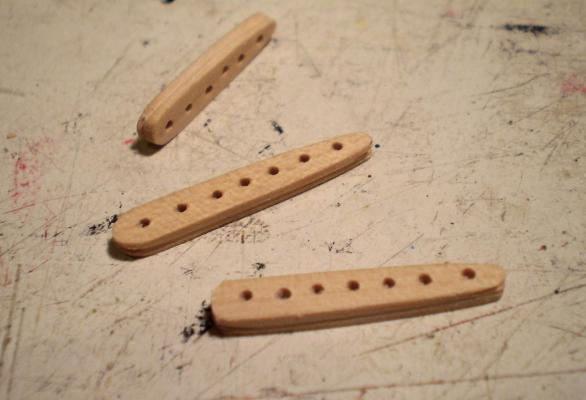
Thanks so much John and Martin and the "likes". No jig Martin. As I've said before, I'm the definition of low tech. I drew a line, made some dots and hoped that I drilled on the dots. Bob
- 1,477 replies
-
- 4
-
-
- essex
- model shipways
- (and 1 more)
-
Thanks so much Mobbsie for the very generous comment and thanks also to the "likes". Bob
-
Thanks so much Sjors, Augie and Captain Steve and the "likes". Always appreciated. Bob
-
Thanks so much Grant, Nils and Tim for the nice comments and also to the "likes". Bob
- 1,477 replies
-
- 1
-
-
- essex
- model shipways
- (and 1 more)
-
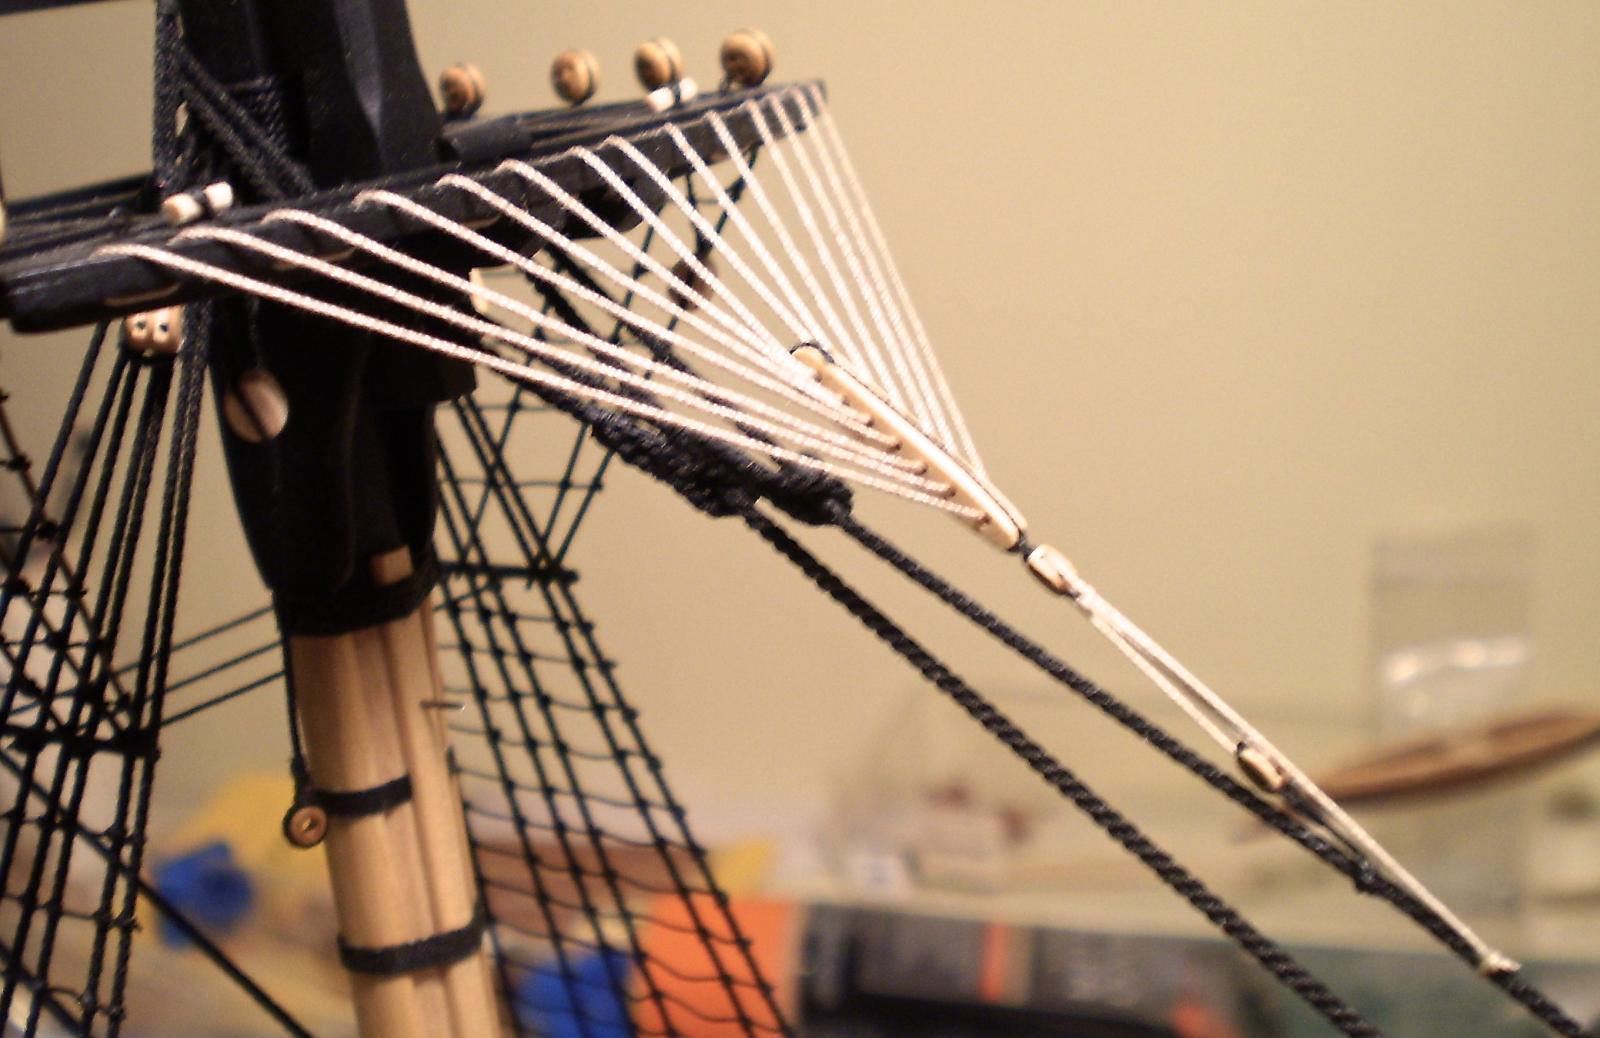
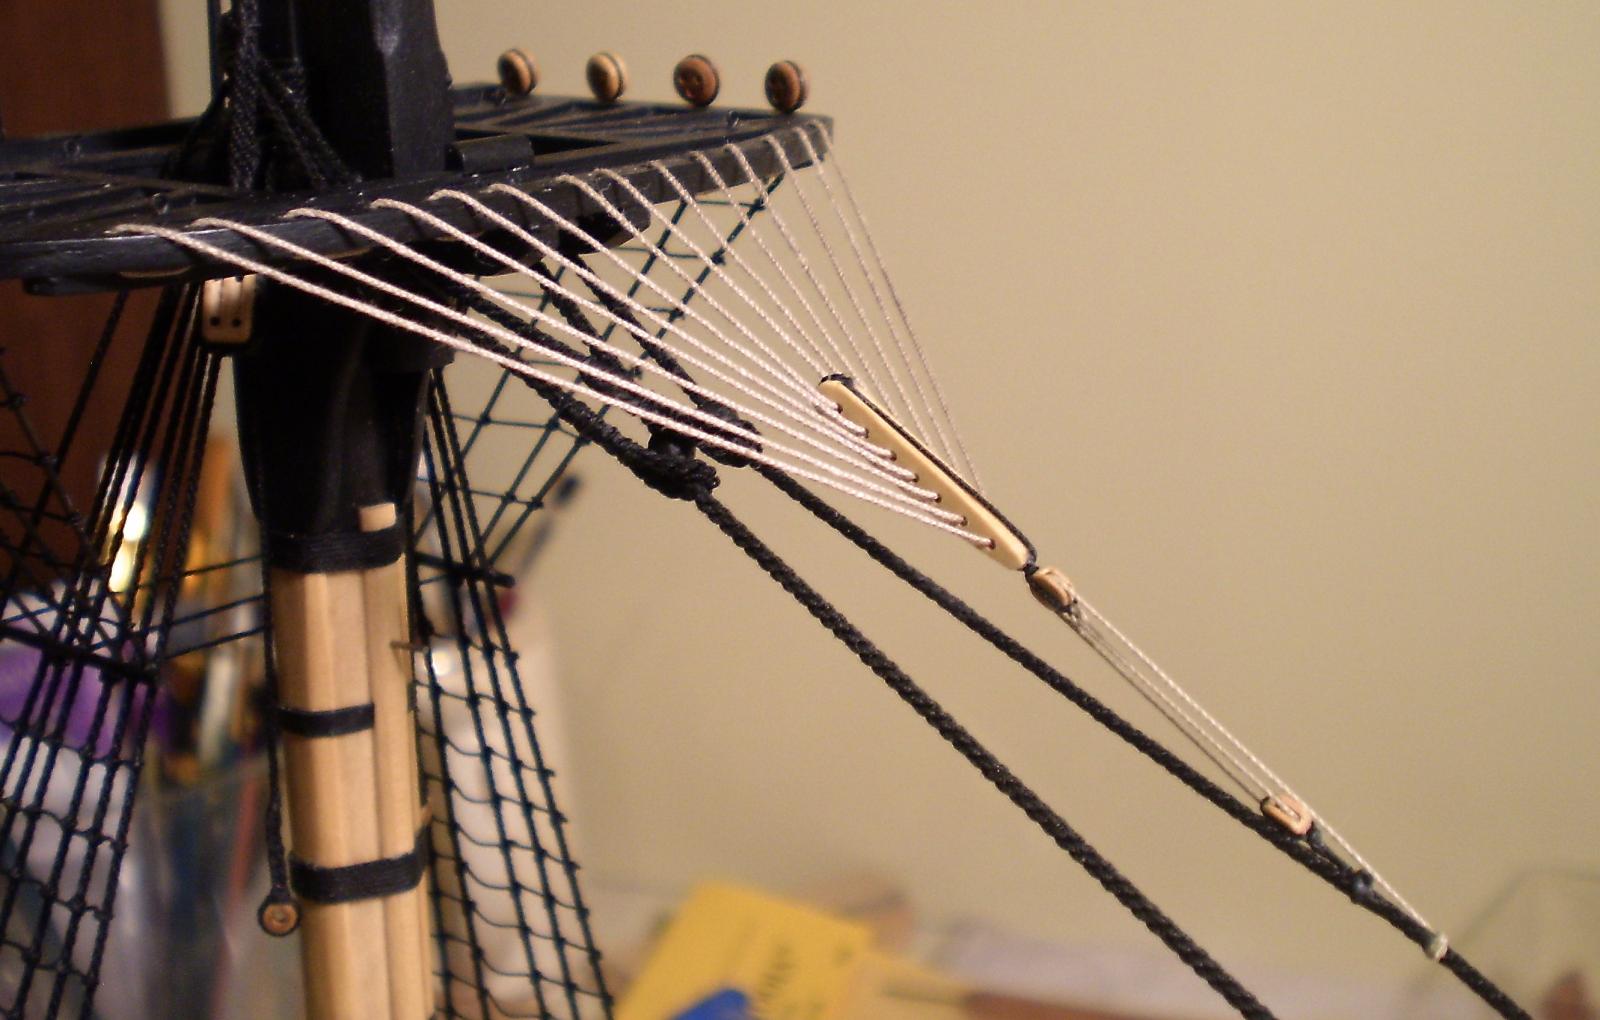
Like the ratlines, it has been a long time since I last did crowsfeet, but absence did not make the heart grow fonder. They were as much of a pain as I remembered. Minimizing distortion of the stays while getting the lines taut is the hardest part for me. They are done now, however, and its on to the topmast rigging. BTW, the photos make the rigging line look whiter and brighter than it is. It is Syren tan line and looks very good in reality. Bob


- 1,477 replies
-
- 30
-
-
- essex
- model shipways
- (and 1 more)
-
It's looking absolutely fantastic Nils. Masterful work. Bob
-
Until I saw the photos with your hands on the frames, it didn't really hit me just how big this model is going to be. It's coming along great. Bob
-
It looks great Sjors. I agree that you shouldn't worry about the deck color. Bob
- 1,616 replies
-
- 3
-
-
- caldercraft
- agamemnon
- (and 1 more)
-
Thanks so much Tim and all of the "likes". Yes Tim, they are Syren blocks (and rigging line as well). Bob
-
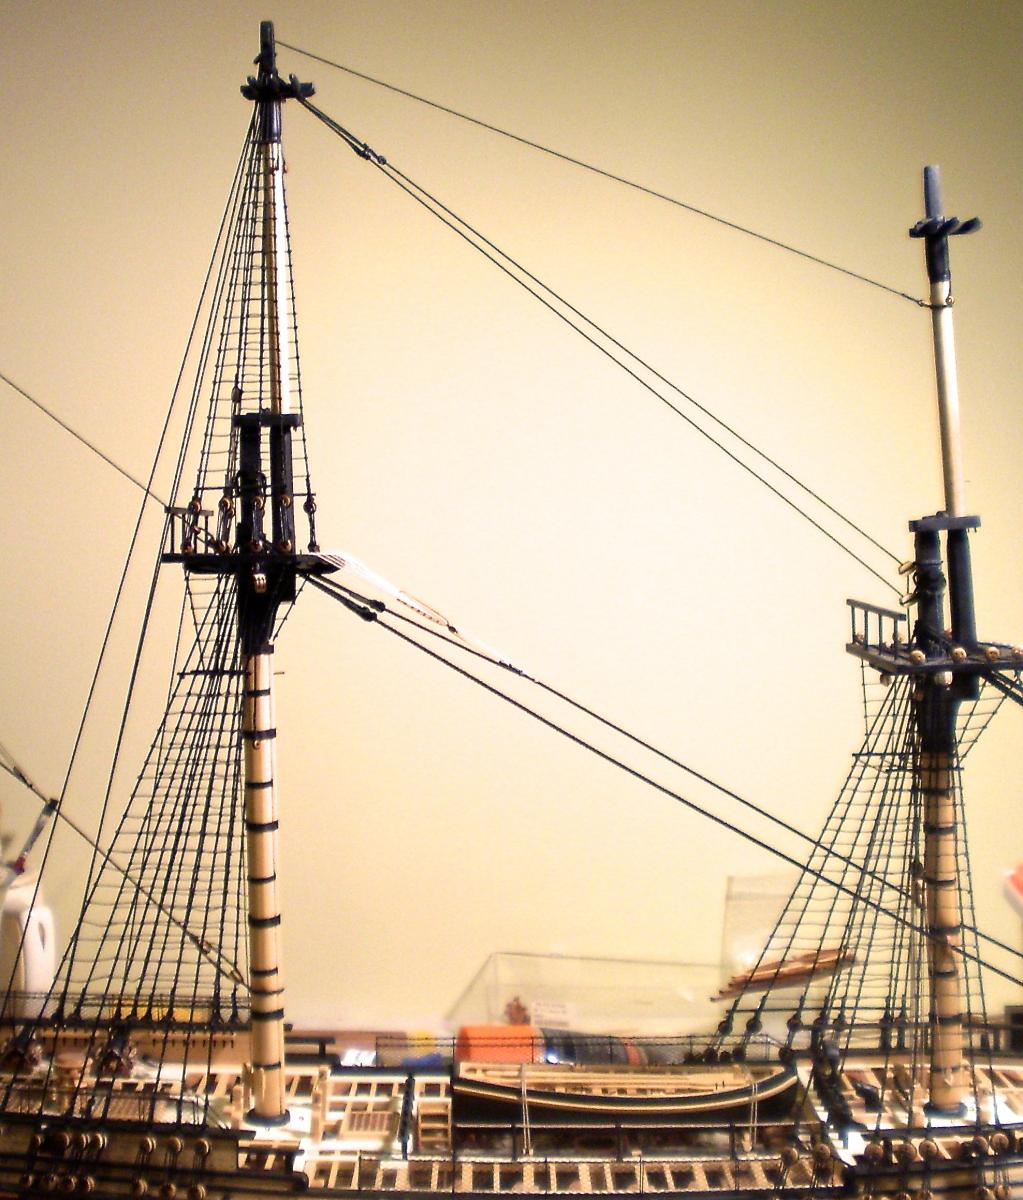
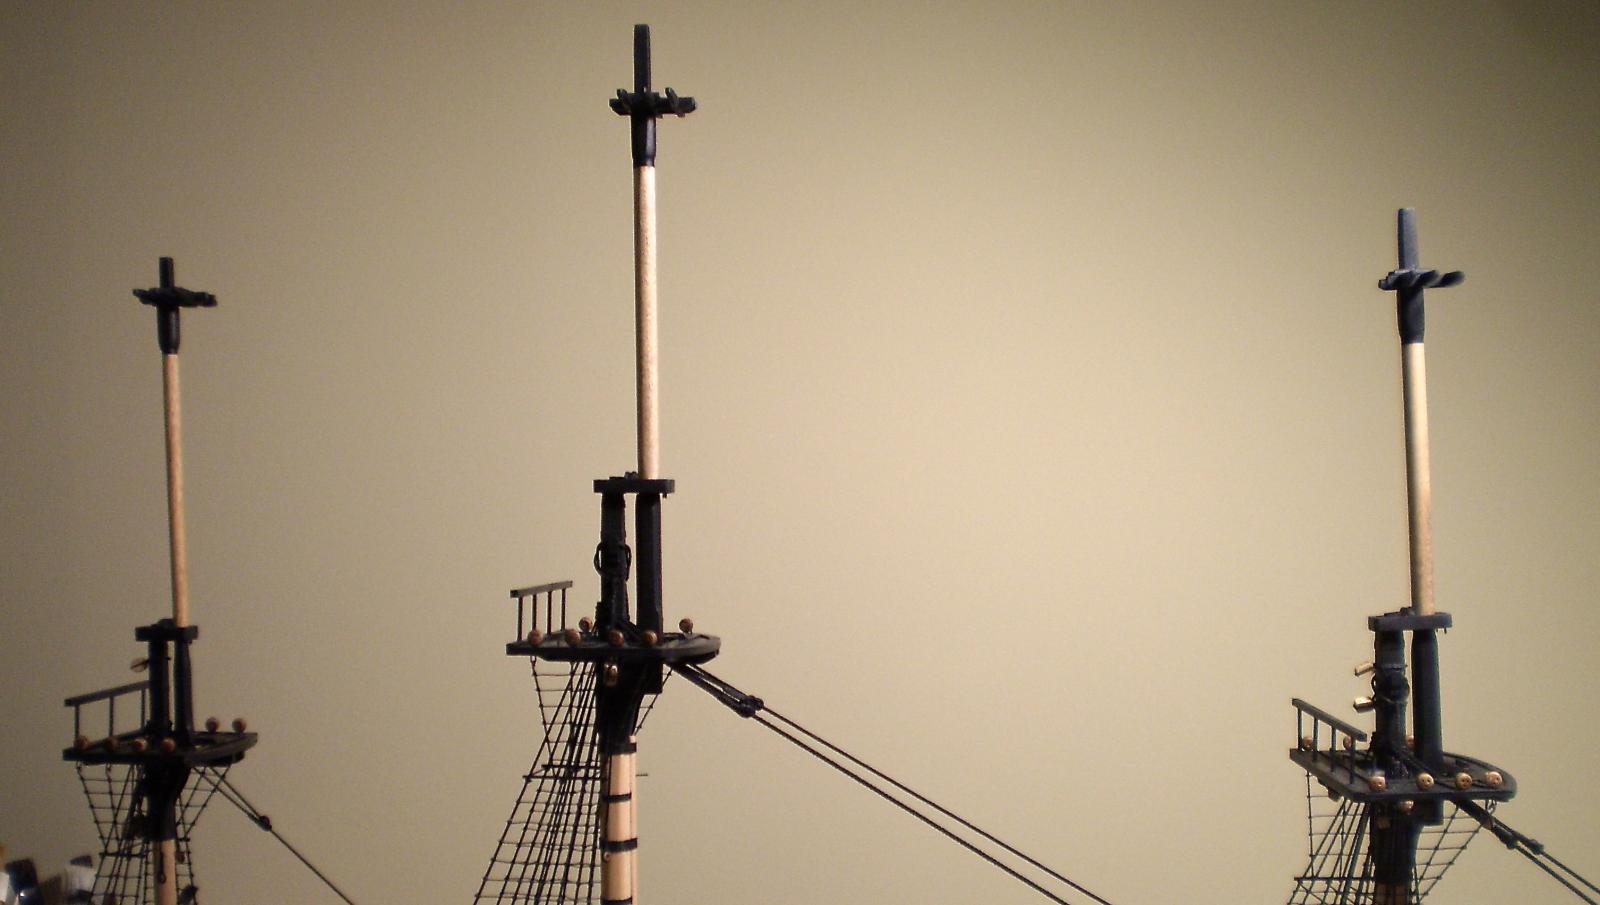
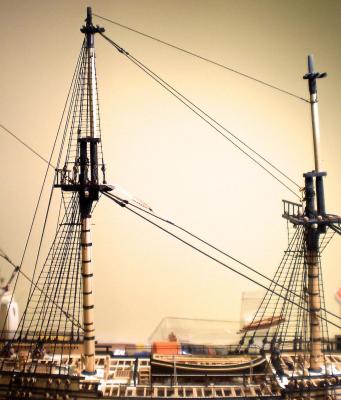
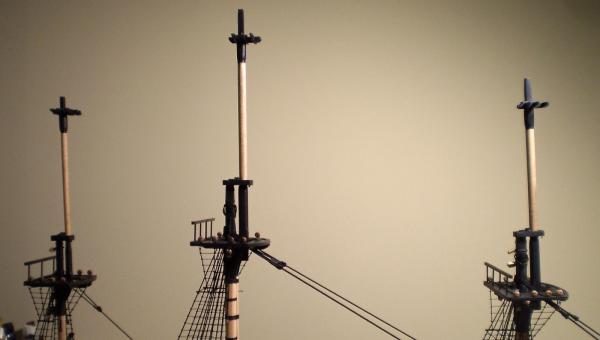
Following up my last update, I made and mounted the trestletree/crosstrees on the topmasts. Before mounting the topmasts on the model, I added blocks that I hadn't previously attached to the lower mastheads.These were the the jeer blocks, with their strops, to the fore and main masts, and the boom topping lift blocks and the peak and throat halliard blocks to the mizzen. I then mounted the topmasts. I'm working on the crows feet now. Bob

- 1,477 replies
-
- 21
-
-
- essex
- model shipways
- (and 1 more)
-
Thanks so much Grant and Thomas. Greatly appreciated. Bob
-
Thanks so much Augie, John and the "likes". It would probably be nice to have the mill and the lathe (no place to store or use them ) but it's nice to know that you can get things done without them. Bob
-
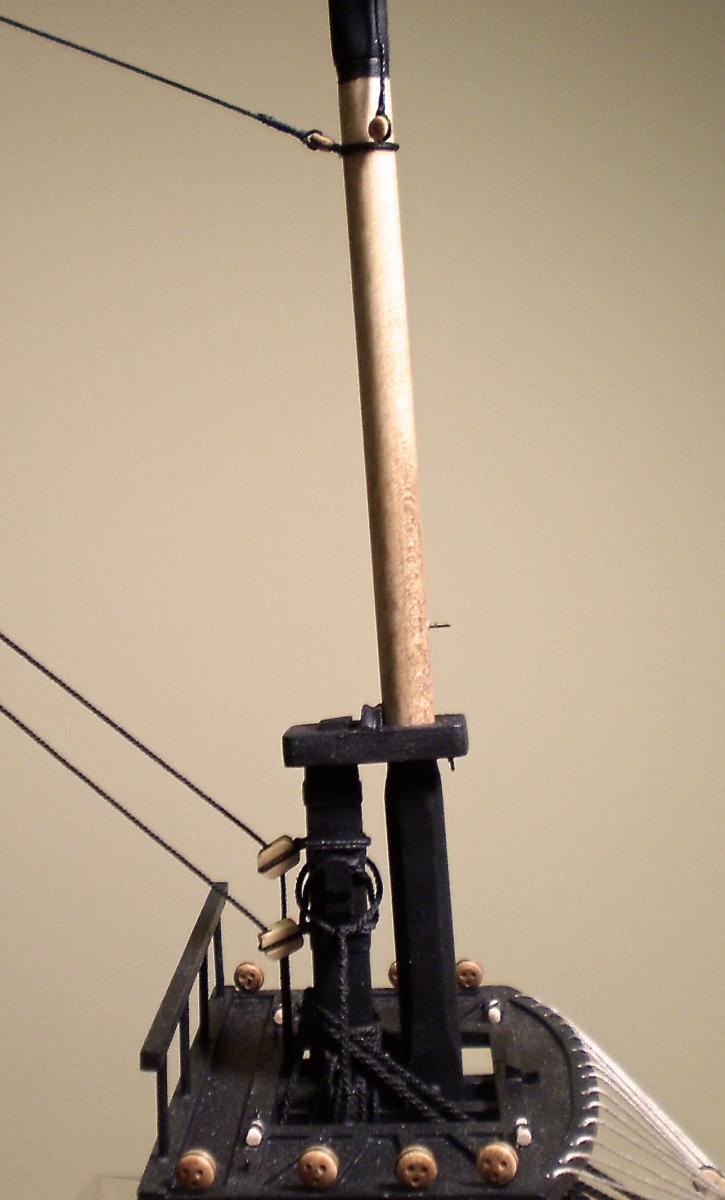
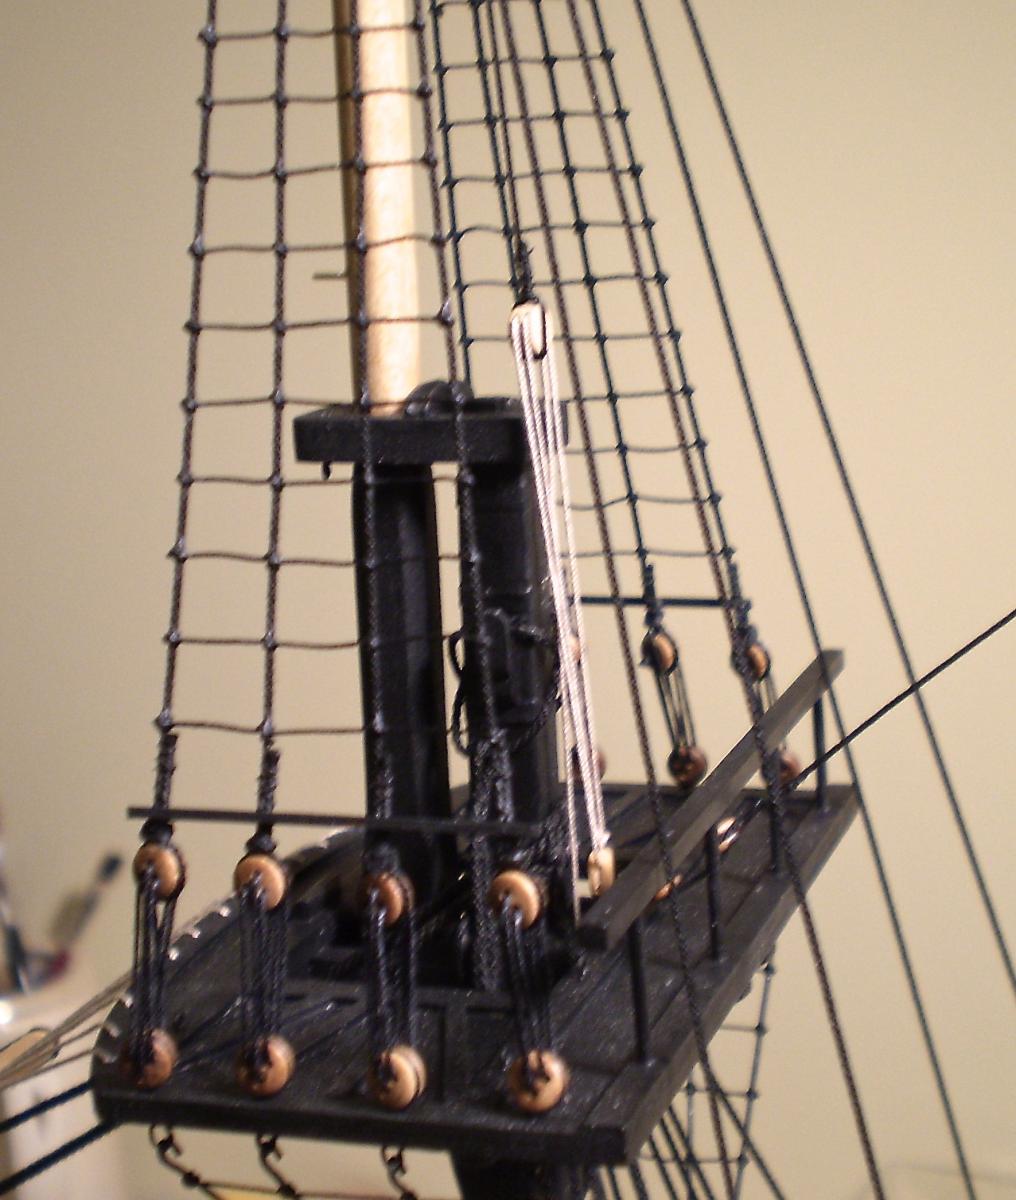
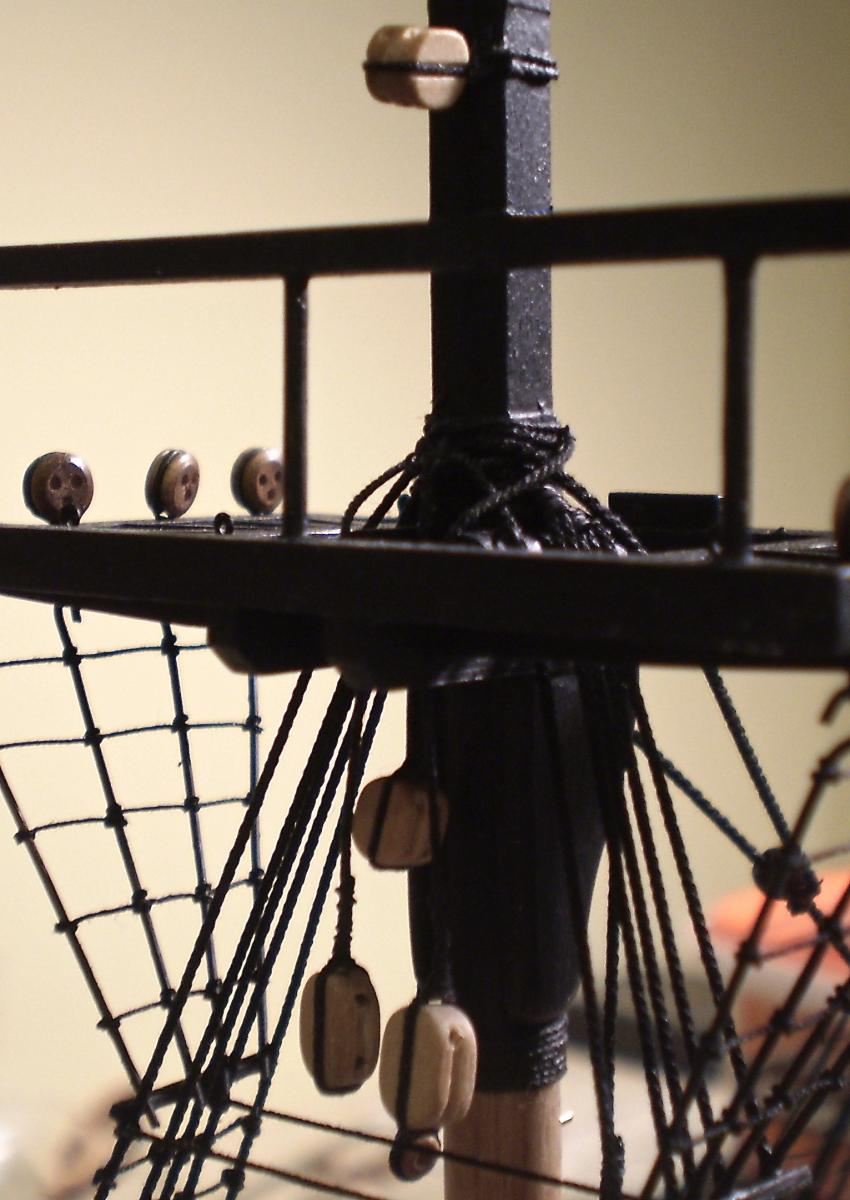
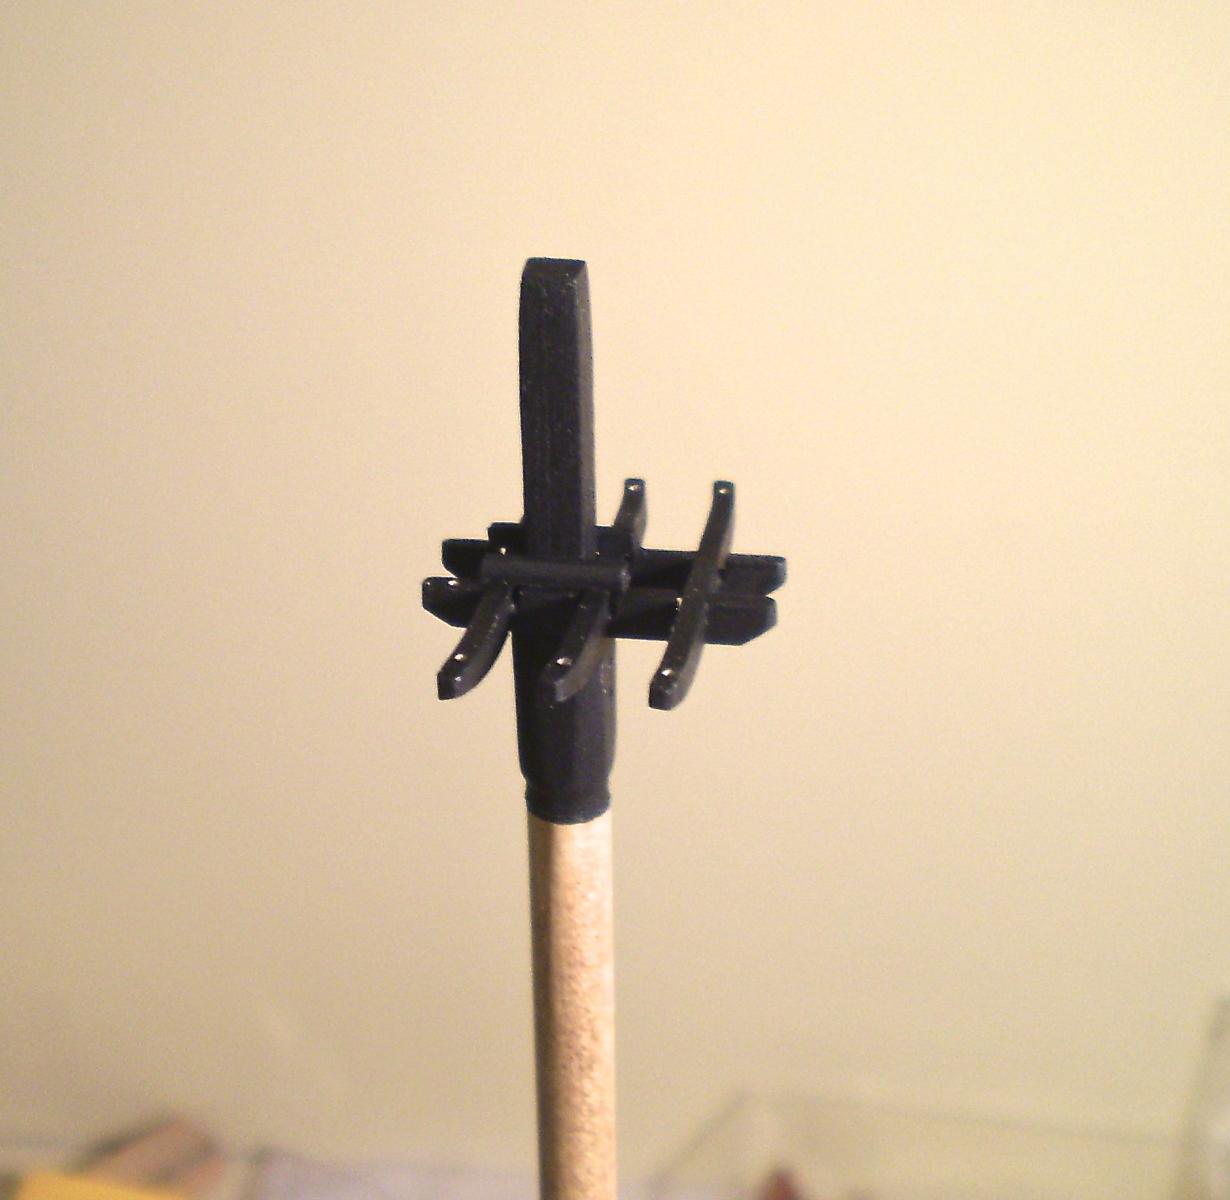
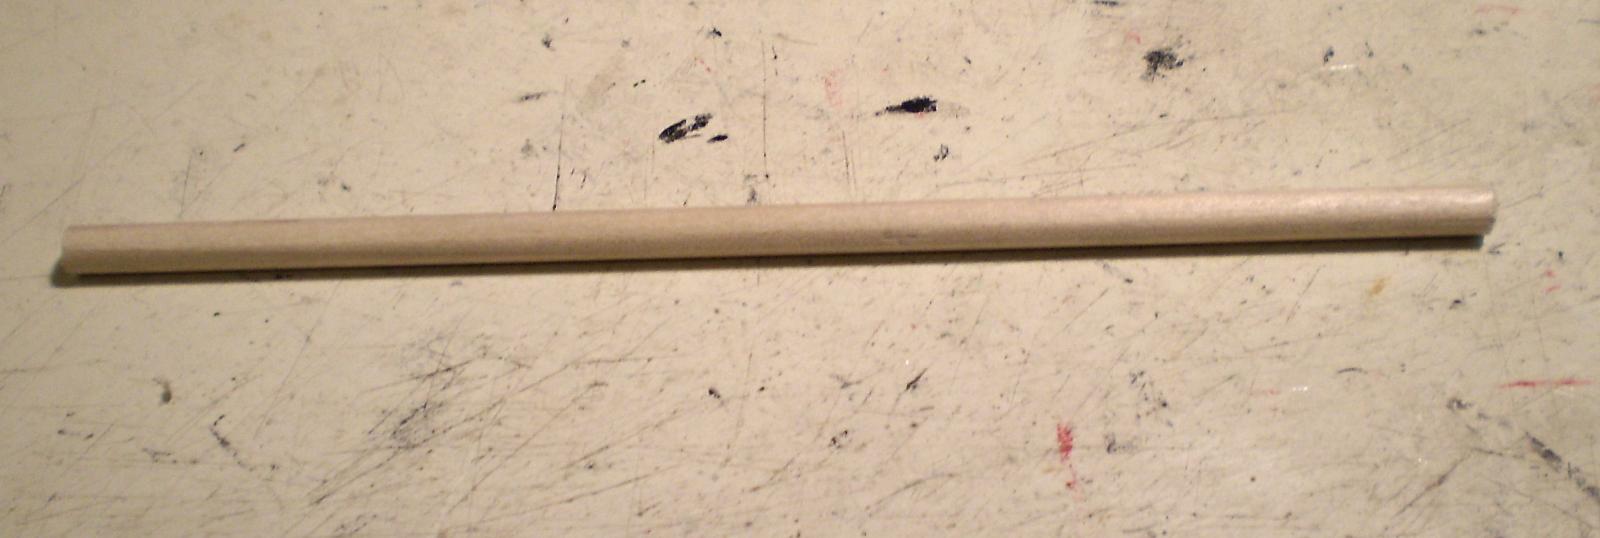
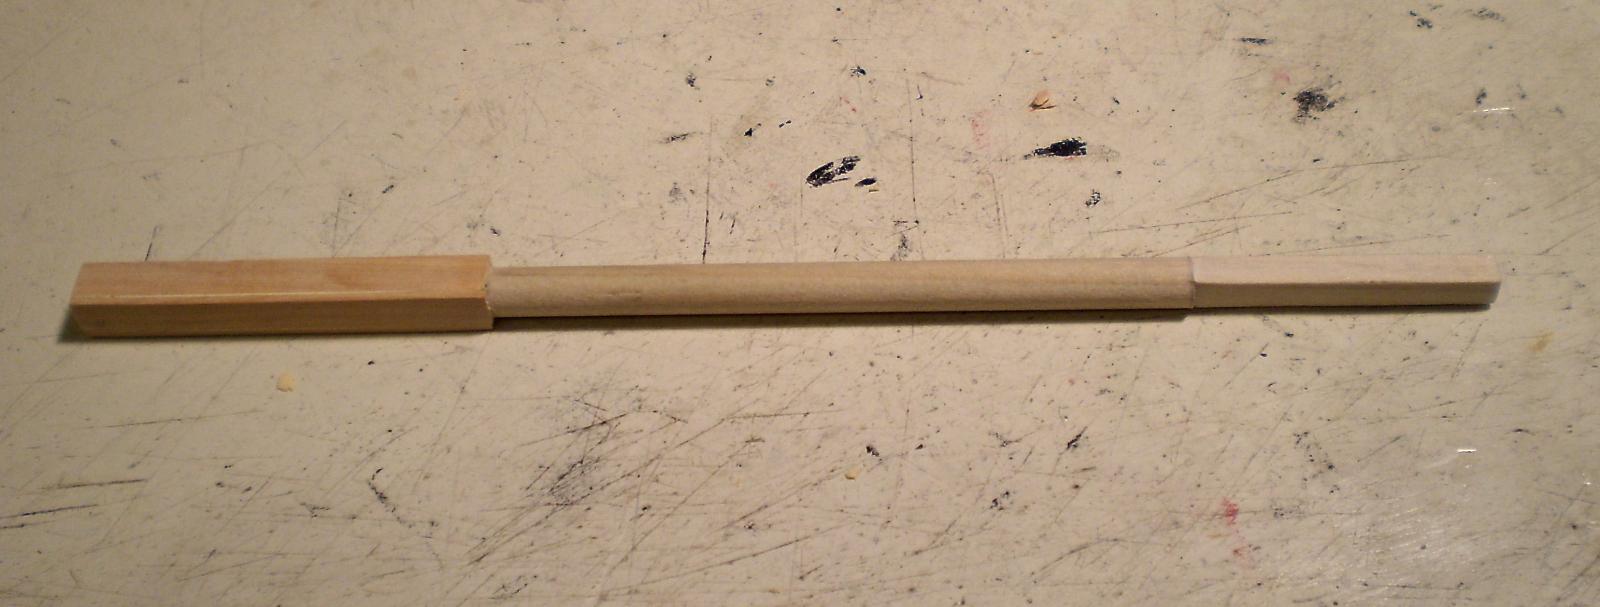
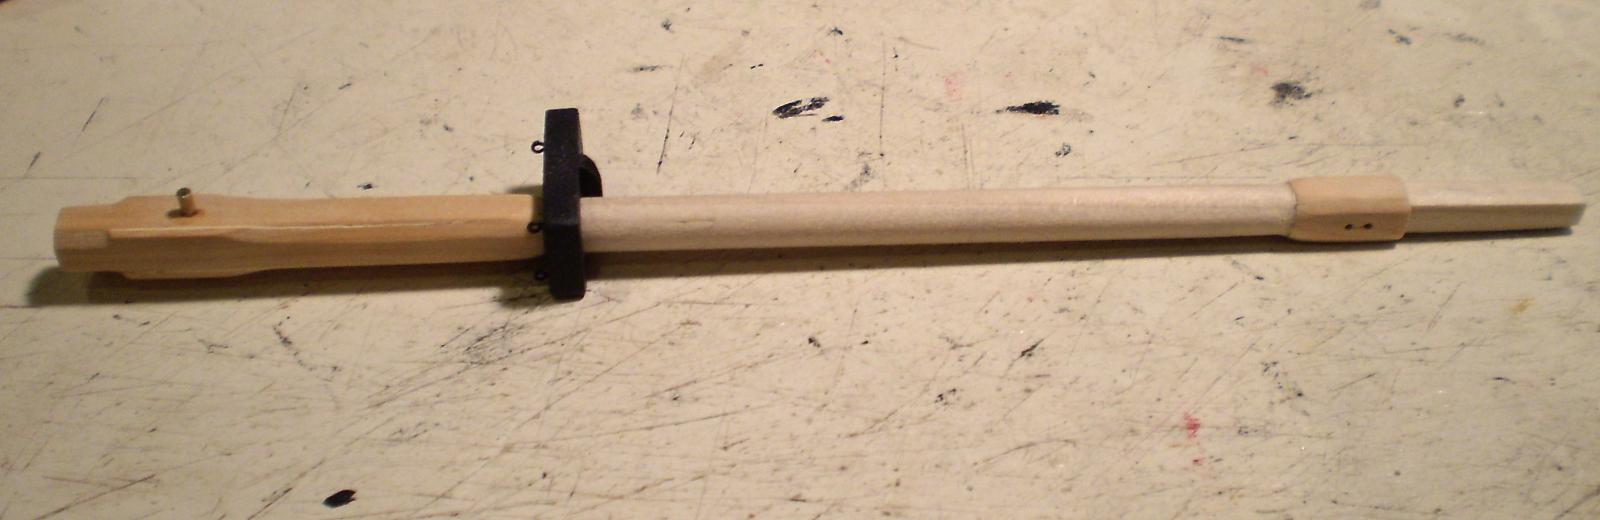
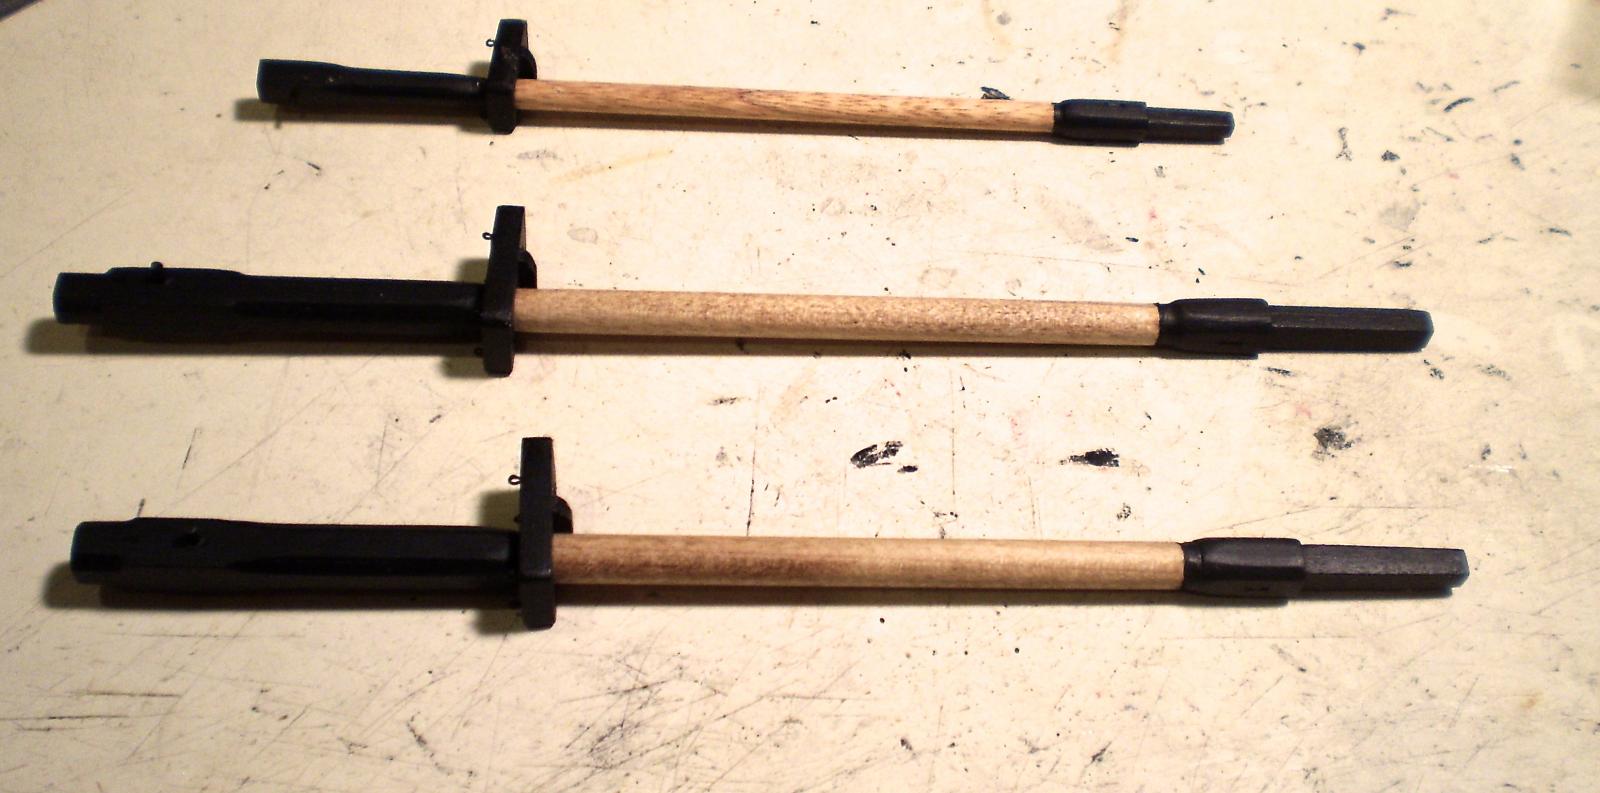
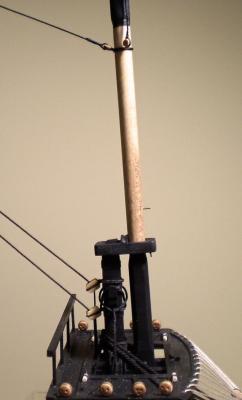
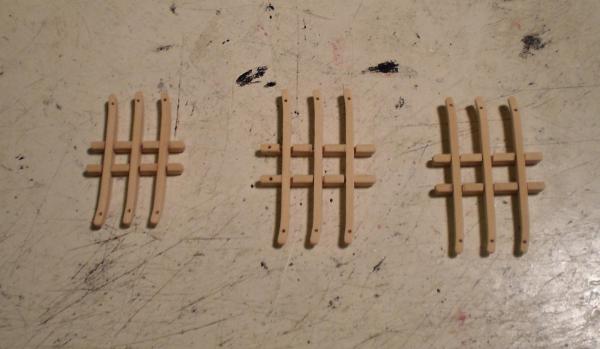
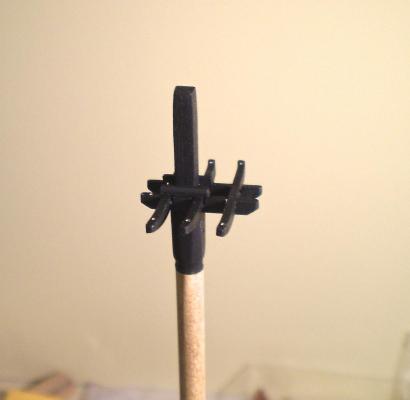
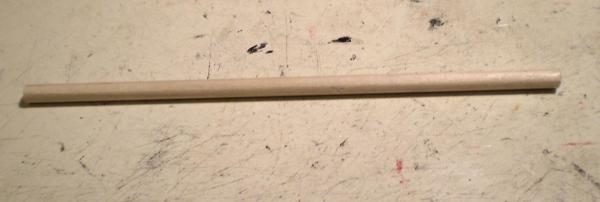
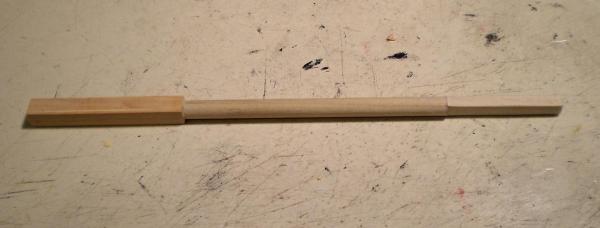
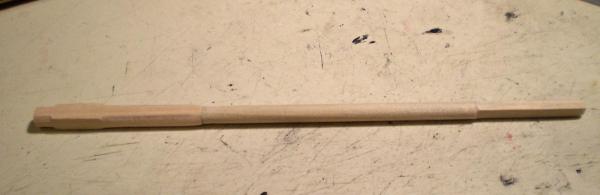
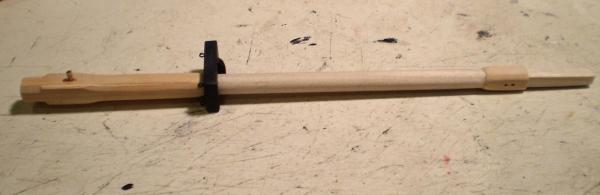
I had previously mentioned that I was working on the topmasts to break up the work on the ratlines. They are now completed (with the exception of the trestletrees and crosstrees). I thought that those of you who are low tech and tool challenged like myself might like to see how I made up the top masts from a dowel, rather than starting with a piece of square stock. These masts have an octagonal heel, then a square section, then an octagonal section, then a round section, then octagonal hounds and finally, a square head. I began by squaring the upper and lower sections of the dowel with a file and sanding sticks. I then added stripwood to create a square section at the lower end. I then used a file to make the 8 sided portions. At the upper end, I added stripwood to create a square section the length of the hounds and then used a file to make that eight sided. I should add that I made up the lower mast cap and put it on the topmast before doing the hounds, since the cap would not slide down the mast once the hounds were in place. I completed the masts by drilling and cutting simulated sheaves in the hounds, adding the fids and staining and painting the assembled masts. I have attached a series of photos showing this sequence. I will now make and install the trestletree/crosstree assemblies before mounting the masts. Bob


- 1,477 replies
-
- 20
-
-
- essex
- model shipways
- (and 1 more)
-
Super looking work Augie. Of course, we would expect no less. Bob
- 2,191 replies
-
- 2
-
-
- confederacy
- Model Shipways
- (and 1 more)
-
For whatever its worth Patrick, I have favored the holly for my builds for quite a while now. Very easy to work with and looks good to my eye as a contrast to the hull planking. As everyone says, it's your opinion that counts. Bob