rafine
-
Posts
2,932 -
Joined
-
Last visited
Content Type
Profiles
Forums
Gallery
Events
Everything posted by rafine
-
 Off to a running start Kevin. You will enjoy this. Bob
 -
Much as I hate to see your Victory put on hold, I like your decision to do the Triton cross-section. I also did it to prove to myself that I could do a framed scratch build if I chose to. Go for it Kevin. Bob
- 1,319 replies
-
- 1
-

-
- caldercraft
- Victory
- (and 1 more)
-
Thanks so much Tim, Nils, Sjors and all of the "likes". Tim, I really don't know yet what the finished dimensions will be. I haven't scaled out the sizes of the upper masts and the jib boom and flying jib boom.I have no drawings to this scale and still need to figure these out from the prototype dimensions. The blocks arrived about a week ago Sjors, and I've just been too lazy to put them in their boxes. Bob
- 1,477 replies
-
- 1
-
-
- essex
- model shipways
- (and 1 more)
-
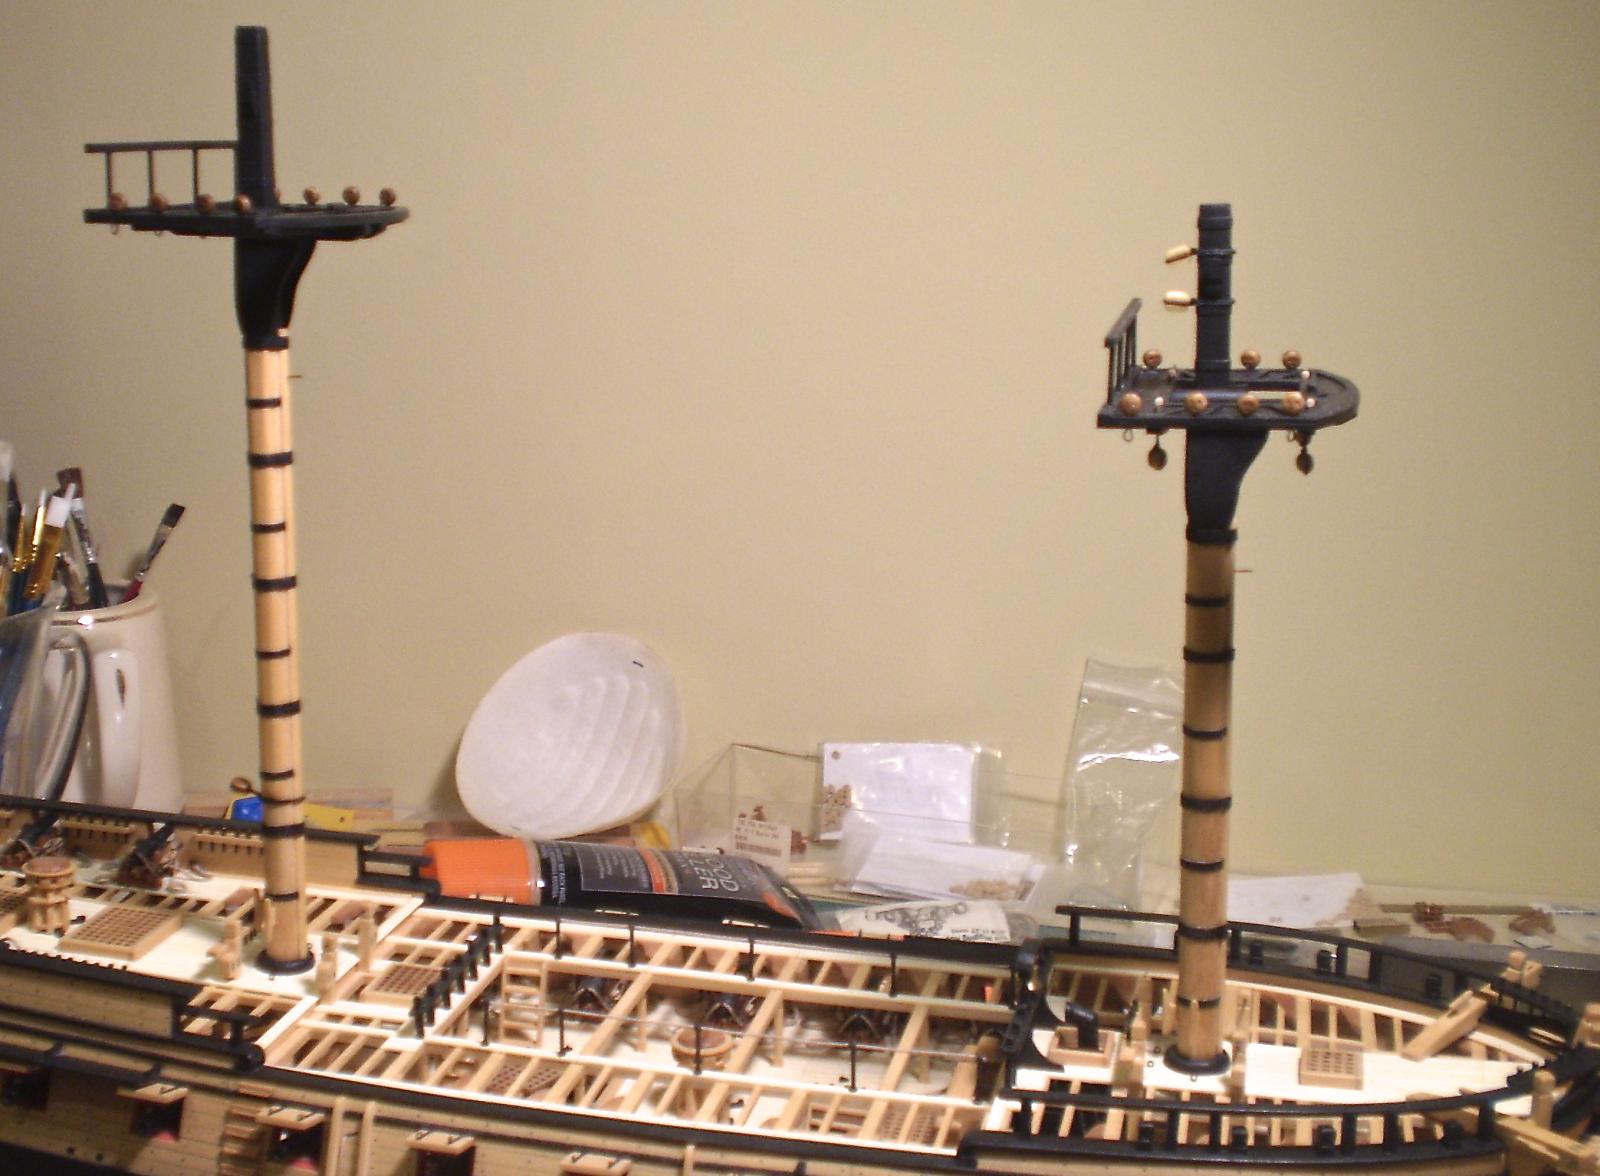
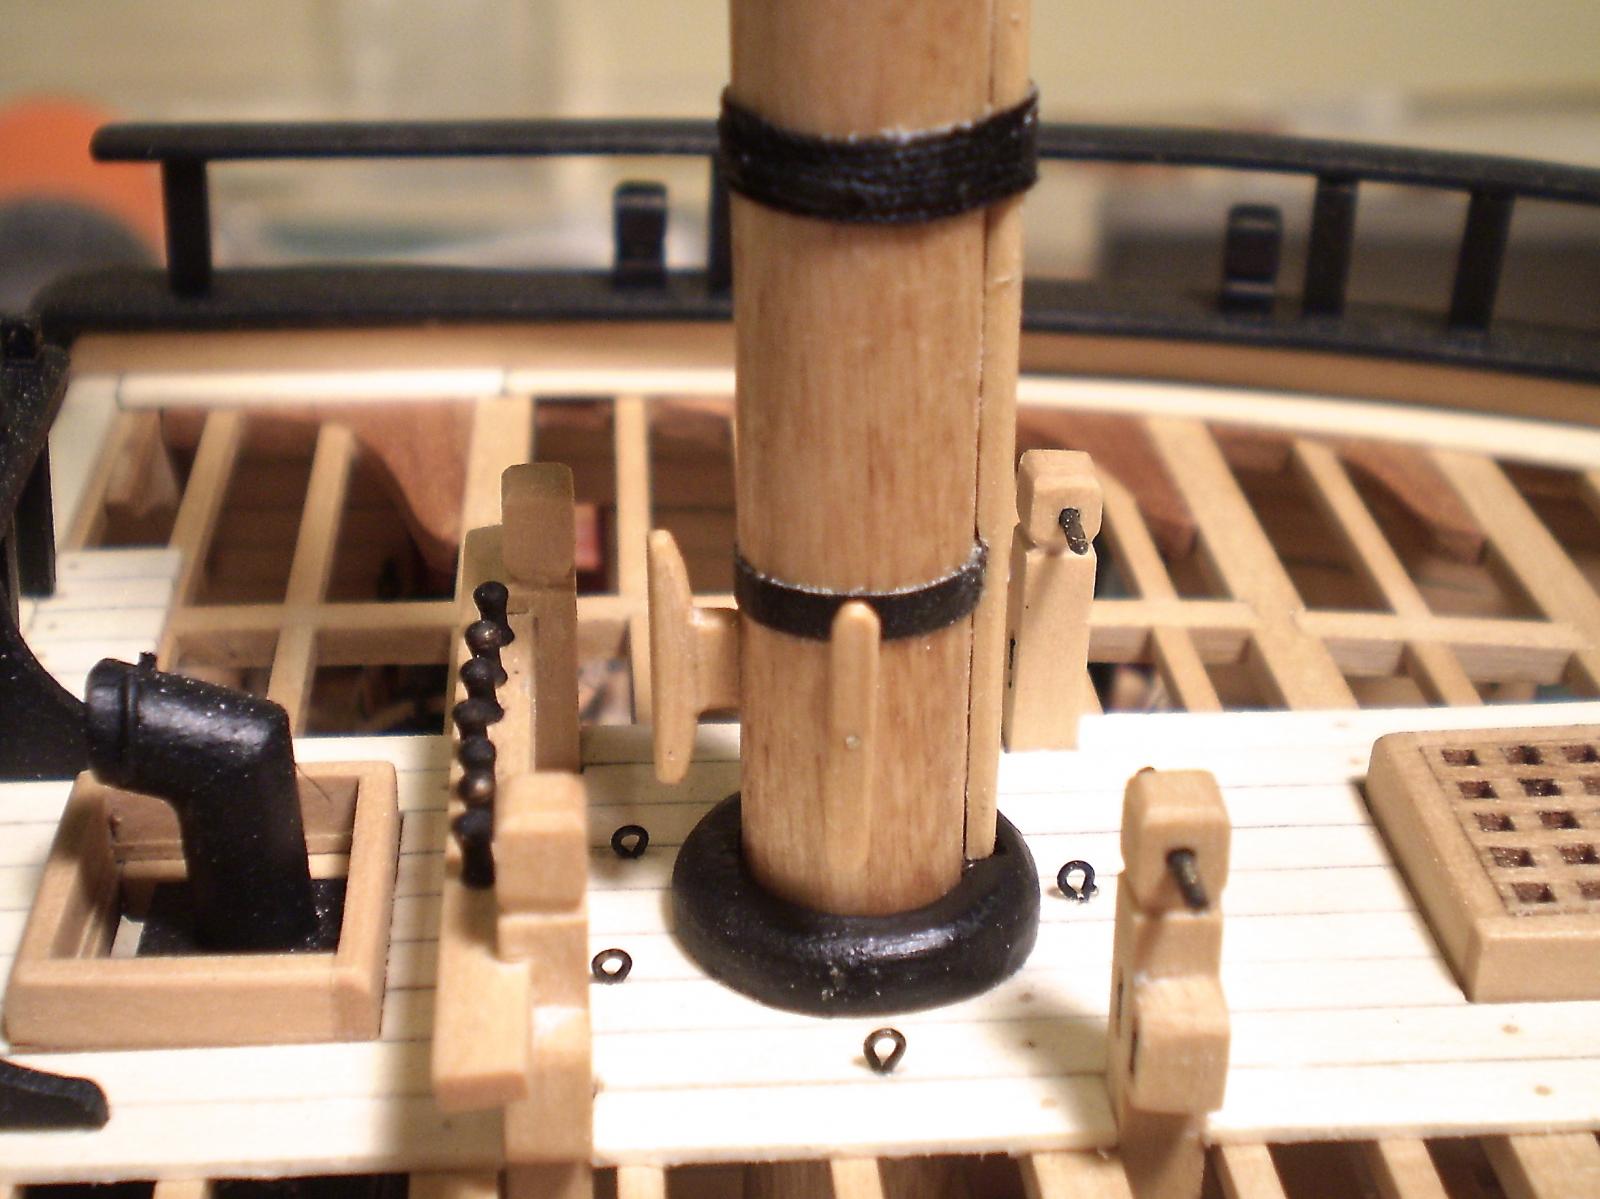
I've now completed and mounted the main lower mast. The procedure was identical to what I showed for the fore mast , with the exception that there are no blocks hung from the top or seized to the masthead and there is a deadeye seized to the lower part of the mast for the mizzen stay. I'm now working on the lower mizzen mast. Bob


- 1,477 replies
-
- 23
-
-
- essex
- model shipways
- (and 1 more)
-
Thanks so much Hamilton. Bob
-
Thanks so much Sjors, Thomas and Tim and the "likes". Bob
-
Rich, just to confuse you, I've always glued my masts in and have found no reason not to. I like the fact that I can put pressure on them while rigging without having to worry about movement. I like the stability. Bob
- 1,756 replies
-
- 4
-
-
- constitution
- constructo
- (and 1 more)
-
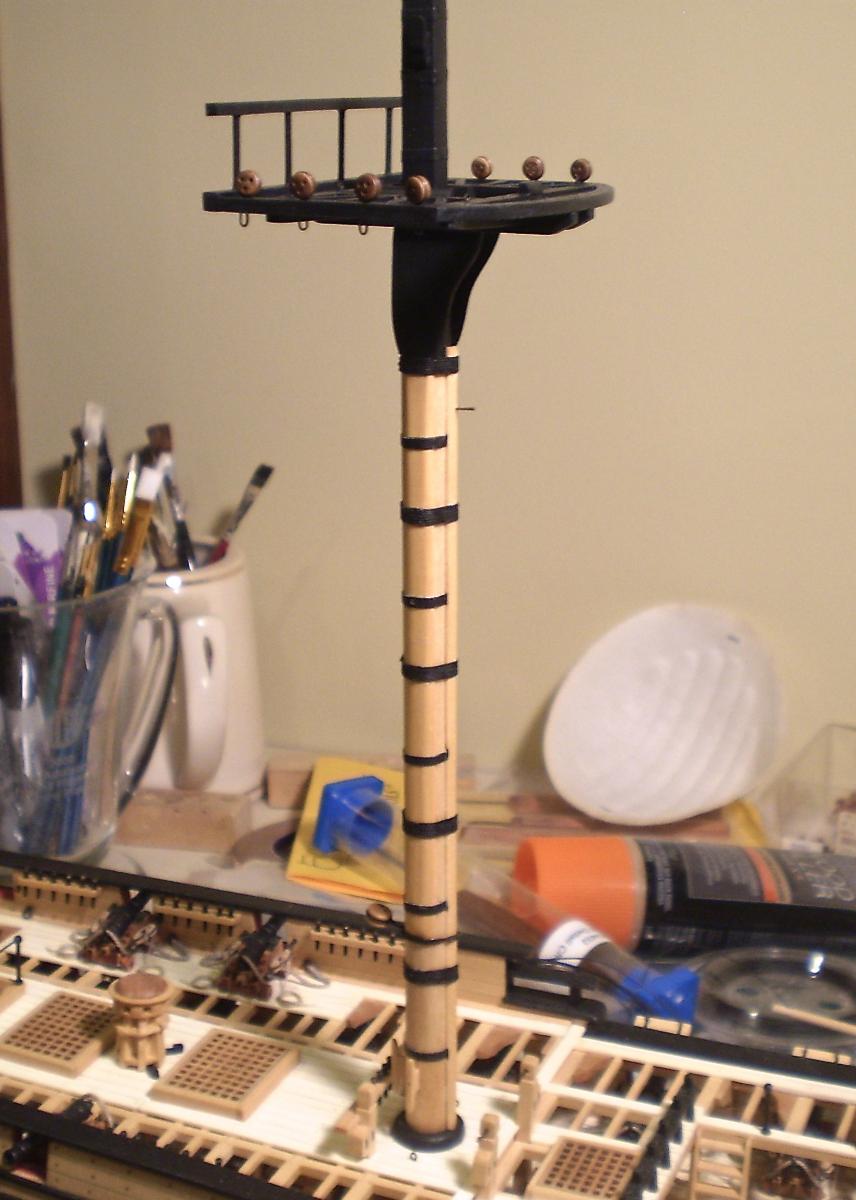
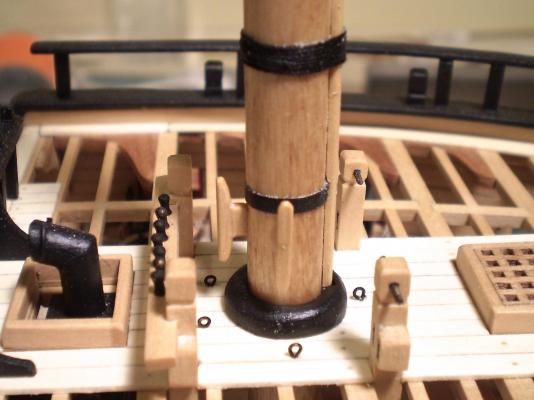
Lower mast construction continues. The fore mast and it's top are now complete and installed. The work included adding the blocks for the spritsail and spritsail topsail yard braces. These are hung below the top and held in place by pegs on the deck of the top. These will be the only blocks that I will attach to the tops, since I do not intend to rig buntlines, leech lines, reef tackles etc.and won't show the blocks for them. After gluing the top to the mast, I added the bolsters, the jeer sling cleats and the lead blocks for the main topmast stay and preventer stay. Lastly, I permanently mounted the mast. Work now continues on the main mast and top. Bob


- 1,477 replies
-
- 23
-
-
- essex
- model shipways
- (and 1 more)
-
Thanks so much John. Thanks also to the "likes". Time to start a log Terry. I did a lot of reshaping on bulkheads 1 and 2, both outside and inside. My memory is that I just kept adding and sanding until I thought that I had it right. The reason for the tight fits is that the plywood is thicker than it is supposed to be. This will bite you on the stern framing as well. Bob
-
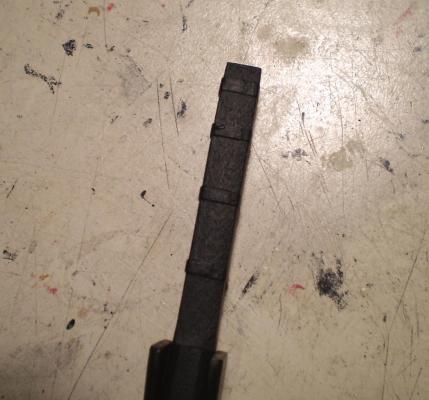
Thanks so much Tim, Augie and the "likes". Tim, I actually used masking tape on this one. Cut into strips, painted black, wrapped twice around the mast and secured by a drop of glue at the final lap joint. Bob
- 1,477 replies
-
- 1
-
-
- essex
- model shipways
- (and 1 more)
-
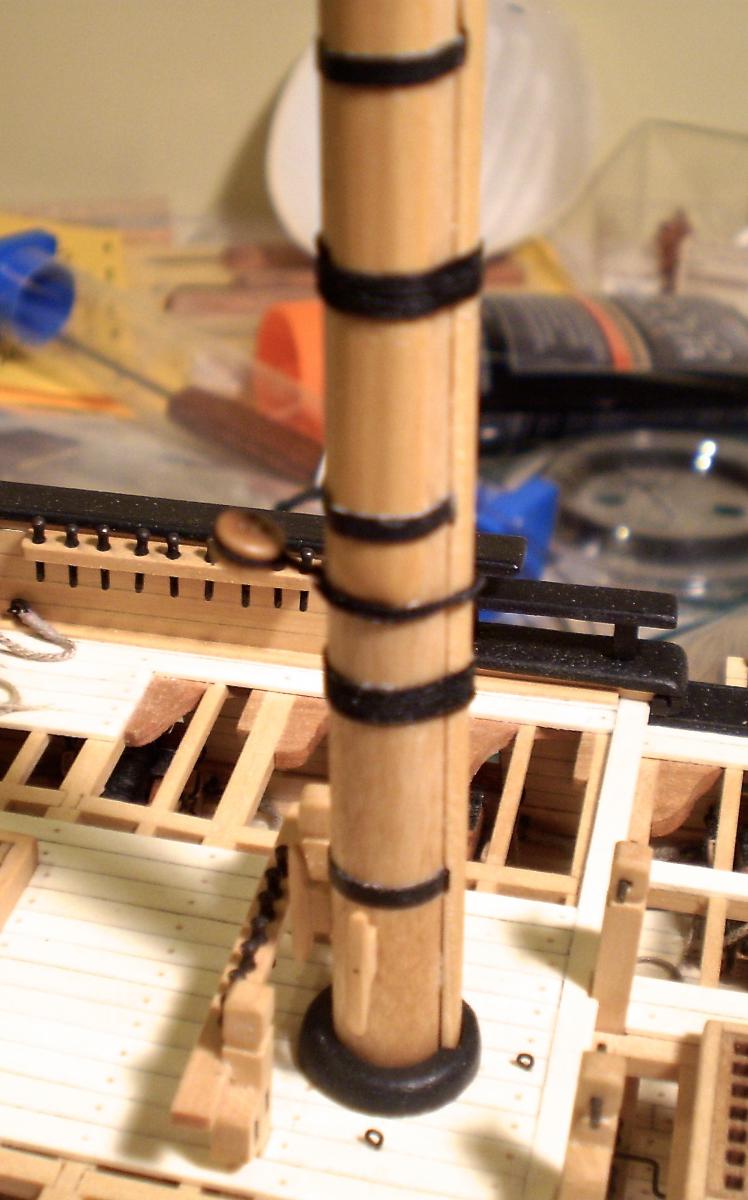
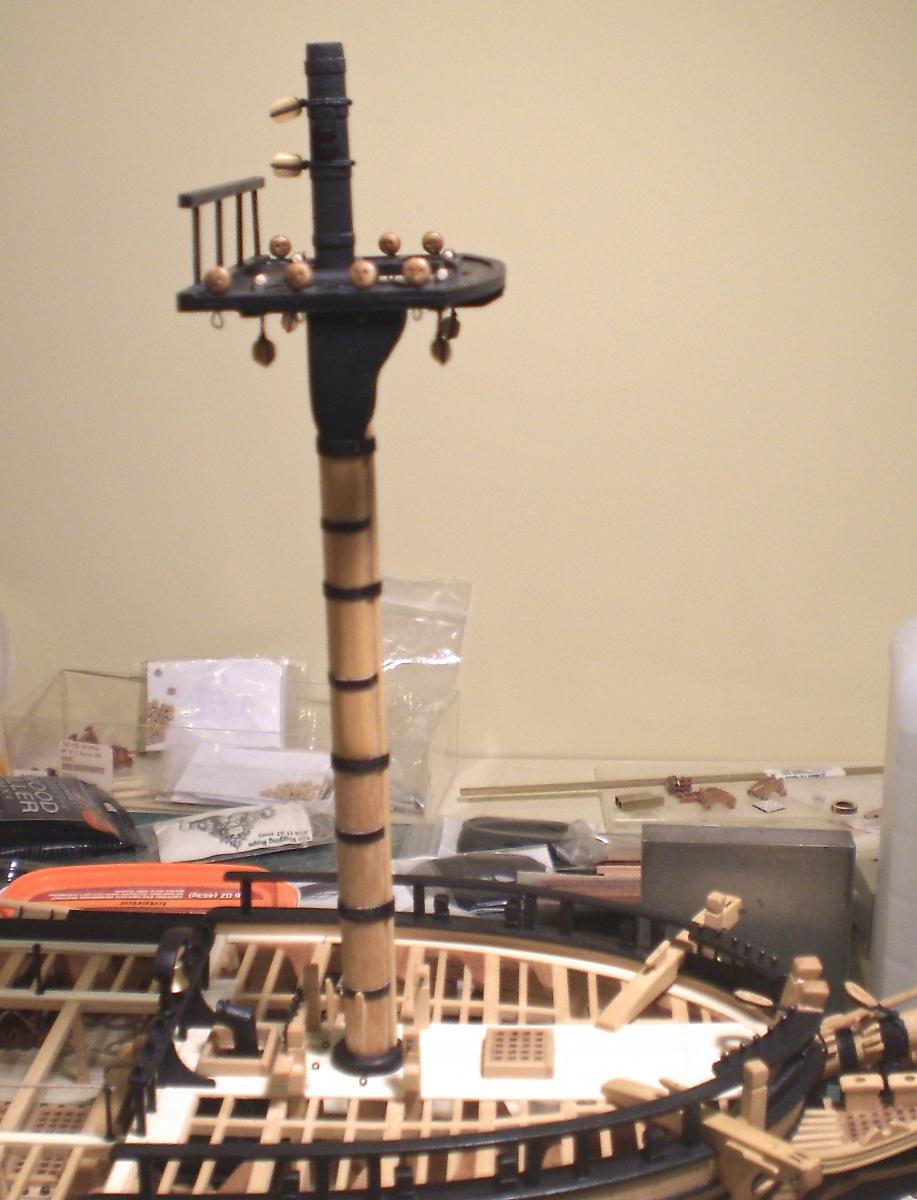
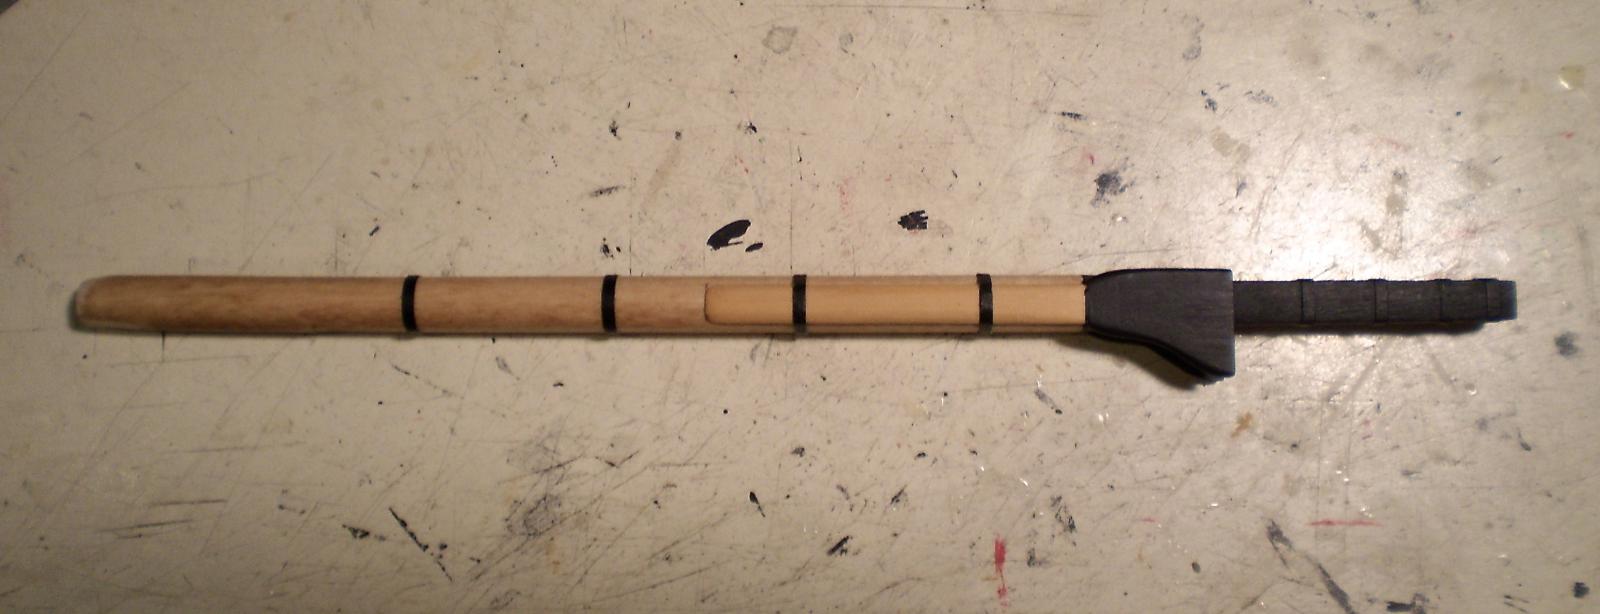
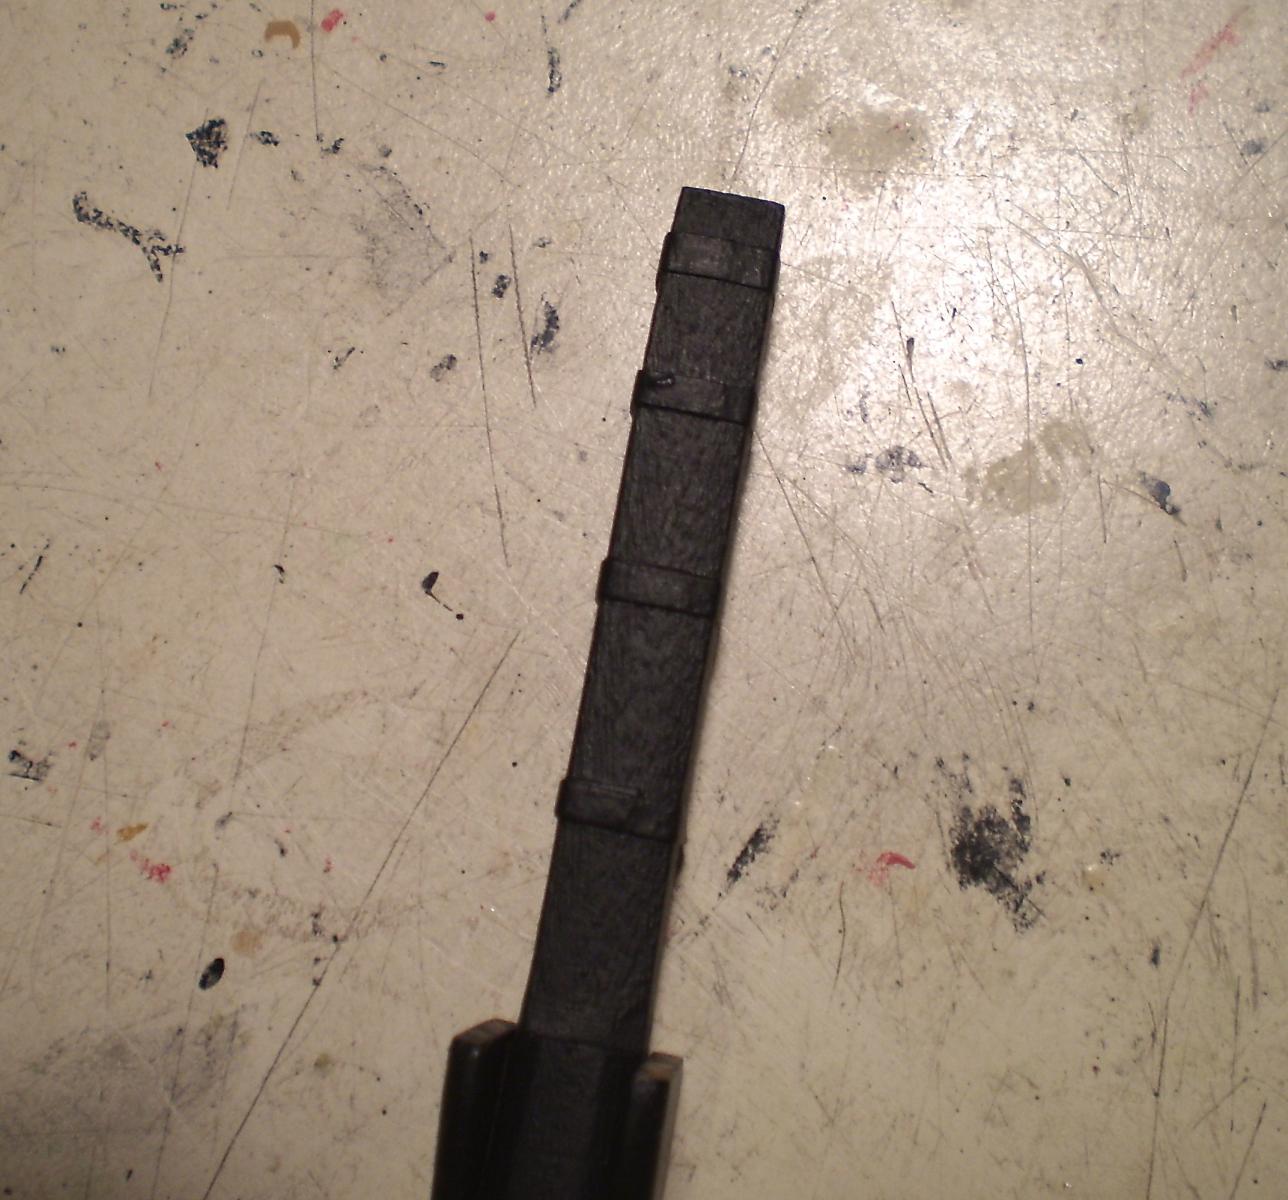
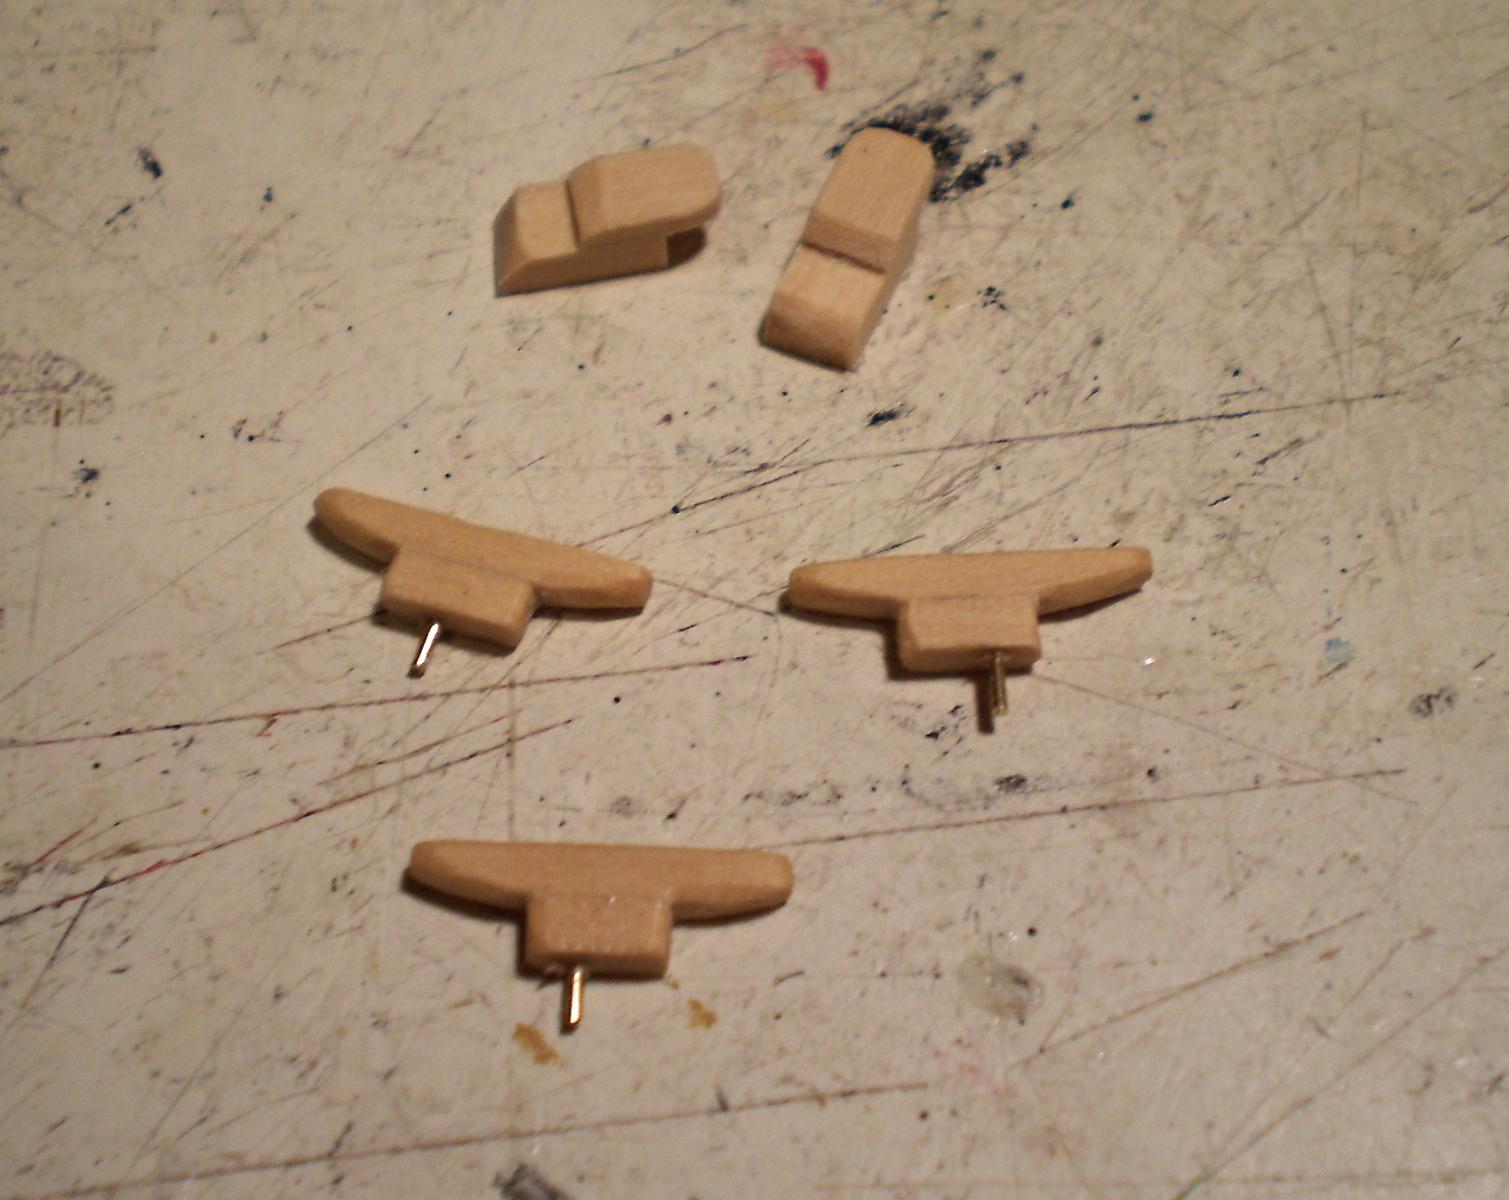
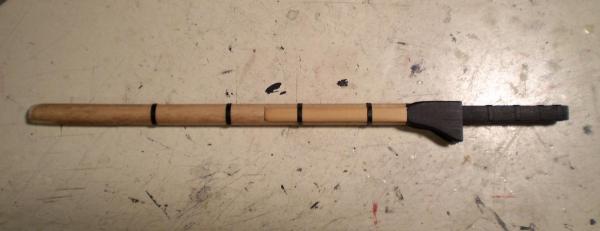
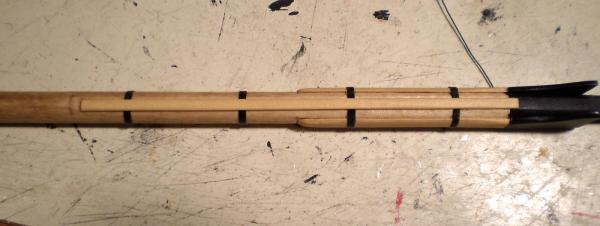
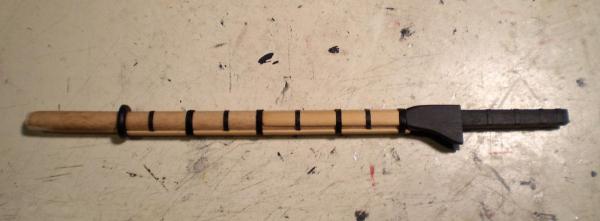
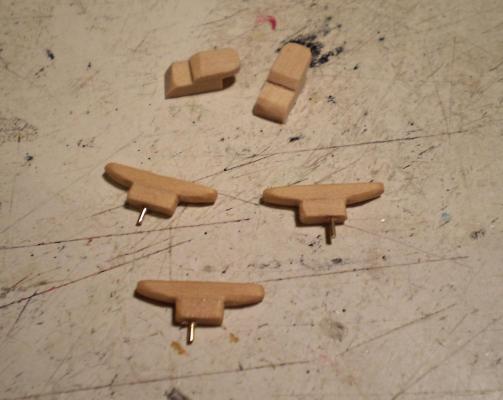
I've been working on the fore lower mast. This involved shaping the mast and mast head, making and adding the bibbs and cheeks, adding the bands to the mast and head ( black painted paper), making and adding the front fish (notched to fit over the bands), adding the wooldings, making and adding cleats and making and adding the mast coat. I also made some cleats for the jeers to be added to the mast head after the top is attached. The top is still awaiting blocks to be attached, as is the mast head. The mast has not been permanently set yet. Bob
- 1,477 replies
-
- 24
-
-
- essex
- model shipways
- (and 1 more)
-
A long time in coming Ed, but well worth the wait. It's all looking very good. Very nicely done. Bob
-
Rich, it is much easier to make mast bands from paper than from metal. I even use masking tape at times. When painted, it's hard to tell the difference. Bob
- 1,756 replies
-
- 5
-
-
- constitution
- constructo
- (and 1 more)
-
Thanks so much Michael, B.E. and all of the "likes". Always appreciated. Bob
-
Thanks so much Ben and the "likes". Bob
-
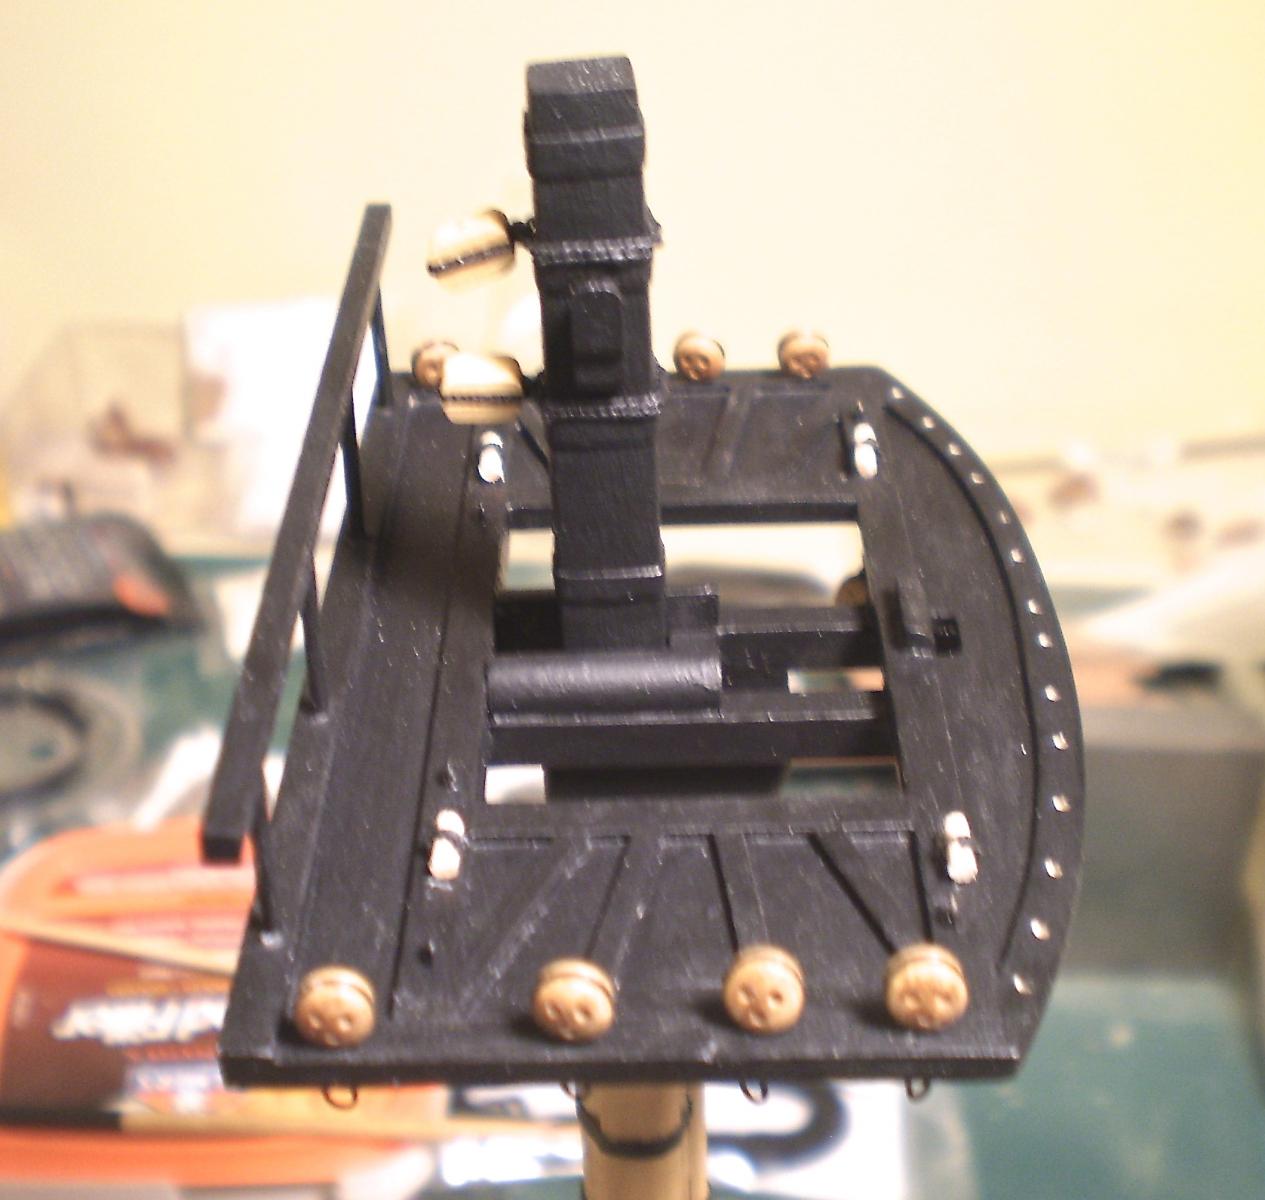
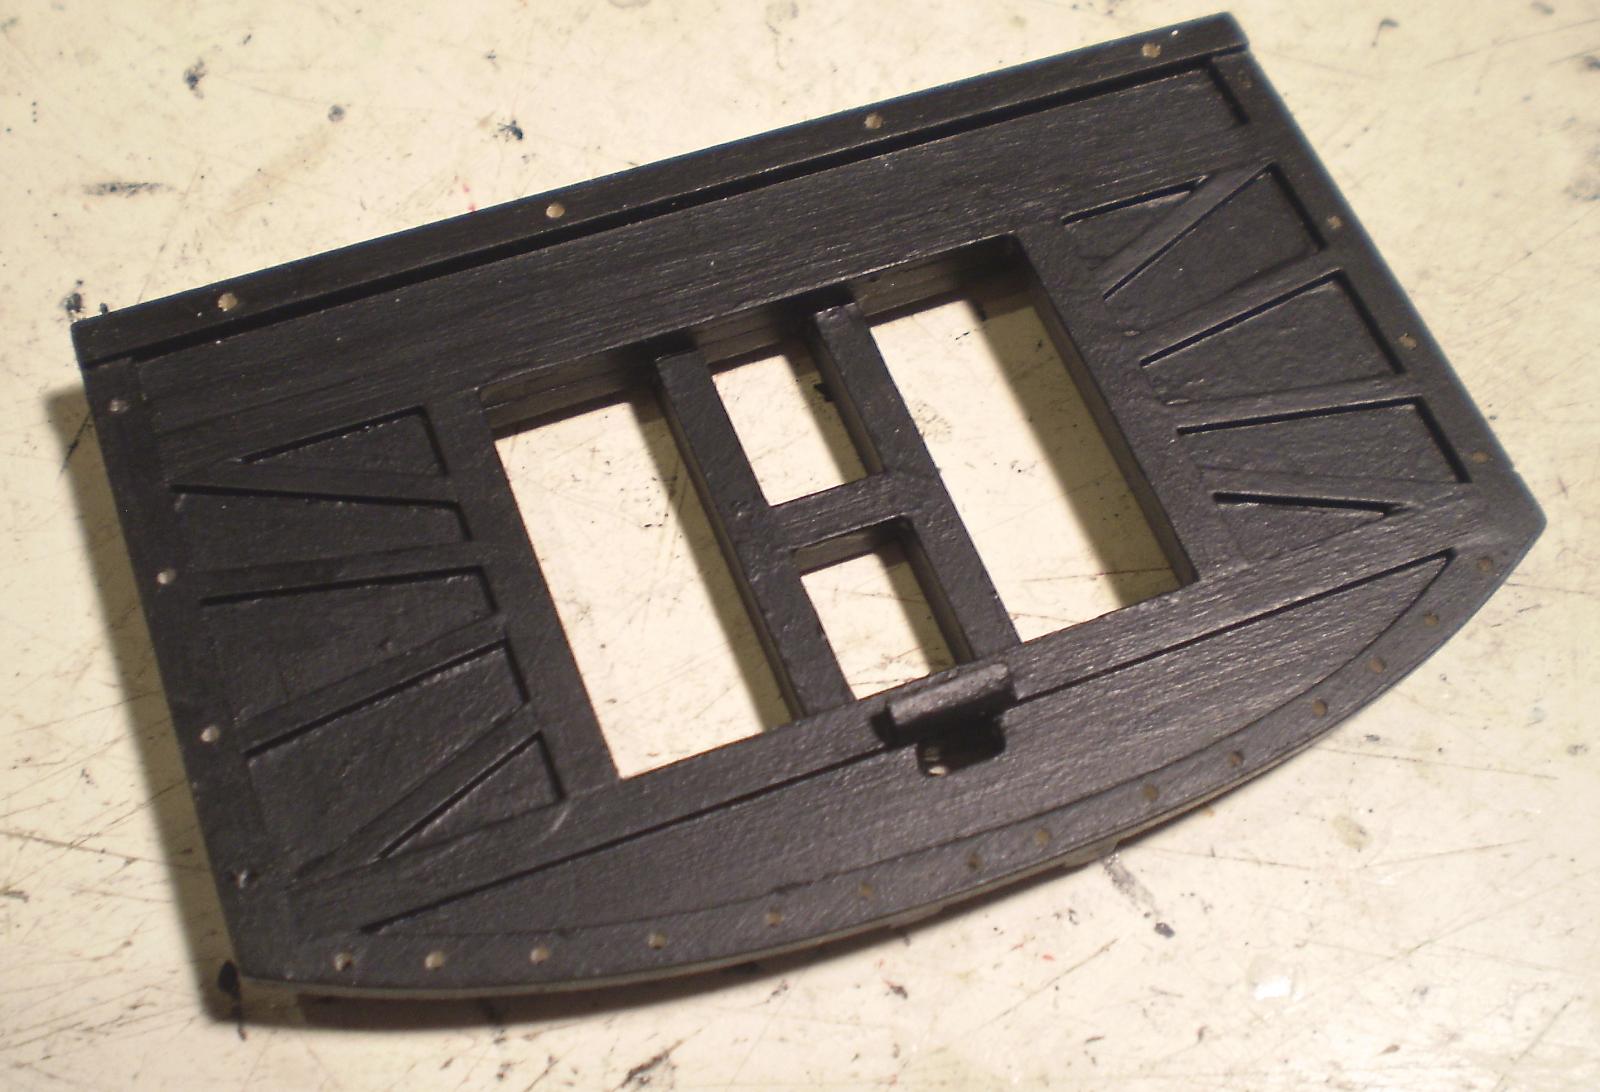
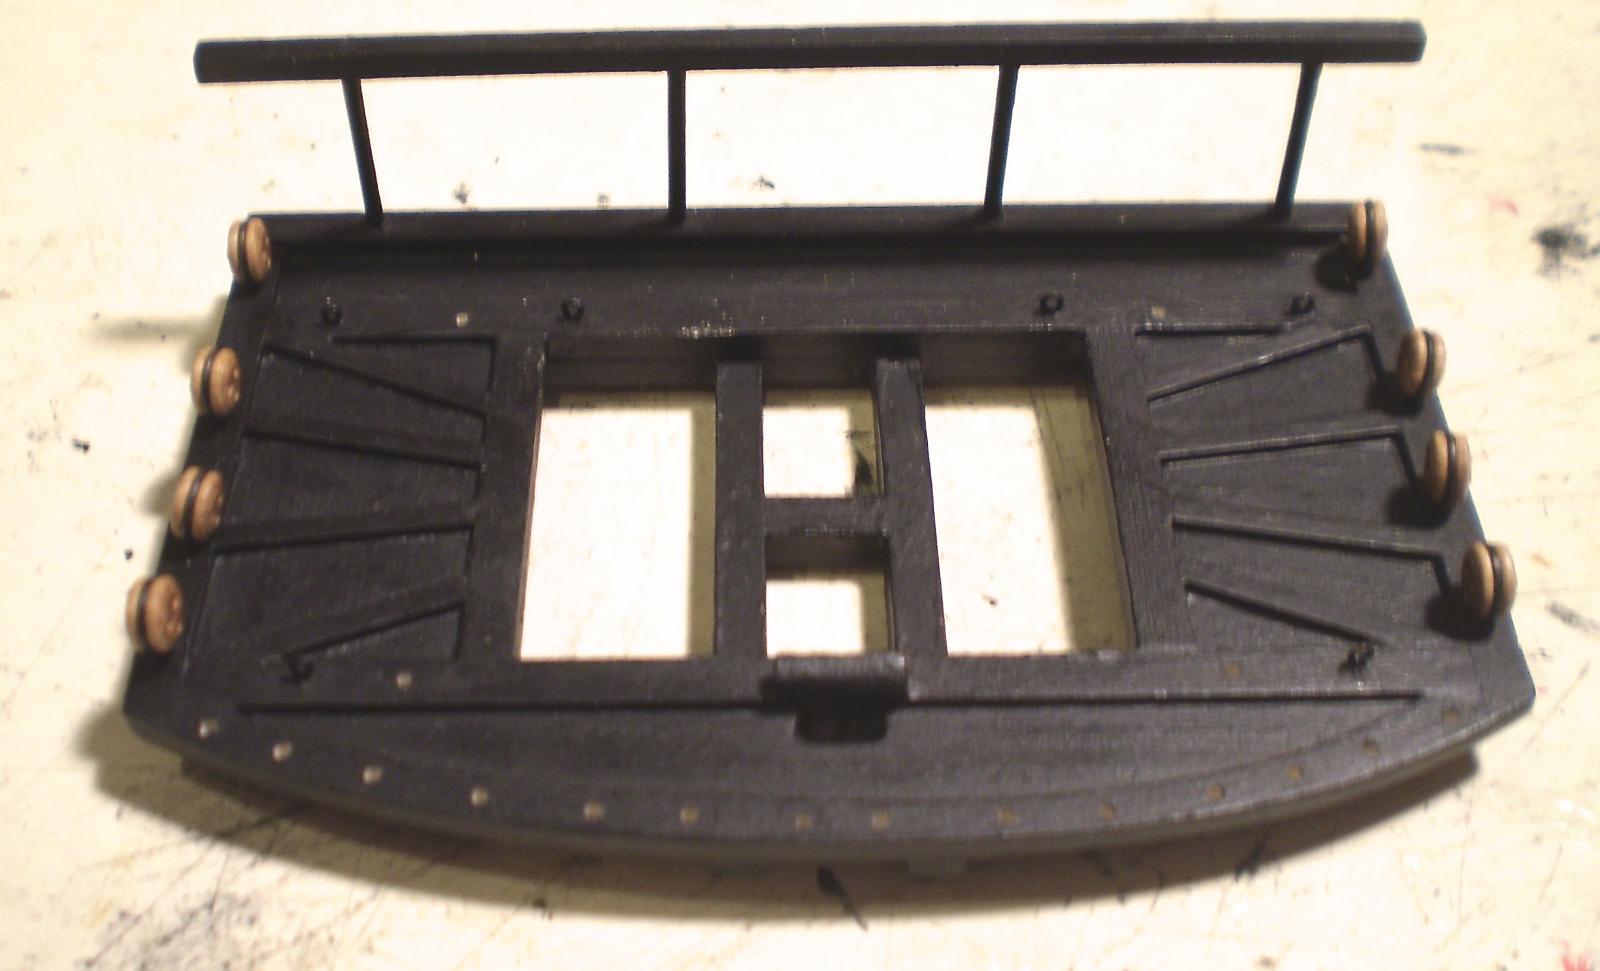
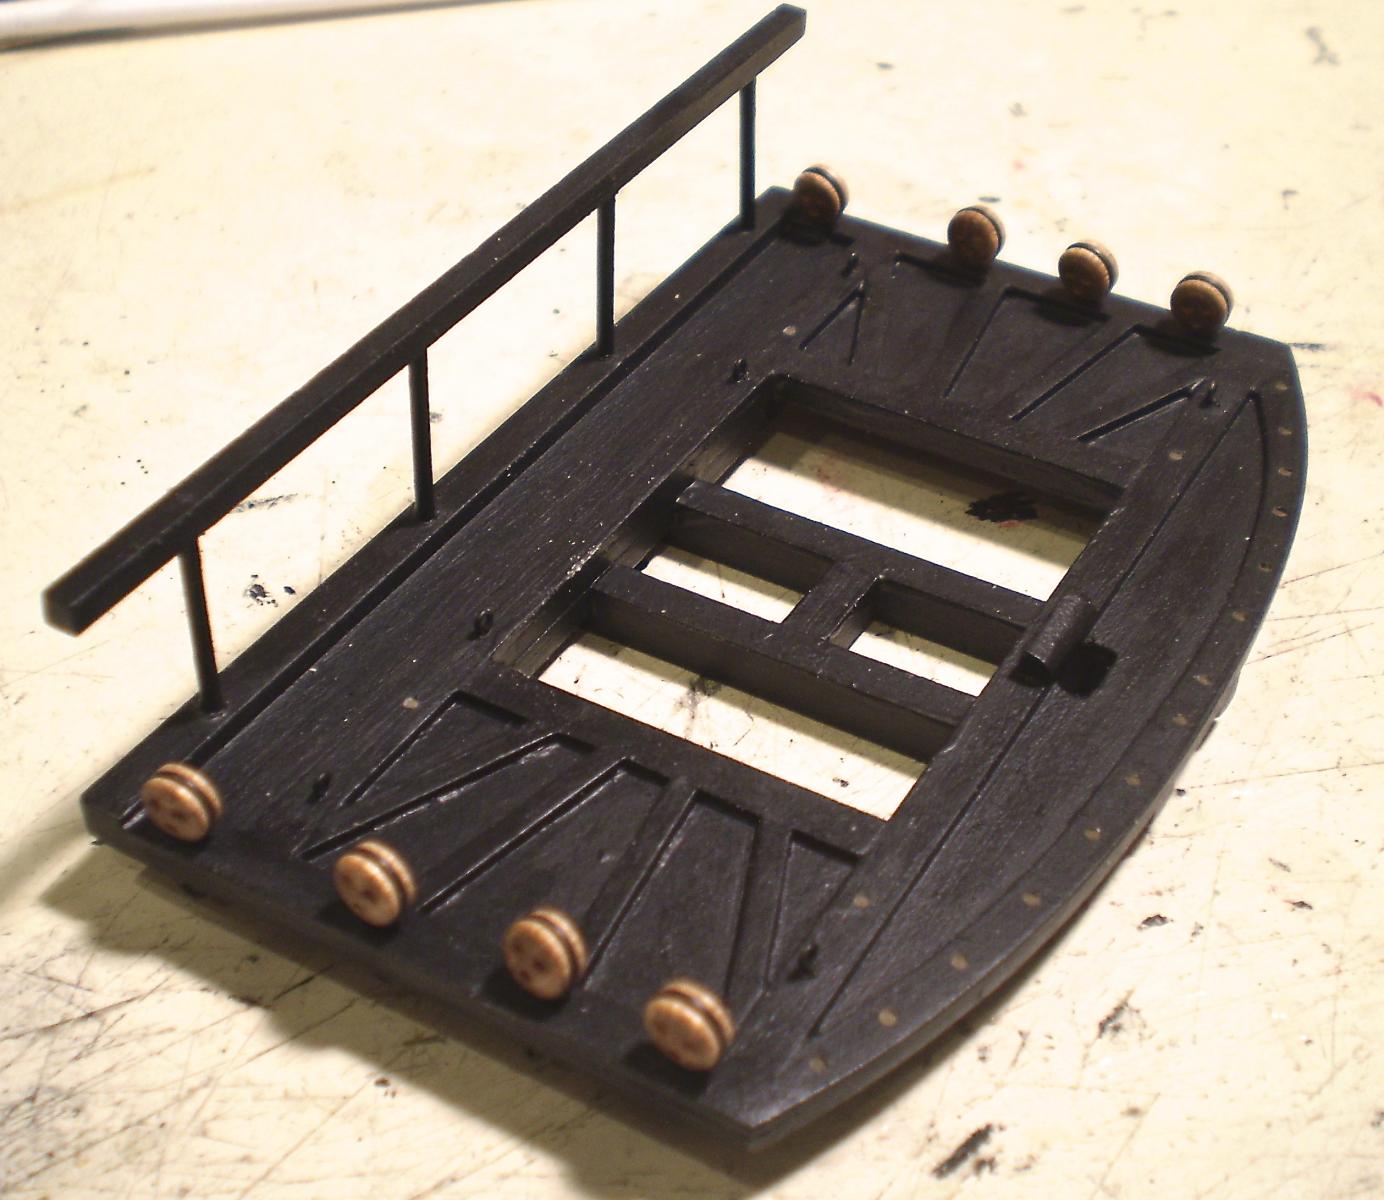
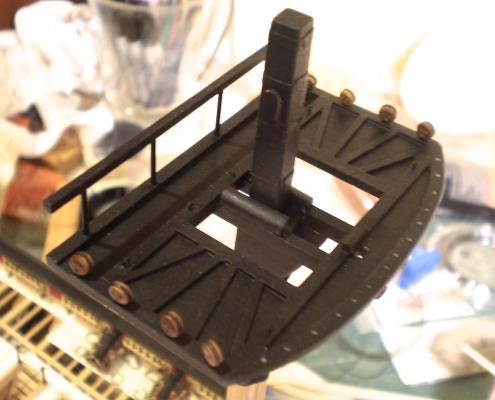
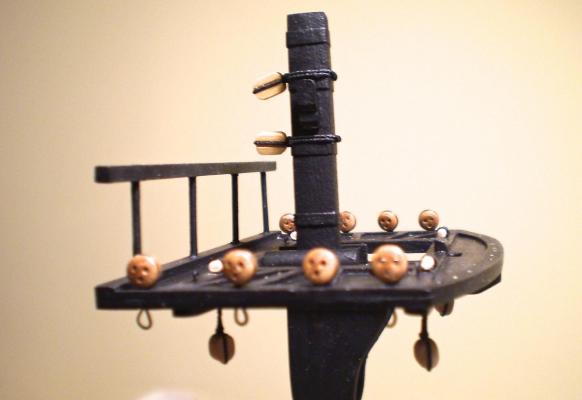
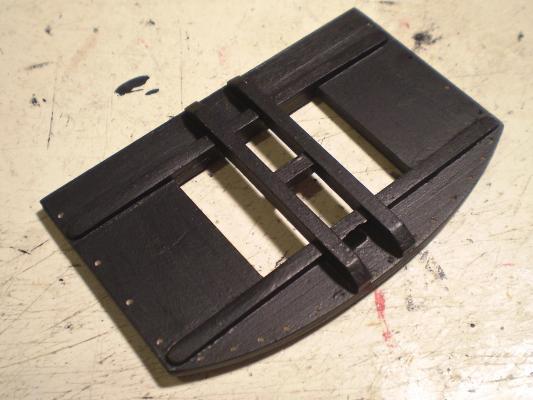
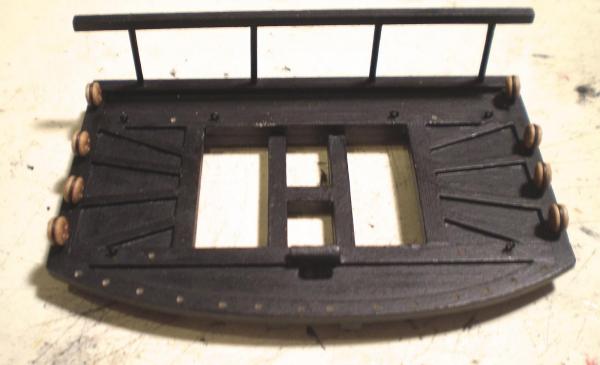
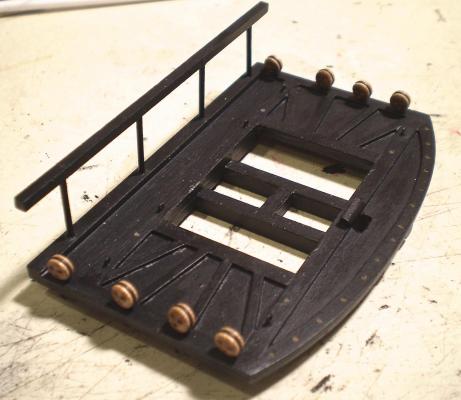
A little further progress. I've completed the fore top (with one exception).I assembled the trestletrees and crosstrees and the mast block and glued them in place under the top. I then drilled all the holes for the deadeyes, the crowsfeet, the spritsail brace blocks, some eyebolts and to mount the railing. I also cut the hole for the lower yard slings and made and added the sling bolster. The assembly was painted black. The railing was made from a boxwood rail and brass stanchions, painted black and glued into the previously drilled holes. The eyebolts were glued in place. Lastly, I stropped the deadeyes and mounted them. The only item remaining was the spritsail brace blocks, which I had forgotten to order from Chuck, and am now awaiting. I'm now working on the lower fore mast, and will complete that before moving back to the main top and lower main mast. Bob
- 1,477 replies
-
- 24
-
-
- essex
- model shipways
- (and 1 more)
-
Your usual beautiful work Nils. I particularly like the jib traveler. Bob
-
Thanks so much Thomas and Dirk and also the "likes". Bob
-
Thanks so much Tim, Grant and Martin and the "likes". Tim, the material in AOTS is good as far it goes. The tops, for example, are shown in pretty full detail. The same is true for the masts and yards. The rigging plans are good for the general runs and layout. I have found Lees very helpful in the past for additional details and for showing differences that occurred at specific periods of time. As for those details, I may add the lockers, but no chicken coops, since I didn't do any deck planking in that area. Grant, the ME deadeyes are really not bad. Particularly at small scale, the difference would be barely noticeable. The blocks are another story entirely. Bob
-
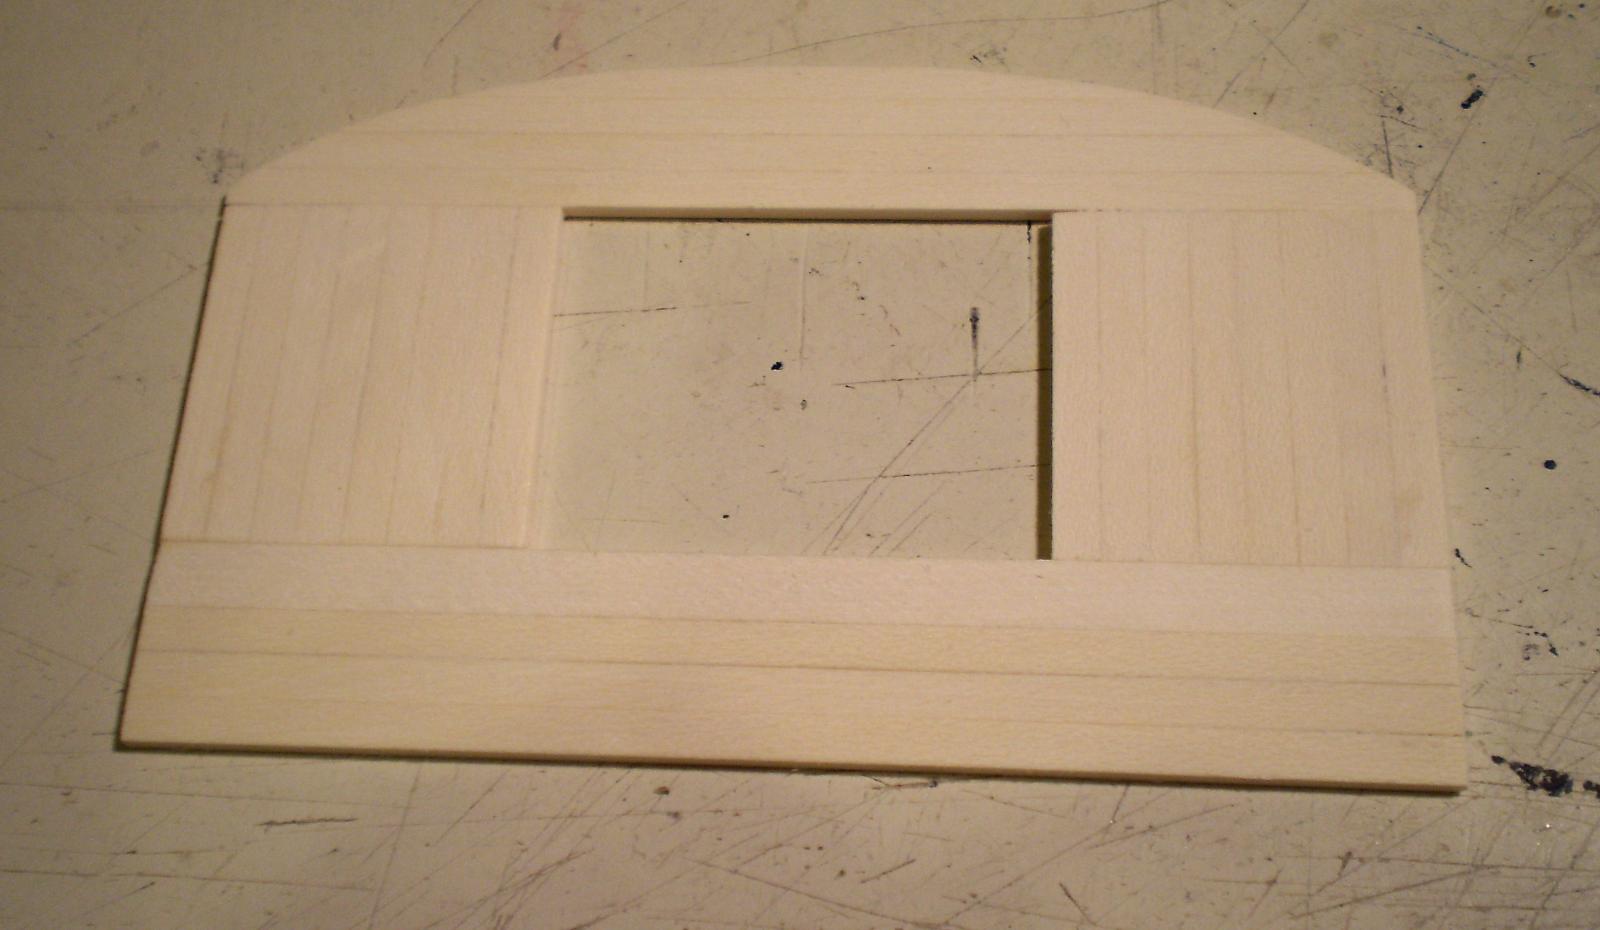
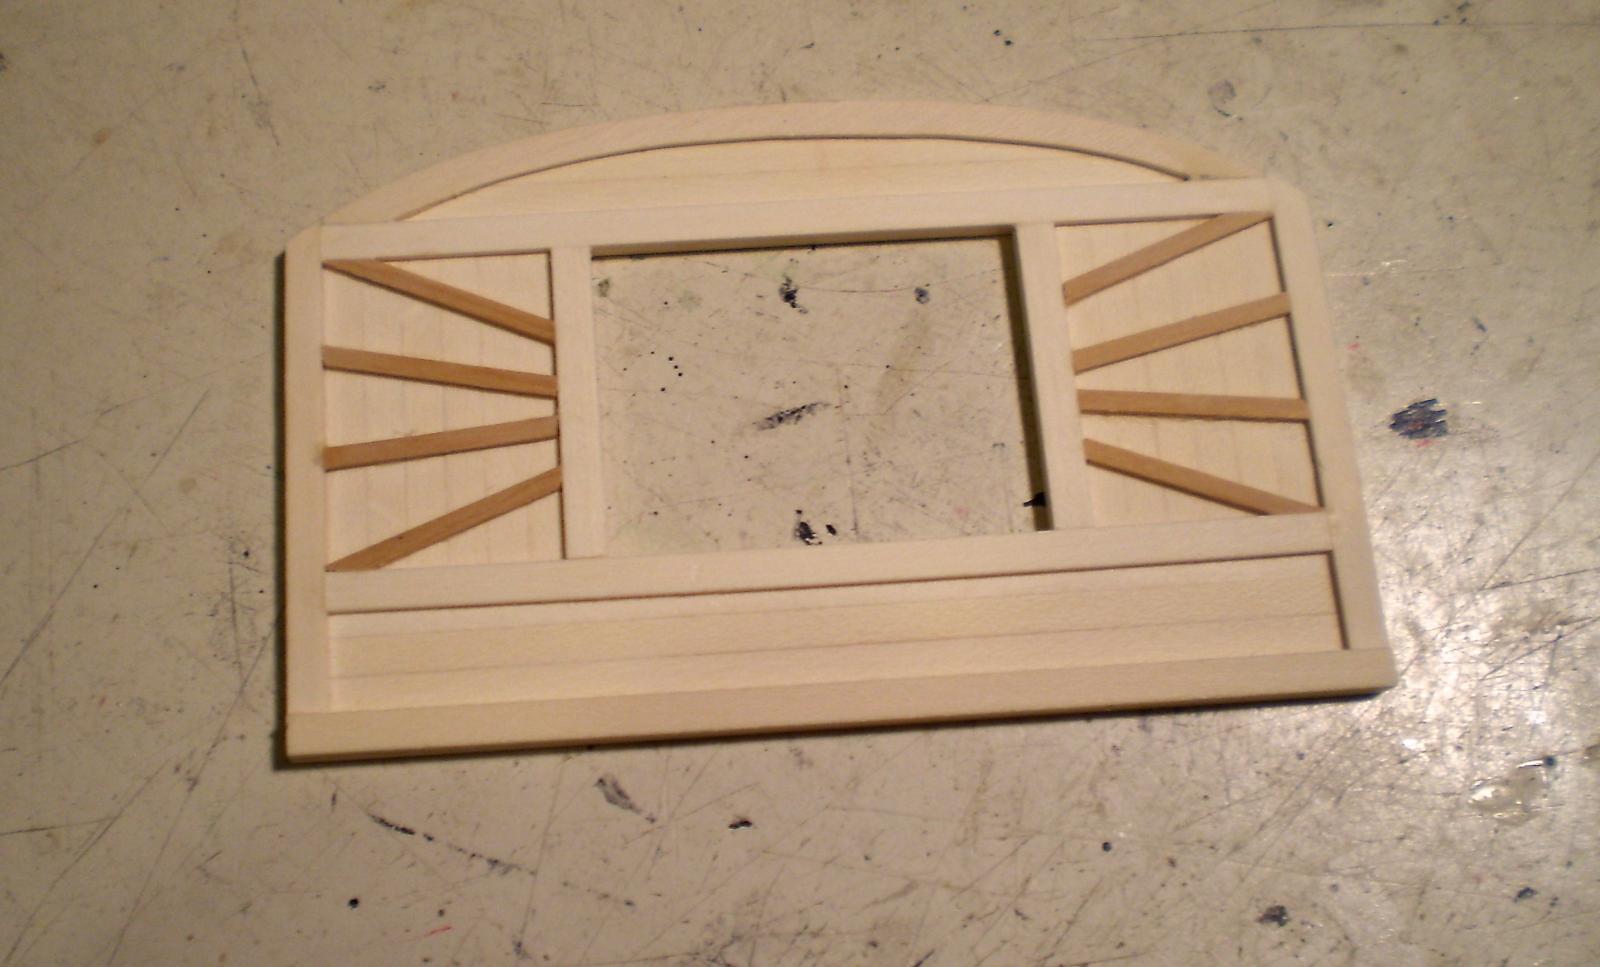
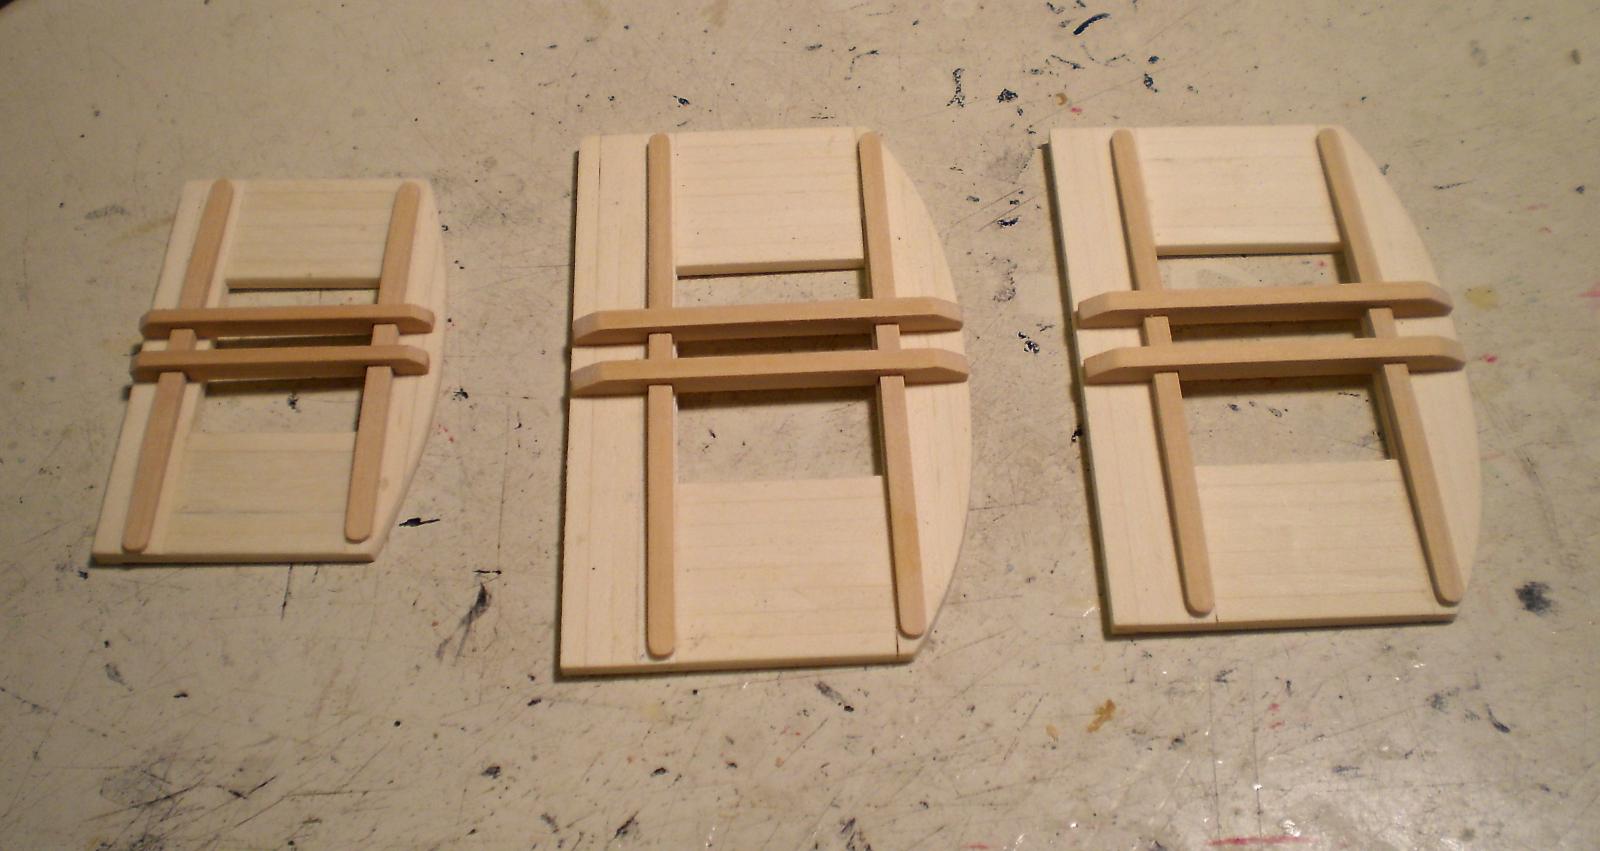
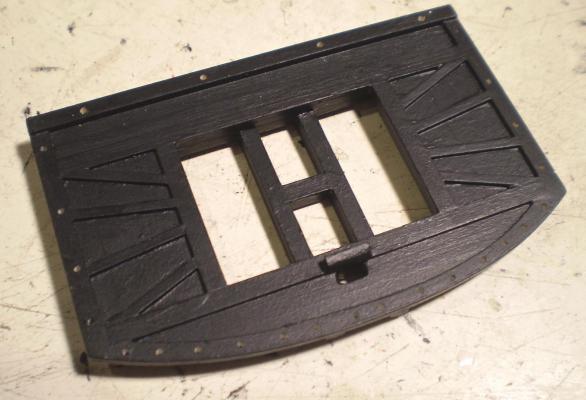
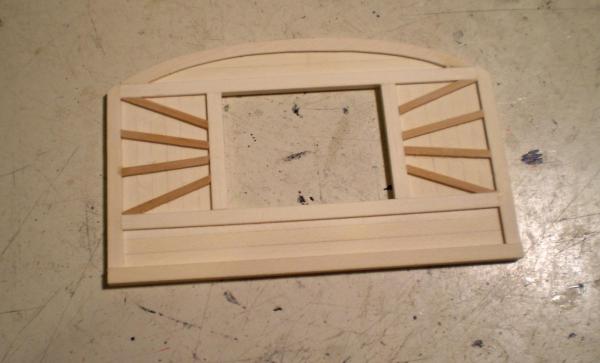
I neglected in my last update to explain how I am going to proceed from here. The kit was designed as a hull only Admiralty type model. As a result, all of the masting and rigging has to be done from scratch. My two primary references for this work will be AOTS Essex and Lees. I am confident that a representative job can be done this way. All of the blocks and rigging line will be from Syren (Chuck). The deadeyes are from Model Expo (I have a lot of them on hand). Some specialty items, such as the already done hearts, will be done from scratch. The order of the work should be roughly as follows: the bowsprit (done); the lower masts and tops; the lower deadeyes and chains; complete the hull by doing the hammock netting; the lower standing rigging; the topmasts and jib boom and their standing rigging; the topgallant and royal masts and the flying jibboom and their standing rigging; the yards and the running rigging; the boats, anchors, lantern and any remaining undone items. I've begun the lower mast work by starting on the tops. So far, I've made up the decking from holly strip and added the rims and other reinforcing pieces from holly and boxwood. i've also made up from boxwood and dry fitted the trestletrees and crosstrees. A lot of holes need to drilled and other parts such as railings need to be added. These assemblies will be painted black. Before finishing the tops, I will at least partially make the lower masts. Bob

- 1,477 replies
-
- 22
-
-
- essex
- model shipways
- (and 1 more)
-
Very nicely done Hamilton. The copper on my Syren was finished with a coat of Floquil flat finish. This was several years ago and it has aged (darkened and mellowed) nicely, notwithstanding the finish. Bob
- 69 replies
-
- 1
-
-
- fair rosamund
- occre
- (and 1 more)
-
Wonderful start on the lower planking Rusty. Bob