

baskerbosse
-
Posts
212 -
Joined
-
Last visited
Content Type
Profiles
Forums
Gallery
Events
Posts posted by baskerbosse
-
-
Hi Michael,
I would suggest removing the pins and replacing them with a fid, -a square wooden pin that goes through the topmast sideways, just above the trestle trees.
The topmast should rest on the treatle trees by means of the fid.
Hope this helps?
-Great work by the way. The tops are turning out fantastic!
Cheers,
Peter
- CaptainSteve, EJ_L and fmodajr
-
 3
3
-
Thanks Nenad
Hope your back feels better?
/Peter
-
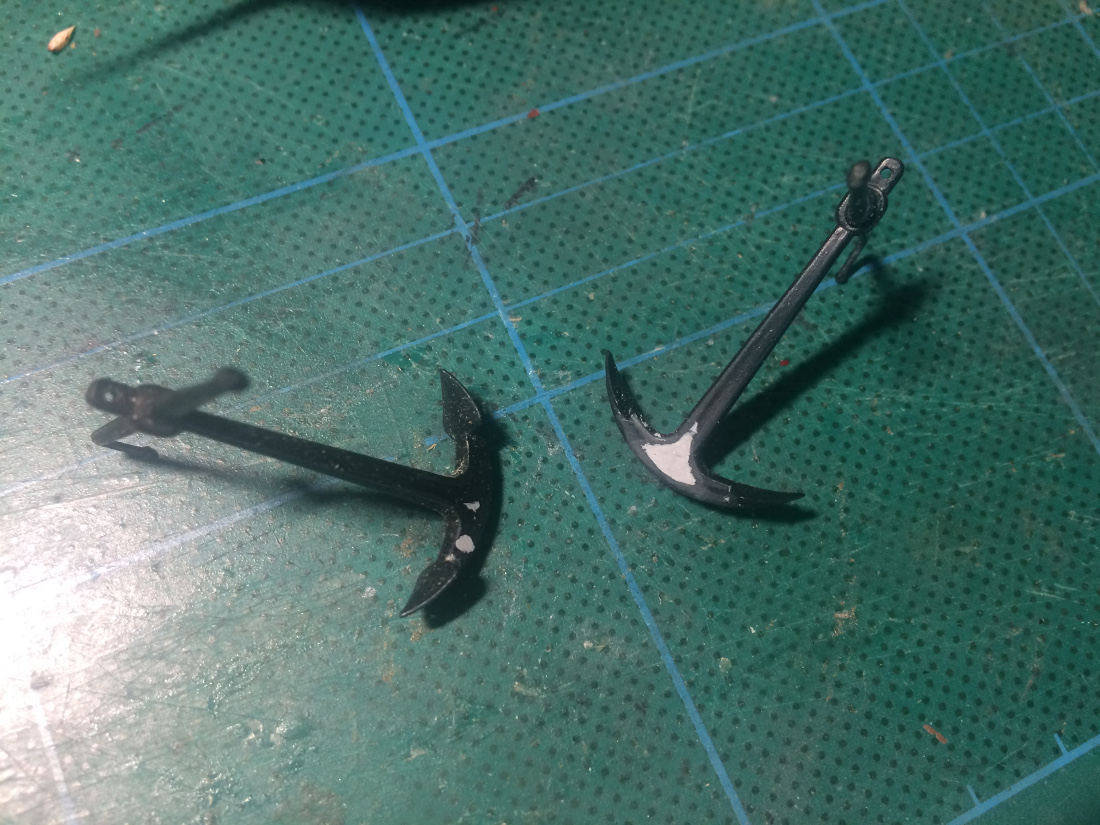
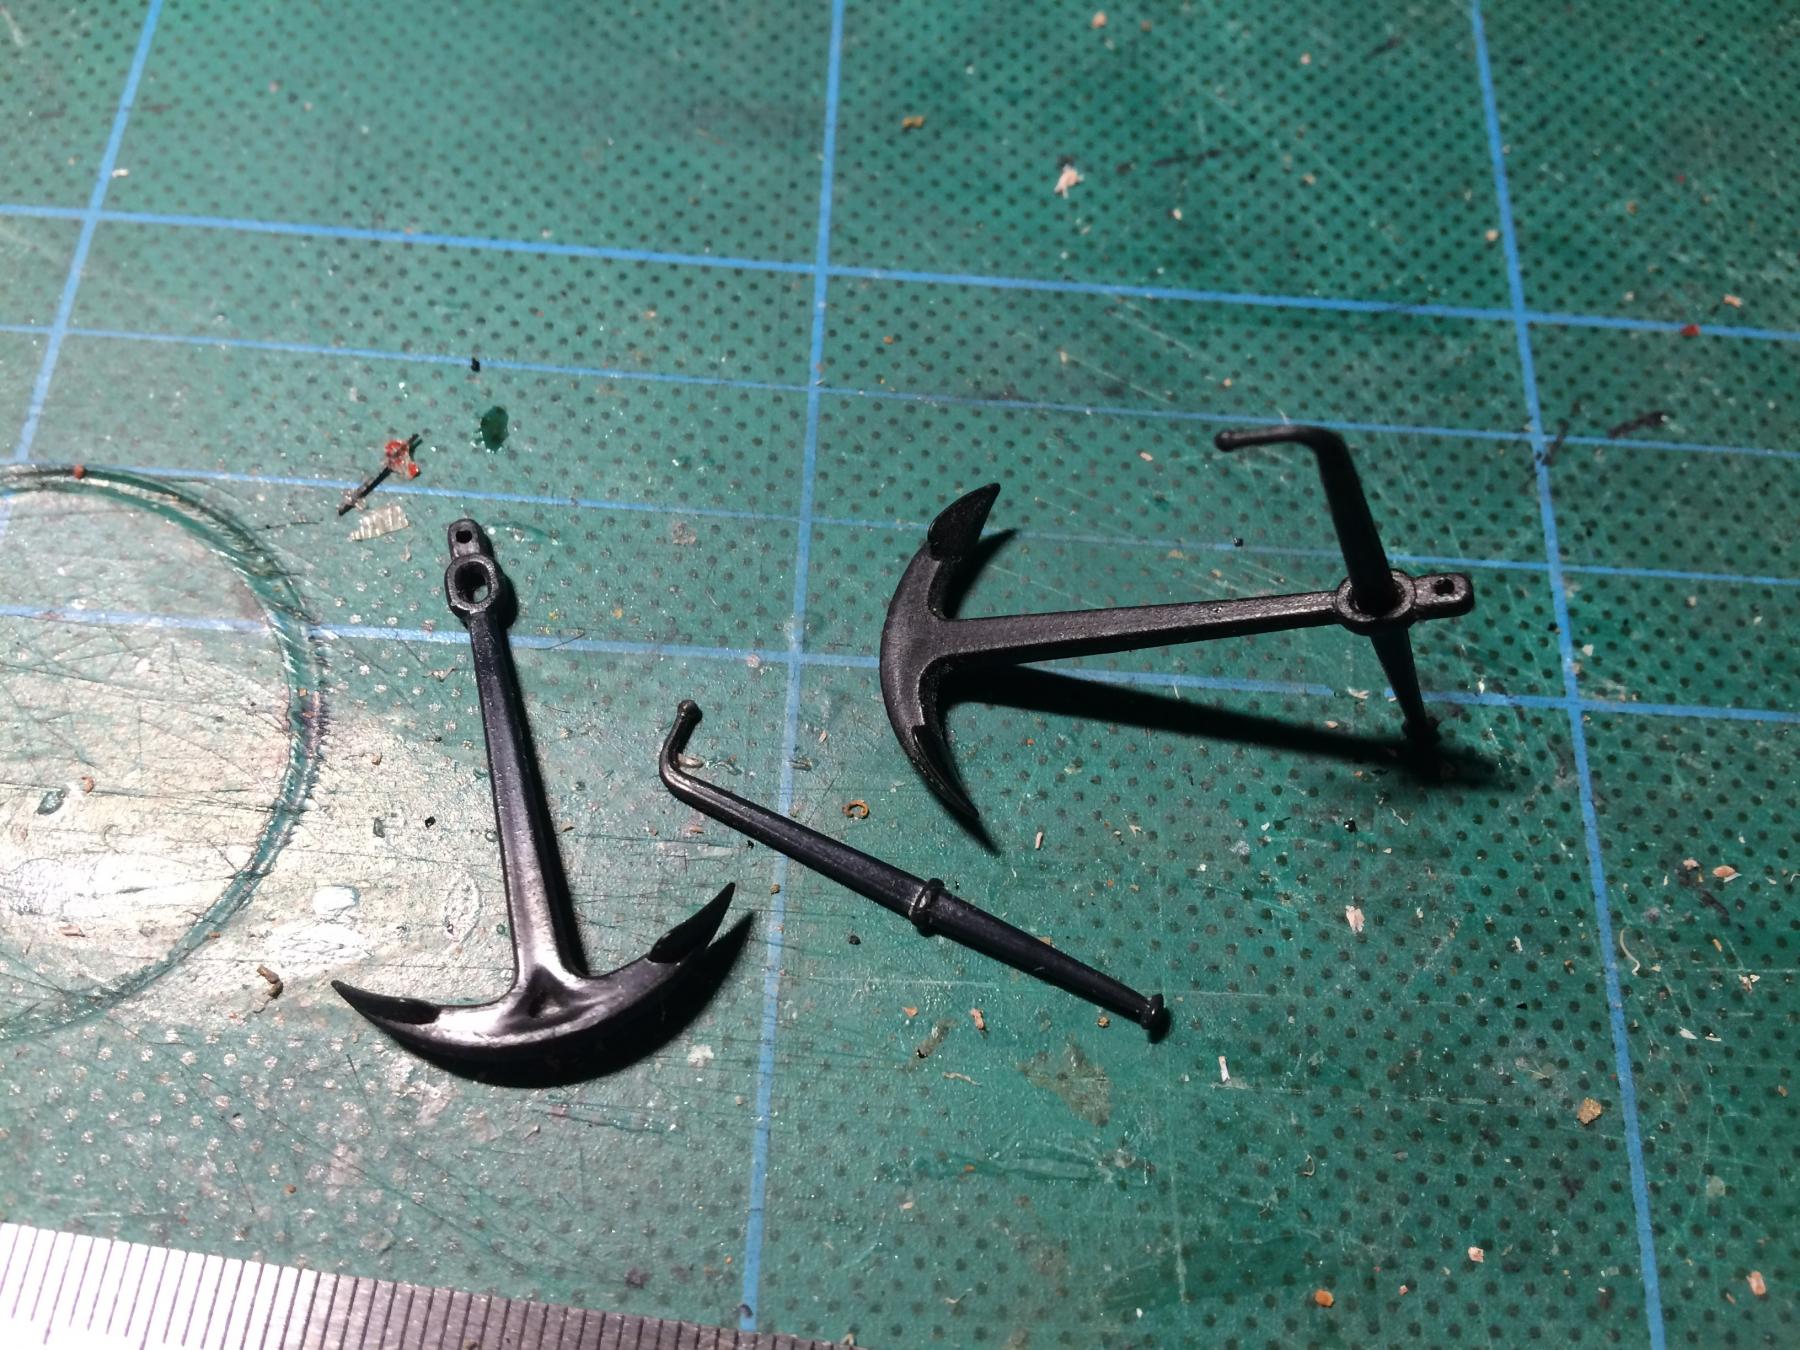
Putty and paint done on anchors.
(No it didn't really take three months I have been busy with other things...)

Cheers,Peter
-
-
Hi Michael,
Which book is that? It's not the Vasa I, I believe, I have that one.
(JPS Lotus, the way an F1 car is supposed to look ;-) -I built this one, http://f1lotusbuild.blogspot.com.au/I have a Lotus 78 in 1:20 scale still to build as well)
Cheers,Peter
-
Hi Michael,
The guns should probably not point straight out anyway.
Have you seen this?
http://warshipvasa.freeforums.net/thread/150/observation-regarding-frames-dutch-built?page=3
-Specifically this diagram:
http://warshipvasa.freeforums.net/attachment/download/632
From Fred Hocker.
Cheers,Peter
-
-
Great work.
The finish and skin tone looks just right.
I would suggest not using white for the eyewhites, And make sure to keep them almond shaped.
Remember, if you look at someones eyes, you see eye white only a bit on each side of the iris, if even that.
Returning with skin colour for the eyelids might be helpful in creating the right shape.
Bluish grey with a bit of sienna at the corners.
Perhaps at the scale you are painting, omitting the eyewhites altogether might be with a try.
What paints are you using? Oils can be helpful if you need more time to get details right.
Cheers,Peter
-
I know this is not strictly in chronological order.
In actuality, the deck was planked at the same time as the hull, but here i'm showing it afterwards:
First waterways: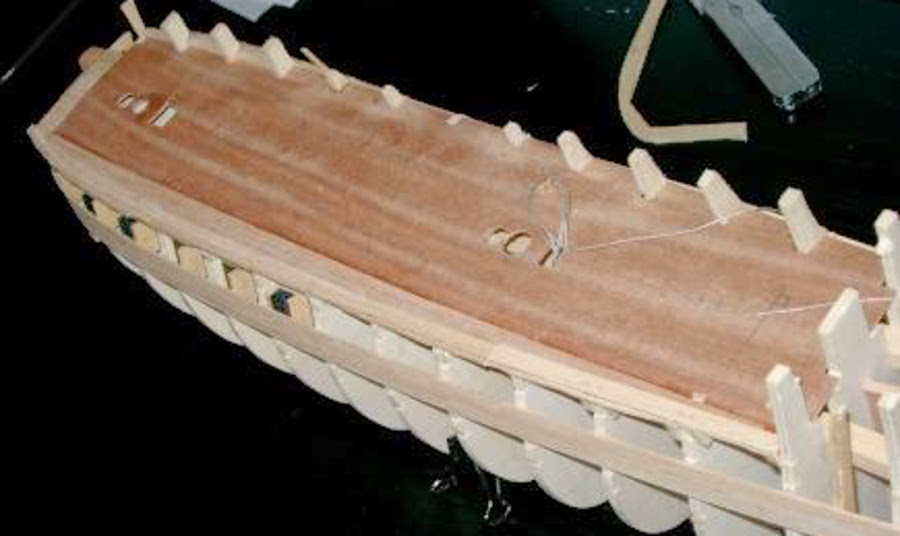
Both sides: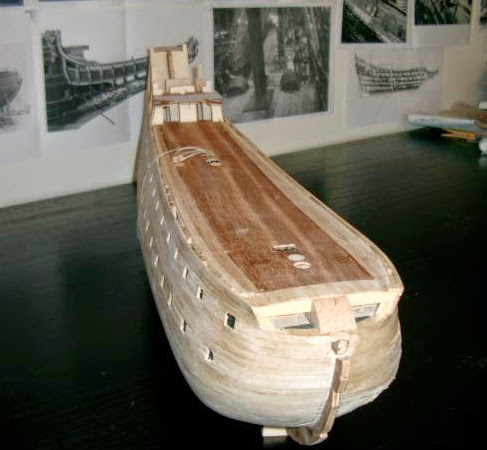
The planking might look random, but it is an exact copy from the museum plans.
The deck planks are of highly different lengths and widths:
Main deck planking finished. King planks and waterways are basswood.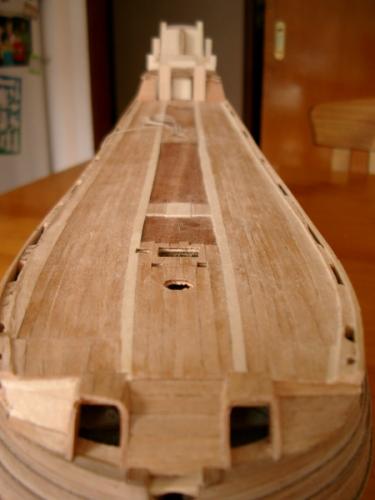
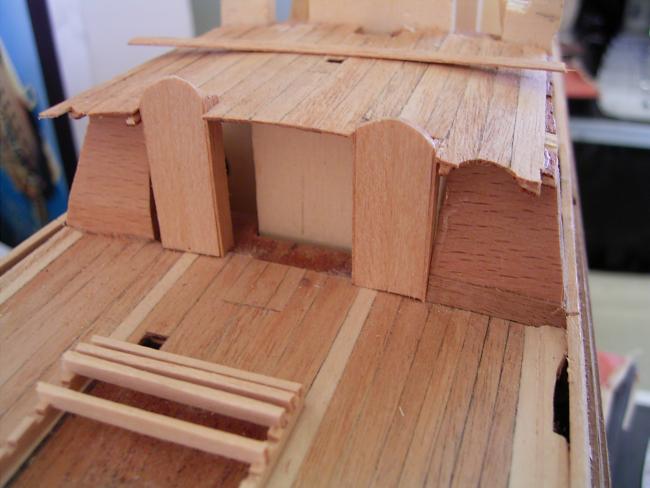
Next, the problem of fixing the gratings. Corel has them just glued on top of the deck.
(In actuality, they sit between the king planks, flush with the deck)
Cheers,Peter
- GrandpaPhil, puckotred, Baker and 2 others
-
5
-
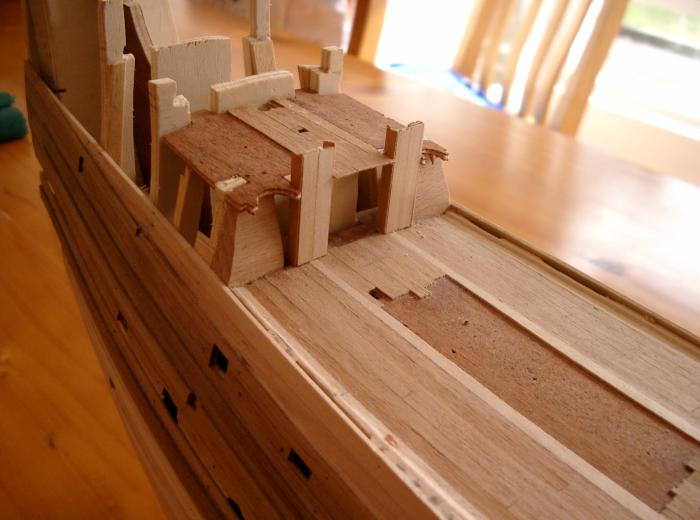
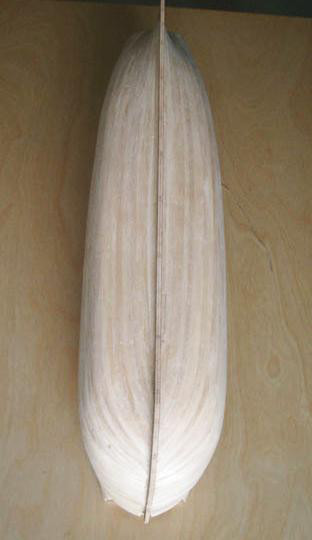
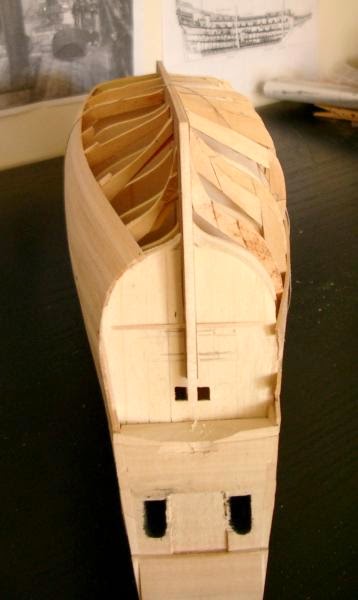
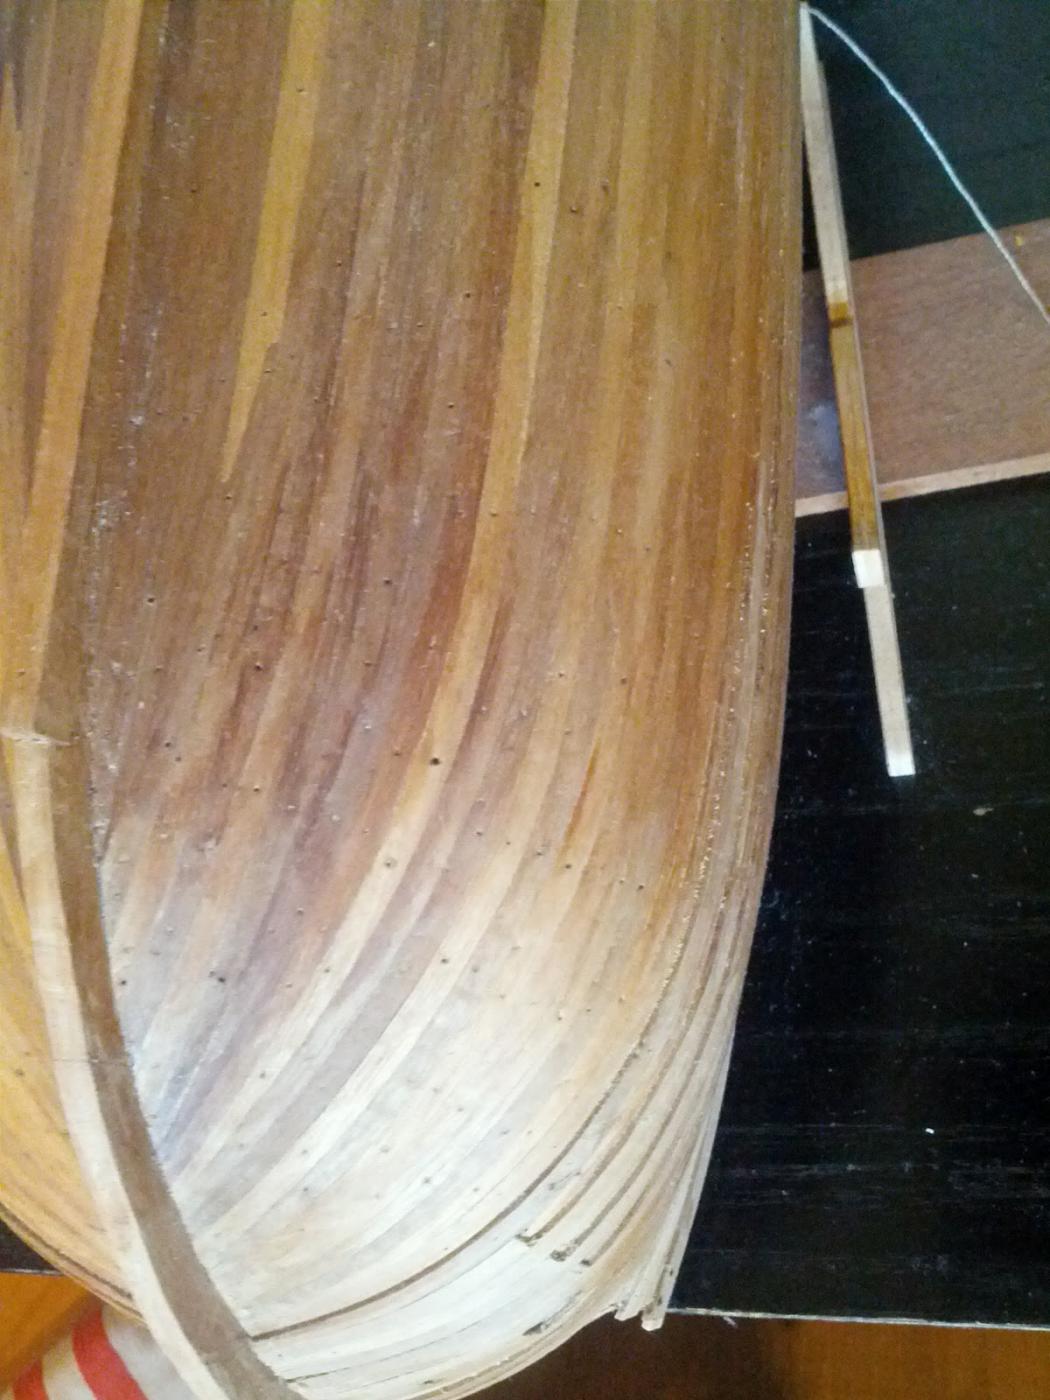
More pictures from the second planking:
Beakhead bulkhead as per museum plans.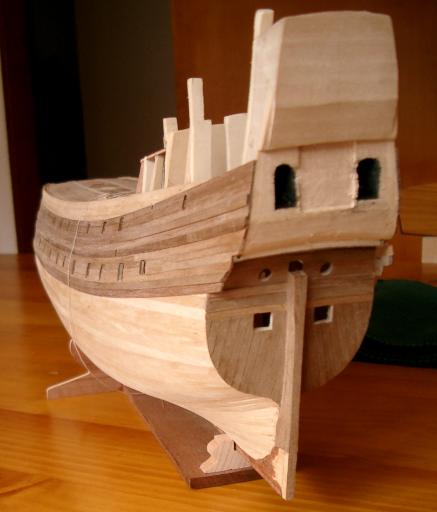
I had started mahogany planking from the keel upwards with the view to paint over it with white.
When I decided against that approach, I purchased more walnut and proceeded with walnut planking all the way to the keel.
I also cut the plywood keel off and replaced with walnut.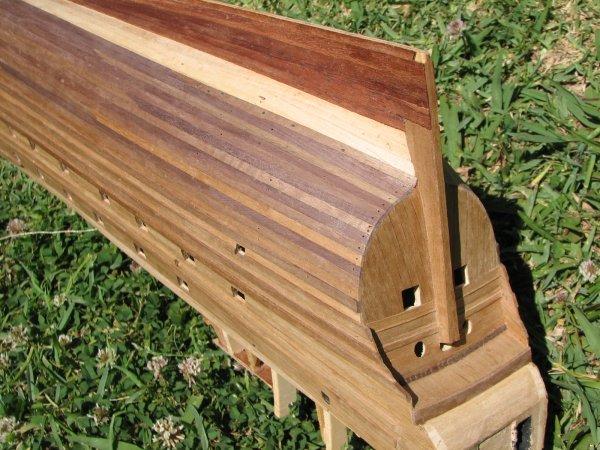
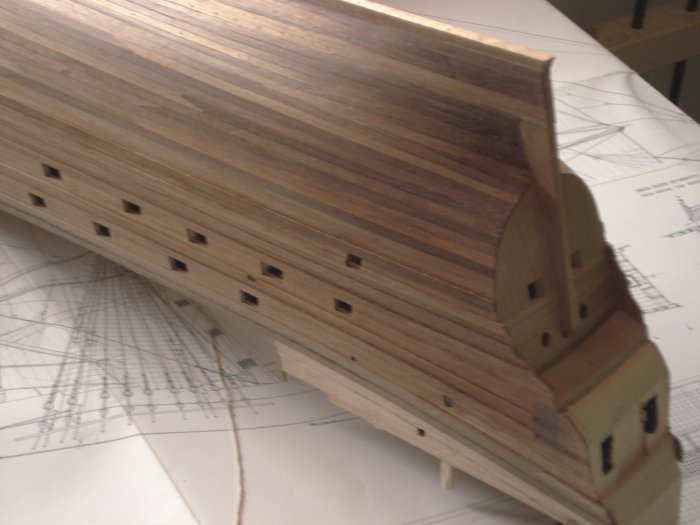
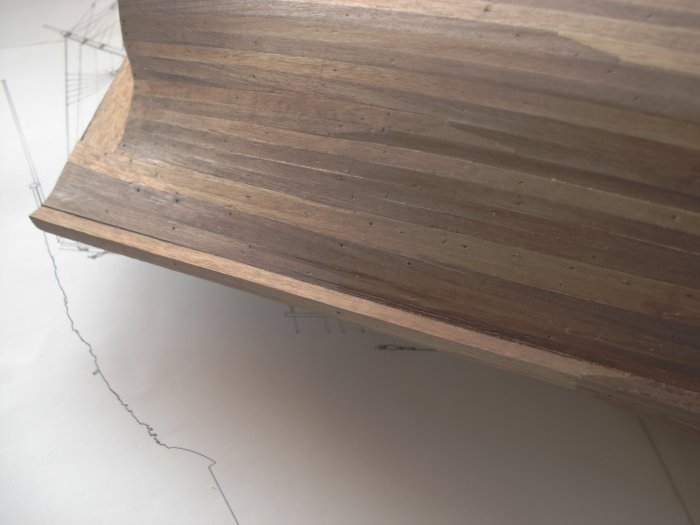
Cabin windows:
Pictures of the laying of deck planks to follow.
Cheers,Peter
-
Thanks everyone for your comments!
Mark, I don't know how they used the museum plans. Pretty clear they didn't loft the frames from them.
B.V. -If you don't mind the errors, I'd suggest to ignore them and build as is.
If you want to start fixing them, I recommend selling the kit and build from scratch.
Fixing it is a huge job.
Michael, I don't think I will be using the sculptures either. I have already started making gunport lions out of Super Sculpey.
From memory, I think one of the masts were too thin as well, either the fore or the main, so I ordered a replacement from the right diameter.
Also, the thick walnut planks for the wales were not wide enough, so I ordered replacement for these, plus enough thin walnut to continue to the keel with walnut instead of the supplied mahogany.
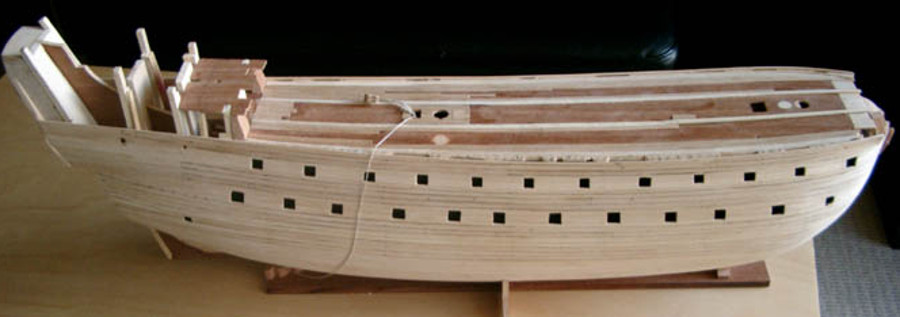
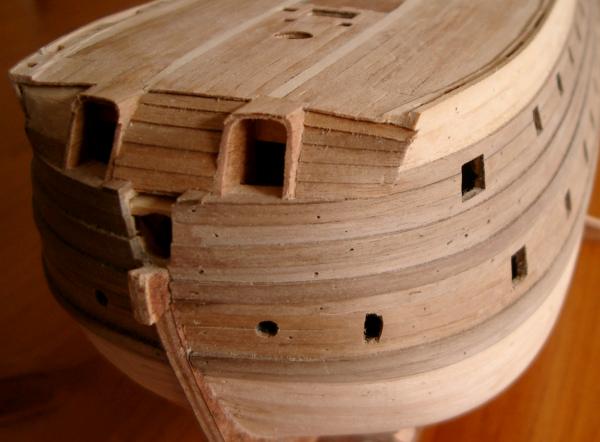
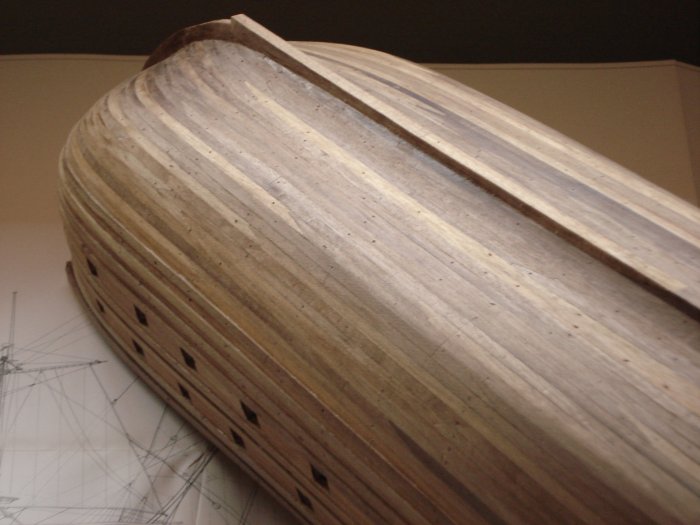
Mr Pucko, I think you have made the wise choice in using a kit that is truly made in cooperation with the museum.So, this is the hull after first planking:
Marking out run of wales with pencil: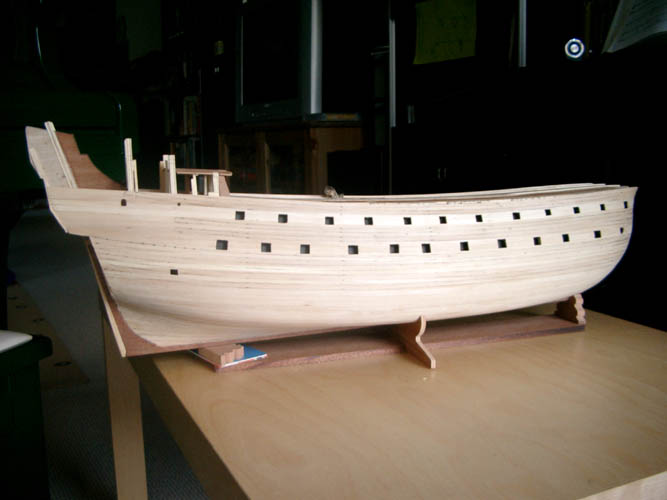
Bow view: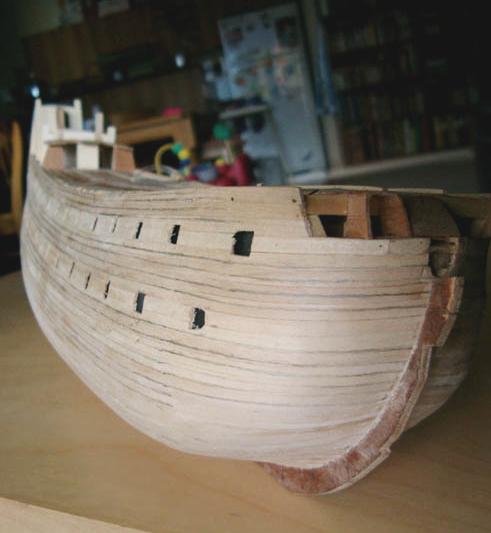
First runs of second planking: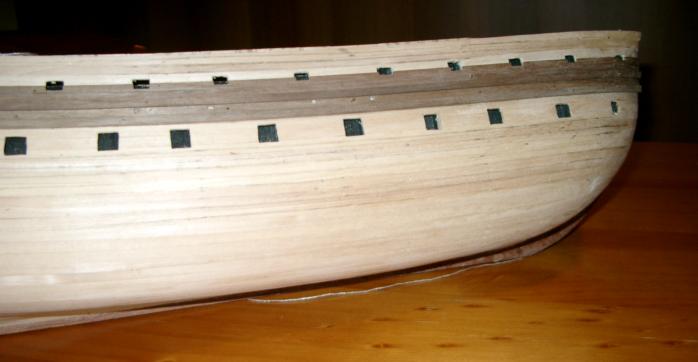
Transom planking: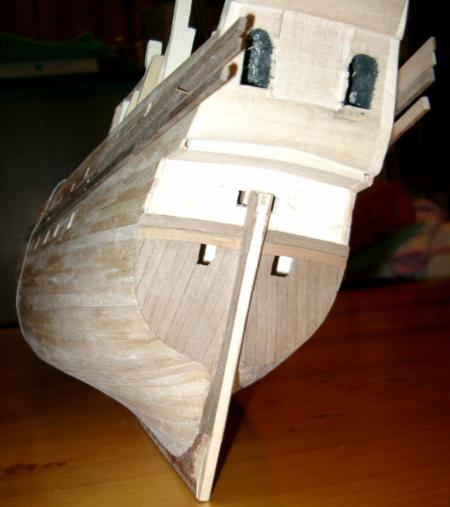
More to follow, sorry for the delay. (Please bear with me, I'm collecting images from multiple websites and image folders up to ten years old .. :-o )
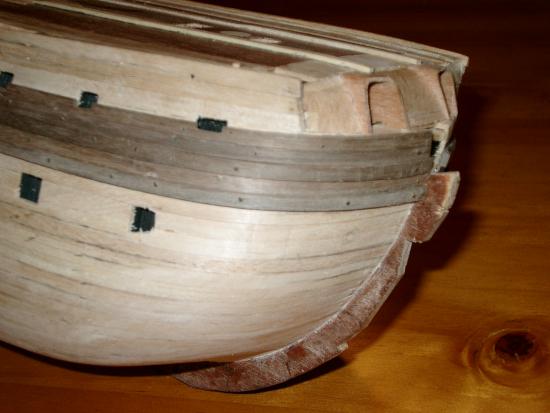
In the meantime, here's a picture of more current work; -The rudder (Corel version below for comparision):
Cheers,Peter
- WackoWolf, md1400cs, CaptainSteve and 4 others
-
7
-
I suspect that if she'd been shaped the Corel way, she would have keeled over as she went from the slip to the water.
The Corel hull is even narrower and even taller than the original by quite a bit..
- CaptainSteve, puckotred, mtaylor and 1 other
-
4
-
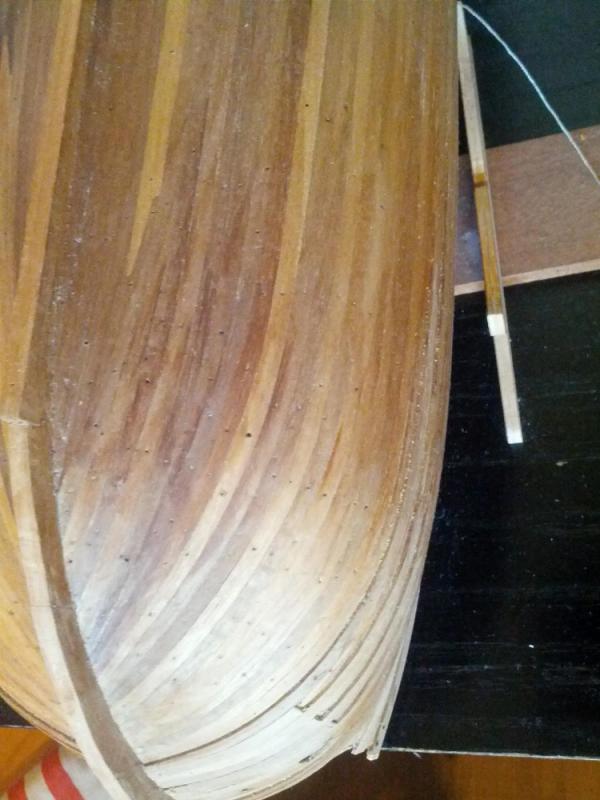
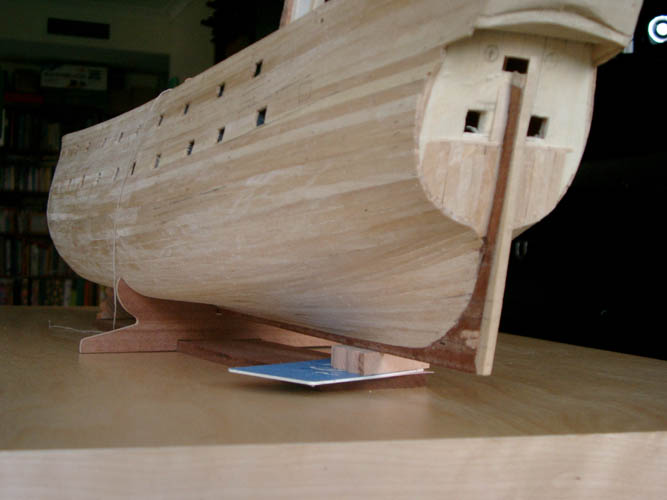
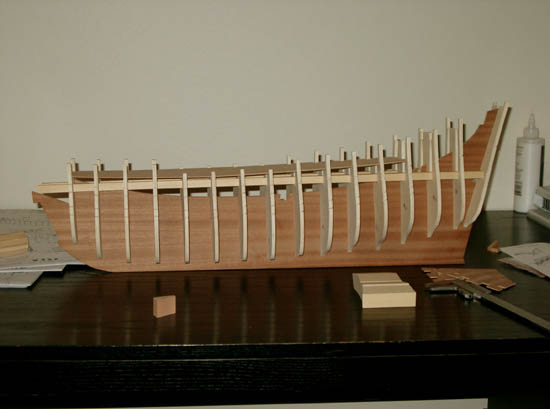
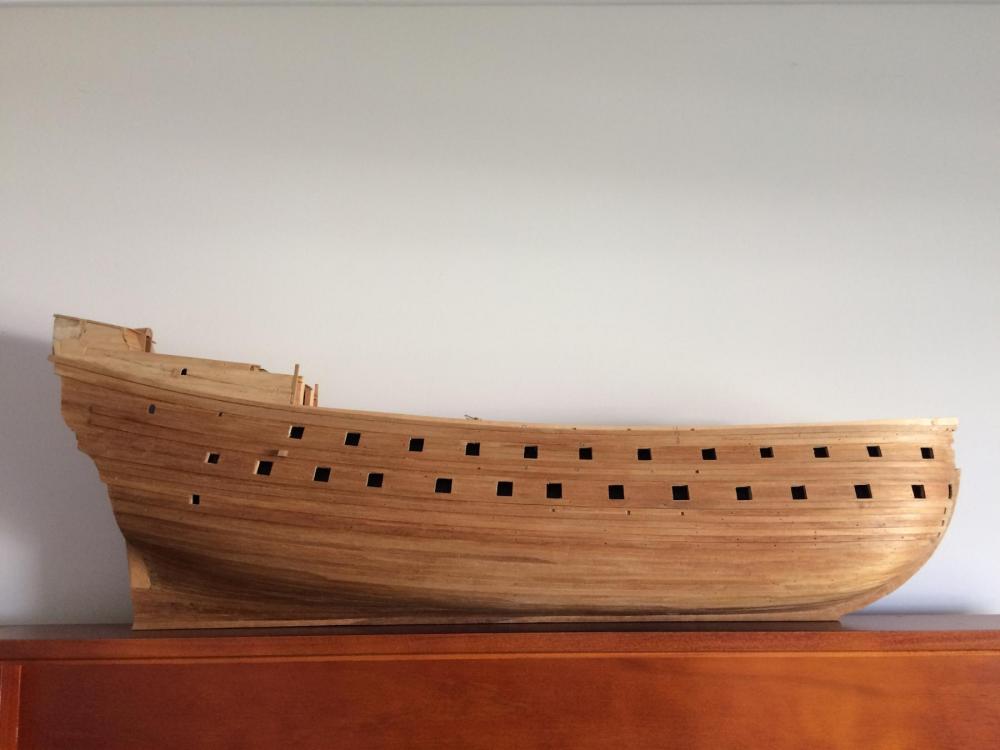
Lowering the deck and creating new frames:
The new frames are part frames, part "shape guides used to pad out the existing frames so that the hull matches the proper shape.
Paper station cutouts are used to check from the outside that the resulting shape is correct..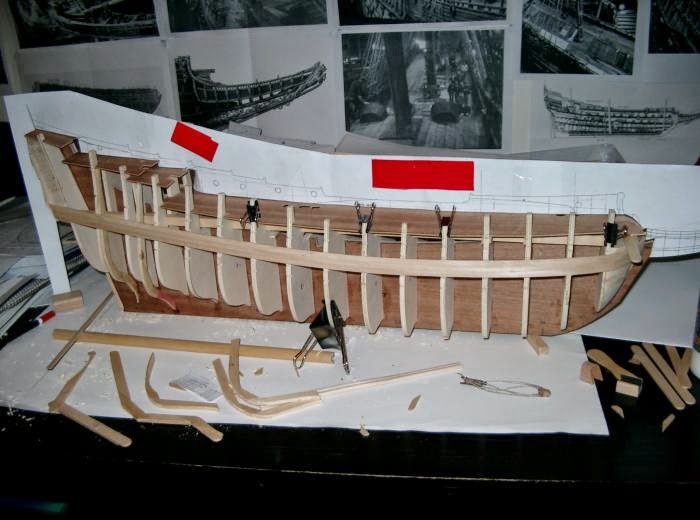
Continuing adjusting the shape.
The lower hull in the stern according to the kit has no volume at all.
Just a giant wooden blade.
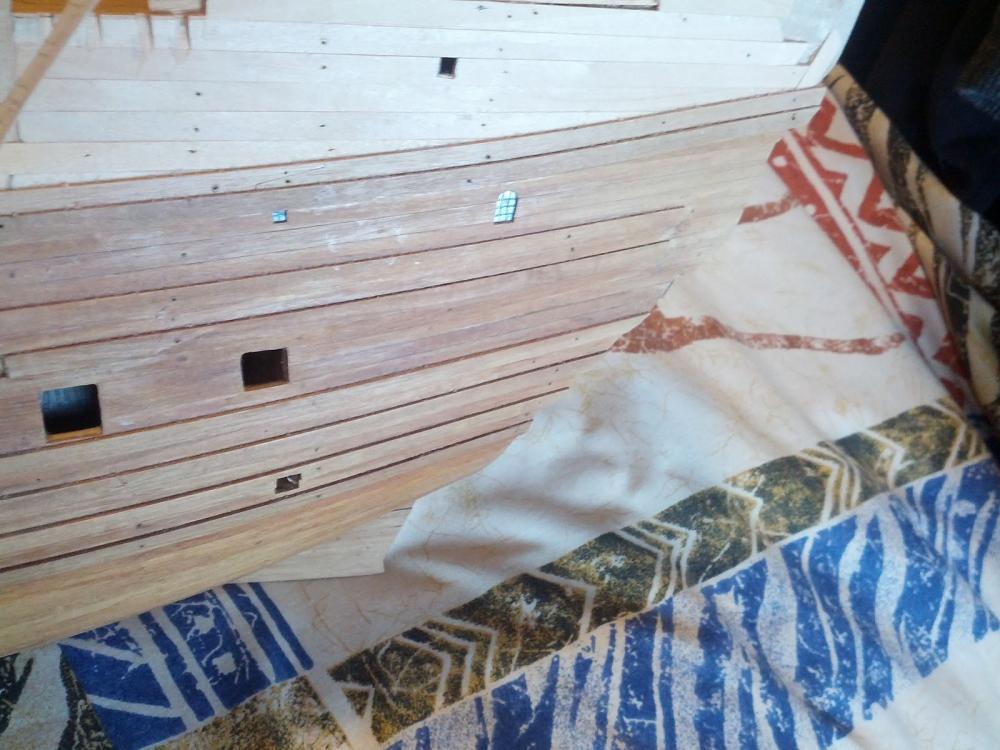
Here you can see numerous problems with the fore deck.
It's too narrow (waterways fit outside of bulkheads)
It's too short.
The fore mast is too far aft.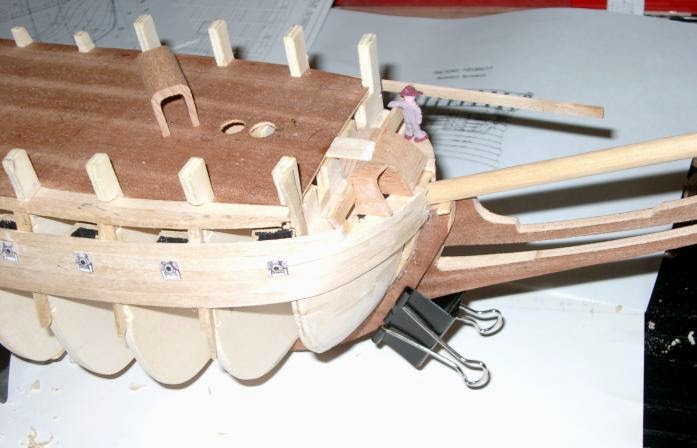
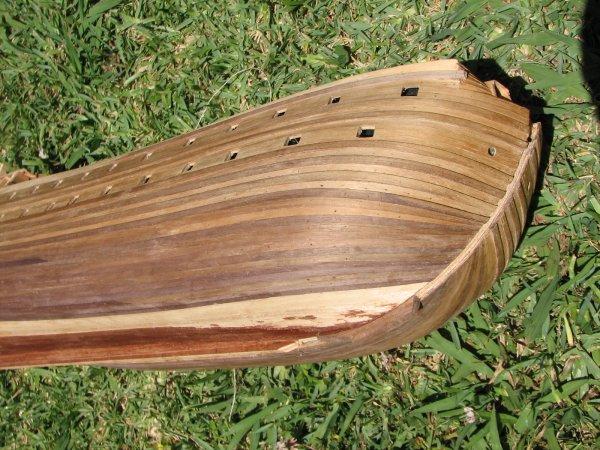
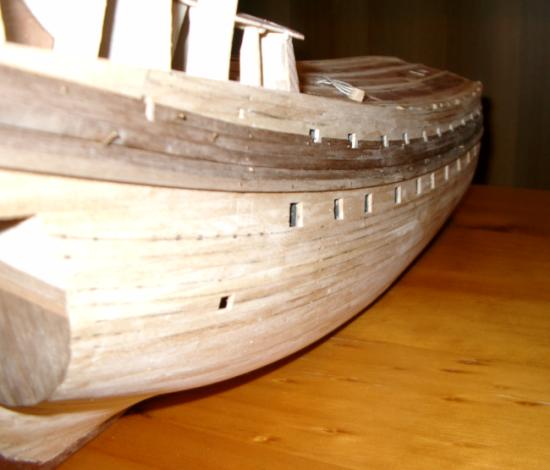
Planking progressing. The planks don't touch the original Corel bulkheads much.
Nearly done.
What is pretty neat is that with the proper shape to the hull, the planks run really well from end to end without need for stealers or dropped planks.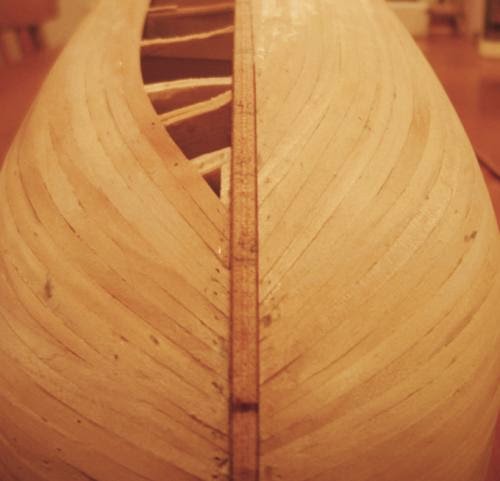
Next to follow, Second layer planking.
Cheers!
Peter
-
It does not seem unreasonable to me to think bright colours were used.
We do have accounts of what pigments were used, they are on display in the museum:
https://upload.wikimedia.org/wikipedia/commons/thumb/0/0b/Vasa_color_pigments.jpg/500px-Vasa_color_pigments.jpg
Unfortunately, some of these pigments fade or darken with age, so tones on surviving sculptures and paintings found elsewhere tend to be duller and/or darker than they would have been originally.
It can be interesting to compare with church carvings.
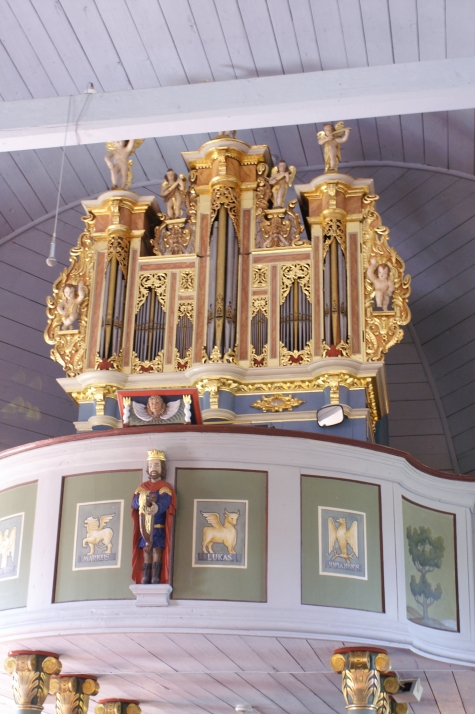
For example, see Övertorneå church:
http://norrbottensmuseum.se/imagegen.ashx?image=/media/375284/nbovertornea1.jpg
Where incidentally the upper half of a church organ with a facade carved by Mårten Redtmer (who also carved Vasa´s sculptures) survives;
http://www.overtornea.se/Global/Bilder/Kultur%20och%20fritid/Kyrkan%20Orgeln2%20liten.jpg
This organ was located in St Gertrude in Stockholm for 150 years before moved. (Possibly some of the original painting has been gilded over during this time, as gilding became more fashionable than natural colours)
The lower part, also by Redtmer, is located in Hietaniemi church:
http://www.allakartor.se/venue_images_475/58674_37884117.jpg
Perhaps some of the original colours have been restored since the 1770s, when a copy was built and installed in St Gertrude (Tyska Kyrkan).
To me this "new" one looks more golden:
https://upload.wikimedia.org/wikipedia/commons/e/e5/Tyska_kyrkan_Orgel_(1).jpg
Cheers,Peter
- EJ_L, slow2cool, BLACK VIKING and 2 others
-
5
-
I doubt the sailors would be tasked with maintaining the sculptures.
Analysis has shown painting techniques with blending of multiple colours and accentuations with gold leaf.
In baltic waters, I suspect there would be plenty of time for maintenance during the winter months when the fleet would be frozen in.Cheers,
Peter
-
Looks great!
When comparing the 1/10 model with the actual ship, it may be worth considering that there are sculptures that are not mounted on the actual ship.
Either because they are missing, or that it has been deemed not suitable to mount them. It may be safety reasons, or the sculpture may be too fragile.
When it comes to identify reconstructed parts, quite often it's possible to identify new pieces on the ship, as they are typically lighter wood.Also note that the 1/10 model seems to have oversized sculptures in many places, especially if one compares the upper gallery roof sculptures that on the ship are considerably thinner than on the 1/10 model.
Cheers,
Peter
-
This is in there somewhere:
The hull is about 1.5 cm too tall and 1 cm too narrow. The masts are in the wrong places and the deck is too short.
The main mast is too thin, the sternpost angle is too great and the main deck is too short.
But that's not the worst.
The worst became apparent when I got the museum plans and started checking the shape of the hull: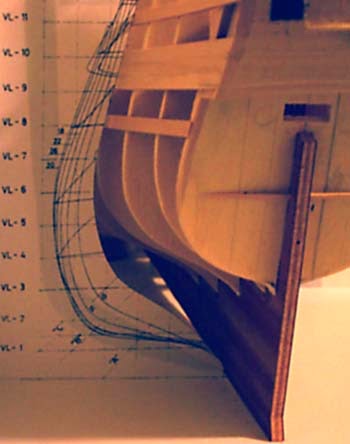
The reason I ordered them in the first place was that the kit frames looked quite odd and not really reasonable, unless you are a Dr Seuss illustrator..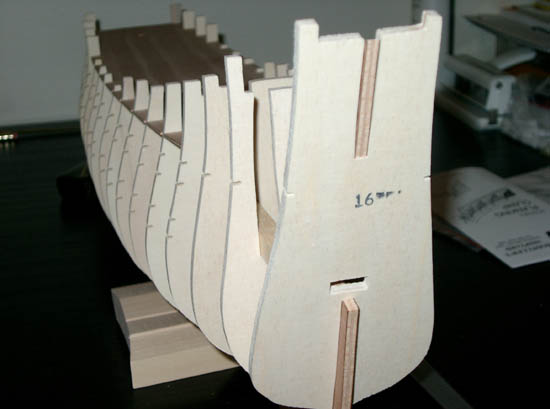
Before receiving the museum plans, I tried to assess how it could be fixed using the sketch on the left, based on photos and drawings from litterature: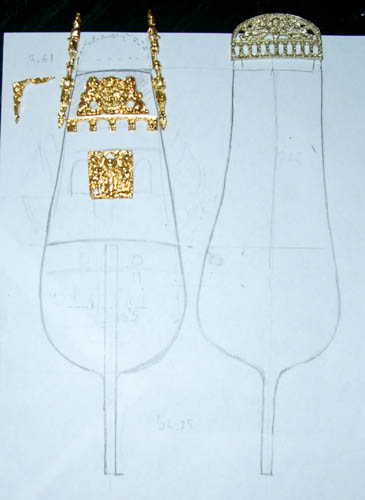
The outline on the right is surprisingly a carefully made tracing of the frame as provided in the kit.
No, it's not symmetrical.
Analysis for what needs to be done on the hull(essentially a complete change of shape:
Extend the main deck forward by 2 cmMove the fore mast 2.5 cm forwardMove the main mast 1.5 cm aft.Reduce the rake of the sternpost, (extend aft by 7mm at the bottom tapering to zero at the top)Take 5mm off the keel and about a cm off the bulkhead tops. (reducing distance keel-deck by 15 mm)Widen main deck by approx 5mm each side. (i.e. 10mm wider)
Plus make new frames.
Cheers,
Peter- WackoWolf, puckotred, marktiedens and 5 others
-
8
-
Hi all,
This is my build of the Vasa, started as kit, but quickly changed to scratch using wood from the kit.
Current side view.I will post some pictures on how it got to this stage.
thanks,
Peter
- WackoWolf, ggrieco, BLACK VIKING and 5 others
-
8
-
-
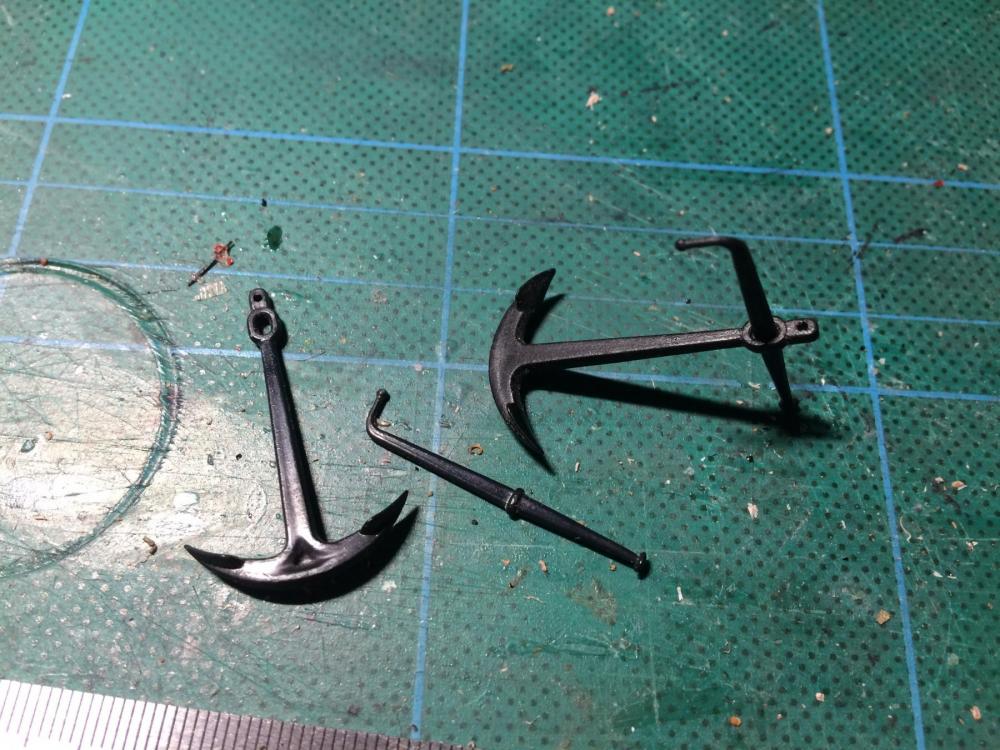
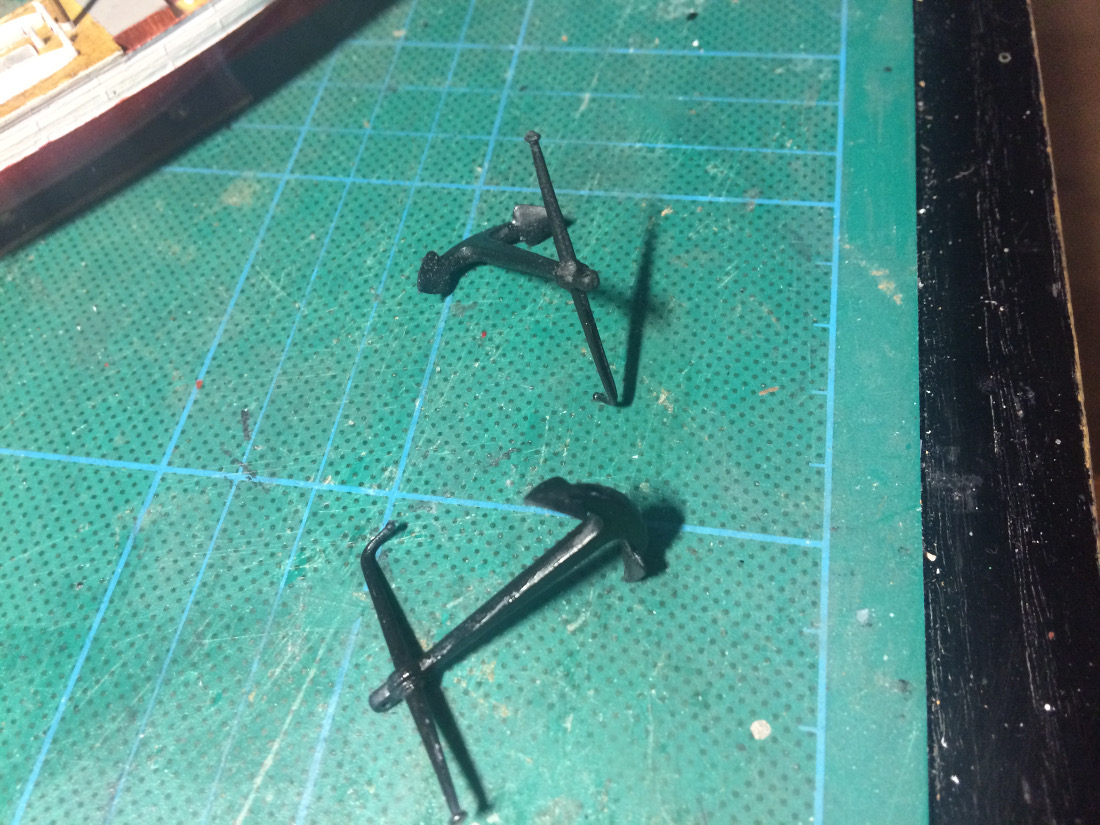
Found the anchors,
Plastic. Not very good casting. Time to get the putty out...
- popeye the sailor and NenadM
-
2
-
-
Very nicely done!
You might want to know that Corel is not known for their accuracy.
Their Amphion kit is not actually of the Amphion, but rather another of F.H Chapman's designs, no 4 on plate XLIV in Chapman's "Architectura Navalis Mercatoria":
http://www.sjohistoriska.se/ImageVaultFiles/id_3074/cf_1787/44.JPG
I have difficulty comprehending the reasoning behind doing this, especially since the real Amphion plans exist, the stern still exist and there are even photos of her.
See "Daniel G Harris: Fredrik Henrik af Chapman: The First Naval Architect and his Work"
Pg 90-91 for the Amphion plans.
Model:
https://upload.wikimedia.org/wikipedia/commons/f/f3/Trtanj-Amphion.PNG
It is a nice model of a Chapman pleasure Yacht though.
It would be nice if more of the Chapman designs were issued as kits.
Very nice work!
Cheers,
Peter -
At the Vasa Museum, I believe they have left gun carriages natural wood on their models, Here's an example from the Kronan exhibit at Kalmar Museum though:
https://upload.wikimedia.org/wikipedia/commons/2/2c/Kalmar_museum_Kronan_(ship).JPG
/Peter
-
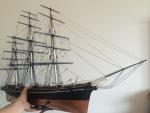
Many interesting details!
I never noticed the wooden hook to keep the sheets out of the water before.Monkey face, -excellent name, just what it looks like!
I noticed with regards to the monkey face plates that the Cutty Sark museum rigs them with the reef tackle holding them outwards.
(Something that I don't think I have ever seen on models of the Cutty Sark)/Peter


.jpg)
.JPG)
Wasa by md1400cs - FINISHED - Corel - 1:75
in - Kit build logs for subjects built from 1501 - 1750
Posted
Yes, that's it.
To lower the mast, the top rope would be used to first lift the mast enough to take the load off the fid.
Then the fid could be pulled out and the topmast lowered.