Supplies of the Ship Modeler's Handbook are running out. Get your copy NOW before they are gone! Click on photo to order.
×


michael mott
-
Posts
5,195 -
Joined
-
Last visited
Content Type
Profiles
Forums
Gallery
Events
Everything posted by michael mott
-
 Really Nice Rob, my that is a lot of work with all that sail and associated lines. Michael
- 1,208 replies
-
- 2
-

-
- great republic
- clipper
- (and 1 more)
-
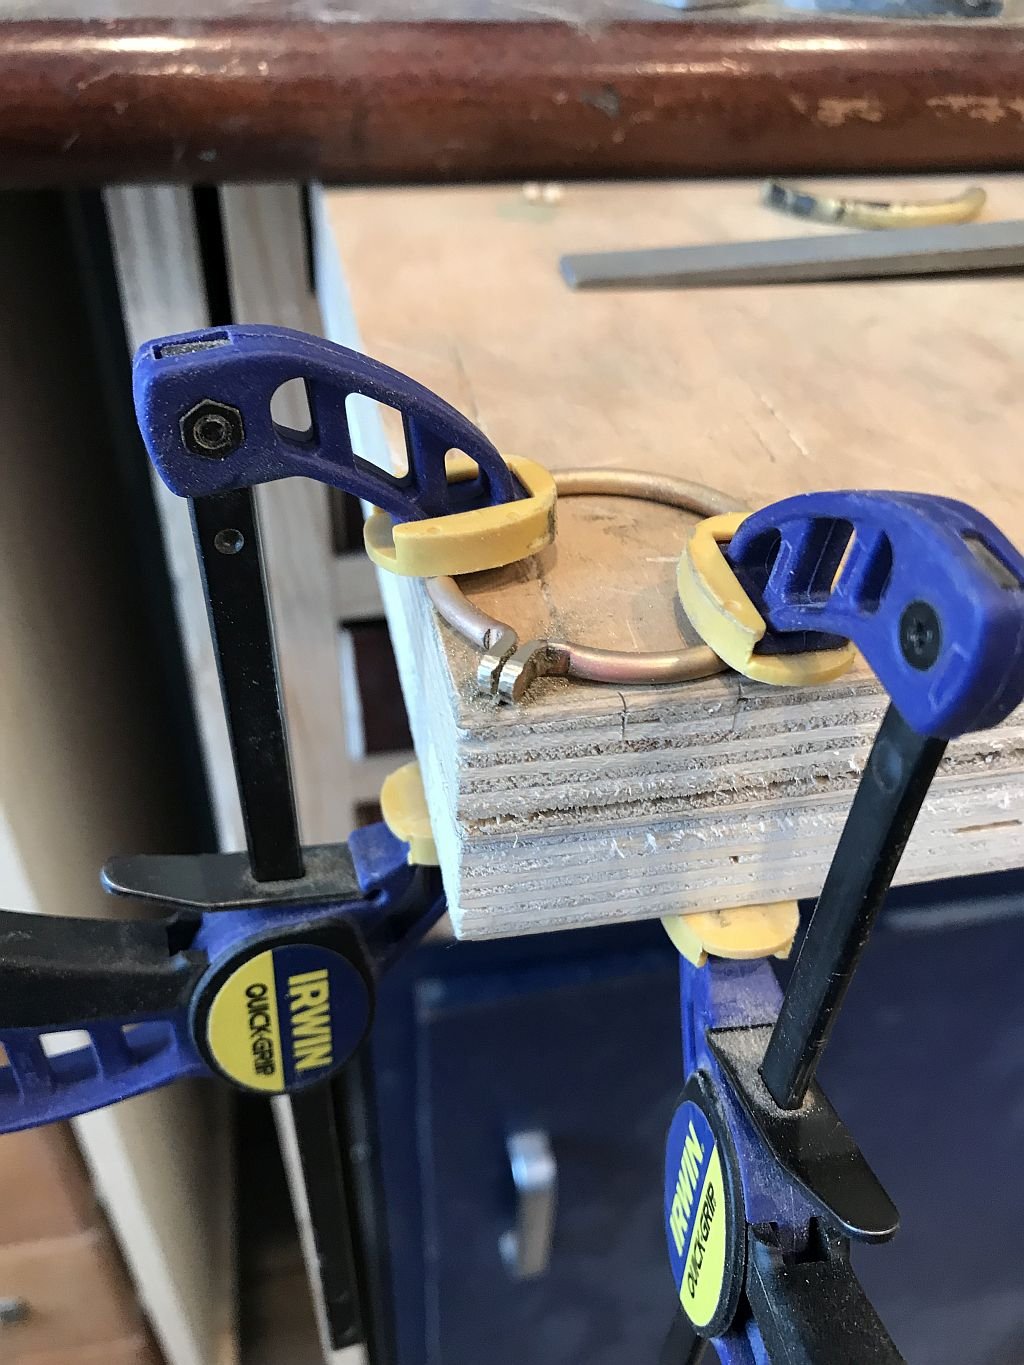
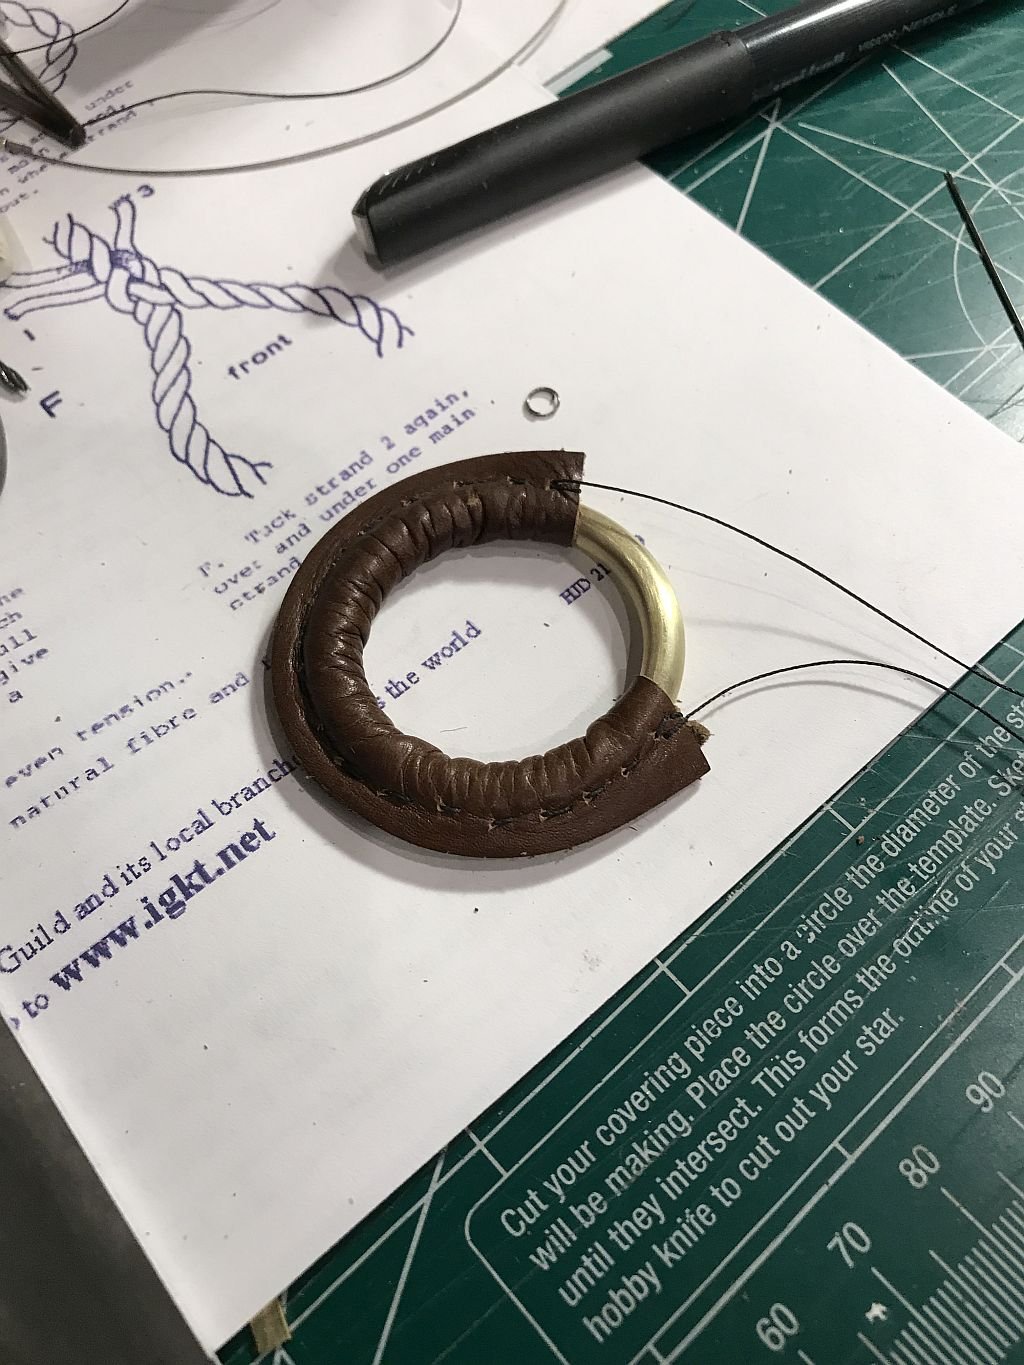
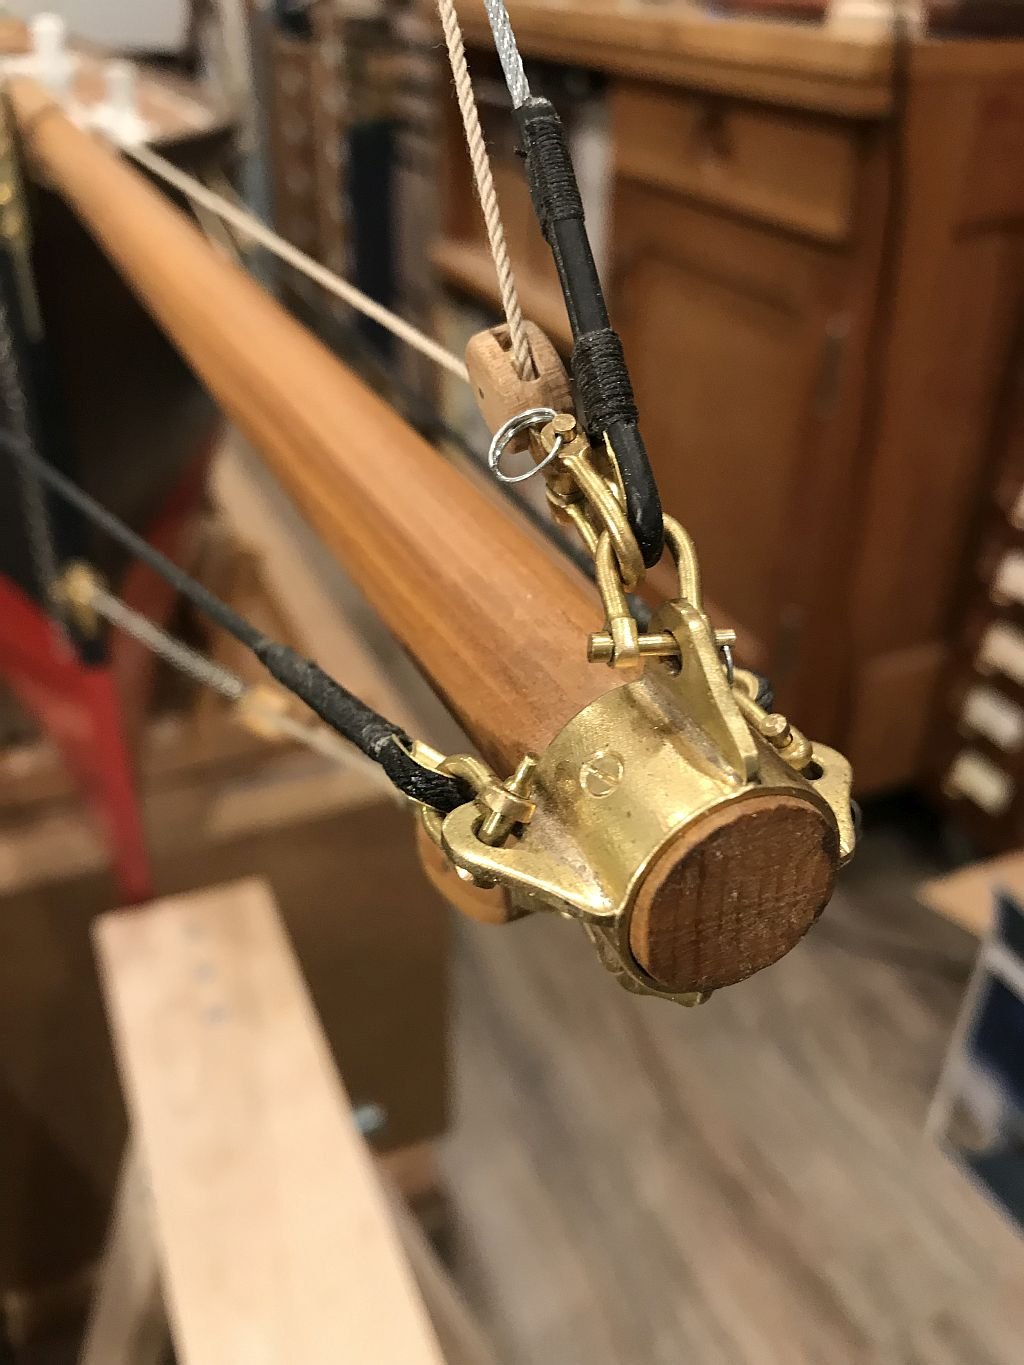
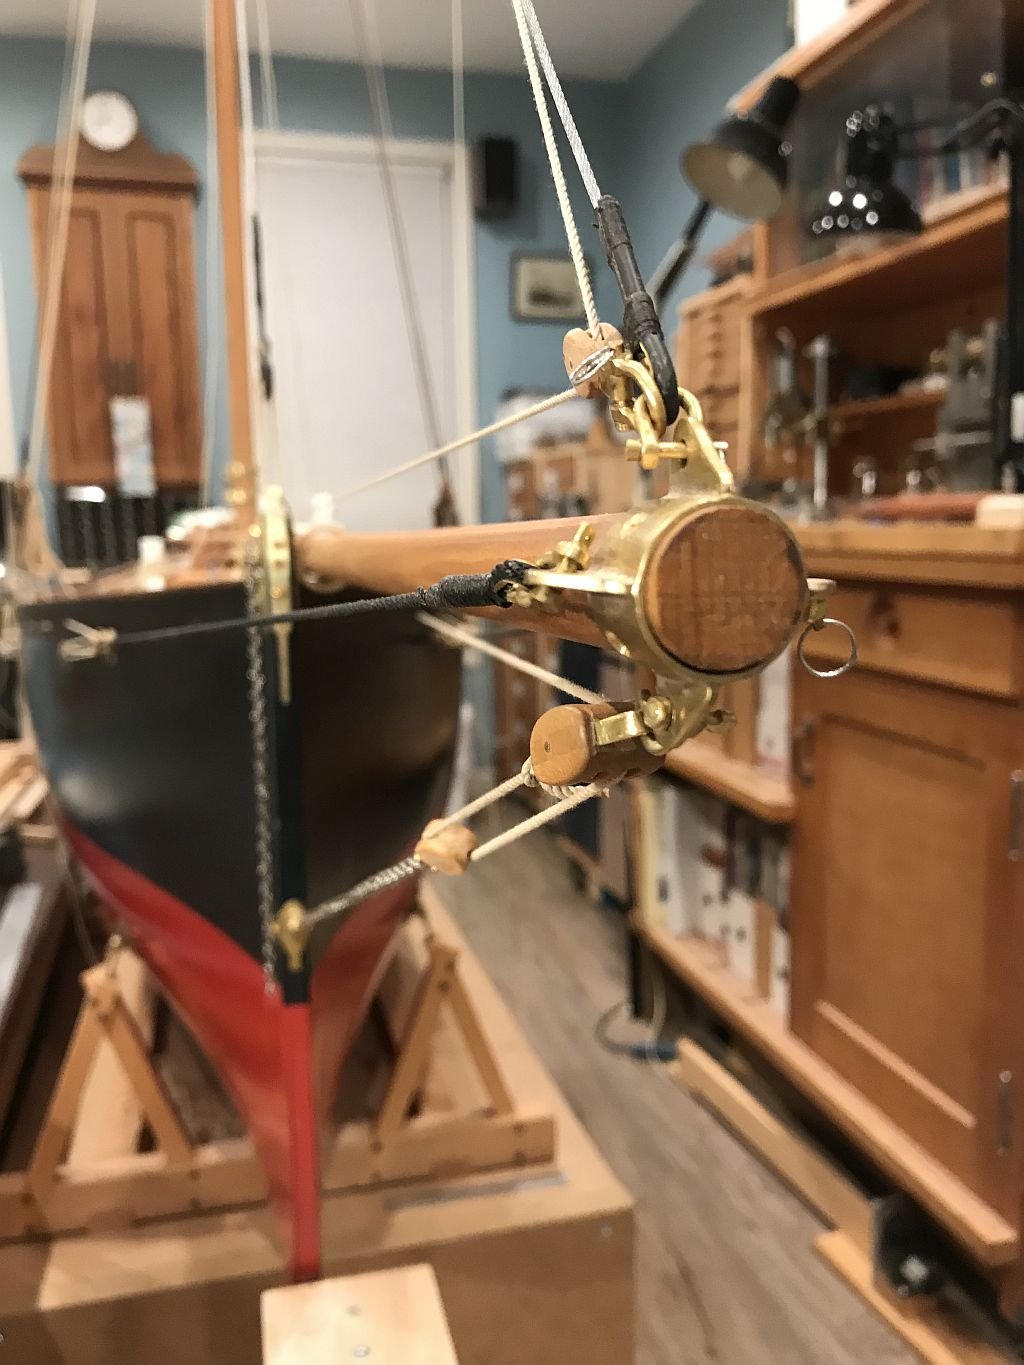
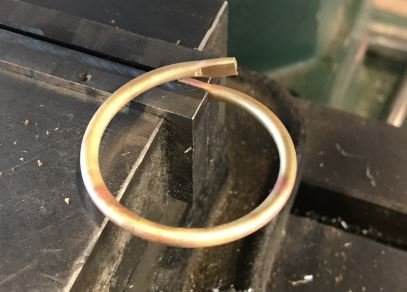
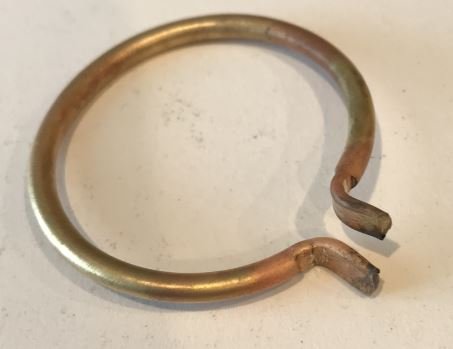
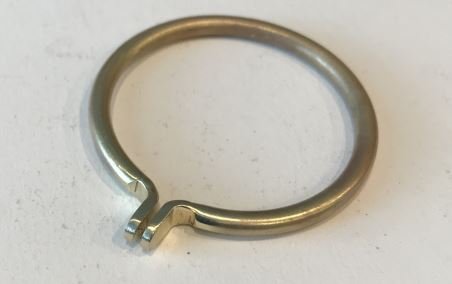
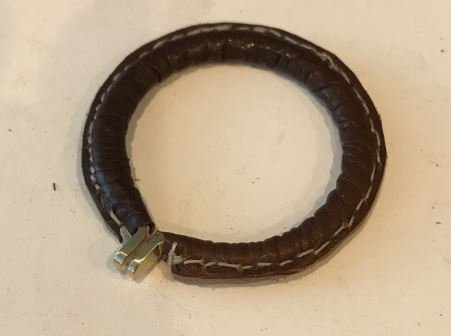
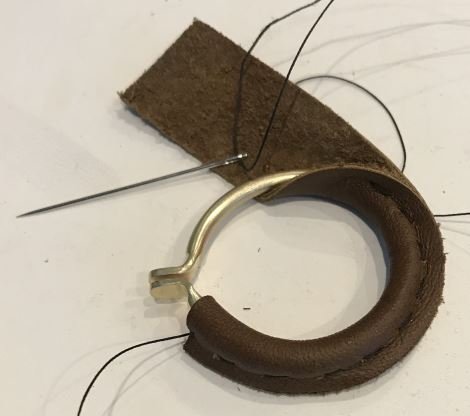
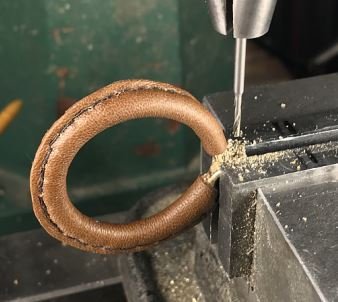
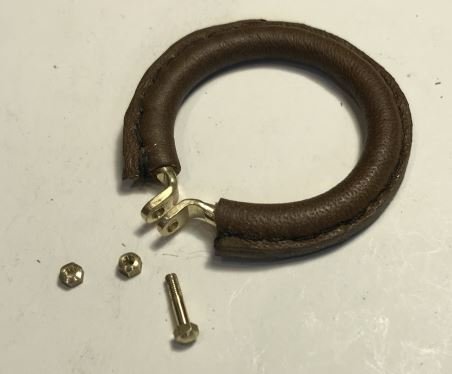
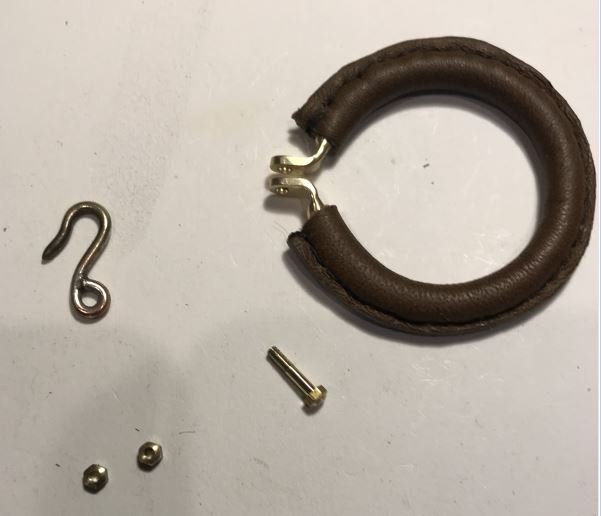
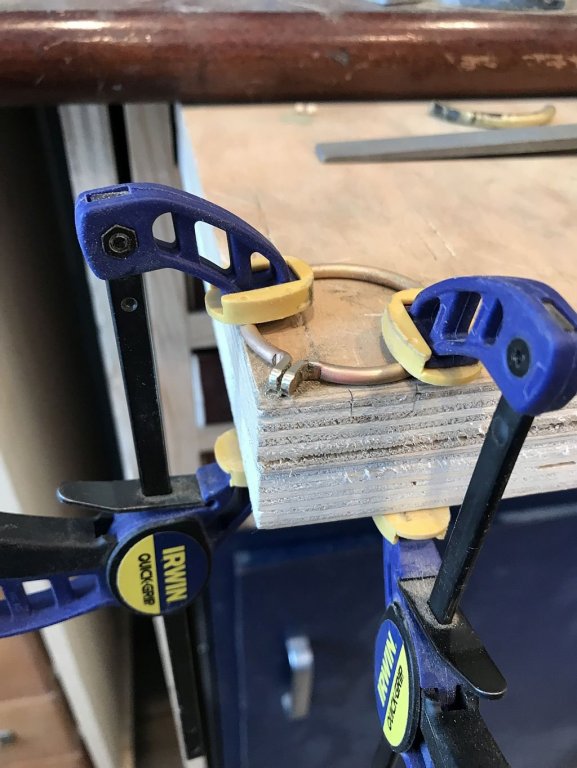
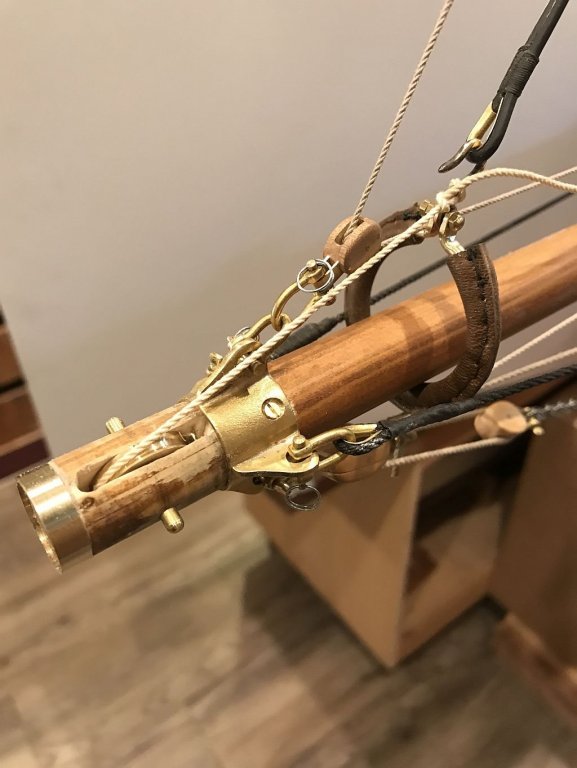
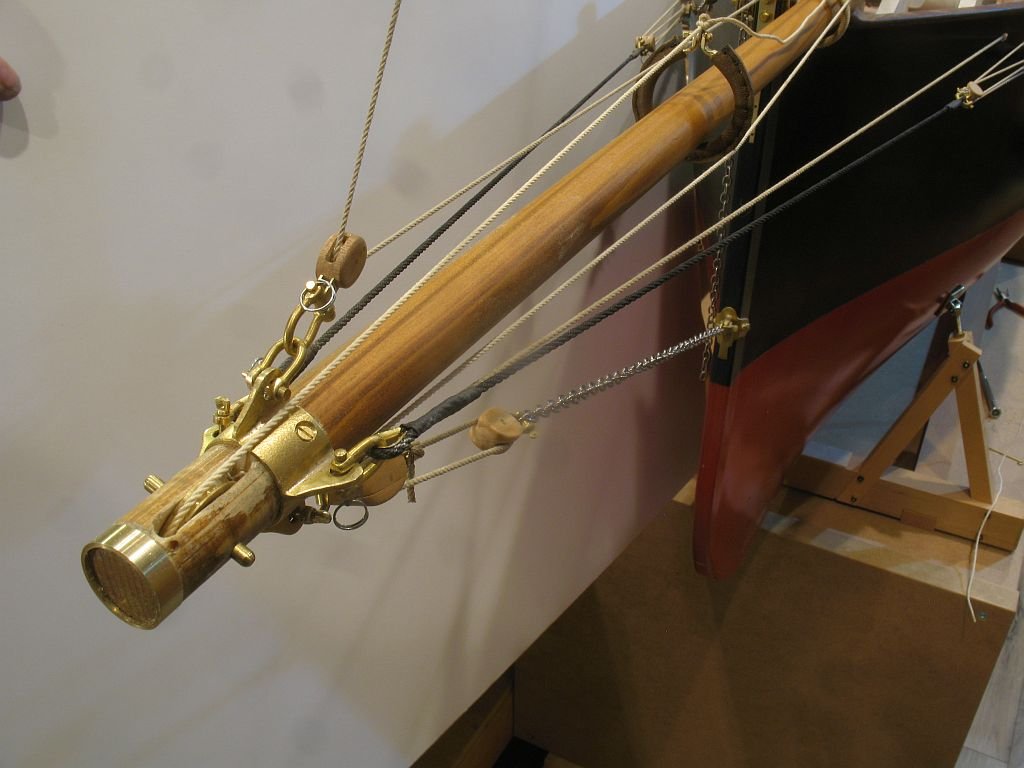
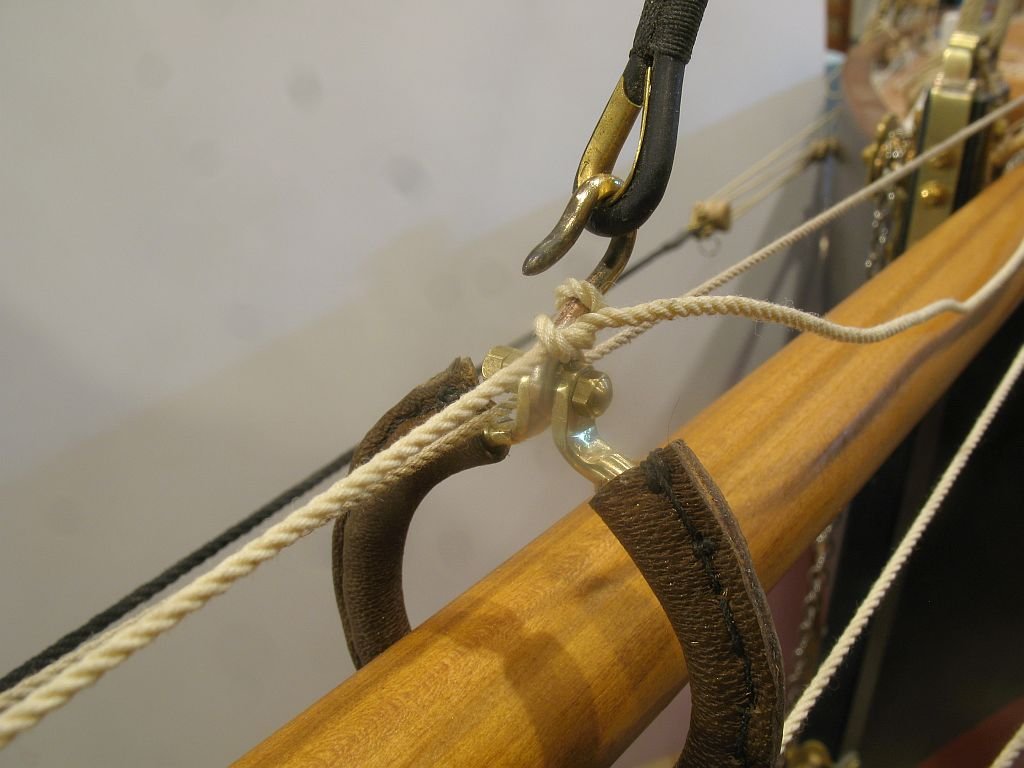
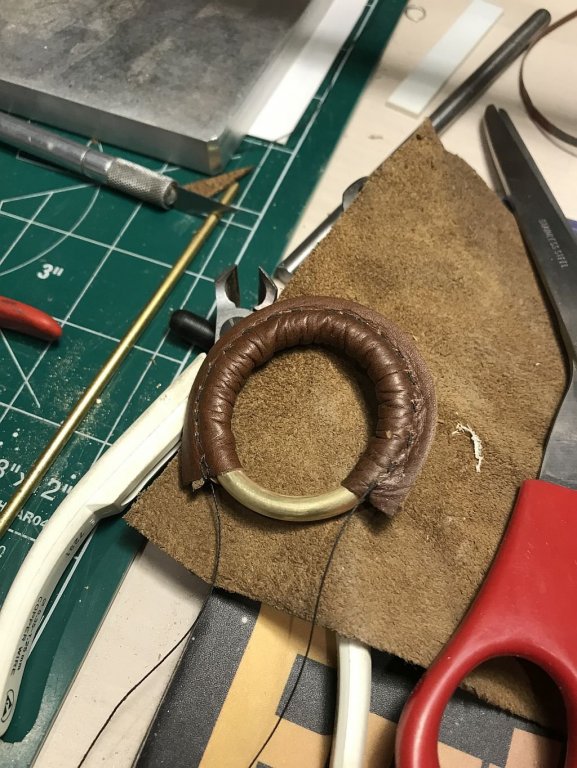
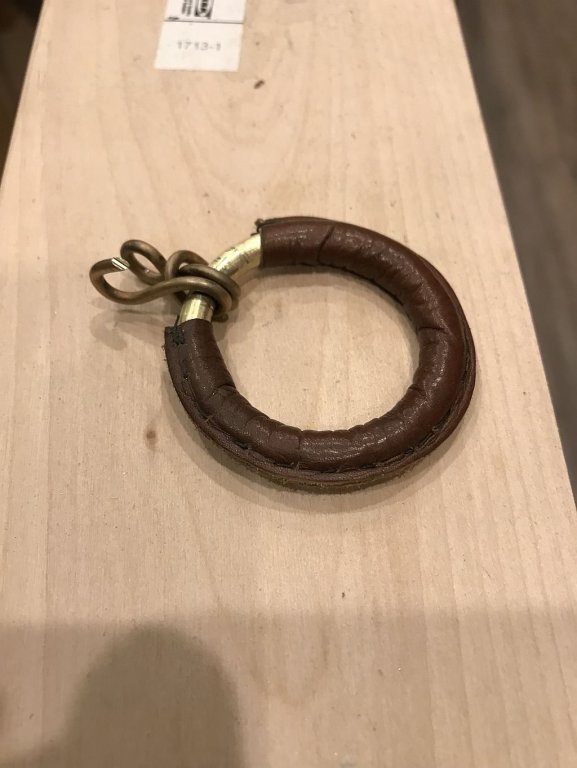
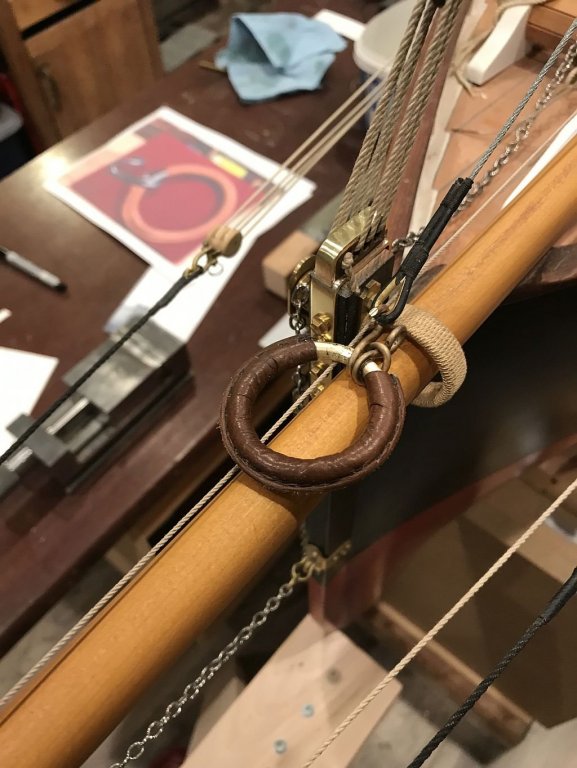
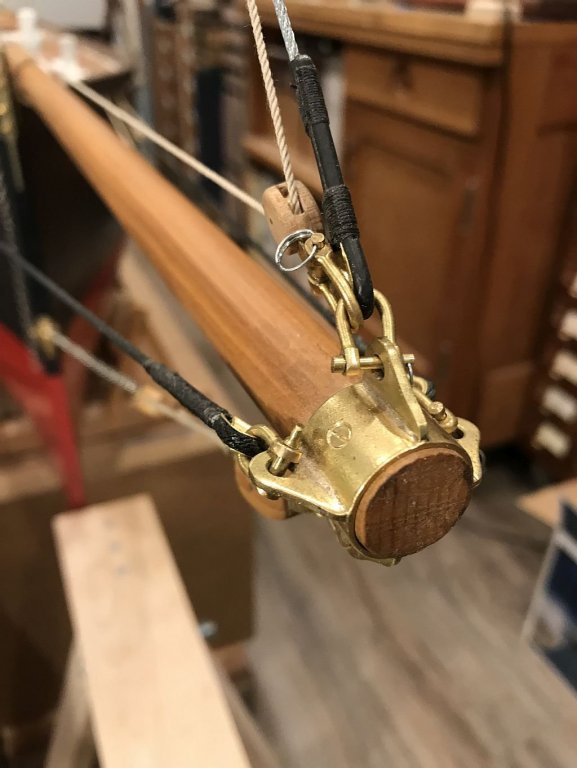
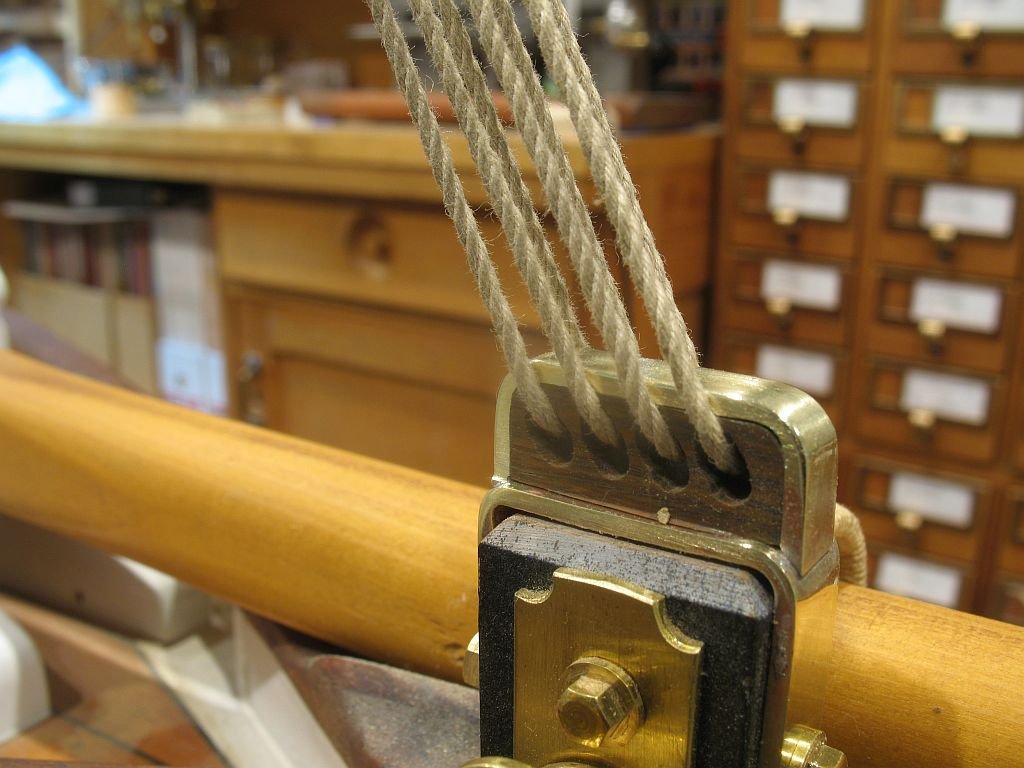
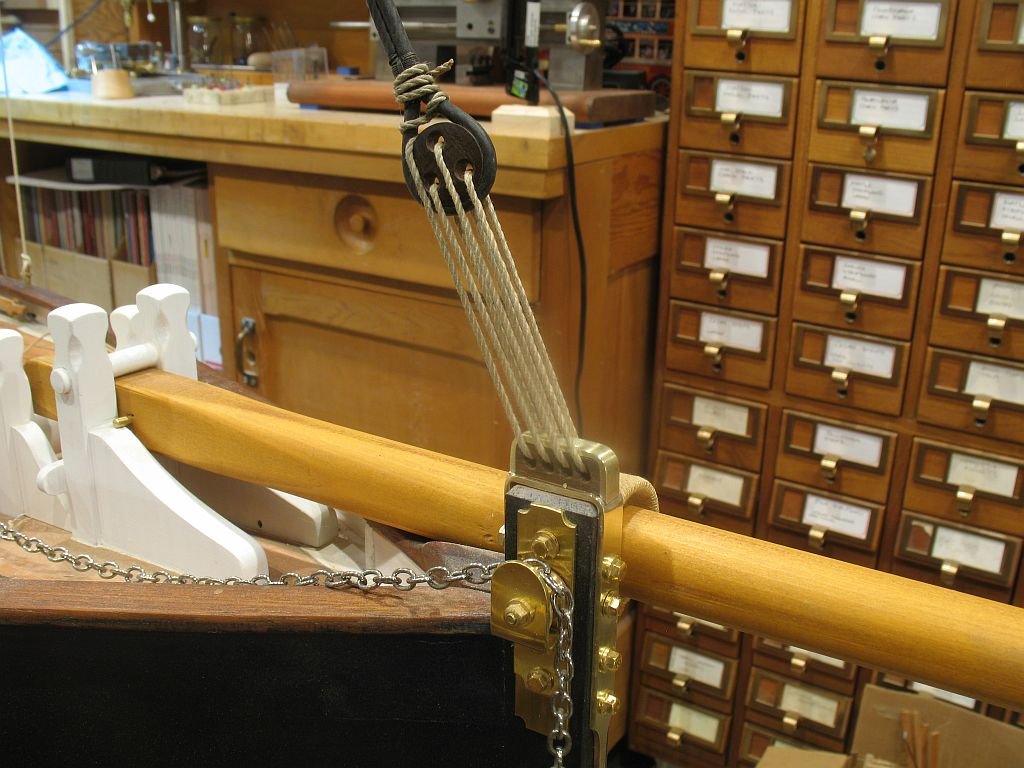
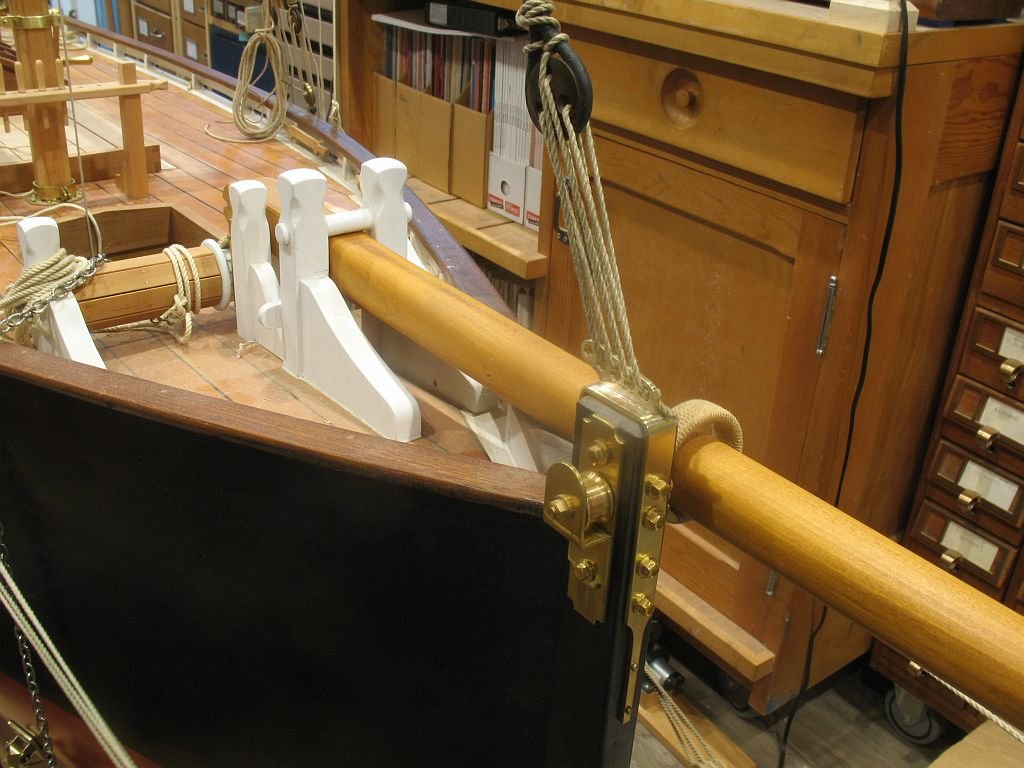
Thanks all for the fine comments. I mentioned yesterday revisiting the hook.... well one thing led to another, I know that's what they all say. First thing was to machine down some more 3/16 (.1875) to .140 this is reduced the ring from a scale 1 1/2" diameter to 1 1/8" diameter. then annealed it and bent up a new ring. Next the ends were annealed again and flattened. The flattened ends were then folded up with some round nosed pliers after another annealing. The folded ends were cleaned up with a file. Then a new leathering done using the same thin leather and some light thread. I was not happy with the results and so stripped off the leather and used a thicker leather. This worked much better that I expected and laid much smoother around the ring. The holes needed to be drilled because I was so caught up with getting the leather work done, that I forgot to drill them first. Next a retaining bolt and a couple of nuts from some 1/8" hex stock and threaded 1x72. and a hook I needed to modify the end of the bowsprit to add a sheave to pull the traveler back and forth. Also added a brass strengthening ring once the sheave was fitted. Threaded up the traveler line and tied it to the traveler. Lastly pulled the traveler out to the end of the bowsprit. A long day but I am pleased with the outcome. So now the jib stay is operational. Tomorrow I need to clean up the shop which looks like a hurricane went through. Michael
-
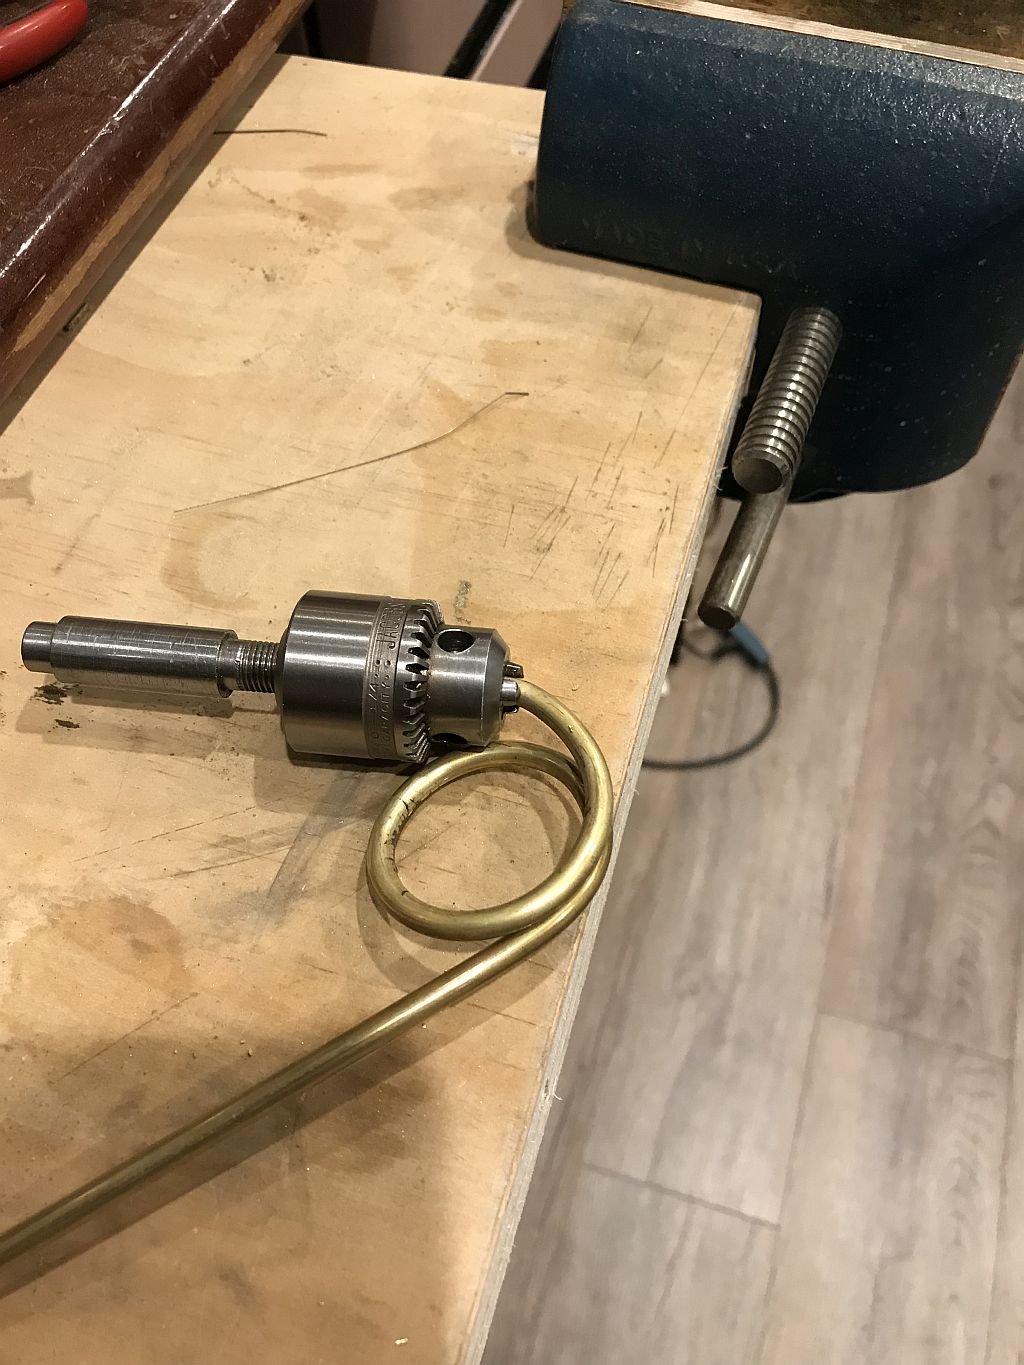
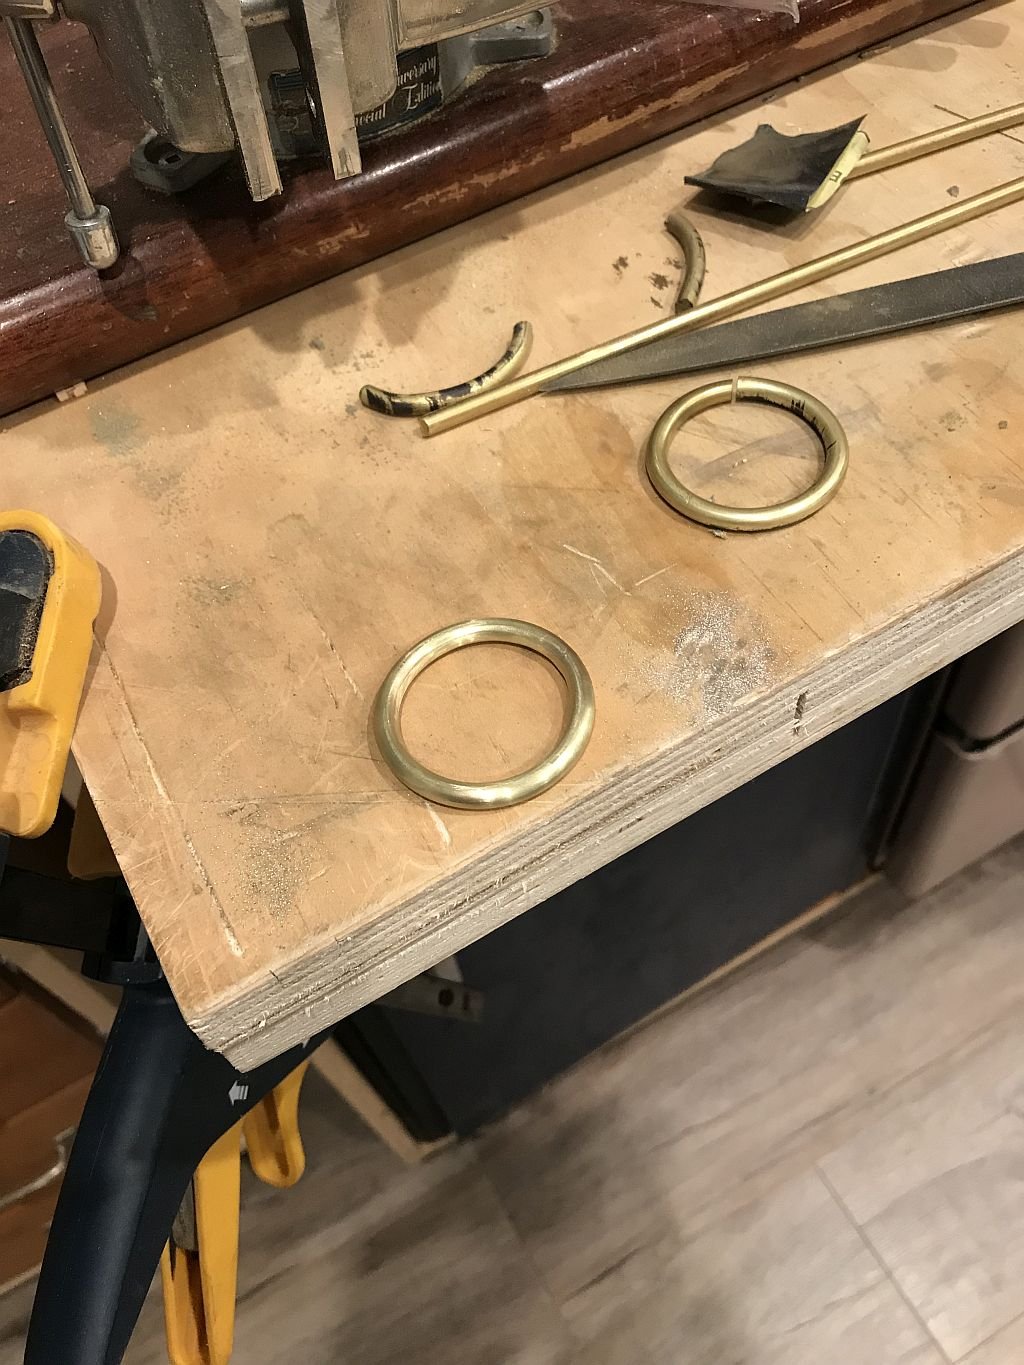
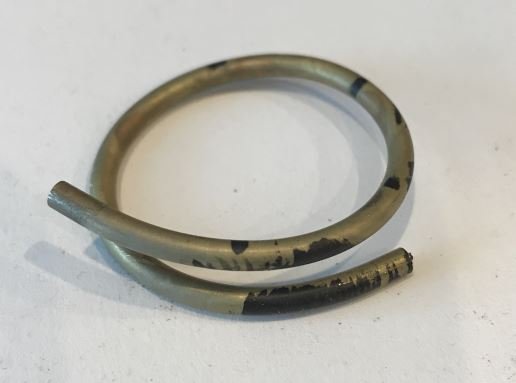
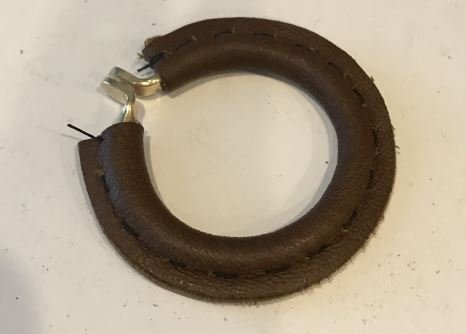
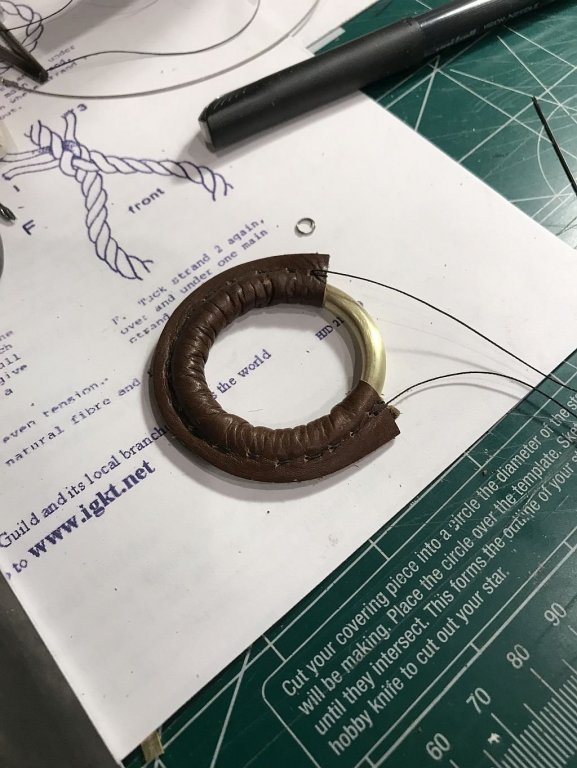
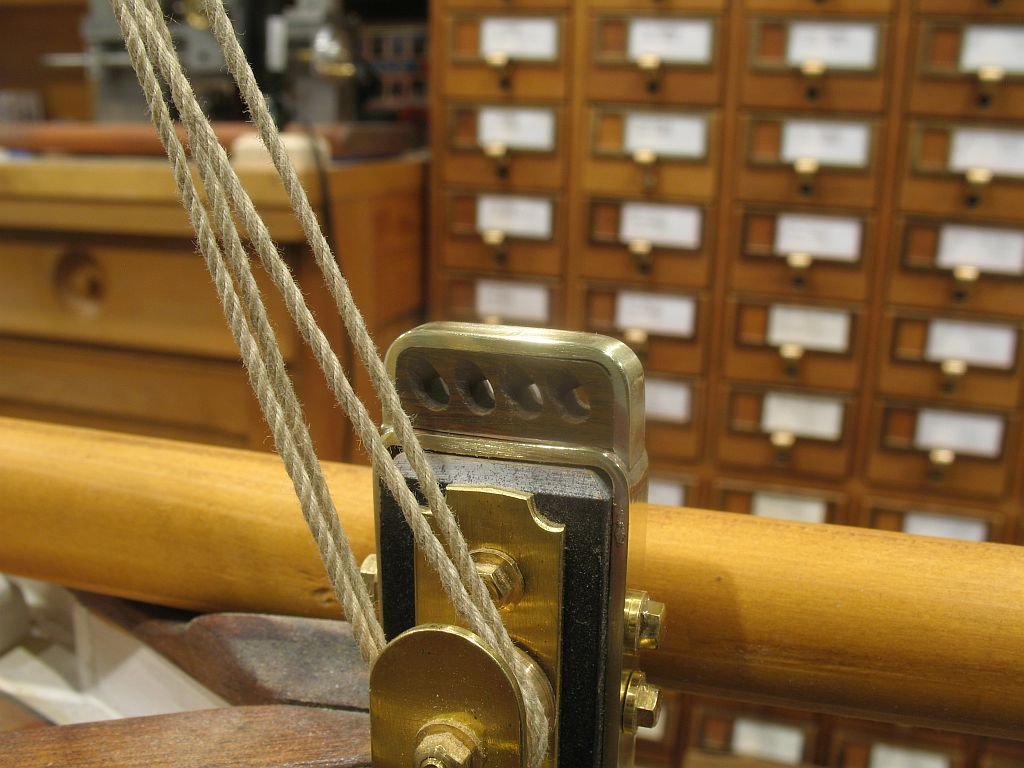
An interesting observation I did look at a number of prototype pictures of shackles and it doen't seem to be an issue with many of the situations that I looked at. From and aesthetic point of view thoughIt might look better. Thank you Doris for you kind words. Thanks Pat for looking in and you compliments. I worked on the bowsprit traveler after looking at a lot of them on the web. I used some 3/16 brass rod first I annealed it then wrapped it around a rod in order to create a ring. The using the jewelers saw cut across the area where the double layer is, I did this twice because I was not happy with the first attempt. I was not able to close up the gap satisfactorily. The second one silver-soldered and cleaned up is in the front. Next I cut a length of thin leather to sew around and stitched it without skewering my fingers Yea! Next I trimmed off around the edge and then folded some 1/16th diameter rod into a hook and eye, I will probably revisit this tomorrow. I will need to undo the cranse Iron in order to slip the traveler on after ensuring that the hook is going to work properly. Michael


-
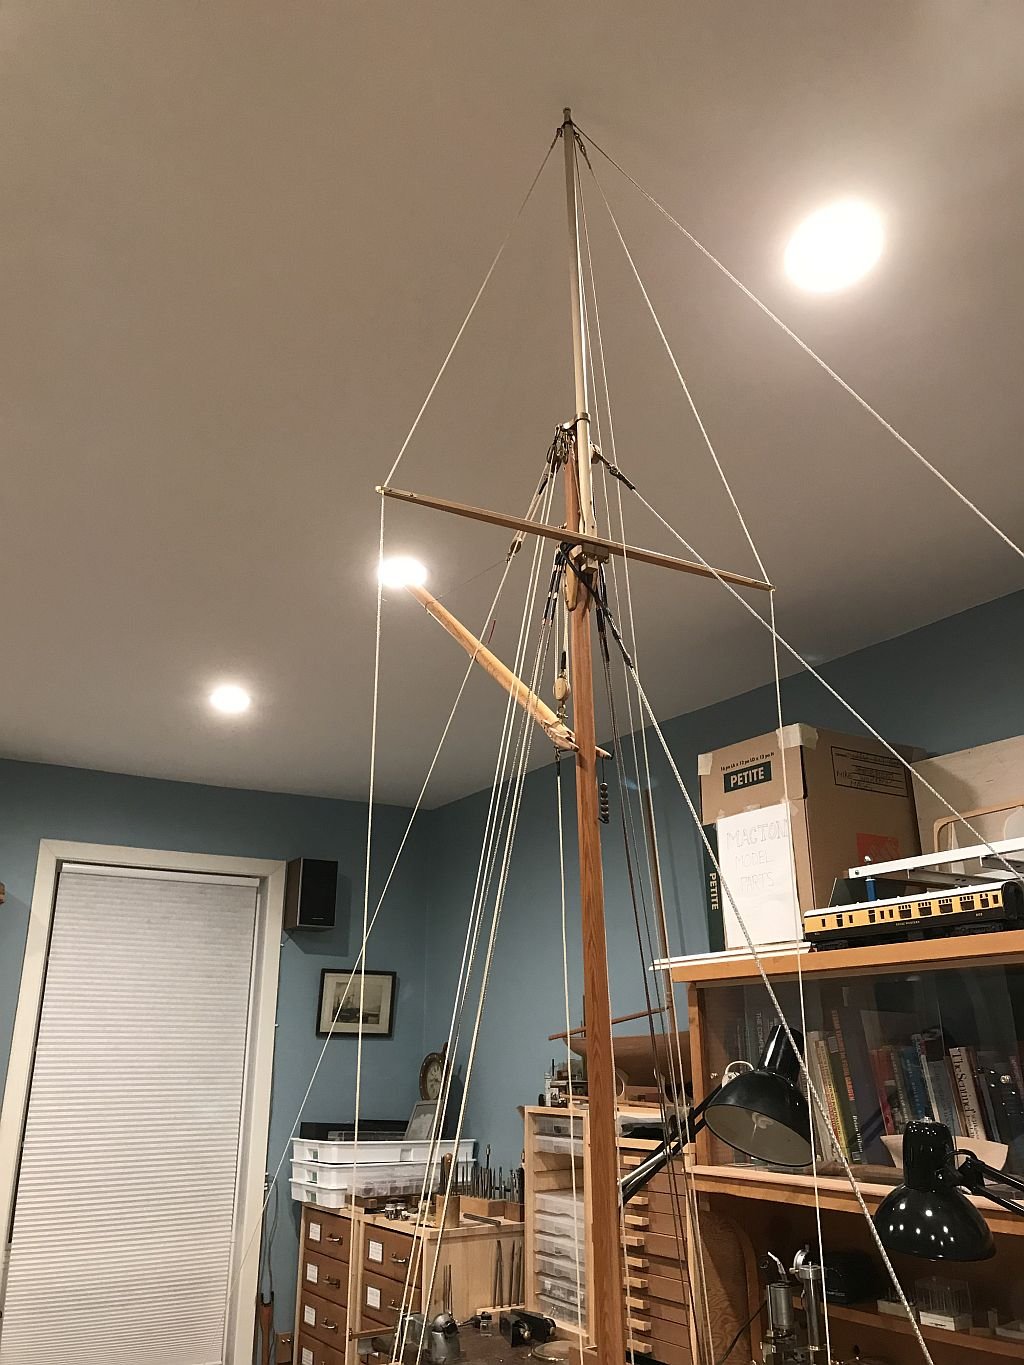
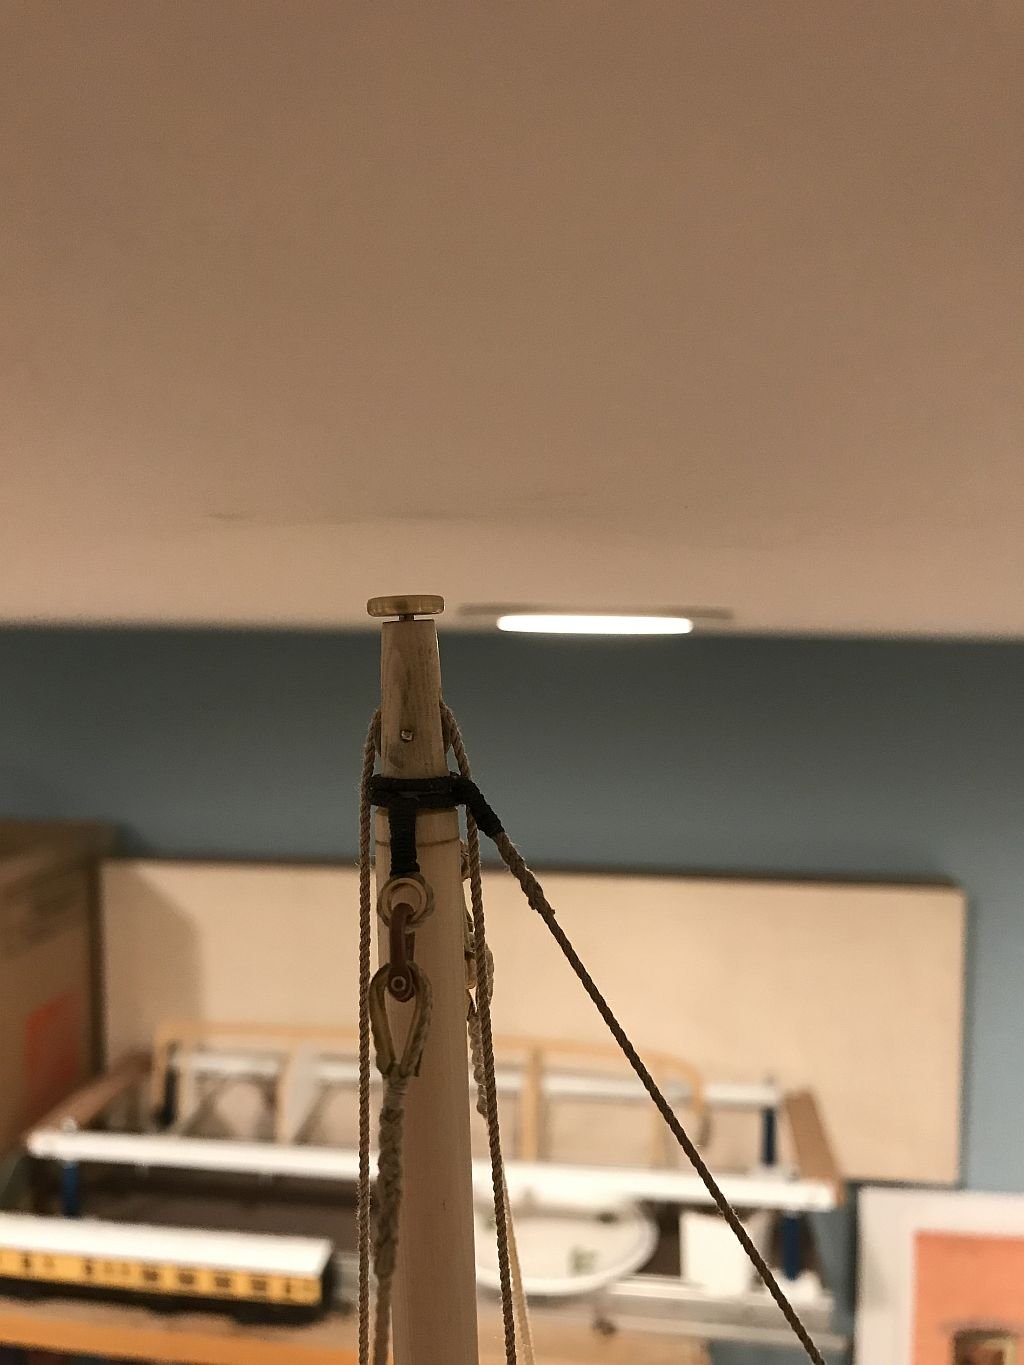
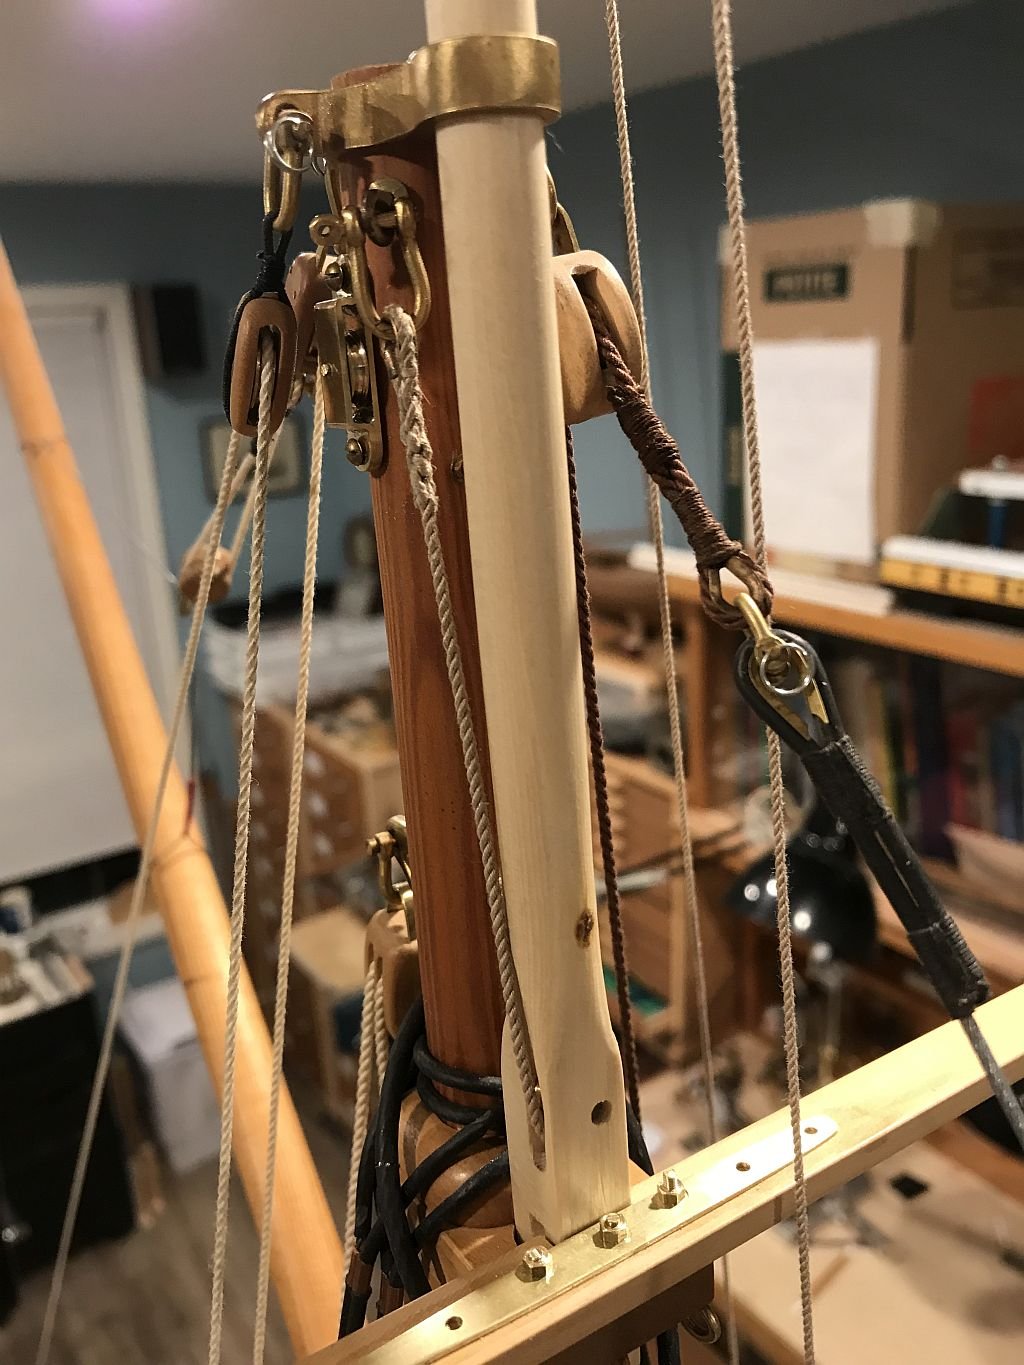
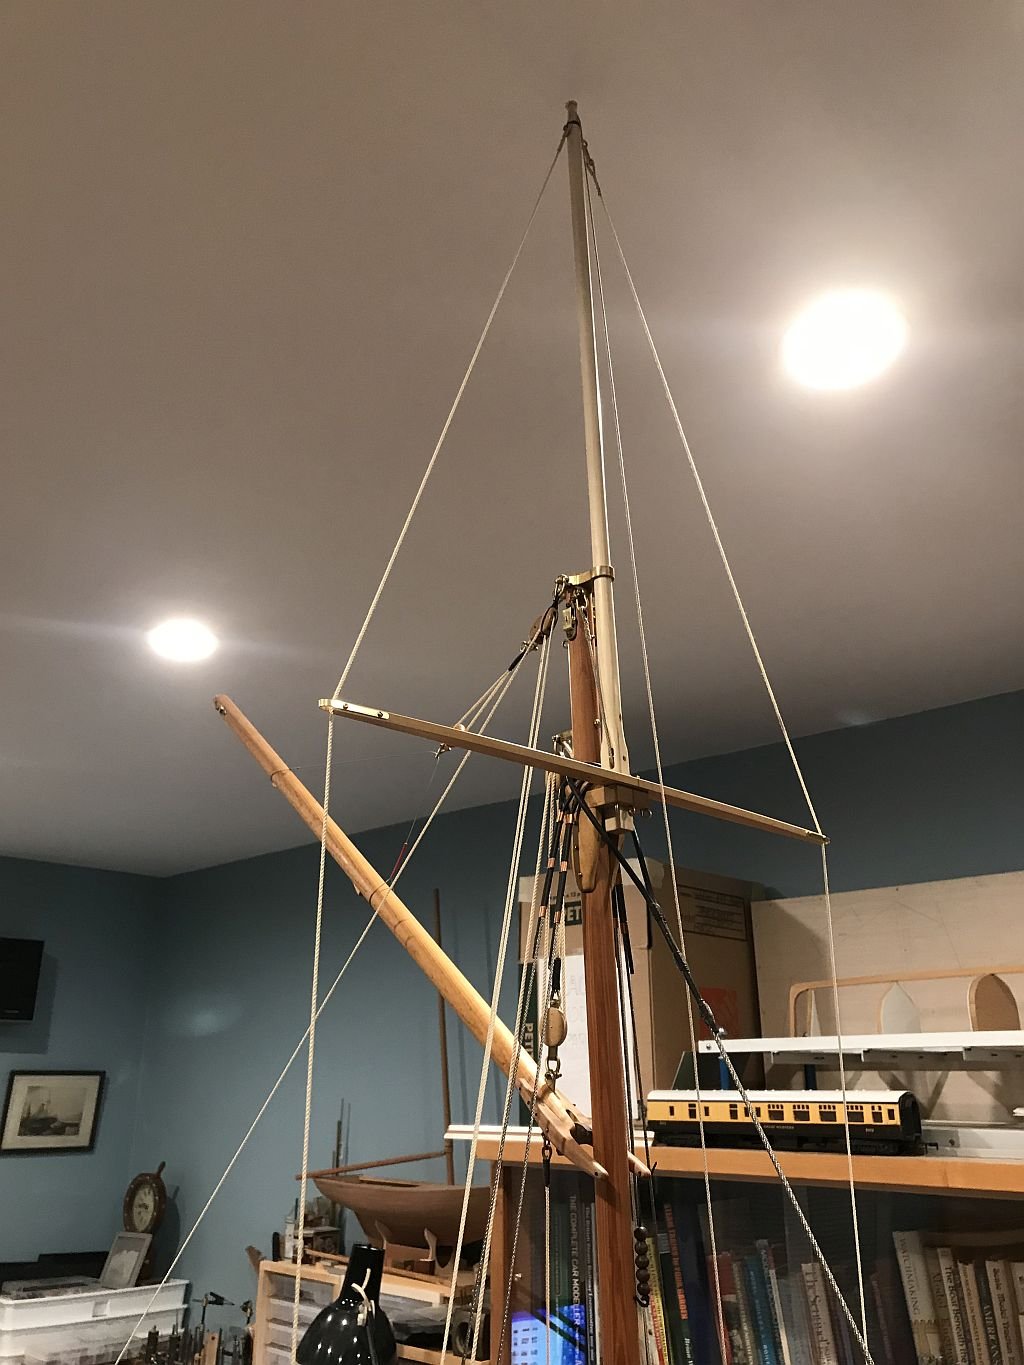
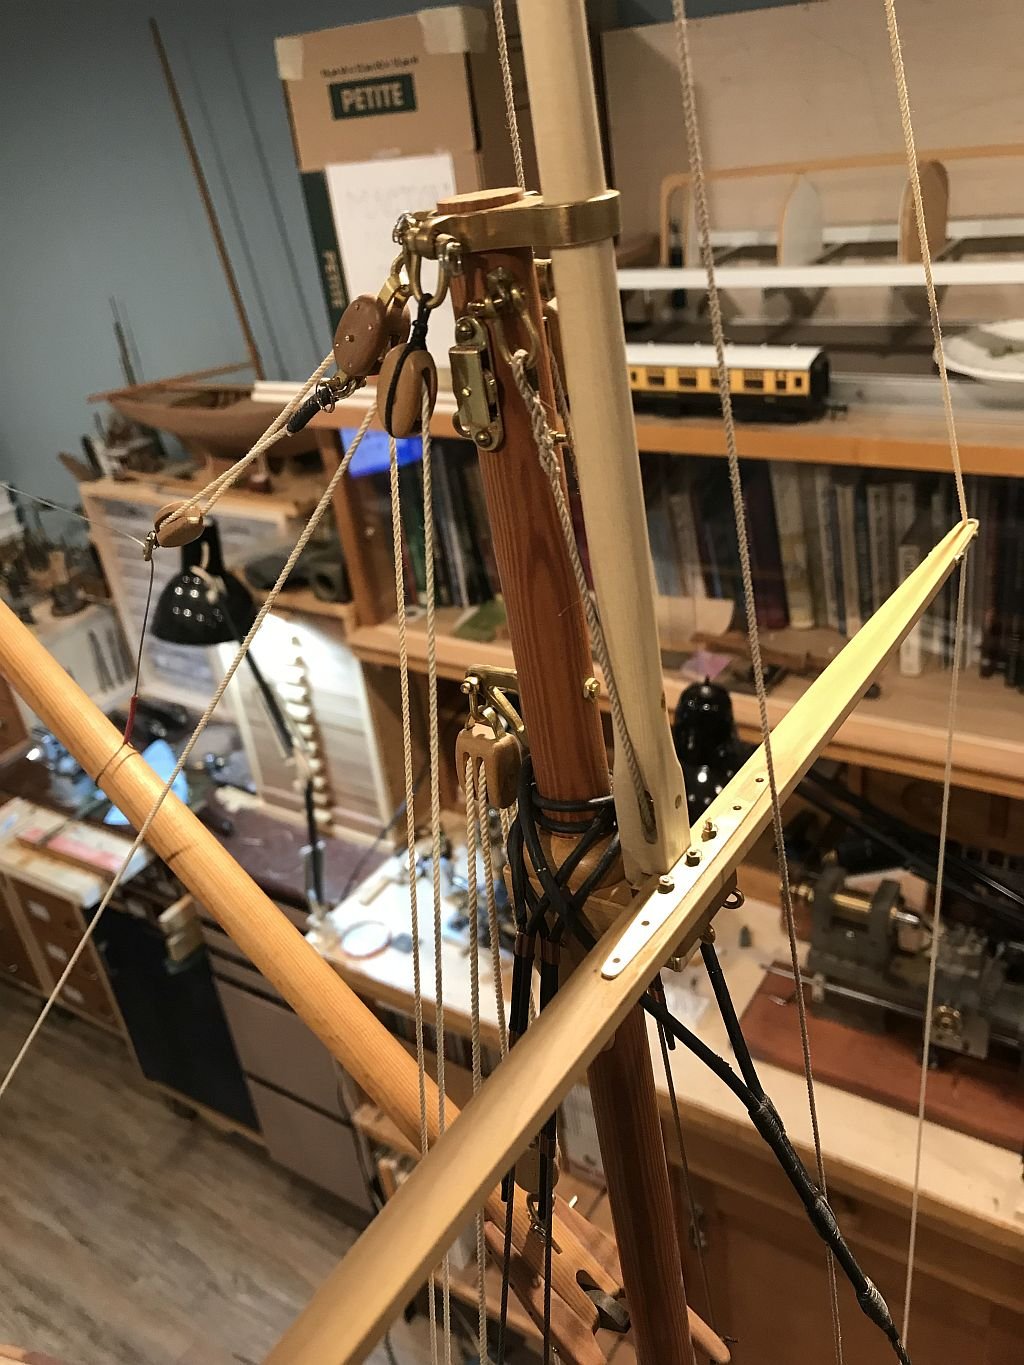
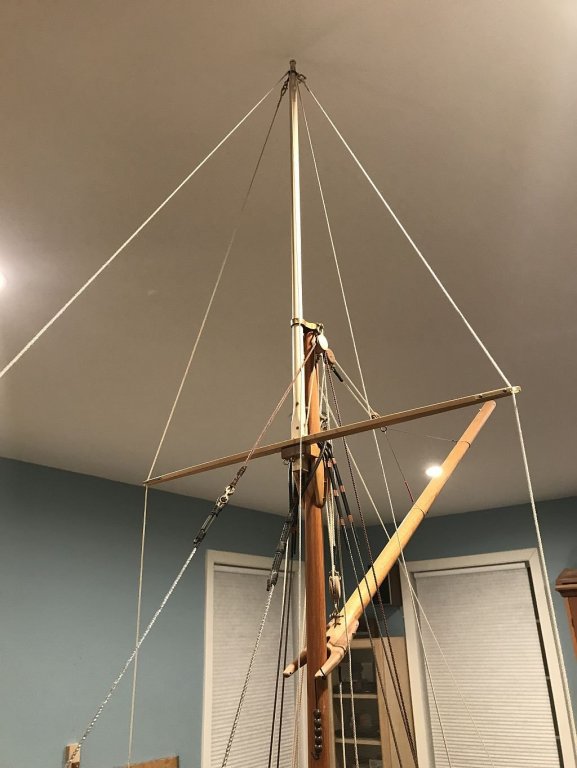
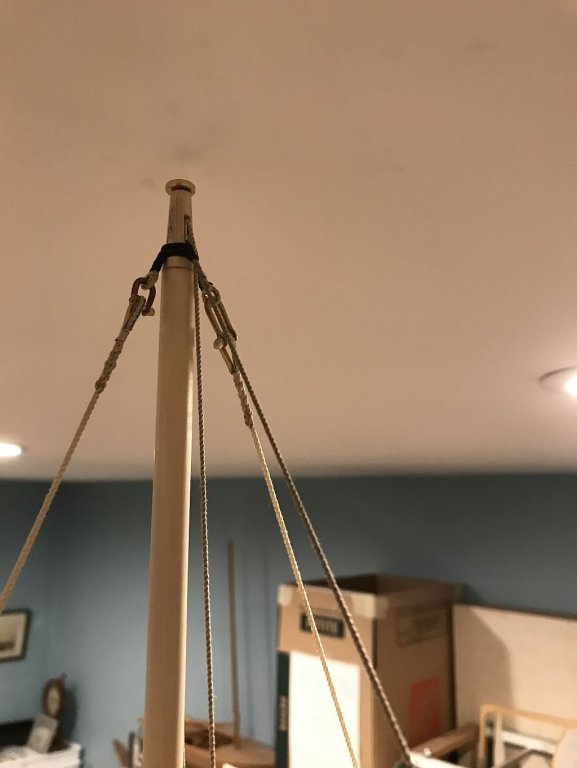
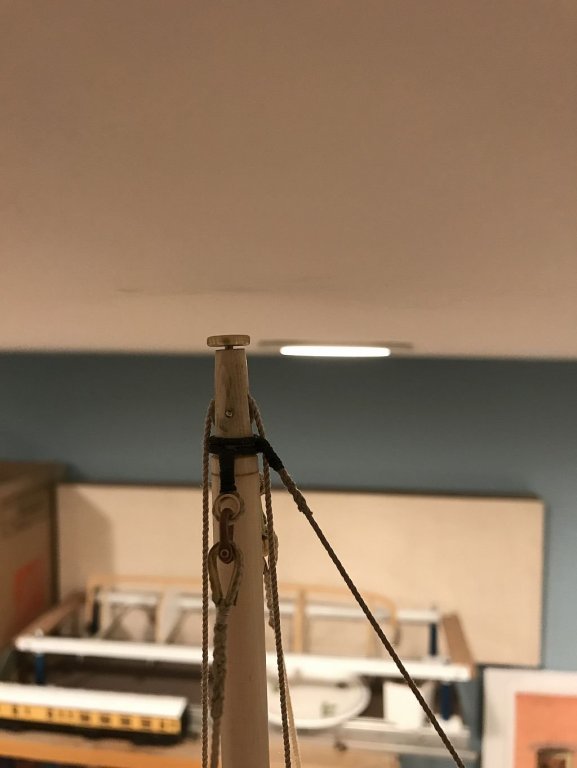
A little more work on the topmast rigging. First I did an eye splice then served it. It was a bit tight slipping the eye over the sheave at the top but with a bit of fiddling it all worked out a little easier when I lowered it after my arms started to ache. I need to push the cap back down. I also put the jib Forestay up and realized that it will need to be set up differently because it will attach to the bowsprit traveler that can be positioned along the bowsprit. The steel part will need to be shortened as it is too long because the halliard for the forestay is at the limit and there is no room to adjust it as the length is shortened moving toward the bow. It is beginning to get busy up there. A shot at the cranse iron at the tip of the bowsprit. presently there is a double block with a becket but it need to be changed to a single block with a becket, The one I have is too small. the topmast forestay is set through a single block and will cleat off at the bow somewhere. It is belayed to the post next the the bowsprit at the moment while I determine where to cleat it. Michael


-
Not if you use a mirror 😀 Hi Denis just went through the log, looks like you are having fun and doing a nice job of it as well. Your comments about catching up are well placed when one considers just how much fine work is being presented on this forum. I really does boggle the mind. She looks good. Michael
-
Sounds like you have a special edition Roger. Michael
-
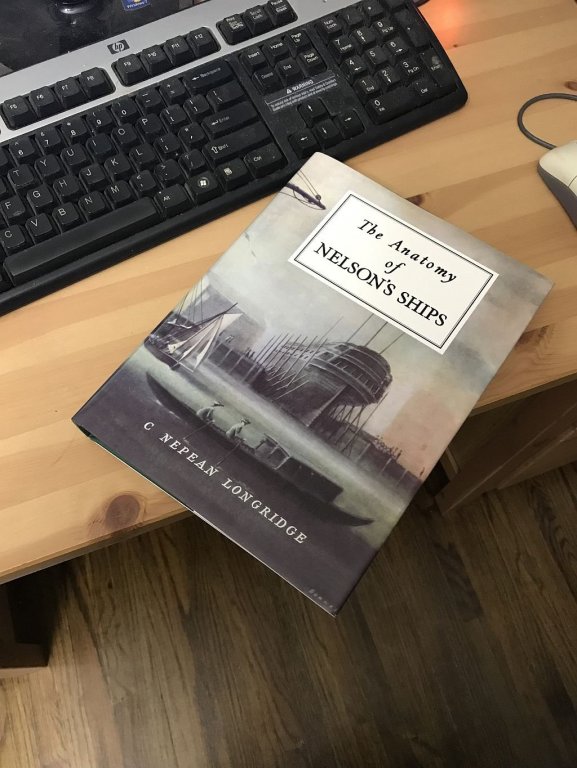
I am not sure if it is just my memory, but it seems to me that the photographs in this copy are no where near as crisp and sharp as the ones in my 1981 copy. Druxey a first edition, I am envious. The only book I ever won was "Metals in the Service of Man" for getting my O level metalwork when I was 14. Michael
-
Thank you Doris, I will look forward to seeing it. as I am sure others will as well. Michael
- 1,035 replies
-
- 8
-
-
- royal katherine
- ship of the line
- (and 1 more)
-
Hello Doris, thanks for the new update, I have a question about how you handle such fine delicate parts and how you attach them to the model. After you have made the fine parts and they are "Baked" then I am assuming that then you paint them. But after that then you show us them on a new sheet and then on the model. Can you share some information about the way you handle these last two steps? And I forgot to say that the work in simply amazing. Michael
- 1,035 replies
-
- 6
-
-
- royal katherine
- ship of the line
- (and 1 more)
-
I first purchased this book in 1981, some time ago 2or 3 years ago I lent it to someone......The operative word here is someone.....and I did not write it down, I cannot remember who it was and so a few weeks ago I ordered a new copy, it arrived this afternoon, I am a happy camper this evening. What a great resource this book is, and i just love the fold out drawings of the rigging. Just wanted to share my joy. Michael
-
Spy Tell me more about the Equinox, is she a modern Yacht or an older one that has been restored? Michael
-
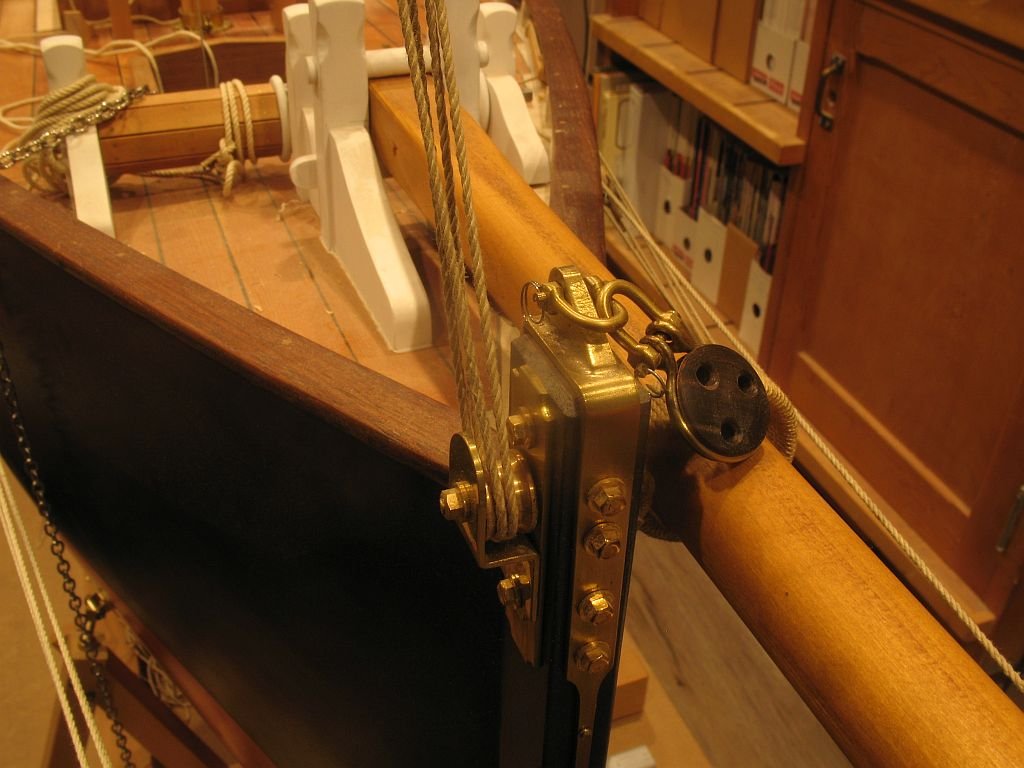
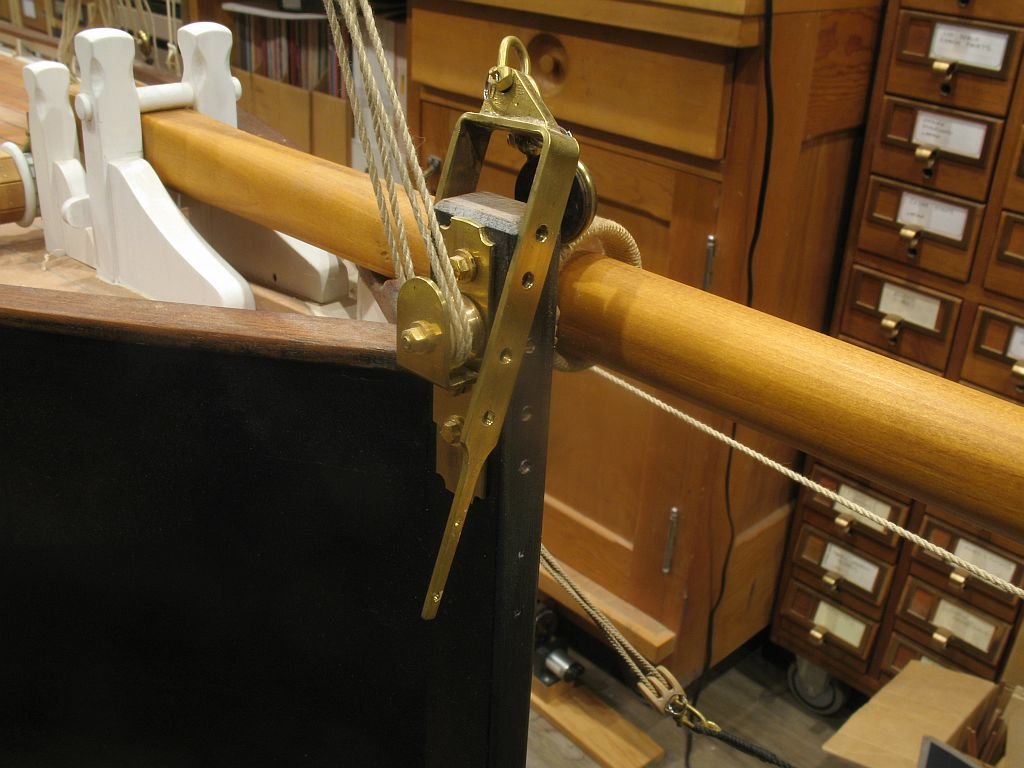
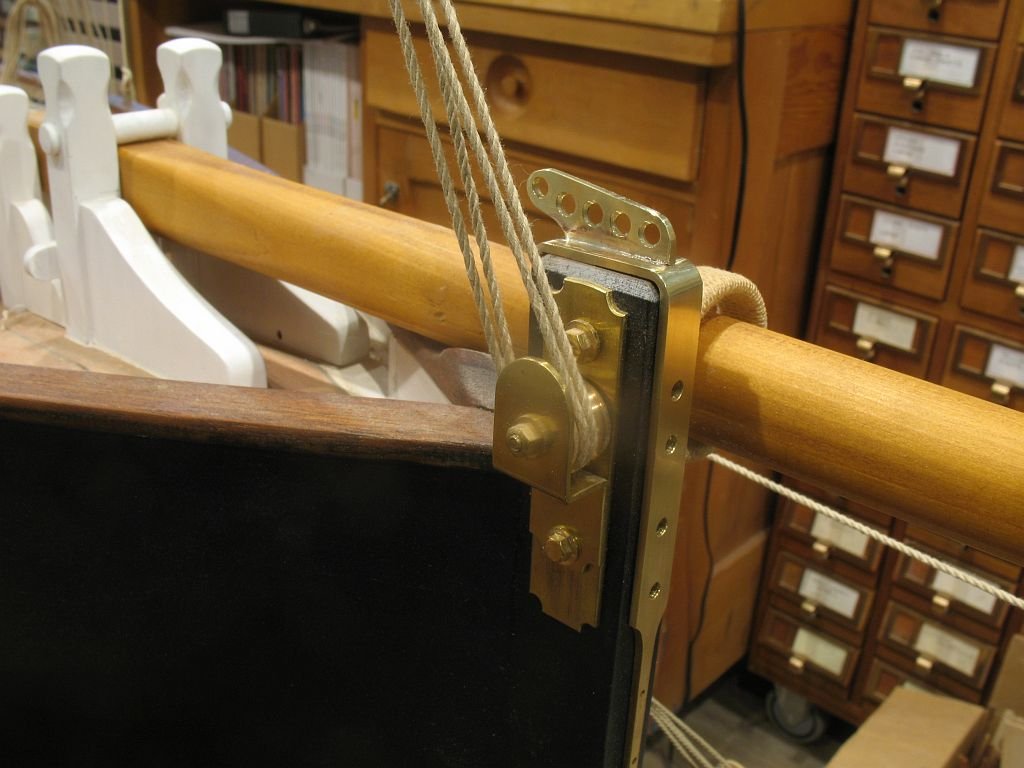
Spy, I have not got to the back stays yet. Thanks for the pictures. The reason i have not gone to the bottle screws is because I like the look of the dead eyes. So in light of Druxey's comment and wefalck's comment about a wooden bolster, It occurred to me that I needed a dead-bar to complement the dead eye. Back to the drawing board. off with 'is 'ead then. First a bit of Lignum Vitea for the dead-bar Next a support for the dead -bar a bit of un-soldering and re-soldering after a lot of fettling the parts together. final fitting and then a tight press fit of the lignum Vitea into the frame, and finishing and then bore out the holes and carve the easements at an angle. Next smooth out the holes with a thin strip of Emery. Then return it to the stem. And re-thread the new dead bar I think this will work, and Keep the consultants happy. Michael


-
Good point Druxey, so I shall make the plate as thick as the dead eye which will eliminate that concern, And as wefalck indicated the principle is one that is practiced by our Dutch friends. So long as the radius of the curve that the rope turns through then the stress on it would be no more than all the other locations that the lines and ropes pass through. My reason for making the change was to add a clean place to shackle the tack of the stay-sail and to help eliminate the rotation of the forestay which seemed to keep happening no matter what I did. Thanks Rob Denis, every day I realize that there is so much more to the rigging of even a single masted yacht, especially when there are moving parts to the standing rigging that is adjustable. And this being a continual work in progress based on my own ideas, traditional working and some nice modern iterations of these yachts, it can sometimes be a little troublesome, doing and redoing but that aspect is really not a problem, but a process. Michael
-
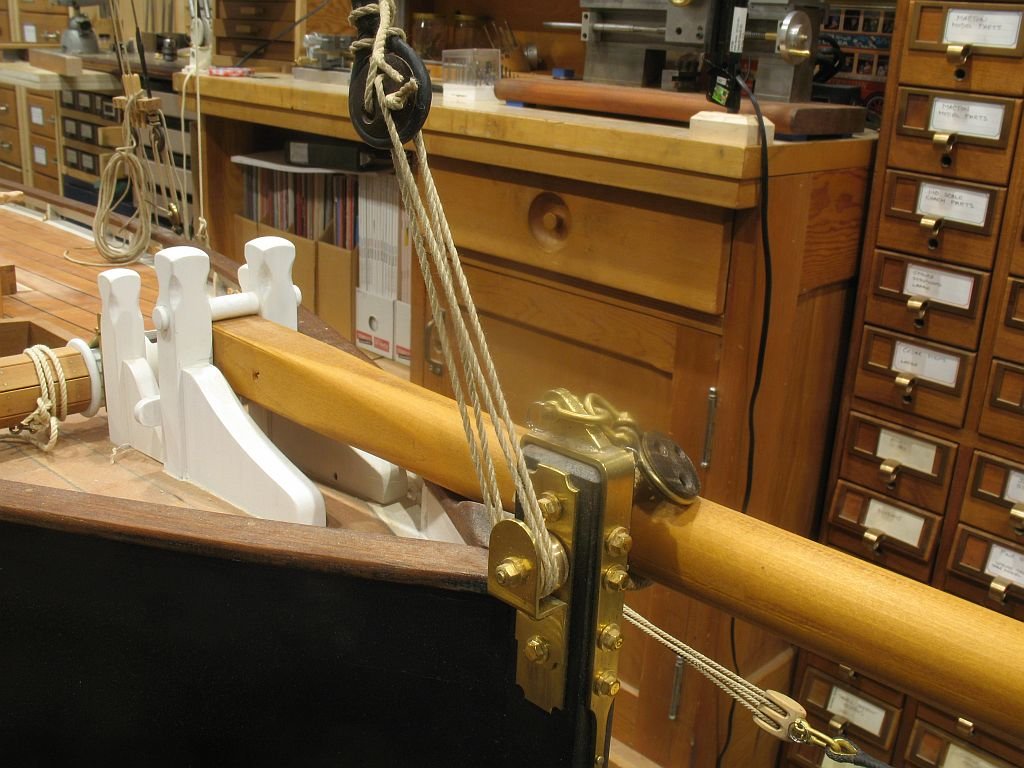
Thanks for all the likes and comments I do appreciate them. Thanks Jeff, we should get together again in the not too distant future. I had to make a new spreader bar because I slit the end of the pine one so I opted for a Castelo one which actually looks better anyway. I finished the captive loops on the ends and added a reinforcing plate in the centre. Also I have been doing a fair bit if cogitating about the forestay and the bowsprit when it is housed. The new taller pin-rail just happens to interfere with the bowsprit when shipped on board, so I am re configuring it so that it also acts as a seat for the end of the bowsprit when fully retracted. So beginning with the forestay today I decided to change the way it was set to the stem post. First I needed to secure the forestay temporarily so tied it off to the anchor roller then removed all the bolts and the two pins on the bottom thin section to lift off the fitting. Next I removed the existing bracket that was silver soldered on the top and replaced it with a new one with a series of holes plus an extra hole to shackle the stay-sail into. I like the way this new fitting looks. So again one step forward two steps back and so on. Also watched a nice video of Cornubia under sail, looking at the rig. Michael

-
Javier, very nice even though so much of the model is not able to be seen yet you make the internal structure as well as the external parts. Michael
-
I am amazed that you can keep track of all that looking at you diagrams. the ship out of the bottle looks incredible. Michael
- 185 replies
-
- 4
-
-
- jolie brise
- pilot cutter
- (and 2 more)
-
Ed you clearly show that sequencing some of the operations is something that only comes with experience. I wonder how many times some of us think, "I wish I had thought about this job earlier when things were easier to hold or not connected to something else" The picture showing the holes being drilled in a square spar before it is shaped and rounded brought this home to me. The shot of all the spars also reminded me if this. Michael
- 3,618 replies
-
- 7
-
-
- young america
- clipper
- (and 1 more)
-
Javier thank you for showing us the beginning of your next build I am looking forward to seeing how you progress with this build. Michael
-
Hello Daniel, I just found your build. What a superb job you are doing, I am inspired by the way you are able to use manual control on your mill to create a curve, I know that it is not easy to do. Your assembly of the frames looks like a very good way to clamp them. The exploded view of the successively smaller frames for the bow is almost like an installation sculpture. beautifully executed wood work. I shall continue to follow along. Michael
-
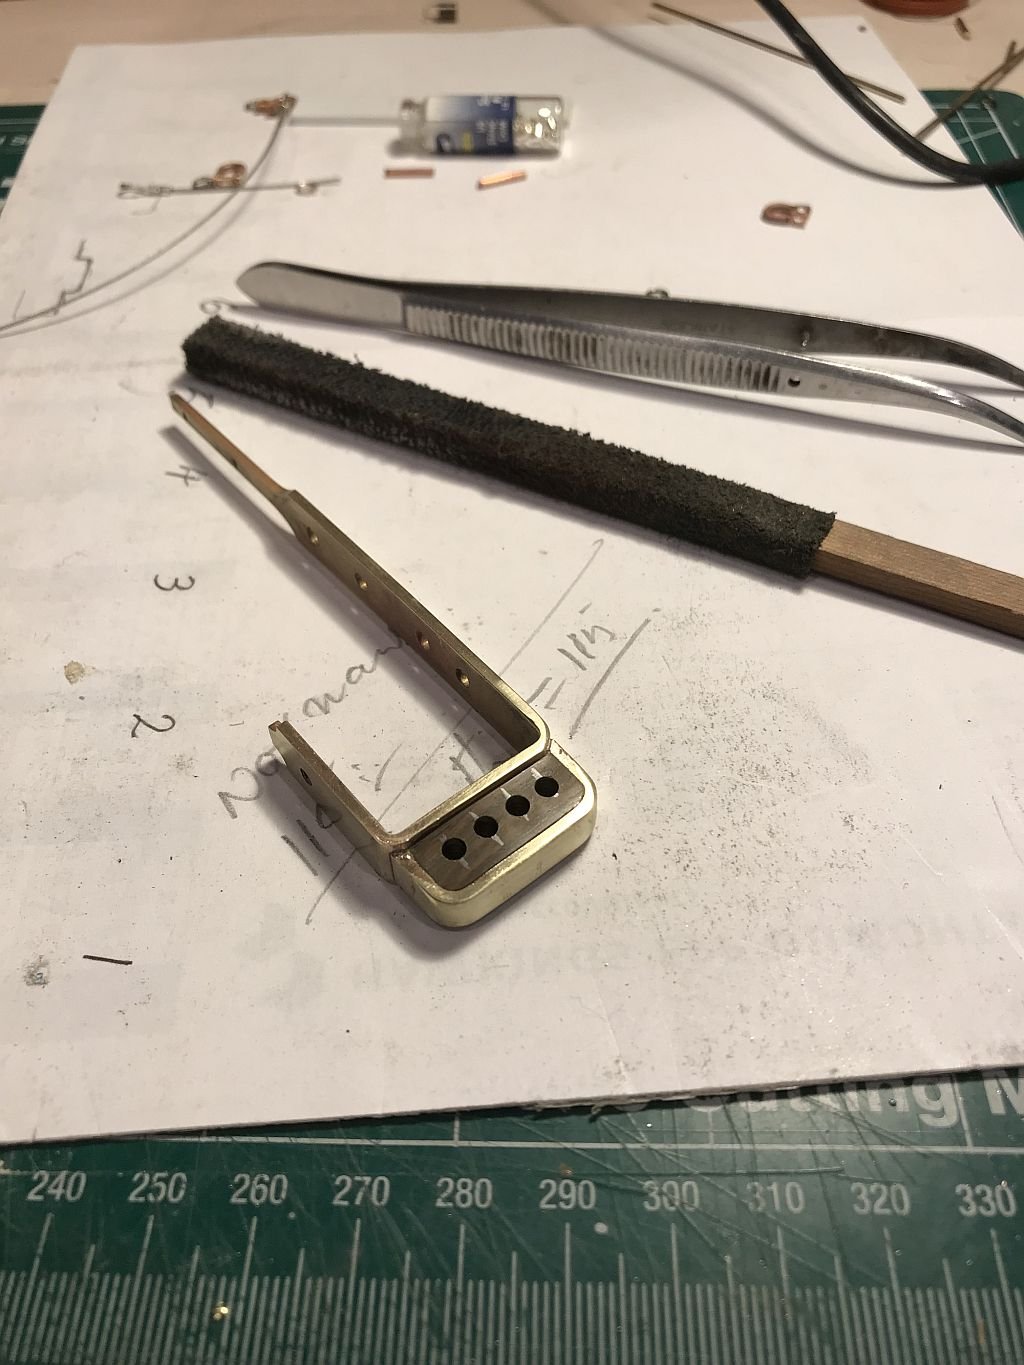
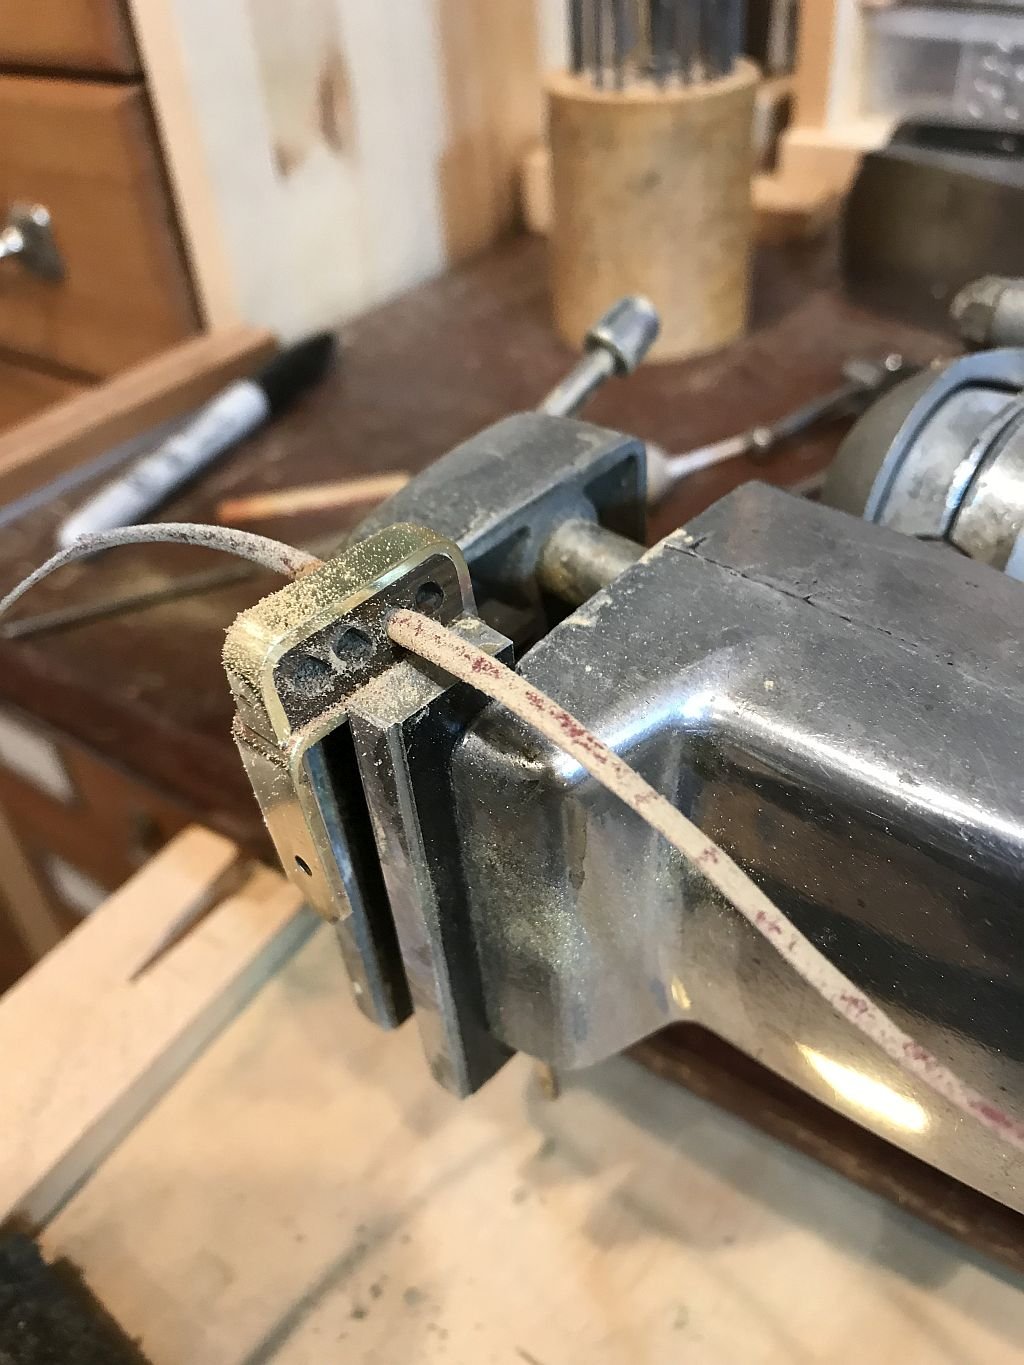
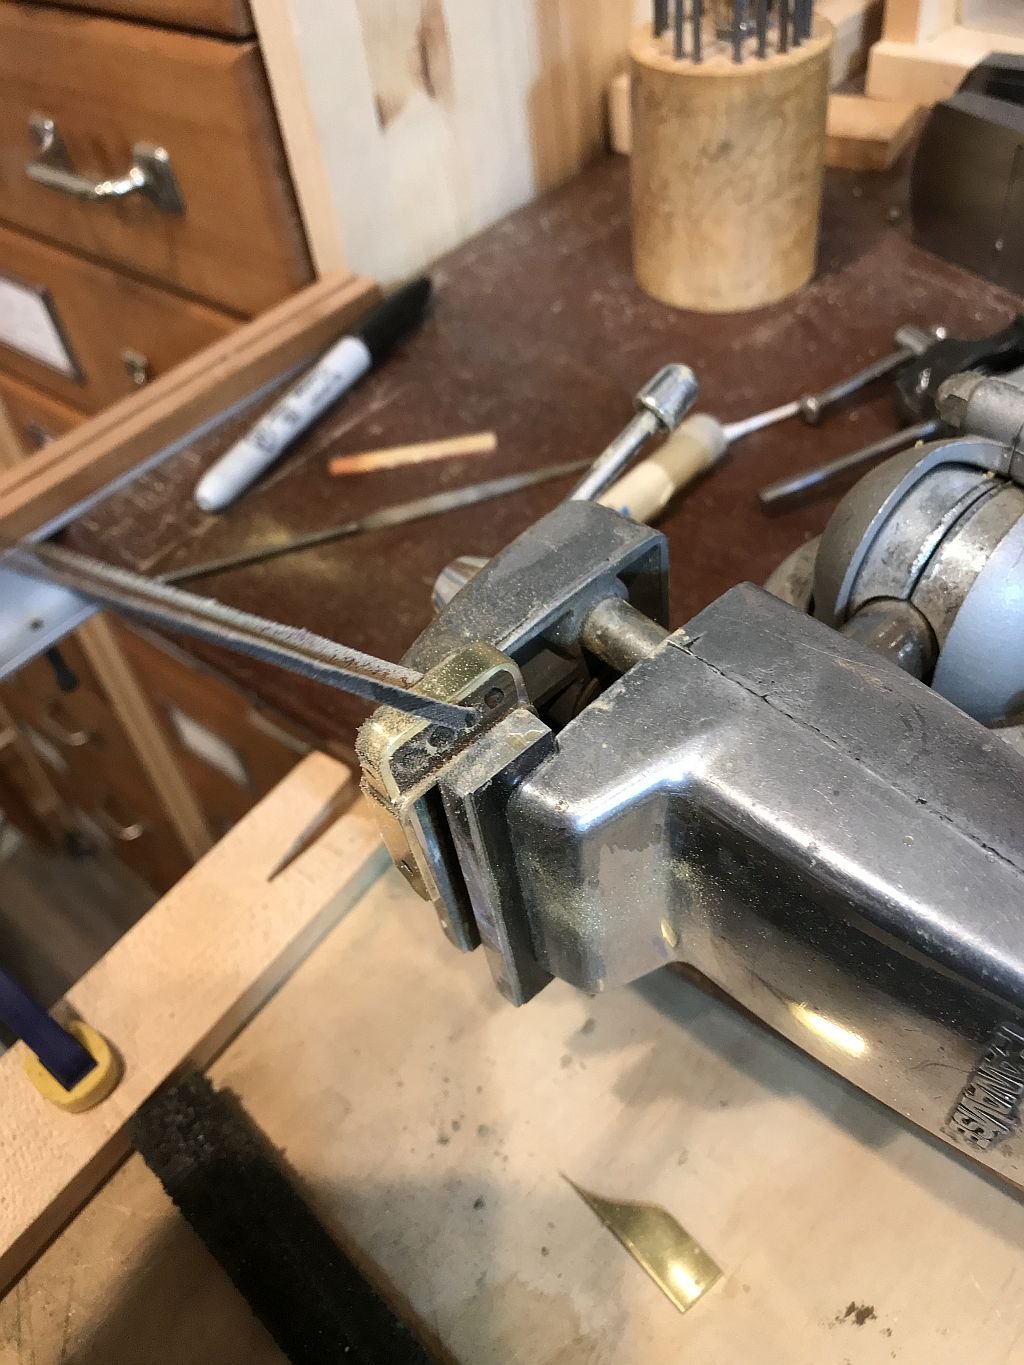
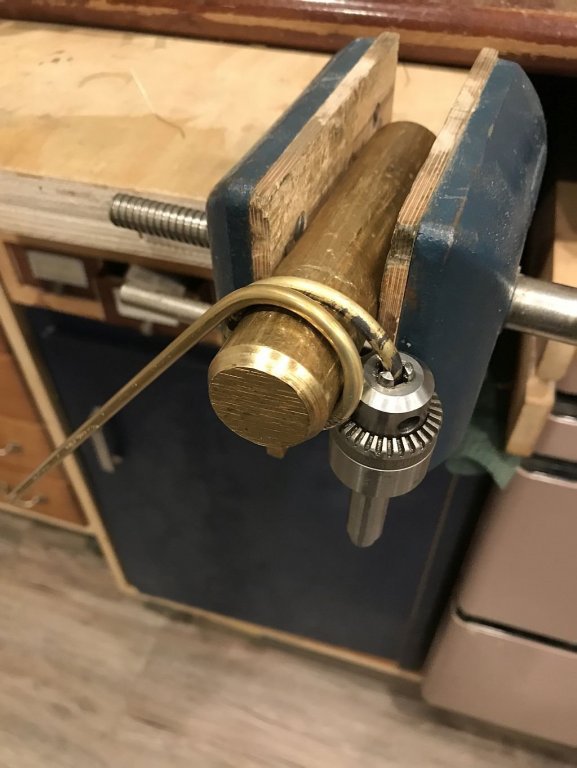
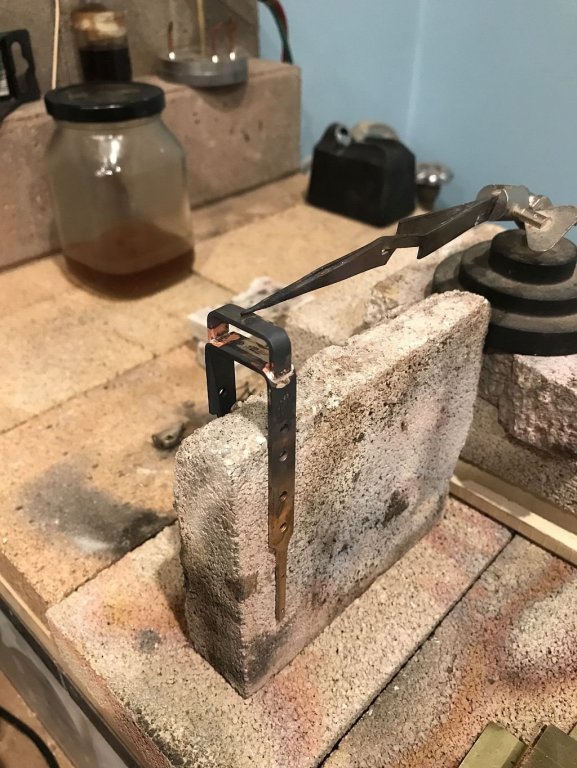
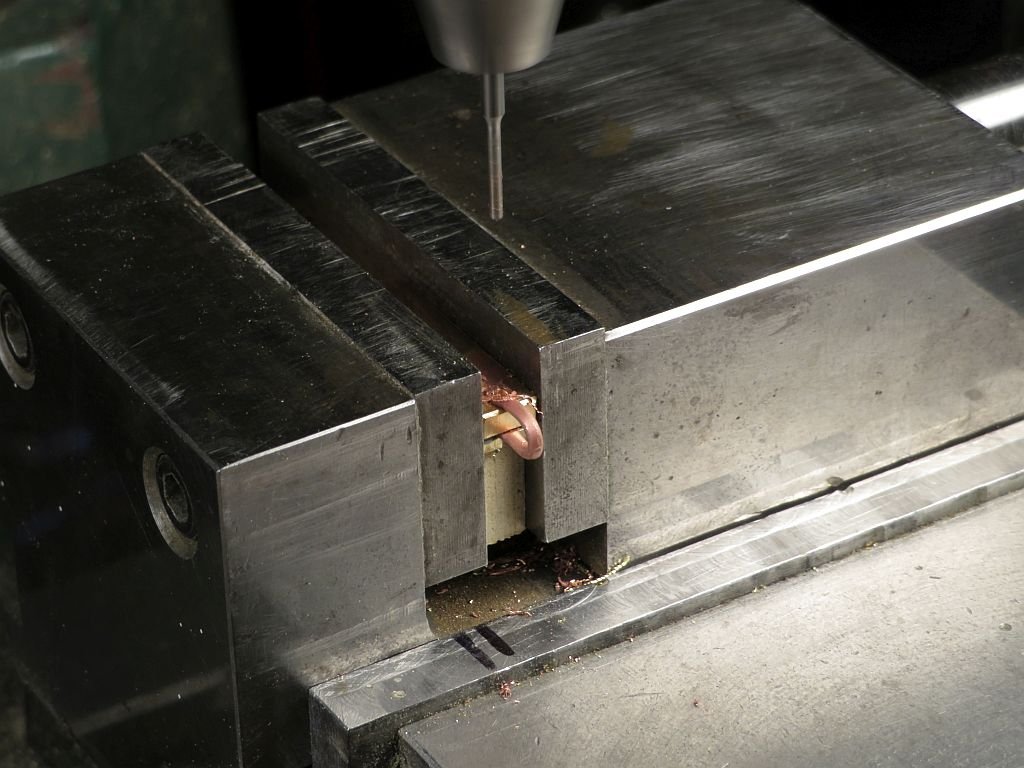
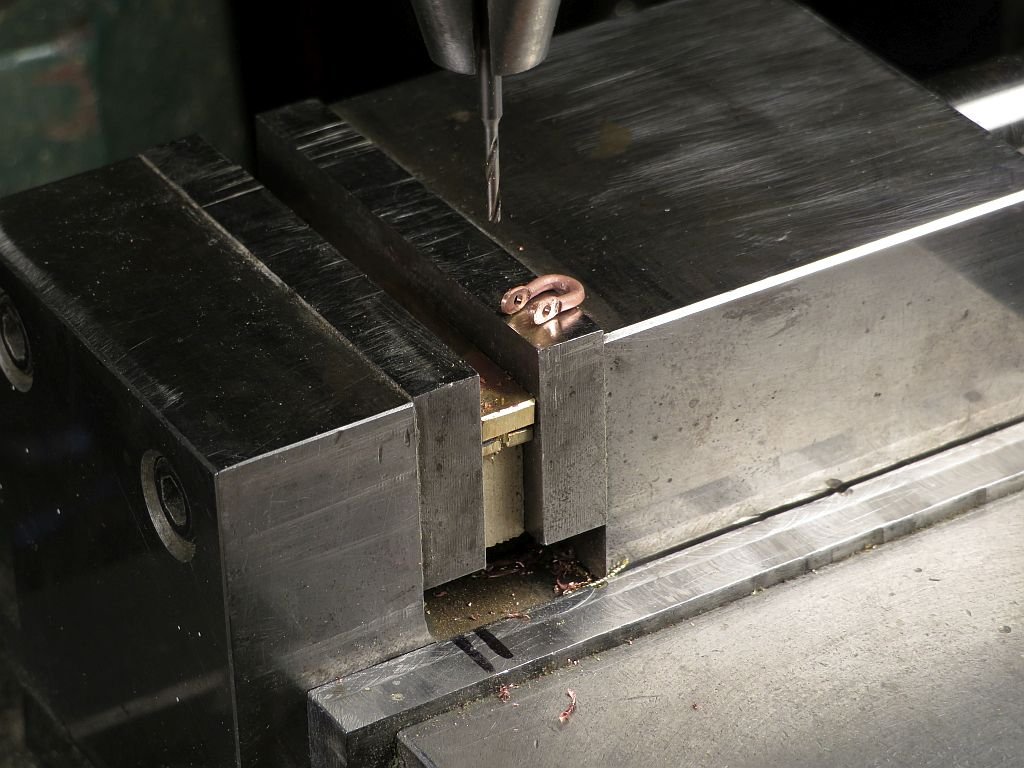
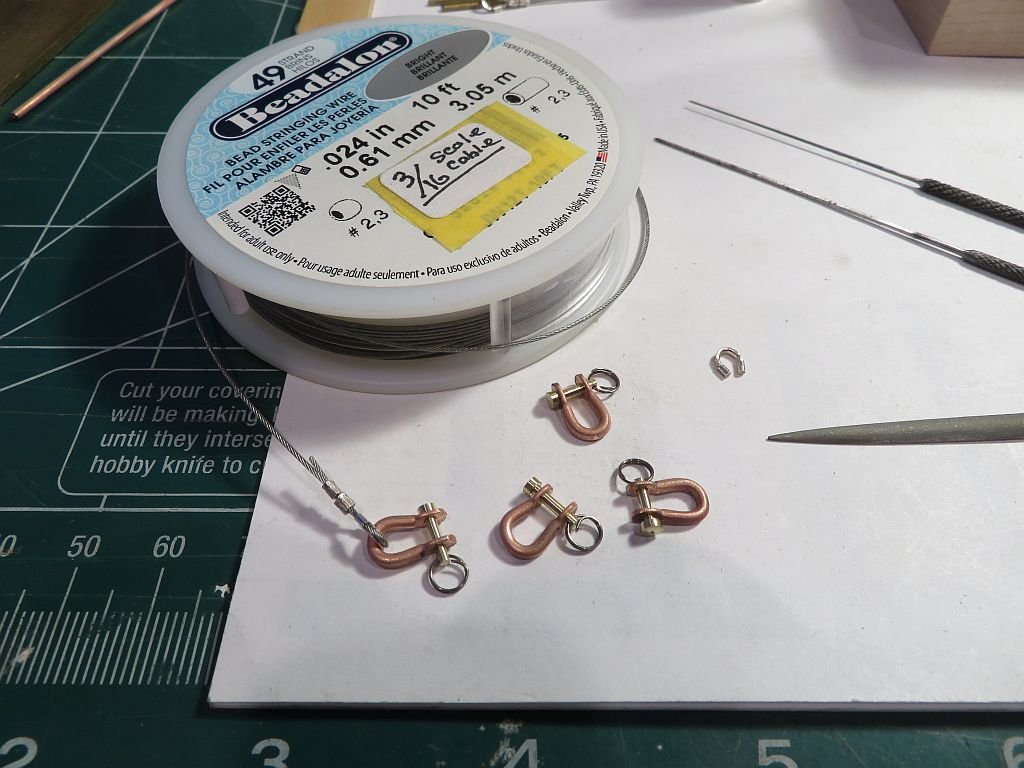
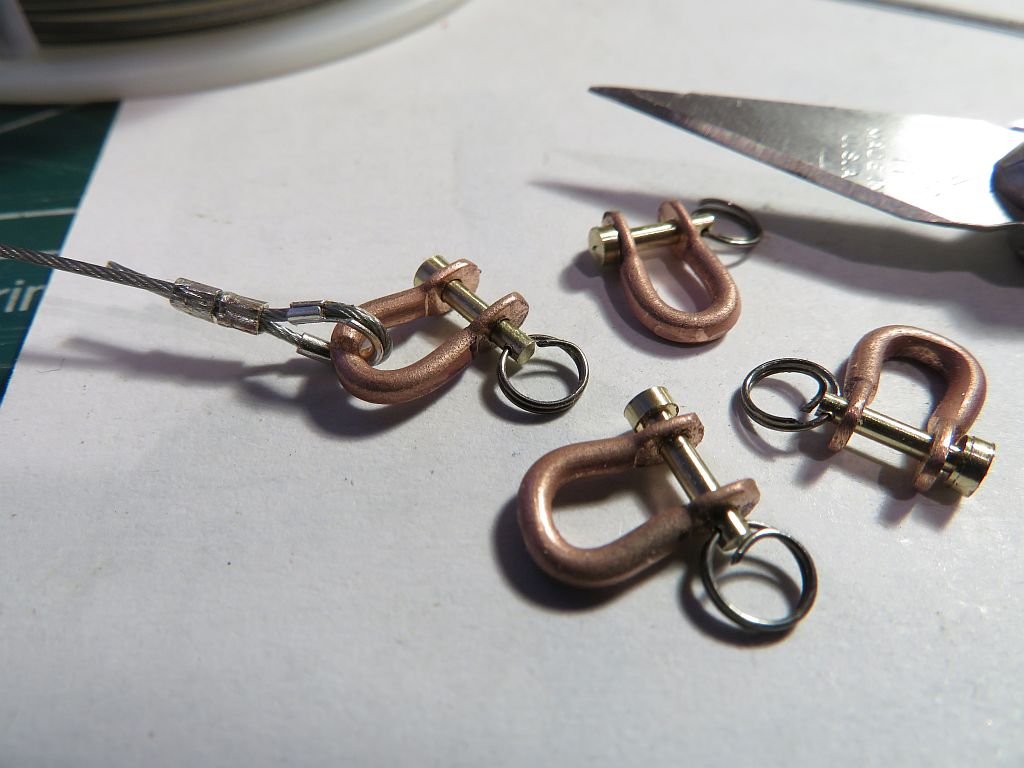
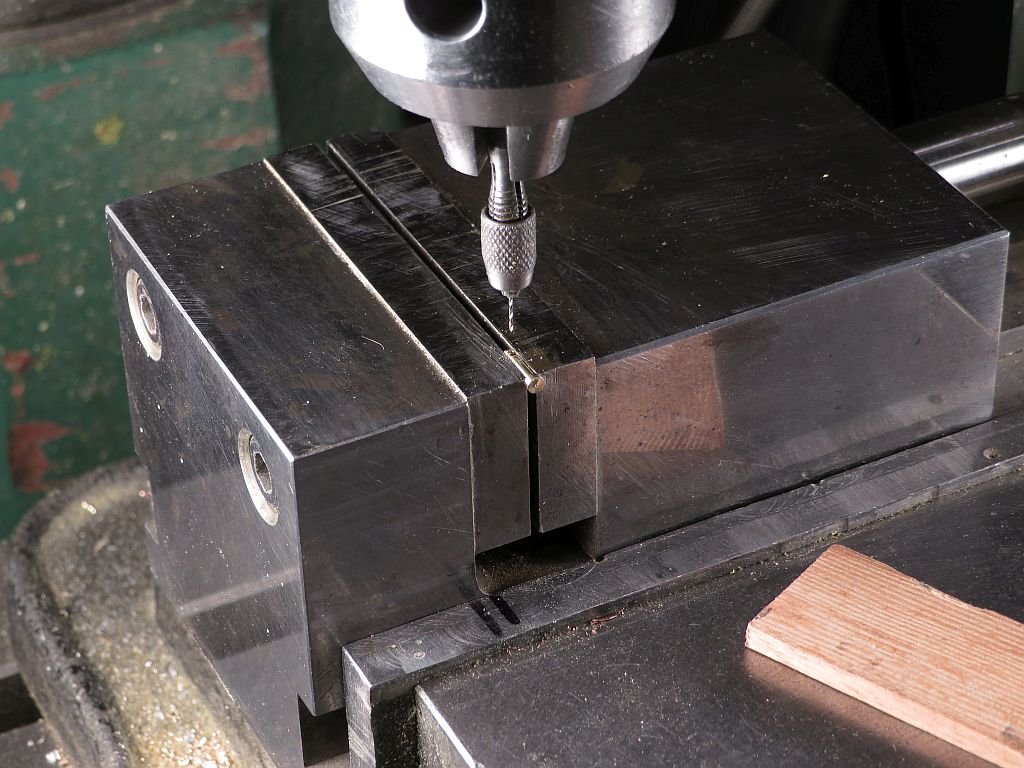
Thanks Pat Not a lot to show for today, I am thinking of some steel cables for the topmast shrouds so did some experimenting with some Beadalon wire and made 4 new shackles. from some .060 copper wire. I soldered up a small fixture for drilling the .056 holes through the shackles The pins were turned from some inexpensive 3/16 brass rod from Home Depot. I am impressed at the free machining quality of this brass, which allowed for me to cut the diameter in one pass, this ensured that the work was supported all the way by the 3/16 section as it was being reduced. I backed out the cutter and cut a shoulder that was .030" larger in diameter, then parted off the pins for drilling the #78 retaining ring hole. I filed a small flat with a #8 cut file as a land for the drill. which I supported pretty close to the cutting edge. That's it for today. Michael
-
Very Nicely done Ab the final results are really lovely the photograph has a great mood to it reminds me of the Dutch painters who loved all the detail in their oil paintings Michael
- 65 replies
-
- 4
-
-
- fish hooker
- fishing
- (and 2 more)