HOLIDAY DONATION DRIVE - SUPPORT MSW - DO YOUR PART TO KEEP THIS GREAT FORUM GOING! (Only 13 donations so far - C'mon guys!)
×


michael mott
-
Posts
5,195 -
Joined
-
Last visited
Content Type
Profiles
Forums
Gallery
Events
Everything posted by michael mott
-
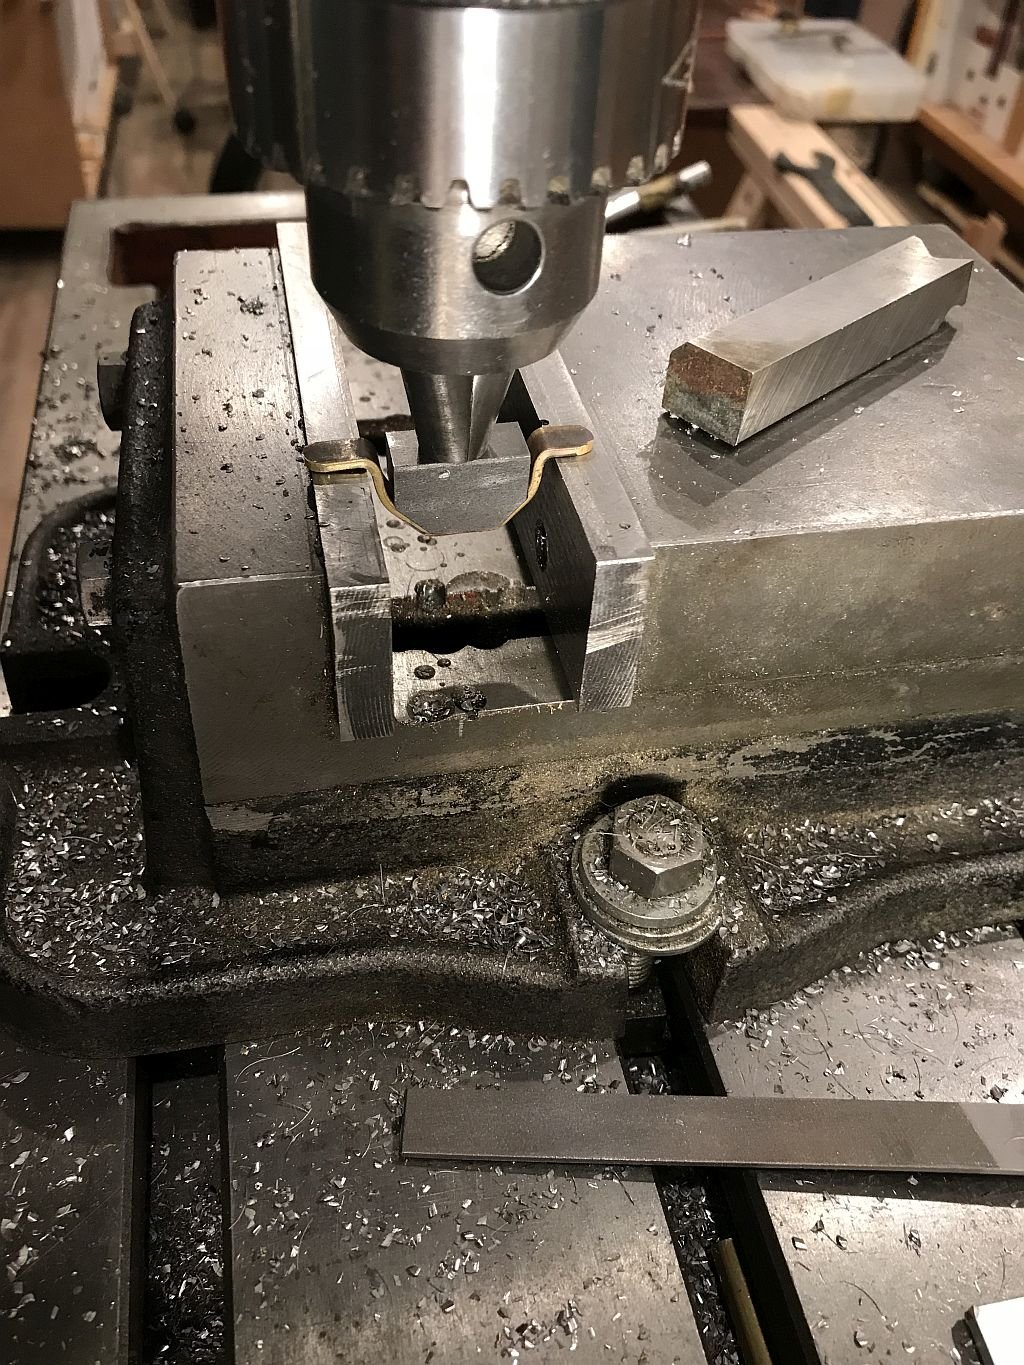
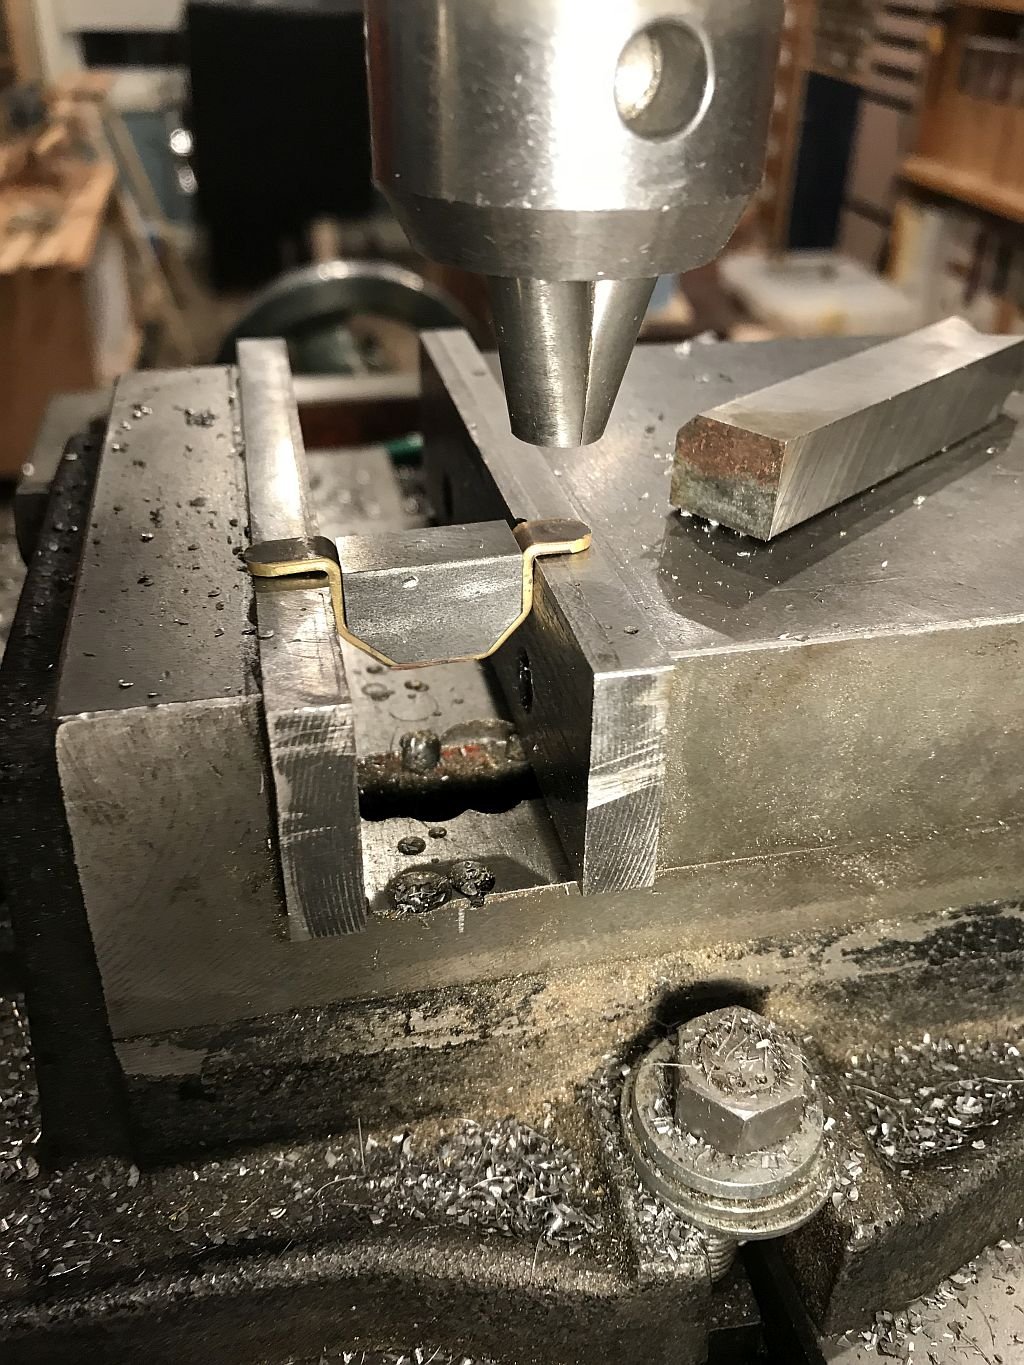
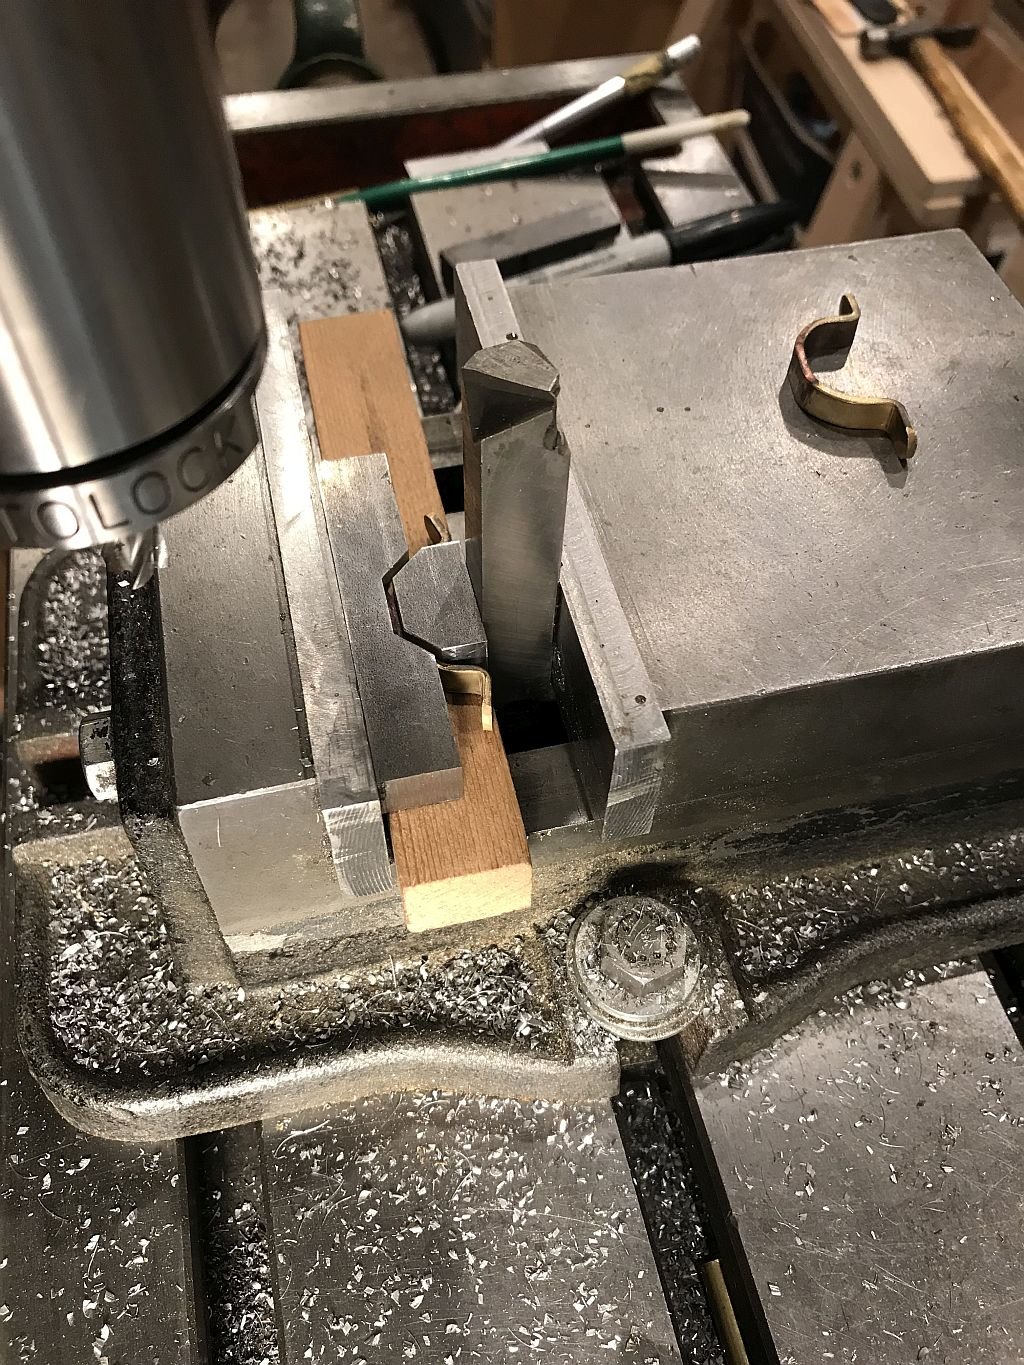
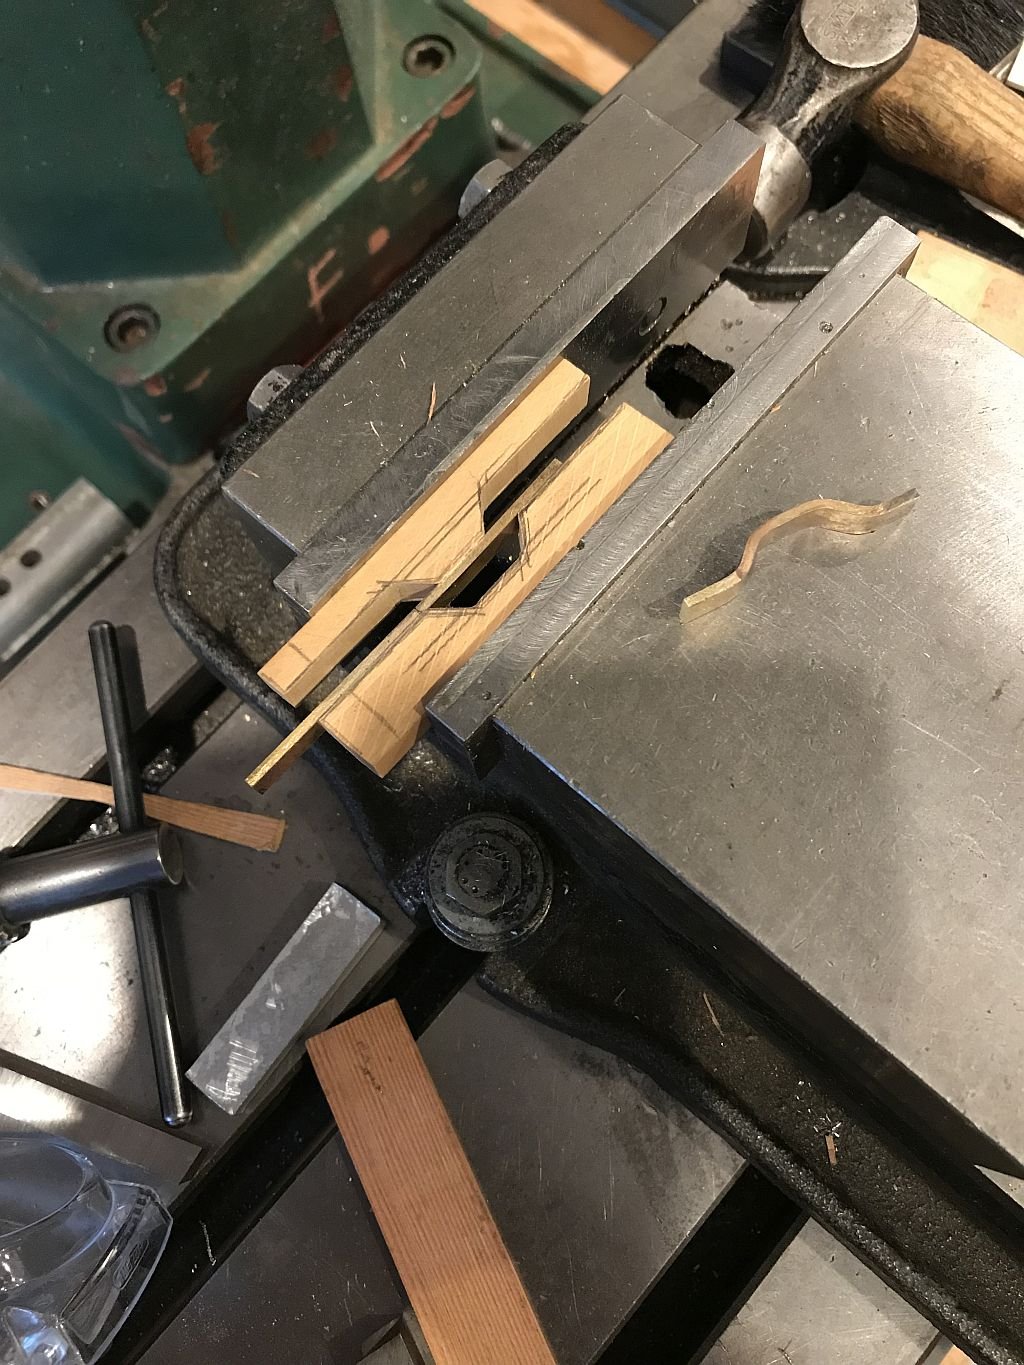
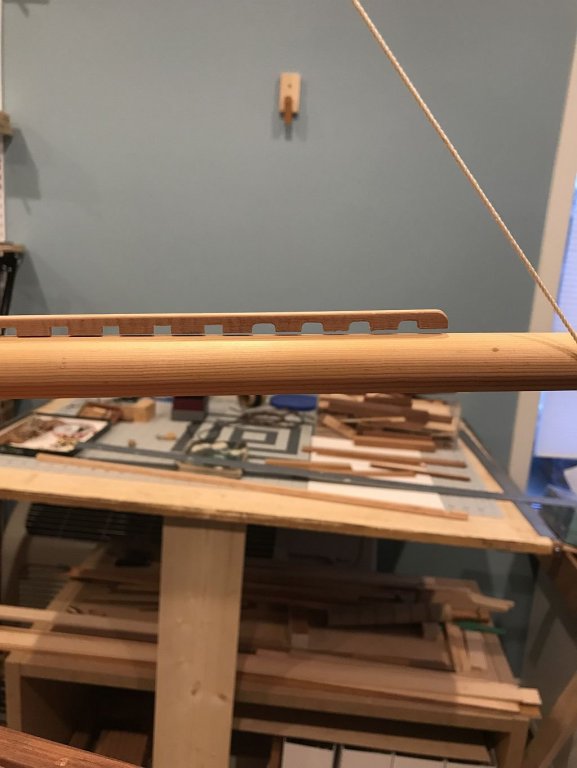
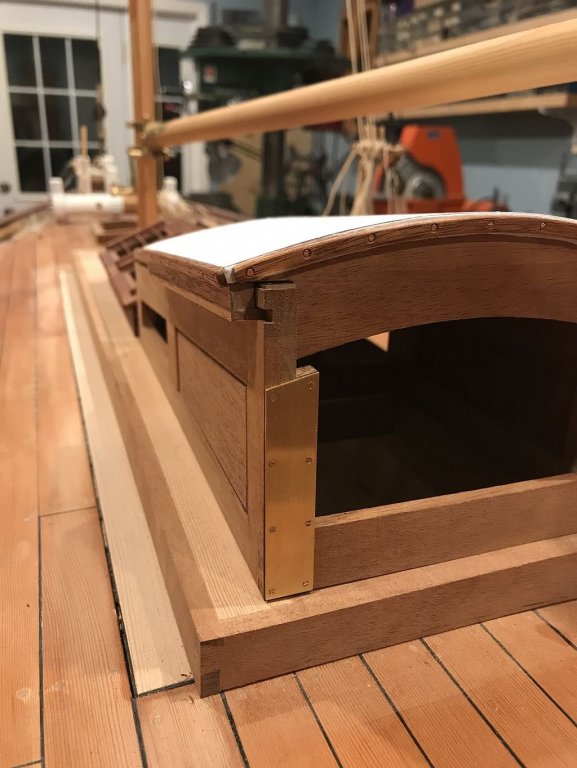
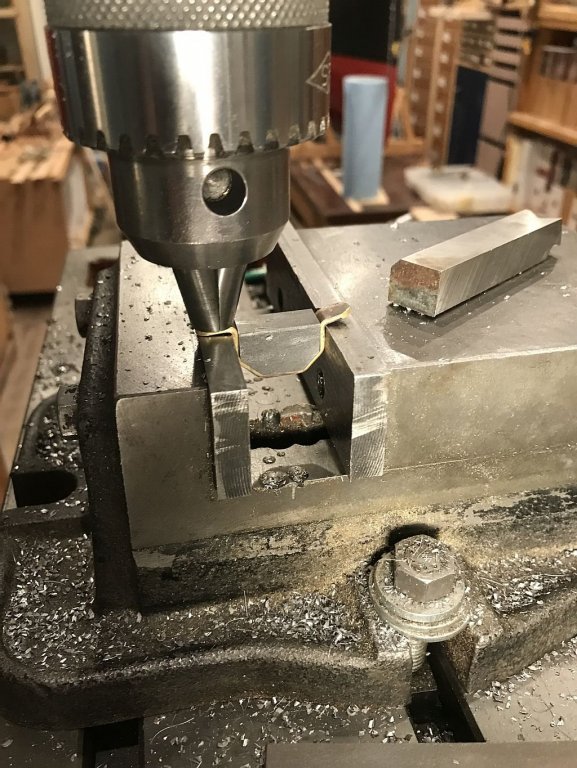
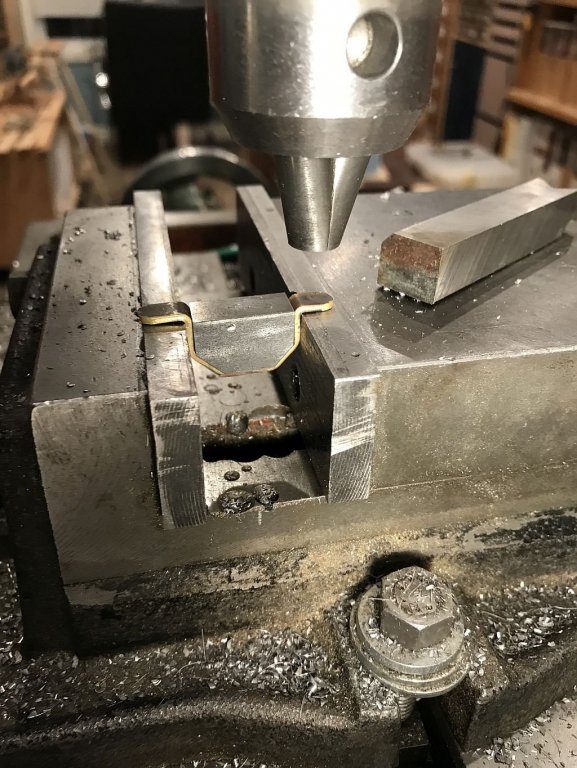
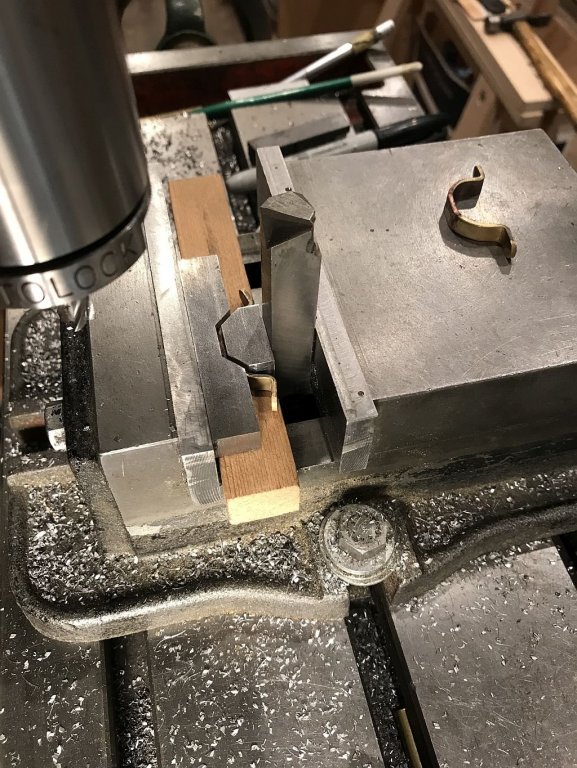
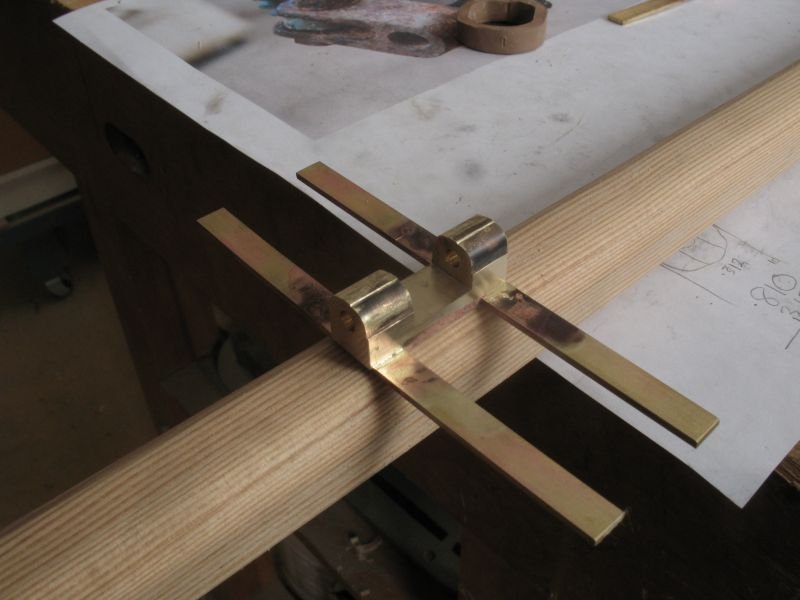
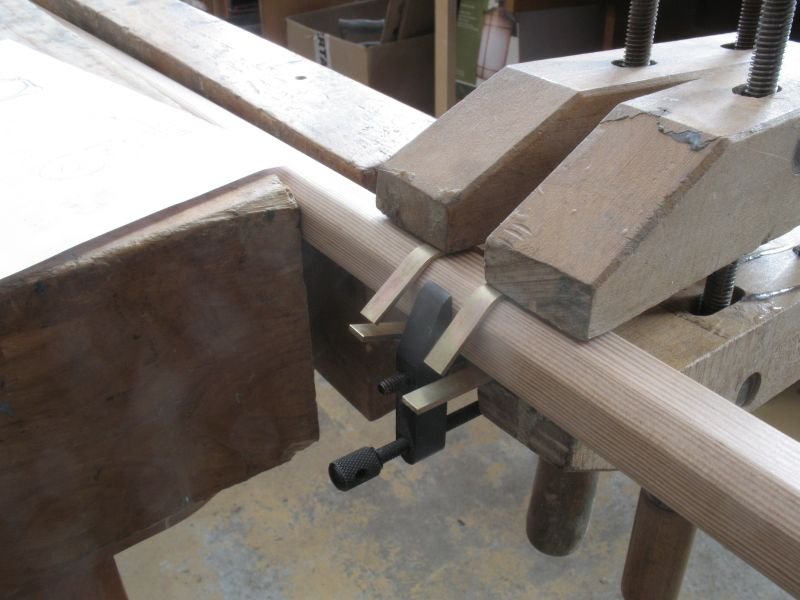
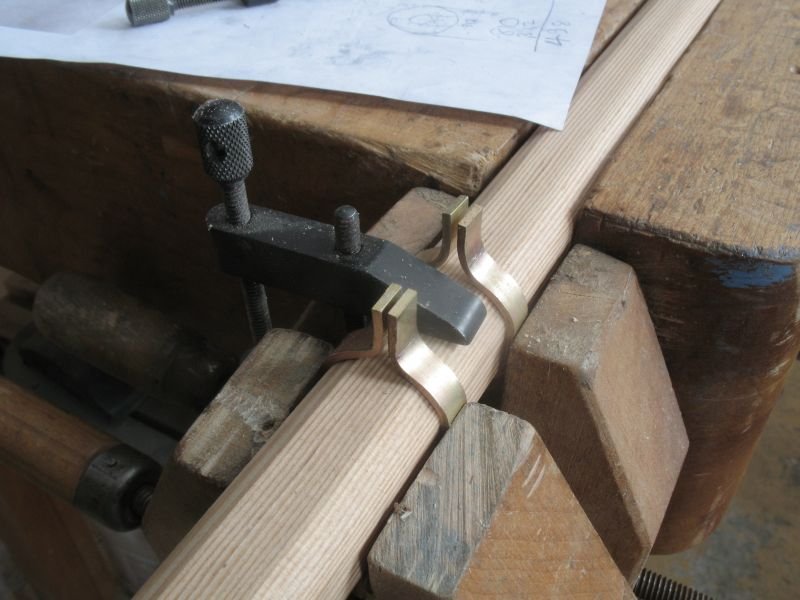
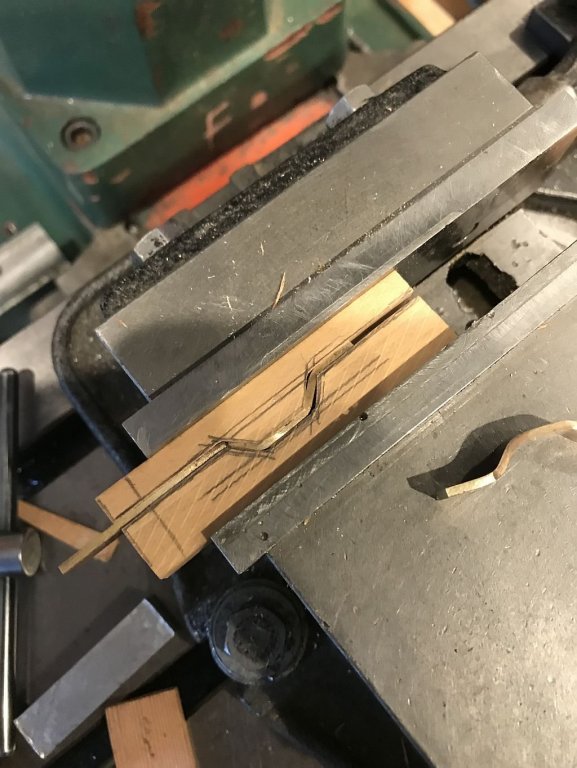
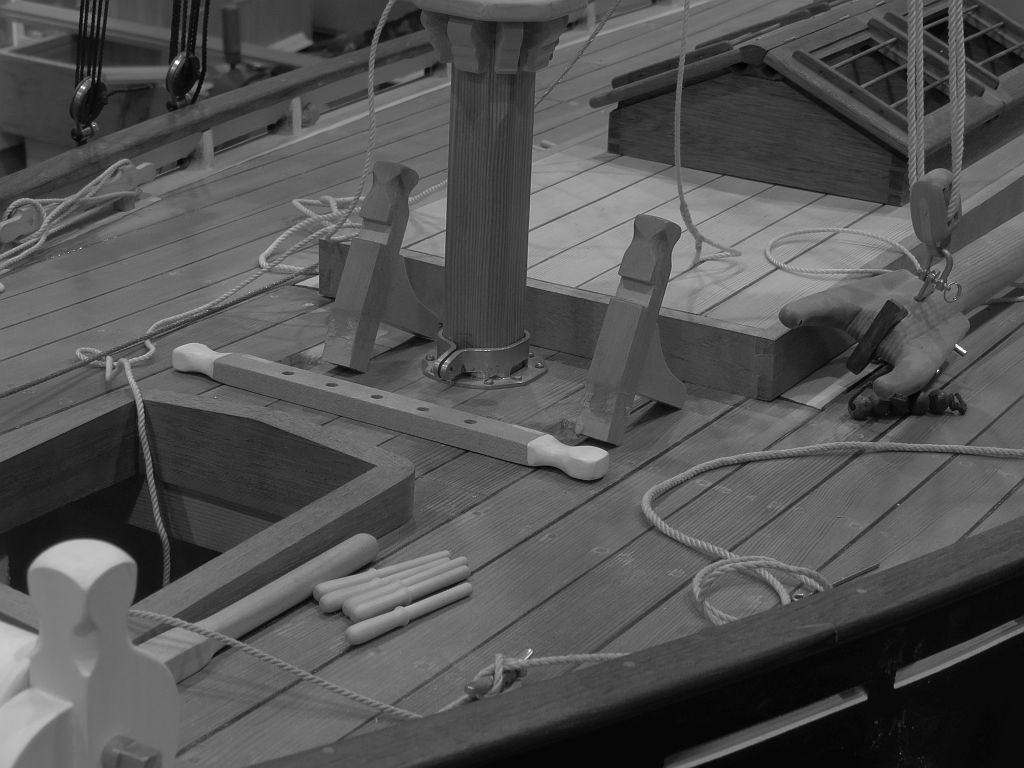
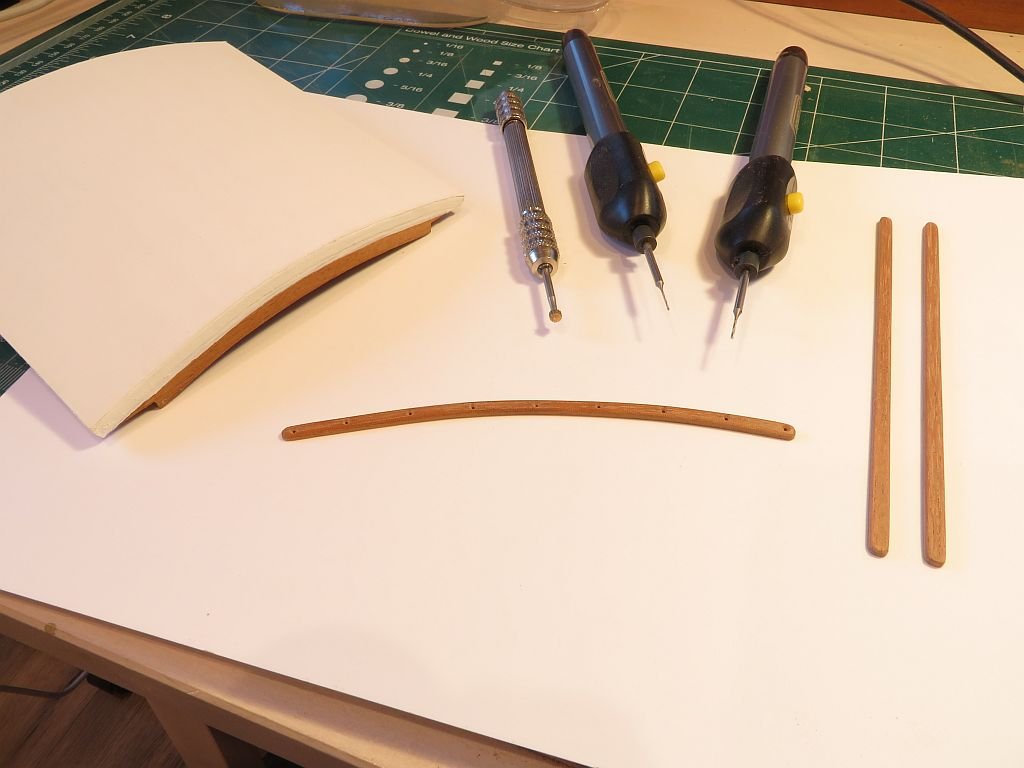
 Mark thanks for your thoughts and you are correct of course, I would still contend that it is easier on a small craft with a loose foot though. Kurt I'm not sure about that case....more of an alcove I think, it certainly wont fit on top of the piano. I did do a couple of experiments before heading off to a meeting this evening I need to shape the cut outs of the rail that will attach to the top of the boom. The first picture the rail is just resting on top of the boom, I cut out the slots on the table saw. The second shows the first attempts at shaping the opening using my Mini Mill. That's all for now. Michael
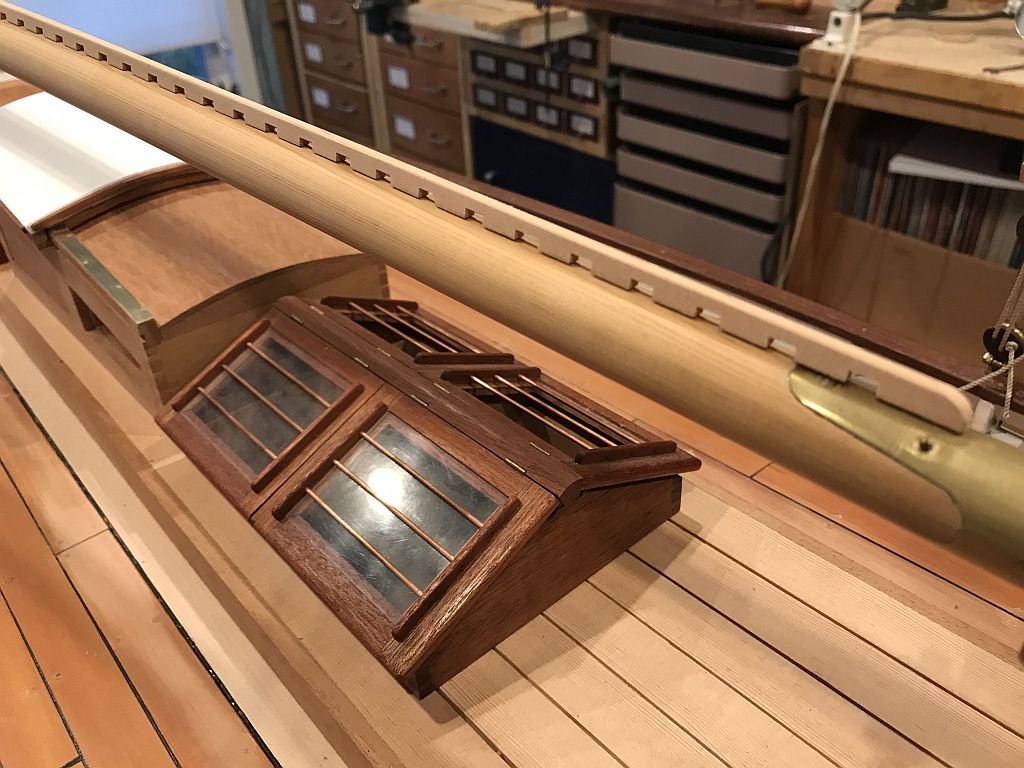
-
I am pretty sure that I modeled the roller reefing from the cutter Carlotta. I chose the roller reefing because I thought it looked neat, this is a model and i am not having to deal with the vagaries of actually having to reef. In real life 1:1 my preference is for a loose footed sail anyway, that way the sail can more easily take the airfoil shape all the way to the boom. I have just finished making a rail like the one on Carlotta from a strip of old growth fir with rings that are less than a 1/32nd apart. I did not take any pictures while using the table saw. I will have some later. Michael
-
I have a question for you then, I am considering what type of fixing method to use on the boom, John Leather in his book "the Gaff Rig" talks about the Americans tended to use a rail fixed to the spar with small blocks to provide a smaller element to lace the foot lacing rather than wrapping it around the boom. While the English used a foot rope in a groove or slides in or on a track. What was your experience? Thanks to all for your kind comments, I am really enjoying the working on the cutter again. Michael
-
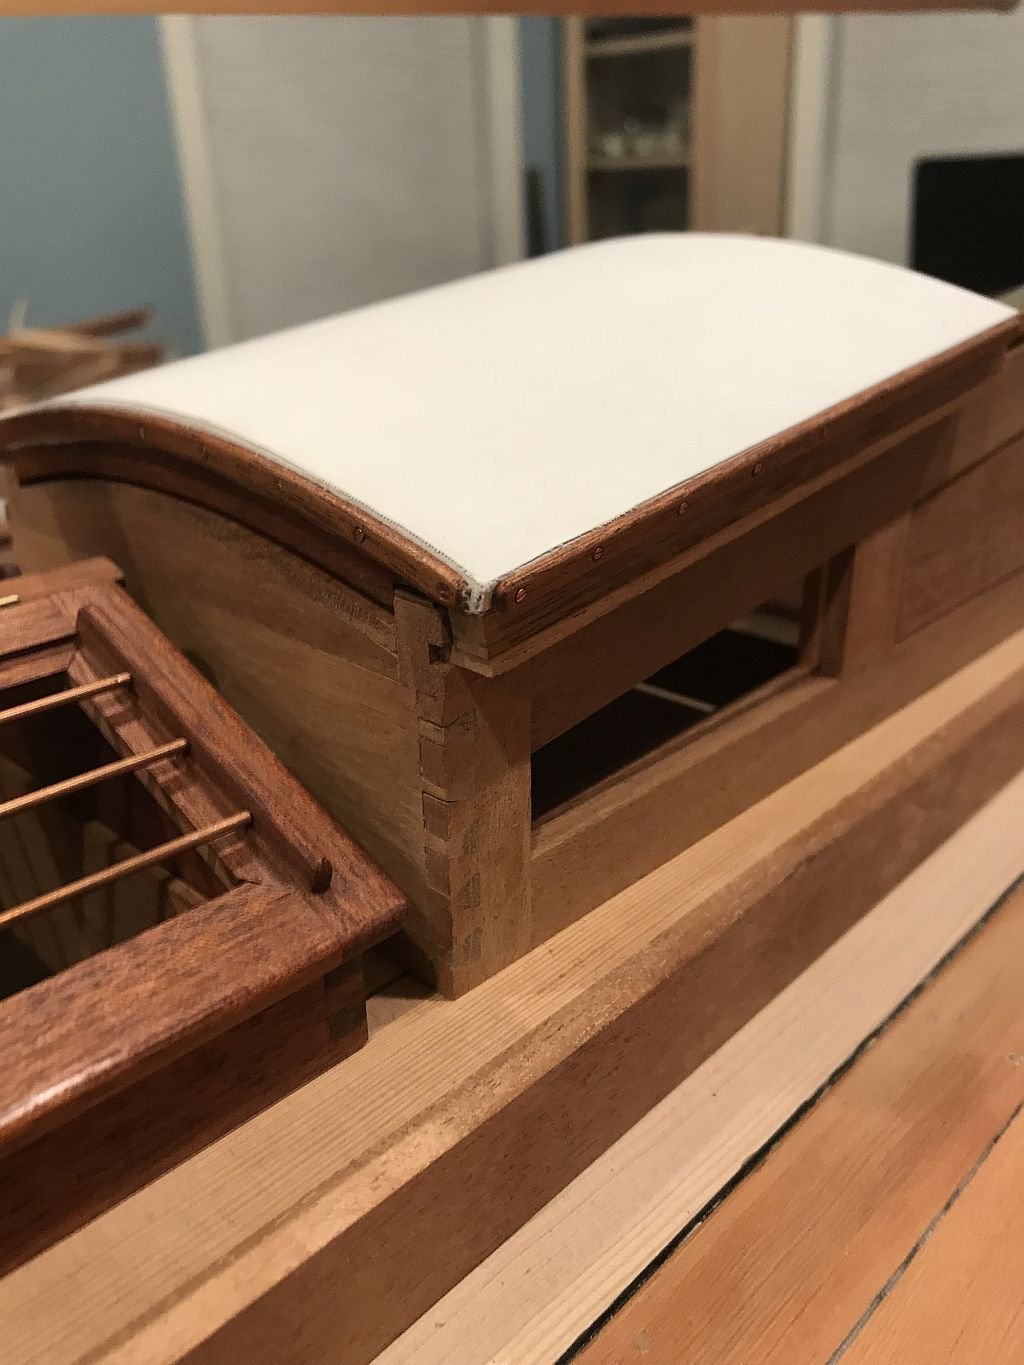
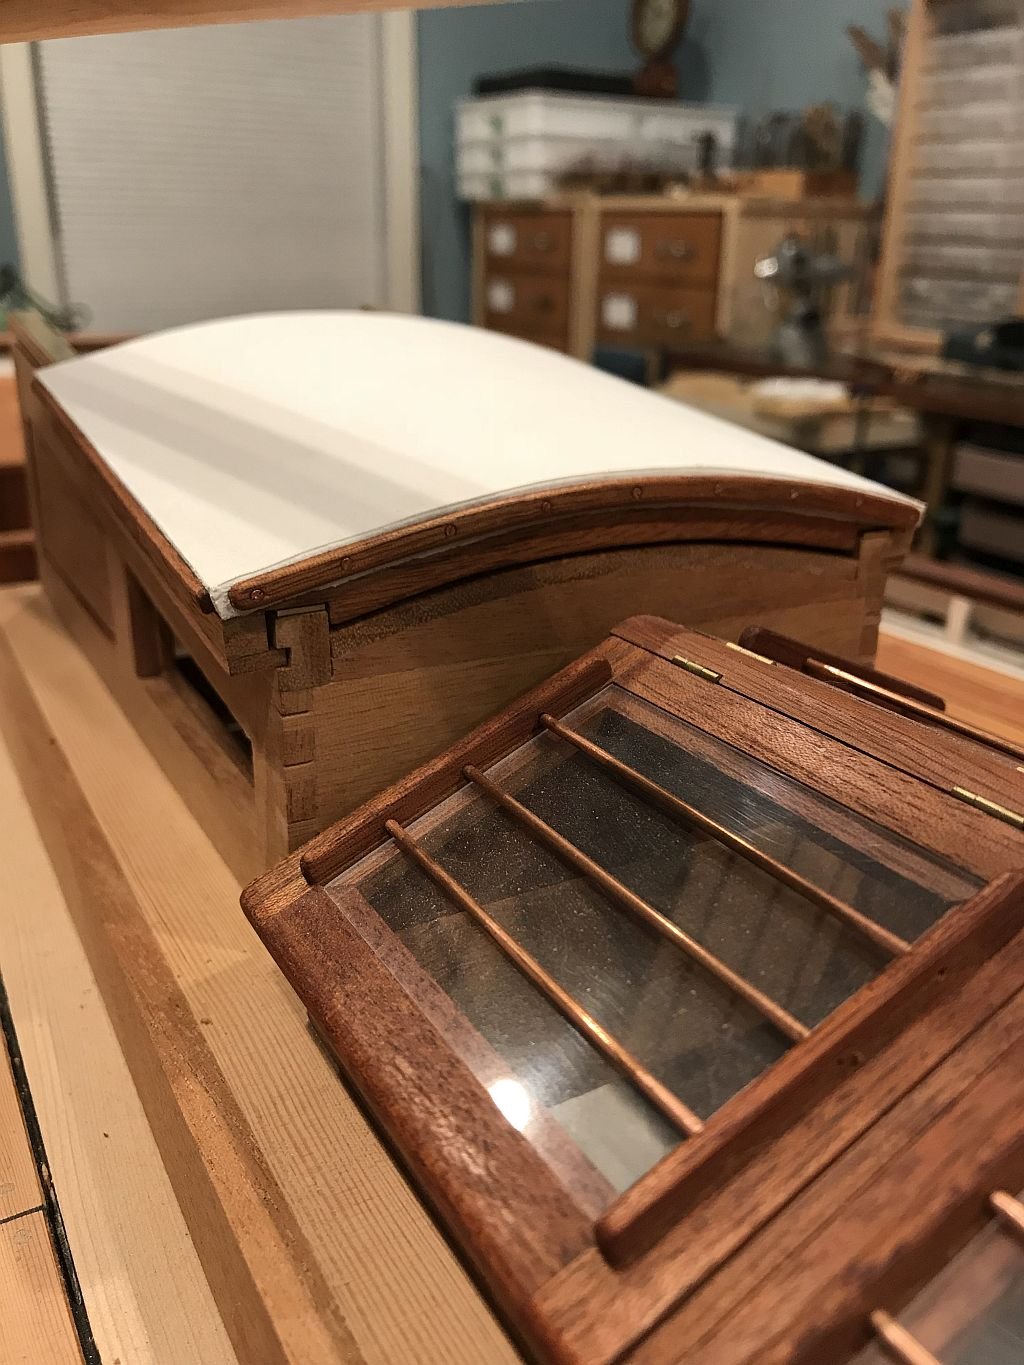
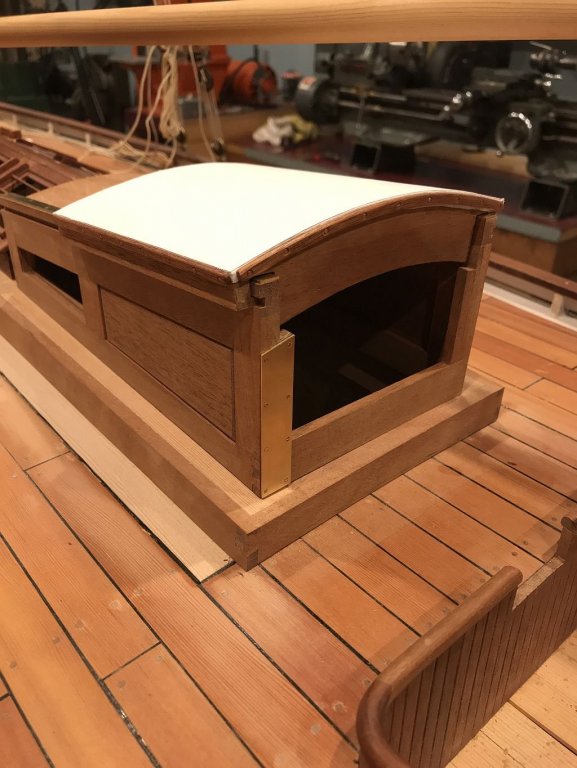
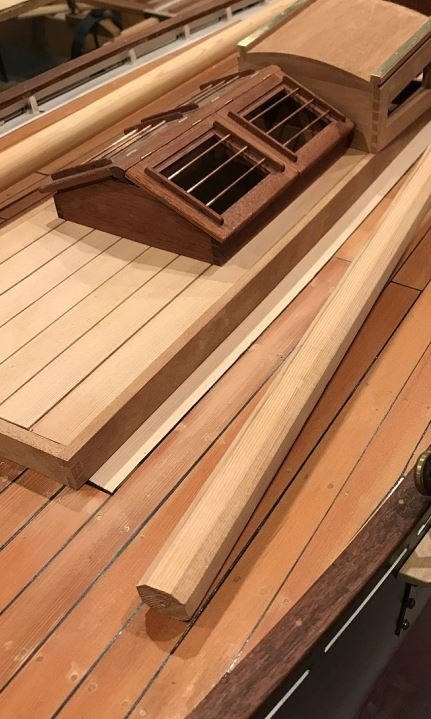
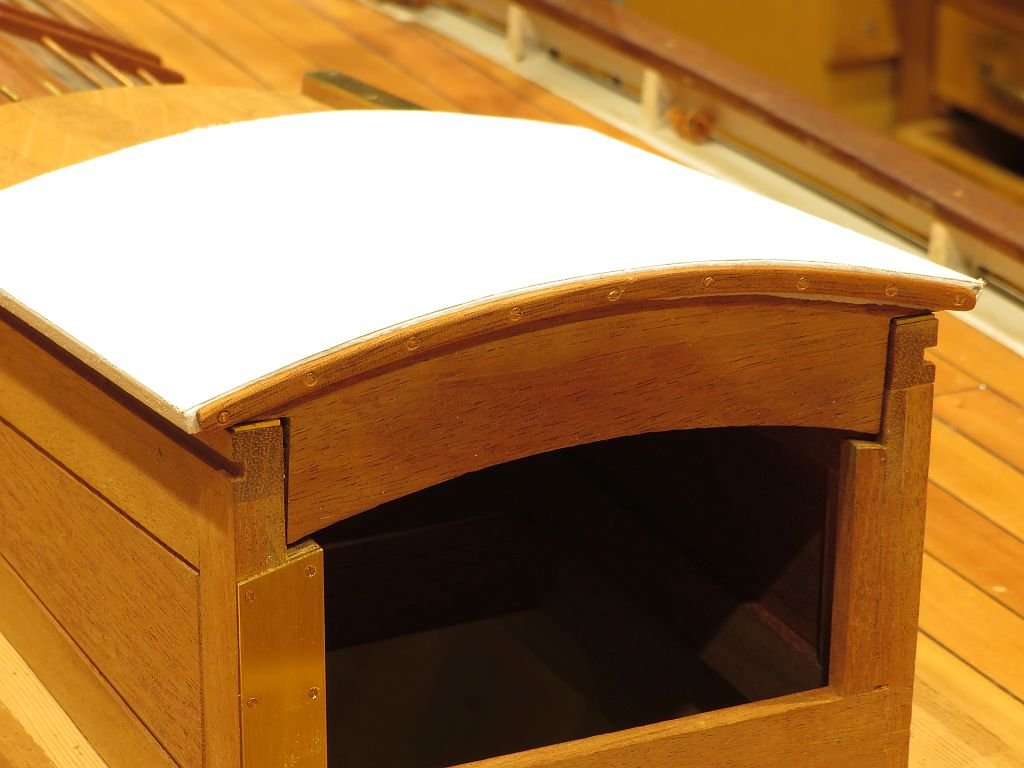
Thanks for all the likes and visits. I put the rest of the canvas holding strips on today which meant making another 27 screws. then also the capture strips for the hatch itself a little bit of clean up on those tomorrow and then on to finishing the hatch boards or perhaps some doors. I really must get those other two glasses into the skylight. Also I had to un-jam the roller reefing gear which had locked up because there was some moisture that had gotten into the shaft which was ordinary drill rod and not stainless. It was easy enough to polish up the shaft once it was taken apart. Michael


-
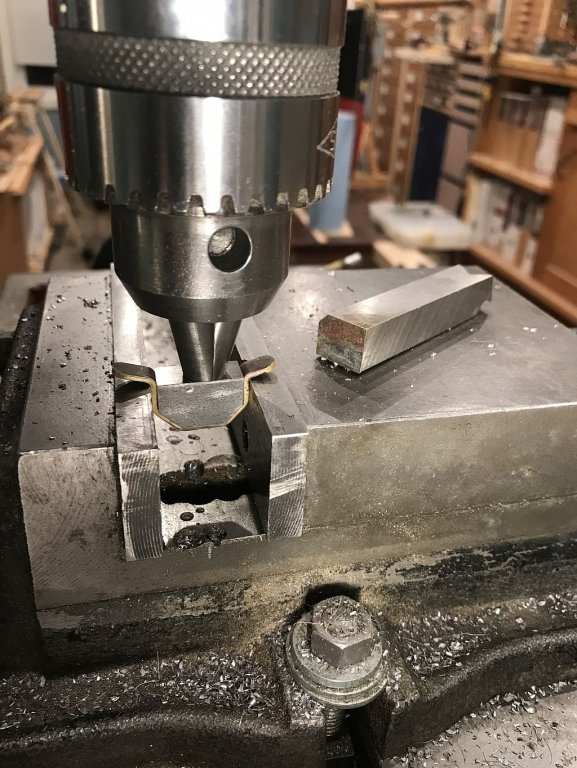
Hi Druxey interesting that you mention the chuck being used that way. My Mill Drill uses a large crank to raise and lower the head which is heavy I had been using the Clarkson collet head to shape the steel and switched to the drill chuck to drill some holes. normally I would have put a solid bar of brass or steel into it to push down and use it to act as a hold down or punch. But closing the jaws accomplished the same task. I have used the same method many times on the lathe using the chuck in the lathe tailstock as a press of sorts. Michael
-
Good morning Paul I have not decided that yet, making it black implies that it would be iron. obviously if I leave it brass coloured it would imply bronze or brass and keeping it bright or just allowing it to patina naturally are also options. These questions lead to all those other questions which address the moment that one wants to capture with the model. The issue of do I weather it or not. It is a model of an imaginary cutter based on the fishing smacks and cutters of the late 19th and early 20th centuries, that has been adopted as a pleasure craft perhaps one that has been restored. I also want to sail it as a practical model in a simple way without all the complexity of radio control. Basically an elaborate pond yacht. At this point I am leaning more to just leaving it to age naturally. Michael
-
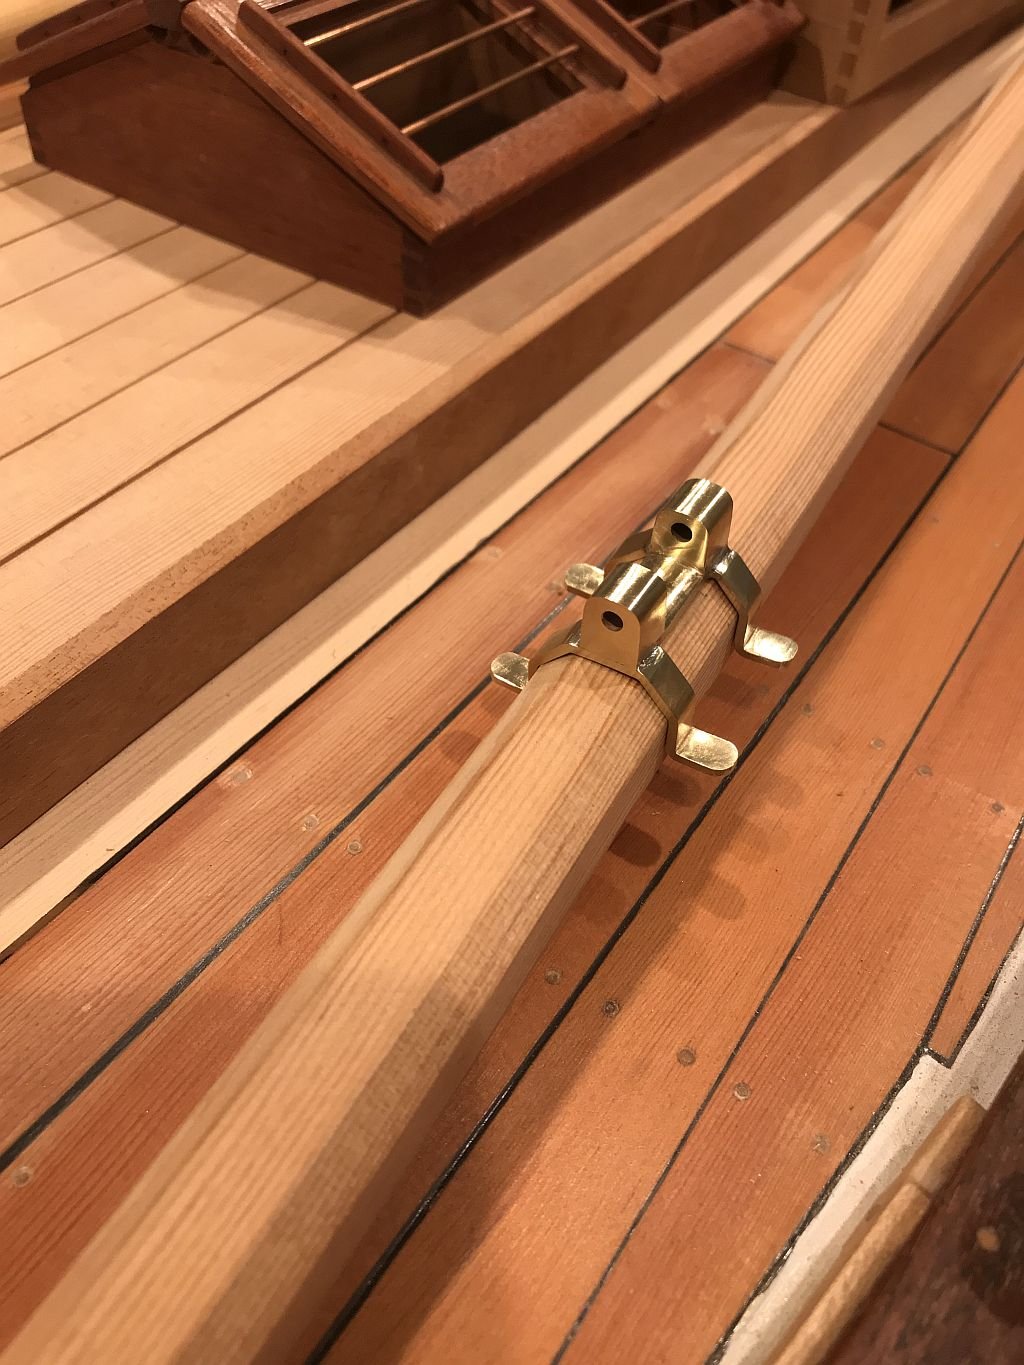
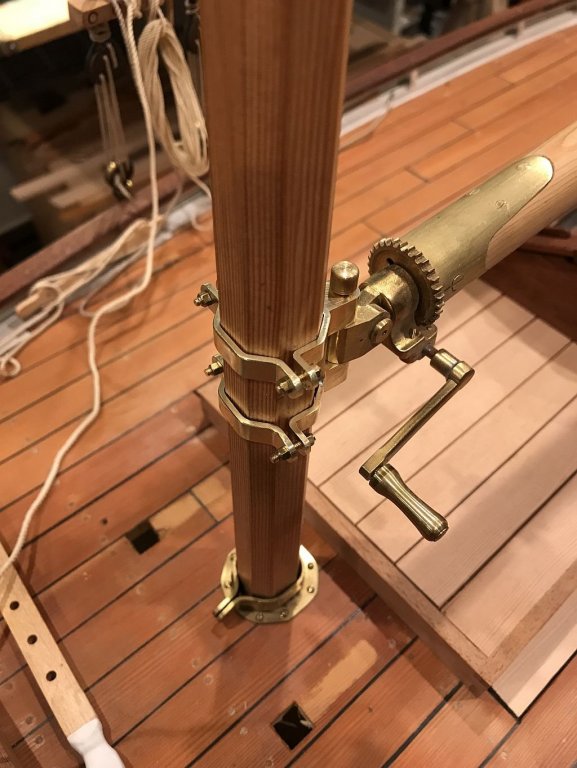
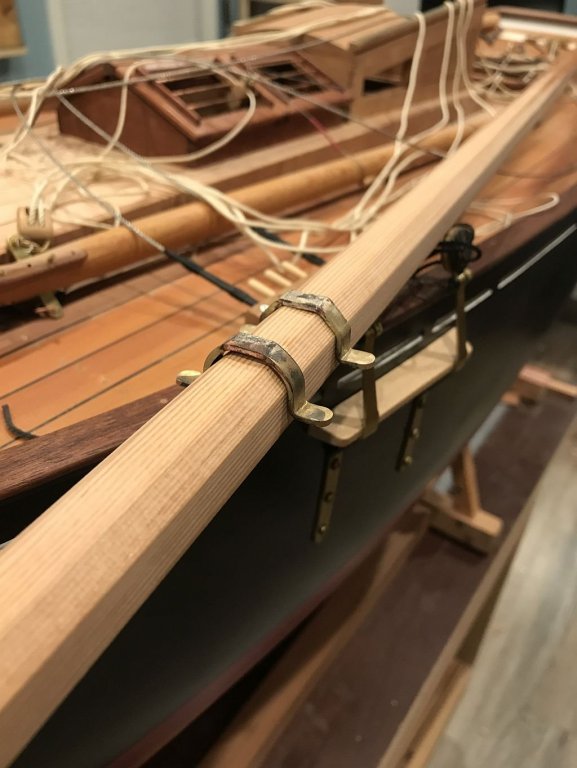
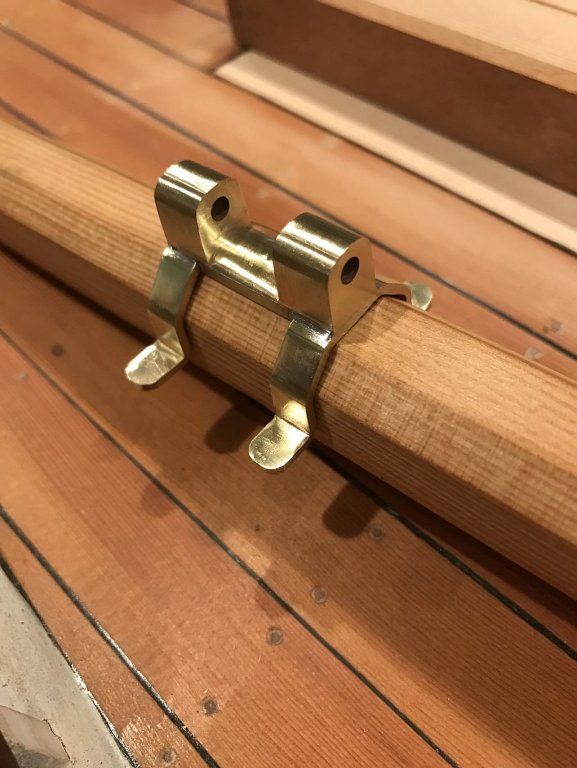
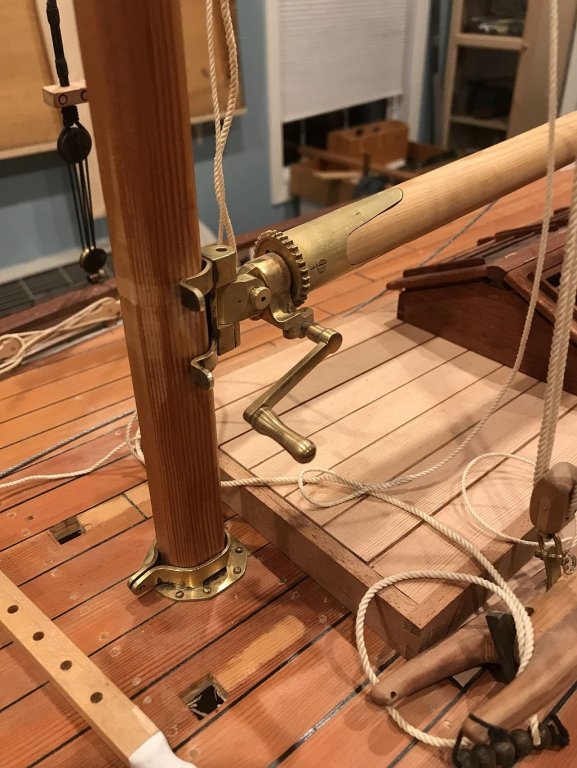
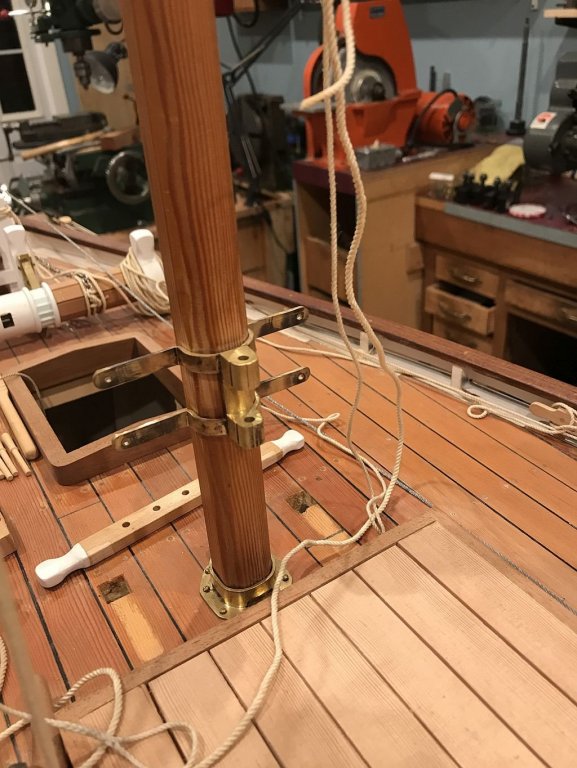
Hi Jim, yes it was a solid piece that I machined. here is the result of the work this evening. I finished off the front clamping plates for the gooseneck and re rigged the mast, it took a while because i changed the mechanical advantage on the gaff by swapping out the pulleys. I changed the ropes that are in the dead eyes to a tan colour as well. next up is to finish the sliding canopy. Michael

-
Nice work on the ebony Paul. Michael
-
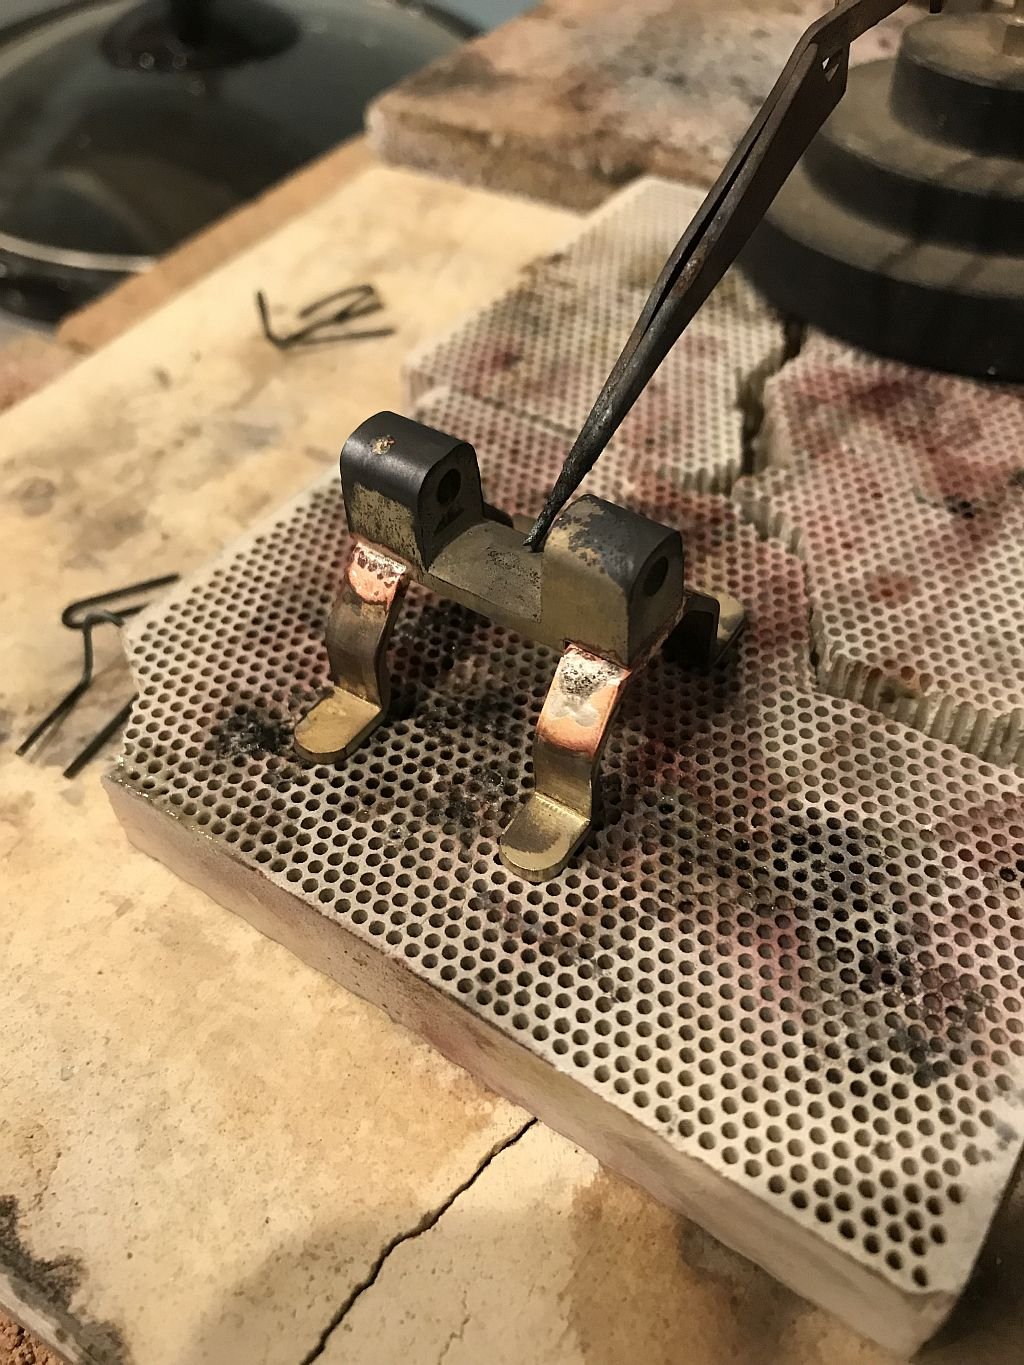
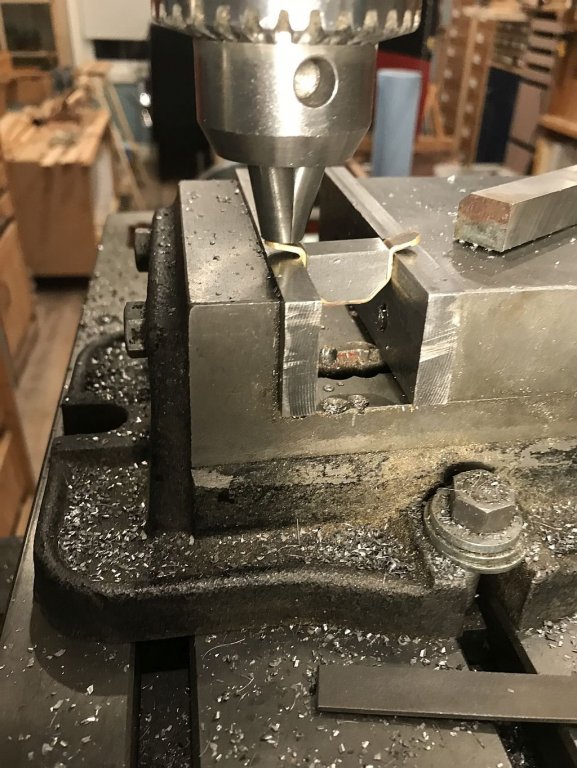
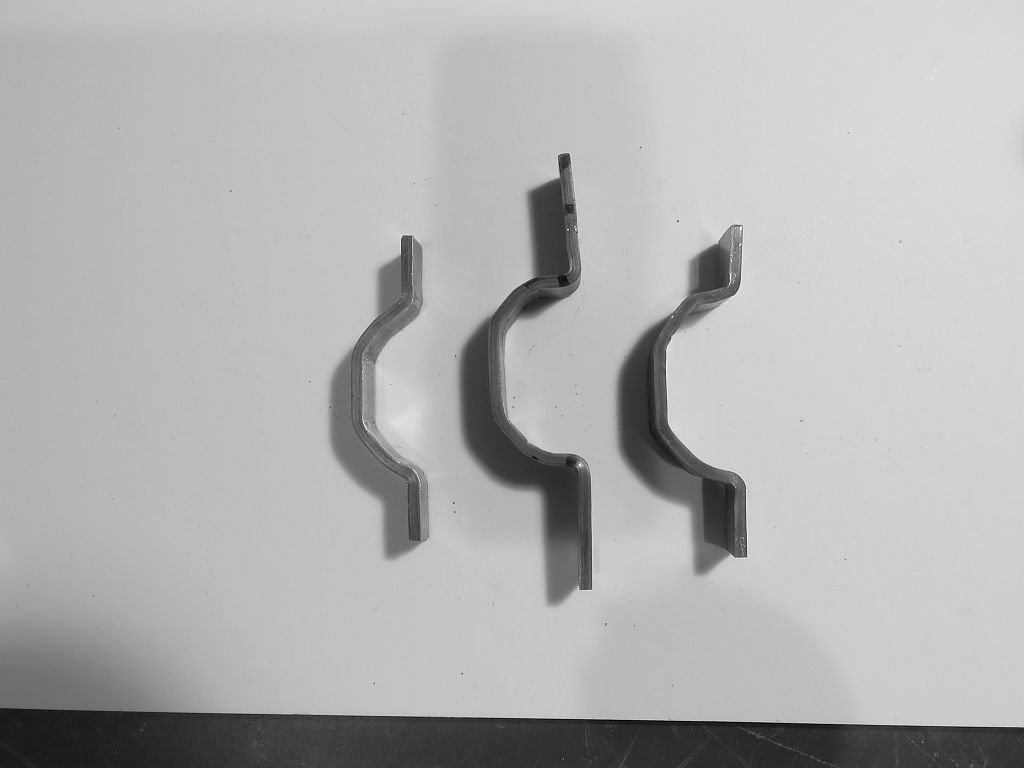
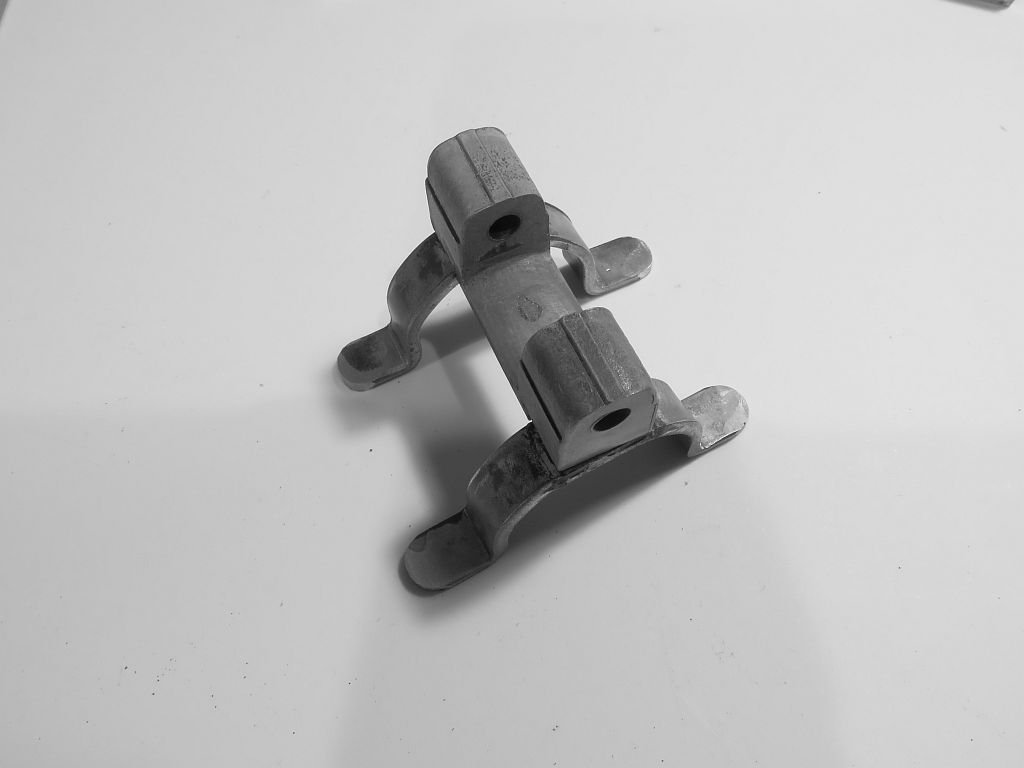
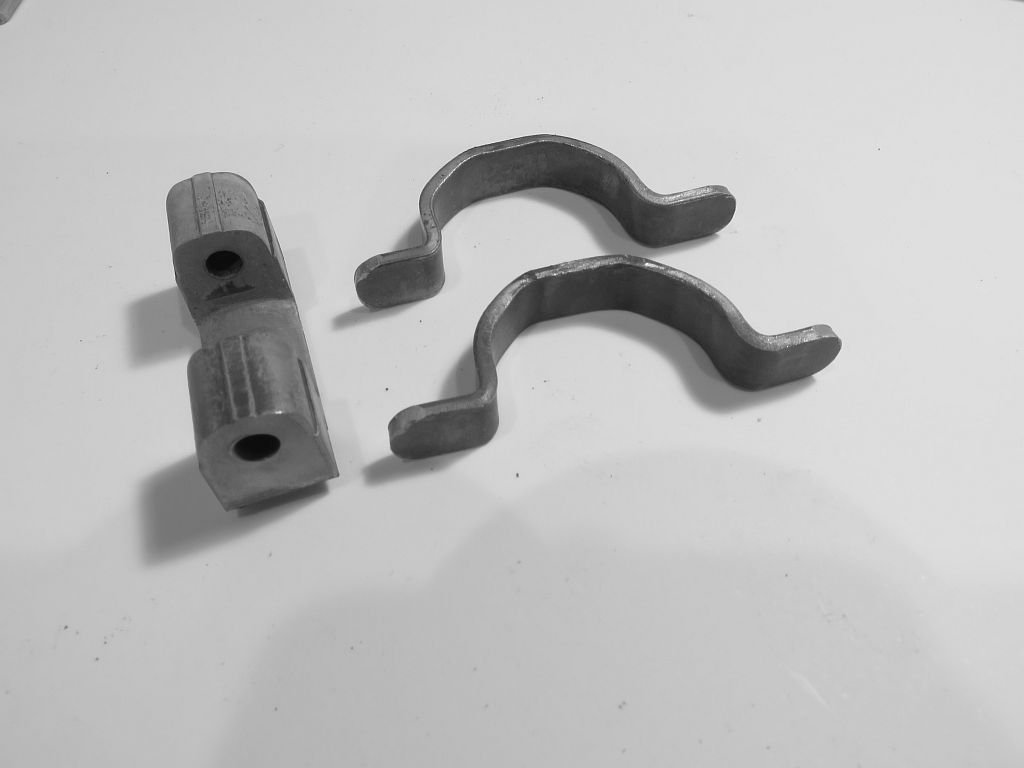
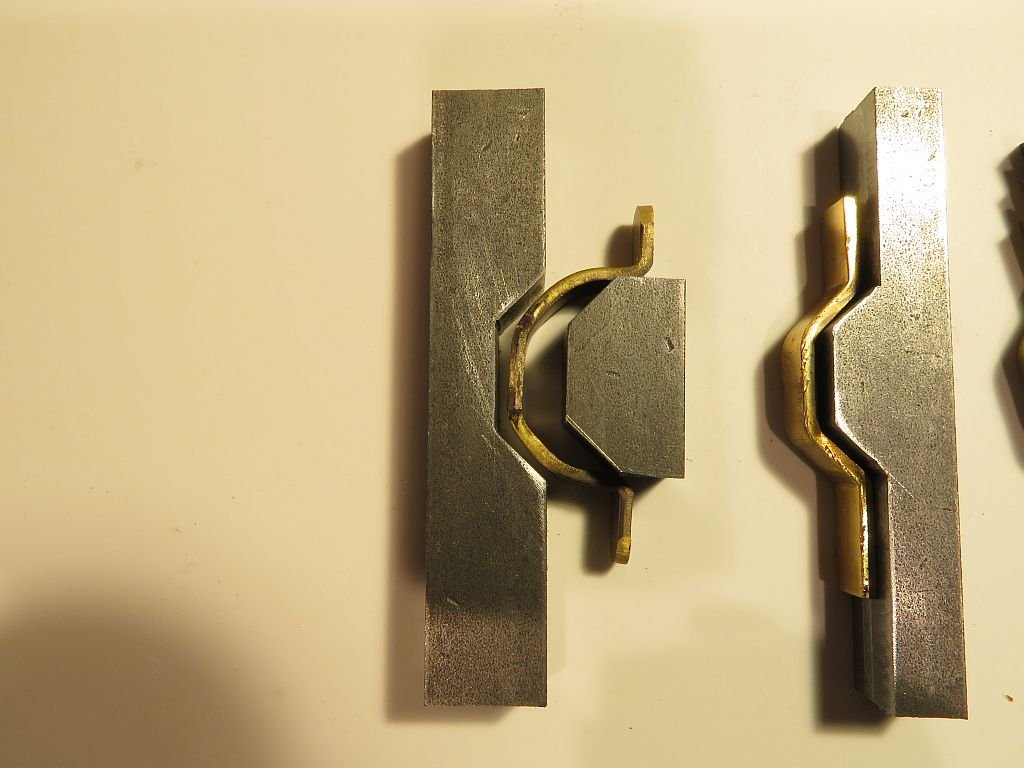
This next sequence shows the rear bands being reshaped with the second die and using the vice and chuck to assist. After reshaping you can see the difference. the forward one has not been reshaped yet. When they were both shaped it took two tries to get them reassembled, the first attempt was well soldered but the bands were crooked to each other by just enough to be a problem. so a second re-soldering worked. After cleaning the assembly up a lot more the result looks good. Now to mate the front pieces and we are ready to put all this lot back together. As I mentioned earlier the saga continues. Michael


-
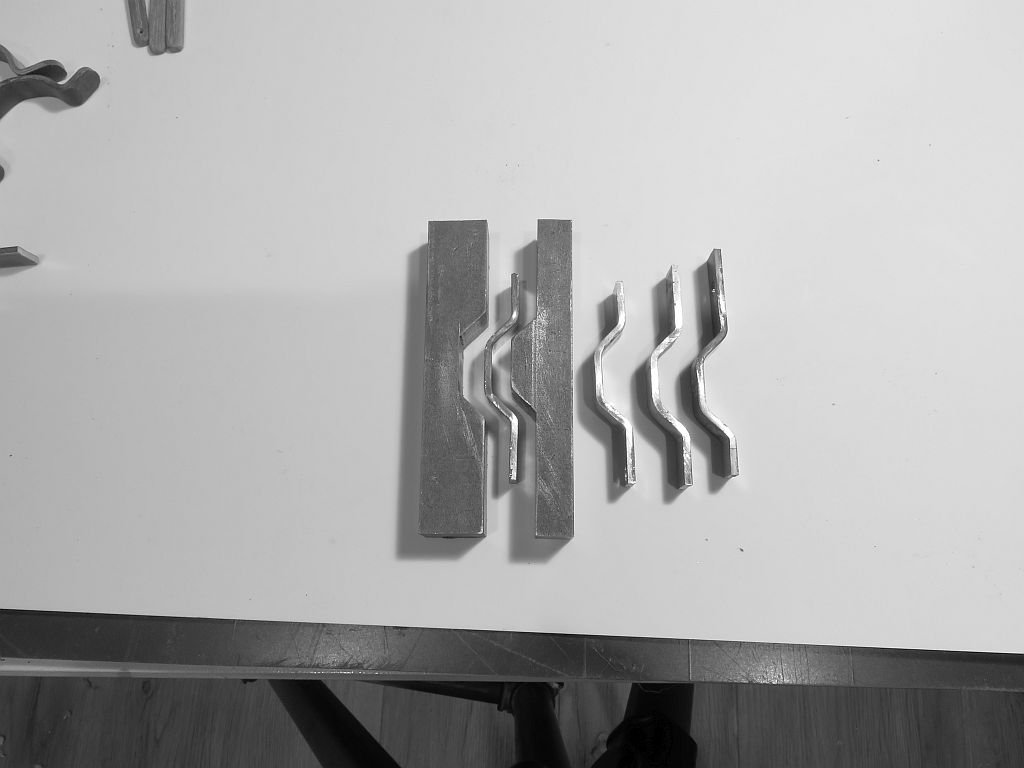
Again thanks for the interest in this saga. Back in 2013 when i was working on the first mast boom and the attendant fittings, I was perhaps a bit lazy in the way I went about some of the work, looking for shortcuts as to the methods of fabrication. I bent the clamping strips around the wood of the mast, it seemed like a good way at the time, it did however indent the wood and did not fit as well as it could have. Forward to now and I made the choice to rework this goose-neck but not without a struggle. After modifying the clamps to look like this I attempted three times to make a front part to mate to the rear, and was disappointed with the efforts, because none of them matched properly. The original gooseneck was not a great fit ok but not great. Step one was to take it apart again since this was silver soldered it meant high heat. It was now possible to reshape the bands to fit better but I had already been having difficulty with the front pieces so I made the decision to see if i could make a former out of hardwood and use it to form the bands I would test the idea on the front retainer parts. This worked well enough for one piece so I knew that making a proper form would work for multiples. so I machined one out of steel. Once I had made the blank shape I mad a second form but not until I had done some work on cleaning up the mast. which meant taking it down. I re worked the lower portion and cleaned up the octagonal portion quite a bit. Now it was time to reshape the rear band parts. so i made a second die to work the back part. I will break this into two posts the next part will follow right away. Michael

-
Mike you really are doing a great job, very clean and precise. Michael
-
As always Ed your attention to the tiniest details is exemplary! Yes, the 4 shackles floored me. I also agree with your sentiment that it is certainly easier to work seated at the workbench where possible. My own workspace consists of a variety of places that can be worked at both sitting and standing. Michael
- 3,618 replies
-
- 2
-

-
- young america
- clipper
- (and 1 more)
-
Hello Paul the ones I have are made by general and are sold as an engraver with a small ball burr. the collar is set to accept 3/32 shaft drills. it uses a couple of AA batteries doesn't have a lot of jam but is handy for a variety of small jobs. Michael
-
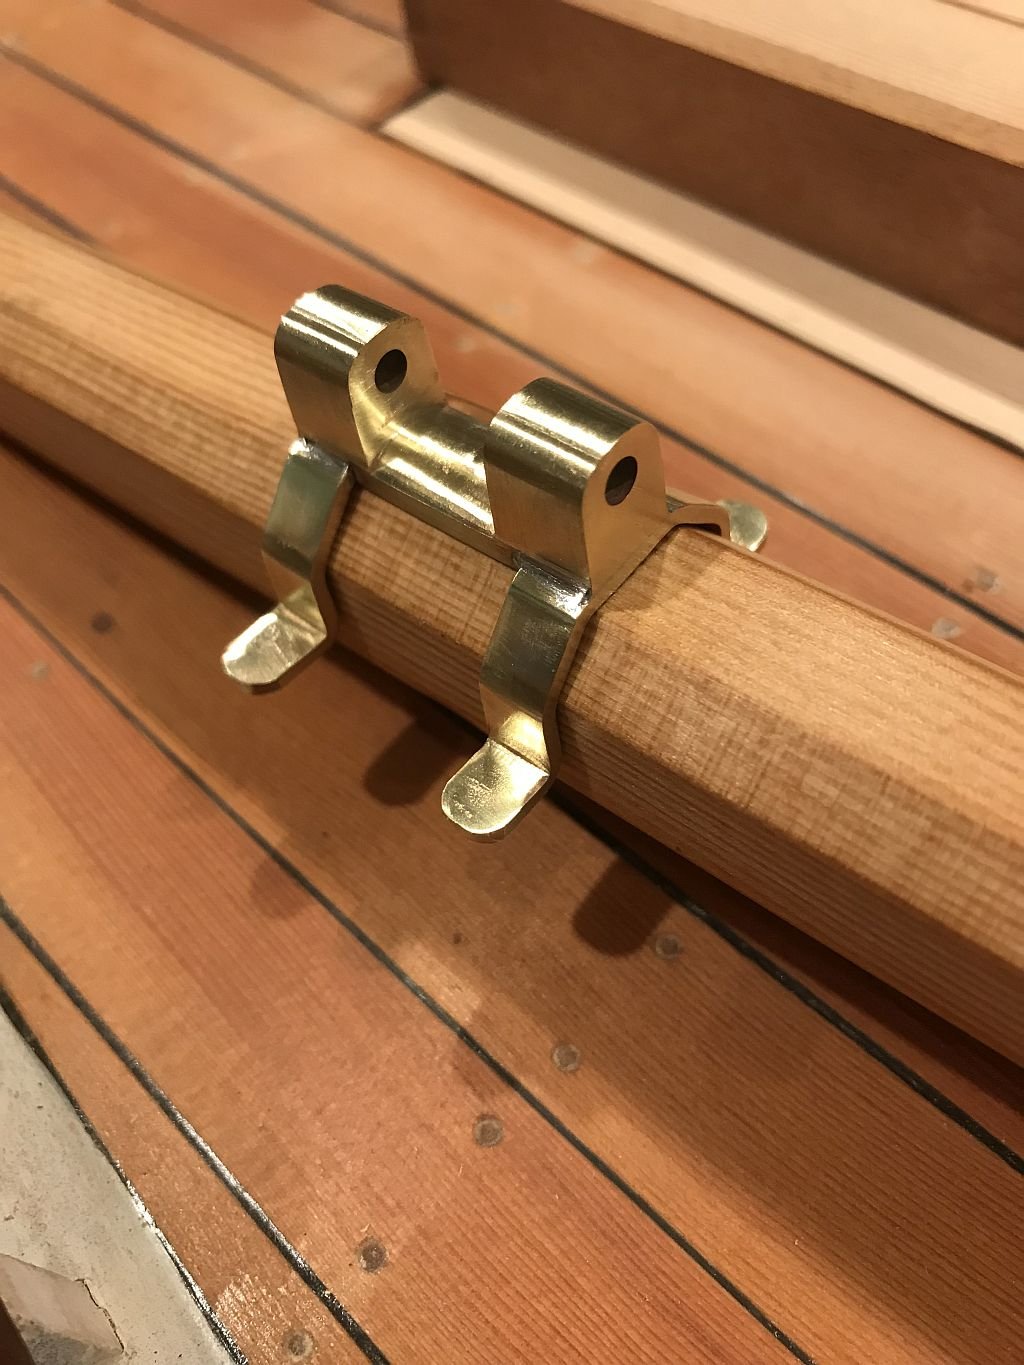
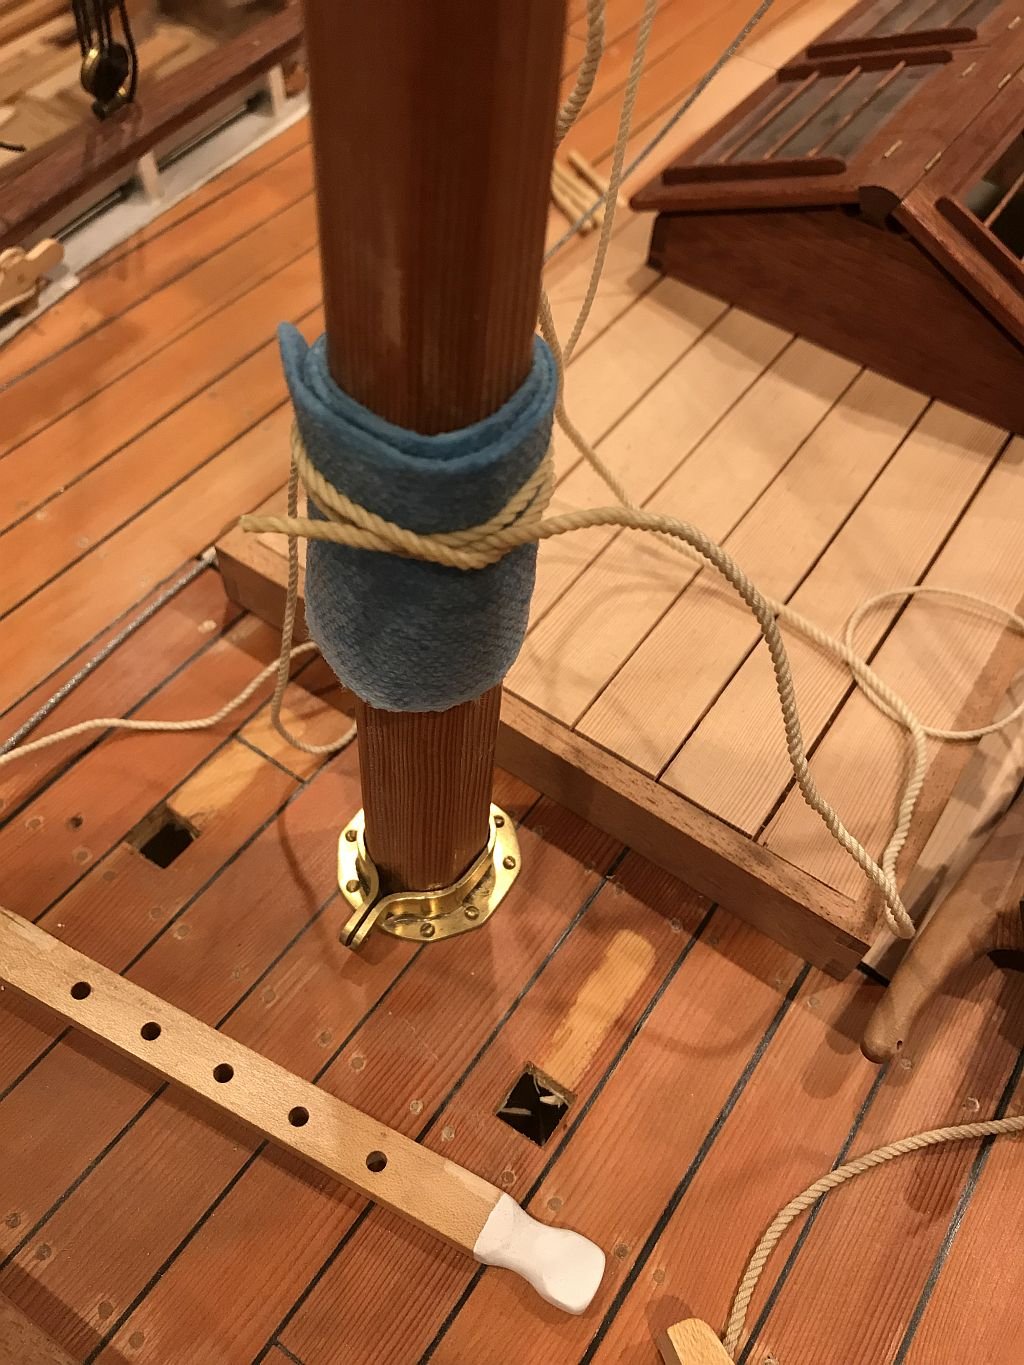
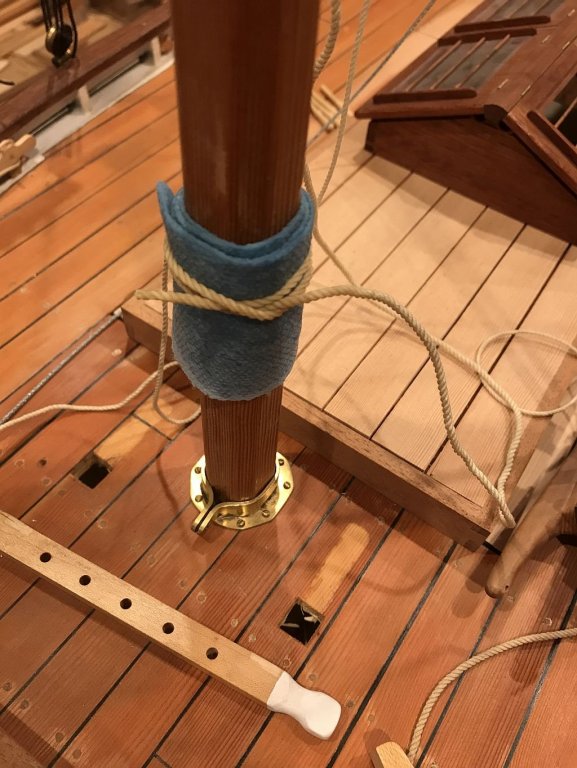
The changes are still happening I'm going back to the roller reefing boom. For the second time I have used the isopropol alcohol and am impressed by how well it works, after removing the shelf for the gaff jawed boom, I wrapped the mast with some industrial paper towel and soaked it to do a final clean up of the location where the glue was. It took a little while to find the old goose-neck bracket and I decided to modify it in order to be able to put it on and off without taking the mast down. a bit of annealing and reshaping did the trick. Now I need to make a couple of retaining bands to finish clamping it back on. Now I get to rework the way the main sheet is attached. I feel good about going back to this option. Michael

-
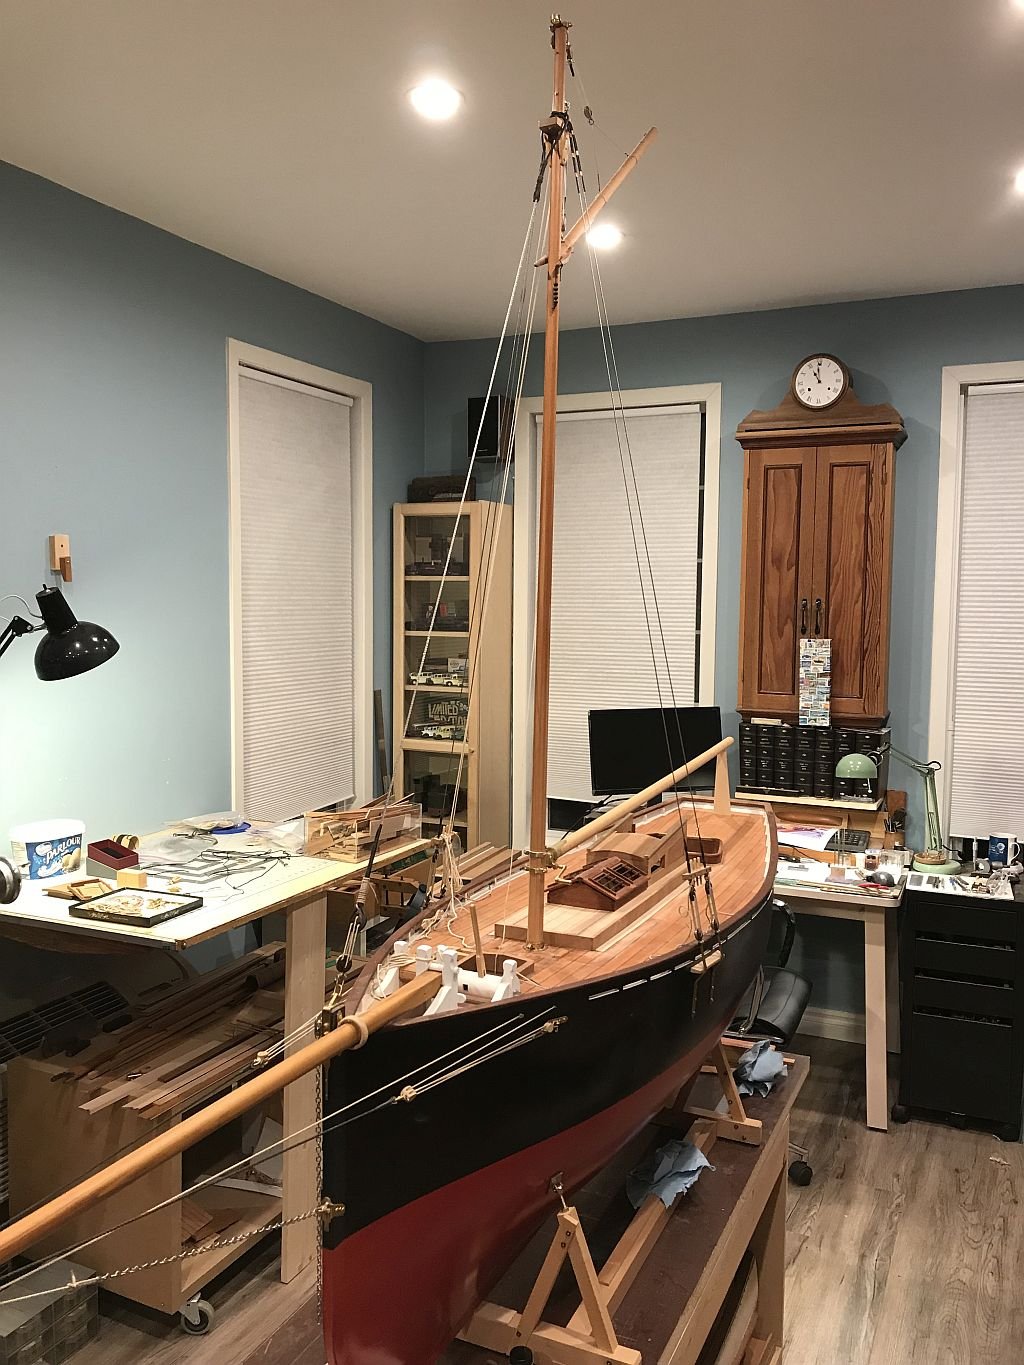
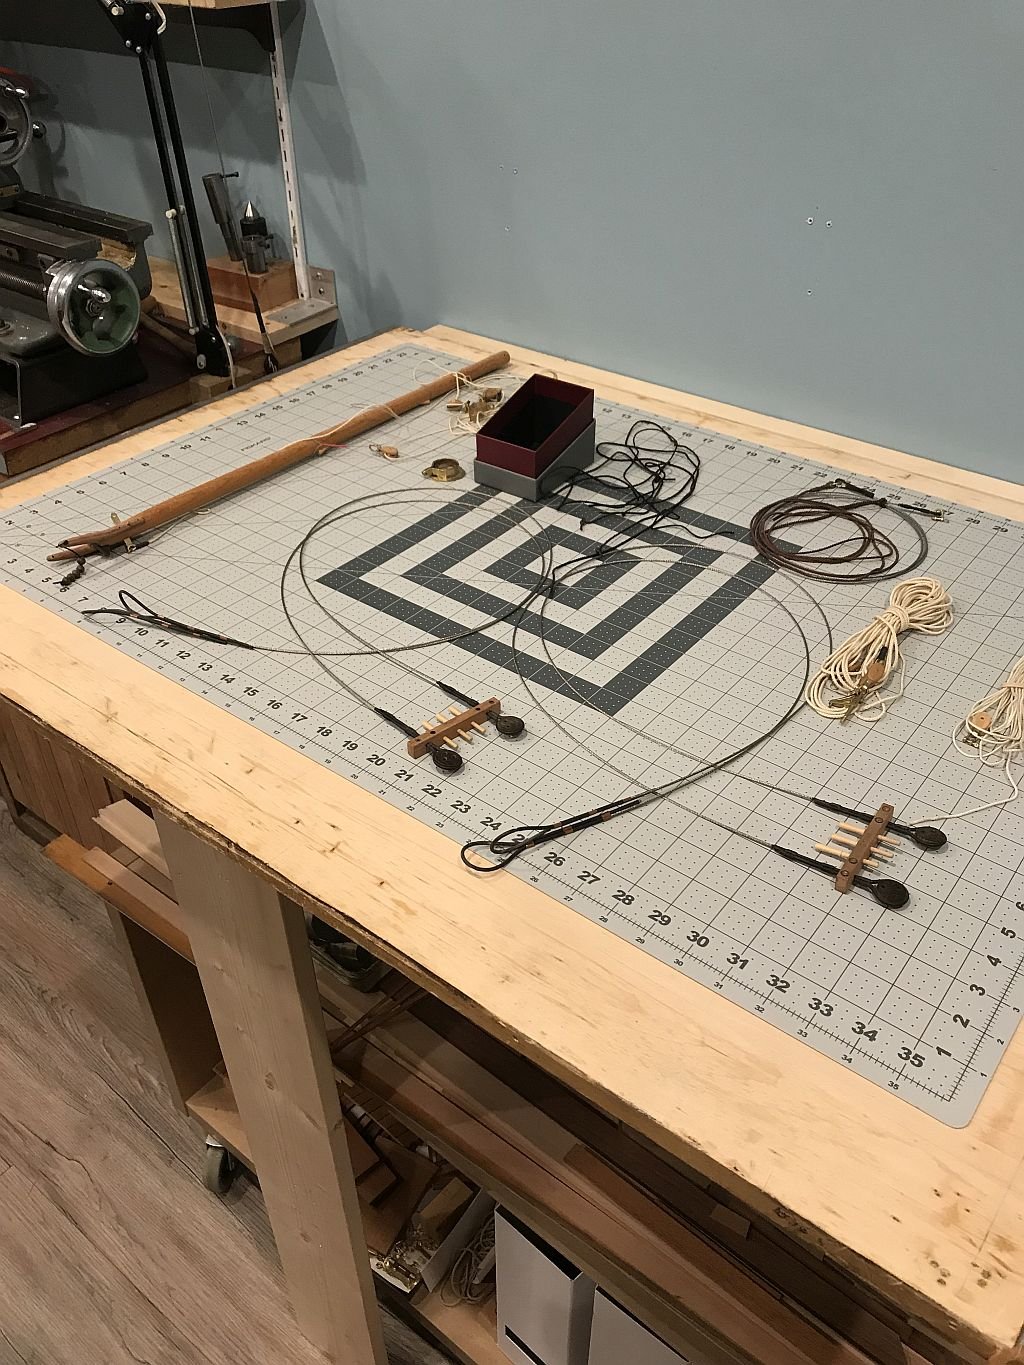
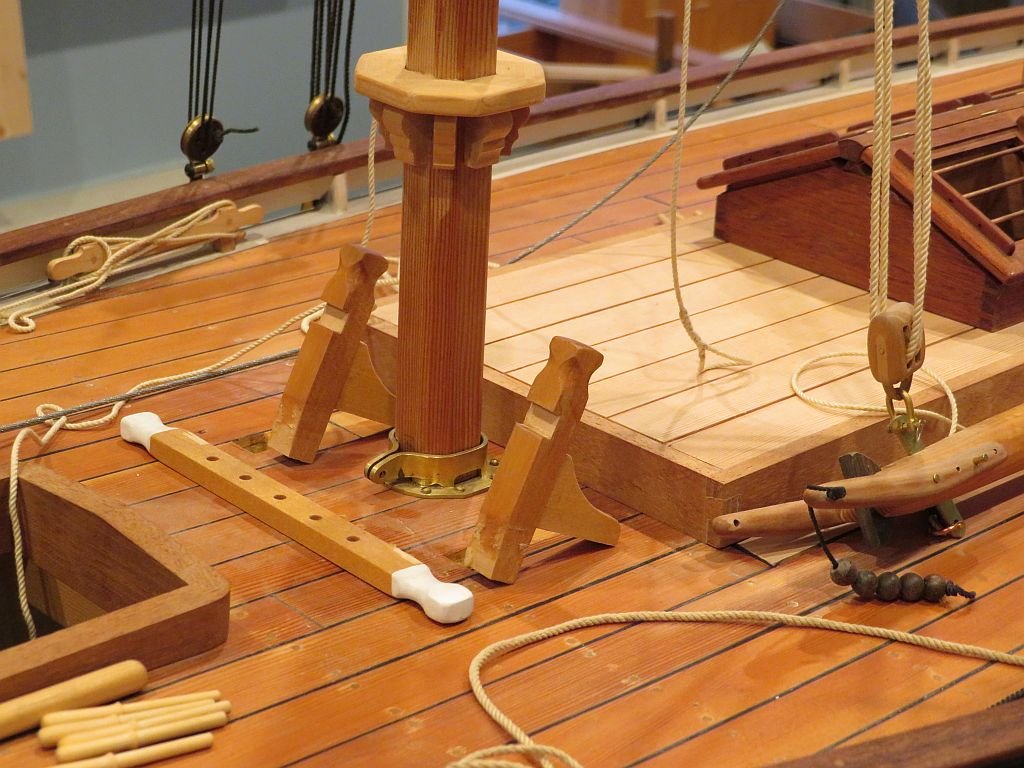
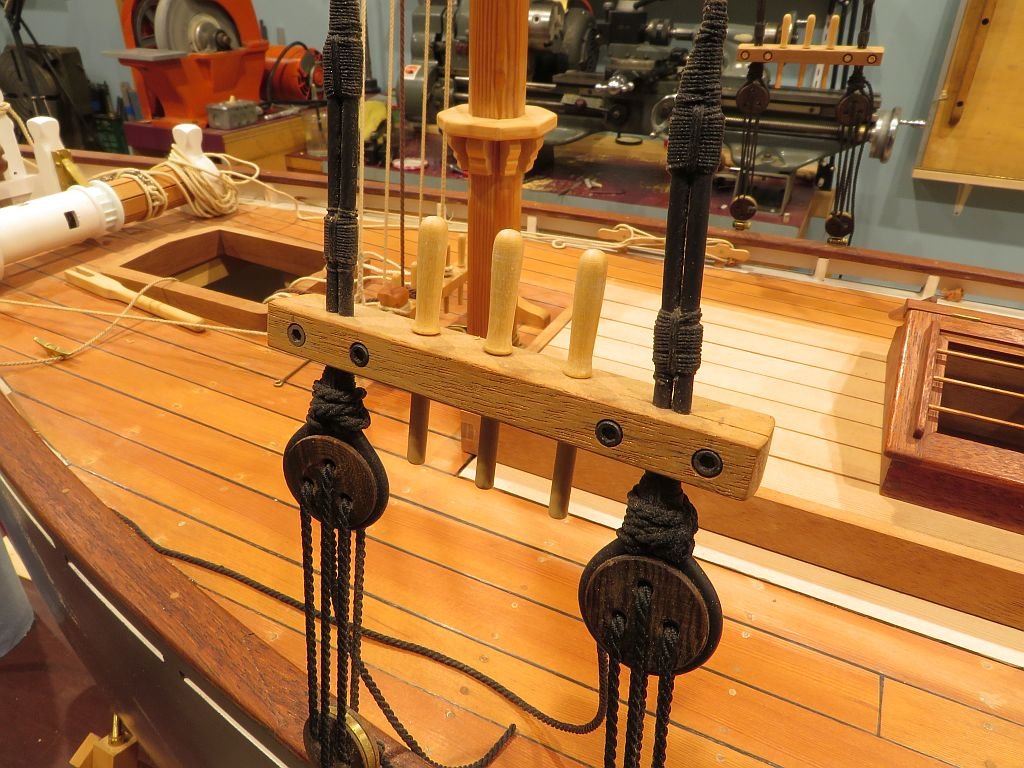
Good morning Dan. excellent question, it has been something that I have been wondering about myself. I had asked Russ about the rails on his sloop and about the sorts of clearances needed to make things like rails and pins workable. when I did a Google search for fife rails they appear to be all over the map(both literally and figuratively)regarding heights and sizes. The top of the rail on mine is 9 inches above the deck and the pins are also 9 inches long, short perhaps for a ship but long enough I think for this size of boat she is basically 40 foot long, well 42 feet. My cap rail is only 8 inches above the deck as well. The other option is to redo the whole rail and make it higher, I wouldn't rule out that option either. The more things change the more they stay the same, the height of the pin rail was first raised in 2013 and here we are 5 years later and the last sentence back then has finally come to pass.
-
Well I let the toddlers go and suggested that they spend more time playing before taking on a boys work. The grown ups stepped in and dis-assembled the rail!😮 and while the grown ups were doing that the builder continued with the canvas catch rails. The builder is taking the evening off to spend time with his wife. michael
-
Looking good, and eager to see what comes next. Michael
- 219 replies
-
- 2
-
-
- smack
- cross-section
- (and 2 more)
-
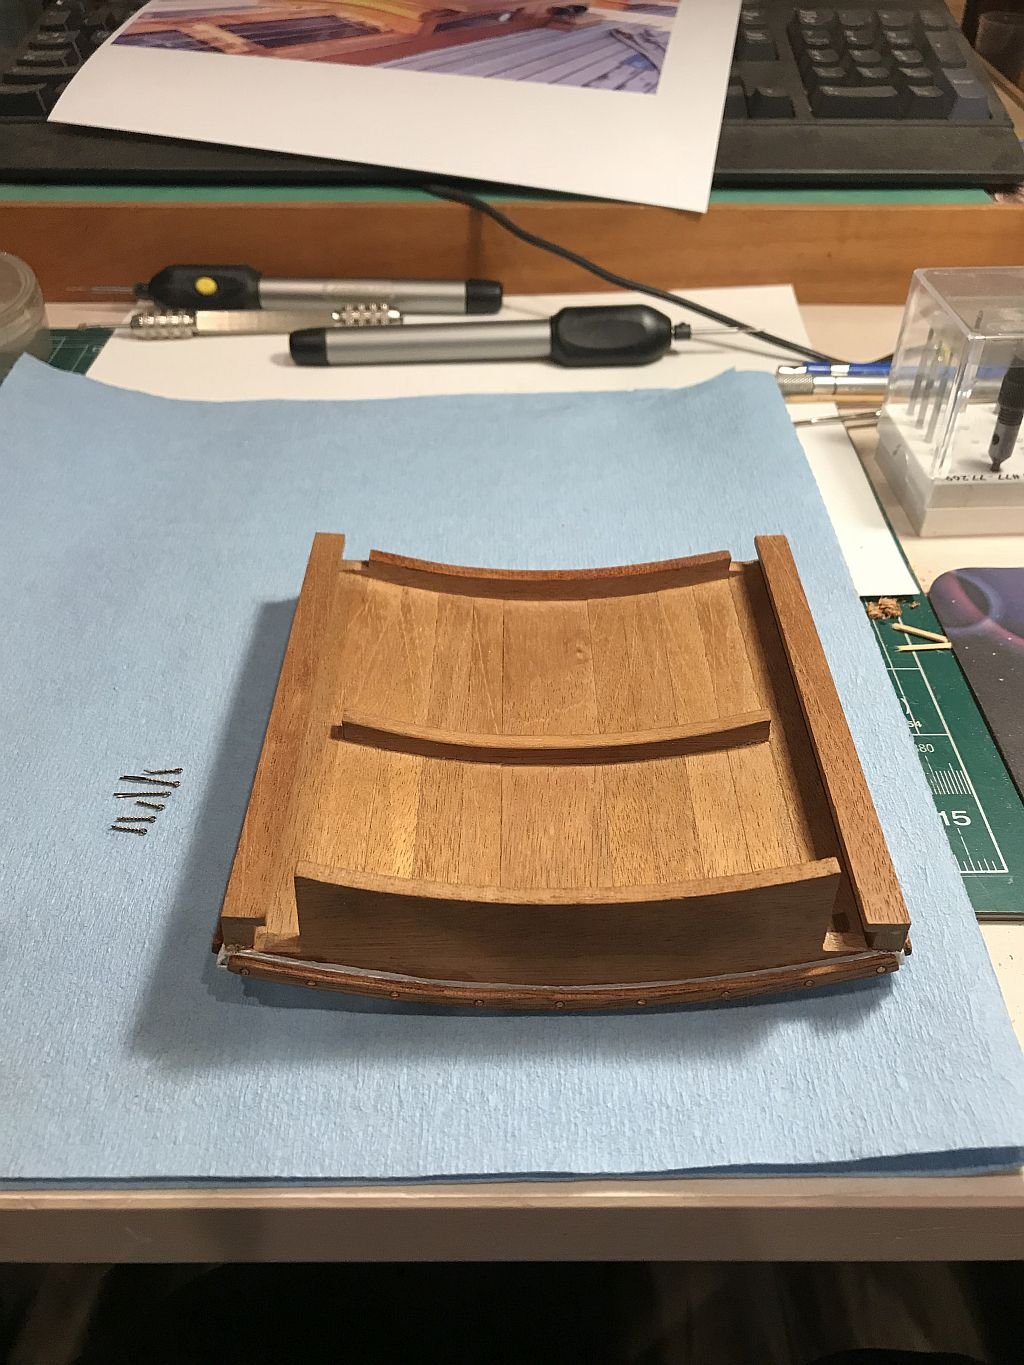
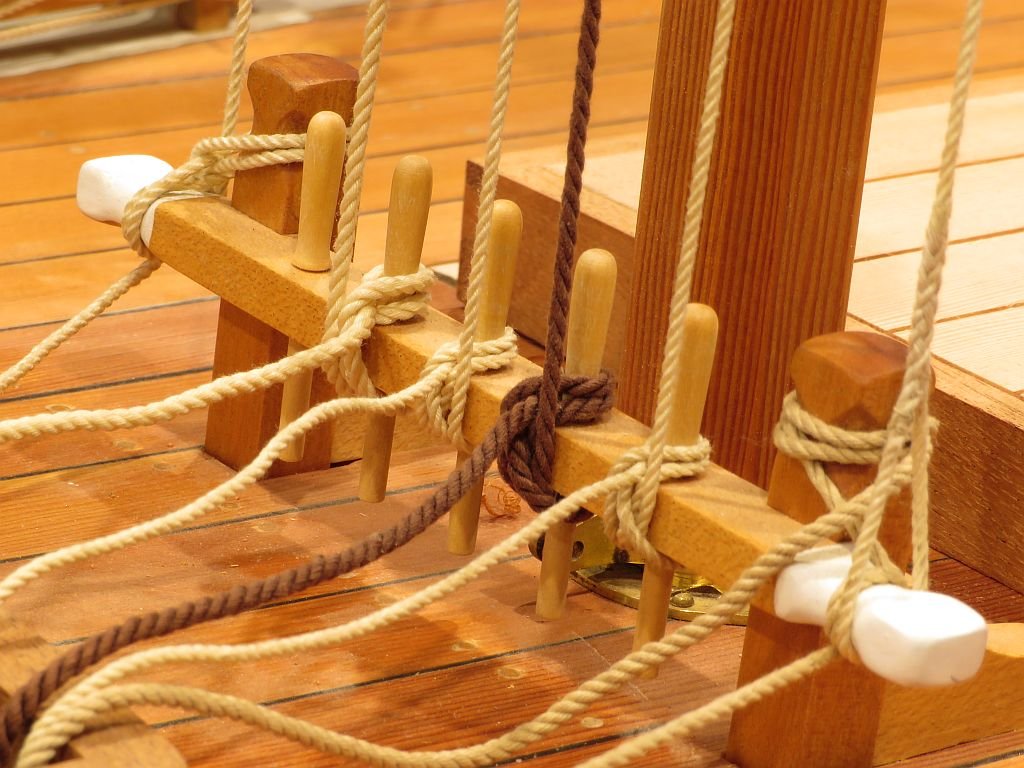
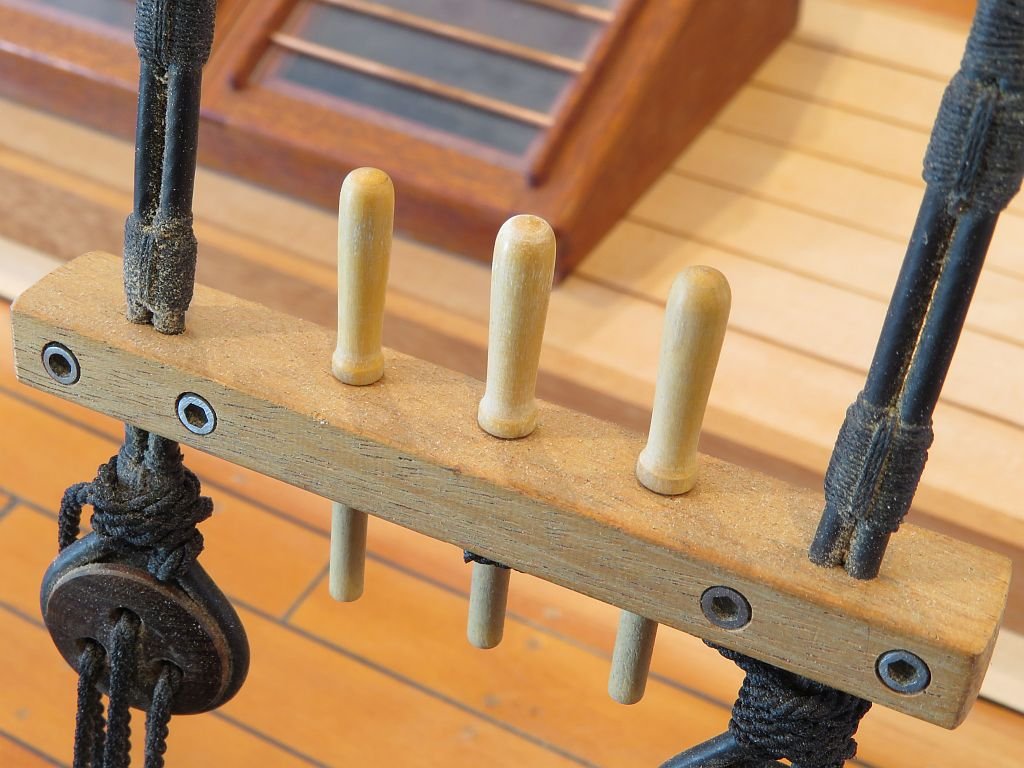
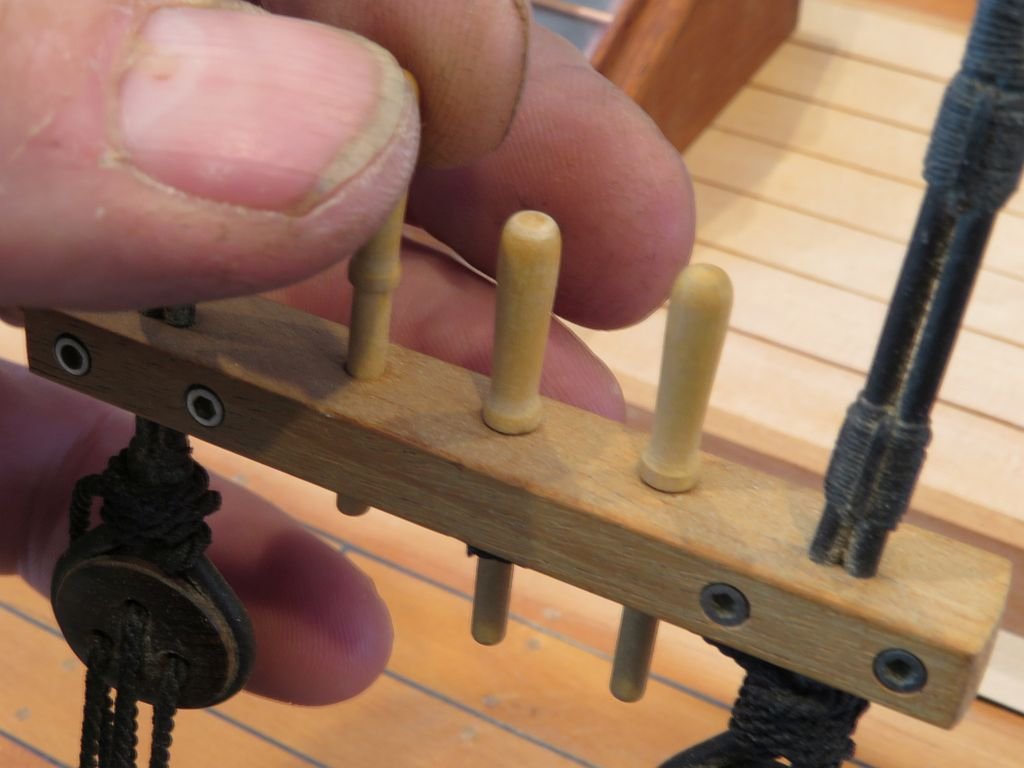
Close up pictures really do expose the flaws....hmmm I laid a second covering of cloth over the first because the paint job turned out a bit rough. so thinking that a second layer would work better if I adhered it with paint it would look better. I did not wand to fold it over the edges again though so trimmed it off. I cut and bent the first mahogany capture strip and fitted it today I like the strip but am not so happy about the cut line visible. Also I was not really pleased with the shoulder on the belay pins and so reworked them a little. Compared to the first shaping. I replaced all the pins on the forward rail, and while setting the ropes I realized that the rail is a bit low and should probably be raised up a foot or so from a practical point for the crew setting the ropes. Oh the joys of muddling along and learning on the job. Michael


-
Hello Martin, good to hear that you will be getting back to the yacht. I forgot to ask you about the masters you did for the crew loco Dickie, can you send me a pm about it? Because i am working on a live steam version of the same loco. Michael
-
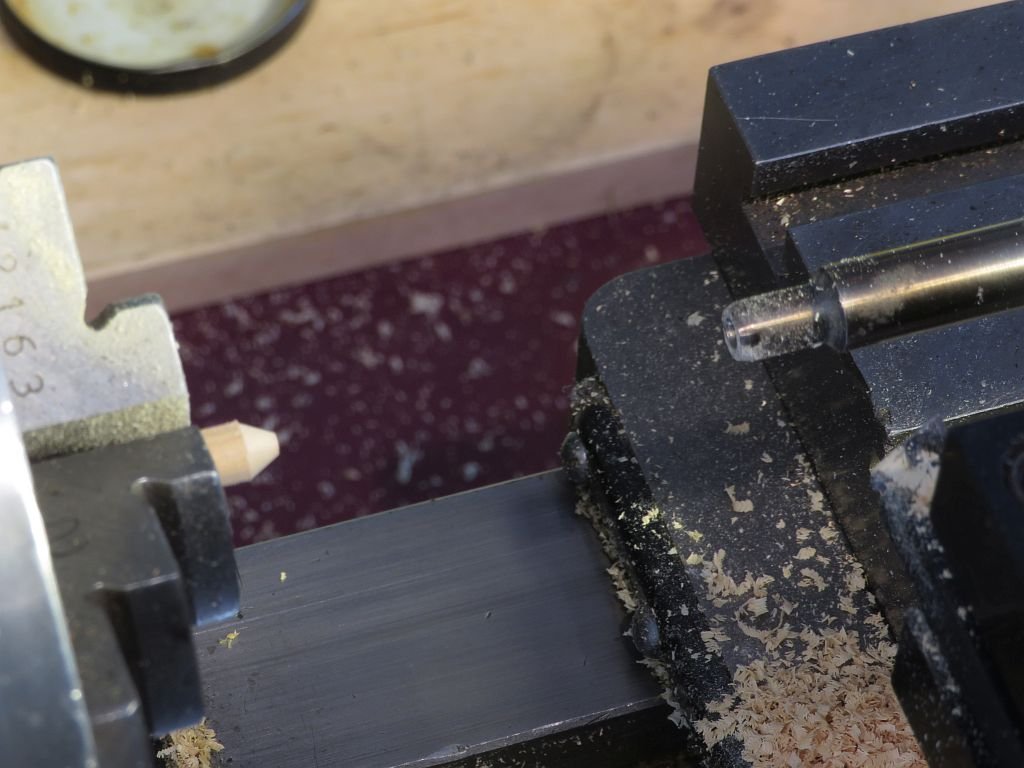
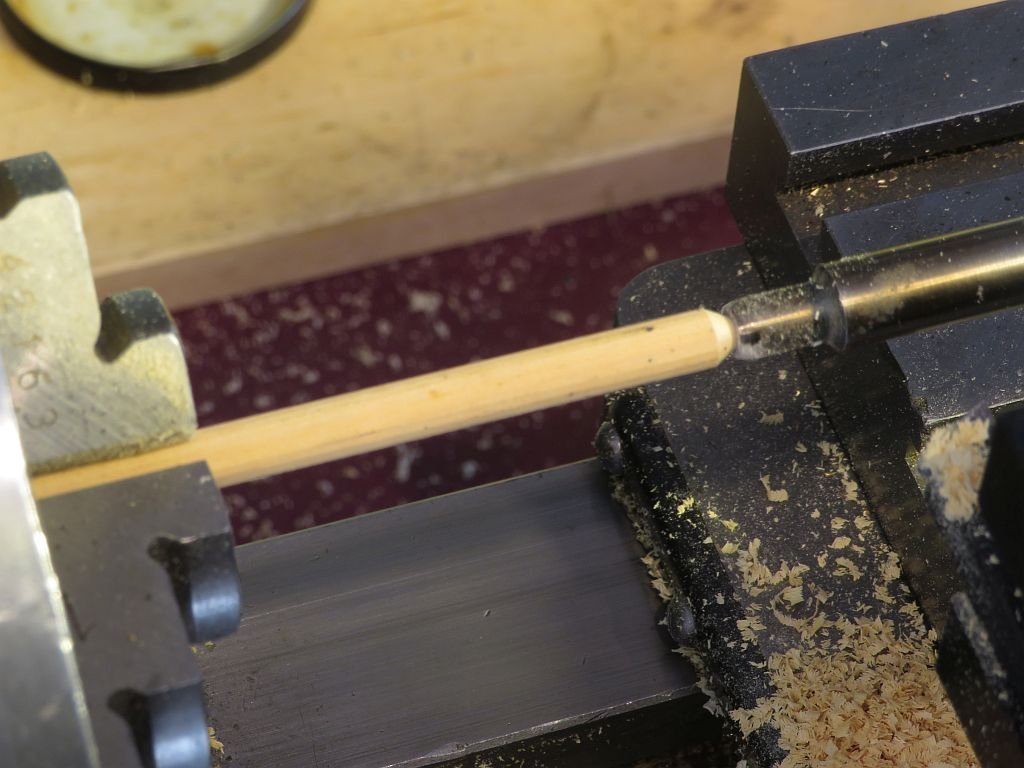
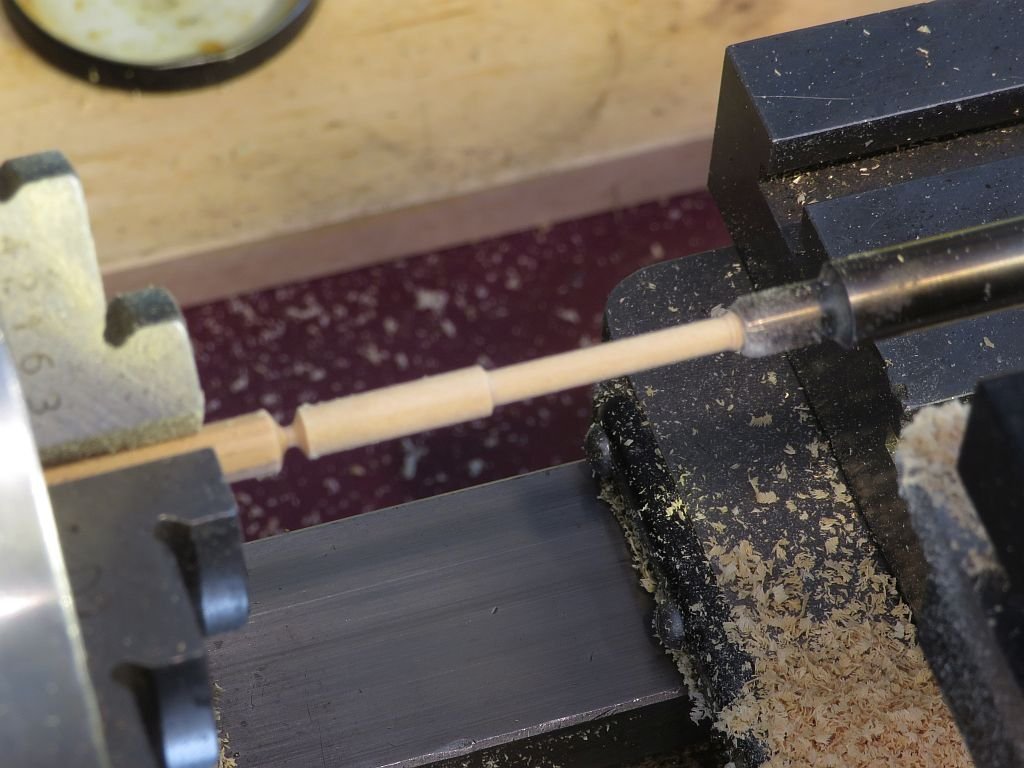
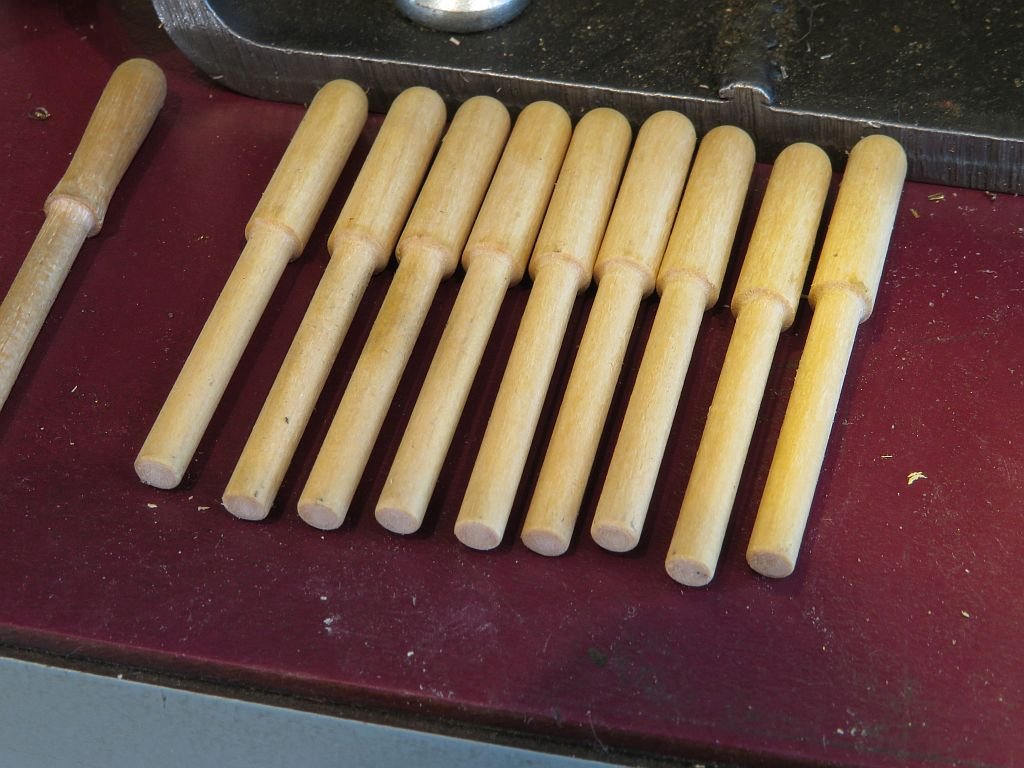
Thank folks for the kind remarks. While waiting for the paint to dry on the second layer of Canvas on the hatch. I though that a set of belaying pins that were all the same size might be a good idea. the following sequence should be self explanatory. The final shaping was done by using one cutter then using some sanding sticks. Michael
-
Nice work on the wheels Eric, revisiting that picture of the wreck still amazes me how much sediment has covered it in such a short time. Michael
- 599 replies
-
- 7
-
-
- sidewheeler
- arabia
- (and 4 more)
-
Looks like you are well on your way with learning the ropes Johann. Michael