michael mott
-
Posts
5,200 -
Joined
-
Last visited
Content Type
Profiles
Forums
Gallery
Events
Everything posted by michael mott
-
 By following along I see just how much work one of these types of ships are, and all the different ways to accomplish the same task, or effect. Michael
- 2,625 replies
-
- 6
-

-
- kaiser wilhelm der grosse
- passenger steamer
- (and 1 more)
-
Forgive my ignorance Druxey but is this a common practice with this type of model? Michael
-
Again thanks for all the visits it is encouraging. Hi Nils I came to Canada on the Sylvania in October 1967 One day I would like to make a model of her. I have very fond memories of that 8 day trip. Just happened that we were in a force 10 for three days, with 40 foot waves, it was exciting for this young man at the time. But I also like these types of ships Michael
- 749 replies
-
- 6
-
-
- albertic
- ocean liner
- (and 2 more)
-
Beautiful Workmanship Toni, a question regarding the tops of the frames on the open side, do they get trimmed to length or am I missing something? Michael
-
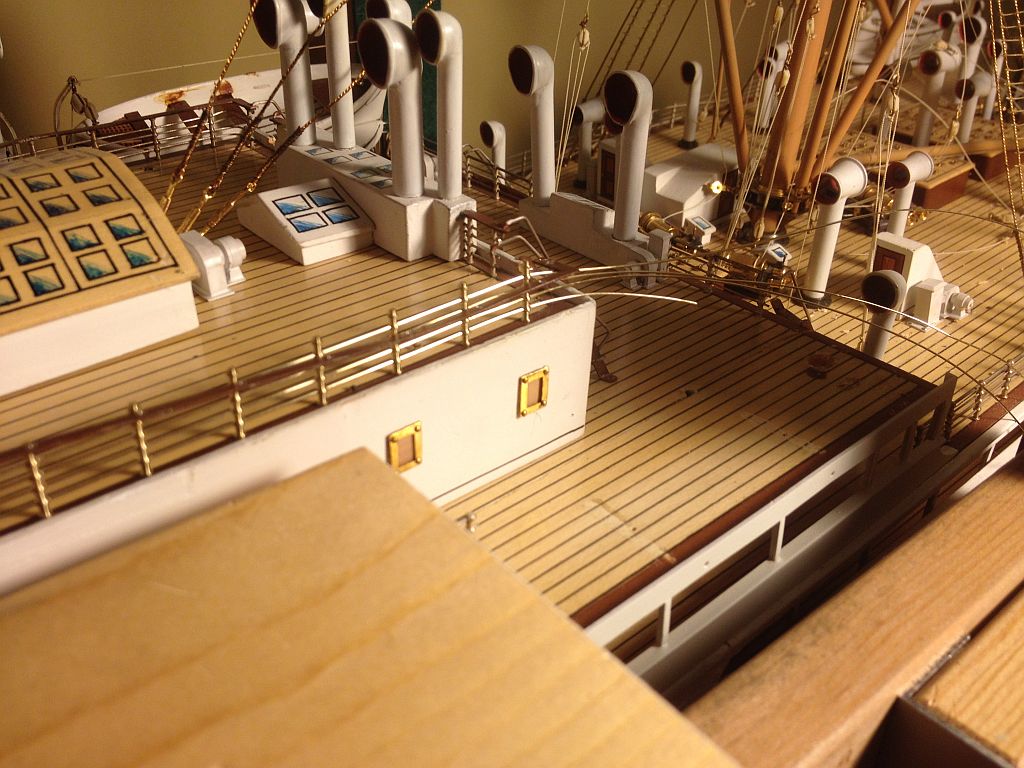
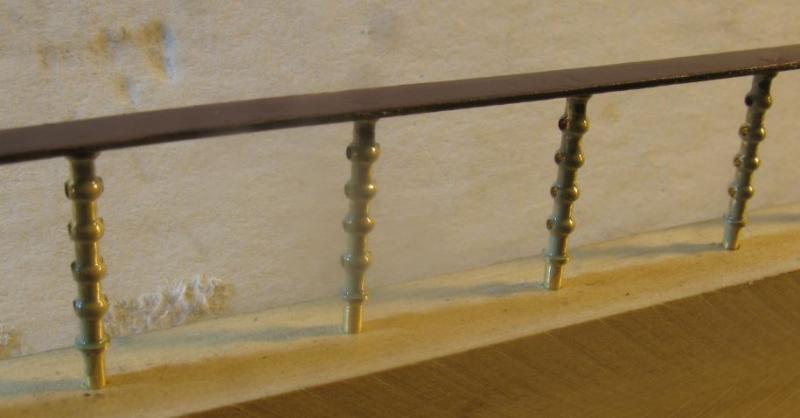
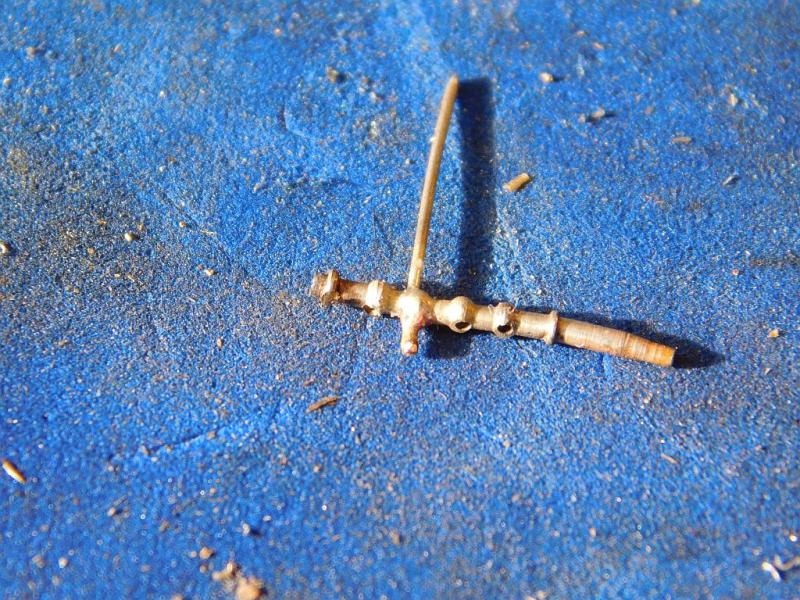
Rob The new stanchions are brass and I am painting them to look like nickel silver with an aged patina they soldered up very nicely, by laying the handrail on its side and using the small block of Jellutong, it kept the top flat. I am happy basically with the colour which was achieved with a mixture of Humbrol air frame silver and Humbrol unbleached linen. After all the wires are in place on the ship I will give it a scruffy coat of Microscale Micro Flat. The handrail still need a little toning down. The area at the end where the handrail steps up was difficult to thread and keep clean(smooth) One can only guess at the assembly sequence that was used long ago. I have decided to break this area up by using some of the original stanchions at the step. the next picture shows some short pieces of original wire threaded through two set stanchions, the third one is free at the moment once I have got the new section ready to place into the holes I can fettle the short wires to create the transition from the old to the new. and the stepped end of the handrail will fit over the top of the original type stanchions. These will be fixed with a drop of CA. Michael

- 749 replies
-
- 18
-
-
- albertic
- ocean liner
- (and 2 more)
-
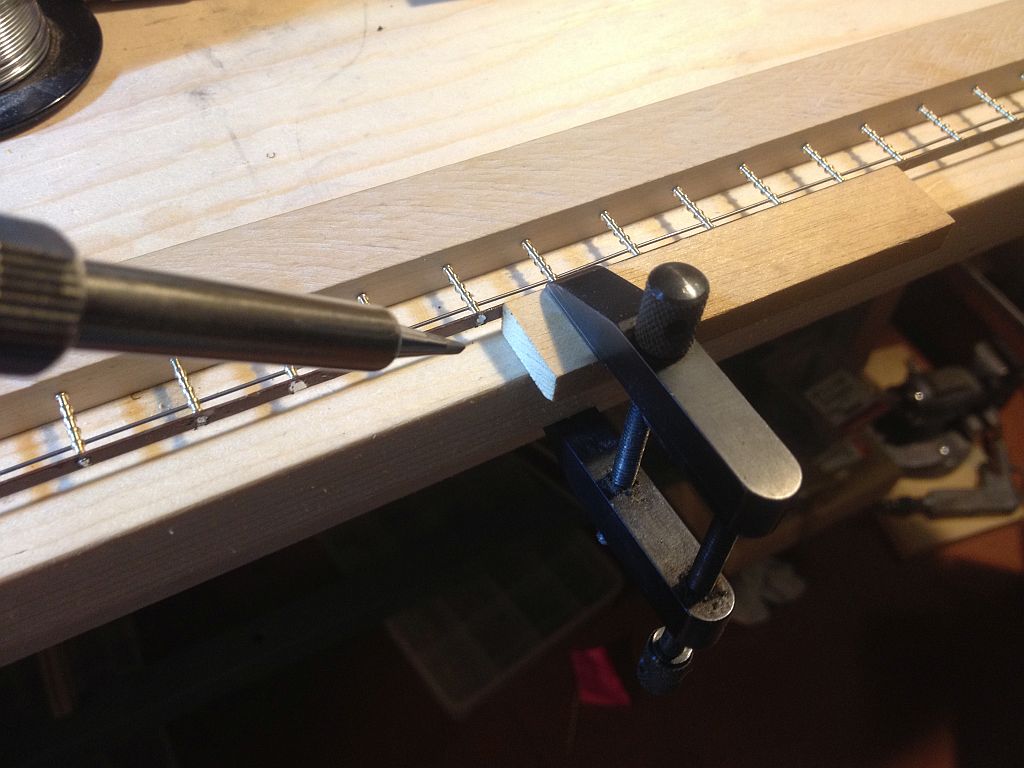
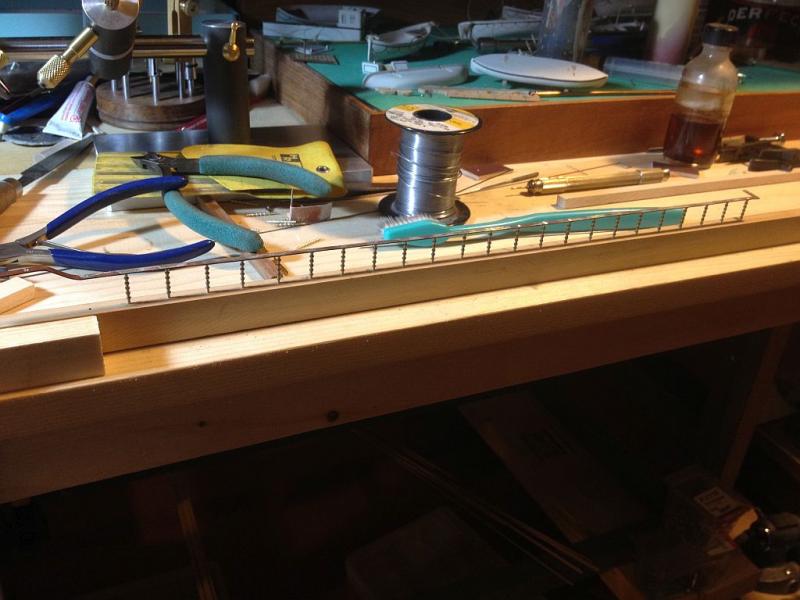
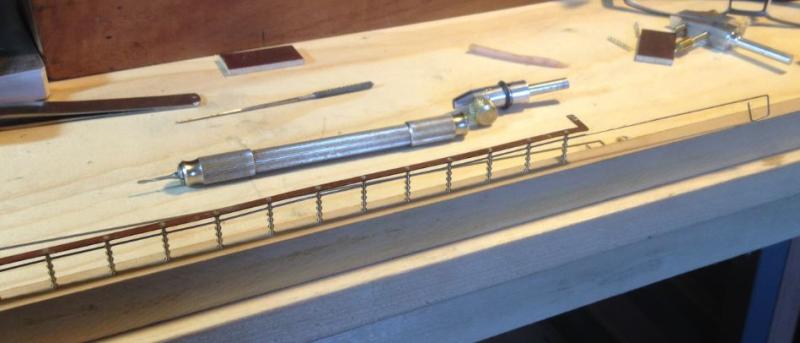
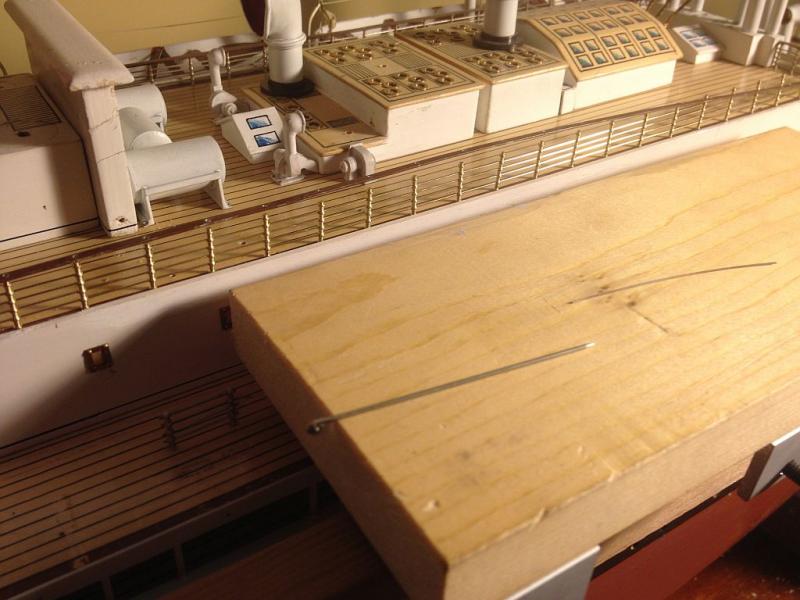
Thanks for all the visits to the log. I set up the jig to solder the stanchions to the top rail I set a piece of music wire through the top hole to align all the stanchions both longitudinally and vertically. I used the rail as the template for drilling the holes I dropped a stanchion in each hole as they were drilled to ensure that there was perfect alignment After the stanchions are soldered I can pull out the music wire and thread the nickel wire. Michael
- 749 replies
-
- 16
-
-
- albertic
- ocean liner
- (and 2 more)
-
Nils the top handrail is brass that is painted. Michael
- 749 replies
-
- 4
-
-
- albertic
- ocean liner
- (and 2 more)
-
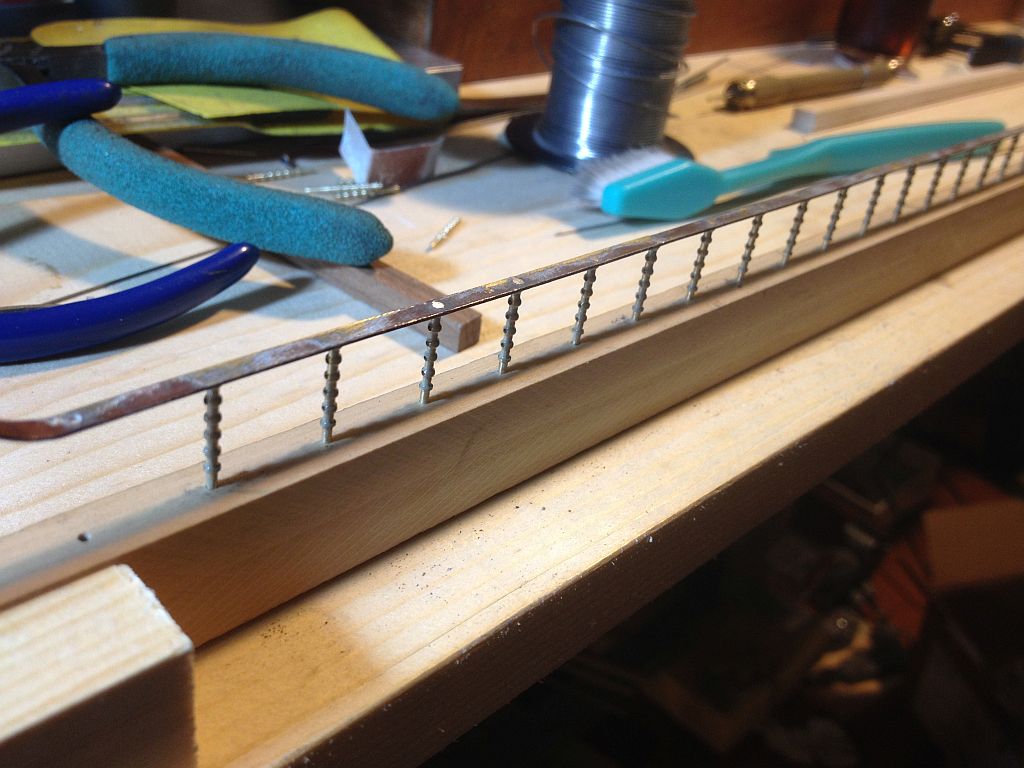
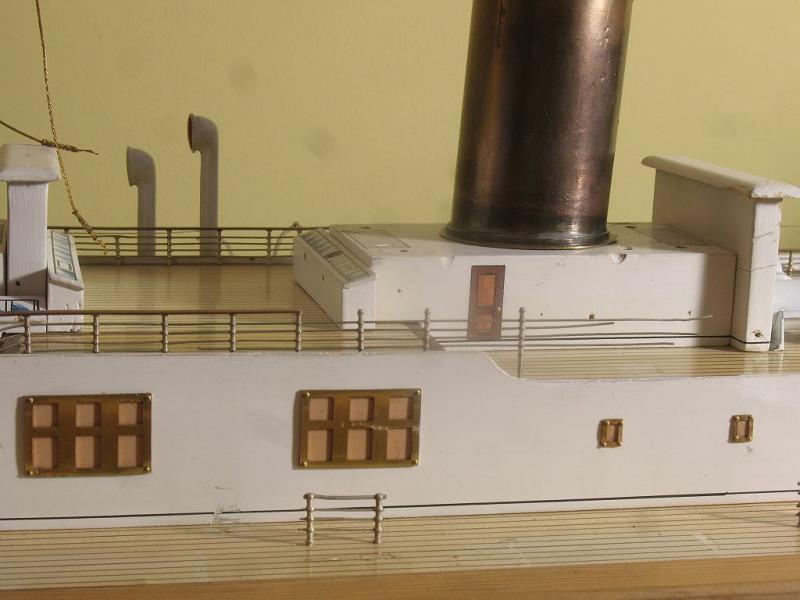
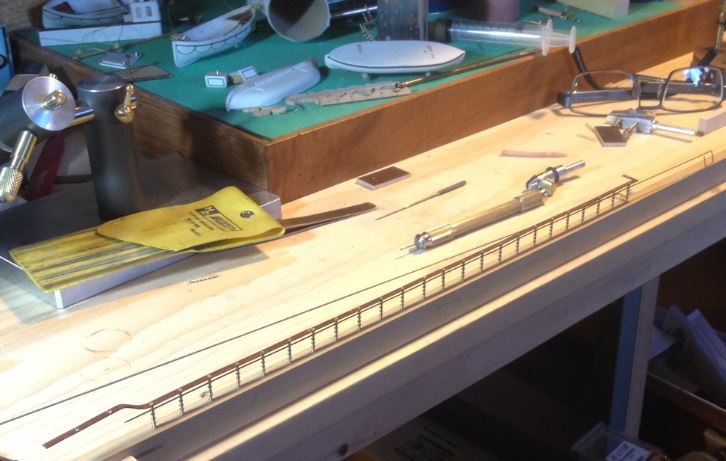
Thanks all for the encouraging remarks. Finished drilling all the holes (gave me a stiff neck bending down to line up the first hole in each stanchion) and fitted them onto the deck. Threaded all four wires through that was the easy part. Before that I popped the handrail off the old stanchions And dry fitted it to the stanchions this was the difficult part. Ended up with needing to use the little clamps to gently hold it in place. tomorrow I will modify the clamps so that there is a small metal bar that holds the rail on to the posts. I will soft solder the rail to the posts, this was how the first posts were attached. The wires are the right color with some flat varnish on them so when it is all assembled I will give them a light coat of flat. Slow but its getting there. Michael


- 749 replies
-
- 14
-
-
- albertic
- ocean liner
- (and 2 more)
-
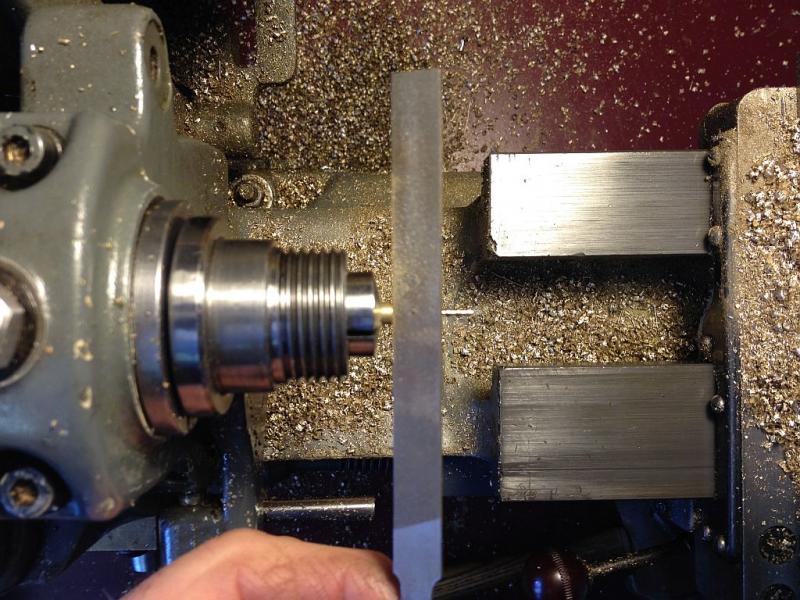
Wefalck, A Myford ML7 which I purchased new in 1970. the spindle hole is a #2 Morse taper with a 1 1/8 x 12 threads for the chucks. In the pictures I am using one of the Little Machine Shop's set of 7 #2 Morse taper collets. I had to make a draw bar for them, The Myford Collets have a special spindle cap which pushes their collets into the spindle. Michael
- 749 replies
-
- 6
-
-
- albertic
- ocean liner
- (and 2 more)
-
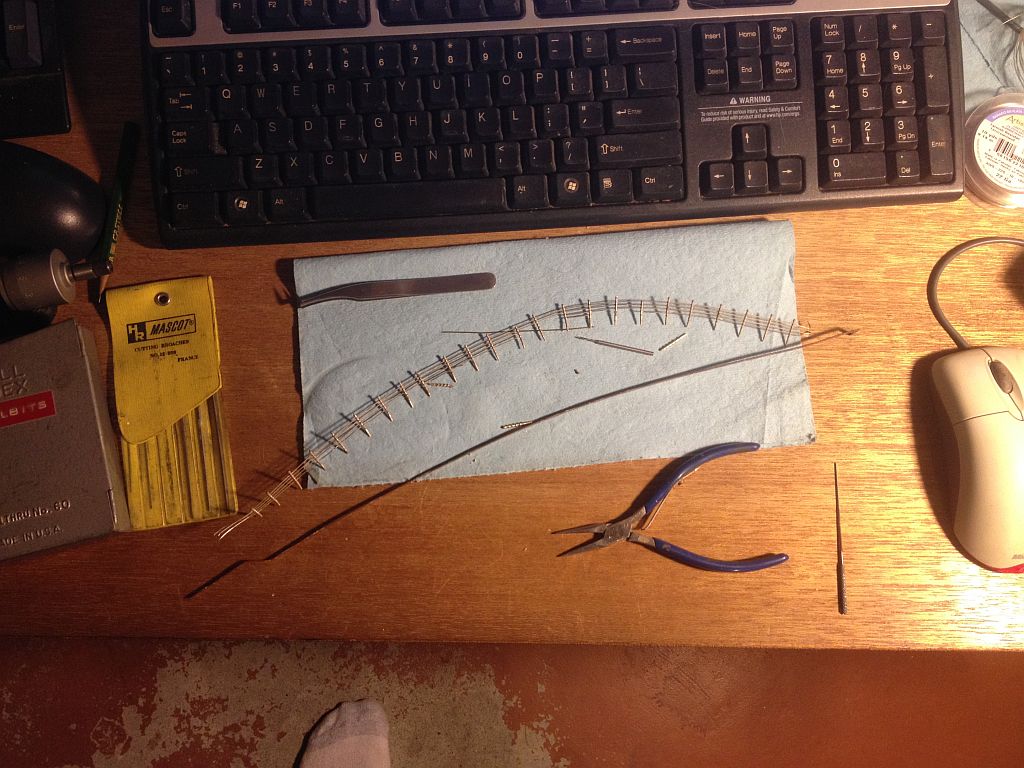
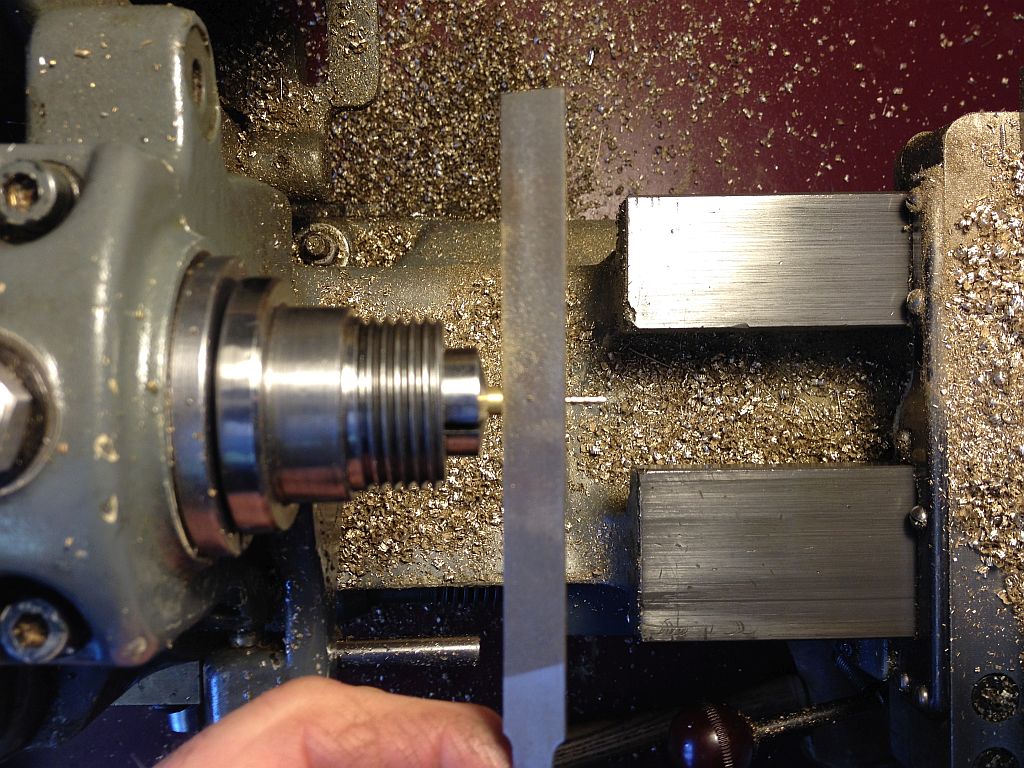
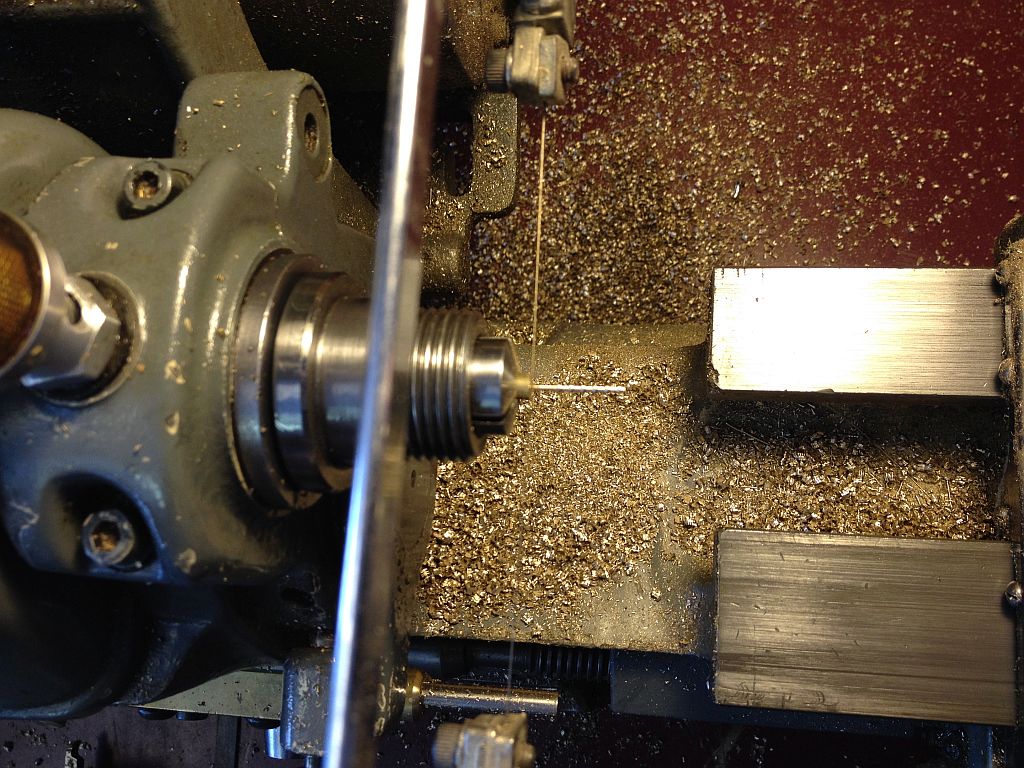
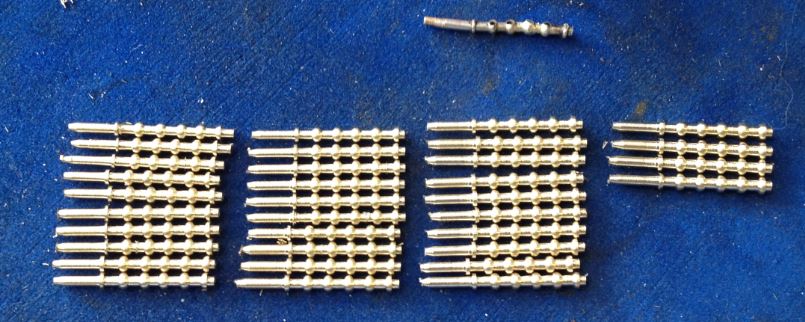
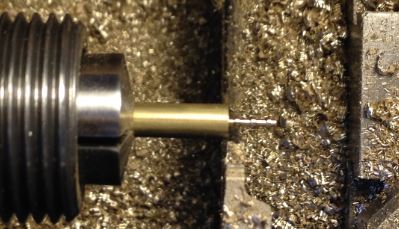
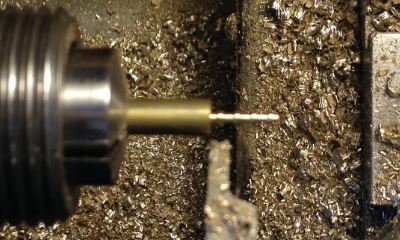
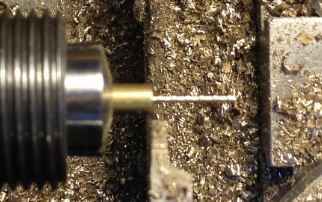
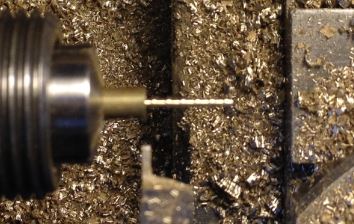
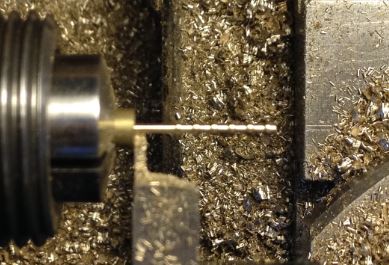
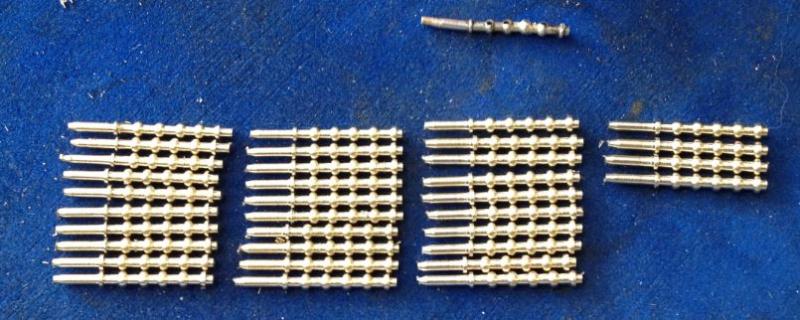
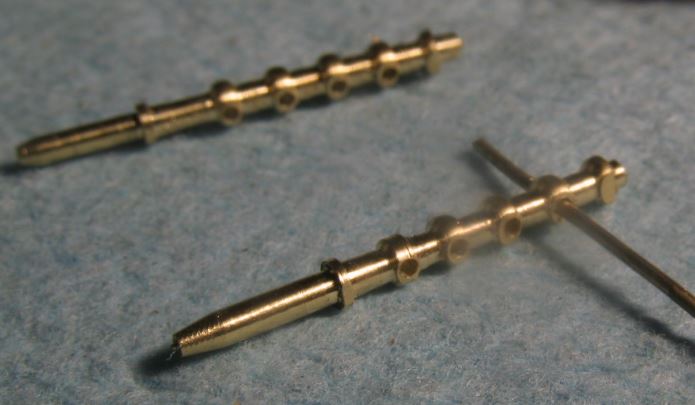
Jeff I am glad that this was useful for you. I finished the turning of the stanchions this morning, here is a Step by step of the process. The form tool was used to create 6 bulbs The bulb diameter is .065" and the shaft diameter is .045" the bulbs are on .085 centres. The top bulb was trimmed to its center on the top side to accept the handrail. the form tool was switched for the narrow tool to finish off the bottom, the lowest bulb was trimmed on both sides to create the foot. Next a #4 file was used to create the small taper at the bottom next the stanchion was separated with the jewelers the lathe was stopped for this operation The finished stanchions, a few of the first ones had some minor variations so a few extras were turned up to replace them. I will leave the set up on the lathe until I have made sure that I do not need to make any more. Next comes the drilling. Michael


- 749 replies
-
- 17
-
-
- albertic
- ocean liner
- (and 2 more)
-
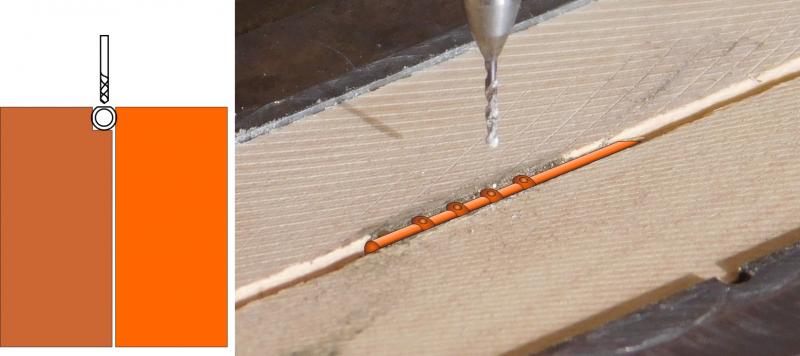
Wefalck thanks for the picture, it looks like a tricky bit of slitting, and one needs a good indexing chuck to do that, or a collet block. Keith This is how I accomplished drilling the holes and will use this method for all 28 stanchions I used a #4 flat file to create a small circular flat a little bigger than the diameter of the drill. The boxwood jaws are easy to cut a small rabbet on one of the blocks the distance between the bulbs is a constant .085" I index that with the table travel. stanchion drill.pdf Michael
- 749 replies
-
- 10
-
-
- albertic
- ocean liner
- (and 2 more)
-
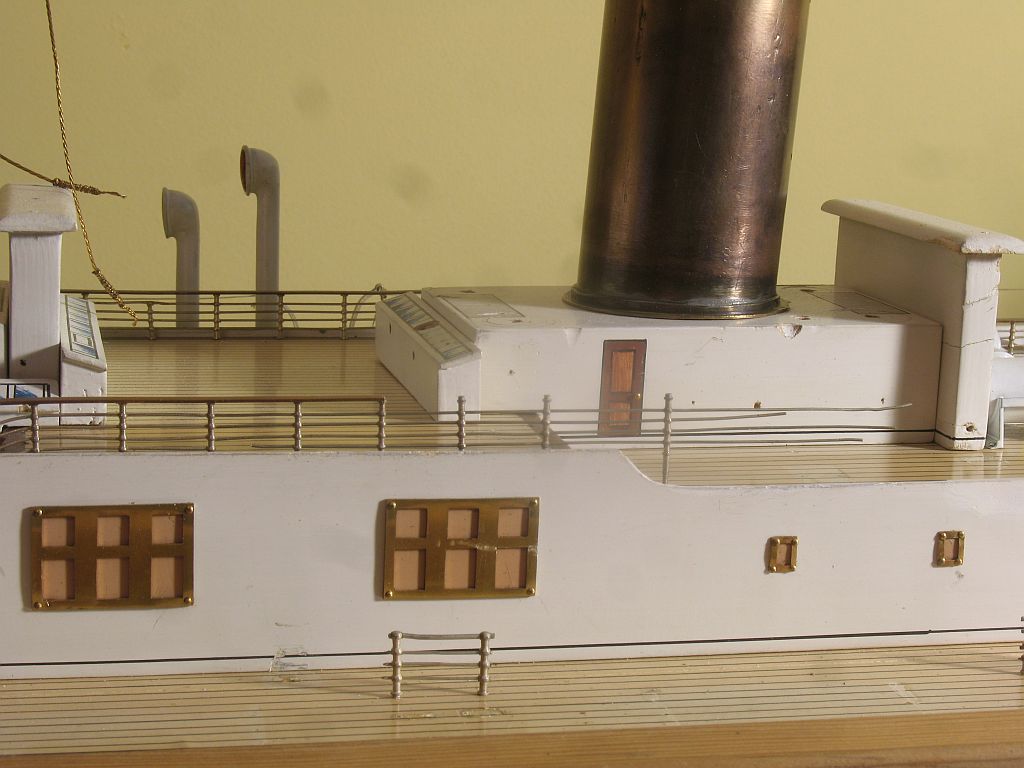
Doing more tests to come up with the right color for the handrails on the ship restoration I have been looking at whether the Beadalon and Artistic Wire products could be made to look aged by changing the color very slightly. I did pull the wire through some fine wire wool to see if that would dull it down, before attempting the heat treatment. The silver plating is very thin and the copper wire underneath started to show right away so I stayed with the shiny wire for the tests The method for this test is heat. Using the hot soldering gun to get some inkling of where the temp needed to be i found that the range between 35 -38 to be adequate to get the slight patina. I have been baking some at varying temps beginning at 350c baking for 15 minutes and then upping the temperature and watching for the subtle color change. 380c looks like a close fit. Michael
-
Wefalck A picture showing this Idea would be really helpful. Michael
- 749 replies
-
- 2
-
-
- albertic
- ocean liner
- (and 2 more)
-
Thank you Wefalck for your detailed comments, The issue of very small collets for square stock is one that I have overcome to some degree using a round hole that has been cut with a slitting saw similar to the Dremel collets. this works well enough to put a round on the end of the small square stock. The comment about the type of brass is an important one, not all brass is equal when it comes to machining. I have found that some of the hobby brass rounds in the propriety hobby metal stands has been gummy to machine and the swarf comes off in long flexible curls instead of the crisp shavings of the free machining brass from the metal suppliers. That said the 3/16 and 1/4 brass that is in the Home Depot local store does machine very nicely. Ed thanks for your kind words, you have not missed the paint restoration I have been letting the paint mature for a while before doing the final sanding and polishing. your suggestion of replacing all the stanchions on that damaged section is in fact the method that i am now pursuing. Just like everything else we do in this hobby it takes a while to get competent at doing a repetitive task. It took about 4 or five stanchions to get the system sorted for making consistent ones, this is now underway. I will be setting them into the deck after getting the colour right then threading the rail wire in situ after it is colored. Druxey, questions such as yours are great because they give rise to considering all the alternatives as to why we choose the options that we do, which often sparks those "why didn't I think of that idea moment" Thanks to everyone who have been quietly visiting as well. Michael
- 749 replies
-
- 11
-
-
- albertic
- ocean liner
- (and 2 more)
-
Kevin One of the gems of this video is the sound of the ocean at the end, that's not to take away from the great commentary of your trials and tribulations of the explanations of your building. Kudos to you for your honesty regarding the areas that caused you the most problems. Michael
-
Bob I really like the look of this boat it is so Edwardian, would be lovely to build one at a large scale.....Must not let you tempt me....must not be tempted.... must not be tempted.... Michael
-
Very nice planking Erik. Michael
-
Very clever use of a device designed for a completely different purpose, it takes a particularly observant person to be able to see these sorts of opportunities. The winches look really good. Michael
- 1,208 replies
-
- 4
-
-
- great republic
- clipper
- (and 1 more)
-
An interesting question Druxey My thoughts on it; 1 I do not know how much stress would be imparted on the stock while turning, of which I see two issues first the need to hold it in a collet of some type for such small square stock after drilling. And second the need to work as close to the supporting collet or chuck to do the turning, machining square stock always has an intermittent cut until one gets to the round, this in itself is a jarring motion at such small diameters it could be a problem. 2 The drilling of the holes is in my view the least difficult part of the operation. 3 With small diameter parts that are long the difficulty is support, one has a few options i) a cradle similar to the ones that Ed Tosti has used for shaping belay pins, ii) starting with the base diameter and incrementally extending it from a chuck or collet working close to the collet. As the free end gets further away some form of end support from the tailstock end works, this often need to be a custom type extended one because the toolpost and tailstock often interfere with each other. 4 beginning with oversized round stock is an easy option because the stock itself acts like a superb collet as long as the free end gets completed incrementally there is the opportunity to accurately index toward the lathe collet until the work is completely turned, Experience has shown that this method produces the least vibration and chatter with form tools, and as Wefalck has already pointed out brass can be machined with zero rake which makes form tools easy to shape. 5 Some experimenting with the form tool is always needed it seems. I have a clamp for my Dremel flex shaft that I can clamp into the bench vise to form a miniature grinder and using the carborundum shaping block I can shape the green stones easily for making tiny negative curves in the form tool. I hope this answers your question sorry its a bit long winded. Michael
- 749 replies
-
- 10
-
-
- albertic
- ocean liner
- (and 2 more)
-
Very nice Jeff, by the way I have about 25 miles of some AWG 42 copper wire if you need a foot or two Michael
-
Great work Johann. I learn something new every time I visit your amazing build. Michael
-
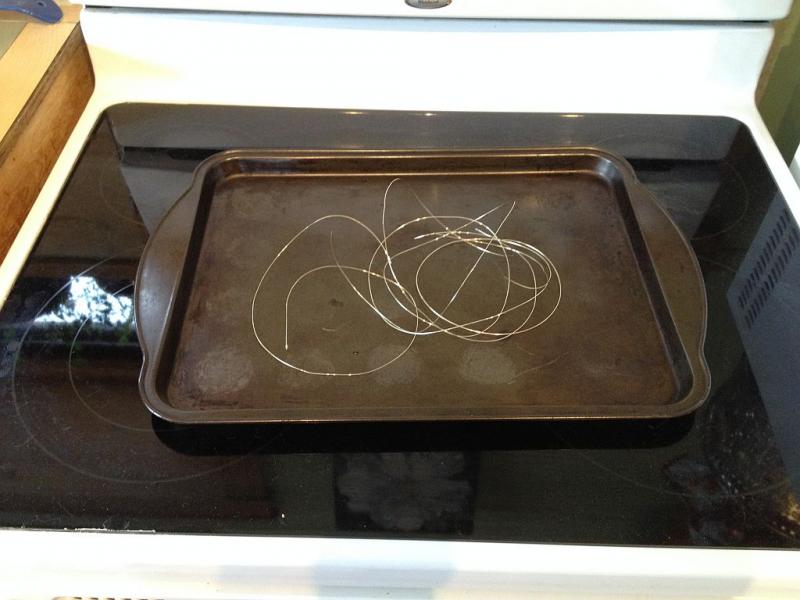
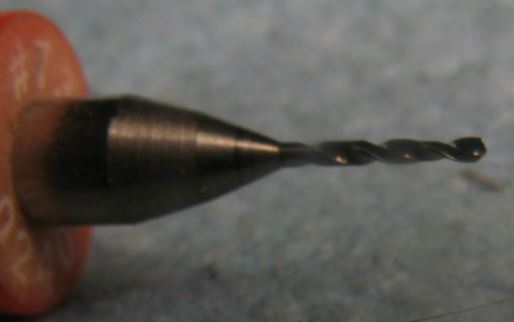
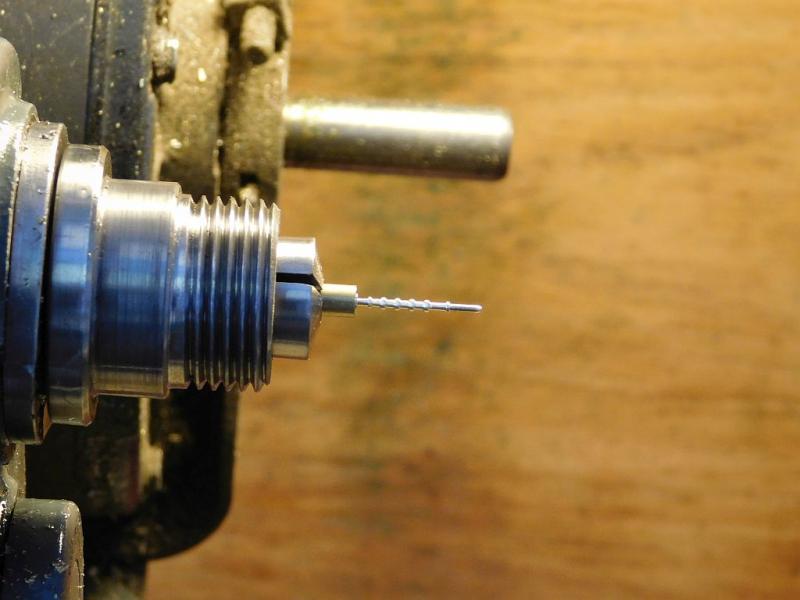
Wefalck I have done the end mill out of broken drills too, in fact I have broken drills on purpose to get a particular diameter of end mill Mostly I have done this with number drills. This drill however I sharpened by eye on my diamond stone like this. And a better pic of the stanchions. Michael
- 749 replies
-
- 14
-
-
- albertic
- ocean liner
- (and 2 more)
-
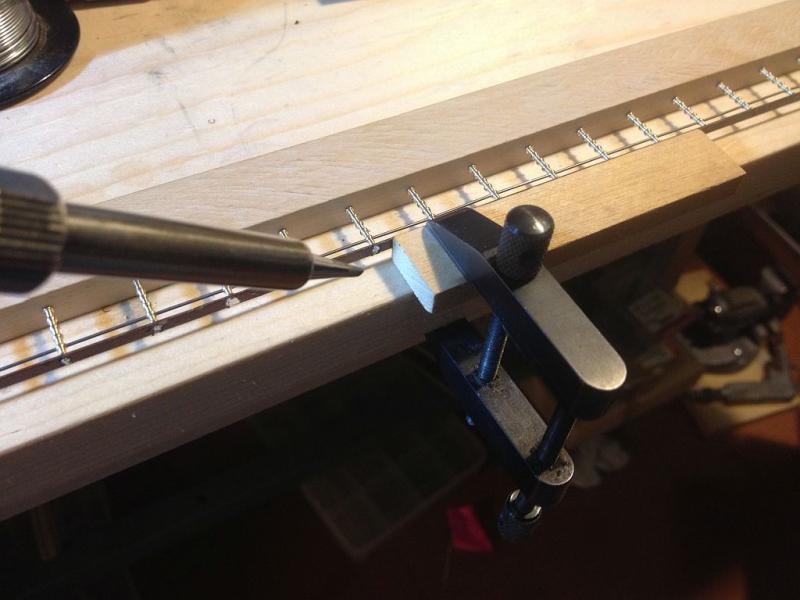
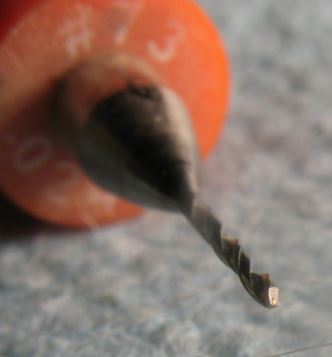
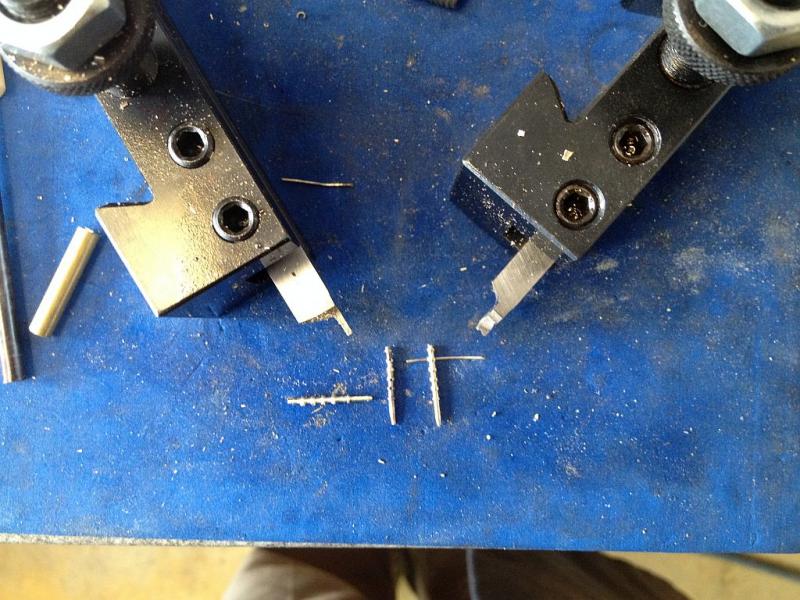
Thanks to all who have looked in and for the positive comments. Today I made the choice to replace a few of the stanchions which I was not happy with. I cut the ones I want to replace out of the rail this is one of them First I made a form tool to shape the rounded parts, and also used the small parting tool to make them from some 3/16 round stock. The 3/16 is strong enough that I can begin at the bottom and shape the first 1/4 inch or so while the rest is still 3/16 for support. The form tool is then used to form the bulbs incremented .085 at a time along the 3/16 it is pushed in to the finished diameter then moved along the next .085" to then form the next bulb and so on until we get this configuration Then the stanchion is cut off the 3/16 with a jewelers saw, and clamped into the soft wood jaws for drilling with a #73 drill it is short because I broke it some time ago and had to resharpen it, this turned out to be a benefit because I was able to drill accurately without having to spot it first. Before drilling however I used the #6 cut file to give a tiny flat across the tops of the bulbs to give the drill a flat surface to start into. and they seemed to turn out alright. Having done this I have also realized why some of the stanchions are slightly different within one run of the handrail. I think that the stock of stanchions that were used by B&L were made in batches and the tool setting probably done with a screw cutting capstan lathe had very slightly different set ups of the stops with each batch and that from the bin of stanchions they were pulled without much regard for the very minor discrepancies. These are really only noticed when one gets as close to the detail as I have been doing. Michael


- 749 replies
-
- 12
-
-
- albertic
- ocean liner
- (and 2 more)