


michael mott
-
Posts
5,200 -
Joined
-
Last visited
Content Type
Profiles
Forums
Gallery
Events
Everything posted by michael mott
-
Happy Birthday Bob, quite a milestone! I hope that I can still be as actice and creative when I reach your age.
Michael
-
 Hi Patrick, I am just checking in again, you just keep amazing me with how much detail you can squeeze into this small big yacht. Michael
 -
It is interesting to see how you accomplish the production of the wax masters Alex, The small boats look extremely well made and appear to be made of wood. Working professionally it is always great when you can trust another colleague to prepare work that meets your expectations, it relieves the pressure to do what most interests yourself. I am happy to be retired and not have to deal with this issue any more. Michael
-
Chuck, can you post a picture of the area that you are talking about? Michael
-
Very nice Keith I am not sure I quite follow this Keith, was the form tool the full round or half would you not plunge the form tool in to the required diameter then remove the stem material, then it makes sense to me.... perhaps my meds are dulling my thinking LOL Michael
-
Hi Giampiero, It is very humbling to see such skillful execution of this model with all the fine detail and attention paid to the smallest items. thank you for sharing your skills with us . Michael
-
Igor, Wow! fantastic work, getting the colours of the hull with the strips of wood are so beautifully executed that it seems to be so much larger than it is. Also this is one of the boats that is on my own build list, so seeing how you approach it is very interesting and informative. Michael
- 185 replies
-
- 5
-

-
- jolie brise
- pilot cutter
- (and 2 more)
-
Tecko, what a wonderful project. this is the sort of work that makes being a volunteer worth every penny that you don't get paid. I am really enjoying your approach to the solving of the various elements and of the mostly low tech solutions, These become much easier for the viewing audience to grasp in my view. And at the same time a greater challenge for the designer builder. opening up the control console is a brilliant idea which also helps the viewer to see that complex operations can be achieved with simple technology (if one can call any electronics simple that is) I look forward to the next installment. Michael
-
Keith, what about brass then copper plate it? in the future obviously because you have made these already. And the mast base is a gem. Michael
-
Keith the overall look of the model is very nice. the time you are spending on the details is apparent in these last few pictures. I also like the view outside your shop window, it looks like a very nice location. Michael
-
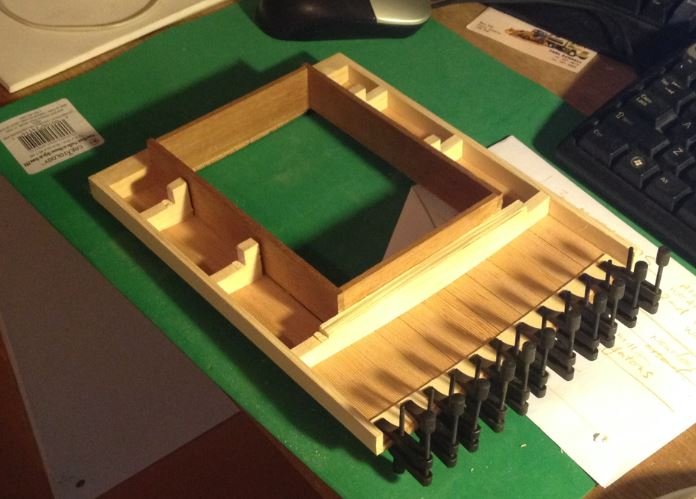
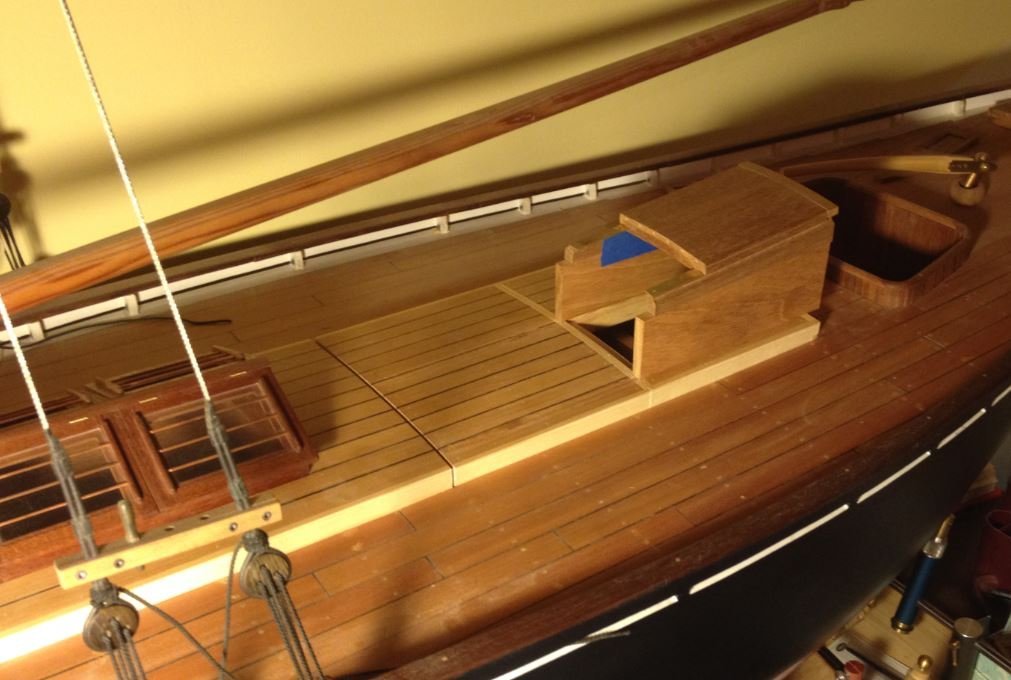
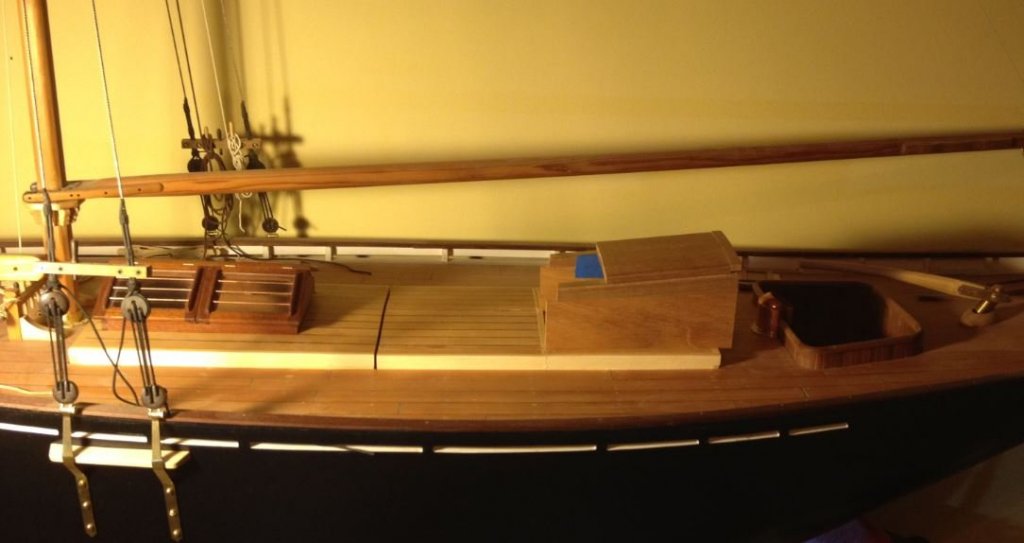
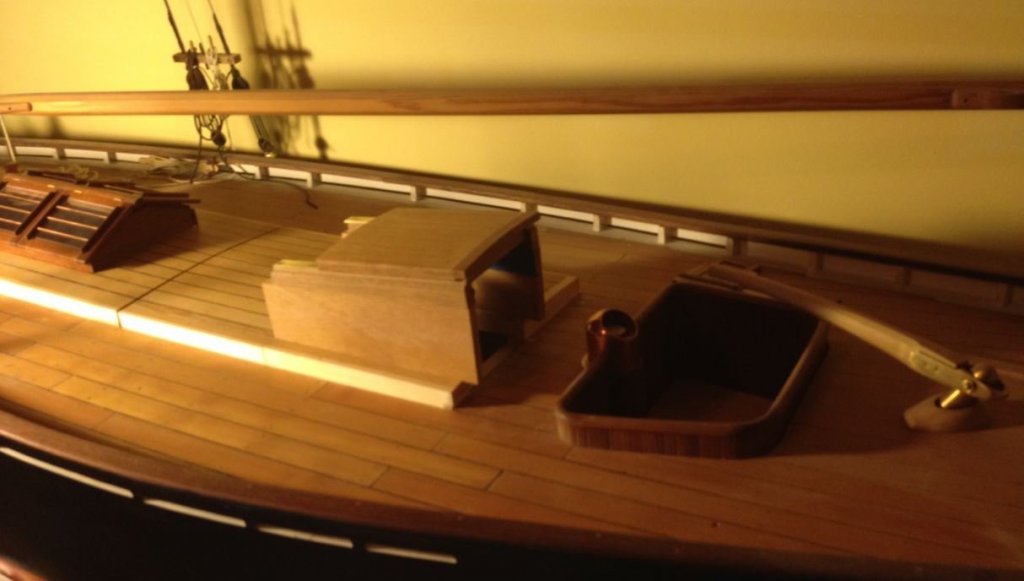
Well thanks to everyone who have pressed the like button on this rather slow build. I took a break from all the other stuff today and did a bit more reworking of the cabin I am still working out the shape and size of the companionway into the hull. The underside of the forward section of the cut up cabin was a bit weak and so I added a thin reinforcing strip to keep things together until the rear cross timber is added I shortened the rails and the hatch and also cut the rear section of the old cabin top in half along the line of the front of the new structure (temporary blocked up to see if this shape and size feel right) So I will sit with this for a couple of days and then if it still feels about right I will finish up the structure and it will be fixed permanently with the rear section to the deck. Access to the interior will still be adequate through the two forward sections in order to load and unload the ballast weights. Michael
-
Micro Drill Press
michael mott replied to michael mott's topic in Modeling tools and Workshop Equipment
Hello Wefalck, it is a surplus 9volt DC motor that I picked up at a company called Princess Auto here in Canada perhaps 7 or 8 years ago. I do not know anything about it other than the voltage and that it is a DC motor. There was no information on the motor itself. Michael -
Micro Drill Press
michael mott replied to michael mott's topic in Modeling tools and Workshop Equipment
Kurt that was what it was today a cold rainy day Wefalck here is a PDF the drawing is full size on an A0 size sheet production model mini drill press.pdf Michael -
Clearly this can be a problem Bob and it did blow the solder off the frame twice before I realized that I had not dialed back the air flow. Also with my third hand I can take all the time I need to set the parts up ready to solder and they do not move and being able to place just a tiny flake of solder where I need it make the soldering easy because only when the metal is at the right temp does the solder flow. And of course all this relates to soft soldering not hard soldering. The advantage as Wefalck pointed out is that you don't have to touch the parts. The set up I have has three different sized nozzles and with the adjustable airflow it is extremely controllable with both airflow and temperature setting mine goes from 100c to 480c. I have also found that like using a gas torch heating the work from the opposite side to where the solder is placed works very well as soon as the metal flows I swing away the air. I really like this tool. Michael
- 749 replies
-
- 5
-
-
- albertic
- ocean liner
- (and 2 more)
-
Micro Drill Press
michael mott replied to michael mott's topic in Modeling tools and Workshop Equipment
Kurt thanks for your kind words about my work, and regarding the workshop see here Joe see above Wefalck I am working on preparing the drawing of the mill XY table and hope to post it in a short while, I thought about taking it apart and taking pictures because I did not take very many while I building it, but chose not to do that. I hear what you are saying about the big dials I would have preferred smaller dials like the ones on the big mill but I could not see a way to do it without a great deal of work. so the big dials are a bit if a compromise. Michael -
John Thanks, there are still a few more bit that need to be made here and there but I am getting through them. Keith, have a look at this unit It is the one that Wefalck recommended, I purchased it online and it has both the basic soldering and the air soldering which is very useful. Michael
- 749 replies
-
- 3
-
-
- albertic
- ocean liner
- (and 2 more)
-
Kees, the pictures are very nice and your work is superb. Congratulations on the completion. Michael
- 434 replies
-
- 3
-
-
- pelikaan
- beamtrawler
- (and 2 more)
-
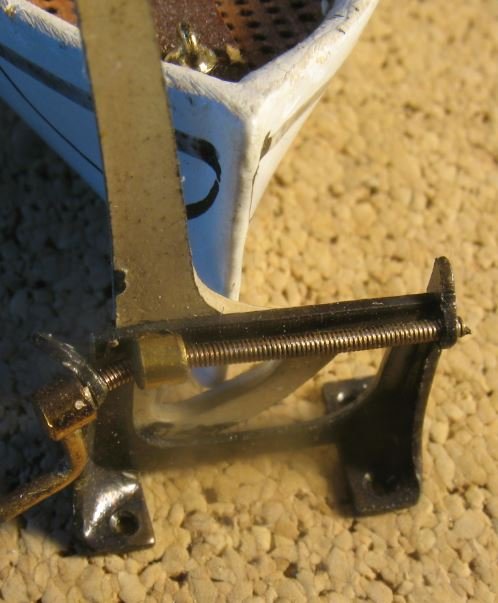
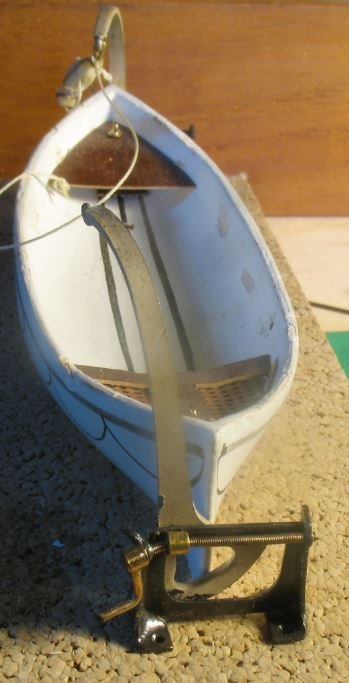
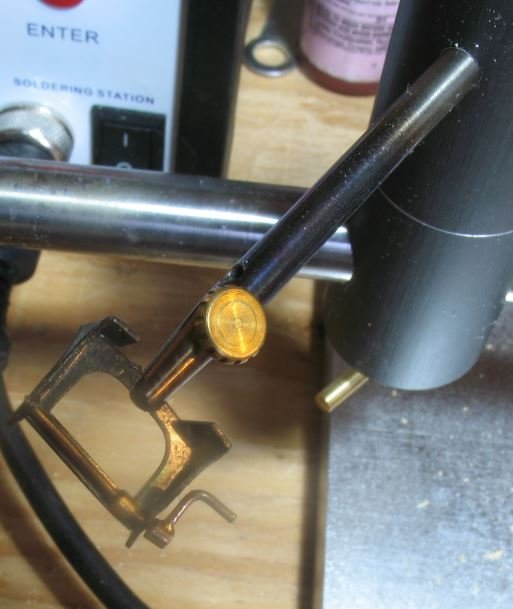
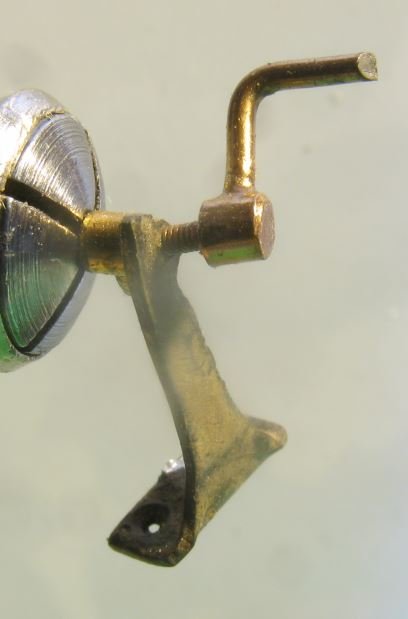
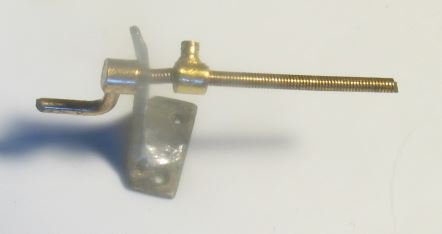
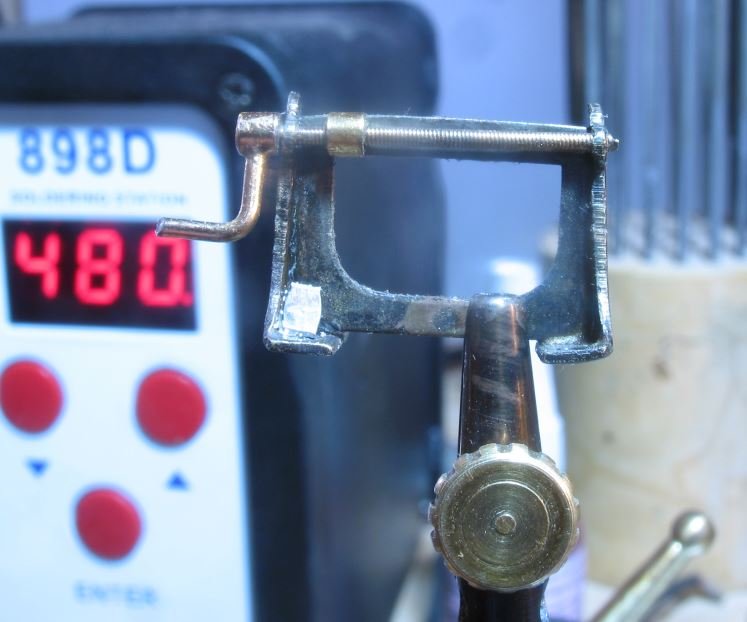
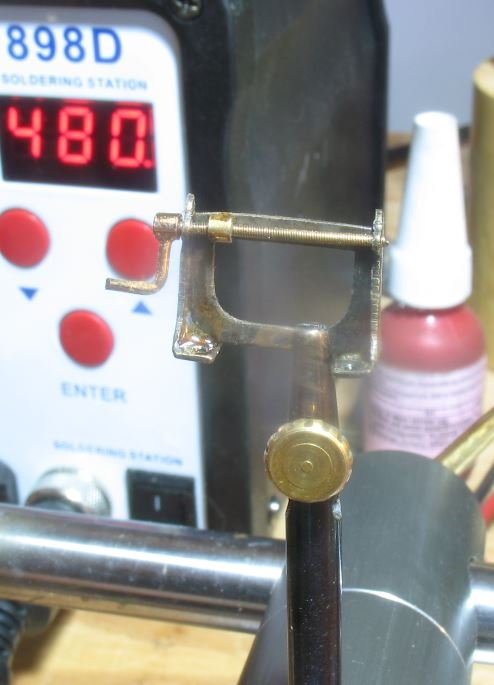
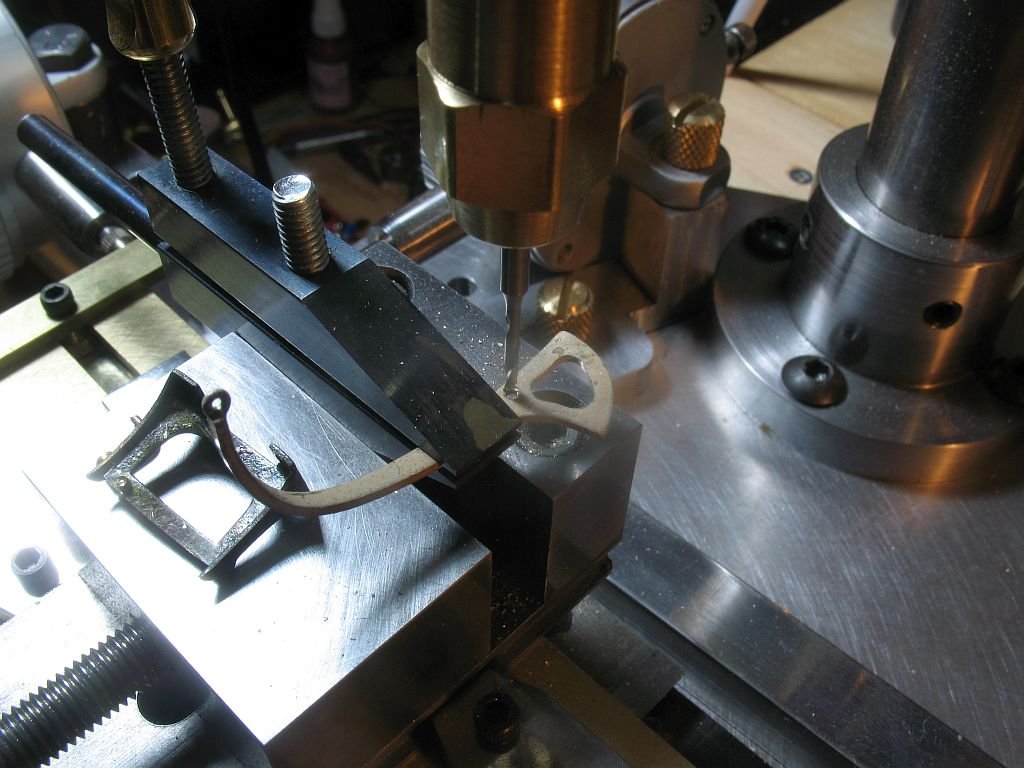
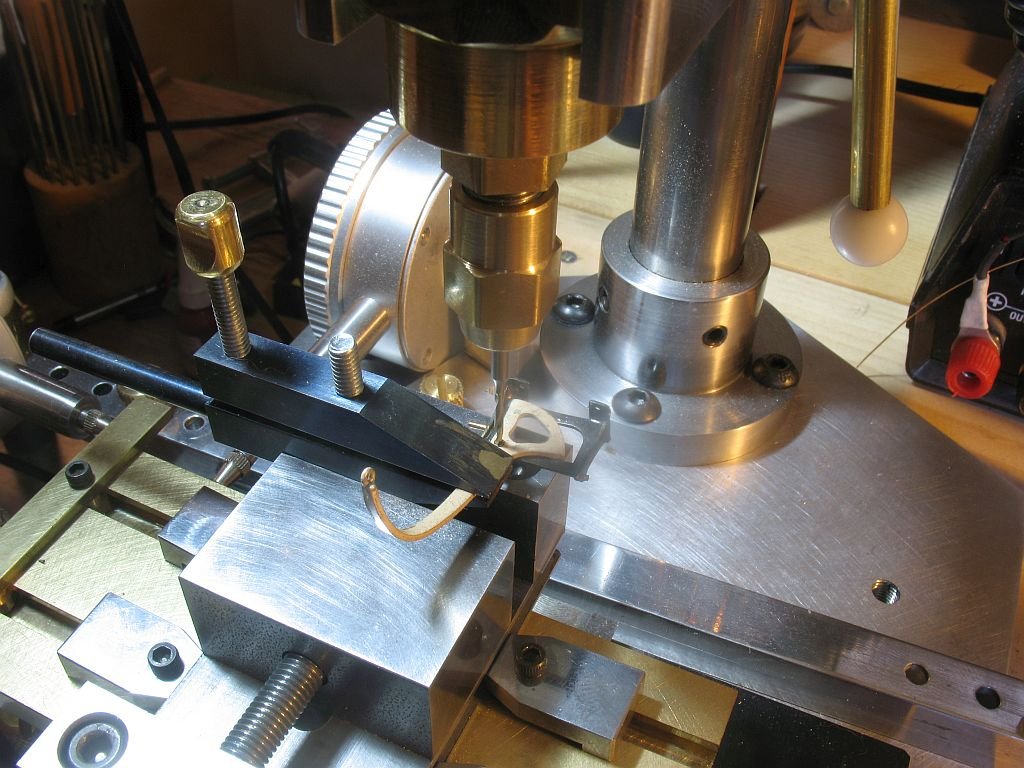
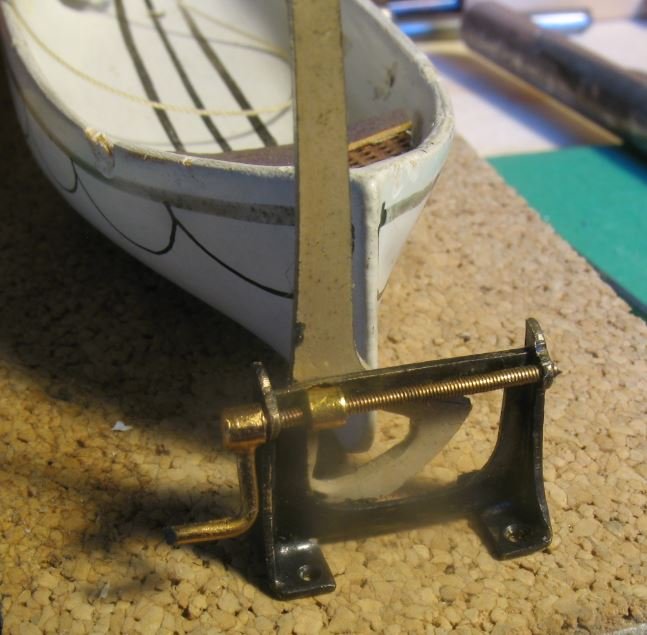
Nils thanks and thanks to everyone who has quietly visited, it is encouraging to know that the work is being followed. The next tackle was the next most damaged davit it was quite well bent in a couple of spots. The winder was badly bent and the frame twisted with the solder joint fractured, this was not going to be able to be fixed as a single element so I decided to take it apart. the first task was to drill out the riveted end of the arm where it joins the frame. Using one of the small toolmakers clamps set up in the small vice on the drill I was able to drill enough of the riveted head away to remove it still leaving enough to reassemble it later. The frame assembly now needed to be taken apart in order to extract the bend shaft. Using the air soldering gun and capturing the frame in the small steel clamp in the third hand the one end fell away easily slipping the long part of the shaft into a pin vise enable me to bend the handle end back in line with some fine needle nose pliers. the frame part that was still bent now needed to be straightened so that it could be mated back to the rest of the frame, this was done again with a couple of pairs of needle nosed pliers using them as miniature vises. next the unit needed to be re soldered together I used Duzall flux and a flake of soft solder the hot air gun was used to re-solder the joint. I have cleaned and repainted it and put it back together and now it is looking new and old again. Michael


- 749 replies
-
- 16
-
-
- albertic
- ocean liner
- (and 2 more)
-
Mike the work on the running rigging is looking fantastic, your photography is also beautifully executed. Michael
- 452 replies
-
- 3
-
-
- cheerful
- Syren Ship Model Company
- (and 1 more)
-
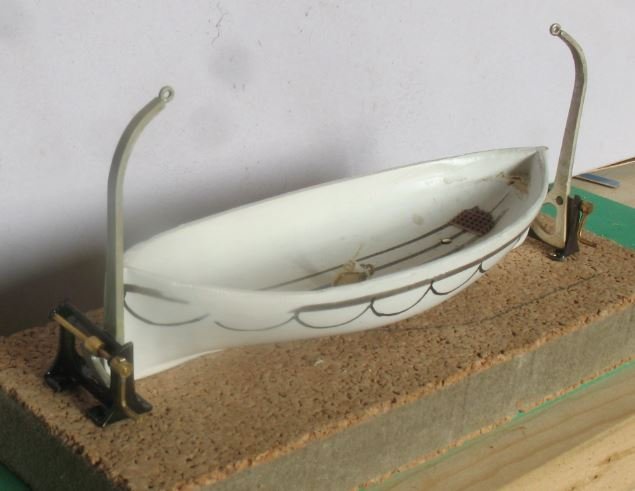
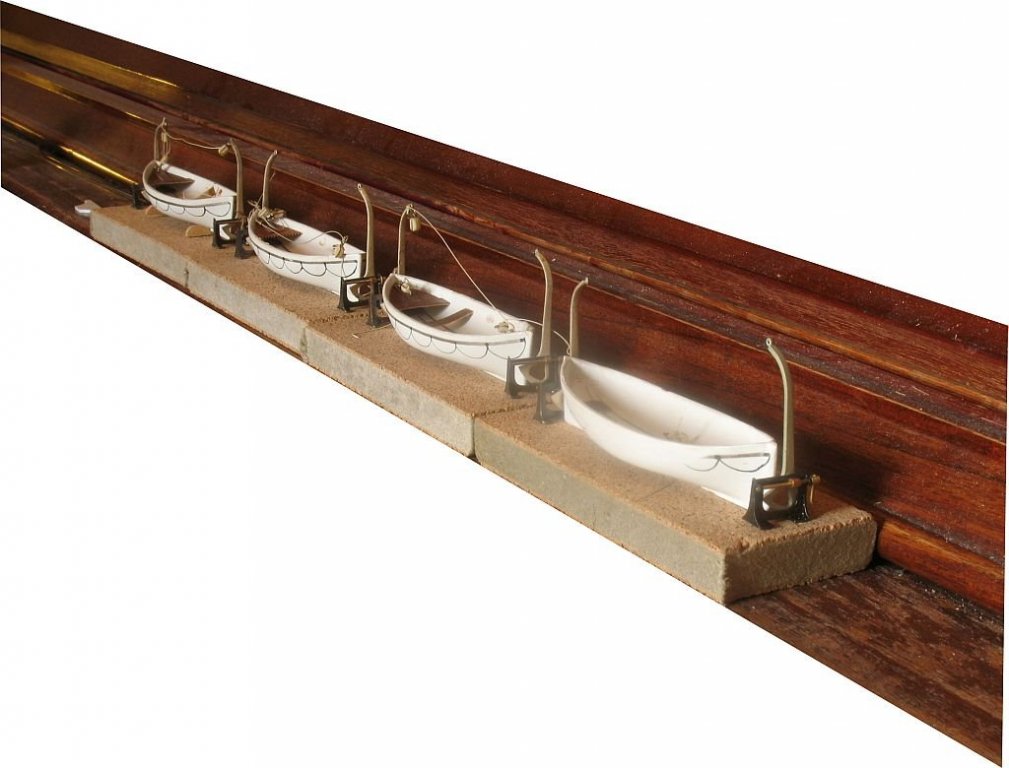
Well thank you all for your encouraging comments and kind remarks. Now that i am back working on the stuff that keep me up at night trying to figure out the next move, I have assembled the new davit and think it will be OK when hidden among the rest. The next up in the line of the other davits that have been straightened out. The new davit is the one closest. Michael
- 749 replies
-
- 17
-
-
- albertic
- ocean liner
- (and 2 more)
-
MONTAÑES by Amalio
michael mott replied to Amalio's topic in - Build logs for subjects built 1751 - 1800
Looking at your work gives me so much inspiration to do better work and not accept anything lest that the best of my ability. Thank you for sharing your exquisite workmanship. Michael


