michael mott
-
Posts
5,200 -
Joined
-
Last visited
Content Type
Profiles
Forums
Gallery
Events
Everything posted by michael mott
-
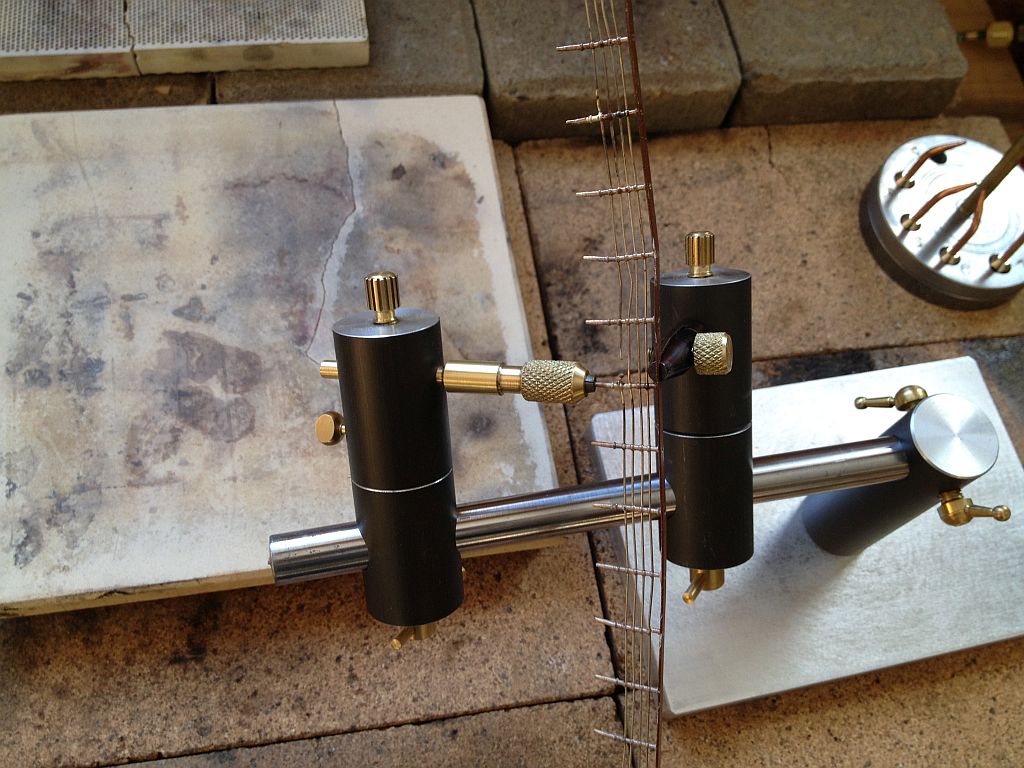
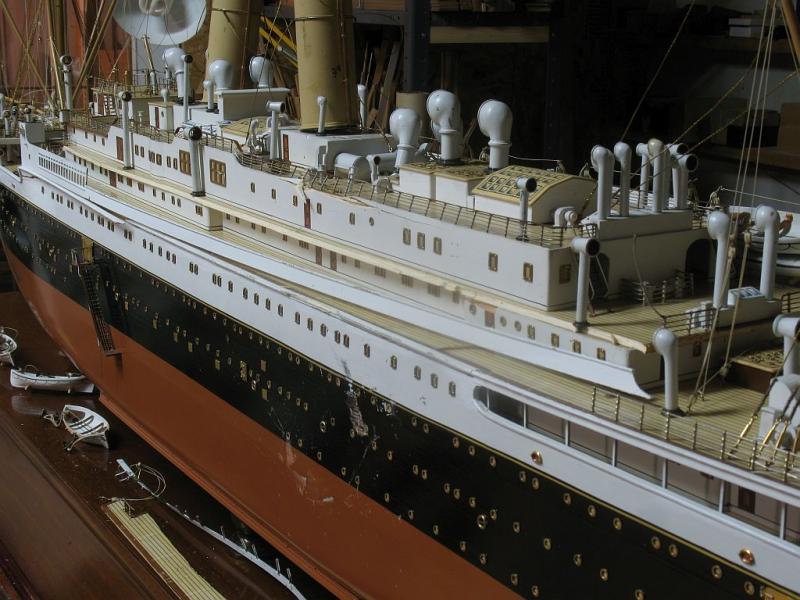
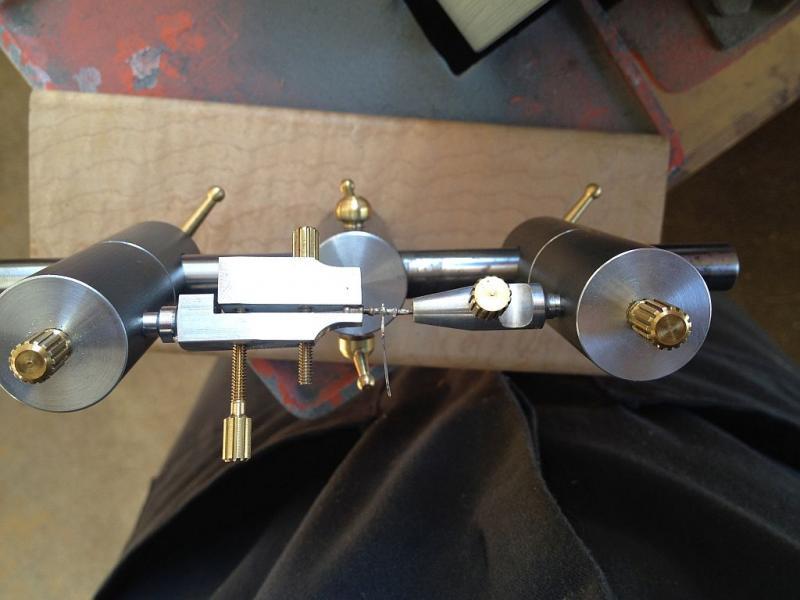
 Druxey I was very surprised at how easy the whole drawing operation was. The most fiddly part was filing the end down to fit through the next size smaller hole so that it can be grabbed with the draw pulling pliers. The last draw almost doubled the length of the wire. My friend says that the smaller the diameter the easier it get to pull, she is correct on that score. The first two pulls were the hardest to pull but with each hole after it became easier. Sometimes it helps to use a little wax on the wire but I did not need it. Pat I am not sure if it was typical, the company Basset Lowke used a mix of brass copper and Nickel silver (German Silver) in this model. Brass was certainly a common metal. One of the tests will be to see how well I can put the patina on it so as to match the other wire, I think that the hot air soldering gun will be the tool to use. As I mentioned earlier the stanchions have been painted it is almost like a stain it is so thin and the colour on most of the handrail look like a ringer for the patina on the aged nickel silver. The top flat handrail is brass and painted a brown colour. Once I get the colour right I think I will add enough wire to span a couple of stanchions and but the one end ext to the silver soldered one and feed the other end into the middle of the other stanchion and use the hot air gun to soft solder the end. Its good to explain this because it is helping me sort it all out before I get on with it. Michael
- 749 replies
-
- 11
-

-
- albertic
- ocean liner
- (and 2 more)
-
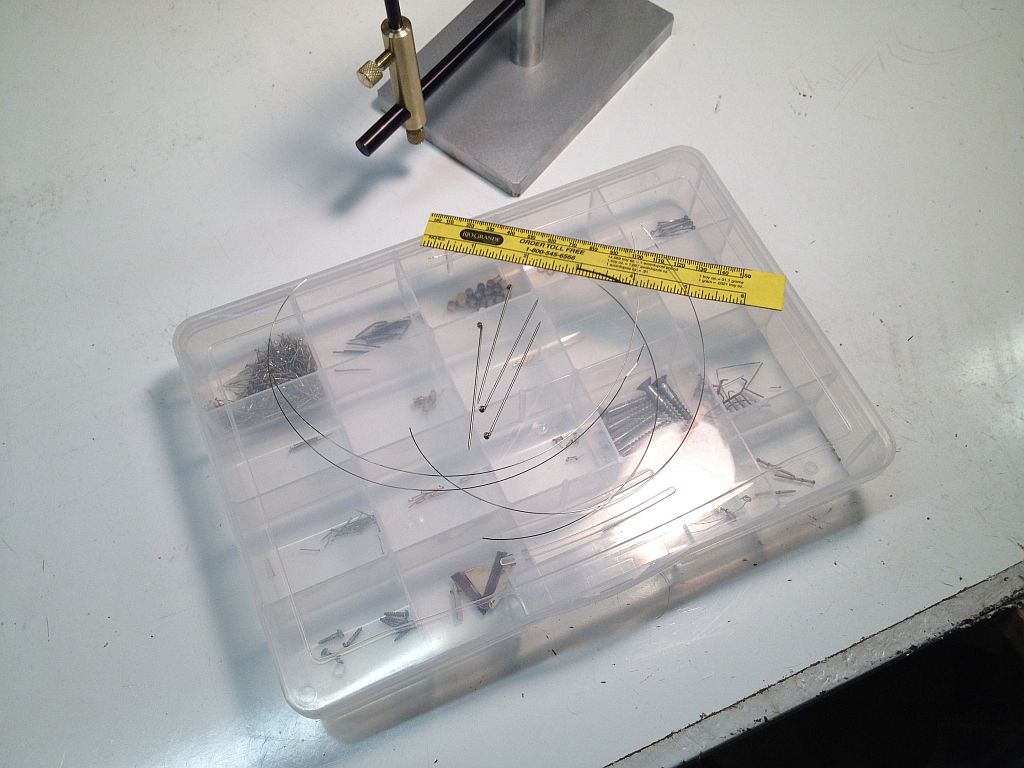
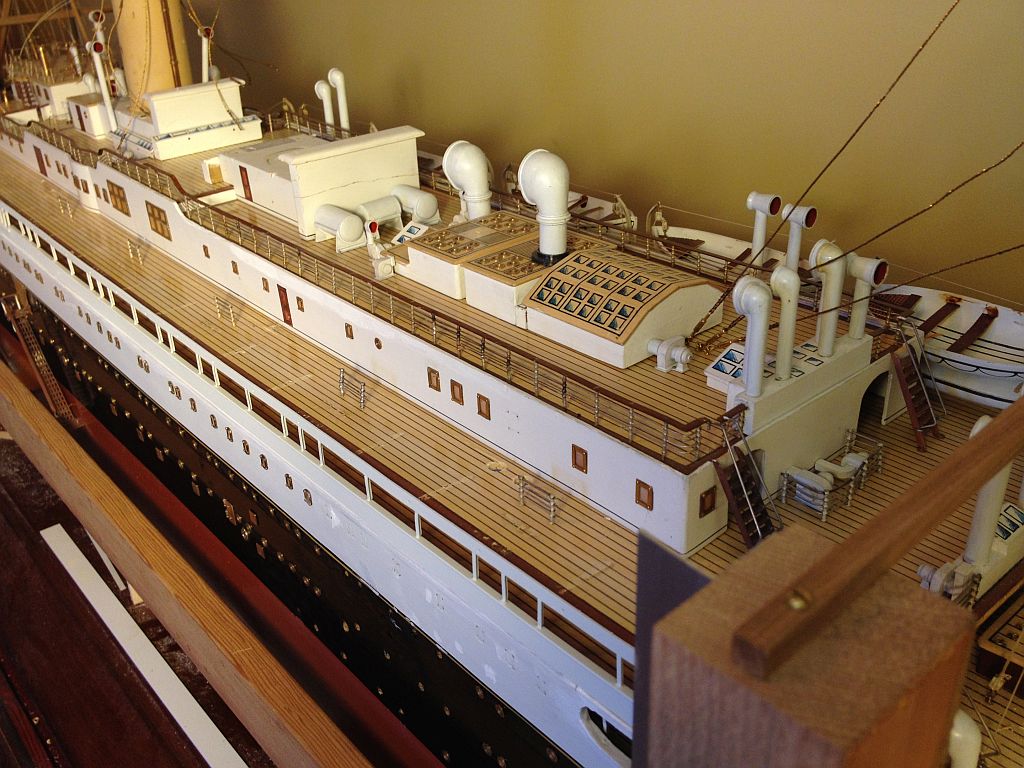
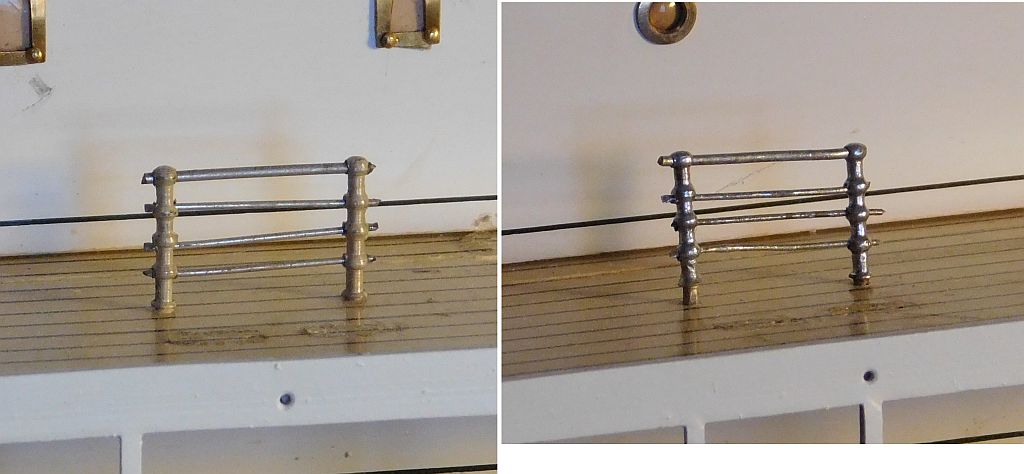
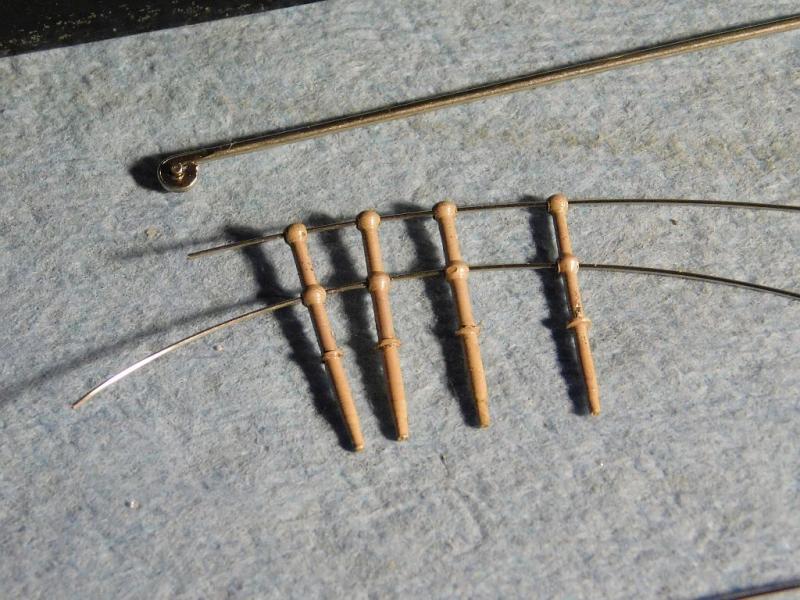
Jan the pictures are lying. Wefalck, I only made the ball handles on the prototype, they take a long time to make. Actually Nils I am hoping that the ship will look like it hasn't been repaired and looks like it was built in 1920 something. Mark and Denis thanks for you positive comments. I spent a bit of time in the big city today visiting my silversmith friend who just happened to have some .8mm nickel silver pins which I pulled through the draw-plate down to .45mm. so I now have enough wire to fix the melted sections and all other very bent parts. I also noticed that the stanchions are painted which will make matching the discolored ones easier to match. Michael

- 749 replies
-
- 15
-
-
- albertic
- ocean liner
- (and 2 more)
-
Gerald, thank you very much for your detailed explanation I shall check out the tooling on your site. Michael
- 281 replies
-
- 1
-
-
- falls of clyde
- tanker
- (and 2 more)
-
Hi Druxey, yes I need to replace a couple of 1/2 inch sections of horizontal rail wire. which is 22 gauge nickle silver. Michael
- 749 replies
-
- 5
-
-
- albertic
- ocean liner
- (and 2 more)
-
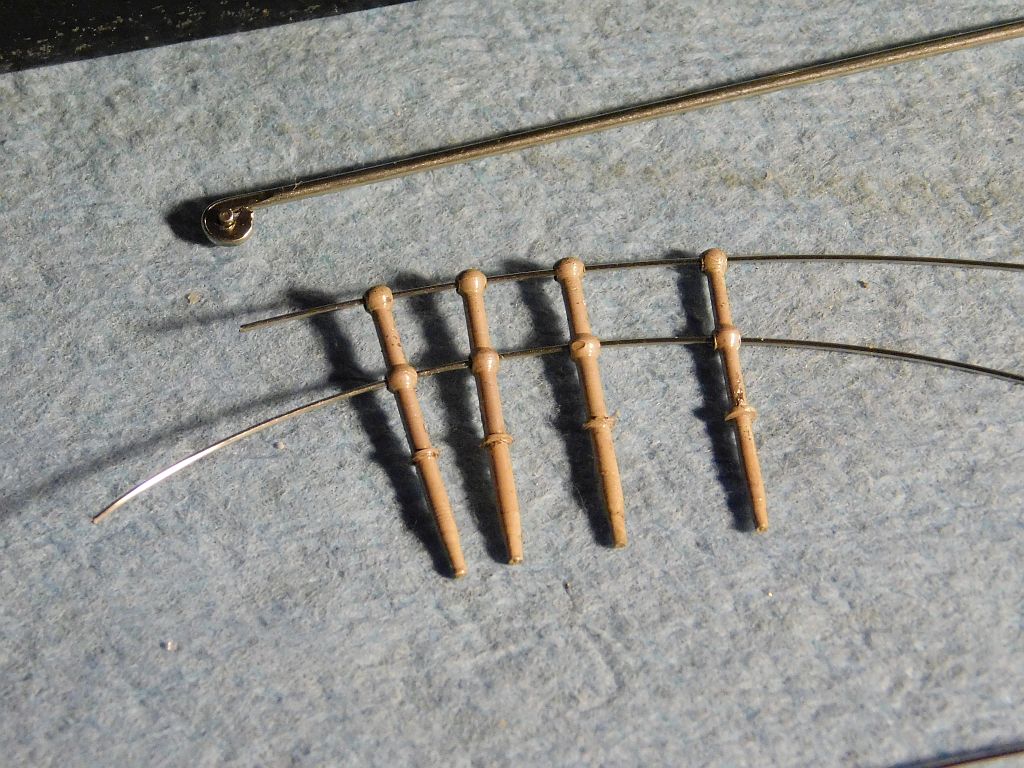
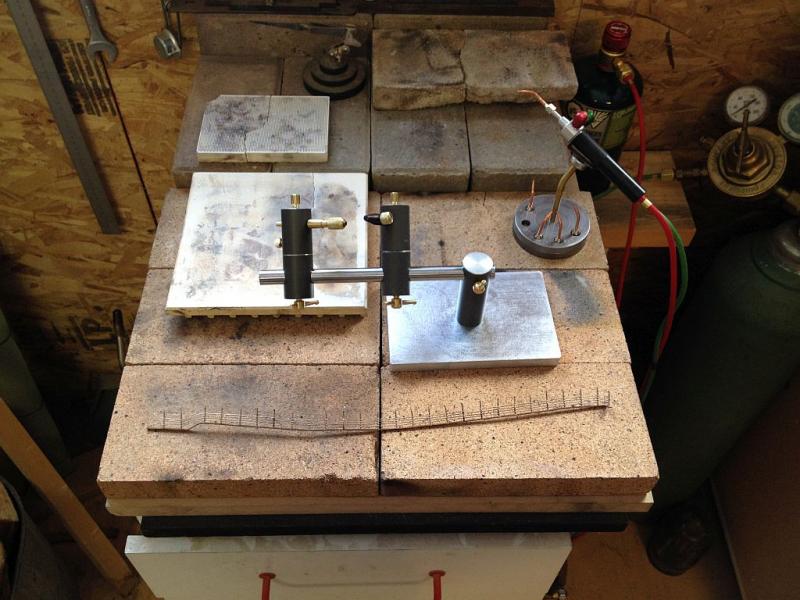
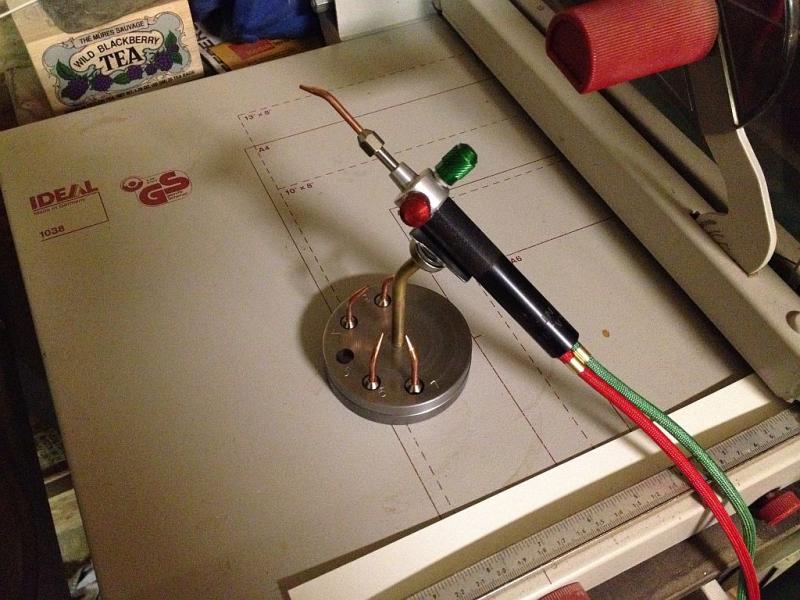
Again thanks for all the positive feedback and for the quiet visits. I set up the soldering area today and put all the broken ends back on the top handrail stanchions. I had a couple of minor issues but they will be solved fairly easily I think. to recap this is what happened to the top handrail, it was bent over and 6 of the stanchions were broken at mostly the bottom rail. I began adding the broken bottom parts of the handrail used the #4 tip All 6 soldered on with a couple of these to add to my work. Next task was to do a quick test fit so I am relatively happy with the effort. Now to clean it up and fix the meltdowns. Michael

- 749 replies
-
- 18
-
-
- albertic
- ocean liner
- (and 2 more)
-
Beautiful work Gerald, I am as interested in your tooling as the model itself. Do you have more details of the tooling? Michael
- 281 replies
-
- 1
-
-
- falls of clyde
- tanker
- (and 2 more)
-
Keith that is a clever chuck, I will save that for another day. The bowsprit looks great sitting in that gorgeous foot. Michael
-
John you certainly have done a great job on this boat so far, I will no doubt enjoy the next one as well. Michael
- 745 replies
-
- 1
-
-
- francis pritt
- mission ship
- (and 1 more)
-
Hi Russ a bit late to the show, A very interesting looking boat, I shall be following along. Looks like youe have made a good start already. Michael
- 420 replies
-
- 2
-
-
- captain roy
- lugger
- (and 2 more)
-
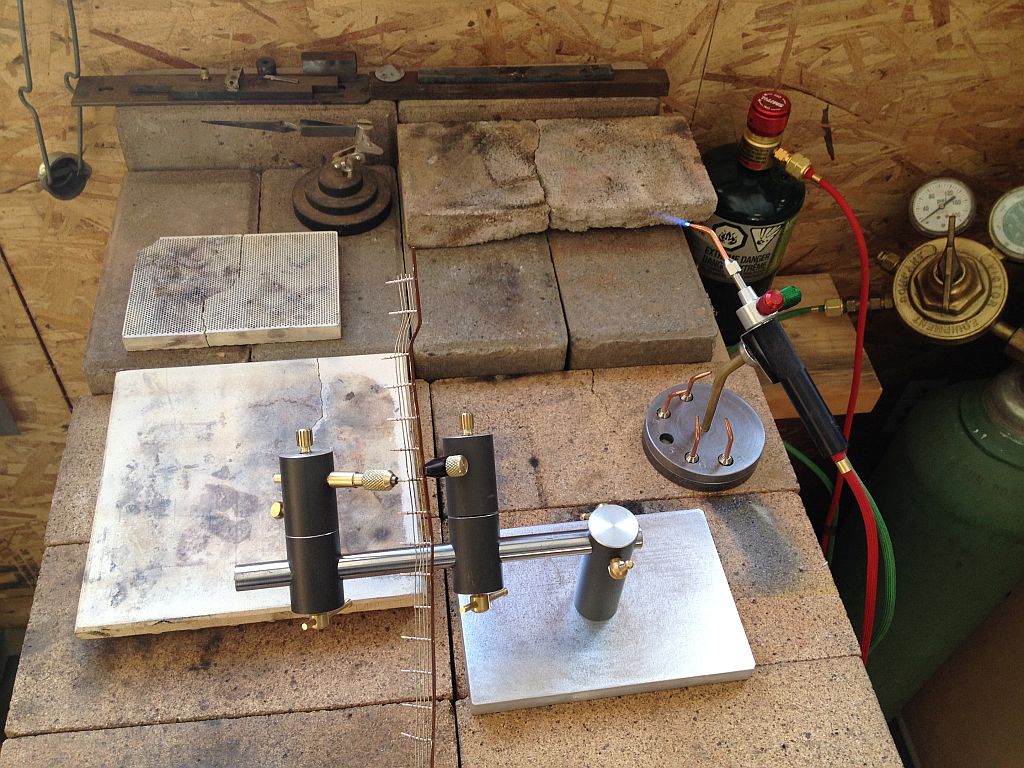
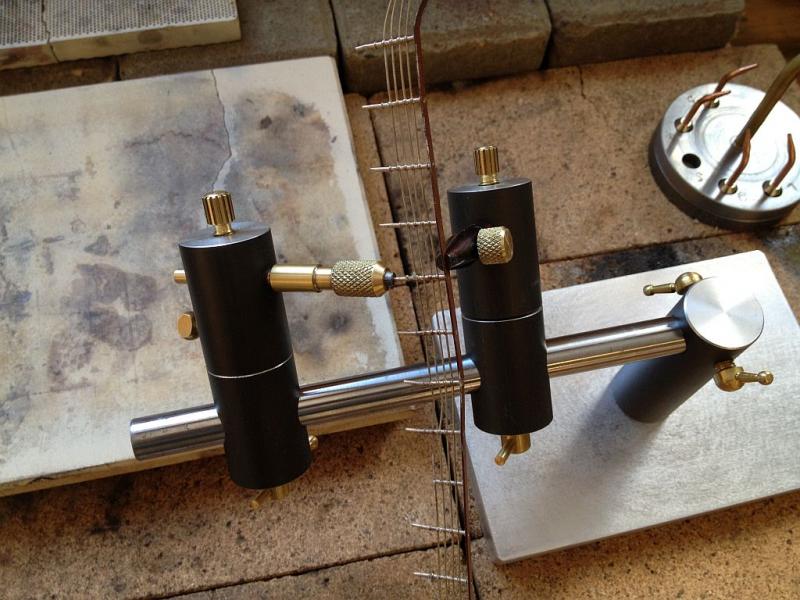
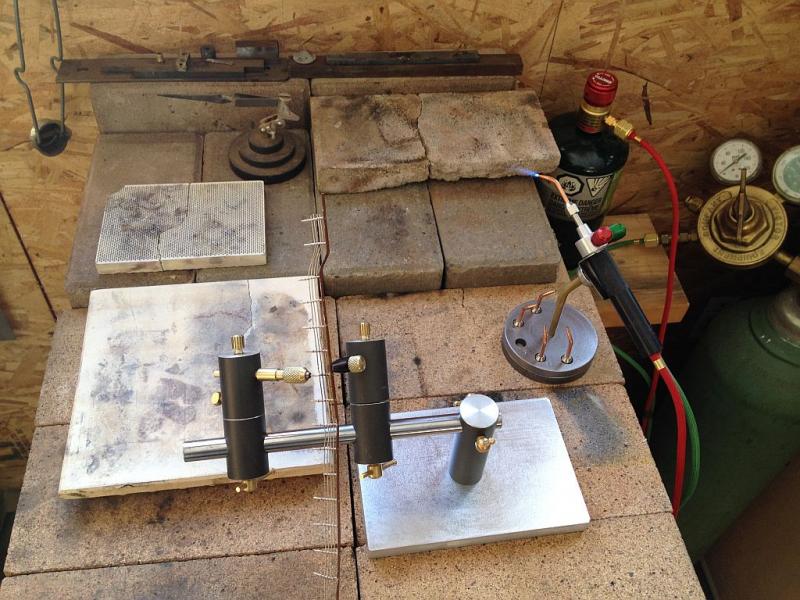
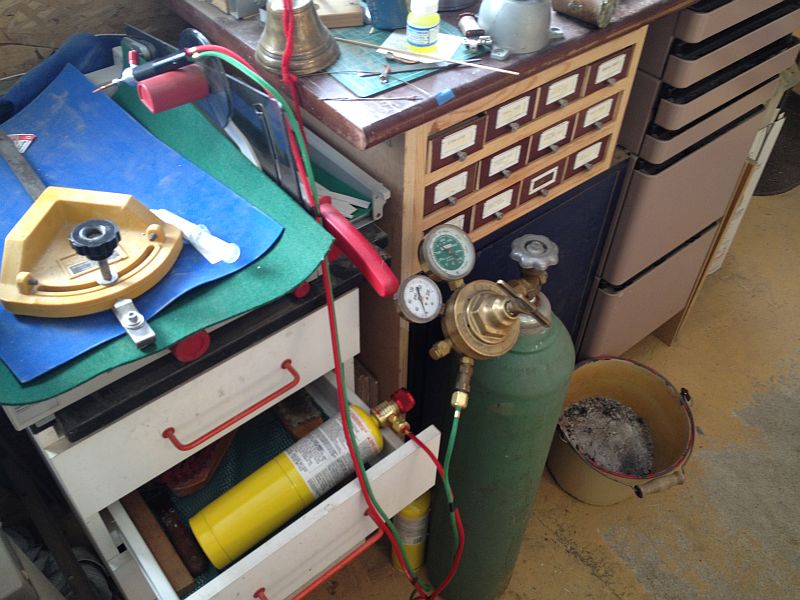
Hi Jeff Thanks for the article. Hi Jud I was talking to the jeweler about doing some very small silver soldering n the broken stanchions and talked about a small torch for my ox-acetylene set up and he said to use the oxy-propane because it was much cleaner, that there was no soot with the propane. when he lit the propane it was very clean burning and then he turned on the oxygen and gave me a demo of the little torch. I was impressed with the way he handled it. I still have my Acetylene torch and for some work I will still use it. I hope this answers your question adequately. Michael
- 749 replies
-
- 6
-
-
- albertic
- ocean liner
- (and 2 more)
-
Thanks for the visits and positive comments. Wefalck the hoses are very flexible. The small magnet holds the torch very well but is easy to lift off. Michael
- 749 replies
-
- 4
-
-
- albertic
- ocean liner
- (and 2 more)
-
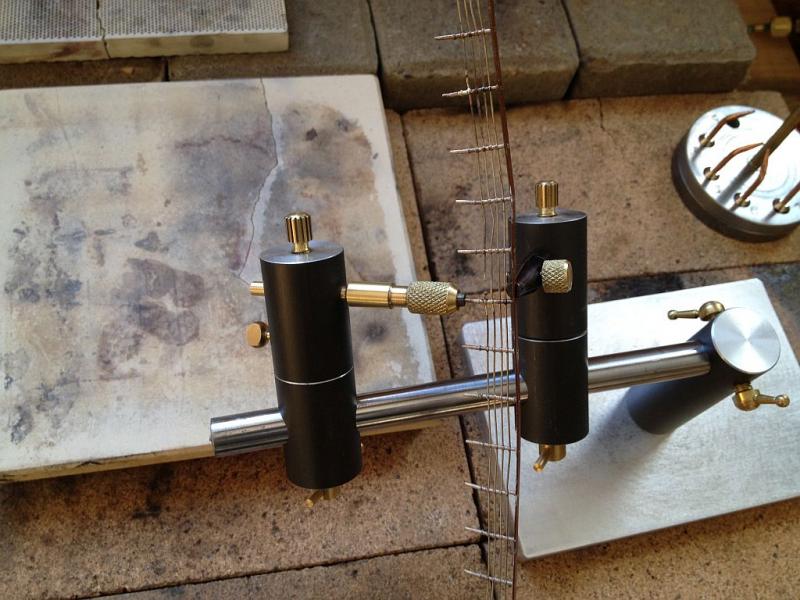
Thanks for the info on the torches Ed and Druxey Here is a shot of the little stand for the torch, the base is 2 1/2 inch diameter x 5/8 thick steel round, the upright is 1/4 diam brass with a 5/8 lee valley magnet on the top attached with a 3/4" flat head 8x32 allen head cap screw I added a small right angled steel catch plate to the torch, salvaged from a baseplate from some defunct electronic equipment. The plate is pinched between the black handle and the head section and is the same as the plate that comes with the commercial stand. Now I have to finish up the soldering station.....one thing just seems to lead to another. Michael
- 749 replies
-
- 14
-
-
- albertic
- ocean liner
- (and 2 more)
-
Just got back from a day in the city. Thanks for all the positive feed back and for all the visits. Nils I have a lot of different types of silver solder, soft, medium, hard, and now paste. I also have easyflow, regarding flux I have both liquid and paste. Ed the only reason for wanting to use the oxy-propane was to get heat fast to a very confined area, My Jeweler friend gave me a demonstration of how well this torch worked, I am curious about the propane one you are using now. My oxygen will last a long time it is a three foot bottle that is almost full. Bob My initial tests seem to be good I do need to understand the correct proportions yet. I will be doing more trials and will report them as they happen. Michael
- 749 replies
-
- 8
-
-
- albertic
- ocean liner
- (and 2 more)
-
Great tip Ron thanks for that. John the only part that looks really serious to me is the great big oxygen bottle I think there will be enough oxygen in it to last another 30 years at the rate this little micro torch uses it. Michael
- 749 replies
-
- 6
-
-
- albertic
- ocean liner
- (and 2 more)
-
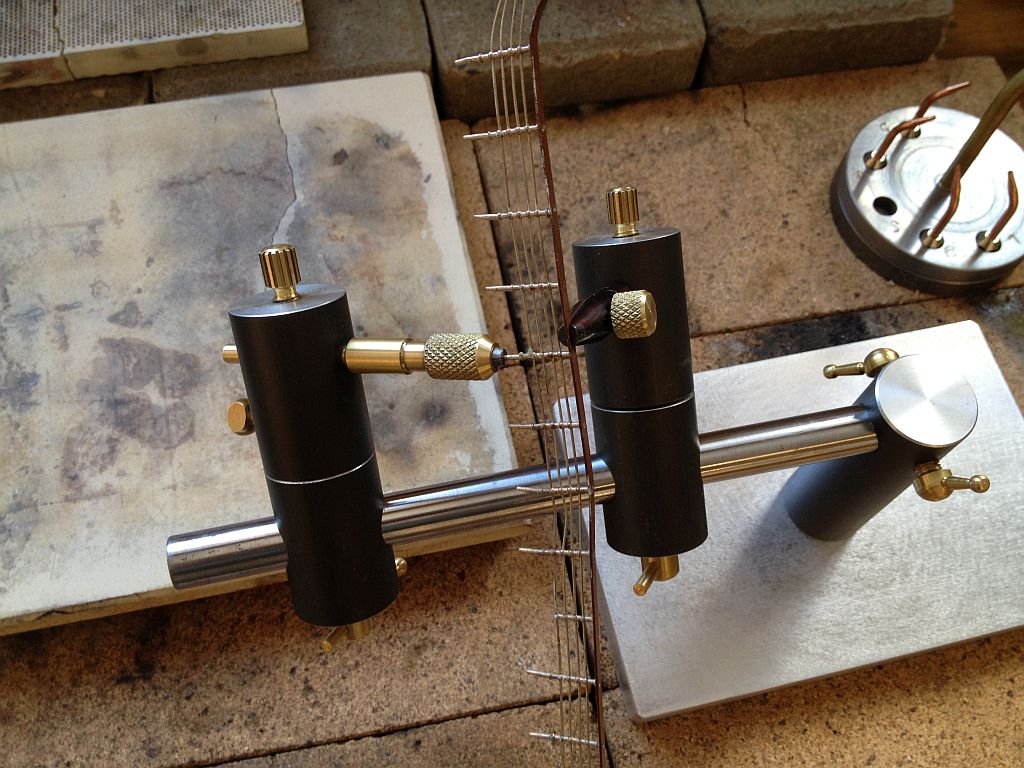
Hi Druxey yes the new torch is oxy-propane, it came with five tips #2, #3, #4, #5, and #6. The jeweler gave me a demo on it yesterday and said to have the oxygen at 11 PSI, and to open the valve on the disposable bottle all the way. I already had the Oxygen bottle for my Oxy-Acetylene set up. Now I need to make a stand for the torch like this one Michael
- 749 replies
-
- 5
-
-
- albertic
- ocean liner
- (and 2 more)
-
Thanks everyone for the encouragement and visits to the work. I set up the torch today it is fantastic, took a few tests to get used to how it works and to practice with some paste type silver solder which I have not used before. I chose the smallest of the damaged handrail sections to begin realizing that if I made a complete mess of it it would be the least onerous to replicate. I set it up in my original third hand( I need to get one of those new fangled ones) and was pleased that it actually did solder together, I used the # 5 tip in the micro torch After cleaning it up a bit I noted that it would either need to be plated again to get the same colour as the originals or I will have to find a way to paint and weather it to look like the originals, the painting option will have to be the first try because some of the other posts that need to be fixed are part of a longer section that would need to be plated as well and it would definitely look different. the right hand rail has been given a quick brush with some Humbrol airfame silver, so this will become the test bed now for matching the other posts. Once I am happy with the results I will solder the rest. Michael


- 749 replies
-
- 18
-
-
- albertic
- ocean liner
- (and 2 more)
-
Miniature Hand Tools
michael mott replied to Julie Mo's topic in Modeling tools and Workshop Equipment
Julie I am not sure where the idea to use glass came from. At the time I was completely enraptured by a chap called James Krenov, I love the line in his book Called "A Cabinetmaker's Notebook" "My way of working is just a long series of personal discoveries. I can't give anyone secrets, something that I promise will work, because, finally, it depends upon one's skill and intuition, and other things. But I can give hints, the benefit of some experience in the things that have happened to me. I don't get kiln-dried wood because I think that kiln-dried wood has been killed. This is not a pun, but a fact. The process of saturating wood with steam and getting it all wet, cooking it, you might say, is a chemical process that changes and dulls the color of the wood, and the fibers are affected so that wood which has been kiln-dried feels different to me. It's got a different ring, a different texture; it isn't clear and fine. It's like a poorly developed photograph-one that was taken well but just didn't come out. Besides, kiln-dried wood is brittle." The bit about personal discoveries is so true, in any field of endevour we come across gems that are true for us, these things just happen at the right time, the key is realizing it. This working with wood gig is just such a fantastic journey, I use wood to heat my shop and as I split the wood every now and then a piece of birch (air dried) or spruce or pine just splits in such a way that I have to put it to one side to use for something other than warming my body, more for using it to warm my soul. Michael- 100 replies
-
- 11
-
-
Nice progress Eric. I will follow along. Michael
-
Great progress Nils, I follow along but often without feeling the need to comment, but the speed at which you get this work done always amazes me. Michael
- 2,625 replies
-
- 8
-
-
- kaiser wilhelm der grosse
- passenger steamer
- (and 1 more)
-
Miniature Hand Tools
michael mott replied to Julie Mo's topic in Modeling tools and Workshop Equipment
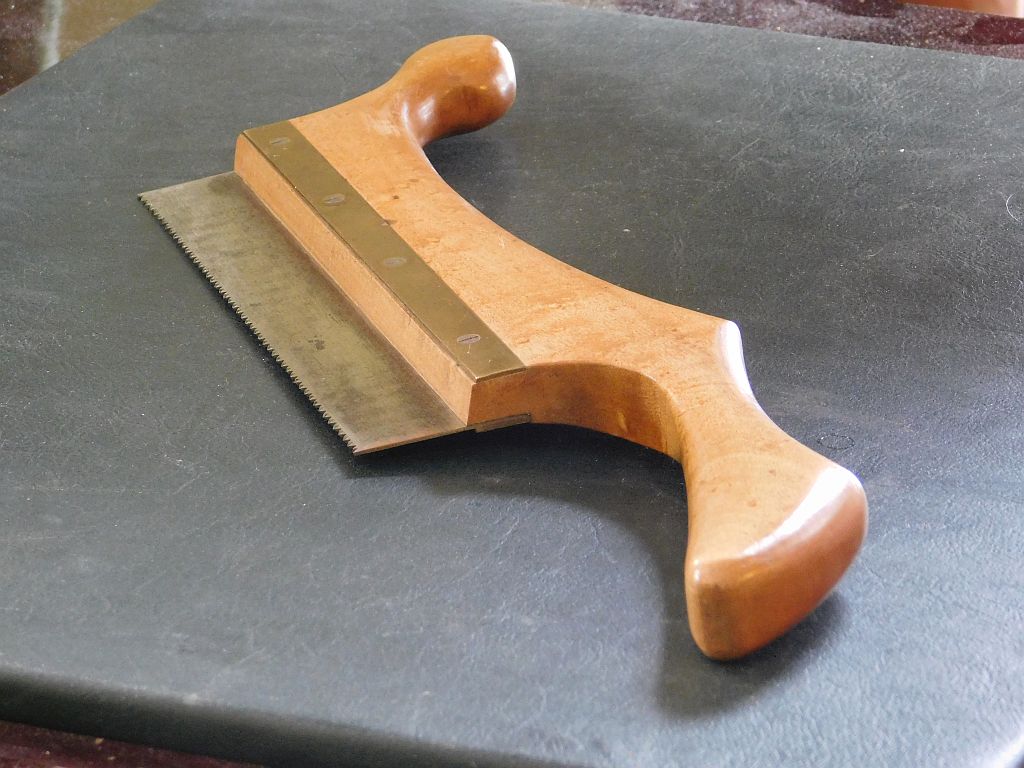
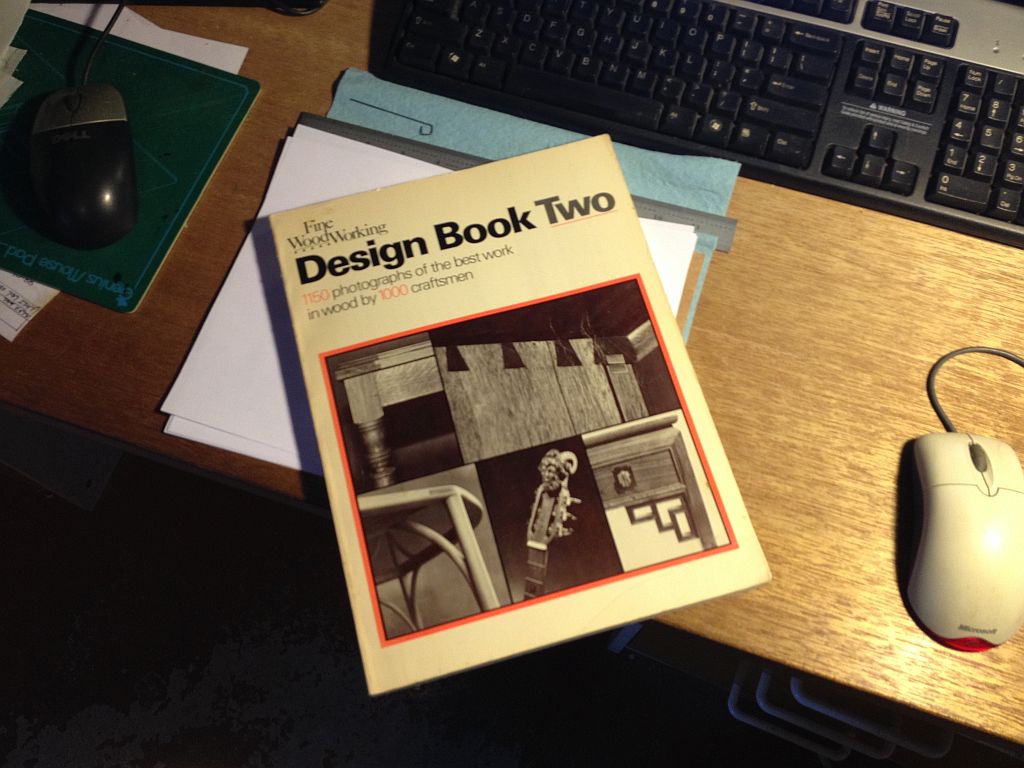
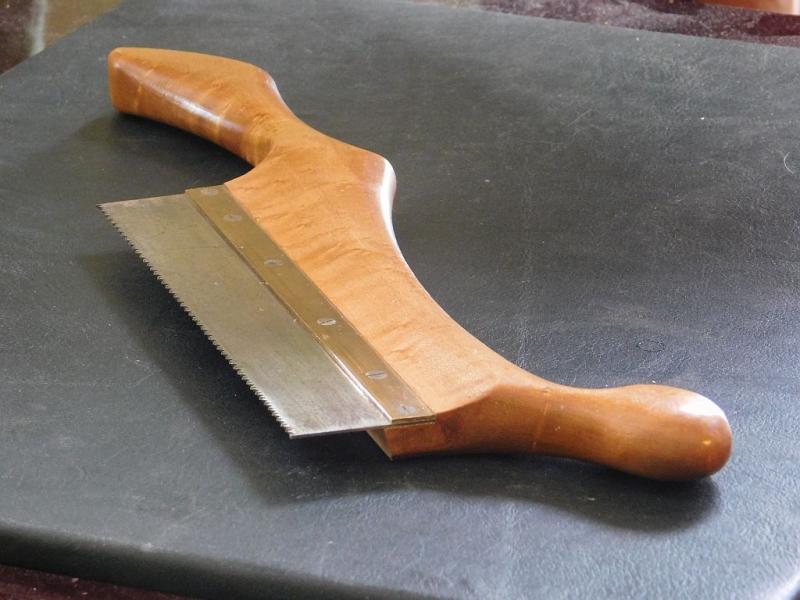
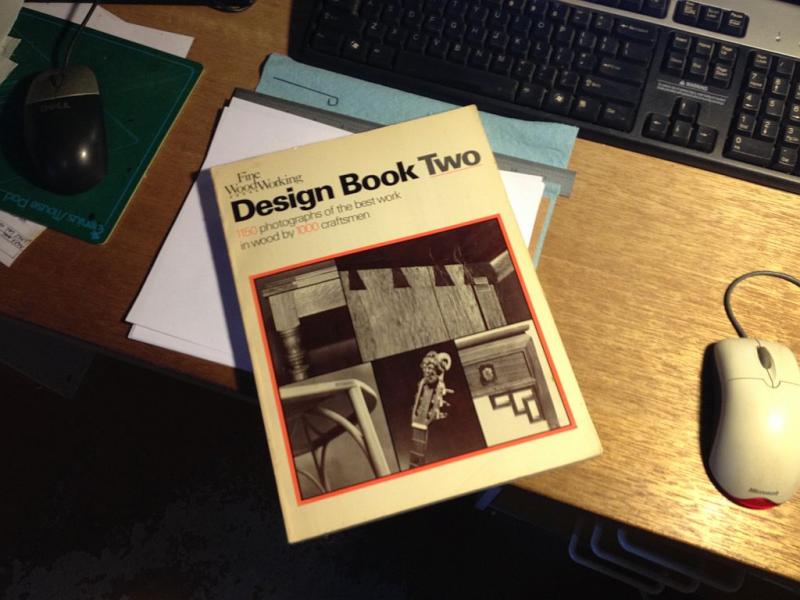
Vossiewulf, I only use the Veritas planes I have both the different low angle block planes and the Jack plane with said blades. Julie I know what you mean about the Koa and there are a few others that are also notorious for the same reason. On page 13 of this book there is a photograph of some tools by a young man called Michael Mott, two of the tools are hand planes the other one was a saw. I couldn't resist the third person reference. The planes were badly damaged by a collapse of a storage shed many years ago. This is the tool which I still enjoy using, it is a pull saw that I use to make dovetails. It is carved from "Birdseye" maple and was scraped with pieces of broken glass. (amazing all the soft curves that one can get by breaking an old 8x10 window pane) No sandpaper came anywhere near this tool or files just chisels and glass to create the finish. The blade was chopped out of an old handsaw and new teeth filed there is no set to the teeth. Michael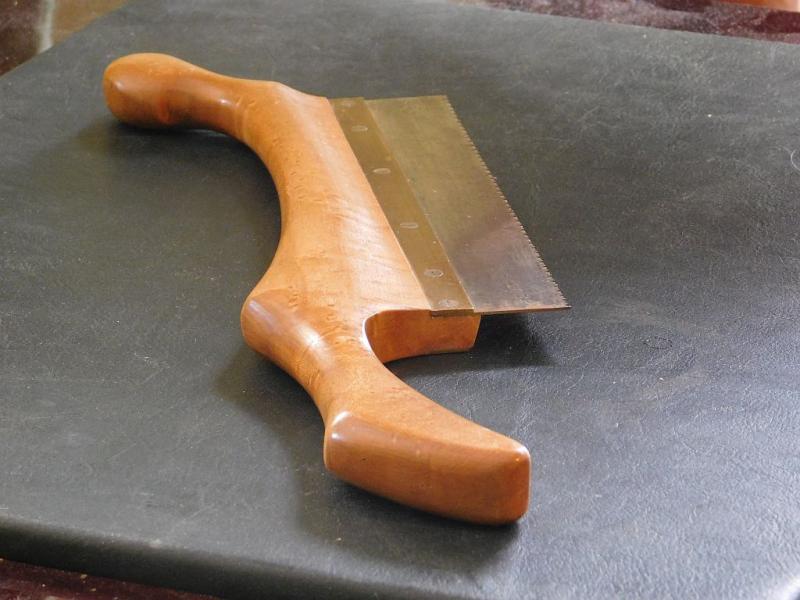

- 100 replies
-
- 15
-
-
I just went back and looked at your rigging for the dead eyes and the overall level of tidiness and size of all the various line and rope is very inspiring. Michael
- 1,051 replies
-
- 9
-
-
- cheerful
- Syren Ship Model Company
- (and 1 more)
-
Catching up Mark, so nice to see the ship without the large building plate. you have done a super job so far and i look forward to the rest. Michael
-
Harvey , yes you are correct, when I purchased this kit I had every intention of building it, so who knows I might just have to do it one of these days. Tomorrow I will show the contents. Michael
-
Sorry Steve not even close. Michael
-
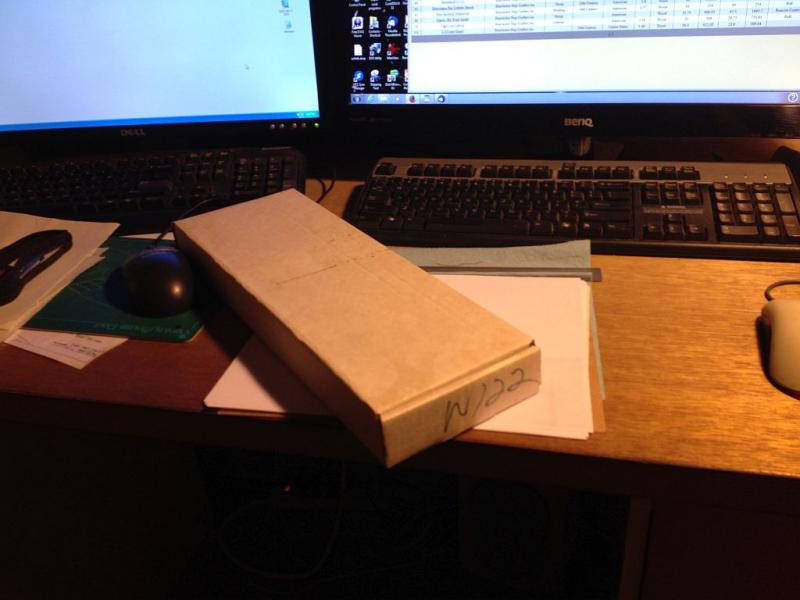
Back in 1984 I visited Maine and purchased this kit while there. I was cleaning up the shop today and rediscovered this kit. I thought it would be interesting to see how well you folk know your kits. Who can identify it? I do know what kit it is. Michael